V-carving 'Hidden Messages' on Wood Using Wordclouds.com, Inkscape, Carbide Create and a CNC Machine
by andrei.erdei in Workshop > CNC
6099 Views, 48 Favorites, 0 Comments
V-carving 'Hidden Messages' on Wood Using Wordclouds.com, Inkscape, Carbide Create and a CNC Machine


Essentially this project is about creating some decorative wooden plates carved with 'hidden messages' based on ... word clouds.
A word cloud or tag cloud is a visualization that displays how frequently a word appears in a text, and if the word appears more frequently the size will be bigger. Then, all the words are arranged in the form of a cloud, or can be arranged in horizontal and vertical lines, randomly inclined or within a shape. I am sure that you saw this kind of representations on many websites, in many cases being used to depict which words are searched more frequently in the searchboxes.
There are many online cloud generators such as WordArt.com, Wordle, TagCrowd, WordItOut, Tagxedo etc. Here, in this instructable, to create the wooden plates I will use the word cloud generator from WordClouds.com
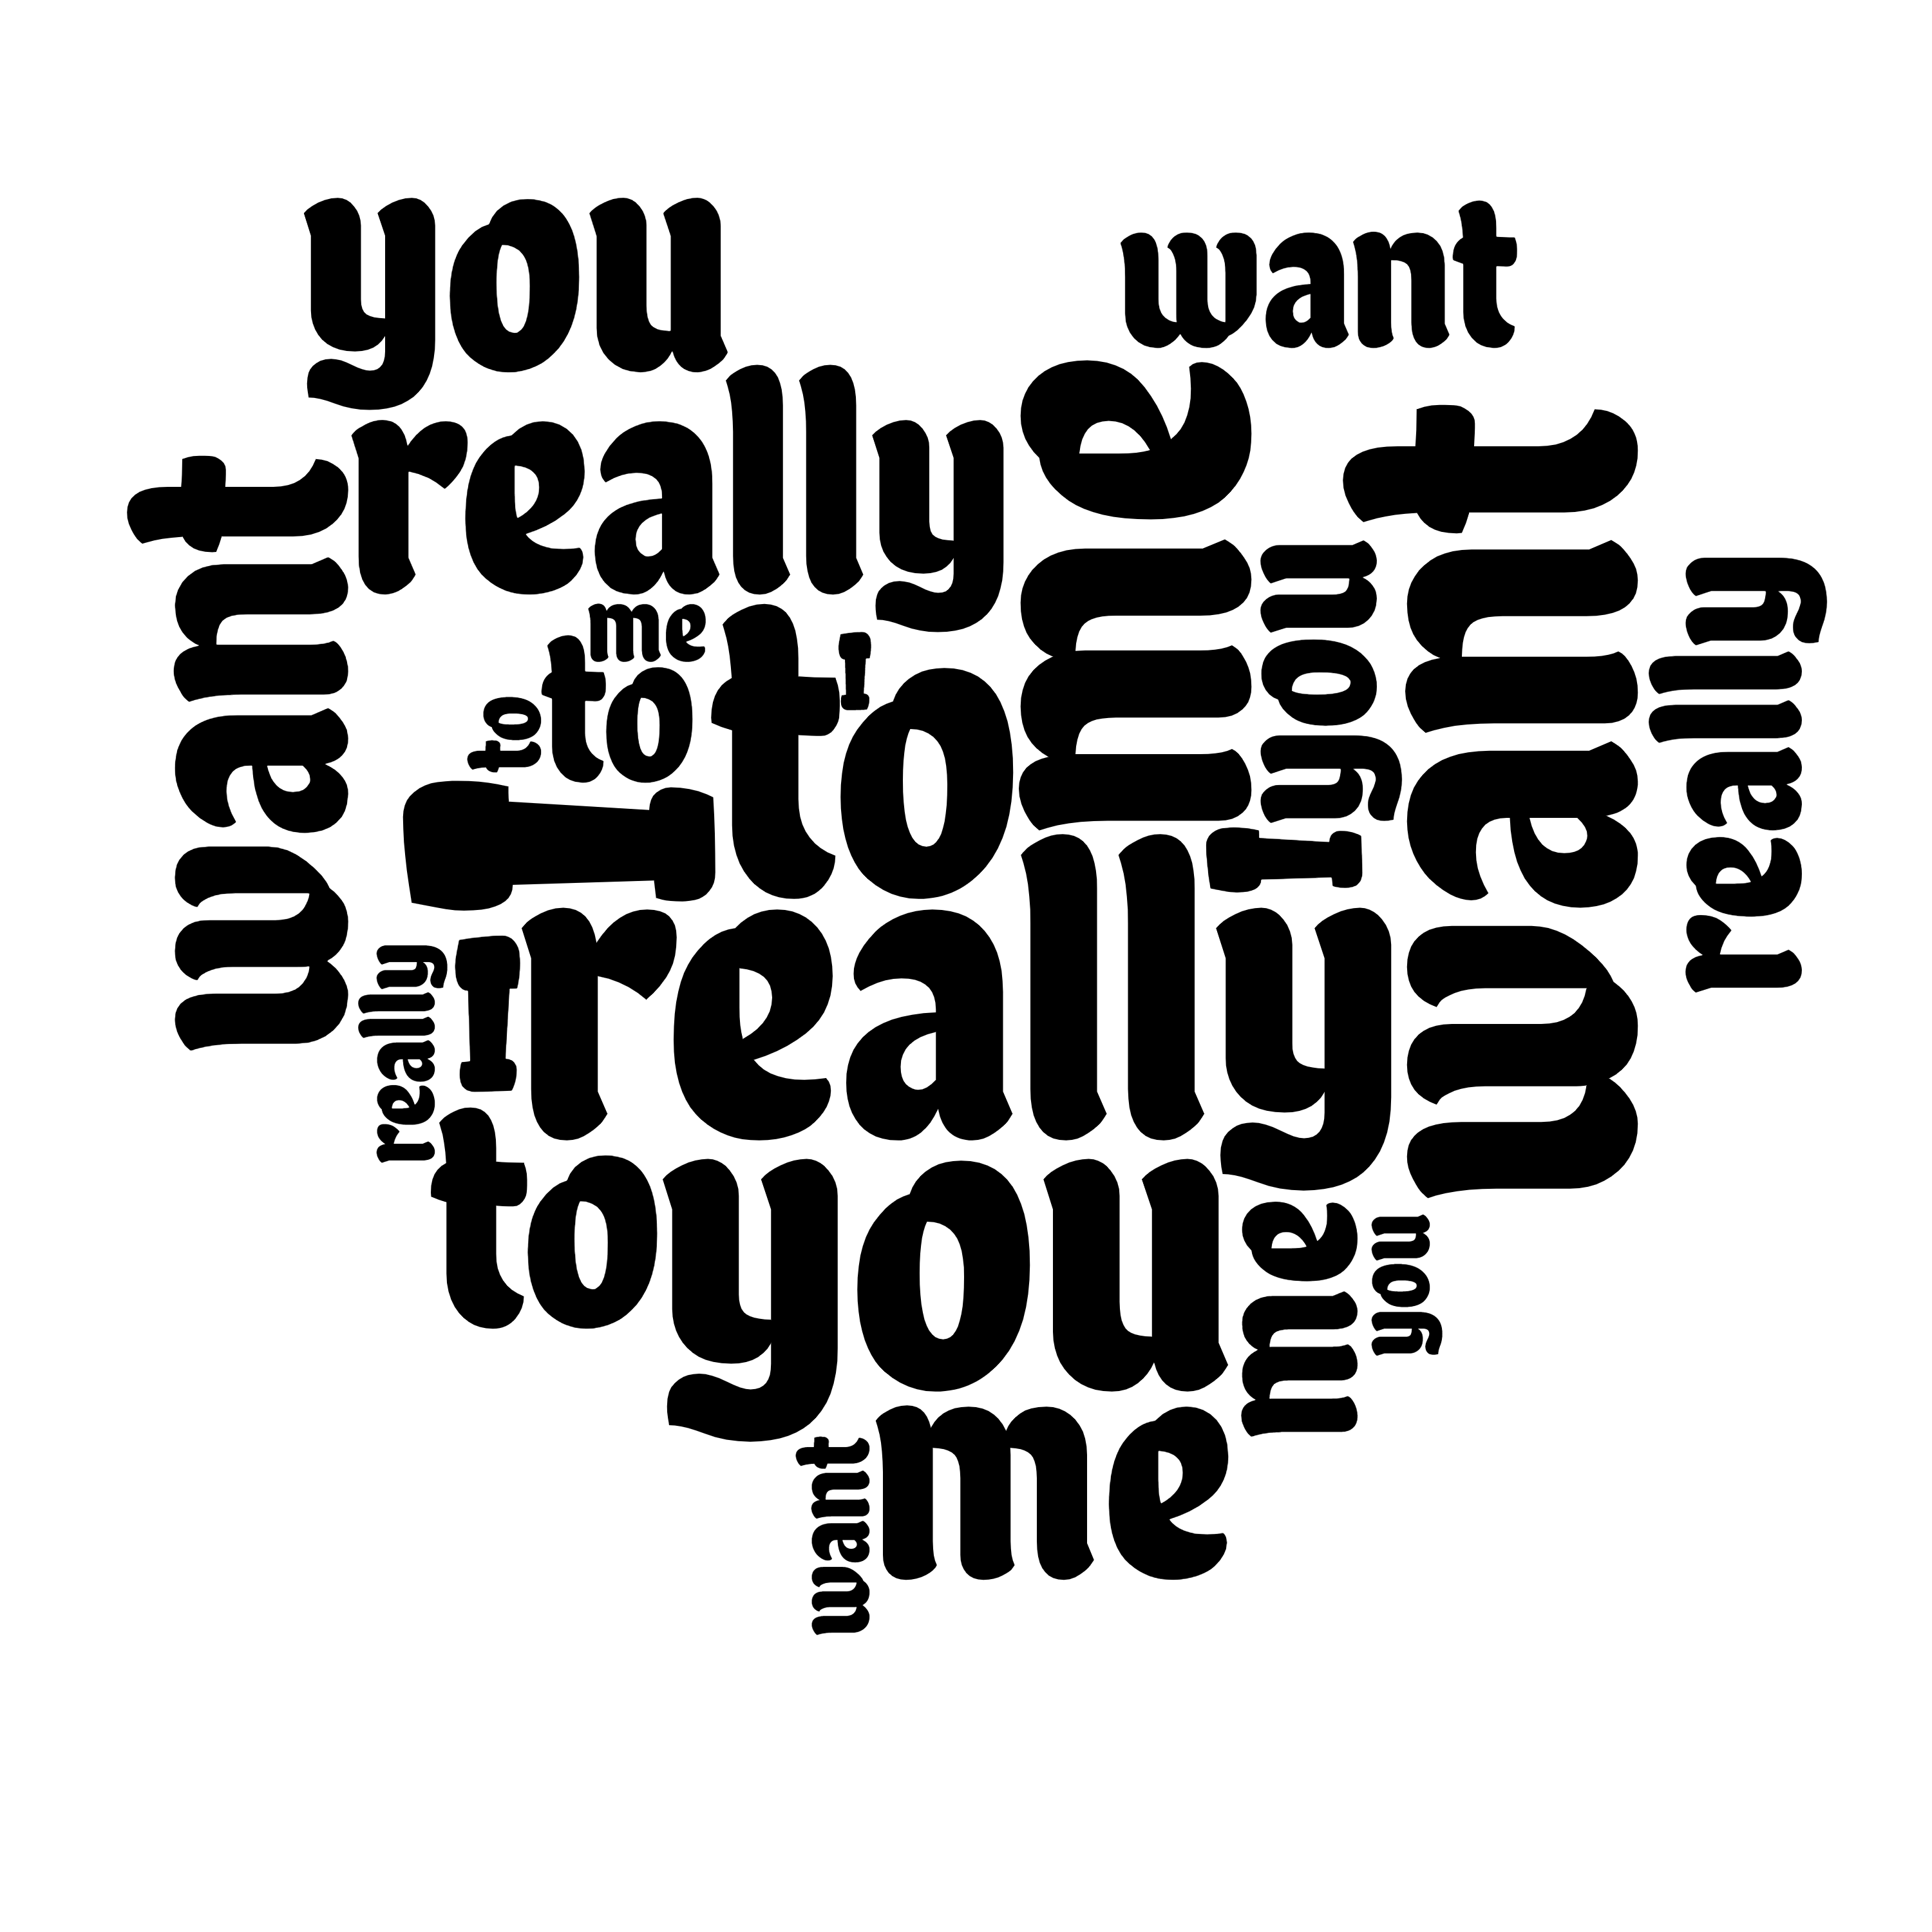
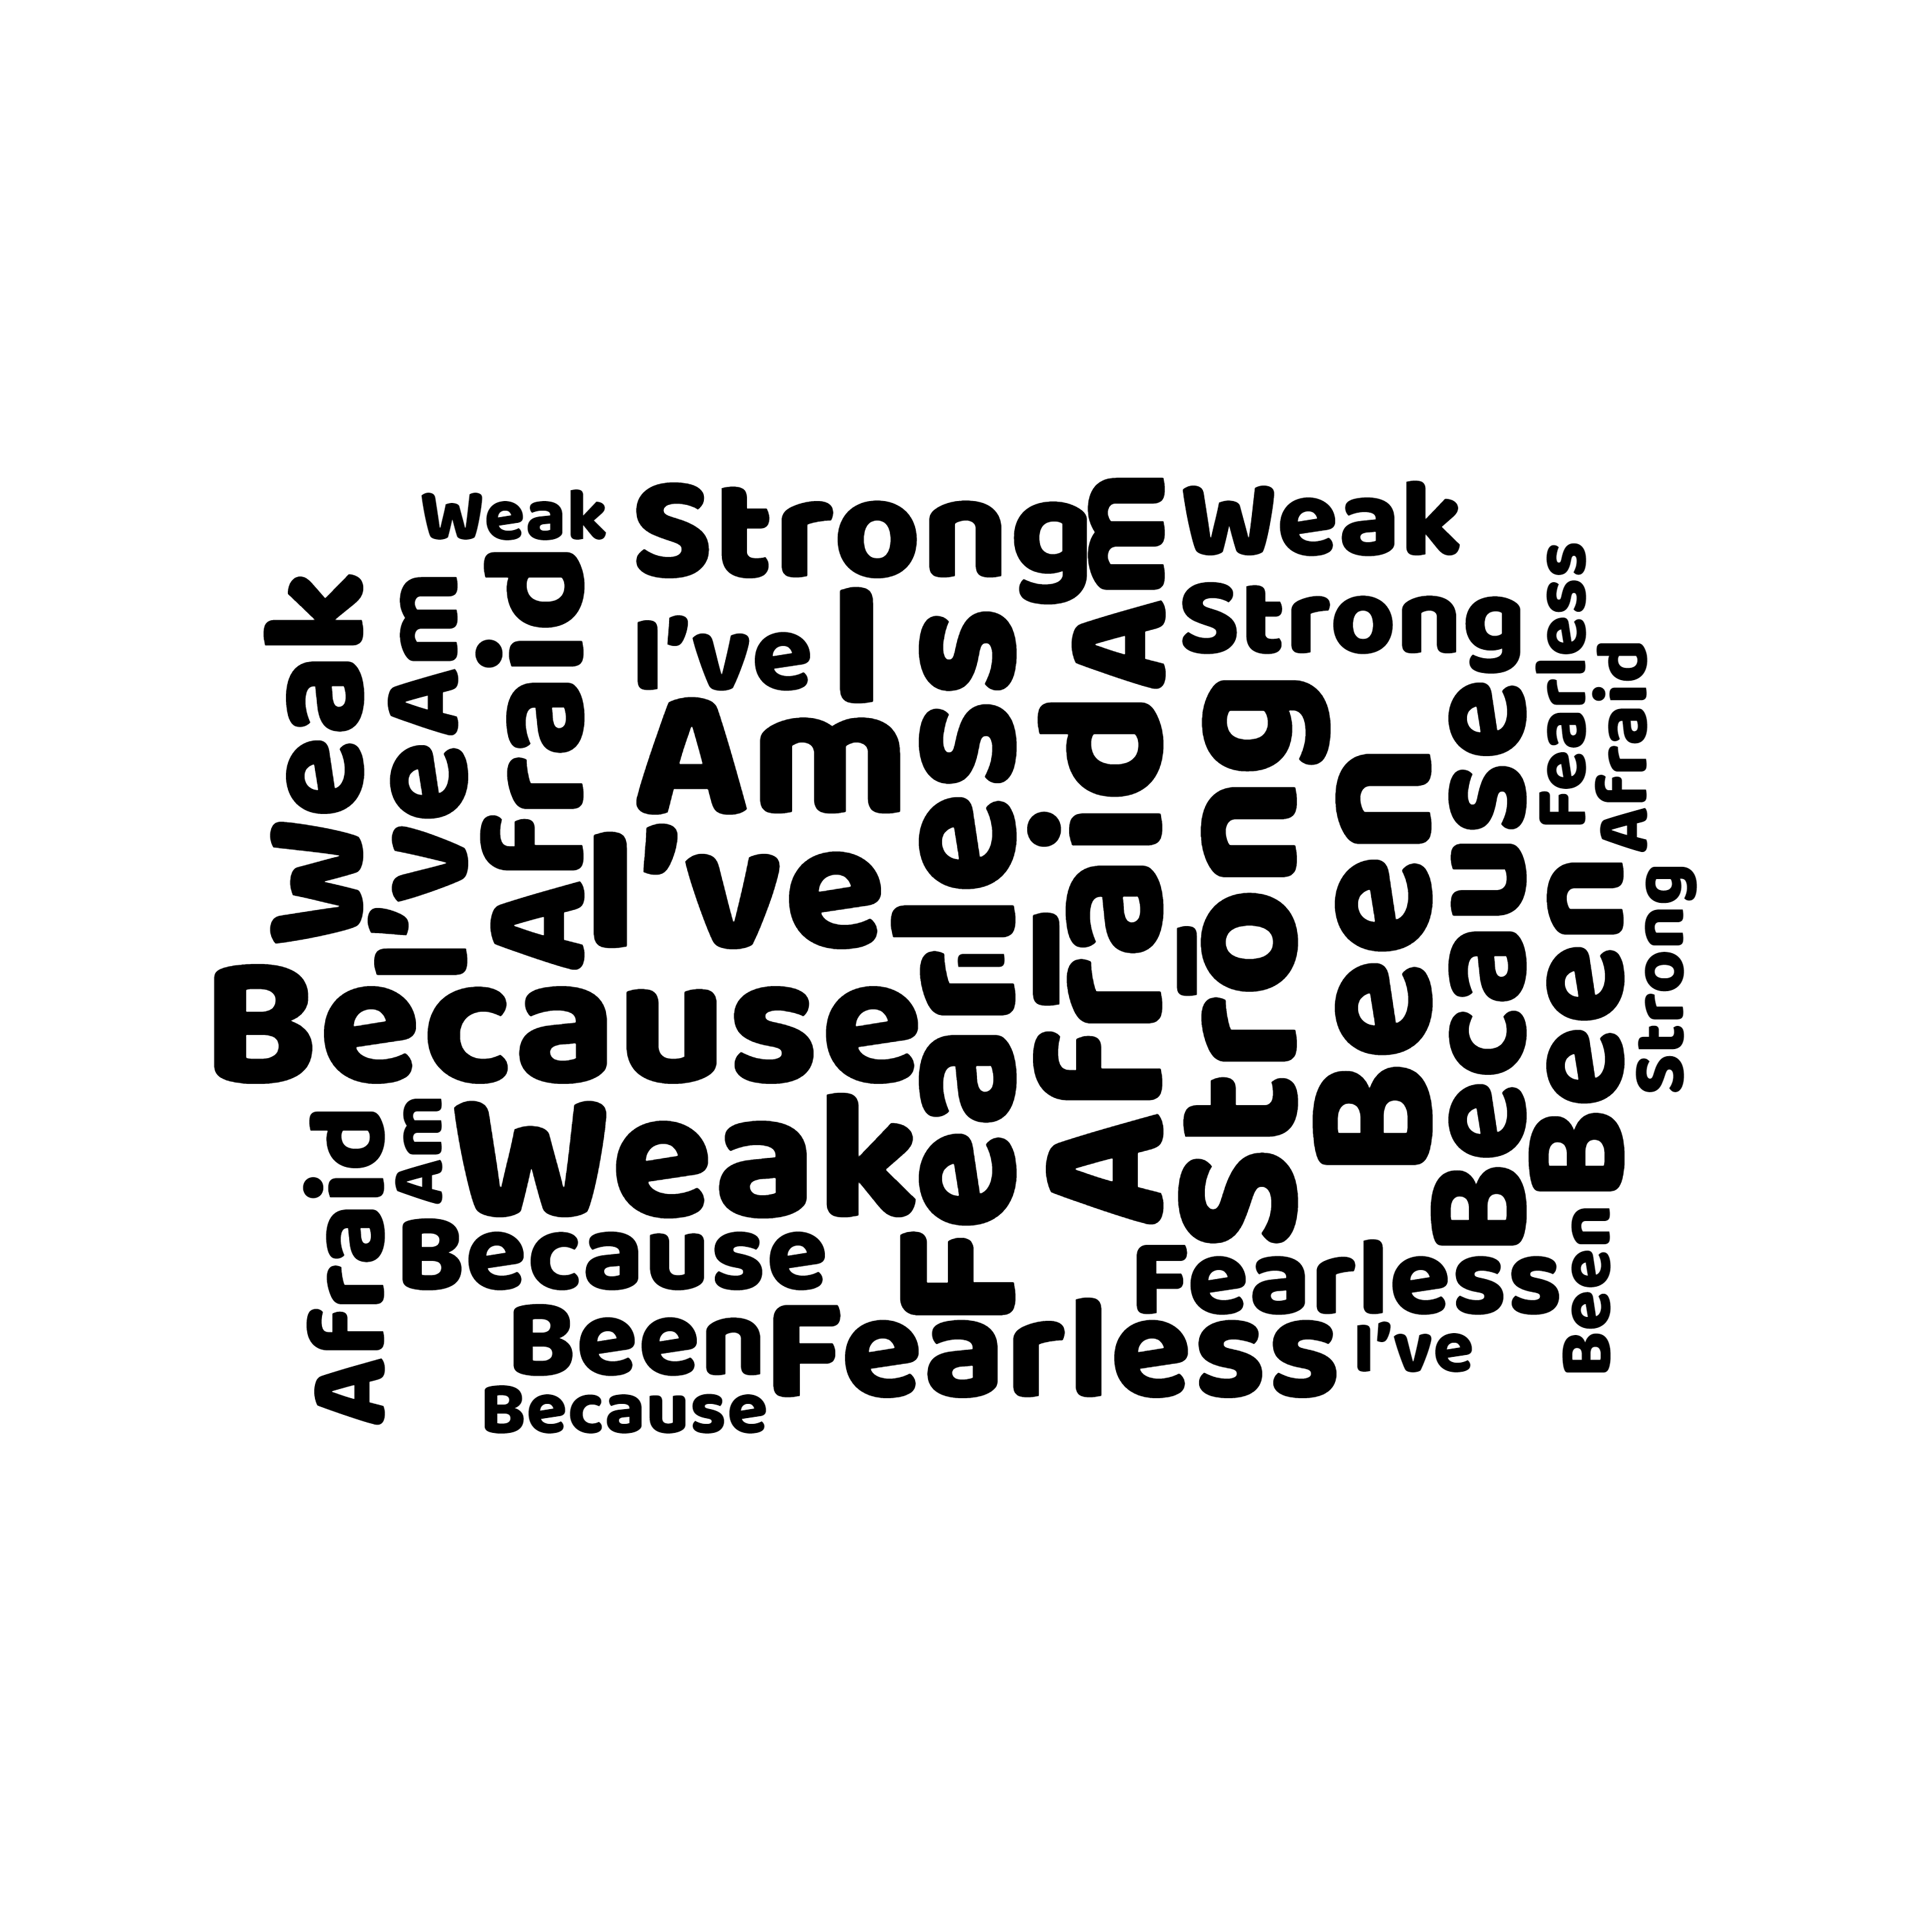
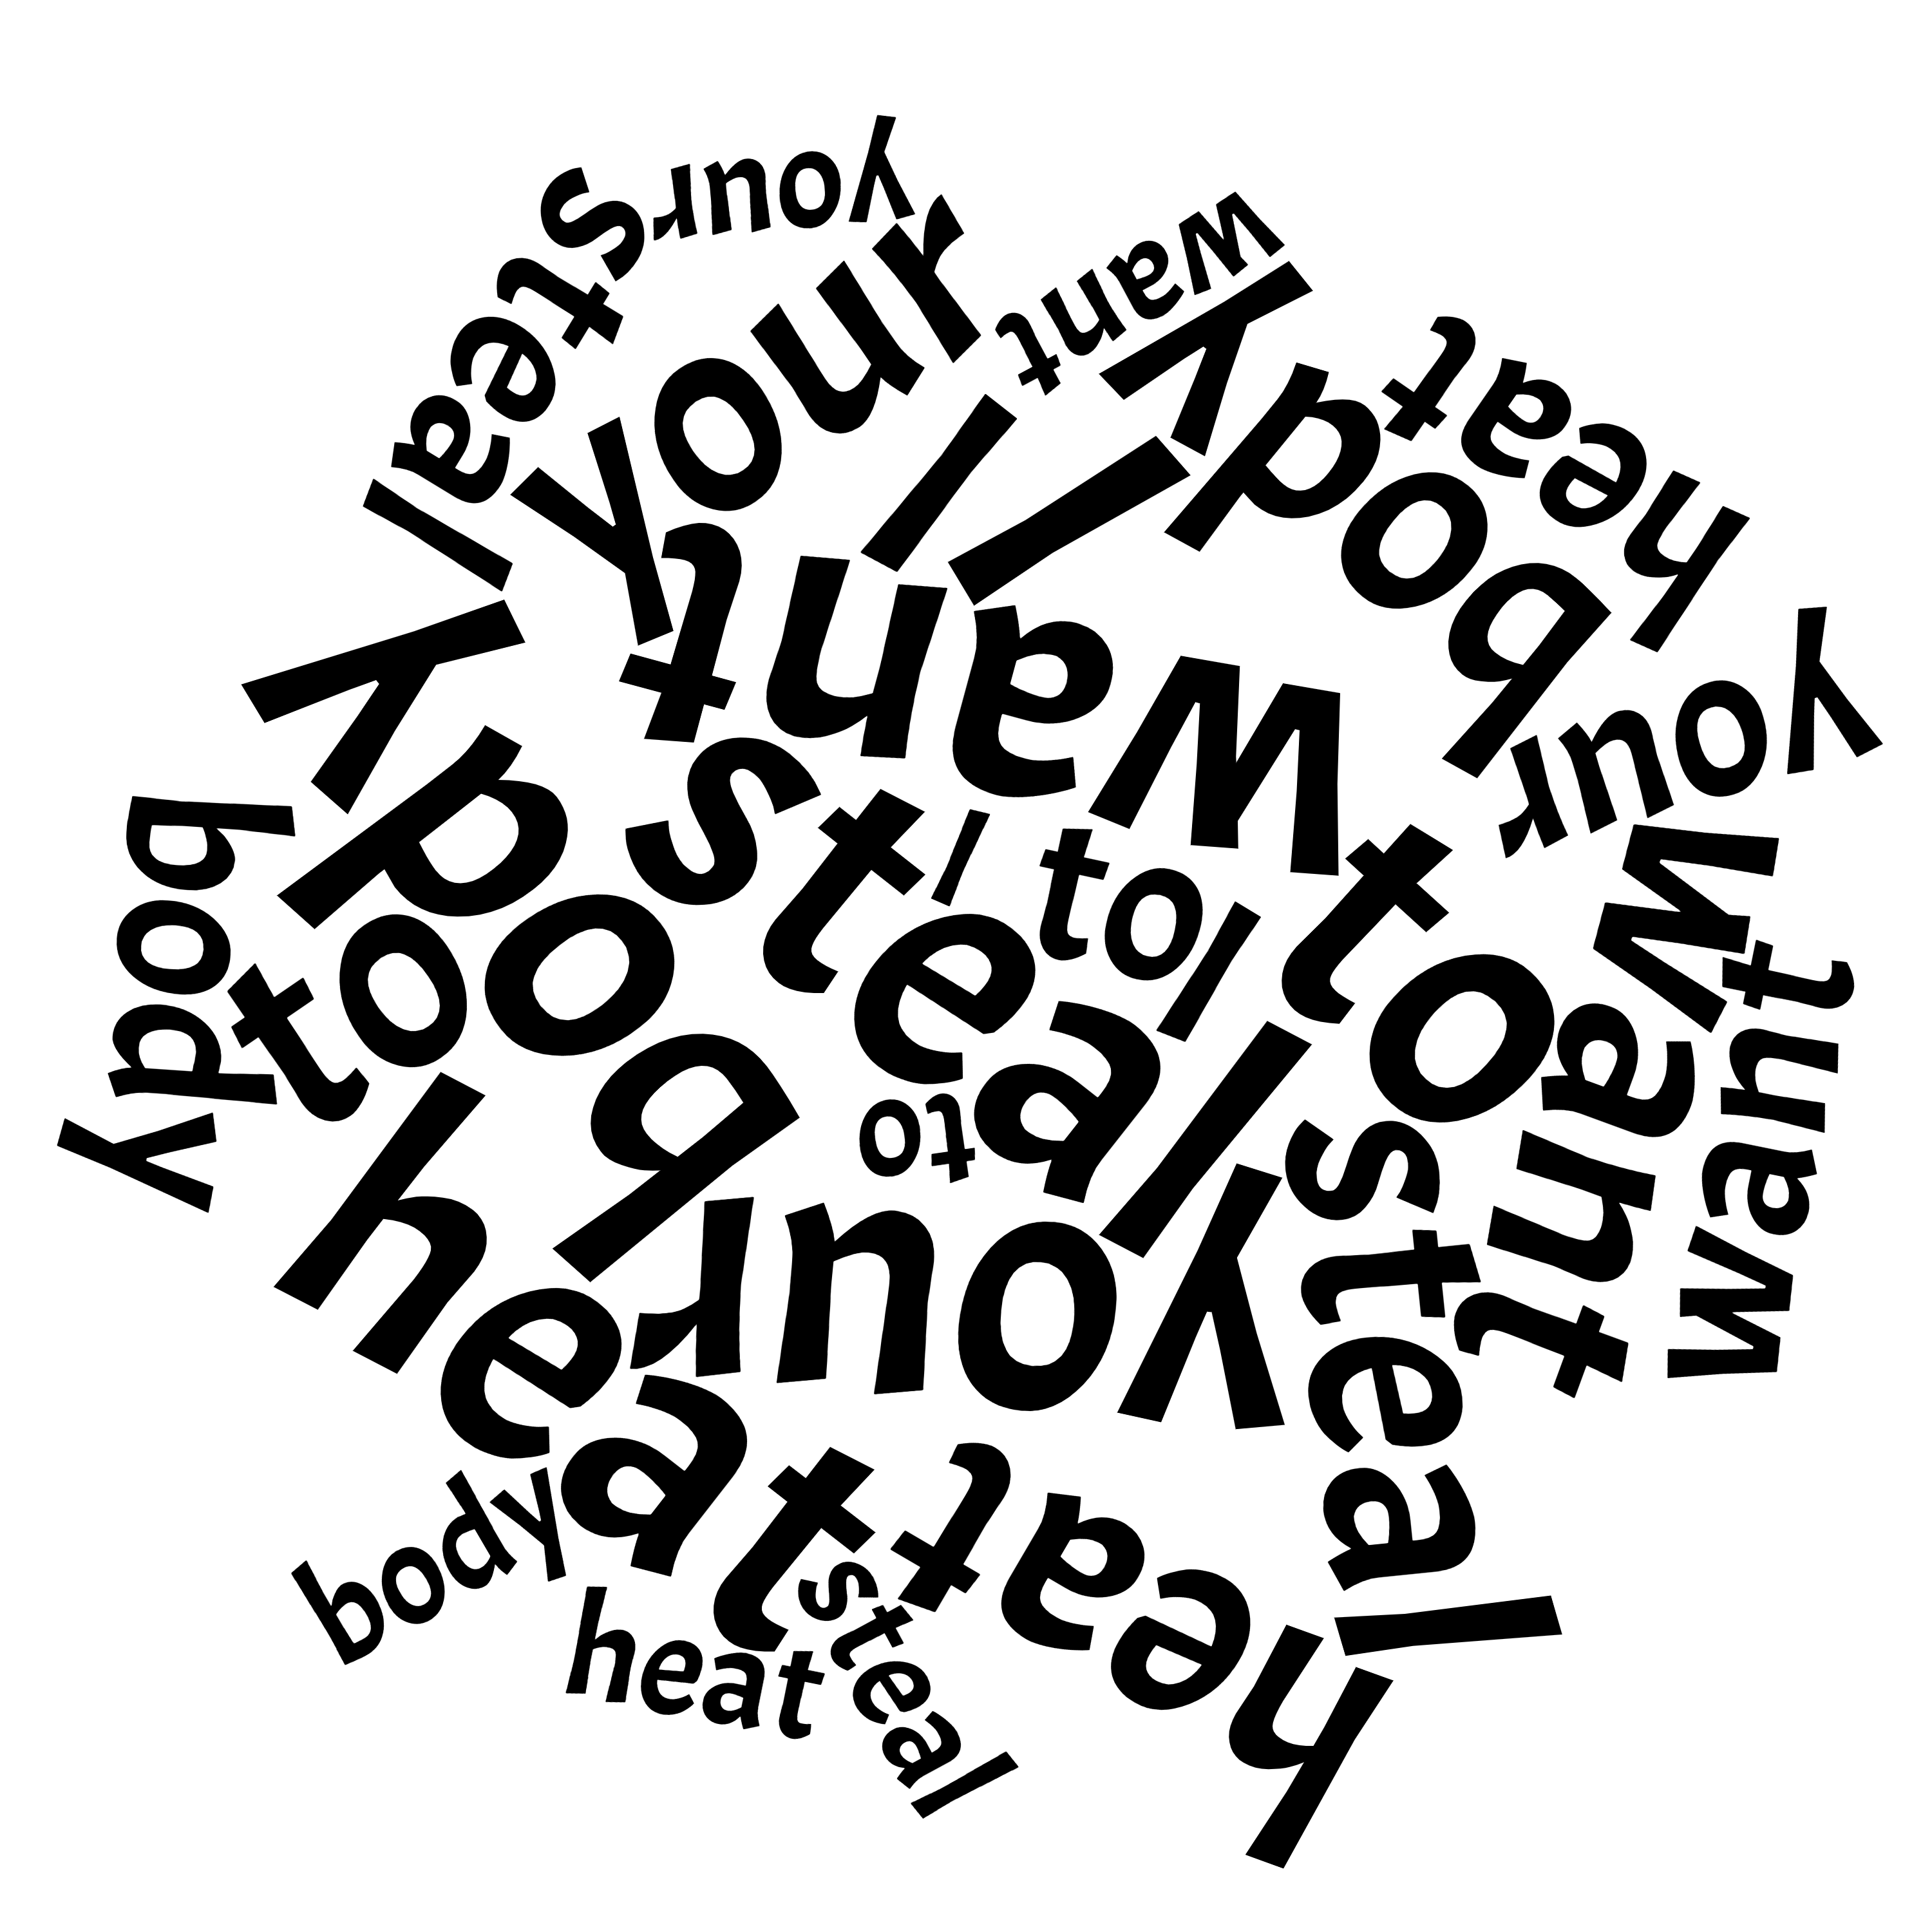
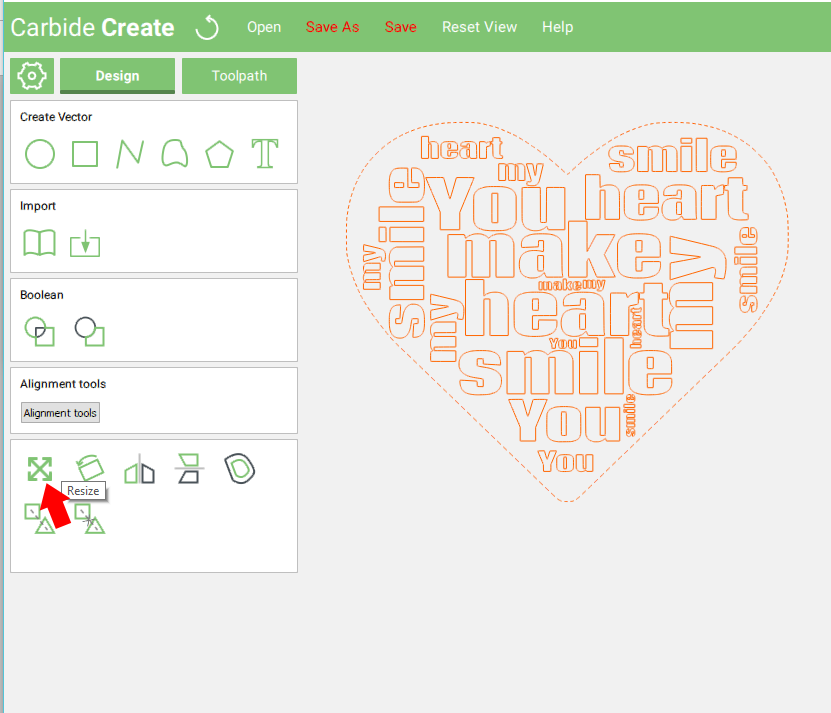
The hidden message is basically a word cloud based on a phrase, a quote, a memorable text, and it is generated by repeating the words in the sentence while changing the display frequency. It's more like a pseudo word cloud. And because a picture is worth more than a thousand words ....
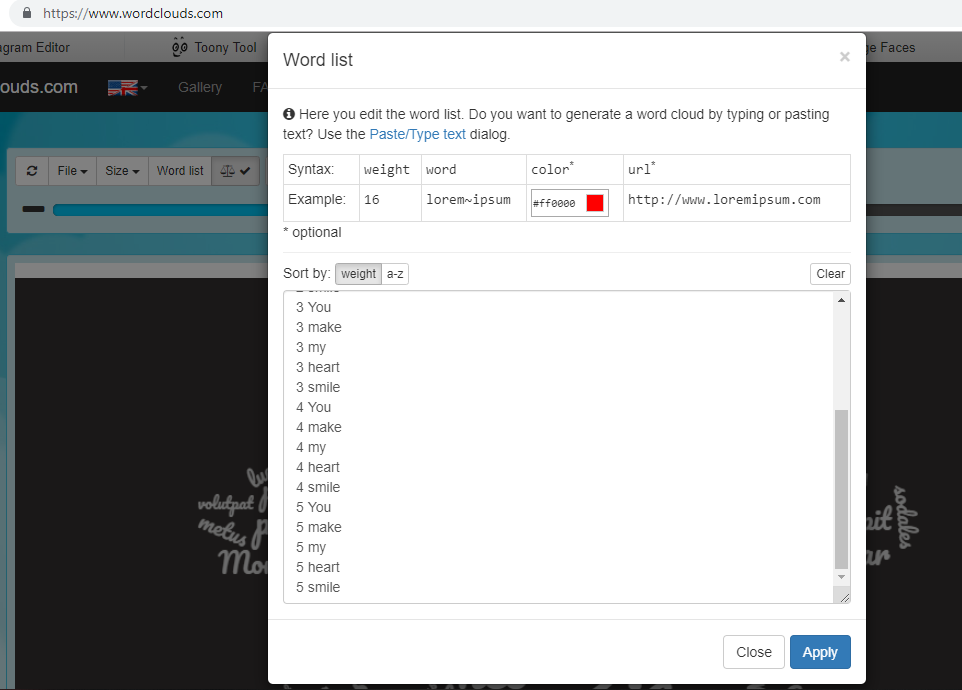
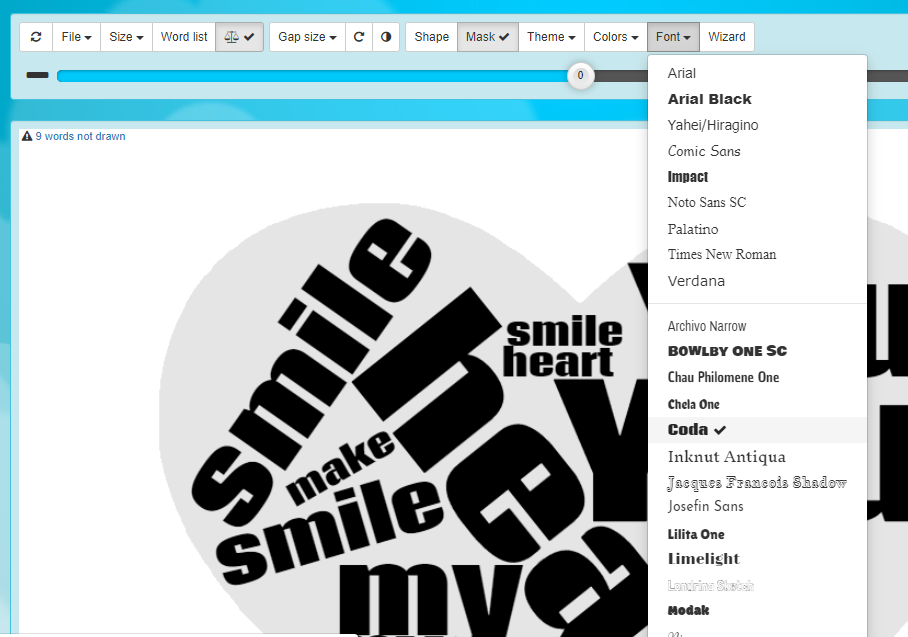
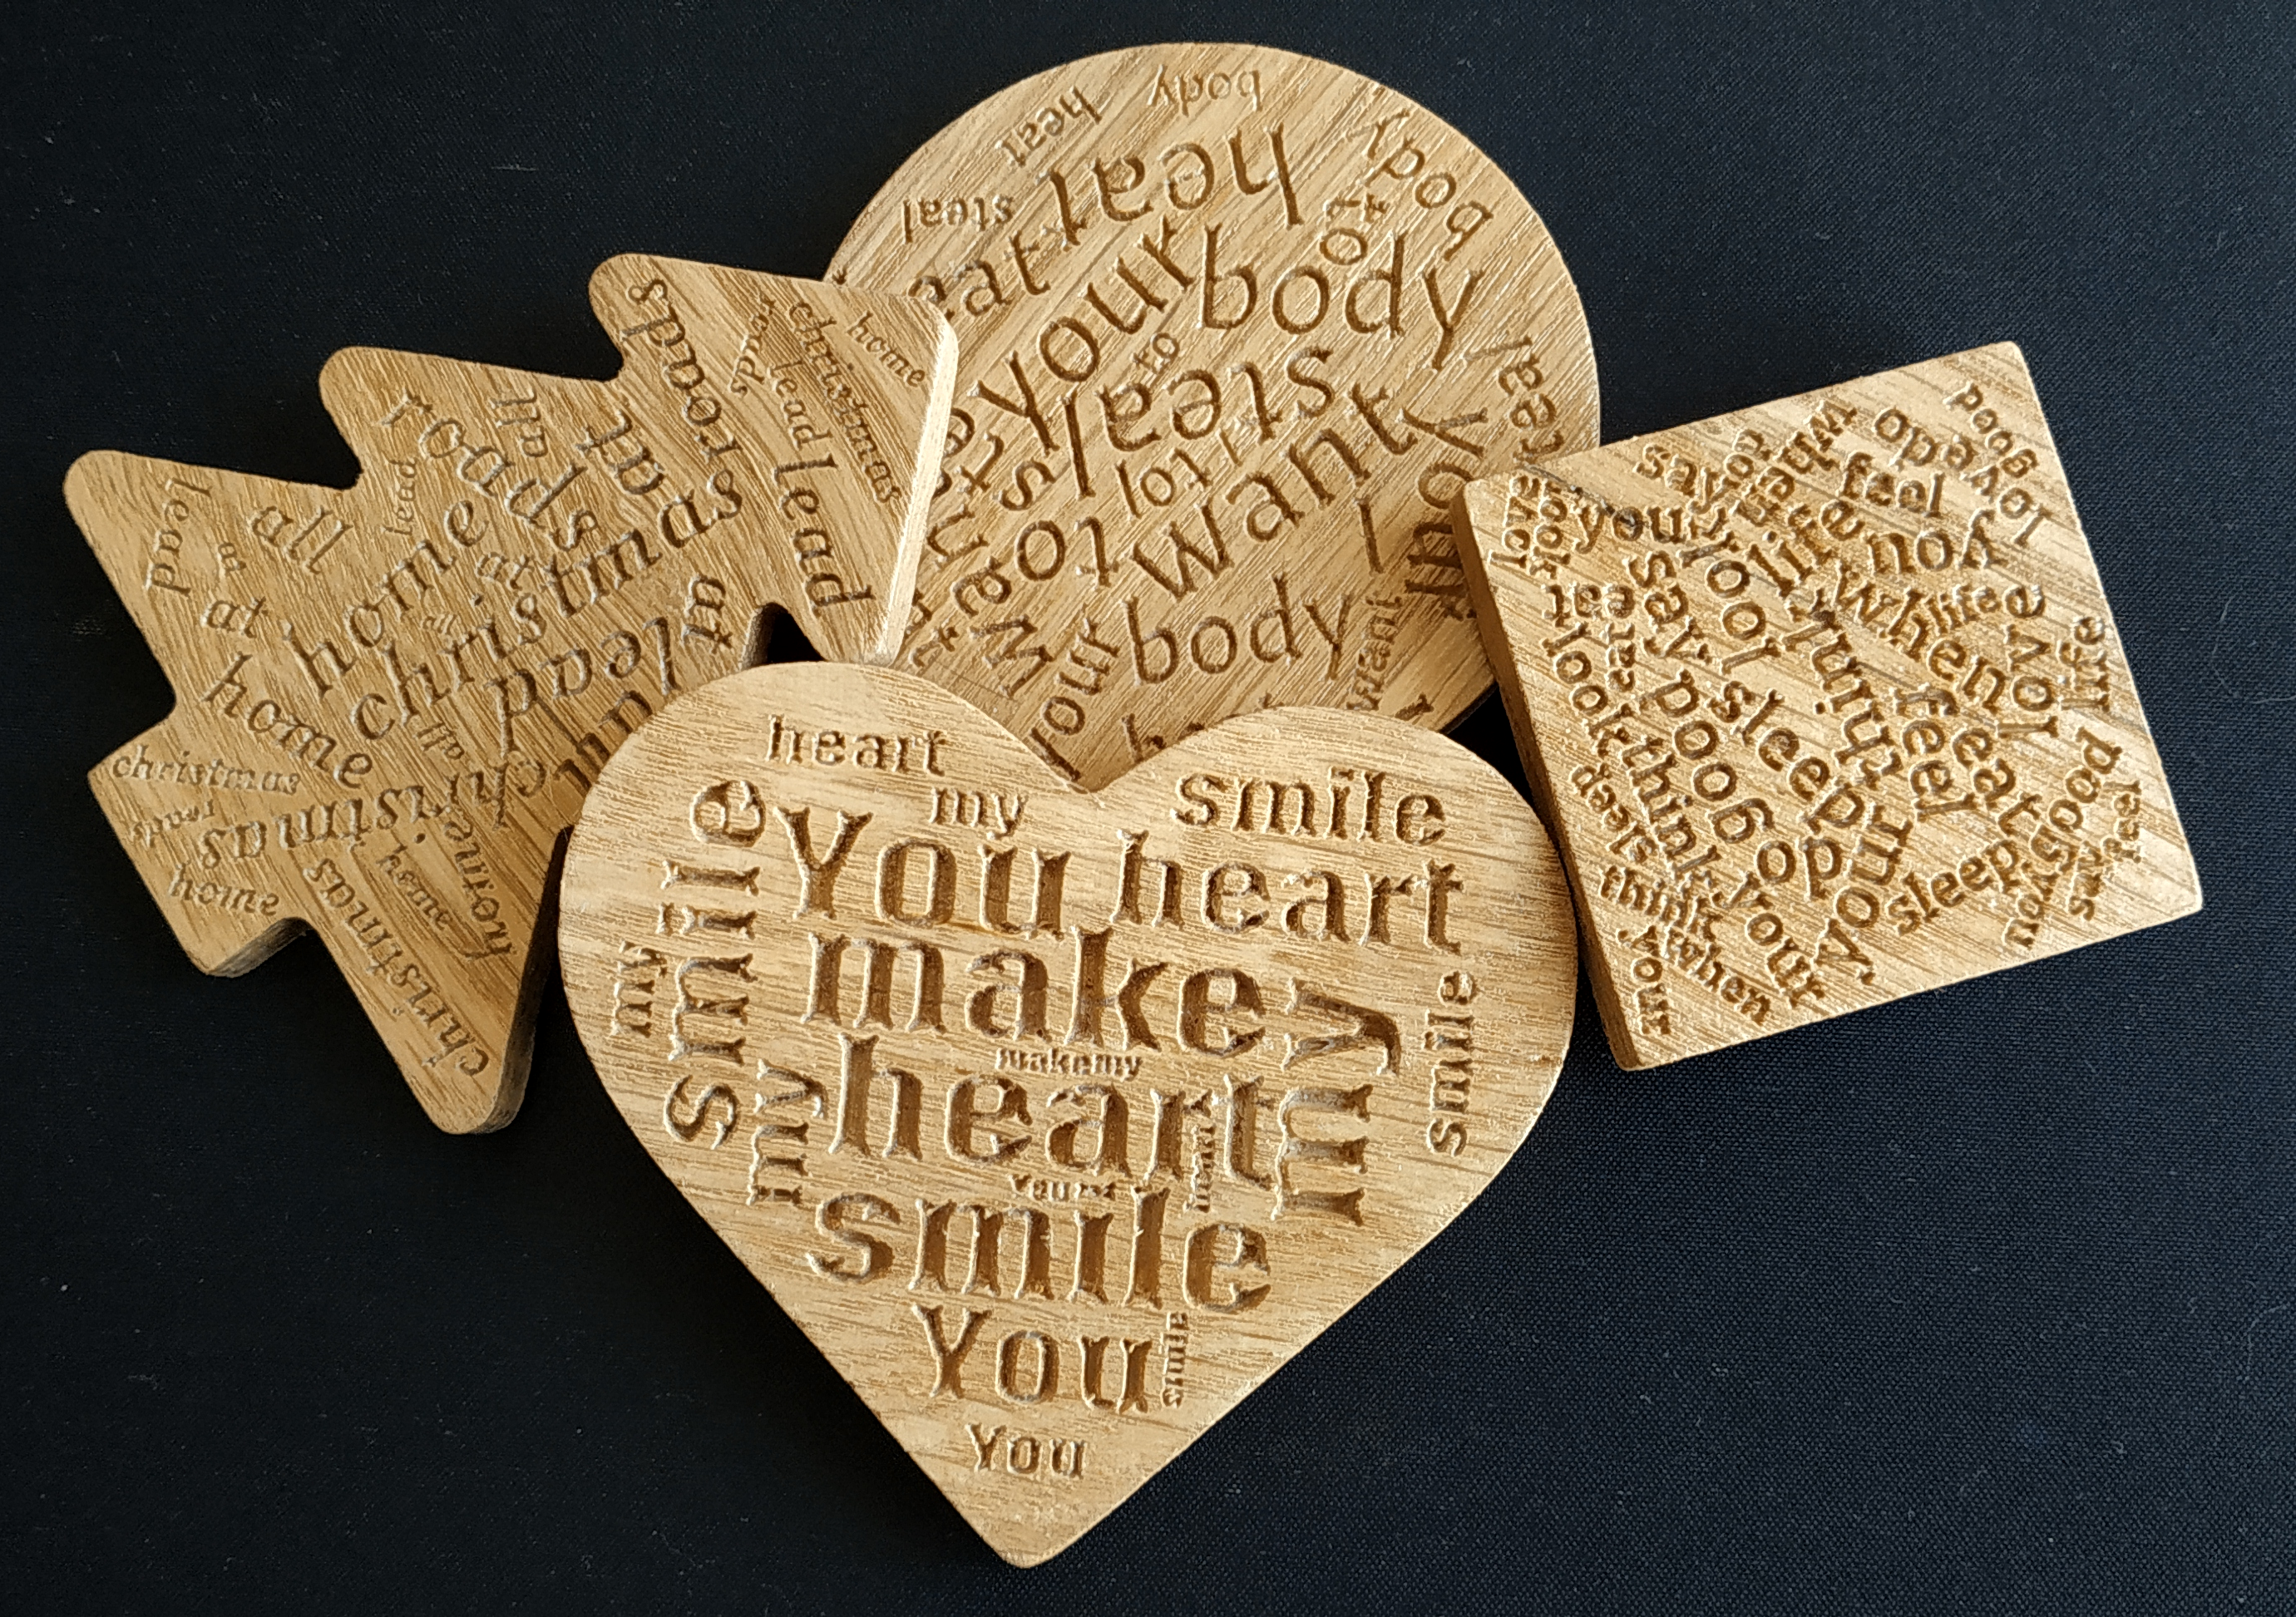
In the first image above I hid a message. The message is - You make my heart smile - and the list on which the word cloud was generated is:
- 1 You
- 1 make
- 1 my
- 1 heart
- 1 smile
- 2 You
- 2 make
- 2 my
- 2 heart
- 2 smile
- 3 You
- 3 make
- 3 my
- 3 heart
- 3 smile
- 4 You
- 4 make
- 4 my
- 4 heart
- 4 smile
- 5 You
- 5 make
- 5 my
- 5 heart
- 5 smile
As you can see in the list, the same words are repeated five times with five different frequencies (sizes). In this way, you can "hide" different messages and make some unique gifts at holidays, special days for your beloved ones. I carved these messages in wood but they can be printed on paper, etched in plexiglas, burned with laser on different materials and so on.
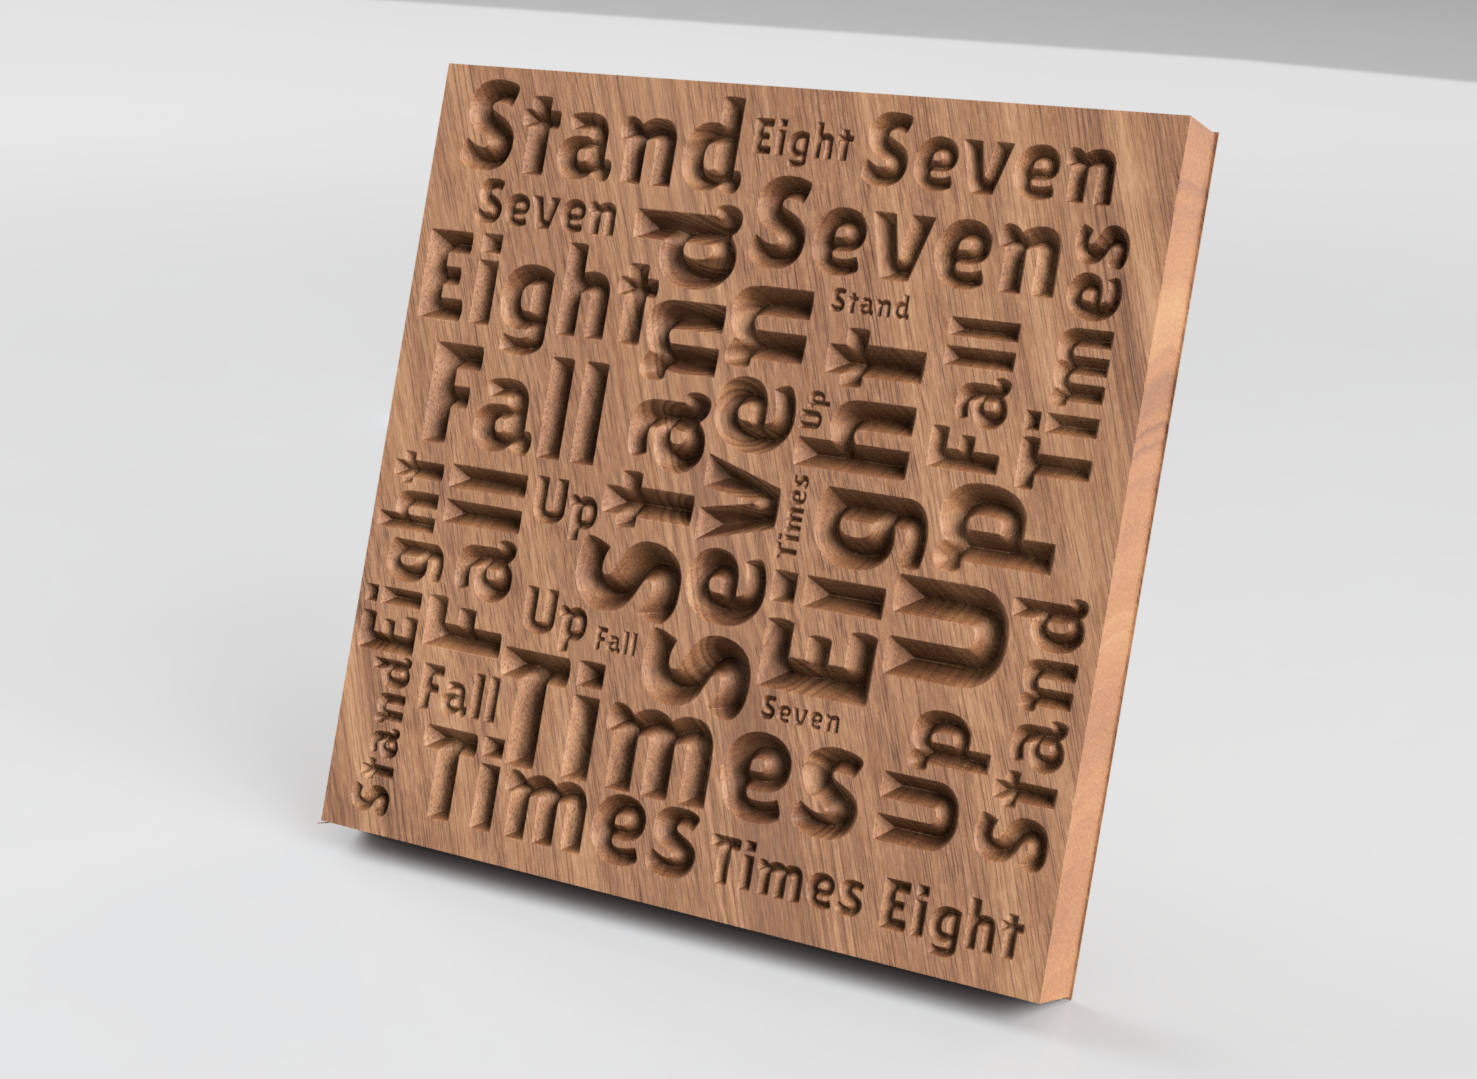
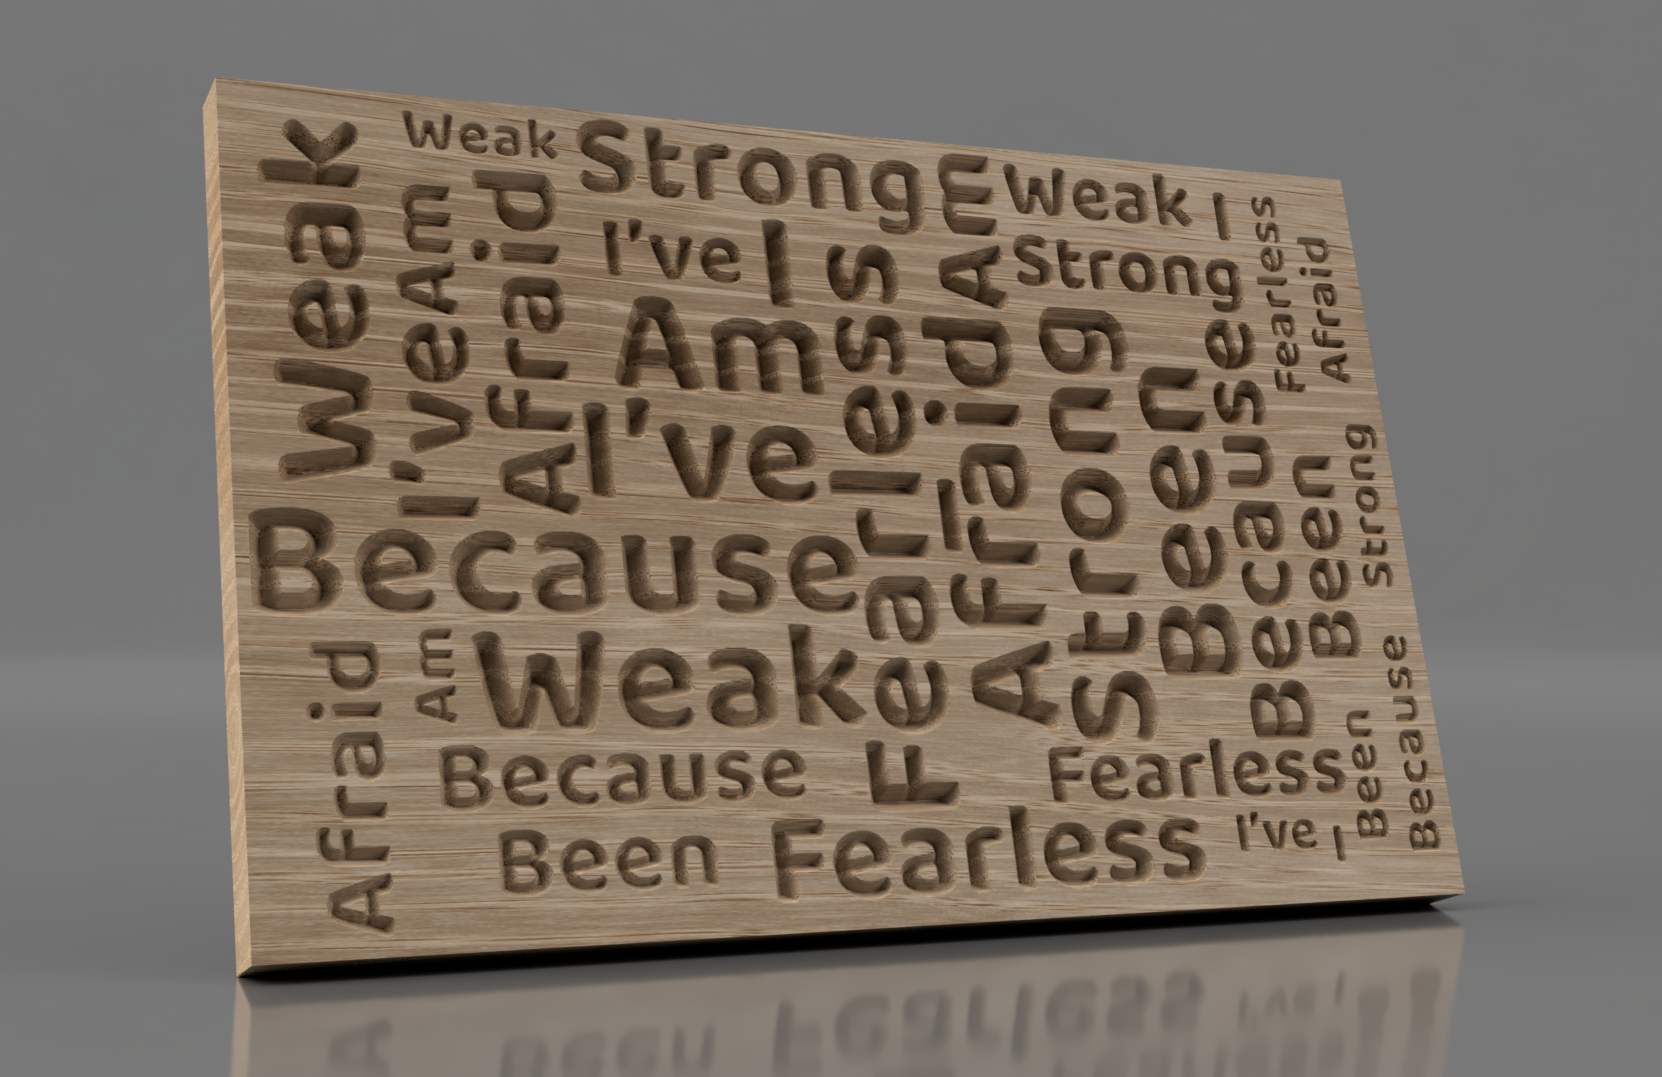
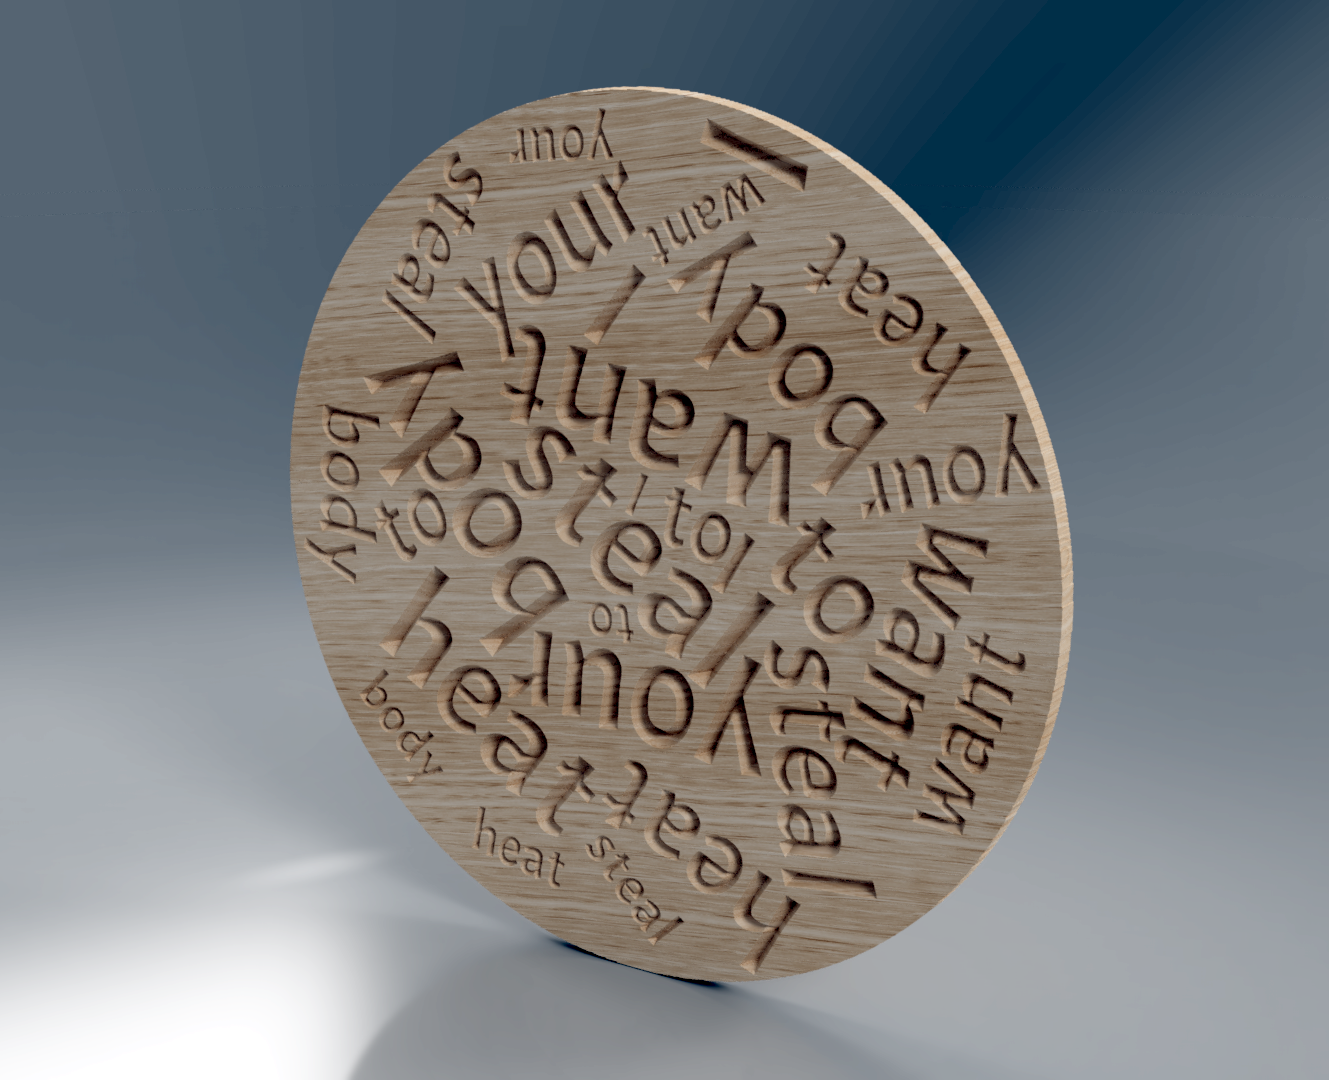
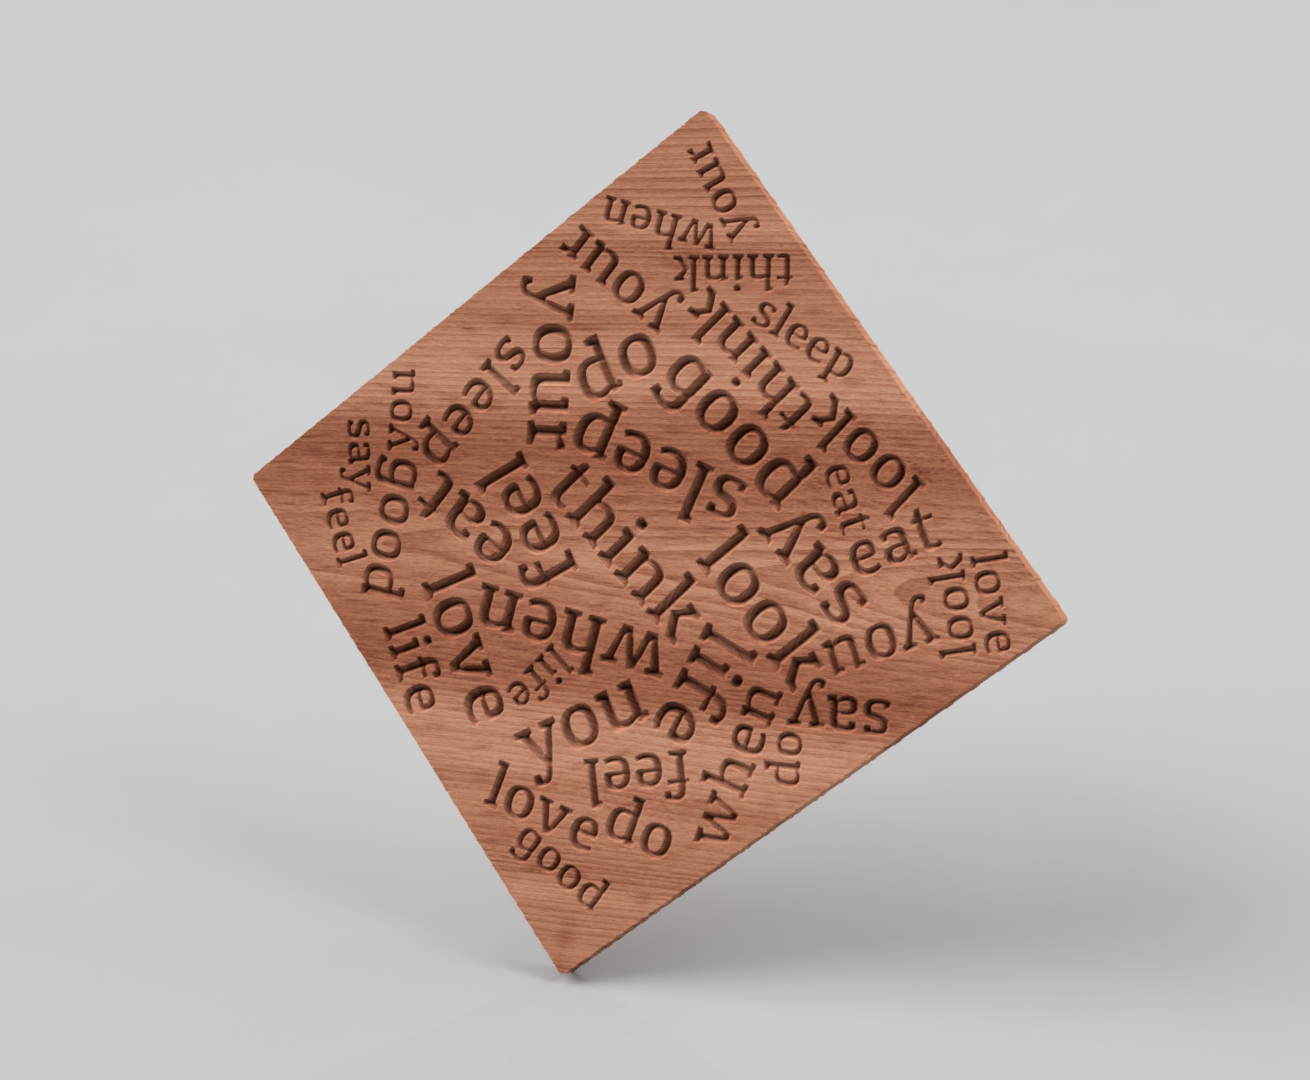
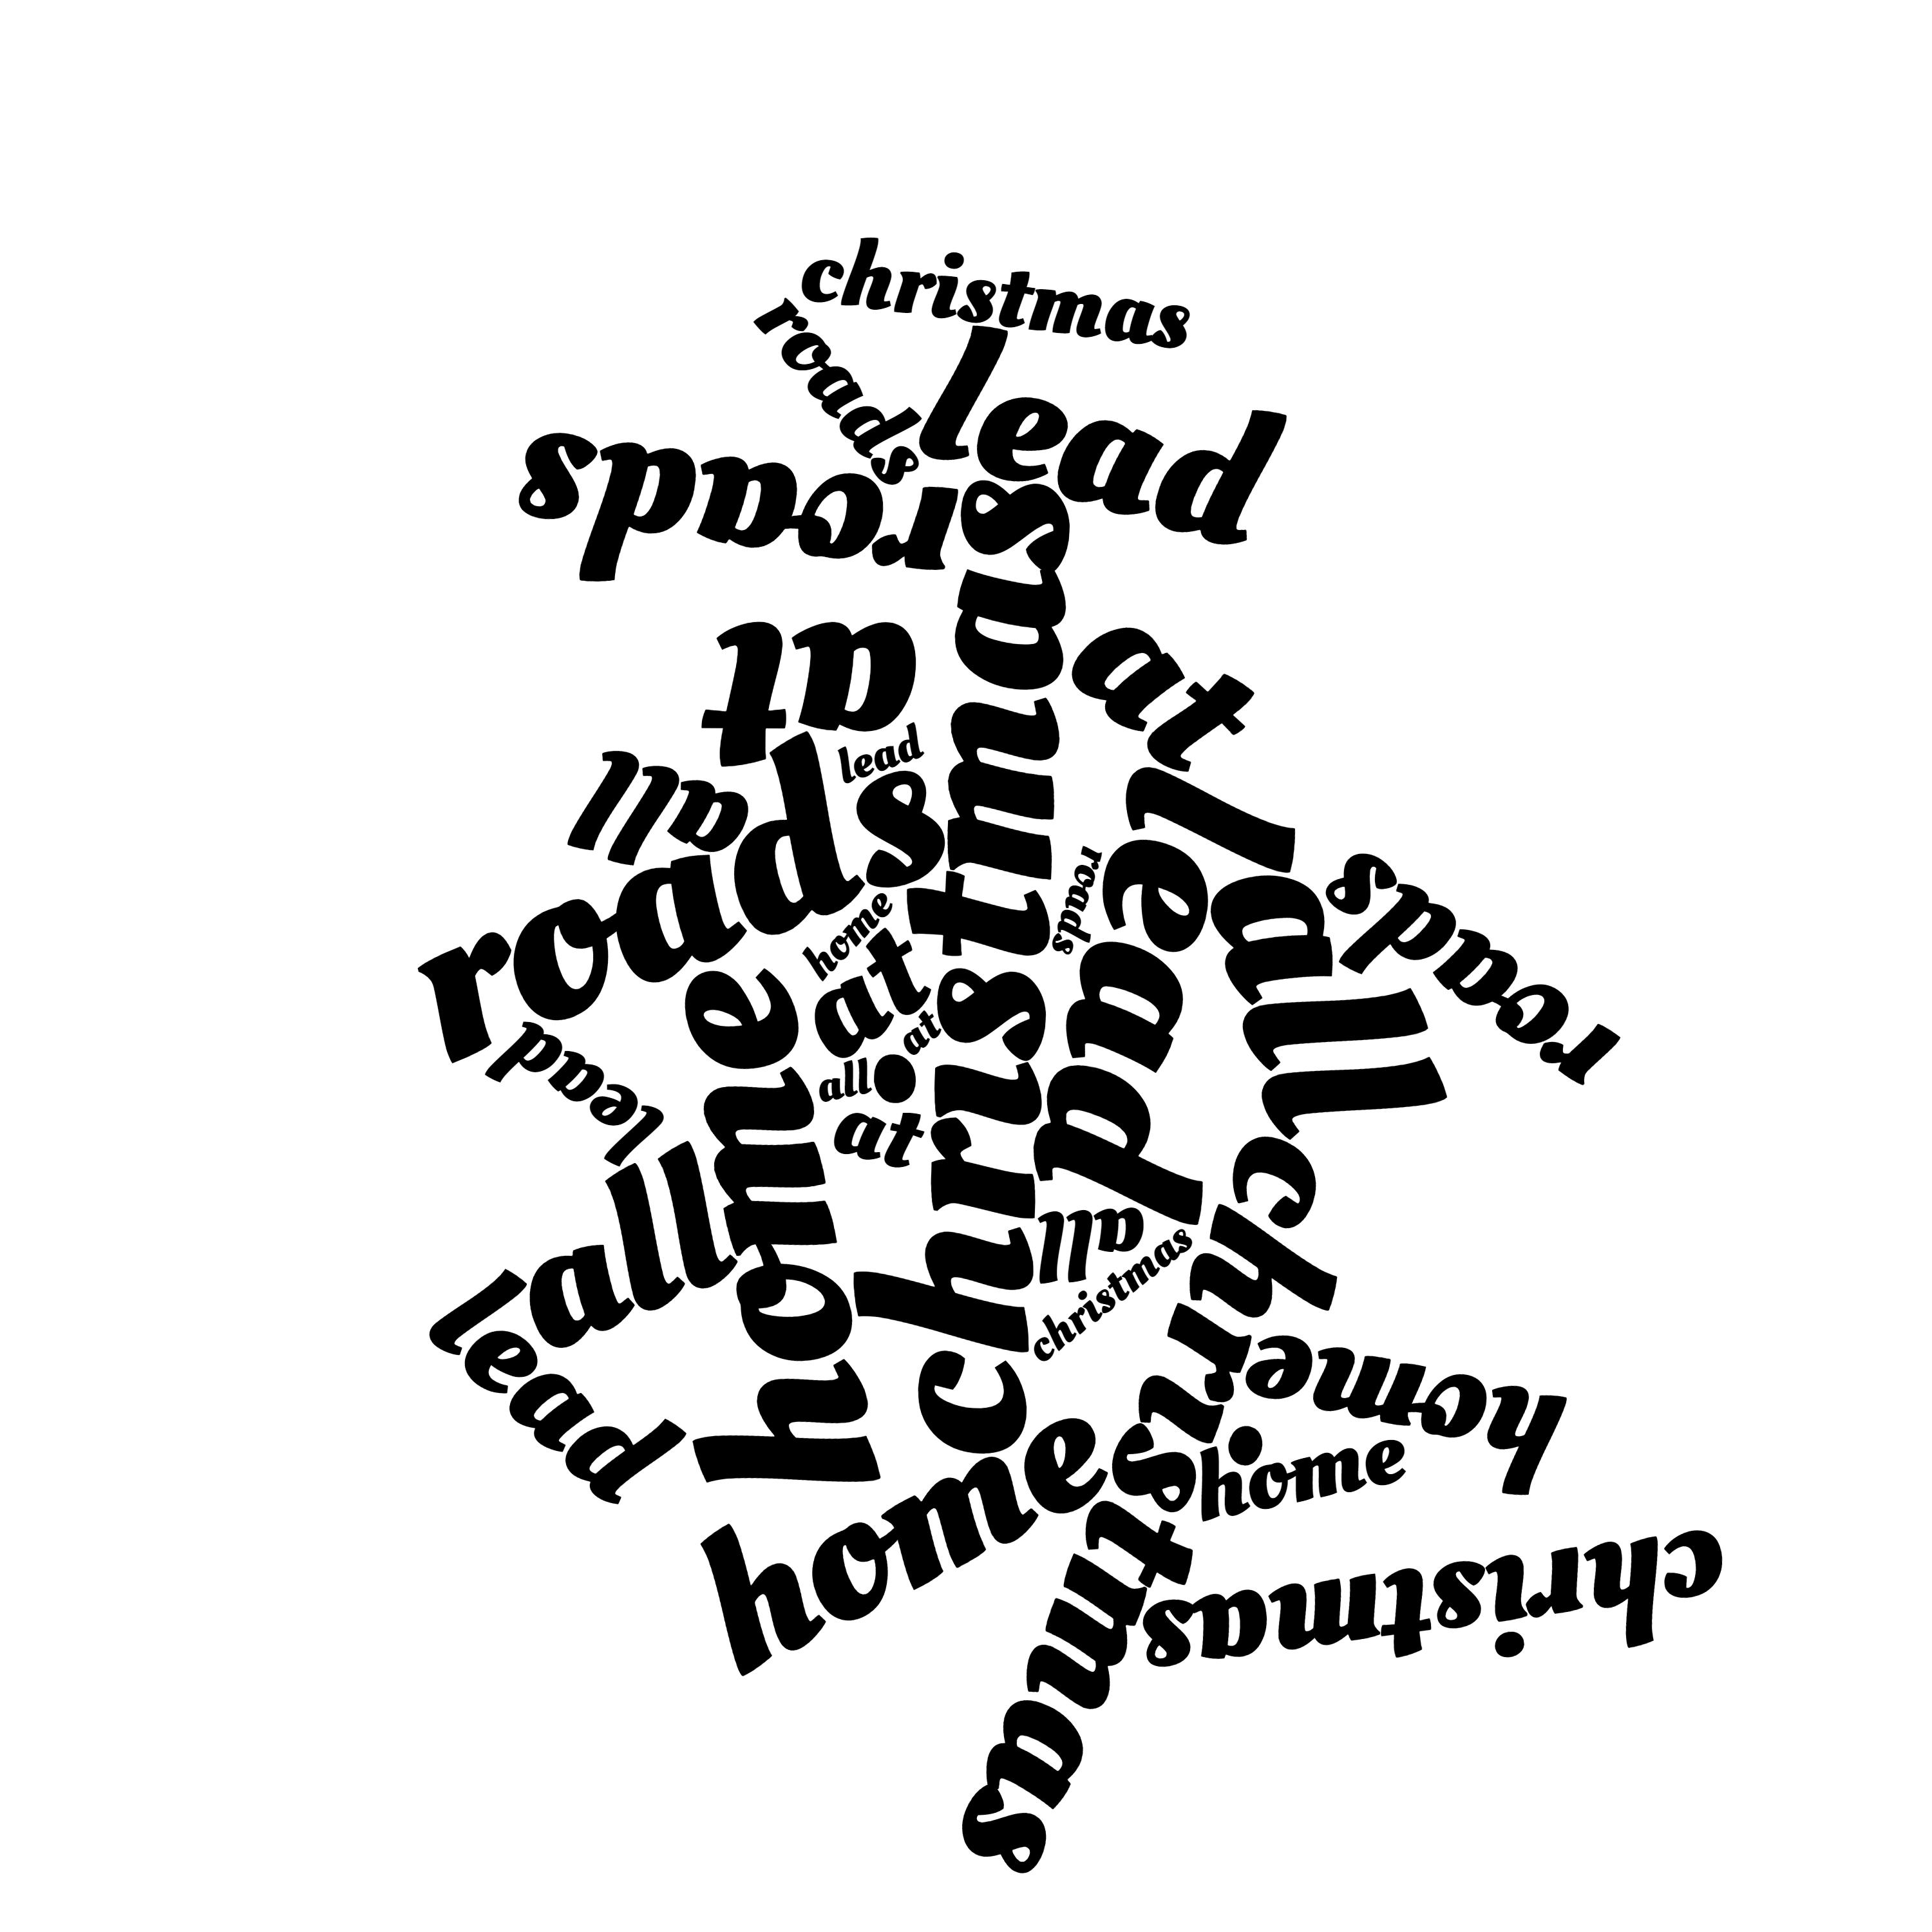
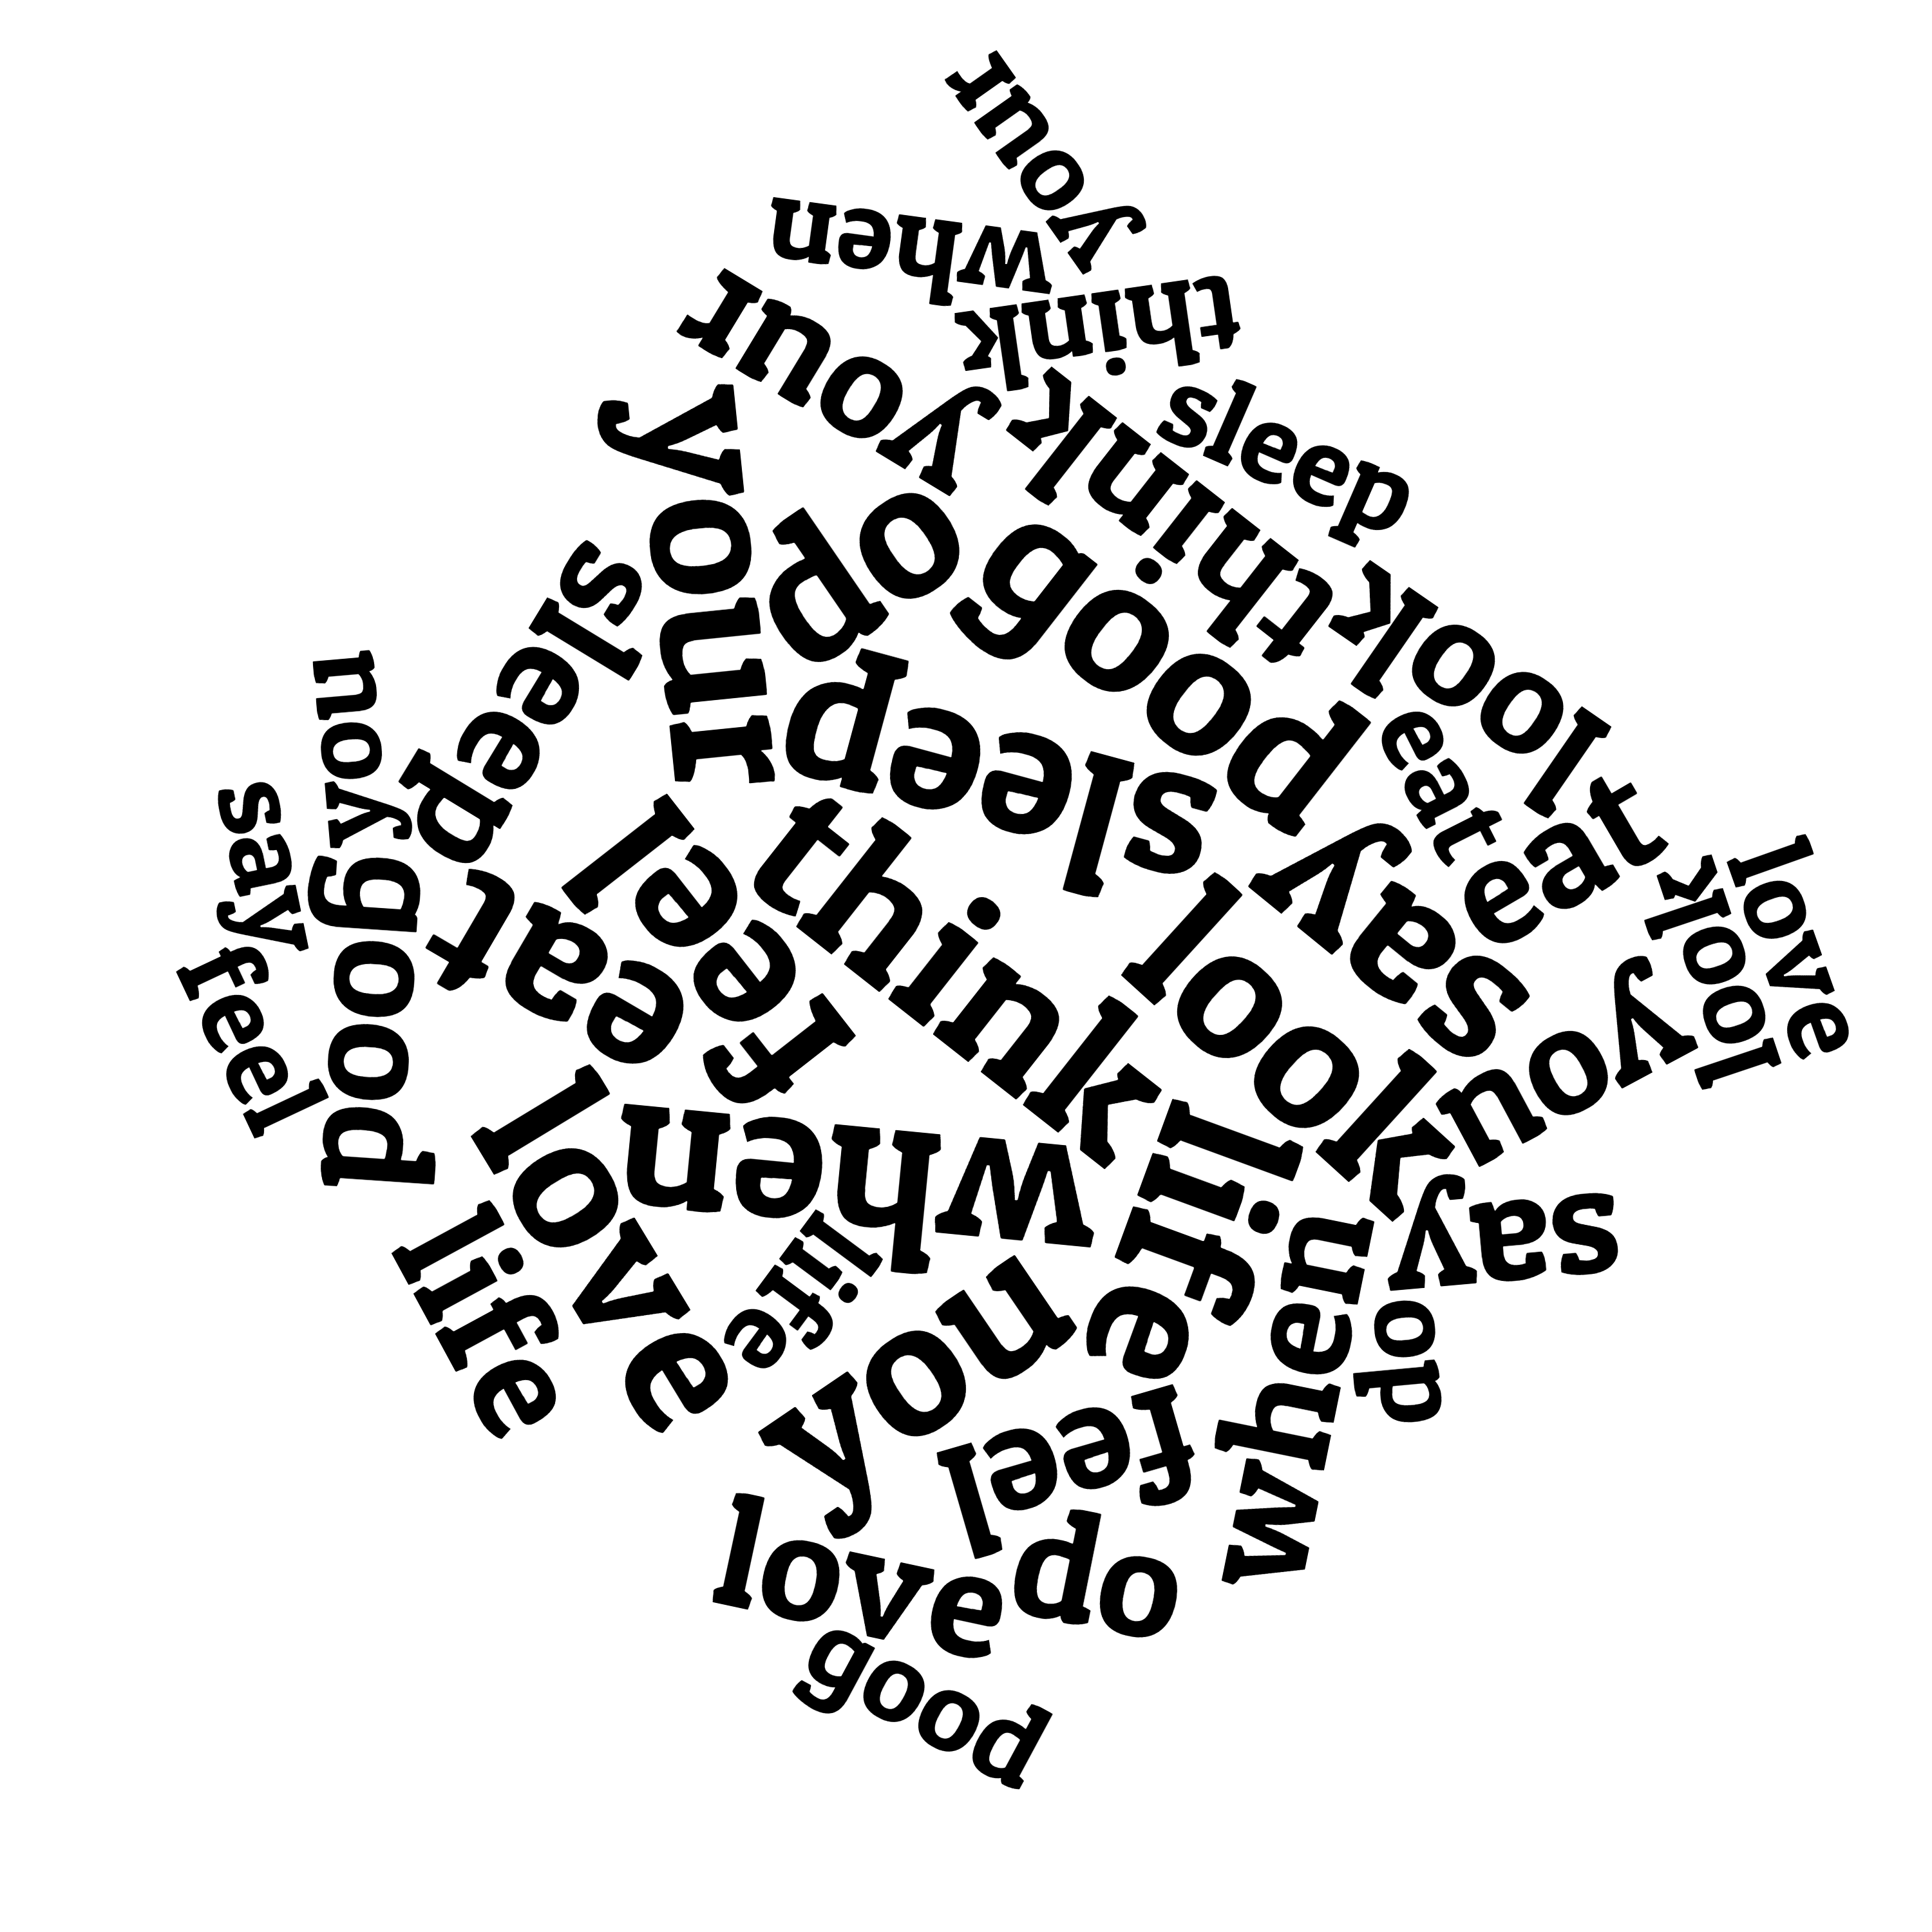
In the renderings above there are also 'hidden messages'. If you will not be able to discover them, at the end of this instructable you can find the list with all of them :)
Generate the Pseudo Word Cloud


As I mentioned before, I generated the Word Cloud using the wordclouds.com web page.
So I have my fraze, in this case "You make my heart smile" and I want to make a list compatible with the rules of wordclouds.com, a number (the frequency, the weight, the size of the word) and a word separated by a space (the color and url are optional). I can edit the list by hand but because it takes too long I made a little script to make this faster look here. I entered the words, one word in every line and pushed the 'Generate List' button, copied the resulting list, and went to wordclouds.com page. There:
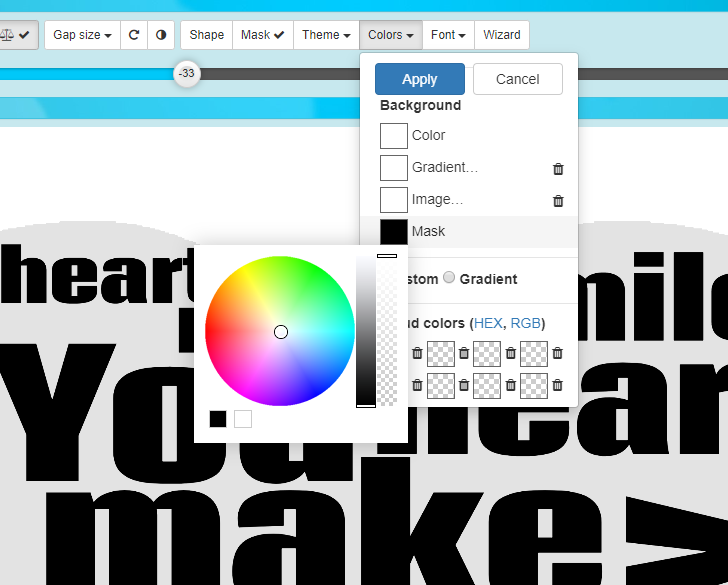
- I clicked on the 'Word List' button, cleared the existent data and pasted my list, clicked on 'Apply' and 'Close';
- chose a one colored theme;
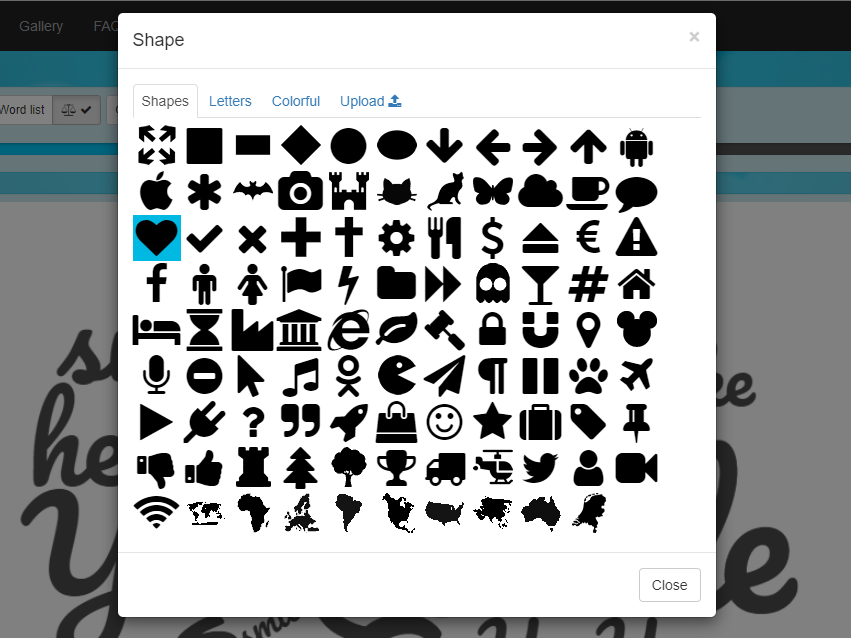
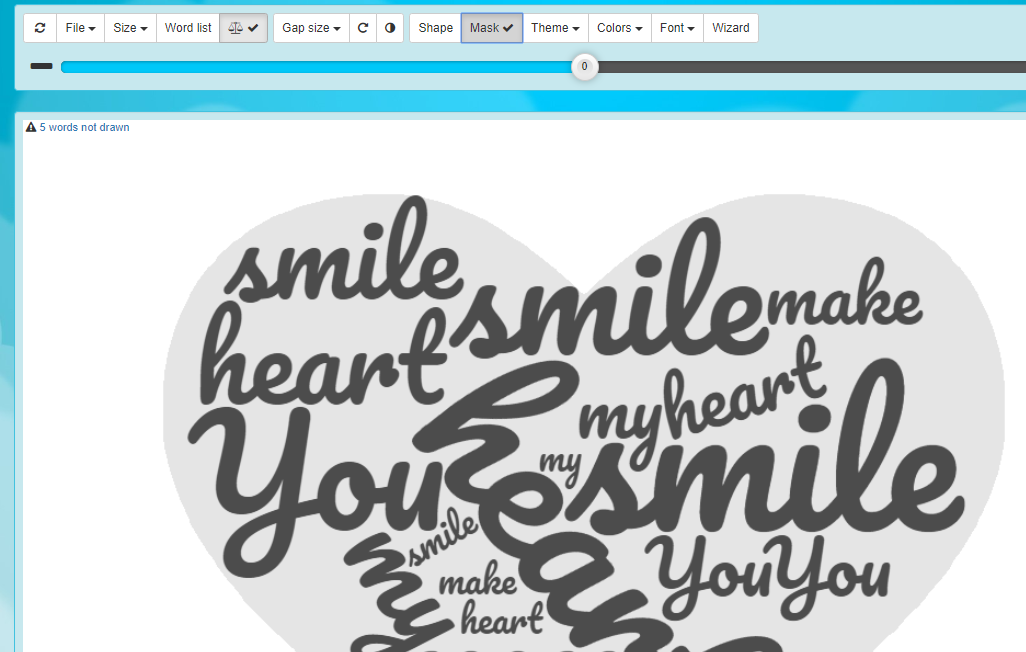
- chose a "Shape" (a heart in my case) and clicked on mask the shape to be visible;
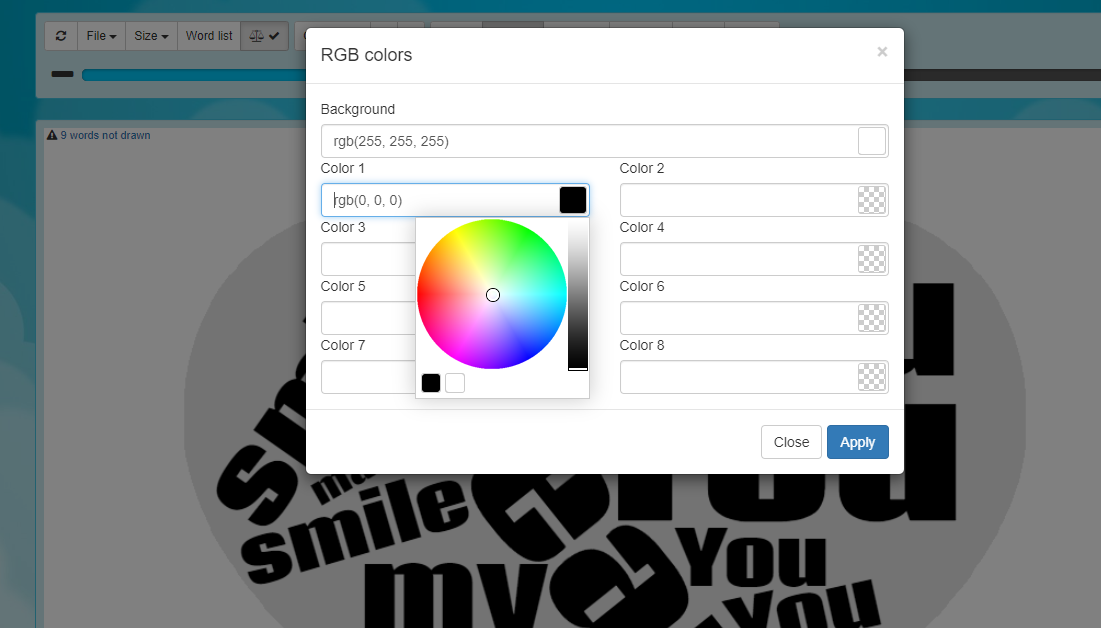
- clicked on 'Colors', 'RGB', 'Color1', changed it to black and clicked 'Apply';
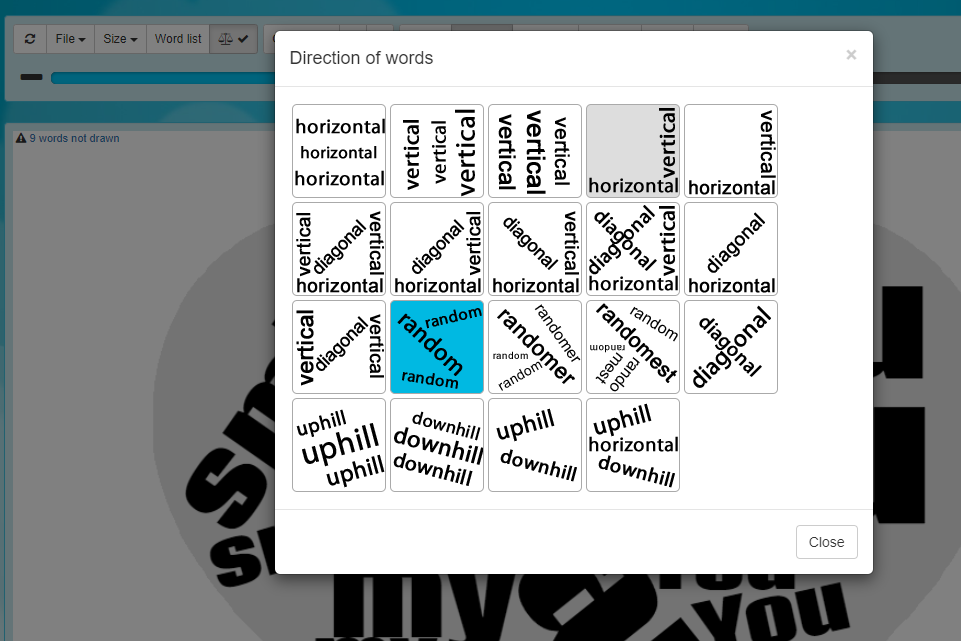
- chose a font - Coda for example - and chose 'Direction of words' horizontal and vertical;
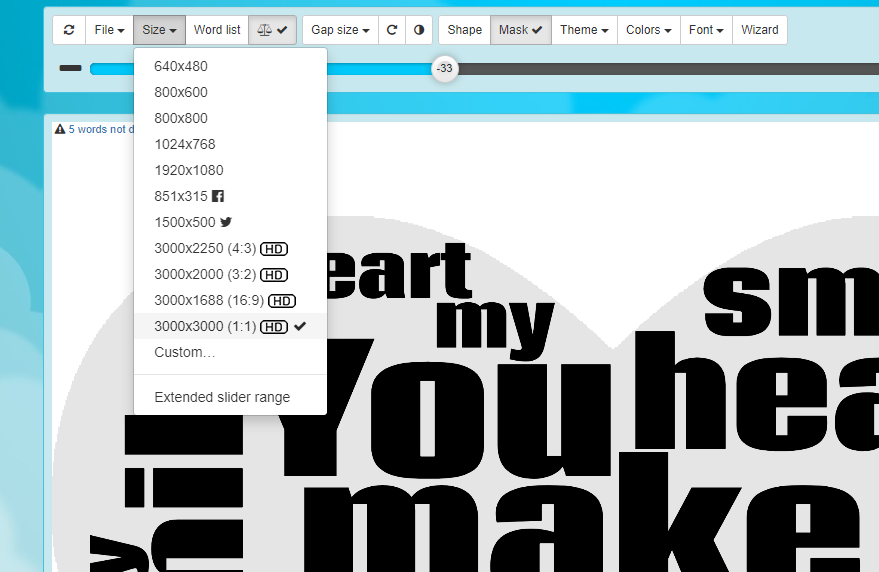
- I chose with the 'Size' button a good resolution (3000x3000), higher is better, because later I make a vectorization (of course the rendering of the word cloud was slower);
- after that tweaked the appearance of the word cloud by changing the 'Gap size', moving the (+-) slider and refreshing the display (first button on the left), it is also good to not have 'words not drawn' displayed;
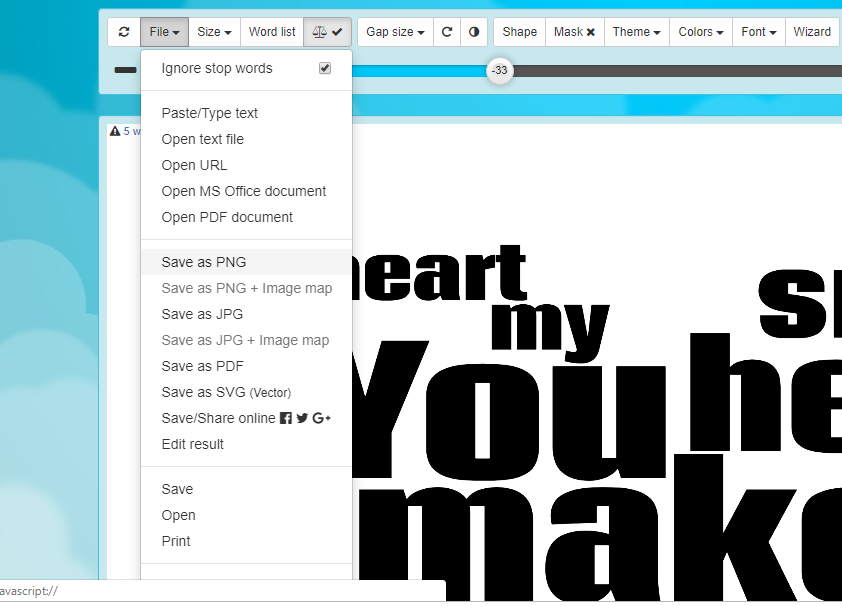
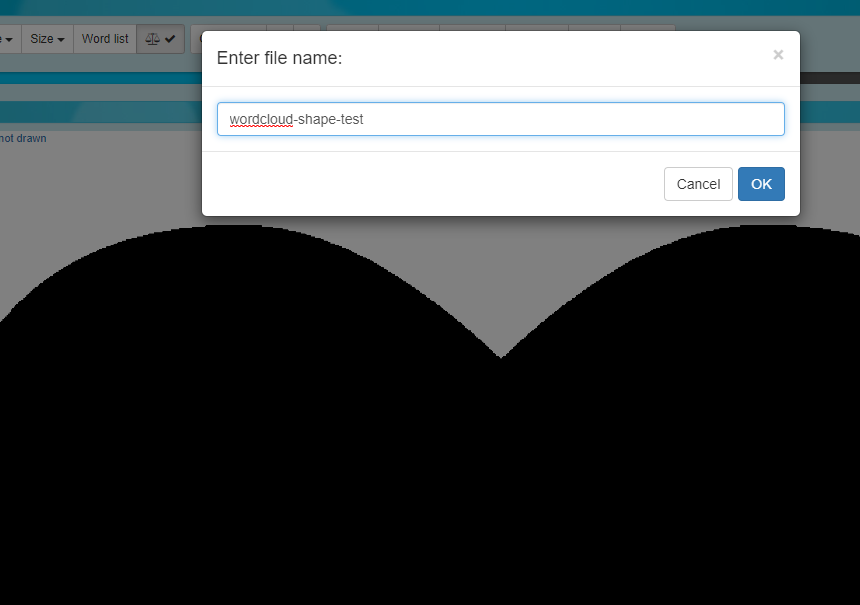
- when I was satisfied with the result, I clicked on the mask button (to stop the shape to be displayed), on the 'File' button and on 'Save as PNG';
- next I saved the shape only (I needed an image for the wood cutting to be made): clicked on 'Mask' , made the shape color opaque from the 'Color' button then saved the shape (File- Save as PNG). I can reuse this shape later for another wordcloud using the same resolution of course.
Now I have two files: the pseudo word cloud (the words) and the mask (the heart shape). If I do not have access to a CNC machine I can look now for a workshop that offers design, cutting, machining, engraving on CNC and for a smaller or a bigger price they can engrave and cut my project. But because I have access to a desktop CNC, I will try to make the production myself. I will use Inkscape and Carbide Create. Carbide Create was licensed only with the acquisition of a ShapeOko 3 or Nomad 883 CNC Machine but in july 2017 was made available for anyone to use it for free.
Vectorizing
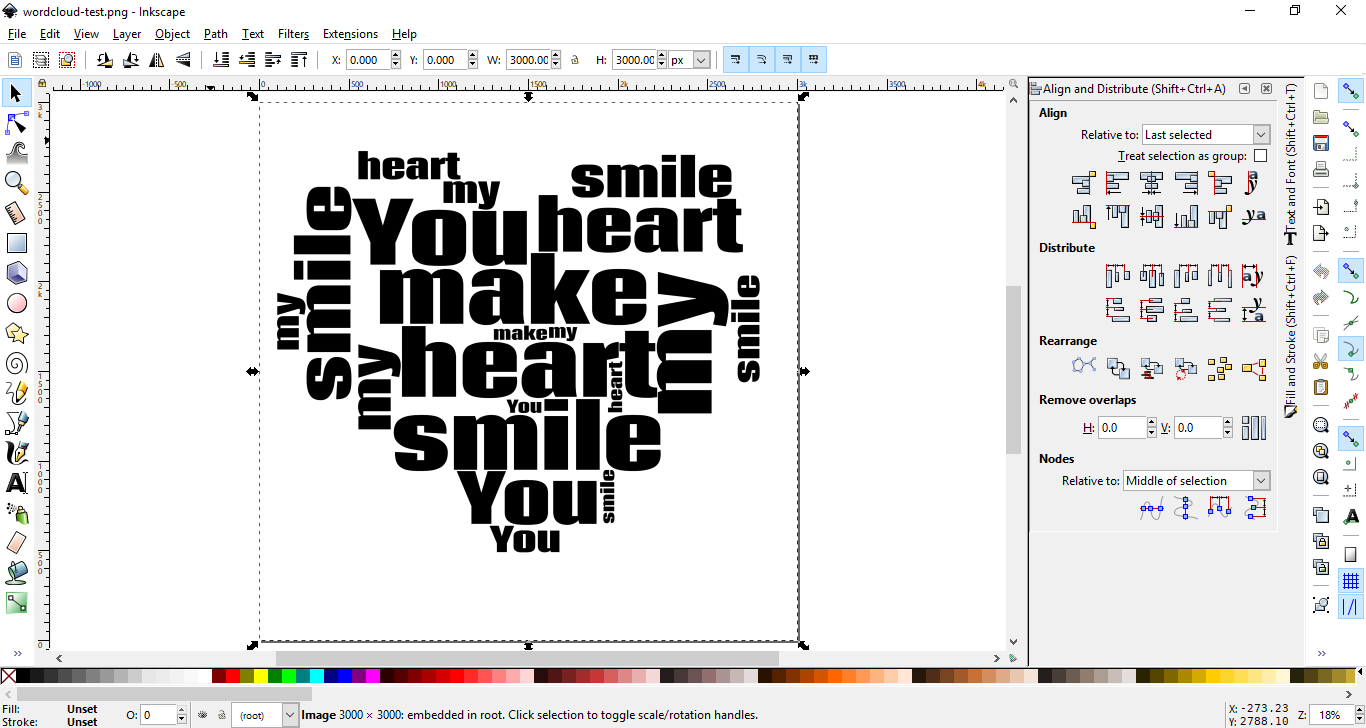


- I started Inkscape and opened (imported) the png file with the words (that you would like to use for the project );
- I clicked on the imported letters (to be selected) and went to Path -> Trace Bitmap, push 'Update', 'OK' and closed the trace window;
- the vectorized letters are now selected, but I selected the bitmap image under the vectors (dragged the vectors apart a little bit) and deleted it;
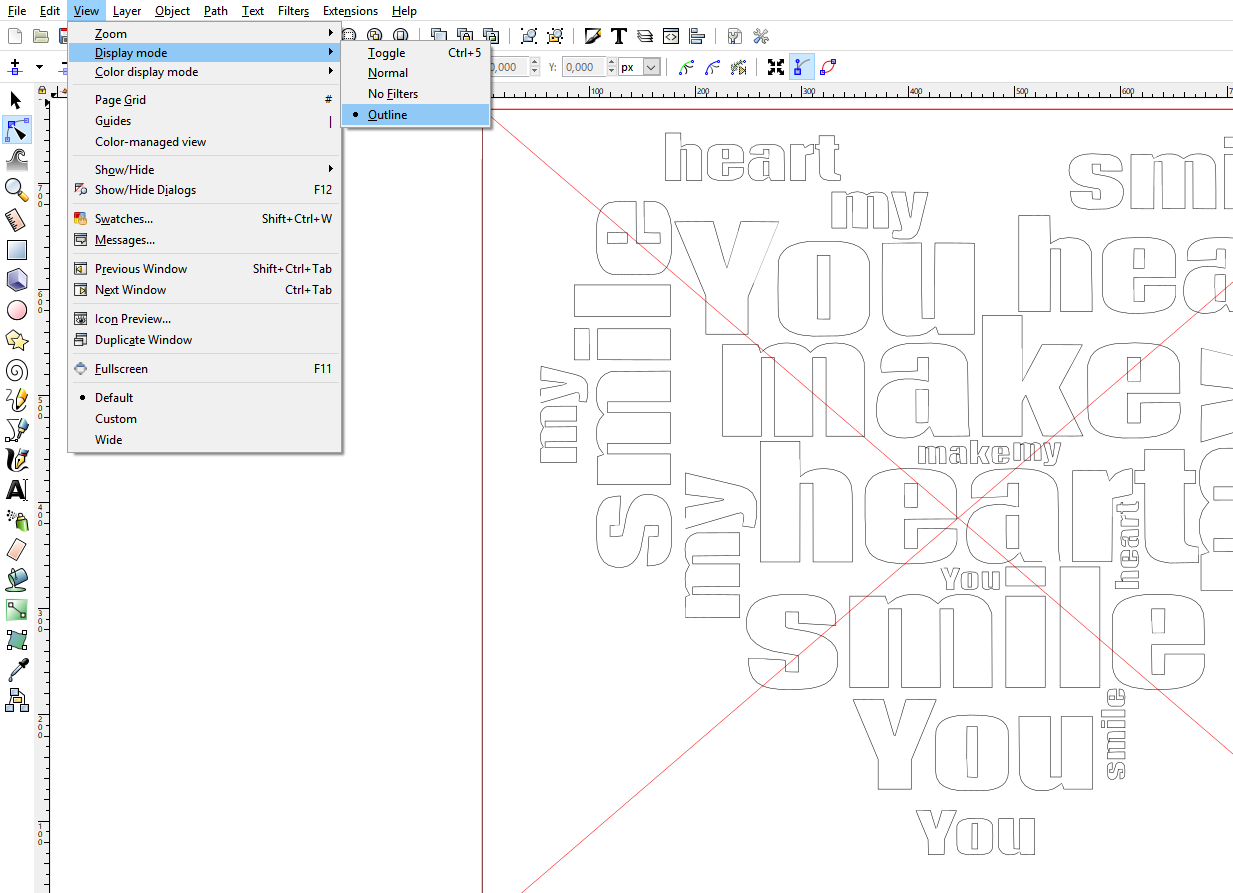
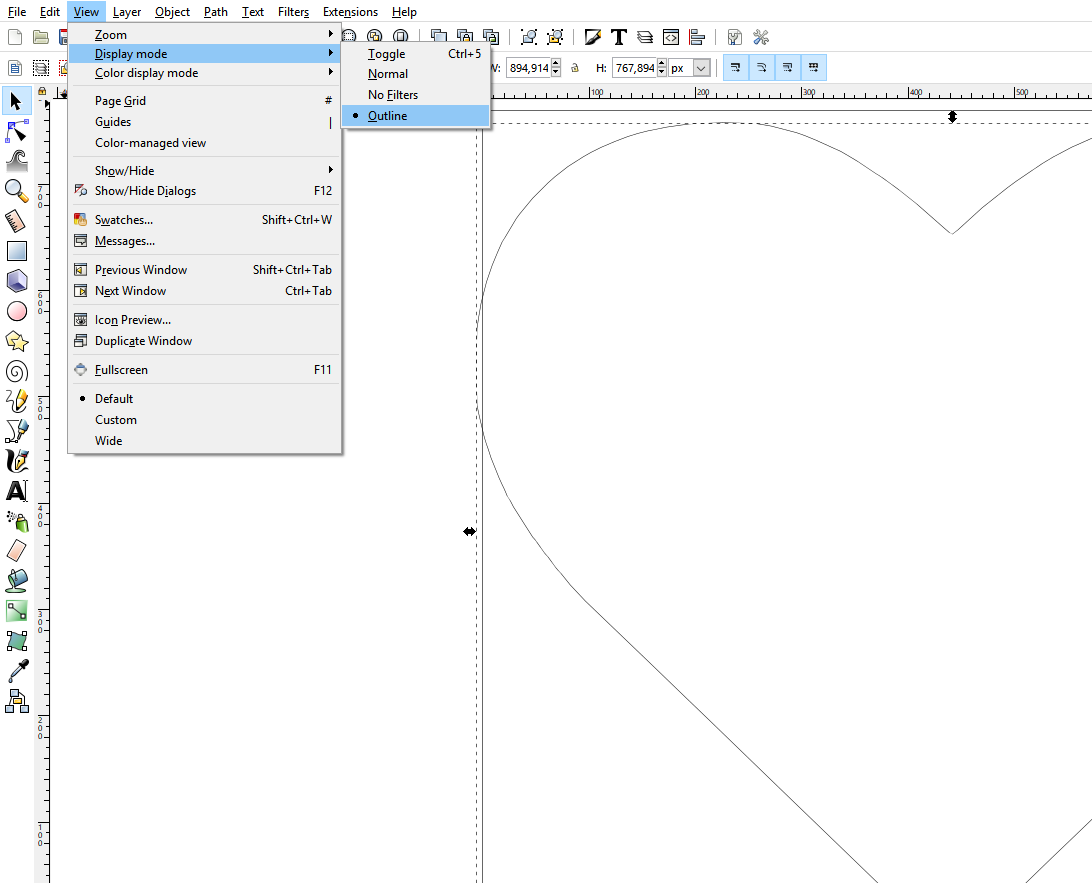
- I changed the display mode to outline mode: 'View'-'DisplayMode'-'Outline' and saved vectors to a svg file.
- I changed back the view mode and repeated the steps for the shape image file (the number of nodes of the shape can be reduced with Ctrl+L just before saving);
Notes:
- If the images are big and sharp the vectorizing will produce very good results. If the images are not sharp and detailed enough do not expect too much...;
- Carbide Create is very picky about the imported dxf and svg files. I have not found a simpler solution than the one that I presented above. If you have dxf files that can not be imported into carbide create the only simple solution is to open and save the file in qcad (this solution is often mentioned in forums). Sometimes I even converted some vector files into png image (filled with black and white where it was needed and exported as a good quality png - 200dpi - at least );
- I have attached the original png files for this project, but also other png files for the other messages presented in the first steps renderings.
Calculate Toolpaths
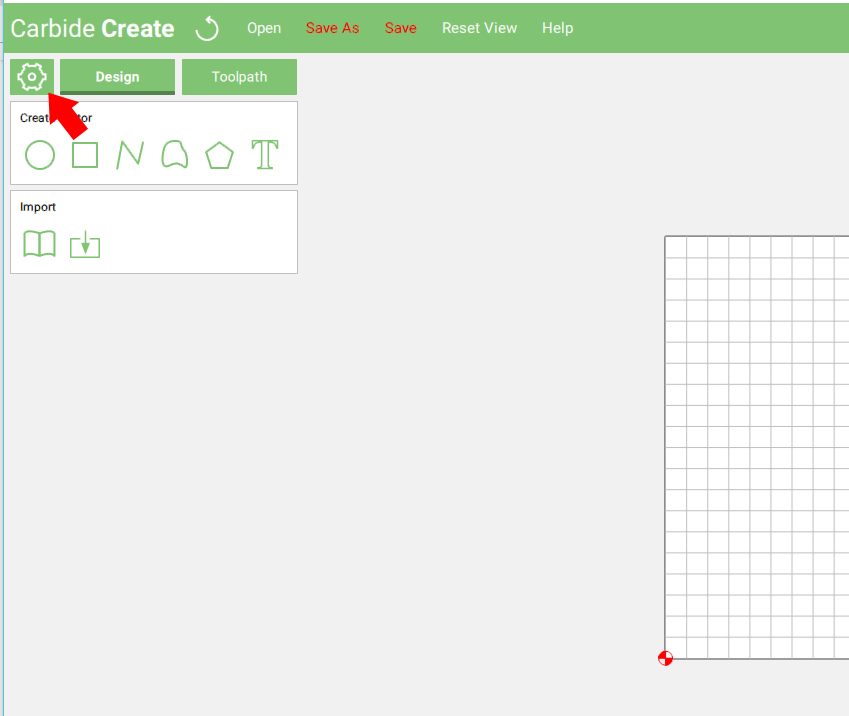
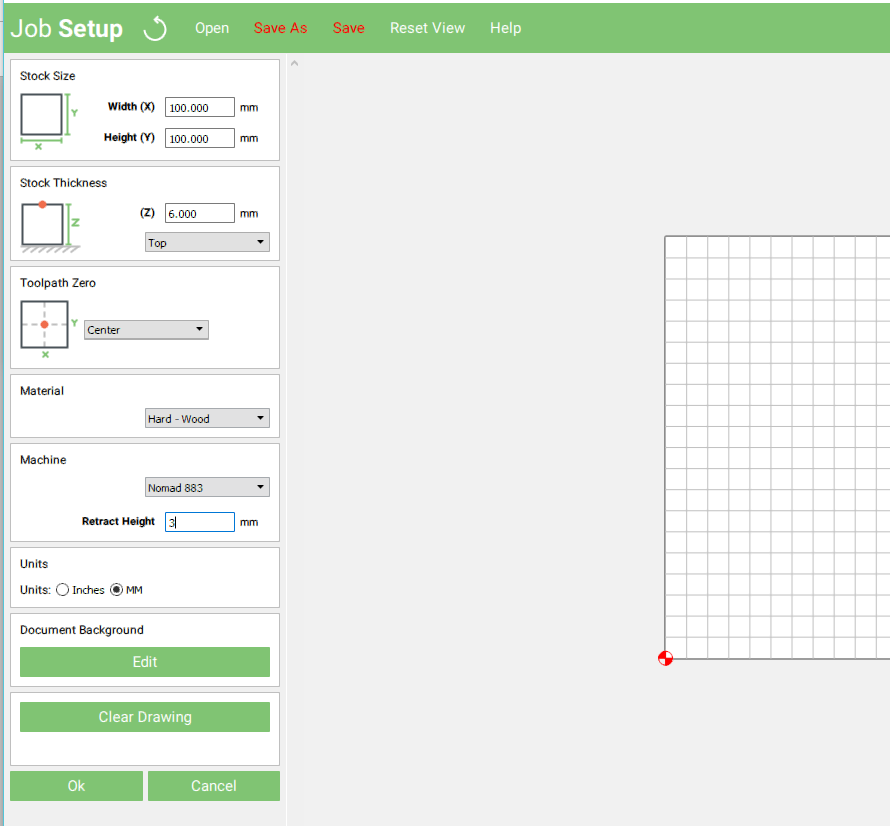
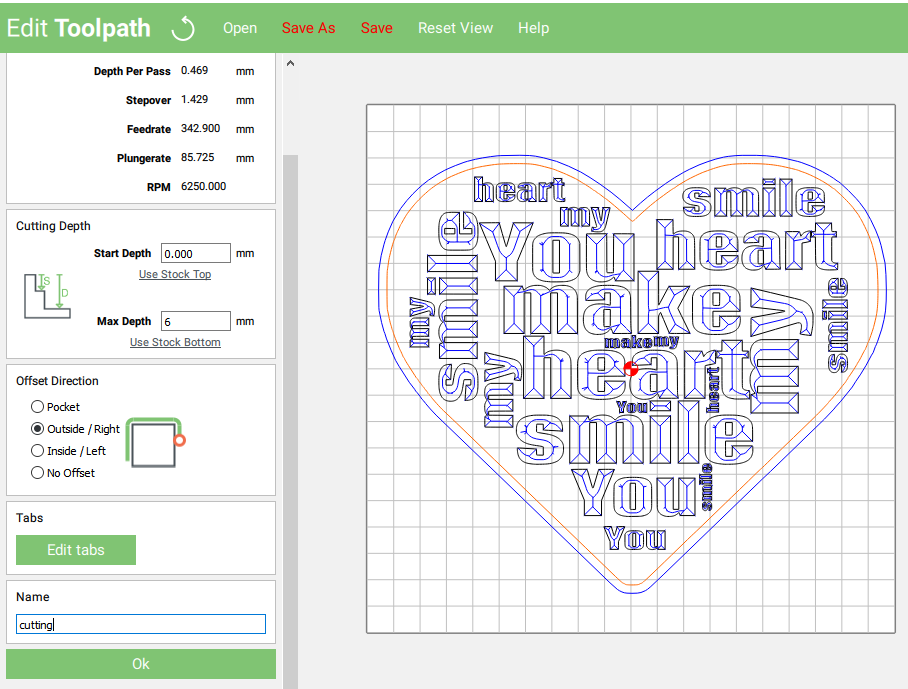
- started Carbide Create, and went to job setup and made some initial settings: 'Stock Size' 100x100mm, 'Stock thickness' 6mm, 'Toolpath Zero' Center, 'Material' hard wood, 'Machine' Nomad 883, 'Retract Height' 1mm, 'Units' mm like in the image then pressed 'OK';
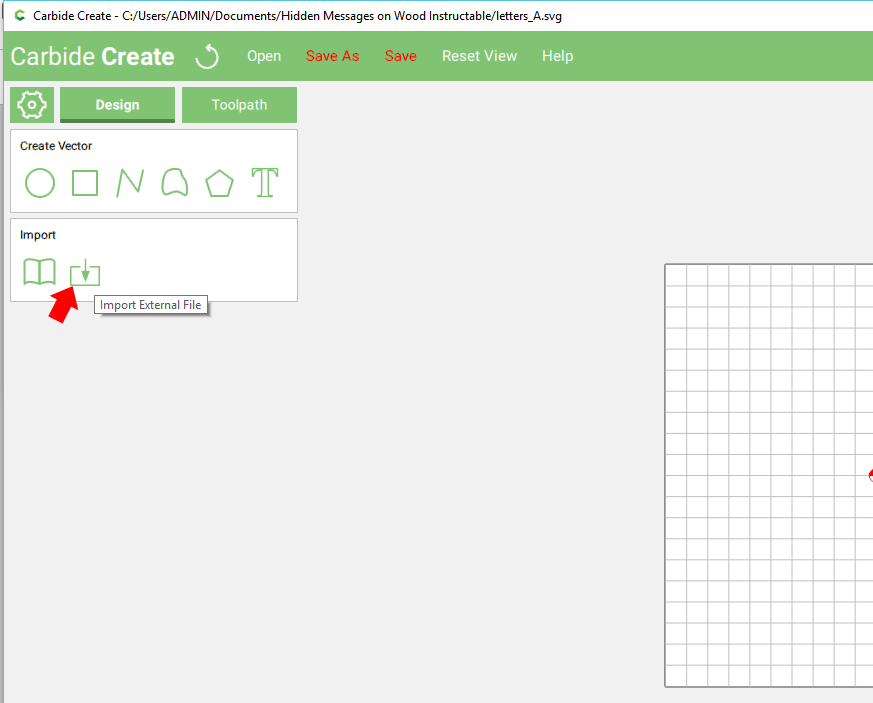
- clicking on 'Import external file' I loaded the two svg files ( when importing letters I clicked the 'Group Elements' option but the letters can be grouped later also);
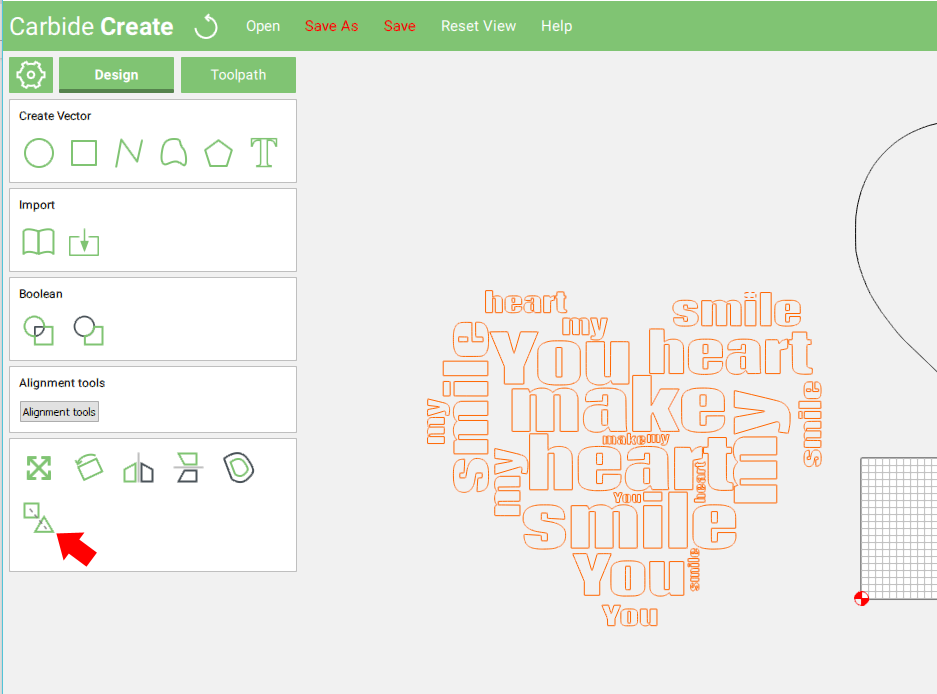
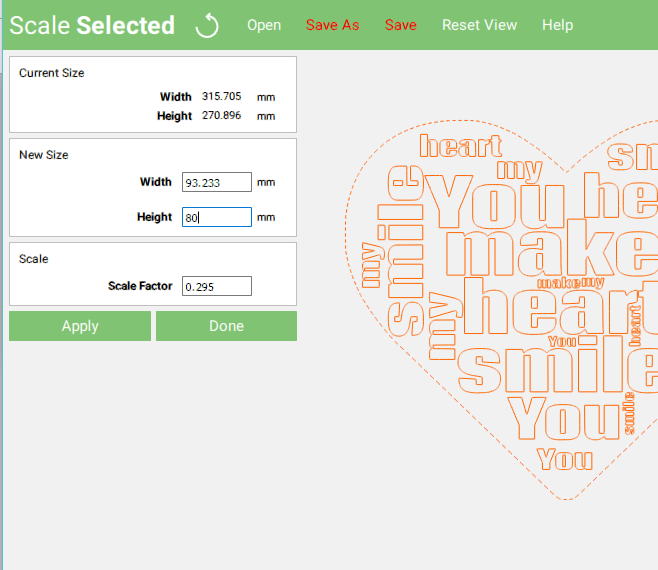
- dragged the grouped letters inside the shape (you can also group them by selecting them and clicking on the group icon), selected all, resized to 80mm height and dragged in the center of the workpiece;
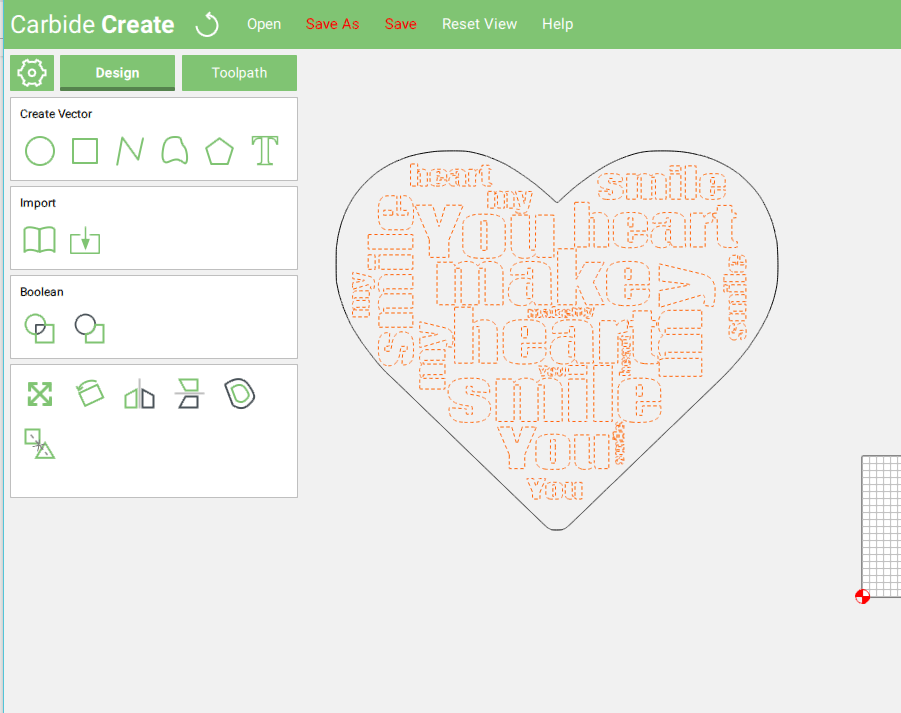
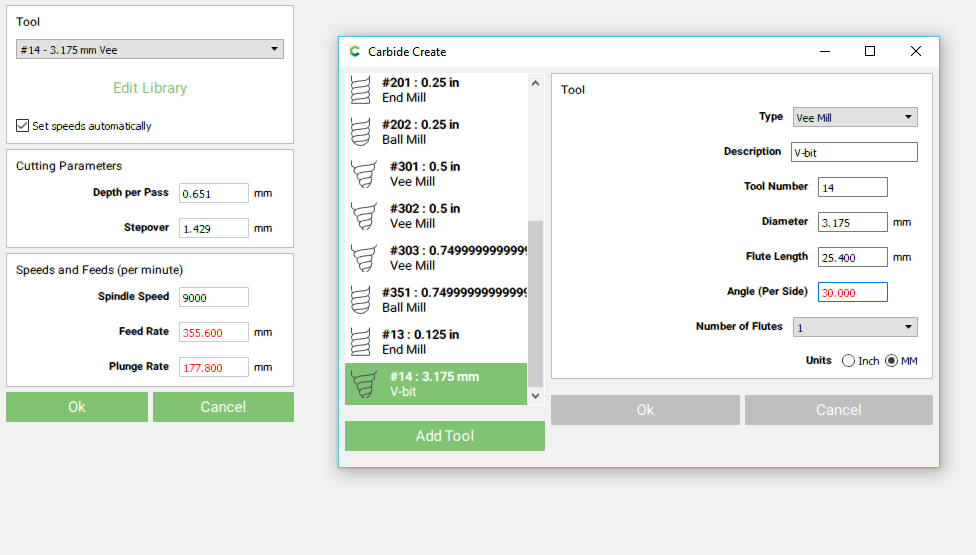
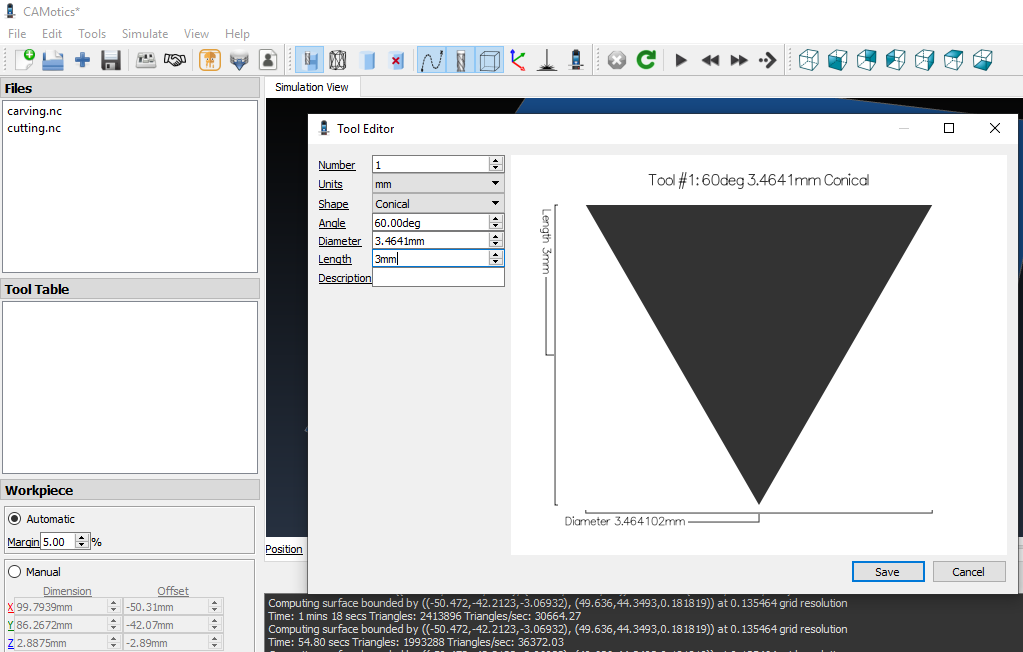
- went to 'Toolpath' tab selected the letters and defined a new tool by clicking 'Vcarve'-'Edit'-'Edit Library', I added my carving bit data in the interface;
- went back, the carving path was calculated and renamed the toolpath, selected the heart shape, chose a tool (I already defined a mill for cutting), then in the pocket interface I made the necessary editing, 'Max Depth' 6mm, 'Offset Direction' outside, renamed the toolpath;
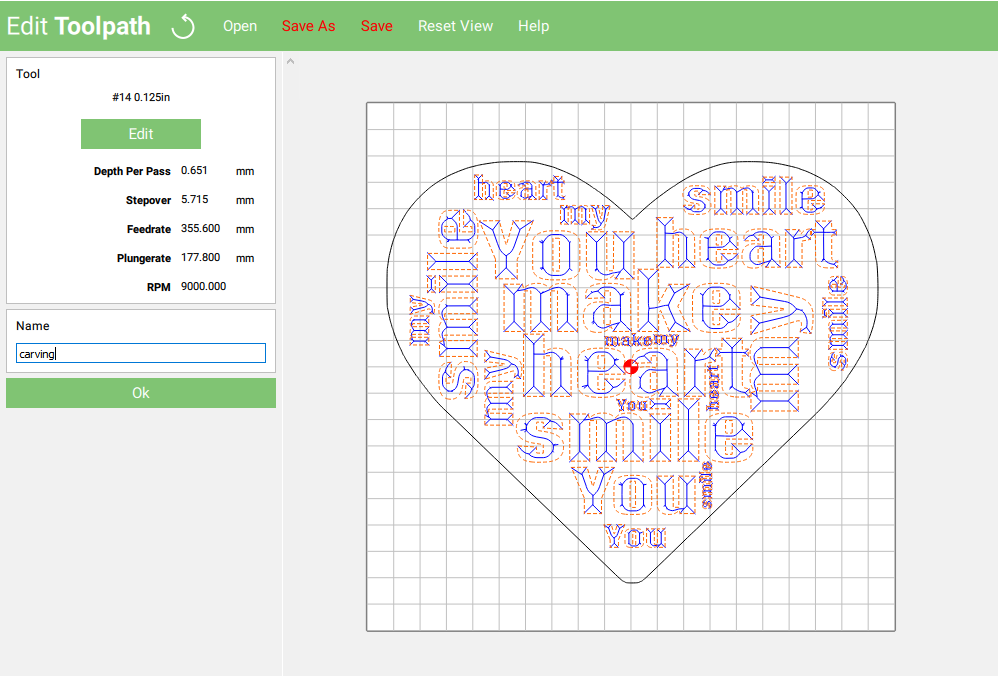
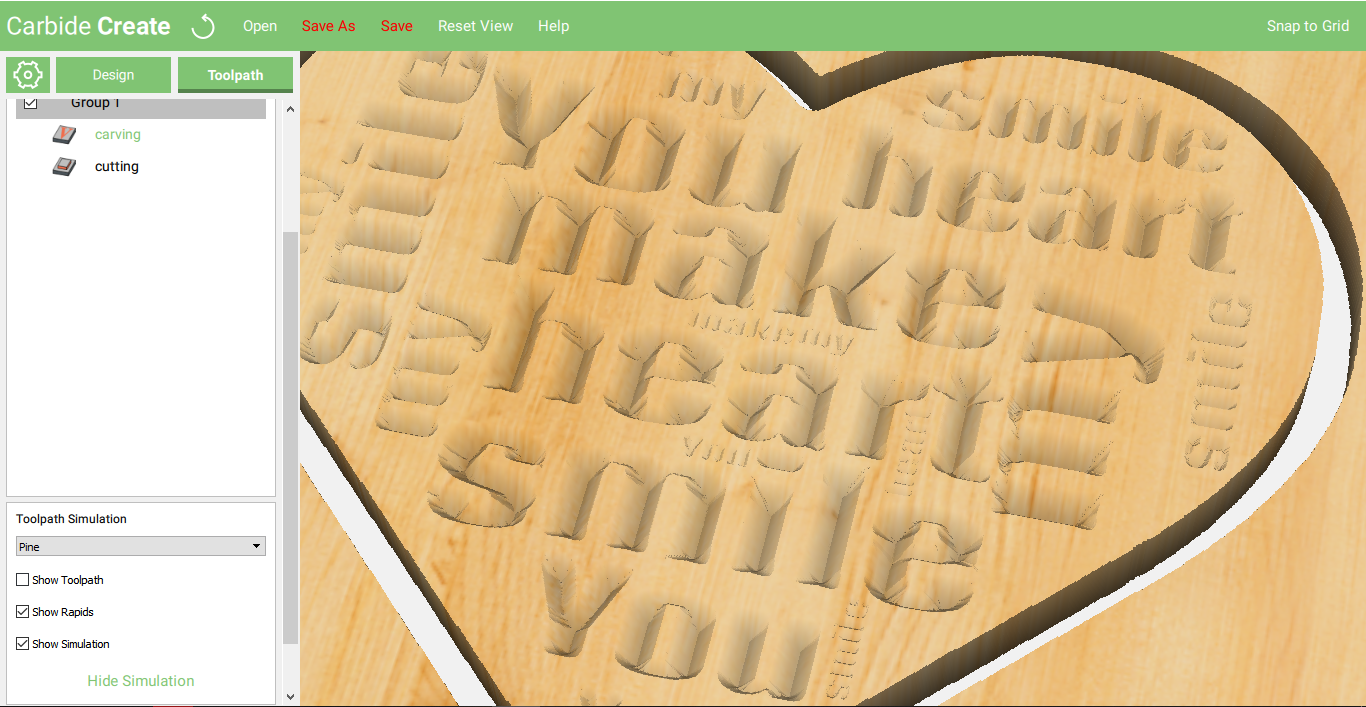
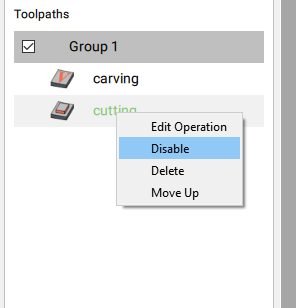
- I tried to run a simulation, as you can see in the image everything looks fine, then I saved the toolpaths. Carbide Create saves all the toolpaths merged but I wanted separate toolpaths for carving and cutting (I do not have toolchanger at the CNC) so I first disabled the 'cutting' toolpath, clicked 'Save G-Code', saved the carving next I disabled the 'carving' toolpath and saved the cutting;
Notes:
-pay attention to the carving depth, because if the letters are too thick the tool can go too deep in the stock, Carbide Create tries to prevent this but you can see on a simulation that the carving does not look well, so for such a tasks you can use F-Engrave (another free carving toolpaths generator software);
-much more docs on shapeoko wiki - https://wiki.shapeoko.com/index.php/Carbide_Create;
Simulation - Optional (but Highly Recommended Step)
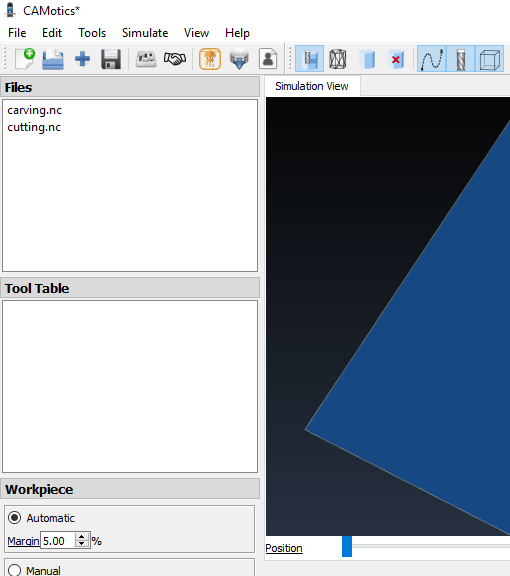
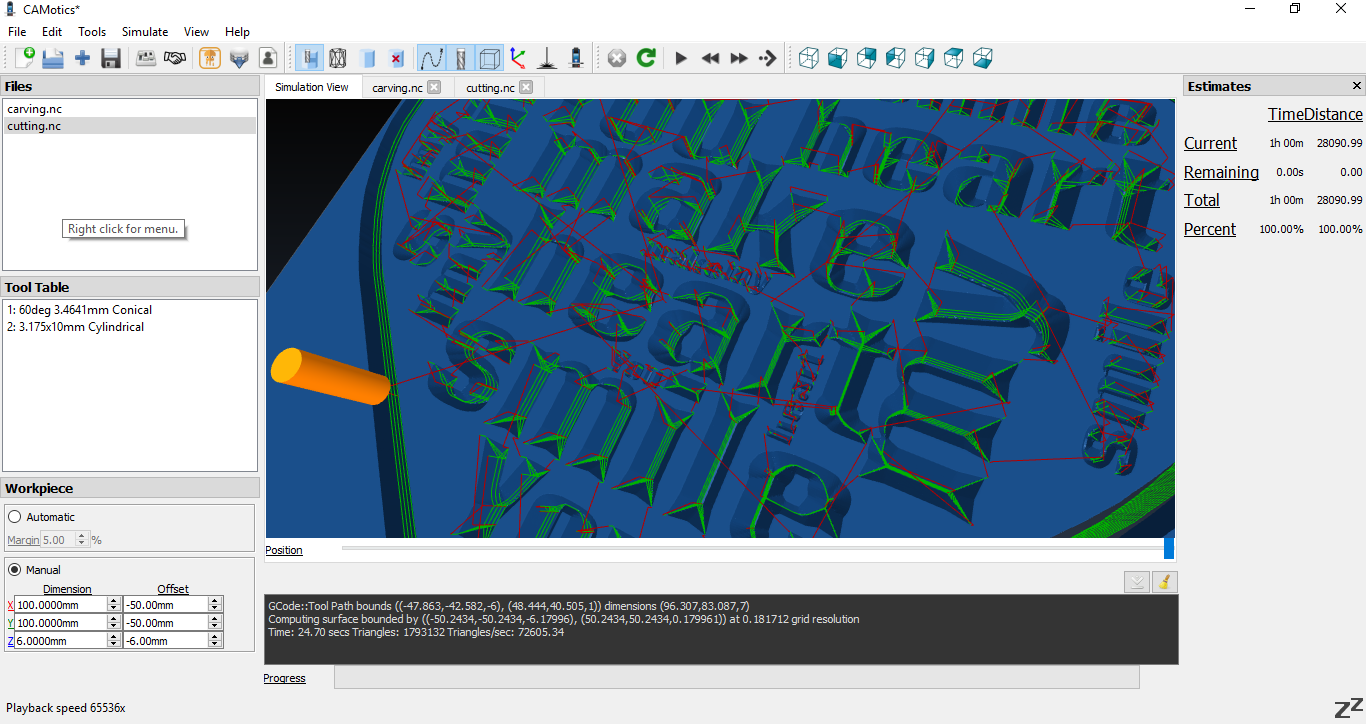
For simulation I used CAMotics.
- Started CAMotics, chose 'File'-'New Project' (with options metric and default);
- Added the two toolpaths (the plus icon on the menu bar);
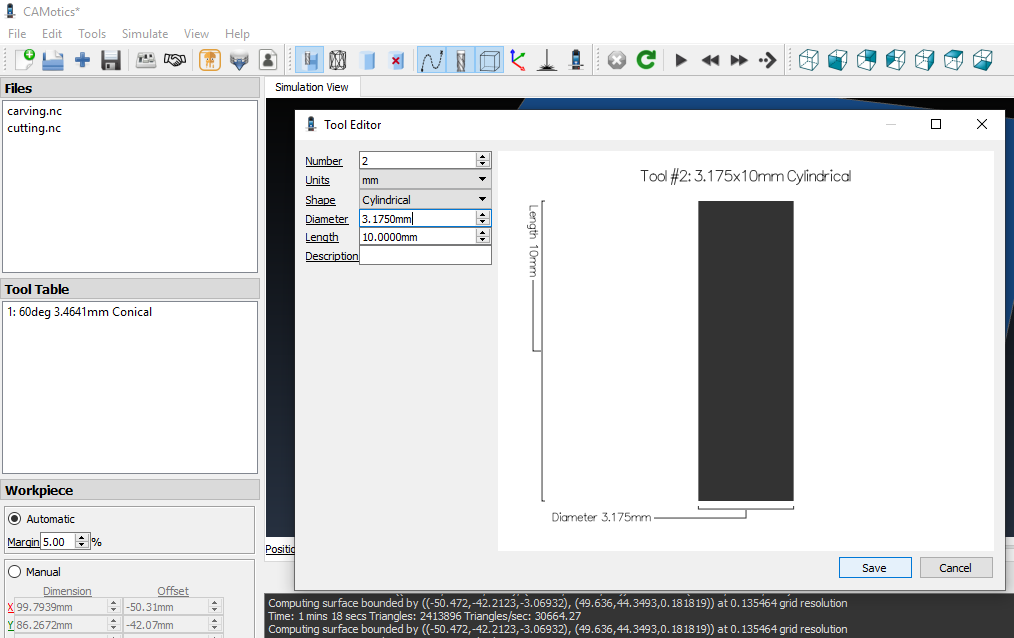
- Defined 2 tools: the Vbit and the 3.175 bit ('Tools'-'New Tools');
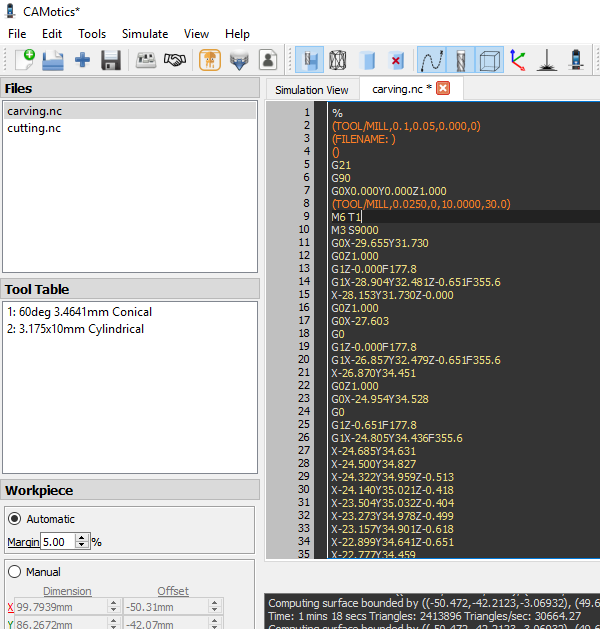
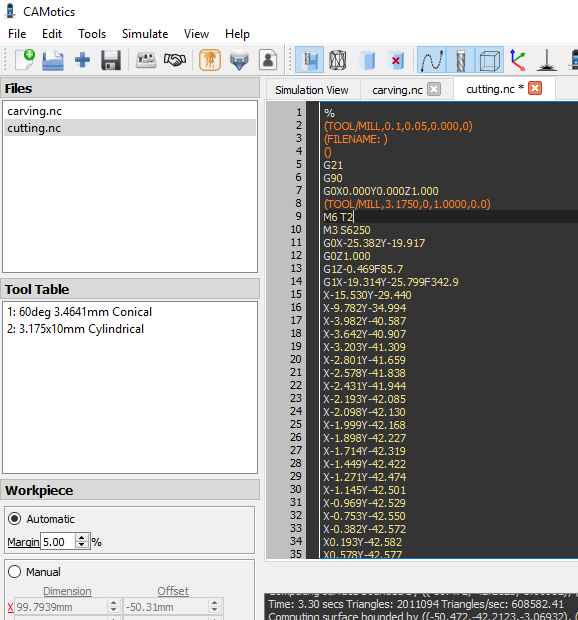
- Double clicked on the first toolpath, edited the line with the tool change to T1 also in the second toolpath I edited for tool change to the cylindrical mill - T2 and saved it;
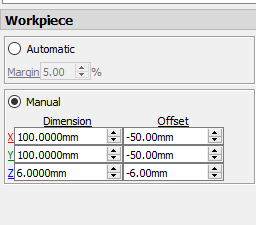
- defined the 'Workpiece' as in the image above;
- clicked on the 'Run or Restart the Simulation' button, the green arrow, the result is in the last image. Everything still looks good. :) Note the total time on the right ...
Engraving, Cutting, Finishing...
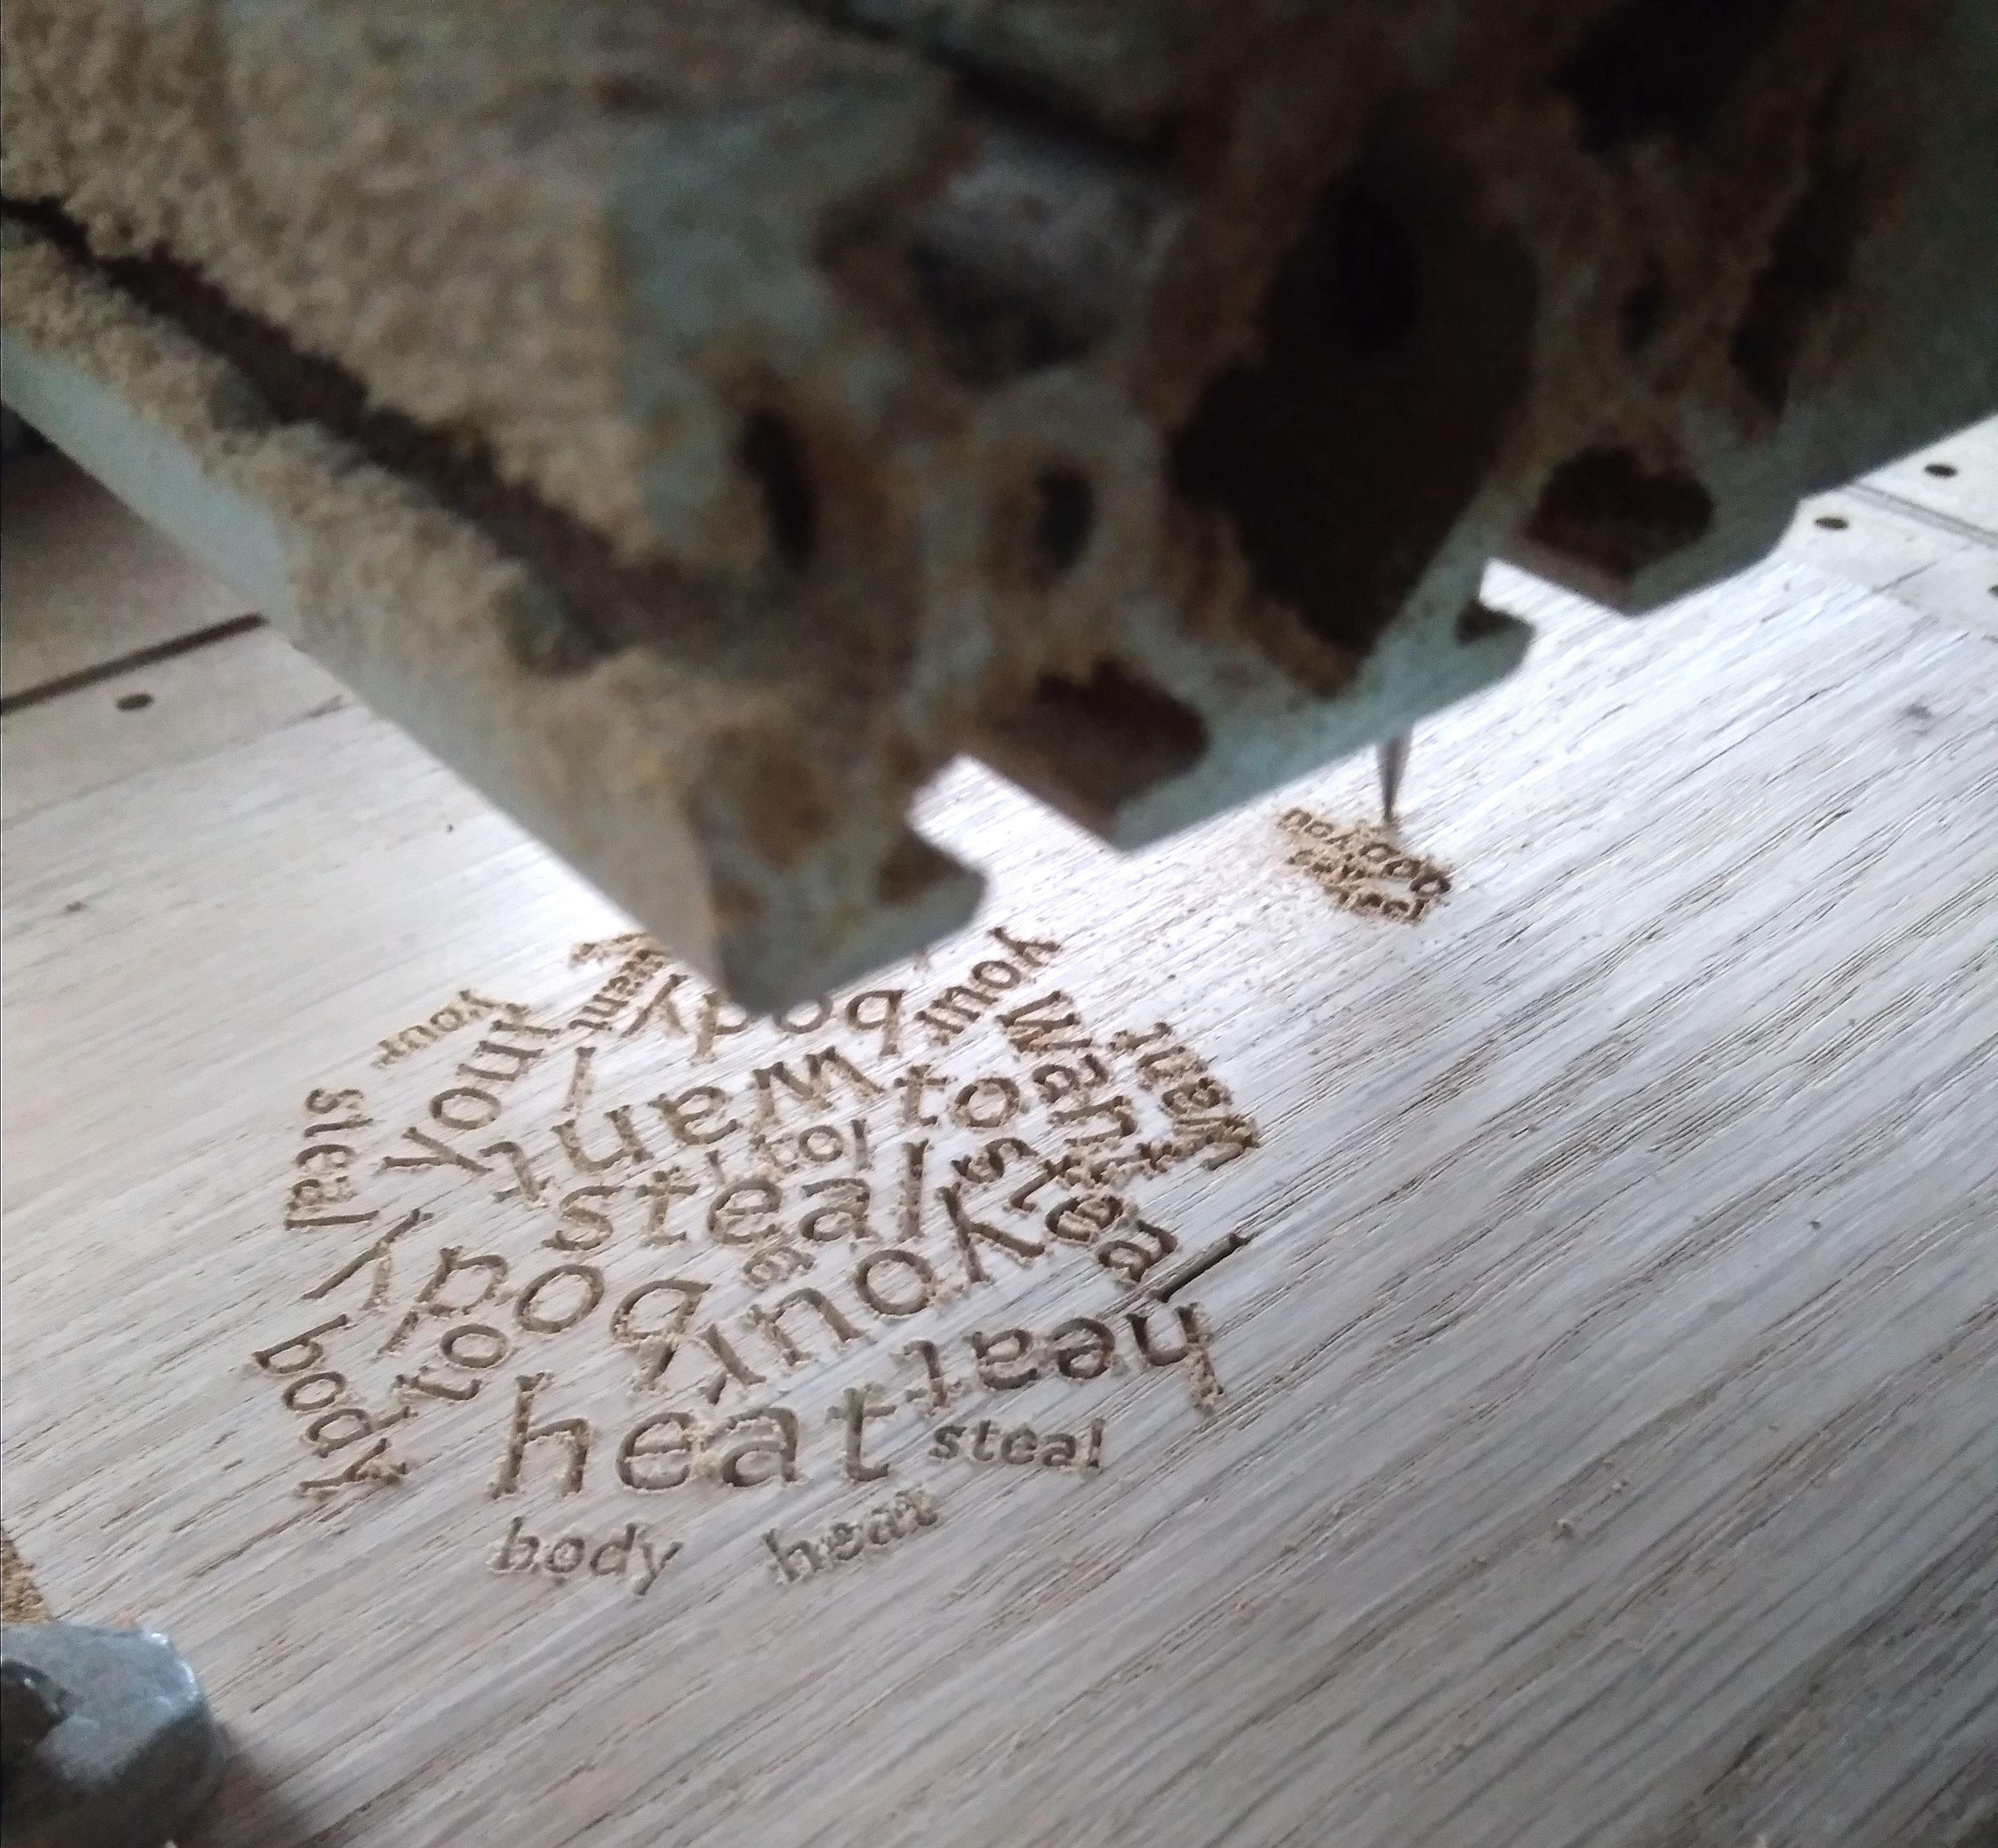

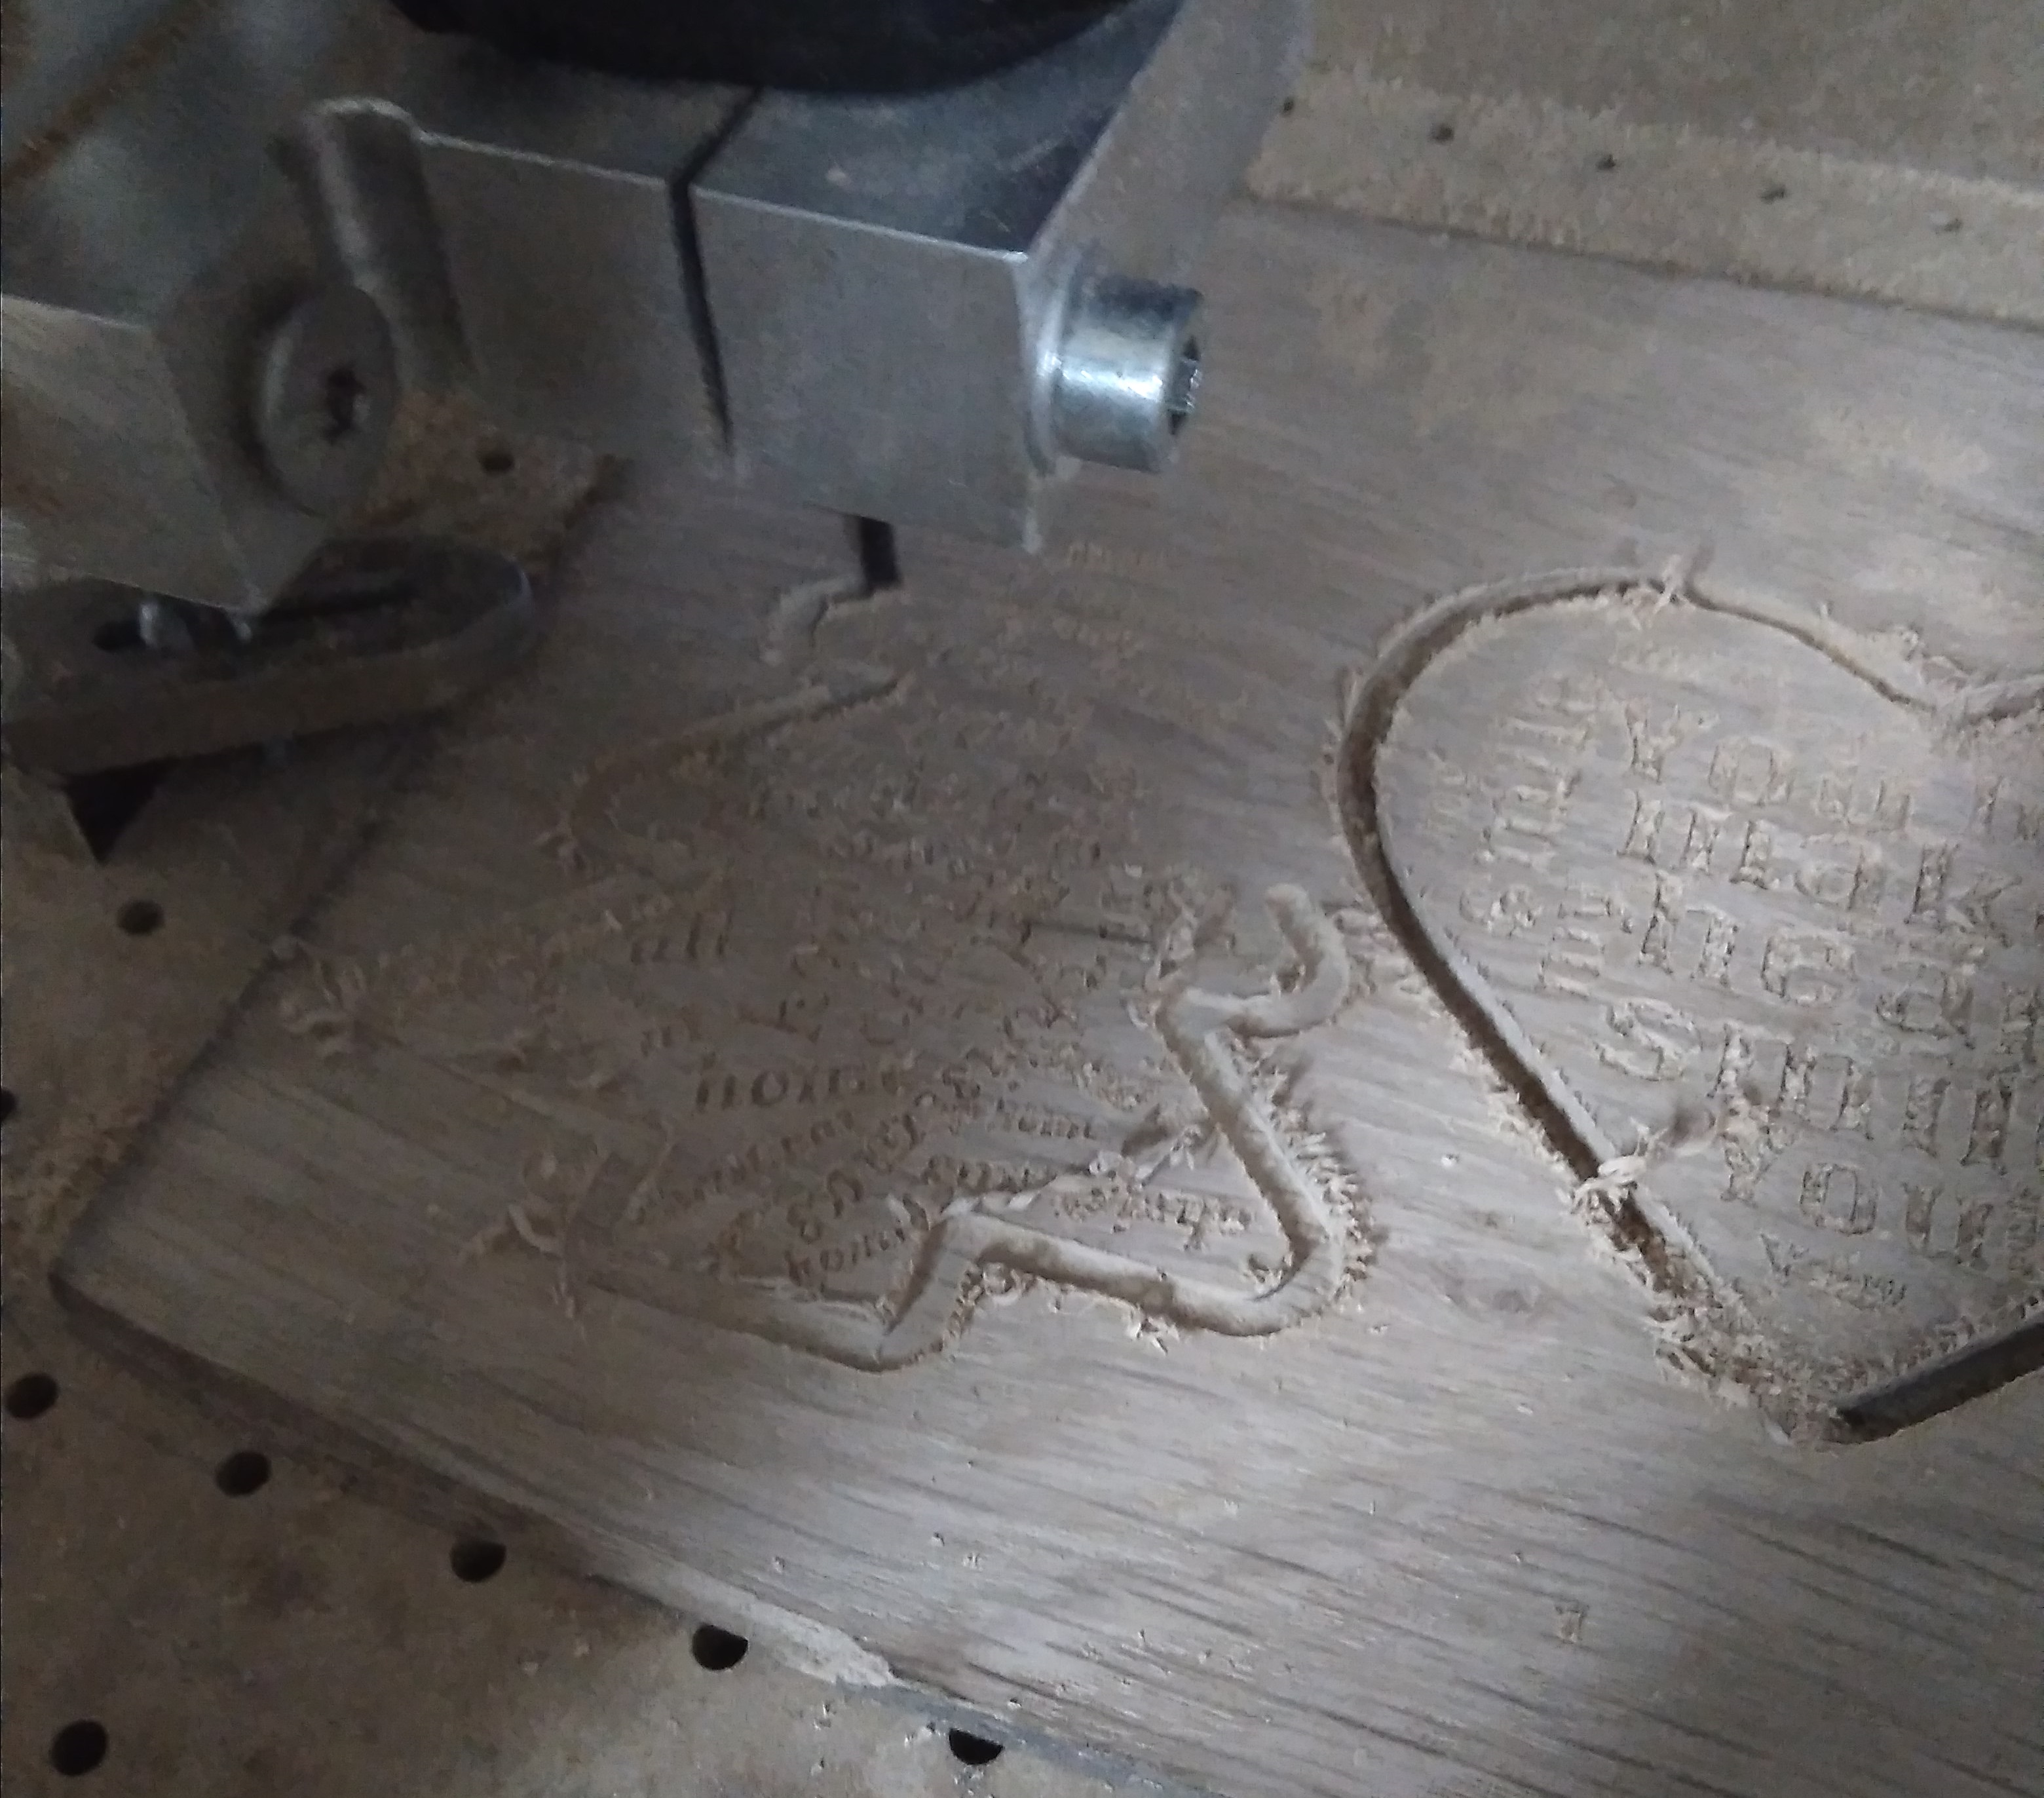


So, I had two toolpaths, the engraving and the cutting, started the CNC and loaded them in MACH3, first the engraving, then the cutting. In the video you can see how the CNC machine works.
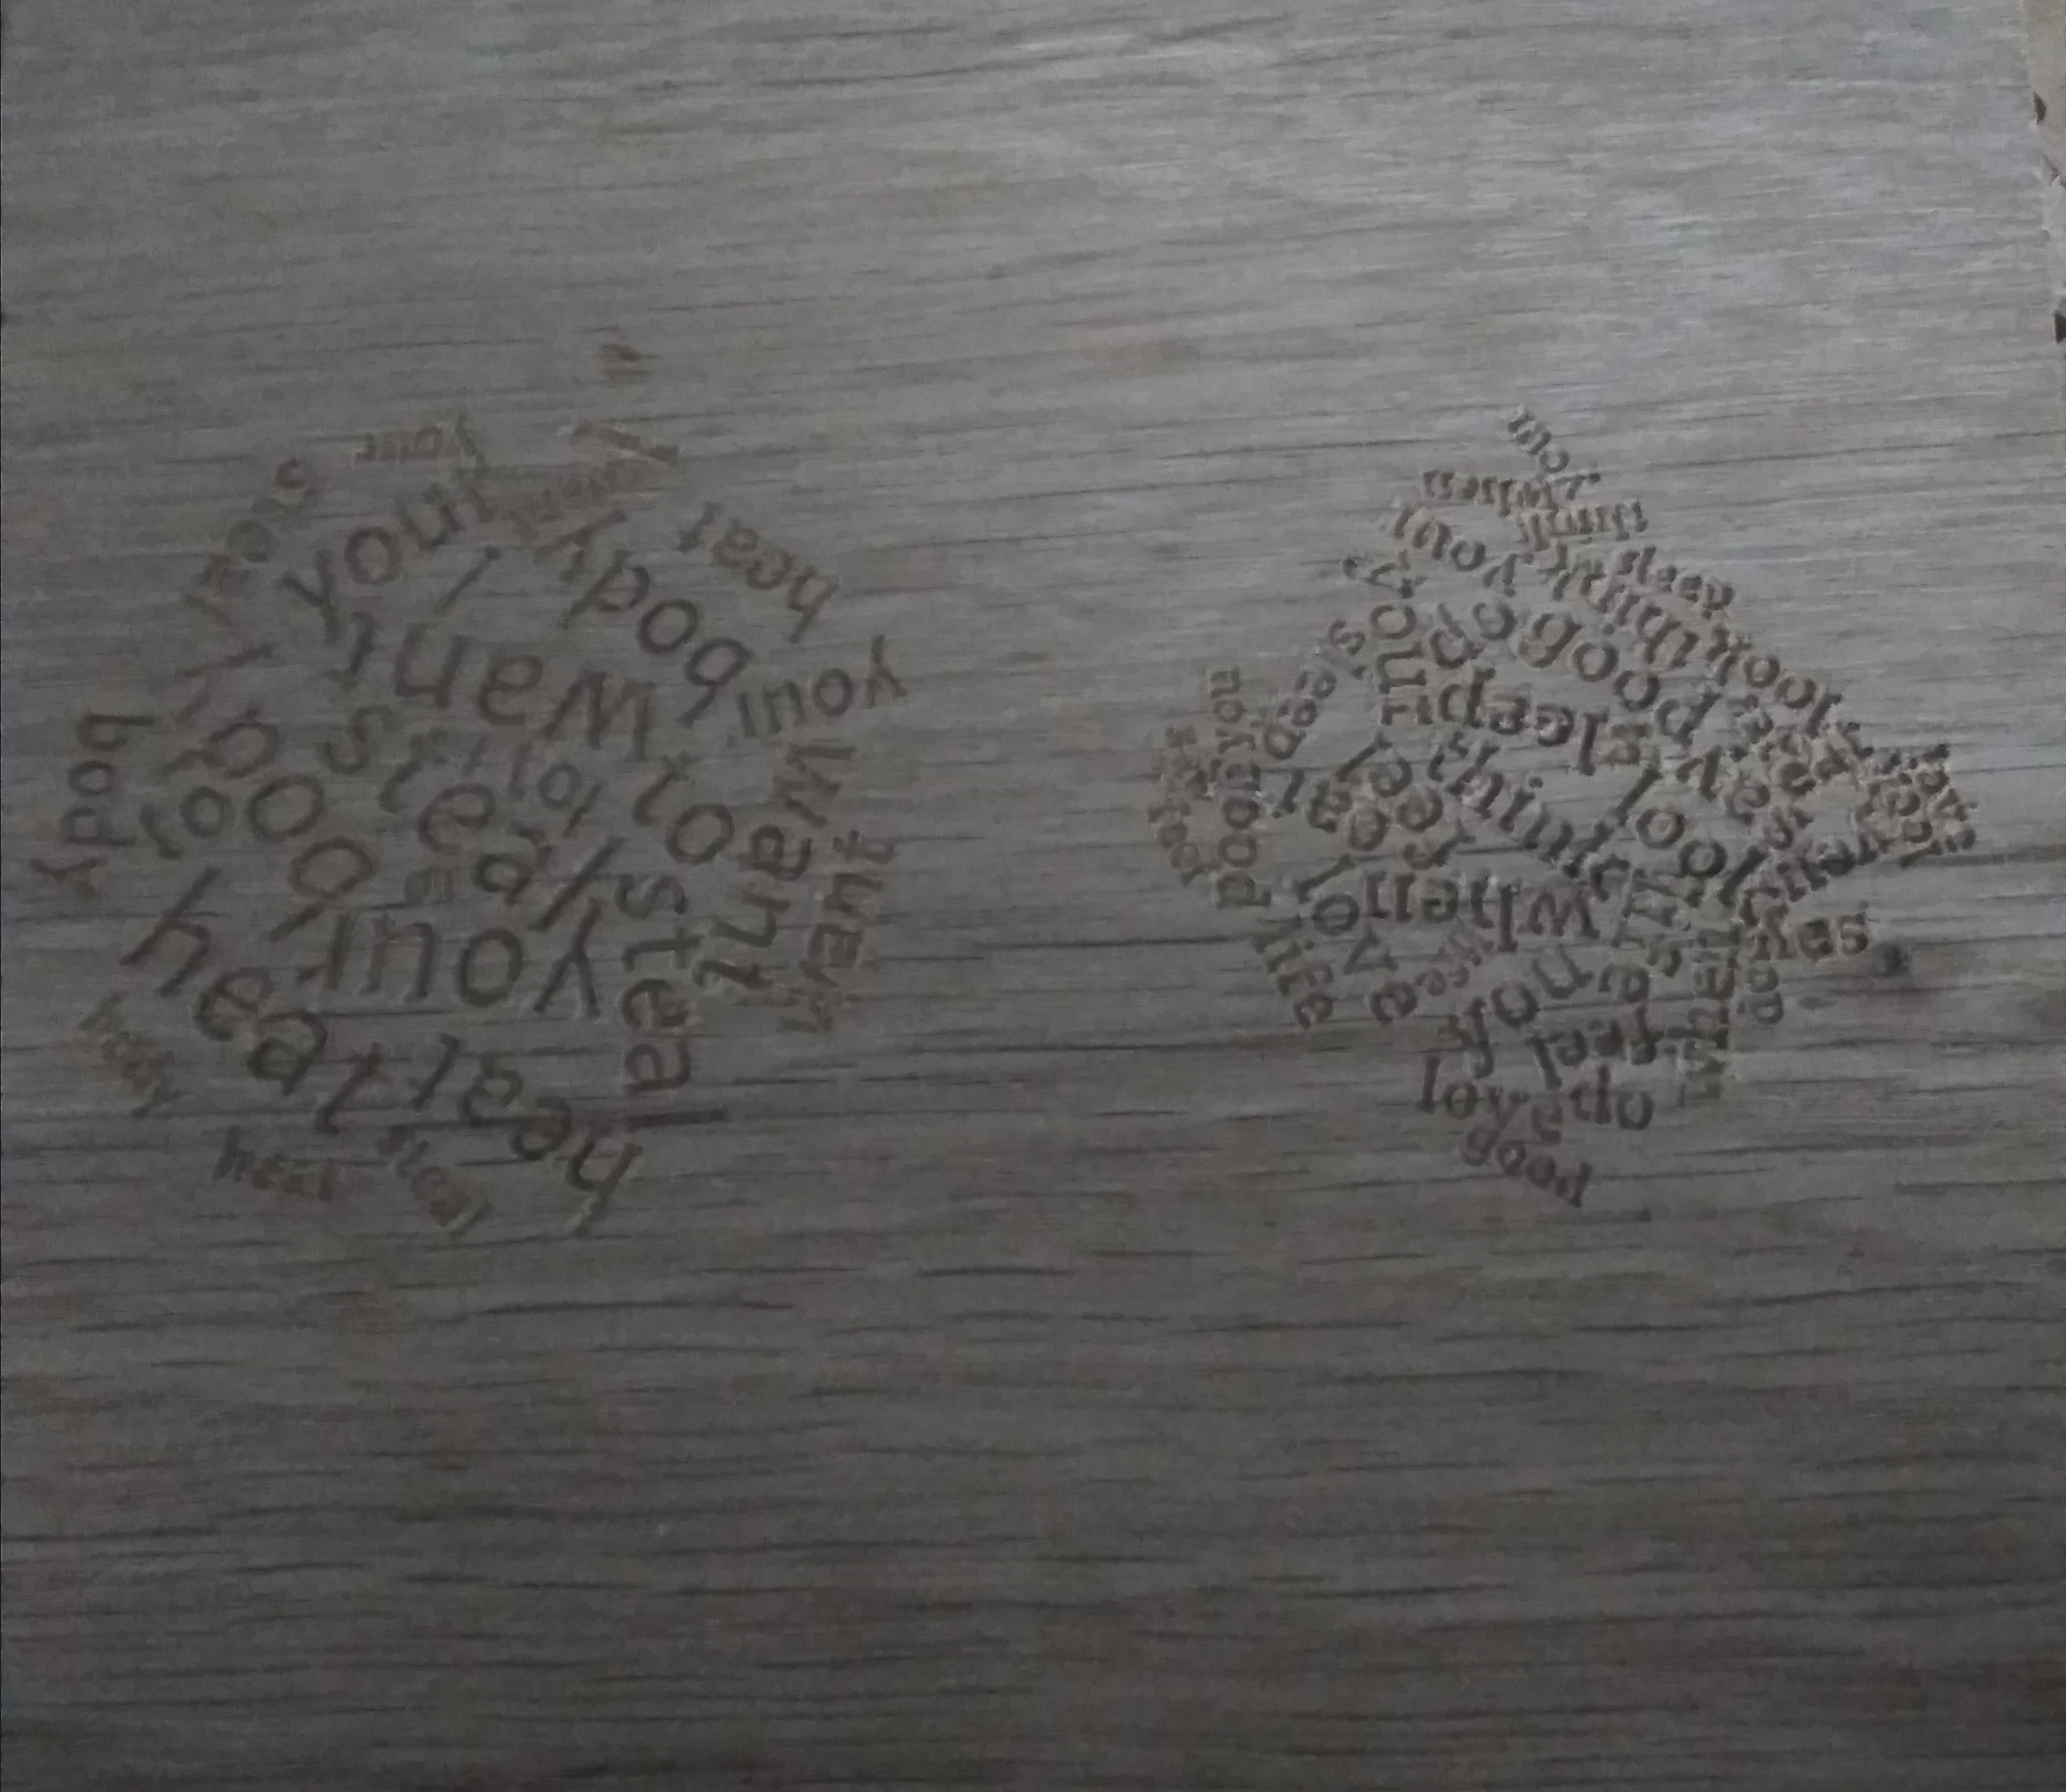
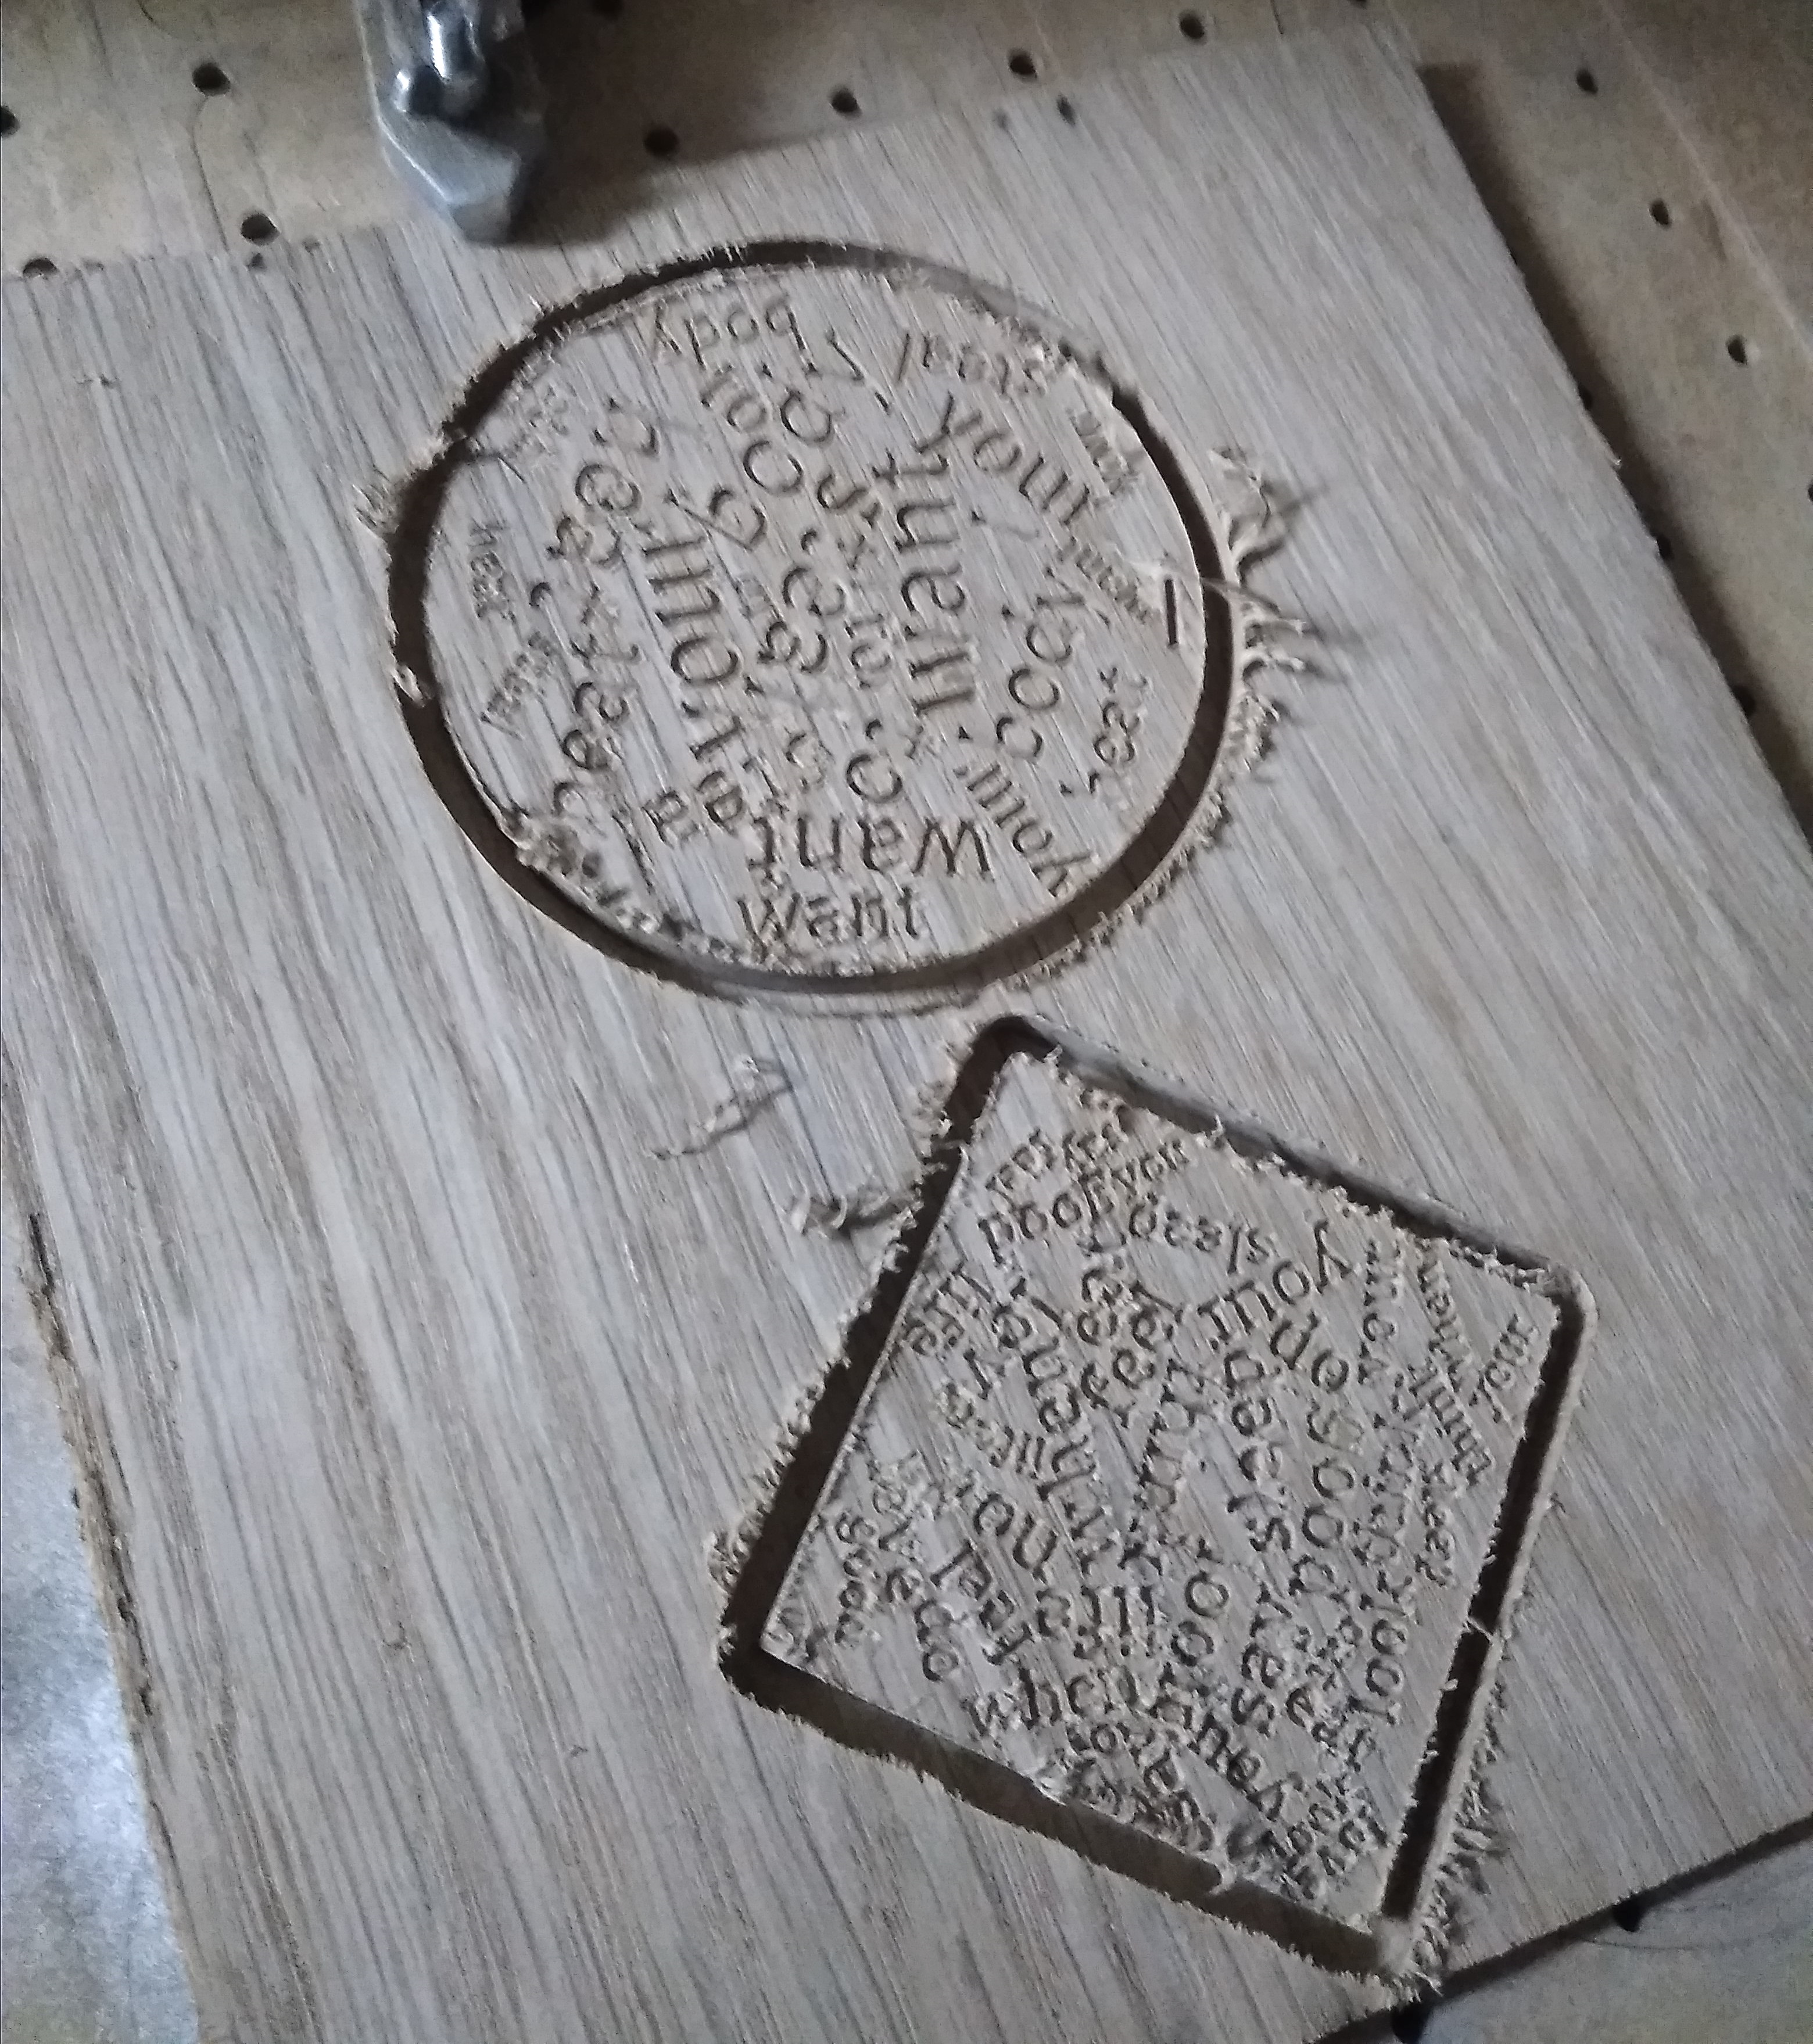
I have taken some photos of the manufacturing process of decorative wooden plates with some of the messages. Most of them was taken in low light conditions so they are not so good, sorry for this...
The final step was the sanding, the cleaning and the varnishing. The varnish I have used is transparent, water based product, I wanted that the natural tones and grains of the wood to be visible.
I have attached also the svg files and the carbide creator files (to generate correct toolpaths you must create the tools for carving and cutting like in the previous step), all in one zip file.
You can use this plates as magnets, hangers, medallions, coasters, gift tags and so an.
I know I have not been able to explain all the details, so if you have any questions I will try as much as possible to answer them.
Finally the list of hidden messages :) (as in the renderings from the first step )
- you make my heart smile
- I really want you to really want me
- Fall Seven Times Stand Up Eight
- I Am Strong Because I’ve Been Weak
- I Am Fearless Because I’ve Been Afraid
- I want to steal your body heat
- at christmas all roads lead home
- when you feel good you look good, when you think good you look good, when you say good you look good, when you do good you look good, when you eat good you look good, when you sleep good you look good, when you love your life you look good