Turn Words Into Art: Design & 3D Print a Personalized Word Cloud Message
by andrei.erdei in Workshop > 3D Printing
803 Views, 8 Favorites, 0 Comments
Turn Words Into Art: Design & 3D Print a Personalized Word Cloud Message

One of the toughest challenges is finding a unique, personal gift for someone you care about – and it doesn't have to break the bank. They say it's the thought that counts, not the price tag. In this project, I'll show you how to quickly and easily create a personalized 3D printed gift that displays a meaningful message, phrase, or words perfect for any occasion.
Think of it like this: instead of just writing a card, you're creating a small sculpture that brings your words to life. It could be a favorite quote, a special date, or even a simple "I love you" that looks way cooler in 3D. The best part is that it's totally customizable, so you can make it as unique as the person you're giving it to.
I'll go through the steps to design your message and get it printed in a way that's both eye-catching and meaningful. Whether you're a tech whiz or a total beginner, this project is a fun way to add a personal touch to your next gift.
Supplies
There is not much needed... :)
- Filaments of different colors, I used PLA: blue with white, blue, cream white and "stary sky"...
- 3D Printer.
Craft the Perfect Message With AI Assistance
Again, we've all been there – staring at a blank card, struggling to find the perfect words for a special occasion. Whether it's a farewell to a colleague, a cheer for a friend's adventure, or a welcome to a new little one, sometimes the right words just don't flow. That's where AI comes in, offering a helping hand (or keyboard) to kickstart your creativity.
We need:
- Access to an AI chatbot (ChatGPT, Gemini, etc.)
- The occasion you're writing for (retirement, vacation, christening, etc.)
- A dash of humor and a willingness to play with words!
Instructions:
- Embrace Your AI Muse:
- Choose your favorite AI chatbot.
- Think of it as your brainstorming buddy, ready to spark your imagination.
- Set the Stage:
- Briefly describe the occasion and the recipient to the AI.
- Example: "I need a funny message for my friend Mike who's going on a cruise."
- Request a Punny Message:
- Ask the AI to generate a short, witty message with a playful twist.
- Example: "Can you write a punny bon voyage message for Mike?"
- Review and Refine:
- The AI will serve up a pun-tastic message.
- Feel free to tweak it, add your own flair, or ask for more options.
Example Prompts & AI Responses:
- Retirement:
- Prompt: "Funny retirement message for my aunt, a librarian."
- AI Response: "Aunt Sue, now every day is a 'book'ed vacation!"
- Prompt: "Punny message for my neighbor's retirement party."
- AI Response:"Happy retirement! Hope you have a lawn-g and happy time!"
- Vacation:
- Prompt: "Funny bon voyage for my friend going skiing."
- AI Response: "Don't break a leg...unless it's on the slopes!"
- Prompt: "Witty message for my coworker going to Paris."
- AI Response: "Eiffel in love with Paris! Have a great time!"
- Christening:
- Prompt: "Punny message for my brother's new baby boy."
- AI Response: "Welcome to the world, little dude! You're a 'wee' bit of awesome!"
- Prompt: "Funny message for my friend's baby girl's christening."
- AI Response: "Congratulations on your new little princess! She's a 'diaper' superstar!"
Tips:
- Embrace the Absurd: Don't be afraid to let the AI get a little silly.
- The Punnier, the Better: Puns are the heart and soul of these messages.
- Personalize It: Add a personal touch to make the message truly unique.
Now let's see a practical application. My colleague David is retiring so...
Prompt: "My colleague David is retiring. Write a message for this occasion, keeping it under 10 words, using wordplay, and a humorous tone."
Here's what I received...
- "Work's over, par-tee time! Congrats, David!"
- "David, it's time to 'Excel' at retirement!"
- "Bye-bye spreadsheets, hello sunsets!"
- "Retirement: David's new 9-to-5 is tee time!"
- "Work's a wrap, David! Time to 'unwind'."
- "Congrats, David! Now you can 'work' on your tan!"
But I liked this one the best.
- "Retirement: like a never-ending weekend. Cheers, David!"
Which I simplified further and will use for this project:
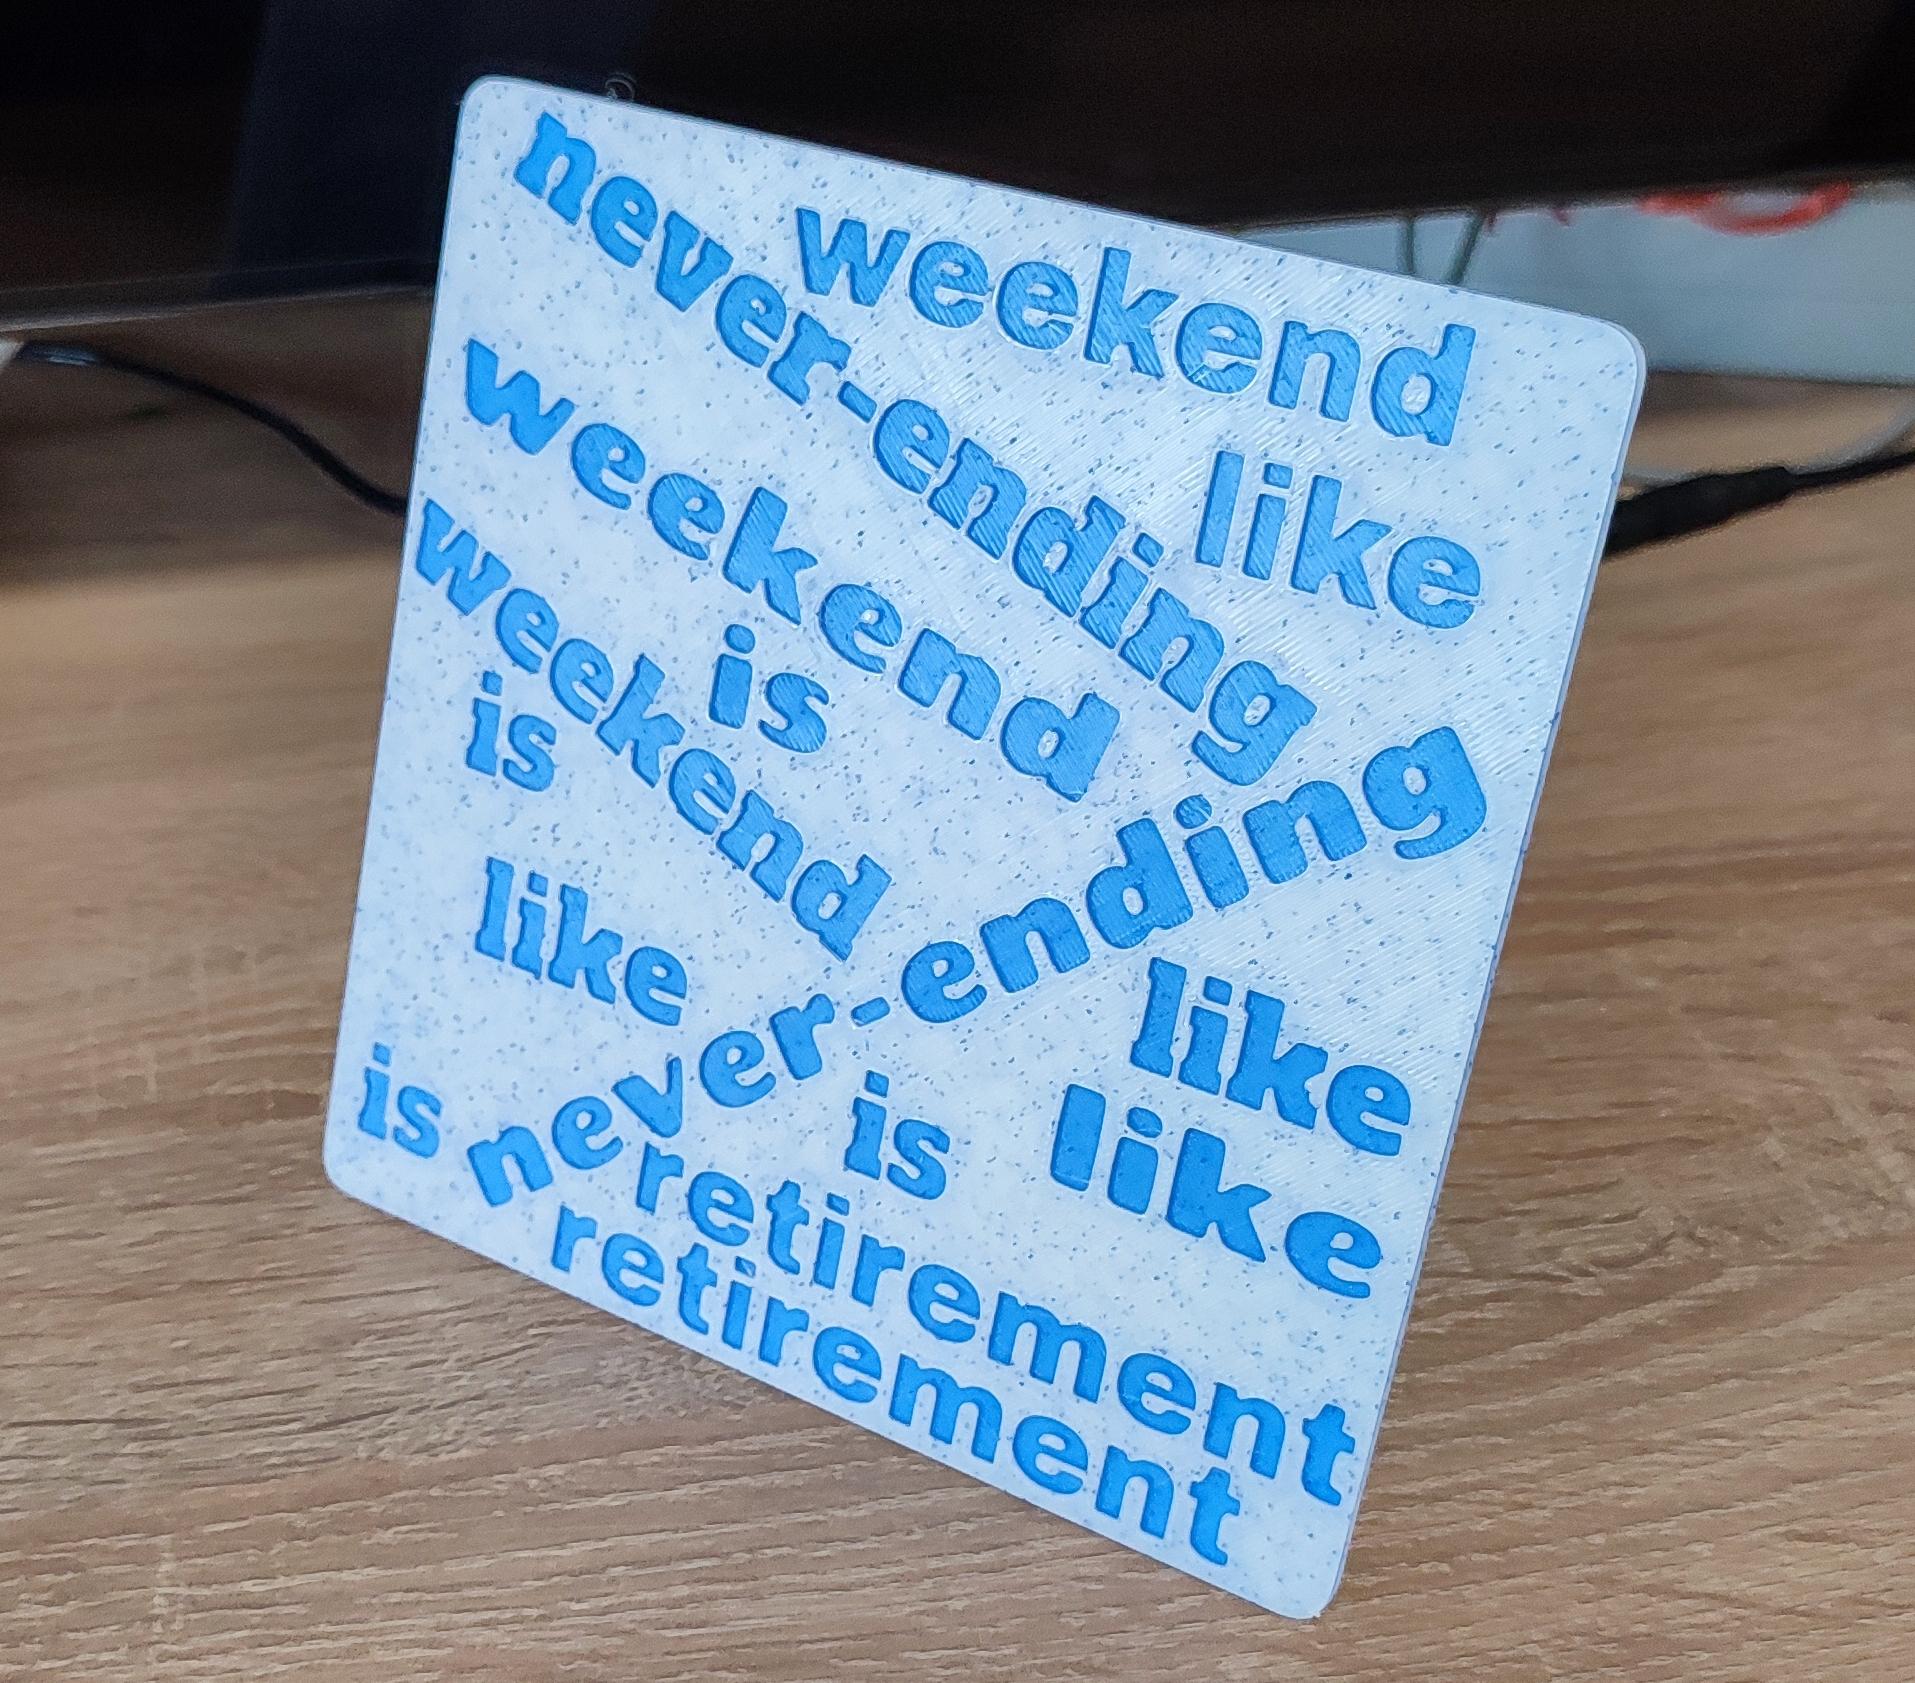
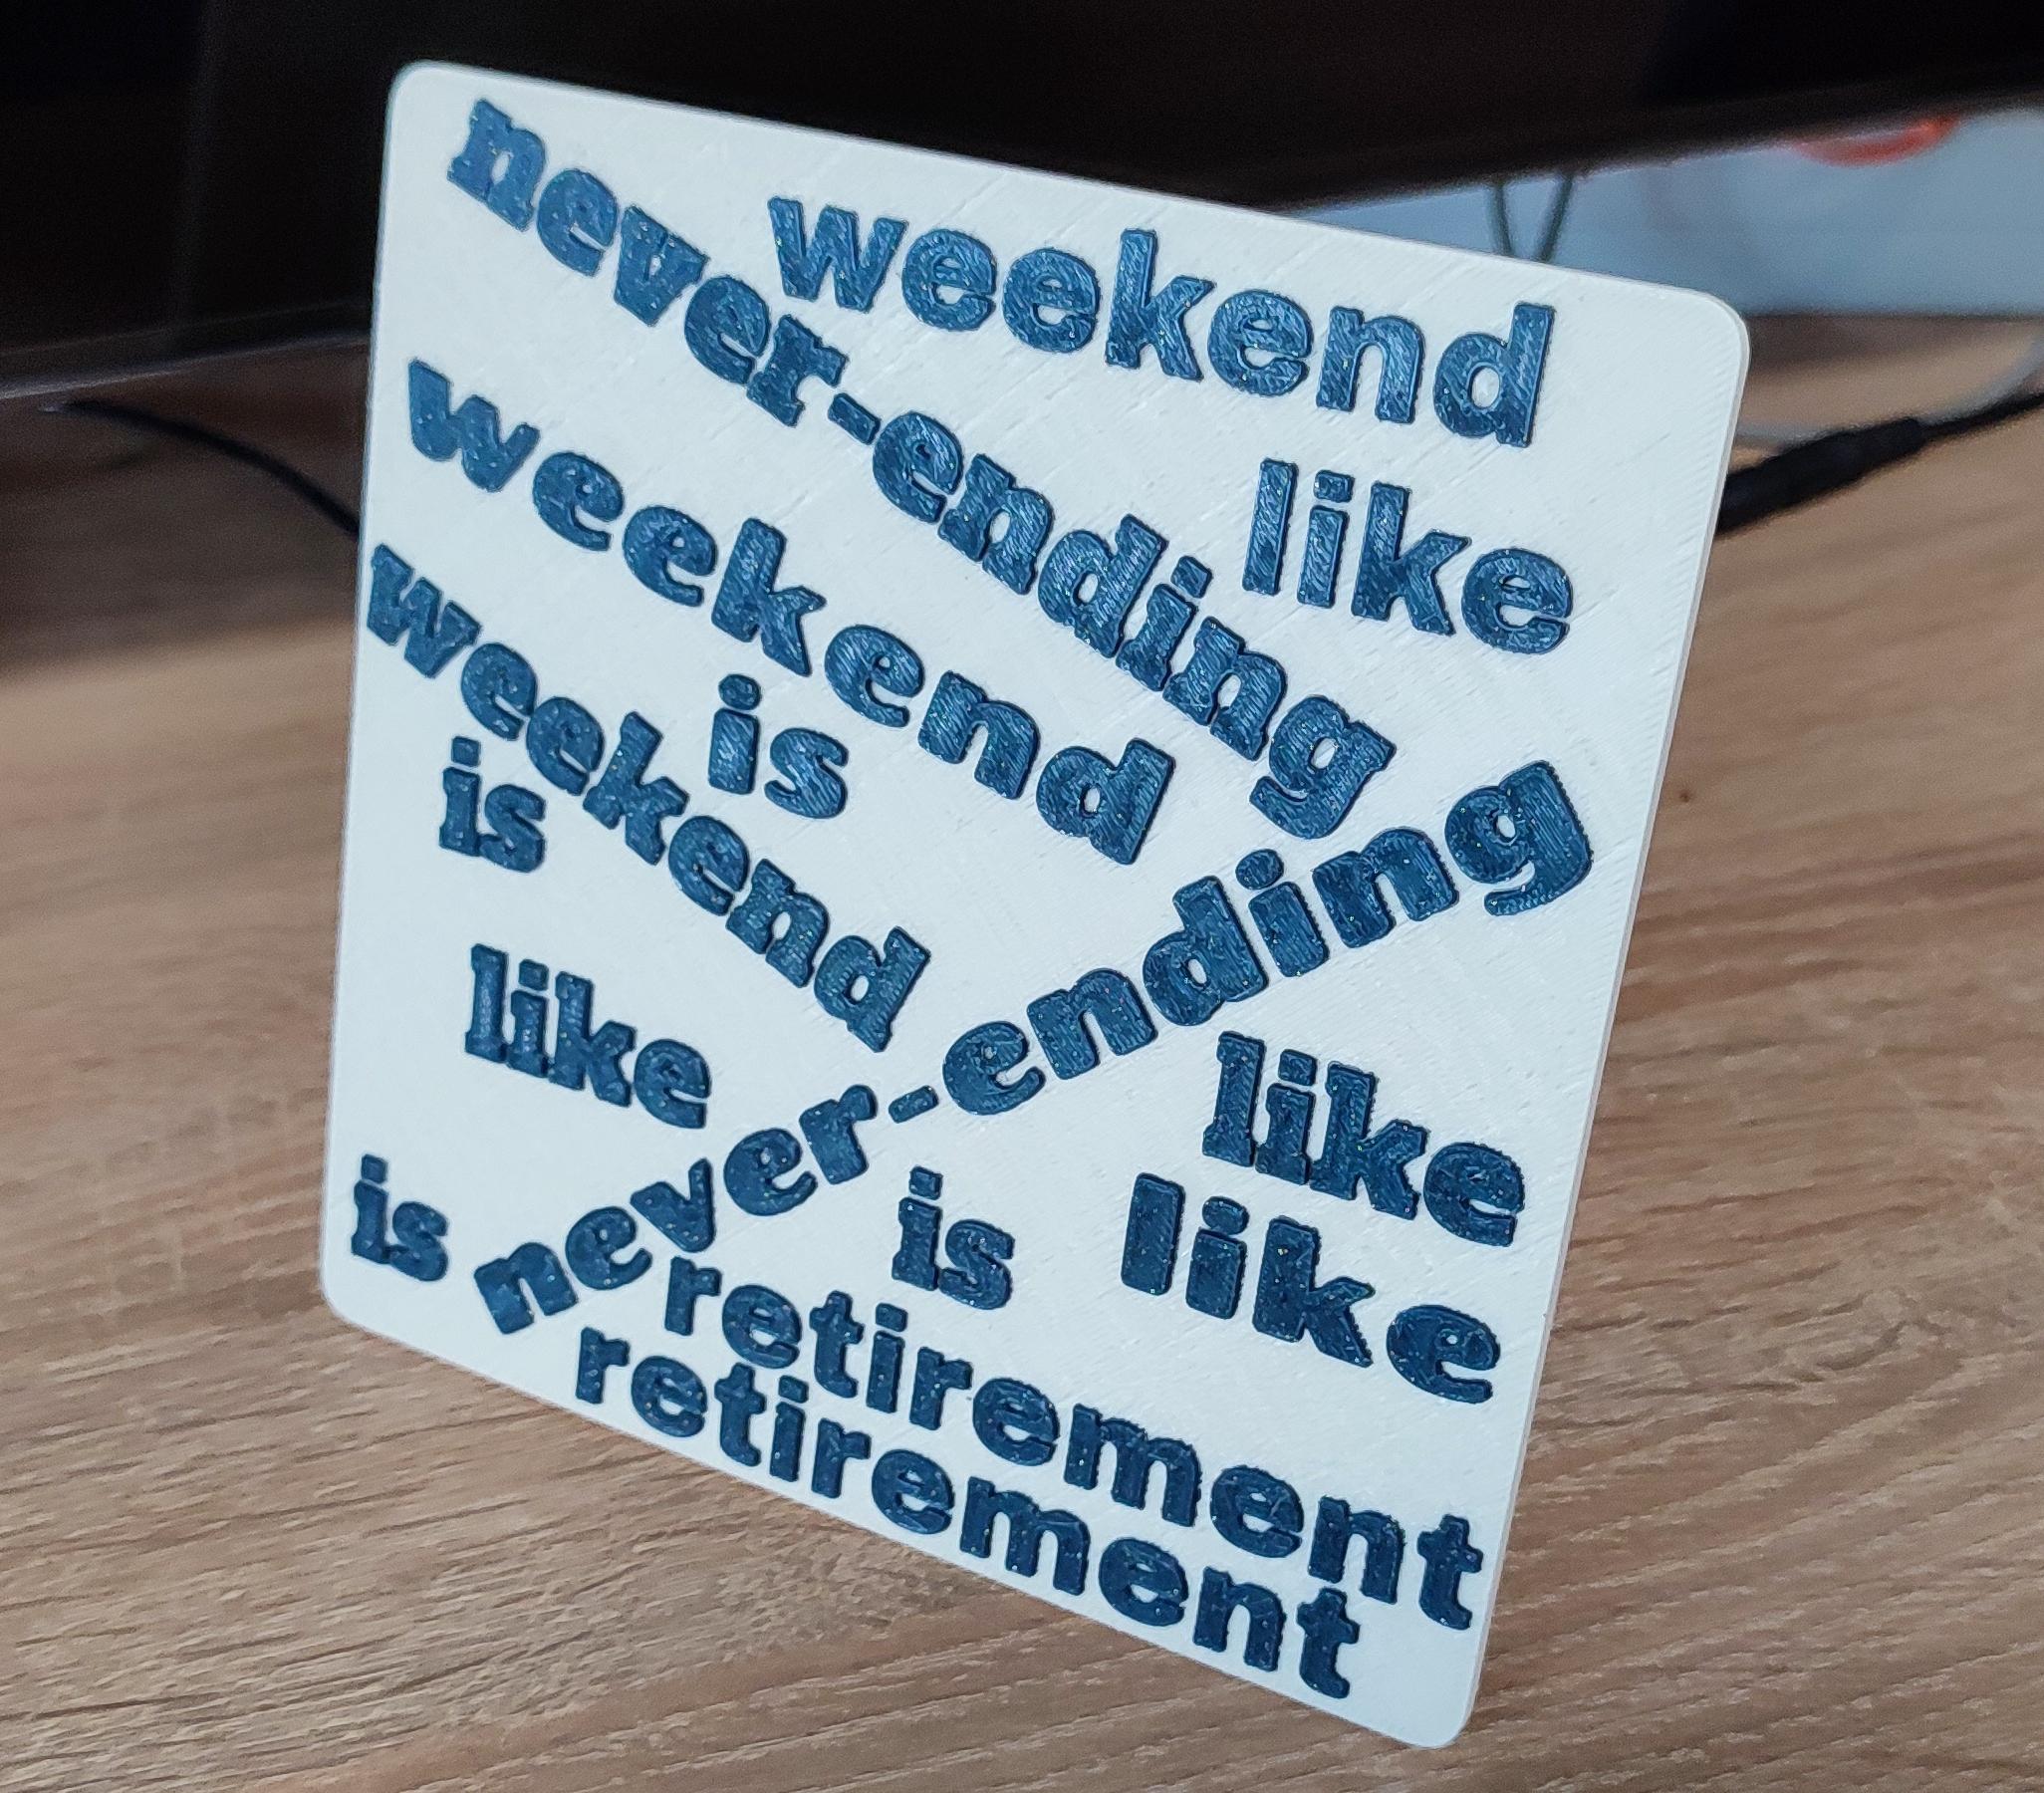
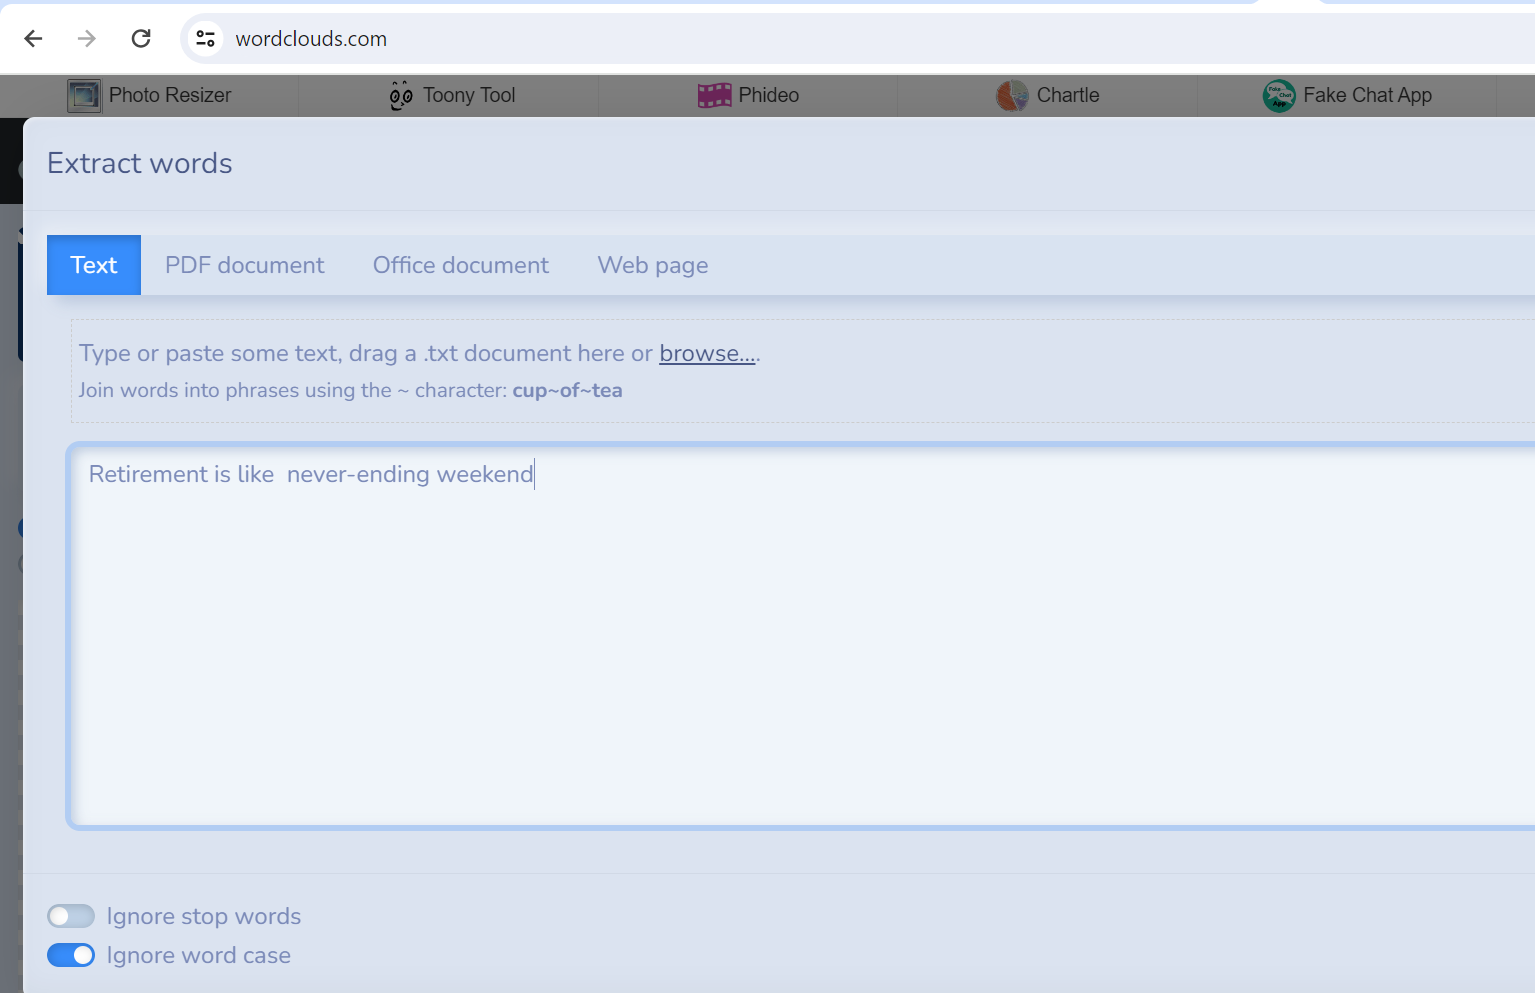
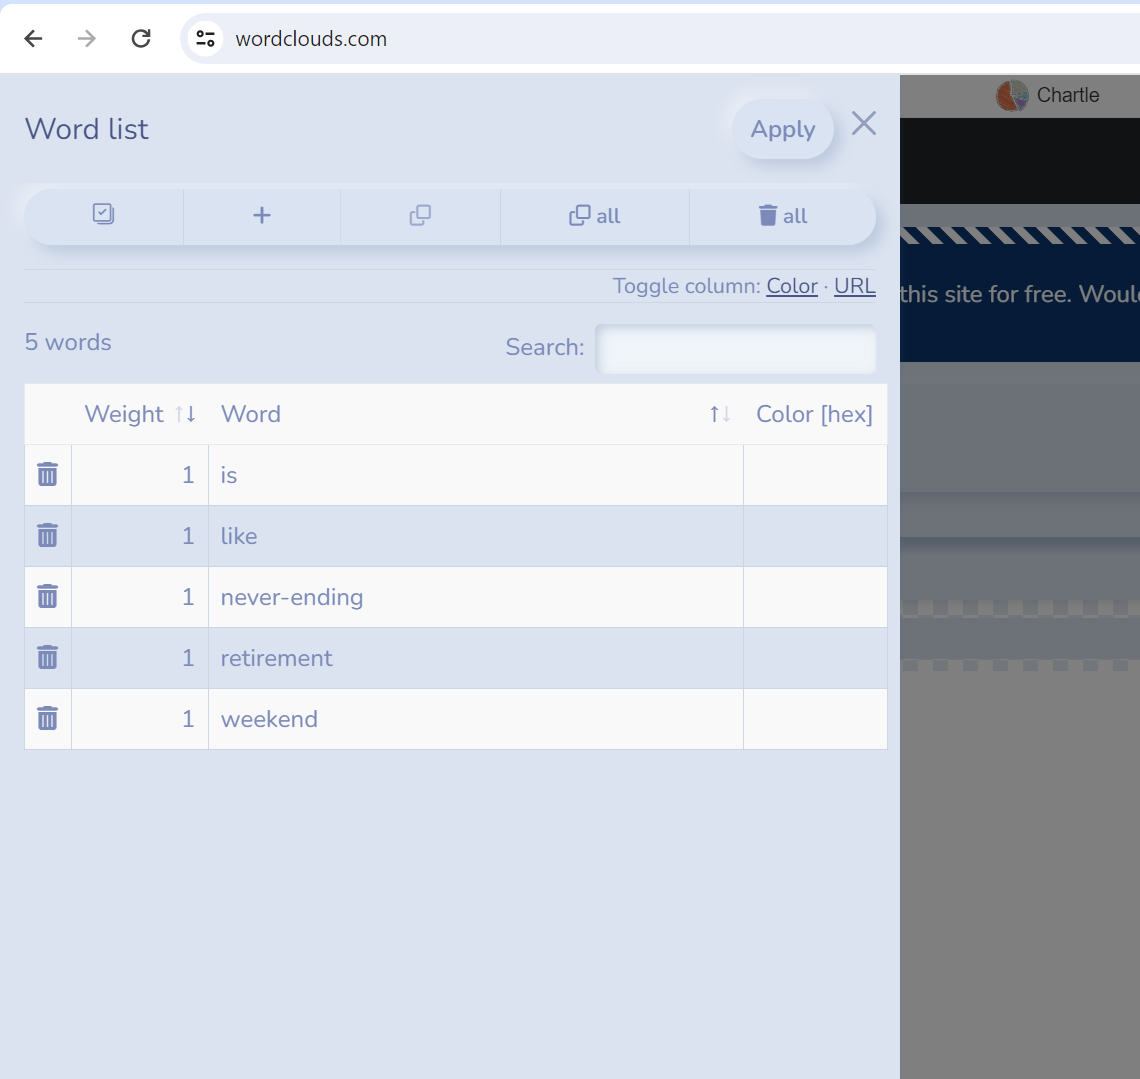
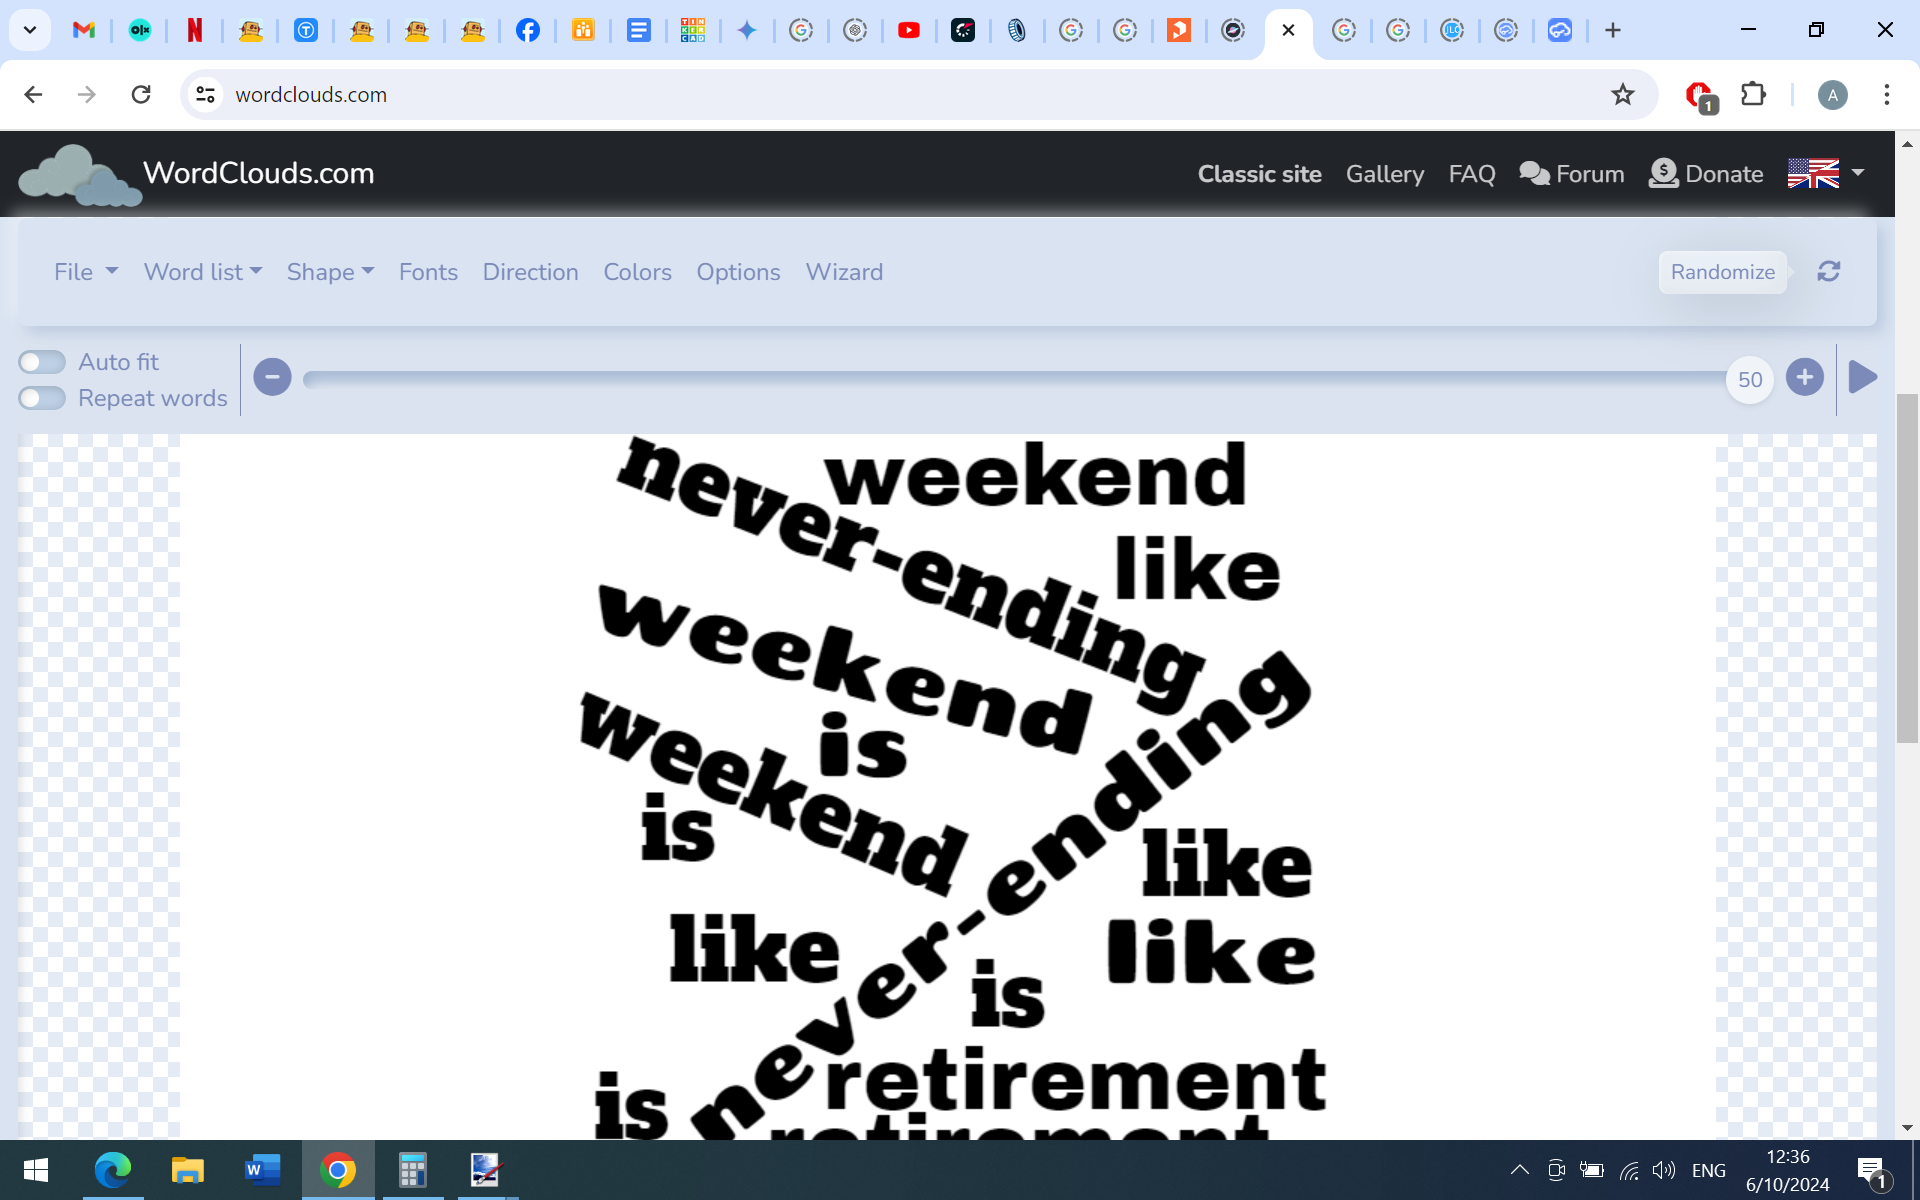
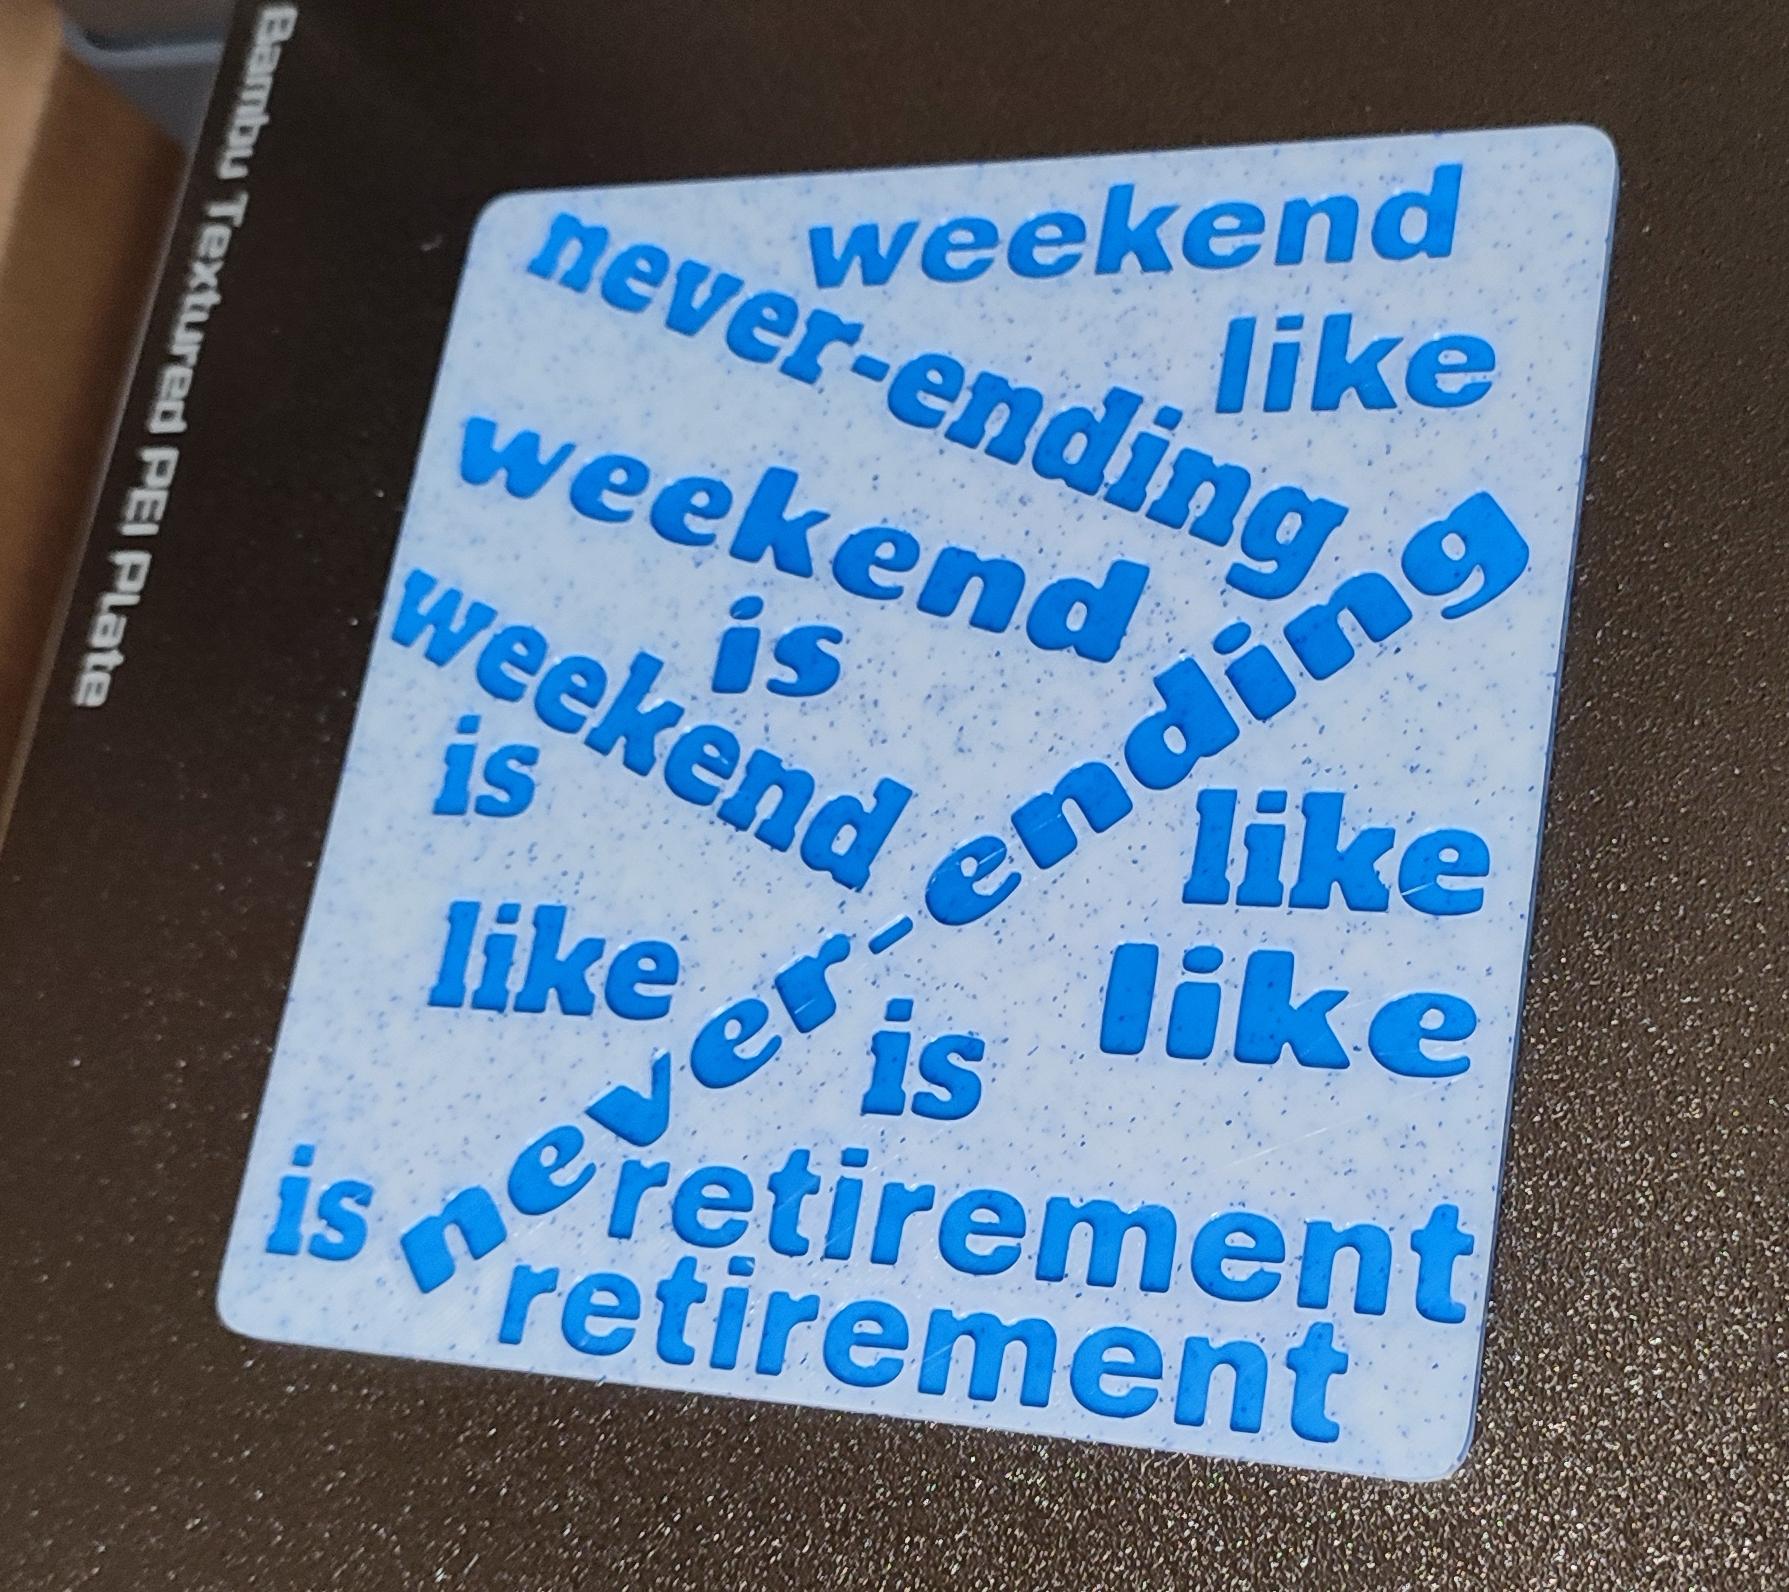
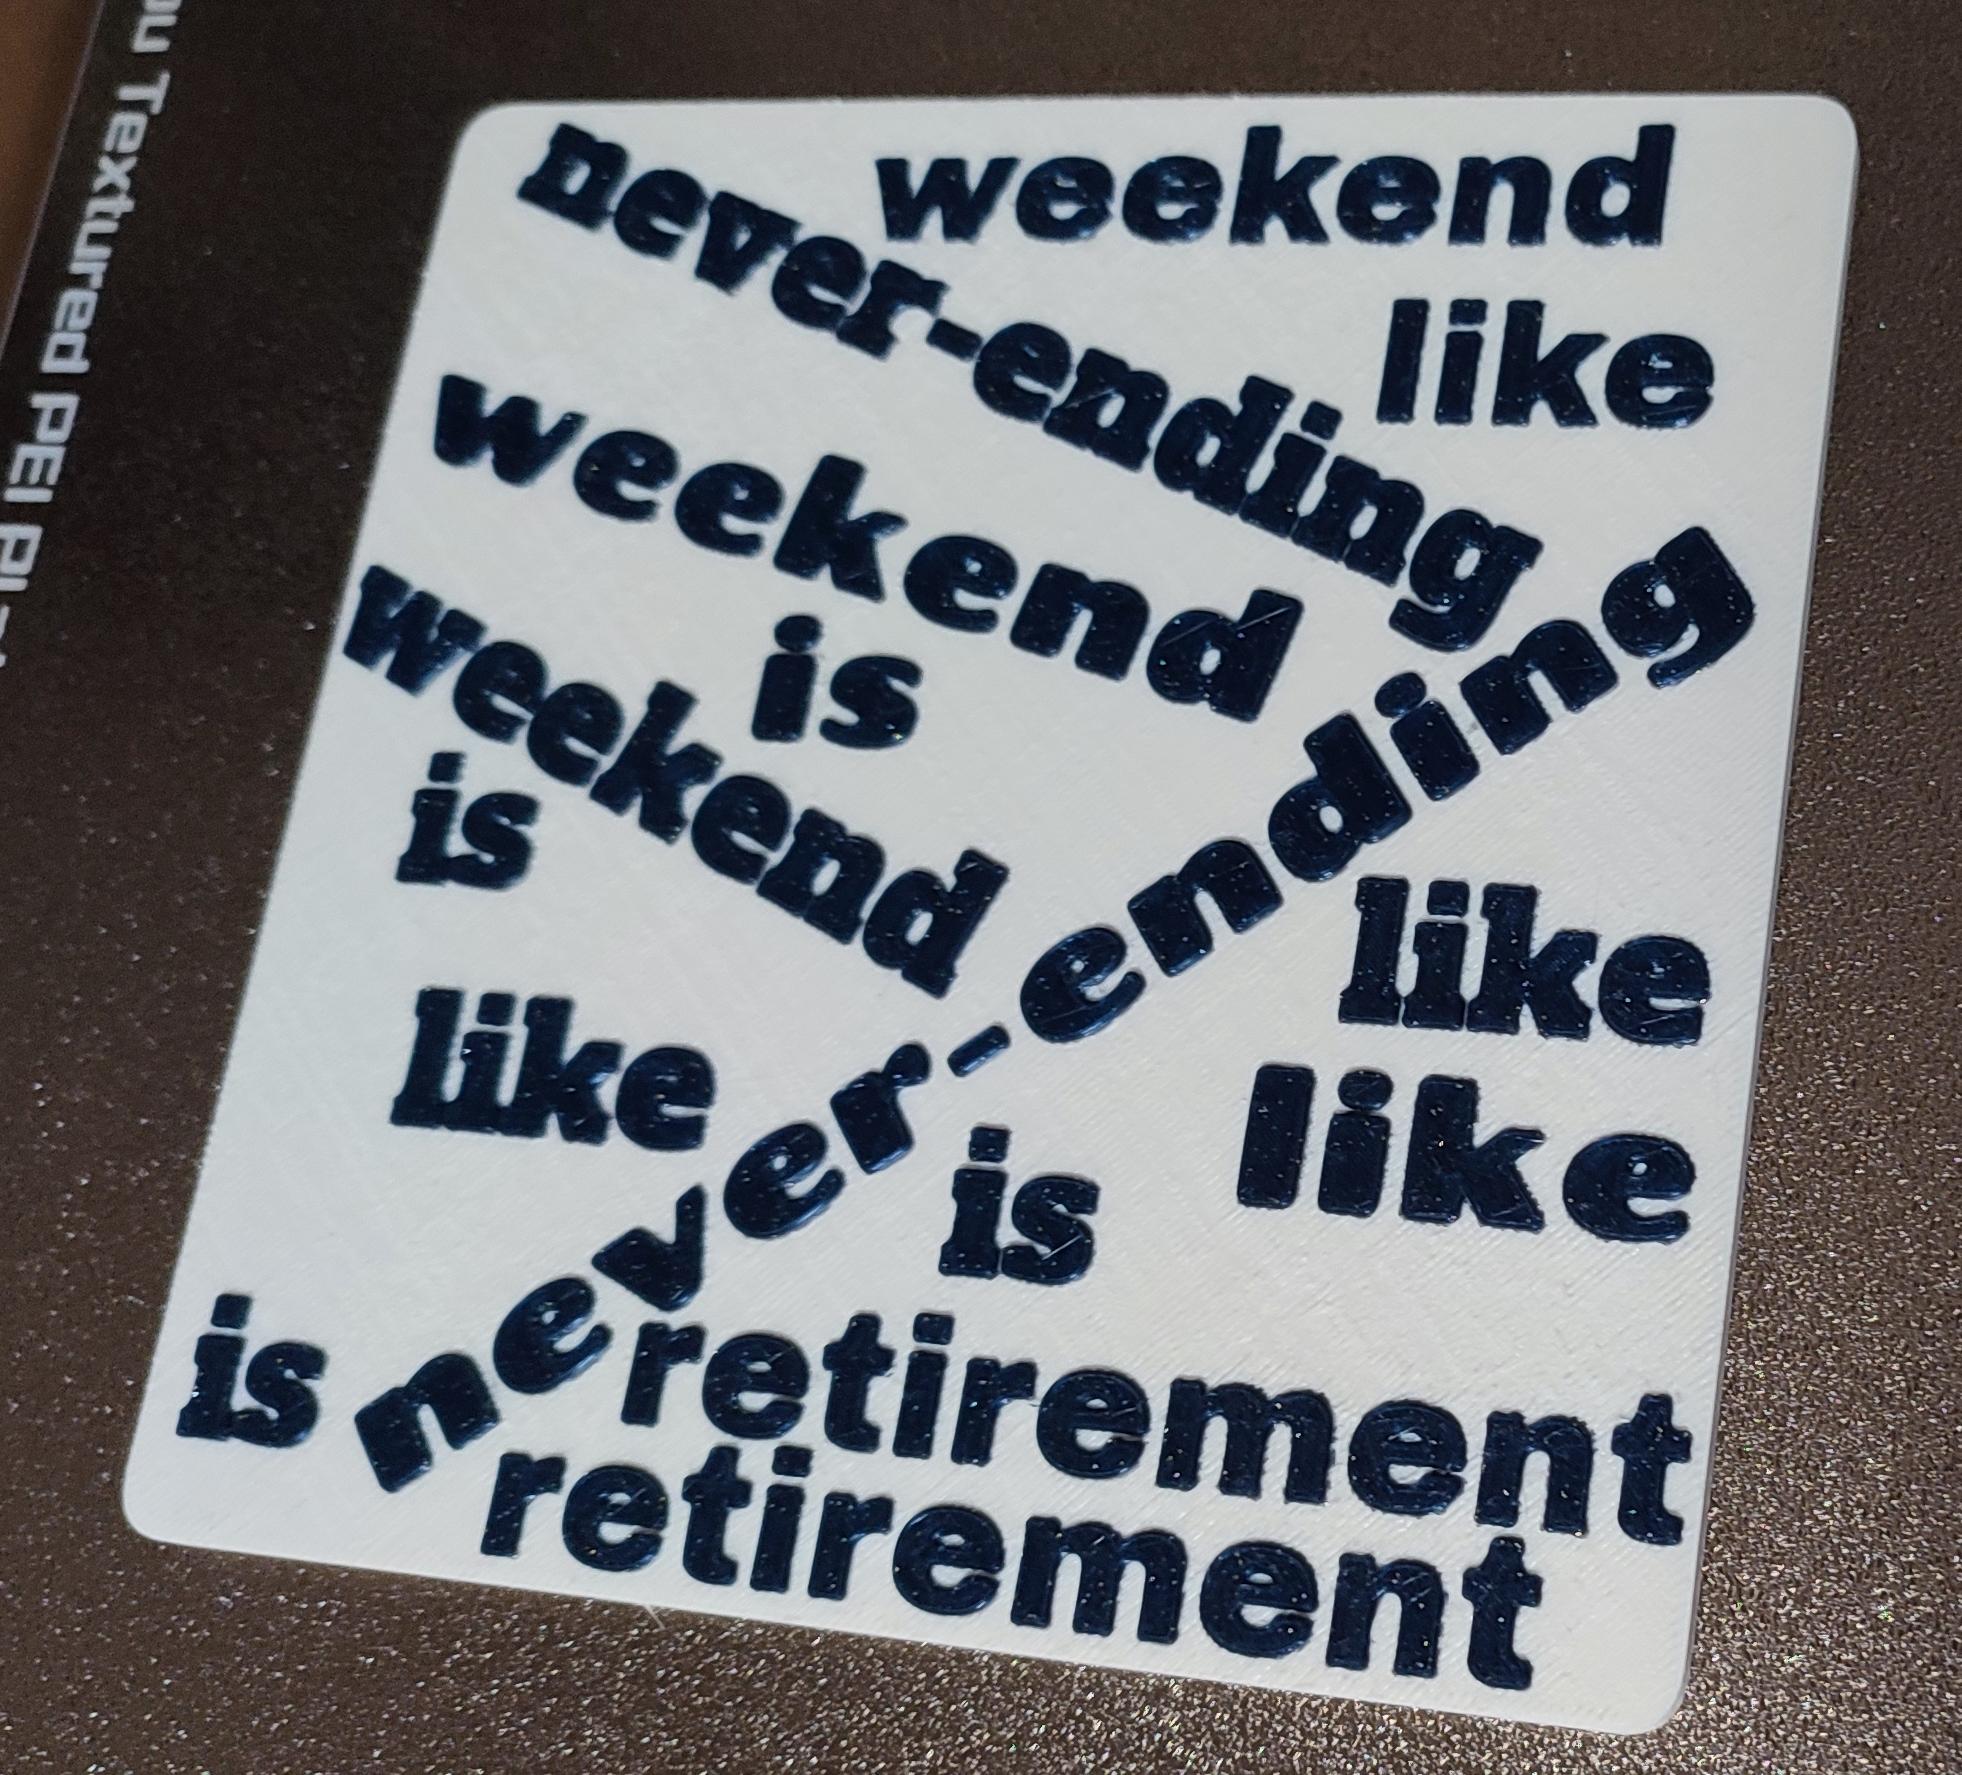
Retirement is like never-ending weekend.
Transforming the Message Into a Word Cloud
I have my message, but I want to present it in a more unique way. For that, I'm using a free service from wordclouds.com.
Wordclouds.com is a free online tool that allows to create visually appealing word clouds from text. A word cloud is a graphical representation of word frequency, where the size of each word indicates its importance or how often it appears in the text.
The platform is user-friendly and offers customization options, such as choosing shapes, colors, fonts, and layouts for a word cloud.
My text isn't exactly ideal for a word cloud, but I'll use a few tricks to make it work on the site and get an attractive result.
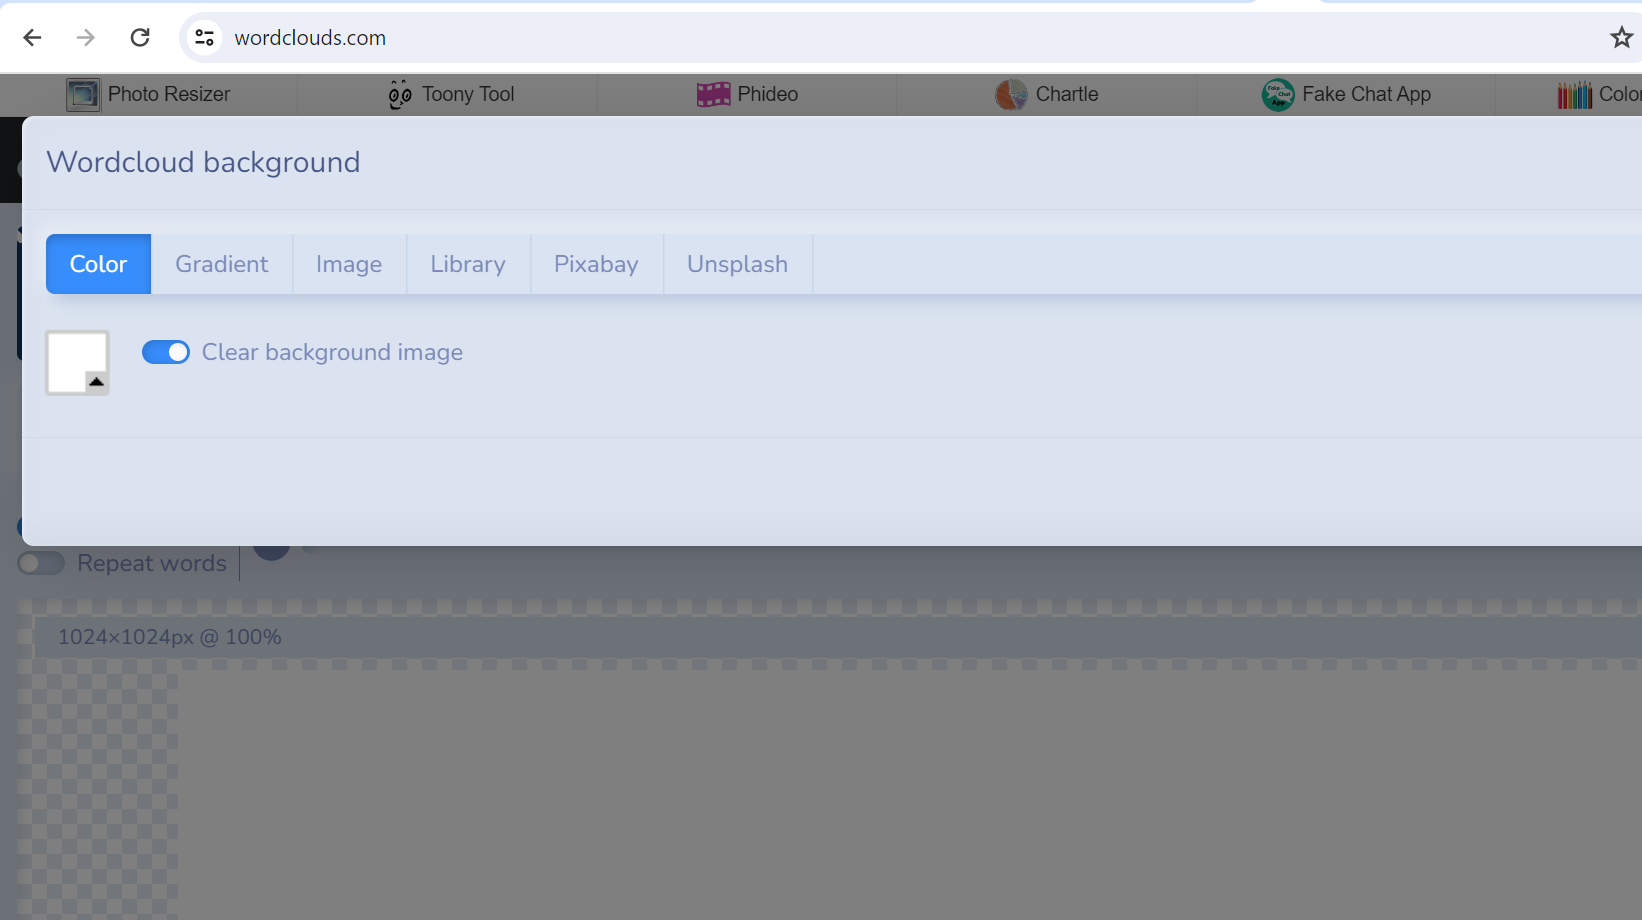
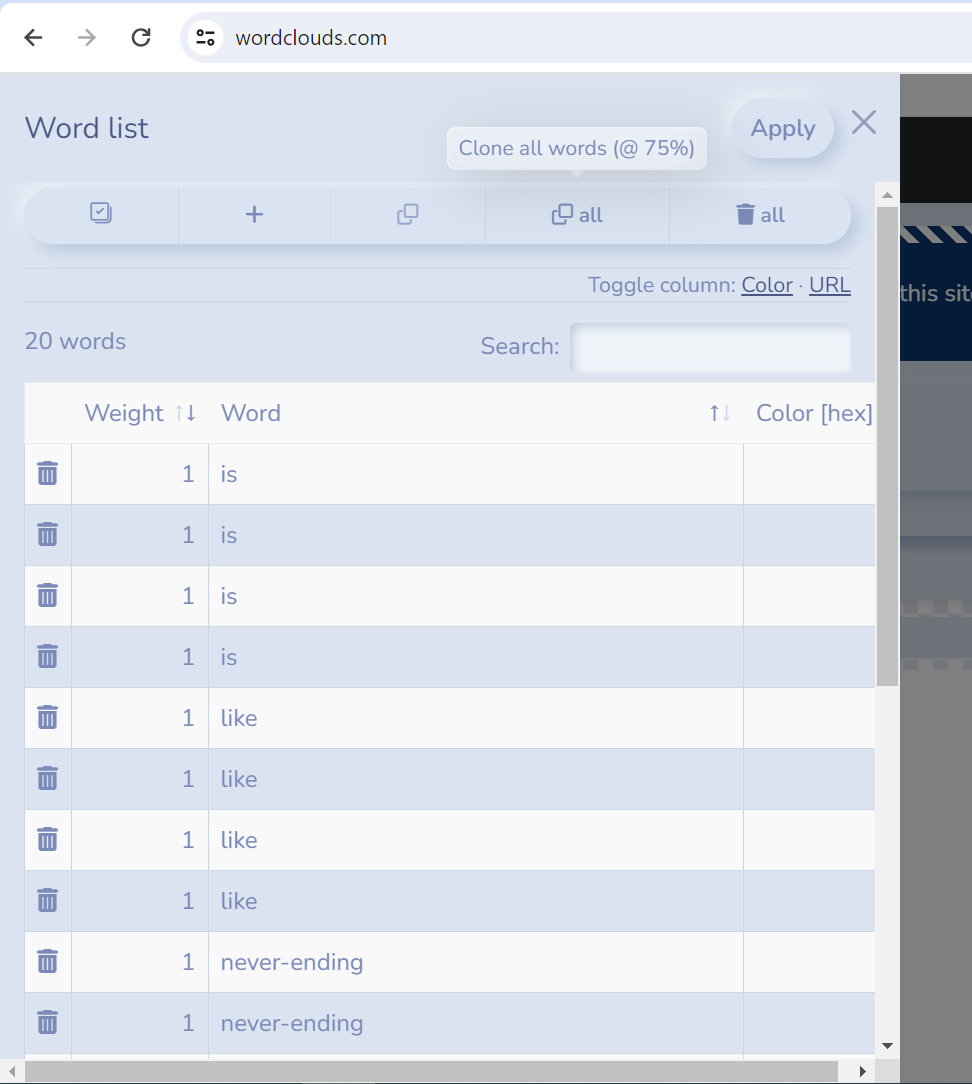
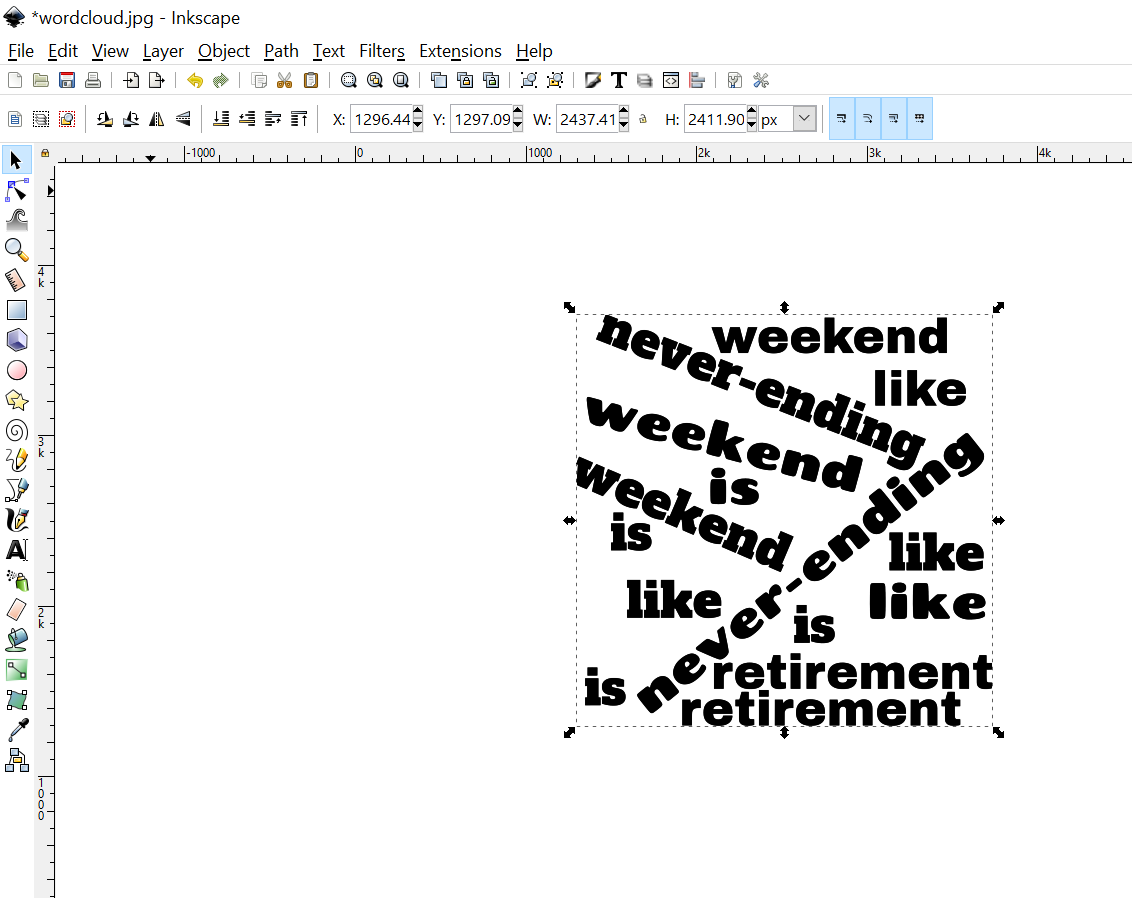
I go to wordclouds.com and do the following: Under File -> Wordcloud Background, I choose White. Then, under Wordlist -> Extract words from text, I paste my text, which then appears under Wordlist -> Edit. Here, I clone all the words twice, so each word appears four times.
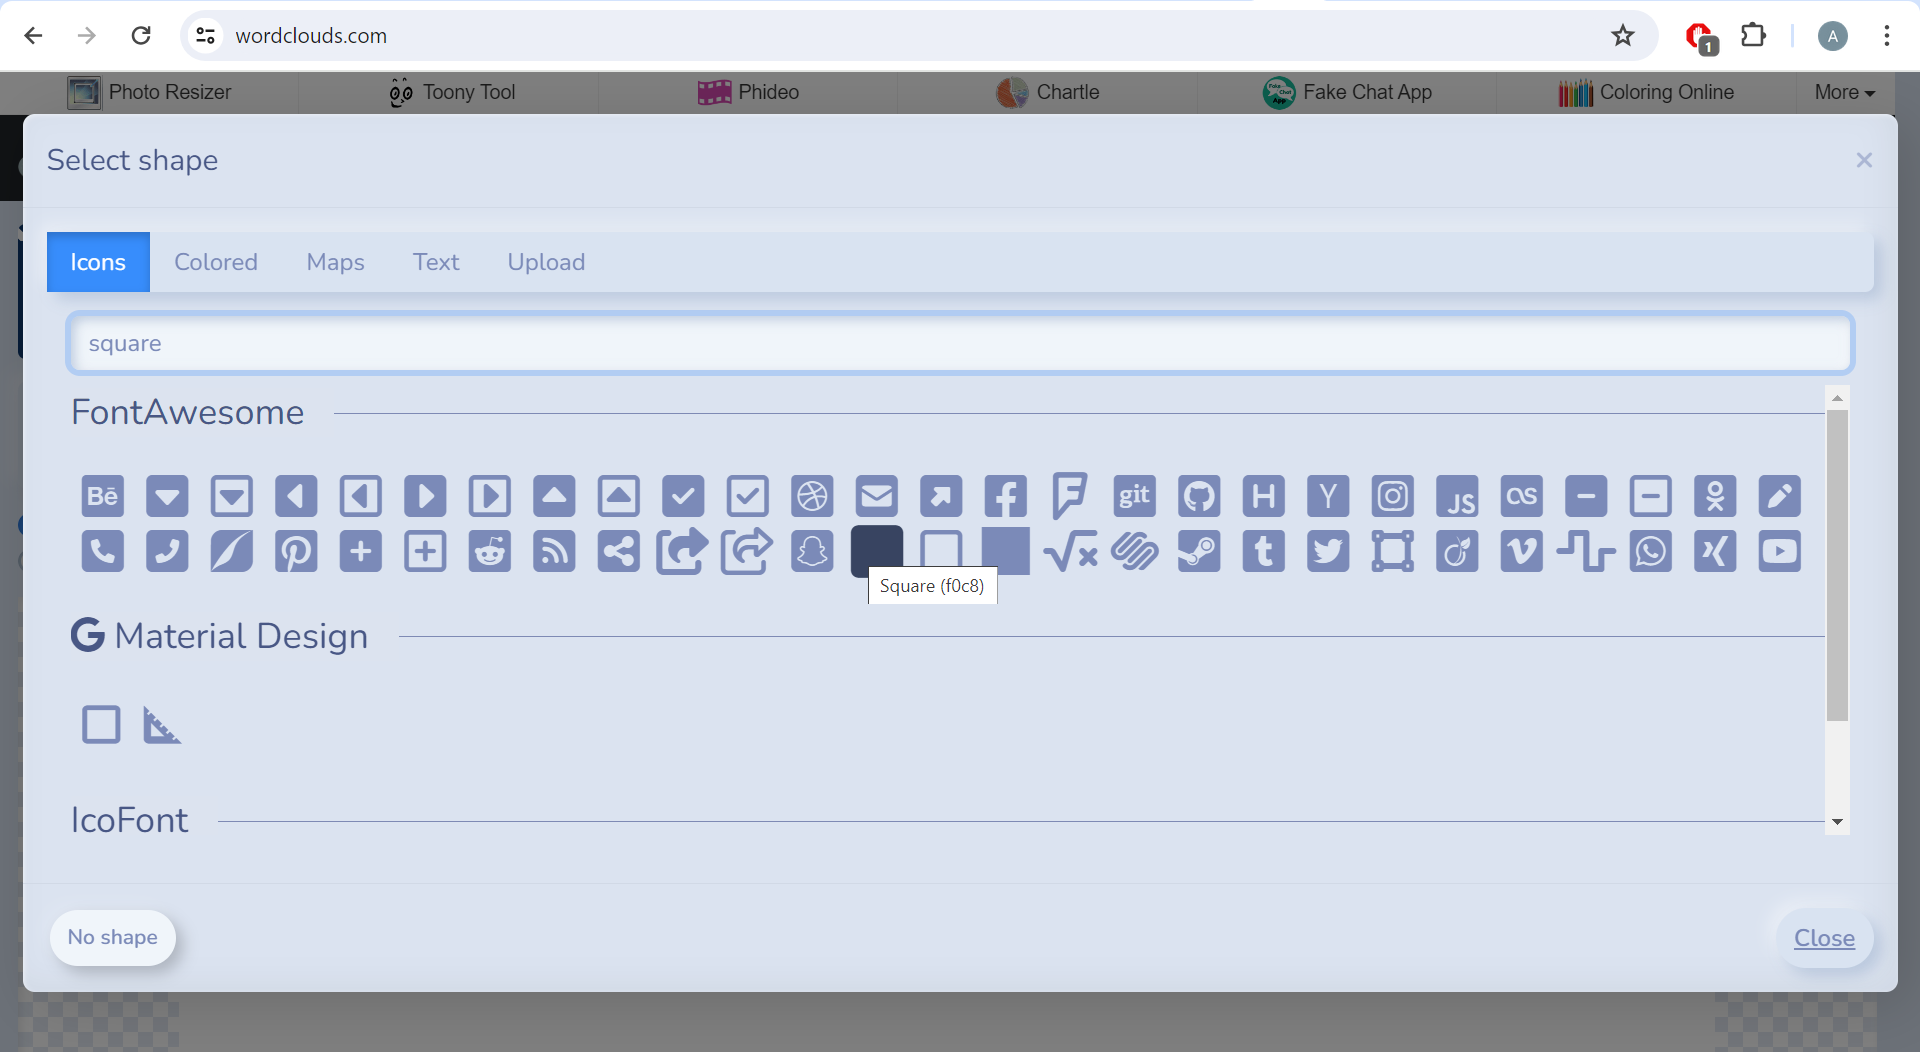
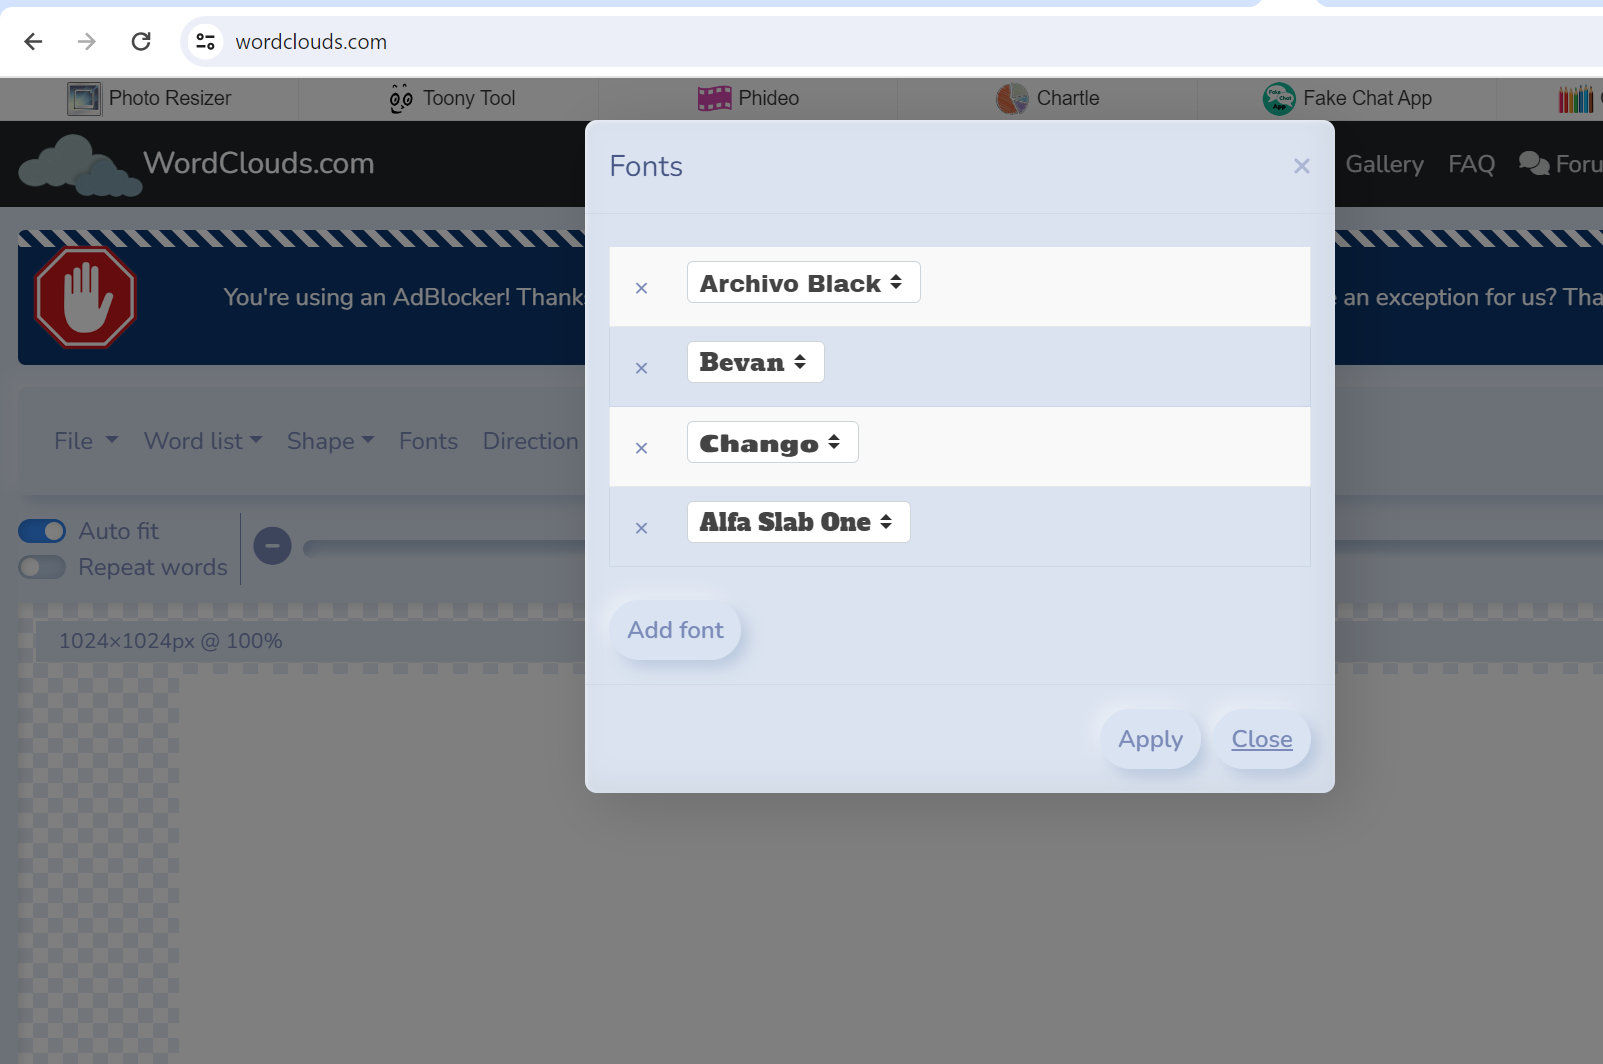
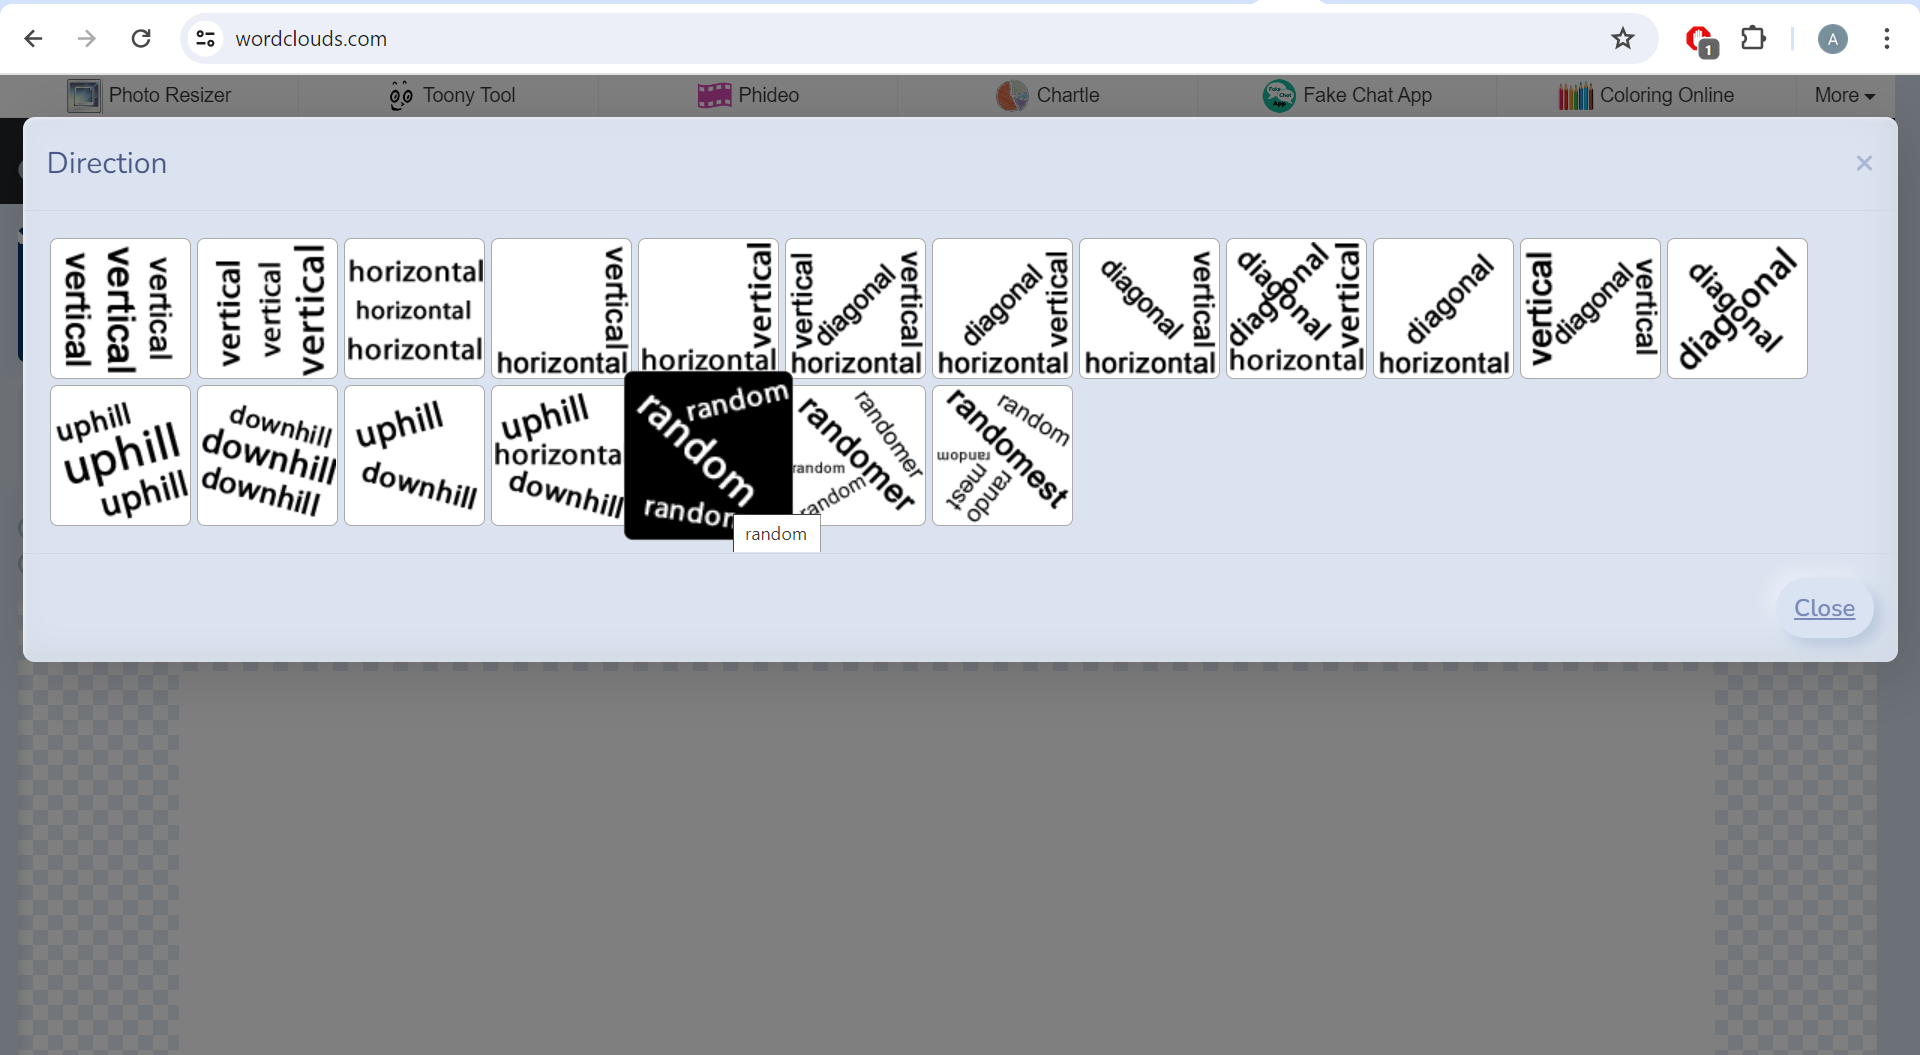
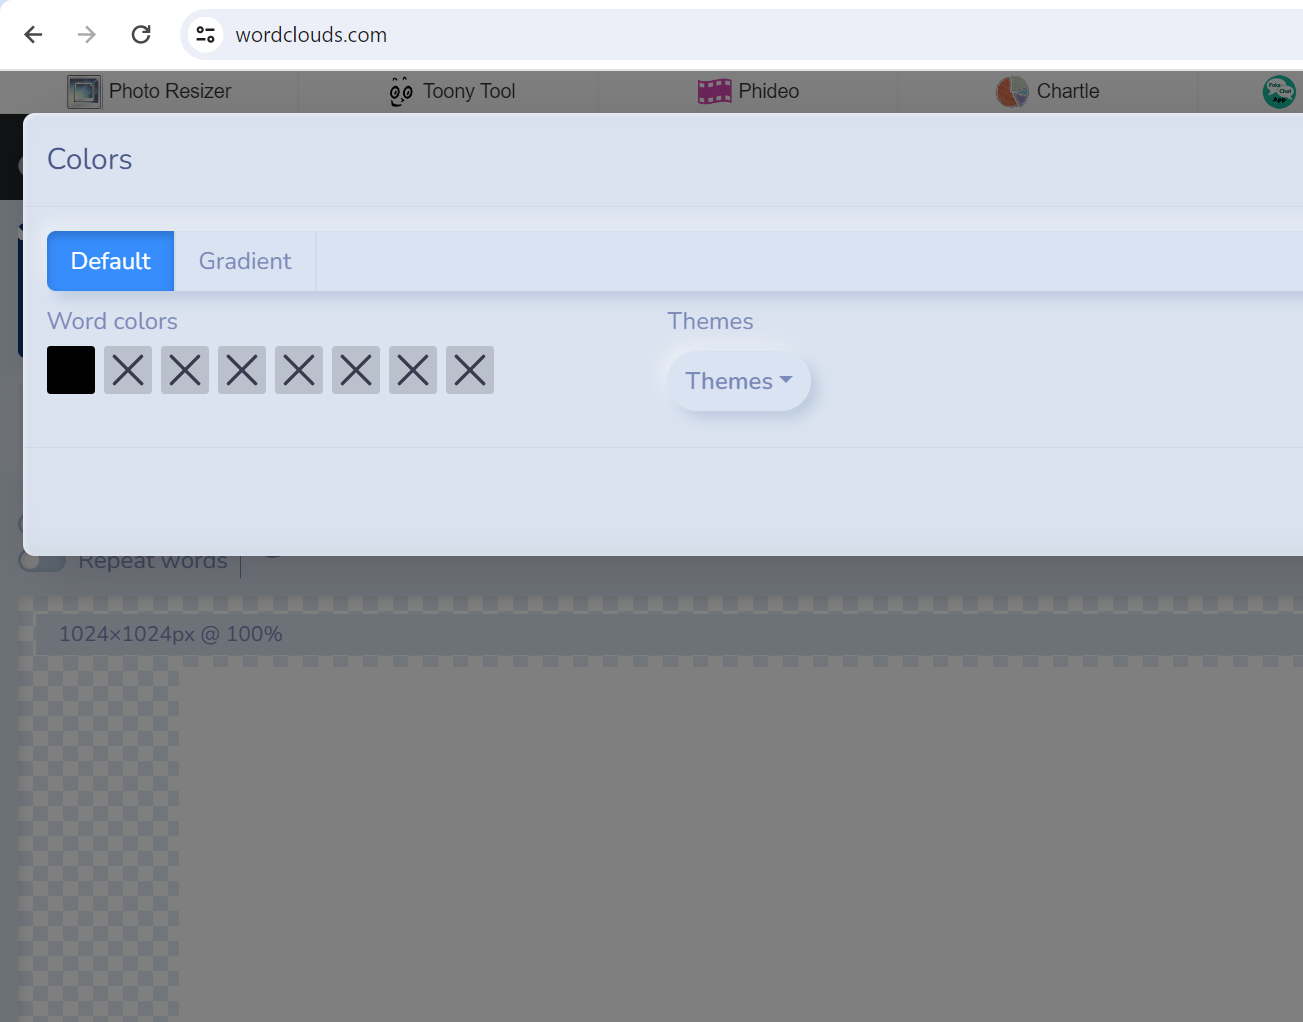
Next, I choose a shape for the words to appear in. Under Shape - Select shape, I choose Square. For fonts, I select a few different typefaces, and under Direction, I choose Random for the placement of the words. For color, I choose a single color, Black. Now, when I click Randomize my message appears...
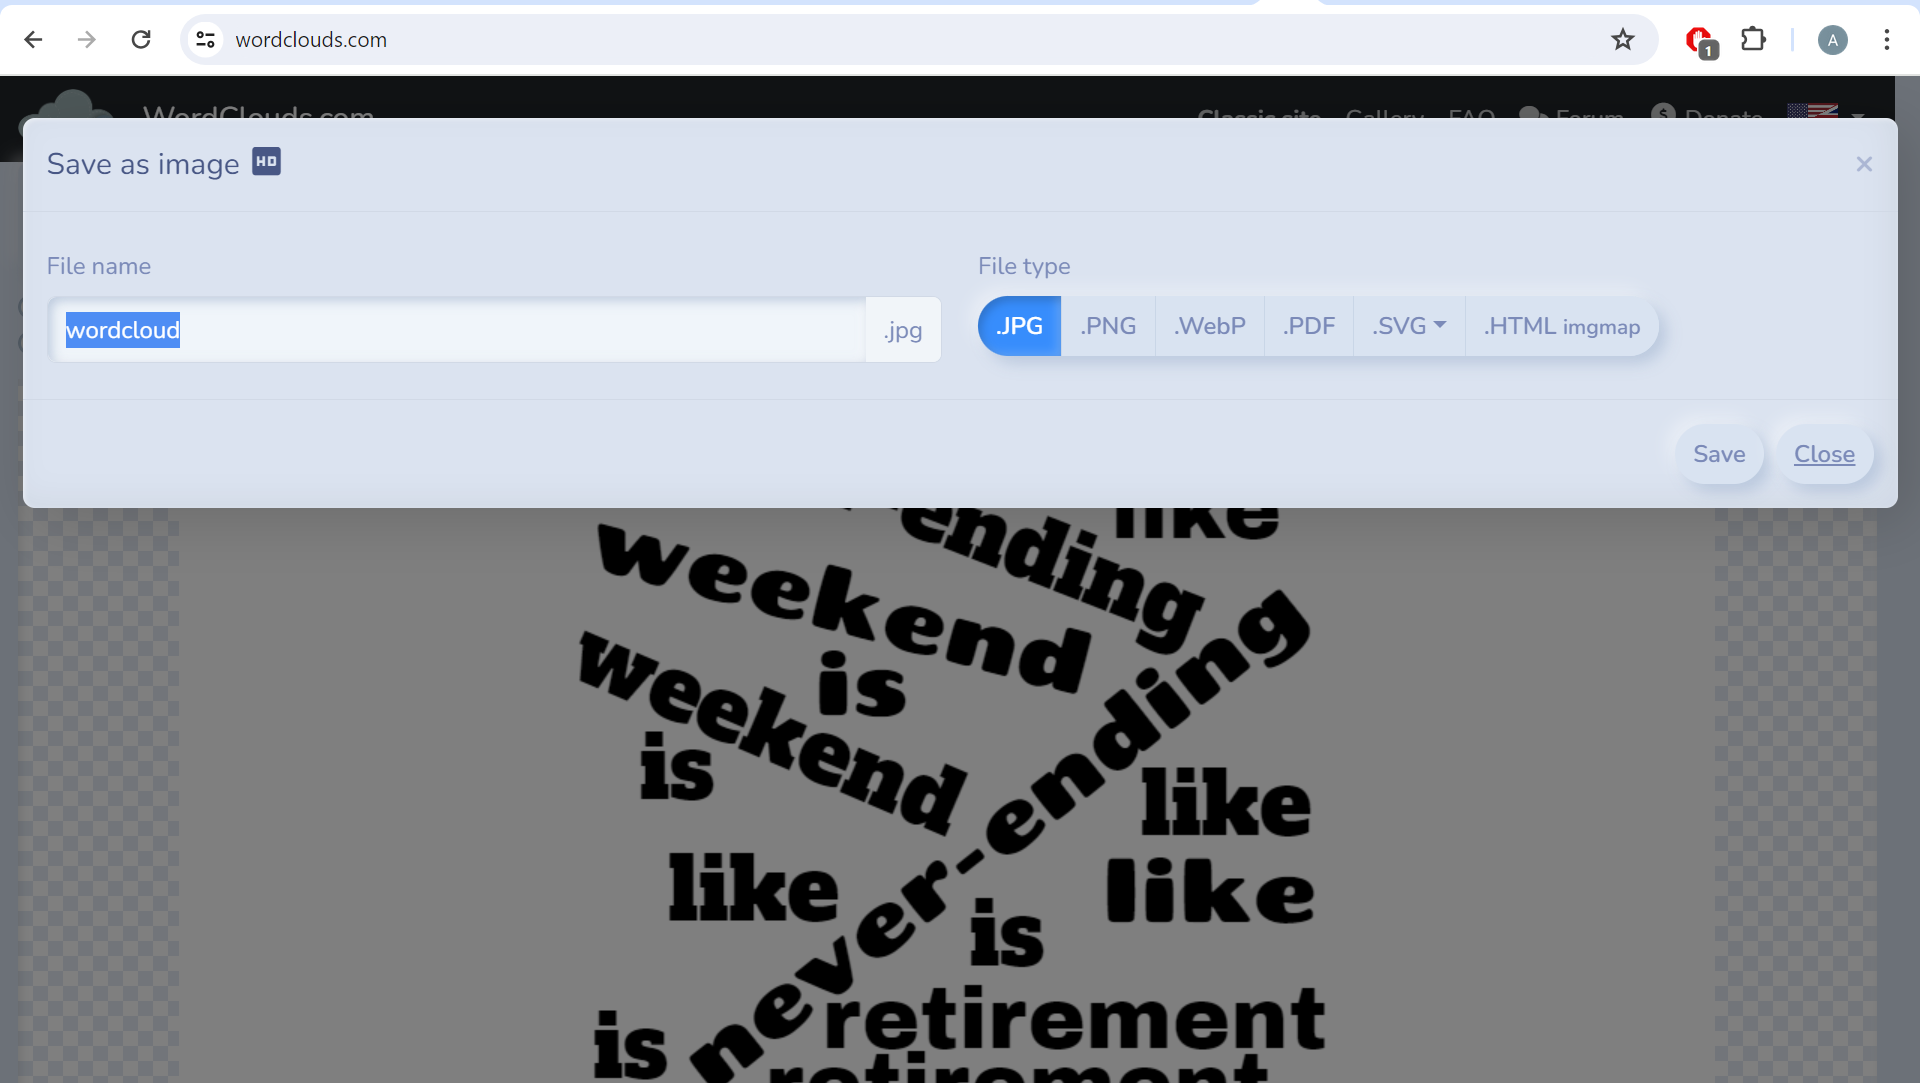
I repeat the rendering process until I'm satisfied with the result, and then I save the generated image.
Follow the screenshots above to understand everything I'm describing :)
Note 1: In the version I considered satisfactory, not all 5*4=20 words from the list appear. There are 4 of "is," 4 of "like," 3 of "weekend," and 2 each of "retirement" and "never-ending." This is because the program tries to maximize the size of the word bodies while fitting them into the chosen shape, and it can only do so by omitting some words from the list. If you don't like this, you can try rendering with the "Auto fit" setting enabled. The risk is that some words may be too small and not visible in 3D printing.
Note 2: You may have noticed that I could have chosen svg as the output format, which is directly vector-based. However, the saving process isn't always accurate, in the sense that often the fonts are swapped or simply not saved, and there are issues when importing into Tinkercad. Therefore, the next step, although small, is necessary :)
From Pixels to Paths: Transforming the Word Cloud Into a Vector Image


For this operation, I used Inkscape.
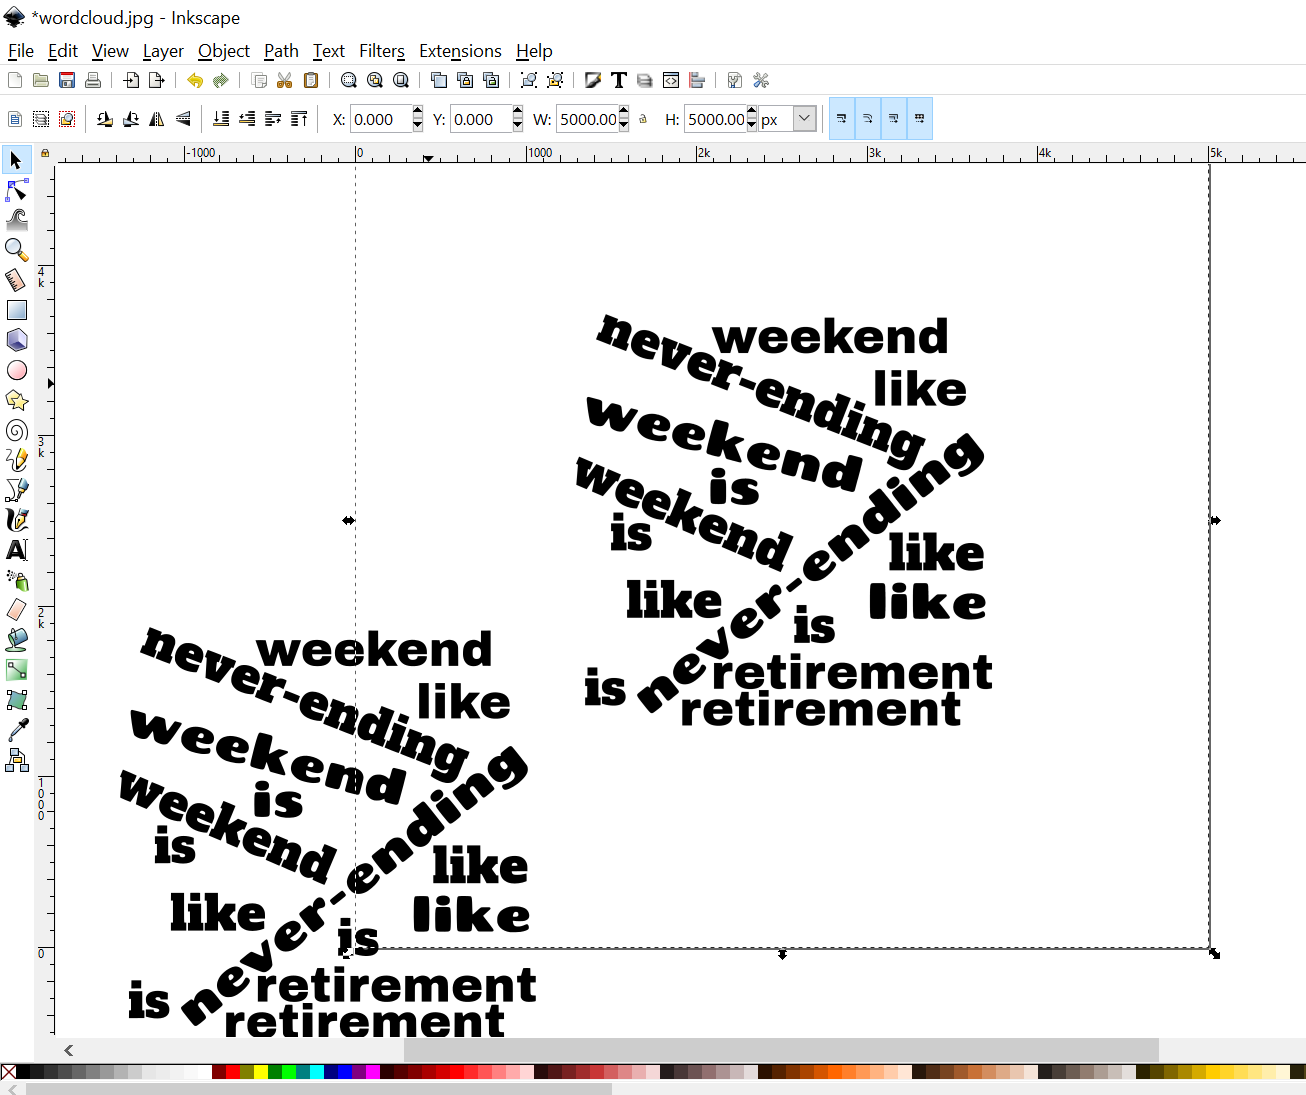
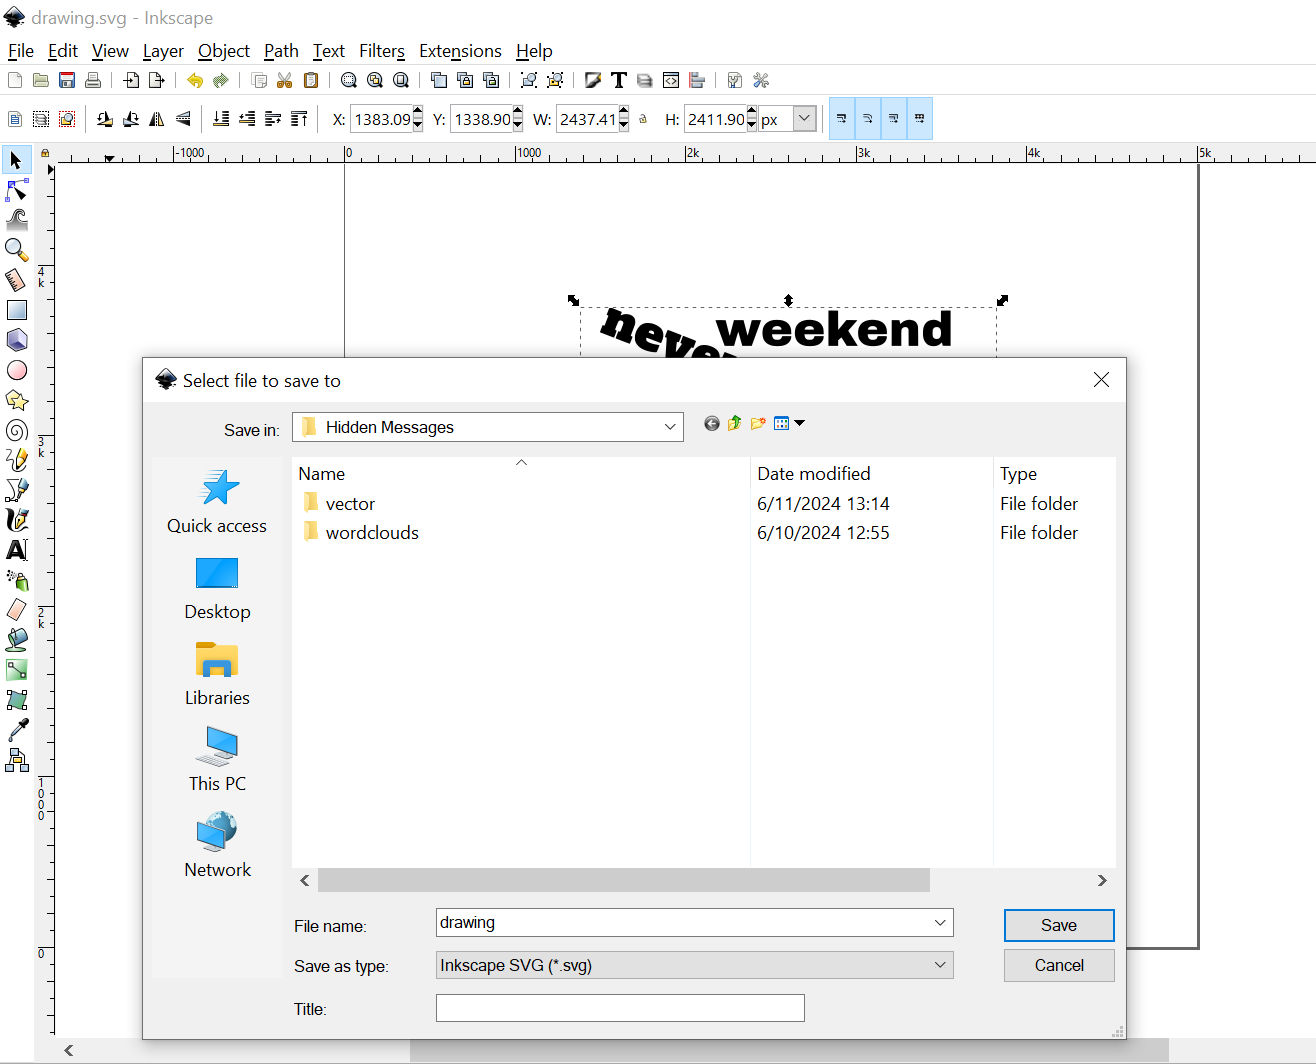
I loaded the image saved from wordclouds.com, selected it, and from the main menu, I went to Path -> Trace Bitmap. I didn't change anything in the window that appeared, just clicked the "Update" button. After an image of the message appeared in the small "preview" window, I clicked "OK" and closed the window. The vectorized message was automatically selected, but first, I moved it aside so I could select the original image to delete it. hen, I saved the vectors as an svg file. Look also at the screenshots above...
There are many tutorials online about vectorizing in Inkscape if you want to learn more.
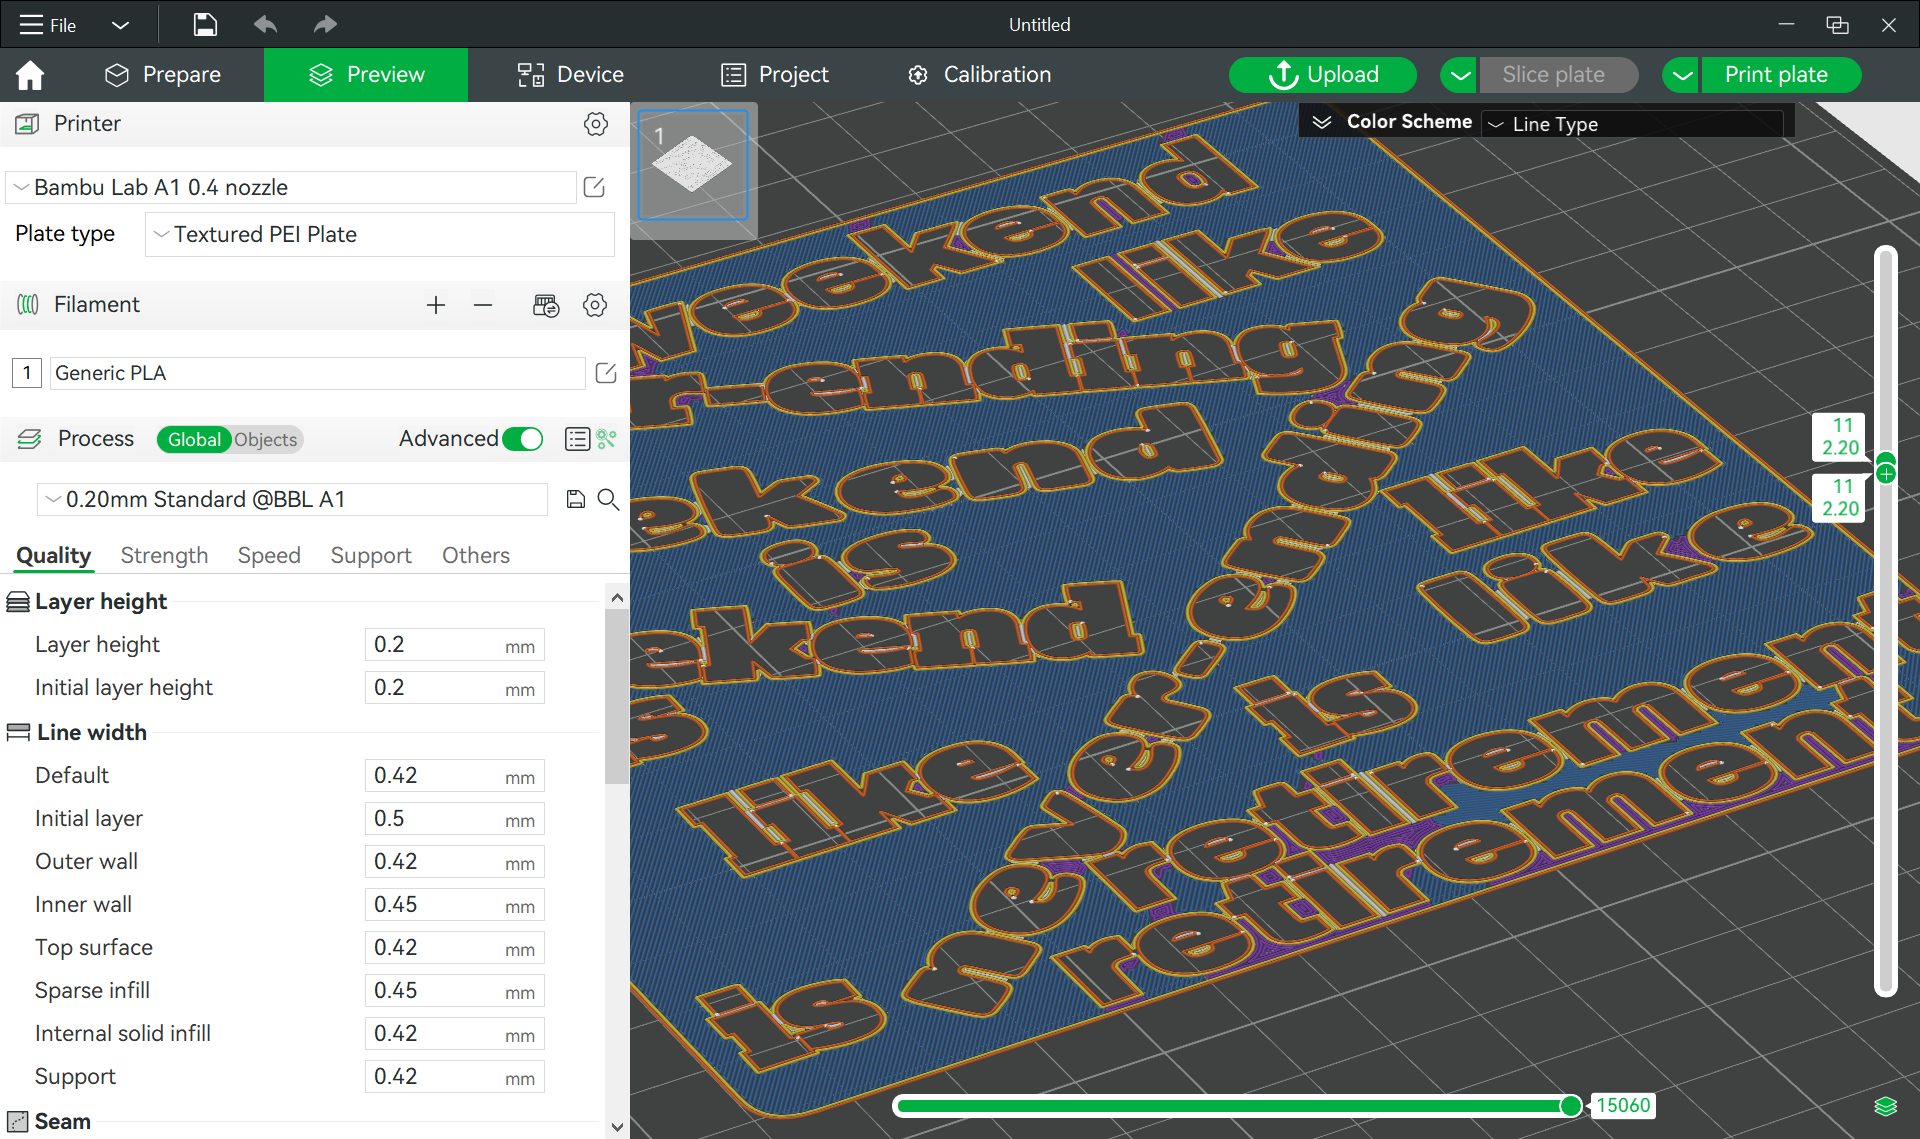
From 2D to 3D: Designing the Word Cloud for 3D Printing in Tinkercad

The final phase of the designing is creating the STL file(s) in Tinkercad.
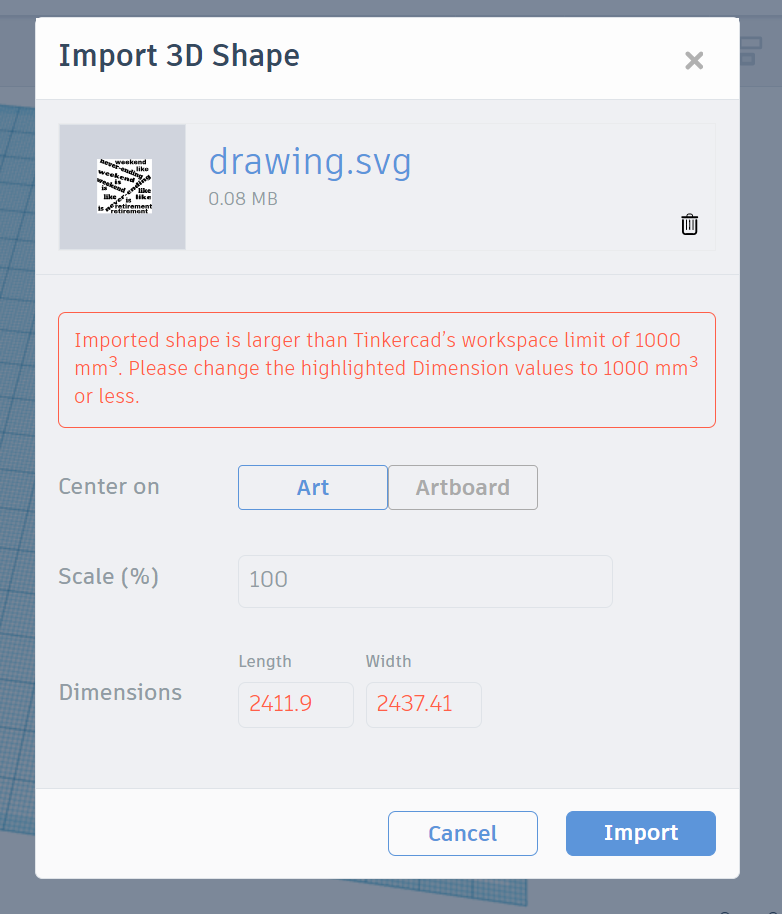
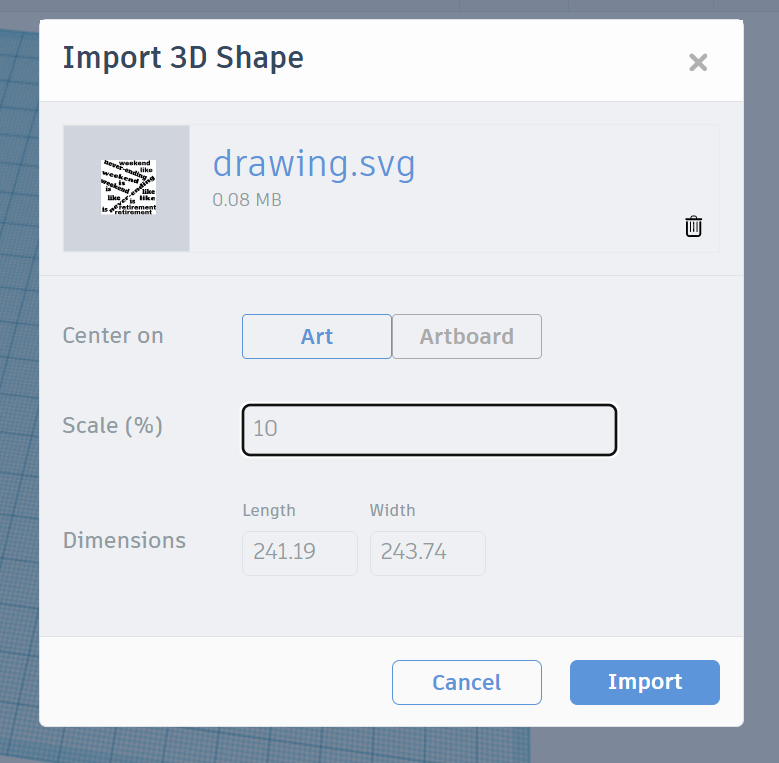
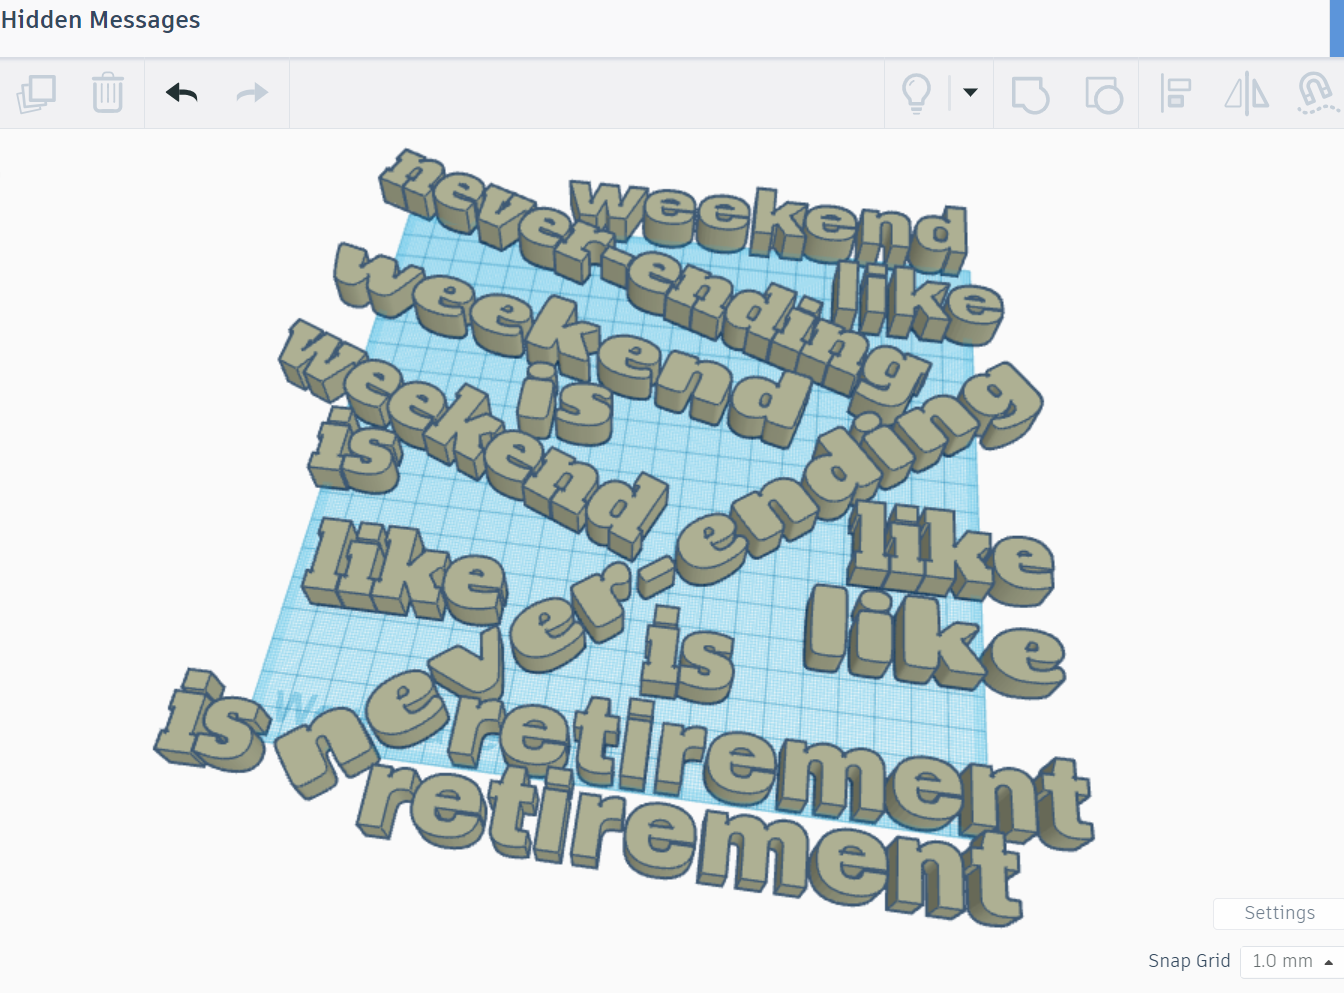
In a new 3D Tinkercad project, I imported the svg file created in the previous step. I was warned that the size of the vectors exceeded Tinkercad's maximum, so I reduced it to 10% and proceeded with the import. It was still a bit large, so while holding down "shift," I further reduced it to just under 150x150 mm. Then, I made it 1mm tall.
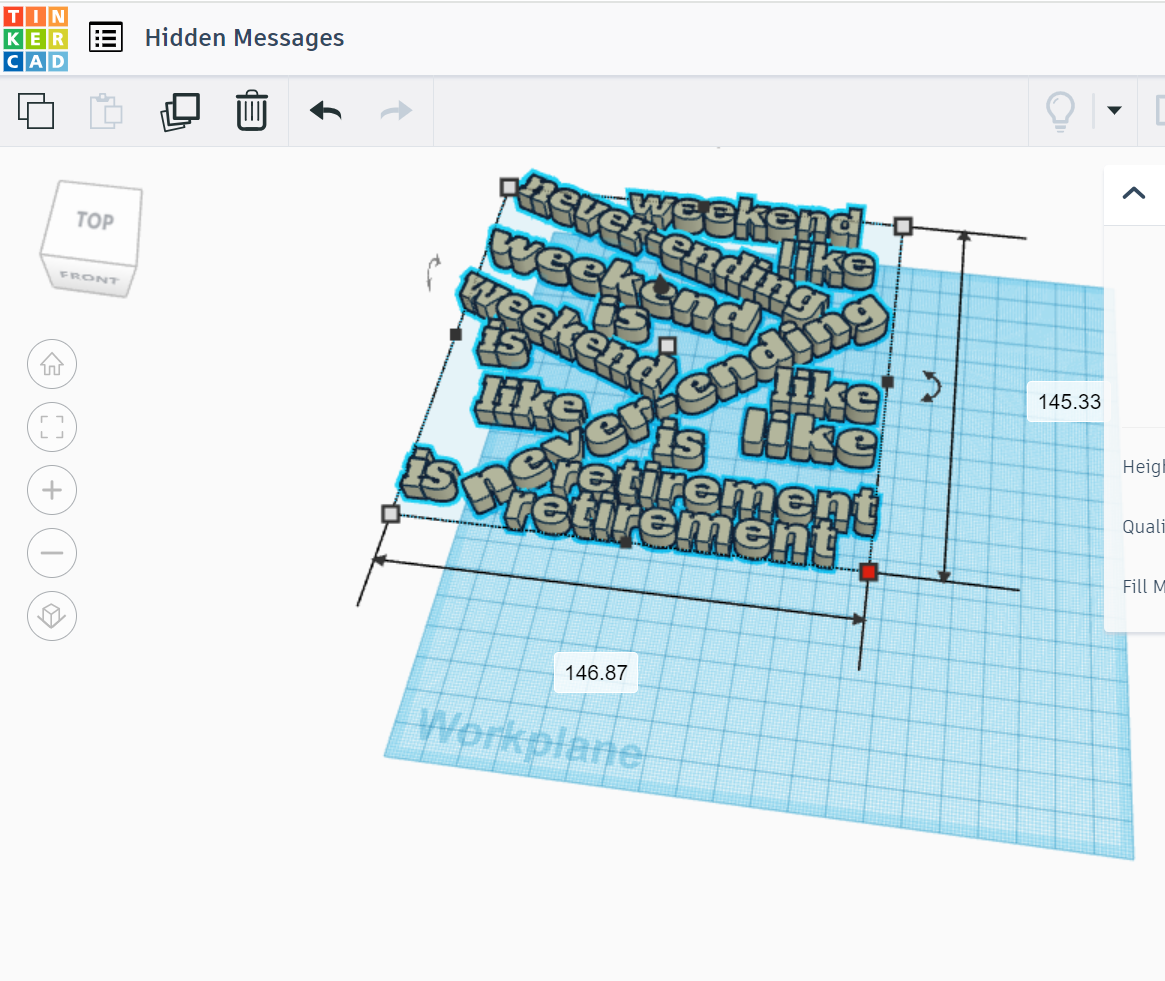
Next, I added two "SoftBox" elements to the workspace (found under "shape generators") and modified their dimensions as follows: X Dim - 150, Y Dim - 150, Z Dim - 3, Wall - 75. I duplicated the message and created two message variations.
In the first variation, I made the message a "hole" and aligned it with the SoftBox element in the center and at the top. Then, I grouped the two elements.
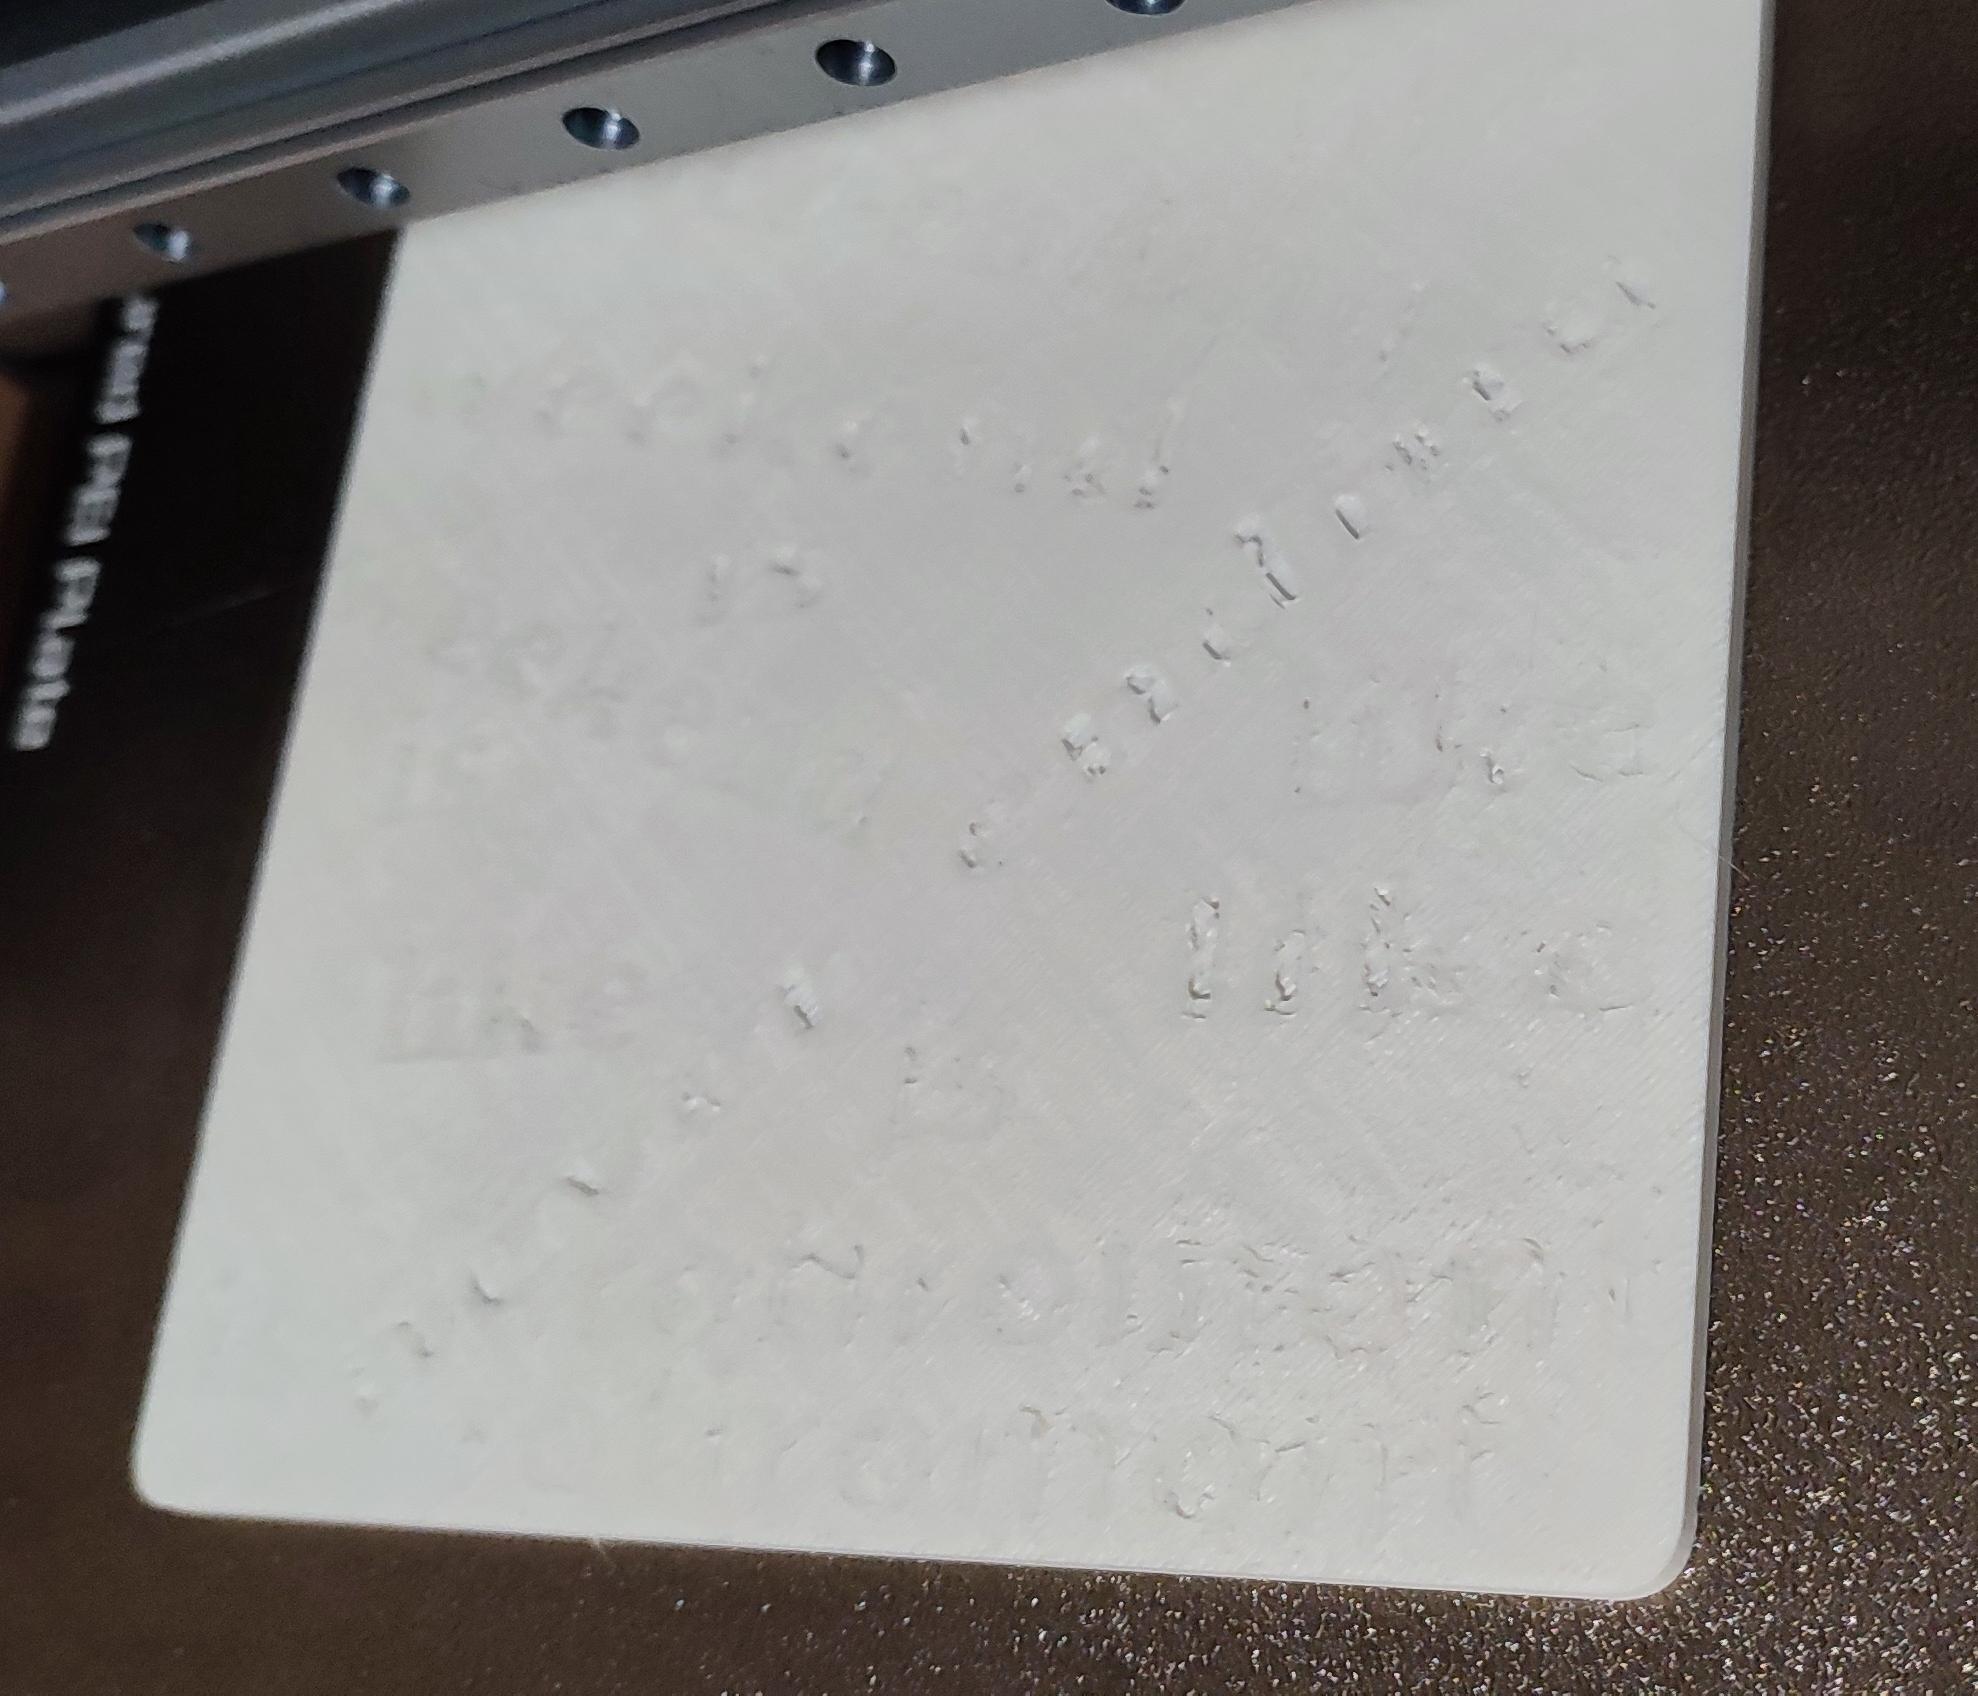
In the second variation, the message remained unchanged, but I aligned it to the center of the SoftBox element and raised it to 3mm, directly above the SoftBox. Then, I grouped these two elements as well.
Therefore, in the first variation, I have the message recessed into the support by 1 mm, like an engraving, while in the second variation, the message is raised above the support with a height of 1 mm, like a bas-relief.
The above screenshots can help you a little...
Make It Pop: Adding a Splash of Color to the 3D Printed Word Cloud
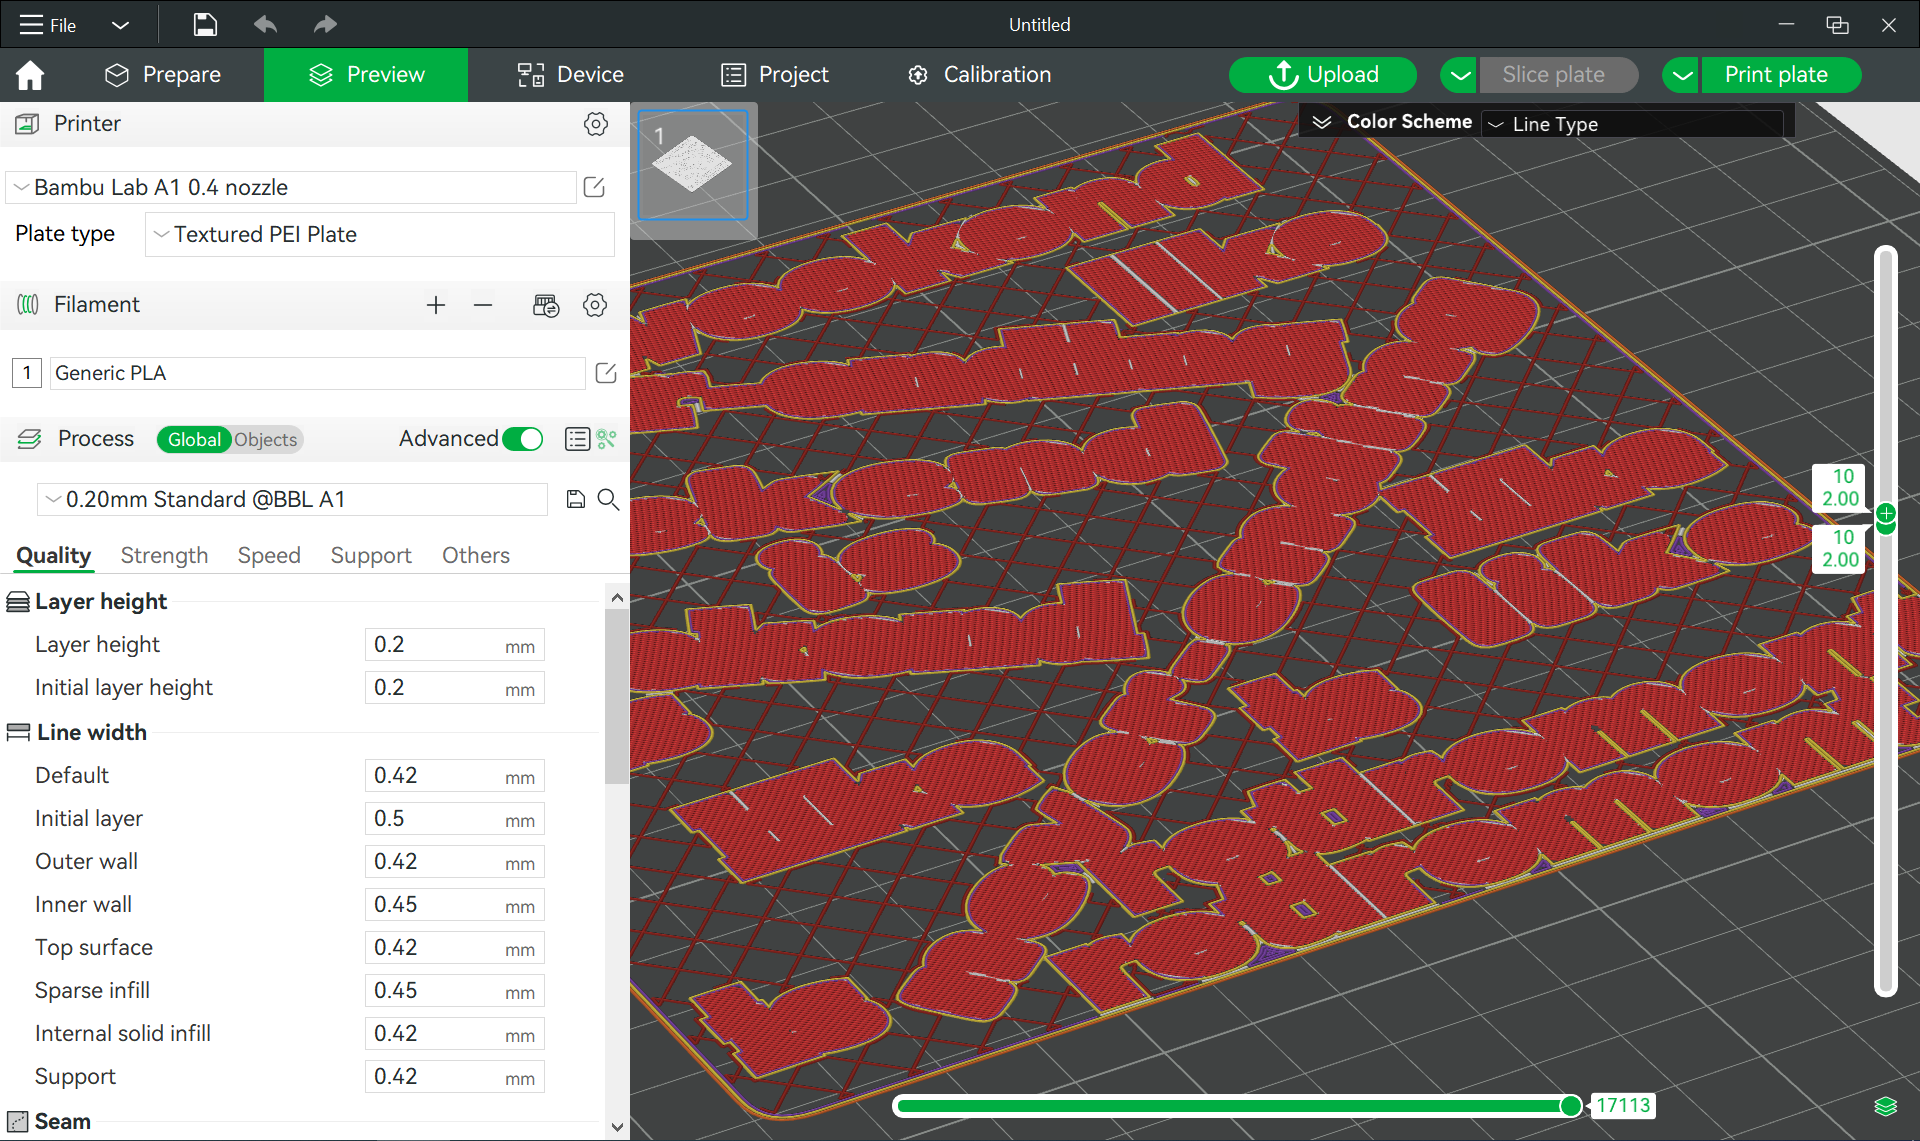
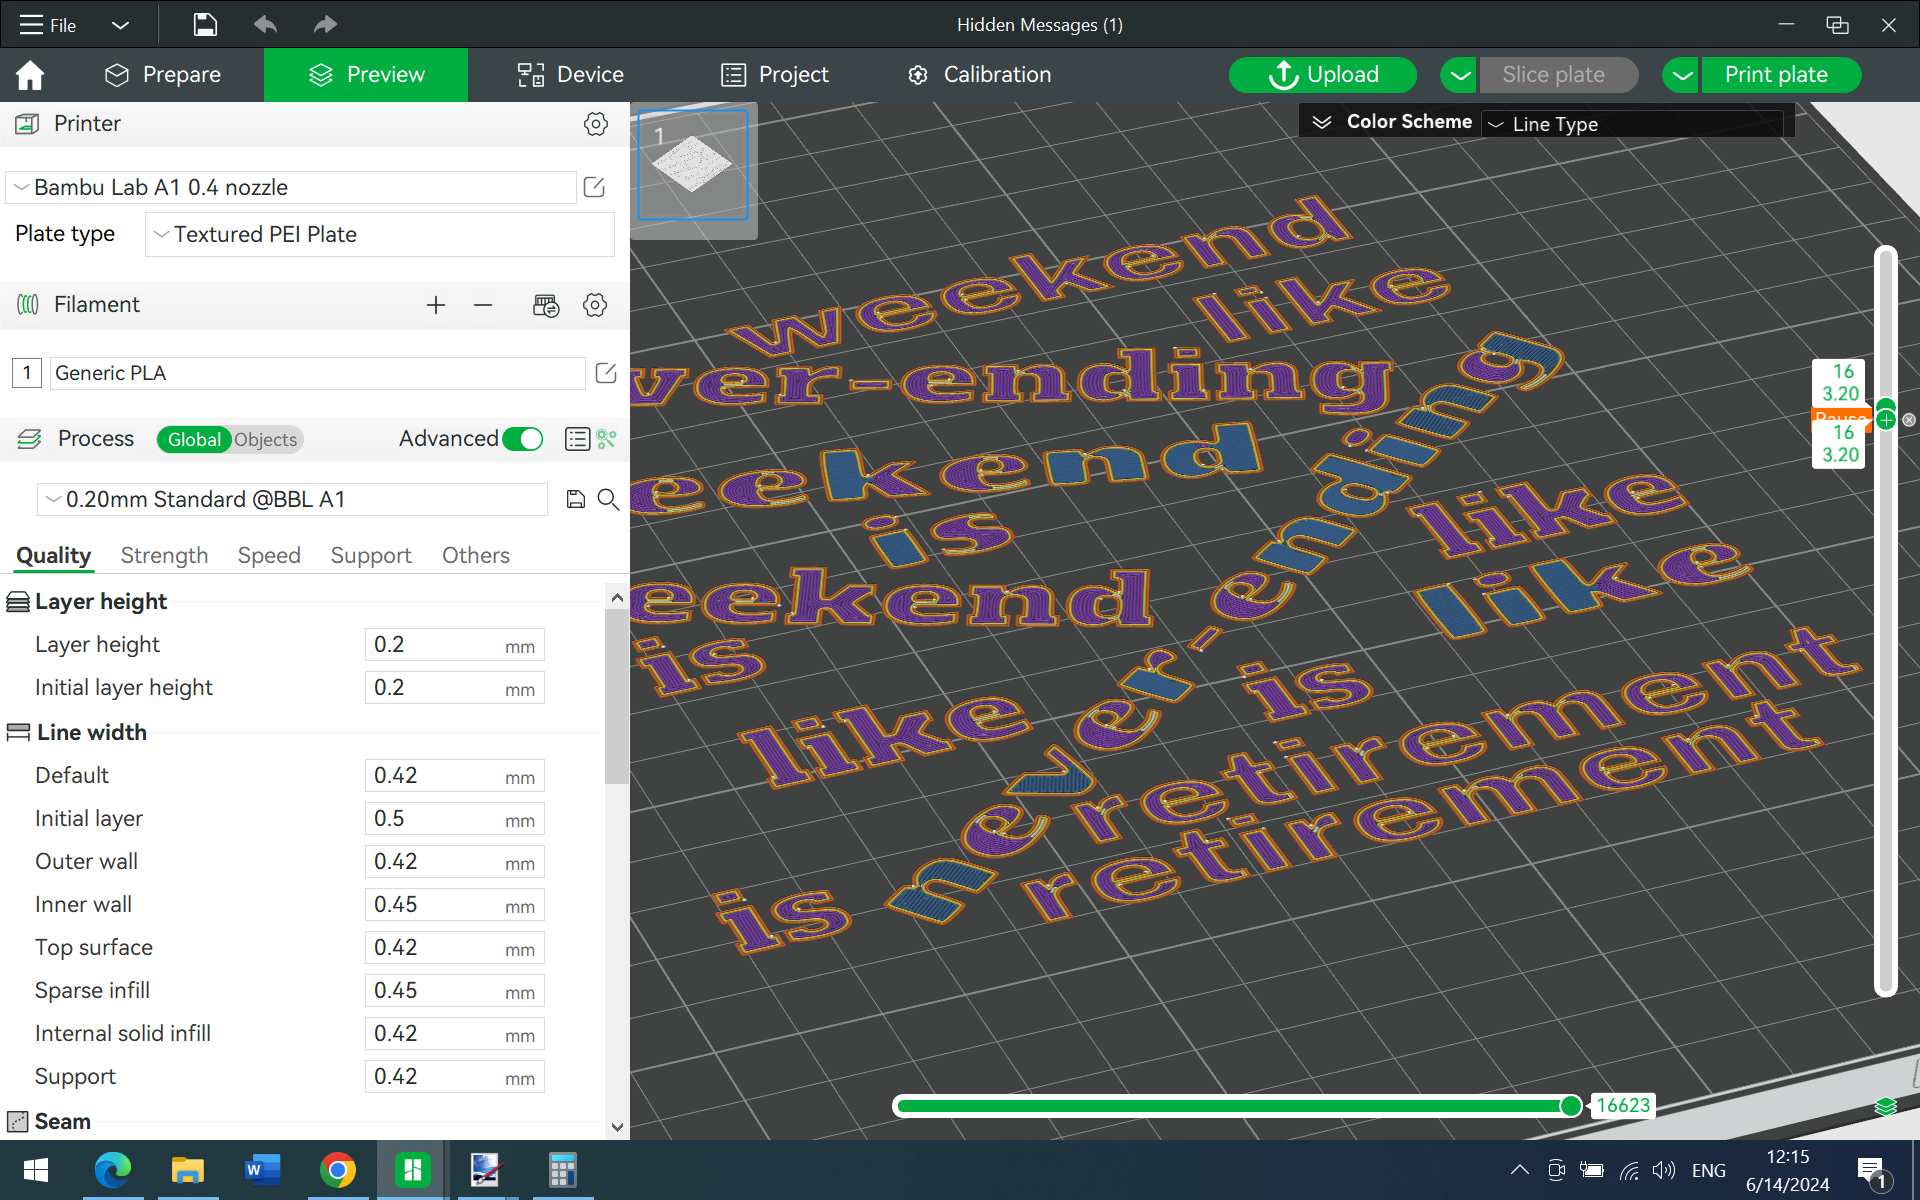
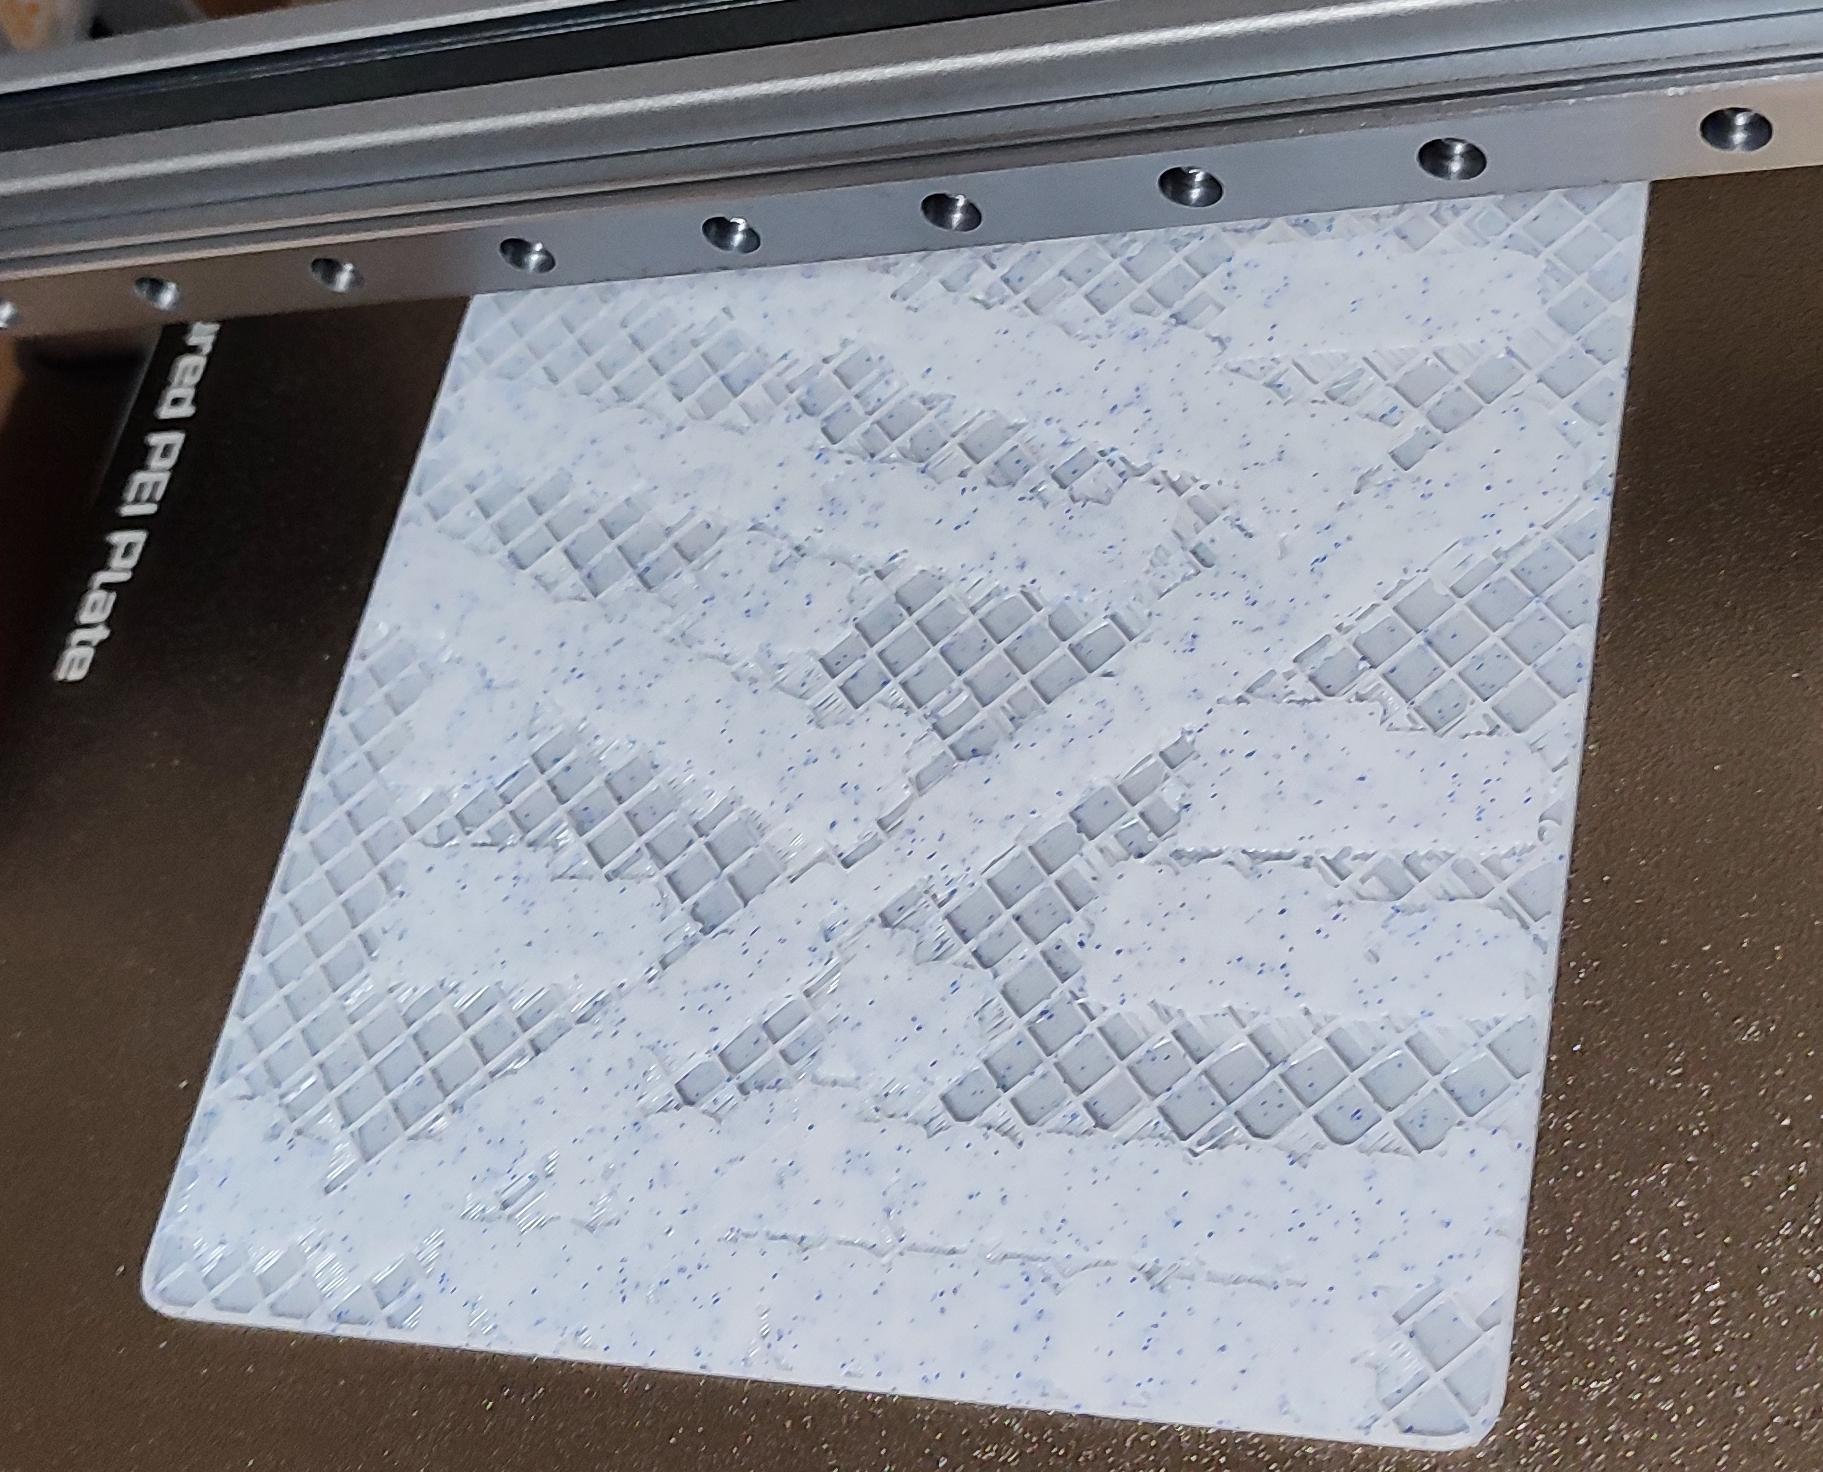
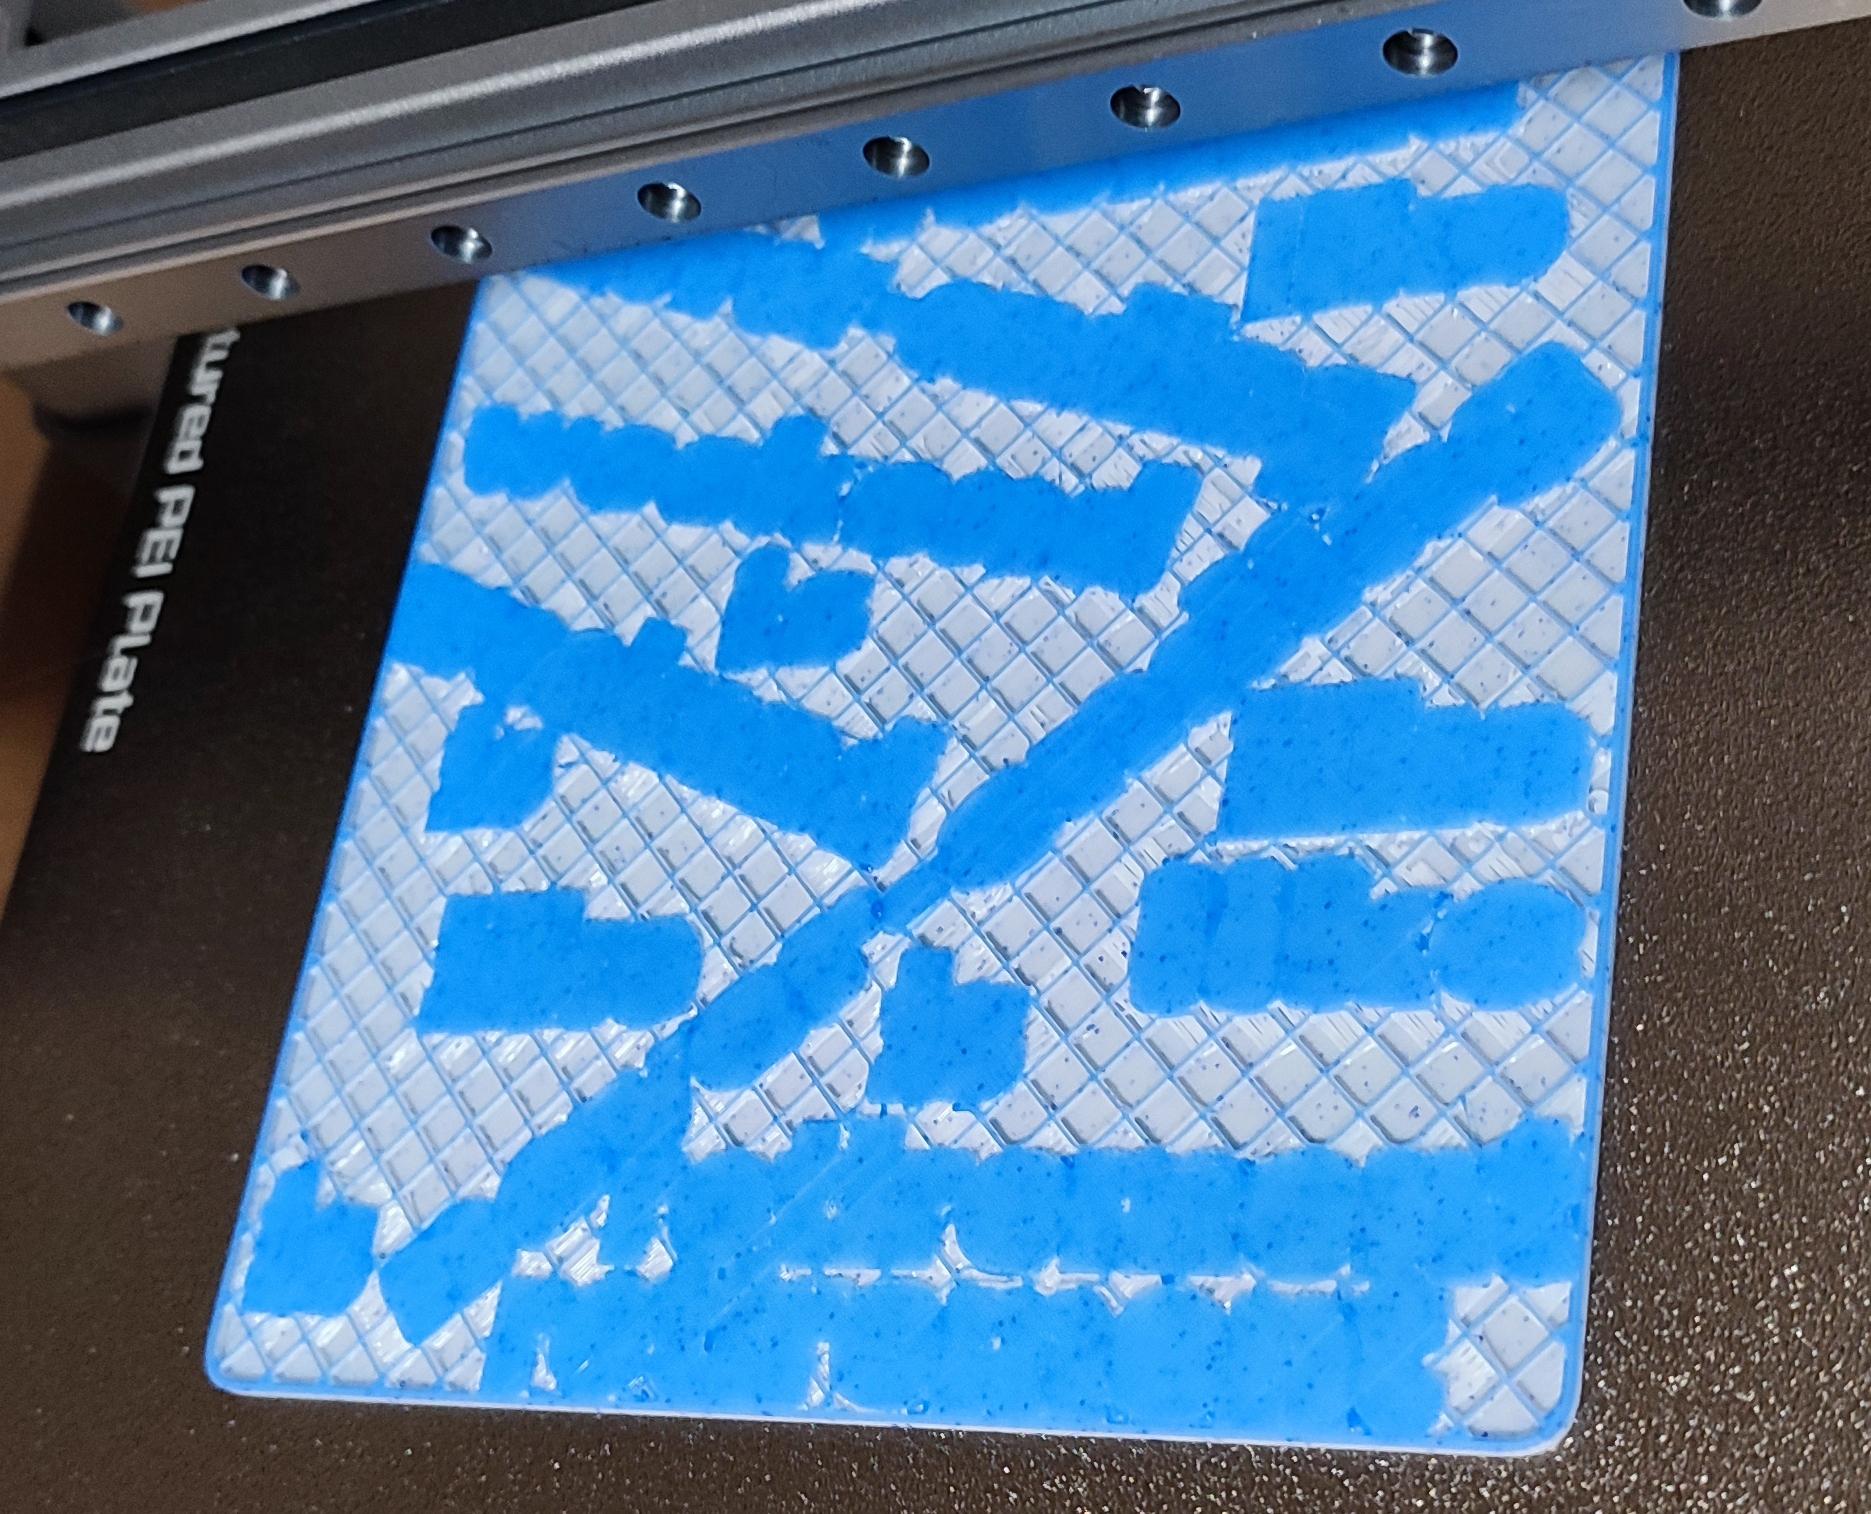
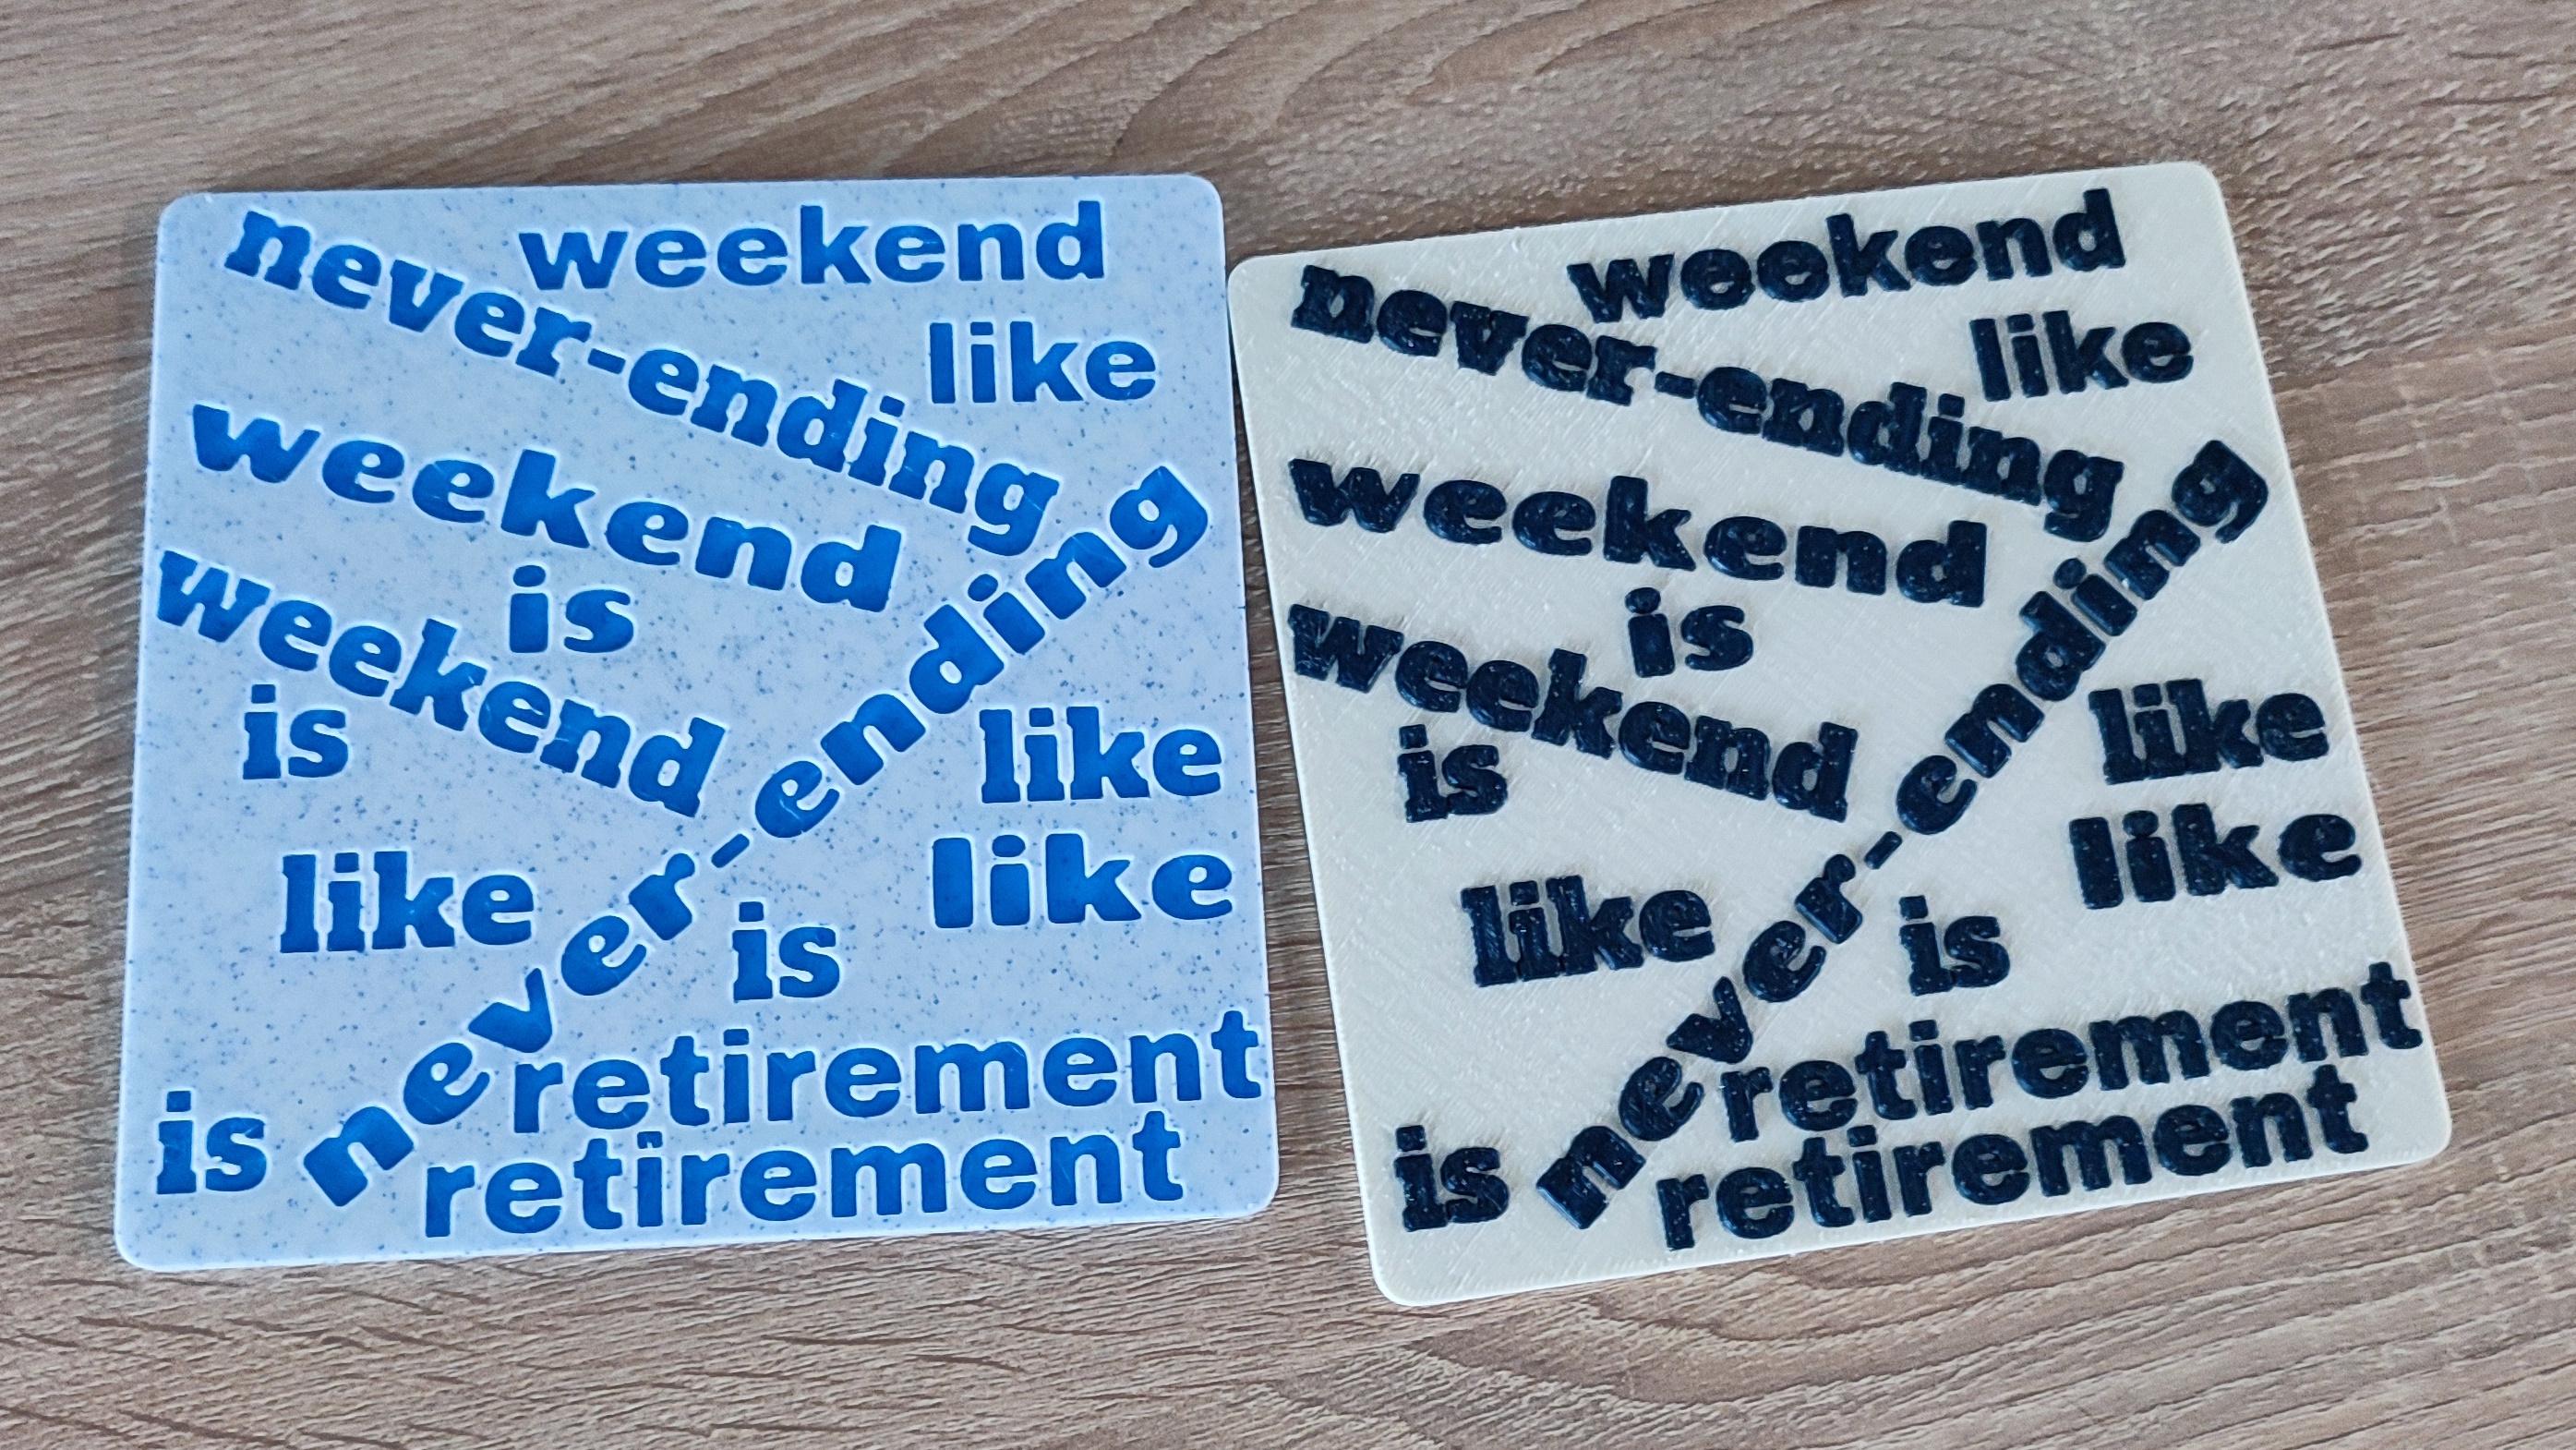
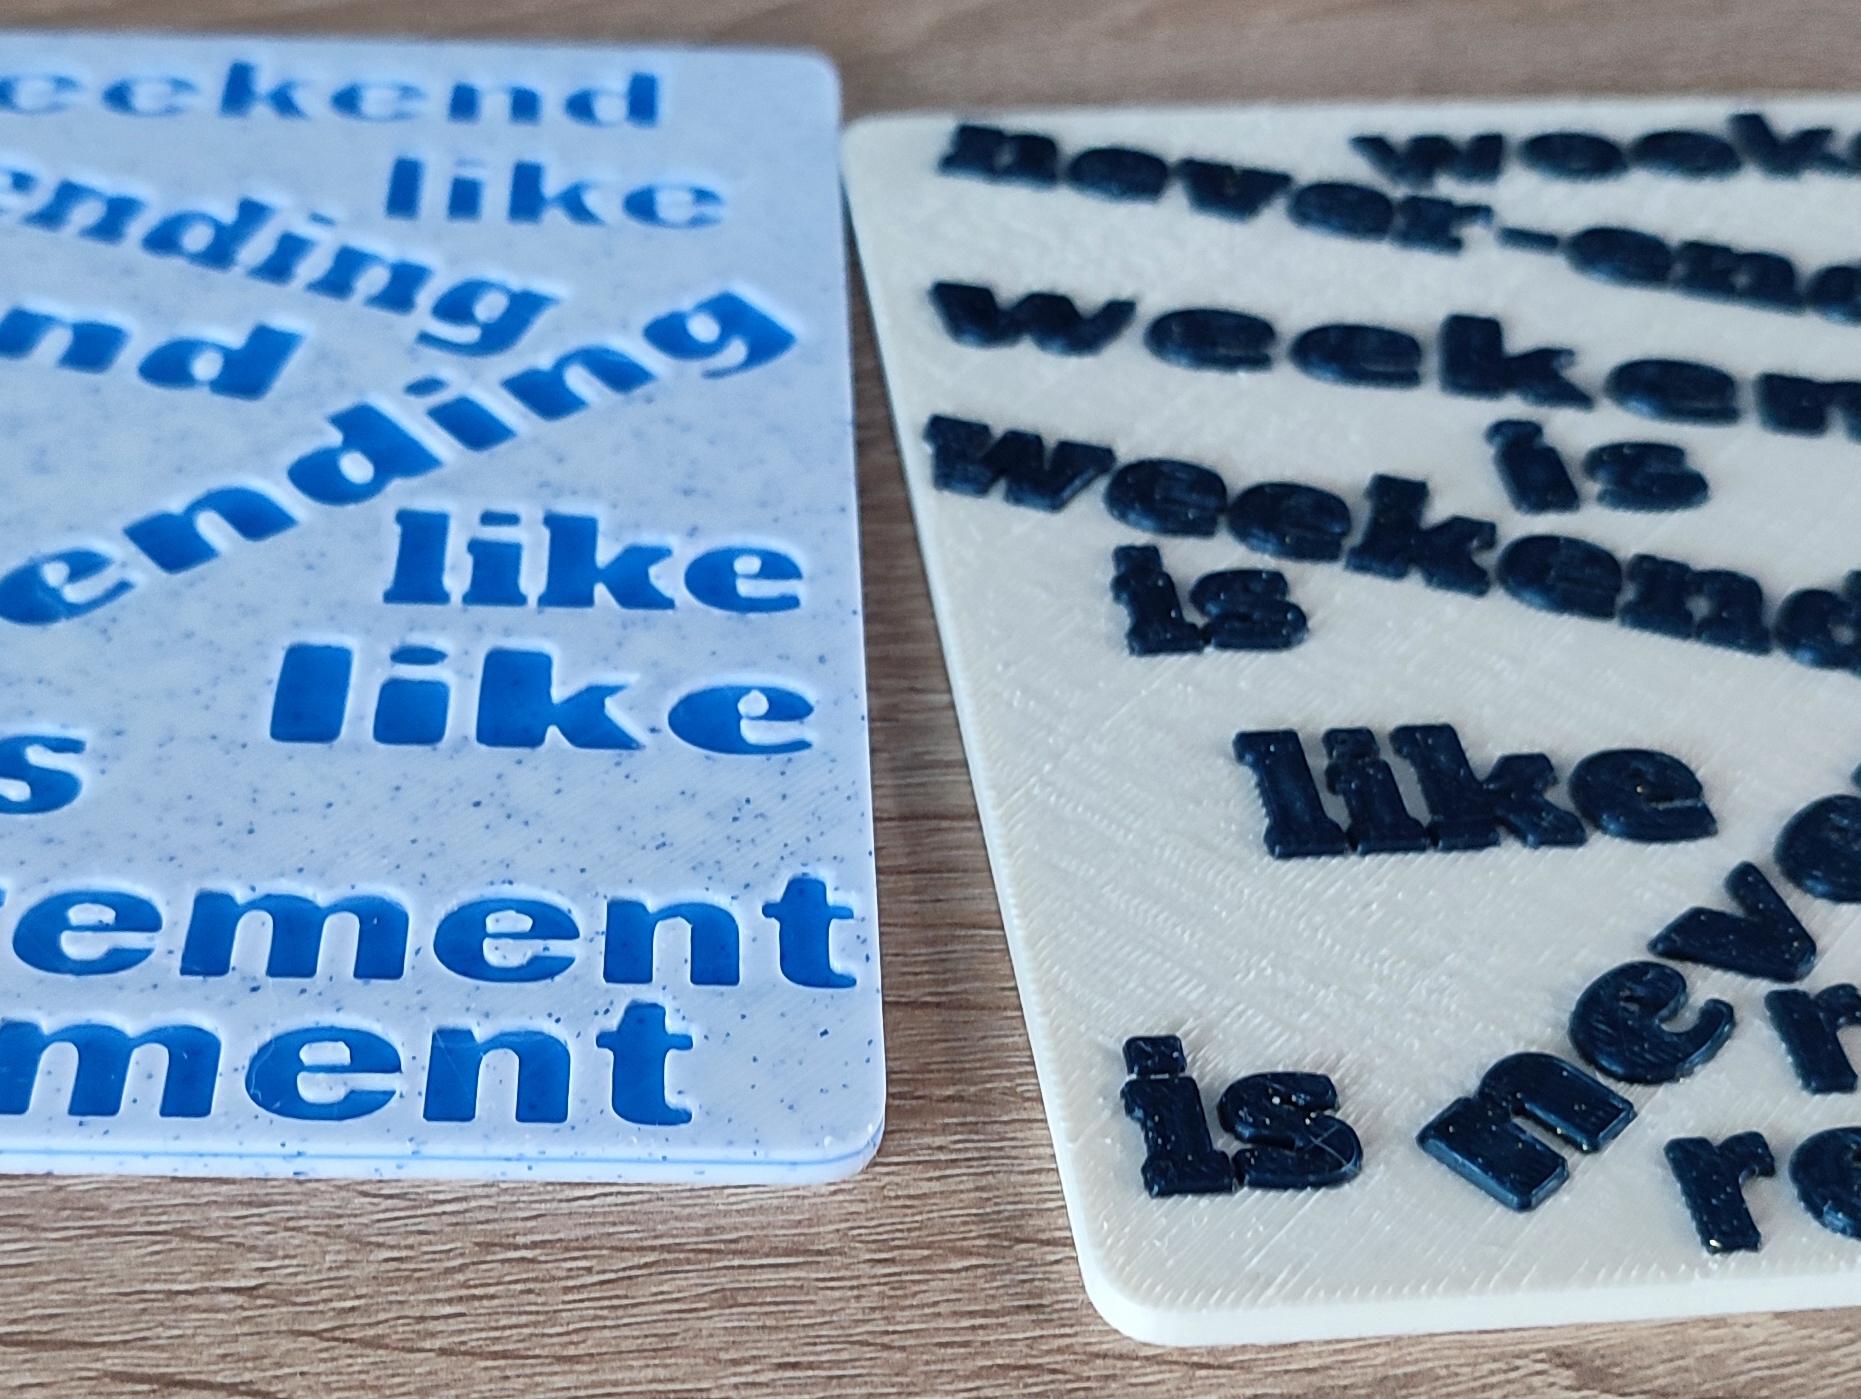
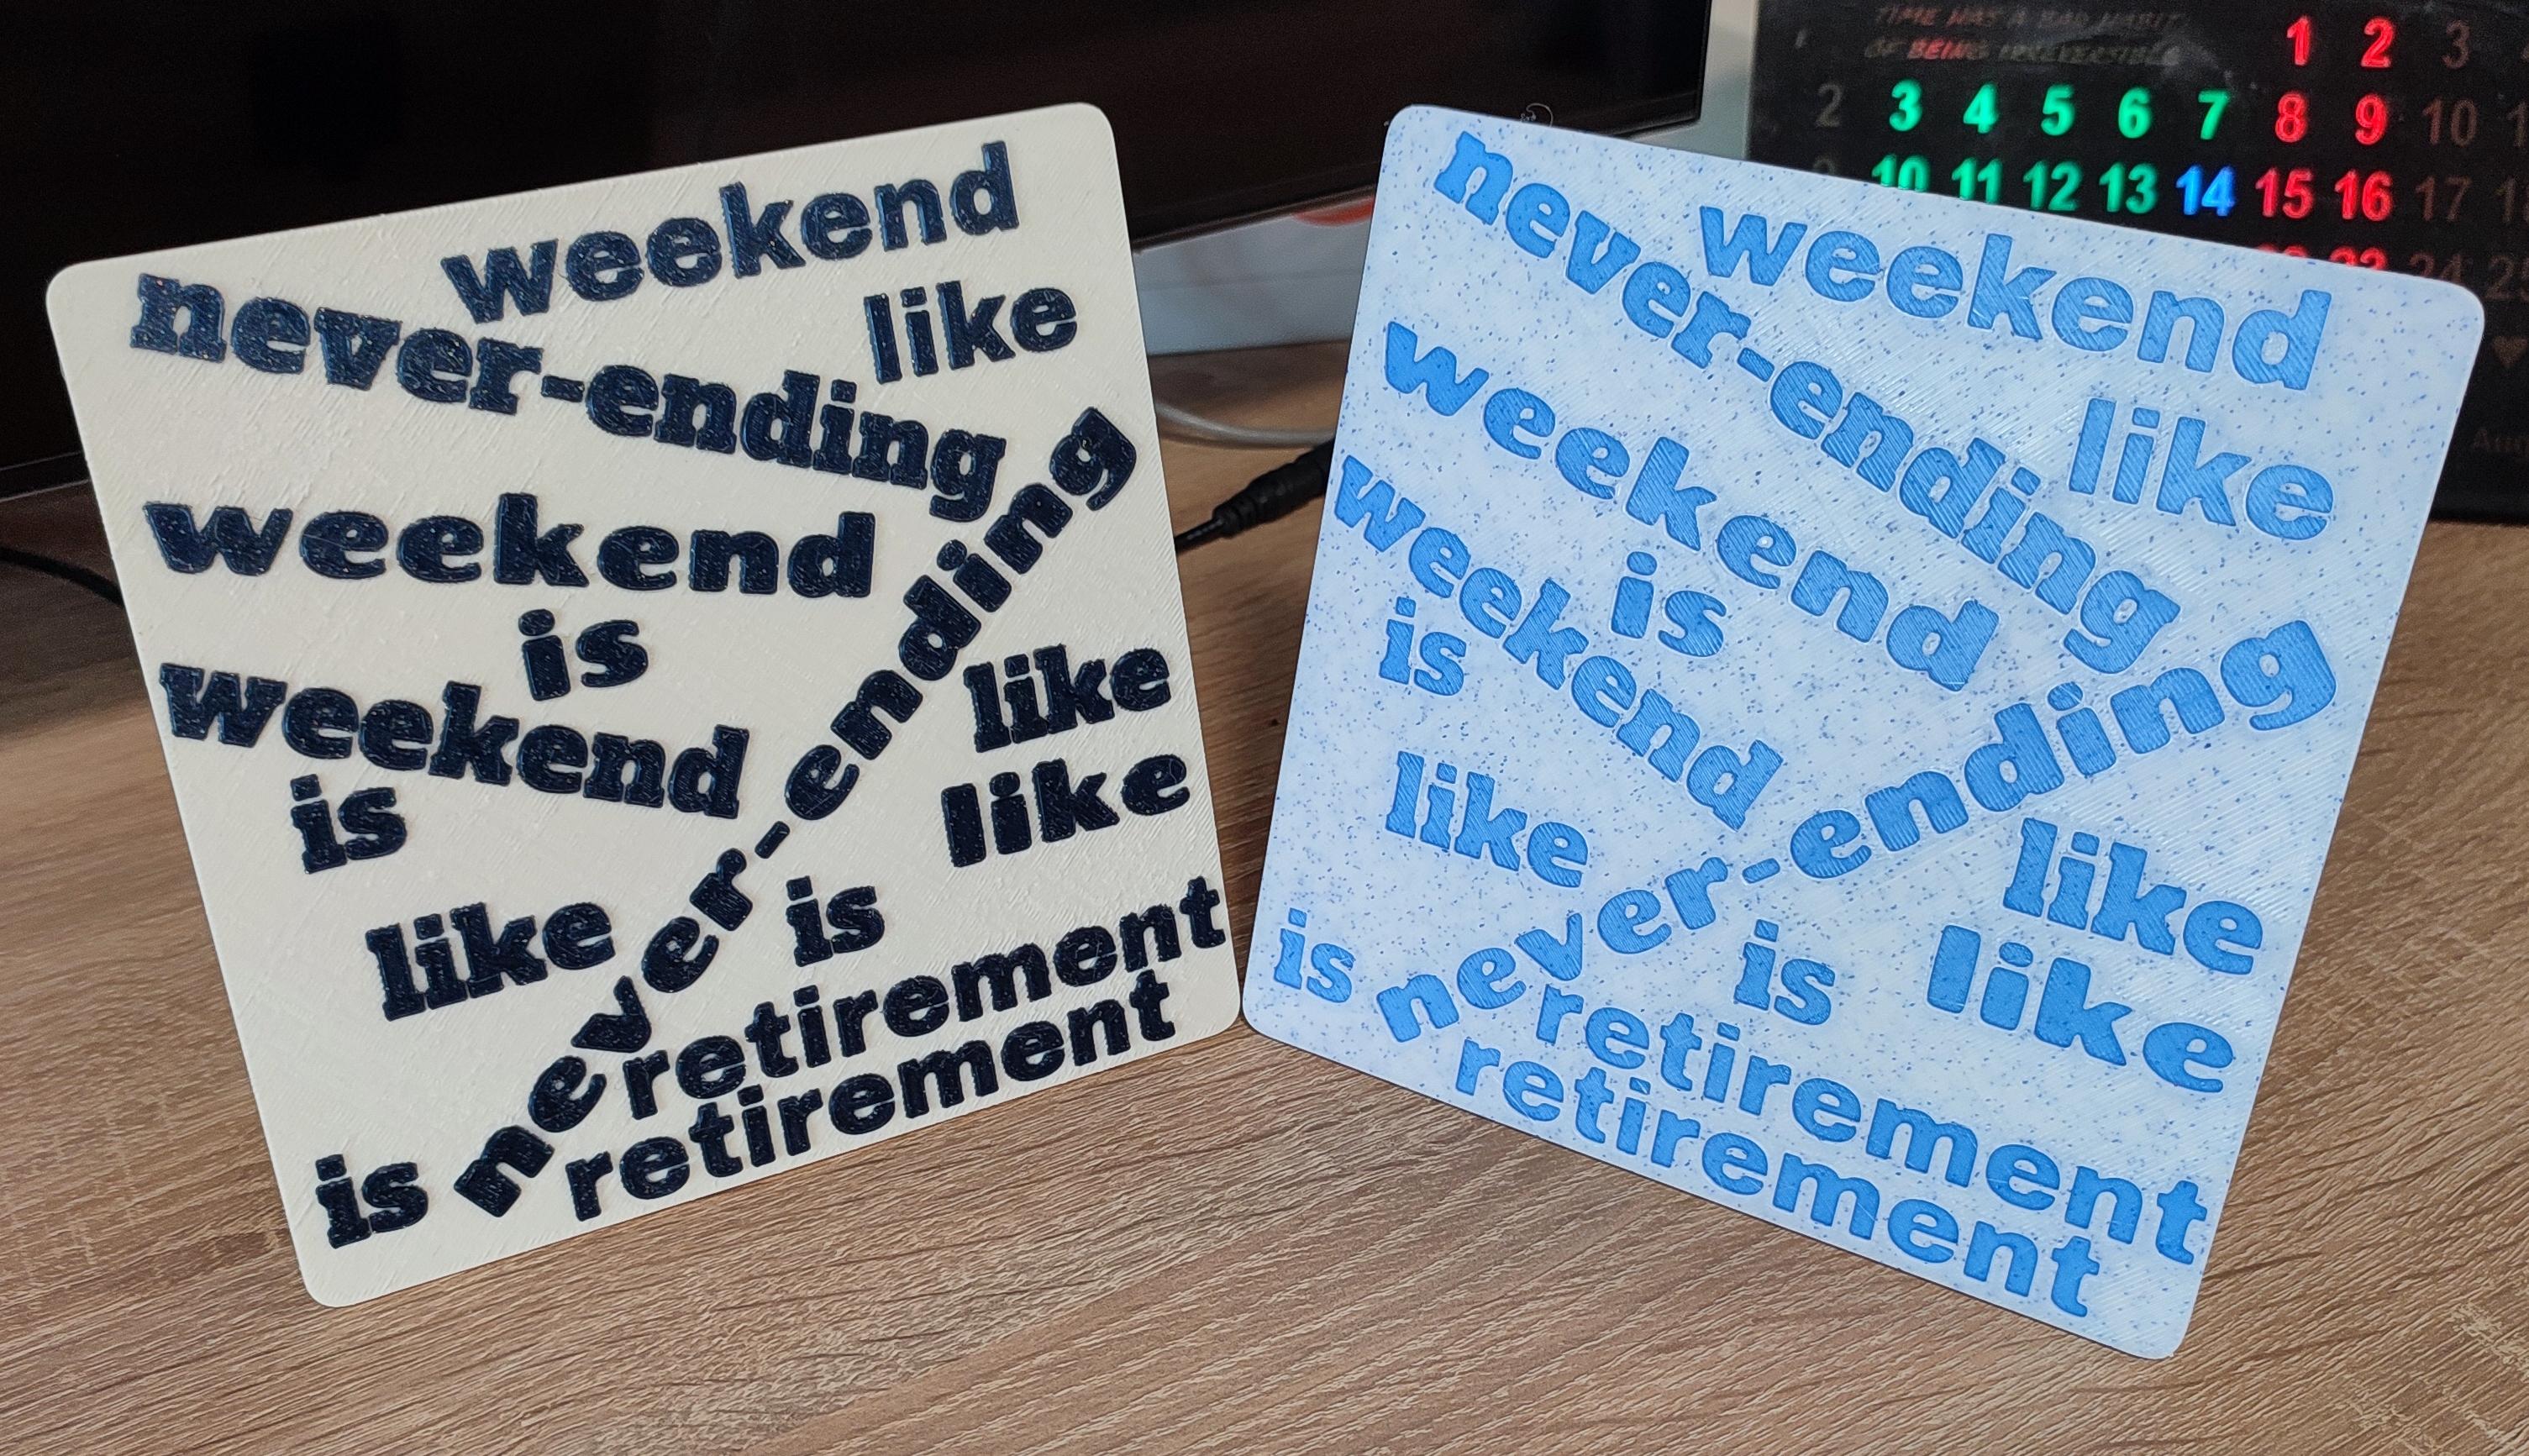
Finally, after all this design work, we have a result: two STL files ready for 3D printing. But not just any printing – a multicolor one, with two colors. One color for the base, another for the letters.
This thread on Reddit contains many ideas and solutions for achieving multicolor printing or coloring prints. I decided to apply a well-known method of pausing the print at the beginning of a layer. This way, I print with one filament, the printer pauses at a certain point, I swap the filament, and then resume printing.
For the first version, I used two pauses: one when printing the "bottom" of the letters and the next when continuing to print the voids of the letters (the next layer). The edge of the print will reveal the different color layer of the letters.
I only used one pause for the version with raised letters (the second STL file), right at the beginning of printing the letters.
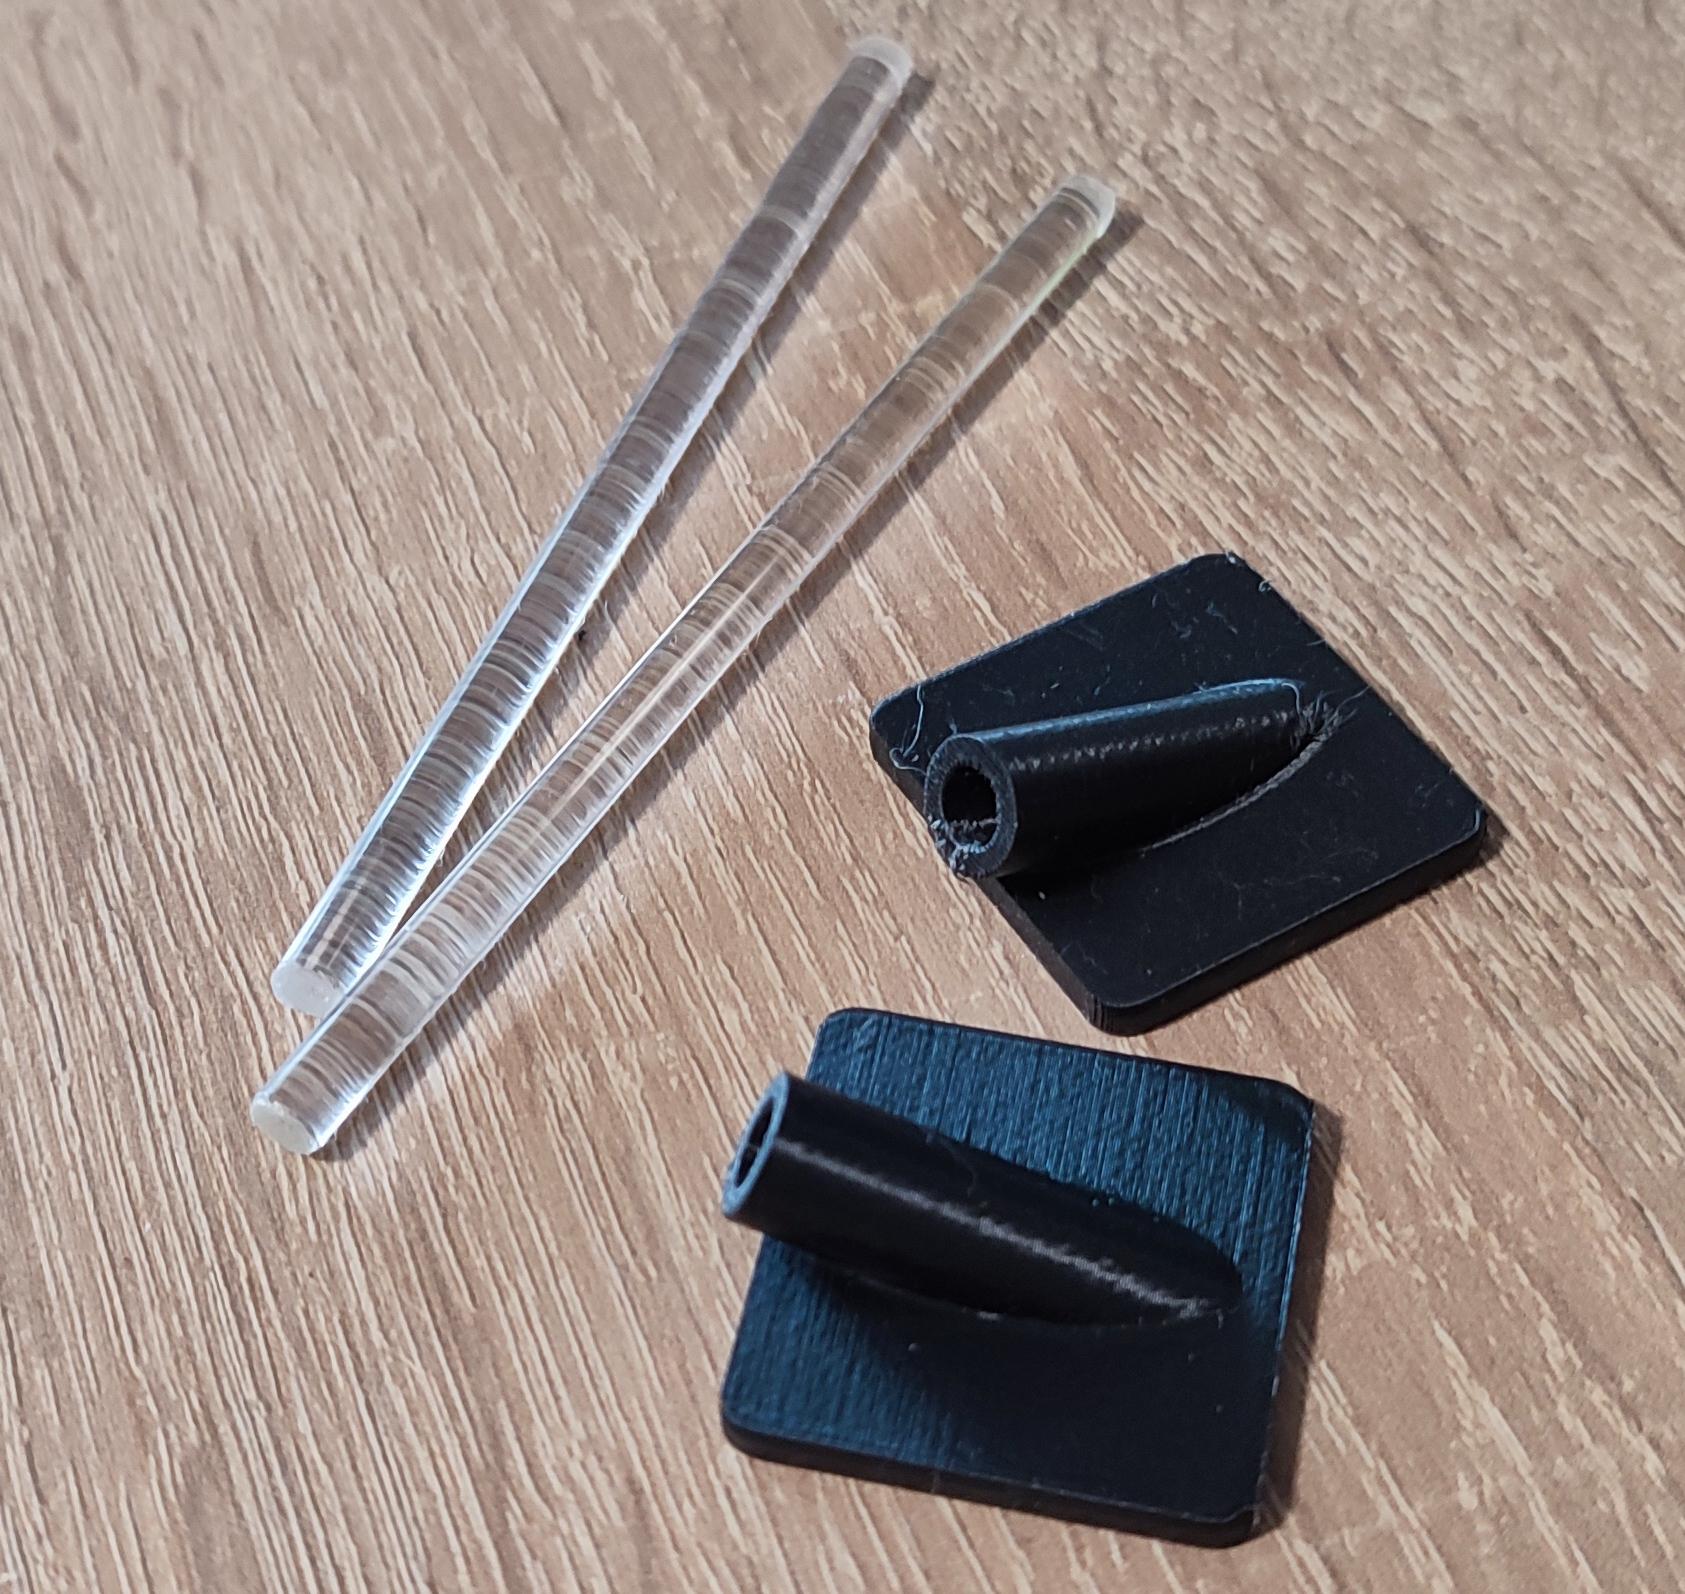
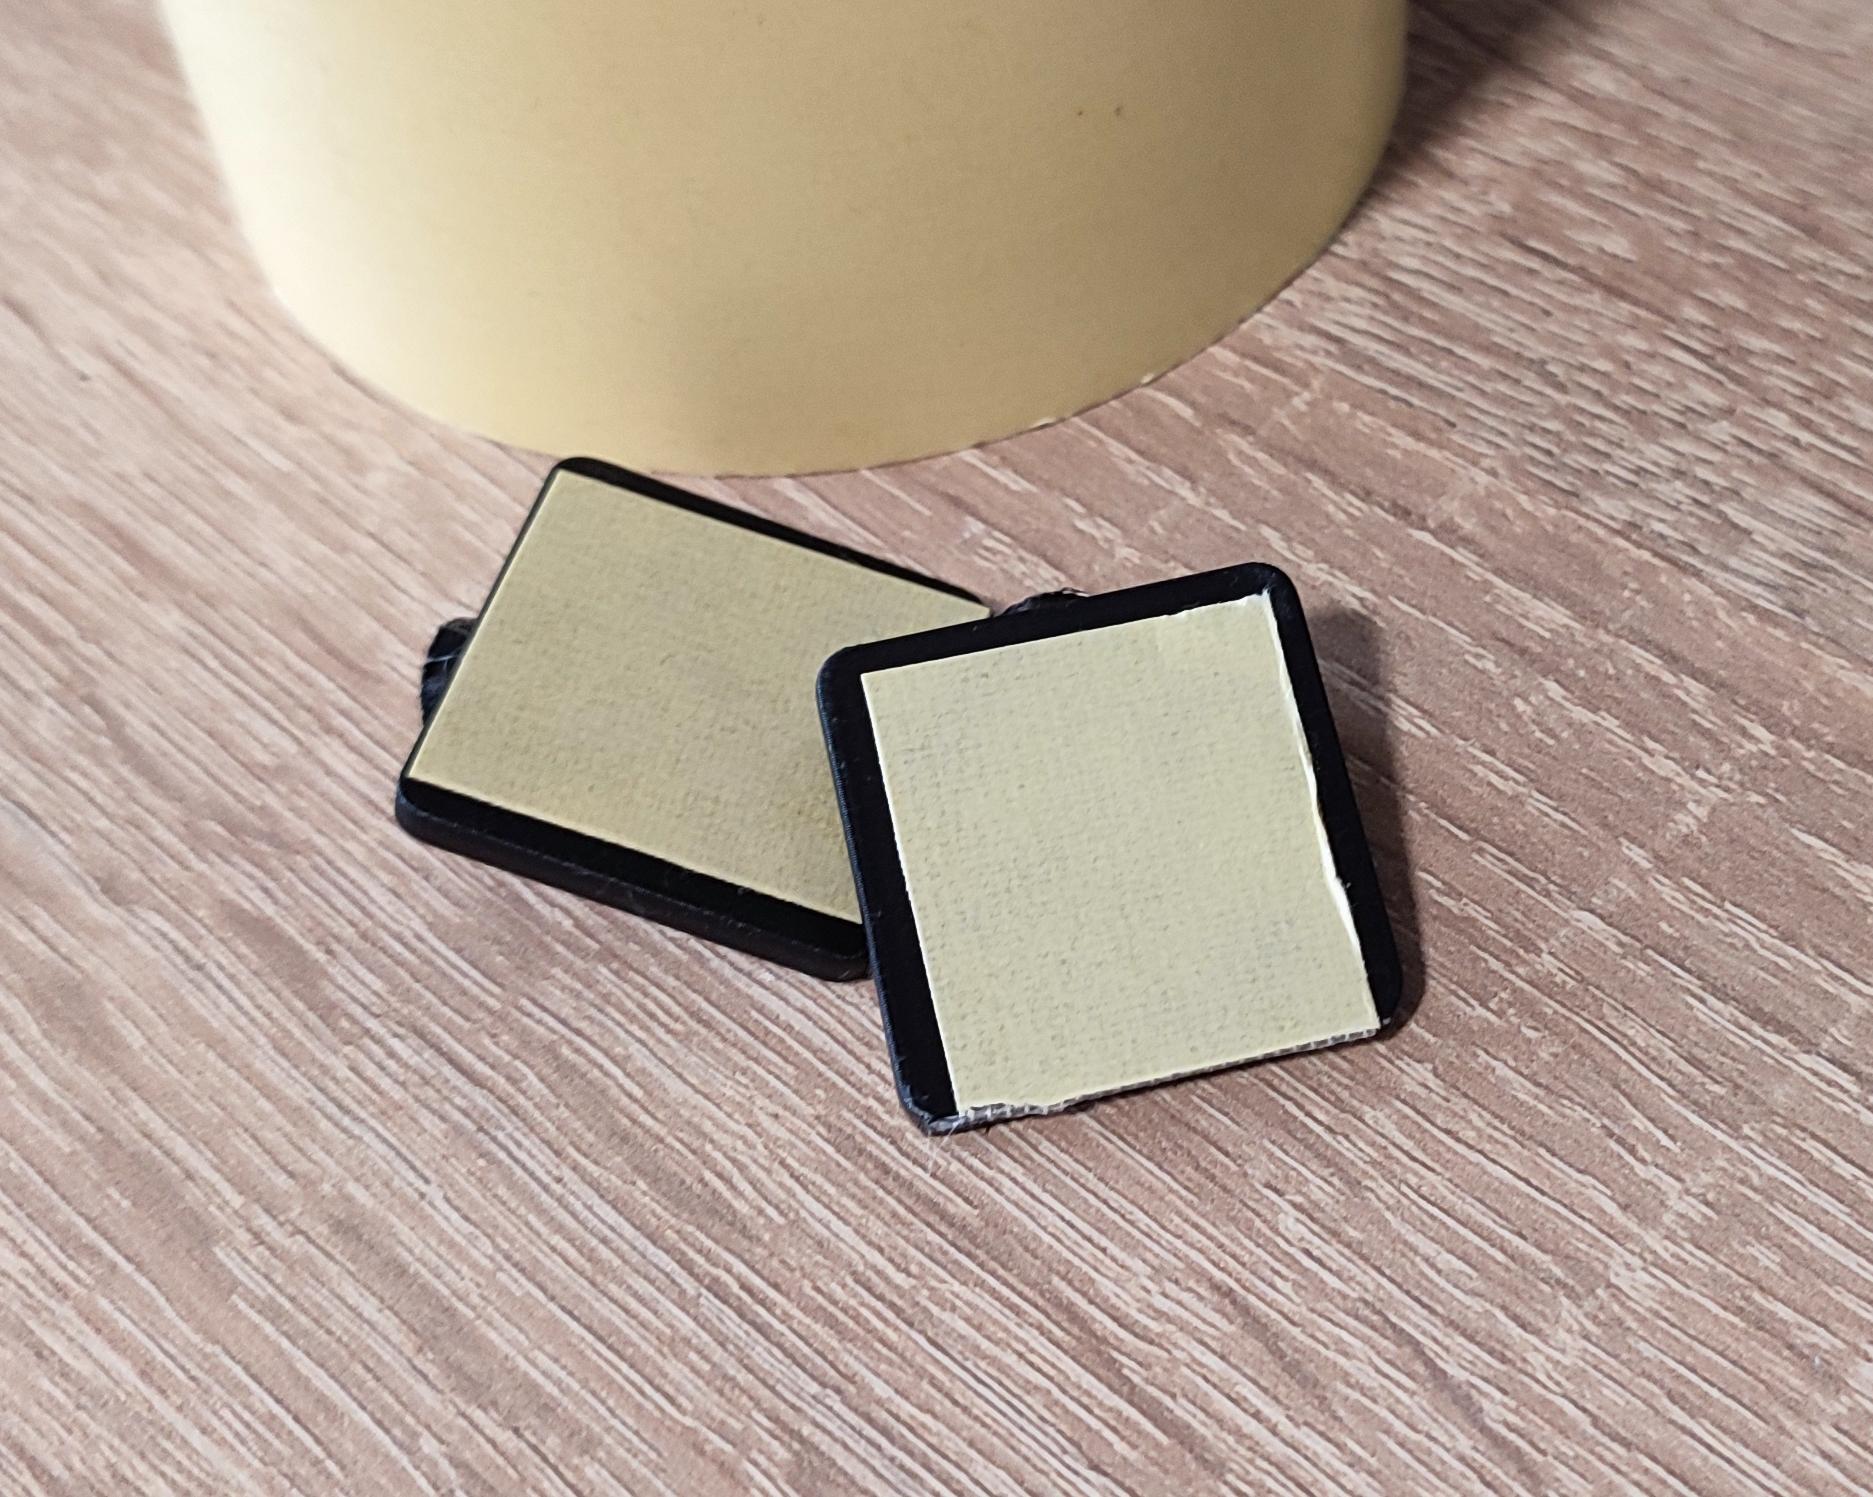
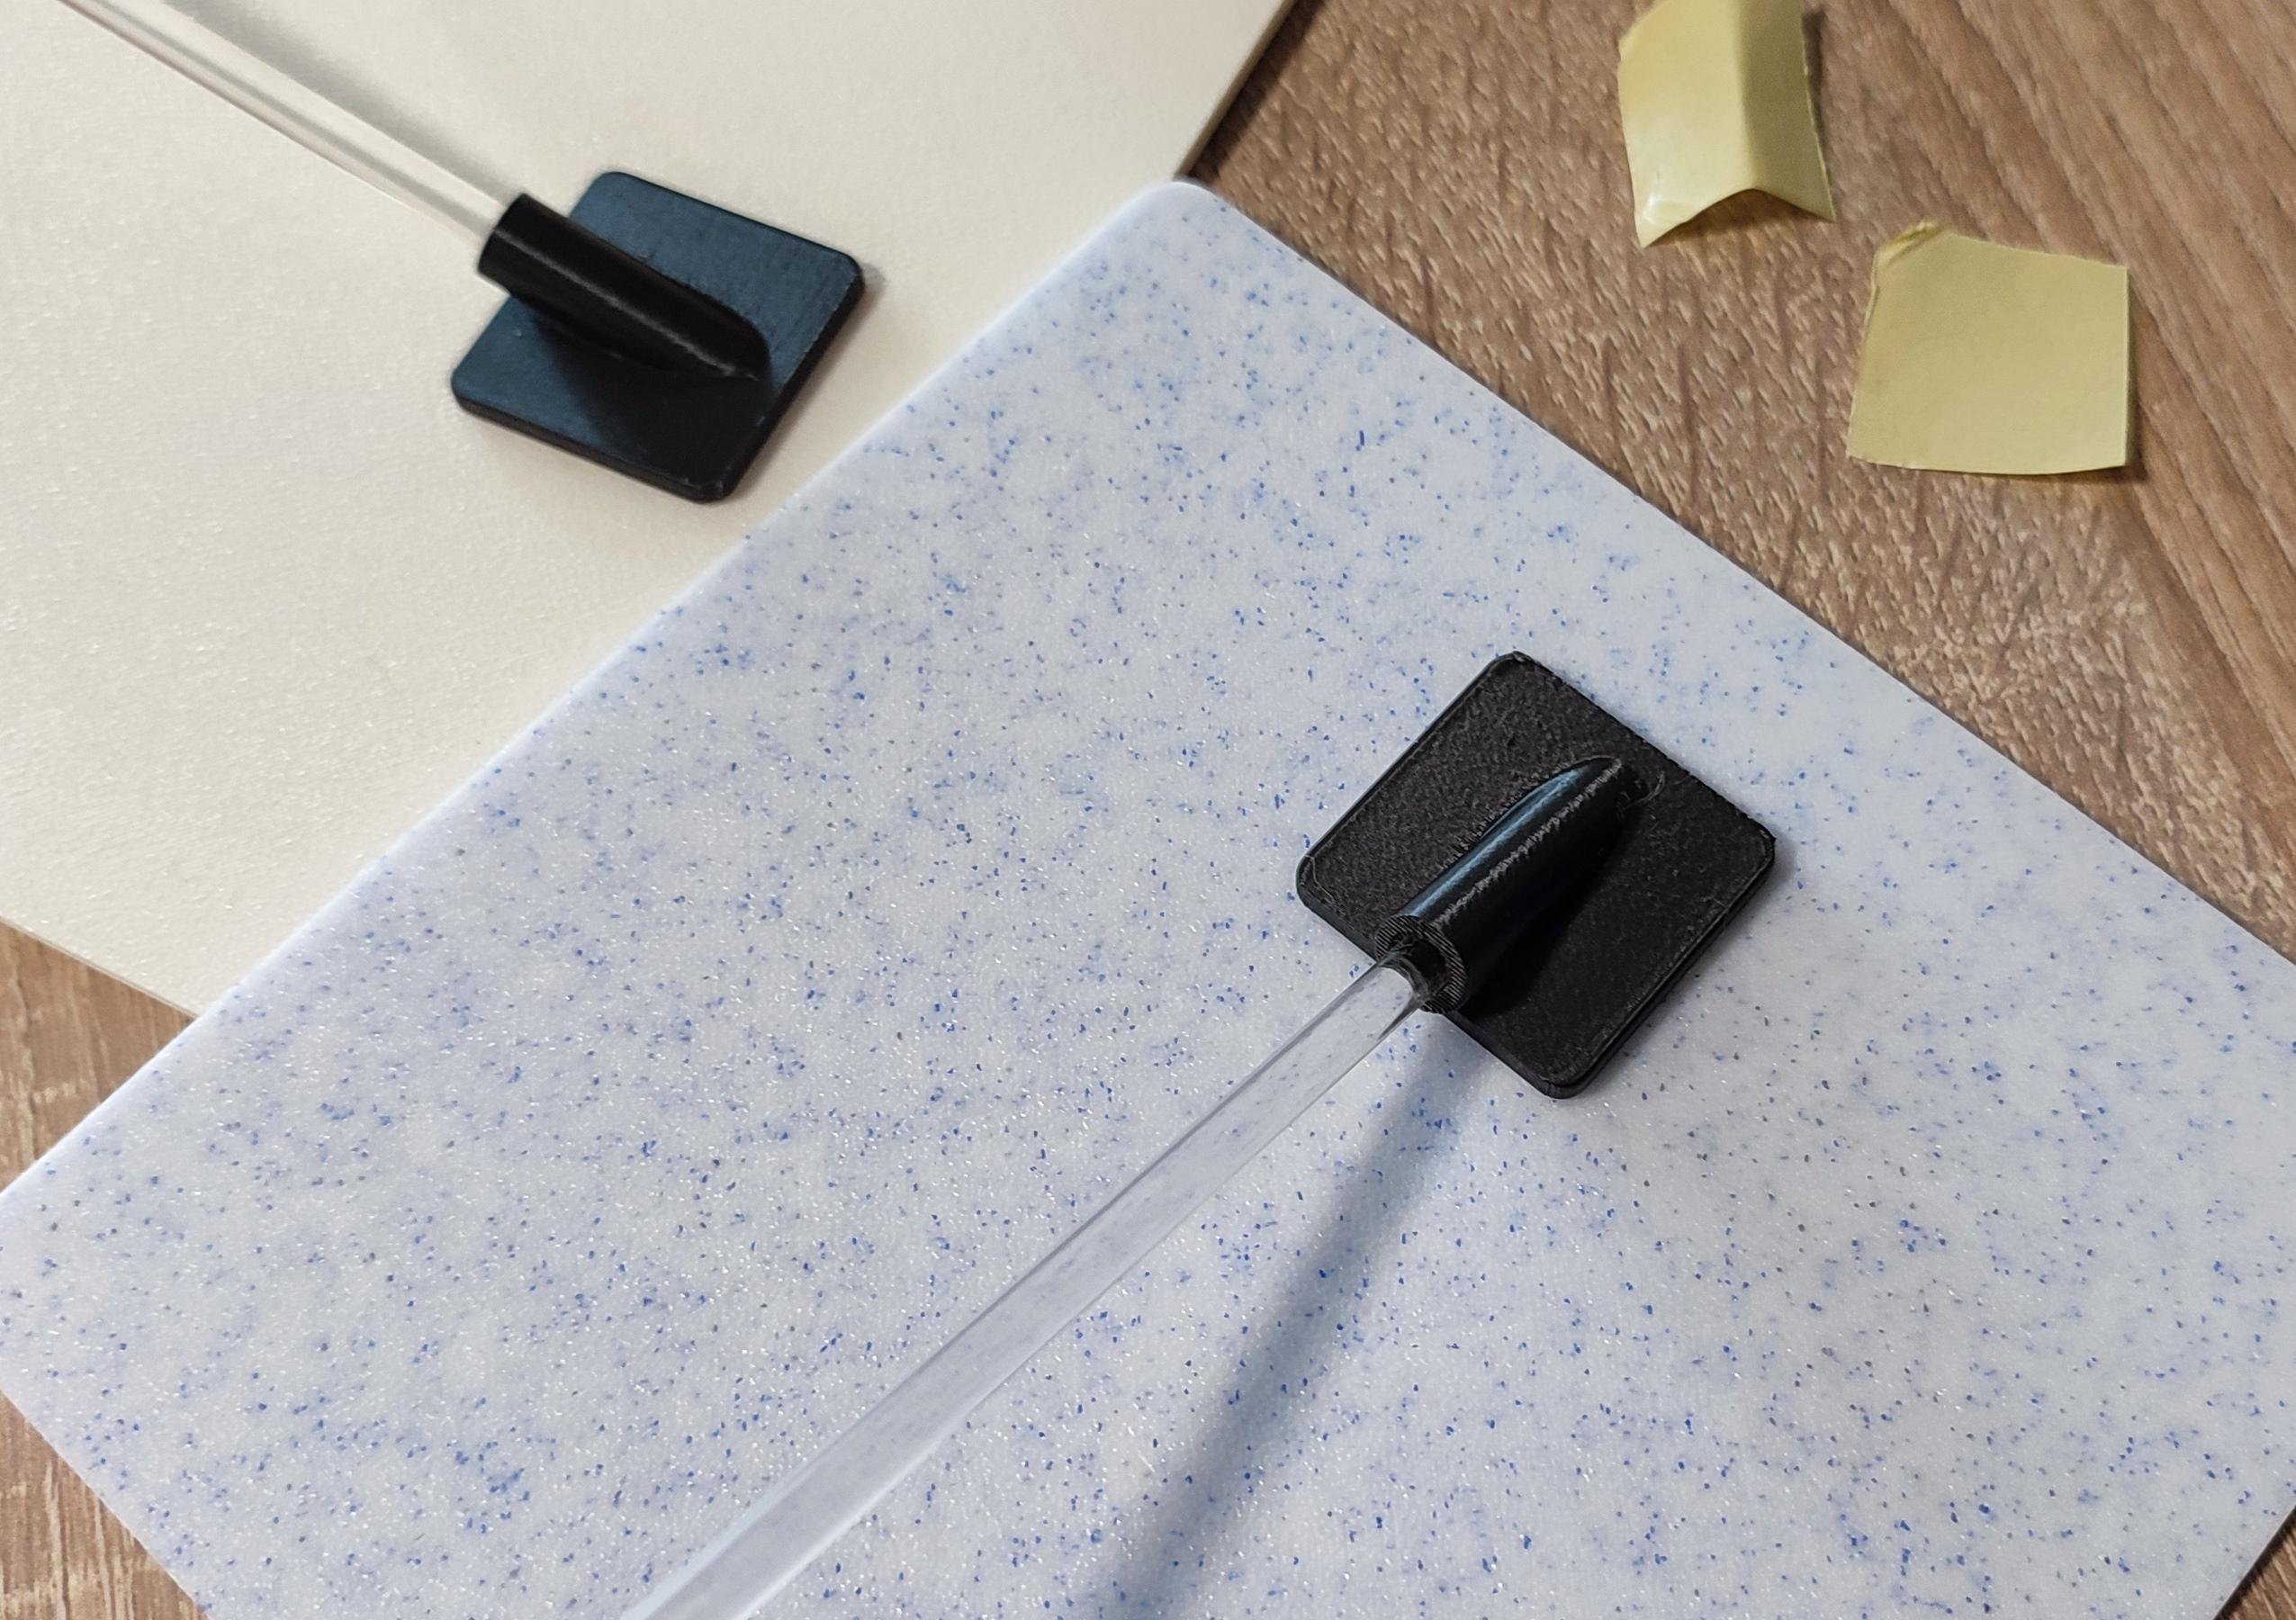
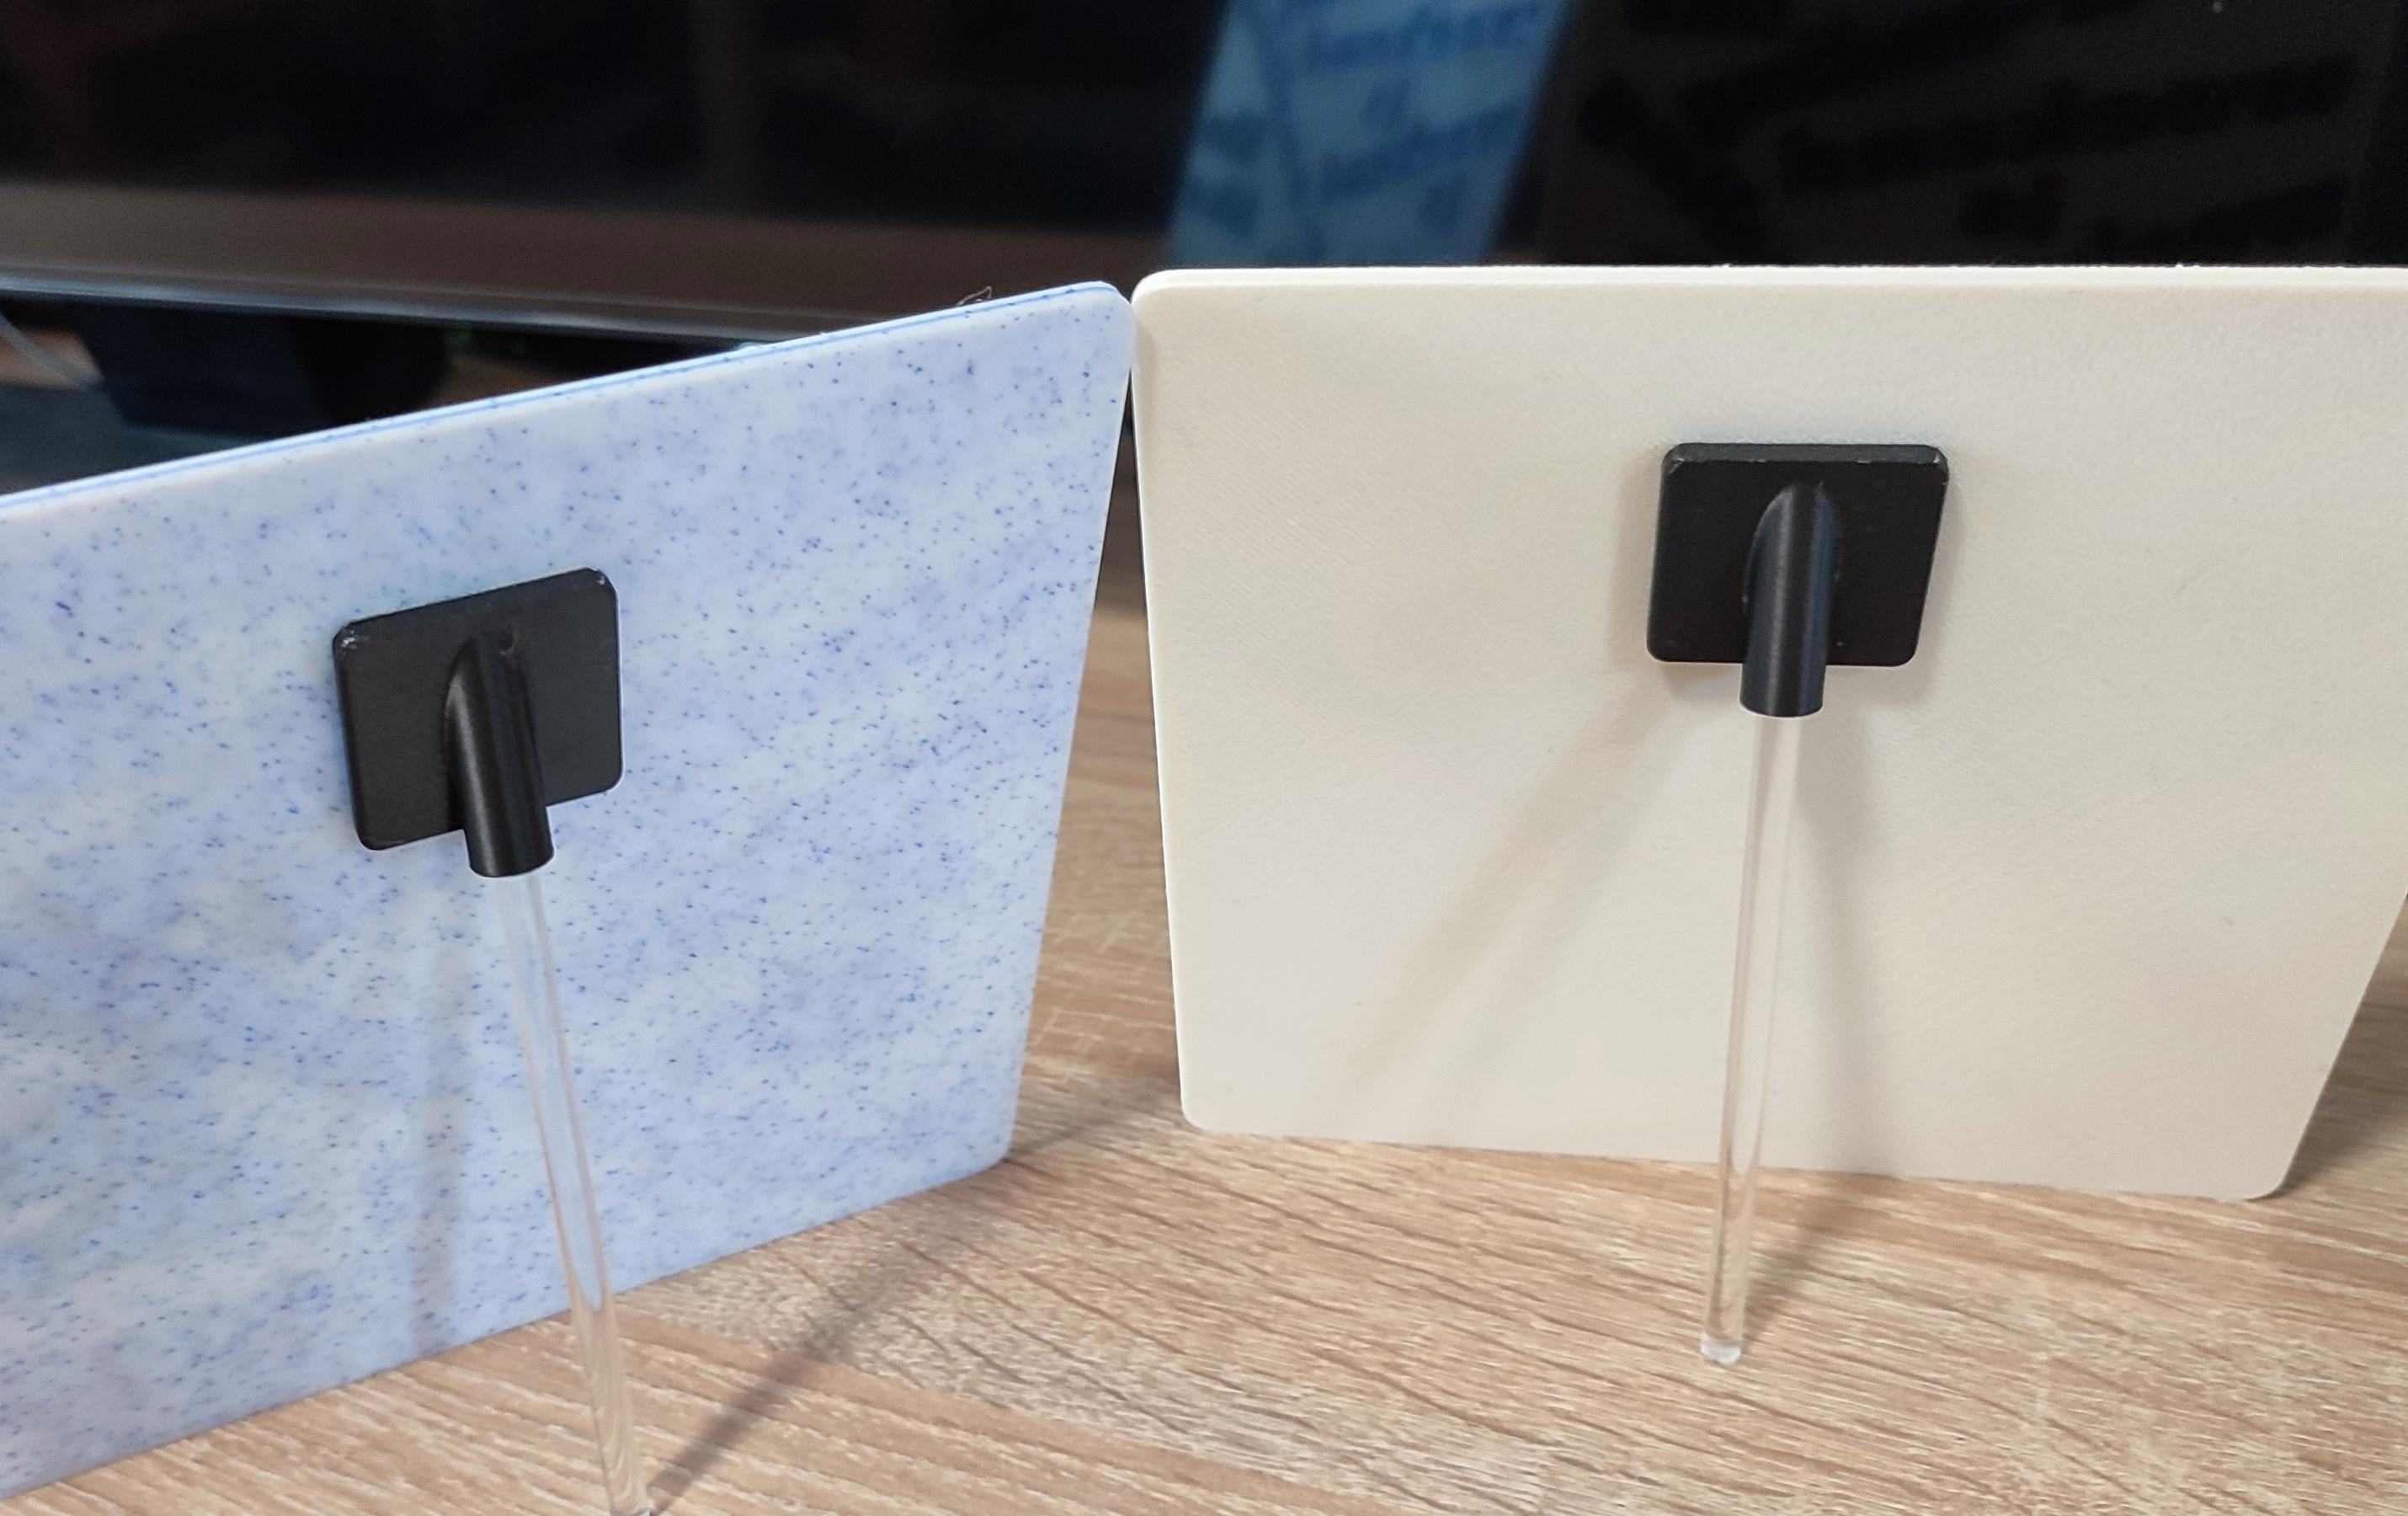
To elegantly display the printed plaques with my message, I also designed a simple support system. It consists of a 3D printed part that attaches to the back of the plaques and a transparent plexiglass rod with a diameter of 5mm. I used double-sided adhesive tape to attach the supports about 20 mm from the top of the plaque, and the rods are approximately 100mm long.
I took a few screenshots and photos, which you can see above...
Final Words
I can confidently say that the final result met my expectations, and I'm thrilled with how the plaques turned out. I'll give both of them to David at the right time; I'm sure he'll love them.
While this project might seem like it has many steps, requiring time and multiple applications, you don't have to follow my process exactly. Feel free to adapt it to your own needs and preferences. Perhaps you already have the perfect message in mind, or you can find inspiration online (my message was actually found online and adapted!). You can even skip wordclouds.com altogether and create your design directly in Inkscape or Tinkercad. There are so many ways to personalize this project!
And when it comes to 3D printing, the possibilities are endless. If you have access to a multi-color 3D printer, you could create a plaque with even more vibrant colors. Or, experiment with different materials and finishes to make your word cloud truly unique.
I hope this Instructable has inspired you to create your own personalized word cloud gift. Remember, it's not just about the final product; it's about the joy of designing and making something special for someone you care about. If you have any questions or want to share your own creations, please leave a comment below!