Micro Wool Coat


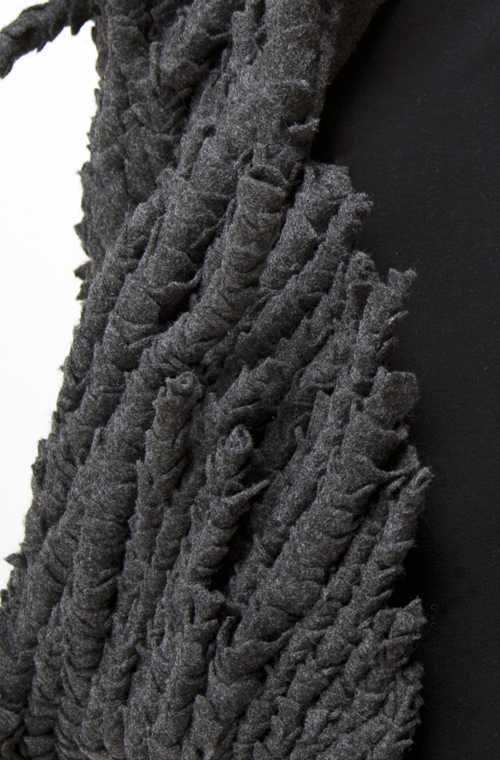


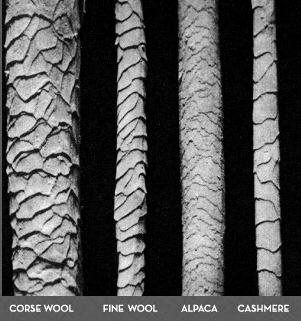

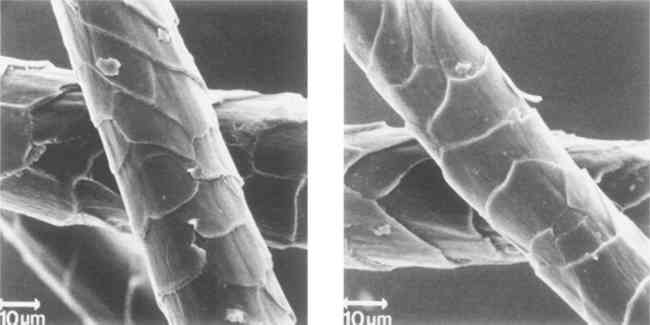
This is a wool coat structured to resemble magnified wool fibers: 100 microns: 1 inch.
Wool creates a complex network of interlocking scaly fibers. At a macroscopic scale, these intricate systems of filaments manifest as flexible, durable surfaces, which provide insulation and circulation. While incredibly adaptive and forgiving, wool fibers have mechanical limits as well as memory.
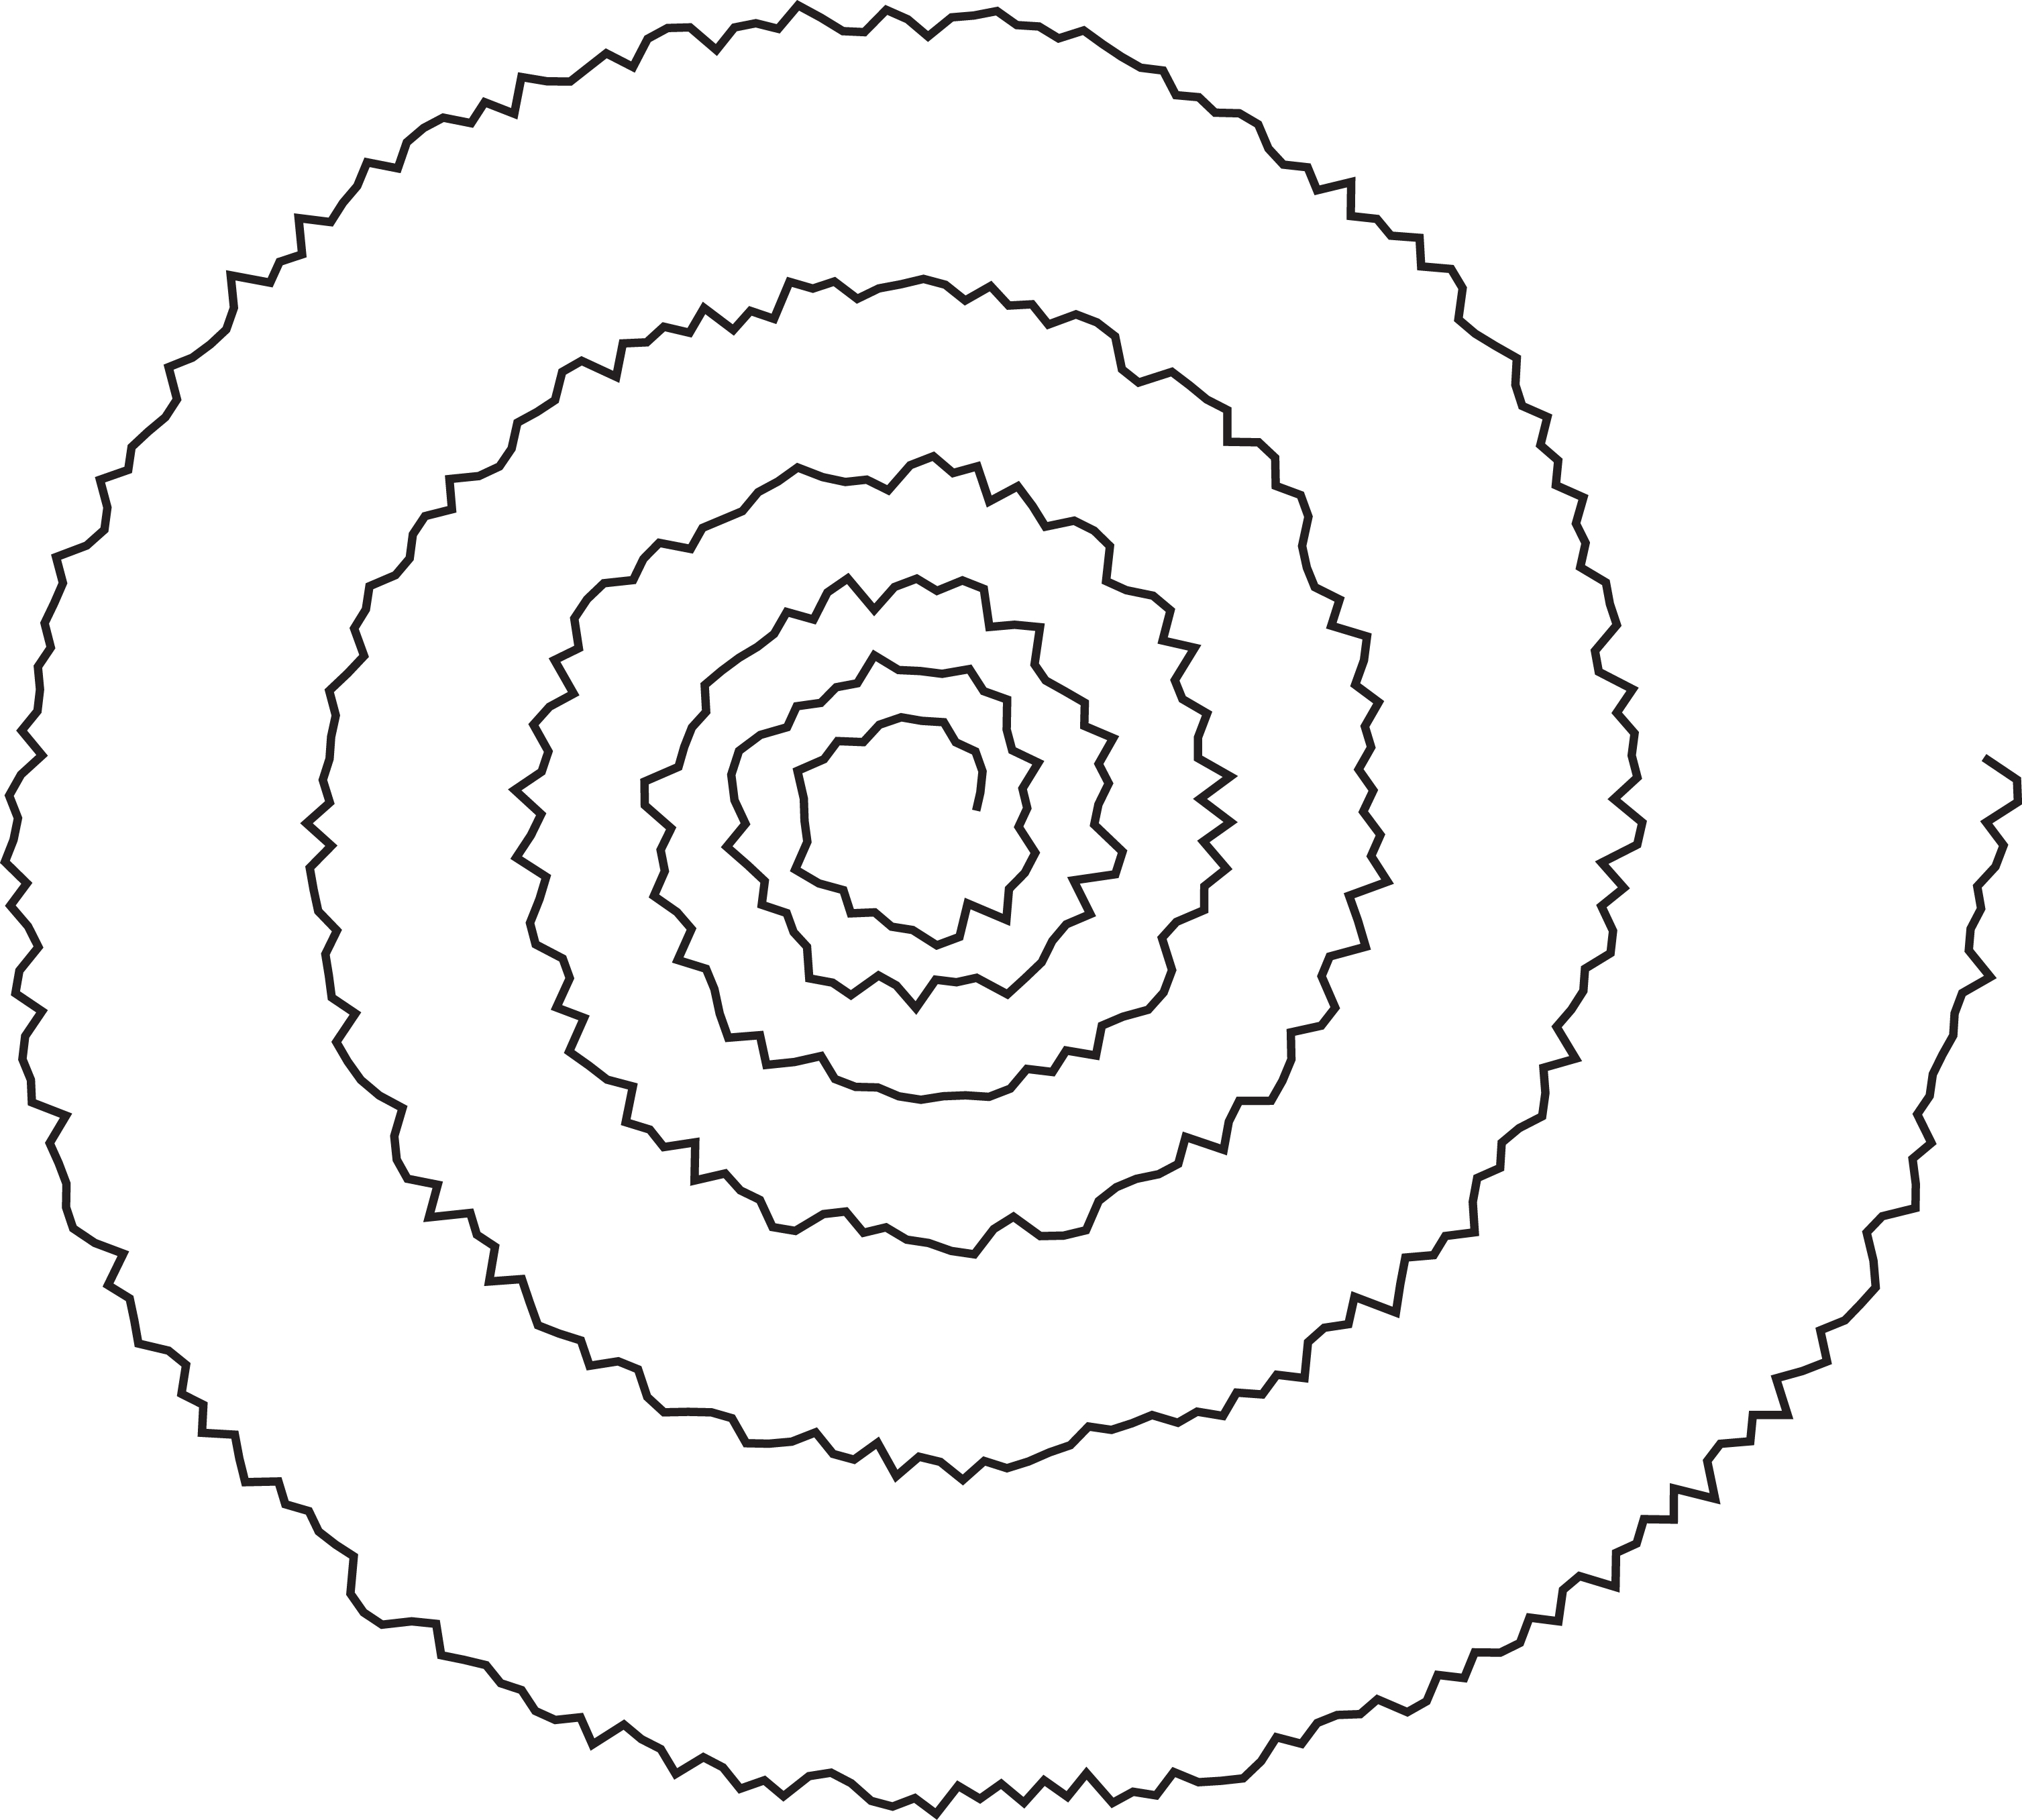
After a series of material tests, I found that I could set up processes that would encourage the fibers to align themselves in different ways. I cut wool into jagged spirals and then wrapped the fabric into tight helixes.
After creating a set of enlarged fibers, I played with how they interacted with one another. The surface scales of the fibers function as hooks; friction locks individual units into larger arrangements. These groupings are fairly rigid at the intersections, but highly flexible at all other points.
MATERIALS:
These are the tools and supplies needed by section:
Observation
- microscope
- glass slides
Design
- Adobe Illustrator or Inkscape
Cutting Patterns (if no laser cutter)
- printer
- pattern tracing paper
- scissors
Materials
- wool felt
- heavy weight thread
Fabrication
- laser cutter
- sewing machine (for base jacket)
- sewing needles
- felting needles
- foam block
- thread
- pins
- scissors
OBSERVATION
Take pictures or videos of your specimen.
Celestron LCD digital Microscope
DESIGN
Create a new document in Adobe Illustrator (or use an open source vector graphics software like Inkscape). Set the artboard size to 48 x 48 inches.
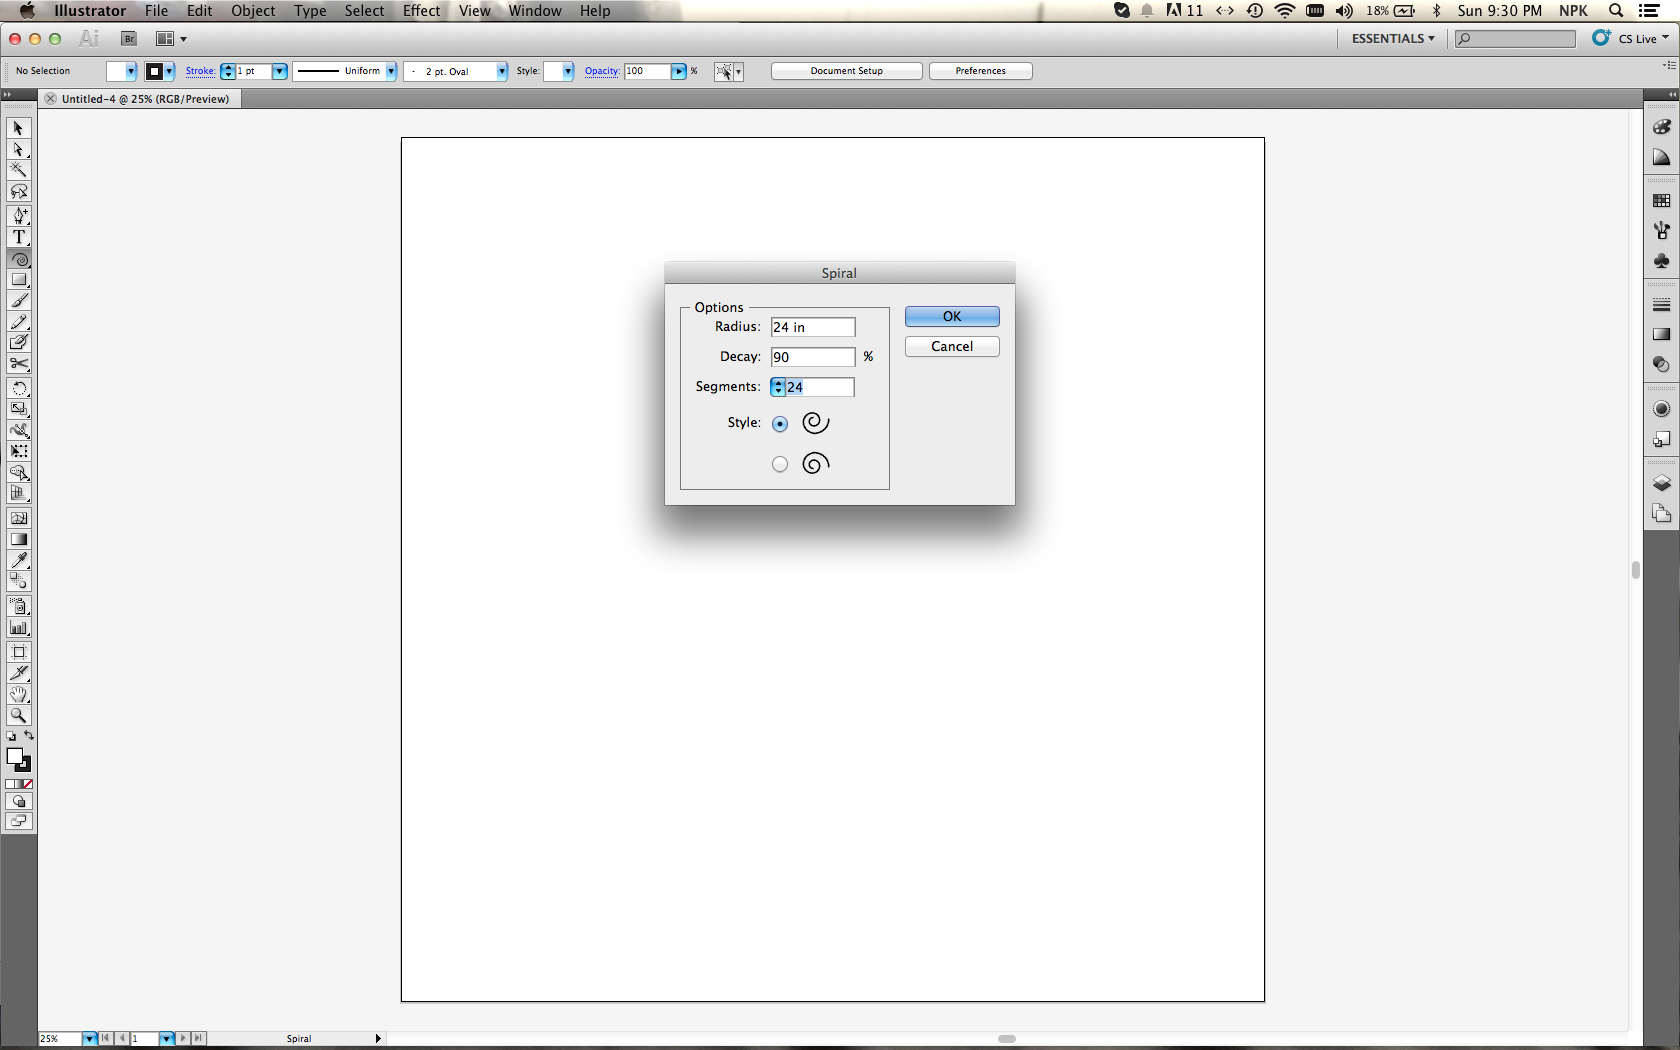
Select the Spiral tool from the Line tool drop down menu in the the toolbar on the left side of the interface.
Click on the Artboard in the center of the canvas and release to access the Spiral tool settings.
Start with the following values for the Spiral parameters:
Radius: 24 in
Decay: 90
Segments: 24
Click OK
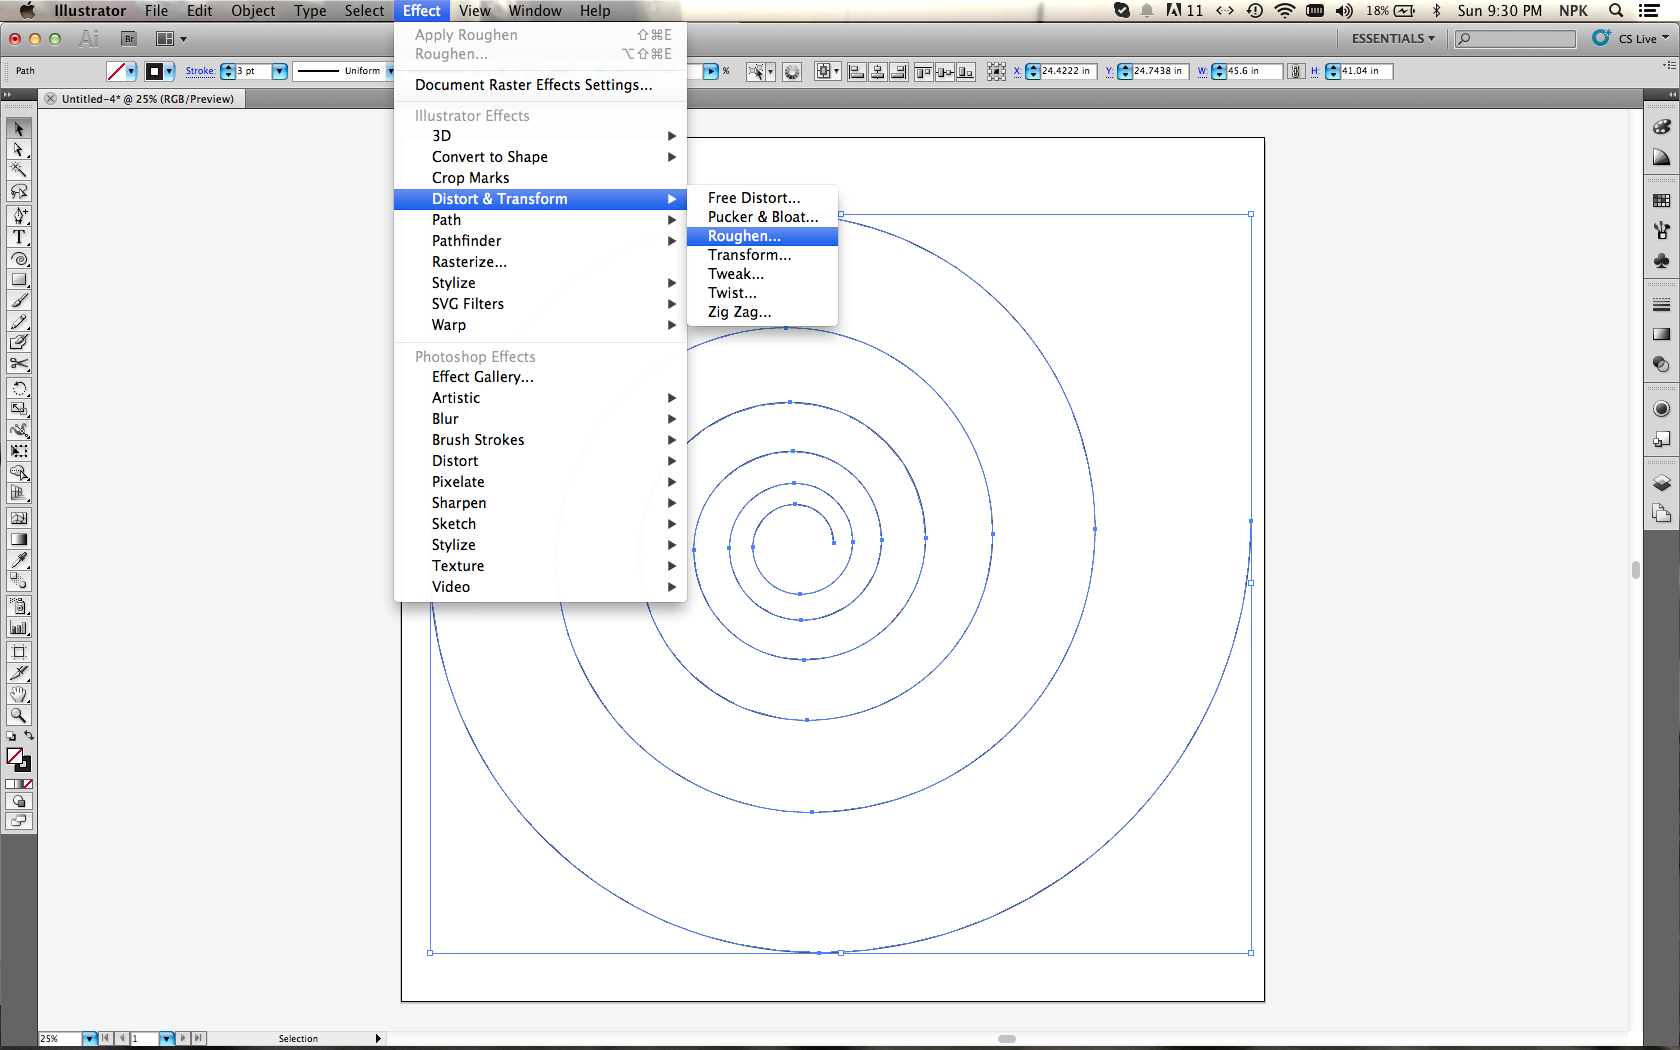
Go to the Effect drop down menu at the top of the interface.
Choose Distort & Transform > Roughen
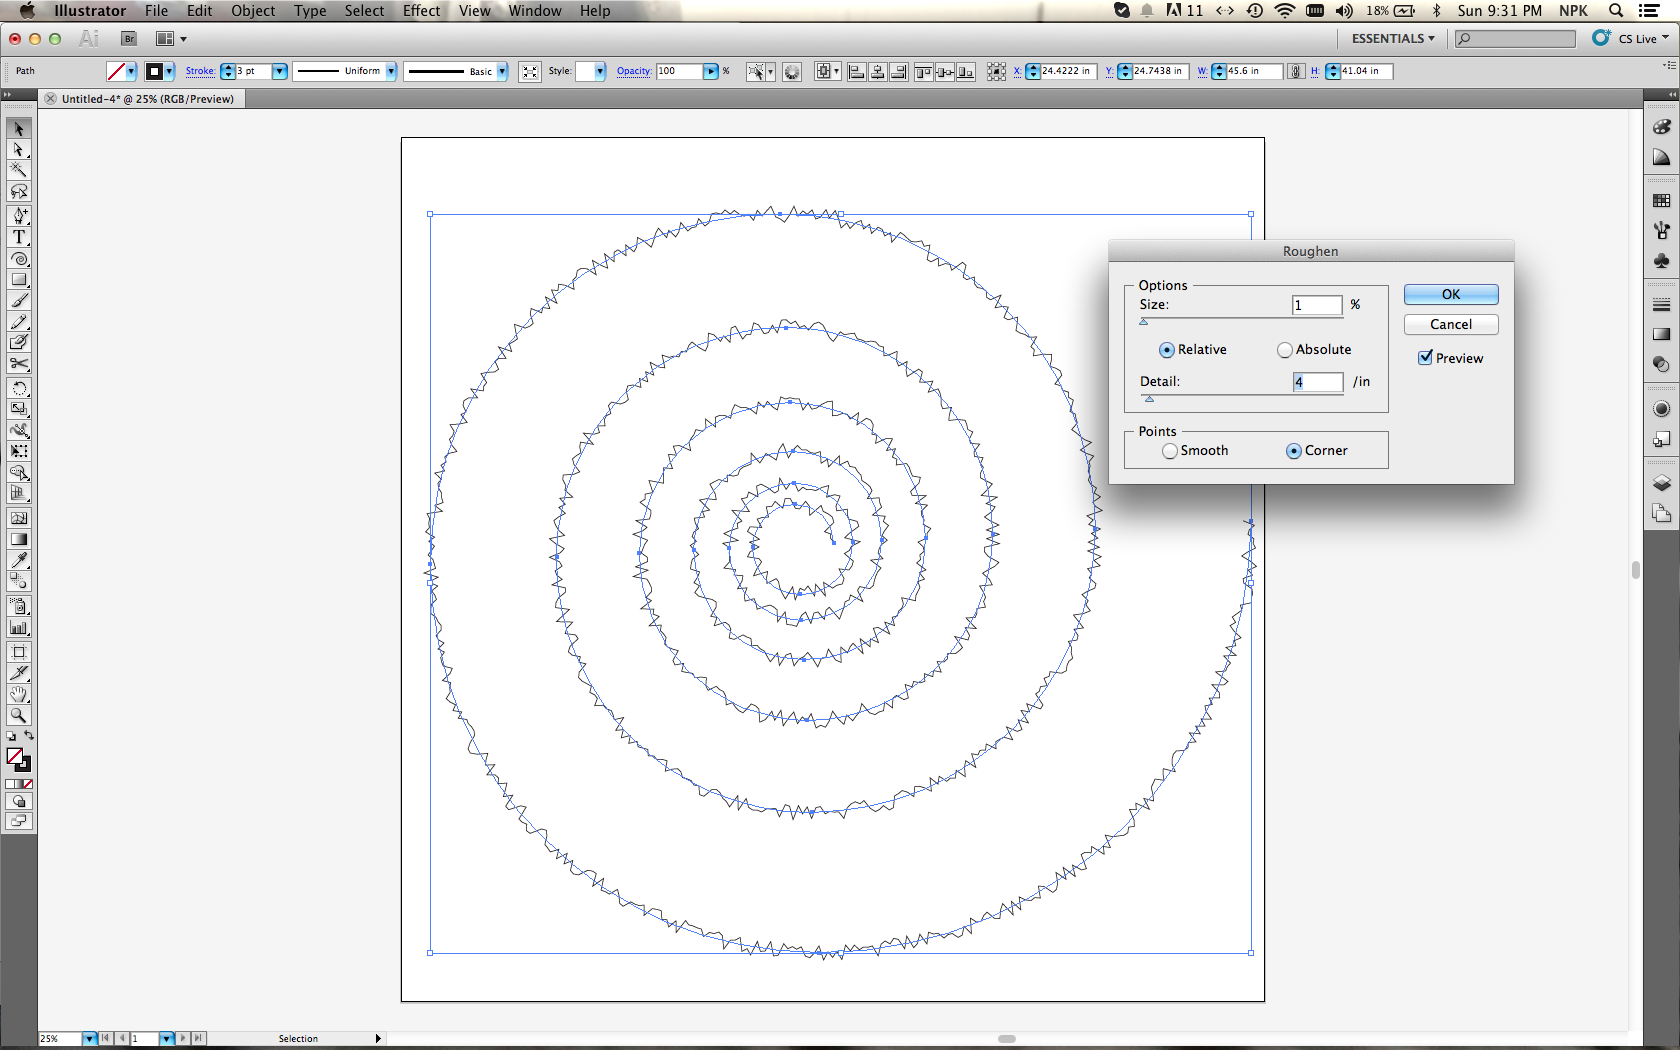
Start with the following settings:
Size: 1%
Relative
Detail: 4
Points: Corner
With the Spiral selected go the the Object drop down menu at the top of the interface and choose Expand Appearance.
Repeat this process and adjust the tool values to create a range of different spiral patterns.
CUTTING PATTERNS (if no laser cutter)
Now that your pattern is ready, you can print it out on paper and use the spiral as a guide to cut the wool felt with scissors.
Print your spiral pattern on a single sheet using a large format plotter, or tile several letter or tabloid sheets together. Ideally, print the spiral on pattern tracing paper.
Place the printed spiral on top of a piece of wool felt. Pin the pattern to the felt along the edges to that the pattern lies perfectly flat. Use scissors to follow to the jagged spiral.
After the entire spiral is cut-out, unpin the pattern. You can reuse the pattern to make another felt spiral, or for more variation, use a unique spiral pattern for every fiber. Continue this process until you have between forty and sixty cut spirals.
LASER CUTTER INSTRUCTIONS
If you have access to a laser cutter you can use the illustrator file to cut the wool felt directly. These instructions were based on a Universal PLS6.60 laser cutter with an 18x32 inch working area. You will likely have to resize the spirals to fit the dimensions of your laser cutter, but you can make many more small intricate fibers since you save time by not cutting by hand.
Laser Cut Patterns:
Place a wool felt test swatch in the bed and go to printer preferences. Make sure to choose vector cuts. The stroke weight in illustrator should be 0.001 pt. Set the stroke color to RGB (255, 0, 0).
Use the following settings for your laser cutter:
80 Speed
30 Power
500 Frequency
This should cut the material without burning the underside.
After testing, place a full piece of felt onto the laser cutting bed. Make sure the material is flat. Focus the laser and begin the cutting process.
CREATING HELIXES
Now you should have a stack of 40 to 60 jagged felt spirals. Apply the following process to each spiral:
Pick up a spiral from the center so that the tail drops down like a slinky. Start wrapping the material from the center outward to make a long telescoping helix. Every few turns, lay the spiral on a foam block and poke the newly wrapped sections with a felting needle 20-30 times, securing the spiral into a tight helix.
Continue this until all of the flat spirals are tight, helix-shaped fibers.
ASSEMBLING THE FORM
Now that you have a set of 40-60 magnified wool fibers, you can start playing the overall arrangement. Use the friction of the material and jagged structures to hold the arrangement in place. If you need extra support, use pins to secure the intersections.
You can create a simple jacket as a base or just spot-sew fibers together for a more open design. Once you are happy with the arrangement, use a needle and heavy weight thread (thread should be the same color as the wool felt) to attach the magnified fibers at key intersections.
Have fun and make the design your own!