Virtual Graffiti
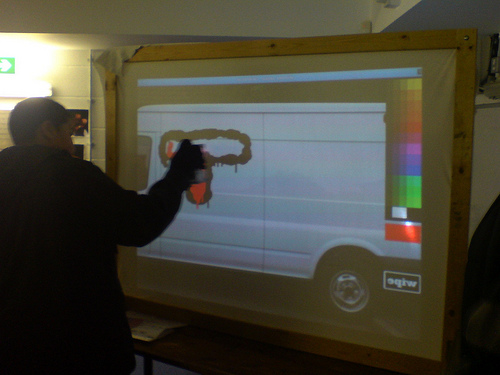
Features
* all open source and hardware,
* cost < £100 excluding projector and computer,
* detects can's nozzle pressure and distance from the screen,
* models paint dripping if you move too slowly!
Notes
* this instructable is quite high level, but please let me know if I've missed something important,
* the computing setup is for Linux. If you get it working on other systems, please post your instructions!
Skills you'll need
* wood working to make the wooden rear projection screen,
* electronic circuits and programming Atmel AVR micro controllers (or arduino),
* be able to install some libraries on your computer to allow processing to talk to the wiimote.
How It Works
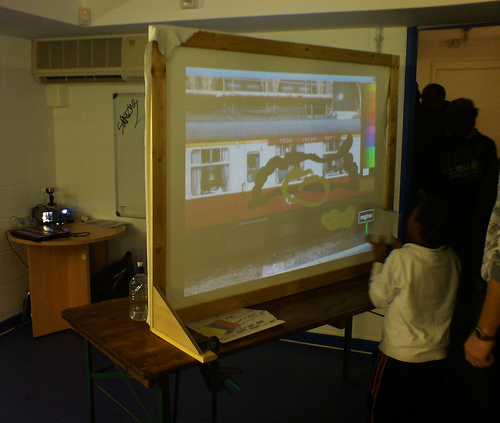
* The wiimote sends the X and Y co-ordinates of the can to the computer via a bluetooth radio link.
* The computer is running a simple painting program that uses a projector to "paint" the lines as you draw with the can. It also takes care of mapping the wiimote camera to the screen using a 4 point calibration system.
* The spray can also detect its distance from the screen and the nozzle pressure: the further you are away the bigger the dot drawn, the harder you press the nozzle, the more opaque the paint dot becomes.
The Components
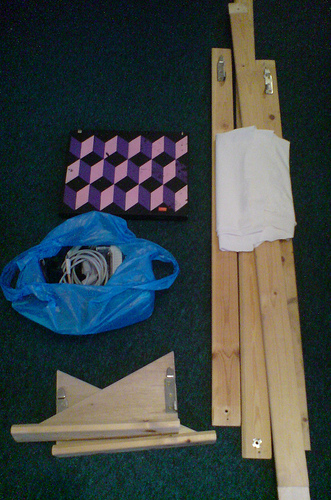
* computer - needs to be about 1.4Ghz, bluetooth and a usb port,
* processing environment,
* virtualGraffiti software, download from the "computer setup" step,
* nintendo wiimote - buy second hand from ebay,
* projector - it will need to be bright if you're planning to use during the day or inside with lights on,
* rear projection screen - make yourself,
* virtual spray can - make yourself,
* virtual spray can receiver - make yourself.
Costing
* arduino for can receiver (built in usb->serial) £21
* radio rx/tx pair £9
* components for building spray can £18 plus optional enclosure £12
* optional enclosure for receiver £8
* nintendo wiimote - buy second hand from ebay £20
Rear Projection Screen
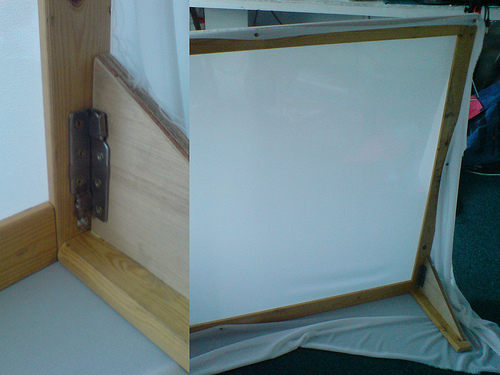
I used lycra, which is stretchy so I can stretch it to make it more transparent. At the moment I hold it on with thumb tacks, but I'm graduating to velcro when I get access to a sewing machine.
I made a wooden frame with the help of a workshop and a carpenter (thanks Lou!) I needed it to collapse so I could transport it on my bike. If you're making one for a fixed venue then it will be easier to make. Just make it at a 4:3 aspect ratio, and stiff enough to stay upright.
I've found people tend to push on the screen material a fair bit so it needs to be a bit rugged.
Spray Can
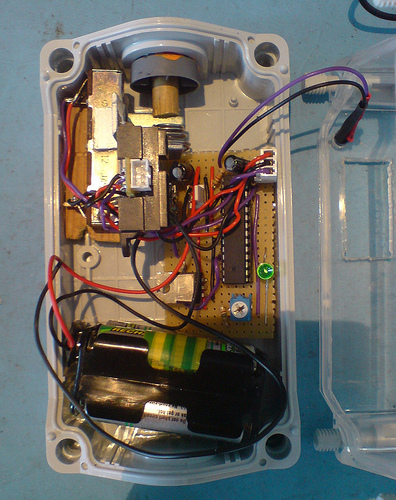
This version is more advanced, because it also measures the distance from the screen and the nozzle pressure. Both these things are important when you're actually spray painting. I wanted to make a training system, so it was important to make the system as "real" as possible (within my cost limits).
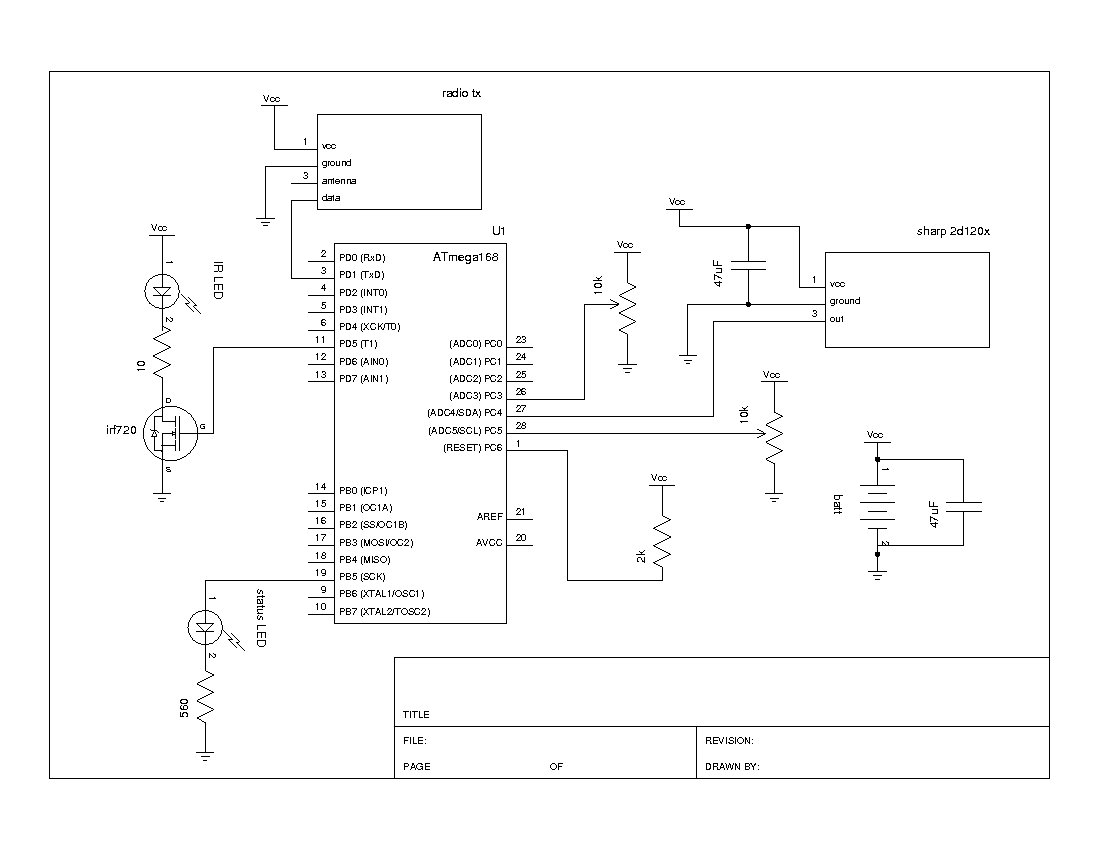
The circuit is pretty simple. Take a look at the attached circuit diagram to see for yourself. You need basic soldering skills and to be able to put a circuit onto veroboard. Also, you should feel happy with programming microcontrollers.
Building a circuit from scratch vs using an arduino board
option 1: if you want to use an arduino board in spray can. Use arduino as is and halve the baud rate of the radio tx in the spraycan code.
option 2: you want to save cash but you don't have a fuse programmer. Build the board and use a 16MHz external crystal. Halve the baud rate as in option 1.
option 3: you want to save even more cash and you have a fuse programmer. Build the board, but omit the external crystal. Use the fuse programmer to set the atmel to use its internal clock. I believe this DIY parallel programmer will allow you to program fuses. I use the olimex programmer.
Overview of the circuit
The microcontroller measures the output from the sharp 2d120x distance sensor (great info on this sensor here) and the linear potentiometer. It also measures the output of the LED PWM potentiometer. This is used to adjust the LED's light output. The IR LED I'm using is 100mA and peak wavelength is 950nm (ideal for wiimote).
The microcontroller uses PWM to flash the LED very fast. We use an IRF720 power mosfet so that the micro doesn't burn out its output. Also I wanted to add capacity for a brighter LED in the future.
There is a status LED that flashes everytime a data packet is broadcast on the radio. If everything is working well, this light should be flashing at around 15Hz.
Finally, the radio transmitter module is attached to pin 3 (digital pin 1 for arduino) of the microcontroller so that we can send the information we're measuring to the computer.
You also NEED an aerial attached to the receiver board. I used a 12cm long peice of wire. This is half what is recommended on this excellent info page.
Programming the microcontroller
After you've built the circuit, you'll need to upload the program (attached). I use the arduino programming environment/libaries. You can compile this with the arduino IDE, and then program it however you usually do.
My circuit is made simpler by using the internal 8MHz clock of the micro. If you use this you'll need to set the fuse settings to use the internal 8MHz calibrated RC: 1111 0010 = 0xf2
This means you'll need to have a programmer that can write fuses.
./avrdude -C ./avrdude.conf -V -p ATmega168 -P /dev/ttyACM0 -c stk500v2 -U lfuse:w:0xf2:m
If you don't have this kind of programmer (say you just have the arduino board), just use a 16MHz crystal between pins 9 and 10 and it should all work (untested - you may need a capacitor). You'll also need to modify the program code so that the transmitter baud is halved.
Testing
After you've got it all together and the program loaded, you need to adjust the IR LED brightness. I just wanted to maximise light output without toasting the LED so I blew a few up and ended up with about a 120ma draw average.
If you have a multimeter you can adjust this quite easily, otherwise just adjust the potentiometer to be quite high but not all the way! You can also check the analogue inputs on pins 26, 27 and 28 of the PWM adjust potentiometer, the distance sensor and the nozzle potentiometer.
If you have a scope you can check the pulse train coming out of pin 3 into the radio TX module. Check the pwm output of the LED on pin 11.
You can use a mobile phone camera (or most CCD cameras) to see the IR LED turn on when you press the nozzle button.
Downloads
Spray Can Receiver
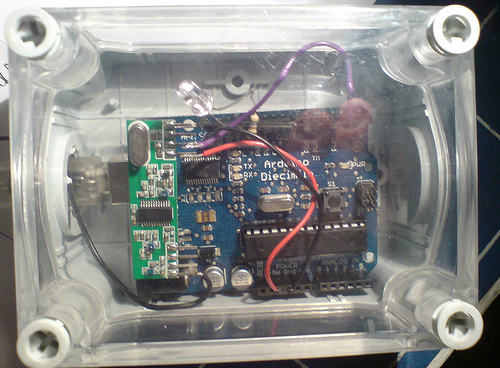
Otherwise, I just use an arduino board, with the radio receiver plugged into the pin 2. This makes it easy to get the data into a computer via the USB -> serial chip on the arduino board. If I was going to make a custom circuit I'd probably use an FTDI USB -> serial UART evaluation board.
You also NEED an aerial attached to the receiver board. I used a 12cm long peice of wire. This is half what is recommended on this excellent info page.
Load the graffitiCanReader2.pde sketch into the arduino. With the can powered up, you should see the status LEDs on the can and the receiver board flashing quickly. Everytime the can LED flashes, a data packet is sent. Everytime the receiver board LED flashes, a valid data packet is received. If you're not seeing this then there is something up with the radio link. Something to try is connecting the TX of the can to the RX of the receiver with a piece of wire. If this doesn't work then you probably have a mismatch in the baud rate of virtualwire (see the code).
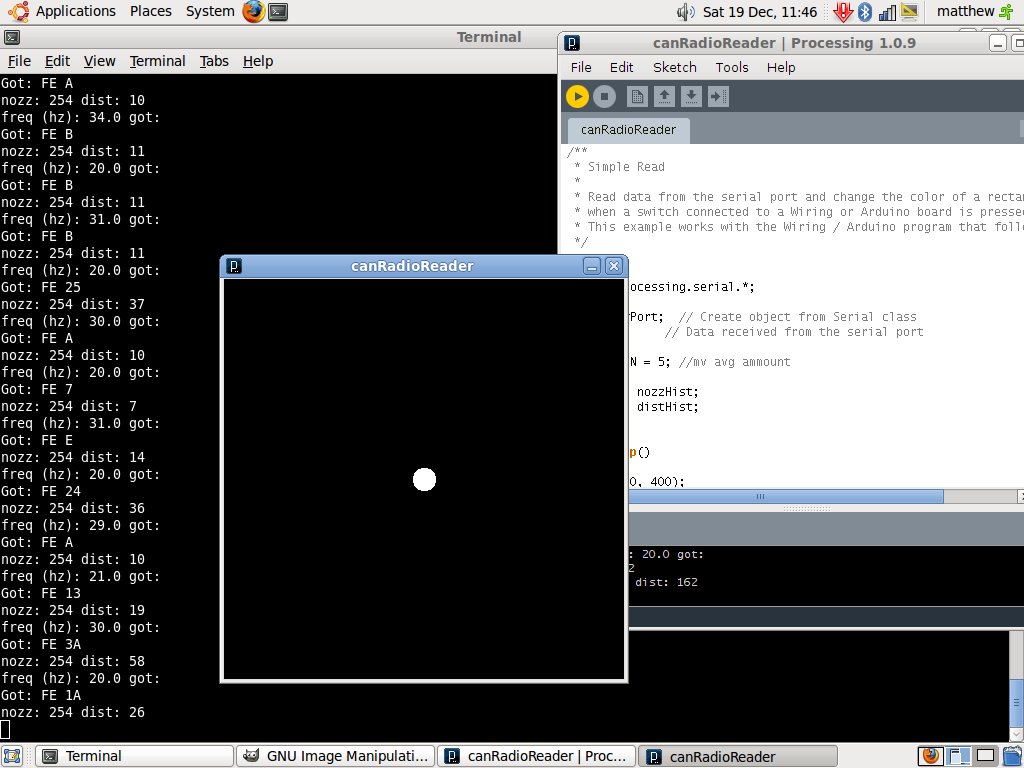
Assuming you've got lots of flashing going on on the receiver board, you should be able to monitor this on your usb serial port. If you monitor the serial port (usually /dev/ttyUSB0) at 57600 you should see data spewing out like
Got: FF 02
Got: FF 03
.
.
.
The first number is pressure, and the second is distance.
Now you can run processing and use this information to make pretty pictures!
Load the attached processing sketch (canRadioReader.pde) . Start the program and check the output of the program. You should be getting a frequency (that tells you how many updates per second the receiver is getting - you definately want this to be at least 10Hz). Also you'll get a distance and nozzle measurement. Test the can by moving the nozzle potentiometer and by moving a peice of card in front of the distance sensor.
If it's all working, then move on to the next step - getting the computer ready to talk to the wiimote!
Computer Setup: Processing and the Wiimote
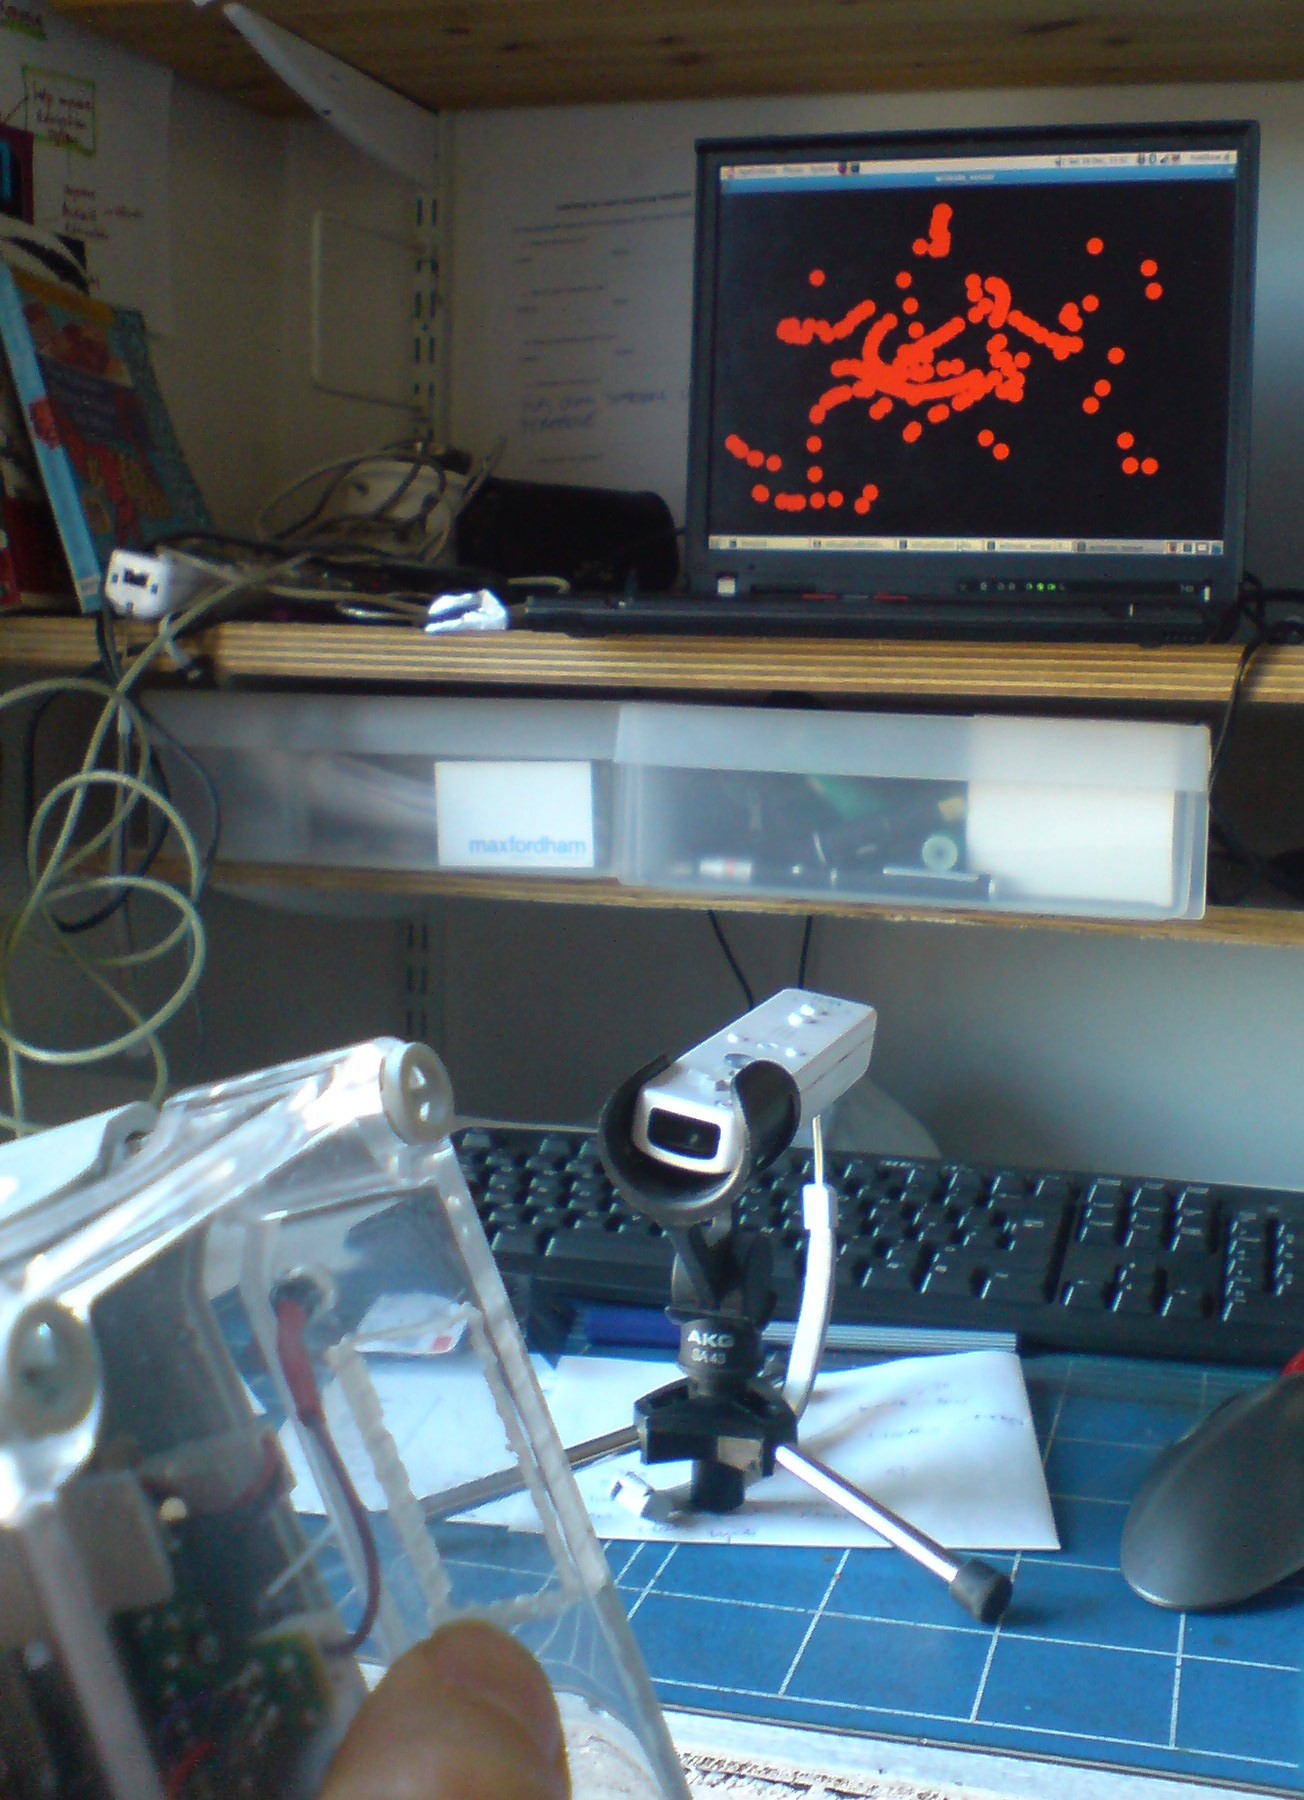
These instructions are Linux specific, but it should all work on a mac and windows with some research on how to get the wiimote's data into processing.
After installing processing, I found some instructions on the forum, but I still had some problems. Here is what I had to do:
- install processing
- install bluez libraries: sudo apt-get install bluez-utils libbluetooth-dev
- create ./processing/libraries/Loc and ./processing/libraries/wrj4P5
- download bluecove-2.1.0.jar and bluecove-gpl-2.1.0.jar and put into ./processing/libraries/wrj4P5/library/
- download wiiremoteJ v1.6, and put the .jar into ./processing/libraries/wrj4P5/library/
- download wrj4P5.jar (I used alpha-11) and put into ./processing/libraries/wrj4P5/library/
- download wrj4P5.zip and unzip into ./processing/libraries/wrj4P5/lll/
- download Loc.jar (I used beta-5) and put into ./processing/libraries/Loc/library/
- download Loc.zip and unzip into ./processing/libraries/Loc/lll/
Then I used code inspired from Classiclll to get the buttons and sensor bar working. The attached code/sketch just draws a circle where the 1st infra red source is found by the wiimote.
To check your bluetooth, press buttons one and two on the wiimote, then try
$ hcitool scan
at the terminal. You should see the nintendo wiimote detected. If you don't you'll need to look at your bluetooth setup further.
If it's all good, load the wiimote_sensor.pde (attached) program and start it. In the lower status part of the screen you should see:
BlueCove version 2.1.0 on bluez
trying to find a wii
Press buttons 1 and 2 on the wiimote. After it's detected, wave your infra red source (the spray can) around in front of it. You should see a red circle following your movement!
Make sure this works before moving on. If you can't get it to work, search the processing forum.
Downloads
Setting It All Up
* power up spray can, check status LED light is flashing.
* turn on computer, plug in spray can receiver,
* setup screen and projector,
* check that spray can receiver status LED is flashing,
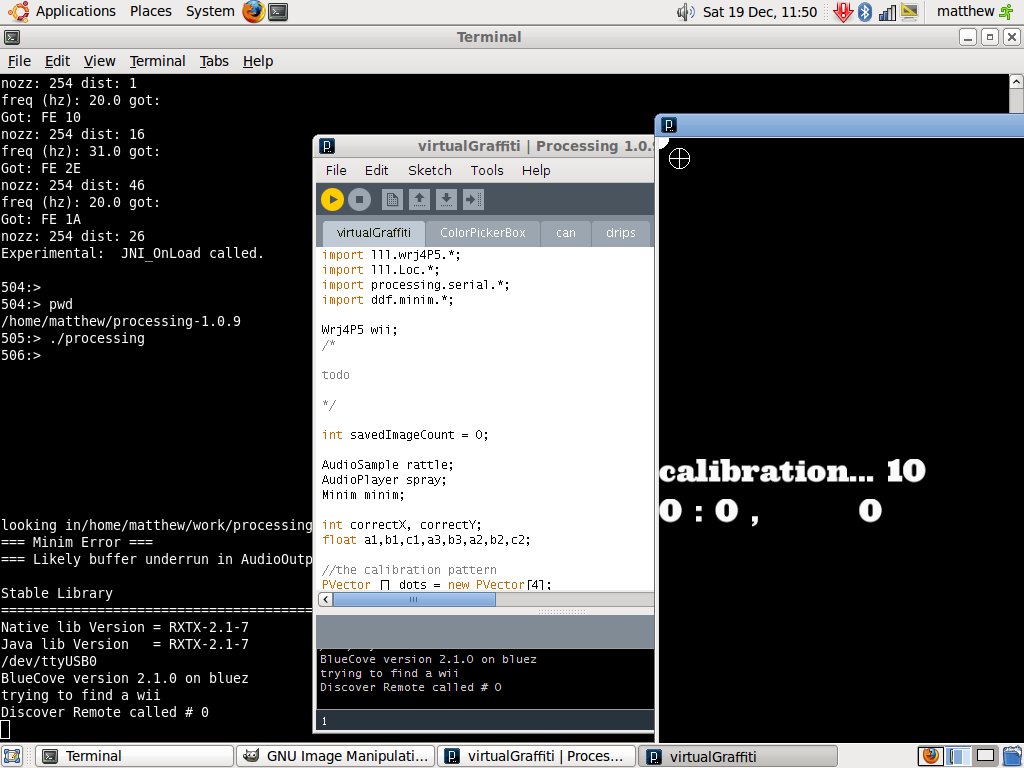
* start processing and load the virtualGraffiti program,
* check that you're getting both RX and TX serial indicator LEDs are flashing on the arduino board,
* press both buttons on wiimote,
* do 4 point calibration when prompted (put spray can over each target in turn, then press the nozzle till the writing goes red).
* have fun!
Downloads
Resources, Links, Thanks, Ideas
Here are the links that were invaluable in making this project work:
RF info: http://narobo.com/articles/rfmodules.html
Arduino: www.arduino.cc
Processing: www.processing.org
Using wii with processing: http://processing.org/discourse/yabb2/YaBB.pl?num=1186928645/15
Linux: www.ubuntu.org
Wiimote: http://www.wiili.org/index.php/Wiimote, http://wiki.wiimoteproject.com/IR_Sensor#Wavelengths
4 point calibration: http://www.zaunert.de/jochenz/wii/
Thanks!
Without a lot of people publishing their work, this project would have been a lot harder and more expensive.
Massive thanks to all open source crew, people who hacked the wiimote, Classiclll for making wiimote easy to use with processing, Jochen Zaunert for code to do calibration, processing crew, arduino crew, Lou for carpentry help, and all those who explore, make and then publish their findings online!
Other people's systems
* I only just found http://friispray.co.uk/, with open source software and a howto
* this system allows use of stencils: cool! http://www.wiispray.com/, no code or howto
* yrwall's virtual graffiti system, no code or howto.
Ideas for exploration
* use 2 wiimotes to do 3D volume tracking and do away with distance sensor in the can: http://www.cl.cam.ac.uk/~sjeh3/wii/. This would be good because the distance sensor is currently the weakest part of the system. It would also mean we could use a proper rear projection screen for more vivid images.
* use a wiimote in the can to detect angle of spray can. This would add realism to the spray paint model.