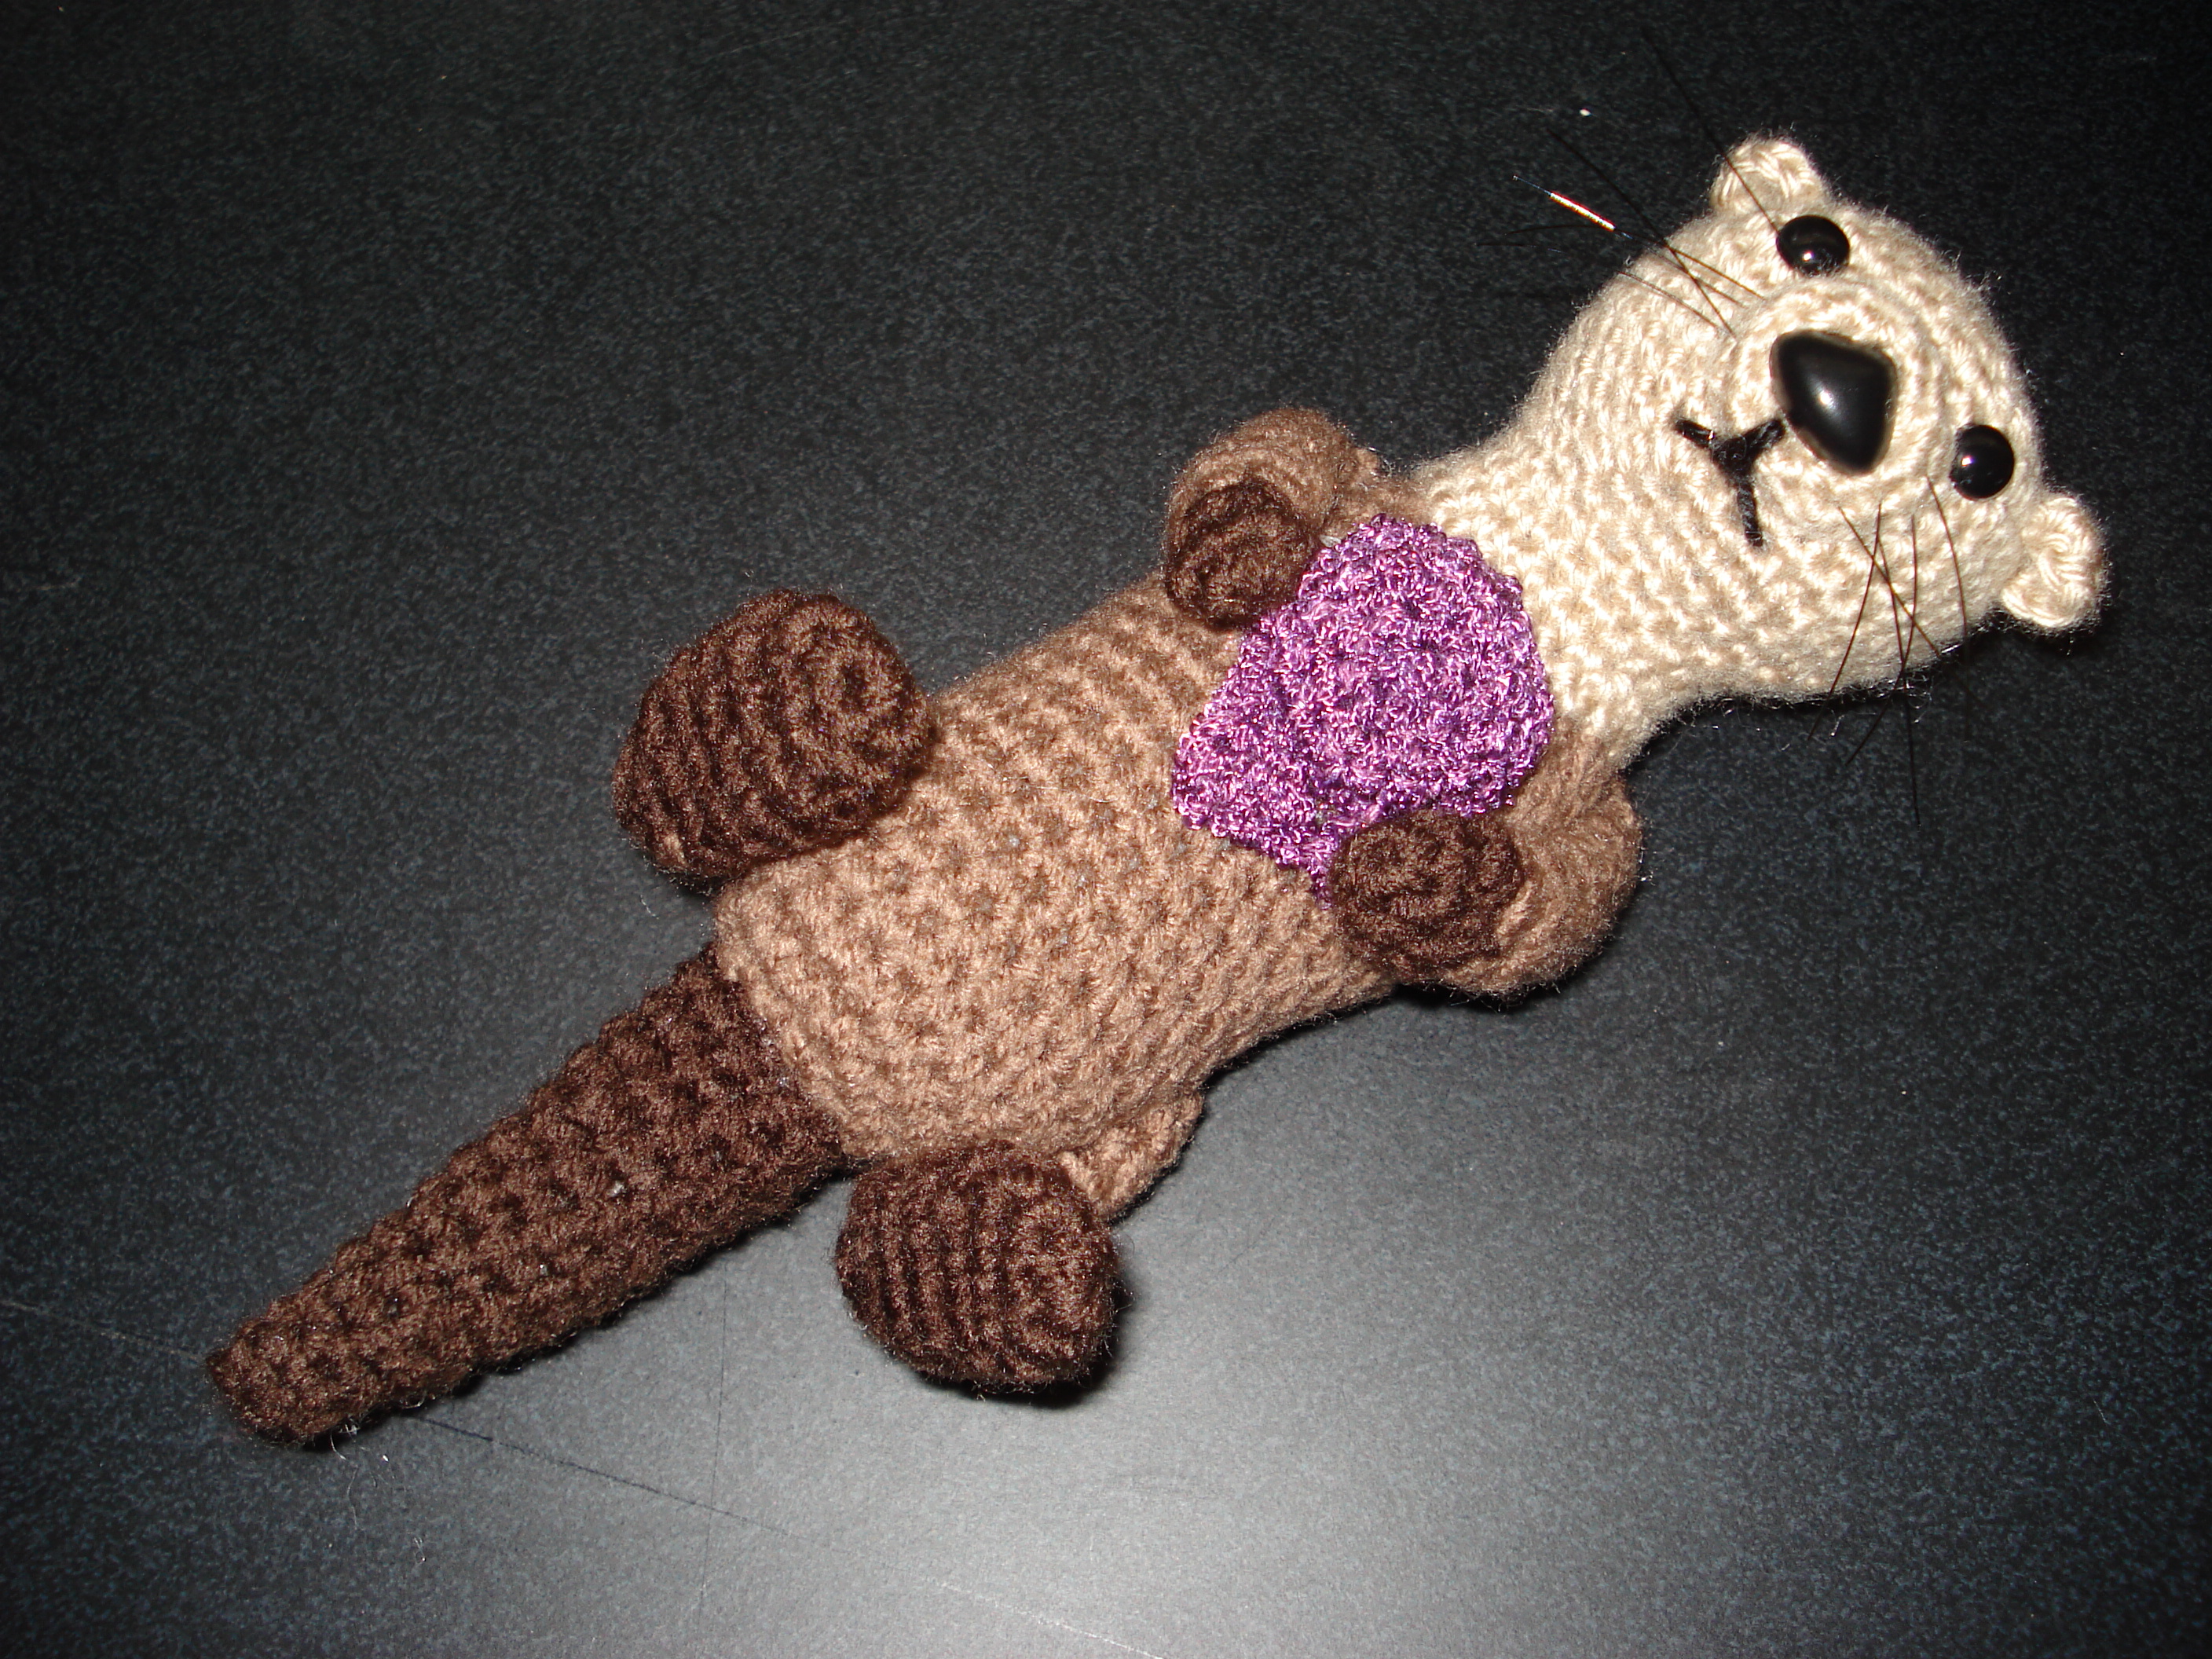
Heather's Otter


Gather Materials!
I know, I know, I posted pictures of this a really long time ago and promised a pattern if I could find it. Since this is my first instructable for one of my amigurumi, I'm providing it free of charge. However, you may not make these and sell them, you must not mass produce them for any reason, and you must give credit where credit is due. That being said, we can work something out, if you should wish to do any of these things.
NOTE: I don't think I should apologize, but just in case, I apologize for my sarcasm, which you will find throughout this instructable. It is not meant to offend anyone.
also NOTE: Unfortunately, I do have a day job that is very demanding, so I can't respond to questions very often. I will try, but don't expect a next day answer, please. In addition, this pattern is not for the faint of heart! Best of luck!
Now, back to the instructions!
This otter was made from multiple yarns:
Caron Simply Soft light brown yarn
I Love This Yarn (at Hobby Lobby) light brown and dark brown
Shell yarn - color of your choice
Small amount of black yarn for mouth
Other materials:
needle size may be varied (I didn't write the needle size in my notes, but I think it was an F. Needle size will determine final size of otter.)
Cotton/polyester fiberfill
9 mm eyes (2) (I use eyes with posts so that if my otters go to families with small children, they are less likely to fall off and be swallowed.)
15 mm nose
plastic cat whiskers
pearl bead, or real pearl if you want to be super fancy
bar pin (for the shell)
stitch marker
glue of your choice
Now for the fun part, abbreviations!
CO = cast on with a magic circle (you can Google this if you don't know what this is)
BO = bind off
st = stitch
ch = chain
sl st = slip stitch
sc = single crochet
hdc = half double crochet
dc = double crochet
tc = triple crochet
tbl = through back loops
incr = increase
decr = decrease
Other notes:
around/all = repeat until end of row (it may be useful to always place the stitch marker at the beginning or end of each row. I never use a stitch marker, so I never make note of it in my patterns)
(...)x# means to repeat what is in the () a certain # of times, e.g. (1 sc 1 incr) x 2 means to sc 1, increase in the next stitch, and repeat what is in the parenthesis once more (for a total of 2 times)
the (##) at the end of rows indicate the number of stitches in that row
The Head
In light brown by Caron Simply Soft
row 1: CO 5
row 2: incr all (10)
row 3: 1 sc 1 incr around (15)
row 4: 2 sc 1 incr around (20)
row 5: 3 sc 1 incr around (25)
row 6: 4 sc 1 incr around (30)
row 7: 5 sc 1 incr around (35)
rows 8-11: sc all x 4 rows (35)
row 12: (3 sc, 1 decr) x 5, 10 sc (30)
row 13: (2 sc, 1 decr) x 5, 10 sc (25)
row 14: (1 sc, 1 decr) x 5, 10 sc (20)
row 15: sc all (20)
row 16: 3 sc 1 incr around (25)
row 17: sc all (25)
row 18: 4 sc 1 incr around (30)
BO
Do not stuff! You must first attach the face and ears! (instructions in a later step)
Body
I Love This Yarn in light brown
row 1: CO 5
row 2: incr all (10)
row 3: 1 sc 1 incr around (15)
row 4: 2 sc 1 incr around (20)
row 5: 3 sc 1 incr around (25)
rows 6-23 (18 rows total): sc all (25)
row 24: 3 sc 1 decr around (20)
row 25: sc all (20)
row 26: 2 sc 1 decr around (15)
rows 27-28: sc all (15)
BO
Stuff!
Muzzle
Caron Simply Soft light brown yarn
diagram for the first 2 rows, because this is tricky (x = ch stitches, I = 2nd row of stitches)(I hope this makes sense)
I I
I x x I
I I
row 1: ch 3
row 2: 1 sc, 2 inc in same st, 1 incr (6)
row 3: 1 sc 1 incr around (9)
row 4: 2 sc 1 incr around (12)
row 5: 3 sc 1 incr around (15)
BO
Tail
I Love This Yarn dark brown
row 1: CO 5
rows 2-3: sc all (5)
row 4: (1 sc 1 incr) x 2, 1 sc (7)
rows 5-6: sc all (7)
row 7: (2 sc 1 incr )x2, 1 sc (9)
rows 8-10: sc all (9)
row 11: (3 sc 1 incr)x2, 1 sc (11)
rows 12-13: sc all (11)
row 14: (4 sc 1 incr)x2, 1 sc (13)
BO
stuff!
Arms (make 2):
I Love This Yarn in dark and light brown
start with dark brown
row 1: CO 5
row 2: (1 sc 1 incr)x2, 1 sc (7)
row 3: (1 sc 1 decr)x2, 1 sc (5)
change to light brown
row 4: (1 sc 1 incr)x2, 1 sc (7)
rows 5-12: sc all (7)
row 13: (2 sc 1 incr)x2, 1 sc (9)
BO
You may wish to stuff as you go along or use a stuffing tool that is provided with most fiberfill
Feet (make 2)
I Love This Yarn dark brown
row 1: CO 6
row 2: 1 sc 1 incr around (9)
row 3: sc all
row 4: 1 decr 7 sc around (8)
rows 5-6: sc all (8)
row 7: decr all (4)
BO
Do not stuff!
Legs (make 2)
I Love This Yarn light brown
pick up 8 st around the back of the foot base
row 1: sc all (8)
row 2: 2 sc 1 decr around (6)
row 3: 2 sc, 2 incr, 2 sc (8)
row 4: sc all (8)
row 5: 3 sc 1 incr around (10)
rows 6-7: sc all (10)
STUFF!!
row 8: decr all (4)
BO
Ears (make 2)
I Love This Yarn light brown
row 1: CO 5
row 2: incr in first 3 st (NOTE: this is not a full round!)
BO
Assemble Otter

NOTE: I whip stitch around with a crochet needle, but feel free to use one of those plastic needles sold in craft stores. It is easier, though, to get around corners with a crochet needle.
Unfortunately, I do not have pictures of assemblage at this time...If I ever make another one of these critters, I'll add pictures at that time.
The face:
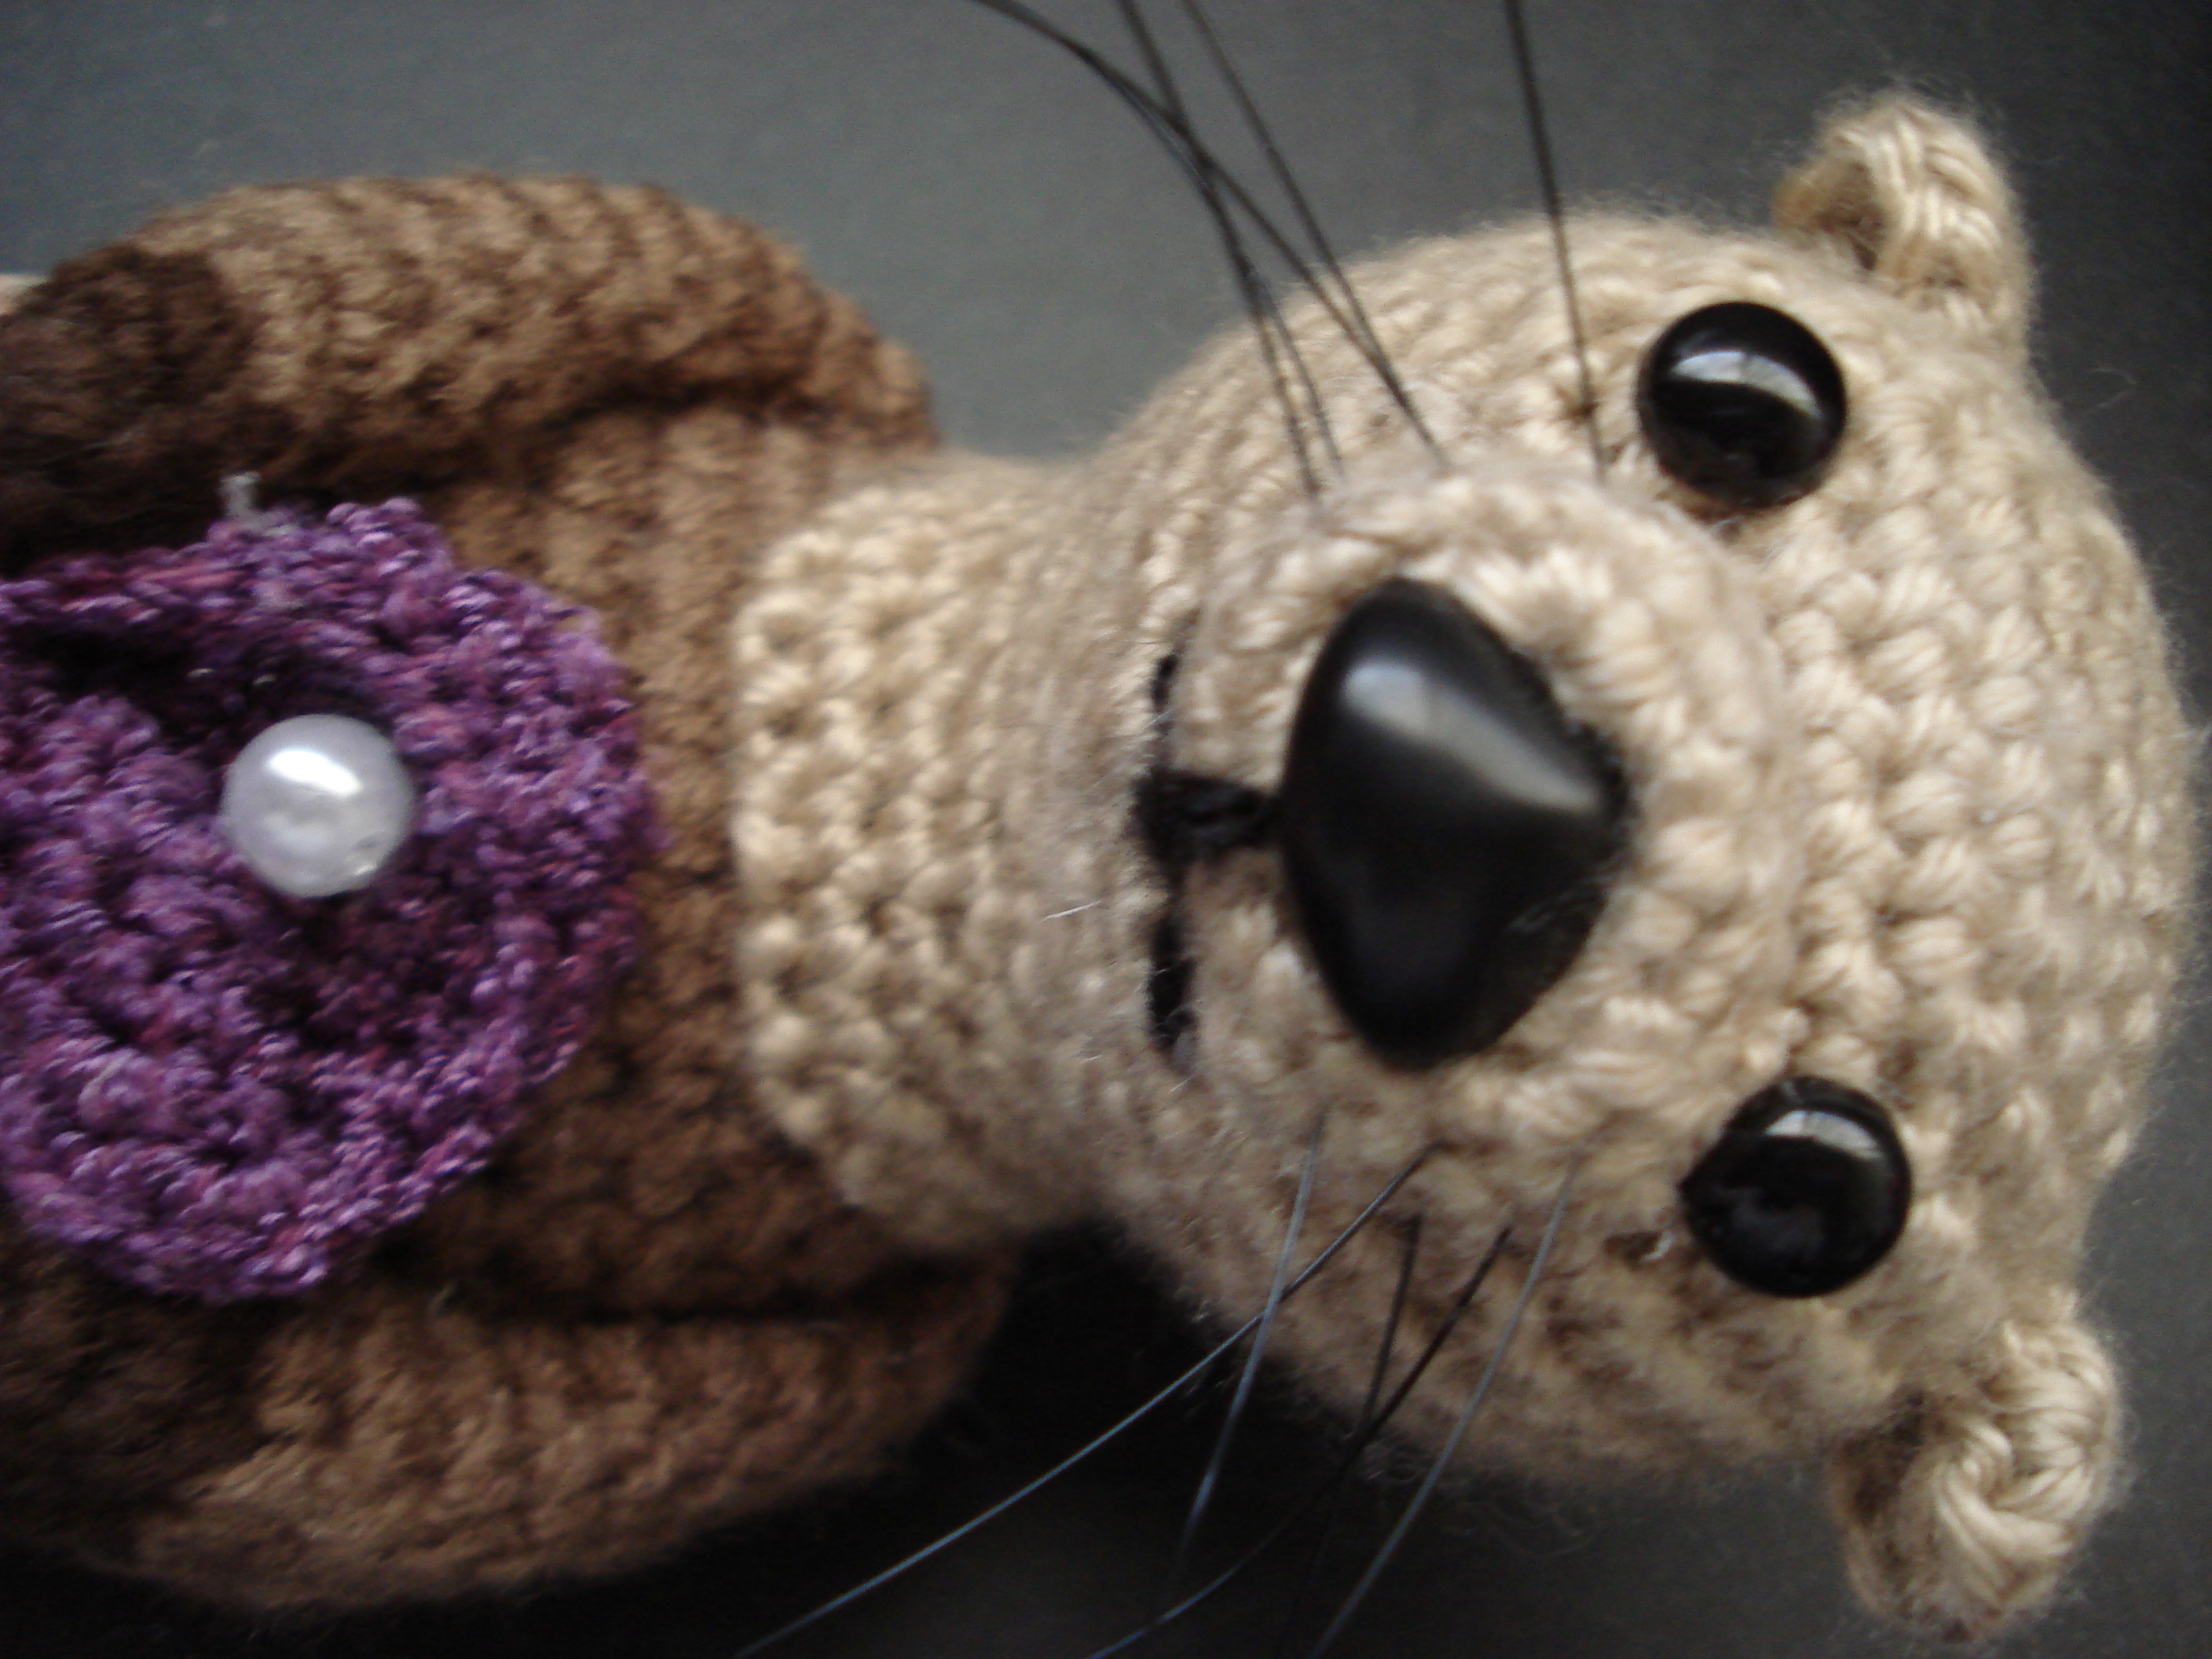
If you are using a nose with a post, center the nose on the muzzle and apply the backing.
I use 3 cat whiskers and thread them through the sides of the muzzle. Once I have them where I want them, I glue them into place.
Attach the muzzle to the front of the face. You can add fiberfill, if there's any room.
Attach the eyes as shown in the picture.
Sew on the mouth, as shown in the picture.
Attach the ears - I fold them in half to get the shape and then tie the ends of the yarn in a square knot. I then pull all the ends into the head
Stuff!
Assemble the rest!
Attach the head to the body - I line up a row of stitches to the open end of the body and whip stitch around.
Attach the arms, legs, and tail in a similar fashion
Now, if I haven't tired you out yet...great! The shell comes next..
The Shell With Pearl


Congratulations on making it this far! This project always takes me a long time...And hopefully I haven't lost anyone along the way...
The shell is made with 2 parts, 2 circles attached to each other and 2 triangles attached to each other.
The circles:
row 1: CO 5
row 2: incr all (10)
row 3: 1 sc 1 incr around (15)
row 4: 2 sc 1 incr around (20)
row 5: 10 sc tbl, ch 10, sl st to 1st st of last row (20) (done with the first side and on to the second!)
row 6: 2 sc 1 decr around (15)
row 7: 1 sc 1 decr (10)
row 8: decr all (5)
BO
The triangles:
row 1: ch 4
row 2: hdc in 2nd st from hook, 1 dc, 1 tc
row 3 (but really, this is a continuation of row 2): ch 5
row 4: hdc in 2nd st from hook, 1 dc, 1 tc
BO
Attach the triangles at the edges of the opening of the circles. Glue a pearl bead on the inside of once of the circles at the center. Glue the pin to the outside of one of the circles. Once the glue is all dry, attach to otter. You could also just skip the pin and sew the shell to the otter, but I think it's more fun on a pin, since then the owner of the otter could pin it wherever they want.
AND YOU'RE DONE!!