IPod/MP3 Player Bicycle Speaker
by susanrm in Circuits > Apple
17833 Views, 12 Favorites, 0 Comments
IPod/MP3 Player Bicycle Speaker


A simple passive speaker for your bicycle using the parts you have lying around. Loud enough to hear on quiet roads. A person with very basic soldering skills should be able to do this; doesn't require any advanced electronics knowhow.
I made this because getting up those hills can be easier with some tunes, and I didn't have the cash to buy one of the commercial ones. I really liked this too because it recycled things that weren't being used anyway - go green!
I made this because getting up those hills can be easier with some tunes, and I didn't have the cash to buy one of the commercial ones. I really liked this too because it recycled things that weren't being used anyway - go green!
Materials Needed:

This instructable describes how I made my bike speaker. It's intended to give ideas for others to modify for their tastes/materials. It just uses what I had around and available; thanks to my friend Chris who donated the speakers that were just lying around.
Materials needed:
Passive computer speakers (or active, but my available speakers were passive). The ones I used were branded Creative, and they were made by Cambridge Soundworks, so they were good quality. This helps.
Screwdriver - mine required Philips Head
Wire cutter/stripper
Soldering iron
Solder
Cassette tape case
Scissors
Foam
Cardboard/stiffening material
Glue gun (or sewing implements, if preferred)
Optional:
Remote control
Nonslip material
Mesh/screen to protect speaker
Speaker Removal & Connection

Open up the case of one of the speakers. As you can see by the photo, the wire ran through a small hole. In order to keep the wire intact, I cut it right where the two parts of the stripped wire were soldered to the speaker, then pulled it through. Remember which wire was connected where! Remove the speaker from the front of the box (I just had to unscrew it).
Cut, Strip, Solder

The speaker will now be free. You will have two wires joined together and leading down to the headphone jack. To make use of the jack, I cut off the wire from the other speaker where it joined the wire I wanted to use. Then I shortened the wire I wanted to use, because there was just too much wire. I left about 4 inches of single wire.
Strip the wire. I ended up with one white-insulated wire and a bunch of copper strands. Strip about 1/2 inch insulation from the insulated wire (careful, it's delicate), and twist the copper strands together.
Solder both wires back to where they were before on the speaker (you do remember, don't you?). :-)
Now you should have a speaker with a wire leading to a headphone jack attached to it. Plug the speaker into a computer or MP3 player to make sure it works and to test the volume.
Making the Case


This is the part where it's a bit harder to show, since made the speaker before making the instructable.
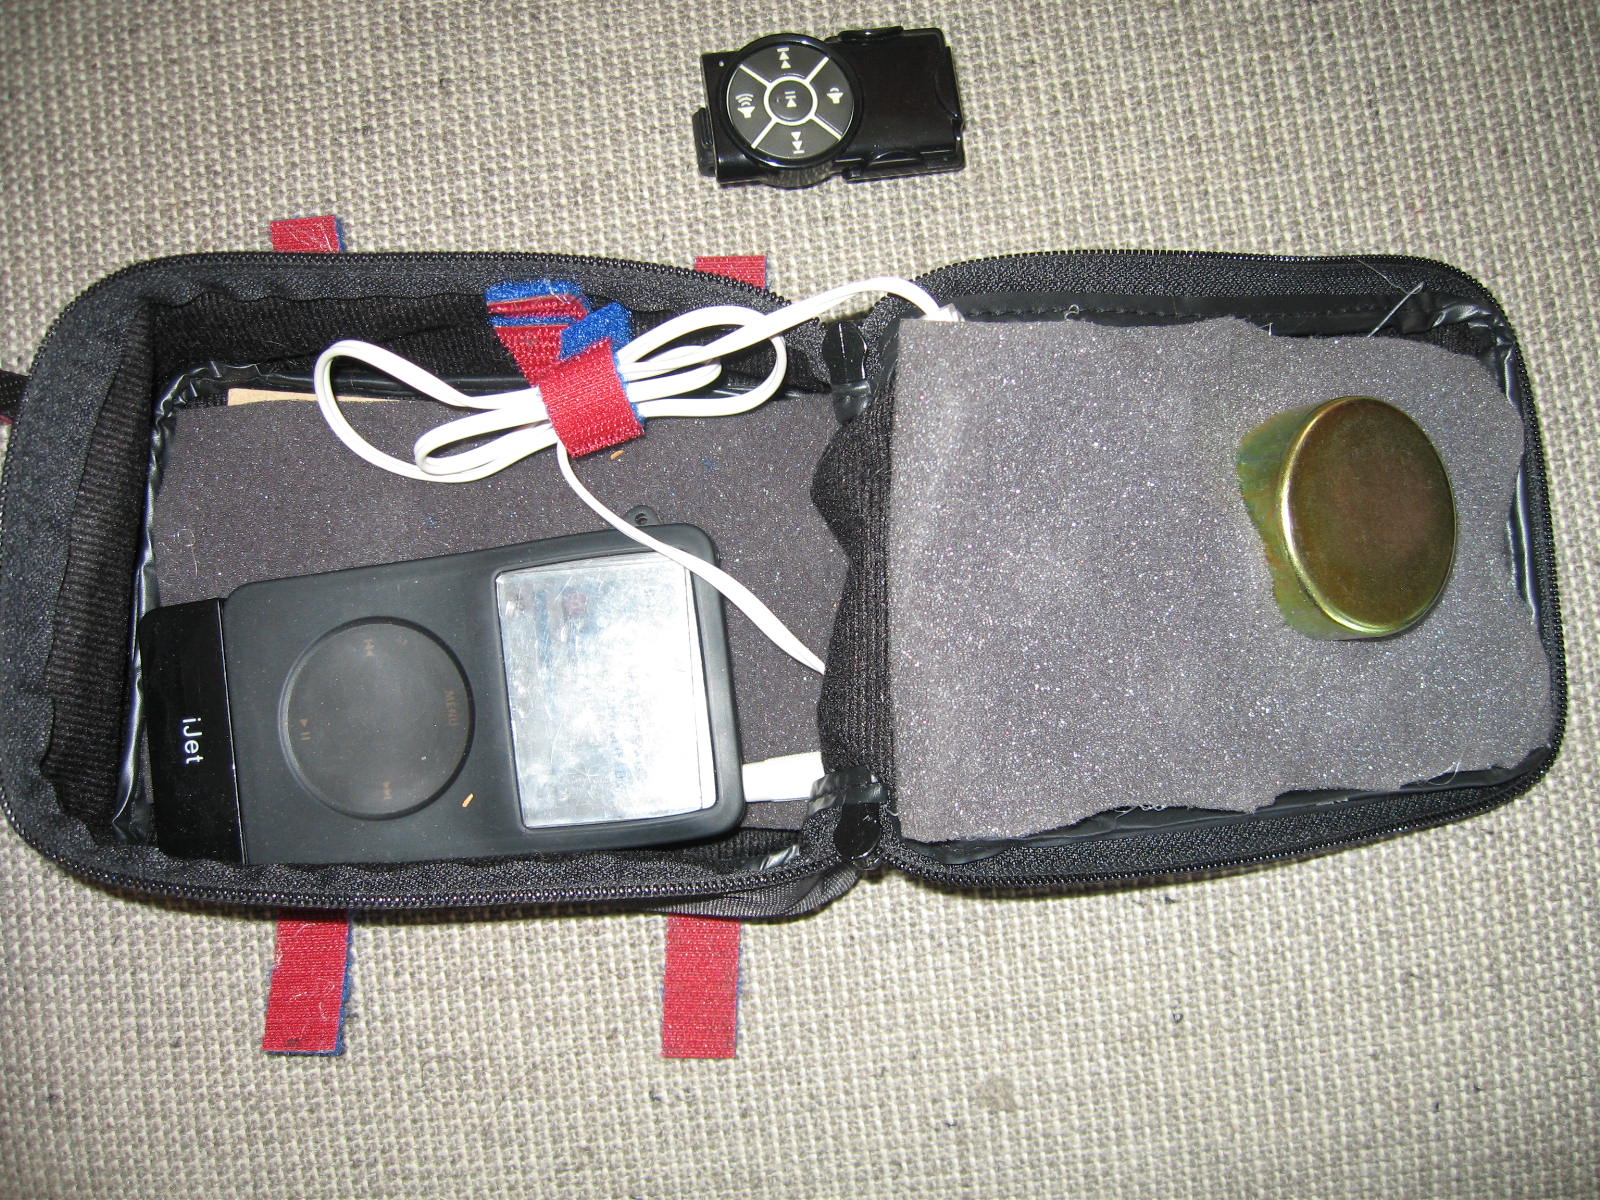
Take the cassette case and cut a hole in the top for the speaker. Then take foam (I used packing foam for a hard drive) and cut a hole in that for the magnet, etc. Glue it all together, running the wire through so it ends up in the compartment.
For the bottom, cut a piece of cardboard to make it less floppy (unless yours isn't floppy), and glue it and a piece of foam into the bottom. This provides shock protection for the iPod.
I had a lot of excess wire despite shortening it a lot, so I used a bit of spare velcro as a tie.
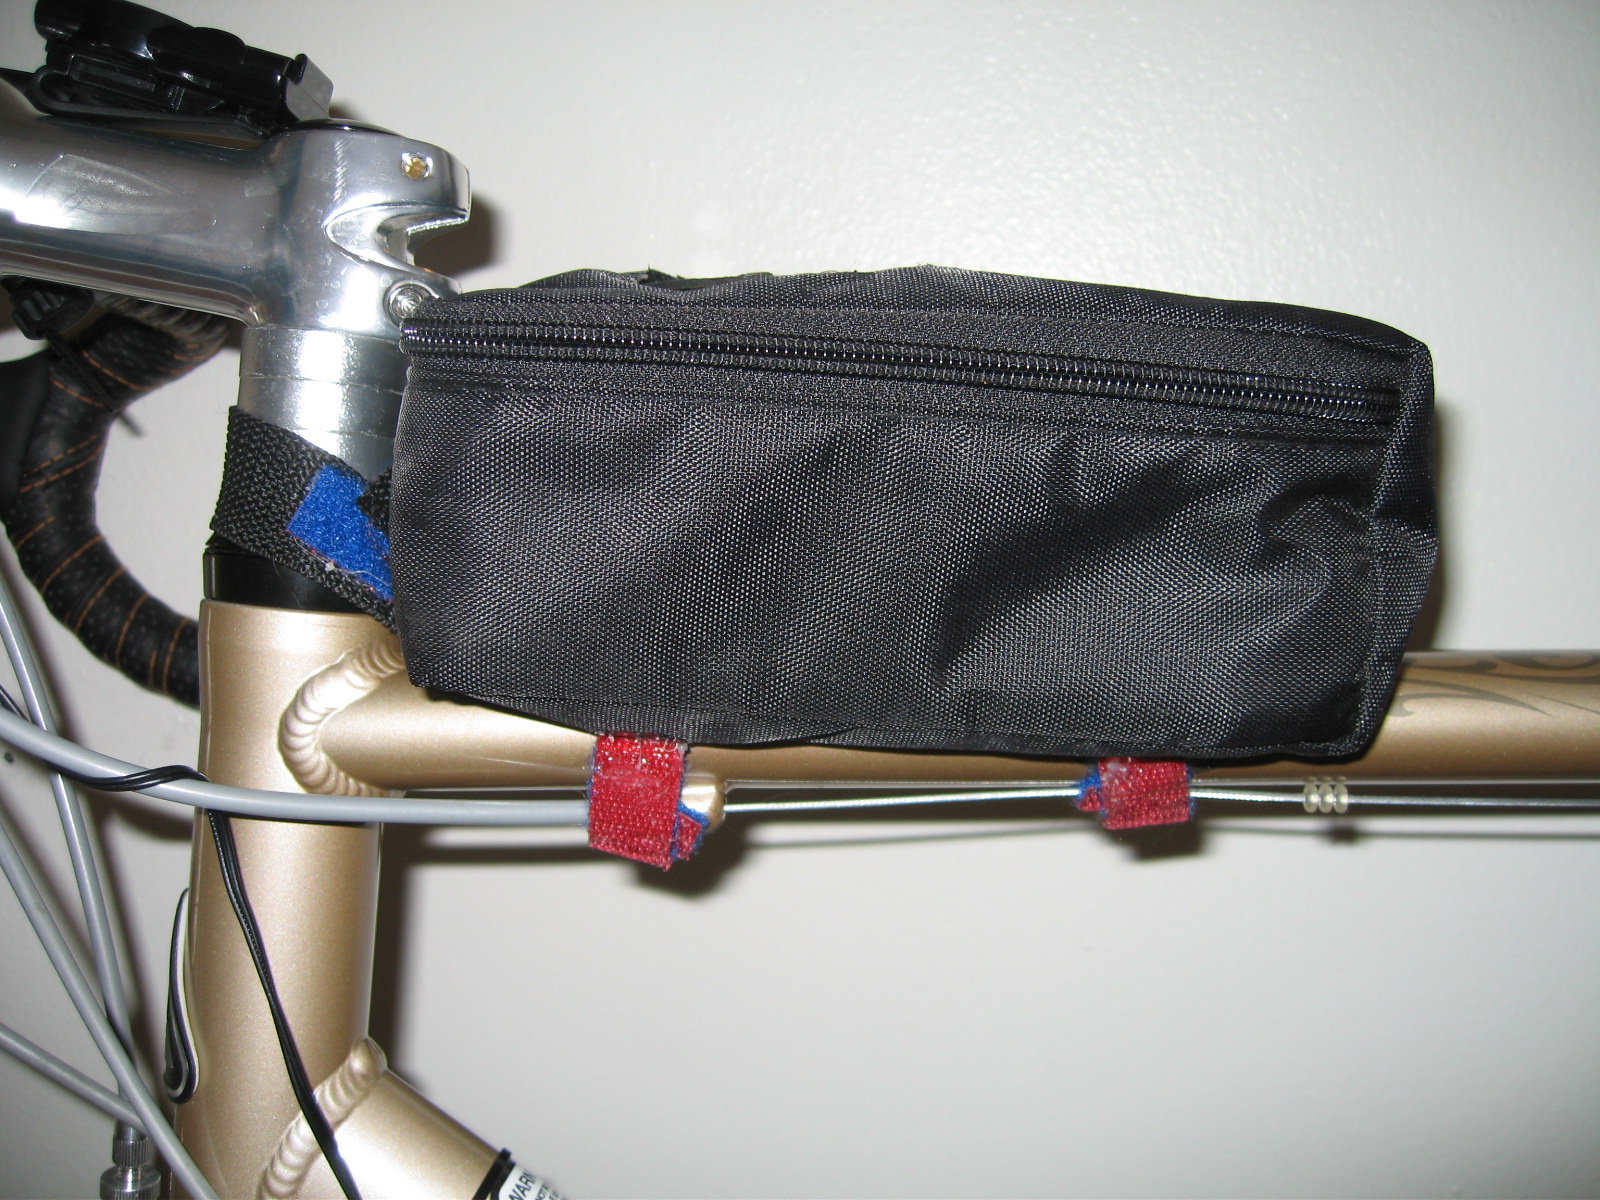
Turn the case over and glue on two double-sided Velcro strips to secure the case to the bike. I also cut the front loop (used previously to carry the case) and glued Velcro onto that to secure it around the handlebar stem.
Optional Steps

The speaker is now usable as it is. You can add refinements (like ones I am thinking of) by:
- adding a screen to protect the speaker
- attaching non-stick material to the bottom to prevent falling to the side, an issue my speaker has sometimes now
- using something a bit narrower, or just the width of the speaker. My knees sometimes hit the sides of the case now
- using a remote control. I find this very useful. I attach it to a pocket in my bike jacket and adjust volume or skip songs with it.
One reason I like it to be passive, besides the fact of being able to hear cars on the road, is that it minimizes weight. The only weighty things now are the speaker itself and the iPod. No batteries.
The sound is pretty good on this. I bought a mini speaker you plug into the headphone jack. It's powered by a AA battery. The sound on my version is better and louder.
I also like the added feature of having a little case on the front, the perfect size to throw snacks in!
If you have other suggested improvements, please feel free to add them in Comments.