Fischertechnik Easter Egg Robot
by ftking_83702 in Circuits > Robots
5950 Views, 6 Favorites, 0 Comments
Fischertechnik Easter Egg Robot
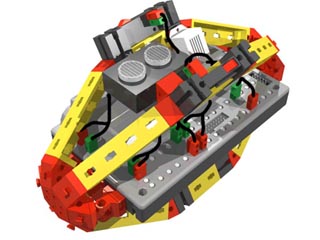
How to create a programmable Easter Egg Robot using fischertechnik elements!
I play with different educational manipulatives for a living. (Visit www.weirdrichard.com). Over the years I have built different holiday themed models using all sorts of toys.
An article in the Idaho Statesman about vision impaired children participating in an Easter Egg Hunt caught my attention. ("Valley kids hunt for Easter Eggs by Ear" Idaho Statesman 03/22/08).
"A half dozen kids with visual impairments had no trouble finding the eggs - but not because they were brightly colored pinks, purples, greens and blues. They found them by listening for beeping sounds coming from a large egg in each hidden pile.....The audio-enhanced Easter egg hunt was brought to the kids at the Madison Early Childhood Center for the second year by the Qwest Pioneers, a group of retired but active former telephone company employees."
(http://www.idahostatesman.com/235/story/330617.html)
You can download a copy of a Beeping Egg from TelecomPioneers (the world's largest industry-related volunteering organization) at http://www.telecompioneers.org/shared/content/BeepEggManual.pdf
It was fun to develop a new version of the beeping egg. The fischertechnik programmable Easter Egg Robot emits a loud regular beep. Once the sonic ranging sensor detects someone closer than 100 cm, the beeping dramatically speeds up! Once the child finds the egg, they can shut it off by pressing one of the switches.
This instructable will describe how to create a programmable Easter Egg Robot!
Note: There are a variety of programmable interfaces that can be used. I used the fischertechnik Robo Interface and the Robo Pro graphical programming language (v 1.2.1.30). This interface can also be controlled with Microsoft Robotics Studio or Logo. I used a cad program to create most of the images for the Easter Egg Robot.
Amelia Explains and Tests the Egg
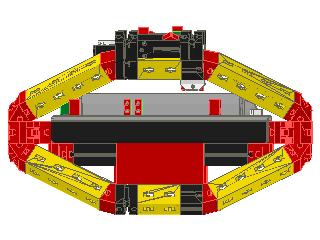
Amelia Explains the fischertechnik Easter Egg Robot:
Amelia Tests the fischertechnik Easter Egg Robot:
Amelia Tests the fischertechnik Easter Egg Robot:
Gather the Parts
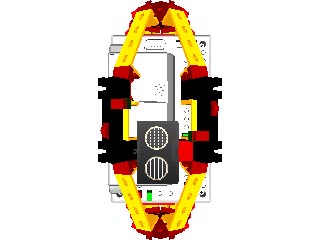
You will need to gather your elements. The fischertechnik elements are available from a range of kits available from ebay, Craig's List, or fischertechnik retailers. Elements can be purchased individually from www.fischertechnik.com.
The List:
24 Angular Block 60 Degrees
9 Angular Block 30 degrees
4 Hinged Block Tab
4 Hinged Block Claw
1 Spring Cam
2 Building Block 30
12 Building Block 15
8 Angle Girder 60
4 Angle Girder 30
16 Building Block 5
2 Mini Switch
5 Mounting Plate 15x30
2 Building Plate 15x30x5 with 3 Grooves
Electronic Components:
1 Robo Interface
1 Sonic Distance Ranger
8 Green Flat Plug
8 Red Flat Plug
1 Buzzer
1 NiCD Rechargeable Battery
8 Leashes
Computer with Robo Pro
It is also useful to have a small screwdriver and a wirestripper to create/alter wire leashes. The battery needs to be charged.
Egg Ends
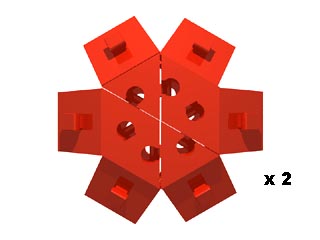
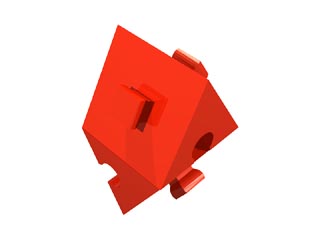
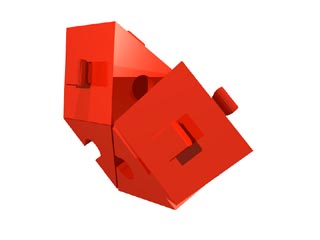
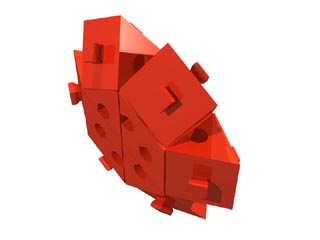
Create the ends of the egg. Start by creating twelve pairs of Angular Block 60 Degrees. Make each end by combining six pairs into a star shaped shape. Set the ends aside.
Lower Frame Member
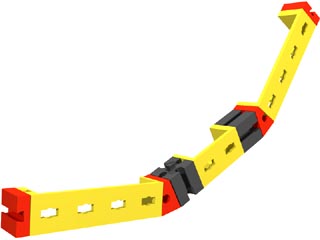
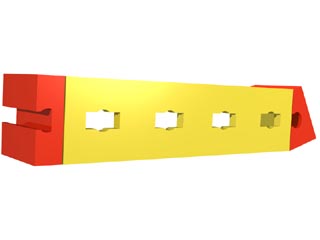
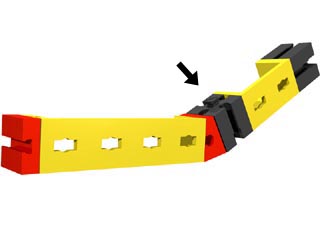
Create one of the egg's frame members by adding in order a Building Block 5, Angle Girder 60, and an Angular Block 30.
On the Angular Block 30, add a Building Block 15 (with pin oriented upwards), Angle Girder 30, and a second Building Block 15.
Finish the member by adding an Angular Block 30, Angle Girder 60, and an Angular Block 60.
On the Angular Block 30, add a Building Block 15 (with pin oriented upwards), Angle Girder 30, and a second Building Block 15.
Finish the member by adding an Angular Block 30, Angle Girder 60, and an Angular Block 60.
Second Lower Frame Member
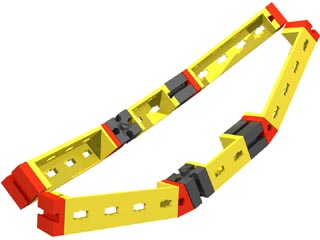
Make a second frame member by constructing a mirror image of the first, using the same parts.
Connect Lower Frame Elements
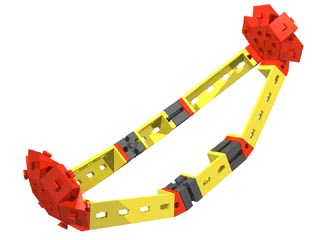
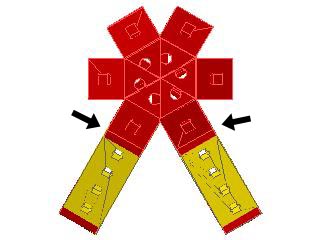
Add the two frame members to the lowest Angular Block 60s of each end assembly.
Add Hinged Assemblies
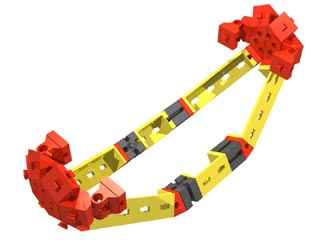
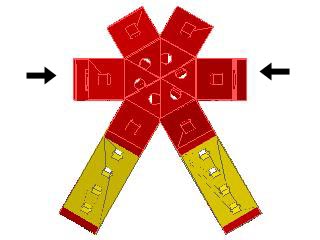
Construct four sets of Hinged Block Claws and Tabs combinations. Add these combinations on each of the two side sets of Angular Block 60s. (These assemblies will support the interface).
Rechargeable Battery Support
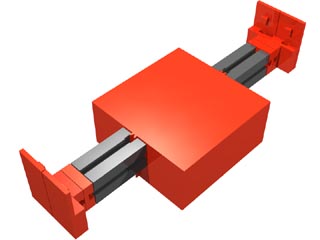
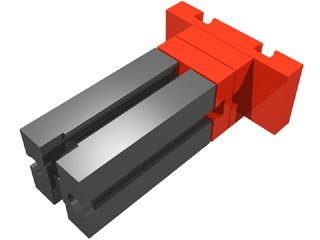
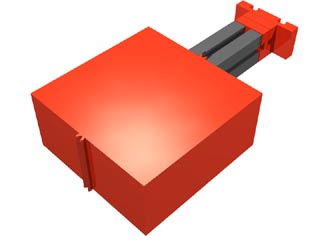
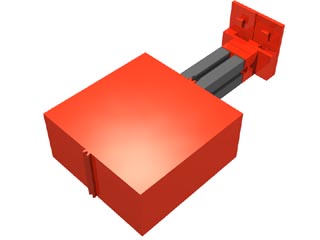
Construct the support assembly for the Rechargeable Battery by adding two Building Block 5s to the end of Building Block 30. Add a Building Plate 15x30x5 with 3 Grooves onto the end Building Block 5. Add the assembly onto the Rechargeable Battery. Add two Mounting Plate 15x30s to the Building Plate 15x30x5.
Create a second assembly using the same parts, and add it to the opposing side of the Battery.
Create a second assembly using the same parts, and add it to the opposing side of the Battery.
Add the Battery and the Interface
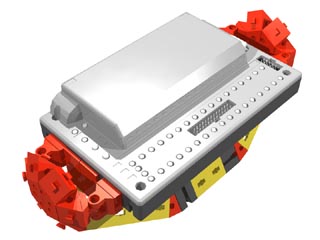
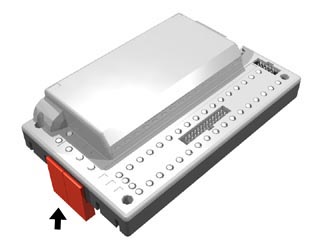
Add the battery assembly to the fischertechnik Robo Interface by sliding the Mounting Plate Pins into the central slots on each end of the Interface Brick.
Add the Robo Interface assembly to the egg by inserting the pins of the extended hinges into the second slot from each side on the ends of the Robo Interface Brick.
Add the Robo Interface assembly to the egg by inserting the pins of the extended hinges into the second slot from each side on the ends of the Robo Interface Brick.
Construct Upper Frame Member
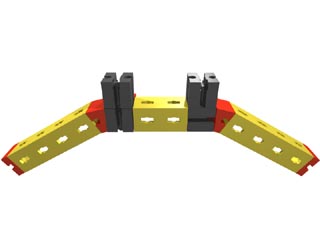
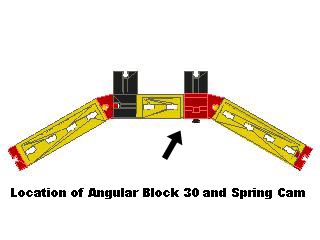
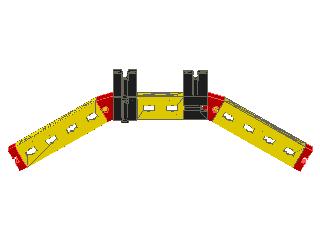
Construct the upper frame members. Start by combining a Building Block 5, Angle Girder 60, and a Angular Block 30 Degrees. Connect a Building Block 15 to the Angular Block 30 with its pin oriented down. Slide an Angular Block 30 Degrees to the side of the block. Insert a Spring Cam into the Angular Block.
Add a Second Building Block 15 to the end of the first. Insert a Angle Girder 30 into the first Building Block 15. Add a Building Block 15 to the Angle Girder 30, and add another Building Block 15.
Add an Angular Block 30 to the Building Block 15, then a Angle Girder 60, and finally a Building Block 5.
Construct Second Upper Frame Member
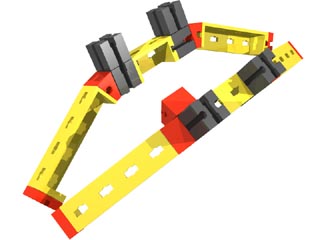
Construct a mirror image of the first upper frame member. The only omission will be the Angular Block 30/Spring Cam located on the side.
Add Upper Frame Members to Egg
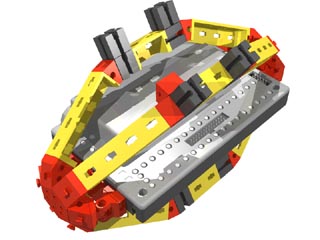
Attach both frame members to the Angular Block 60s at the top of the model.
Add Buzzer and Sensors
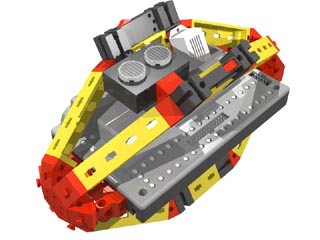
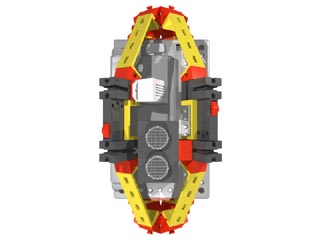
Insert touch sensors between each pair of extended Building Block 15s at the top of the model. Slide the Sonic Distance Ranger onto the Spring Cam located on the Angular Block 30 Degrees. The Sonic Distance Ranger should be oriented upwards. Slide a the Mounting Plate/Buzzer onto a Building Block 15.
Wired
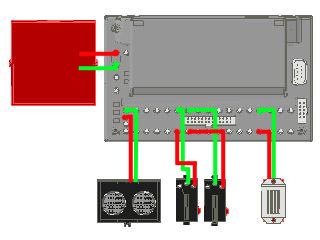
Construct leashes with plugs. Connect the electronic elements with the leashes plugs.
Connect the Touch Sensors to I-1 and I-2 ports. Connect the Sonic Distance Ranger to the D-1 port. Connect the Buzzer to the M-1 port. Connect the battery to the Interface power ports.
Connect the Touch Sensors to I-1 and I-2 ports. Connect the Sonic Distance Ranger to the D-1 port. Connect the Buzzer to the M-1 port. Connect the battery to the Interface power ports.
Program and Download
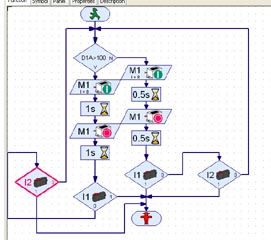
Program the Robo Interface using Robo Pro or similar programming environment.
(Robo Pro is fairly straight forward. I have provided a screen capture of my egg program).
Download program to the programmable Easter Egg Robot!
(Robo Pro is fairly straight forward. I have provided a screen capture of my egg program).
Download program to the programmable Easter Egg Robot!
Have Fun!
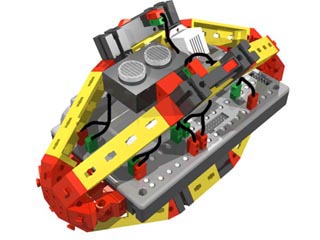
Run program, and have fun!