Code_red
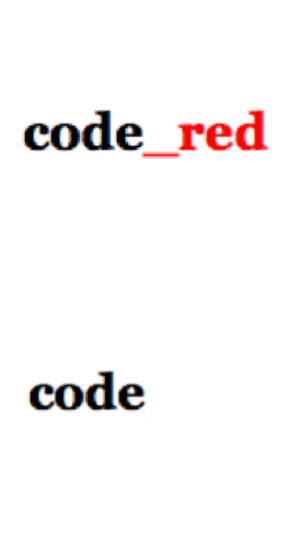
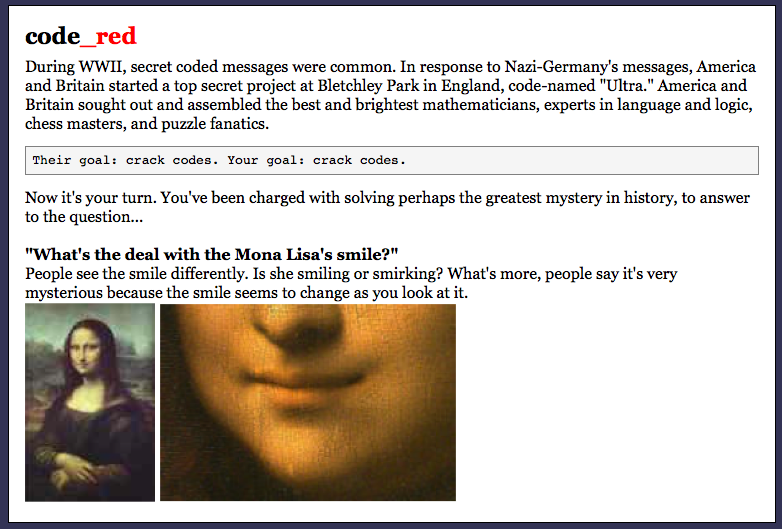
I teach history at an urban high school. Standardized test scores tend to leave room for improvement, especially in reading. So, I'm always looking for ways to increase interest in reading. One "hook" that I've found that seems effective is to have students decipher codes. I made an activity called "code_red" that students seem to really like. The good things seem to be...
To initially grab the students' attention, I asked the question, "What's the deal with the Mona Lisa's smile?" At the end of "code_red", they learn the answer.
My suggestion is to look at the end-product first -- view "code_red" -- and check it out. If it seems useful, then you can take a look at the steps here showing how it was made.
Click the link above or click here if you'd like to download all of the code_red files in zip format (2.4 MB).
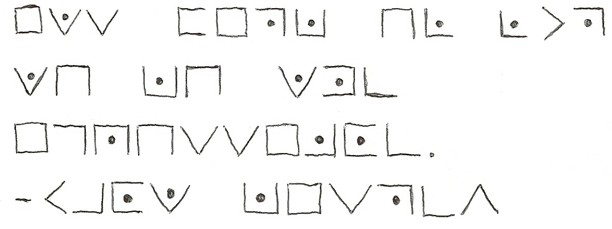
- It grabs their natural interest and curiosity. When you see a jibberish message, you can't help but wonder, "What does it say?" For example, take a look at picture 3, what's it say?
- It rewards accomplishment. By dividing the overall task into levels, students get immediate feedback/praise when they solve each code. This helps keep their attention.
- Most importantly, the students must read carefully. They quickly find out that skimming or skipping over the text doesn't work. They often try this quick-fix first, then they go back and actually read.
To initially grab the students' attention, I asked the question, "What's the deal with the Mona Lisa's smile?" At the end of "code_red", they learn the answer.
My suggestion is to look at the end-product first -- view "code_red" -- and check it out. If it seems useful, then you can take a look at the steps here showing how it was made.
Click the link above or click here if you'd like to download all of the code_red files in zip format (2.4 MB).
Objectives

This instructable has a target audience of other teachers. Specifically, the instructable is designed to show teachers how I made the "code_red" activity using "WoaS" (AKA, Wiki-on-a-Stick). The ambition is to enable teachers to either...
* use the "code_red" reading activity with their own students
* create their own activity using WoaS
A formal learning objective for students using code_red would be:
Using reading, listening, visualization, and problem-solving skills, students will solve 9 coded messages.
The "code_red" activity has 9 levels and a final level. Reading is required for each level, problem-solving is required whenever they "get stuck." The main skills needed at each level are:
1. reading
2. reading, visualization
3. reading
4. reading
5. reading
6. reading, visualization
7. reading, visualization
8. reading
9. reading, listening
final step: reading
Getting WoaS
The code_red activity was made using "WoaS". WoaS stands for Wiki-on-a-Stick (you can read about it here: http://stickwiki.sourceforge.net ). WoaS is an html page that uses javascript to change itself. The best things about it are that...
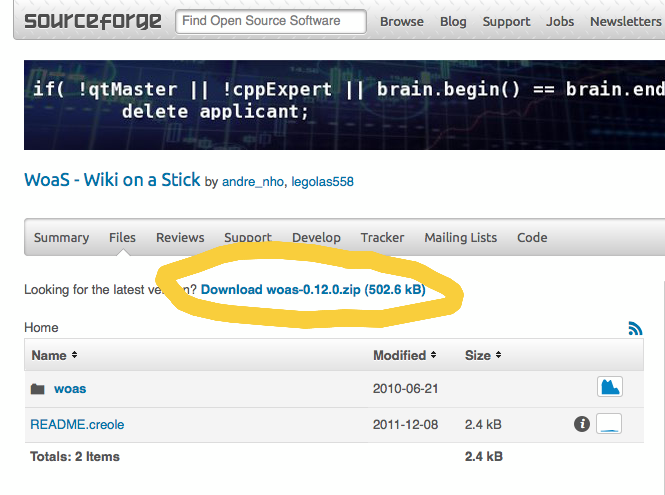
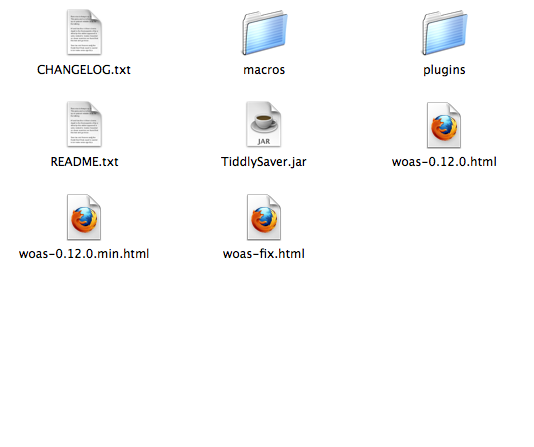
To get WoaS, go to the sourceforge site: http://sourceforge.net/projects/stickwiki/files/ Then click the Download link for the latest version (see photo). You'll get a zipped file. Unzip it, and you'll have 8 files or so as seen in the second picture. And you're ready to go!
- it's pretty powerful
- it's pretty easy to use
To get WoaS, go to the sourceforge site: http://sourceforge.net/projects/stickwiki/files/ Then click the Download link for the latest version (see photo). You'll get a zipped file. Unzip it, and you'll have 8 files or so as seen in the second picture. And you're ready to go!
Getting Set Up
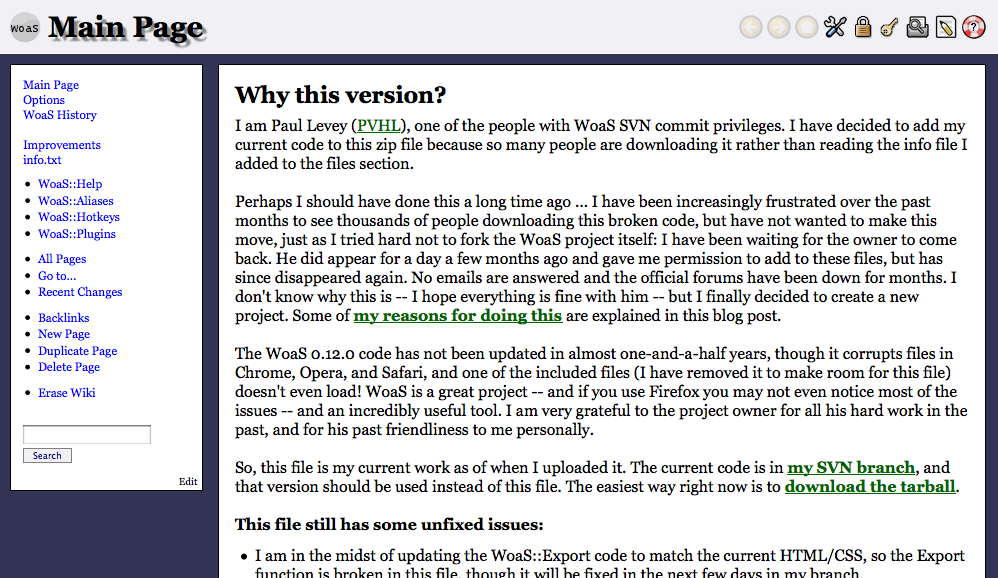
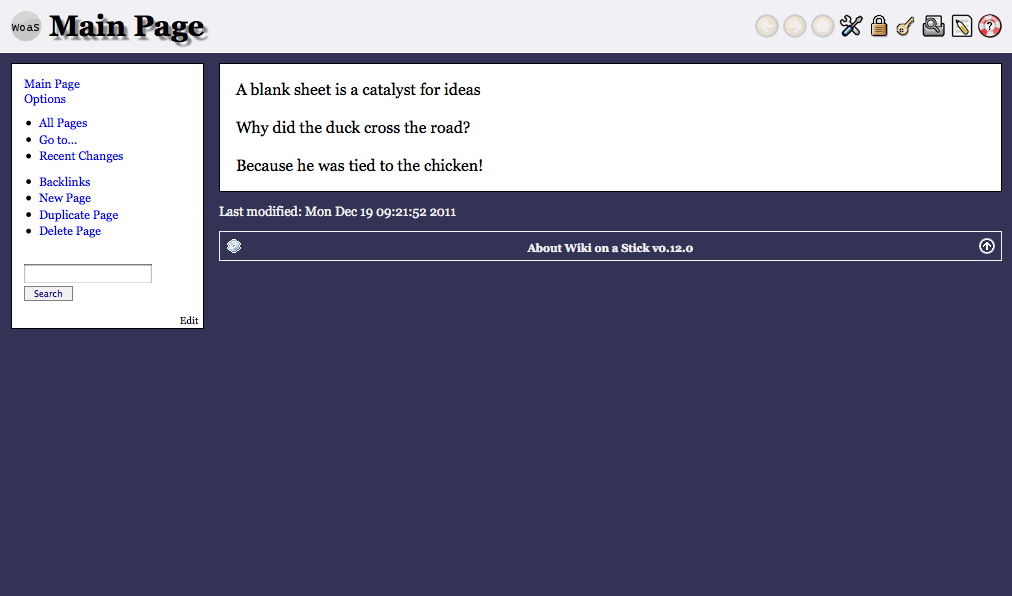
For the code_red activity, I used the file called "woas-fix.html". Just open it up, and you'll see something like the photo here.
A note on browsers, Firefox is best for WoaS. Others will certainly OPEN the file, but changes/saving can be tricky. My advice, use Firefox.
Once you're looking at the "Main Page" you can read what's there or start to customize it. Here's what I did for code_red...
A note on browsers, Firefox is best for WoaS. Others will certainly OPEN the file, but changes/saving can be tricky. My advice, use Firefox.
Once you're looking at the "Main Page" you can read what's there or start to customize it. Here's what I did for code_red...
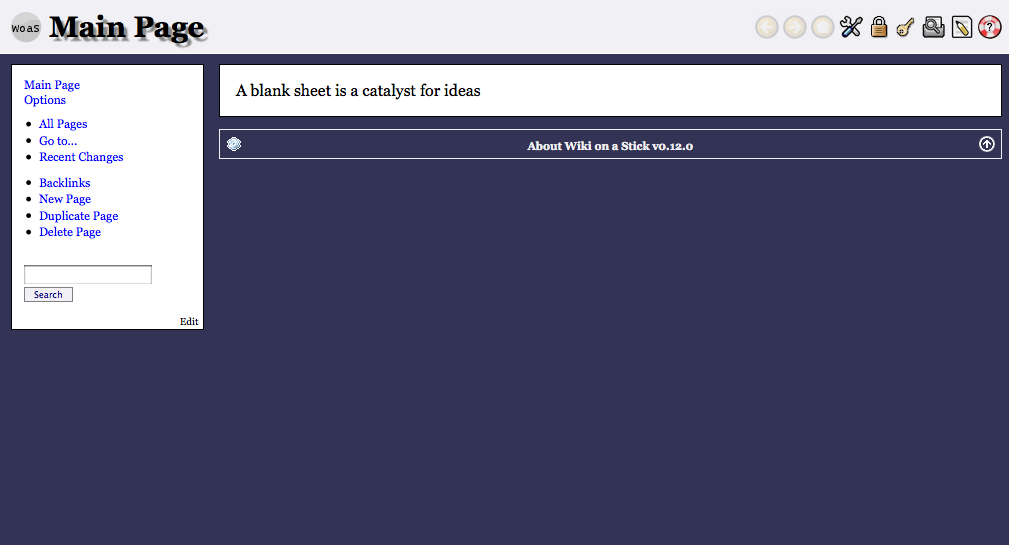
- Click "Erase Wiki" in the lefthand nav-bar. It'll give a couple of warnings about erasing pages, that's okay. It'll likely ask to deny or allow a script because of threats like viruses. It's okay to allow. I realize that may make folks nervous, allowing something they'd just downloaded and talk of viruses. But, it came from sourceforge, a very trusted site.
- Your WoaS is now much cleaner. It should look like the second picture here.
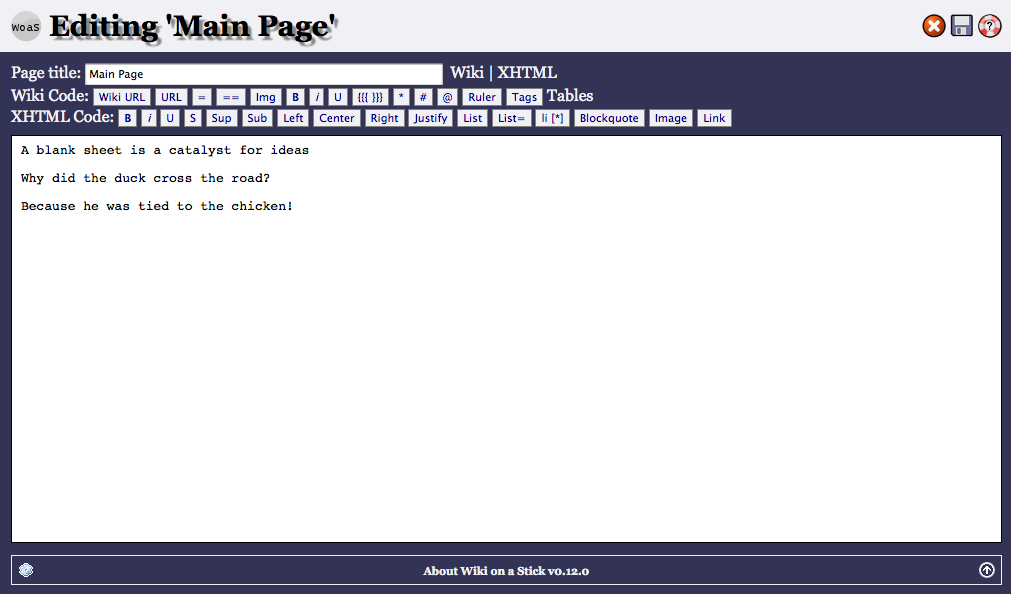
- Try an edit. Click the pencil icon in the top right corner. WoaS will switch to edit mode and you'll be able to see "behind the scenes." Type something in, anything, then click the save icon (floppy disk).
- See the new page? Your changes should appear on the main page. At this point, you should do a test...reload the web page in your browser. This makes sure it truly saved. If your changes reappear, you're good to go. If they're NOT there anymore, it didn't save. This goes back to web browsers -- Firefox is best for WoaS.
- Mess around a bit. Try it out. Don't worry, you won't mess it up and anything done can be undone.
Possibilities
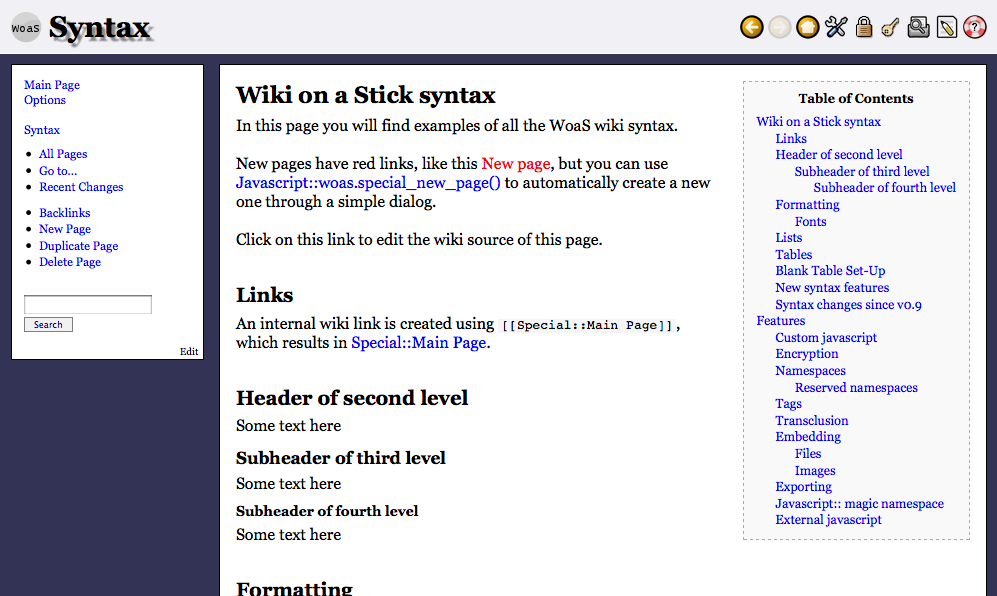
WoaS Syntax creates lots of possibilities
I'm not sure why, but there's no page that shows all the syntax possible. On the "code_red" activity, I put a page called "Syntax". You can look at or steal that info. I'd suggest copying it and putting in onto your WoaS. To do that...
I'm not sure why, but there's no page that shows all the syntax possible. On the "code_red" activity, I put a page called "Syntax". You can look at or steal that info. I'd suggest copying it and putting in onto your WoaS. To do that...
- On your WoaS, click "New Page"
- Give it a name like "Syntax"
- It'll ask if you want to add a link to the nav bar, say yes (you can delete it later if you wish)
- You have 2 options here...
-
Option A
- Go to this link then select and copy all the text that comes up.
- Go back to your Syntax page, click the edit icon, paste in the text, click the save icon.
-
Option B
- Go the code_red, click "Syntax", click the pencil icon
- Select everything that shows up in the white area, copy it
- Go back to your Woas, paste the text in the edit box, click the save icon
- Done, you now have a syntax page. Scroll through it and look at all the possibilities.
Getting Going
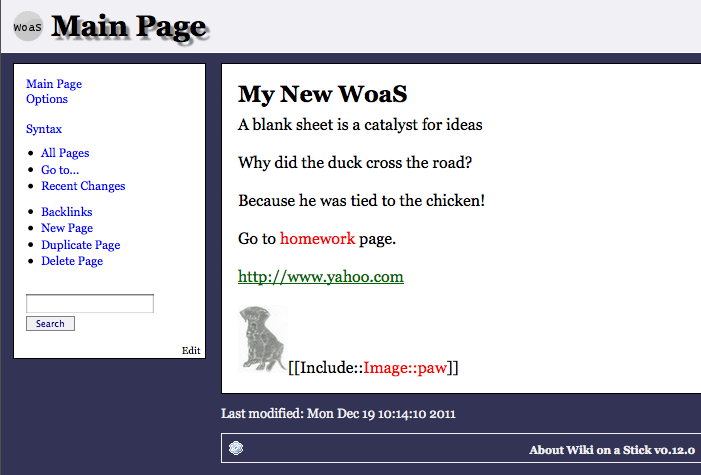
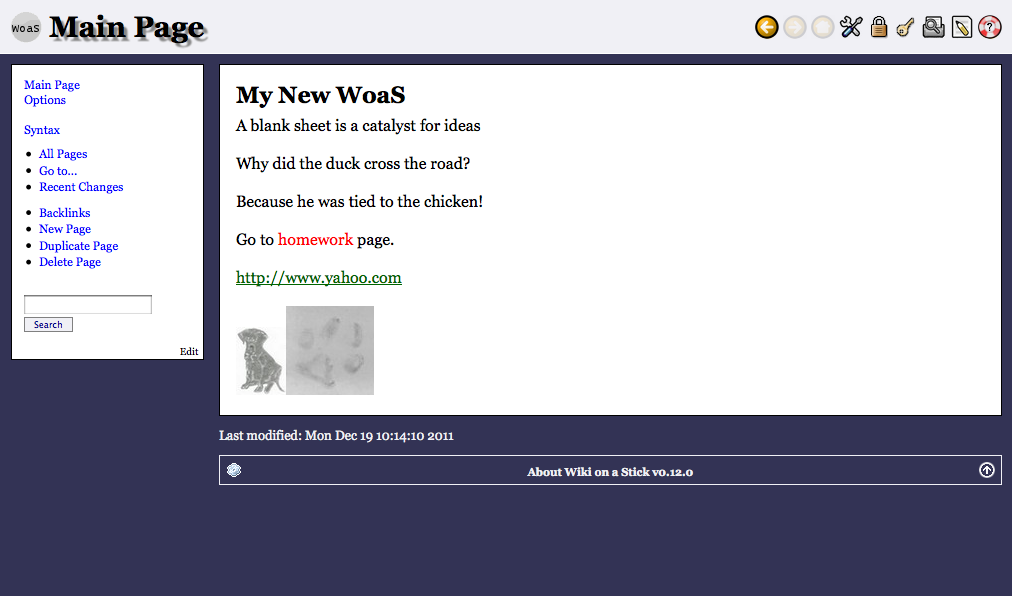
It's time to stretch your legs and make the WoaS your own.
There are many things possible in WoaS, but probably the most basic and useful are...
Pages
There are two ways to make new pages...
WoaS syntax uses the = sign to denote headings. One = is a main heading, two == is the second level, three === is the third, etc. Using these makes your pages look clean. It also automatically fills in a table-of-contents, like the one you see on the Syntax page.
Links
There are two types of links here: internal to pages on your WoaS and external to URLs on the Internet.
There are two main ways to handle pictures in WoaS: include a link to a picture on the Internet or embed the pic into the WoaS page.
There are many things possible in WoaS, but probably the most basic and useful are...
- pages
- headings
- links
- pictures
Pages
There are two ways to make new pages...
- New Page -- Click "New Page" in the lefthand nav bar. Give the page a name. You can either have it add a link in the nav bar or not.
- Double square brackets -- While editing any page, you can simply make a new page by naming it in double square brackets, like this: [[my new page]].
WoaS syntax uses the = sign to denote headings. One = is a main heading, two == is the second level, three === is the third, etc. Using these makes your pages look clean. It also automatically fills in a table-of-contents, like the one you see on the Syntax page.
Links
There are two types of links here: internal to pages on your WoaS and external to URLs on the Internet.
- Internal links -- To link to another page, go to edit mode and just put the page's name in double brackets. For instance, to link to a page named "homework", type [[homework]], click the save icon, that's it.
- External links -- To link to a URL, go to edit mode, type the URL, click the save icon.
There are two main ways to handle pictures in WoaS: include a link to a picture on the Internet or embed the pic into the WoaS page.
- Include a link -- Copy the URL link of your picture. Go to edit mode, in the "XHTML Code" row, click "Image" and paste the pic's URL. I entered a URL to a pic of my puppy. Click the save icon.
- Embed a pic -- I prefer this method because once set up, you don't need to be connected to the net to load the picture. The pic is embedded into the WoaS page itself. To do this, save your desired pic to your computer. Go to edit mode, in the "Wiki Code" row, click "Img", then give your pic a name. I entered "pawprint". Click the save icon. Not done yet -- you see red text with the name of your pic. Click it, browse to find your pic on your computer, click "embed." Done!
Trick 1
Most of the time, the basics are all that's needed. WoaS can do much more, but that's beyond the scope of this instructablee. Still, I'd like to explain the few "tricks" that I used for code_red.
Trick 1 -- monospace font
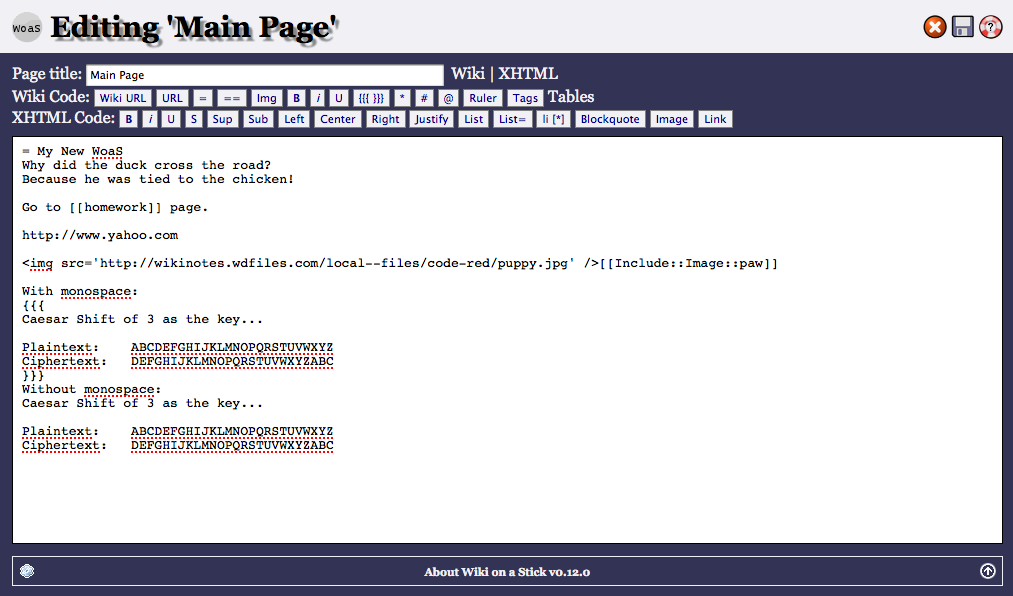
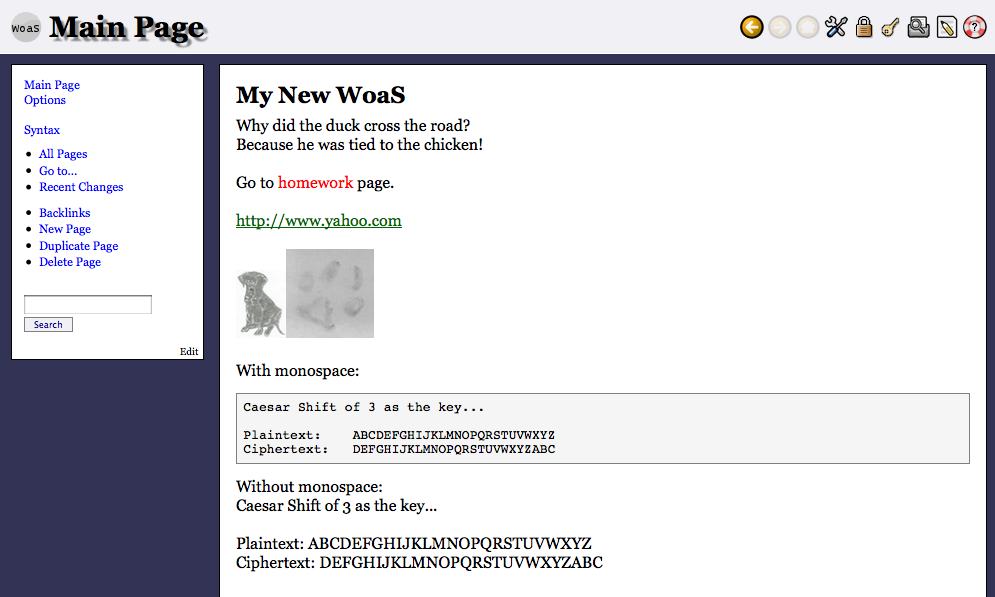
In some of the codes, like code_1 especially, I wanted the text to line up evenly. Monospace does that -- each letter has the same width, even skinny letters like "l" or "i" are the same width as fat letters like "w". There are several ways to do this in WoaS, I just told WoaS to NOT parse the info by using these symbols... {{{ and then }}}. Take a look at the two pictures and how they wind up looking different with or without monospace.
Trick 2
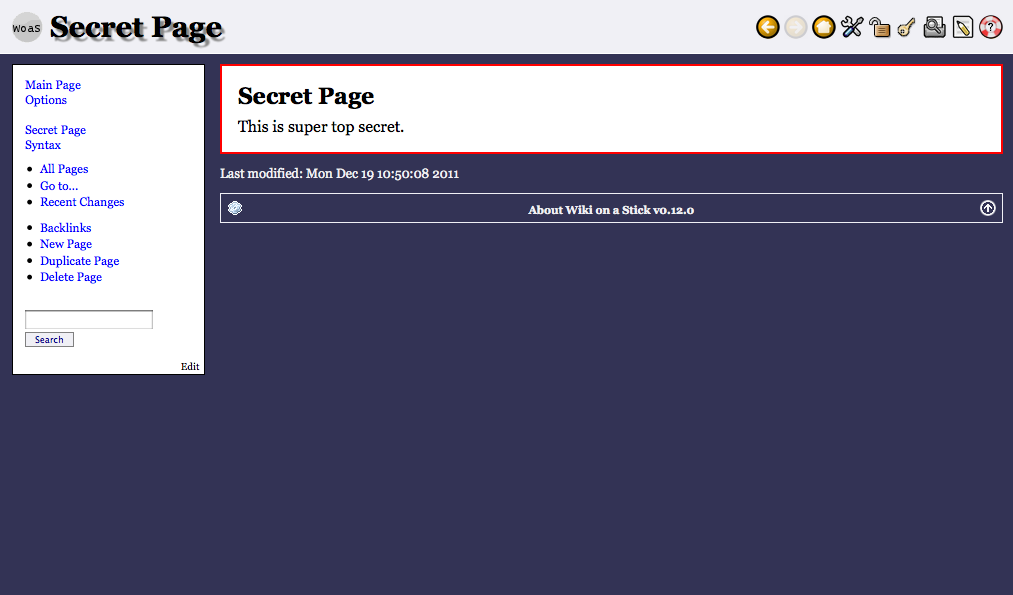
Trick 2 -- key word and lock page function
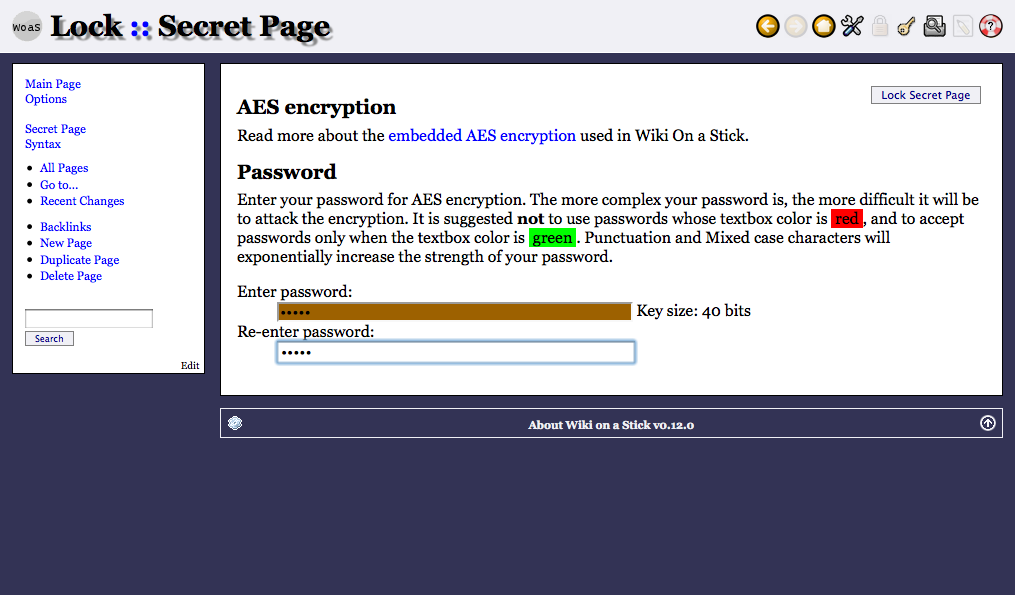
Each "clueword" page is password protected on code_red. Students must decode the message to get the key word. To lock a page is pretty simple...
Each "clueword" page is password protected on code_red. Students must decode the message to get the key word. To lock a page is pretty simple...
- Make a page that you want to lock. Let's do that on your WoaS. Create a new page called "Secret Page," type something in if you want, save it.
- Click the lock icon in the top right. Enter your desired key word twice, PRESS ENTER/RETURN on your keyboard (DON'T click the "Lock Secret Page" button, it seems to have a snag).
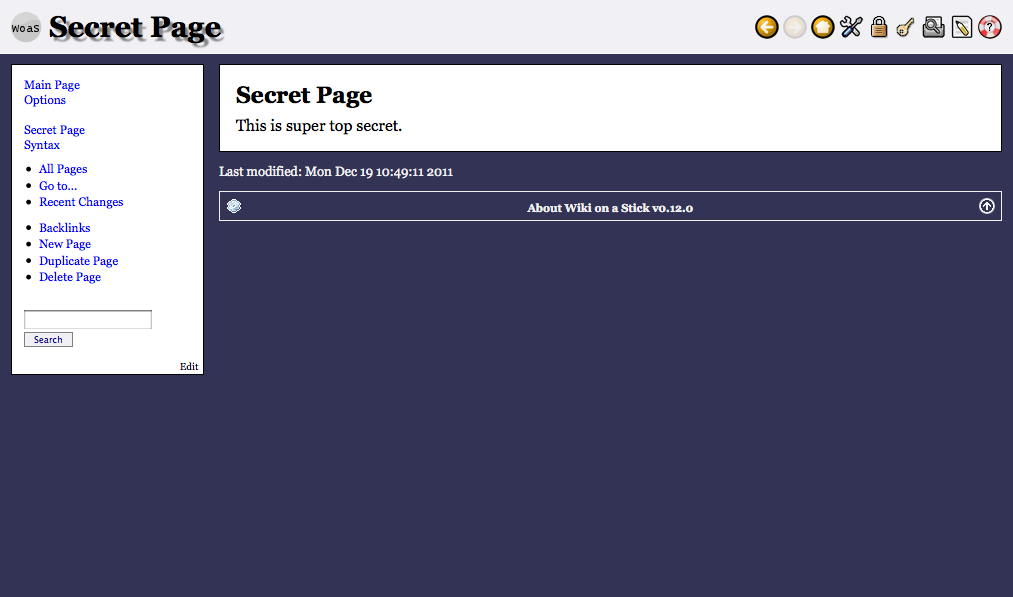
- After hitting RETURN/ENTER, it'll go back to your page, but notice it's outlined in red. That means it's key word protected.
- If you reload the WoaS page, then try to go back to your locked page, it won't. To see it again, click the key icon, enter your key word, then try your locked page. Should work.
Trick 3
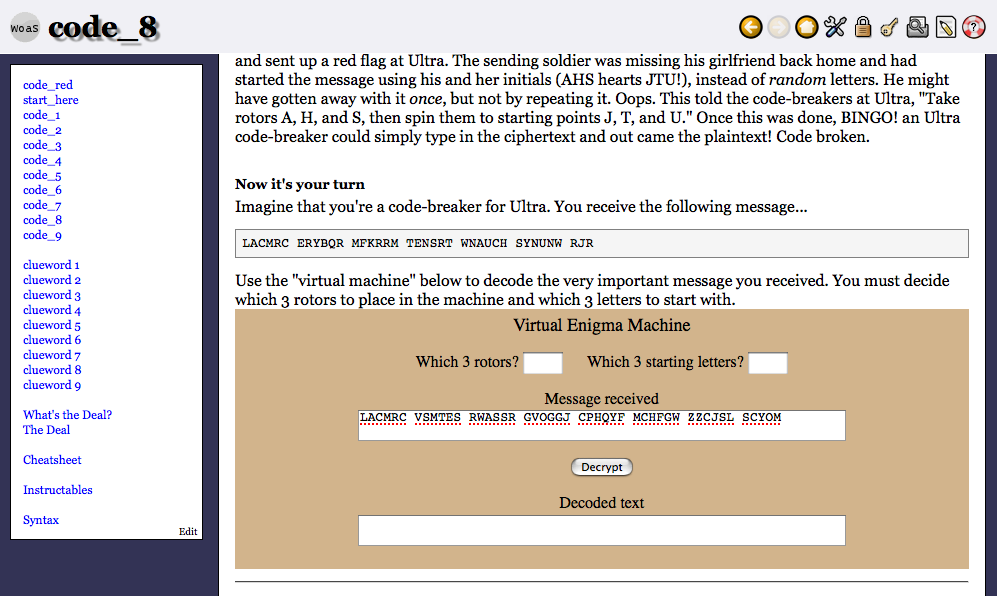
Trick 3 -- embedding a web page
WoaS can handle HTML coded right into it. But for code_8, I found it worked better to make a separate web page (called "enigmacode.htm") then embed it. That means to view one web page within another. To do that...
WoaS can handle HTML coded right into it. But for code_8, I found it worked better to make a separate web page (called "enigmacode.htm") then embed it. That means to view one web page within another. To do that...
- I set up the enigmacode.htm web page on a server so it's accessible on the Internet.
- I used this coding to embed it into code_red.htm: <object data="http://www.mref.net/code_red/enigmacode.htm" style="width:100%; height:260px;">File not found.</object>
- A non-internet option would be to simply stick the enigmacode.htm file in the same folder as your main WoaS file. If you do it this way, use this code: <object data="enigmacode.htm" style="width:100%; height:260px;">File not found.</object>
- The width and height can be changed to whatever.
Trick 4
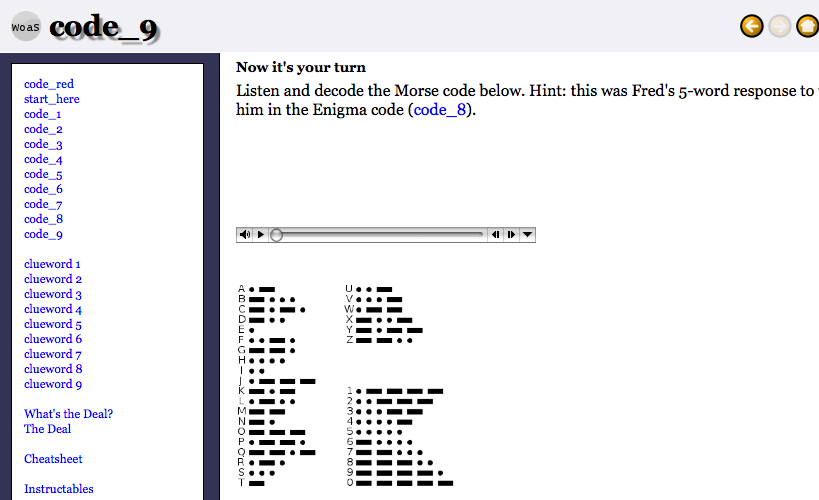
Trick 4 -- embedding sound and movies
For code_9, I needed sound for Morse code. So, I embedded the sound file into the code_red file. To do that...
For code_9, I needed sound for Morse code. So, I embedded the sound file into the code_red file. To do that...
- I made an mp3 of Morse code then put it on a server so it's accessible on the Internet.
-
I used this coding to embed it into code_red.htm: 2. <object width="" height="">
<param name="src" value="morse.mp3">
<param name="autoplay" value="false">
<param name="controller" value="true">
<param name="bgcolor" value="#FFFFFF">
<embed src="http://www.mref.net/code_red/morse.mp3" autostart="false" loop="false" width="300" height="42"
controller="true" bgcolor="#FFFFFF"></embed>
</object> -
A non-internet option would be to simply stick the morse.mp3 file in the same folder as your main WoaS file. If you do it this way, use this code: <object width="" height="">
<param name="src" value="morse.mp3">
<param name="autoplay" value="false">
<param name="controller" value="true">
<param name="bgcolor" value="#FFFFFF">
<embed src="morse.mp3" autostart="false" loop="false" width="300" height="42"
controller="true" bgcolor="#FFFFFF"></embed>
</object> - For the final page called "The Deal" I embedded a short movie. It's very silly, but the students get a kick out of it because they know my goofy humor. It's a fun way to end the overall activity. The process to embed a movie is the same as with sound, only the filename is different.
Wrap Up
There's a lot more that can be done in WoaS. But, we'll stop here because...
Good luck with it! I hope this instructable helps and that you can make awesome use of this tool and gets kids to read.
______________________________________________________________________________________________
The way you really learn to use WoaS is to mess around with it yourself!
Good luck with it! I hope this instructable helps and that you can make awesome use of this tool and gets kids to read.
______________________________________________________________________________________________
By the way, the question in code_red was, "What's the deal with the Mona Lisa's smile?" You'll have to do break the codes to find out!
View "code_red" here.
Download all code_red files in zip format (2.4 MB).