Zoom Virtual Assistance
The need
When every meeting became virtual a lot of us had difficulties, and for those who have children know this but as we return slowly towards our daily life we need to make sure the children are getting in their ‘Zoom’ meetings. The Zoom Virtual Assistant is aiding in support of those issues !
Who are we This project was created by Tal Danai and Oded Helman from IDC Herzliya and the media innovation lab (MiLab) , we want to express our sincere gratitude to our mentor, Zvika Markfeld of ForRealTeam who equipped us with the knowledge, guidance, material and everything in between.
We also want to express our gratitude to Instructables who gave us some of the inspiration for the project and the platform to share it.
One last thanks we want to express is for all the health workers, the pharmaceutical companies who are helping us fight the global pandemic, from our bottom of our heart, Thank You! You helped inspiring this project.
Supplies
This is the list of components we used, its worth mentioning, that almost every component here is replaceable and was chosen mainly due to the availability to us in the time of making this project, it is COVID-19 era :)
1. x1 Circuit Playground Express - (using light, sound, accelerometer sensors)
2. x1 Esp8266 board
Understanding the Data Flow
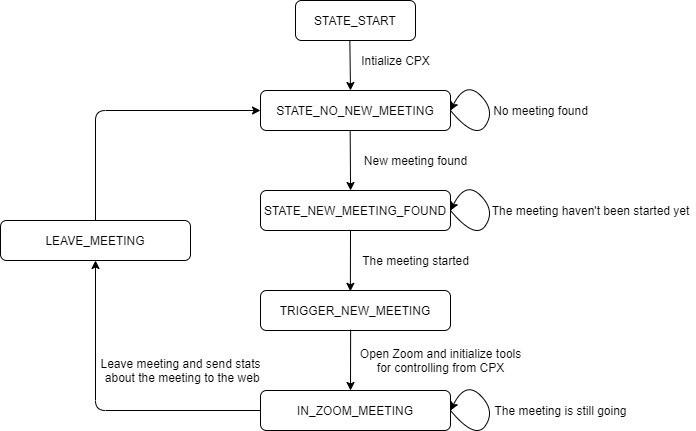
This is a project is built as a state machine which waits until you reach for a new valid ‘Zoom’ link in your google calendar , when it does find it will start a timer until you reach the start of the meeting then it will enter the meeting for you . then you will have option to actively use the functions of Zoom , when the meeting is done (calculated by timer) you will get assistance to leave the meeting and your activity log is being transferred to the spreadsheet. Then it returns to the moment when it searches for new link.
Basic Configuarion & Downloads
The general
config
1. Install latest adafruit driver
2. Install Arduino IDE
3. Install Board Manager
4. Connect the esp8266 shield to playground express
5. Install latest Blynk library
6. Install Adafruit esp 8266 libarary
7. Create Blynk user
8. Create Integromat user
9. Connect playground express to computer via USB
Integromat 1
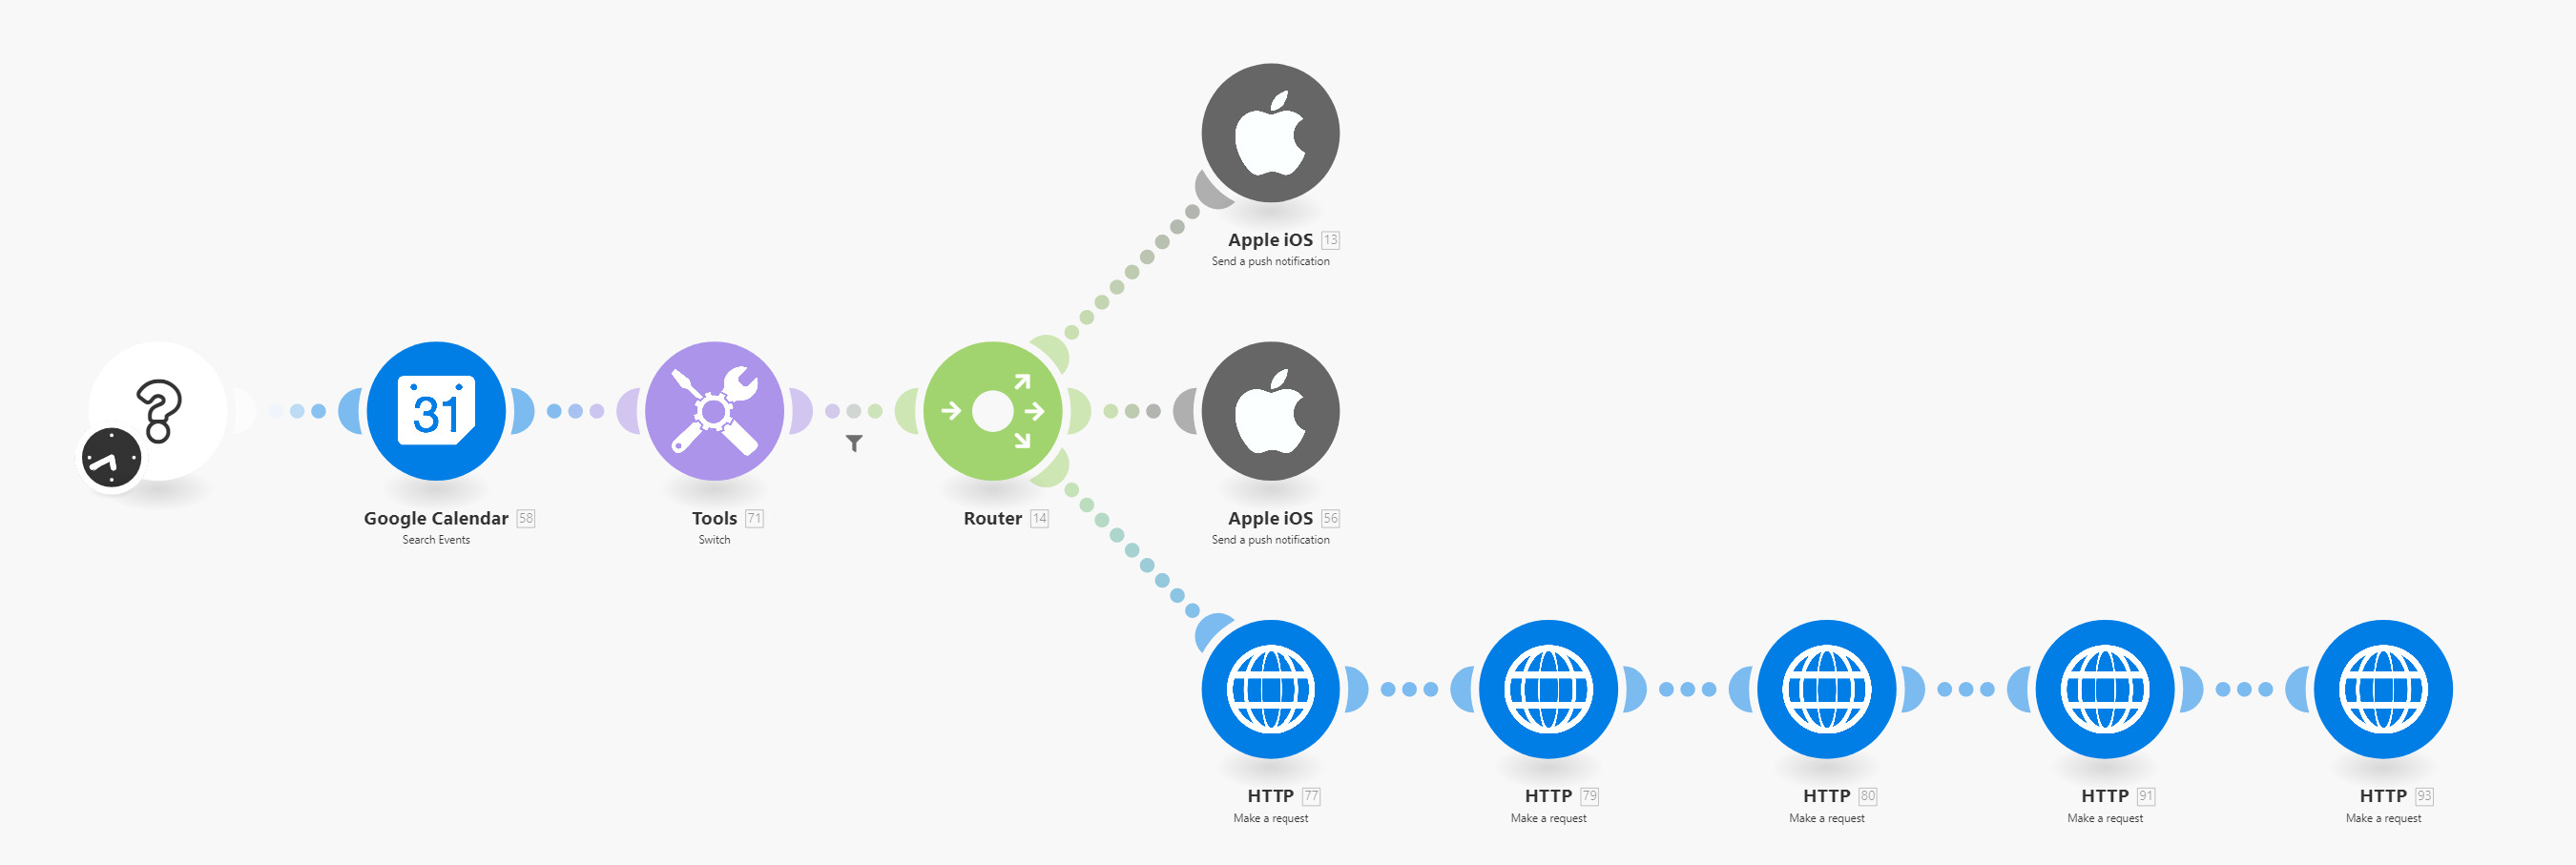

Integromat is a tool that can handle and manage several pipelines in parallel. In our case, we use Integromat services for two main reasons. The first one is to connect the Zoom meeting memo from the Google calendar to the CPX. We do it by sending HTTPs Requests with the following information: URL of the meeting, start time, topic, and meeting duration. The second scenario handles the information updating of each meeting in a dedicated spreadsheet.
Initial steps – first scenario:
1. Create Integromat free account (https://www.integromat.com/en/register )
2. Create a new Blank scenario.
3. Add the following components
a. x1 - Schedule setting
b. x1 - Google Calendar – Search Event
c. x1 - Filter
d. x1 – Router
e. x5 -HTTP – Make a request
f. x2 - Apple/Android – Send a push notification (optional) – Chose the number of smartphones to get a posh notification regards the upcoming meeting.
Building the scenario:
Put the components as follow (look at picture 1):
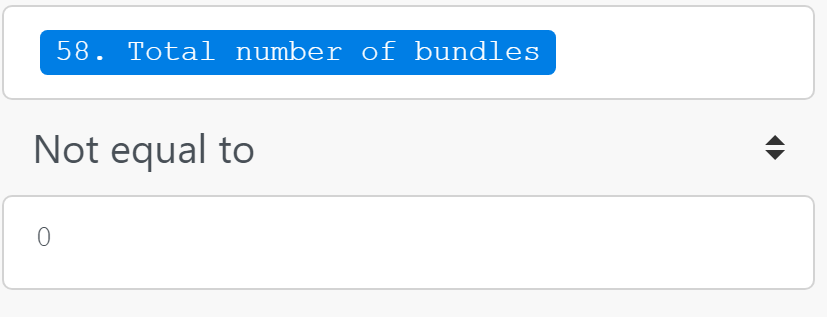
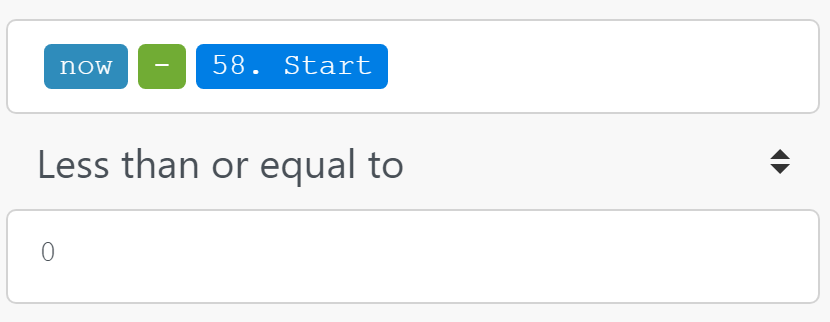
1. Config the "Google calendar - search event" to notify every event that starts in 15 minutes – you can add a filter in the connection of the Google calendar and the router.
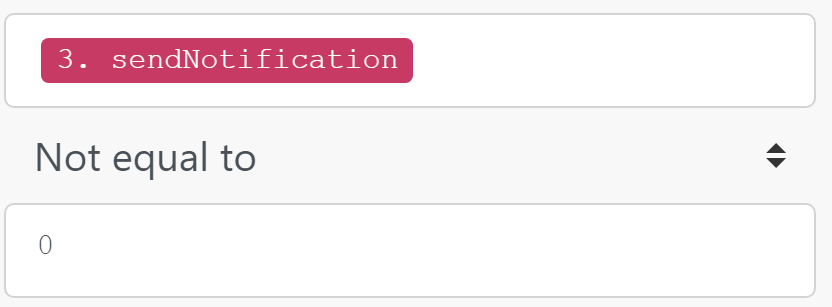
a. The filters data should be configured as following (with AND rule):
2. Connect the router to the push notification events (if exists) and to one HTTP request event (Chose one).
3. Create a message to be sent to every phone whenever a recent meeting is processed in Integromat.
4. Config 5 HTTP request as follow:
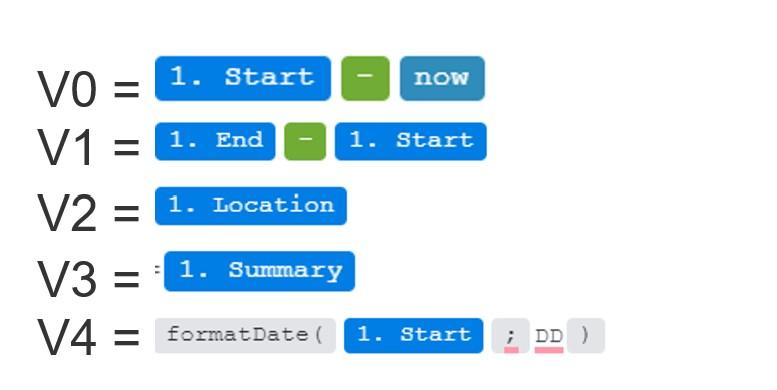
Each request should send data to a dedicated virtual pin on the CPX.
(look at picture)
Each HTTP request should have the following structure:
http://188.166.206.43/auth_token/update/pin?value=val
auth_token = the unique token of the Blynk project
pin = Virtual PIN
value = the value to be sent (as mentioned above)
Example is shown where the summary\subject\topic of the event is assigned to V3
Integromat 2
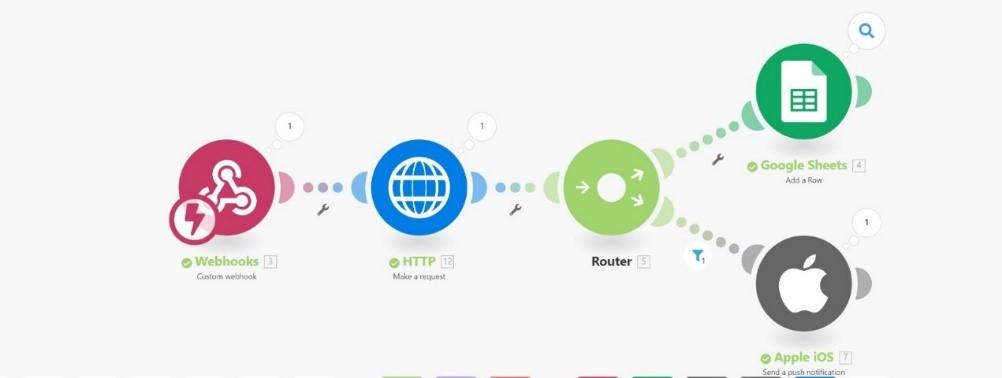

Initial steps – second scenario:
1. Create a new Blank
scenario.
2. Add the following components
a. Webhook – custom webhook x1
b. Google sheets – add a row x1
c. Router x1
d. Apple/Android – Send a push notification (optional) x1
e. HTTP request x1
Building the scenario:
Put the components as follow:
1. Config new webhook – save it for later use.
2. Config the HTTP request to get the value from virtual pin 8 on the CPX (http://188.166.206.43/auth_token/get/V8)
3. Connect the Google sheets and Push notifications using the router.
4. Open a new google sheet that his purpose is to visualize and summarize the data collected from the CPX.
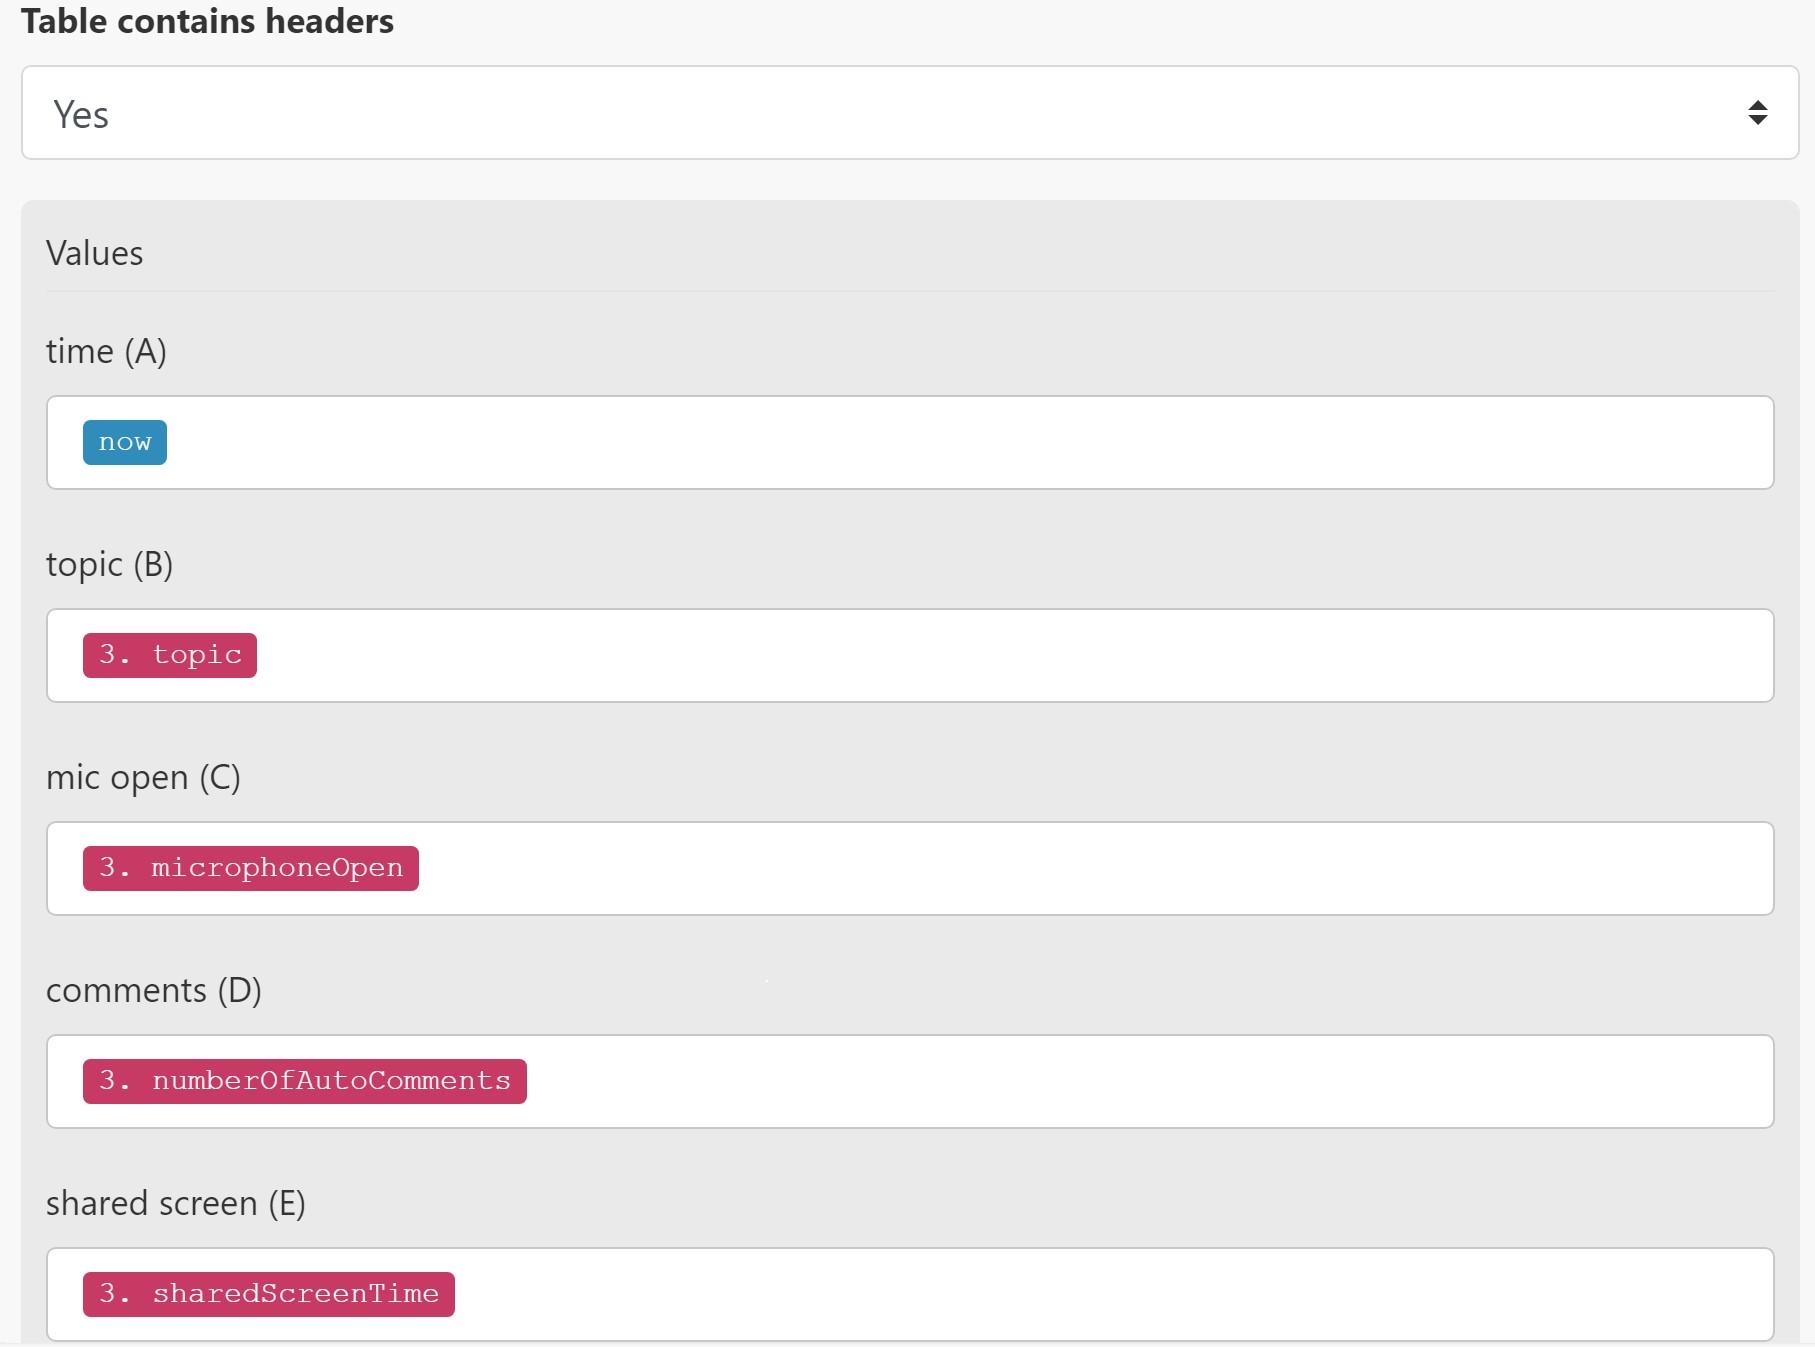
5. Config the "Add a Row" event to add the following data:
- Time
- Topic
- mic open
- comments
- shared screen
(picture of the setting is inserted)
6. Config a message to be sent as a notification to your mobile device whenever a new row has been added to the sheet.
a. The filter is set as follows (with AND rule)
(look at the picture)
Blynk

1. Download Blynk app from AppStore/GooglePlay
2. Go to the Blynk app.
3. Touch the QR-code icon and point the camera to the QR code below
after that send yourself the authentication code (we will use it in the next step)
If this was successful go to next step , else continue to read ,
3. Create a new project.
4. An authentication key will be sent to your email address - keep that key somewhere close.
5.Follow the following steps:
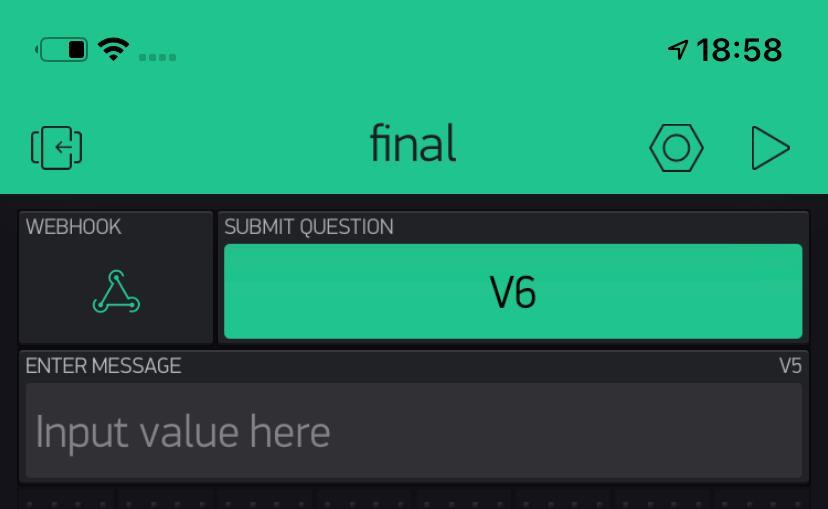
A. Click the small (+) button, and add the following widgets to your dashboard:
· 1 x Webhooks. (500 energy pts)
· 1 x Styled Button. (300 energy pts)
· 1 x Text Input. (400 energy pts)
B. Set the following:
· Webhooks to V4.
· Webhooks URL as follow:
https://hook.integromat.com/xxxxxxxxxxxxxxxxxxxxxxx?microphoneOpen=/pin[0]/&sharedScreenTime=/pin[1]/&numberOfAutoComments=/pin[2]/&topic=/pin[3]/&sendNotification=/pin[4]/
The xxx part of the URL should be replaced with the URL you get from Integromat in the Integromat 2 step
· Styled button to V6 (Chose Switch button in MODE).
· Text Input to V5 and CHARACTER LIMIT = 100K
Notes:
· Other adjustments to your dashboard, such as tweaking the color of your Terminal (like we did, as you can see in the picture) are up to you!
· For additional info on Blynk, its diverse selection of widgets and some very comprehensive documentation and usage examples, check out this link.
Running the Code
The code is attached, hopefully, you will find it easy to use (we tried to document it as much as possible).
Open Arduino IDE and import the code, make sure that you are working on the right board (use Tools -> board)
Initializing code :
1. Enter your wifi under the variable ‘ssid’ (line 68)
2. Enter your wifi’s password under the variable ‘pass’ (line 69)
3. Enter your Blynk authentication code under variable ‘auth’ (line 70)
4. Run your Blynk project
5. Upload sketch to Circuit Playground Express (Note: keep the CPX connected to computer)
6. Run both Integromat scenarios
During meeting functions :
1. Open microphone - > press and hold the CPX’s left button
a. The microphone will be open until you release it
b. The CPX will show you colors if it’s red -> no one can hear you, otherwise green
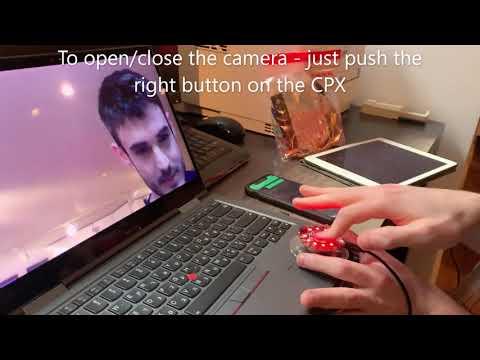
2. Open Video camera -> press for few seconds the CPX’s right button
3. Entering text from Blynk
a. Type in text input the text you want in your phone
b. Press on the submit button
c. If the language is not matching the type of language you want to type in shake the CPX horizontally -> will cause the delete all text, switch language and retype it in the entire thing. (this applies to any time a text is being written during the code)
When Slideswitch is on :
4. You may tilt the cpx vertically -> in order to share\unshare your screen
When Slideswitch is off:
5. You may cover your cpx with your hand and start talking and then lift your hand-> this will trigger a ‘raise hand’ function during the meeting