Zoom USB Button Machine
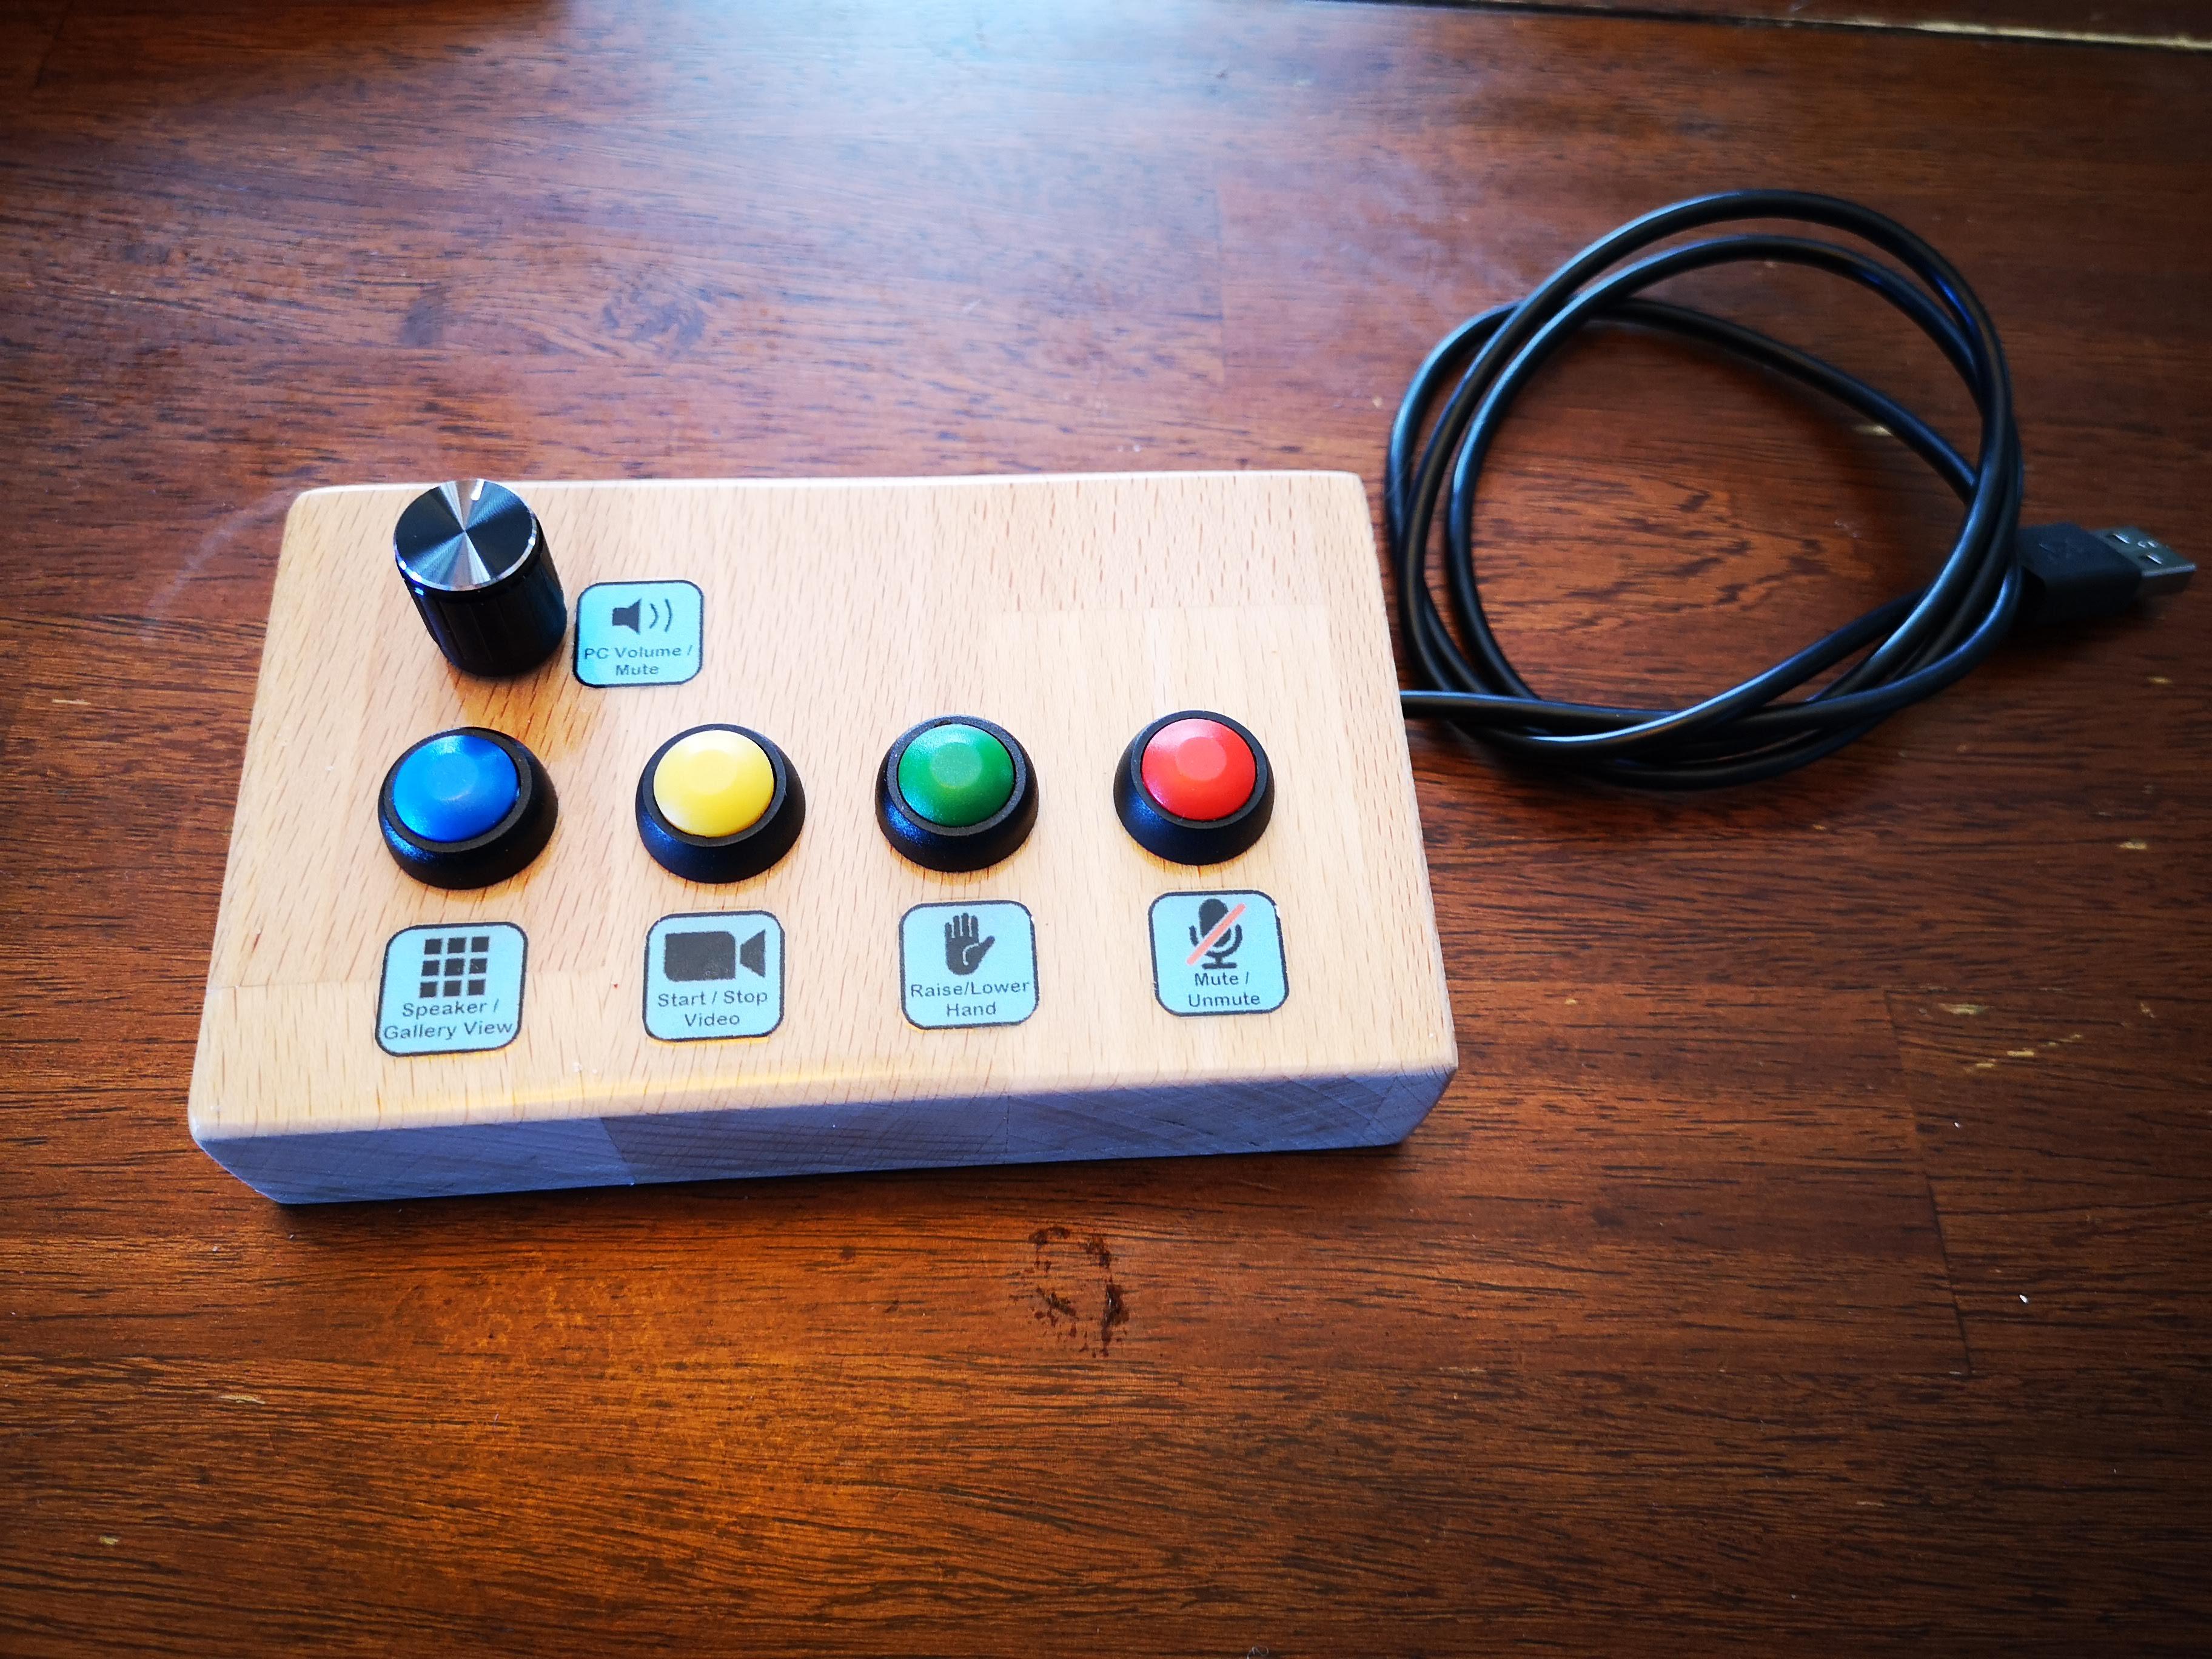
Many of us have changed how we do things during this pandemic, from work to worship. The main commonality is that we are using remote video conferencing tools more and more. The most common has been Zoom, though not the only one.
I have seen many of our friends, especially the less tech savvy, struggle with using the tools... "you are on mute" is probably the most common affliction these days.
In order to alleviate some of these issues I decided to make a small box that will automatically send the keyboard shortcuts needed for muting, raising hand, video on off, etc when the button is pressed.
*NOTE* This will not work on all Arduino models (UNO, Nano, etc). You need a model that uses the ATmega32u4 processor which will work as a USB keyboard.
Supplies
- push buttons
- rotary encoder
- arduino pro micro
- wires
- USB cable
- some sort of case
- soldering iron
- drill and drill bits
Step 1: Start Assembling
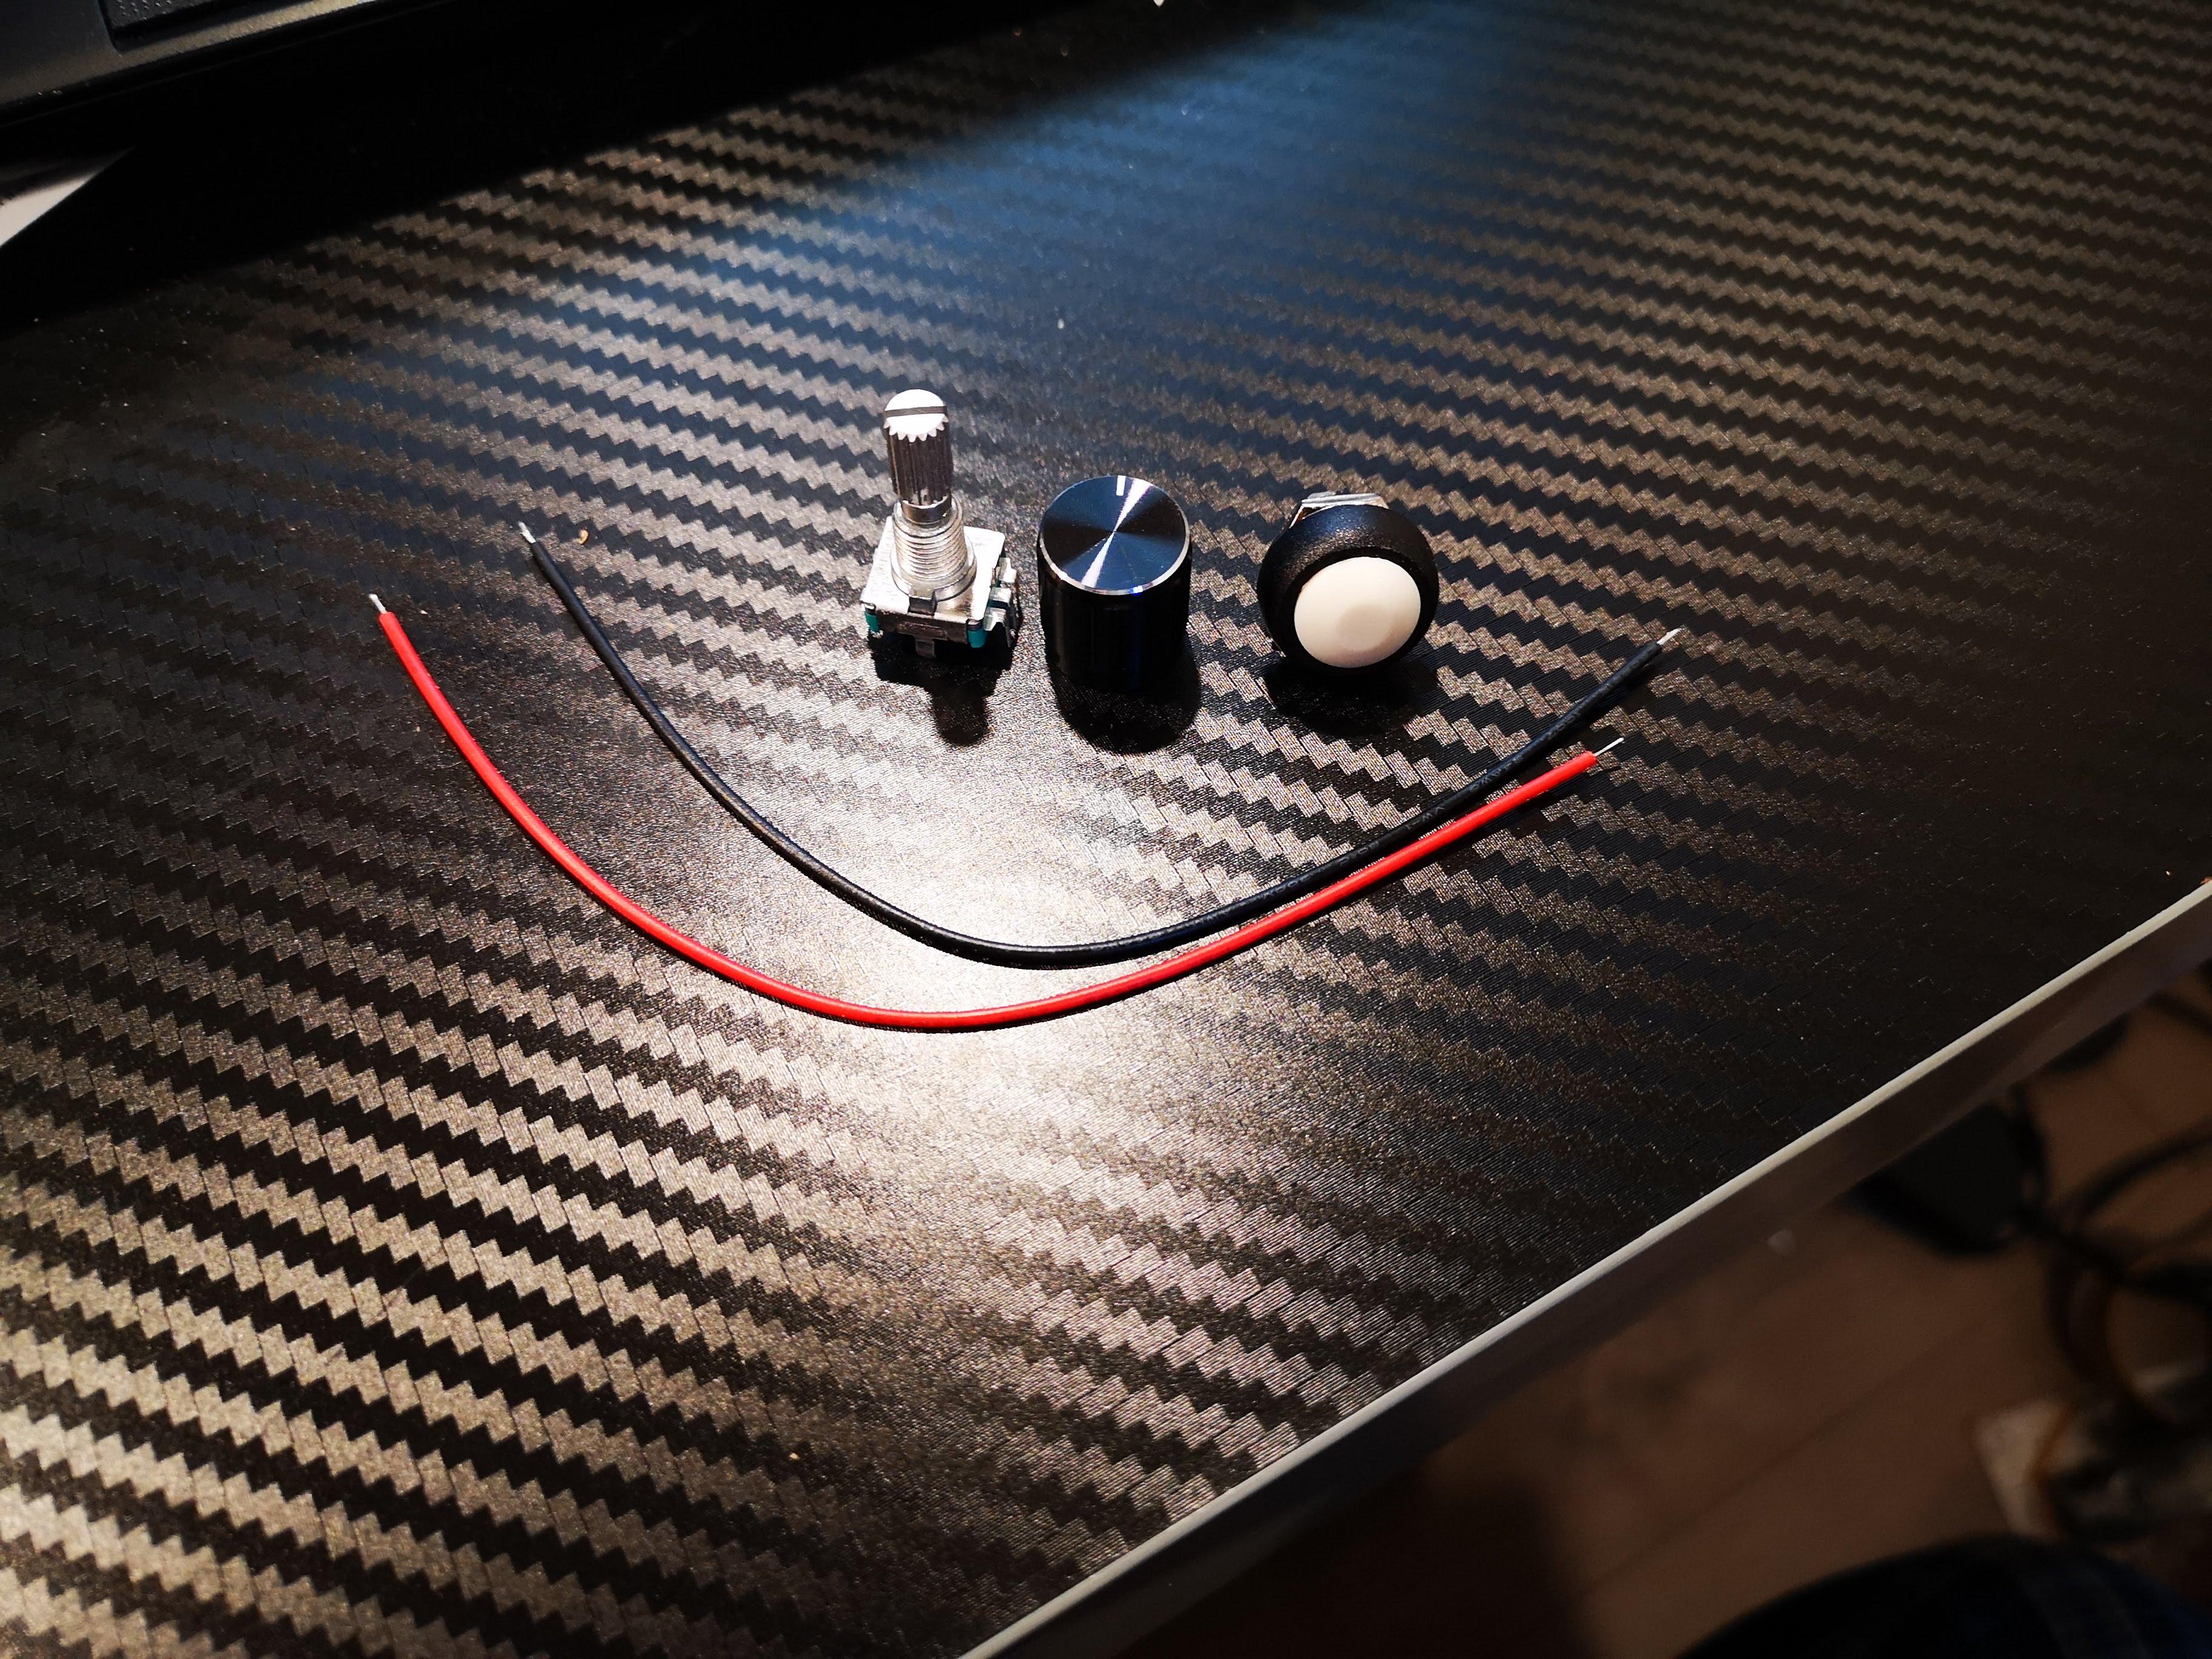
You will need to find a box for this project. You will need to decide on the size of this based on your switches.
You can choose smaller switches like mine (12mm) or even go larger with arcade style switches. You can go simple like a show box, or a box your latest electronic gadget came in (phone, tablet, router, Lego, etc). Another option is a project box (search on Amazon) or making your own as I did out of wood. The world is your oyster.
Based on your switch, make the appropriate sized holes in your box. Once the holes are made, fasten your switches.
Make a separate hole for your rotary encoded. The hole will be big enough for the post and threaded body. The encoder will mount from below, unlike the switches.
Your box will also need a hole for the USB cable.
You can decide to mount the Arduino flush with the edge of the box, or more inside the box. If you flush mount, you will need a hole lined up with the USB connector.
Once everything is in place, we can start connecting everything.
Step2: Wire It Up
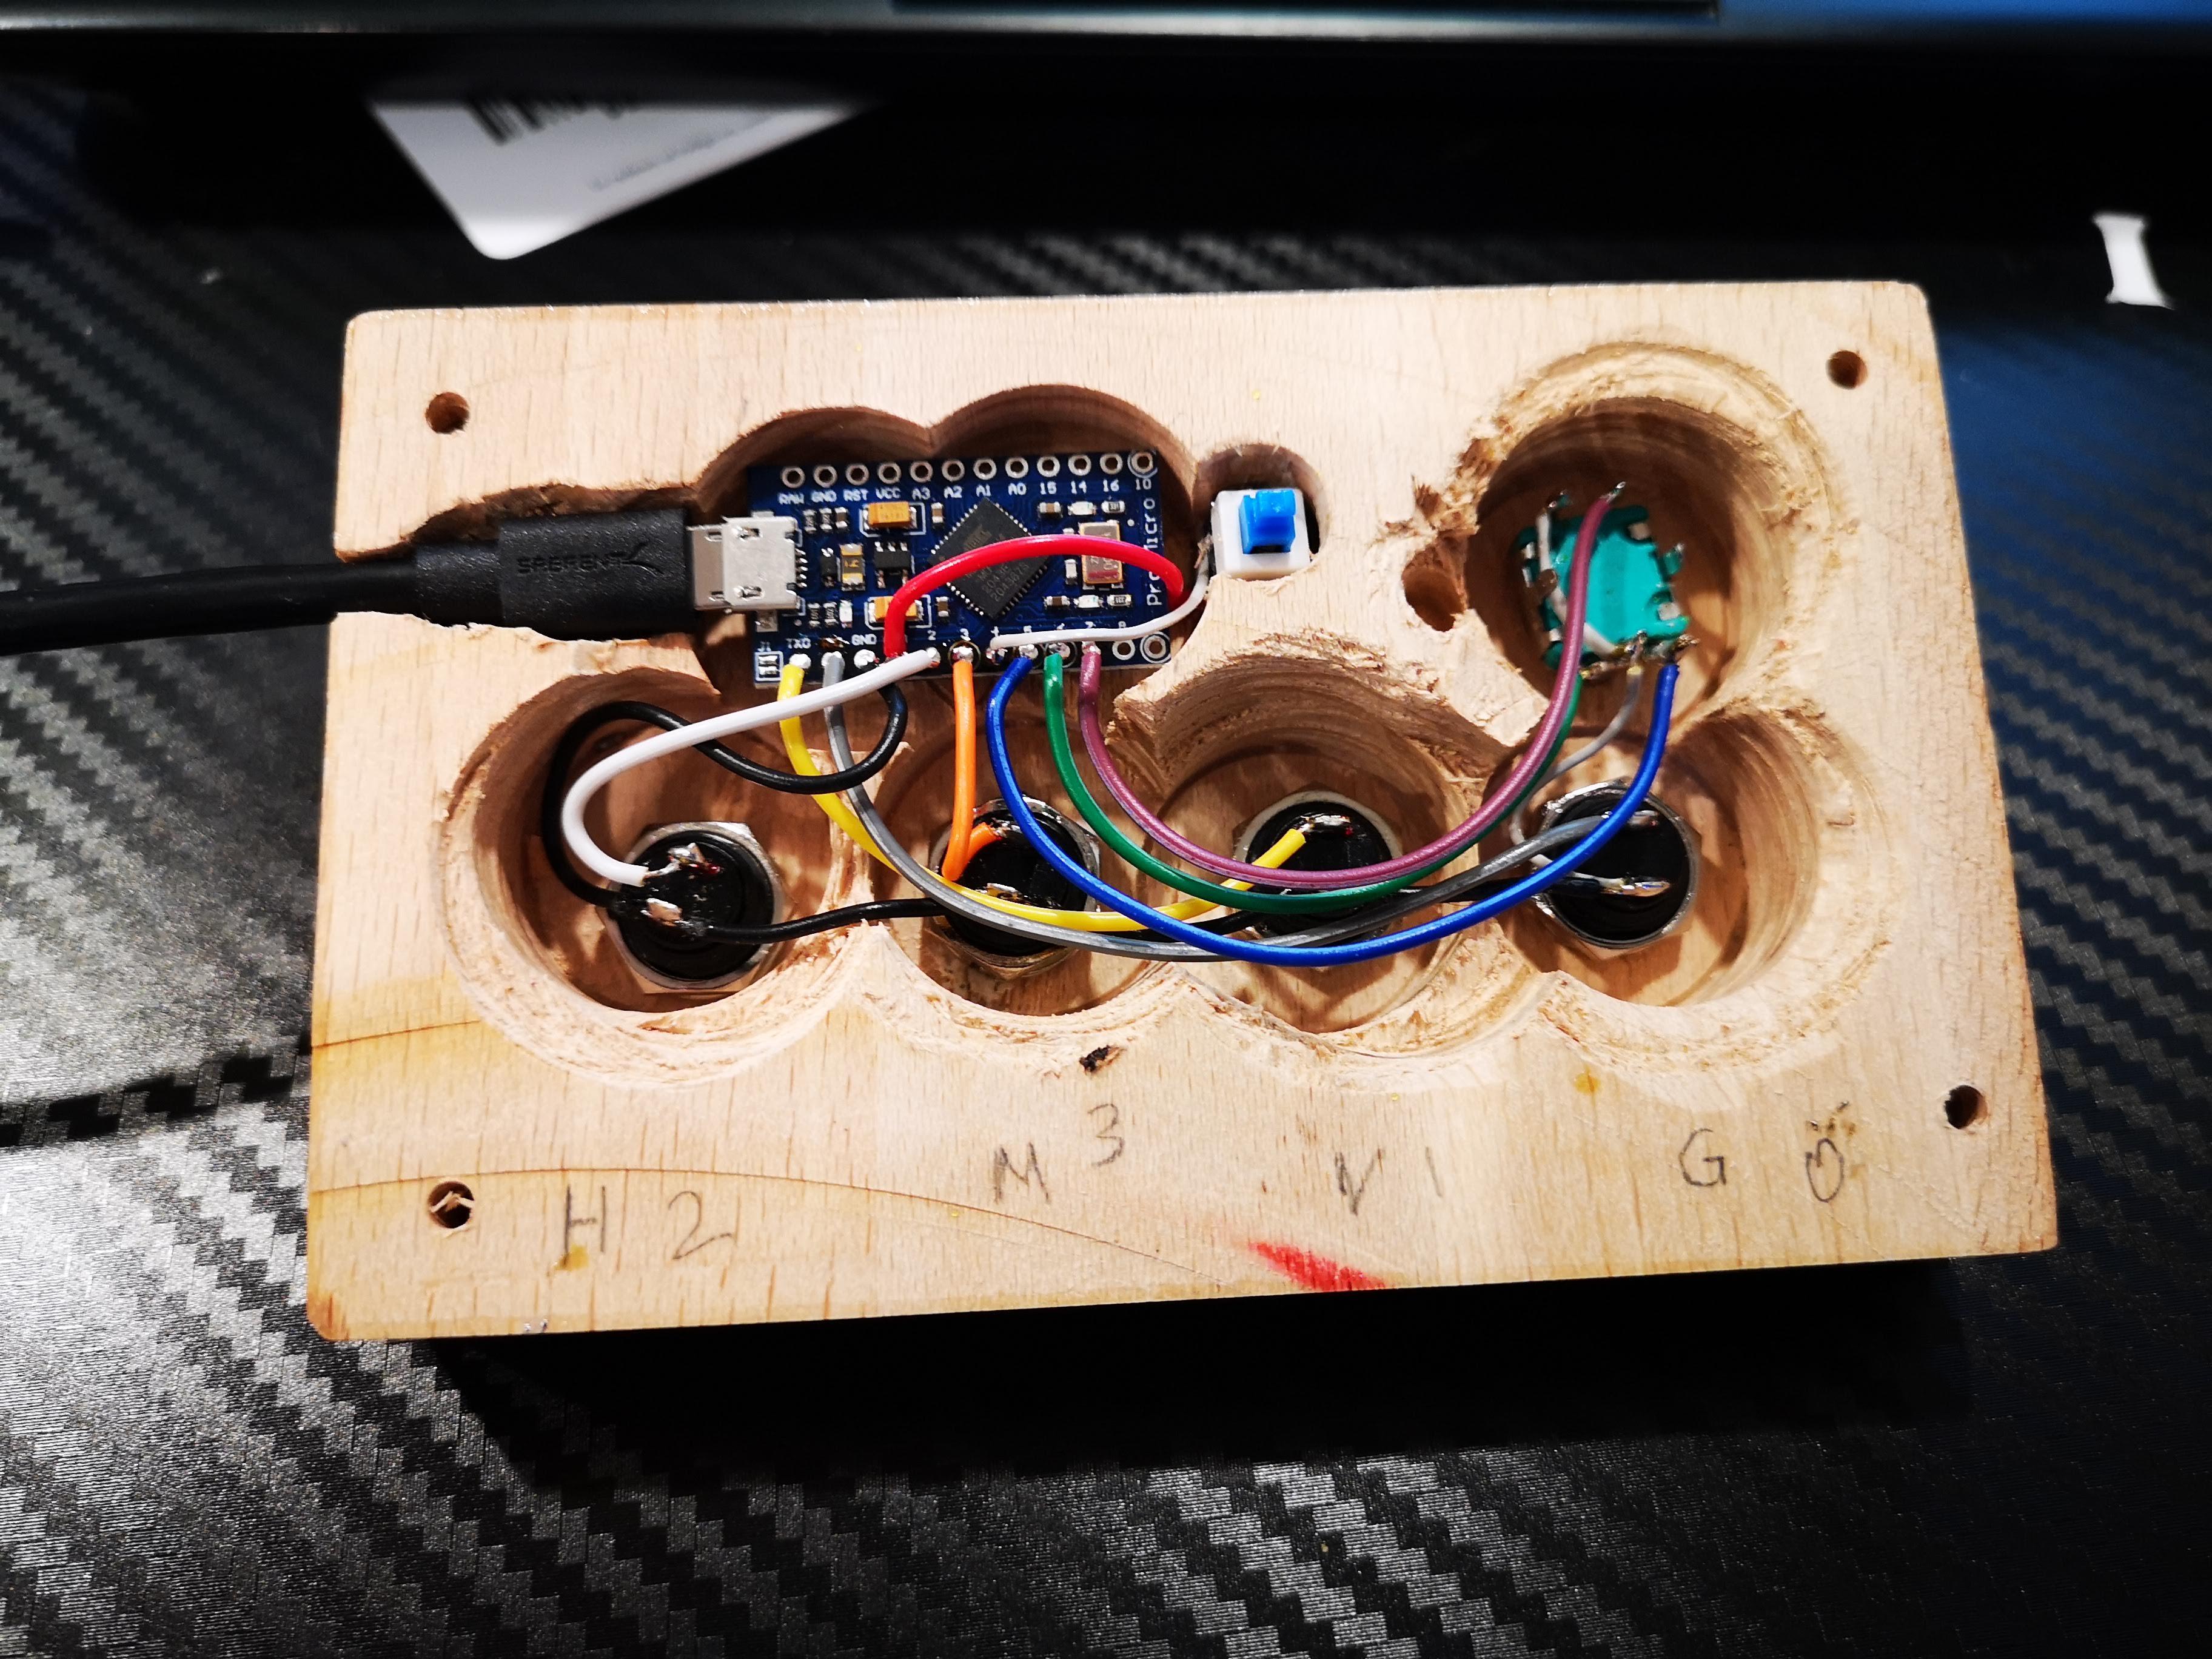
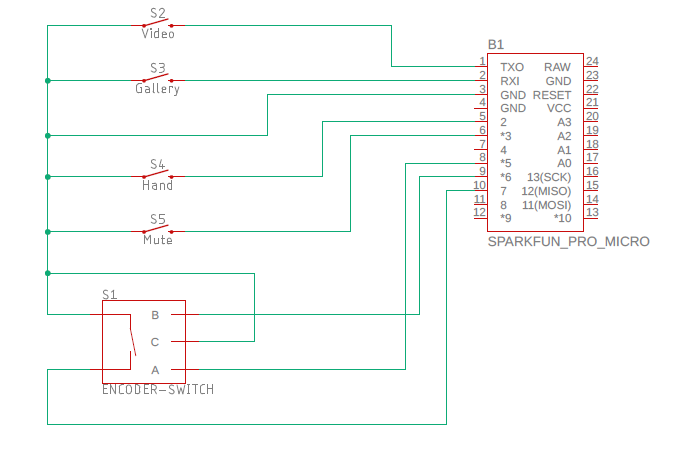
Now that it is all assembled, we can start attaching all the wires.
Start with the ground connections. Each switch has two contacts. One will be ground, the other will be the signal. Connect one contact from each switch together so they are daisy chained.
The rotary encoder has 5 contacts... 3 on one side, 2 on the other. Connect the middle one of the 3, and one on the side with 2. These two pins will be connected to the daisy chained push button pins. These will all go to Ground on the Arduino.
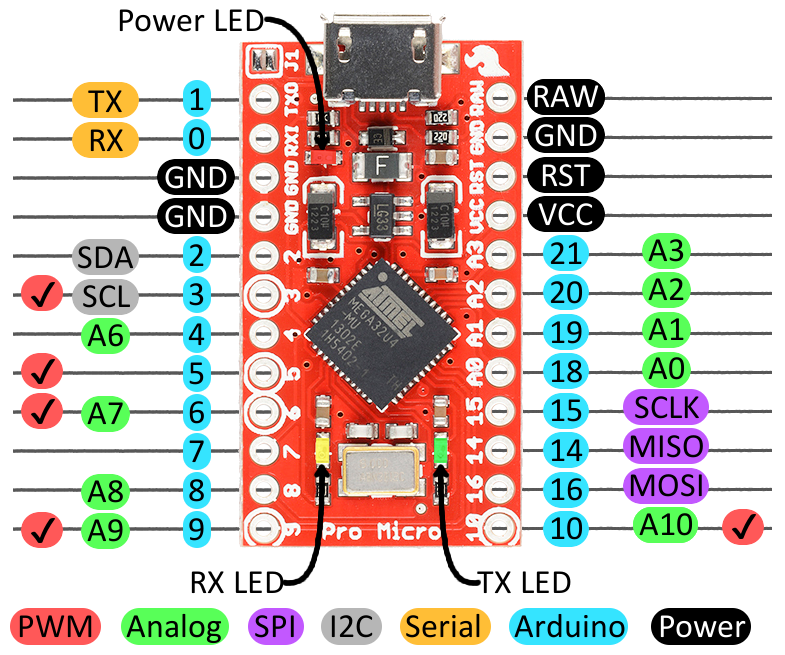
With the grounds out of the way, proceed to connect the remaining pins to the appropriate Arduino pin. Refer to the schematic for the correct pins on an Arduino micro.
Once it is wired, you can program and test the Arduino
Step 3: Program the Arduino
You will now connect the Arduino to your computer and program it using the Arduino IDE.
If you have never used Arduino, you will find all the information you need at :
https://www.arduino.cc/en/Guide
Once you have programed the Arduino, you can close up your project box and start using your new USB Zoom box.
Downloads
Step 4: Start Using It

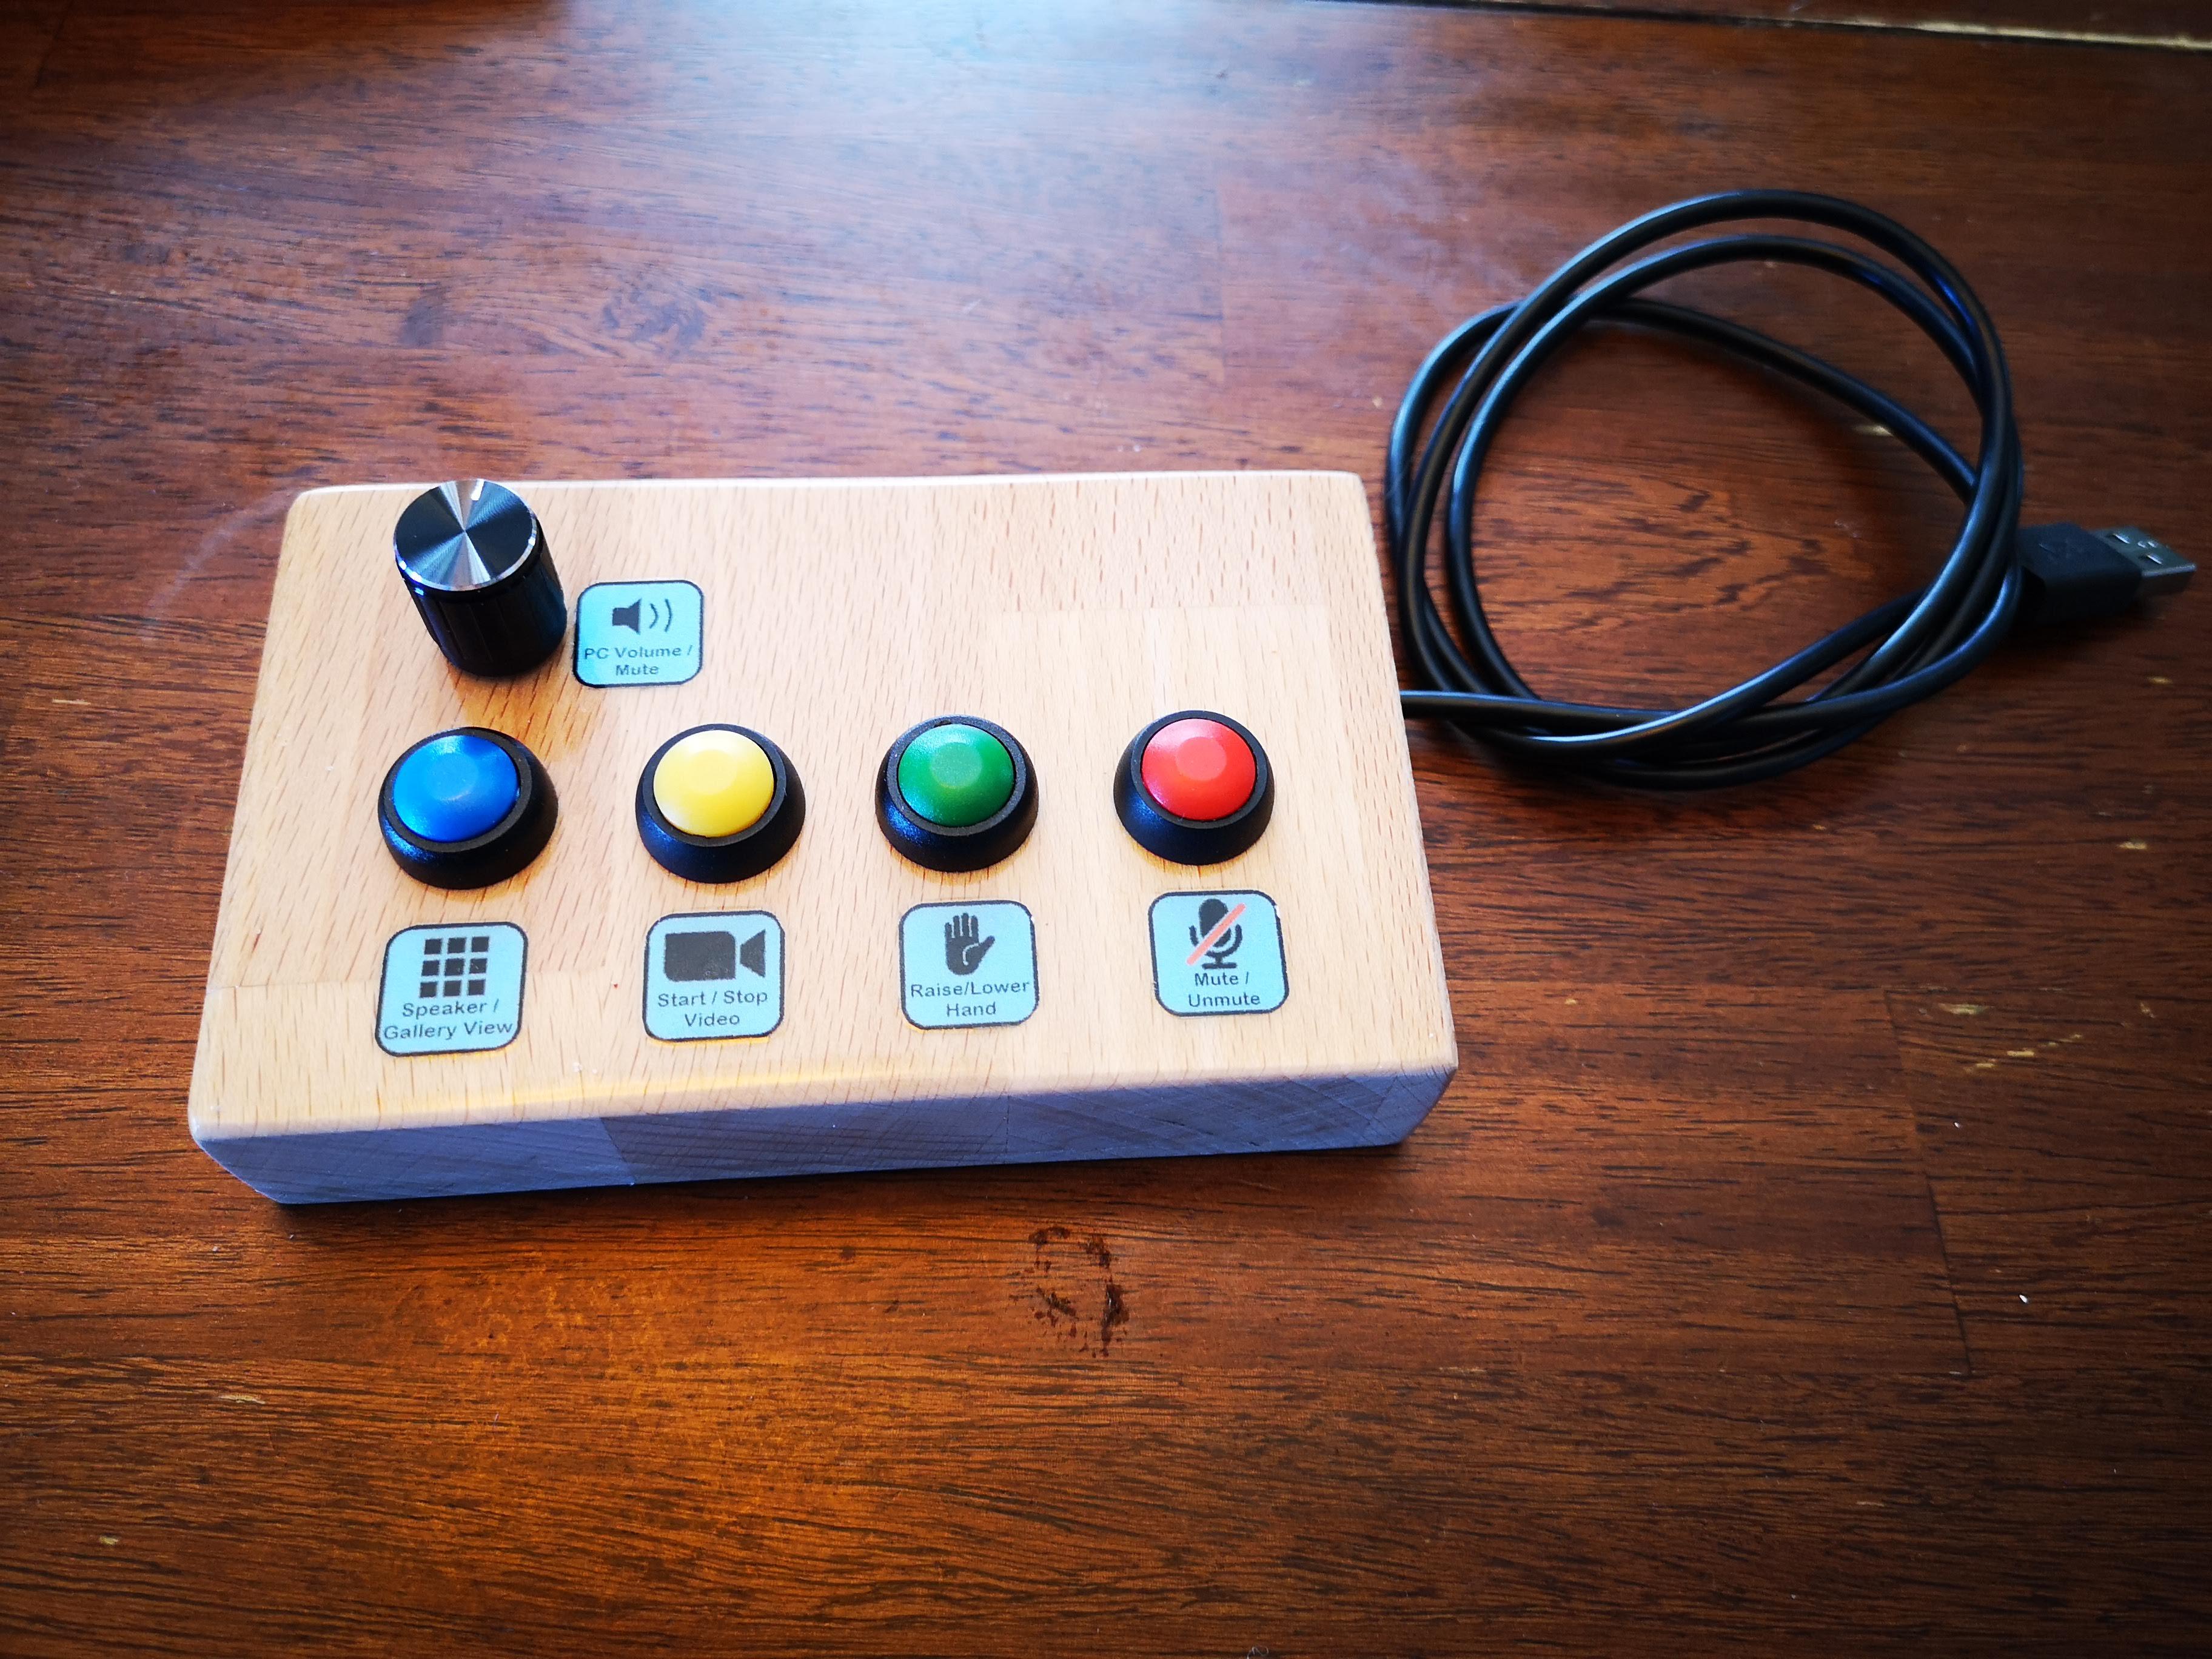
Now, launch Zoom and get into a meeting.
Your buttons are programmed to Mute, Raise Hand, Video On/Off, and switch between Gallery and Speaker view.
If you have changed any of the default keys then you will need to reset them for the box to work properly.
Enjoy!