Z80 MBC2 - Re-compile CPM2.2 Bios
by coopzone in Circuits > Computers
999 Views, 5 Favorites, 0 Comments
Z80 MBC2 - Re-compile CPM2.2 Bios
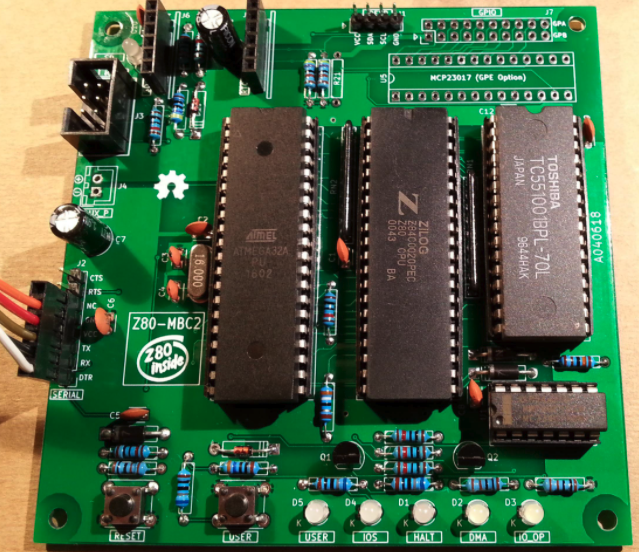
If, like me, you find yourself in a position where you need to re-compile the CP/M bios (2.2) for your MBC2 - then this is how you do it.
In my case I wanted to remove the “WARM BOOT” message every time a program existed or when you did a ctrl-c. I am also going to add some extra calls to flash the user LED on certain events, for example if the PRN device is accessed. To debug an application under CP/M etc.
Supplies
A windows machine to run the compiler on. I used a windows xp virtual machine running on a KVM, because it’s very small and will never go on the internet. But it works under windows 10 perfectly ok.
The TASM 3.2 z80 compiler, search for this on google, you should end up at https://www.ticalc.org/archives/files/fileinfo/250/25051.html
A copy of the SD zip file from the z80-mbc2 home page, at the time of writing it was https://cdn.hackaday.io/files/1599736844284832/SD-S220718-R240620-v1.zip
Preparing Your Machine - Adding the Software Required
Once you have got your windows machine up and running, copy or download the files mentioned in the “you will need” section above.
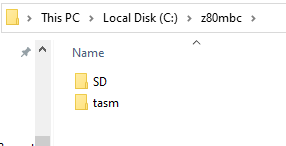
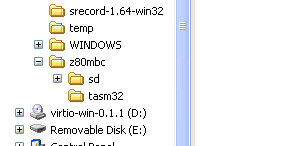
Create a working directory on your machine, I suggest (to avoid a lot of typing and typo’s) you create a directory on drive C, for example c:\z80mbc . I strongly recommend that you avoid spaces in the names and long directory paths. Keep it simple.
Create a folder inside this directory for the TASM files to go in, c:\z80mbc\tasm
Create a folder for the SD card image to go in, c:\z80mbc\SD
Right click on each of the files and extract the contents to the directories you created above. Make sure you extract tasm.zip to c:\z80mbc\tasm and the SD Card zip file to c:\z80mbc\SD
Setting Up the Environment
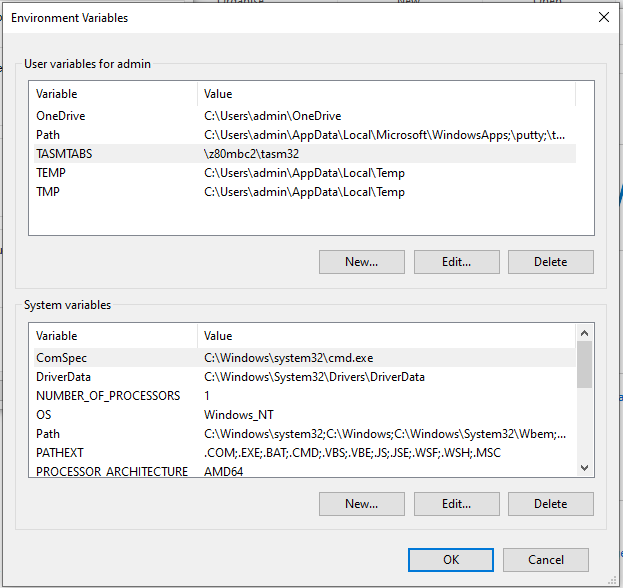
Depending on your version of windows do one on the following
Windows 10
Open the properties menu by right clicking on the “This PC” item from an explorer window.
Click on “Advanced system settings”, this will open a window called “System Properties” (You can also get to system properties in other ways, but I don’t use windows very much so this is my way!)
Click on “Environment Variables”
Windows XP
Click start button, right click on “my computer”, then you can click properties to get “system properties” (You can also get to system properties in other ways, but I don’t use windows very much so this is my way!)
Click on the Advanced Tab
Click on “Environment Variables”
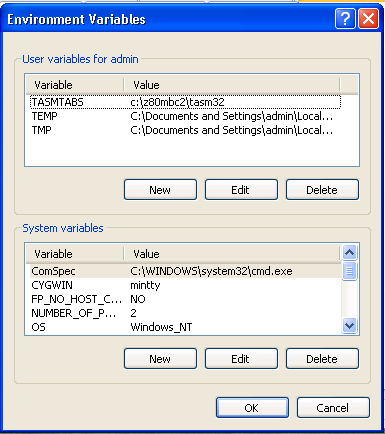
When you have the Environment Variables window on screen you need to do two things;
Add a new variable
In the top part of the windows, under "user variables for ..."
Click New
for the Name type in TASMTABS
for the Value type in c:\z80mbc\tasm
Modify the PATH variable
In the bottom part of the window, under "System Variables"
choose (highlight) Path, then click Edit
At the end of the existing content add ;c:\z80mbc\tasm
(Don't forget the semi-colon at the start!)
You now need to restart the computer for these additions to take effect.
Testing TASM
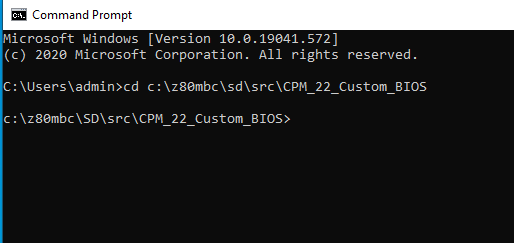
After you reboot your windows machine.
Open a CMD promt;
Windows10
Click the Windows icon, type cmd. When it appears as an App at the top of the search box, double click it or click open.
Windows XP
Click the Windows START icon, click Run. In the box that appears type cmd and click ok.
Change Directory to the source code directory
Type: cd \z80mbc\sd\src\CPM_22_Custom_BIOS
If you do a directory of this folder you should get:
C:\z80mbc\sd\src\CPM_22_Custom_BIOS>dir
 Volume in drive C has no label.
 Volume Serial Number is D426-9C7C

 Directory of C:\z80mbc\sd\src\CPM_22_Custom_BIOS

19/10/2020  11:38    <DIR>          .
19/10/2020  11:38    <DIR>          ..
17/10/2020  13:30             5,597 a.bin
17/10/2020  13:30            44,492 BIOS CPM22 - S030818-R040219.asm
17/10/2020  13:30            47,076 BIOS CPM22 - S030818-R140319.asm
17/10/2020  13:30            44,649 BIOS CPM22 - S030818.asm
17/10/2020  13:30           115,962 cpm22_Z80MBC2.asm
               5 File(s)        257,776 bytes
               2 Dir(s)   5,575,921,664 bytes free

<br>
You are now ready to test if you can assemble the cpm22.bin file, obviously you have not amended any of the code yet. But that's up to you to do.
Hint: the file cpm22_Z80MBC2.asm is were to start looking, it include one or more of the other files, normally BIOS CPM22 - S030818-R140319.asm. Use any text editor you like, even write.exe or notepad.exe are ok
Type the following to compile the BIOS:
tasm -b -g3 -80 cpm22_Z80MBC2.asm cpm22.bin
If all is well, it should say:
TASM Z80 Assembler.       Version 3.2 September, 2001.<br> Copyright (C) 2001 Squak Valley Software
tasm: pass 1 complete.
tasm: pass 2 complete.
tasm: Number of errors = 0
If it fails, go back and check you environment path and TASMTAB settings.
If you decide to make changes too the BIOS, remember to check the cpm22_z80MBC2.asm file. Near the top are some lines related to the destination of the binary you make, by default they look like this:
;-----------------------------------------------------------------------
;                                    Z80-MBC2
;-----------------------------------------------------------------------
iLoadMode   .equ    0       ; Set to 1 for iLoad mode (for testing),
                            ; set to 0 for track 0 image generation,
                            ; set to 2 for cpm22.bin binary file generation
;-----------------------------------------------------------------------
;
Replacing the Cpm22.bin File
At this point you have a working Tasm setup and the source files for your CP/M 2.2 Bios.
You can now edit the source files to meet your requirements
The last step is to get the z80-mbc2 to boot the new version of the software. If you read through the comments in the source code you will know that there are several options to test this code, for example you can produce a hex file and use the iload option in the mbc2 menu to load and run it. However this method is probably best suited to test new developments for your mbc2. Perhaps a version of Mp/m for example.
To test our new cpm22.bin file, i'm keeping it simple. Just copy it in place of the existing one on your SD card and try to boot from it! Before you replace the original - MAKE A COPY. It saves time to have the original to hand.
Thats all, happy new BIOS!