Youtube Silver Playbutton, Designed in Tinkercad
by JShap0430 in Workshop > 3D Printing
499 Views, 0 Favorites, 0 Comments
Youtube Silver Playbutton, Designed in Tinkercad
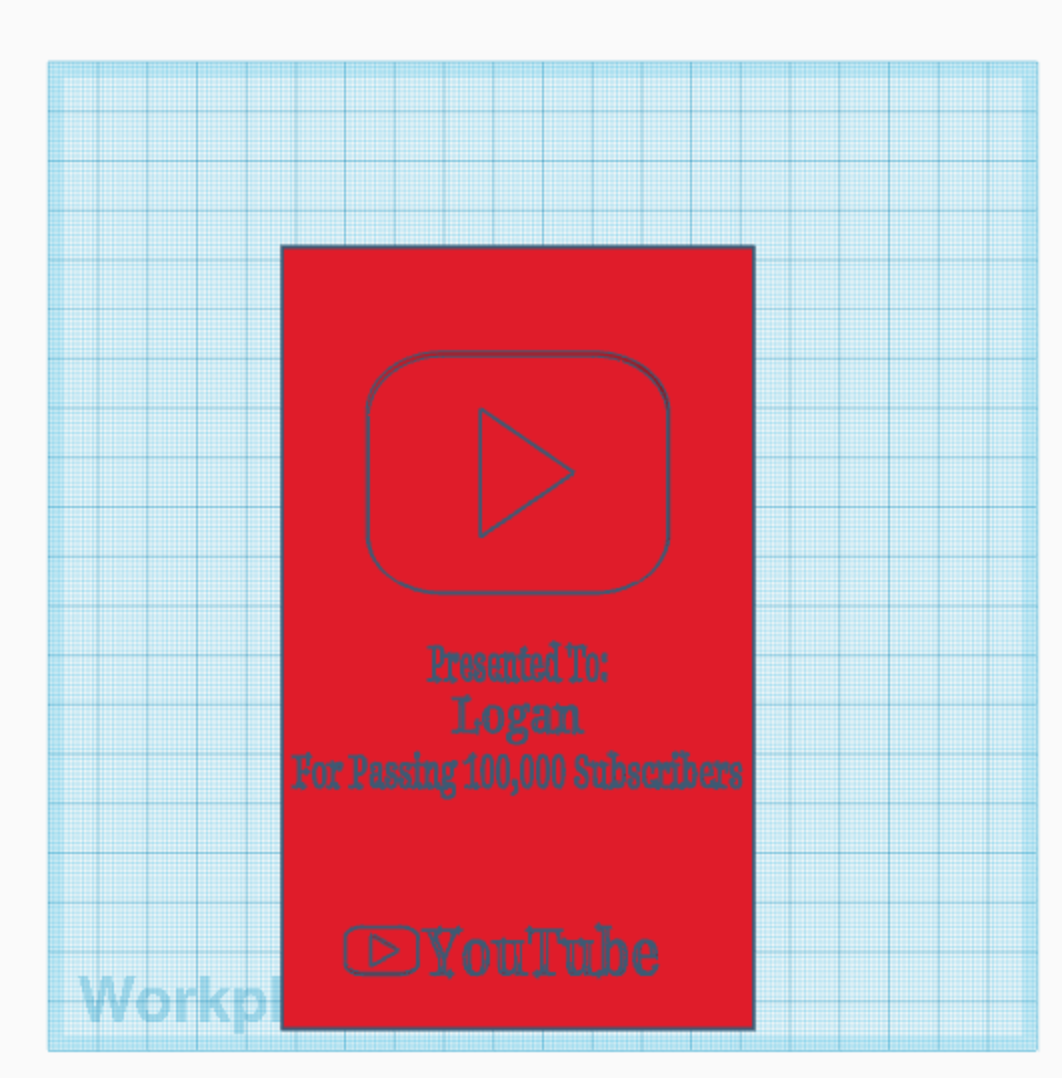
Hello Everyone, today I am going to teach you all how to design a Mini Youtube 100,000 Subscriber Silver playbutton in the 3d design website known as Tinkerced. If you do not have much practice with Tinkercad then you should probably practice using or watch a YouTube tutorial, but if you do not want to, you can still do it but it will just be harder. Also, when I name a shape during a lesson, I am not officially changing the name of the shape in Tinkercad, I am just calling them that so you do not get confused with all the different shapes
Before you get started here are some tips you should use:
* If you happen to mess up, use the undo button in the top left corner which looks like a curved arrow pointing to the left.
* Do not try to drag the adjustment angles, (the squares on the corner and top of a shape) instead click the adjustment angle. (if using a corner angle it will show you the width and length and will show you the height of a shape with the top angle) when it shows you the millimeters for the height, length and width, click where it shows that number and you will be able to type whatever number you want.
* Look at the picture provided with the step before actually moving on to do the step.
Supplies
The only thing you will need is an electronic device to use Tinkercad on. A computer or a laptop works best but you can use an iPad or a phone
Set the Plane
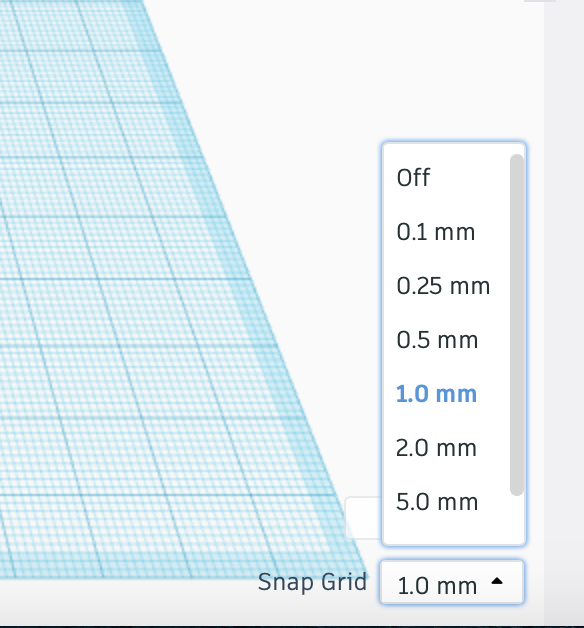
Before you get started on the design itself, you need to change the snap grid to 1.0 mm. The place to change the snap grid is next to where you get the shapes in the bottom right. If you do not set the snap grid to 1.0 mm, then you will not me able to get the right measurements in.
Grab Your First Shape
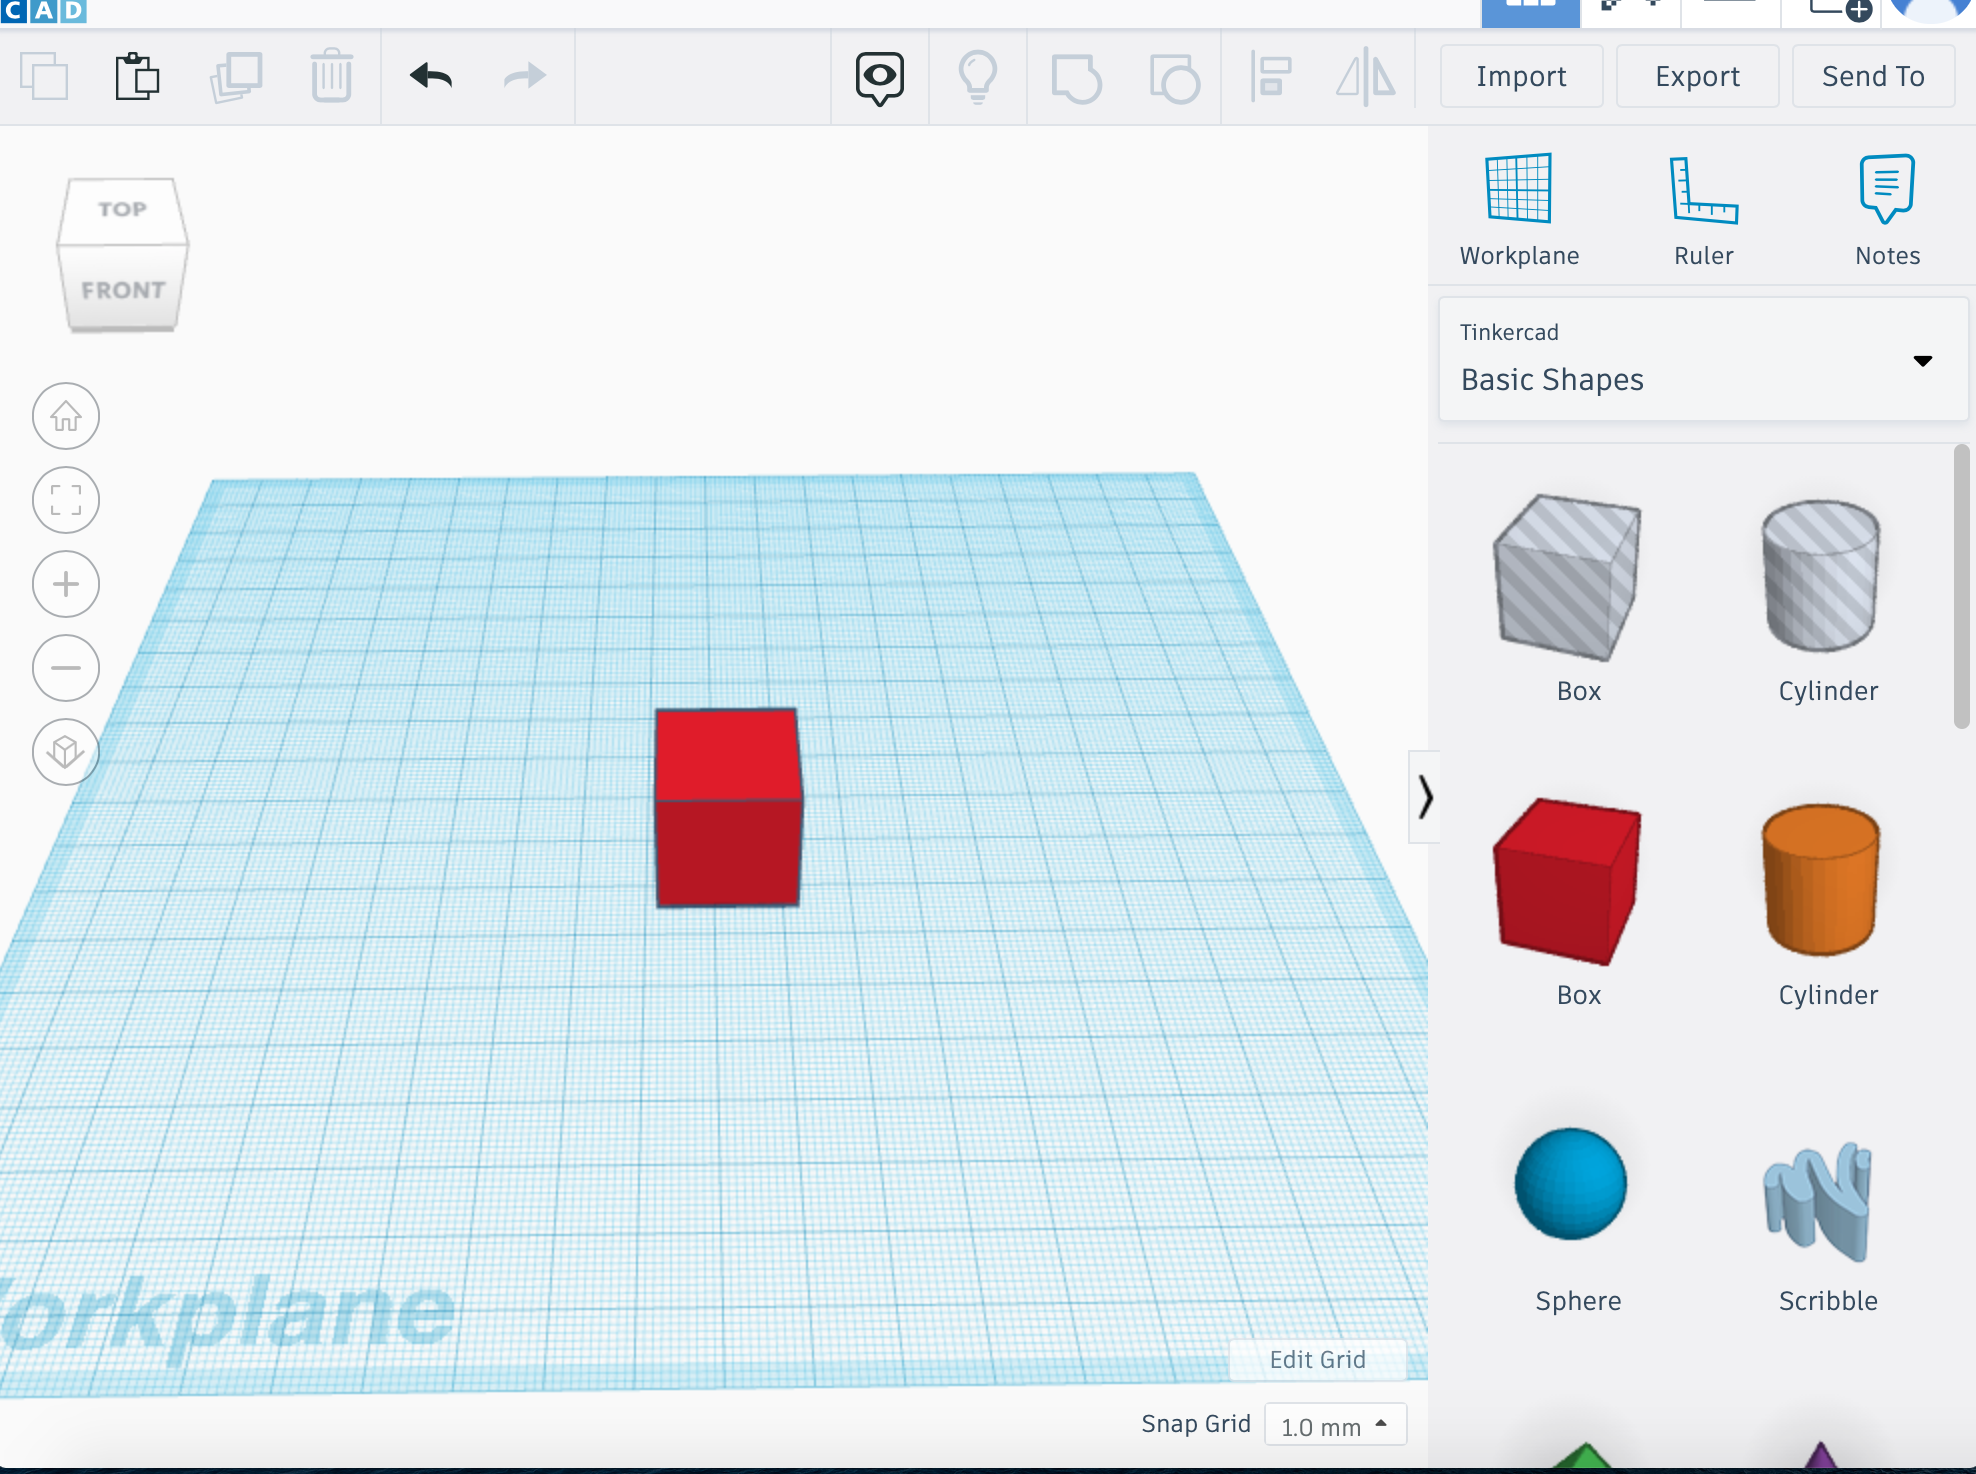
Grab a box from the shape selection (the shape selection is the to the right of the screen) and bring it to the plane. (So you will not get confused with all the different shapes we will call the shape S1.)
CTH of S1
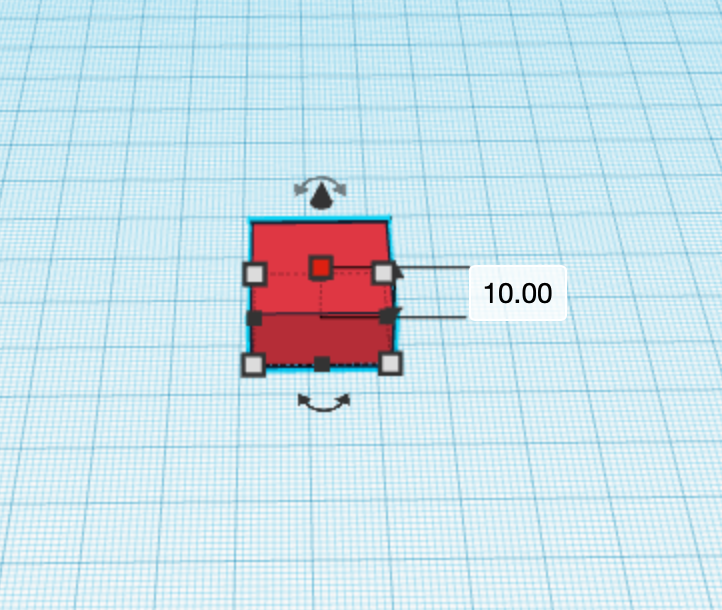
Change the height of S1 to 10 mm.
CTW of S1
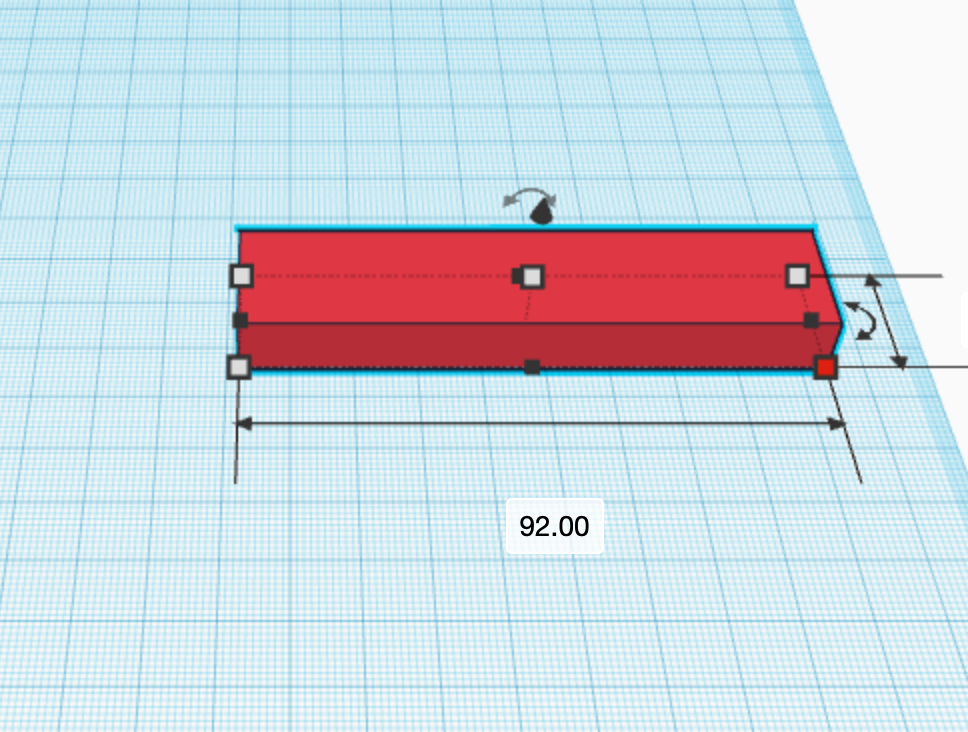
Change the width of S1 to 92 mm.
CTL of S1
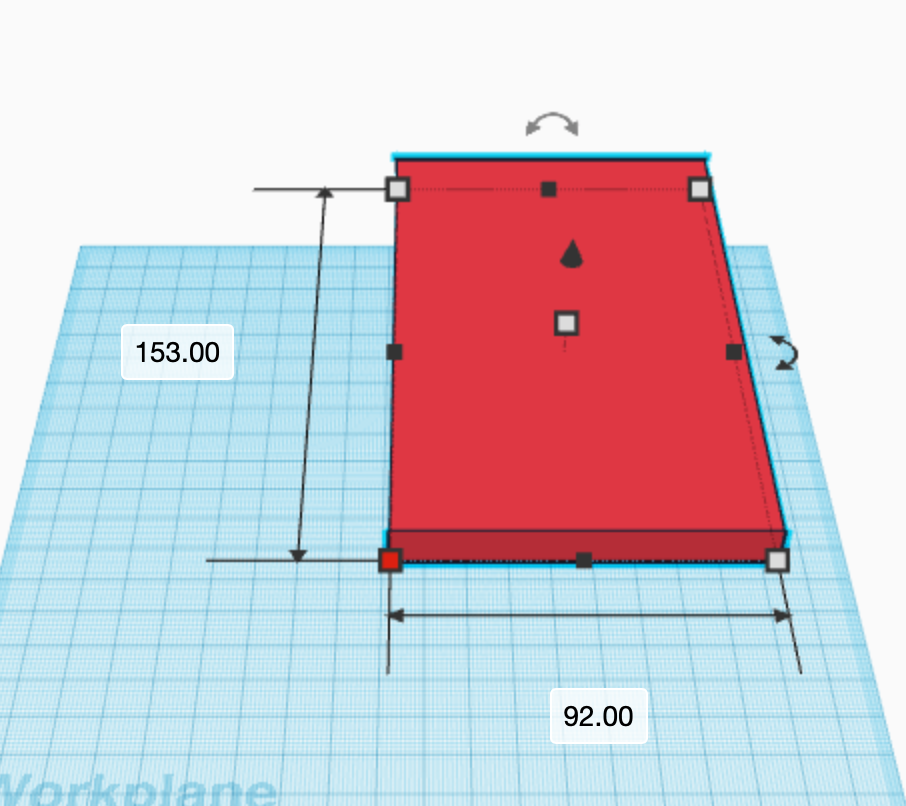
Change the length of S1 to 153 mm.
Move S1
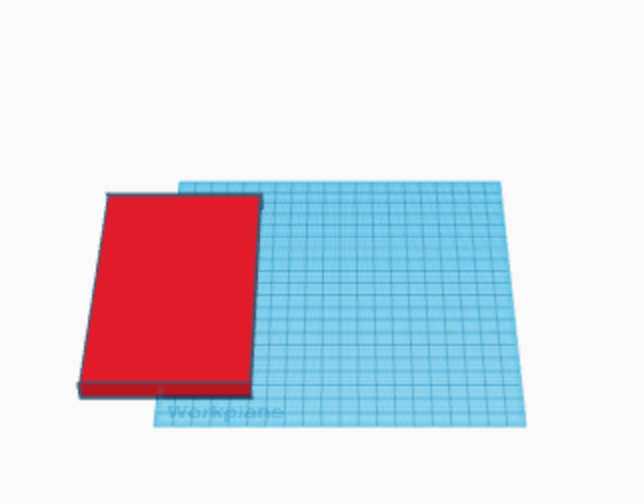
Move S1 out of the way to make room for a new shape.
Grab a New Shape
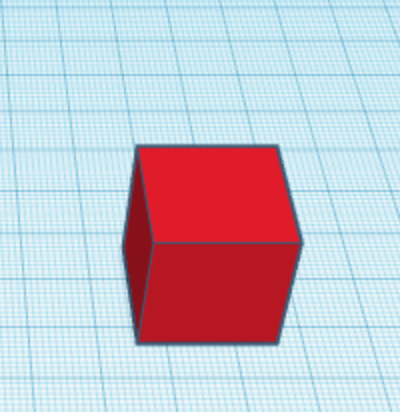
Add another one of the box shapes to the plane. (So you will not get confused we will call this shape S2.)
CTR of S2
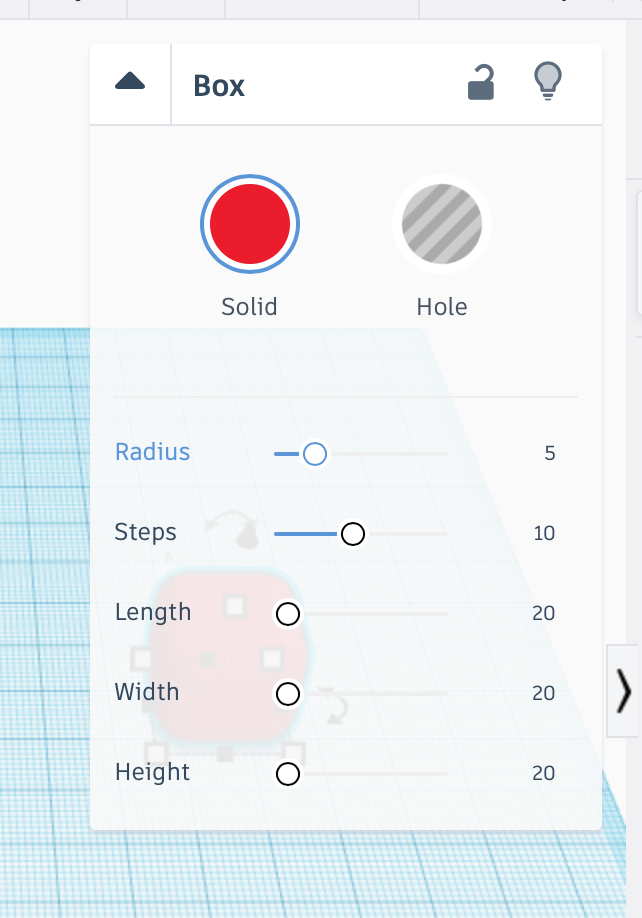
Change the radius of S2 to 5 mm.
CTS of S2
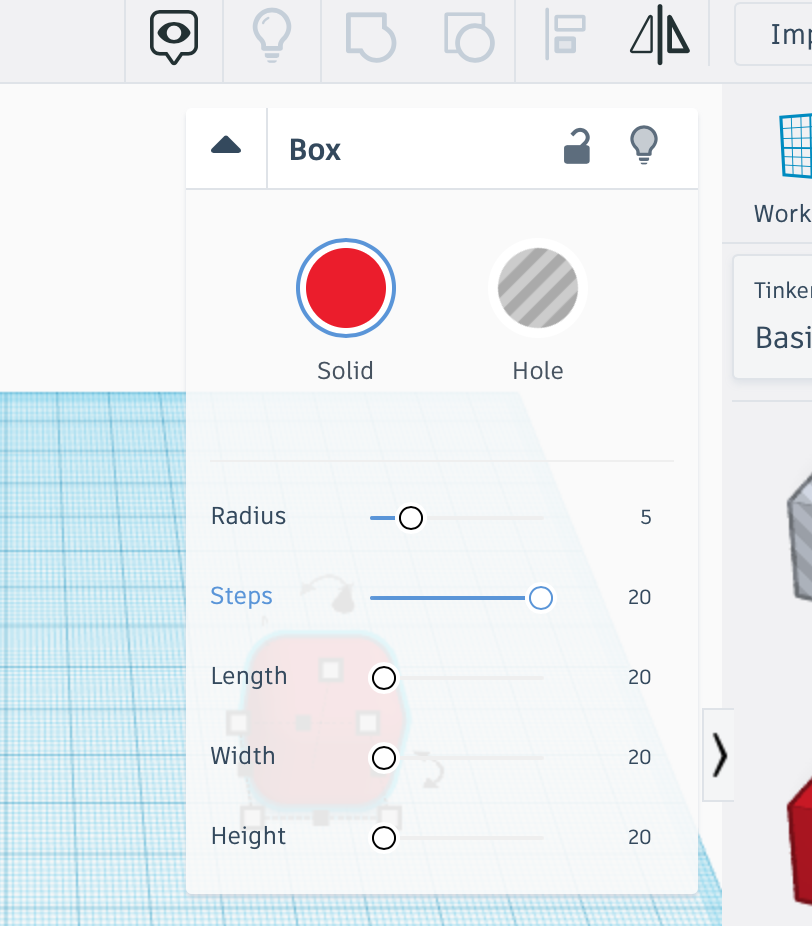
Change the steps of S2 to 20 mm.
Add Another Shape
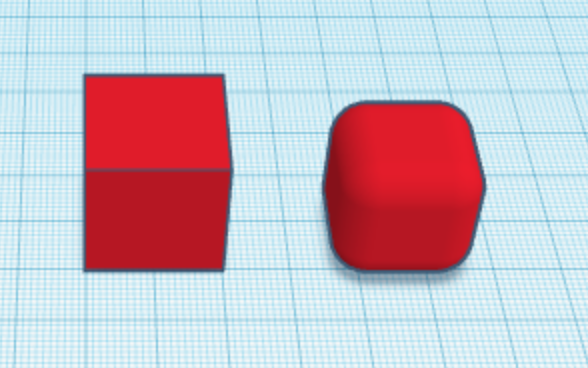
Add another box to the plane. (So you will not get confused we will call the shape S3.)
Change the Shape
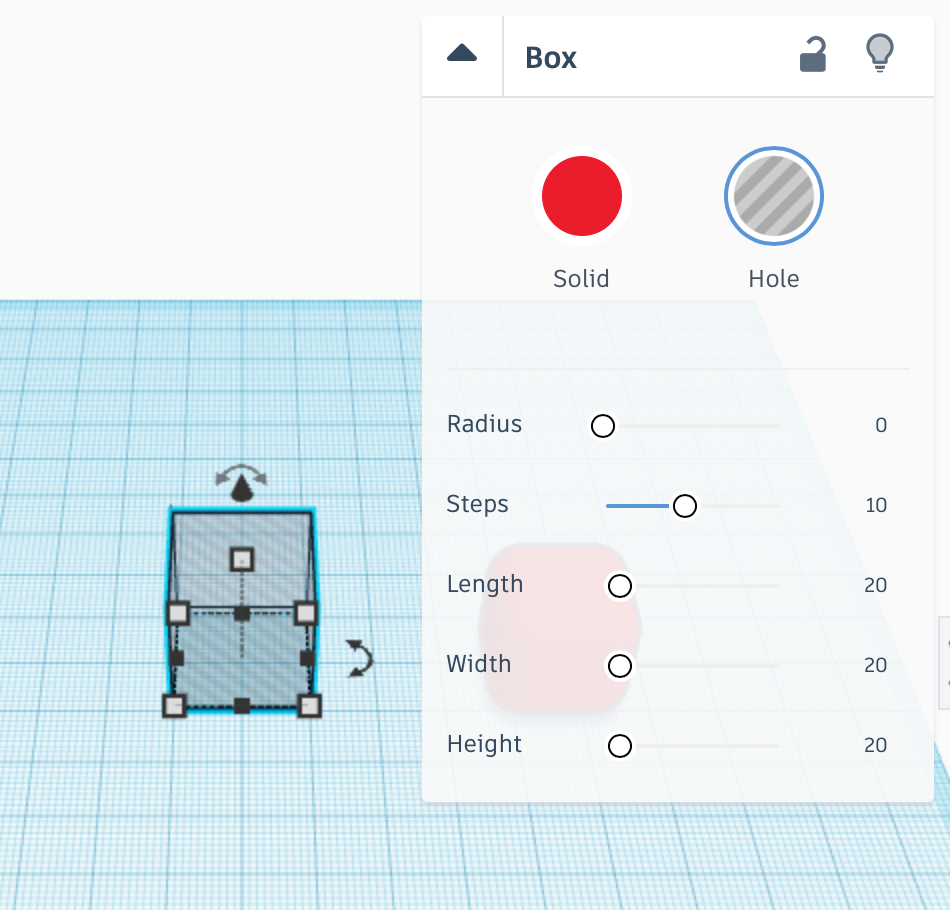
Change the form of S3 into a hole.
CTH of S3
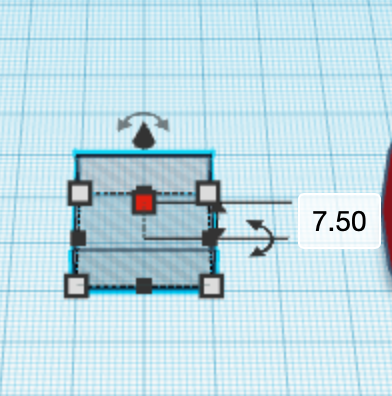
Change the height of S3 to 7.50 mm.
CTW of S3
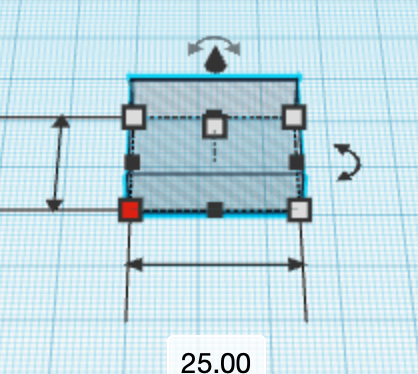
Change the width of S3 to 25 mm.
CTL of S3
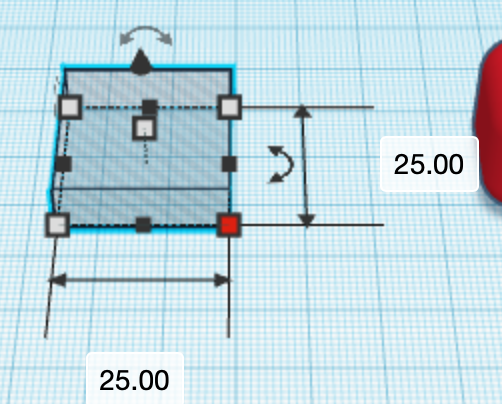
Change the length of S3 to 25 mm.
Make a Copy
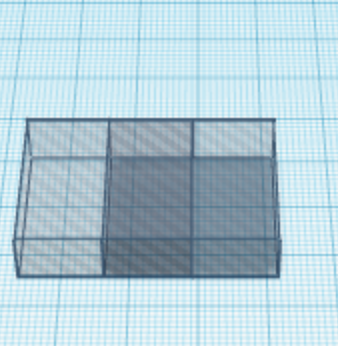
Make a copy of S3. (So you do not get confused we will call this copy S4.)
Separate the Shapes
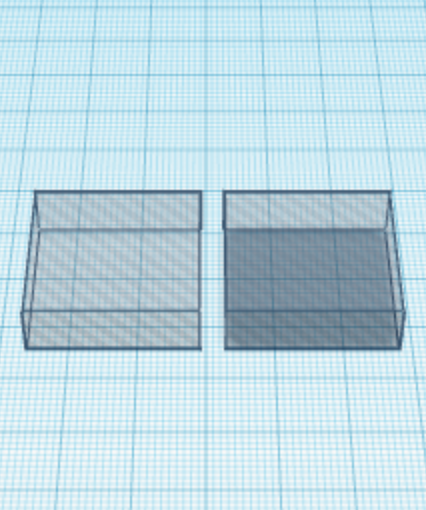
Take S4, and move it away from S3.
Select the Shapes
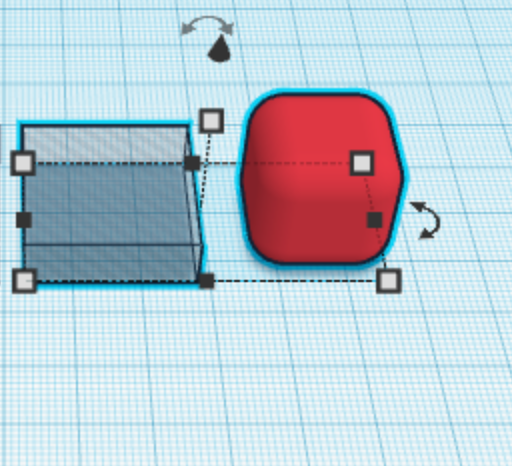
Select the shapes known as S2 and S3.
Move the Shapes
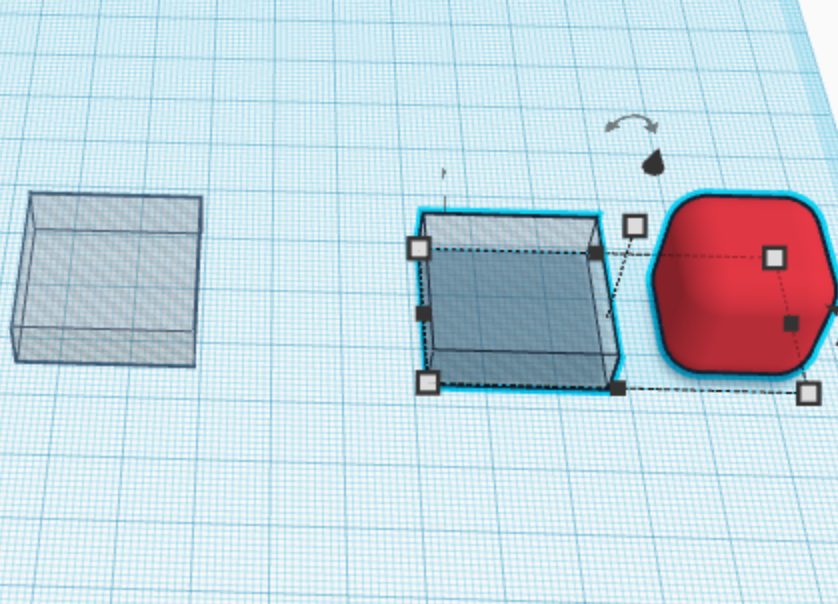
Move the selected shapes S2 and S3 away from S4.
Align the Shapes

While shapes S2 and S3 are selected, press the align button.
Align on Y
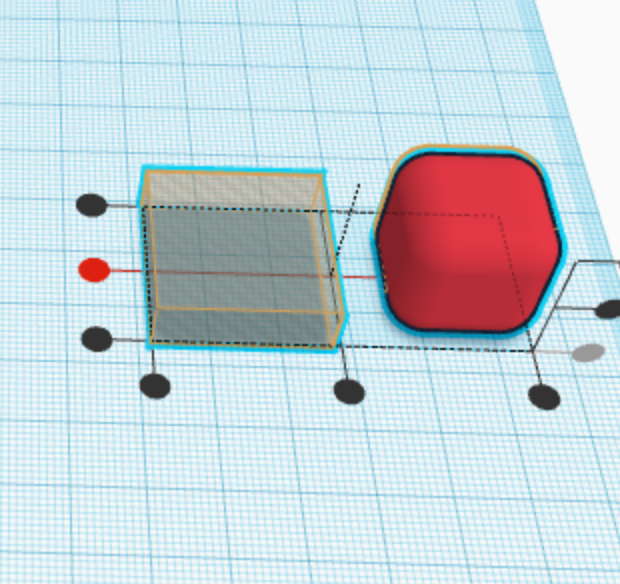
After pressing align button, press the middle button on the Y axis.
Align on X
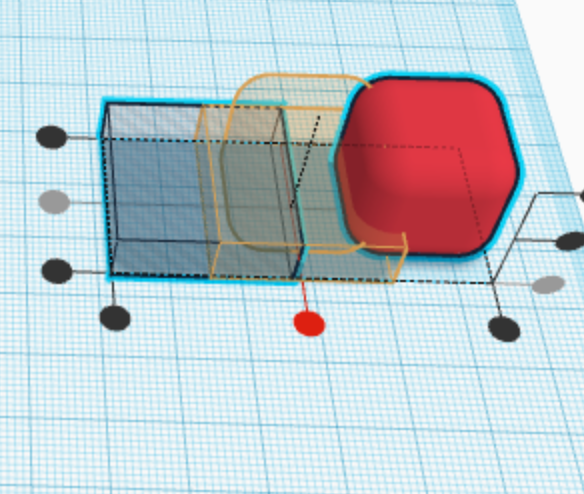
Press the middle button the the X axis.
Raise S4
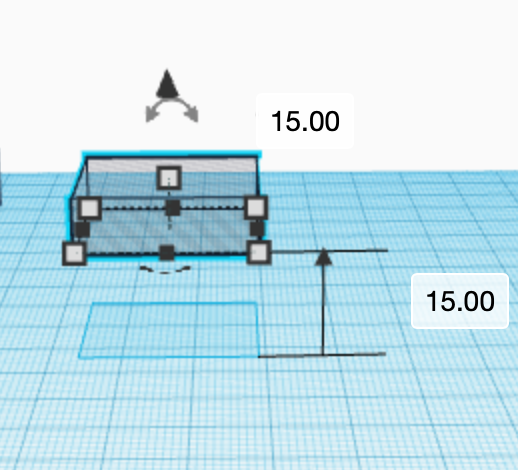
Raise S4 off of the ground by 15 mm.
Select the Shapes
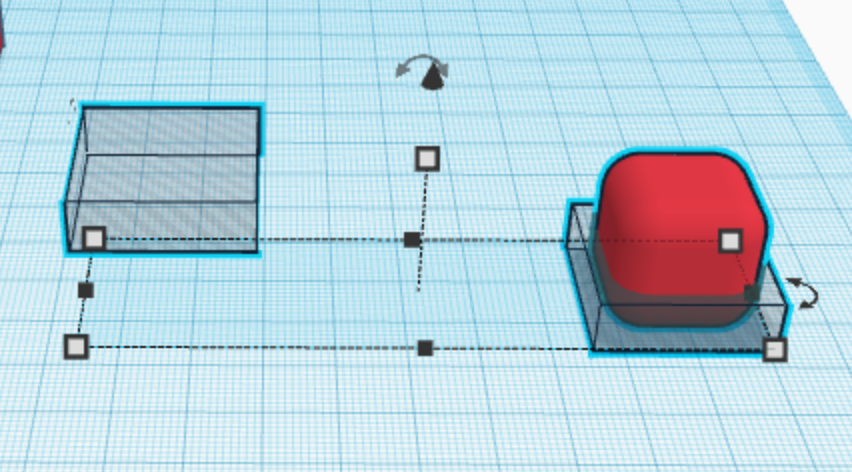
Select the shapes S2, S3, and S4.
Align the Shapes

Press the align button on the top right part of the screen.
Align on Y
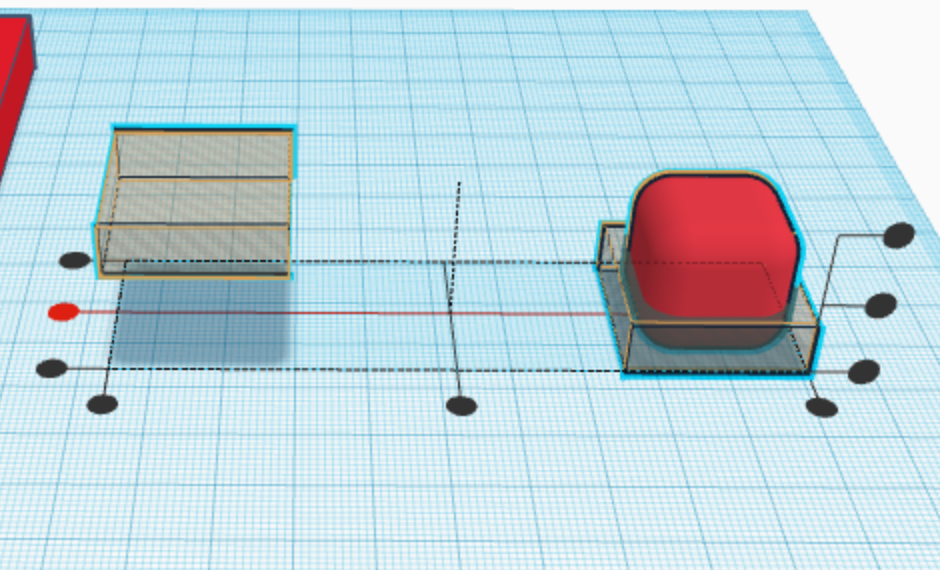
Press the middle button on the Y axis.
Align on X
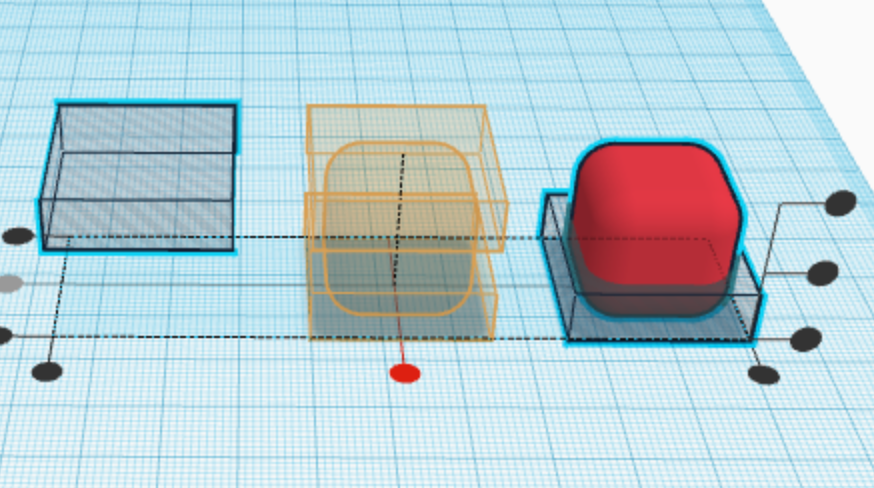
Press the middle button on the X axis.
Select the Shapes
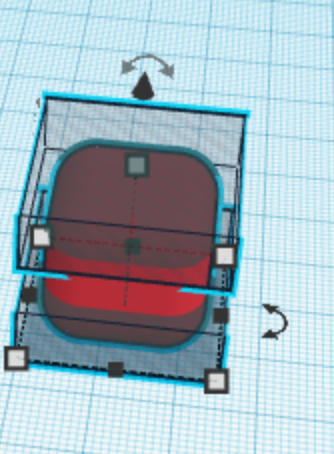
Select the shapes known as S2, S3, and S4.
Group the Shapes
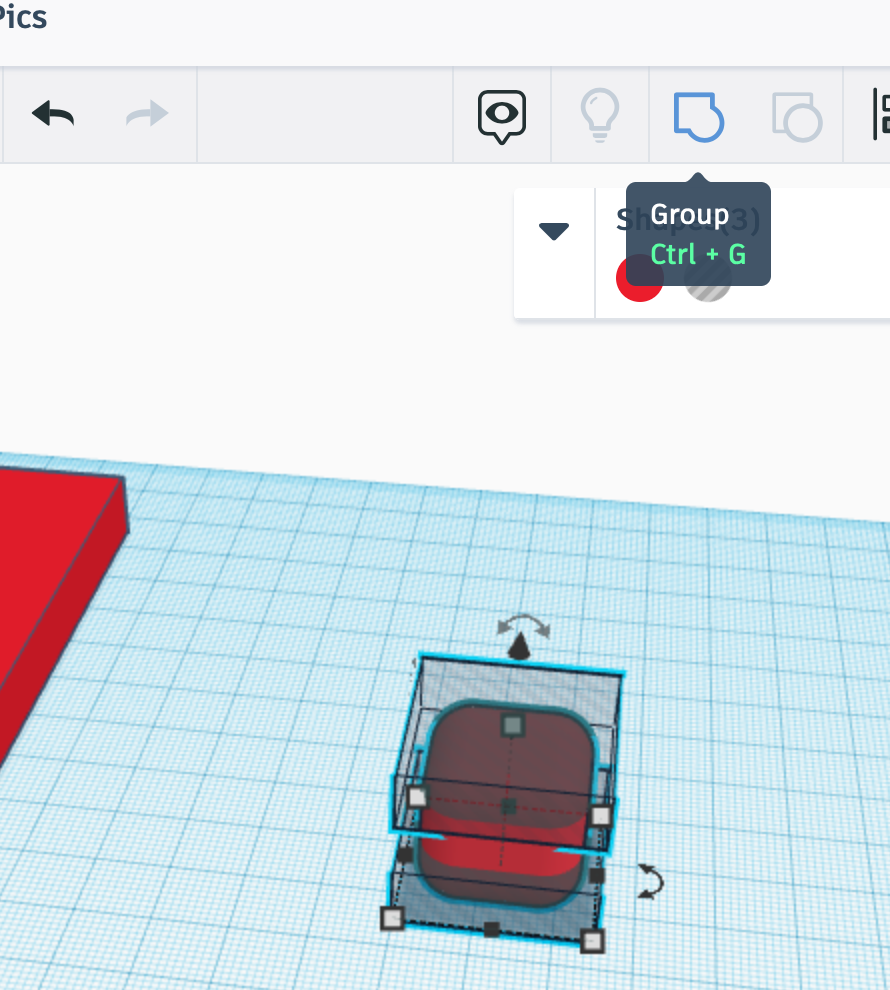
Once S3, S4, and S5 are selected, press the group button. (This combined shape will still be called S2.)
Lower S2
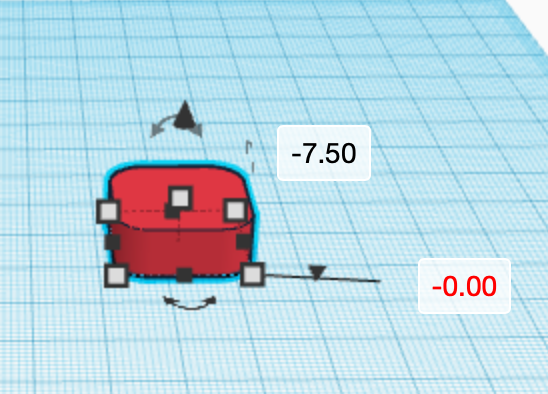
Lower S2 to where it is 0 mm off the ground.
CTW of S2
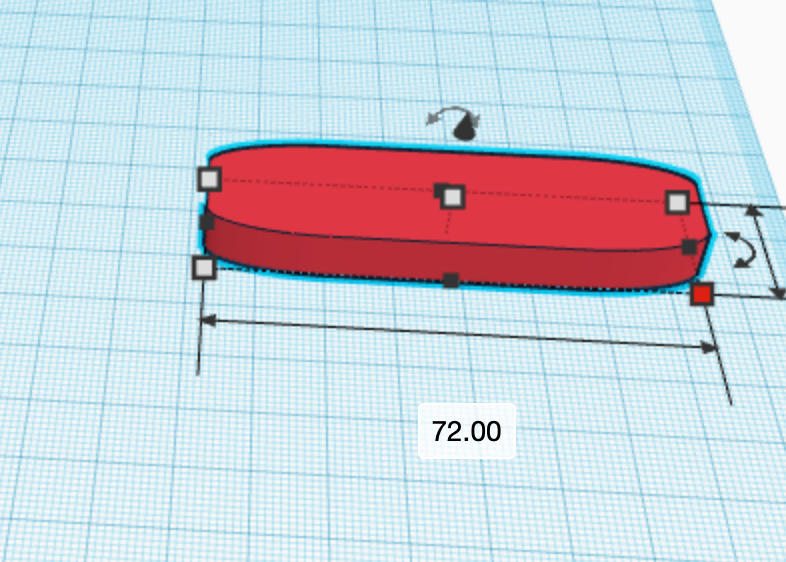
Change the width of S2 to 72 mm.
CTL of S2
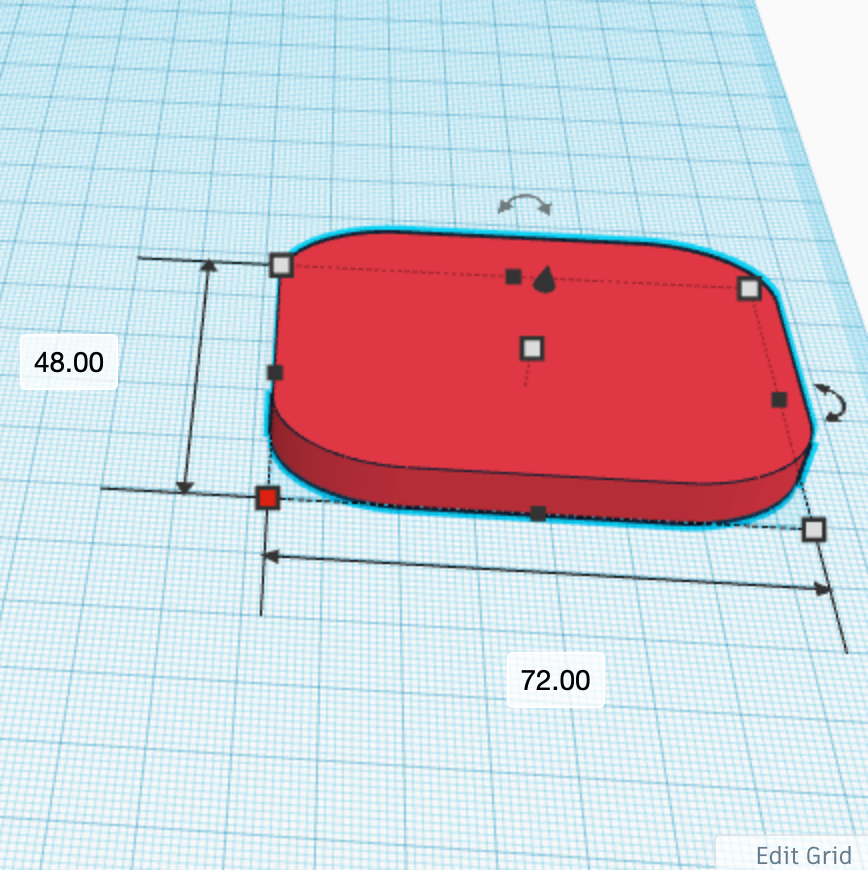
Change the length of S2 to 48 mm.
Make Room
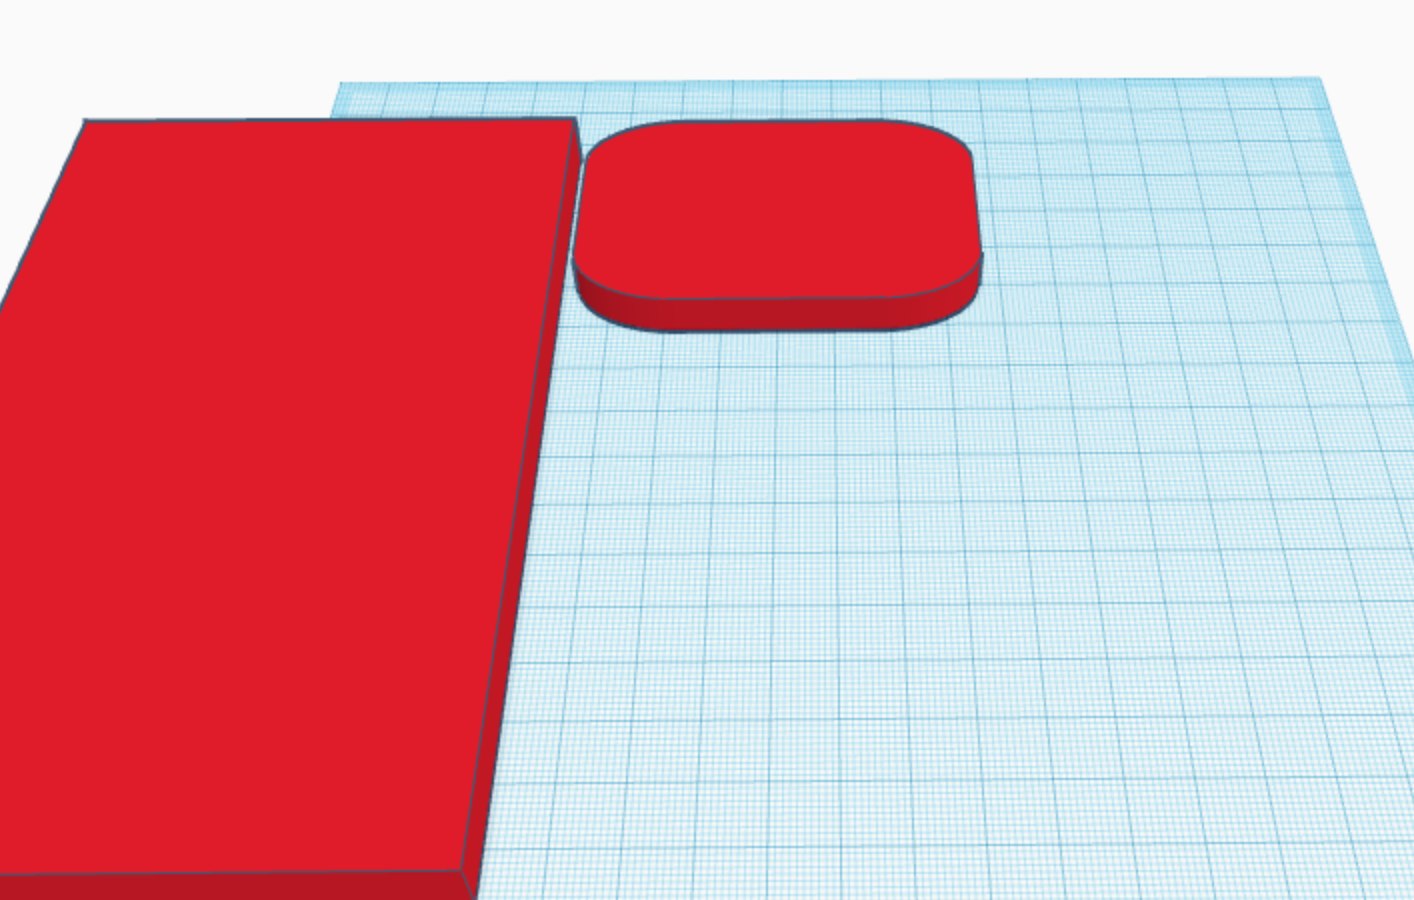
Make room on the plane for a new shape.
Grab a New Shape
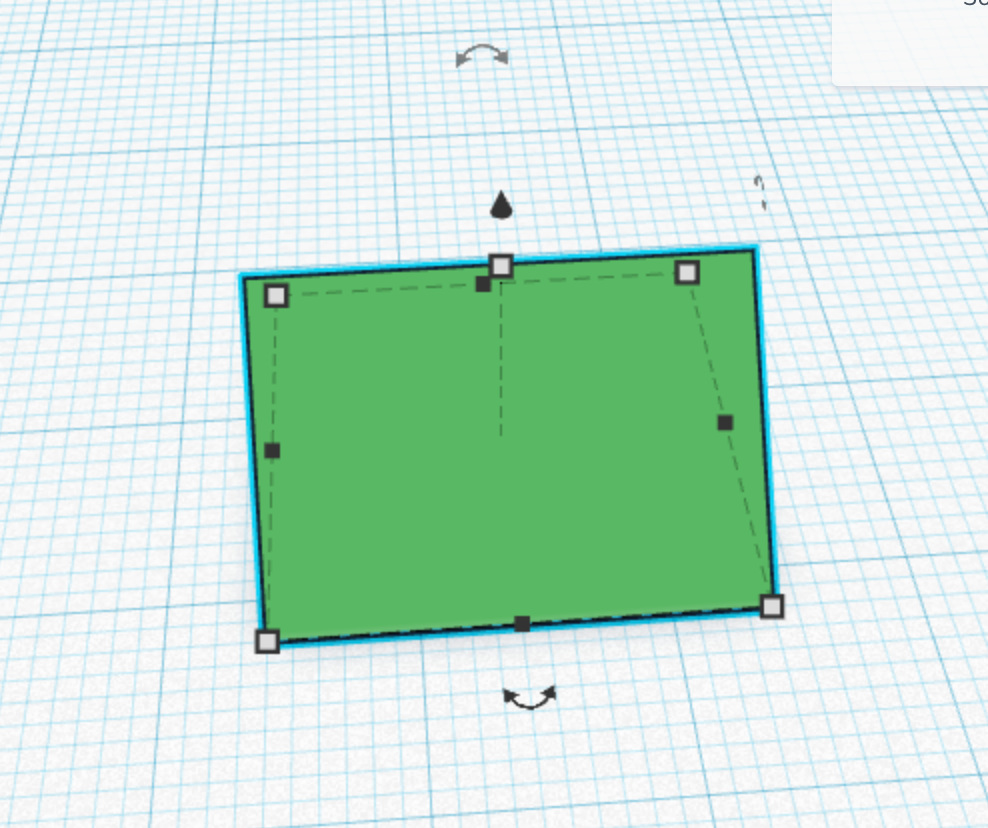
Bring a roof to the plane. (We will call this shape S5.)
Turn S5
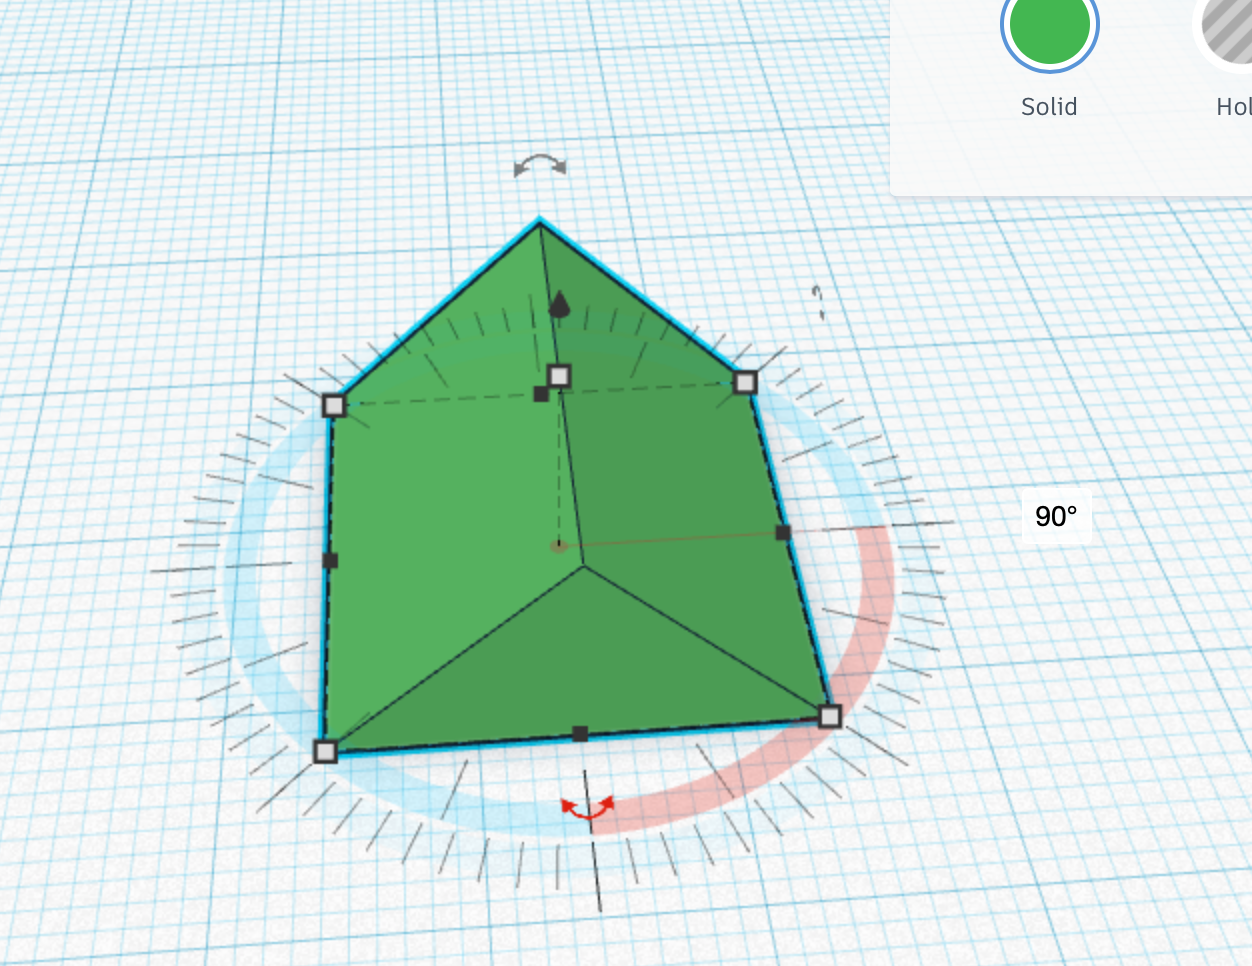
Turn S5 90 degrees on the XY plane.
CTL of S5
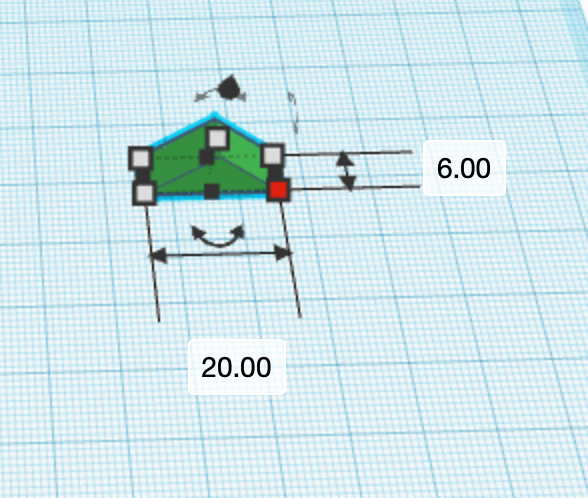
Change the length of S5 to 6 mm.
Turn S5
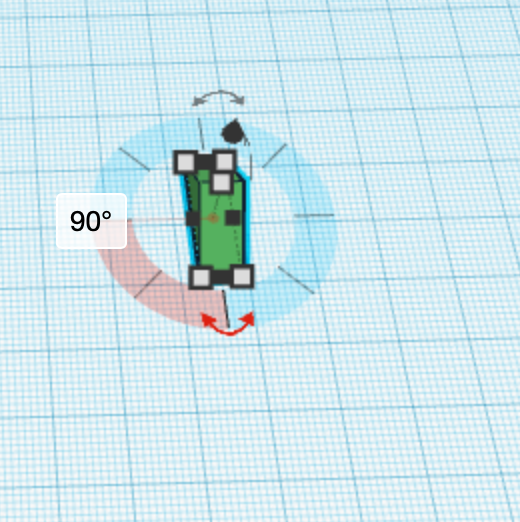
Turn S5 90 degrees on the XY plane.
CTH of S5
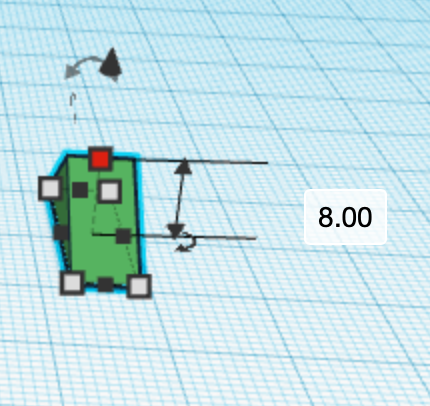
Change the height of S5 too 8mm.
Flip S5
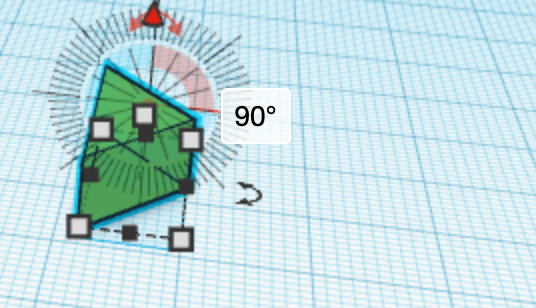
Turn S5 90 degrees on the Z plane.
CTW of S5
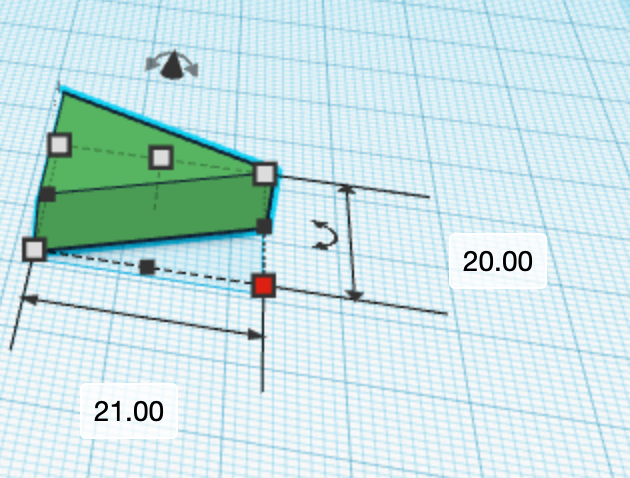
Change the width of S5 to 21 mm.
CTL of S5
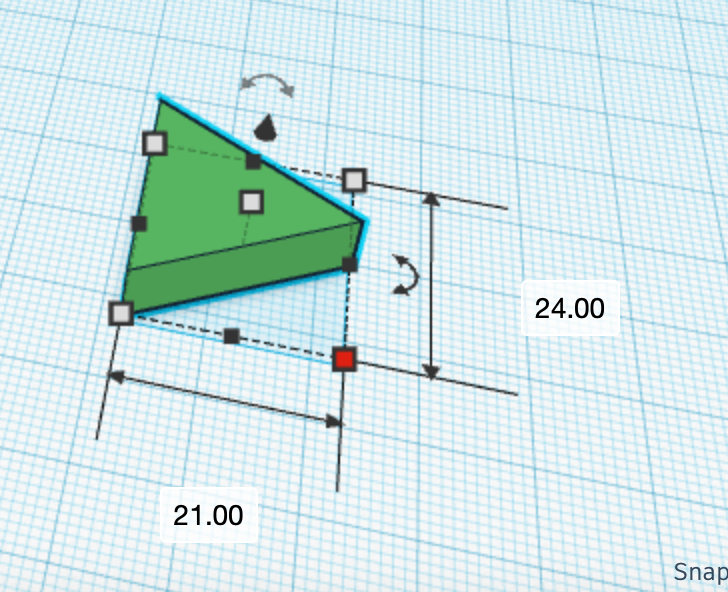
Change the length of S5 to 24 mm.
CTH of S5
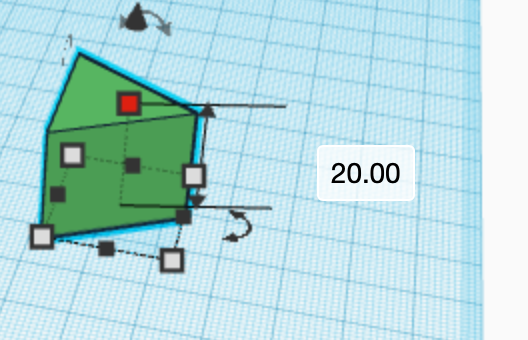
Change the height of S5 to 20 mm.
Lower S5
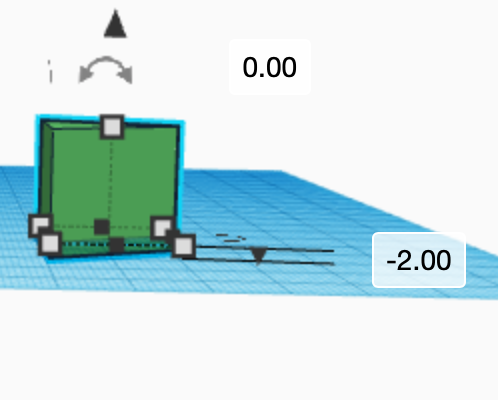
Lower S5 down by -2 mm.
Change S5
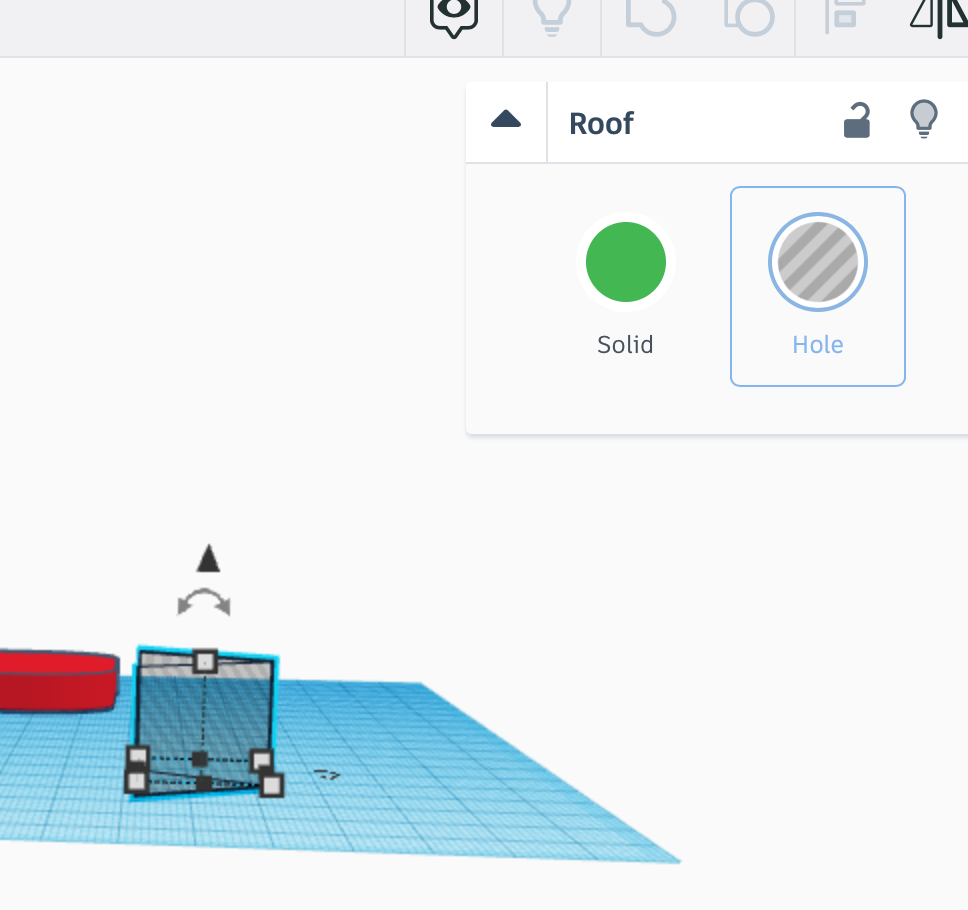
Turn S5 into a hole.
Select the Shapes
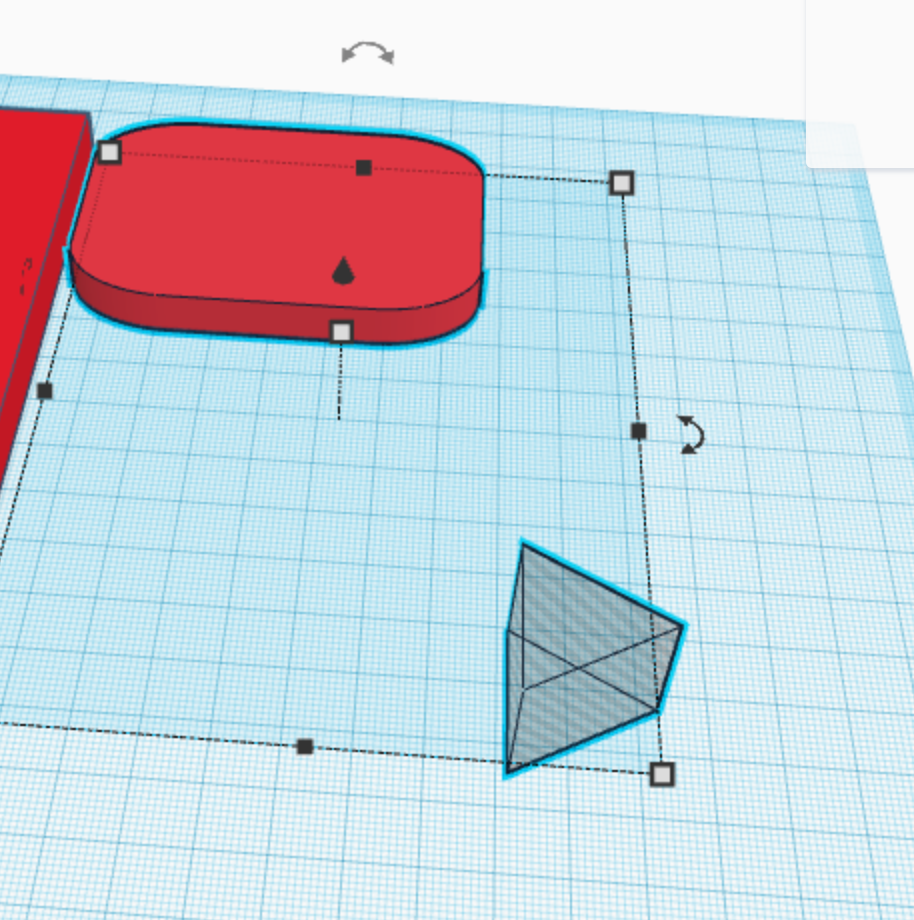
Select the shapes S2 and S5.
Move S2 and S5
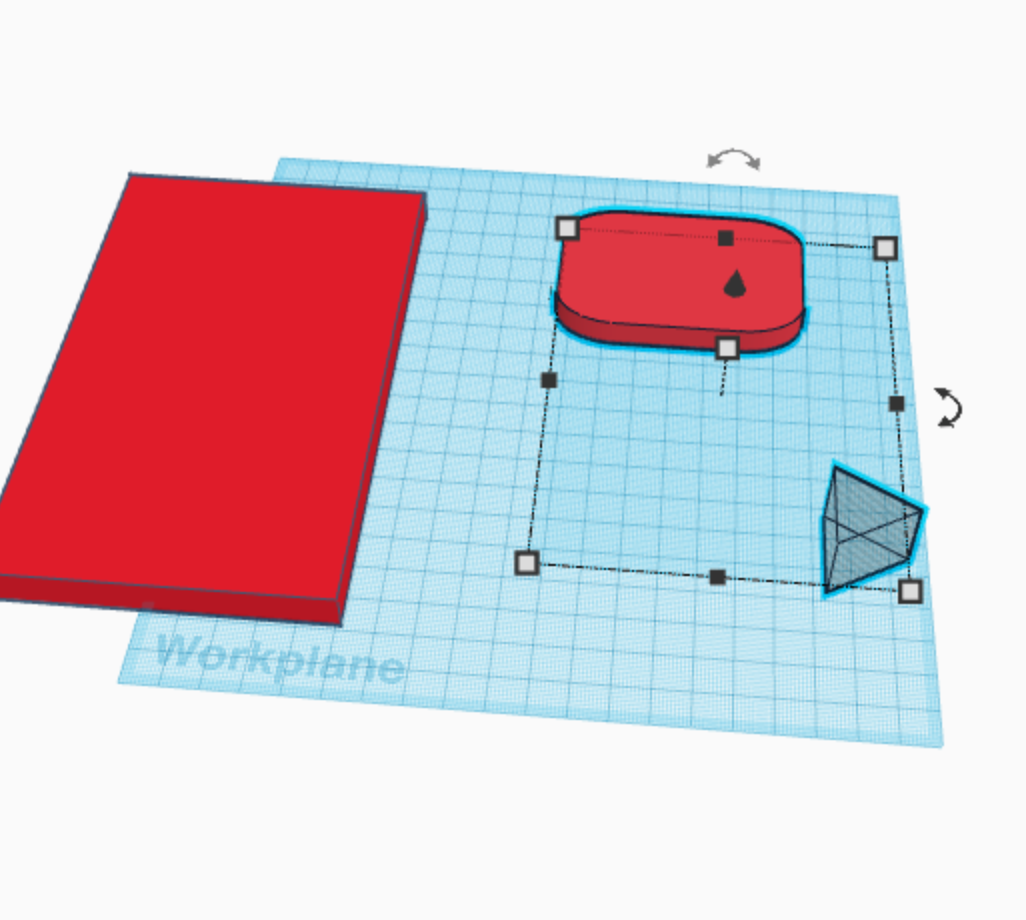
Move the shapes, S2 and S5 to where they have more room.
Align the Shapes
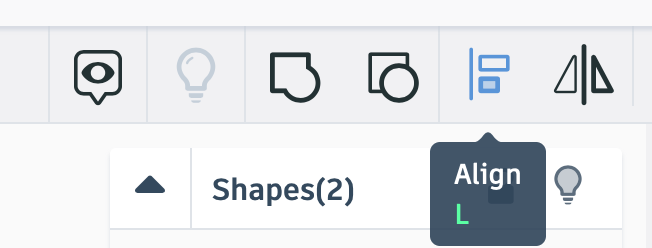
While the shapes S2 and S5 are selected, press the align button.
Align on X
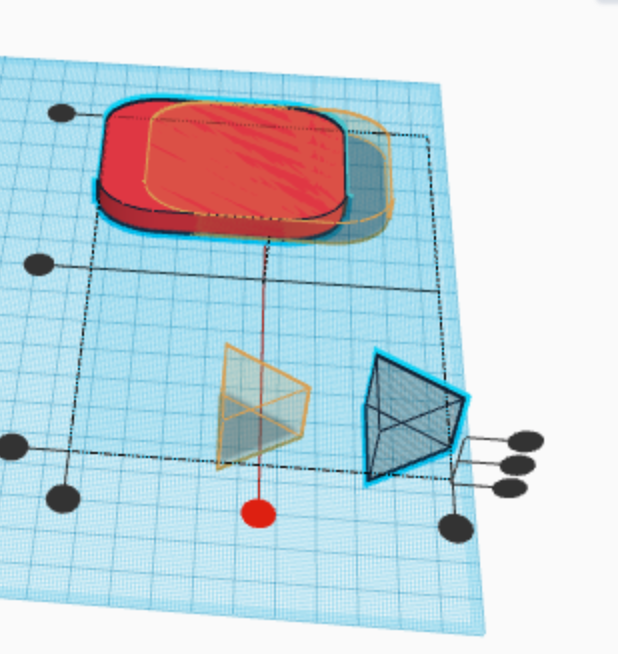
Press the middle button on the X axis.
Align on Y
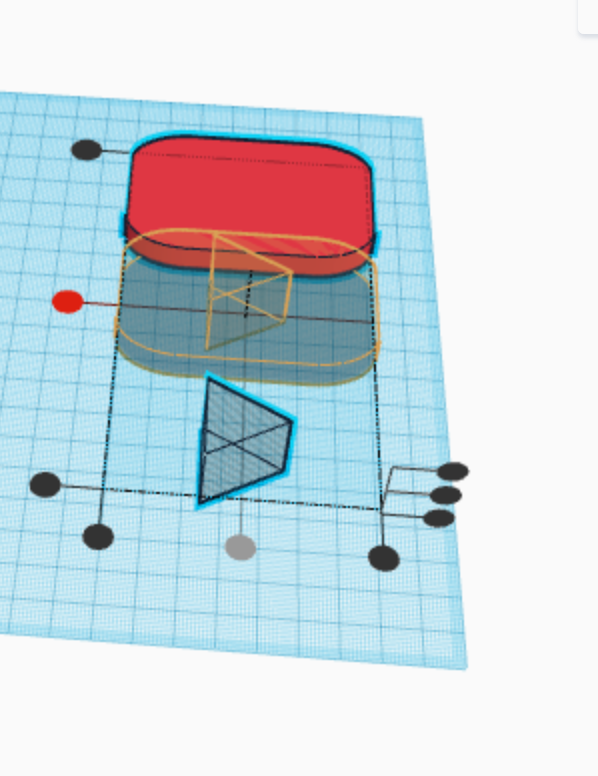
Press the middle button on the Y axis.
Move S5
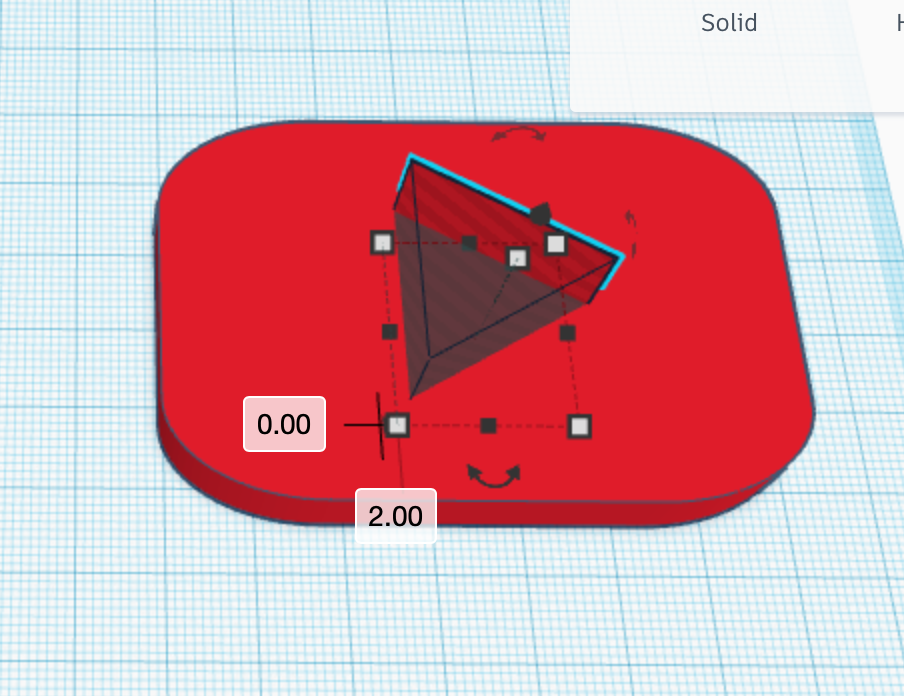
Move S5 2 mm to the right.
Select the Shapes
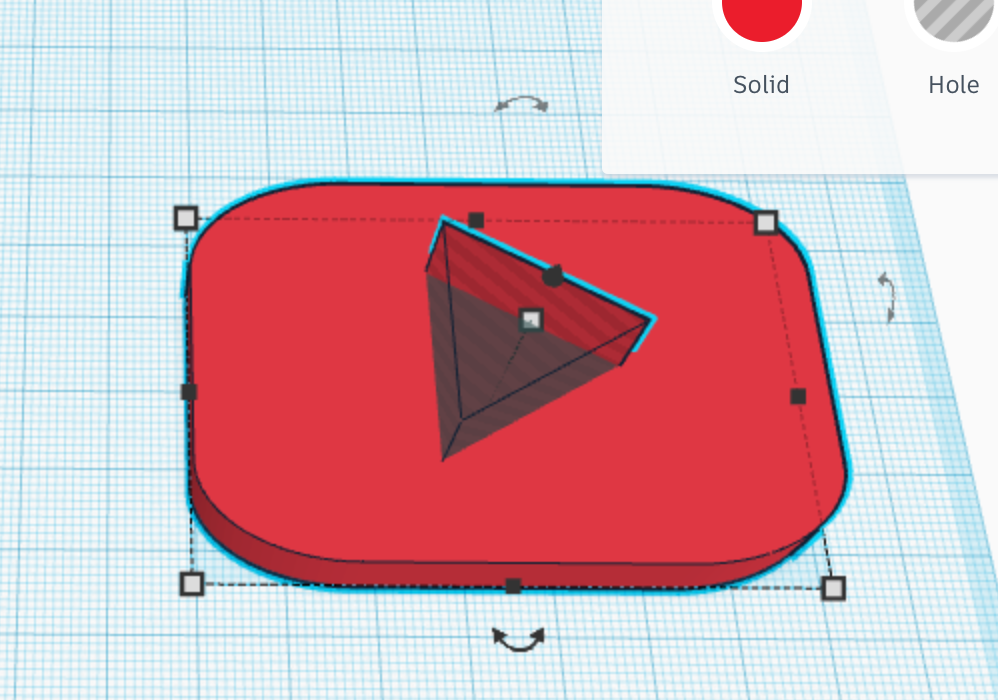
Select the shapes S2 and S5.
Group the Shapes
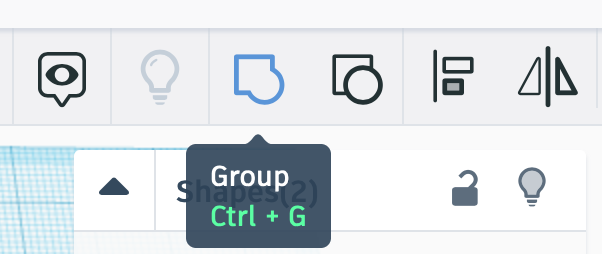
Group the selected shapes S2, and S5.
CTH of S2
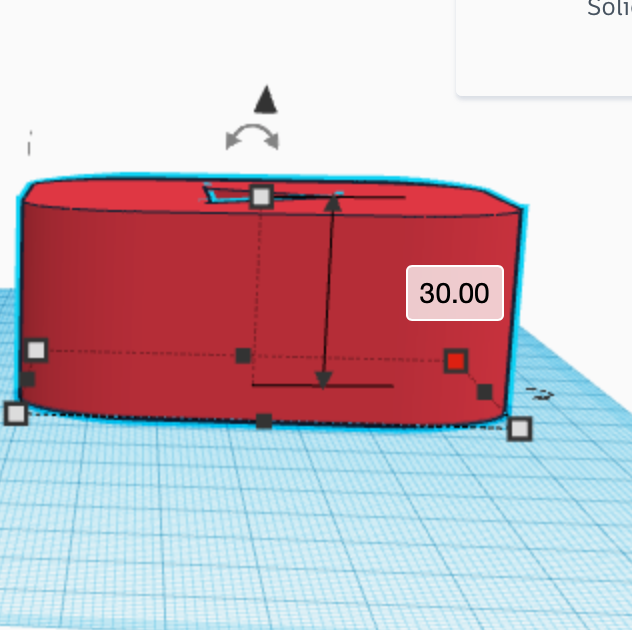
Change the height of S2 to 30 mm.
Change the Shape
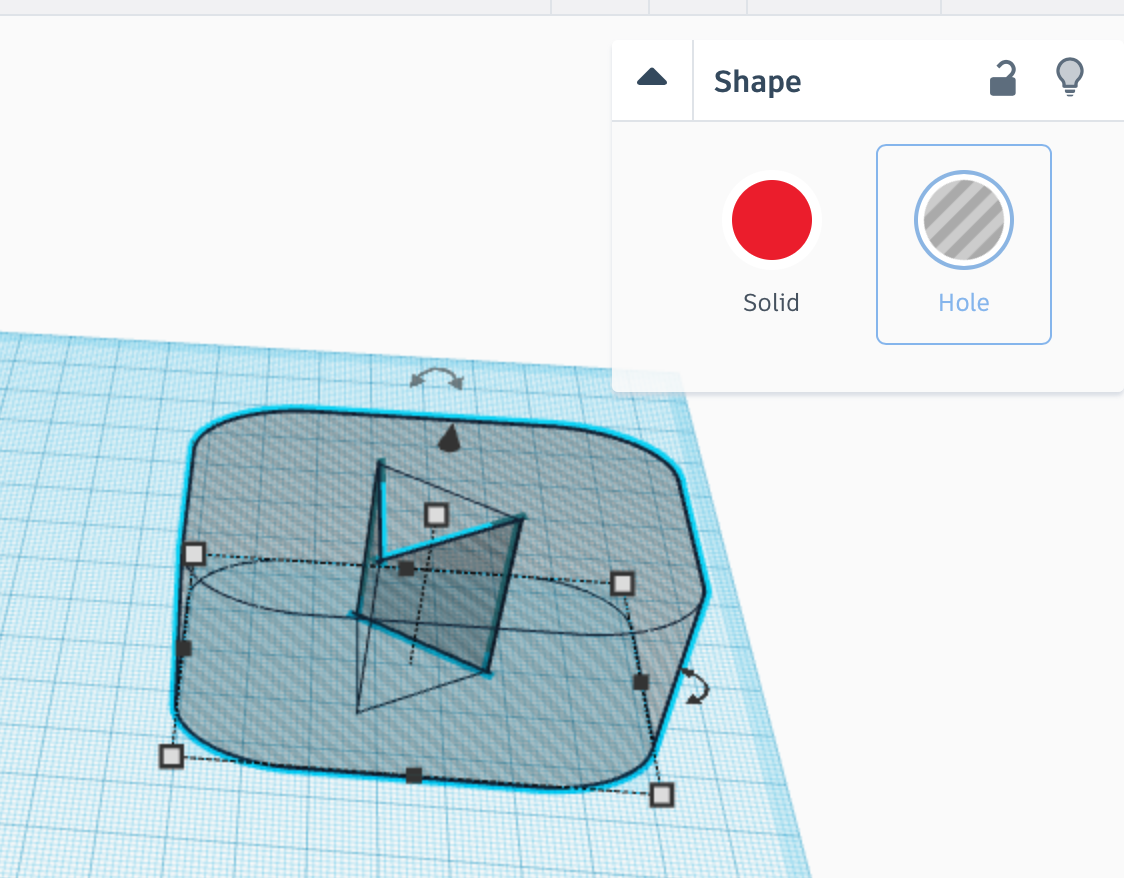
Change S2 into a hole.
Copy S2
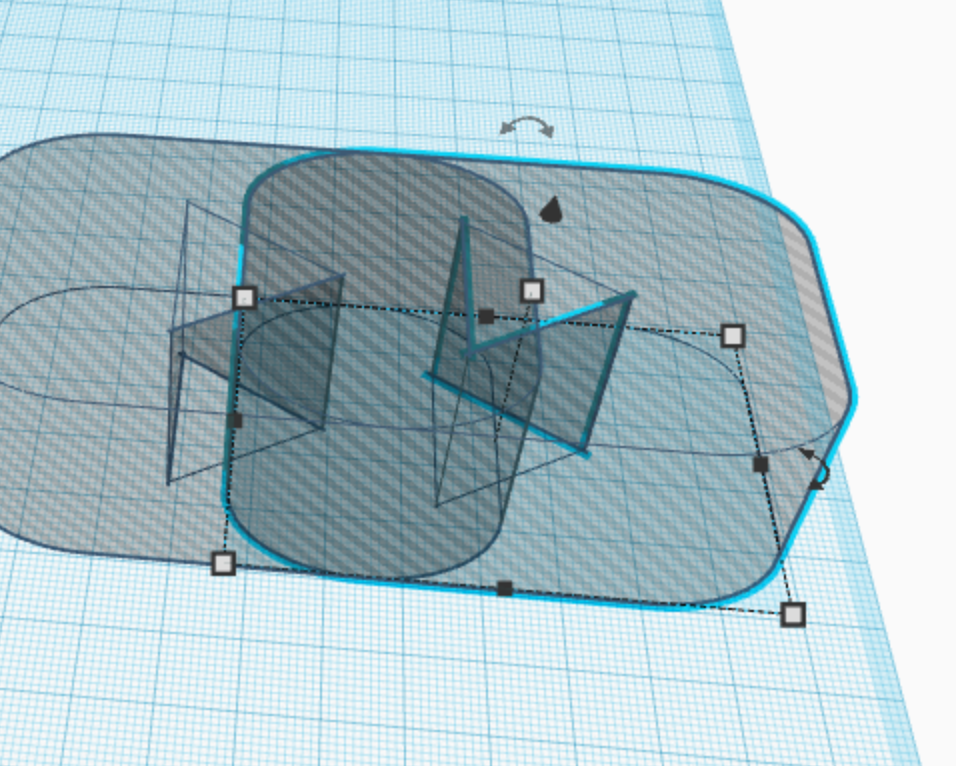
Make a copy of S2. We will call this shape S6.
Separate the Shapes
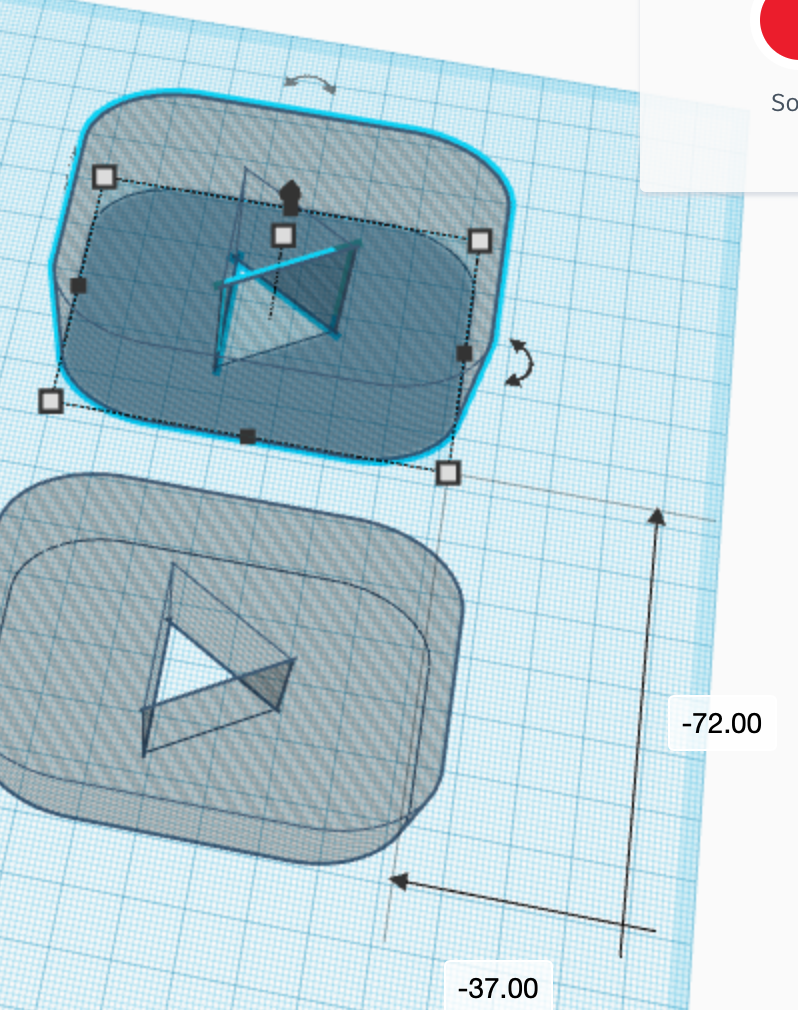
Separate S6 from S2.
CTL of S6
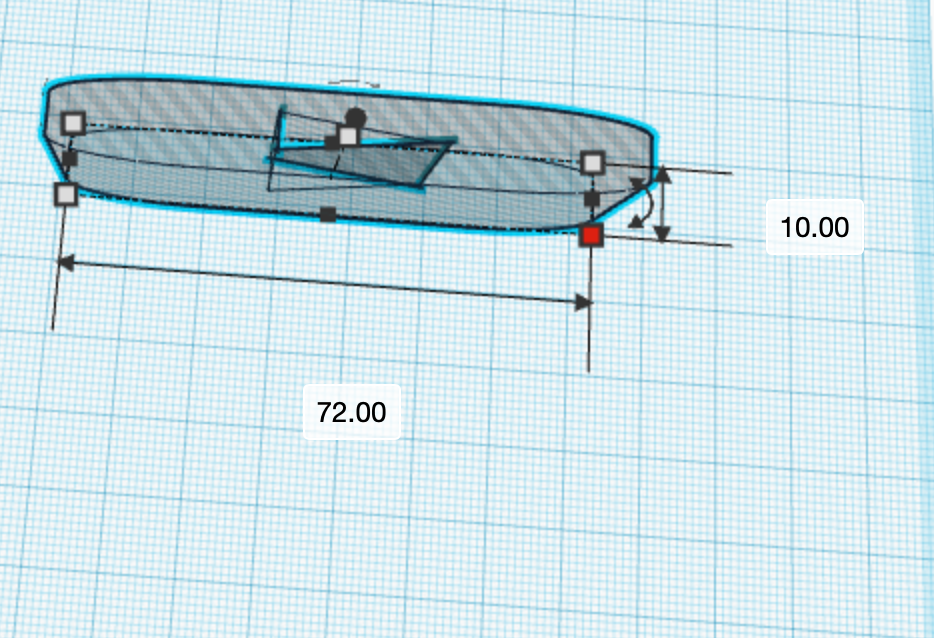
Change the length of S6 to 10 mm.
CTW of S6
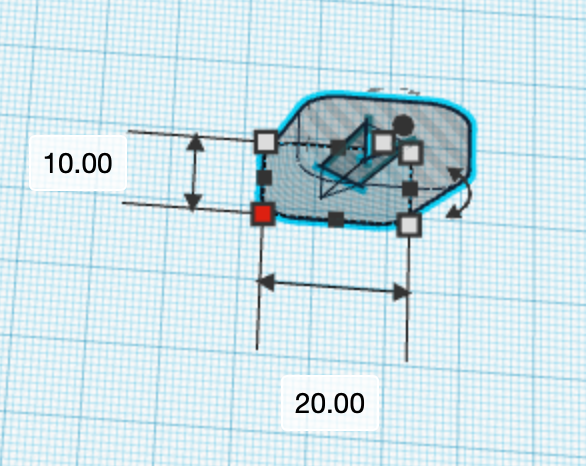
Change the width of S6 too 20mm.
CTH of S6
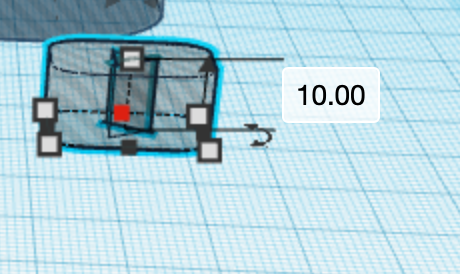
Change the height of S6 to 10 mm.
Move S6 Away
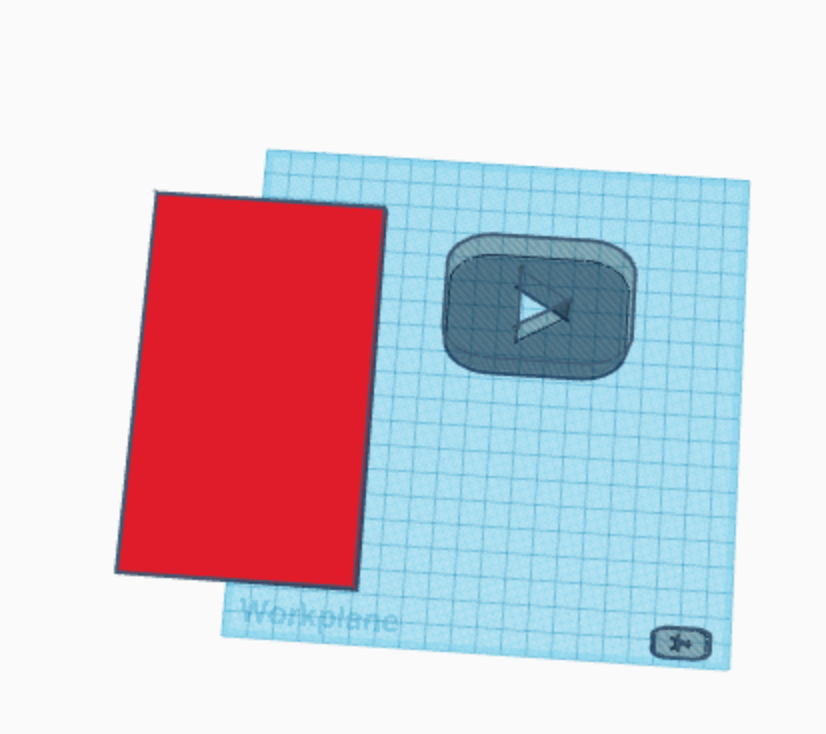
Move S6 out of the way, preferably to the bottom right of the plane.
CTW of S2
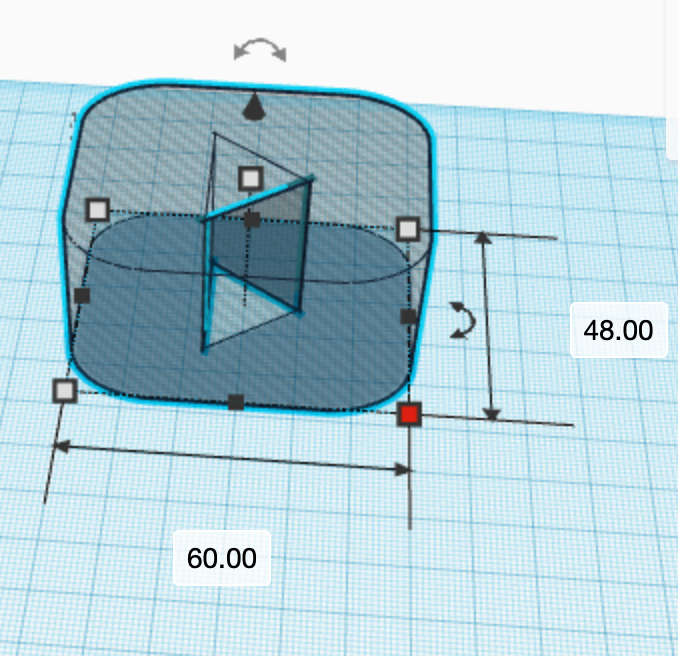
Change the width of S2 to 60 mm.
Select the Shapes
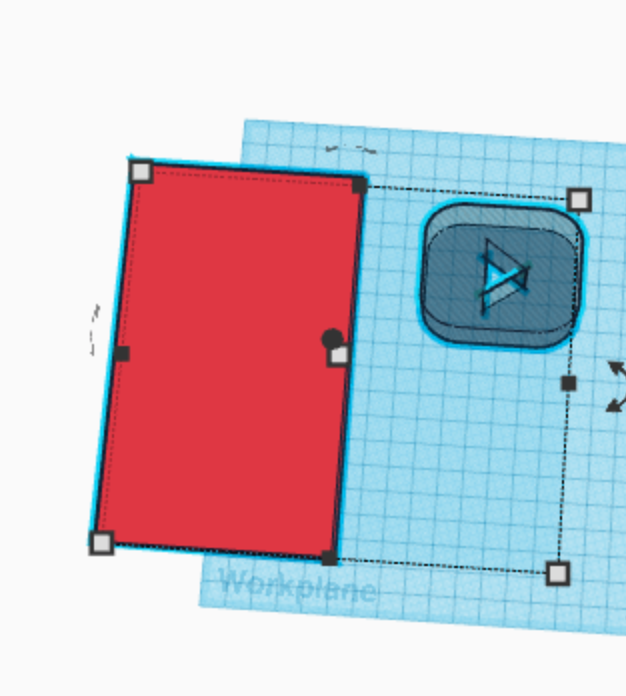
Select the shapes S1 and S2.
Align the Shapes
Press the align button.
Align on X
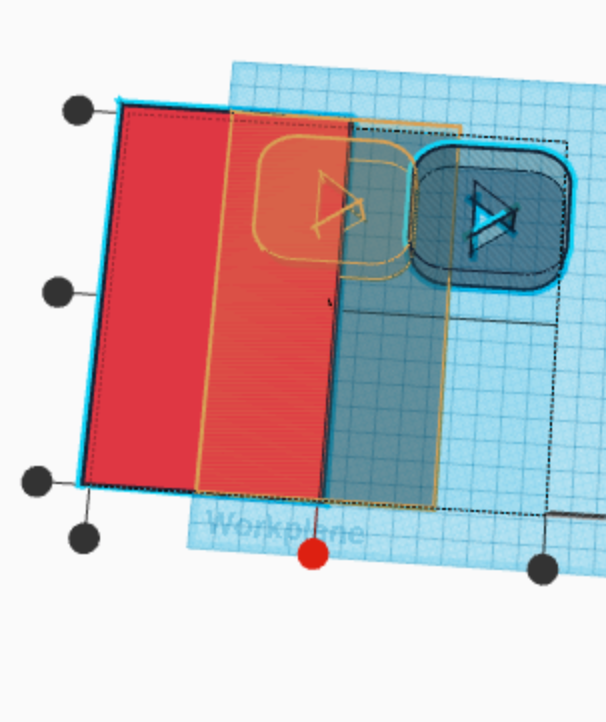
Press the middle button on the X axis.
Align on Y
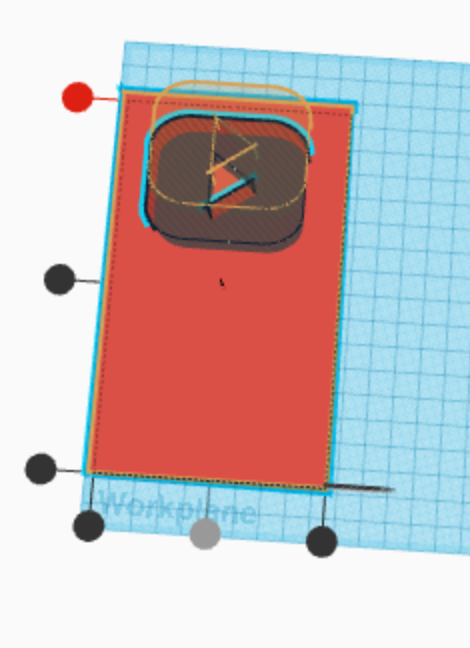
Press the top button on the Y axis.
Move S2 Backward
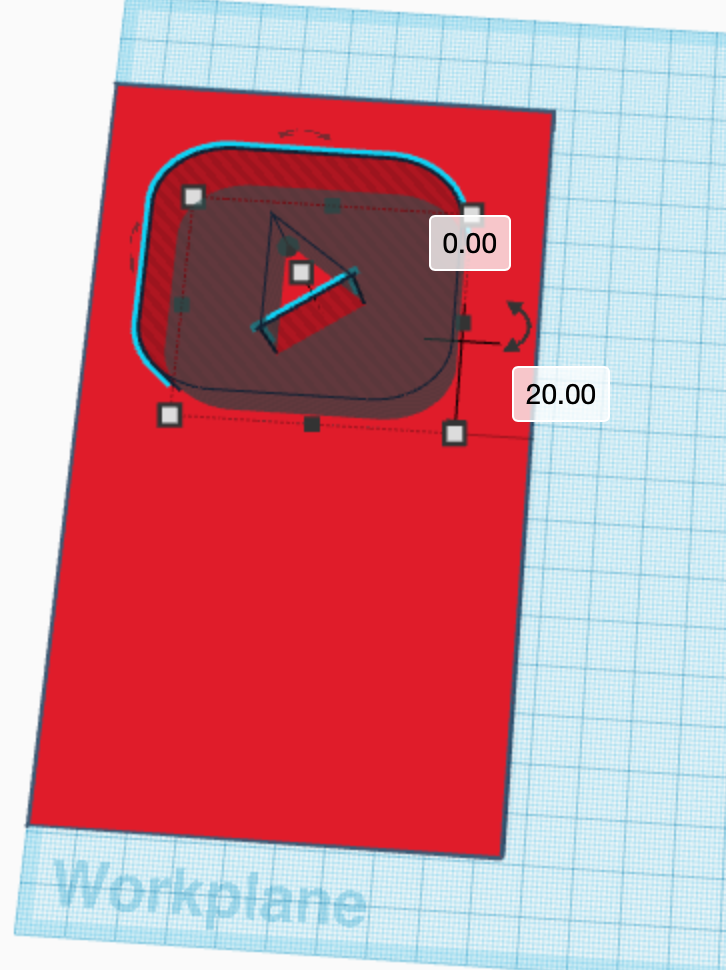
Move S2 backward by 20 mm.
Raise S2
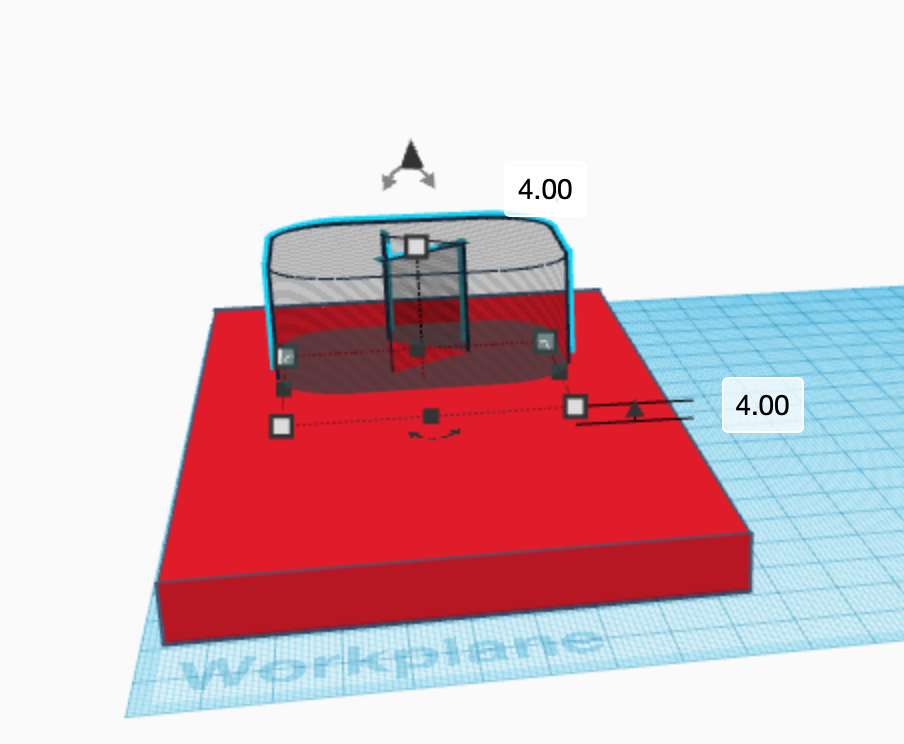
Raise S2 by 4 mm.
Select the Shapes
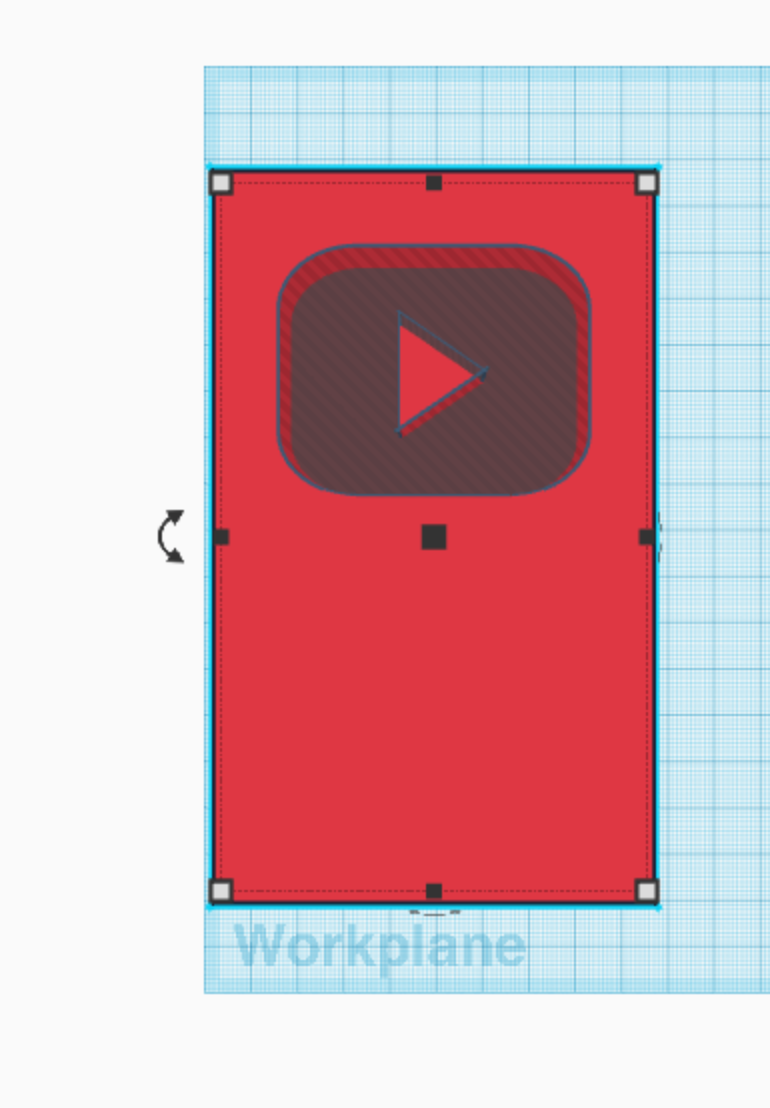
Select the shapes S1 and S2.
Group the Shapes
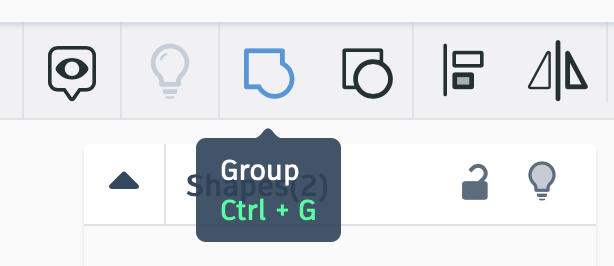
Group the shapes S1 and S2. (We will keep calling this shape S1.)
CTW of S6
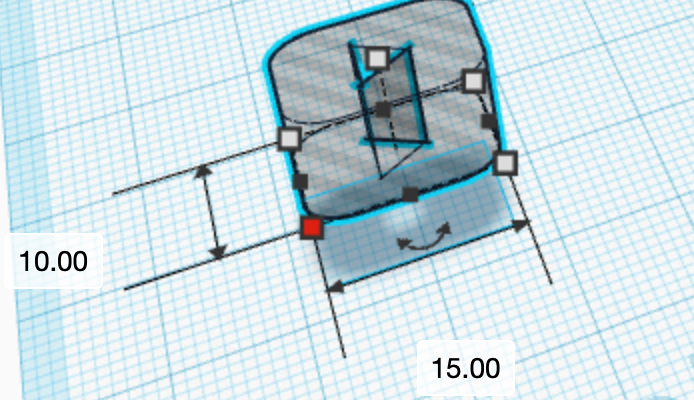
Change the width of S6 to 15 mm.
Raise S6
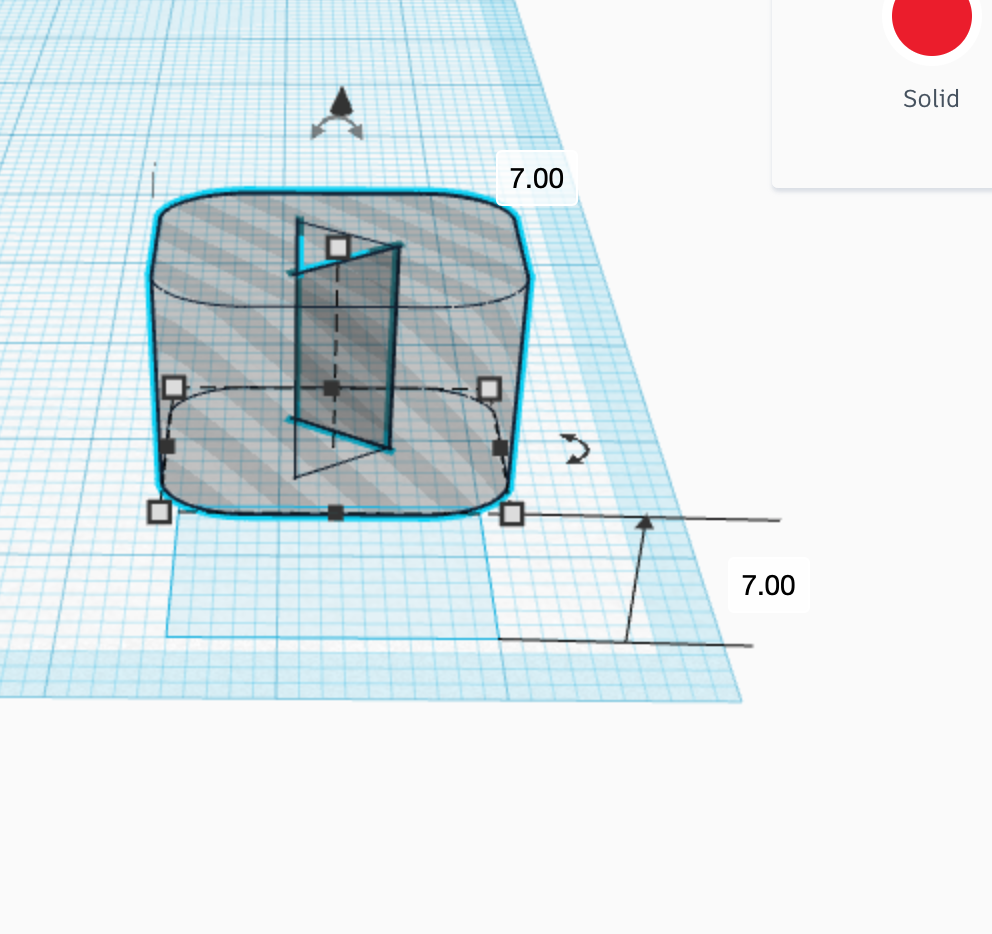
Raise S6 to 7 mm.
Select the Shapes
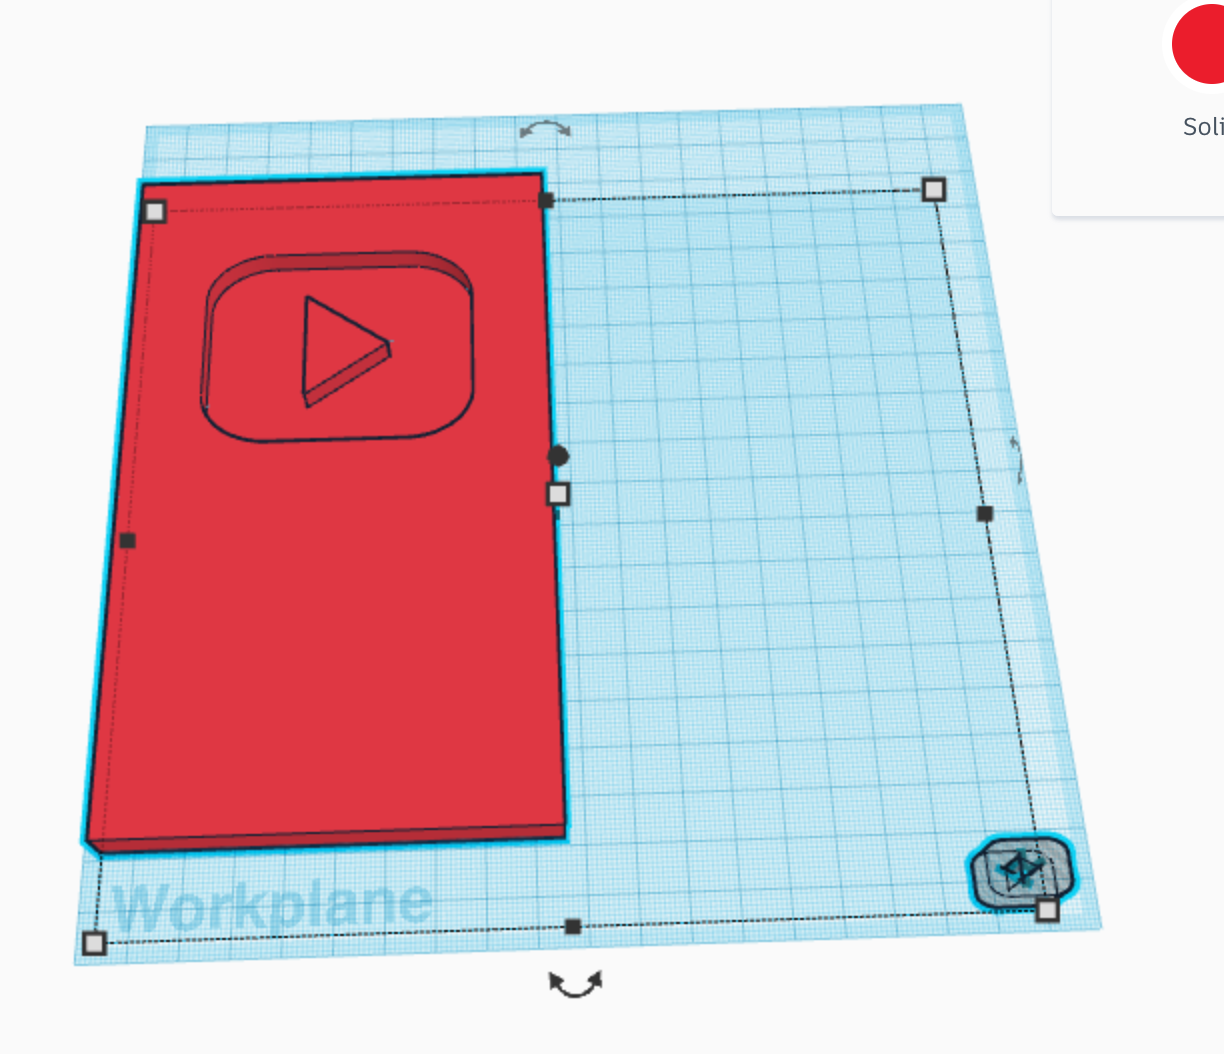
Select the shapes S1 and S6.
Press Align
Press the Align button.
Align on Y
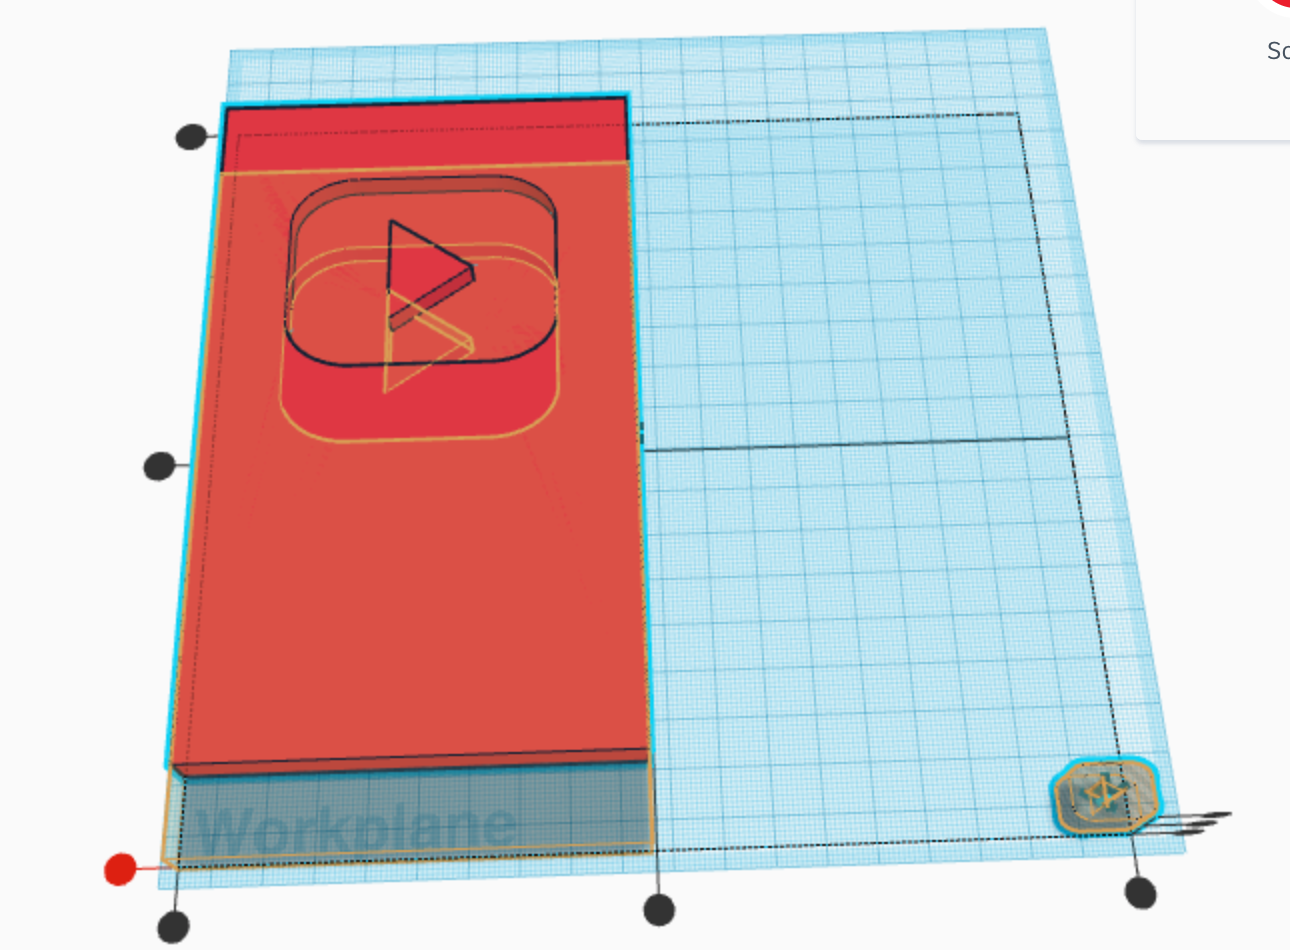
Press the bottom button on the Y axis.
Align on X
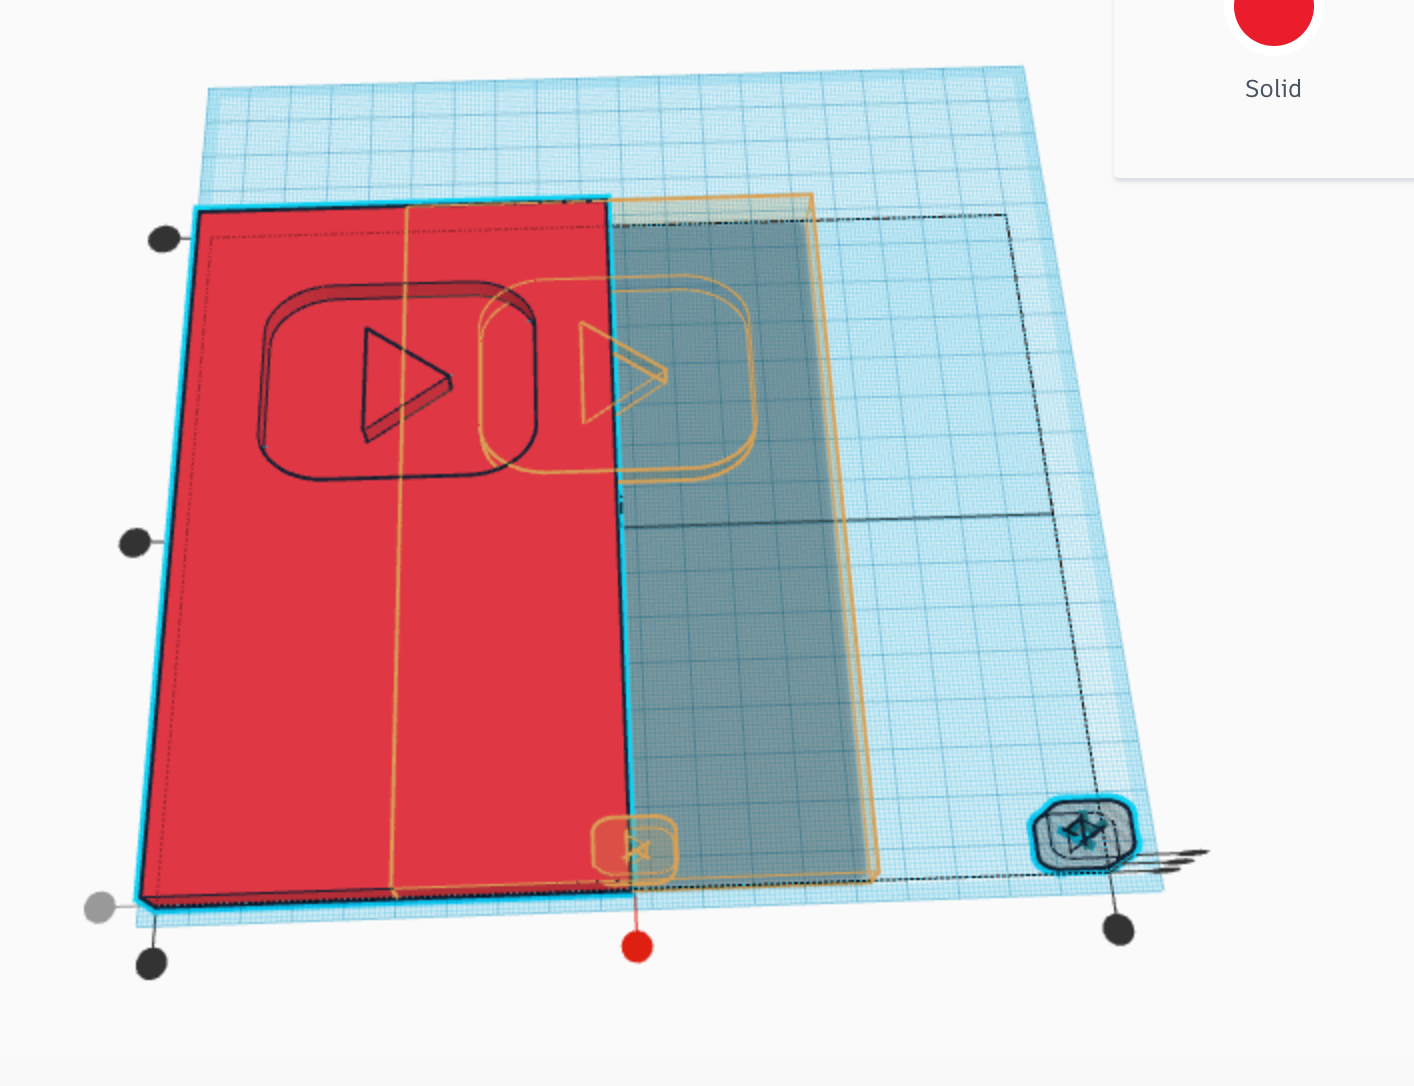
Press the middle button on the X axis.
Move the Shapes
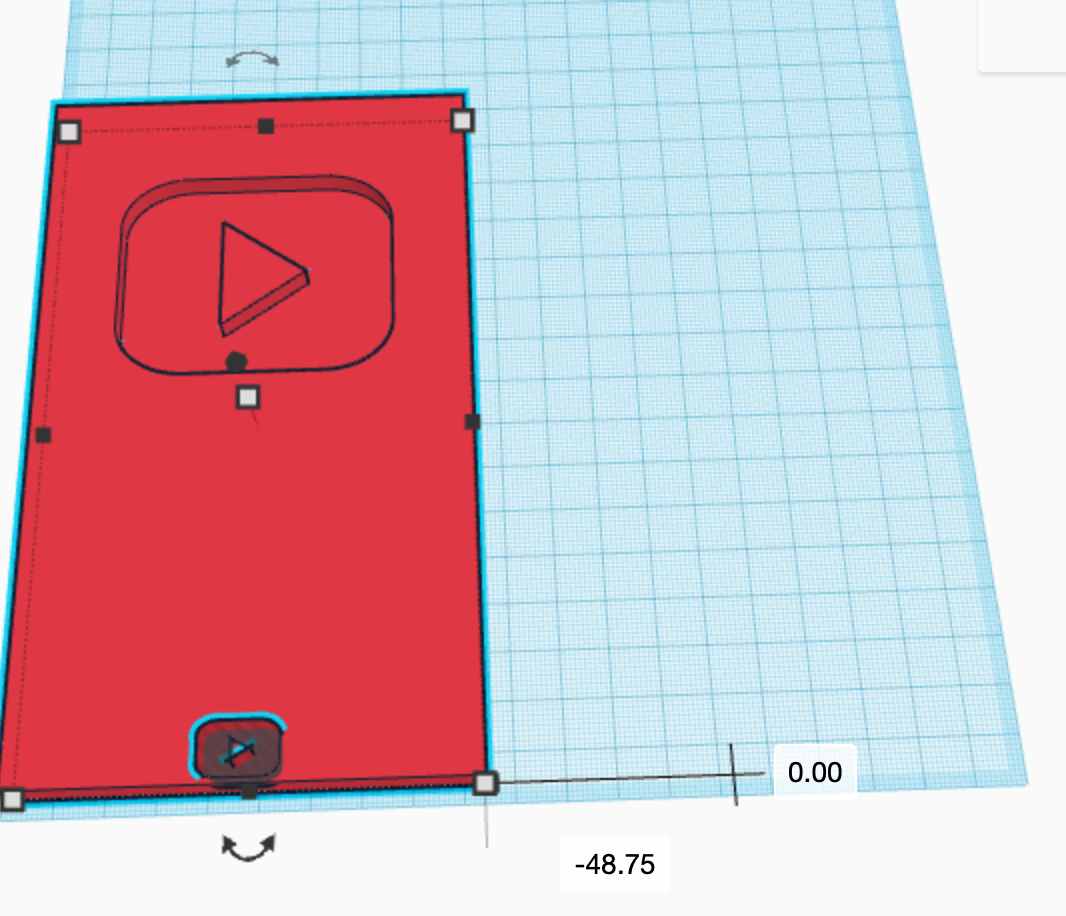
Move the shapes S1 and S6 out of the way.
Move S6
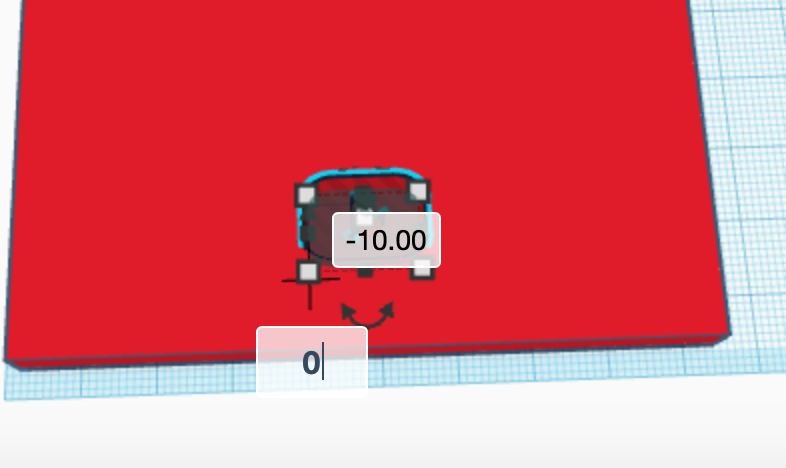
Move S6 -10 mm forward
Move S6
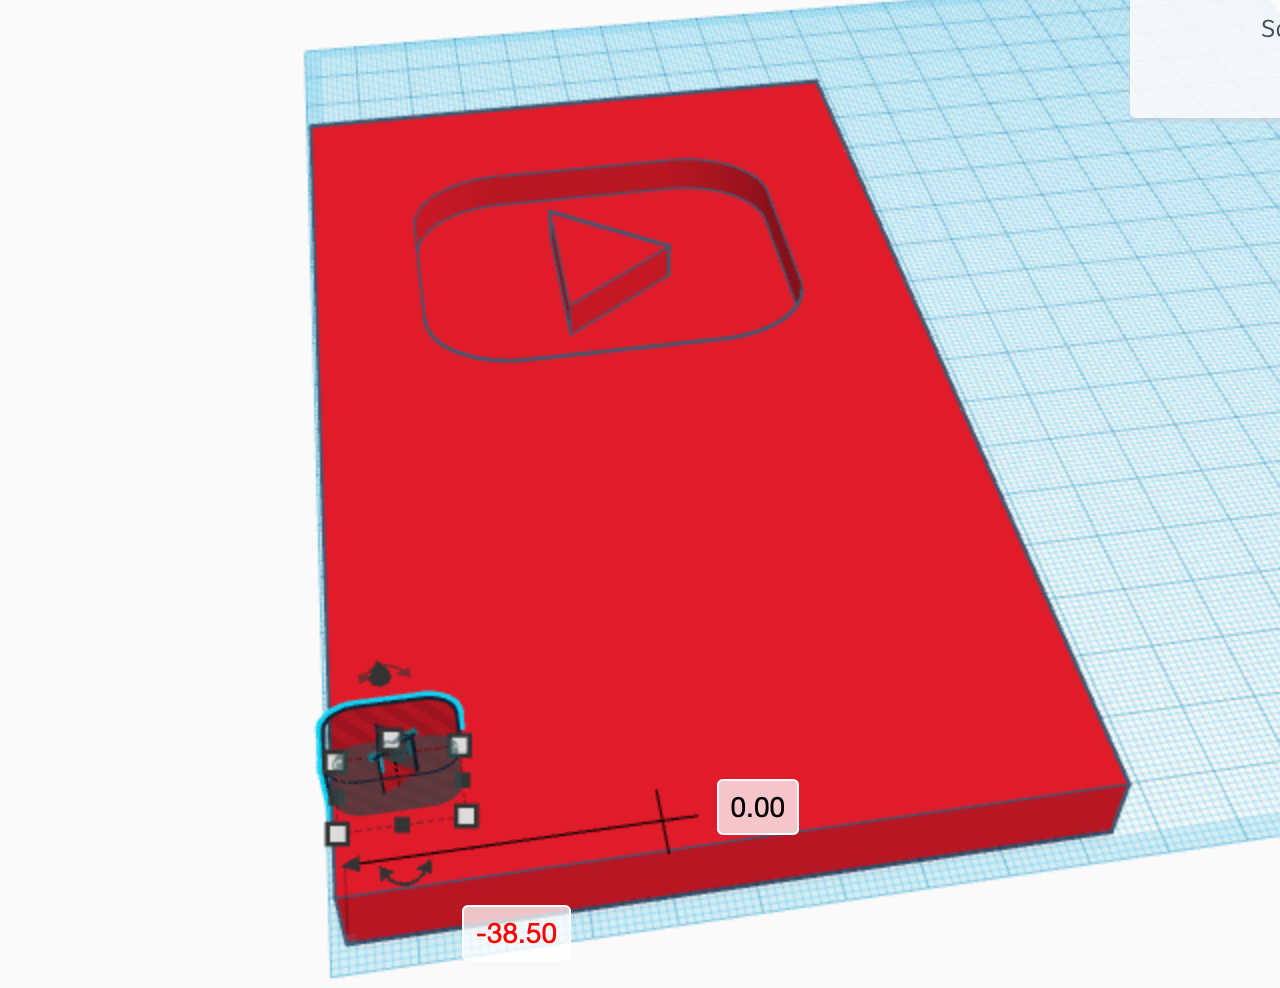
Move S6 -38.5 mm to the left
Get a New Shape
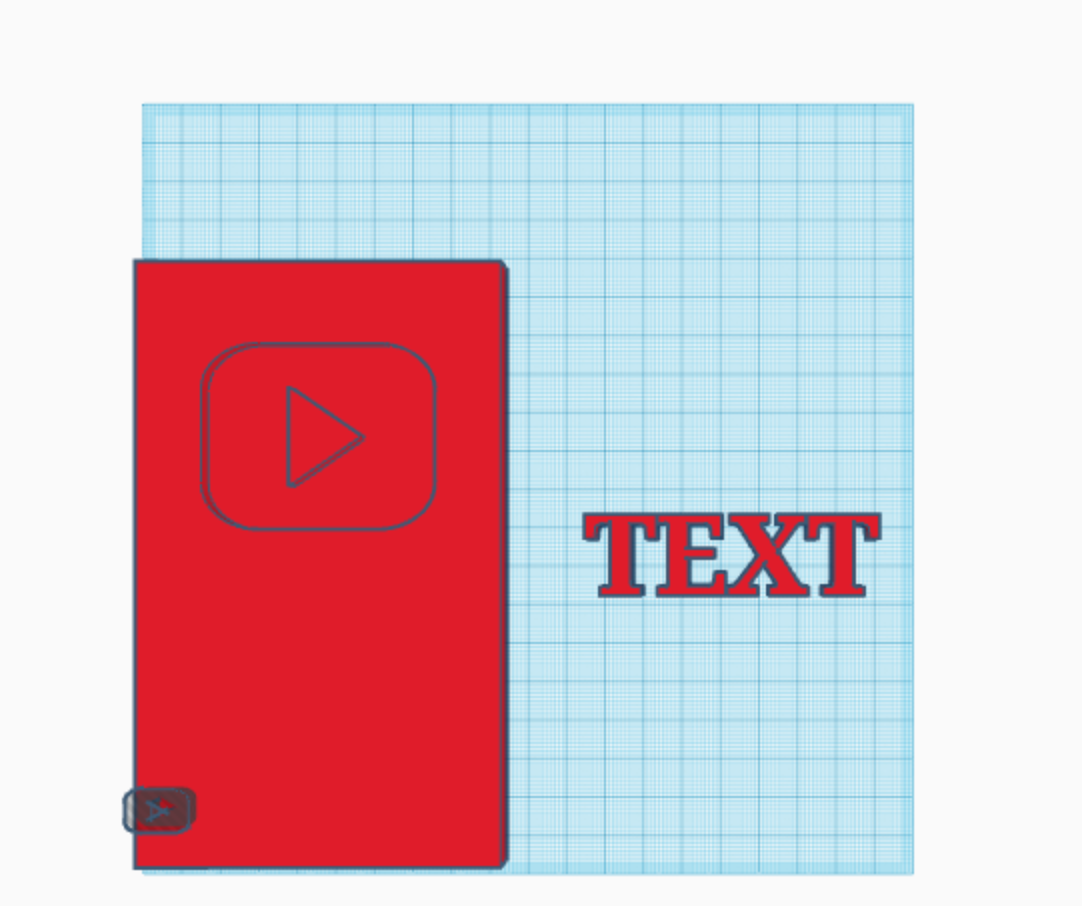
Bring the shape called text to the plane. We will call this shape S7
Change S7
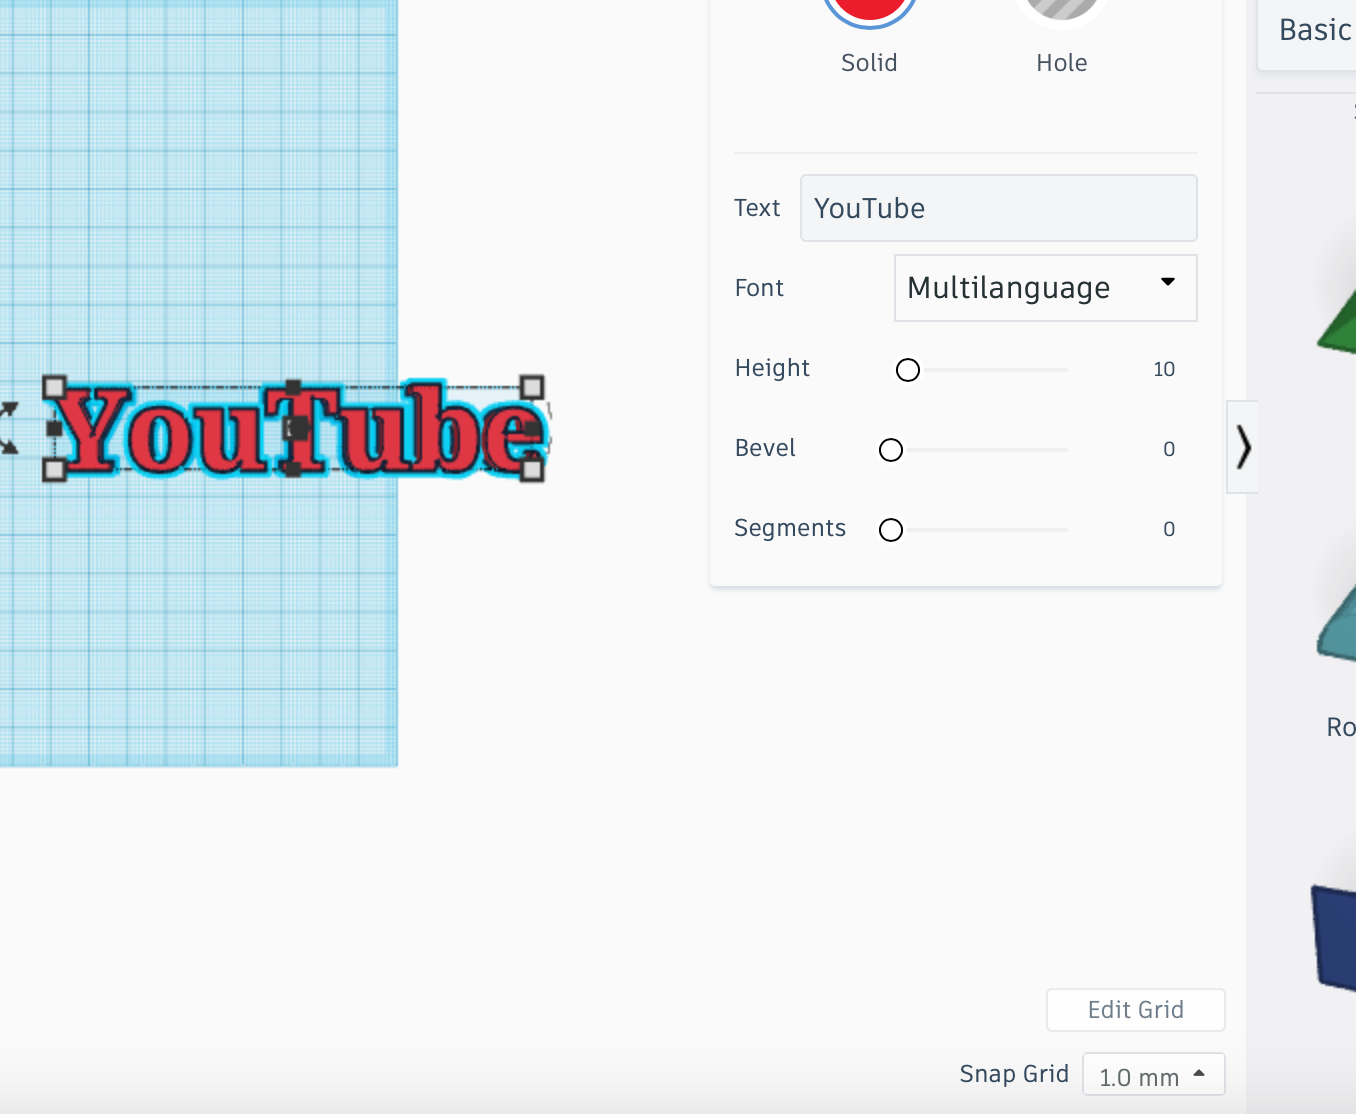
Change the text of S7 to "YouTube".
CTL of S7
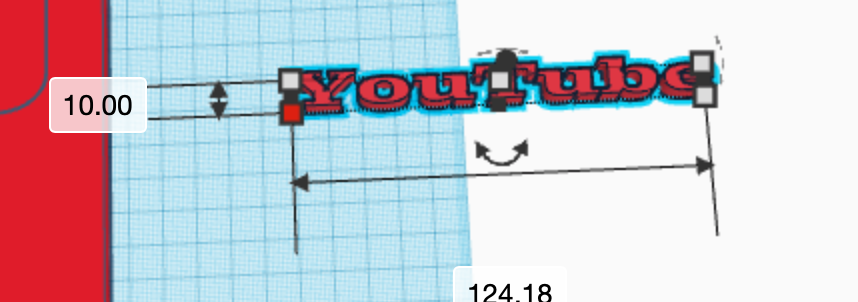
Change the length of S7 to 10 mm.
Change S7
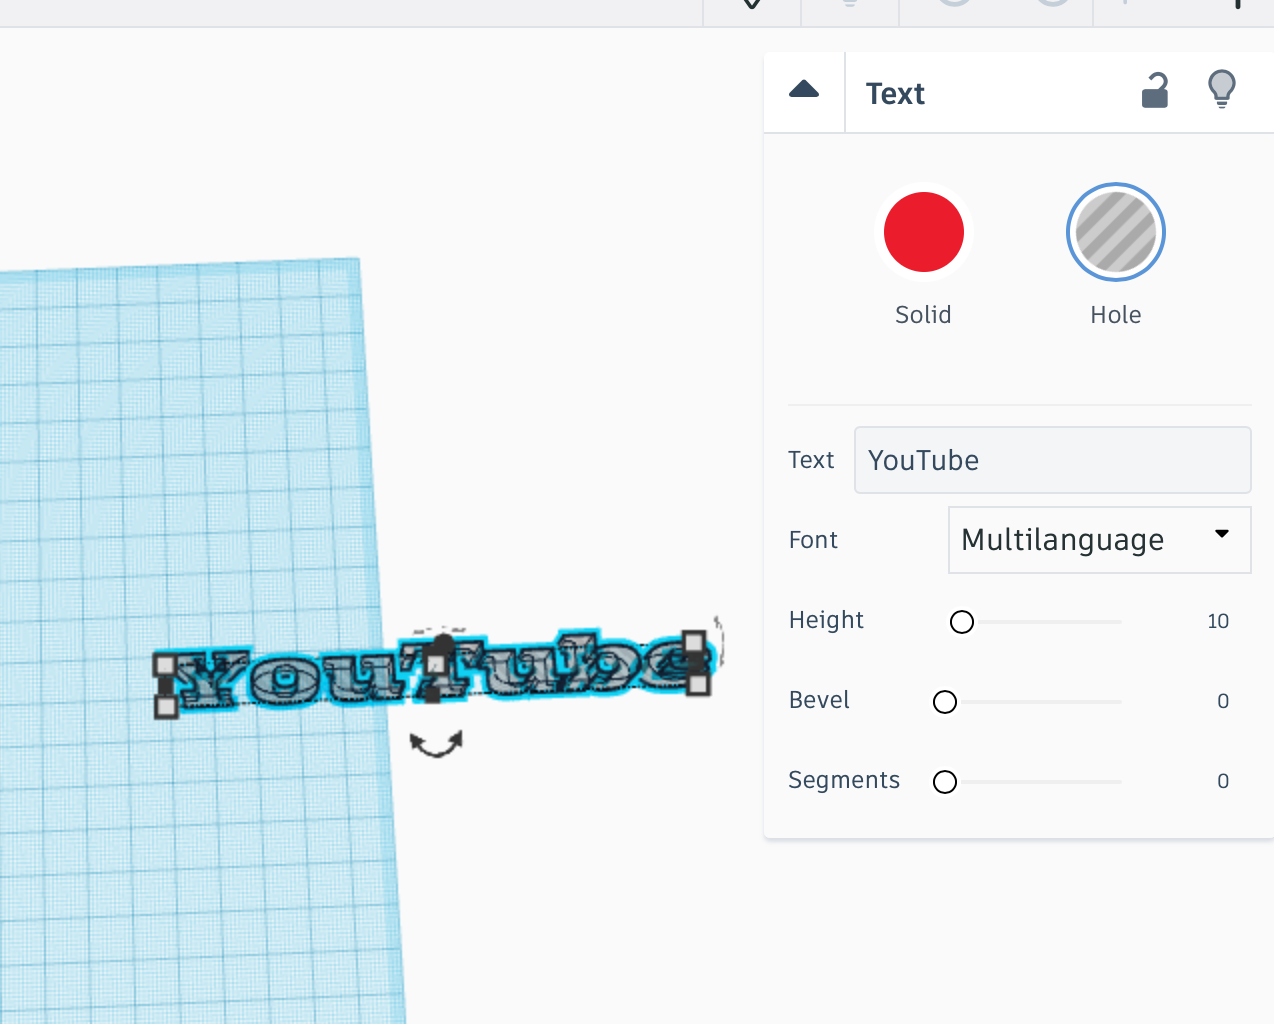
Change the shape S7 into a Hole.
Raise S7
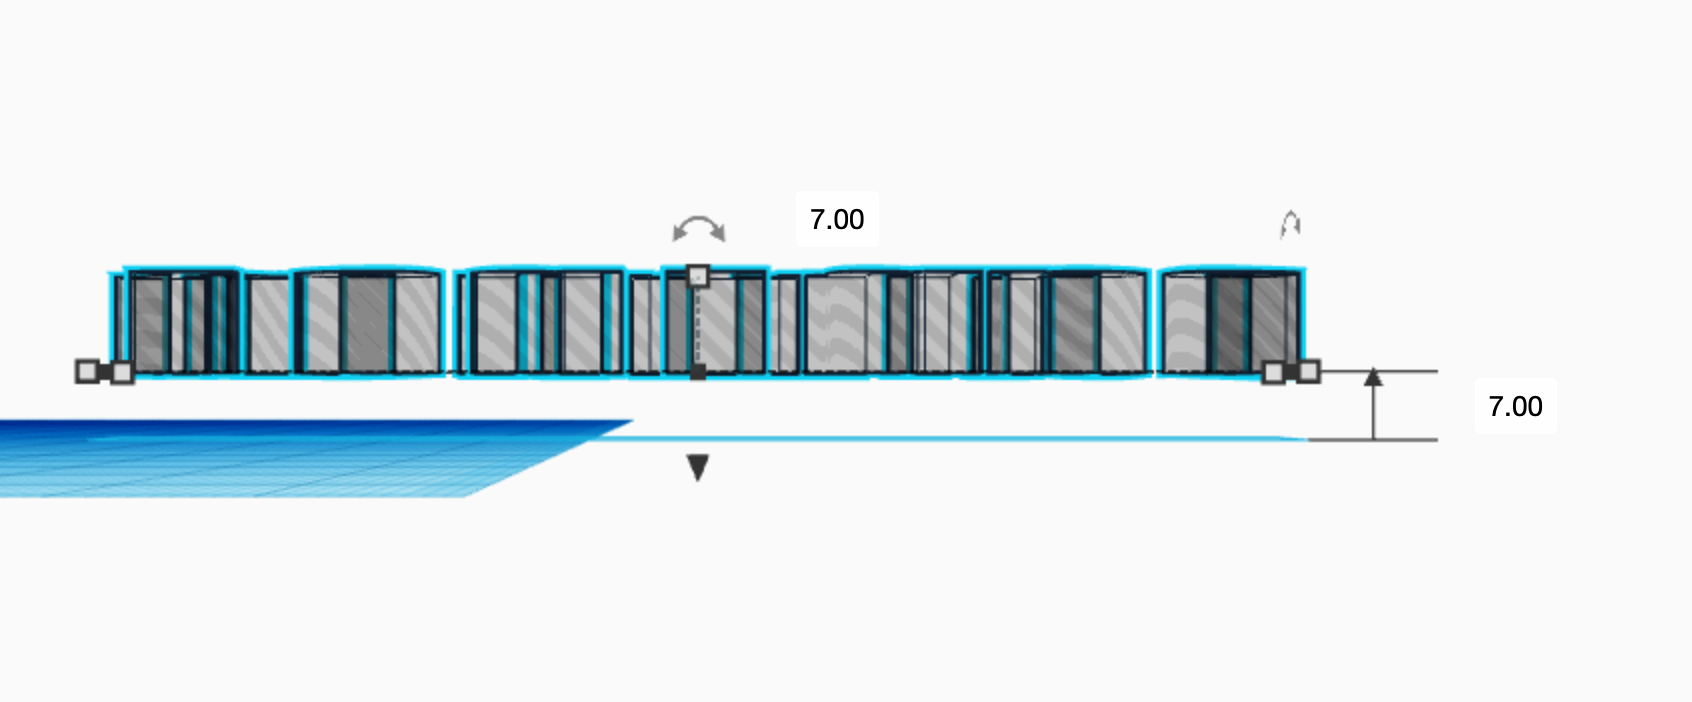
Raise the shape S7 by 7 mm.
CTW of S7
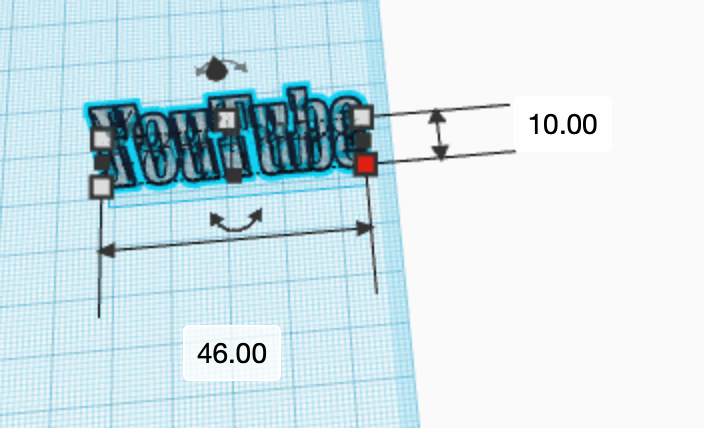
Change the width of S7 to 46 mm.
Move S6
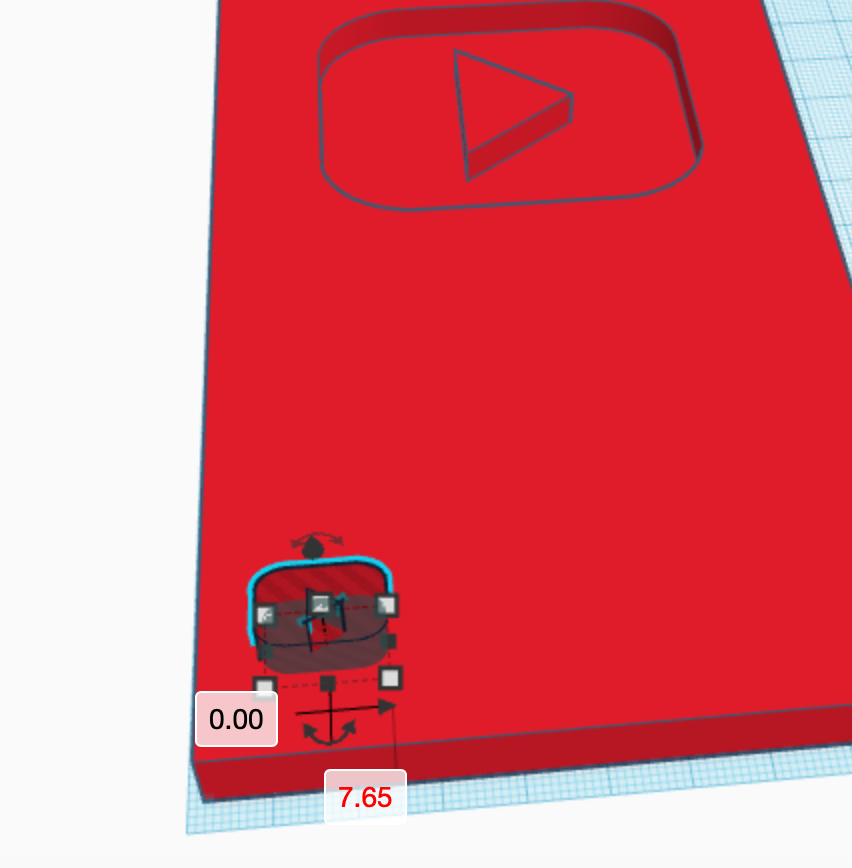
Move S6 7.65 mm to the right.
Move S6
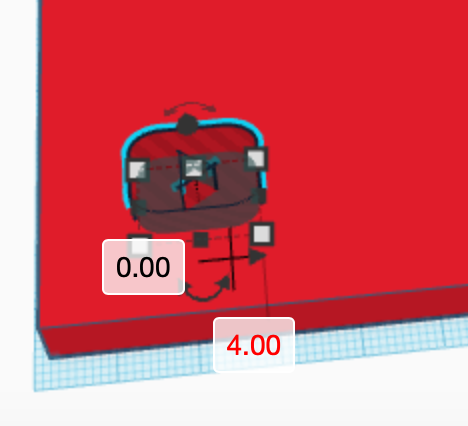
Move S6 4 mm to the right.
Select the Shapes
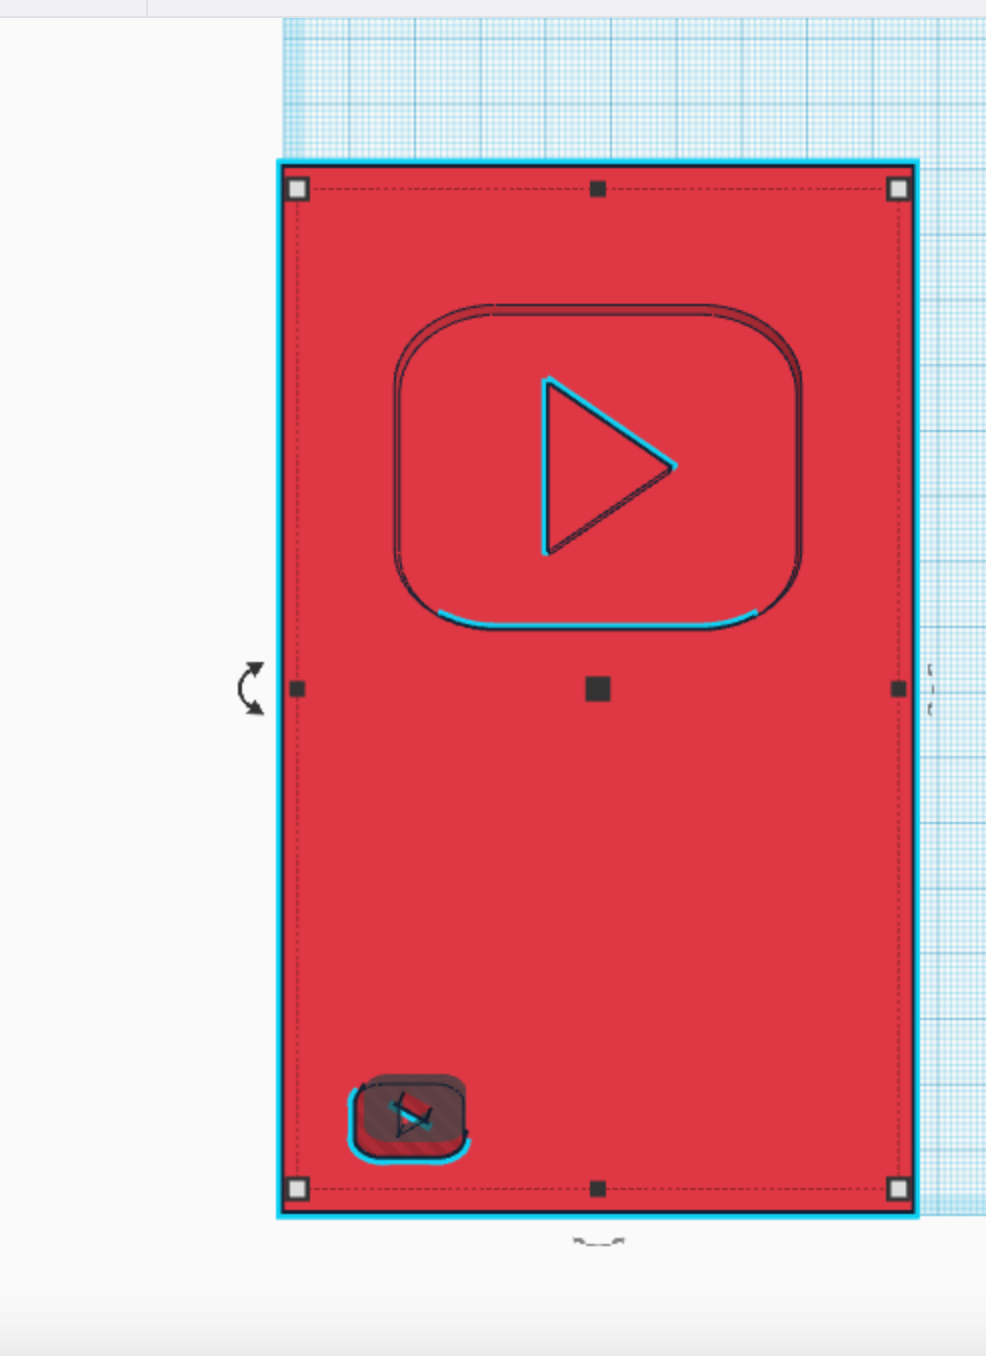
Select the shapes S1 and S6.
Group the Shapes
While S1 and S6 are selected, press the group button. This grouped shape will still be called S1.
Select the Shapes
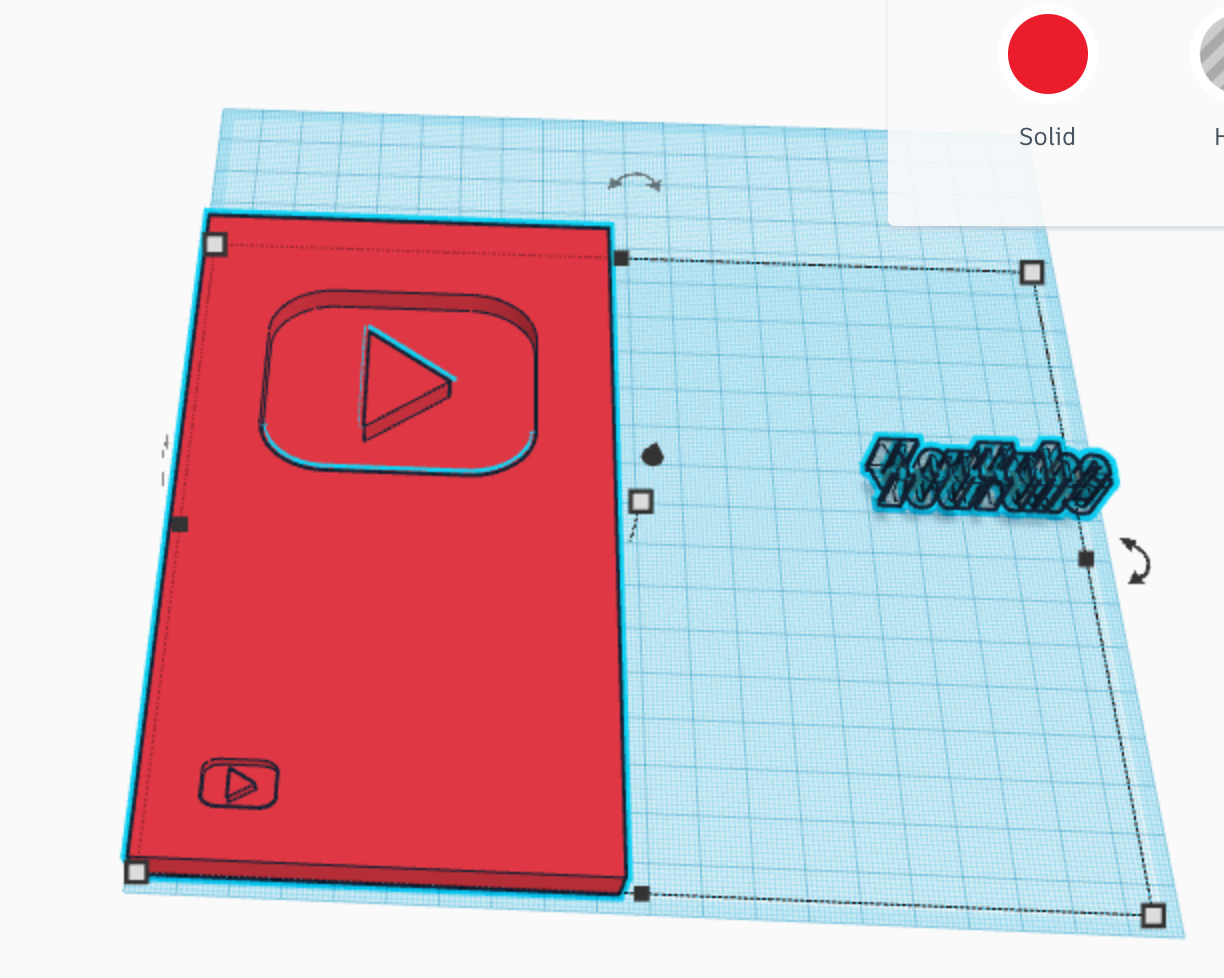
Select the shapes S1 and S7.
Press Align
Press the align button.
Align X
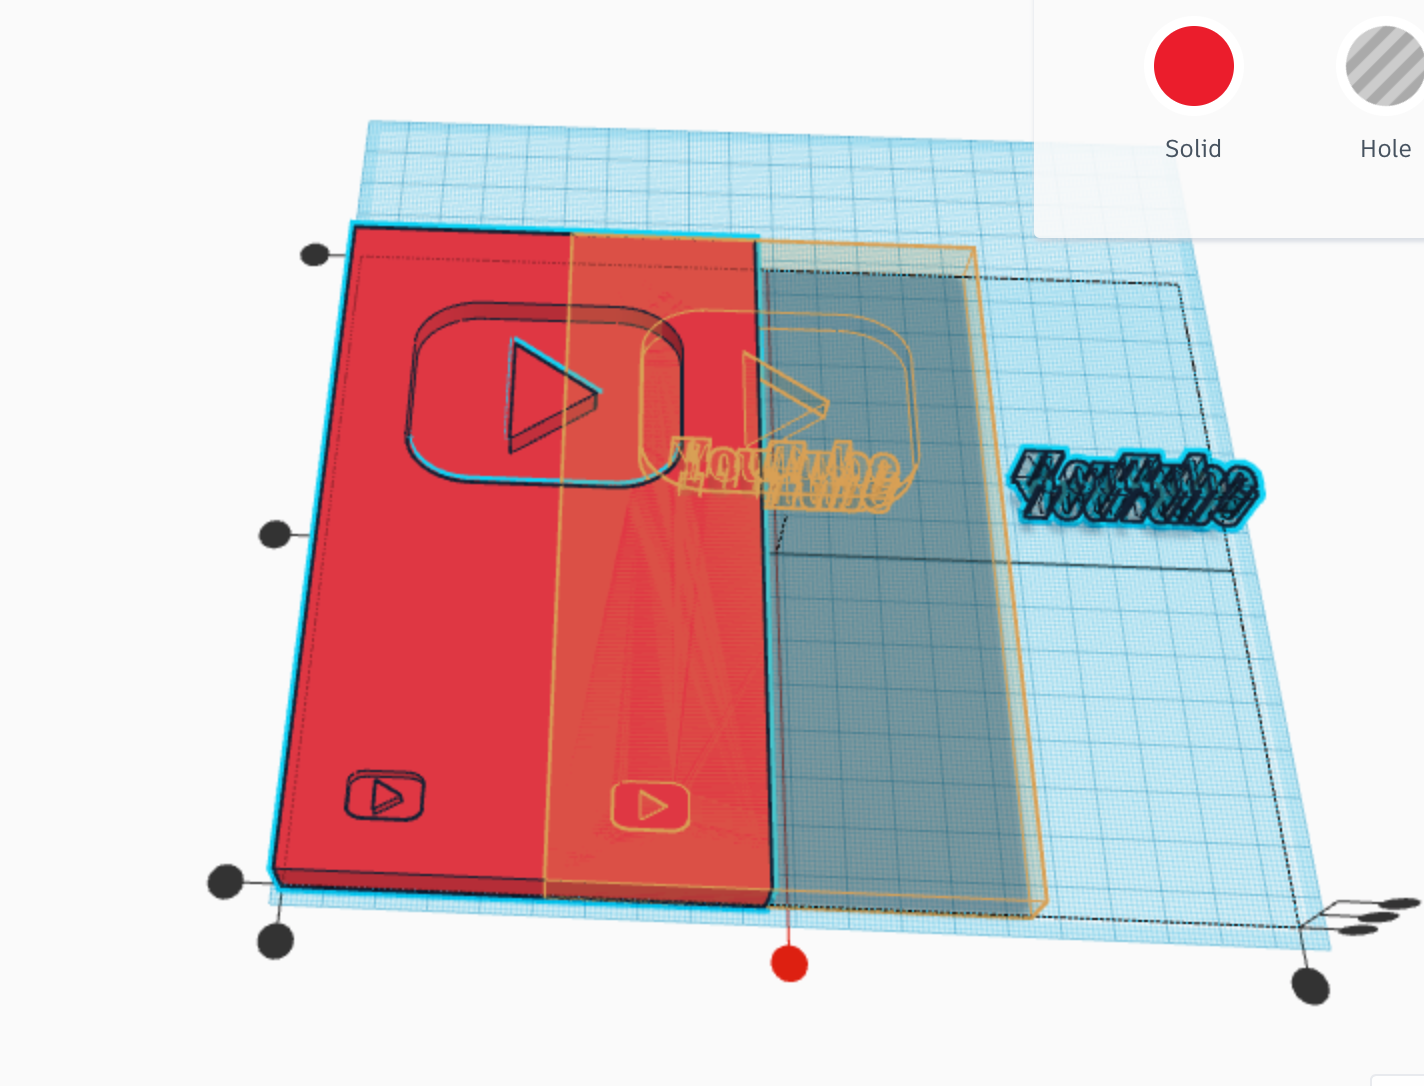
Press the middle button on the X axis.
Align Y
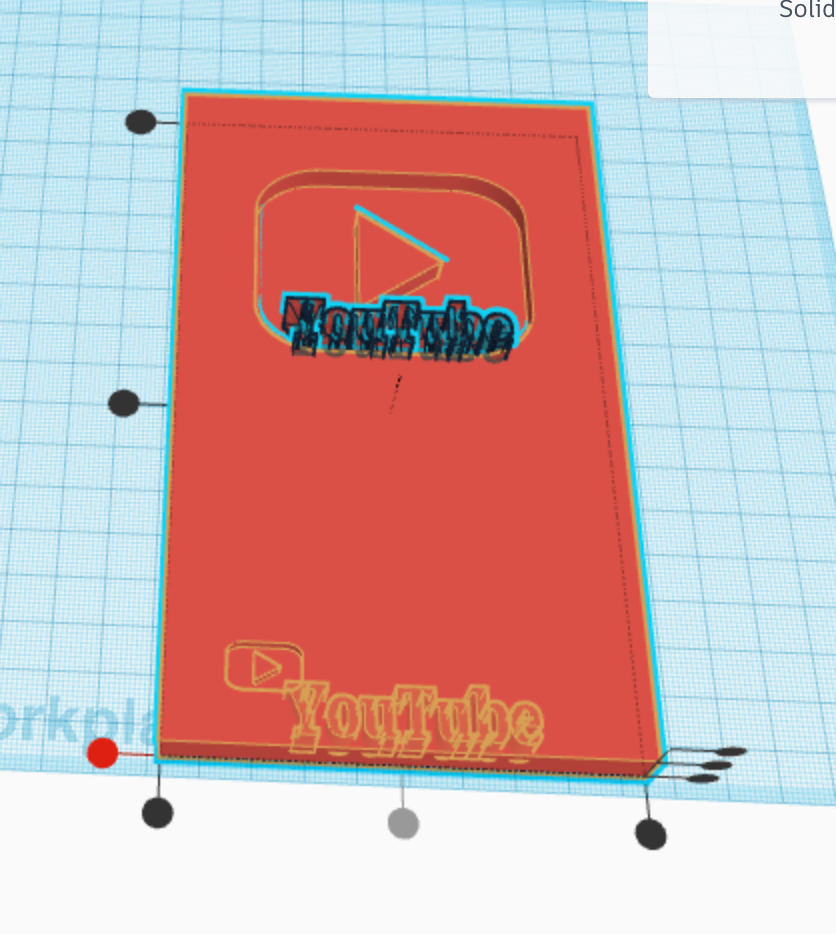
Press the bottom button on the Y axis.
Move S7
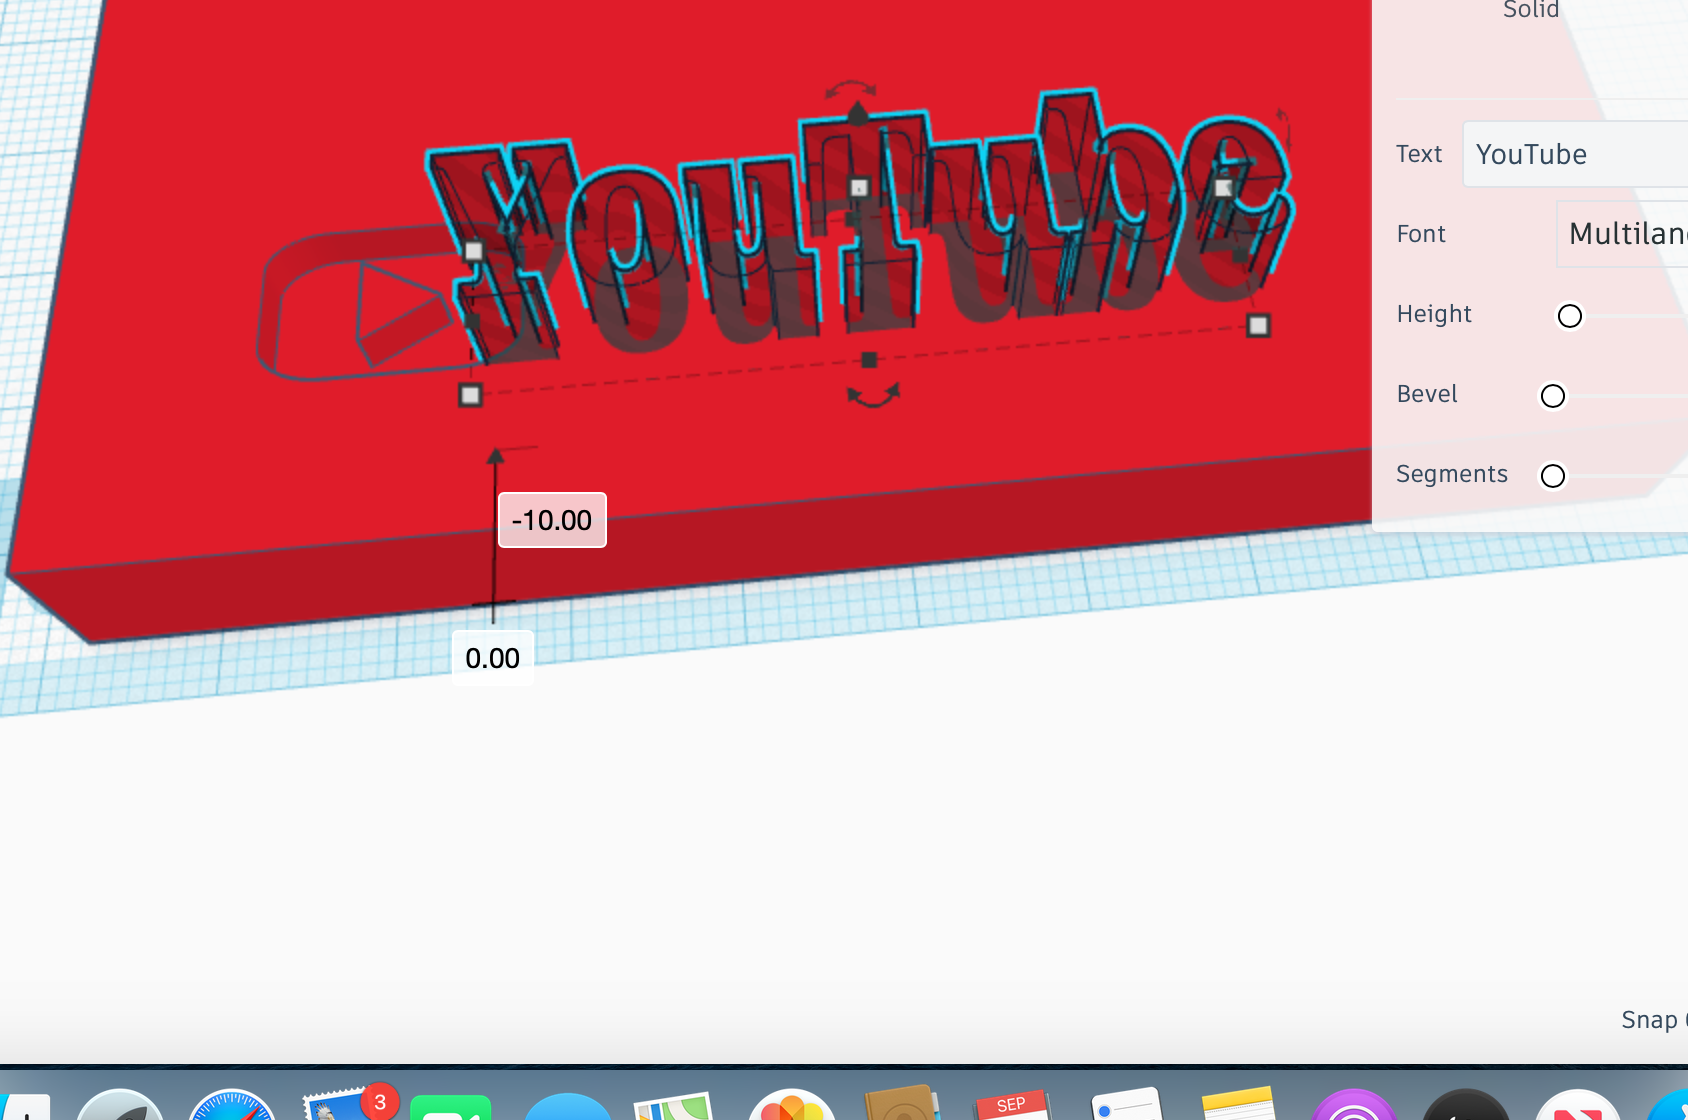
Move S7 forward by -10 mm.
Move S7
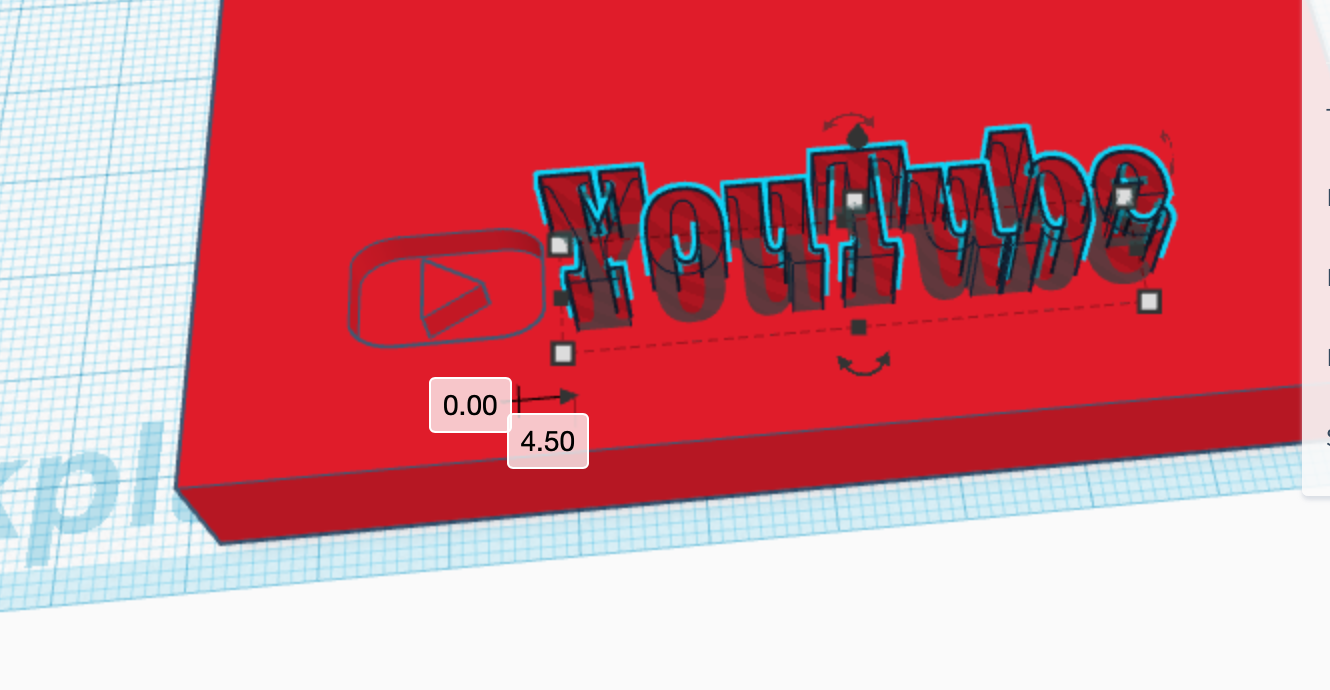
Move S7 to the right by 4.5 mm.
Select the Shapes
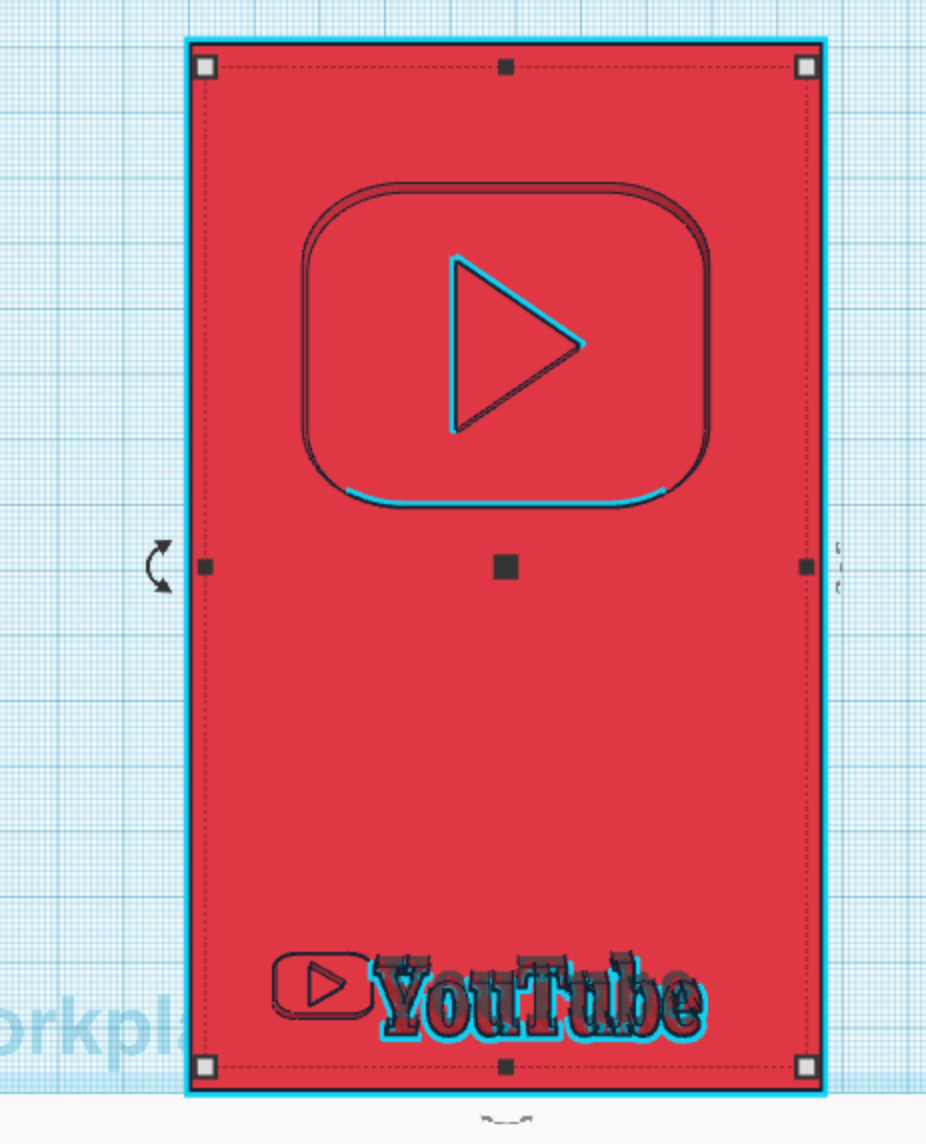
Select the shapes S1 and S7.
Group the Shapes
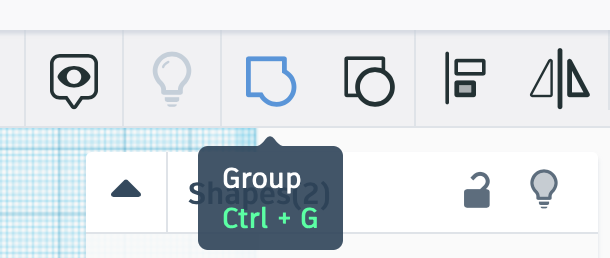
While selected, group the shapes S1 and S7. This grouped shape will still be called S1.
Move S1
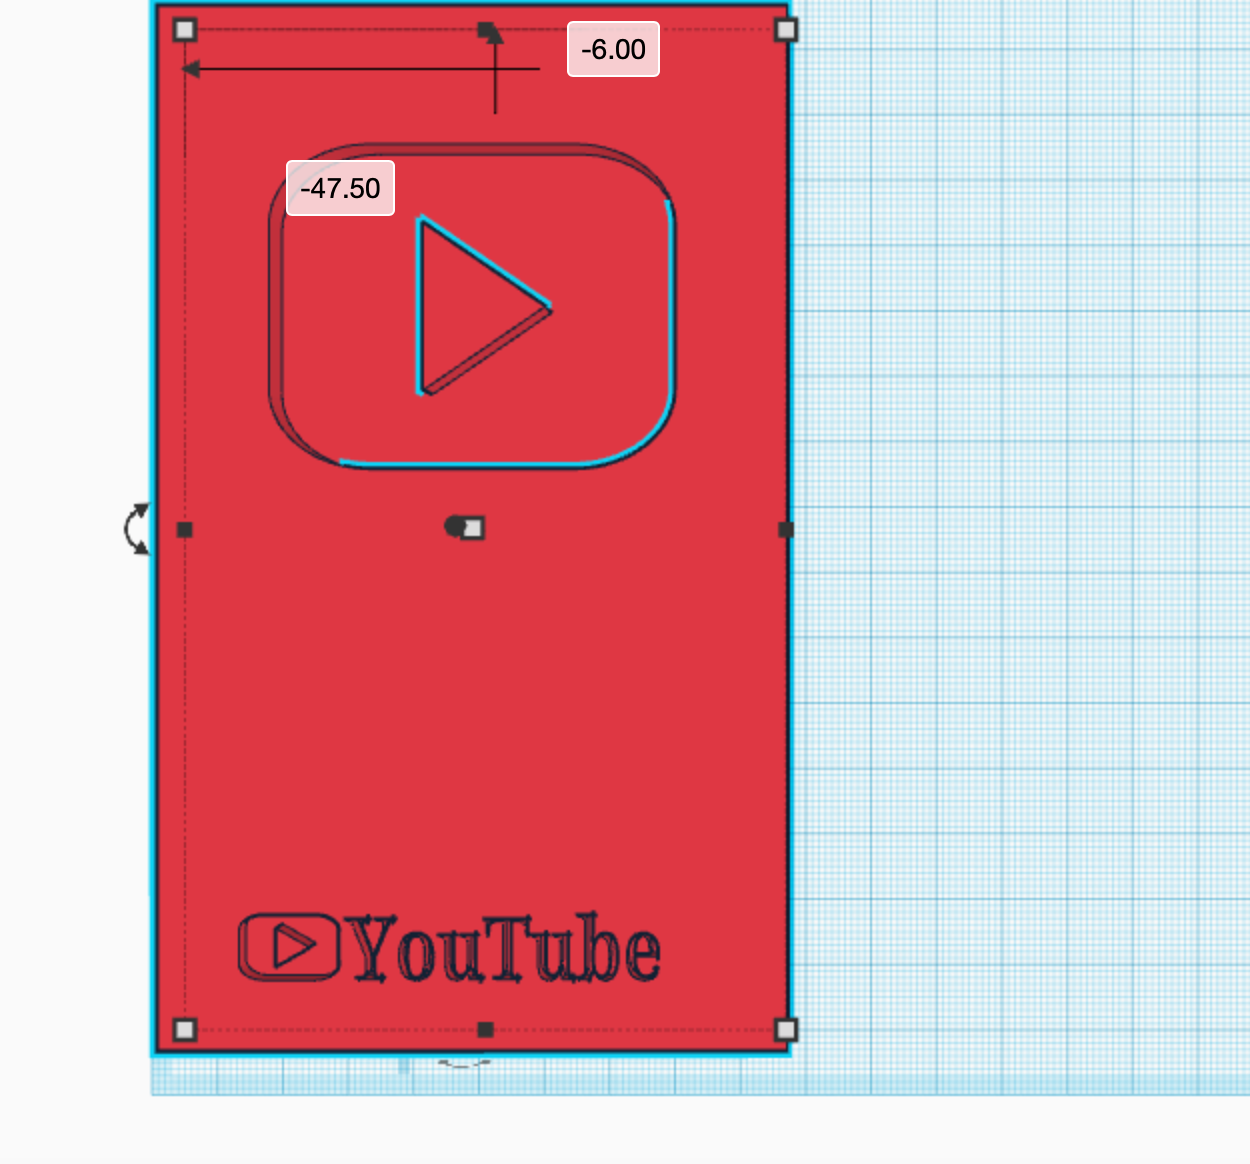
Move S1 out of the way, preferably right next to a side of the plane.
Add a Shape
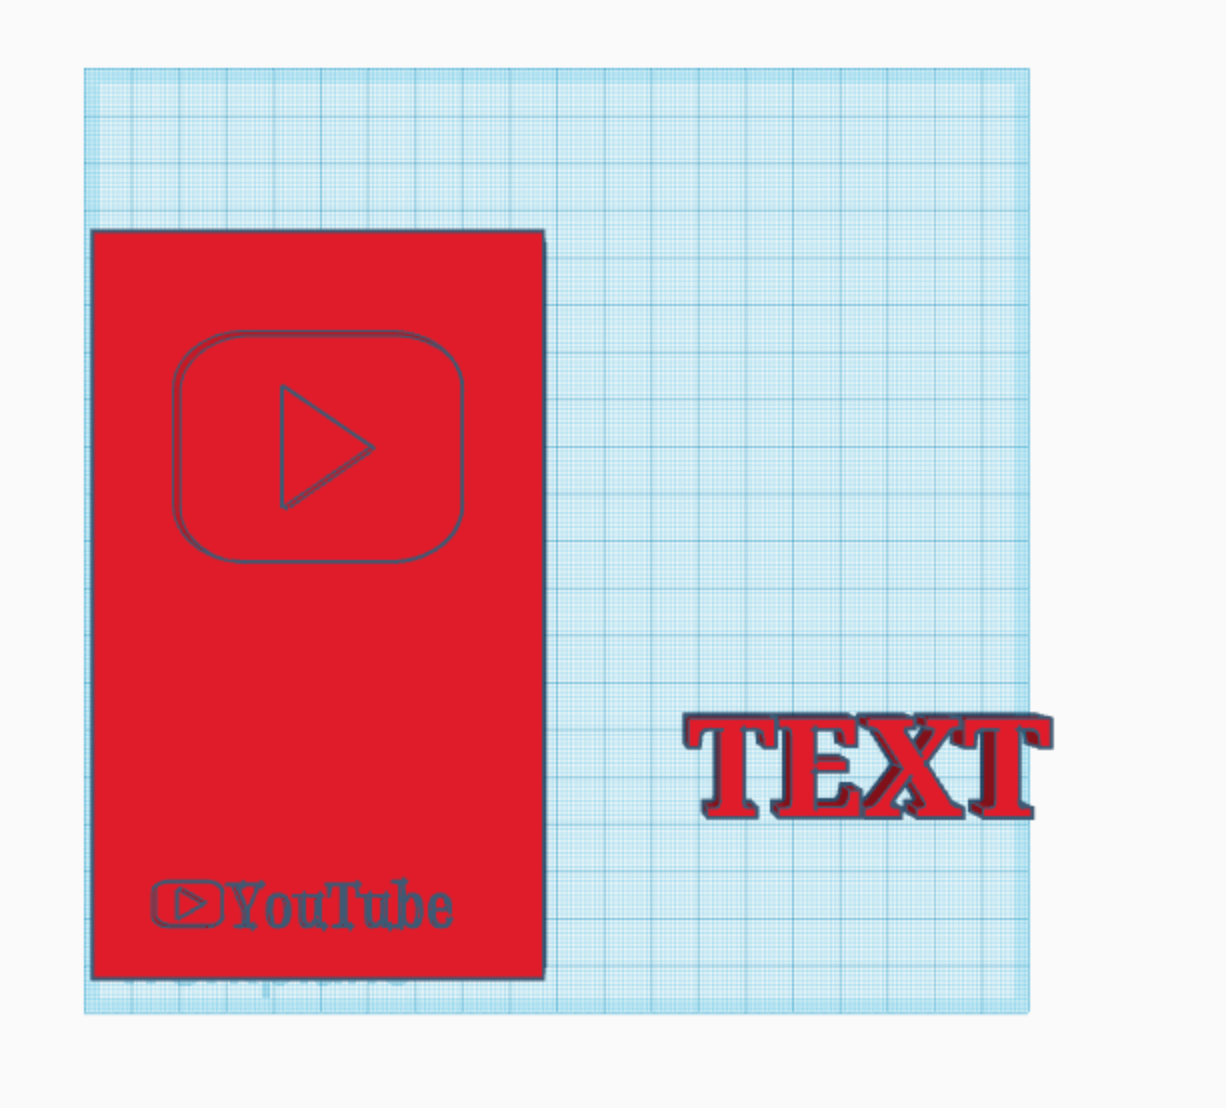
Bring the shape known as Text to the plane. We will call this shape S8.
CTW of S8
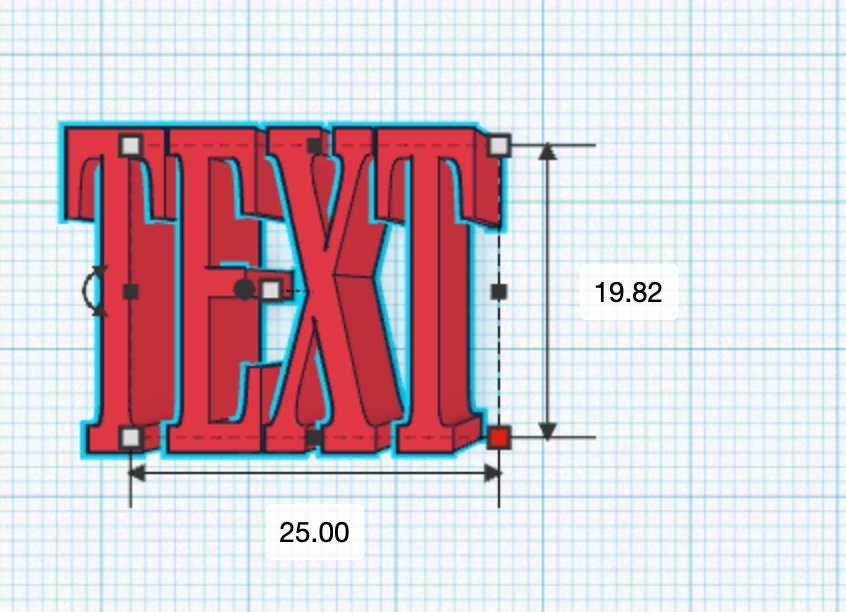
Change the width of S8 to 25 mm.
CTL of S8
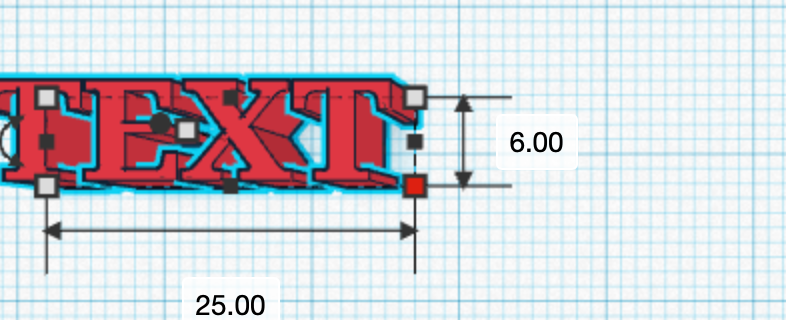
Change the length of S1 to 6 mm.
Change the Text
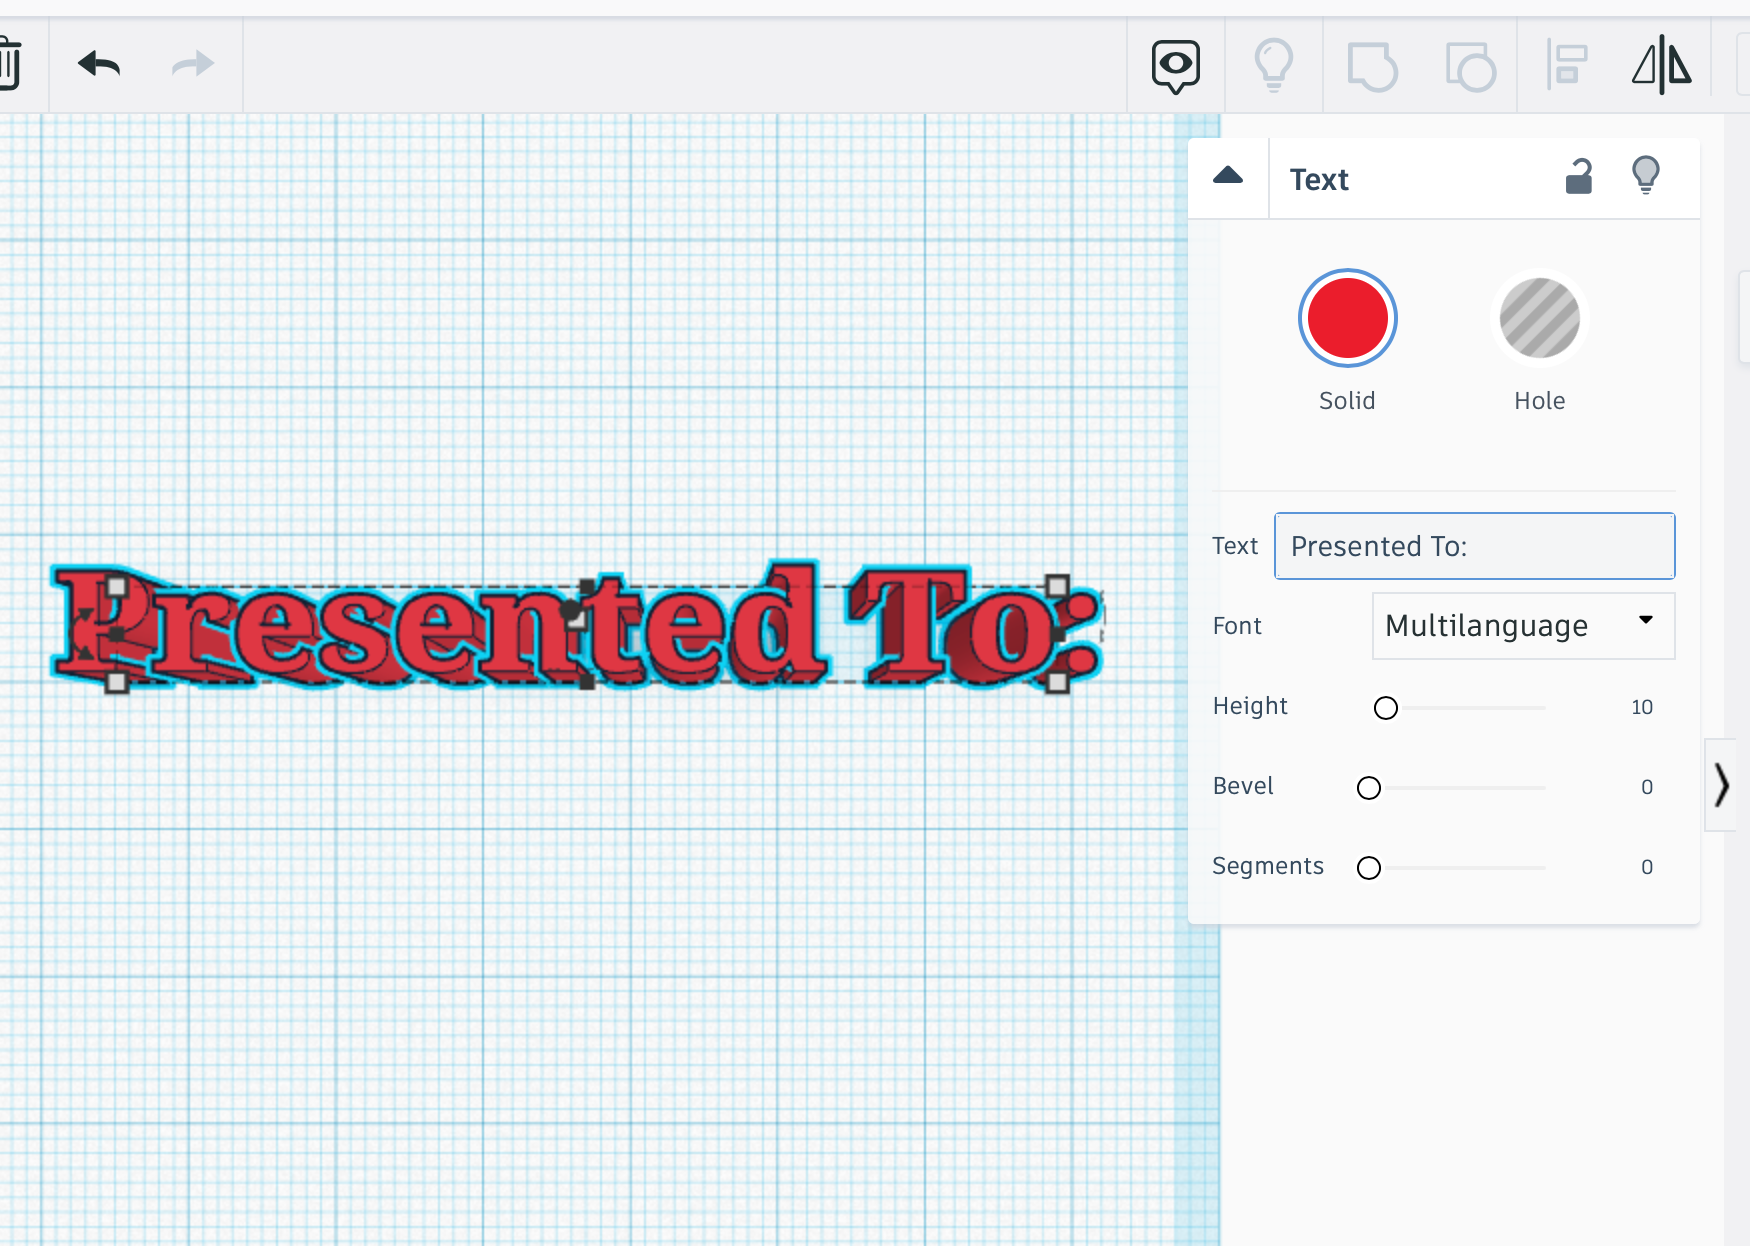
Change the text of S8 to "Presented To:"
CTL of S8

Change the length of S8 to 7.5 mm.
CTW of S8
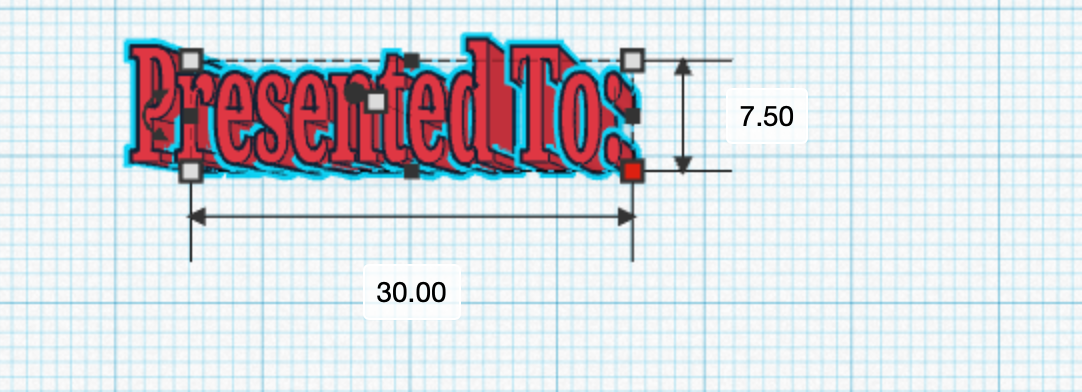
Change the width of S8 to 30 mm.
Change S8
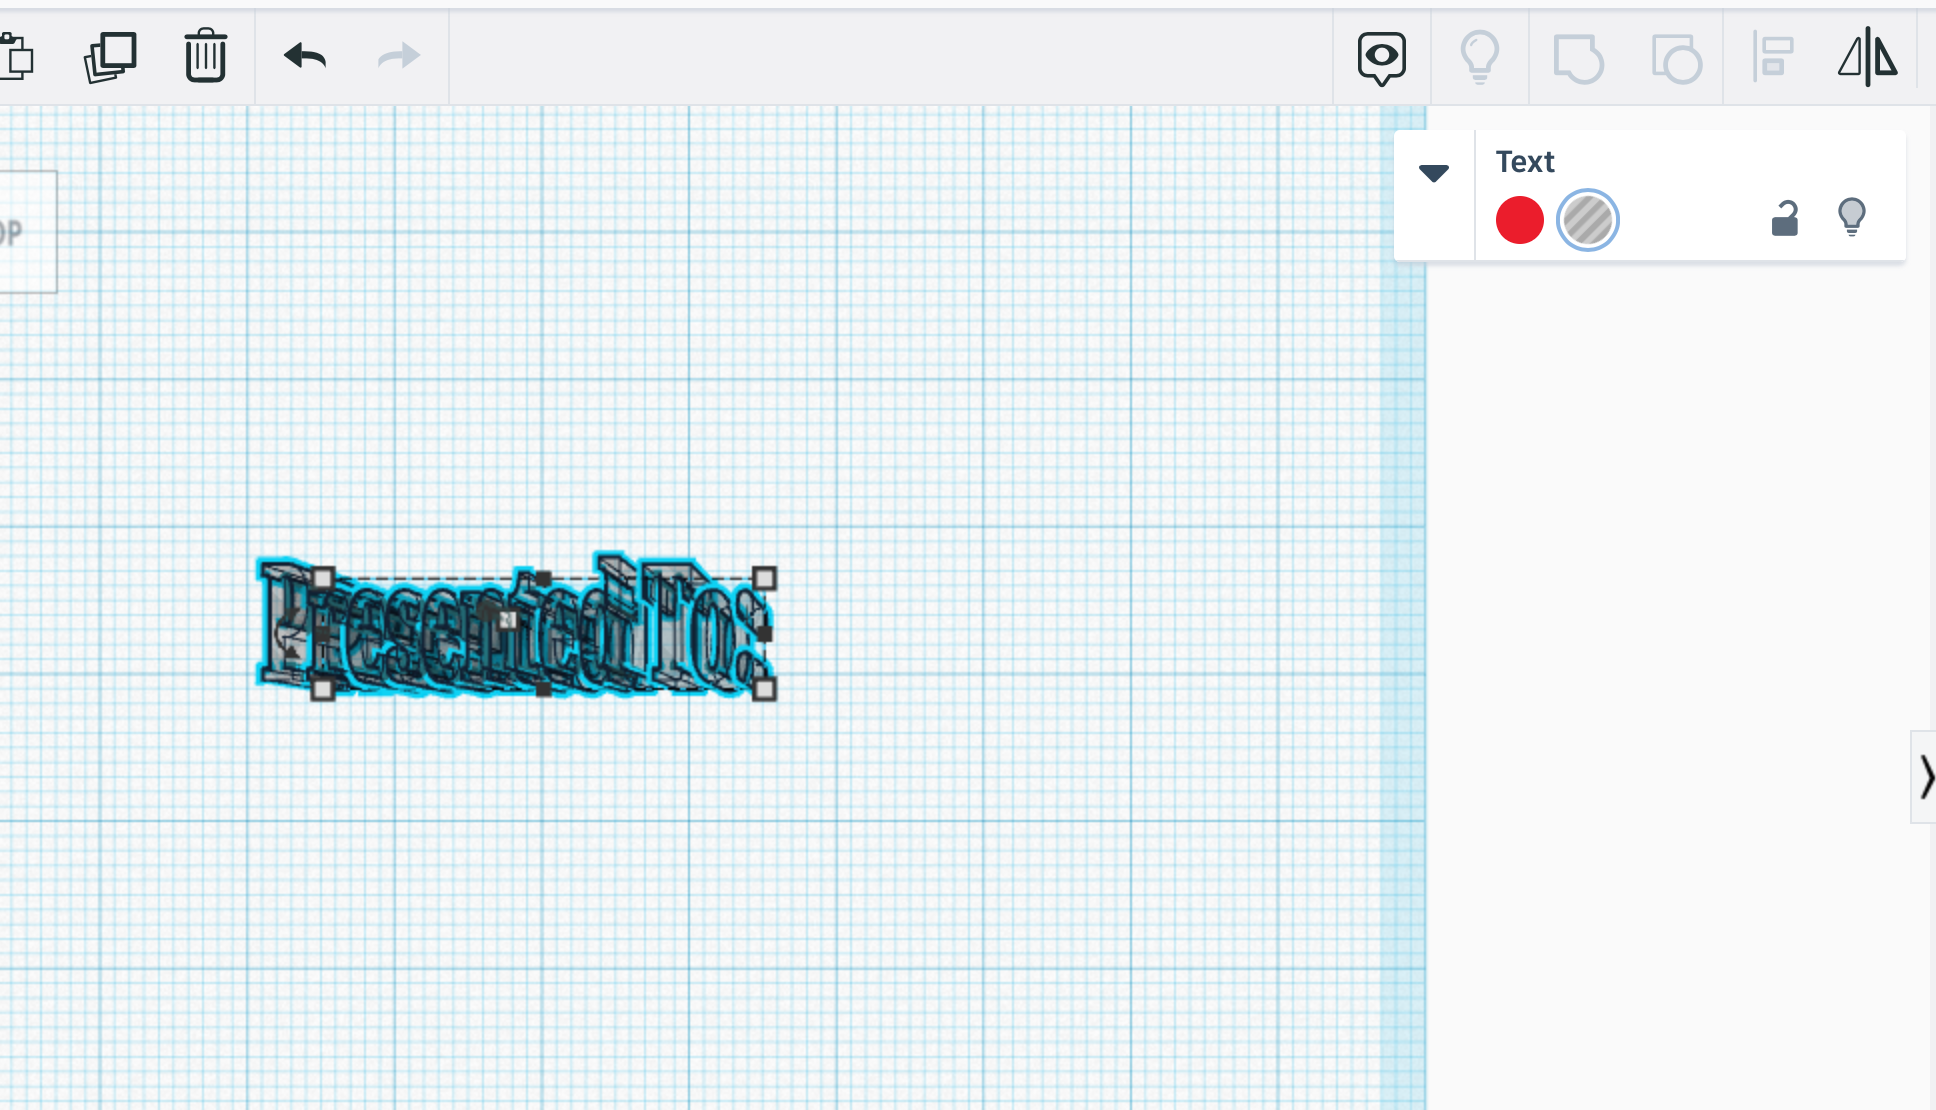
Change the form of S8 into a hole.
Raise S8
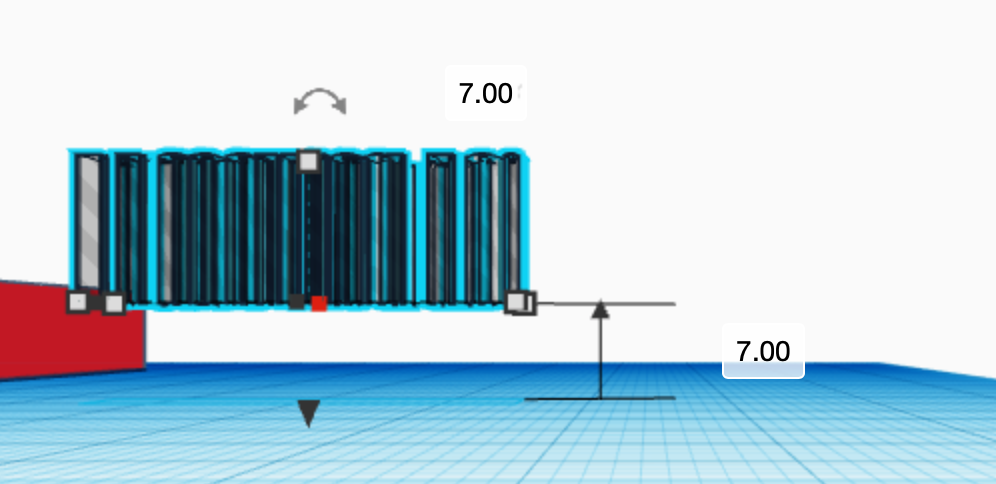
Raise S8 by 7 mm.
Select the Shapes
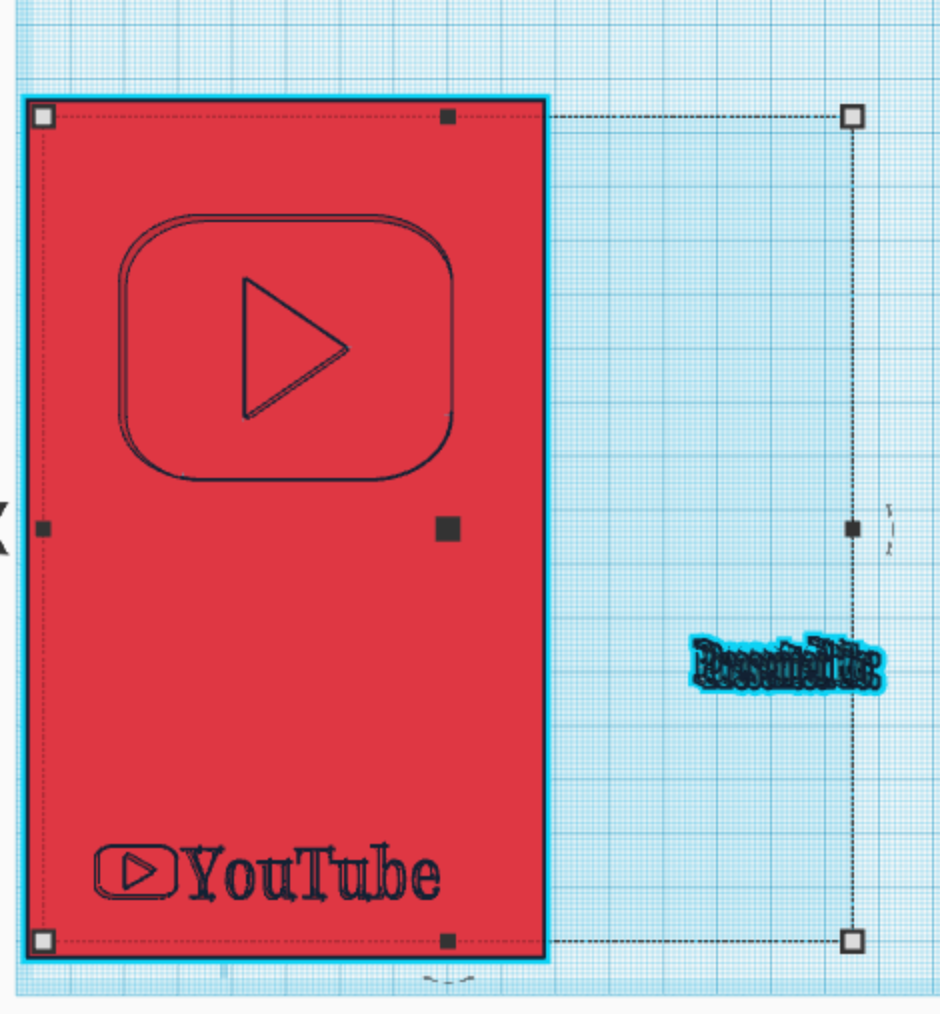
Select the shapes S1 and S8
Align
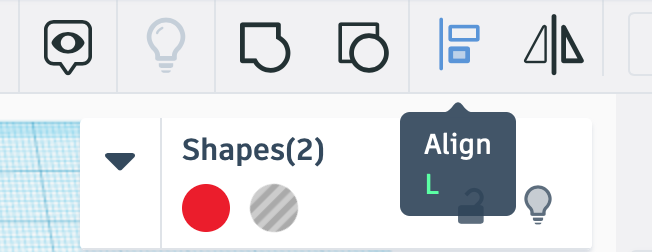
While the shapes S1, and S8 are selected, press the align button.
Press the Button
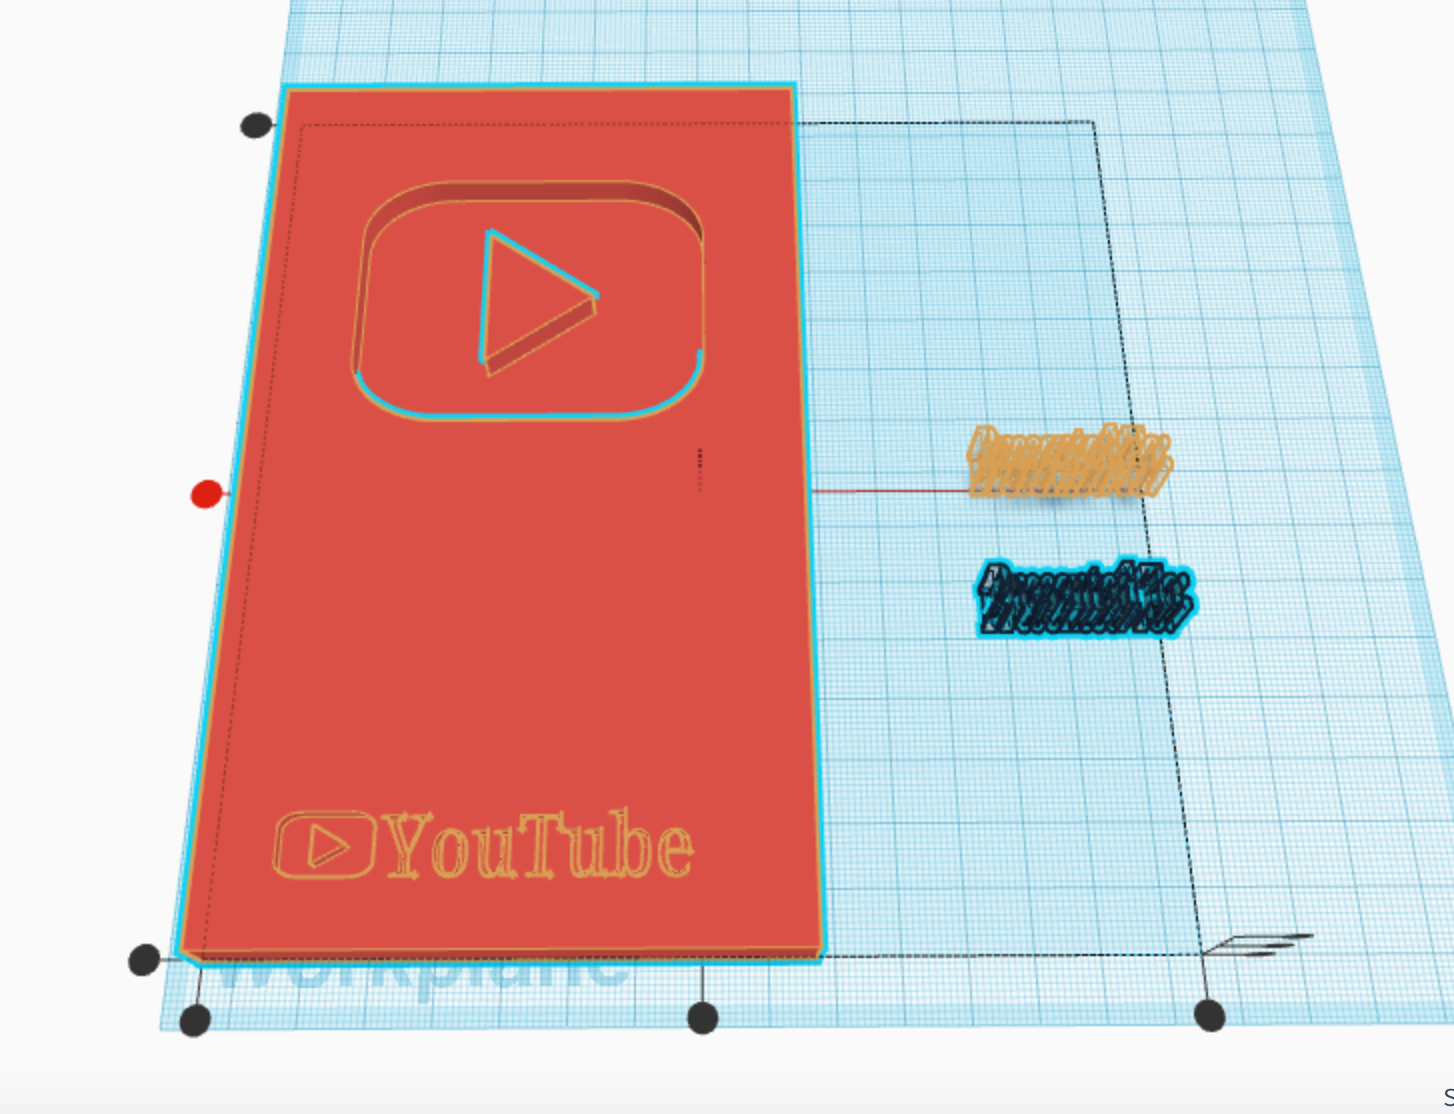
Press the middle button on the Y axis.
Press the Button
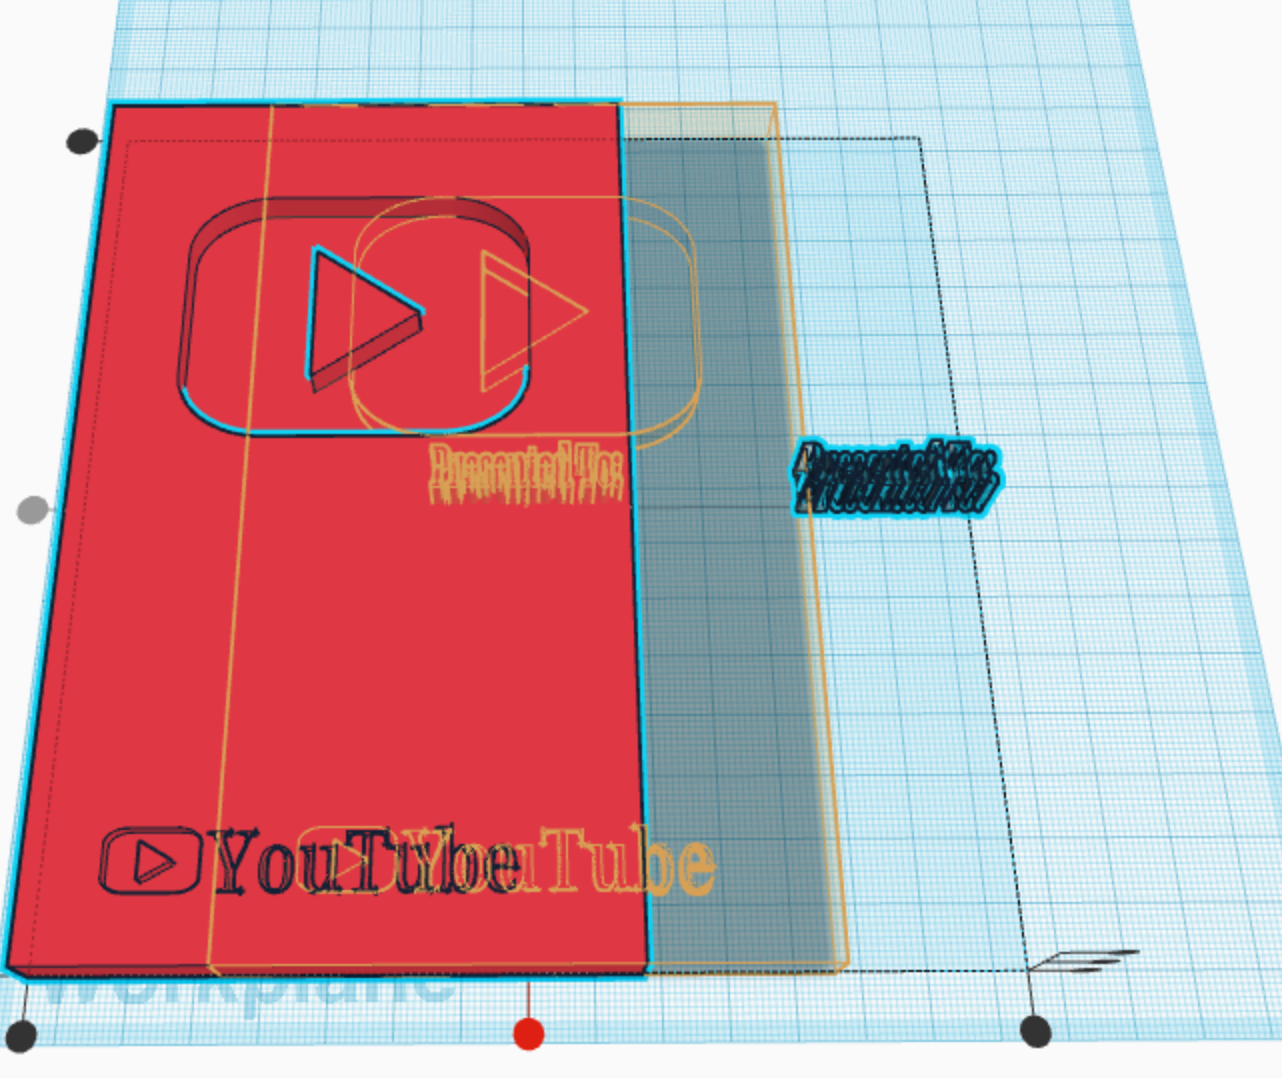
Press the middle button on the X axis.
Move S8
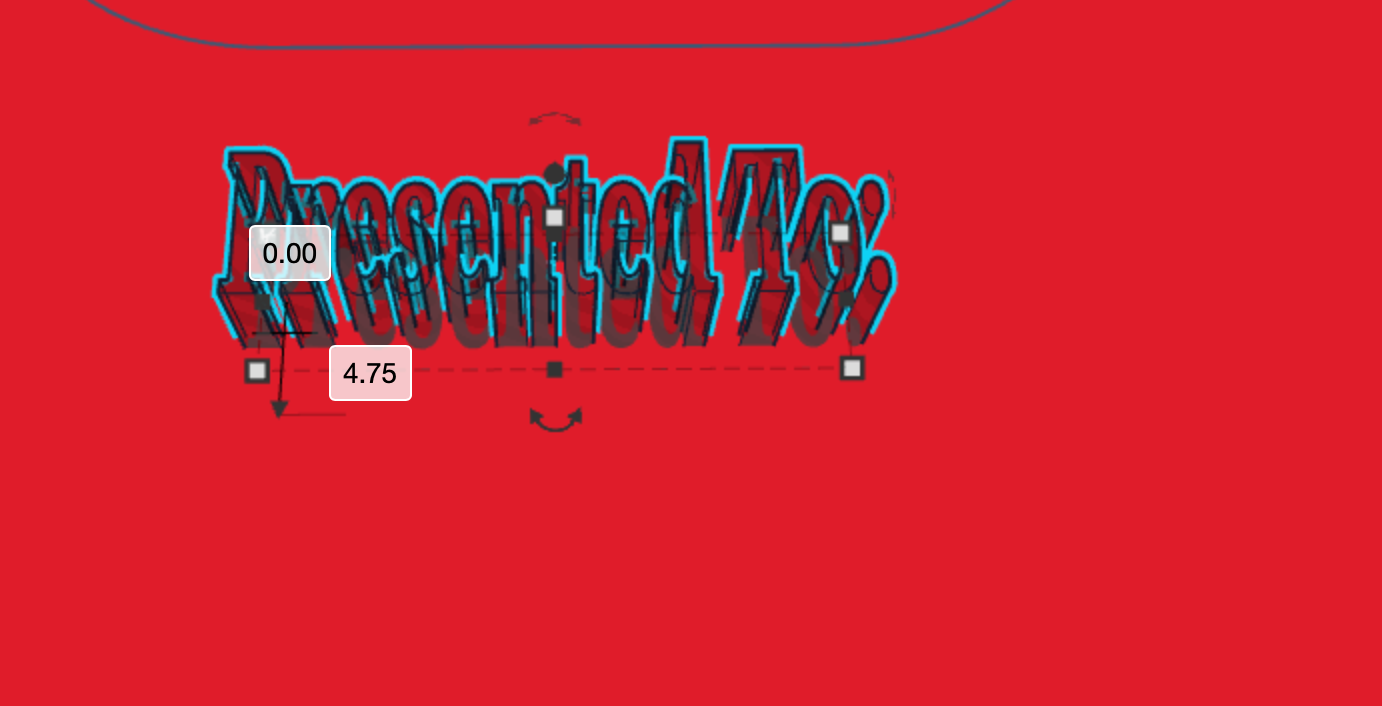
Move S8 backward by 4.75 mm.
CTW of S8
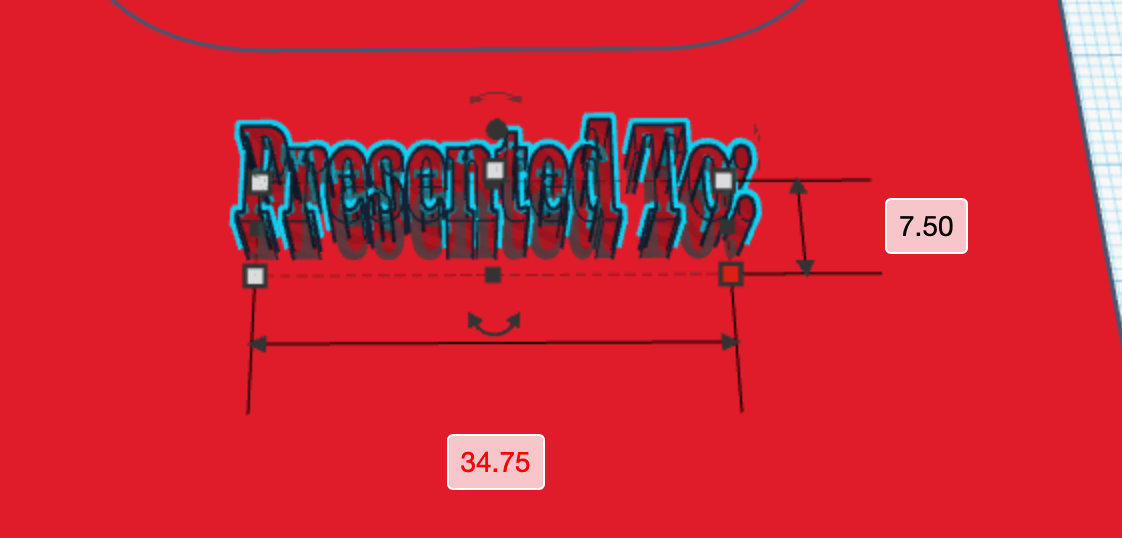
Change the width of S8 to 34.75 mm.
Select the Shapes
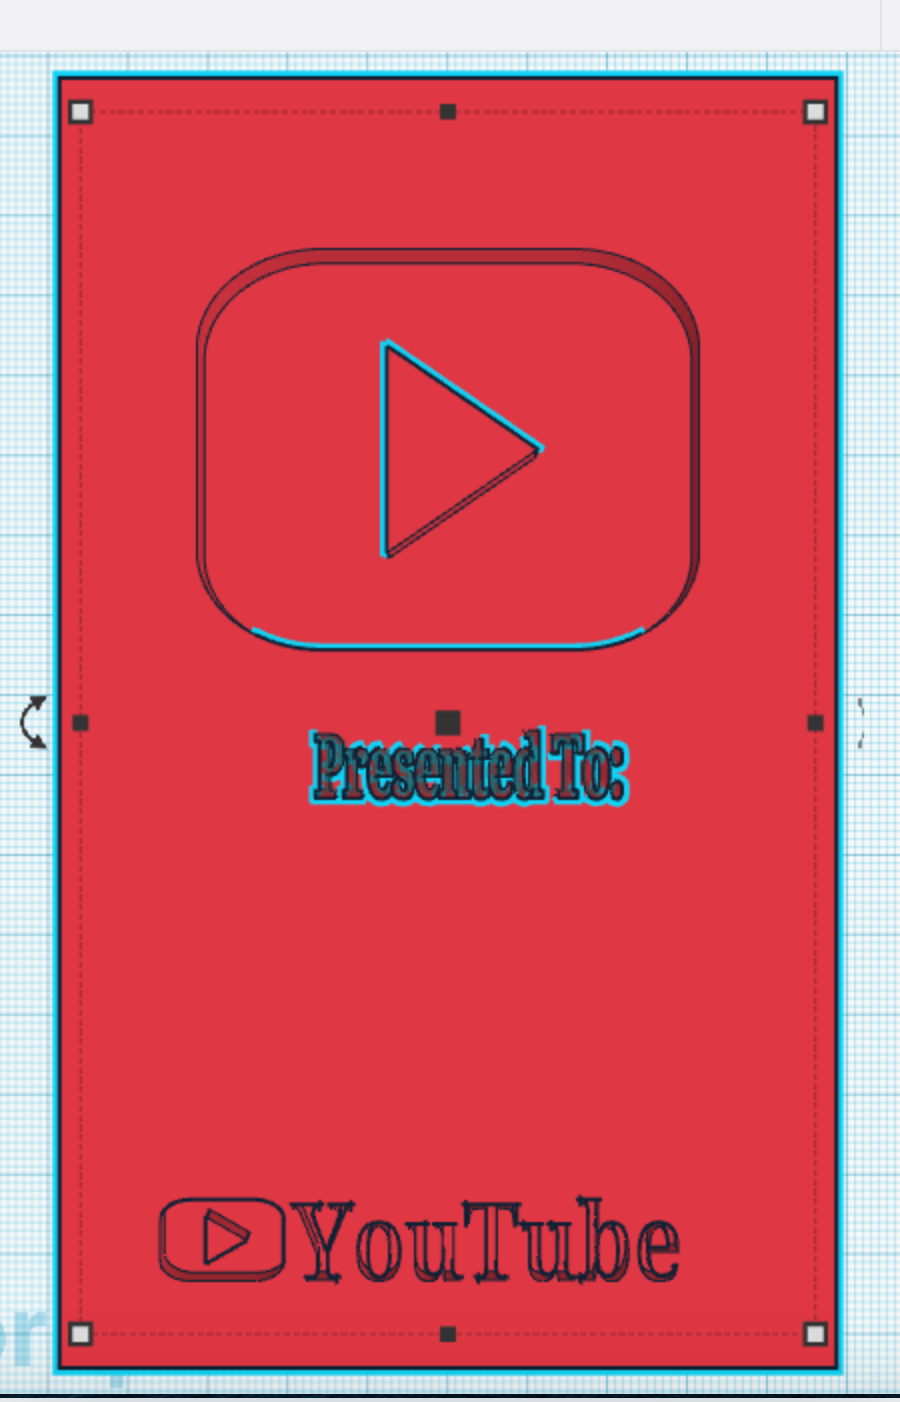
Select the shapes S1 and S8.
Align the Shapes

While S1 and S8 are selected, press the align button.
Press the Button
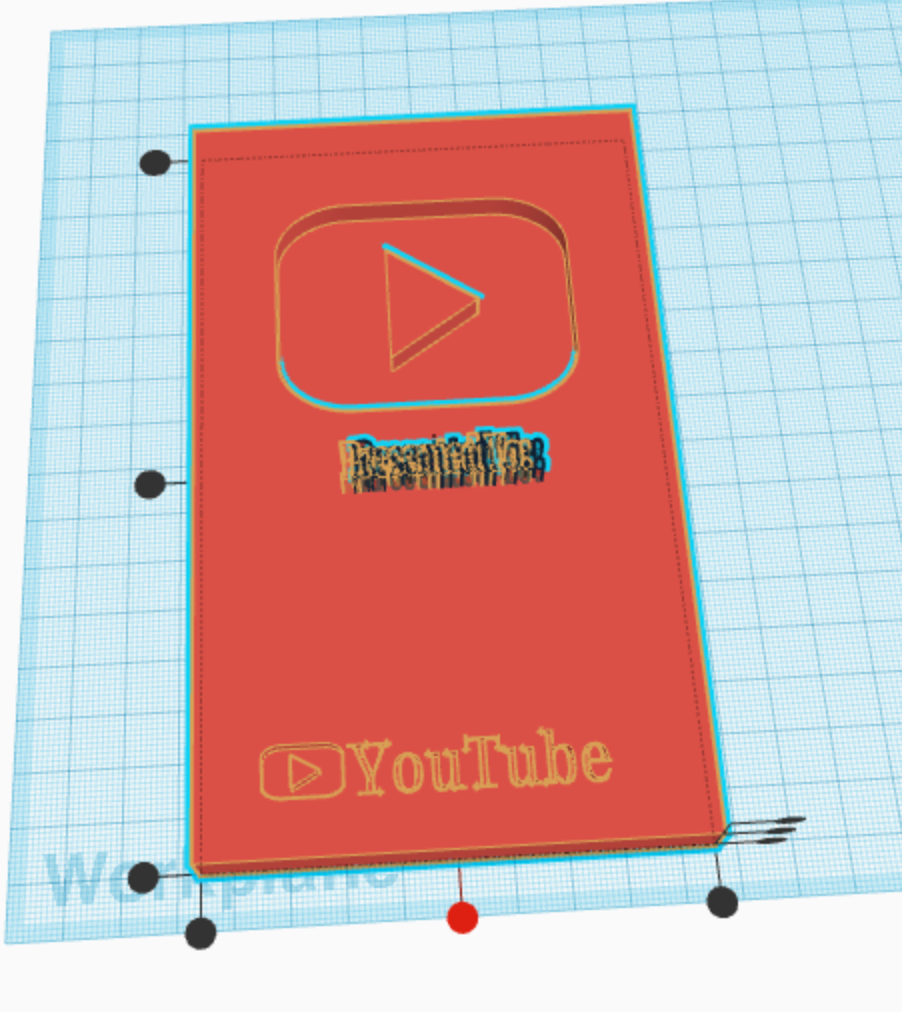
Press the middle button on the X axis.
Make a Copy
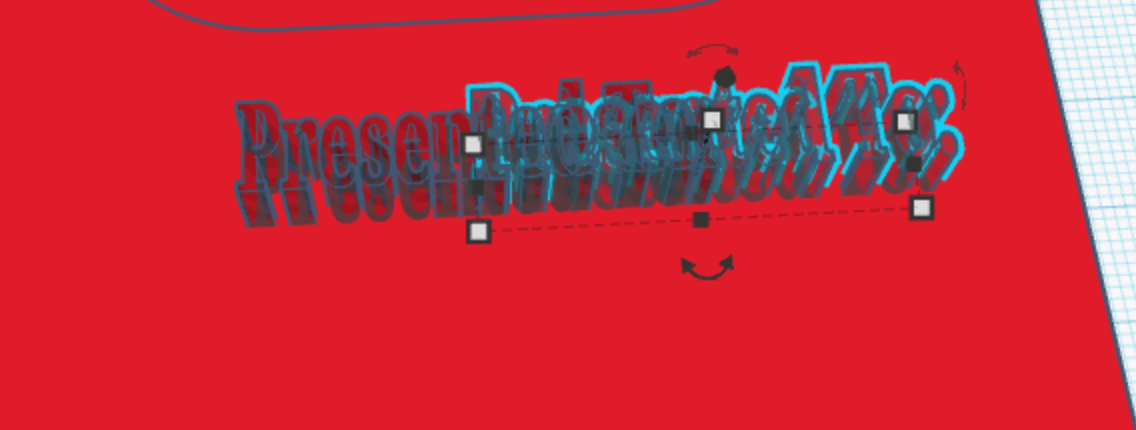
Make a copy of the shape S8. We will call this shape S9.
Move S9
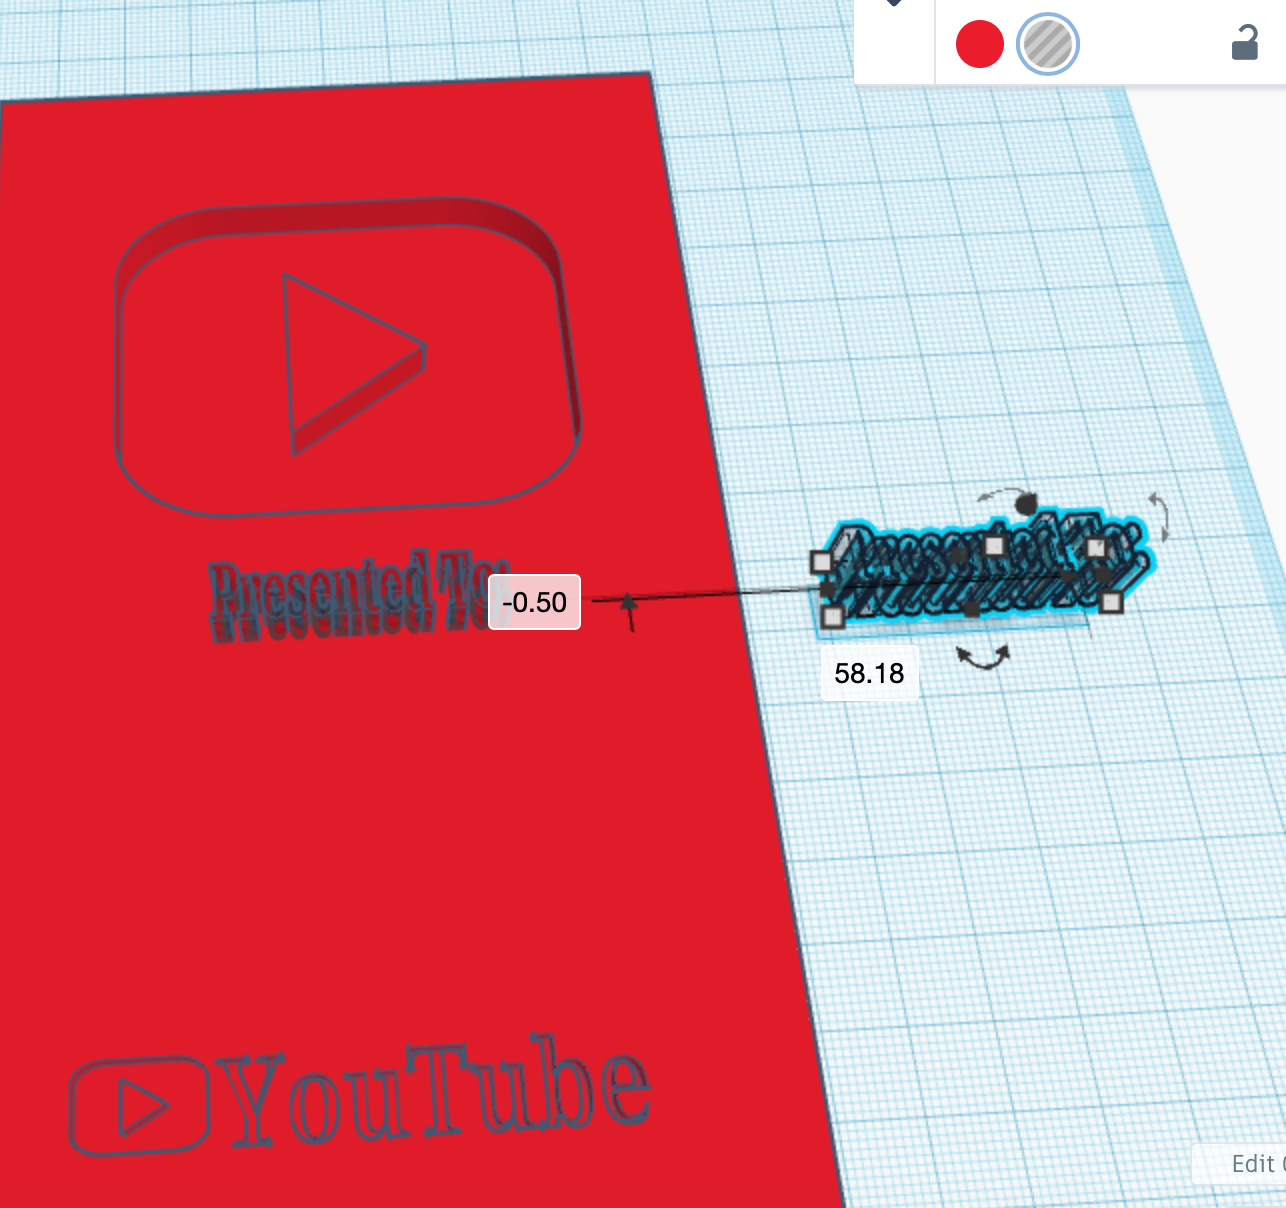
Move the shape S9 away from S1 and S8.
Select the Shapes
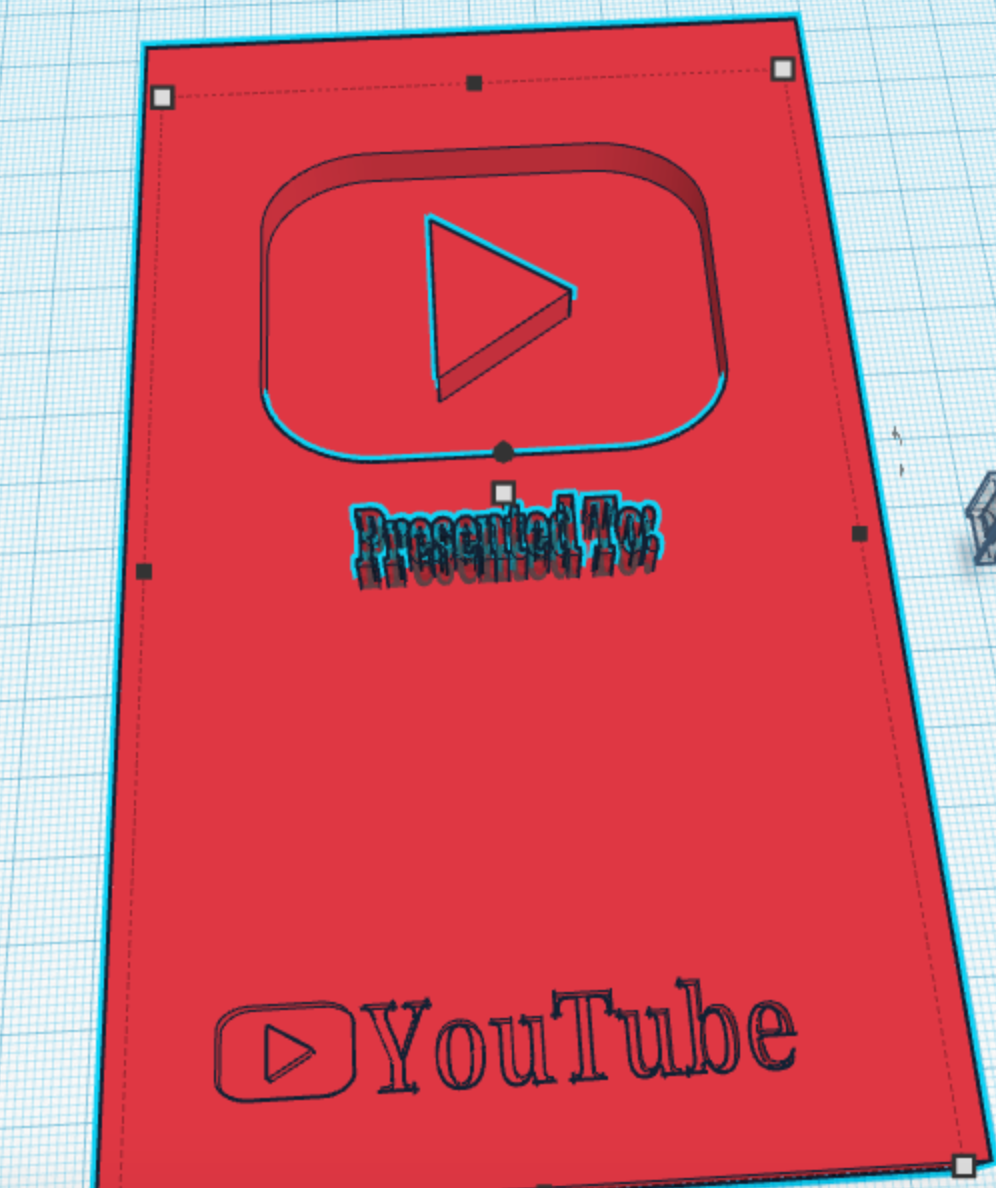
Select the shapes S1 and S8.
Group the Shapes
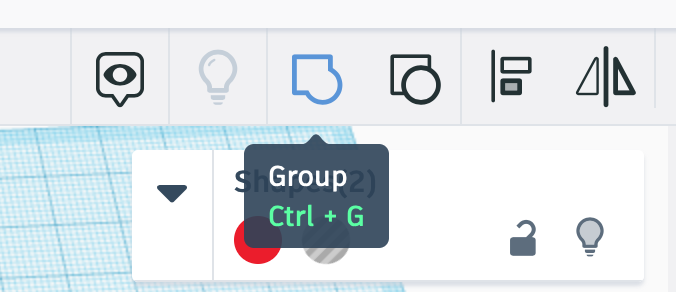
Group the selected shapes S1 and S8.
Move S1
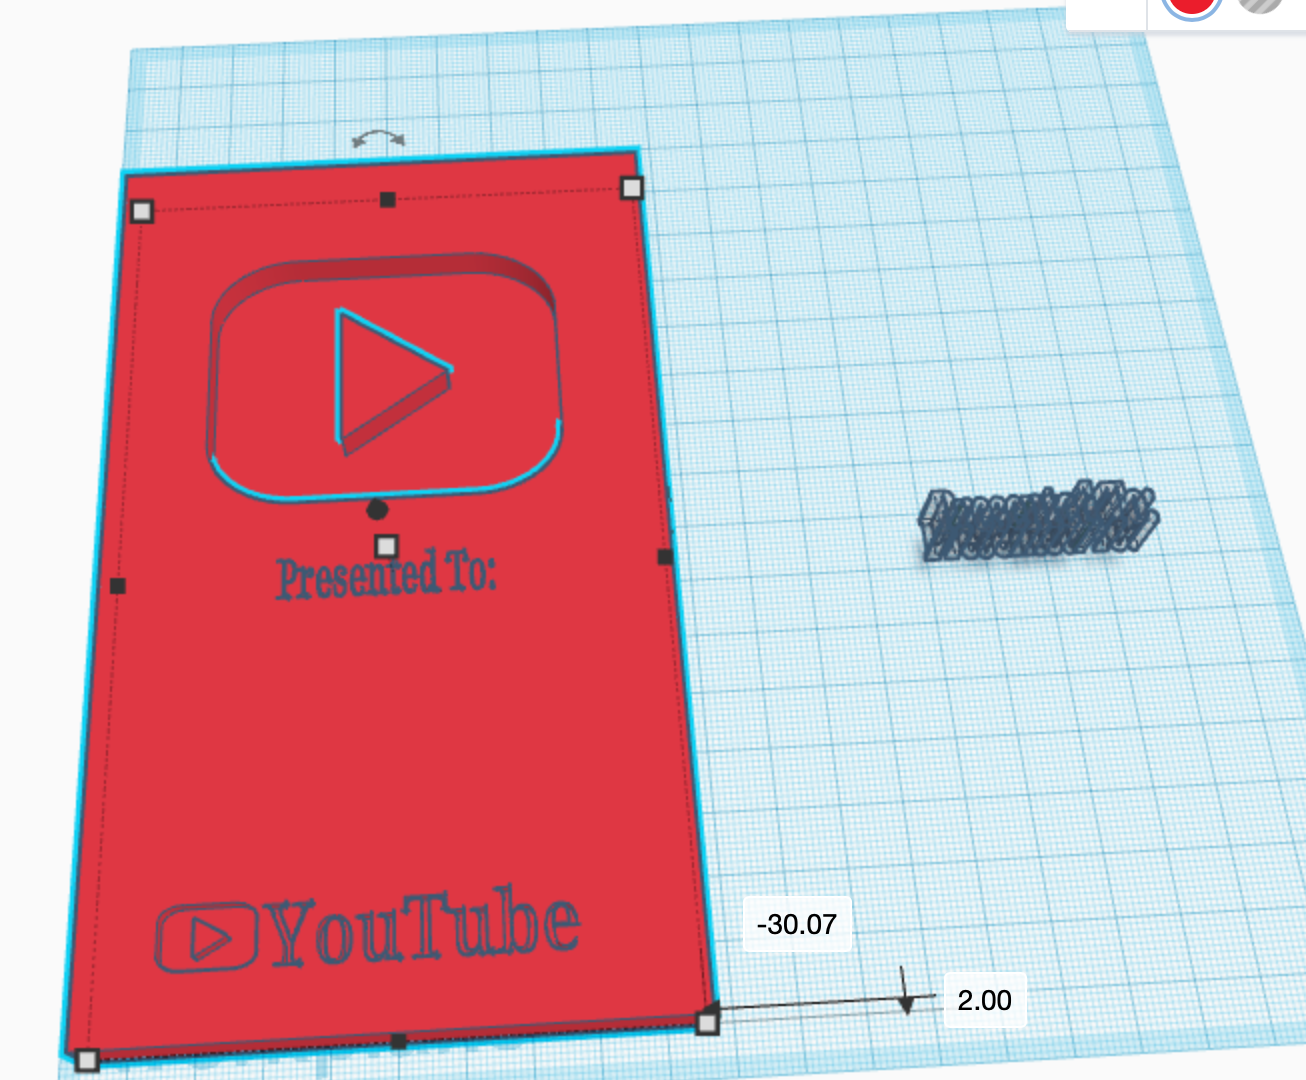
Move S1 out of the way, preferably to the right end of the screen.
Change S9
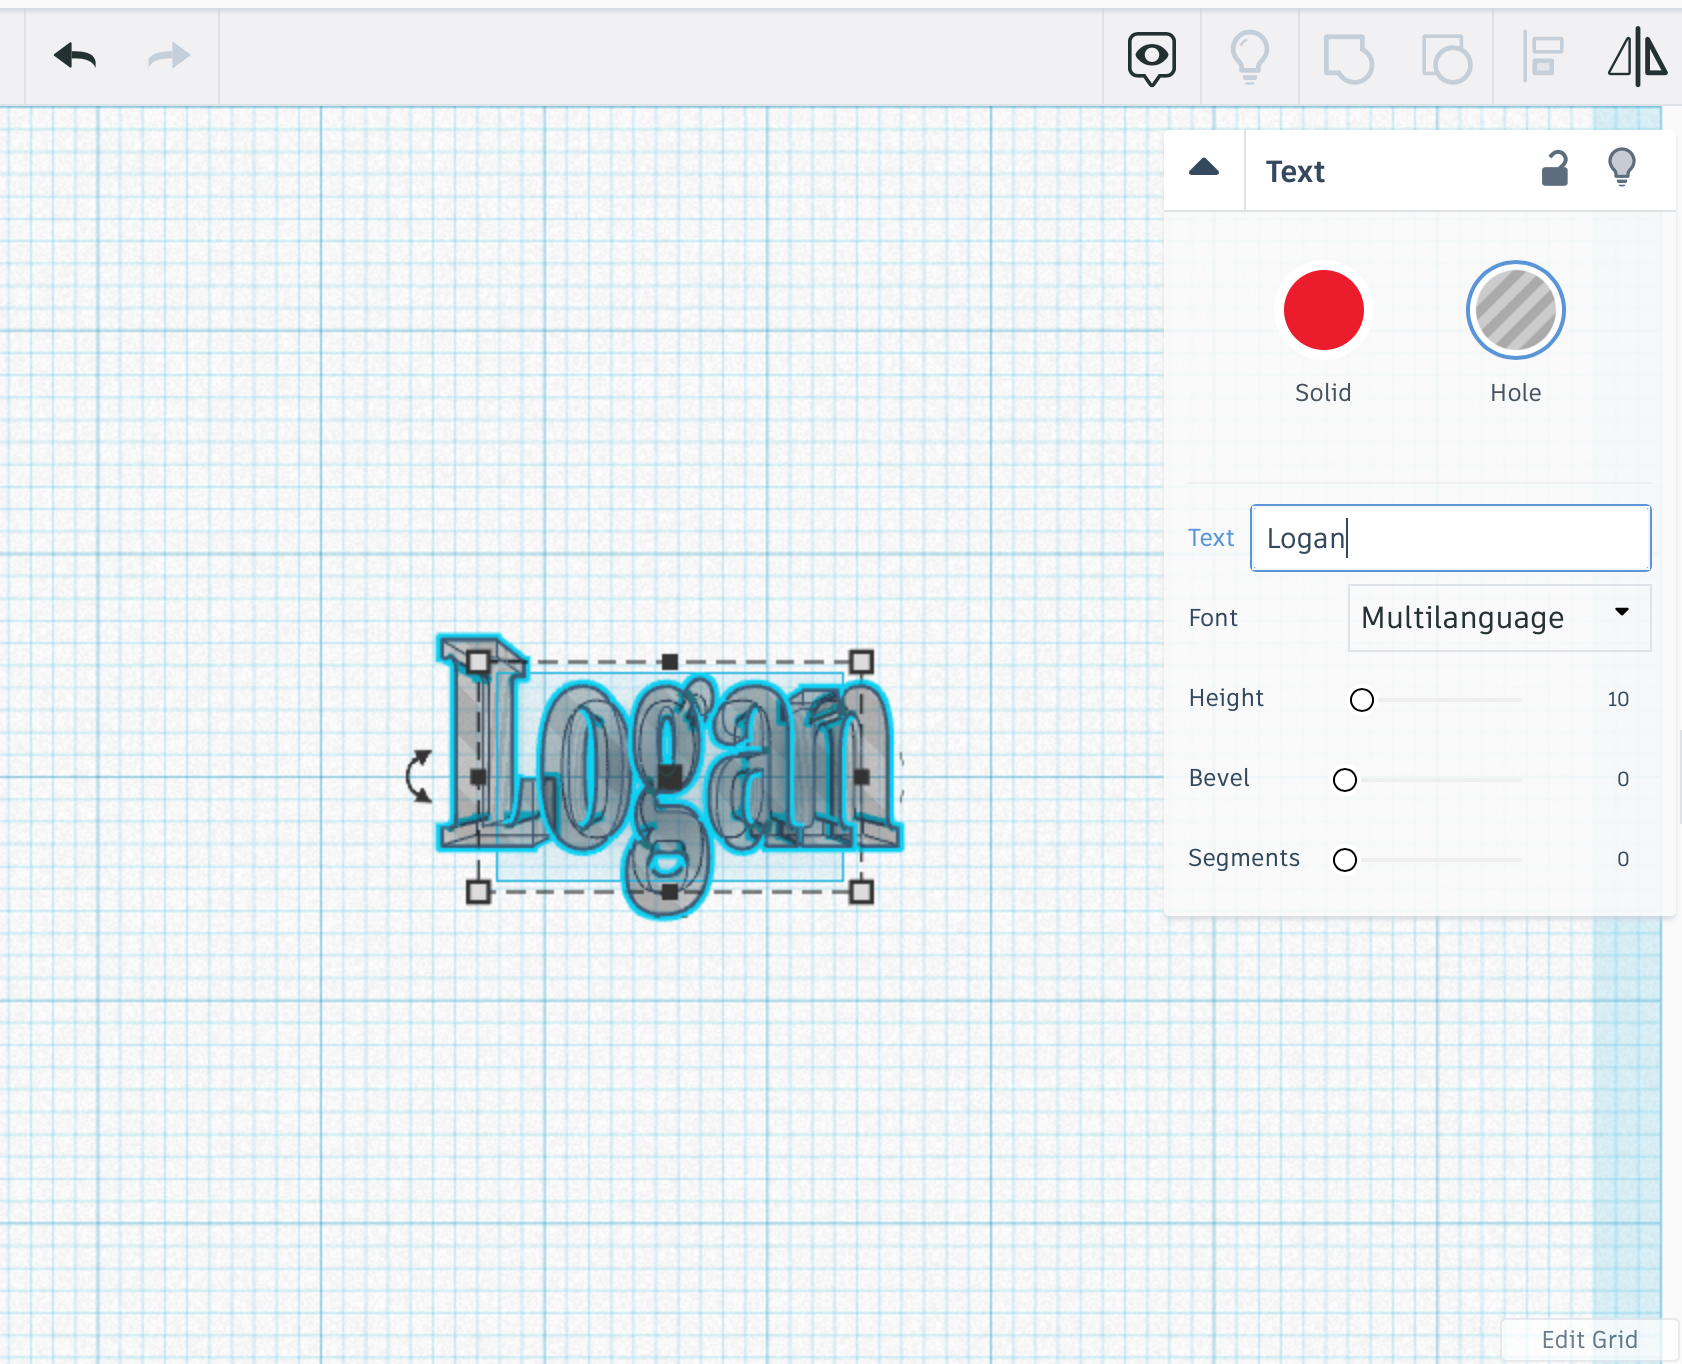
Change the text of S9 to whatever your name or the person you're going to give this to's name is. I just picked a random name (Logan) for the sake of this tutorial.
CTW of S9
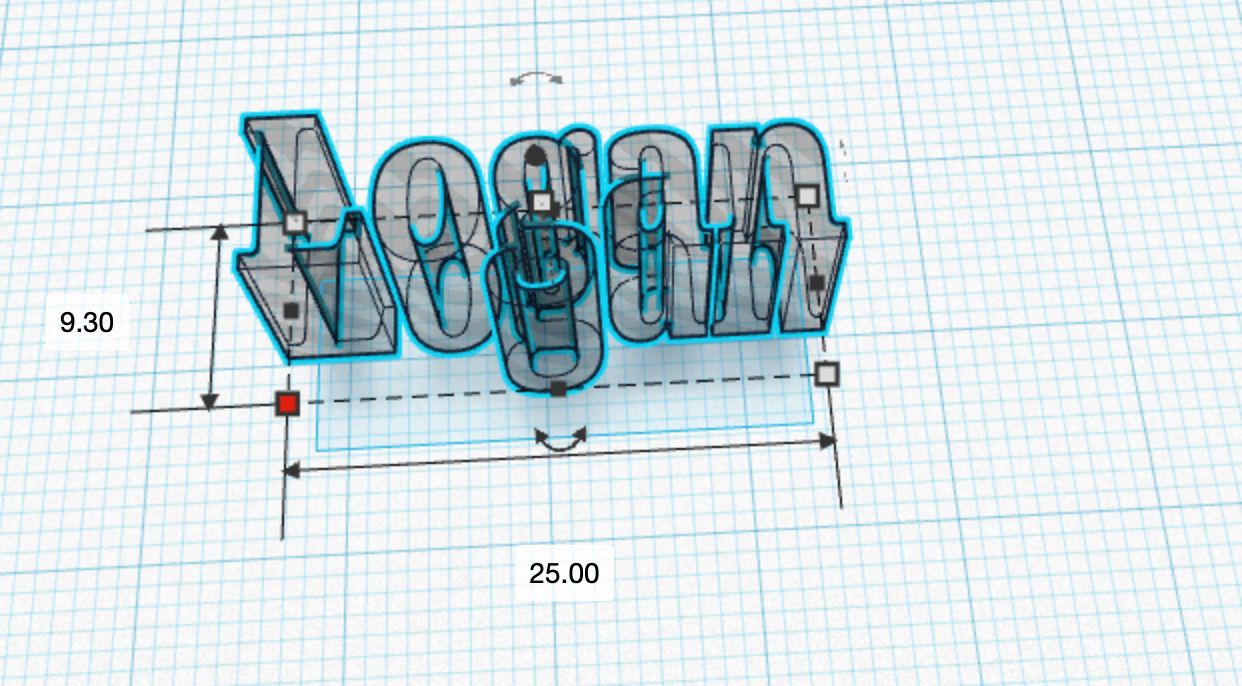
Change the width of S9 based on what your name is. S9's width will be based on the number of letters in the name you choose. You will make the width 5 times the number of letters in the name you chose. For example, as I choose the name Logan, I made the width of S9 25 mm. The reason I did this is because there were 5 letters in Logan so I multiplied 5 and 5. If you choose the name Rick, then since there are 4 letters in the name you multiply 4 and 5 to give you the width. The maximum the width can be for this shape has to 75 mm.
Select the Shapes
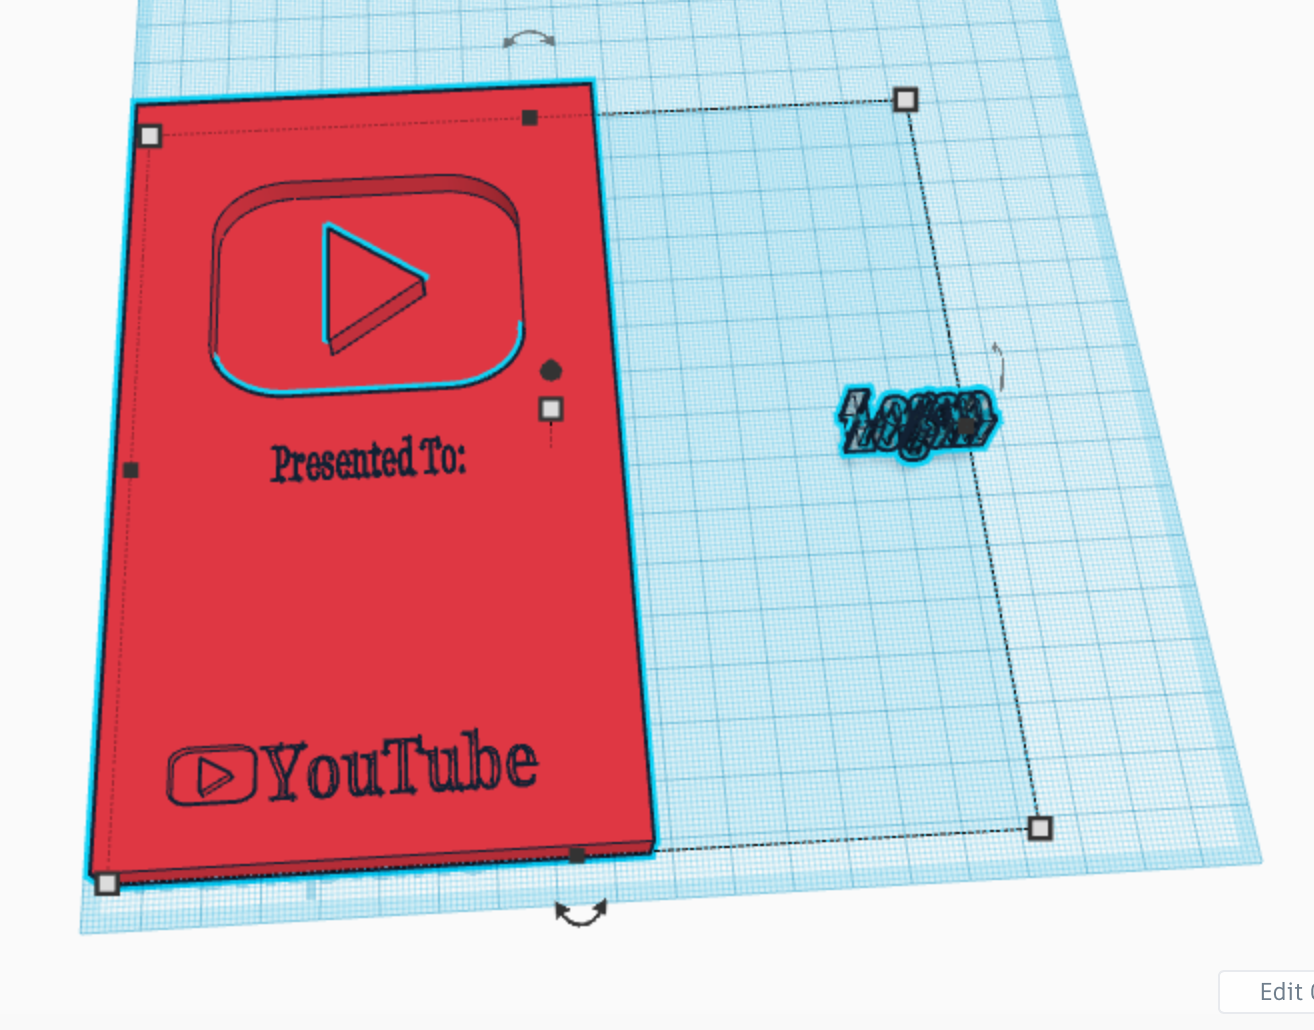
Select the shapes S1 and S9.
Align the Shapes
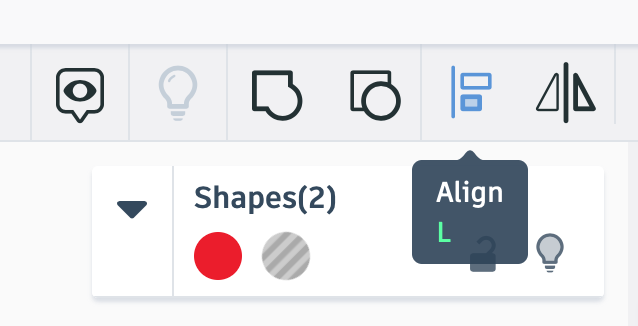
While the shapes S1 and S9 are selected, press the align button.
Click on Y
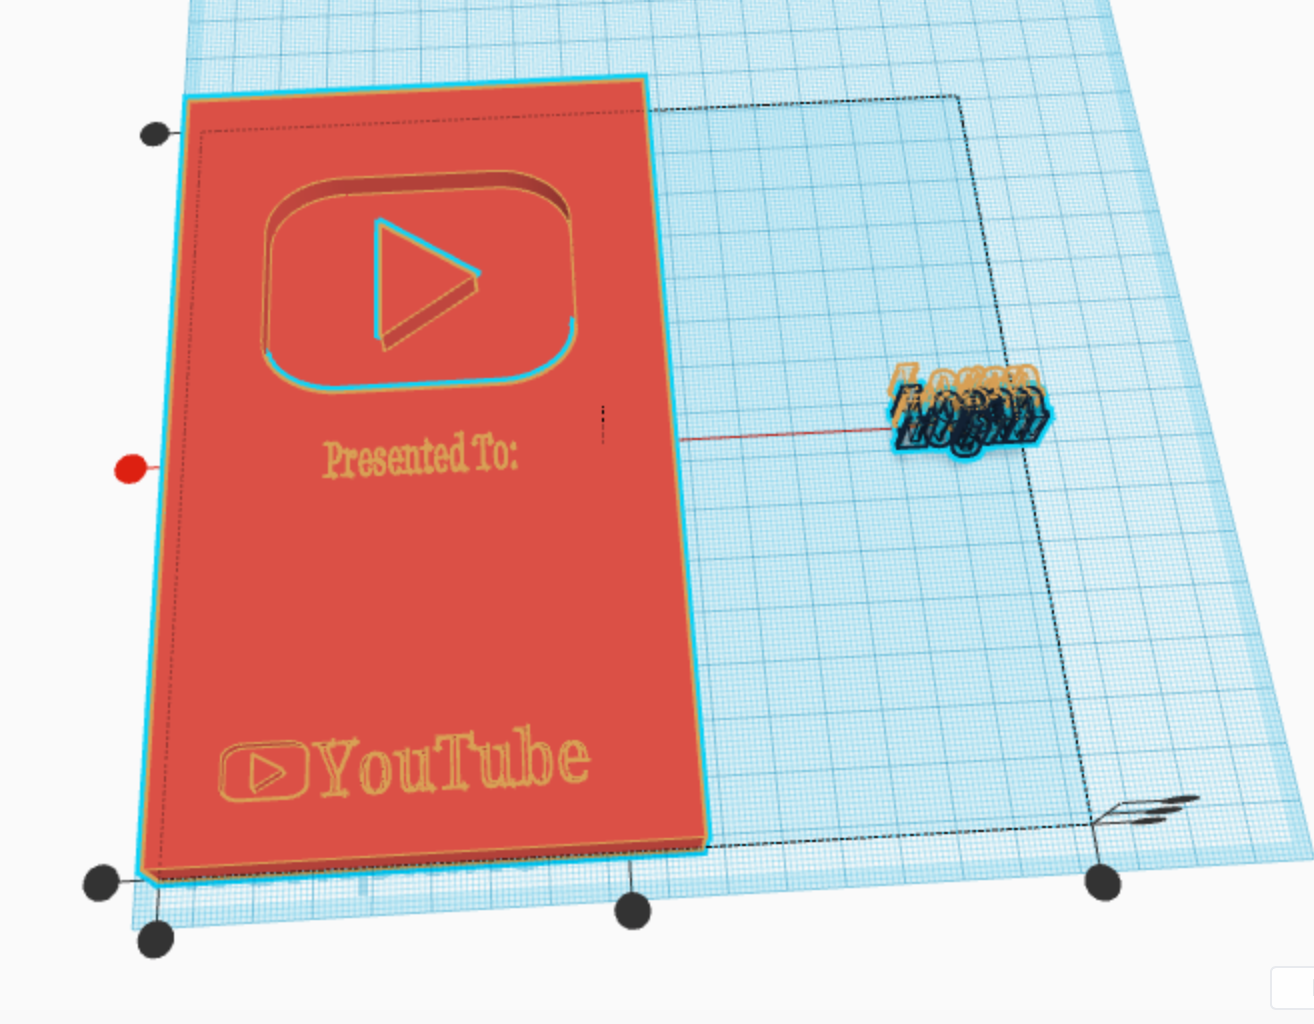
Press the middle button on the Y axis.
Click on X
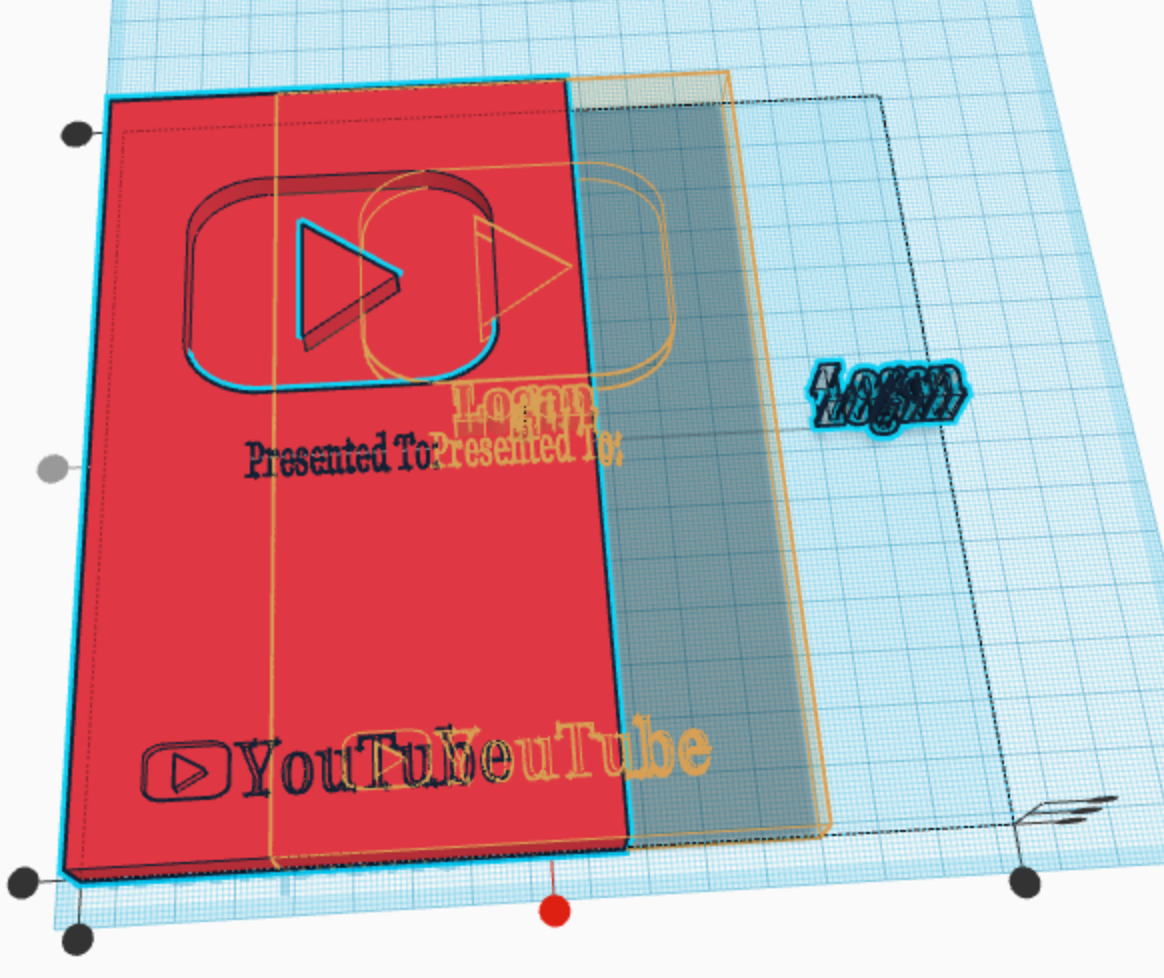
Click the middle button on the Y axis.
Move S9
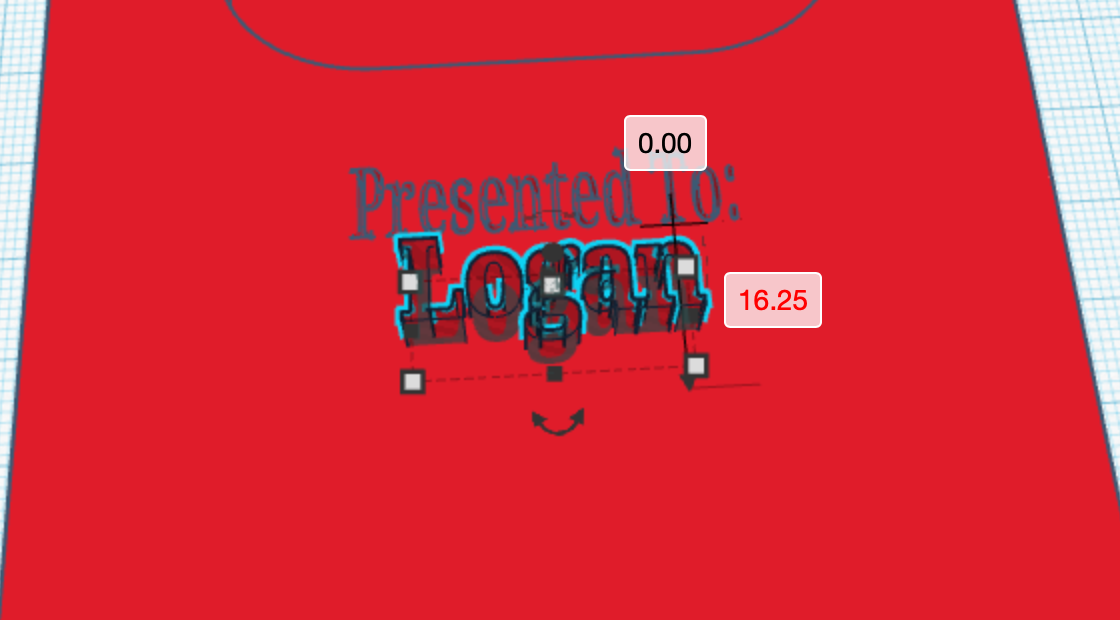
Move S9 16.25 mm backward.
Make a Copy
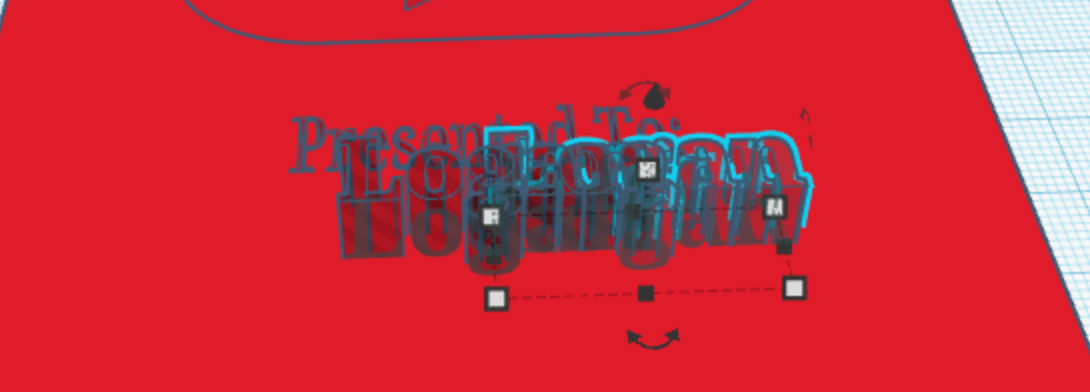
Make a copy of the shape S9. We will call this shape S10.
Move S10
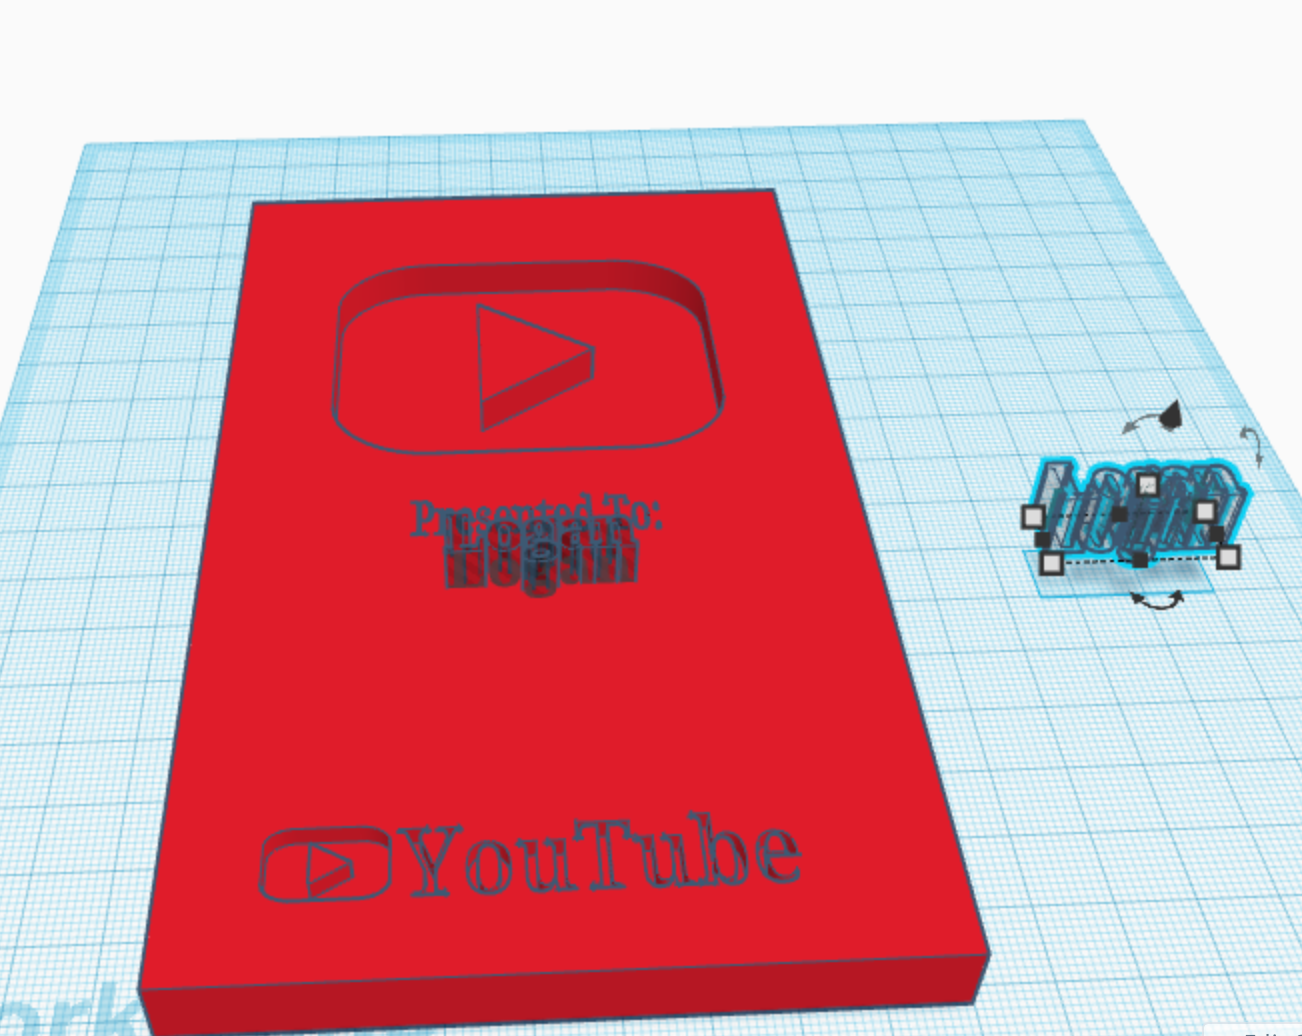
Move the shape S10 out the way, preferably to the left.
Select the Shapes
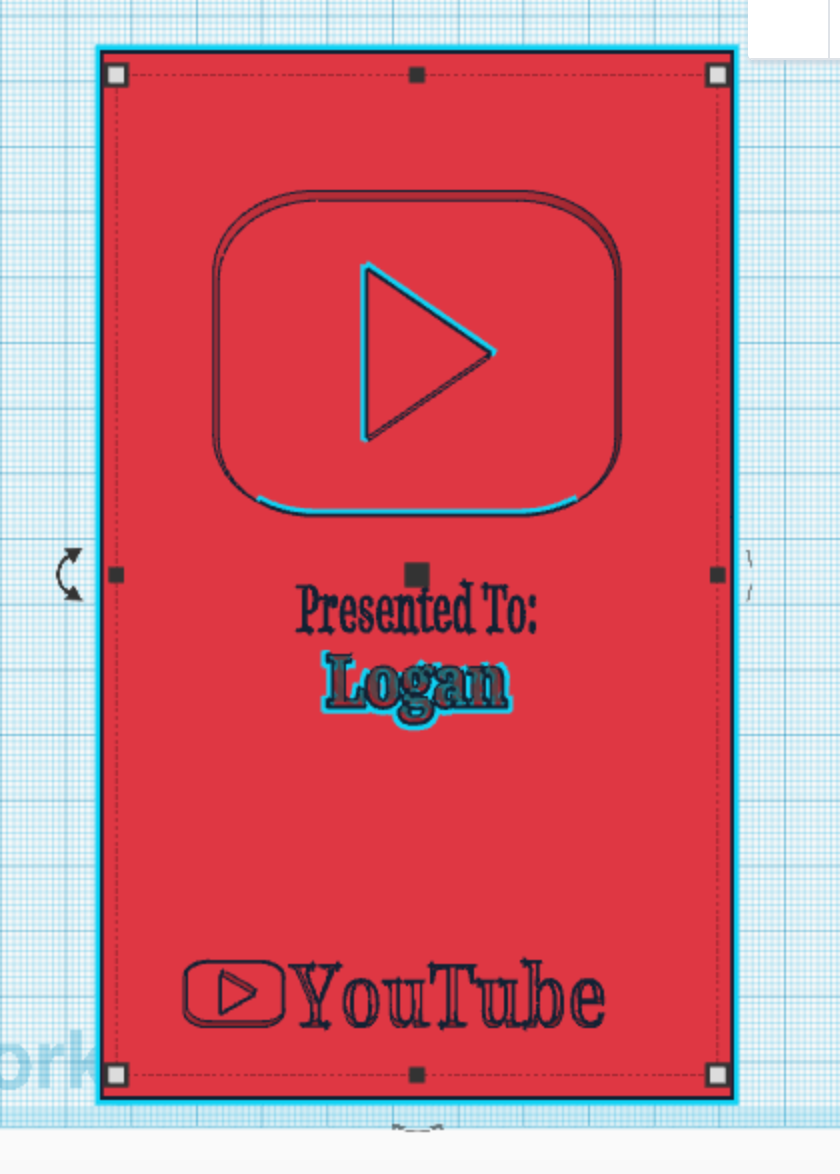
Select the shapes S1 and S9
Group the Shapes
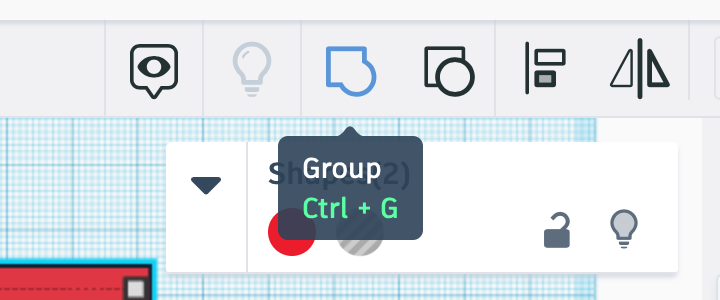
While the shapes S1 and S9 are selected, press the group button. This combined shape will still be called S1.
Move S1
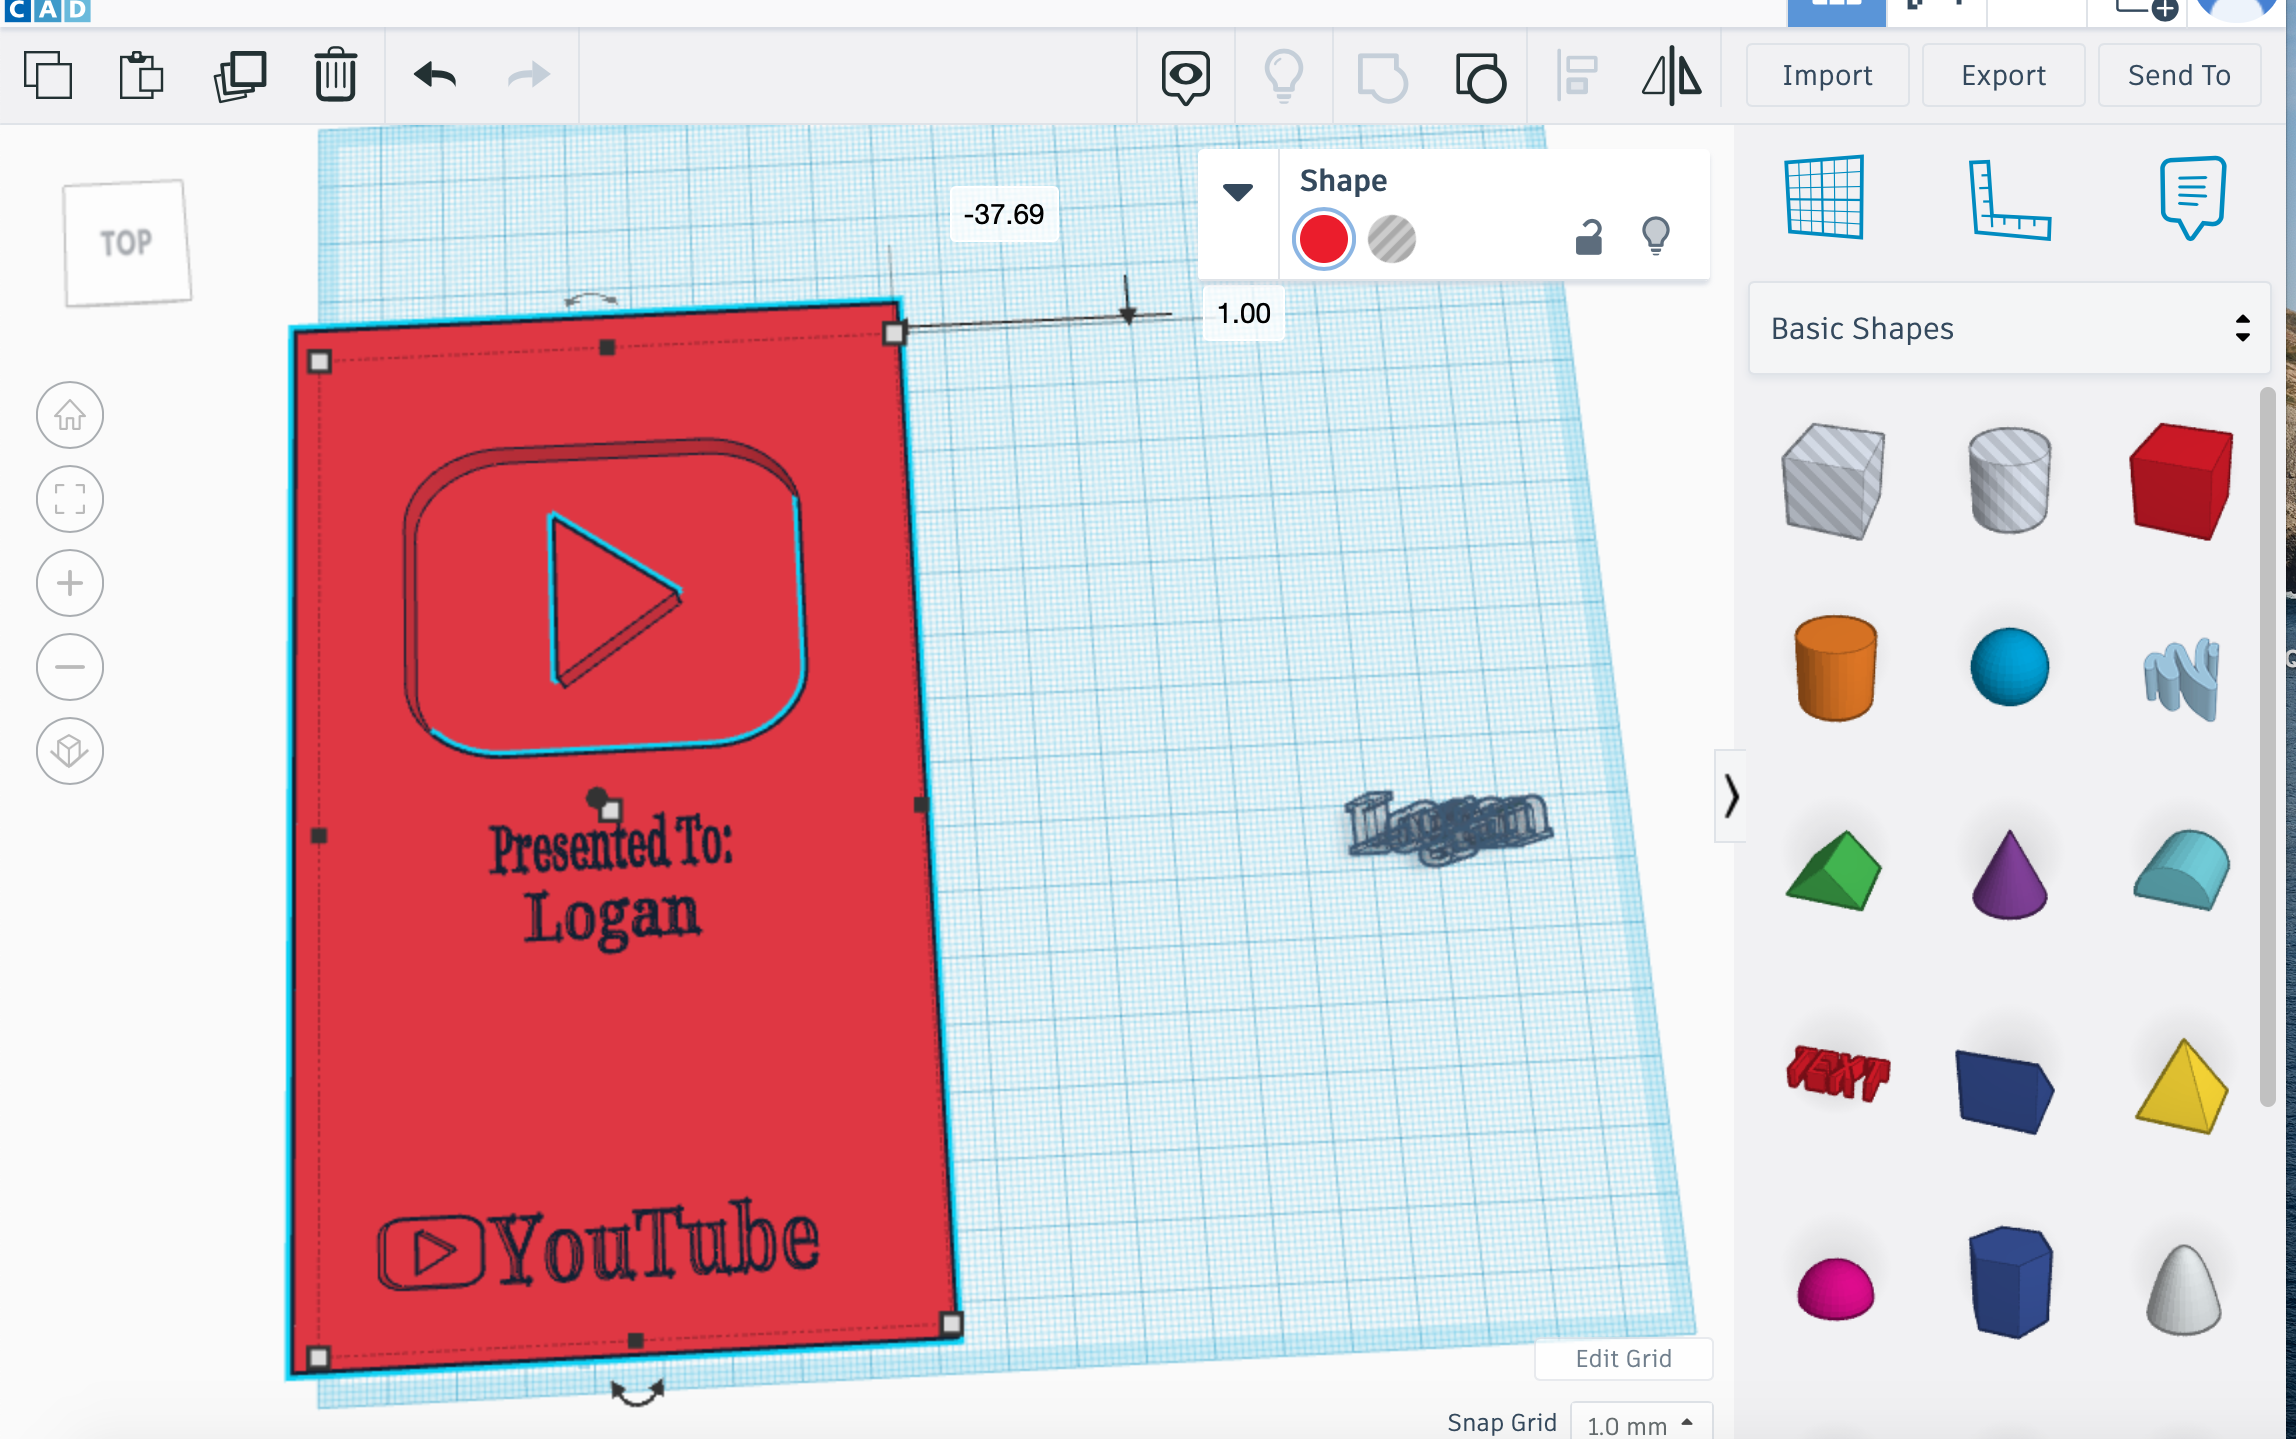
Move the shape S1 out of the way, preferably to the left of the screen.
CTT of S10
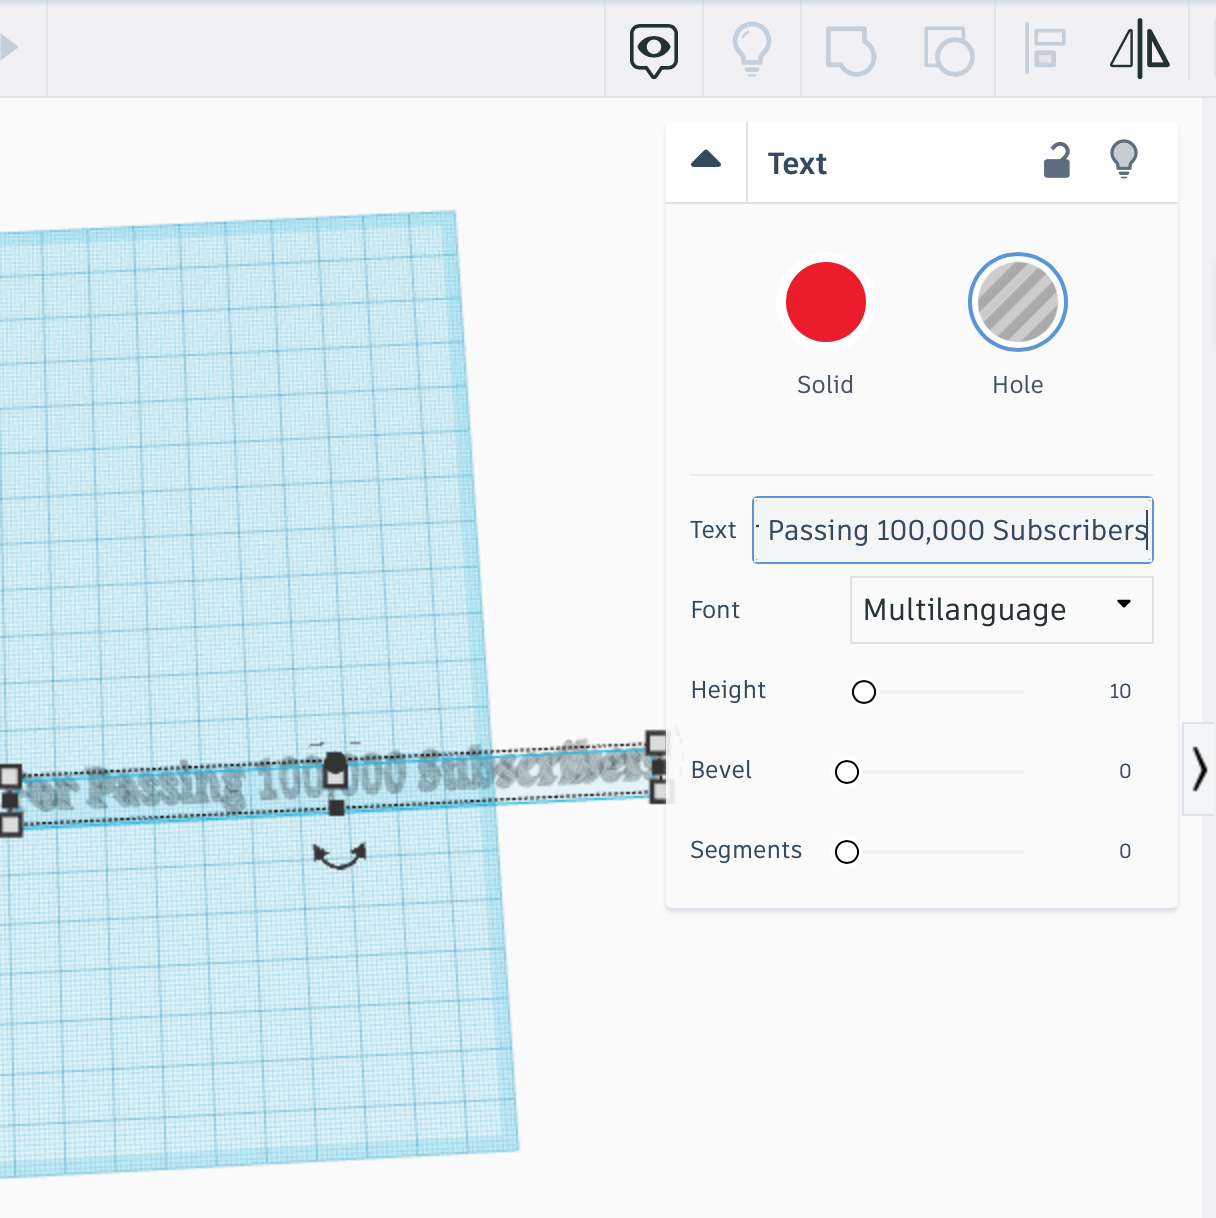
Change the text of S10 to "For Passing 100,000 Subscribers".
CTW of S10
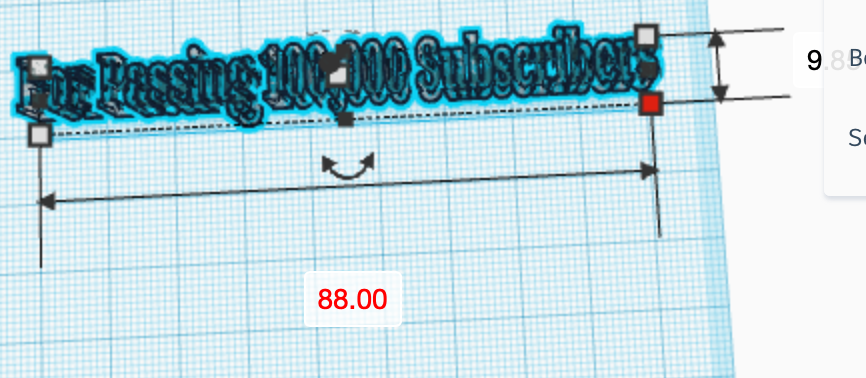
Change the width of the shape S10 to 88 mm.
CTL of S10
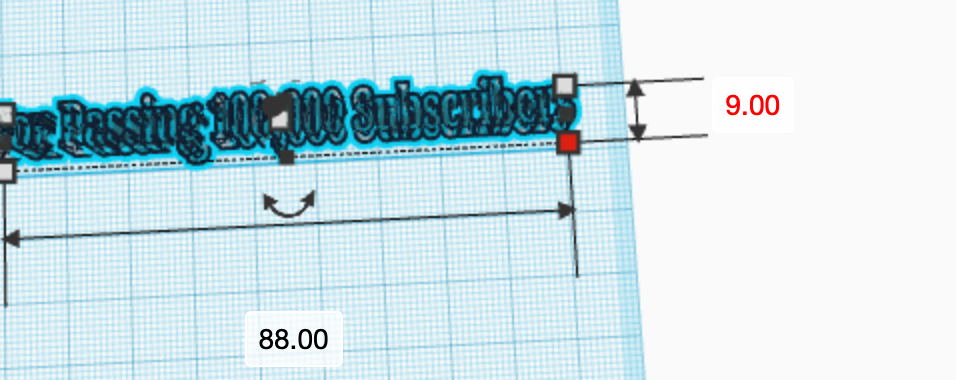
Change the length of S10 to 9 mm.
Select the Shapes
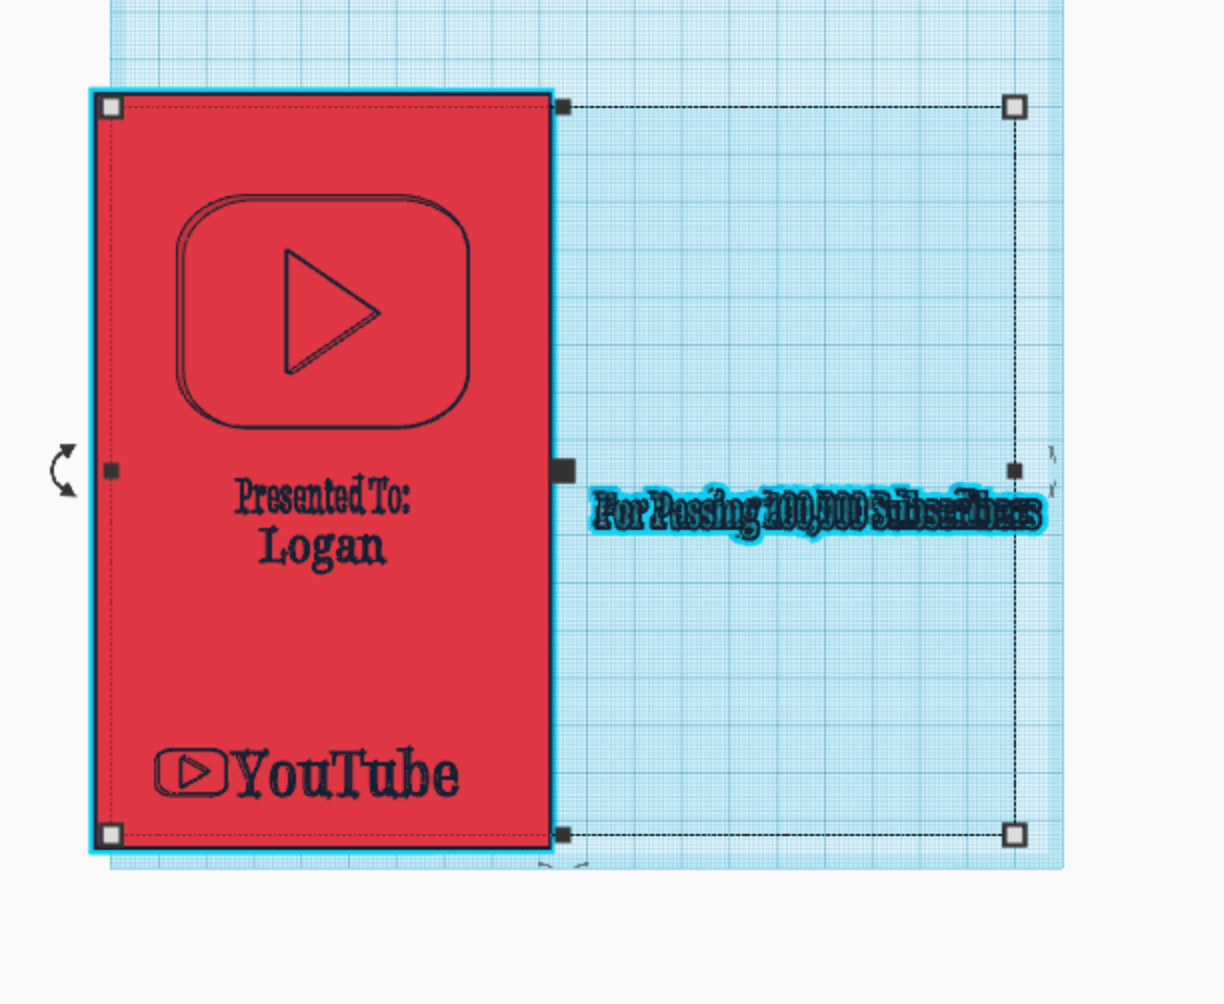
Select the shapes S1 and S10.
Align the Shapes
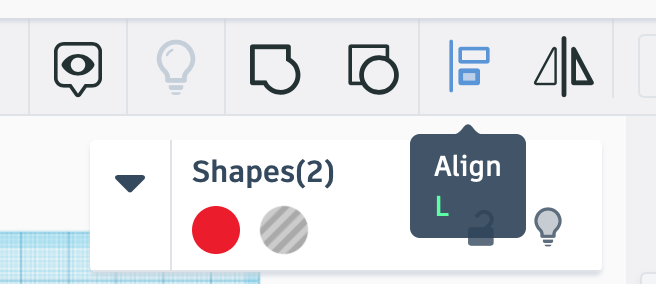
While shapes S1 and S10 are Selected, press the align button.
Align on Y
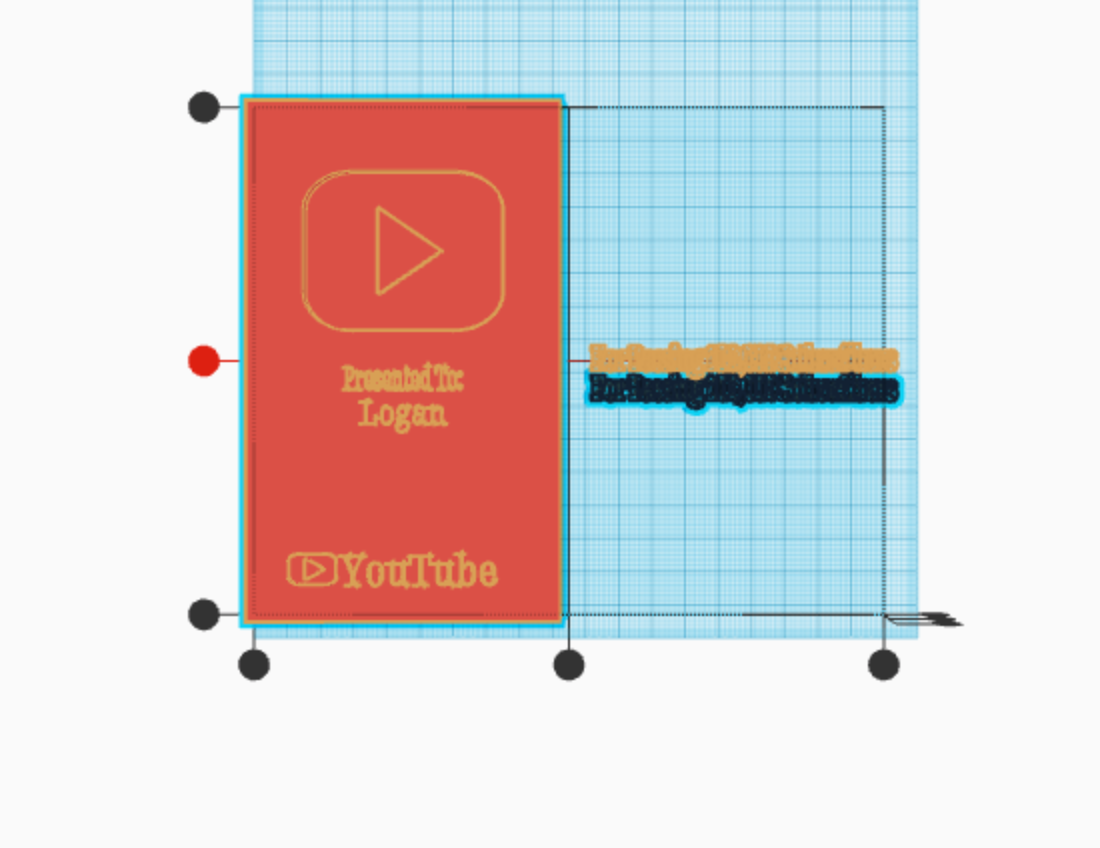
Click the middle button on the Y axis.
Align on X
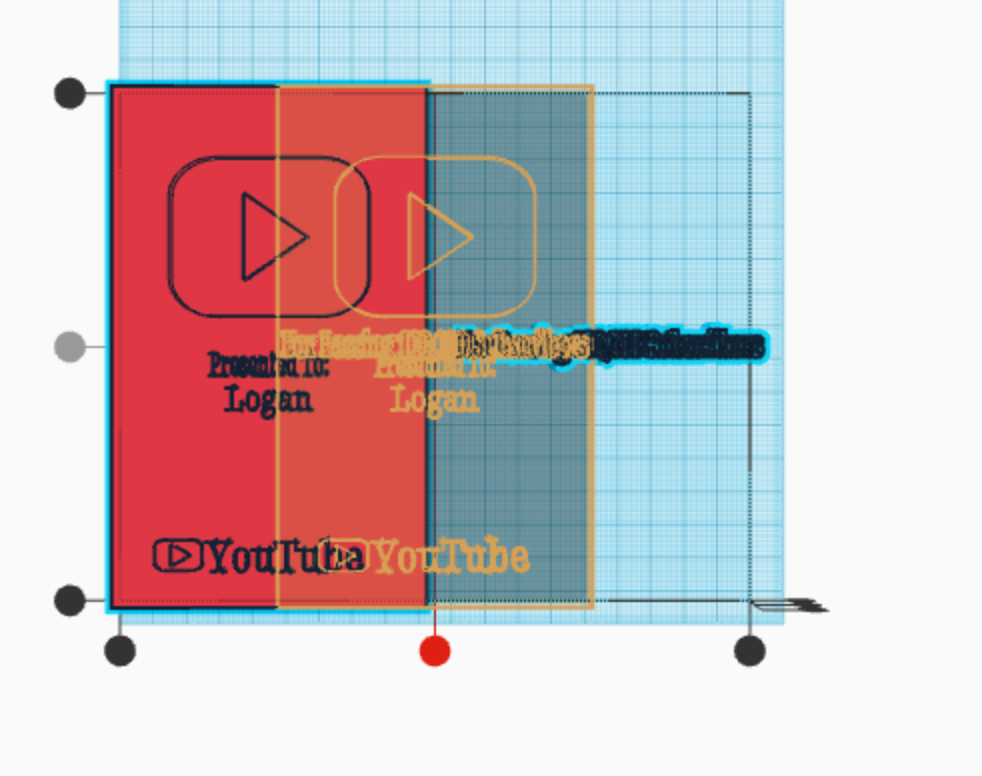
Press the middle button on the X axis.
Move S10
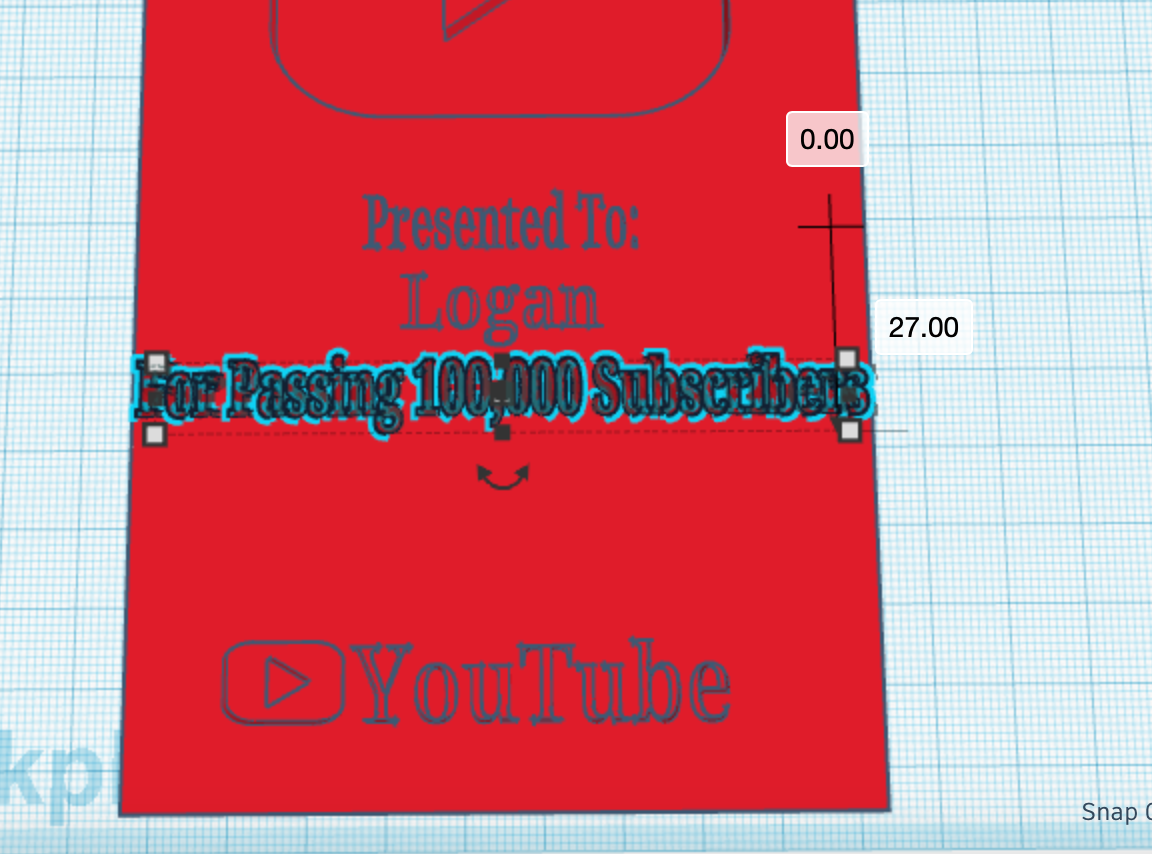
Move the shape S10 backward by 27 mm
Select the Shapes
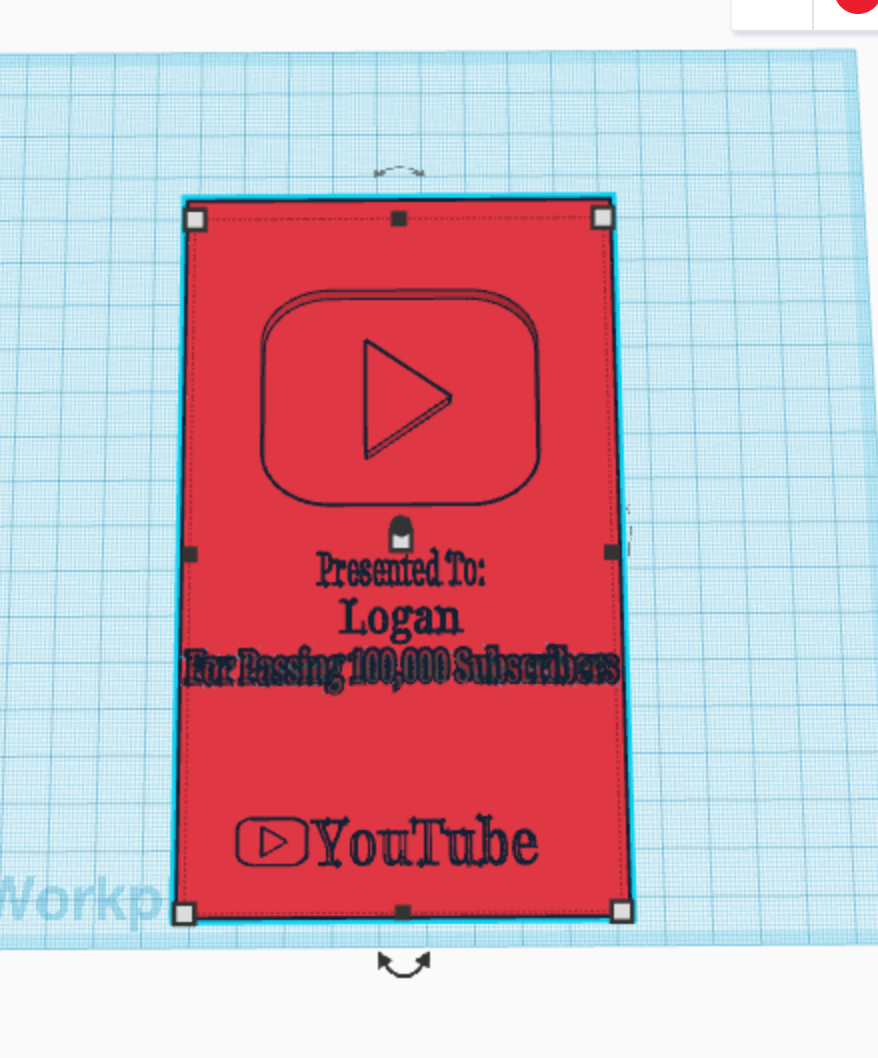
Select the shapes S1 and S10.
Group the Shapes
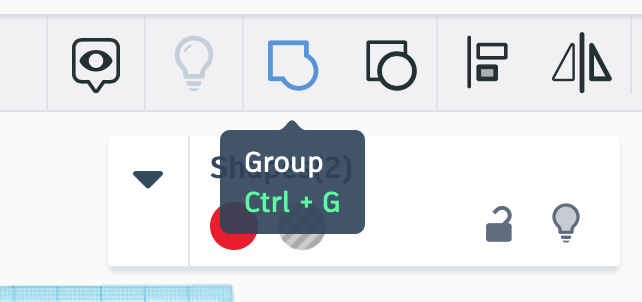
While the shapes S1 and S10 are selected, press group
Congrats, Your Done

Congratulations, you were able to stick with me till the end and finish this Instructable. If you have a 3d printer you can actually print the design we just made. Cool right? Anyways, thank you so much for clicking on my Instructable and who knows, maybe I'll make another Instructable in the future and our paths will collide again. If you are wondering why picture of the 3d printed version does not have the same name as I put on the steps it is because, the photo above is from a Play Button I did for myself thus I put my name there. For the filament I used PLA as that is what I normally use. I decided to choose silver as the filaments color for this project because this is a YouTube Silver play button so I thought I would make it well, silver. If you want, on the play button you can change it from "For Passing 100,000 Subscribers" to "For Passing 1 Million Subscribers" and then change the filament from silver to gold and make your self a 1 million subscriber YouTube play button. Yes you would have to make a few modifications to make the new text compatible with the Play Button but it is definitely possible. Now, that is all I have for you today. Bye.