Yet Another Parametric Projectbox Generator
by TheWheel2 in Workshop > 3D Printing
1834 Views, 3 Favorites, 0 Comments
Yet Another Parametric Projectbox Generator
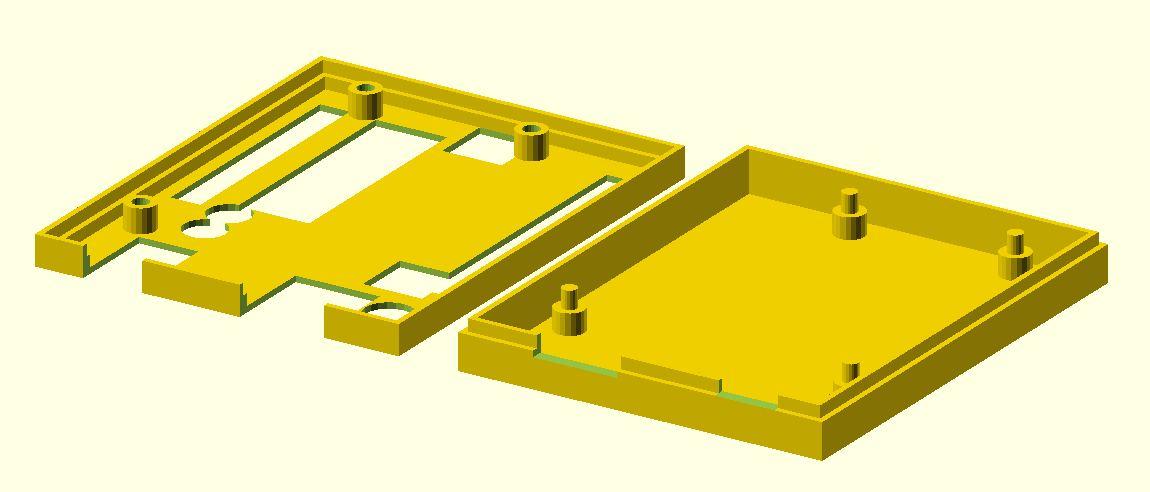
This post describes how to use my YAPP-generator to design Project Boxes for your PCB's.
Here you find more information on the YAPP generator
Supplies
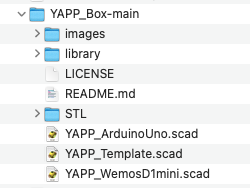
- openSCAD - A recent version of “openSCAD” can be downloaded here.
- the YAPP generator - You can download this as a “.zip” file from github. Extract the “YAPP_Box-main.zip” file into your openSCAD projects folder. You now have a new folder “YAPP_Box-main” containing several sample files. In “YAPP_Box-main” there is also a folder “library” that contains the YAPP generator (so don’t throw it away!). It is wise to leave the folder structure as it is and save new box designs in this “YAPP_Box-main” folder.
Measure the PCB
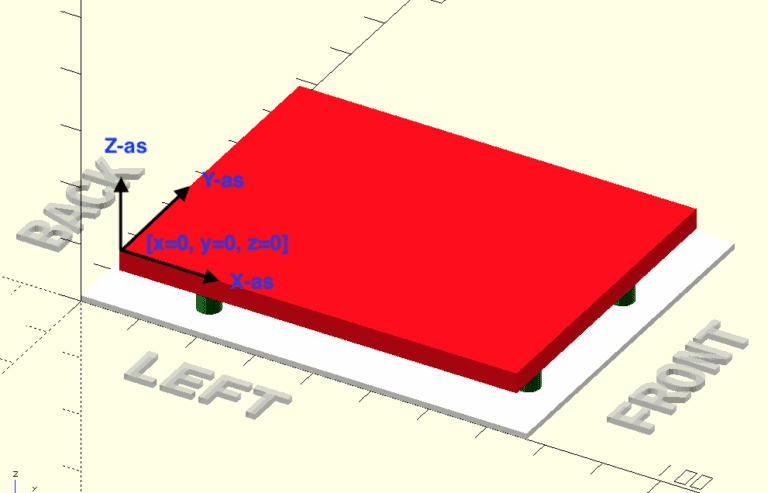
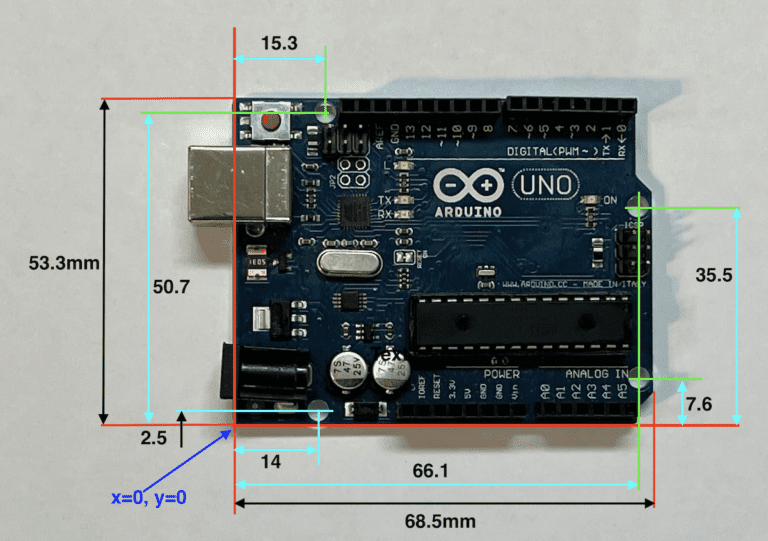
The YAPP generator's point of departure always is the PCB (size and thickness). Everything is relative to the origin of the [0,0,0]. Besides the outer dimensions of the PCB all positions of connectors, leds etc. has to be measured relative to the [0,0,0] coördinates of the PCB.
Fill Cutouts Arrays for All Planes
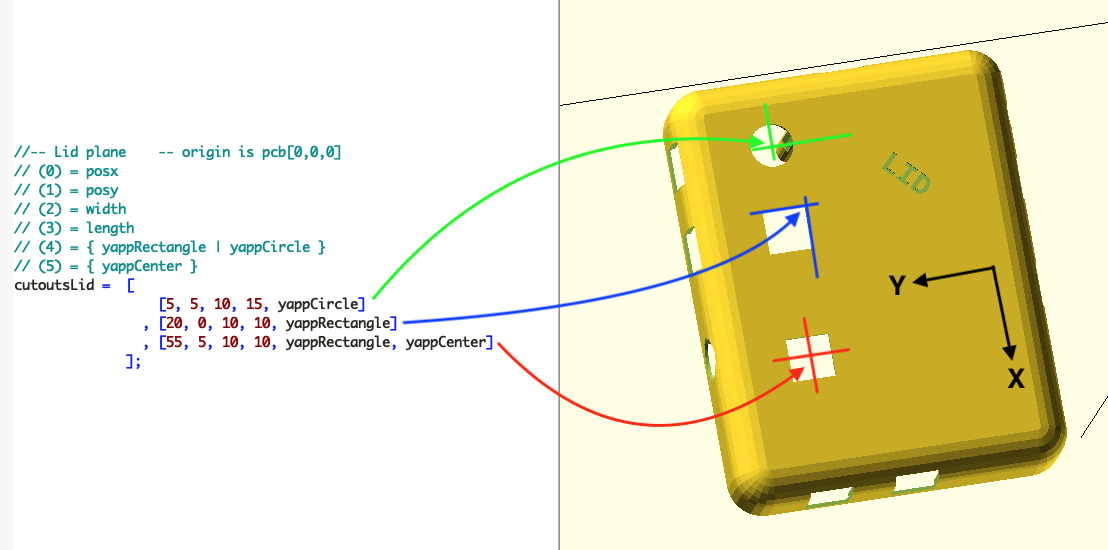
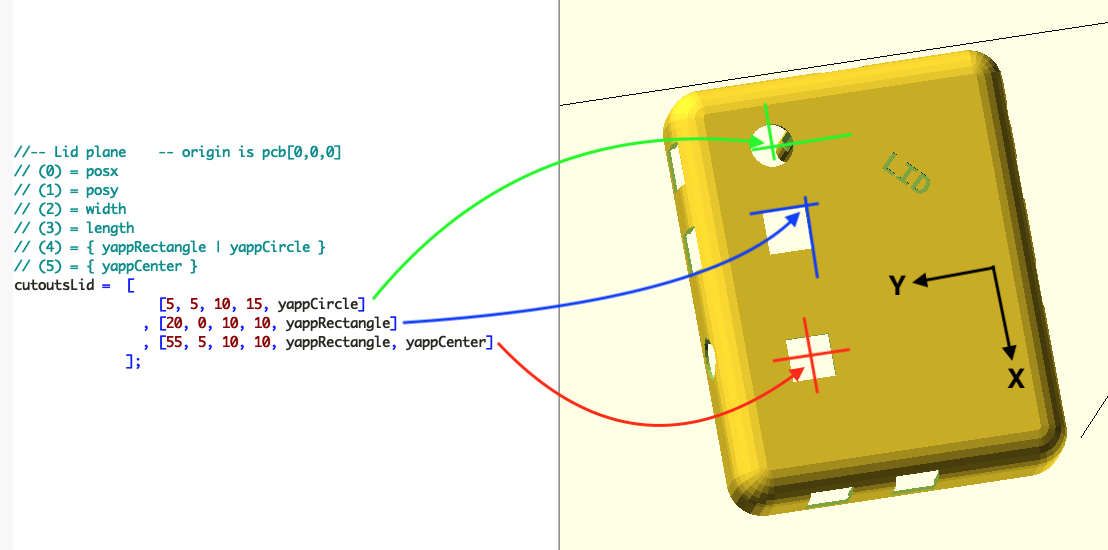
For every plane (side) of the Project Box there is an array in witch you can insert the properties of every cutout in that plane. There are array's for the base, lid, front, back left and right plane.
Leave the plane array where you don't want cutouts empty.
Enter Cutouts in the Lid
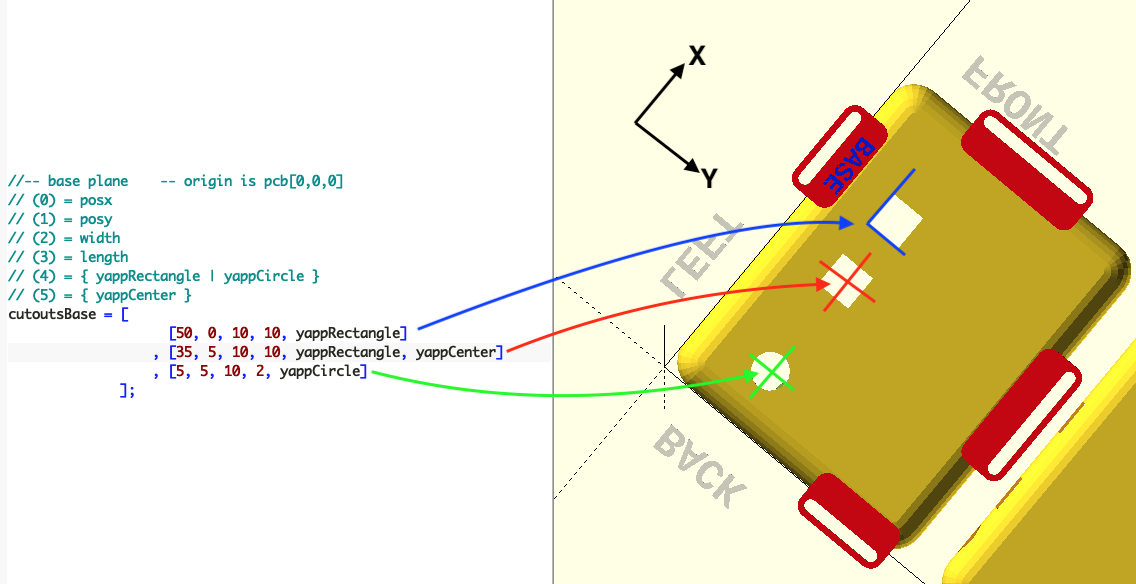
Enter Cutouts in the Base
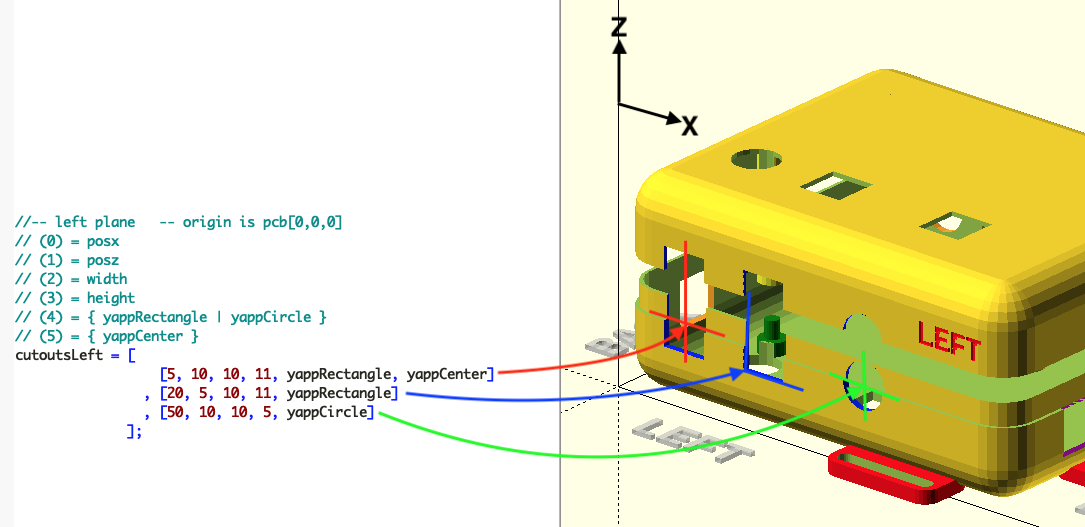
Enter Cutouts in the Left Plane
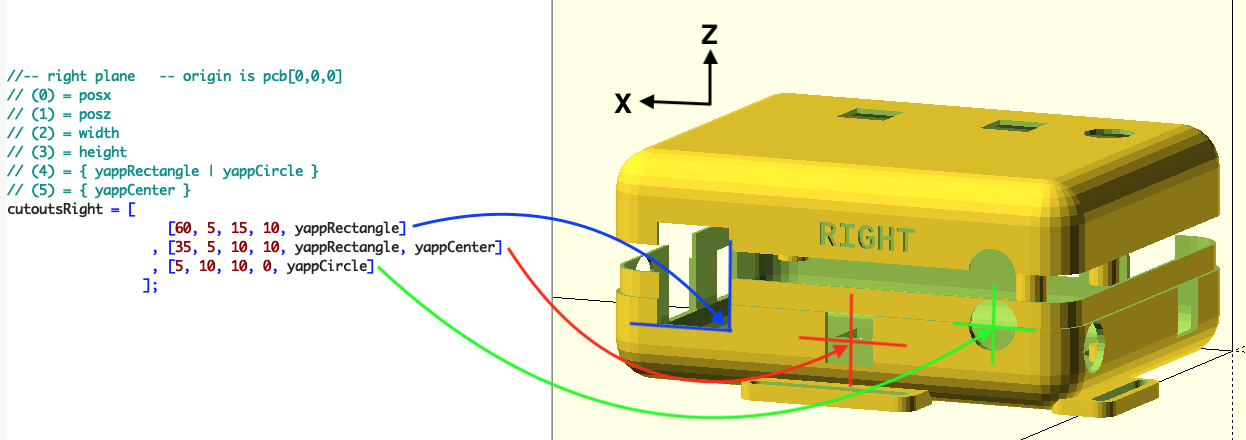
Enter Cutouts in the Right Plane
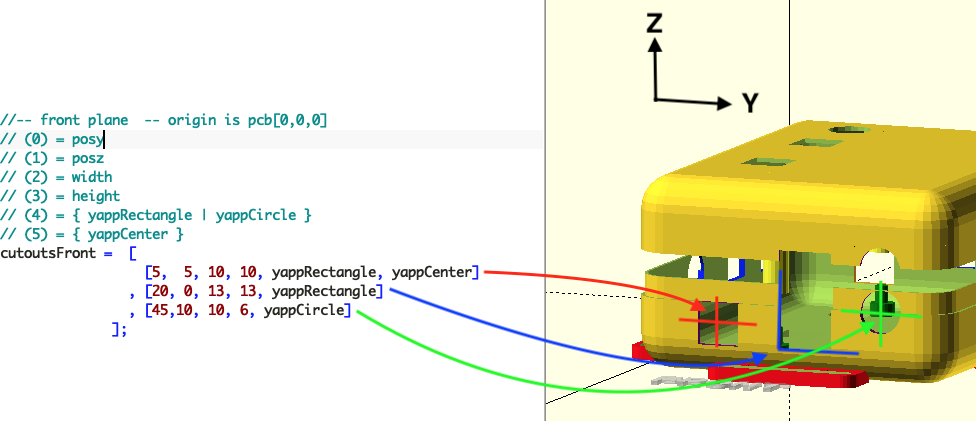
Enter Cutouts in the Front Plane
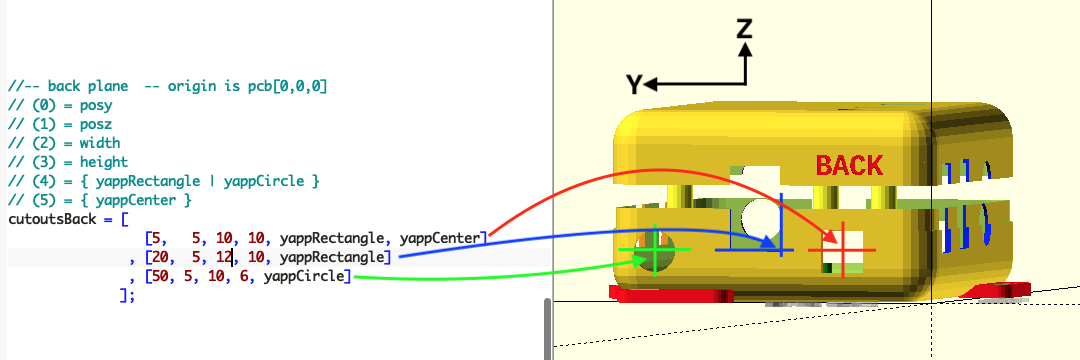
Enter Cutouts in the Back Plane
Other Arrays

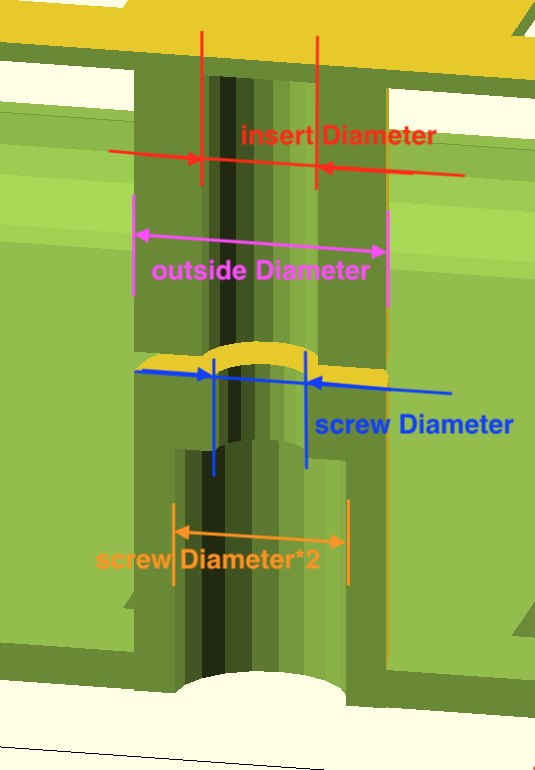
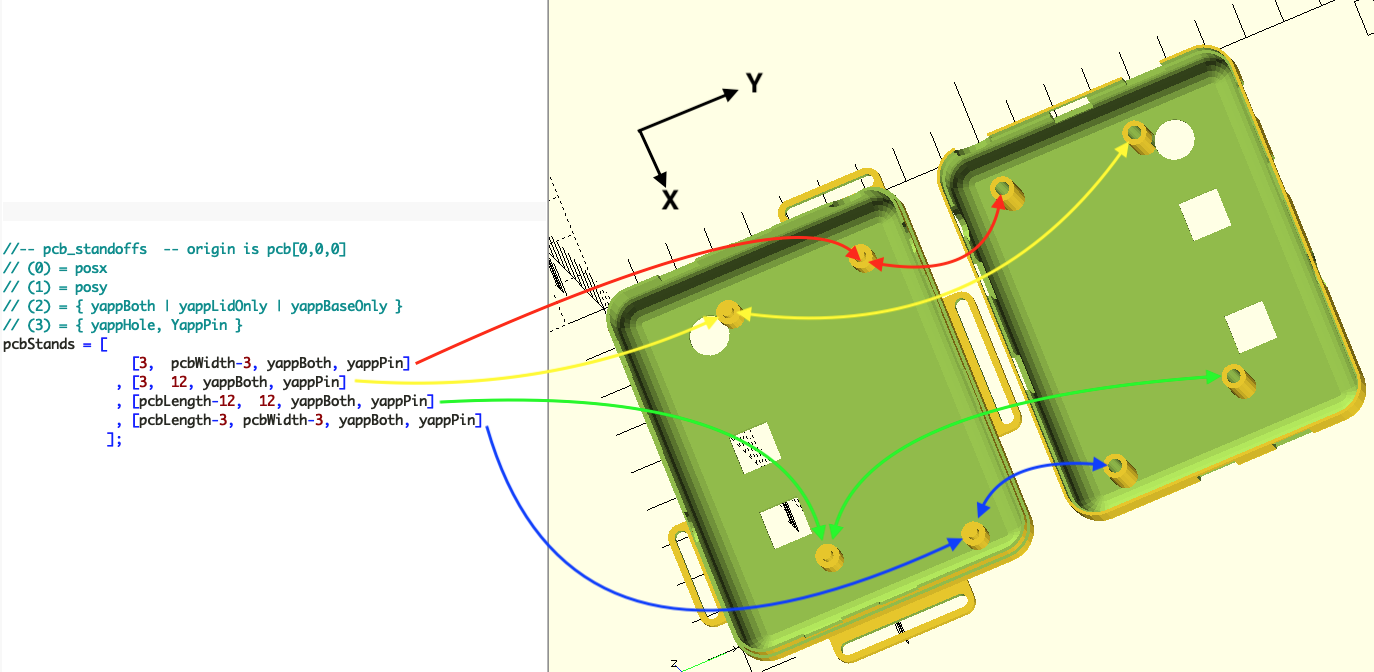
Besides the cutout-array's there are array's for specific functions such as for standoffs and for connecting the Base with the Lid.
Generating the Project Box
The last step is to generate the Project Box. Press [F5] or [F6] to see the result of your work.
If your satisfied with your work generate the STL file, slice it and send it to your 3D printer!