WordPress on Linode

Here is a complete tutorial on how a beginner can install WordPress content management system (CMS) on Linode cloud hosting service.
Until a few days ago, I was running a successful blog on a shared hosting service. But that all changed when my website started experiencing hours-long downtime every day. At first, I thought it was just a glitch and things will improve. When it became a daily occurrence, I had to contact support. They told me that traffic on my website has increased significantly and is the main cause behind the downtime. The servers couldn’t handle the high load, and thus go down once resource consumption threshold was hit. I decided to start looking for a new hosting solution that could handle all server related hassles and could provide scalable hosting for my blog. This was the start of my journey that ended at Cloudways. Here is how you could easily install WordPress on a Linode server at Cloudways Platform
Setup an Account With Cloudways

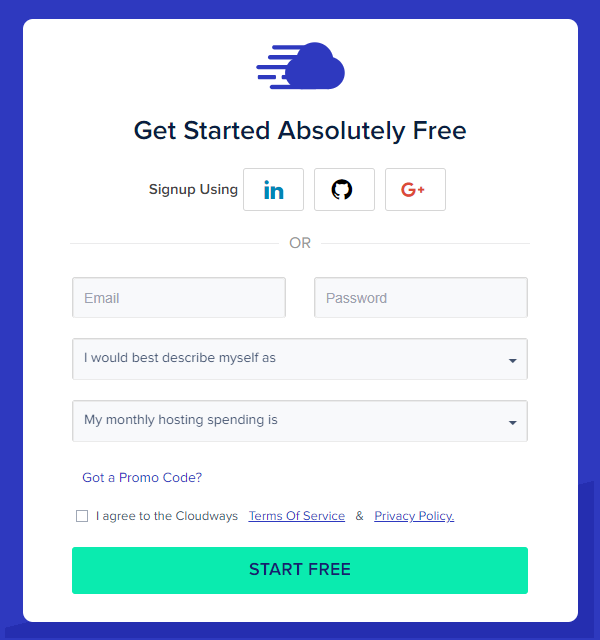
It is easy to launch the process. It all starts with the login page. If you do not have a Cloudways account, the signup process is a simple matter that doesn’t require a credit card.
You could use your Google, LinkedIn or Github account to signup and login.
PS: You can also use an active promo code if available. Search ‘Cloudways promo codes’ in Google to get the active promo code.
On successful sign up, you will get a verification email from Cloudways.
Deploy WordPress on Linode Server

At this point, you have the choice of deploying either the Cloudways optimized WordPress or the regular version. With the Cloudways optimized version, Breeze, the WordPress cache plugin comes pre-installed.
For this: Go to the Application Server & Details and choose your preferred version:
Name Your App, Server, and Project

You will have to add a name for the WordPress app, server, and the project. The name helps in identifying your WordPress app when multiple of these are running on a server.
Select ‘Linode’ From the Server Option Menu

Cloudways currently offers six cloud providers including DigitalOcean, Linode, Vultr, Amazon Web Services (AWS), Google Cloud Engine (GCE), and Kyup. As you are installing your server on Linode, select it from the server options.
Select RAM, SSD Storage and Bandwidth You Need for the Server.

You can only select RAM and every other specification comes pre-configured by the cloud provider. For example, on Linode, with 1GB of RAM, you get 20GB SSD, 1TB transfer, and 1 Core Processor. However, this is not the case with every cloud provider. GCE and AWS don’t have this limitation.
Select the ‘Location’ of the Server

Linode currently offers you to host server at eight locations. Select the one that is nearest to your target audience so that users can enjoy best page loading speeds.
Launch Server Now

The benefit of the Cloudways powered hosting solution is that you can host your website at any Linode data center. This way, your website would be close to target audience and will have low page load time.
Once done, press the ‘Launch Now’ button.
The best thing about hosting with Cloudways is that you pay only for the server usage (on hourly basis) regardless of the number of applications on the server.
Start the Server

When you start the Linode server for the first time, the Platform will take a few minutes to load all settings. In the meantime, you will see the following screen:
Once the server is up. Click the ‘Applications’ button on the top-left menu of the screen.
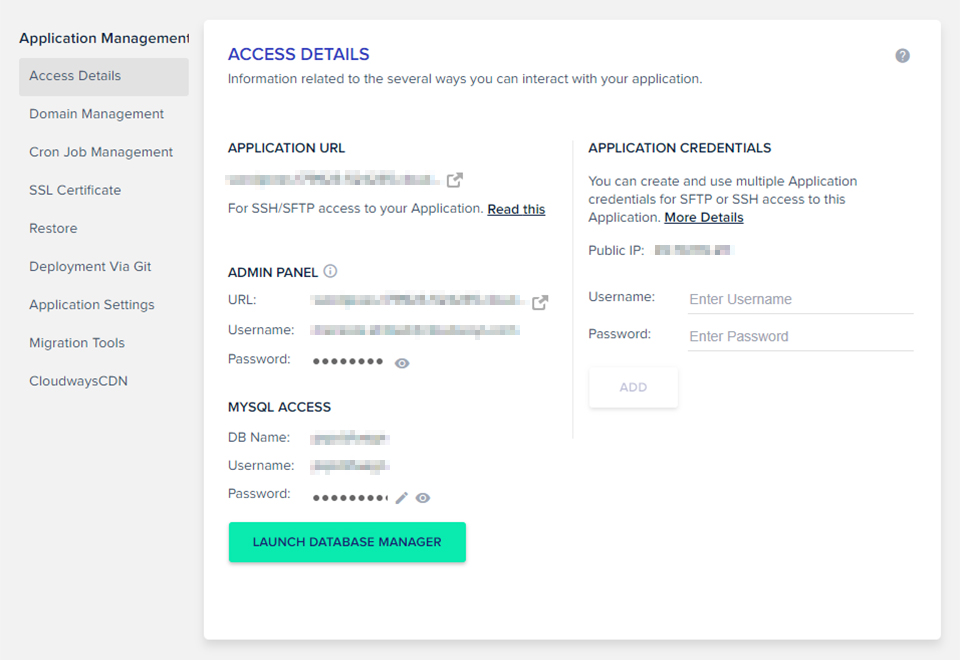
You will be redirected to the Application Management screen. Click the Access Details left menu choice.
Use the URL provided on the ‘Admin Panel’ to open the Admin Backend of your WordPress website. Use the credentials (Username and Password) to validate access.
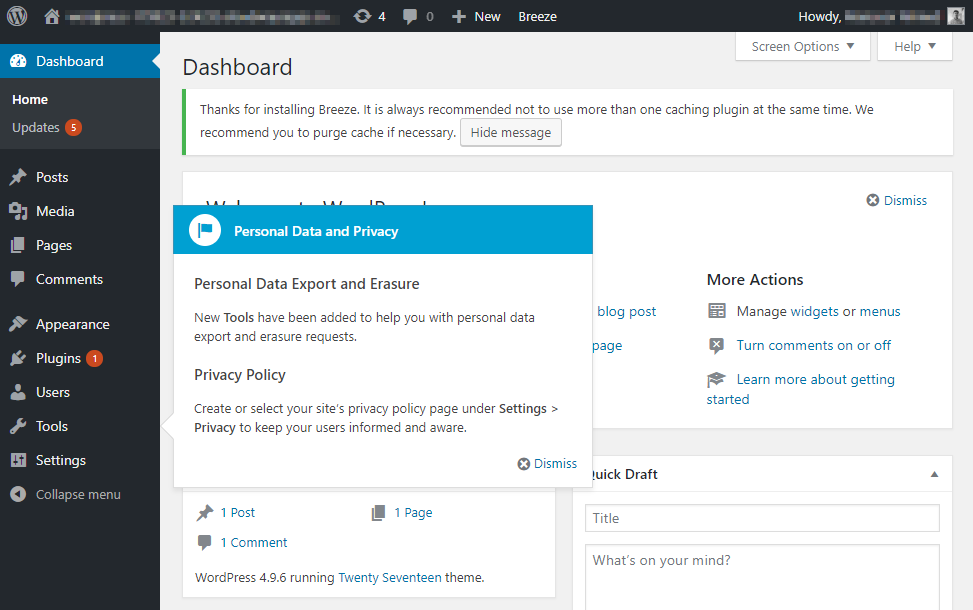
Here’s How the WordPress Dashboard Will Look Like:

At this point, the WordPress website is ready for customization. You could start by installing your choice of themes and plugins or point it to a live domain.