Wooden Link's Shield From Zelda
by davethewoodworker in Workshop > Woodworking
7915 Views, 127 Favorites, 0 Comments
Wooden Link's Shield From Zelda


In this Instructable I will show you how I made Link's Shield from Zelda. Since this is Zelda's 30th anniversary, I thought I would make a Wooden Shield. I remember Zelda when I was young, now my Son and Niece are still playing the game. I cannot believe it's been 30 years since the game was released.
I will show the process of importing image into Aspire and modeling, then carving the shield out with my X-Carve CNC Router. Hope you will like it. Thanks
To see the video on youtube click here:
I have enter this Instructable in the Gaming Contest, so please vote if you like. Thanks
Downloads
Items You Will Need

CNC Router ( I am using the X-Carve CNC)
Cad/ Cam Software ( I am using Aspire)
Wood Panel ( I am using Whitepine 21 1/2" x 14 3/4" x 25/32" )
Wood Glue
Sandpaper (assorted grits)
Miniwax Wood Conditioner
Miniwax Wood Stain ( I used Ipswich Pine)
1/4" Ballnose Bit
1/8" Ballnose Bit
1/4" Downcut Endmill Bit
Keyhole slot Bit
Wiping rags
Vectric Aspire Import
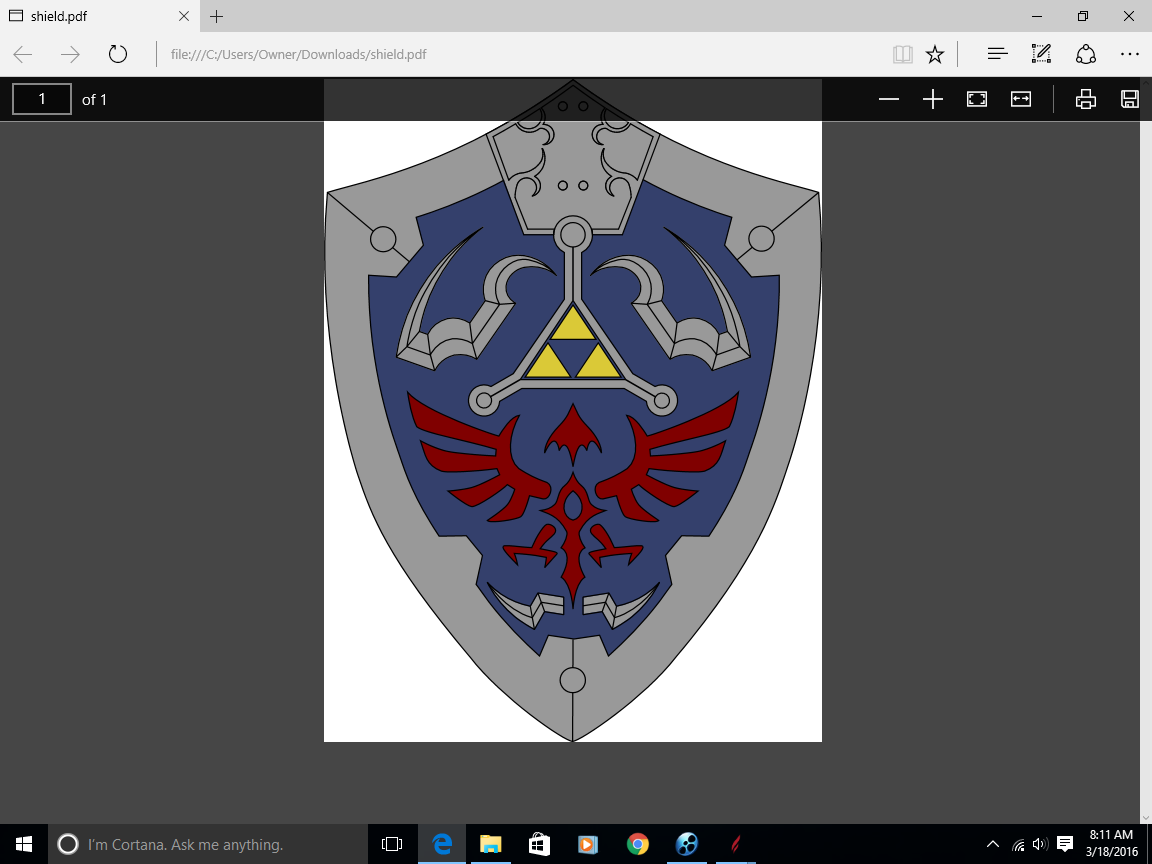
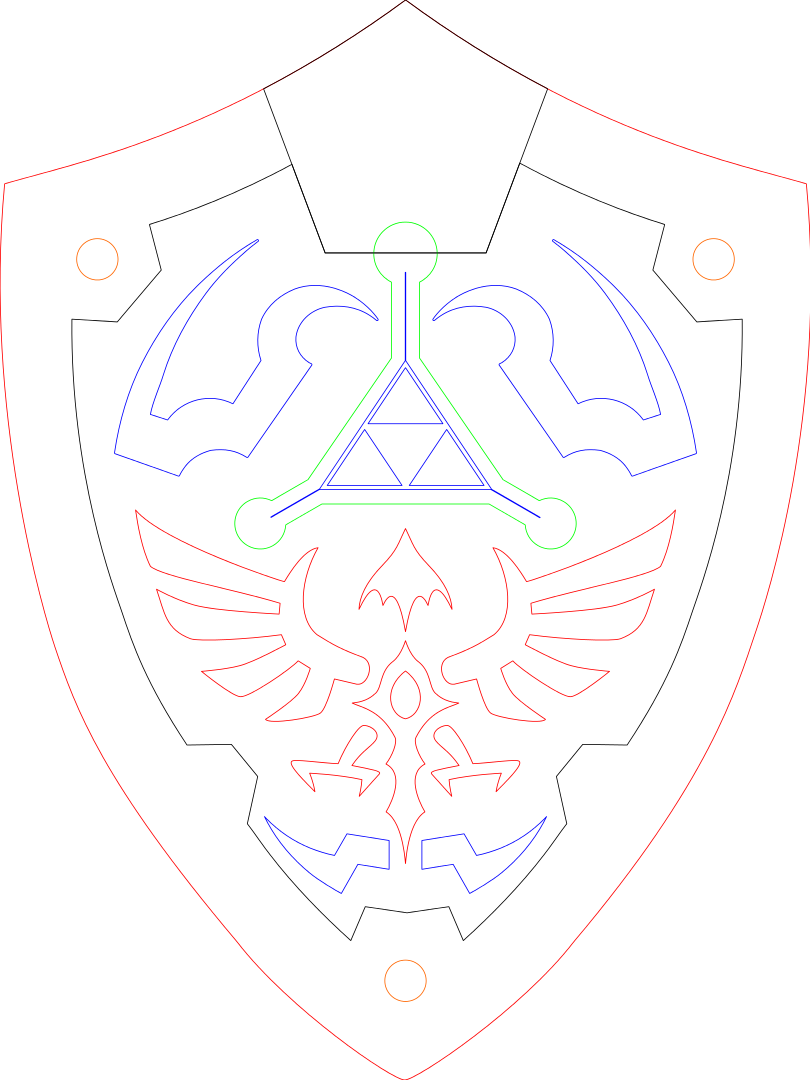
I found this picture of Links Shield on the web. Downloaded it, then imported it into Aspire.
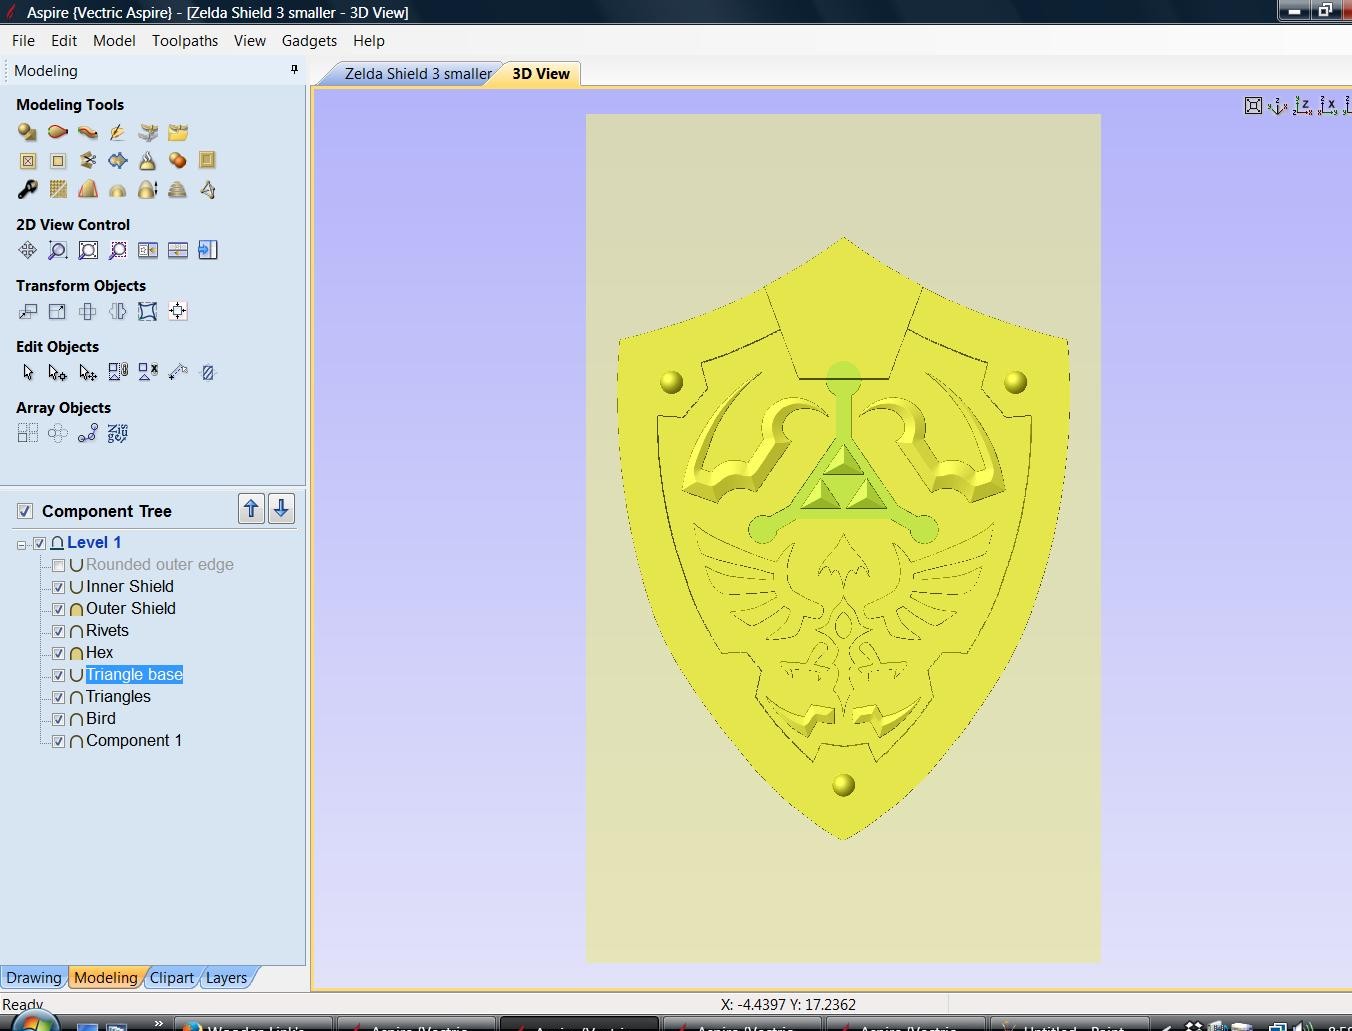
Making Vectors
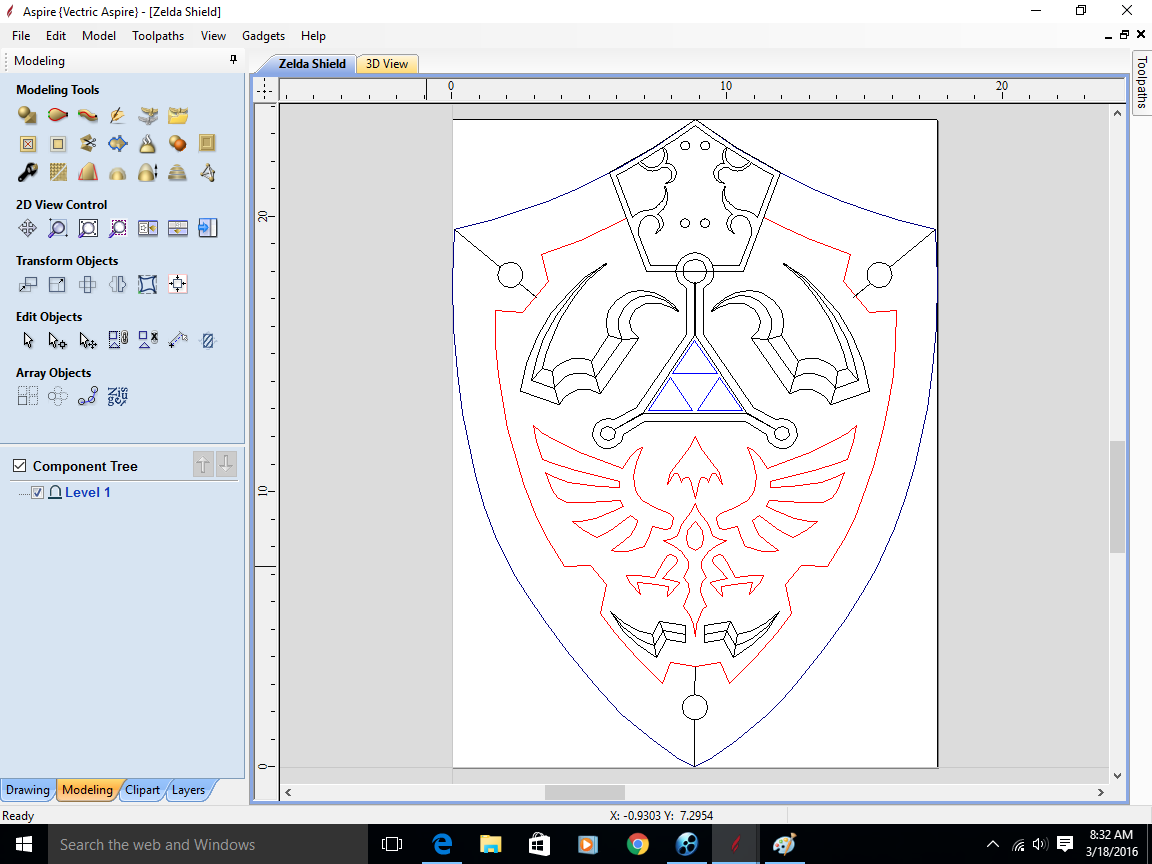

I traced the image in Aspire and now have vectors to work with. I edited the vectors until I was satisfied with my results. It was a little work to get things right.
Modeling
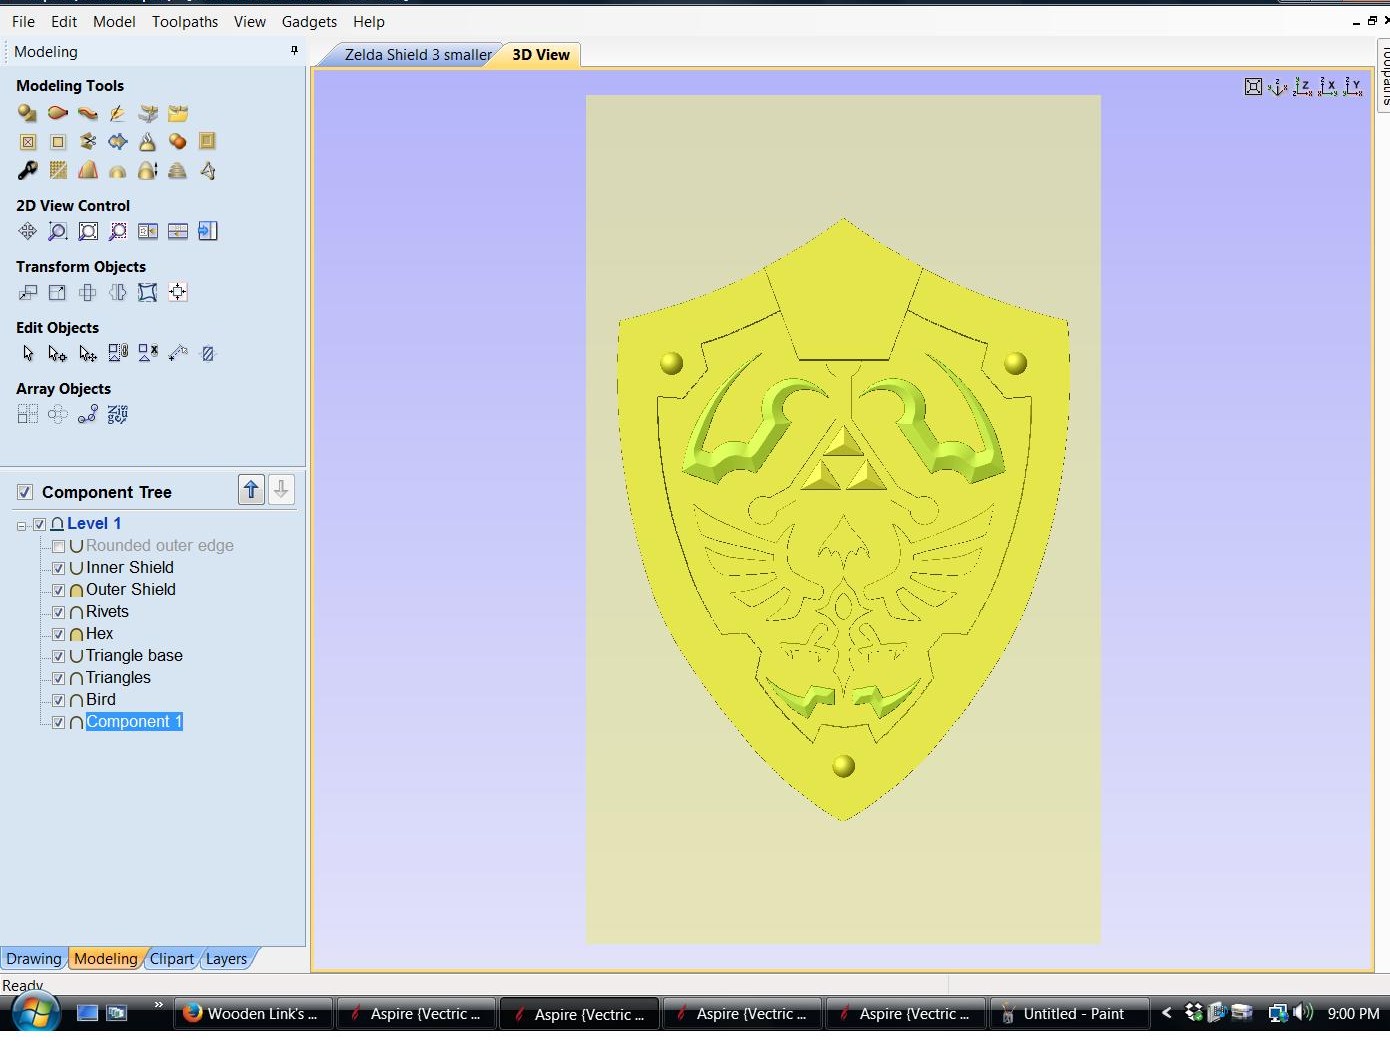
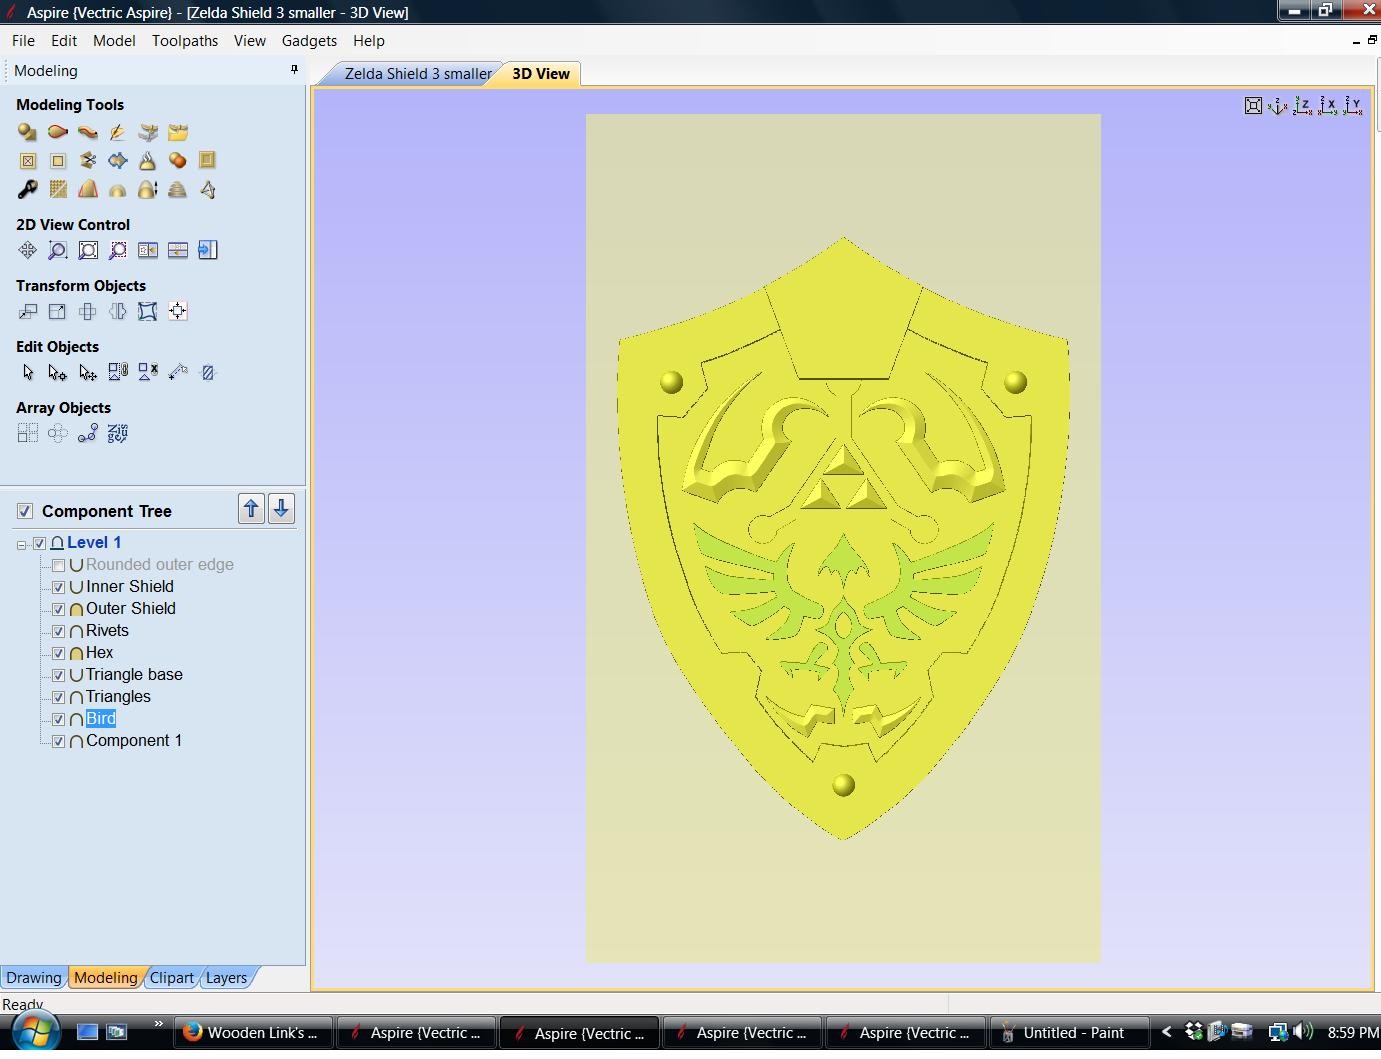
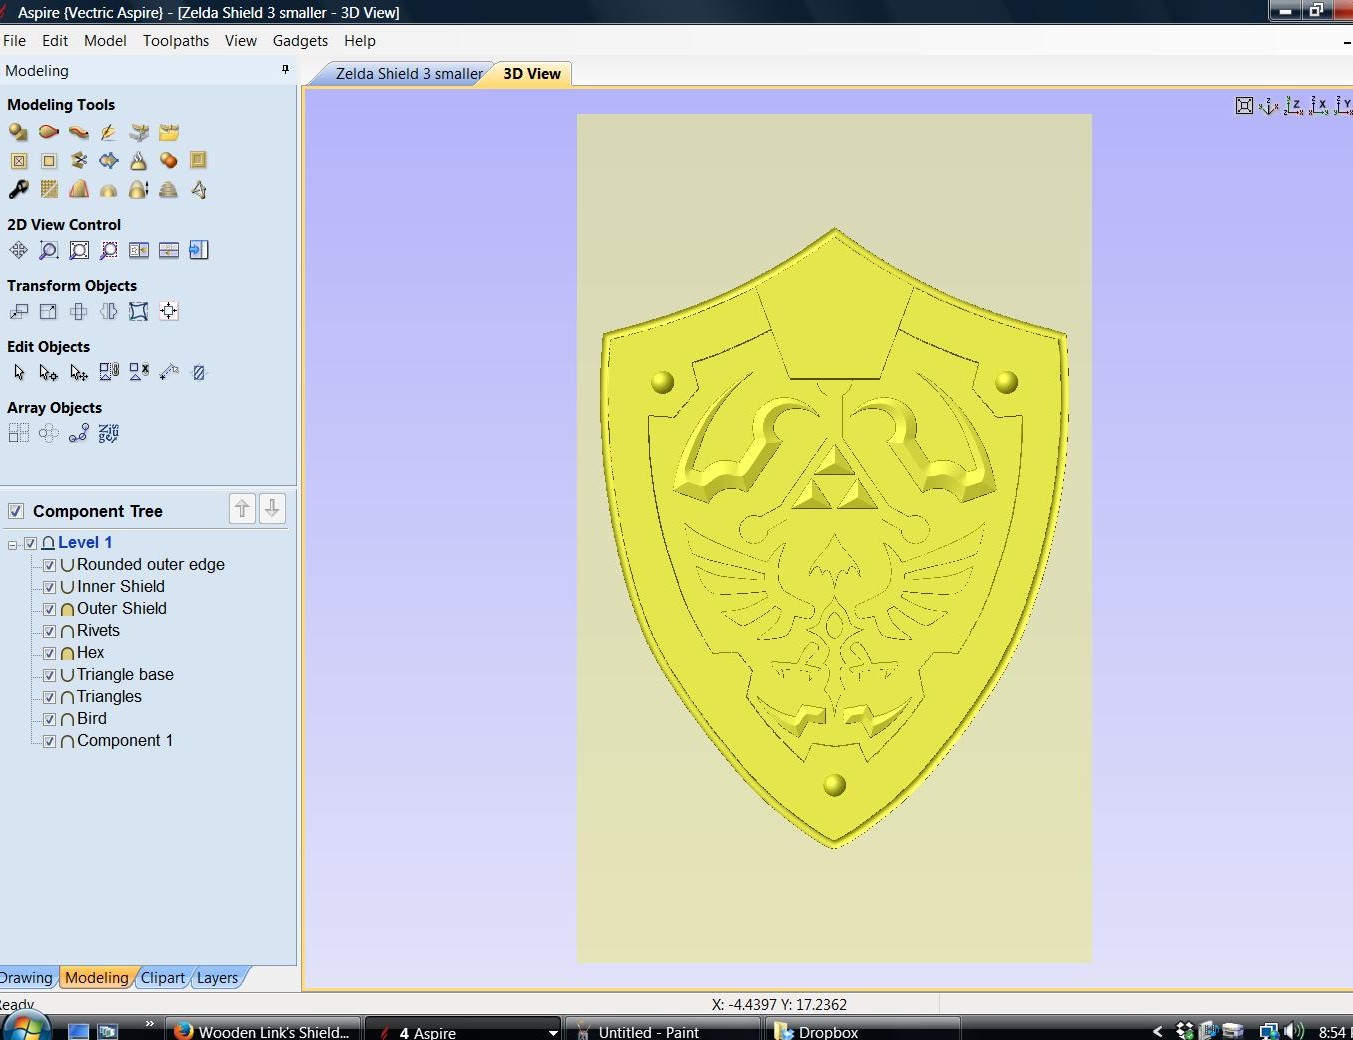

Once I got the vectors where I wanted them, I switched to the modeling tab. From there I created and shape the vectors until I thought it was right. I am no expert at this, I have only had the CNC and software a few months, learning something new everyday. Watched a lot of youtube videos. Also done some trial and error, one thing about Aspire, it lets you preview the carve before using up your stock.
Toolpaths
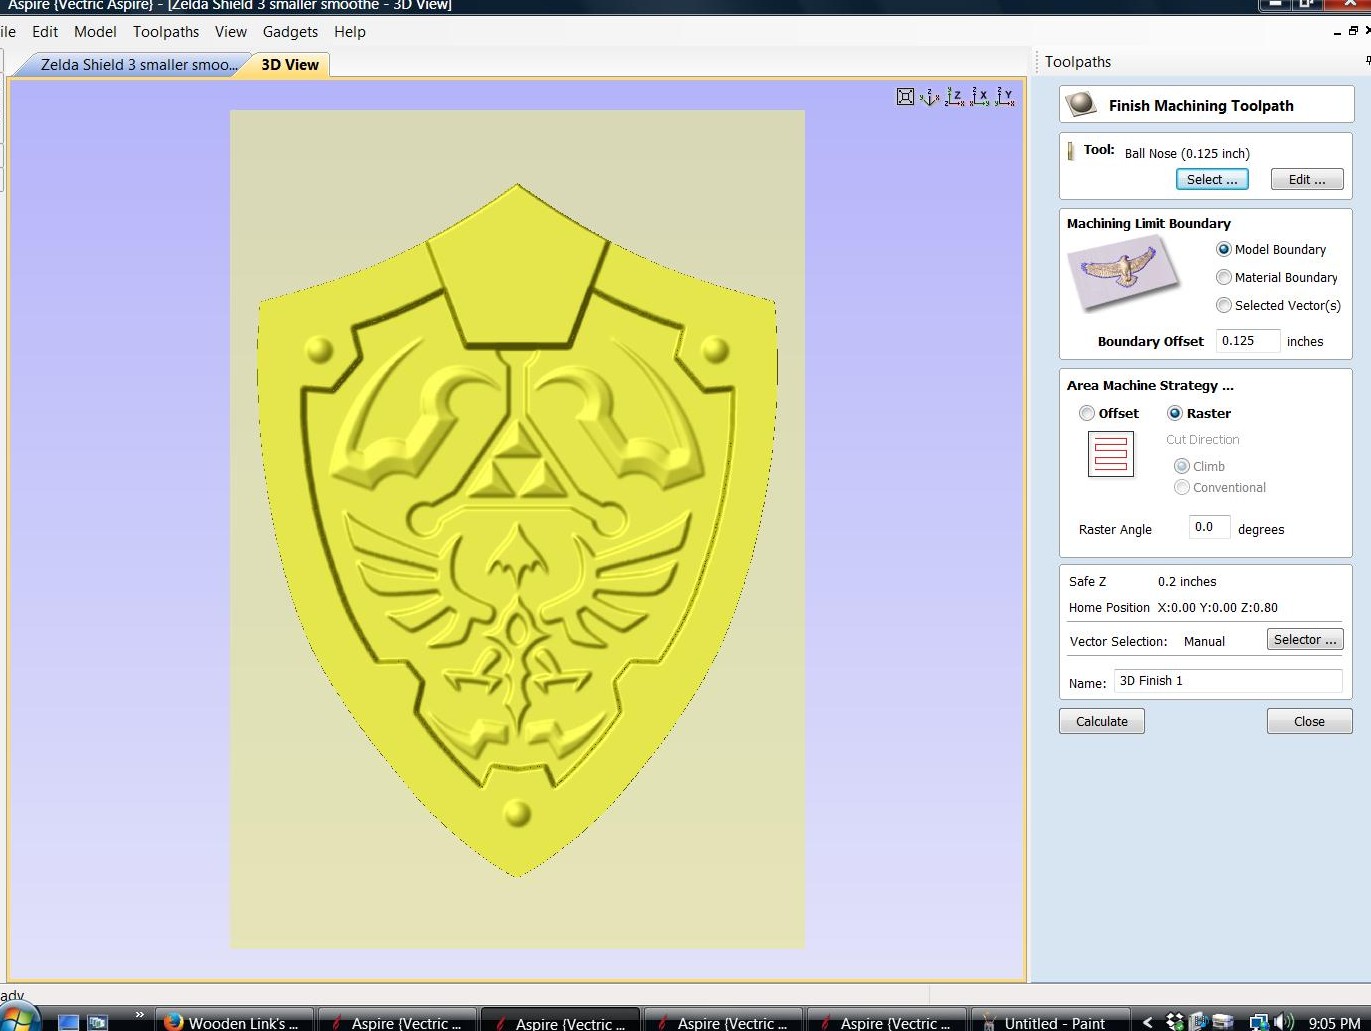
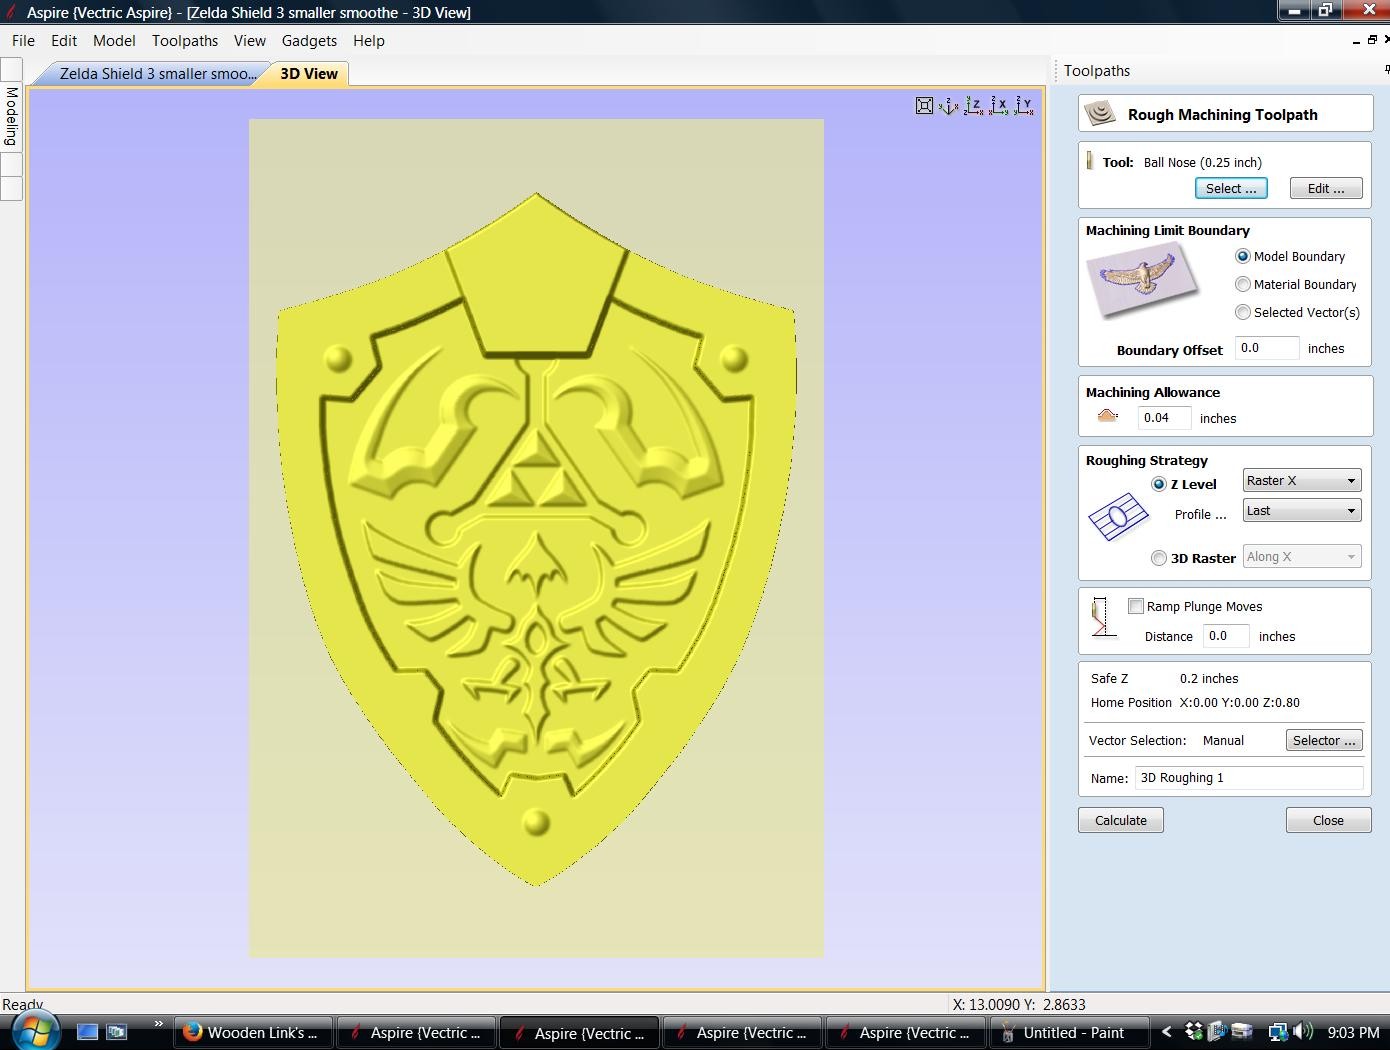
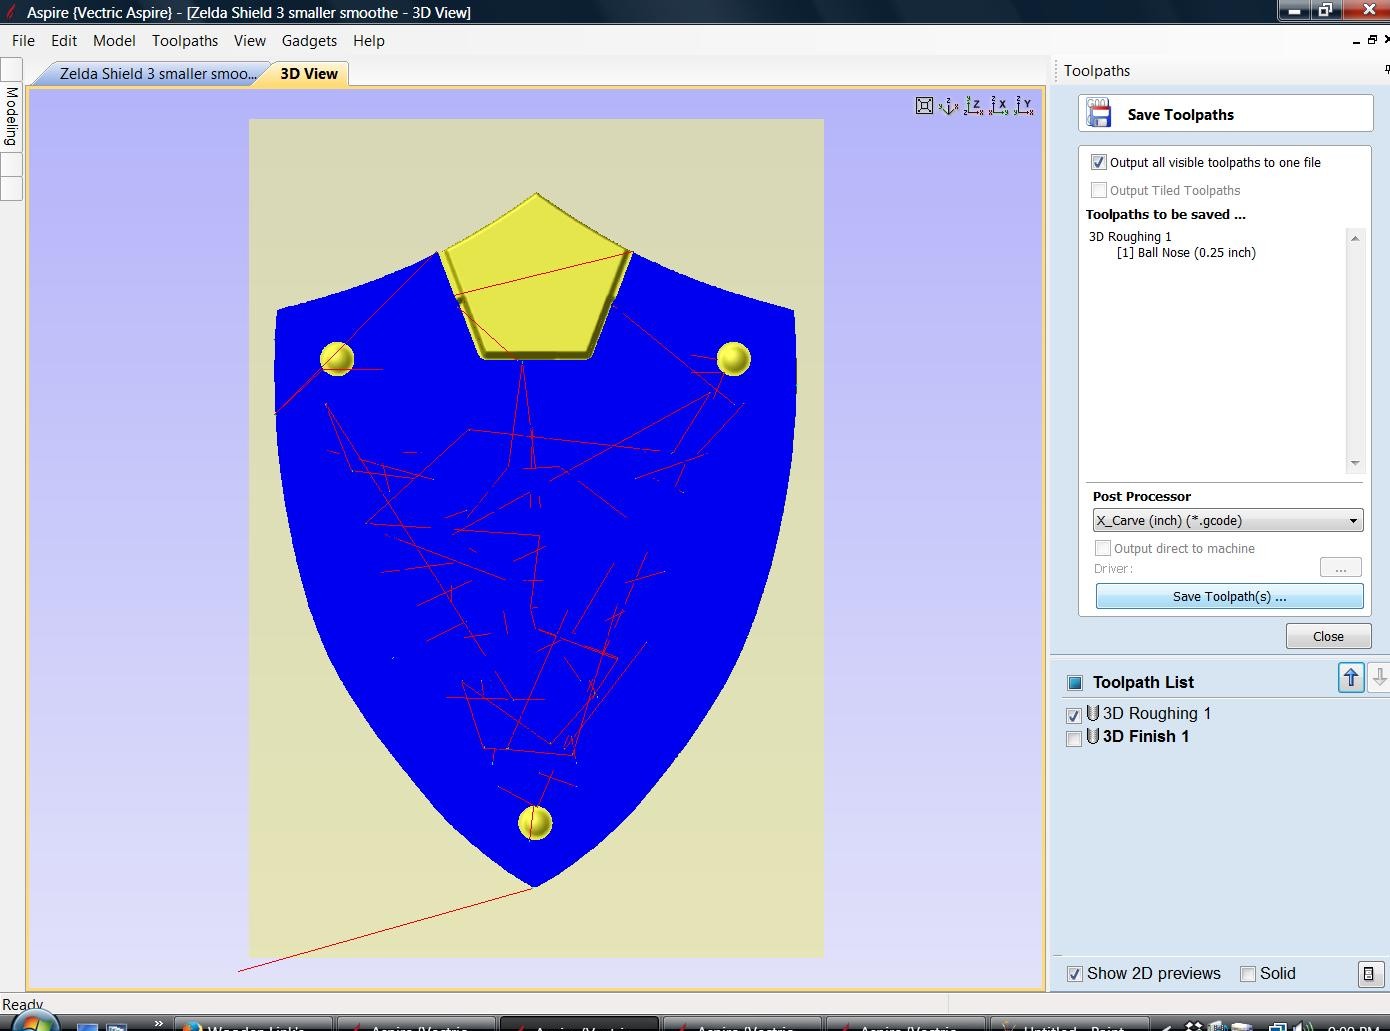
Now we need to create the Toolpaths and to export them into gcode.
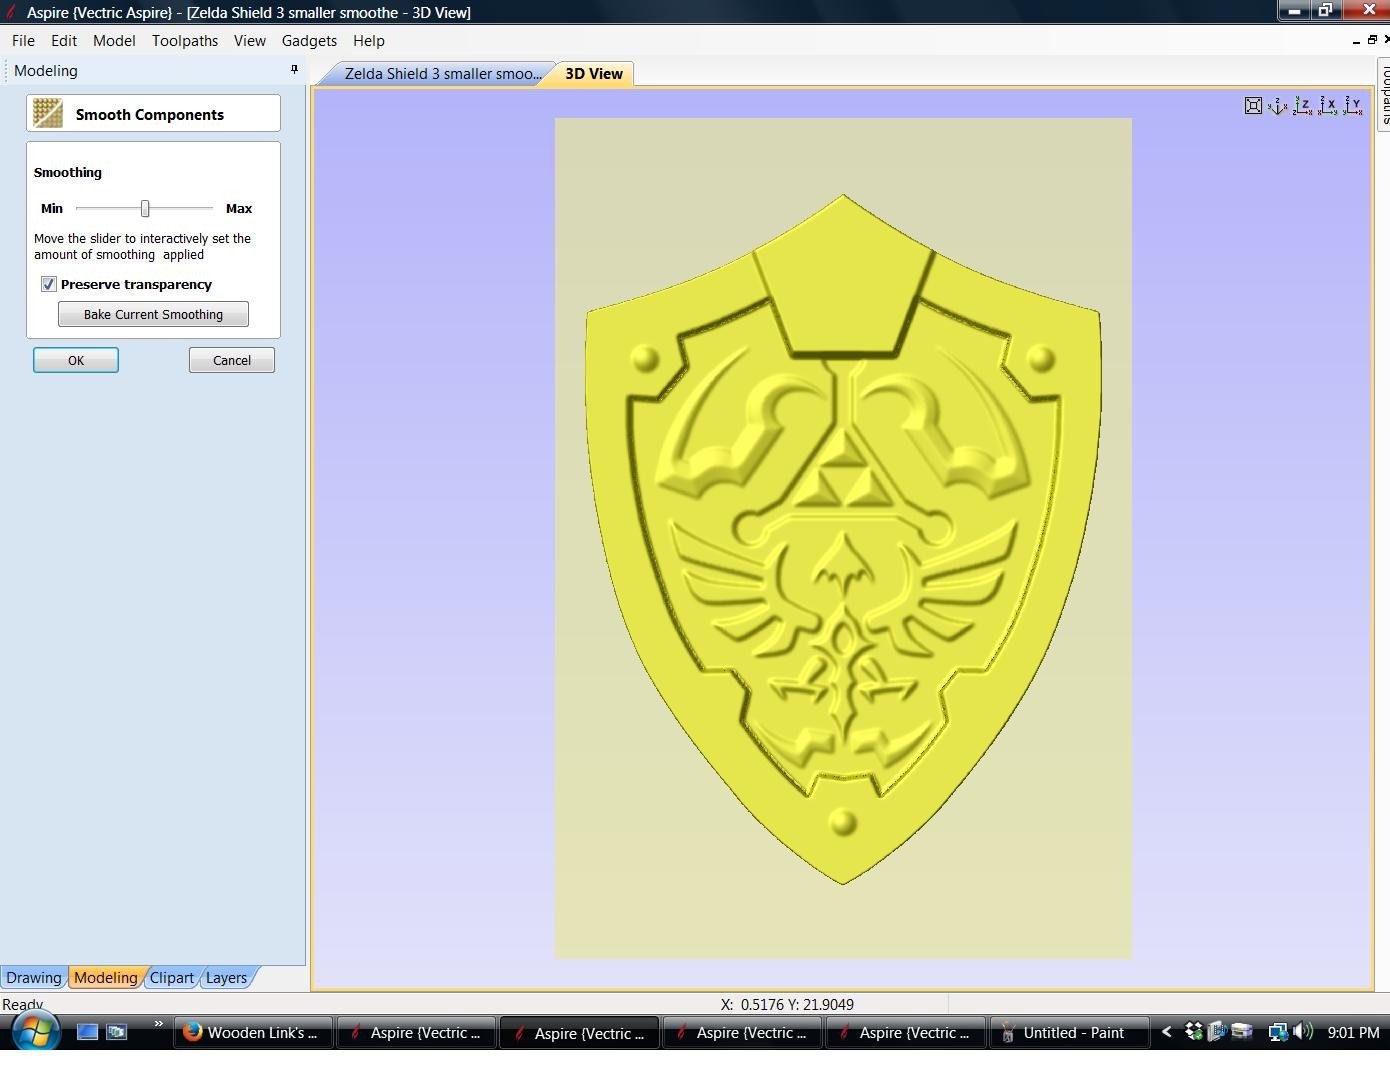
Carving Preview
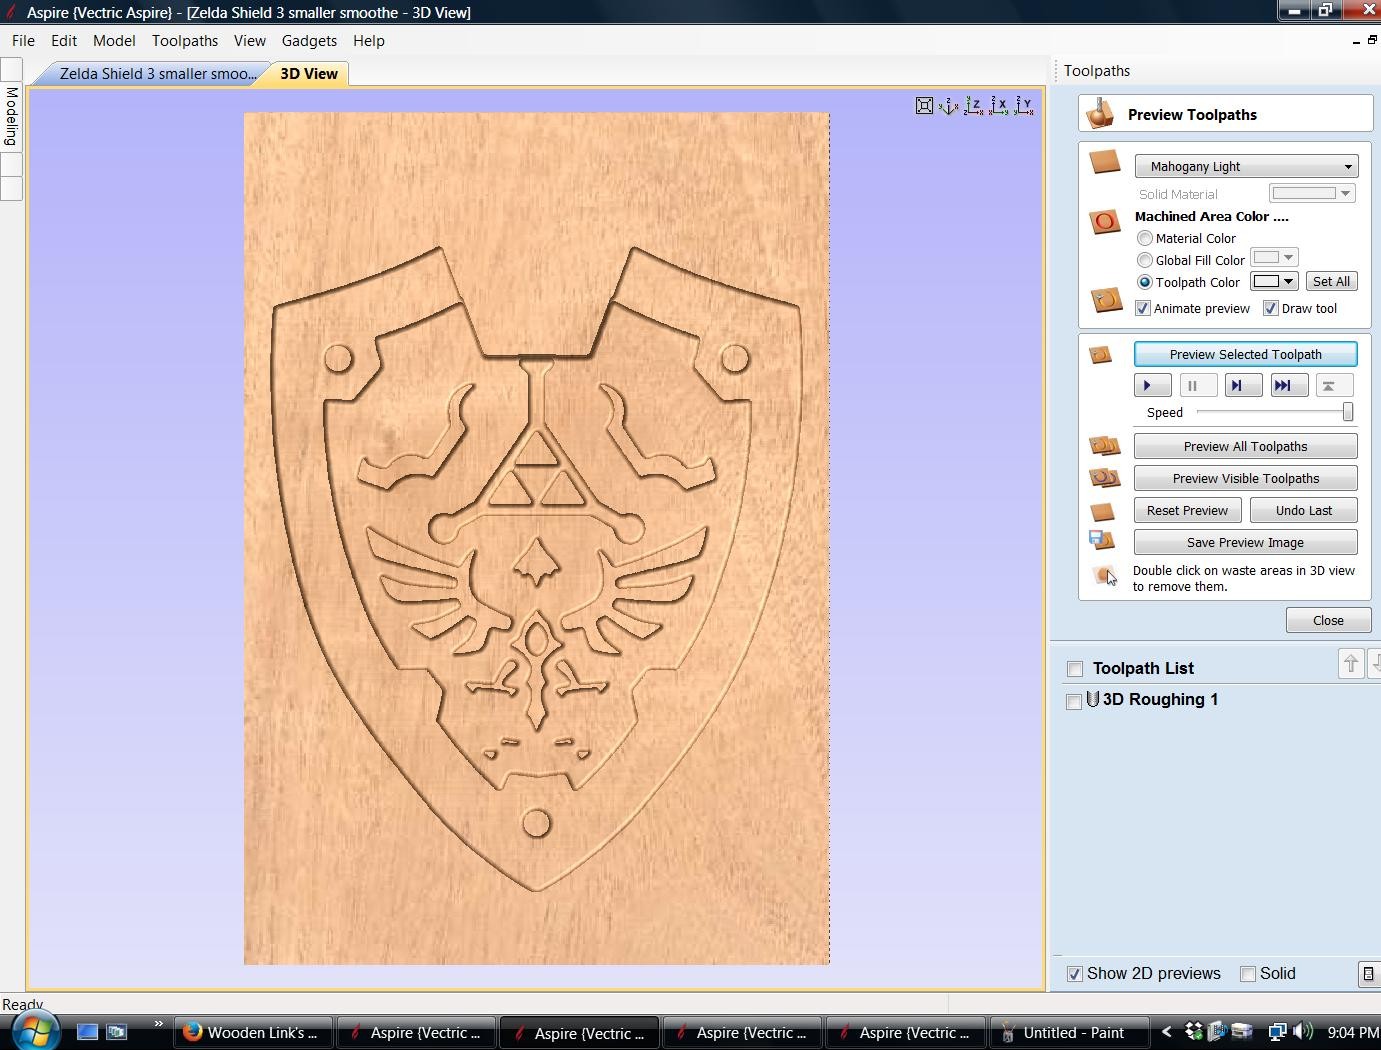
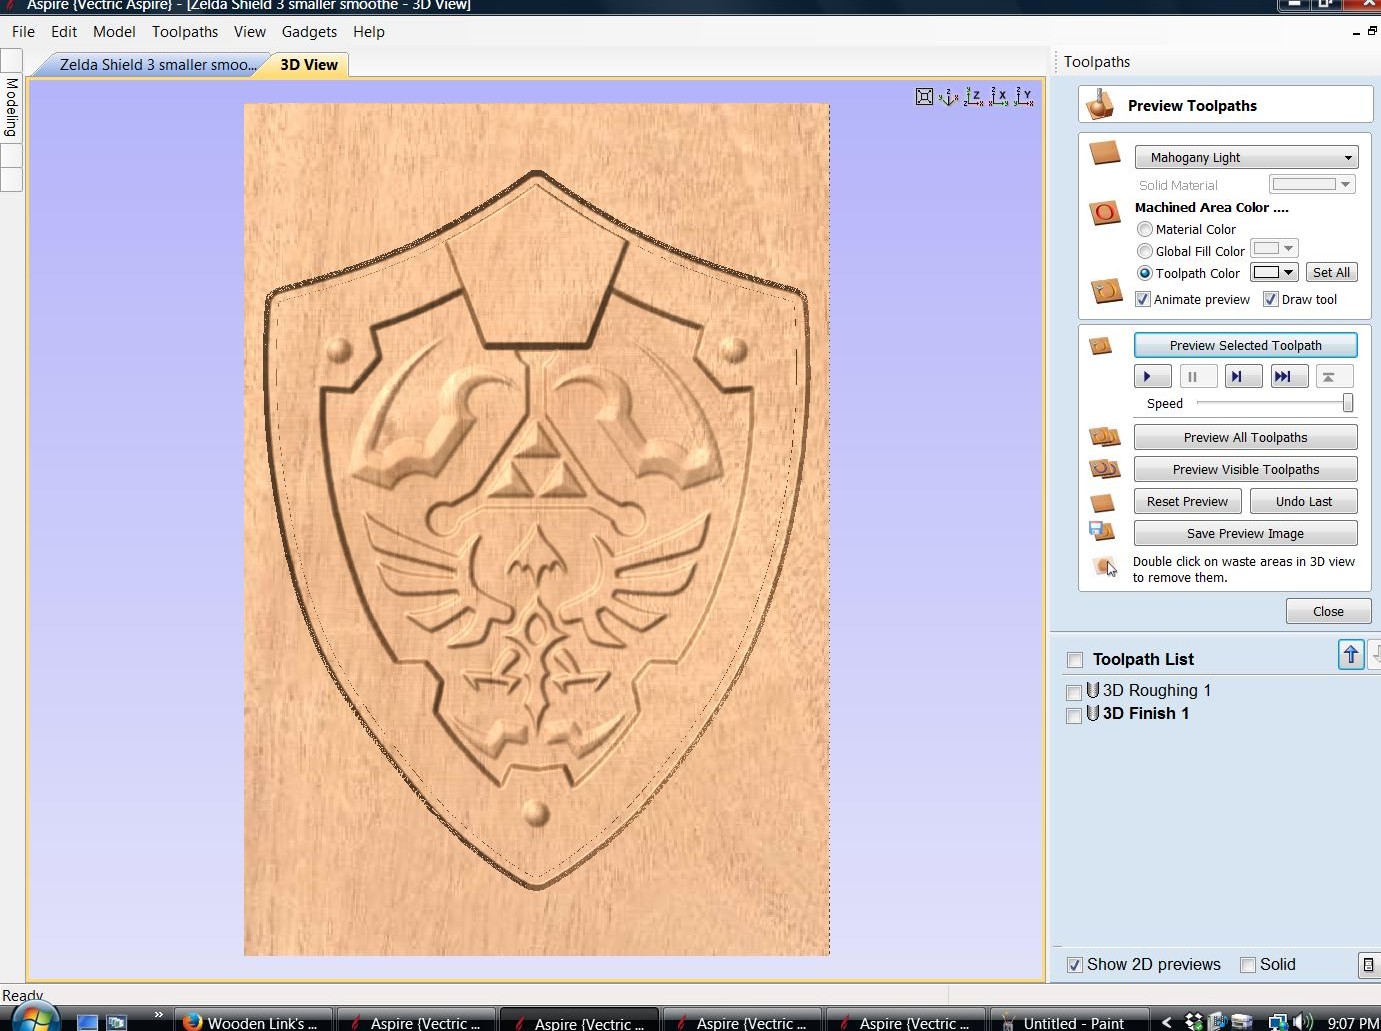
In Aspire, I preview the Roughing and Finishing carving before using my wood panel. I probably went over this at least 25 times, changing my modeling . Like I said, I am no expert at this.
Open Toolpaths in UGS
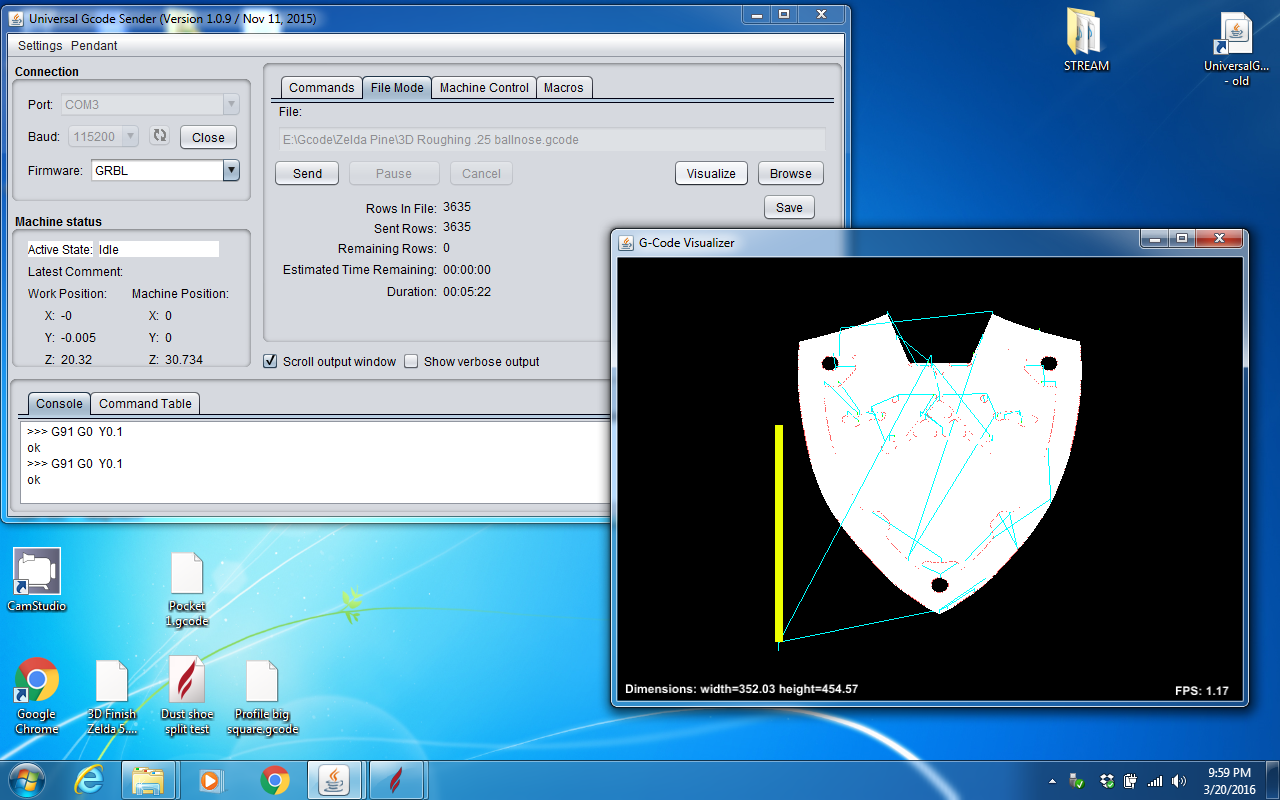
Open Universal Gcode Sender and import the gcode that we made for the cuts. I first done the roughing with a 1/4" Ballnose Bit, Then done a finishing cut with a 1/8" Ballnose Bit. I also cut the Shield almost all the way thru, left about a 1/16". Flip the panel over and done the Keyhole slot and then ran a pocket profile to finish cutting the part out.
Roughing Carve
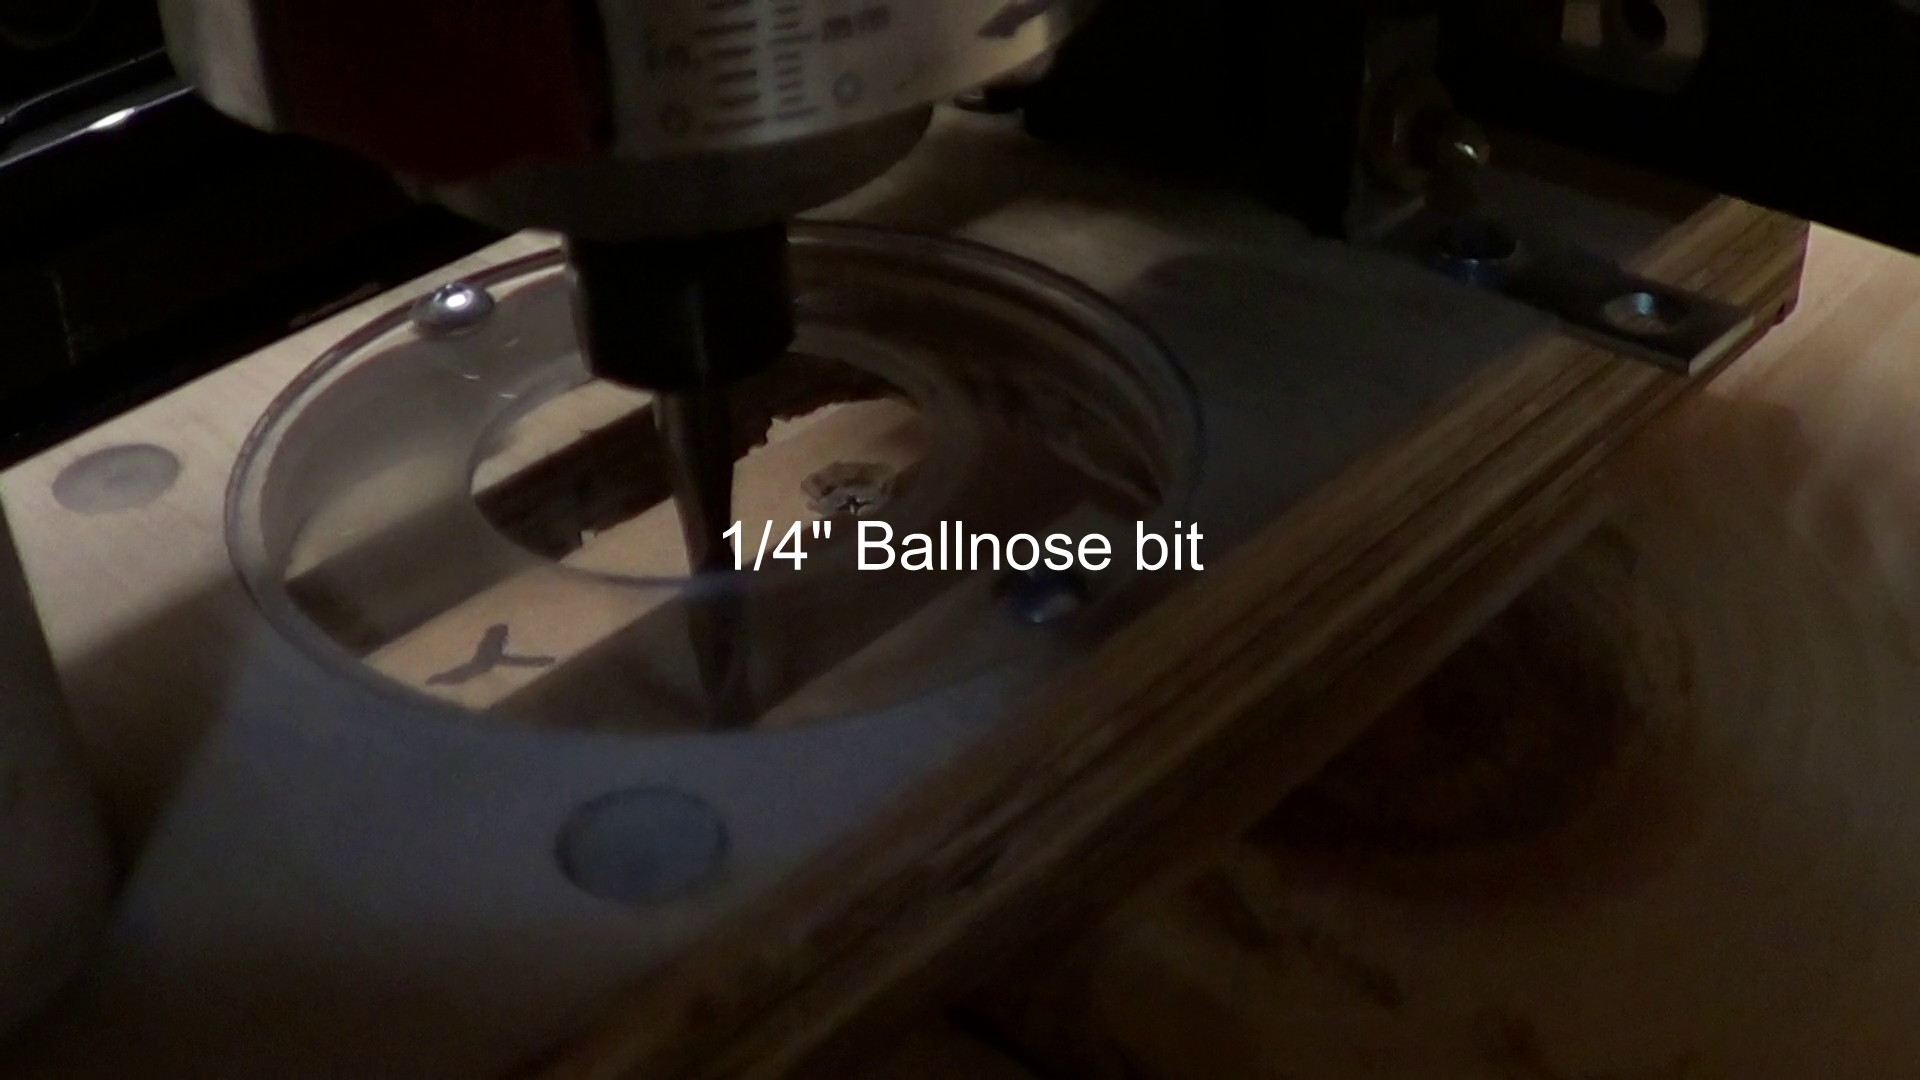
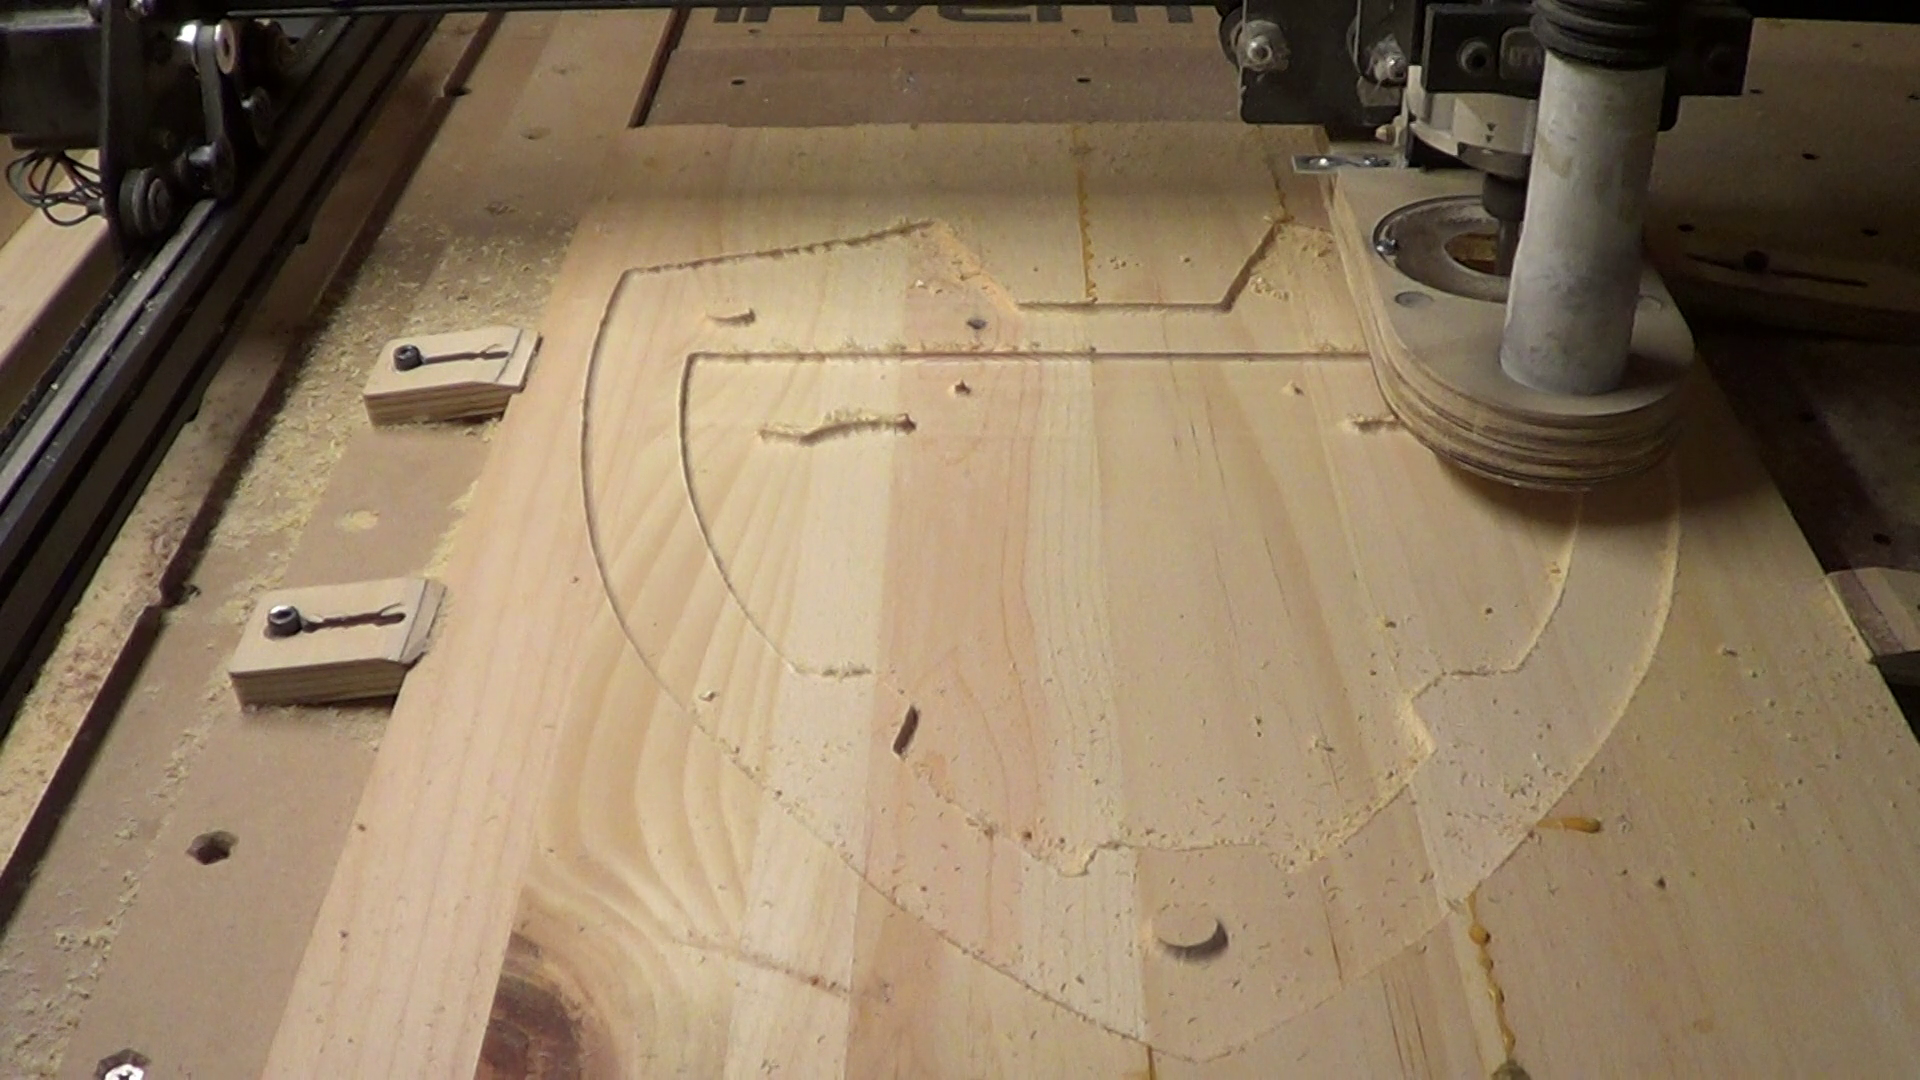
First we will do a roughing carve with 1/4" Ballnose router bit. It take 3 passes to finish.
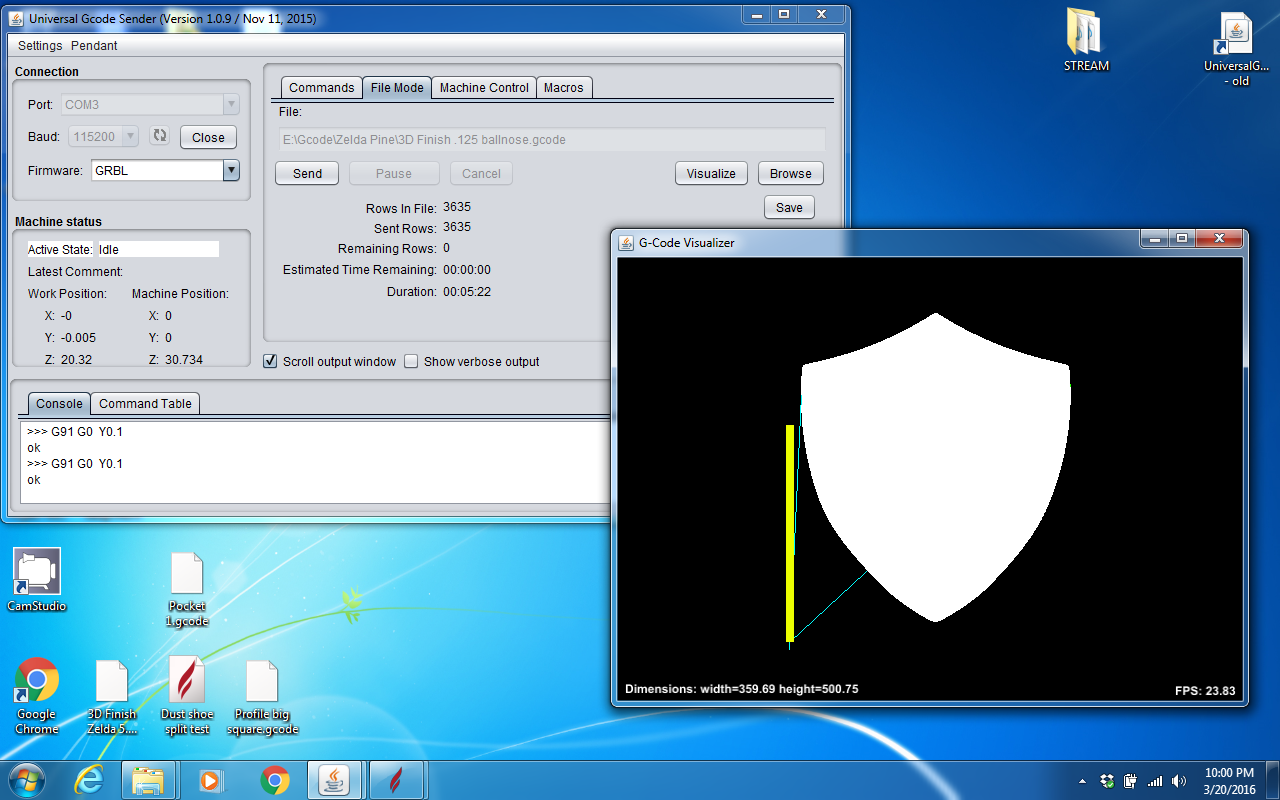
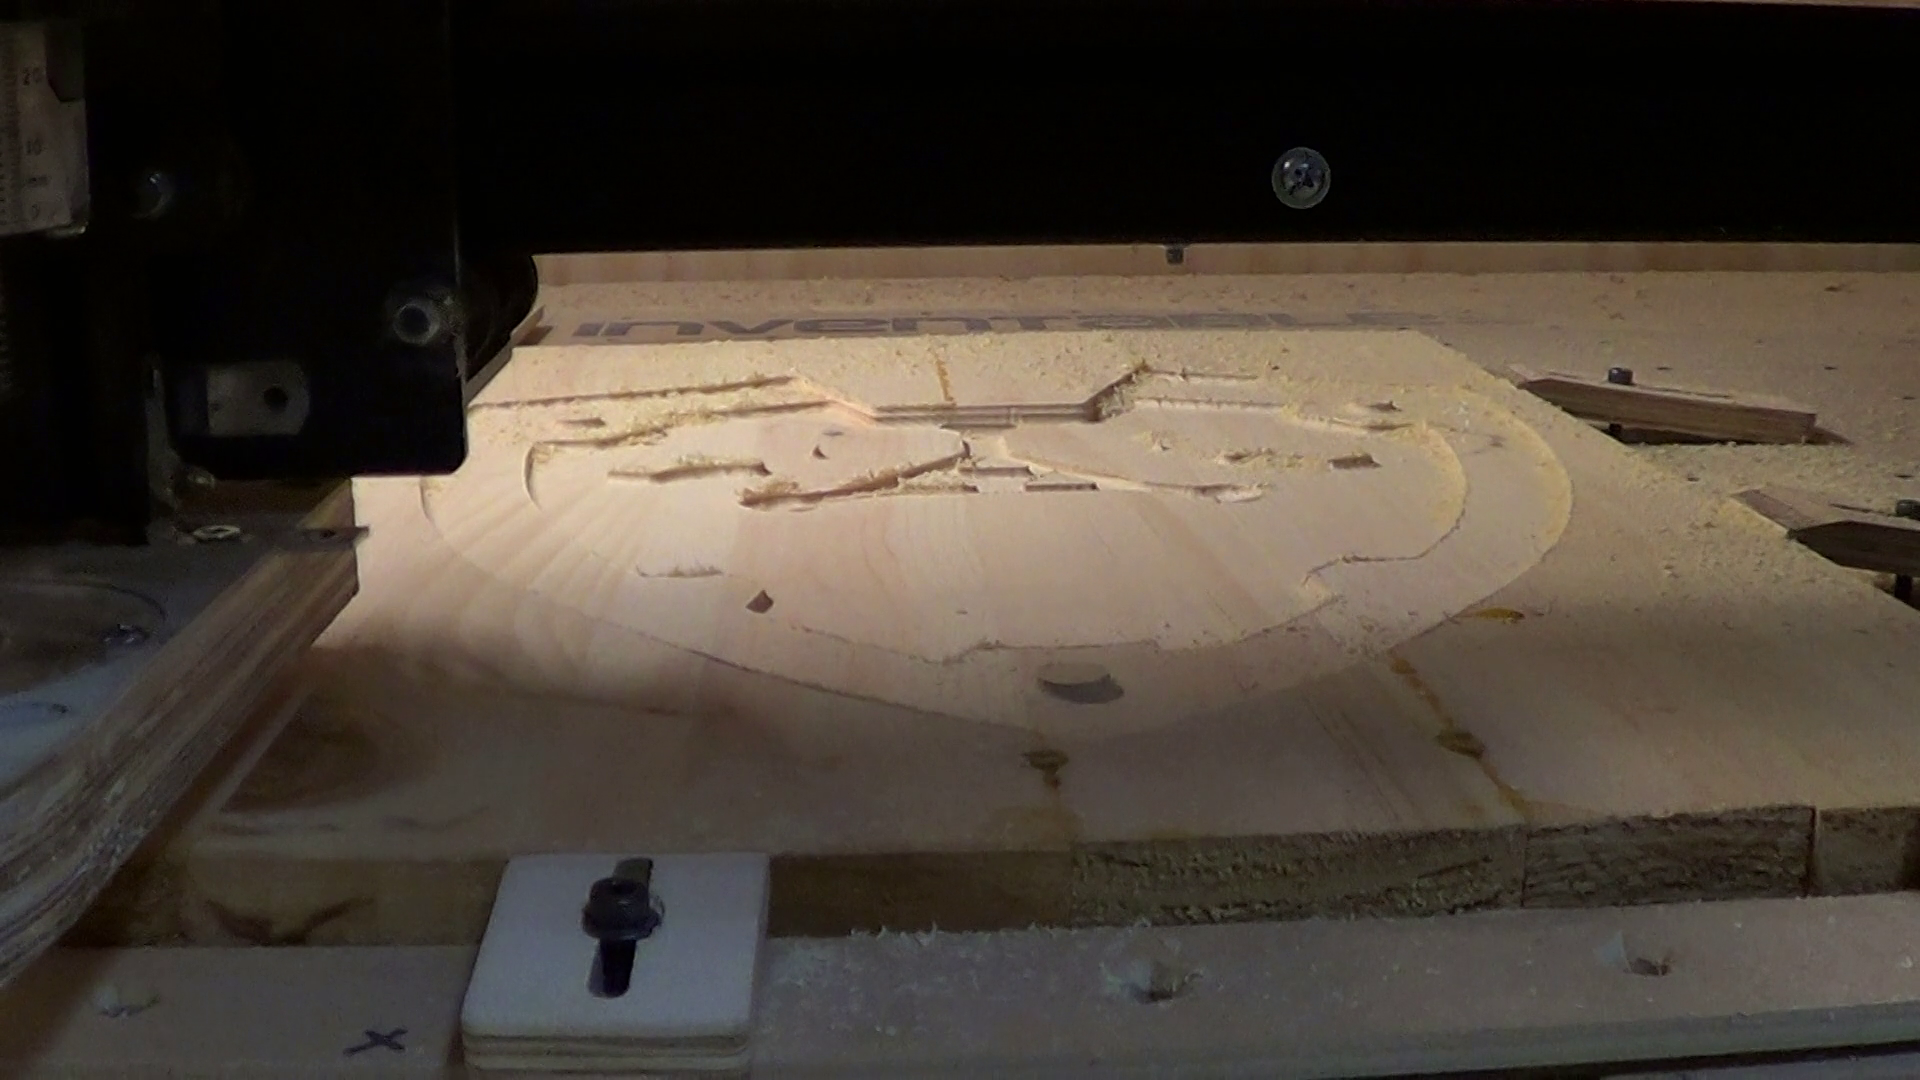
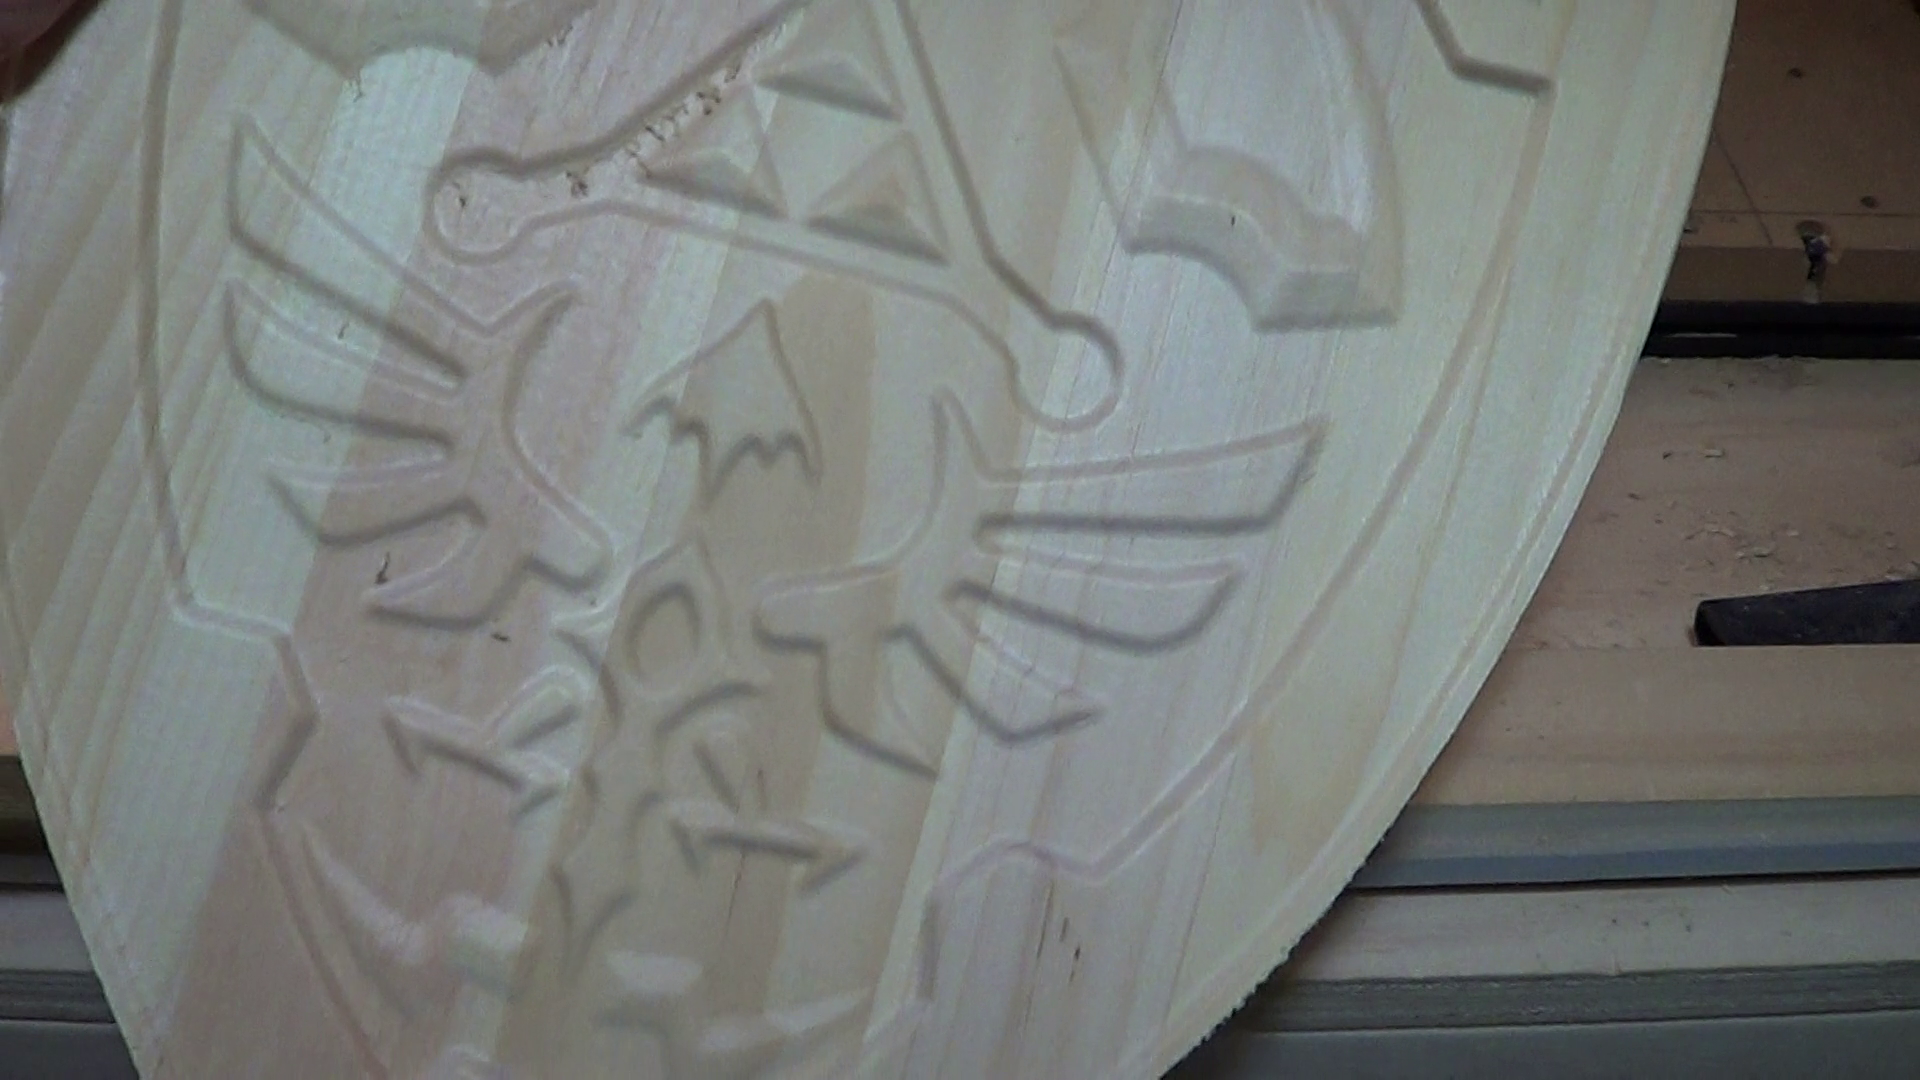
Finishing Carve
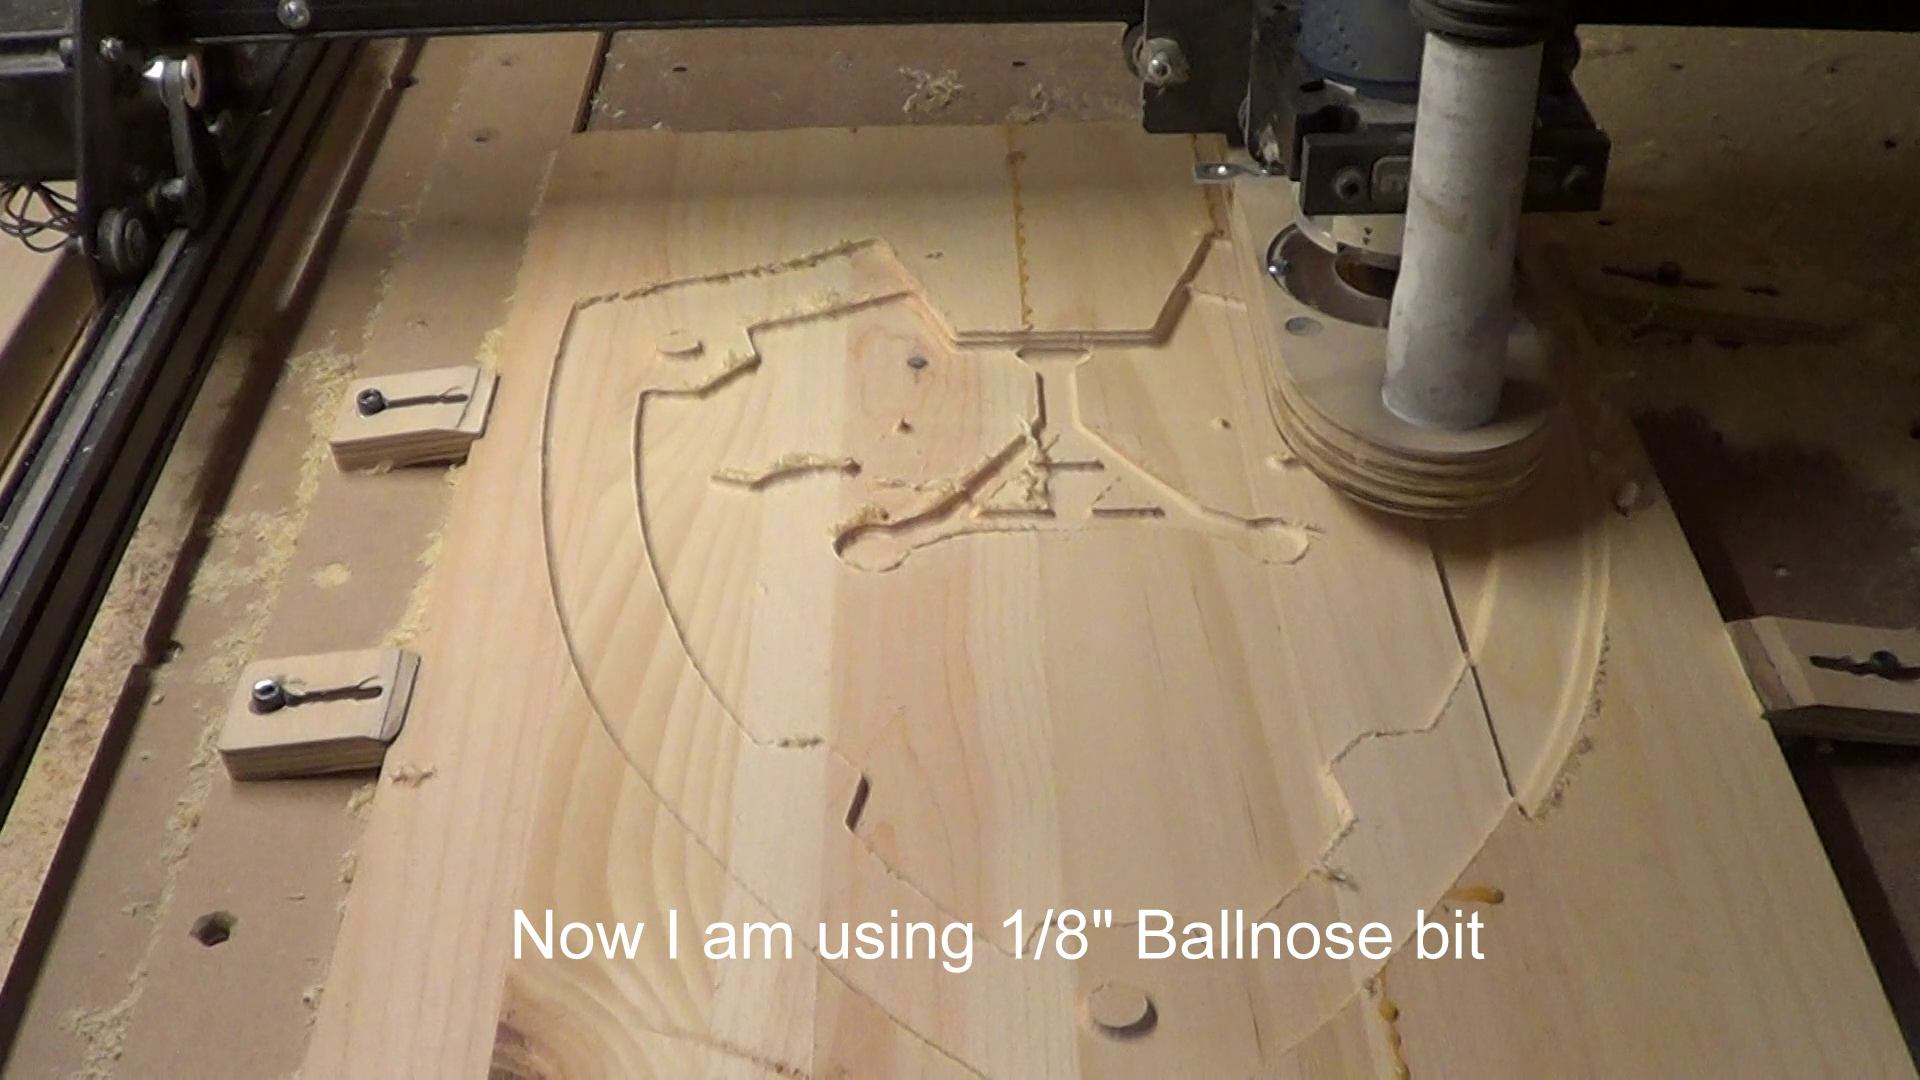
Now we are going to do a finishing pass with 1/8" ballnose router bit.I done this carving at a 90 degree cut using Raster mode, so I could cut with the grain of the wood.
It will give a better finish to go with the grain, but I have learn that some cuts with the cnc router are better to do the offset mode.
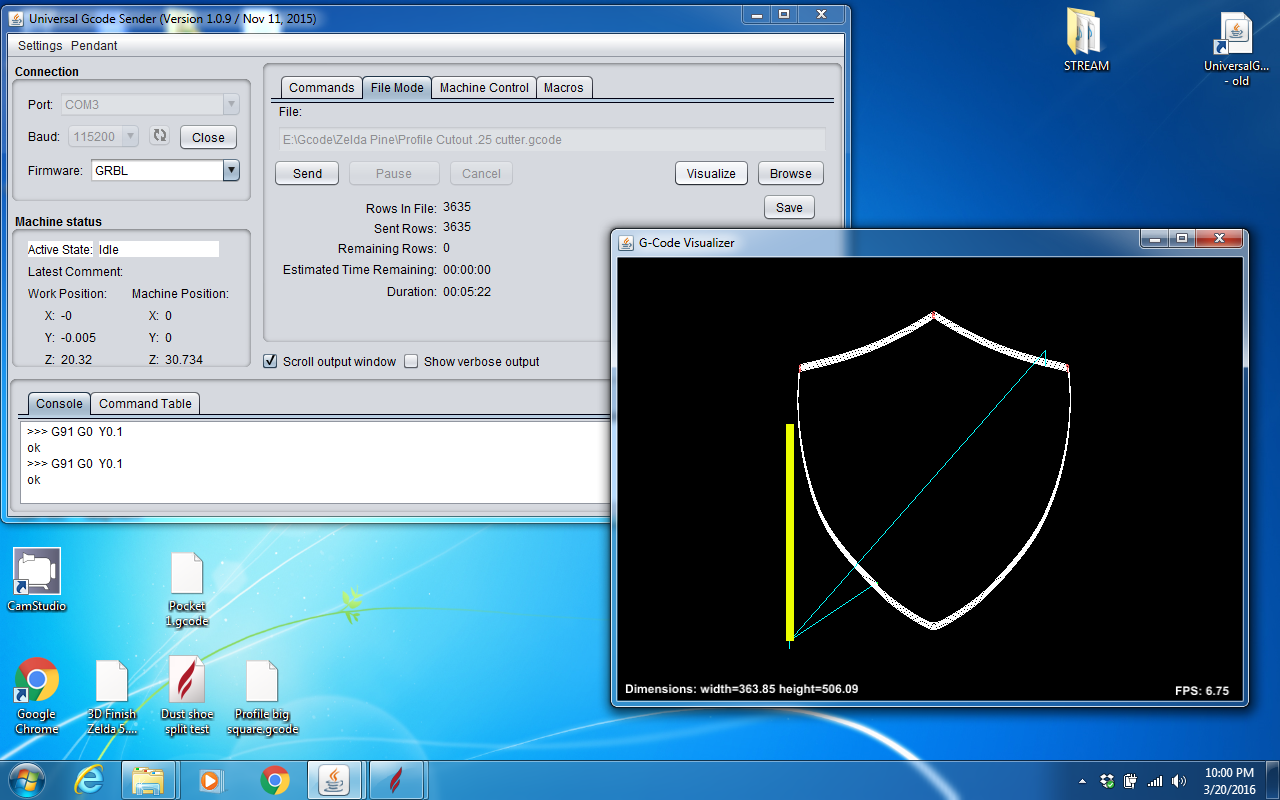
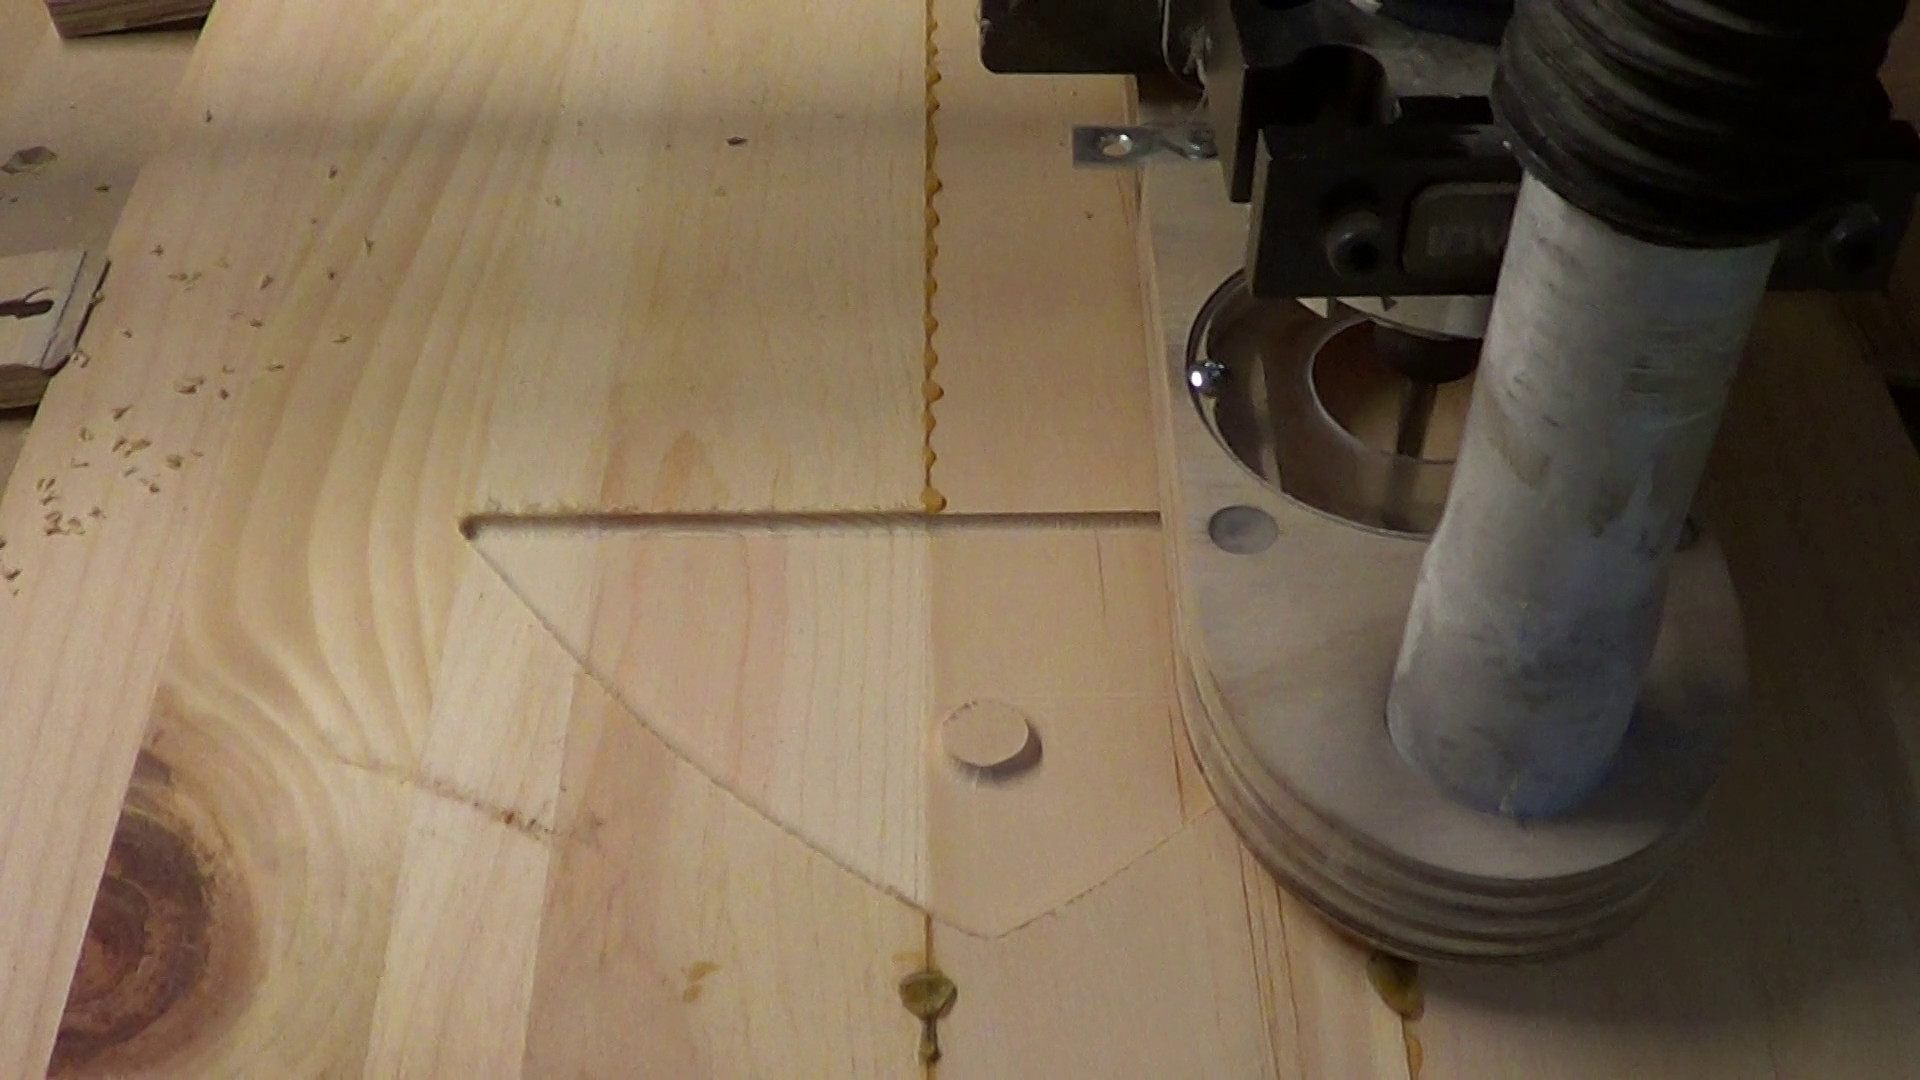
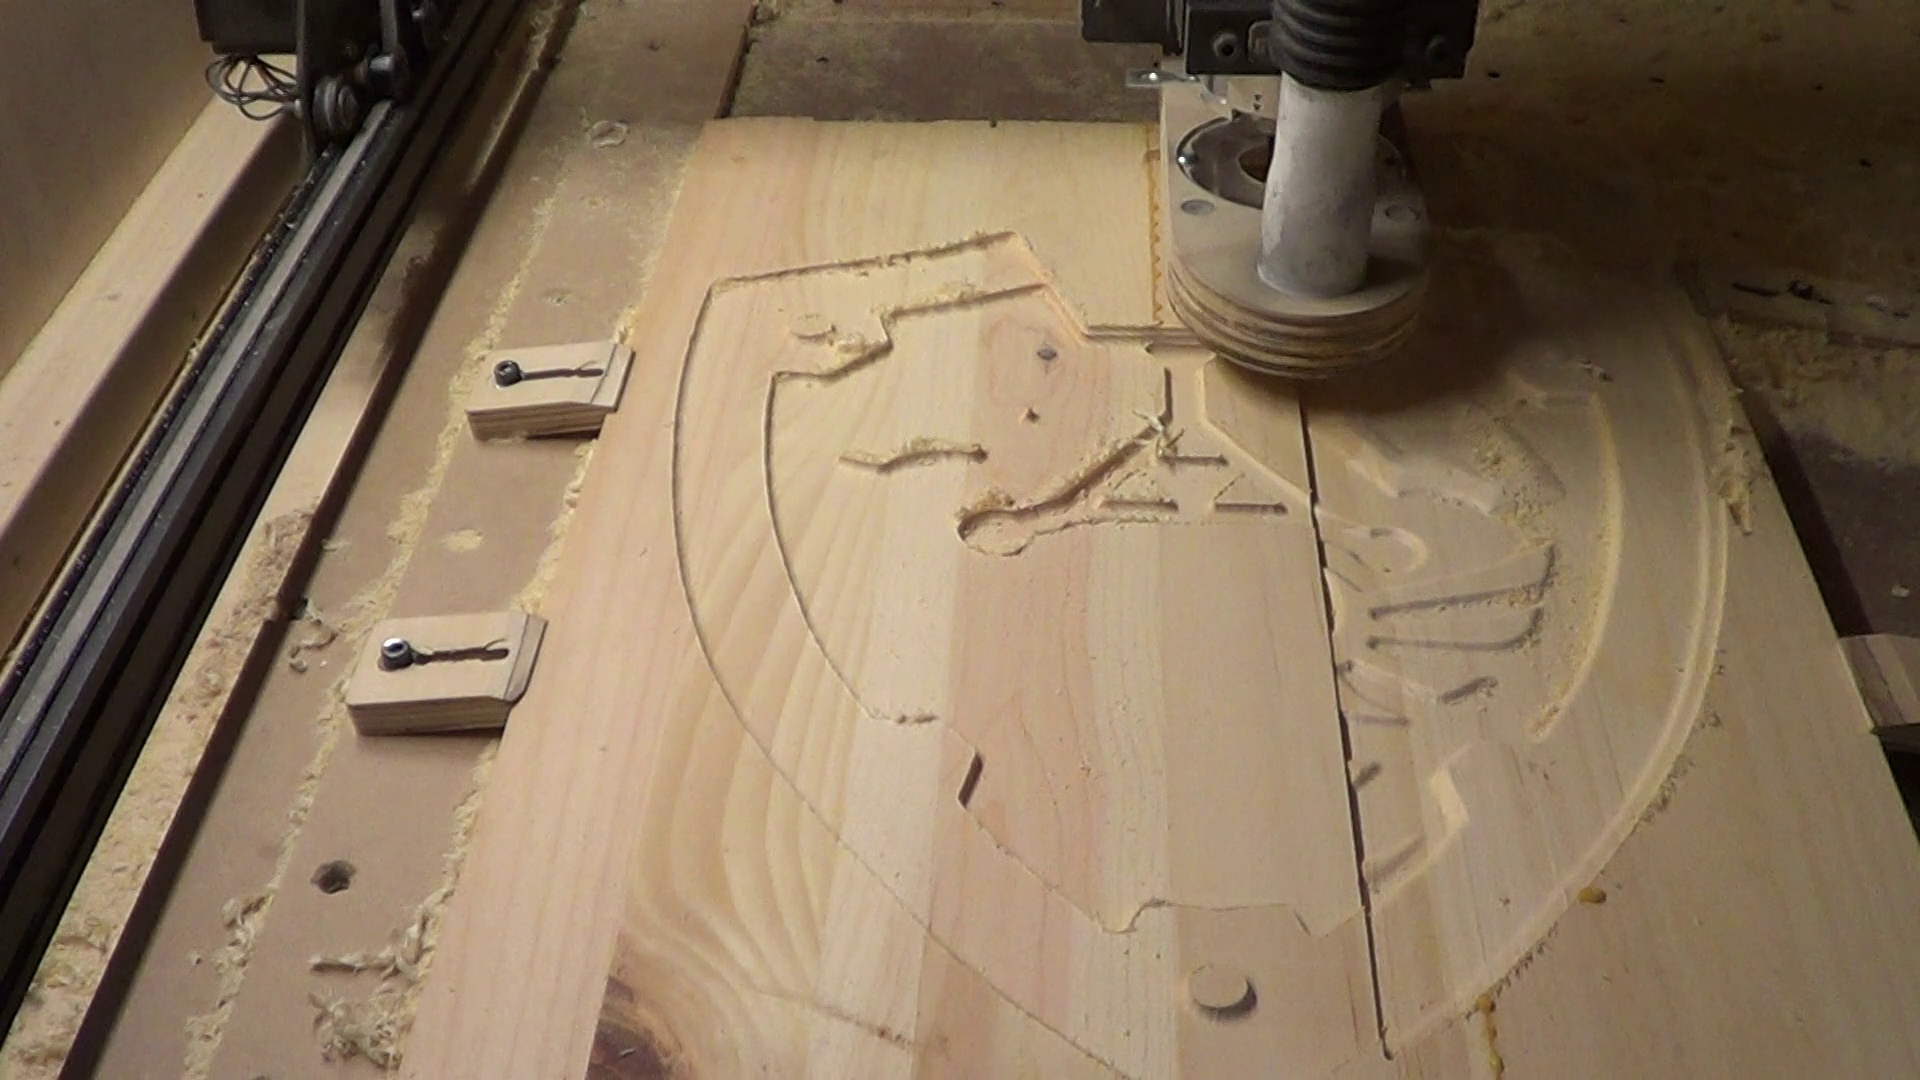
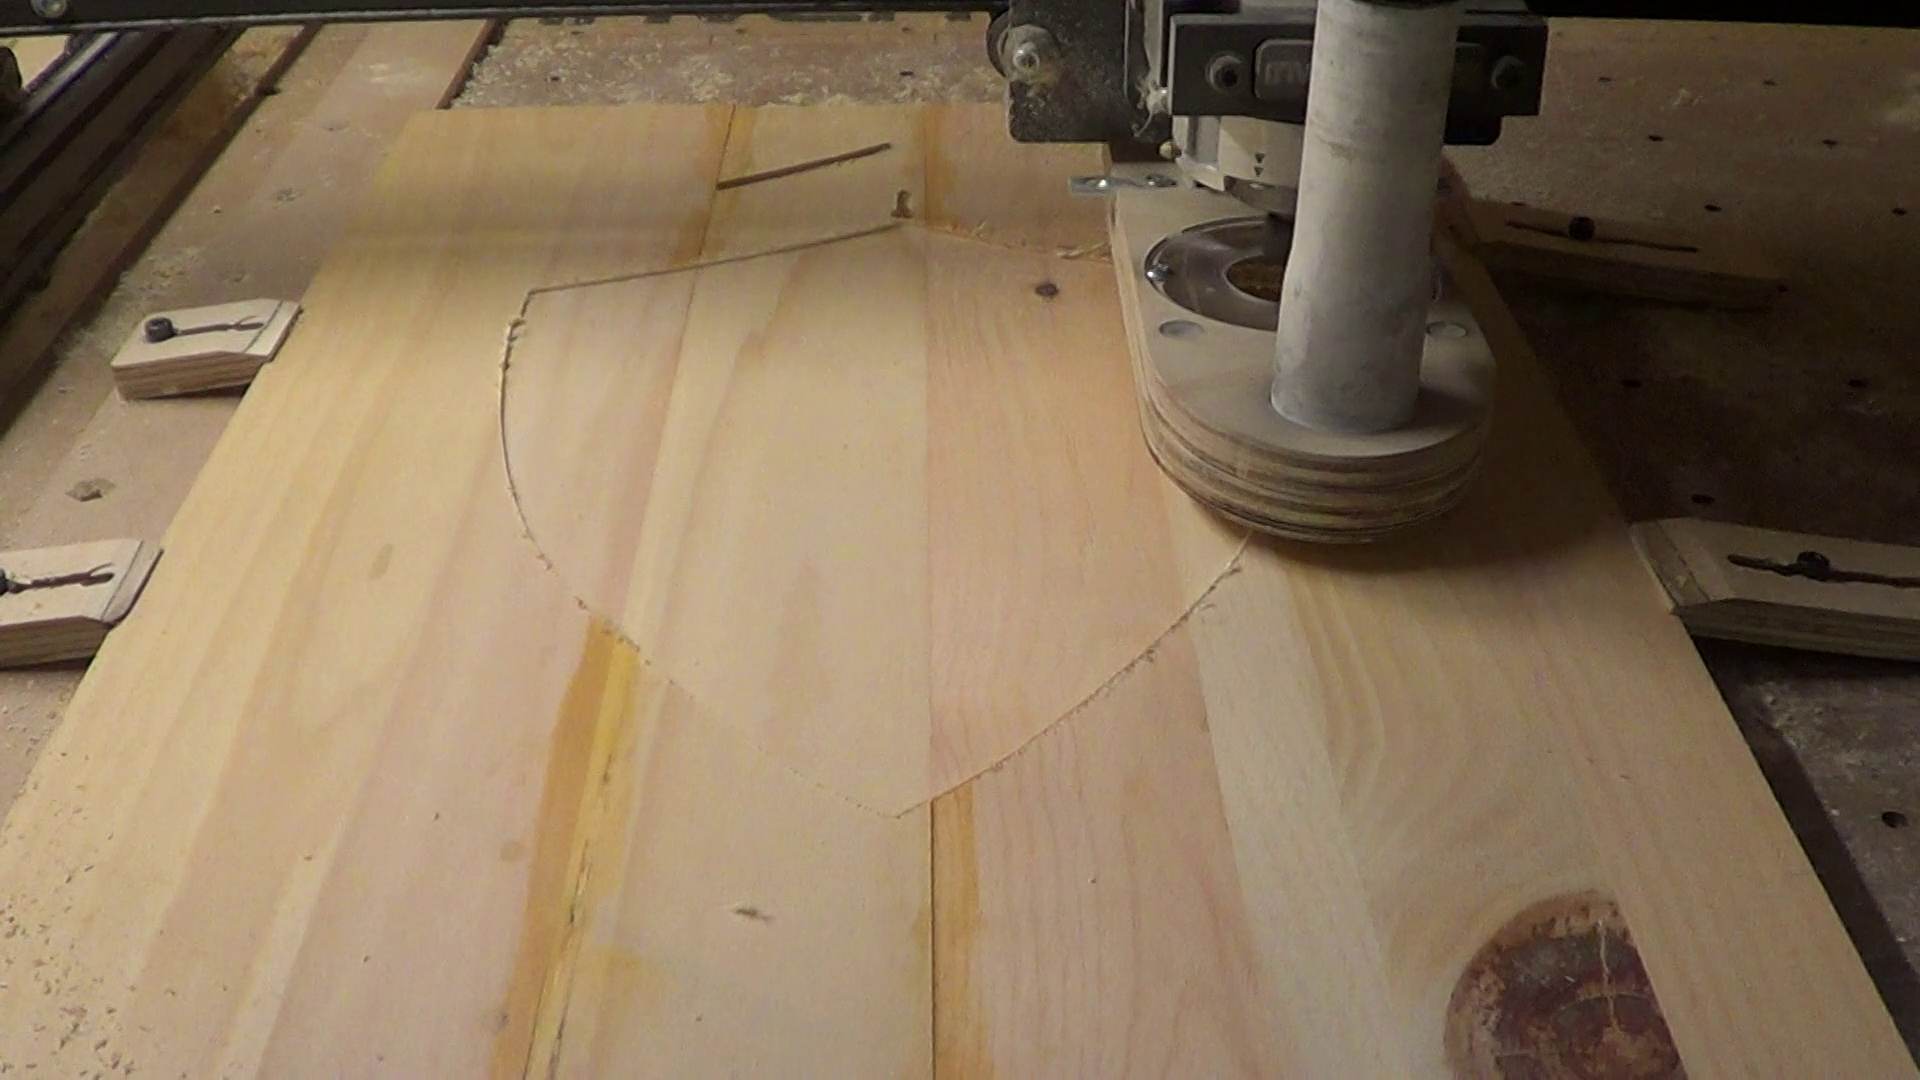
Cutout
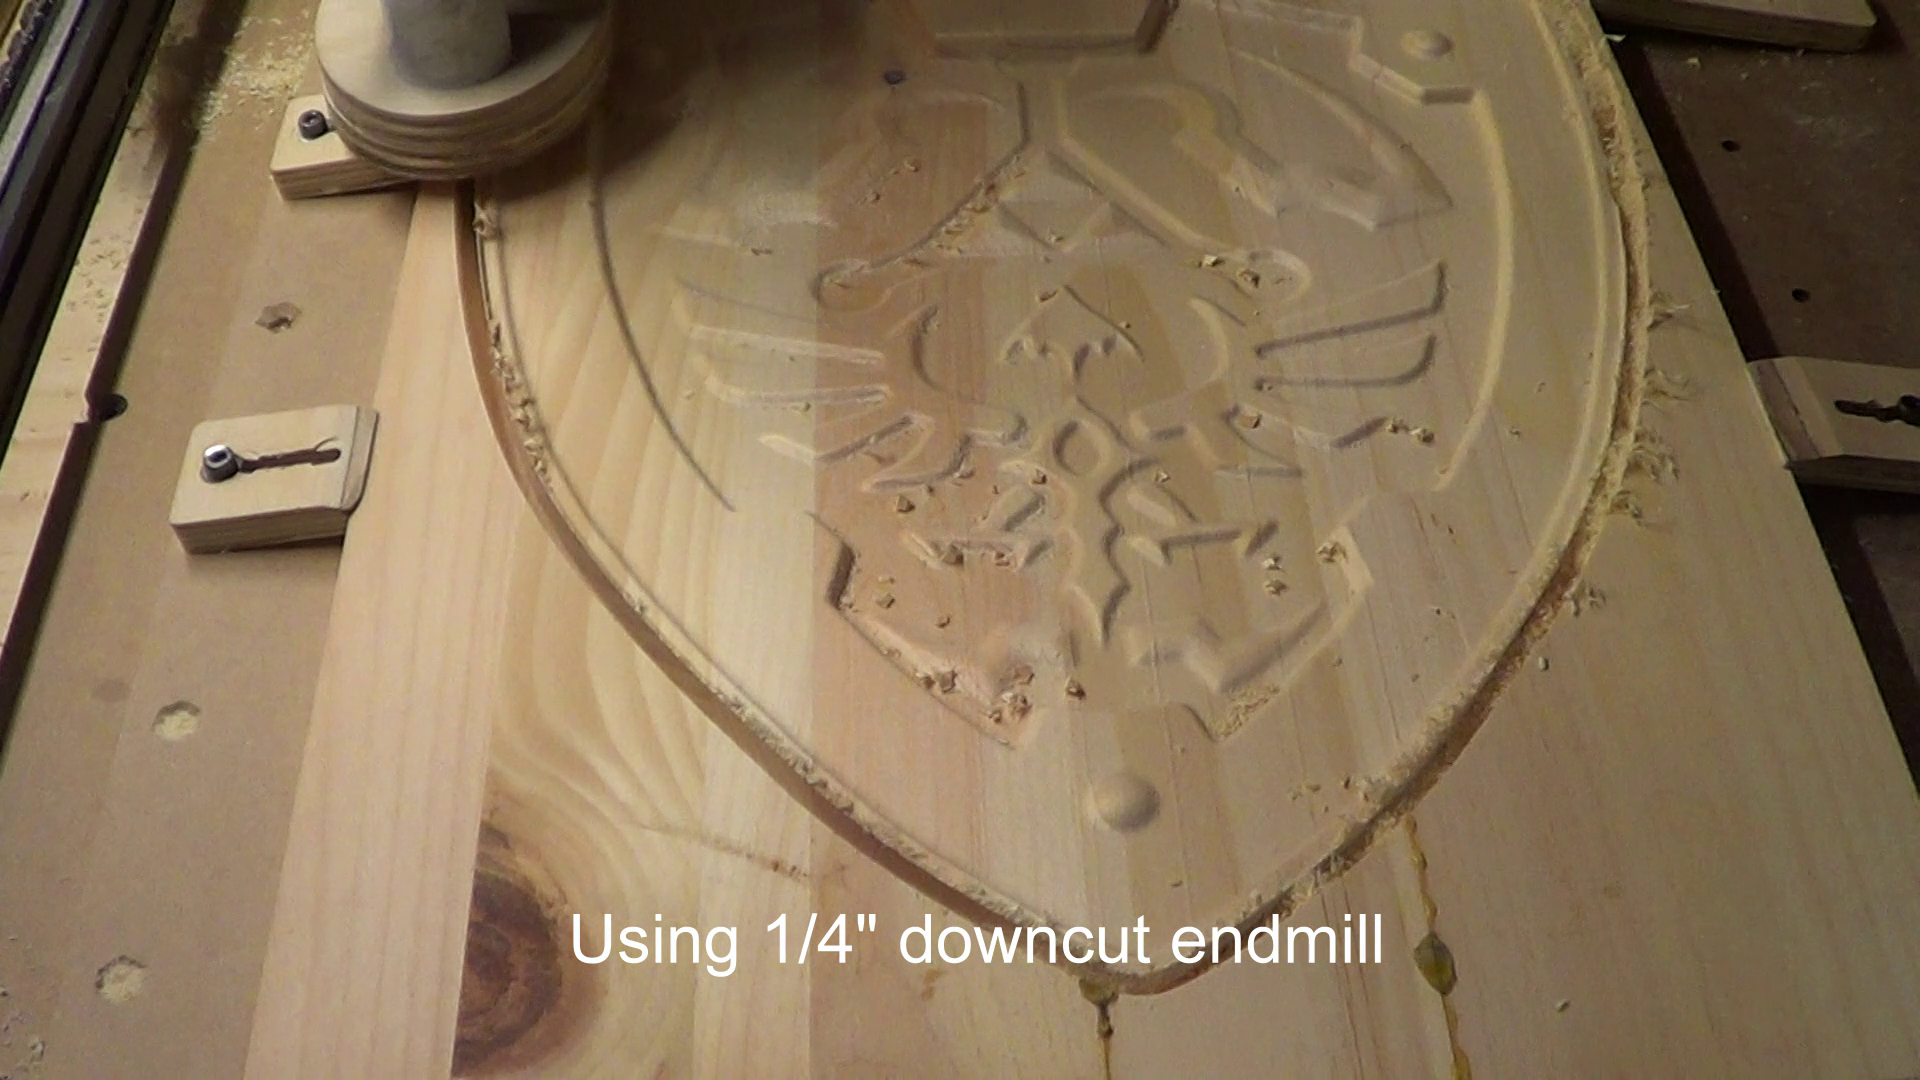
I am using a 1/4" downcut router bit for cutting the part out. I didn't cut the shield all the way thru, I left about a 1/16".
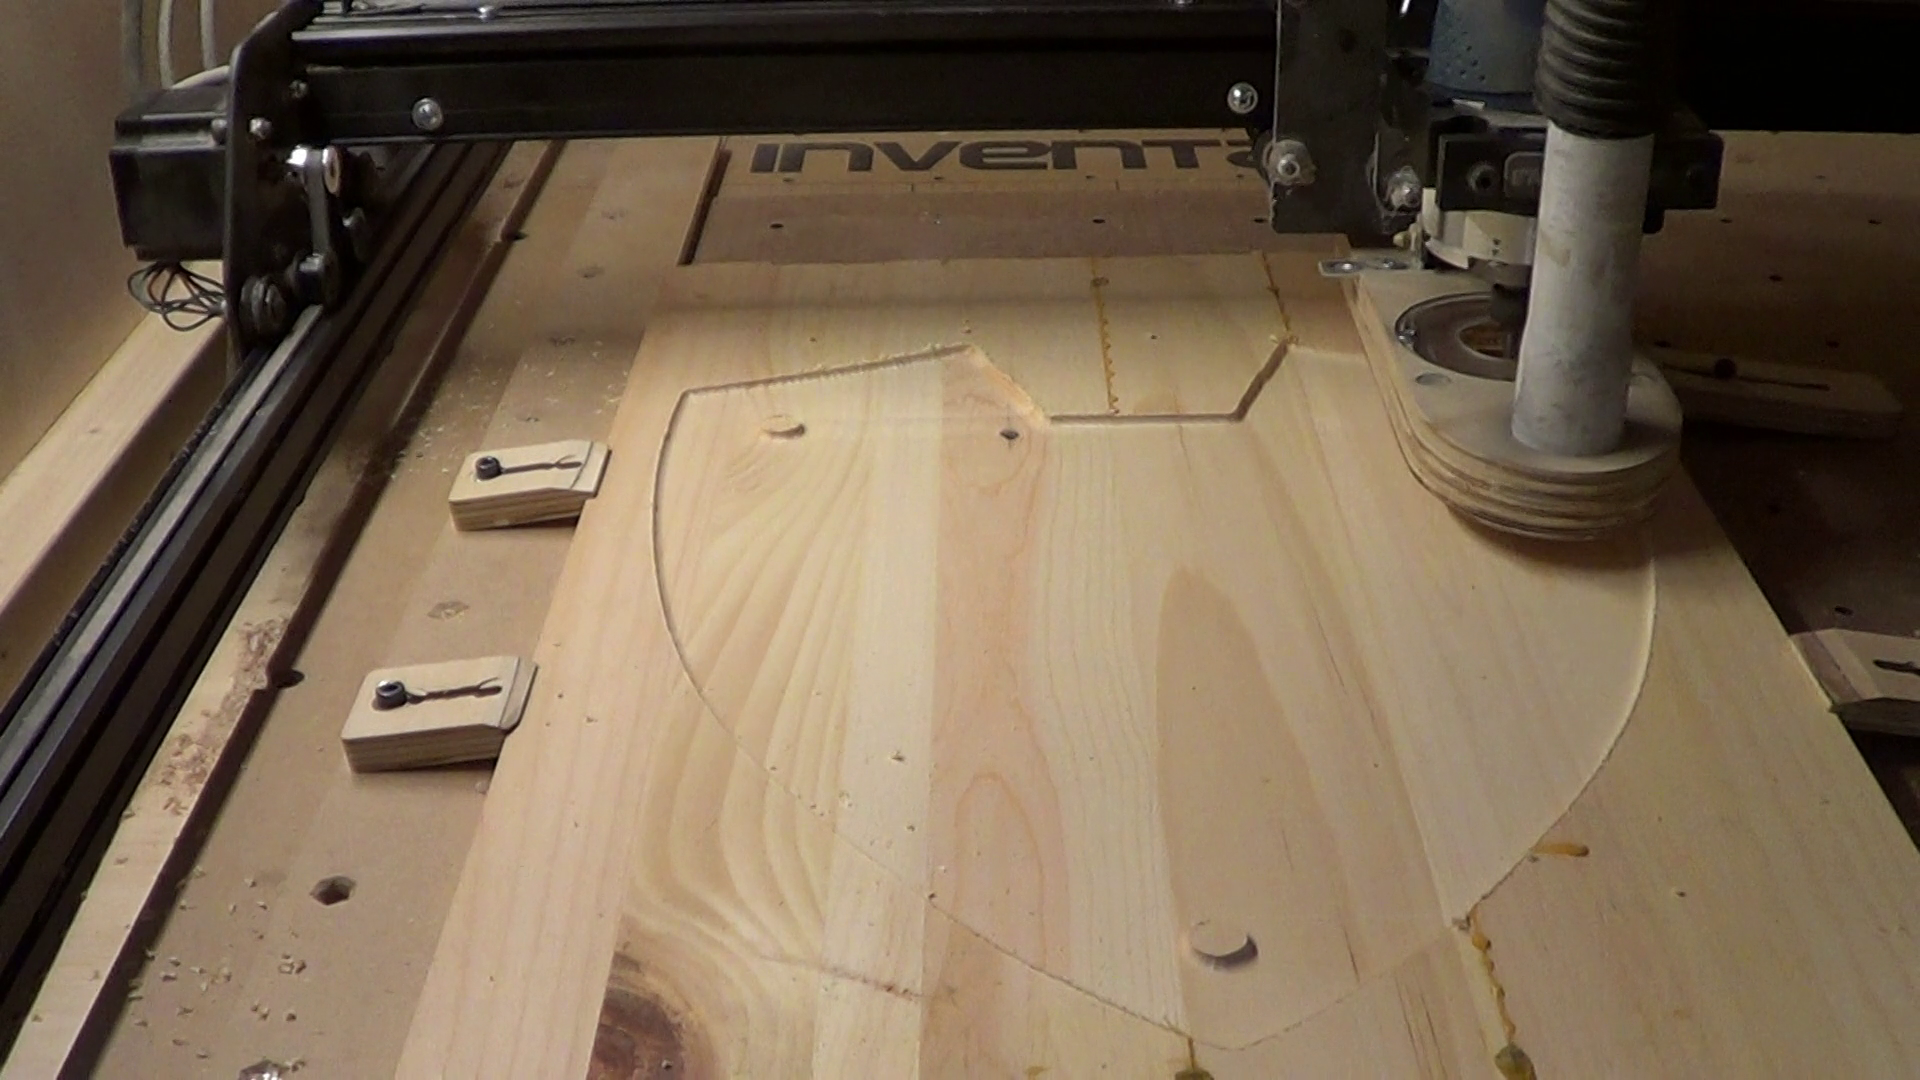
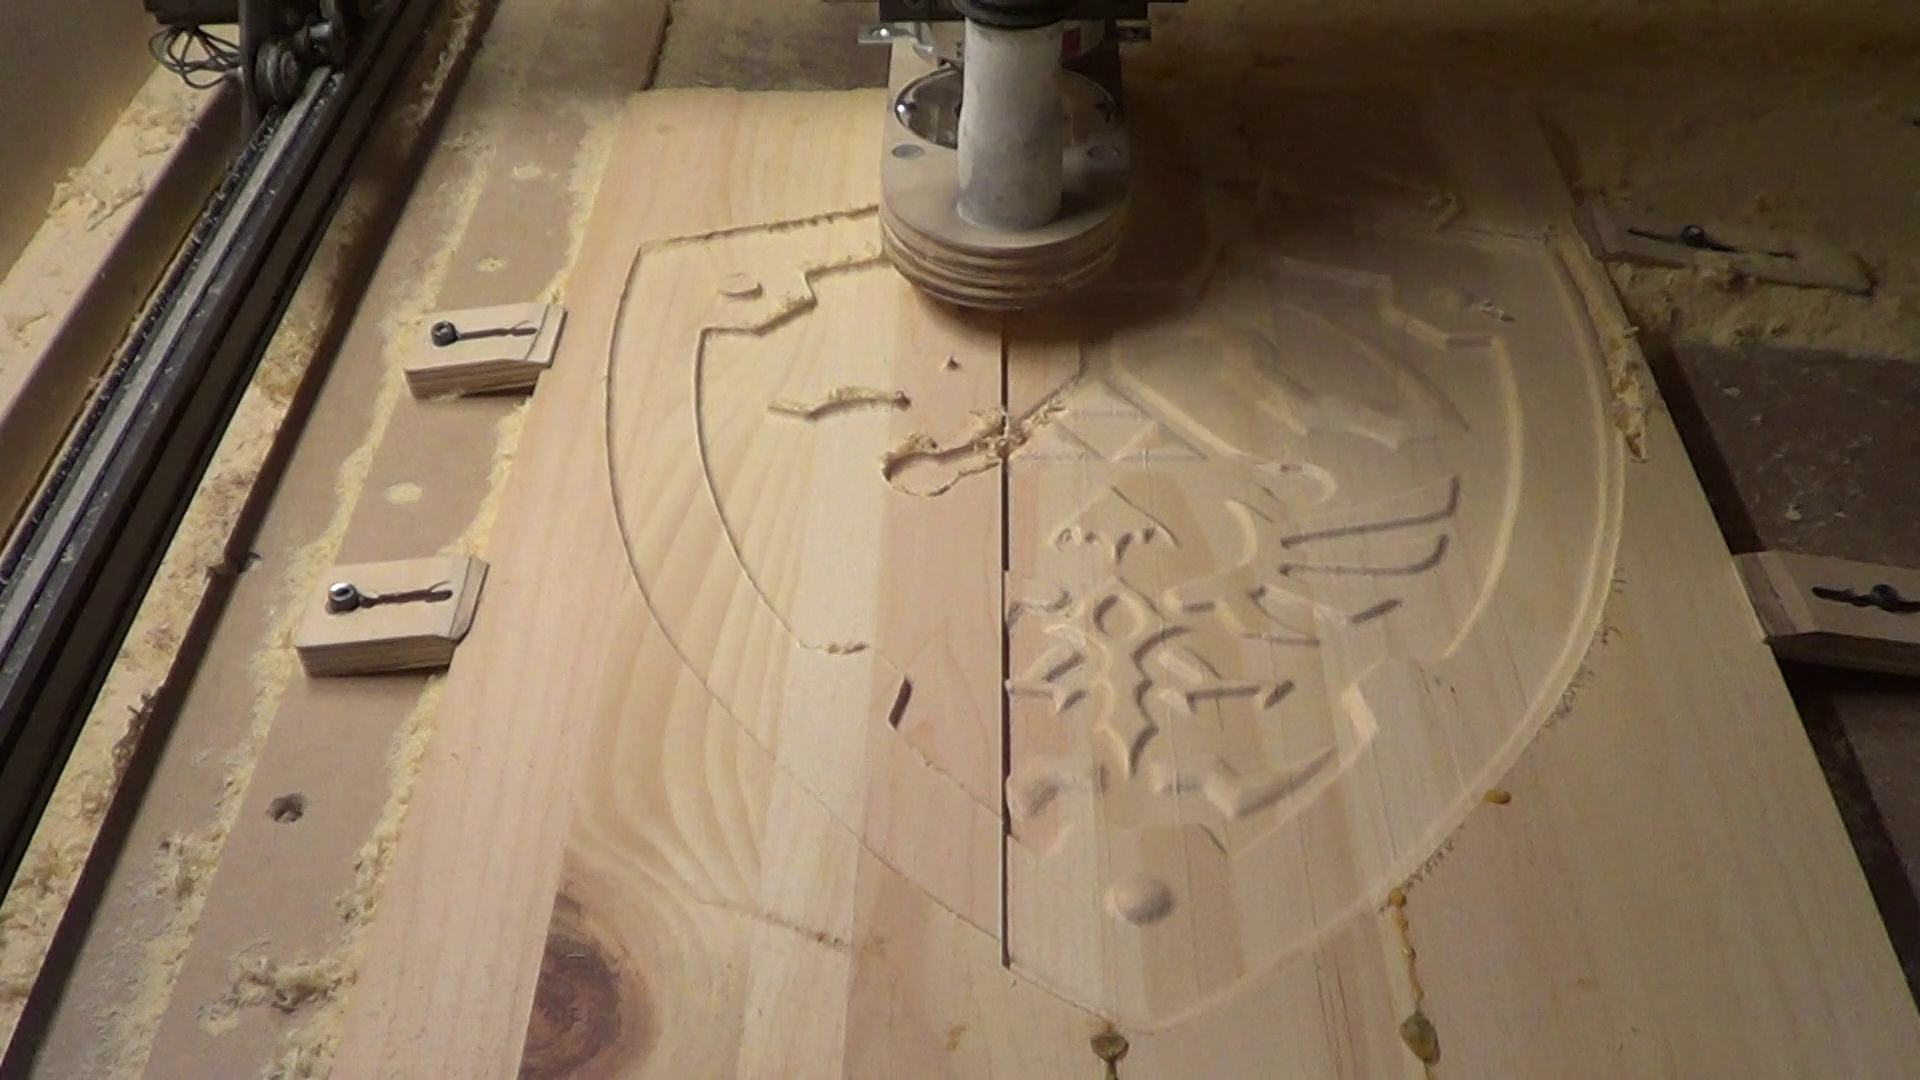
Backside
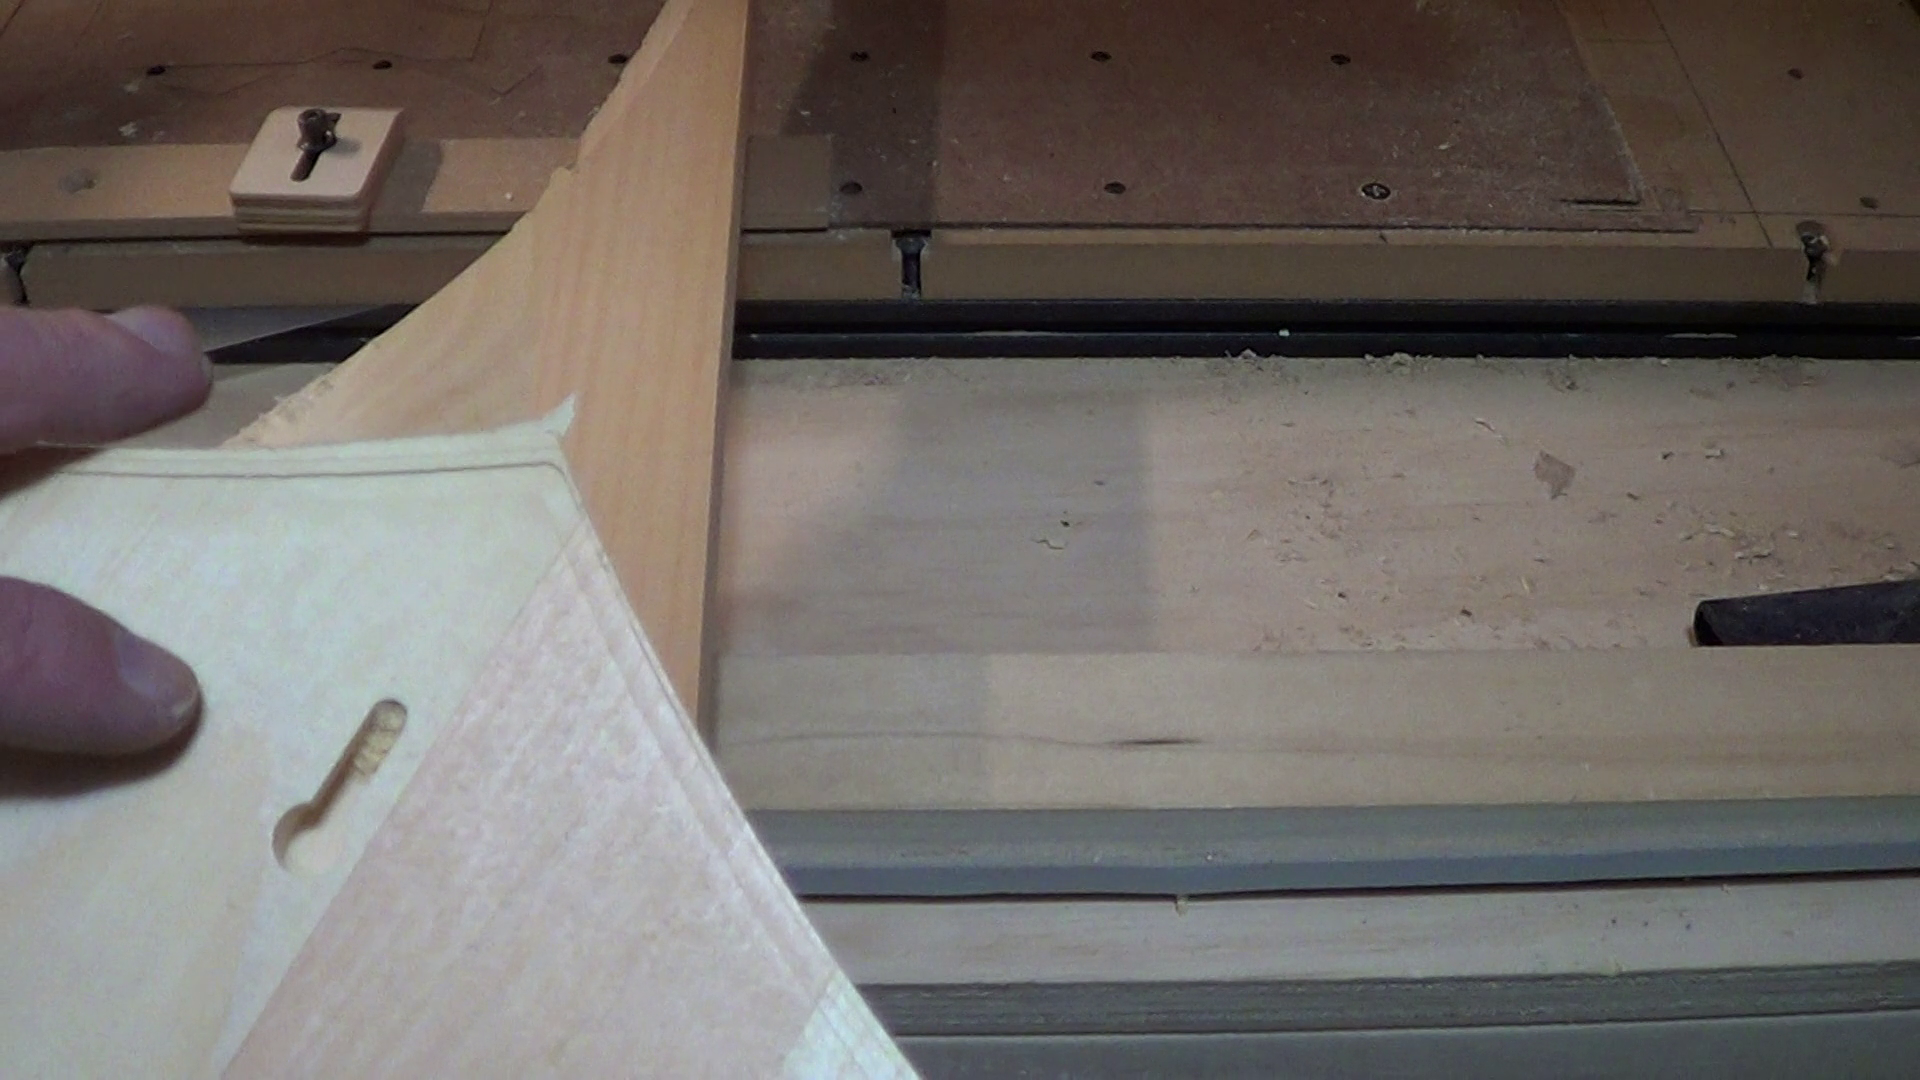
Now I flipped the panel over, cut a keyhole slot and then finish cutting the Shield out.
Sanding
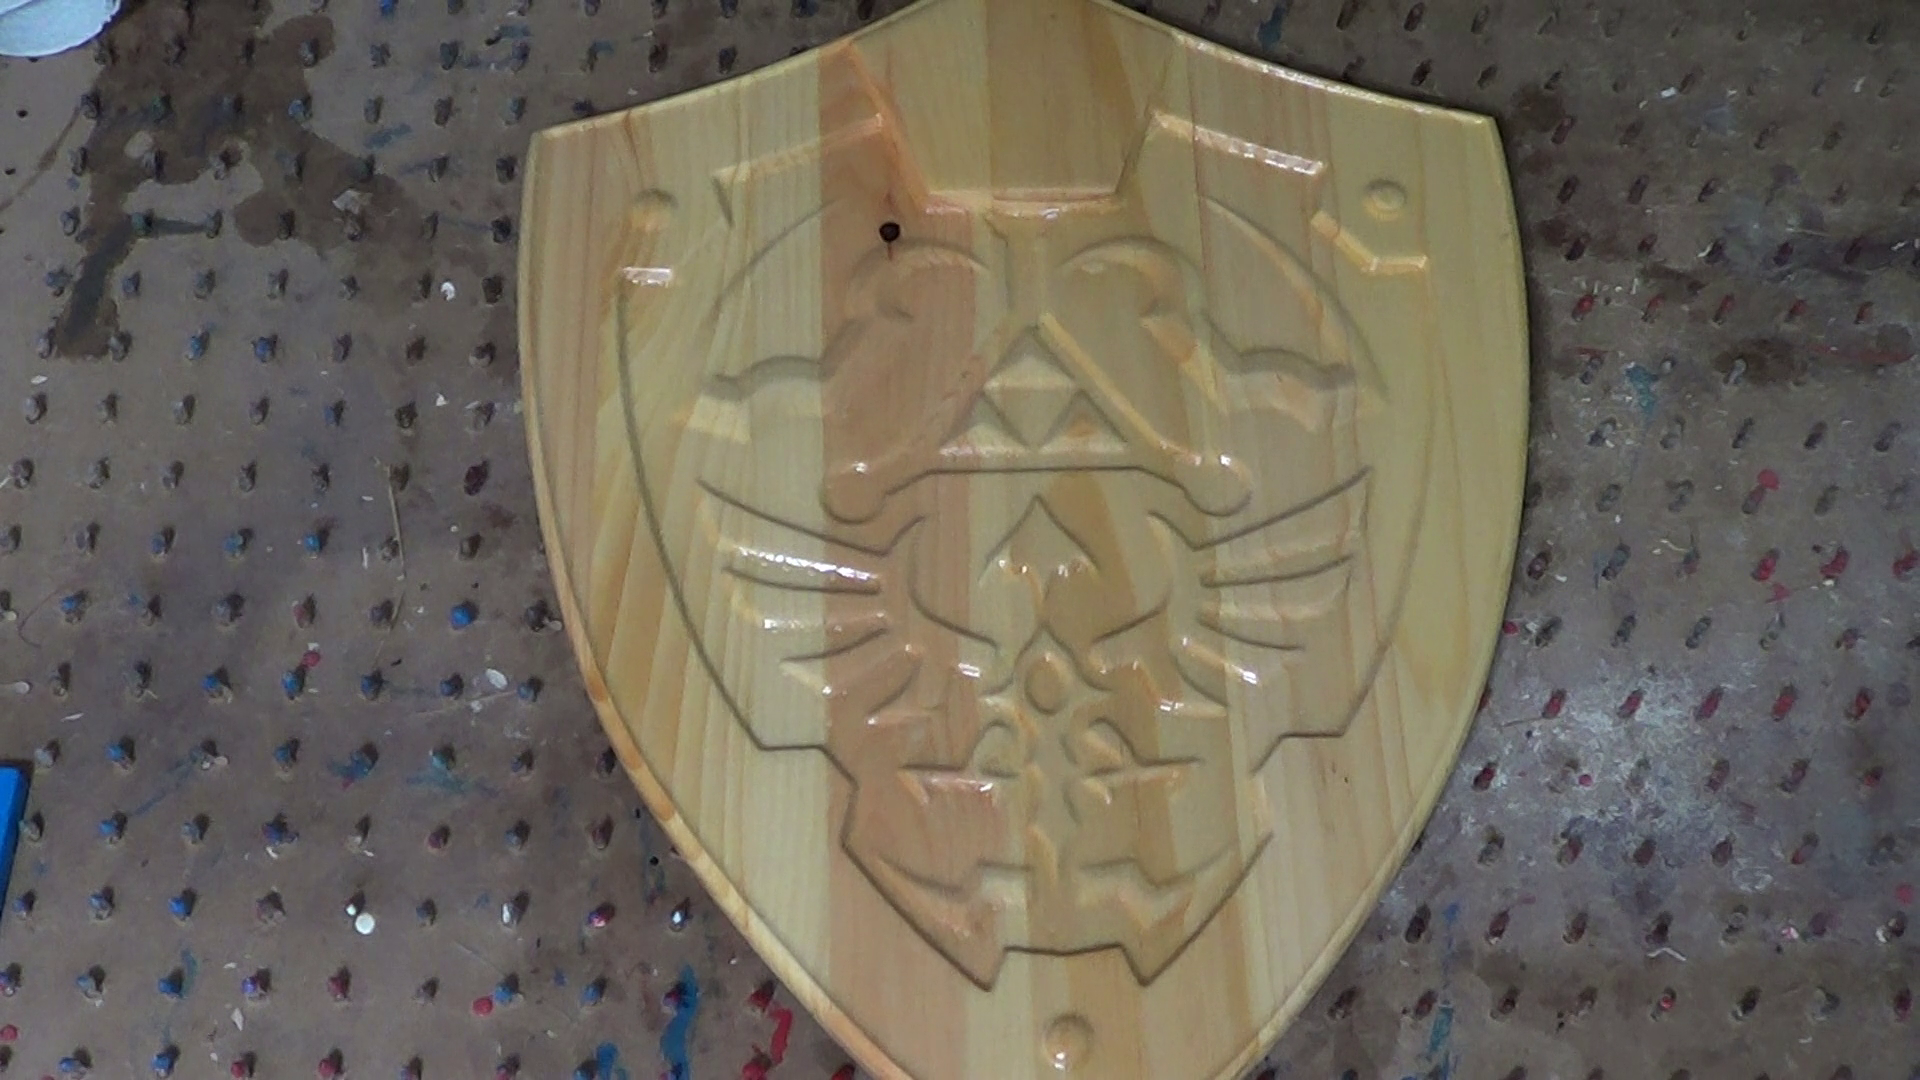
As you can see in the photo, it has some fuzzies, I hand sanded the entire piece with 220 grit sandpaper.
In some areas I used 120 grit and then went back over 220 grit.
Apply Wood Conditioner

Apply Minwax Wood Conditioner and let it set for several minutes. Per can instructions.
Apply Stain
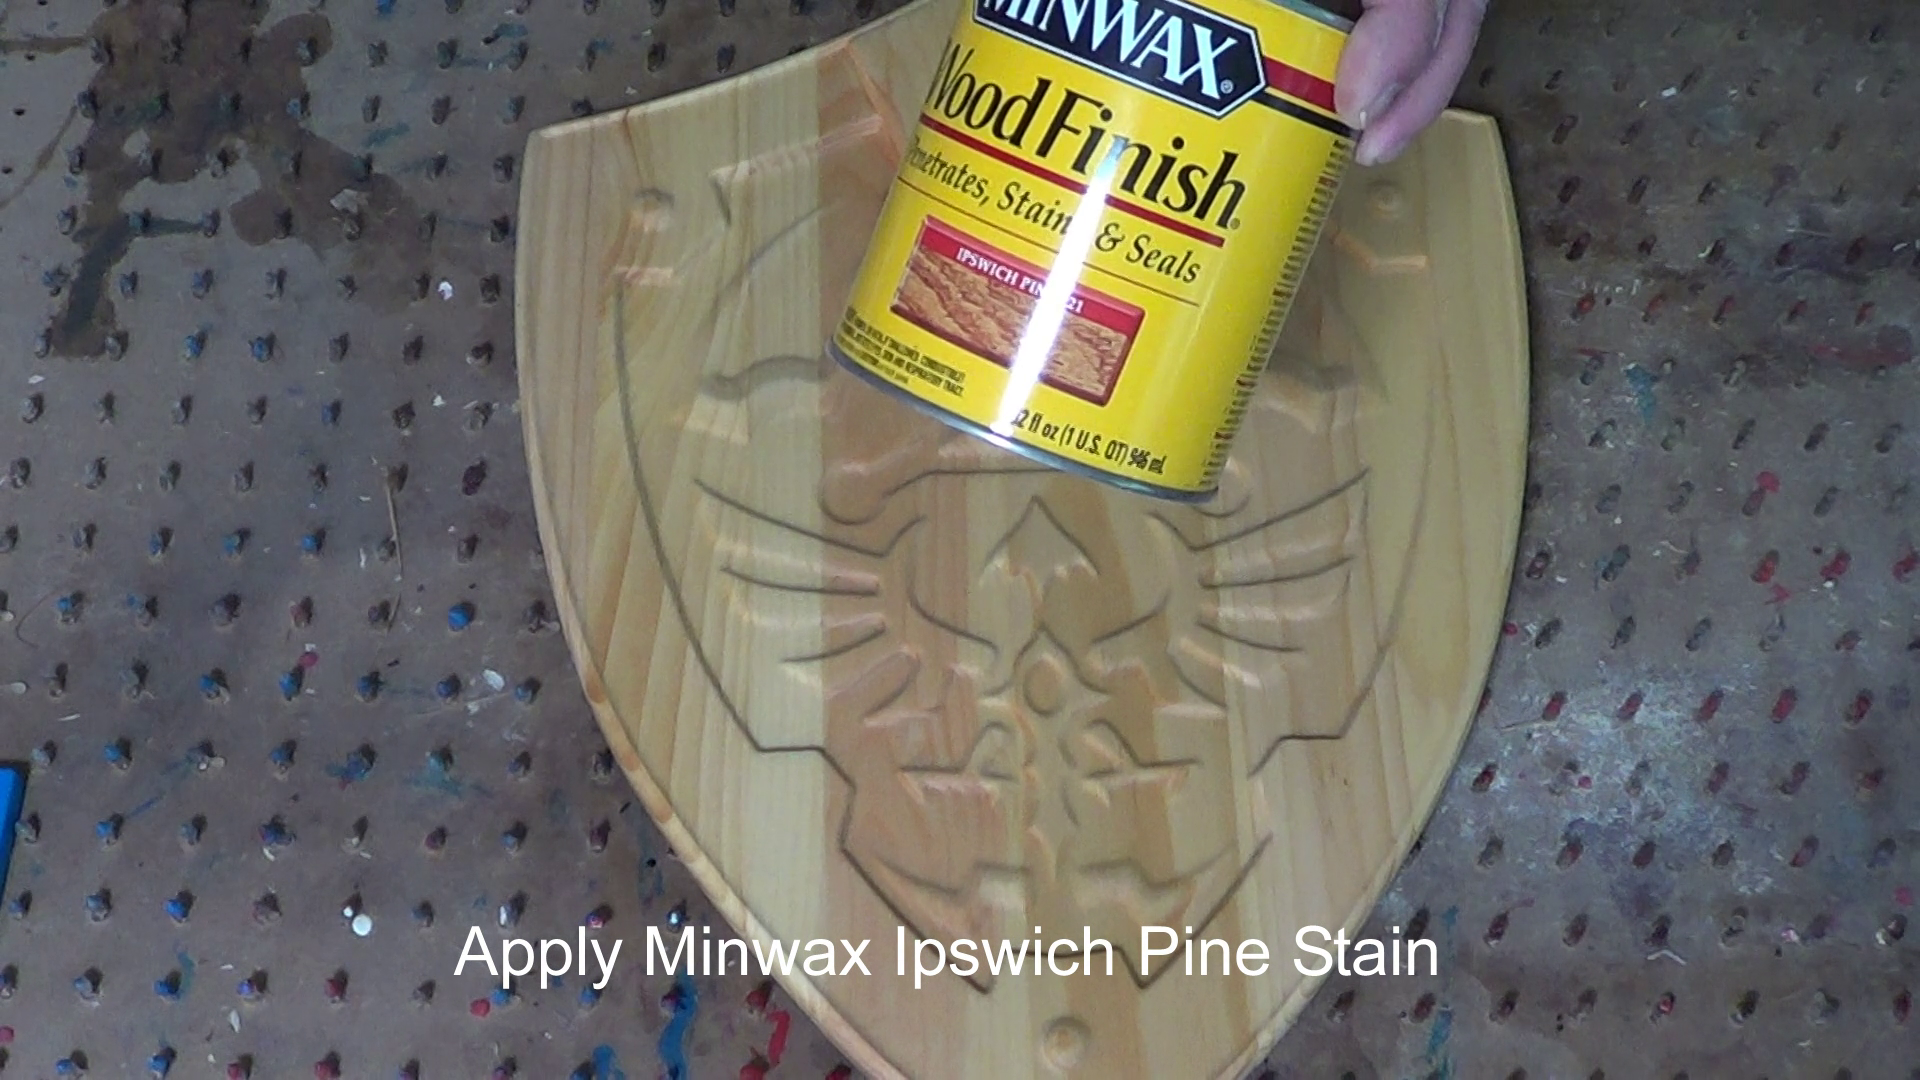


After letting Wood Conditioner set for several minutes (per can instructions). We will apply a good coat of Miniwax Ipswich Pine Stain. Let this set for a few minutes, the longer it sets the darker it gets. Then wipe off the access and let dry overnight.
Note you could use darker stain if you wanted to.
Enjoy
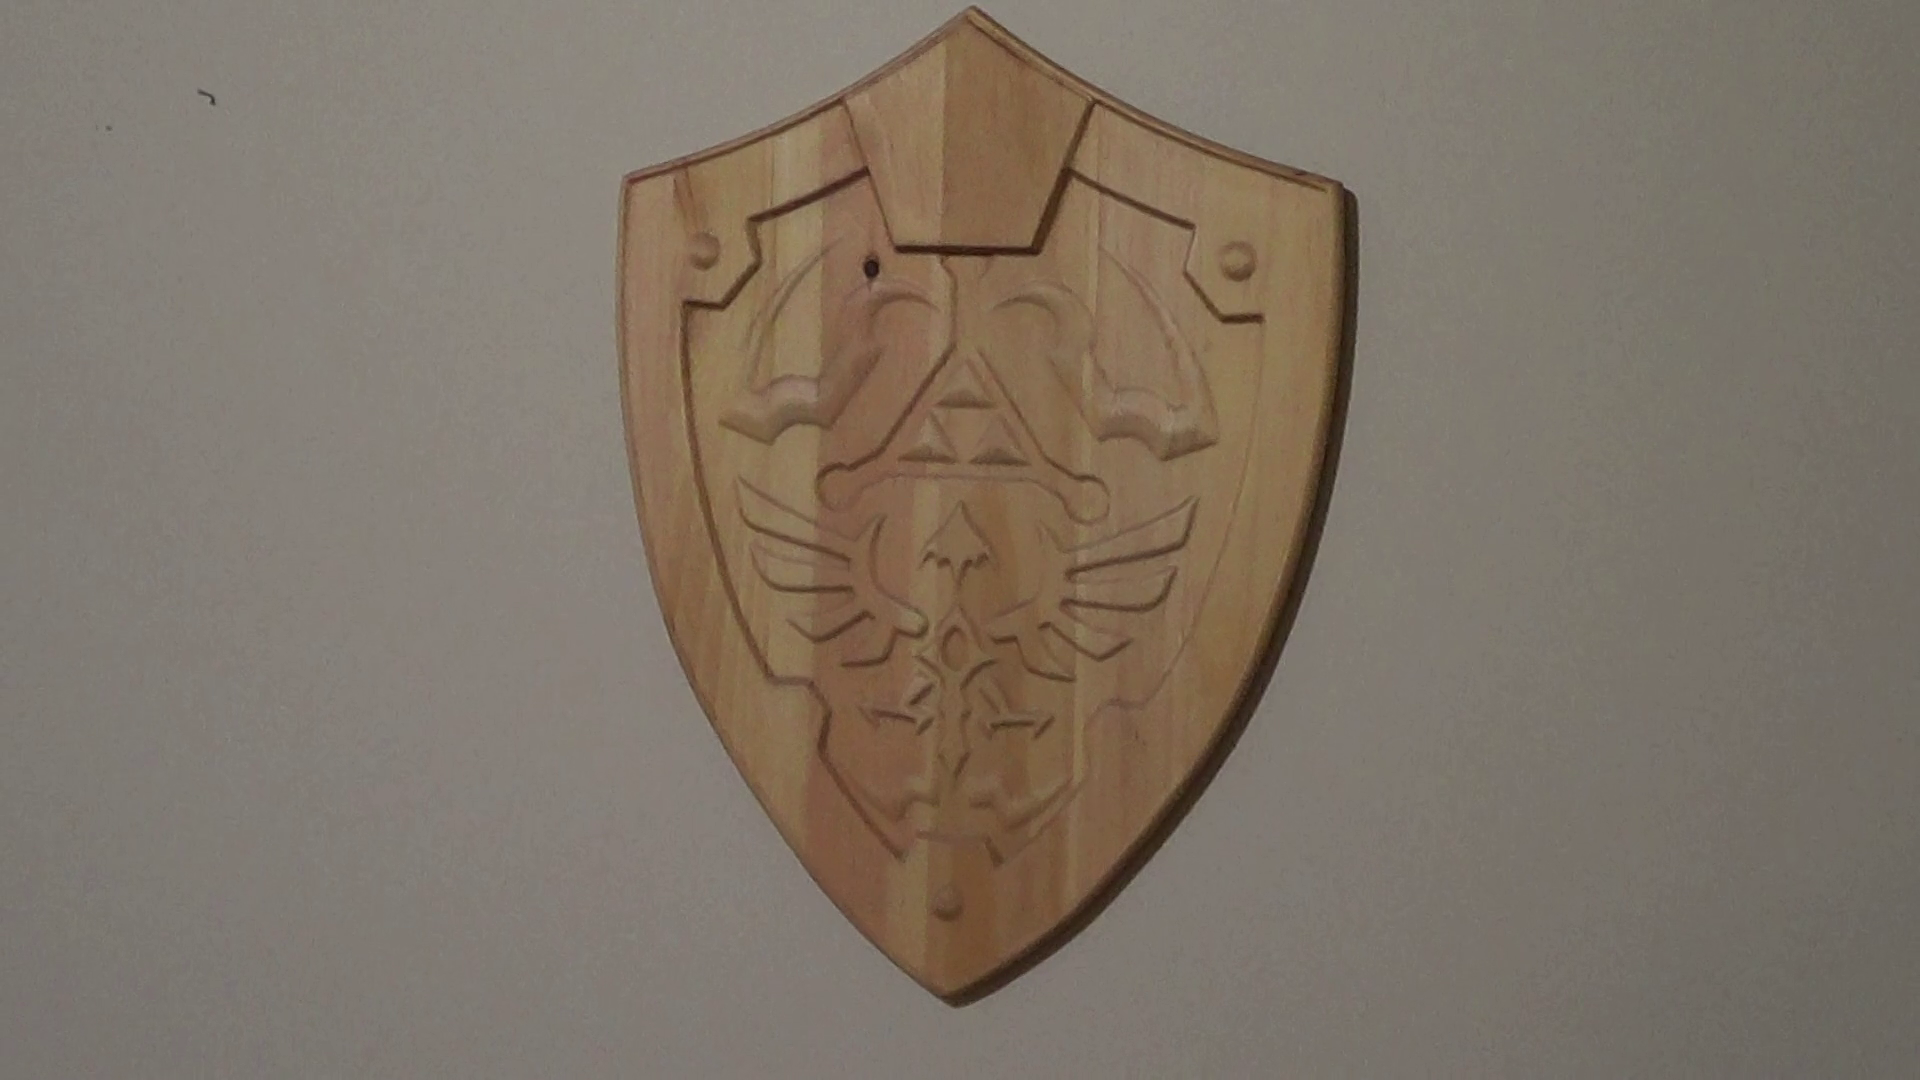
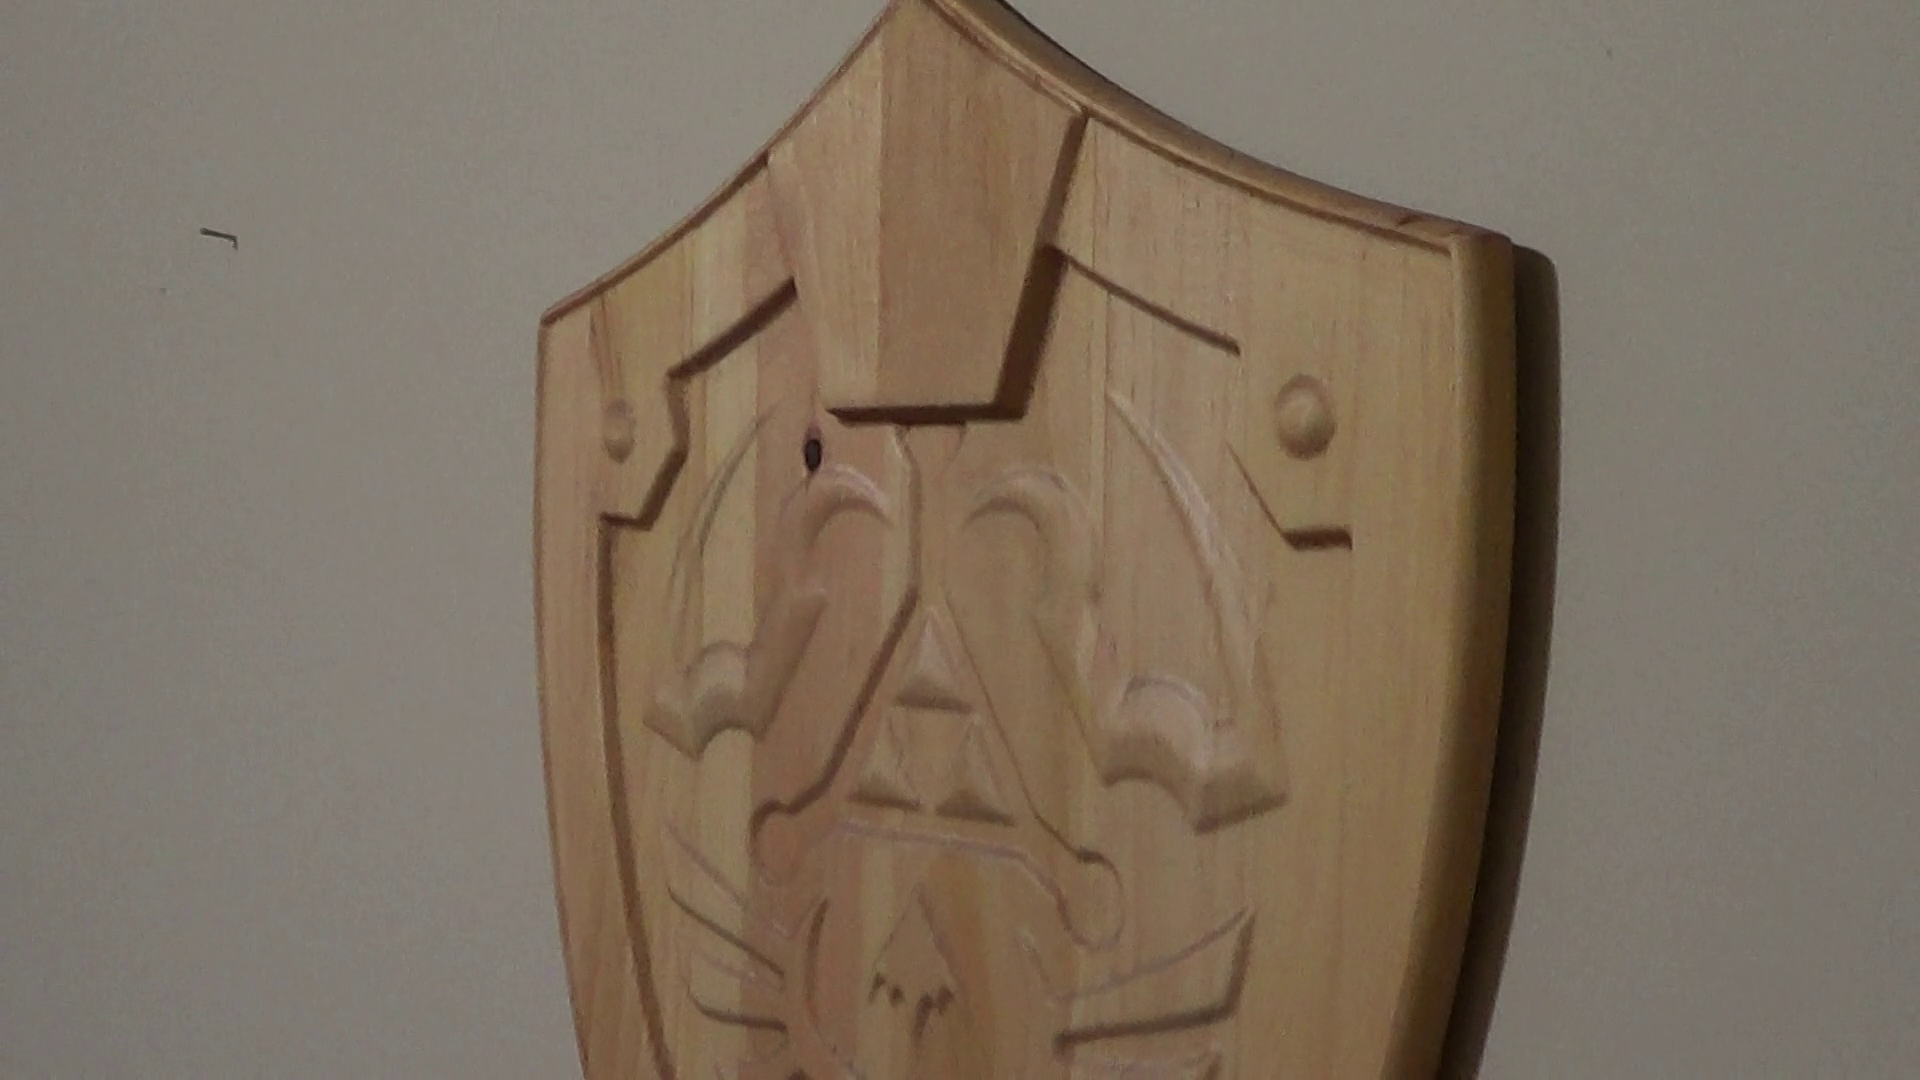
Now that you have finish your Shield, hang it up and enjoy your hard work.
After I made this, my Son and my Niece wants me to make them one life size, we will see. If I do, I will post it.
Thanks for checking out my Instructable, if you like it, you should check out my youtube channel, I post a new video every week. Click here for my channel