Wood & Thread Pendant Necklace
by DarklyLabs in Workshop > Laser Cutting
5307 Views, 39 Favorites, 0 Comments
Wood & Thread Pendant Necklace
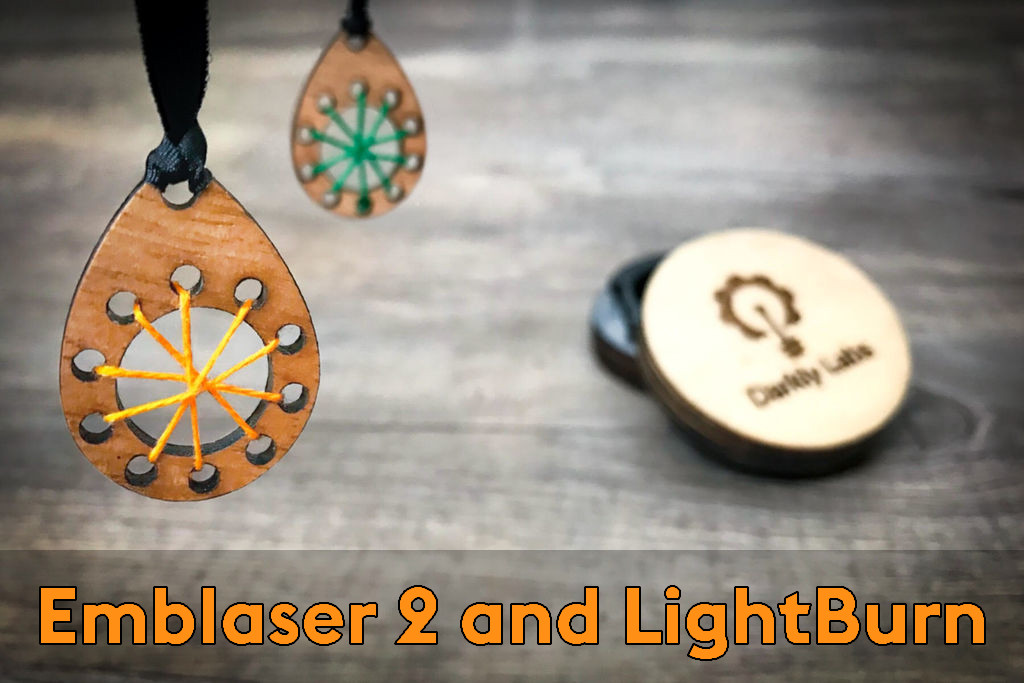
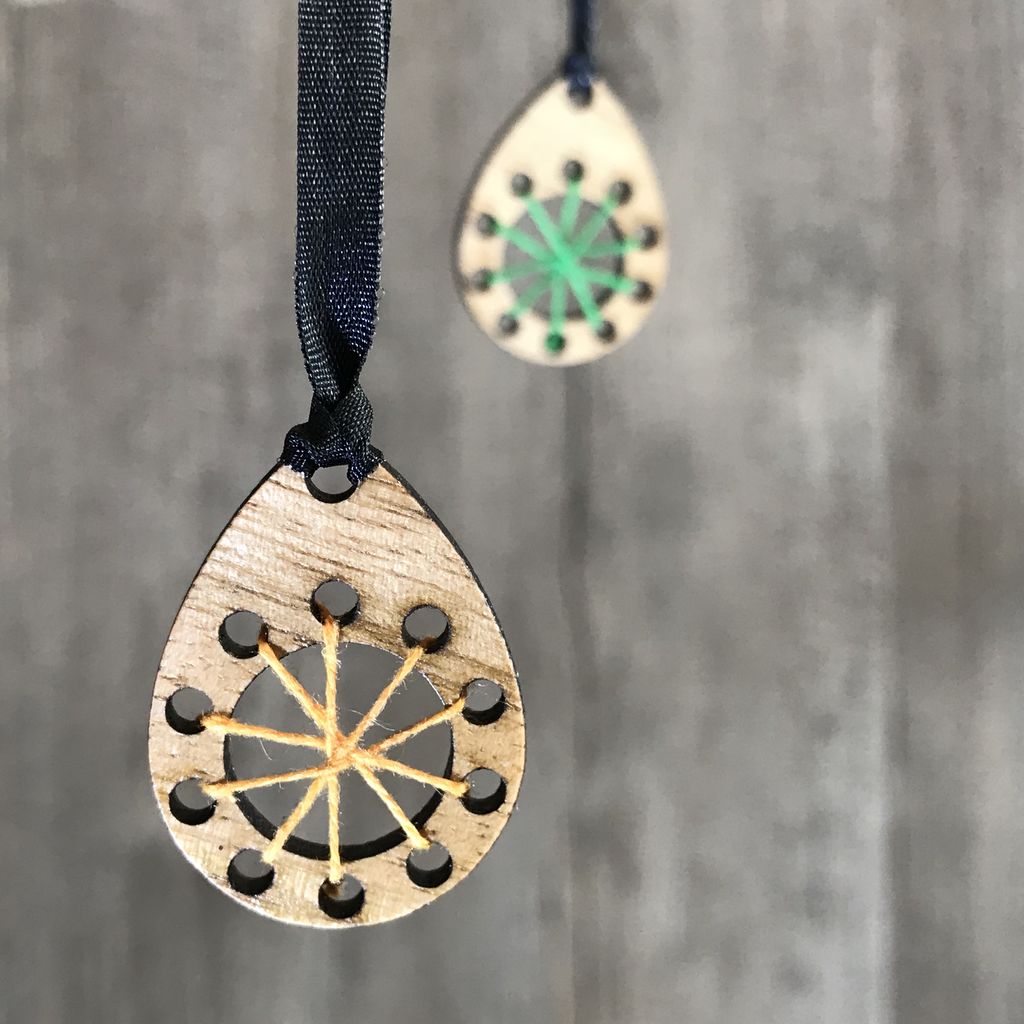
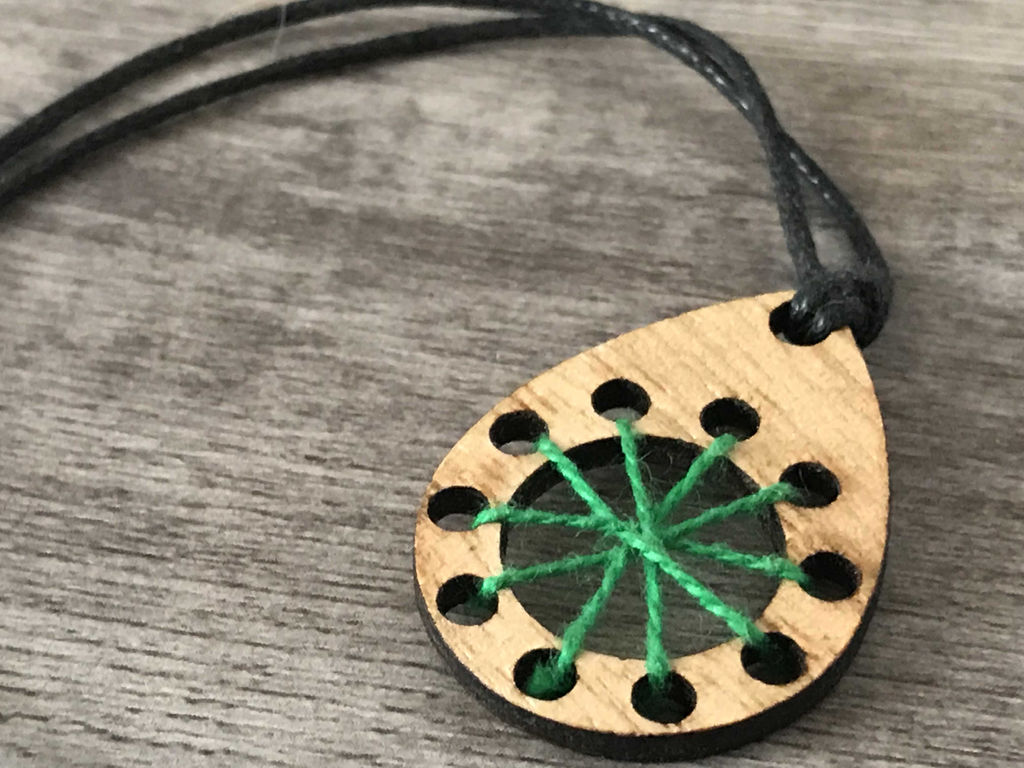

This Instructable is a great introduction to some of the basic vector features in LightBurn, the software that comes with your Emblaser 2. If you know how to turn on your Emblaser 2 and open LightBurn, you can make this project!
Even if you are proficient in LightBurn or are used to working in Adobe Illustrator you will likely still pick up a few tips, as we take this project from start to finish.
This Instructable will focus on the design of the pendant. However, as a bonus the files for the twist box shown in the title image are also included at the end.
You, can of course, use any material, and any laser cutter, though your setting will differ from those shown.
This Instructable assumes you have read and understood the safety instructions that came with your Emblaser 2 (also can be found here), and have the appropriate safety measures in place.
LightBurn - Set Up
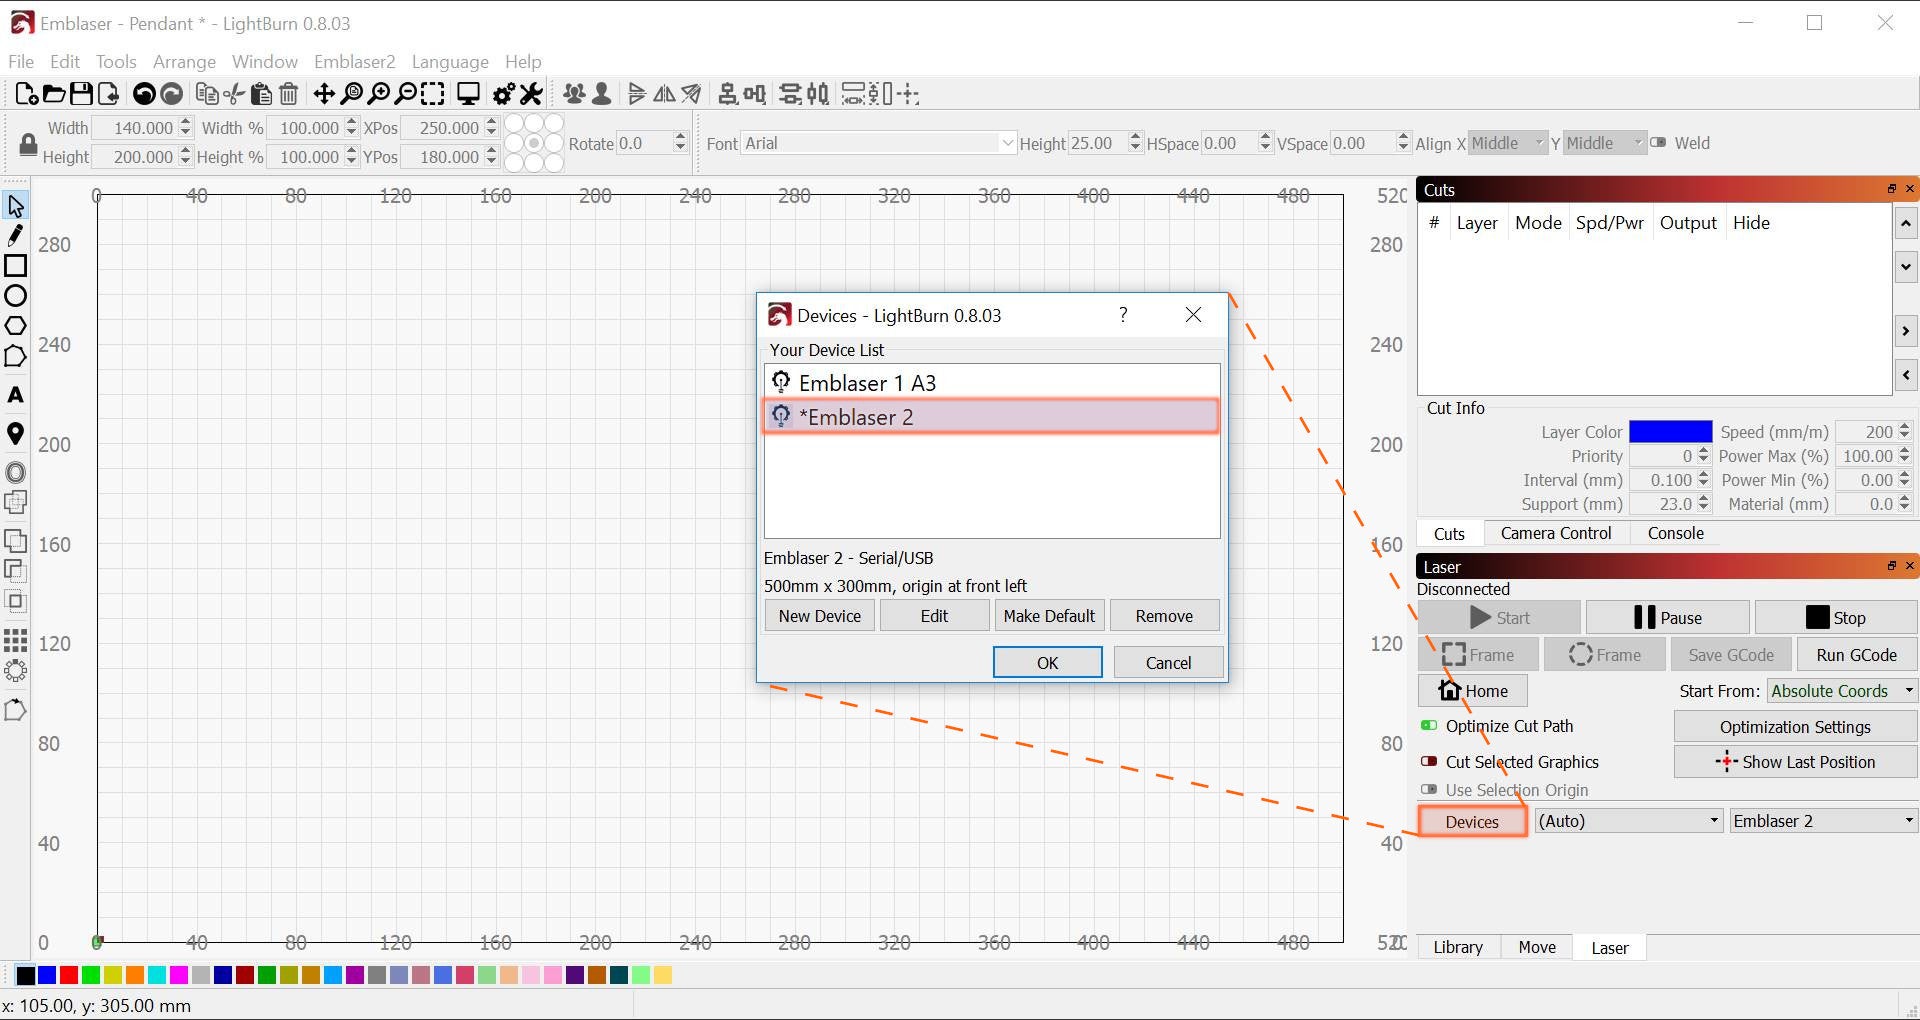
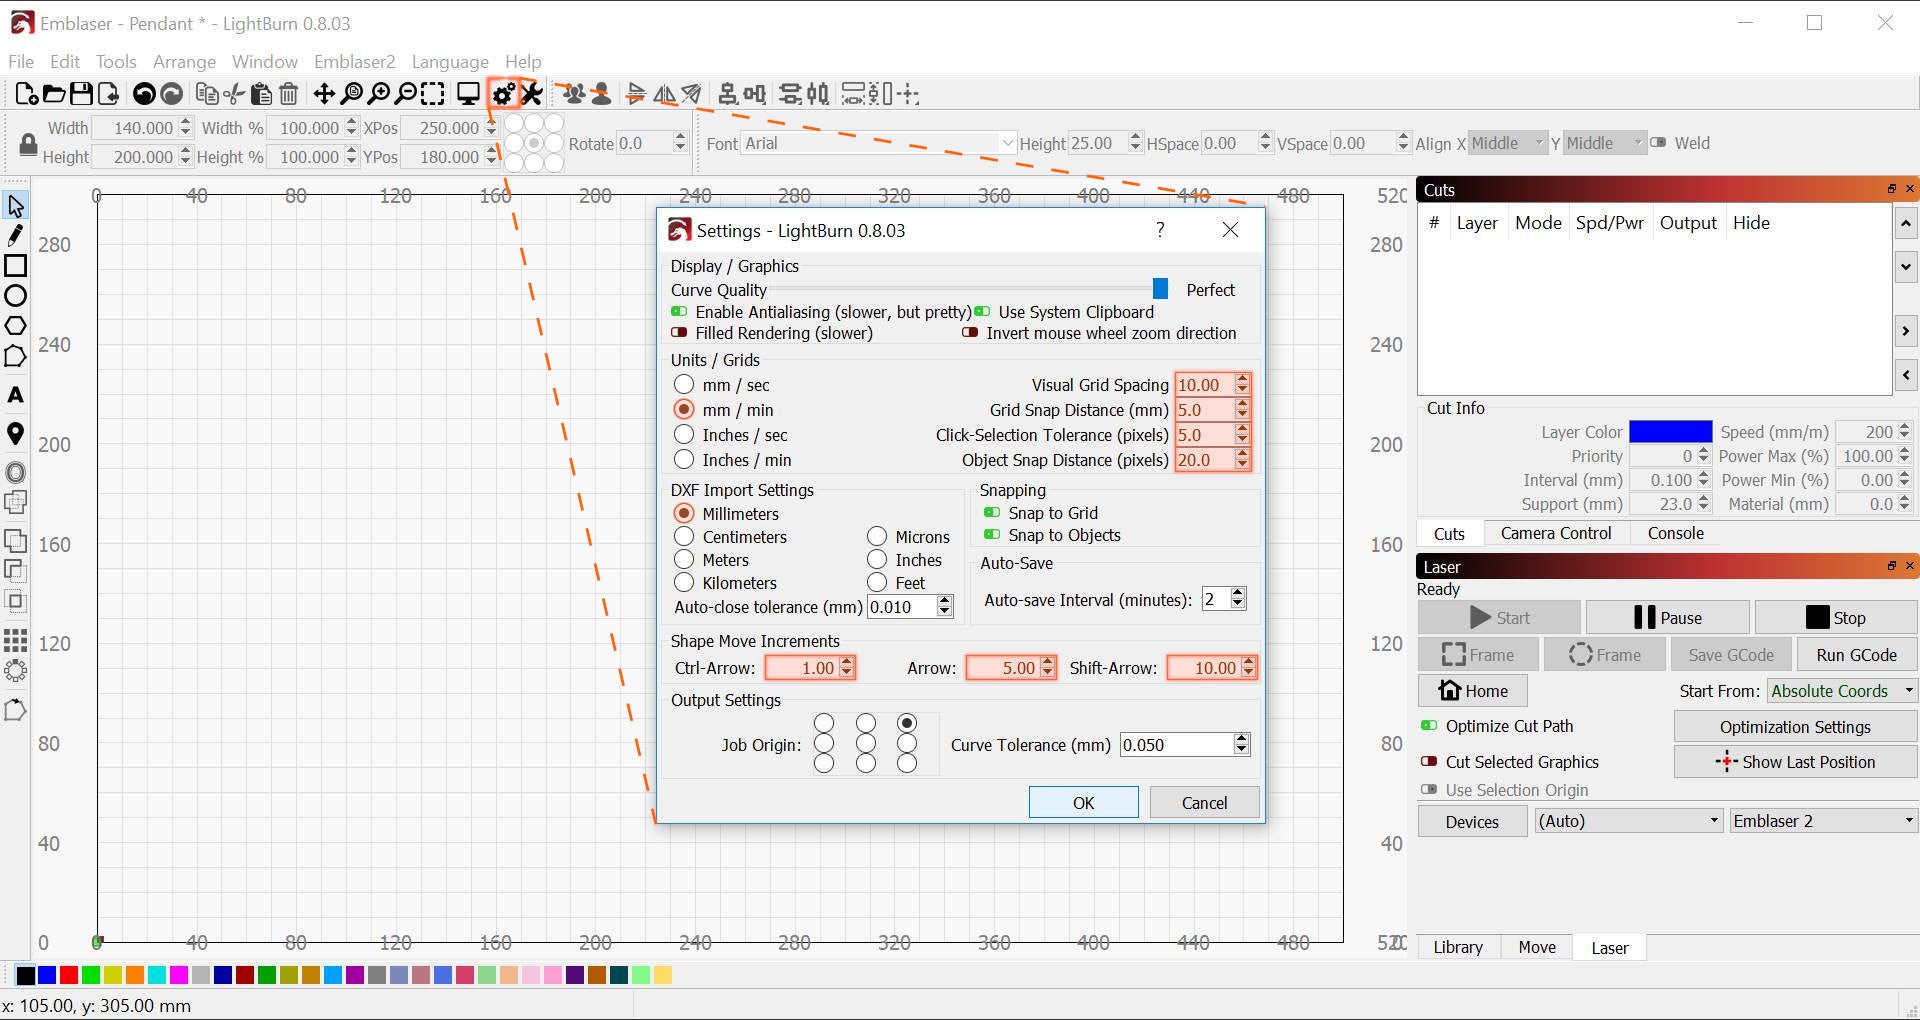
In LightBurn, start by insuring you have selected the Emblaser 2, in the Devices section of the Laser tab. This will automatically set the virtual workspace to match the machine.
LightBurn - Creating Guides With Ellipsis
We are going to start BIG - It is often much easier to work on a large scale then scale down, then it is to start small.
In LightBurn, different cut types (laser speed and power) are defined by different colours, which work like layers. For this project we will use blue for guides and black for cuts.
Now, let’s start by drawing the guides which will help us with the final shape.
Click the Blue Colour in the Cuts Pallet, at the bottom left of the screen.

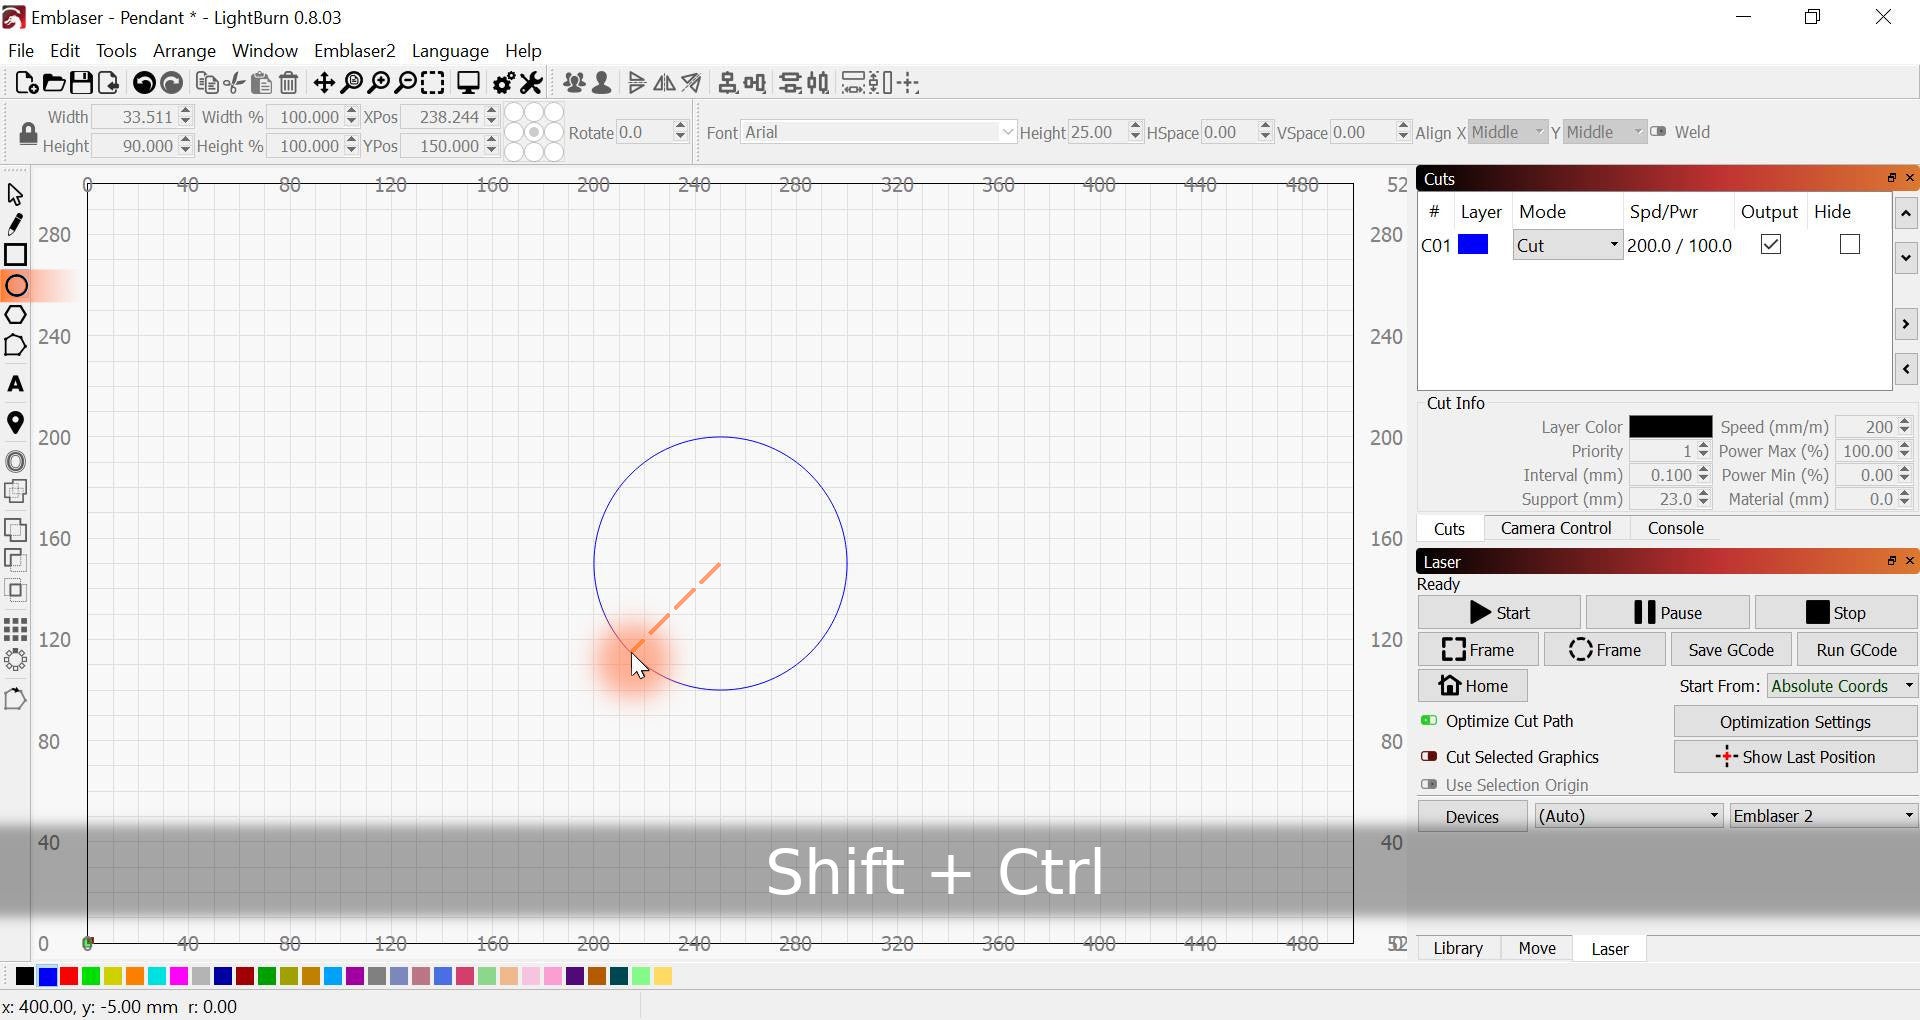
Then select the Ellipse Tool (Ctrl + E) and click and drag near the centre of the workspace to start drawing. While dragging hold down the Ctrl and Shift keys.
Tip: The Ctrl key will make ellipse draw from the centre, and the Shift key constrains the ellipse to a circle.
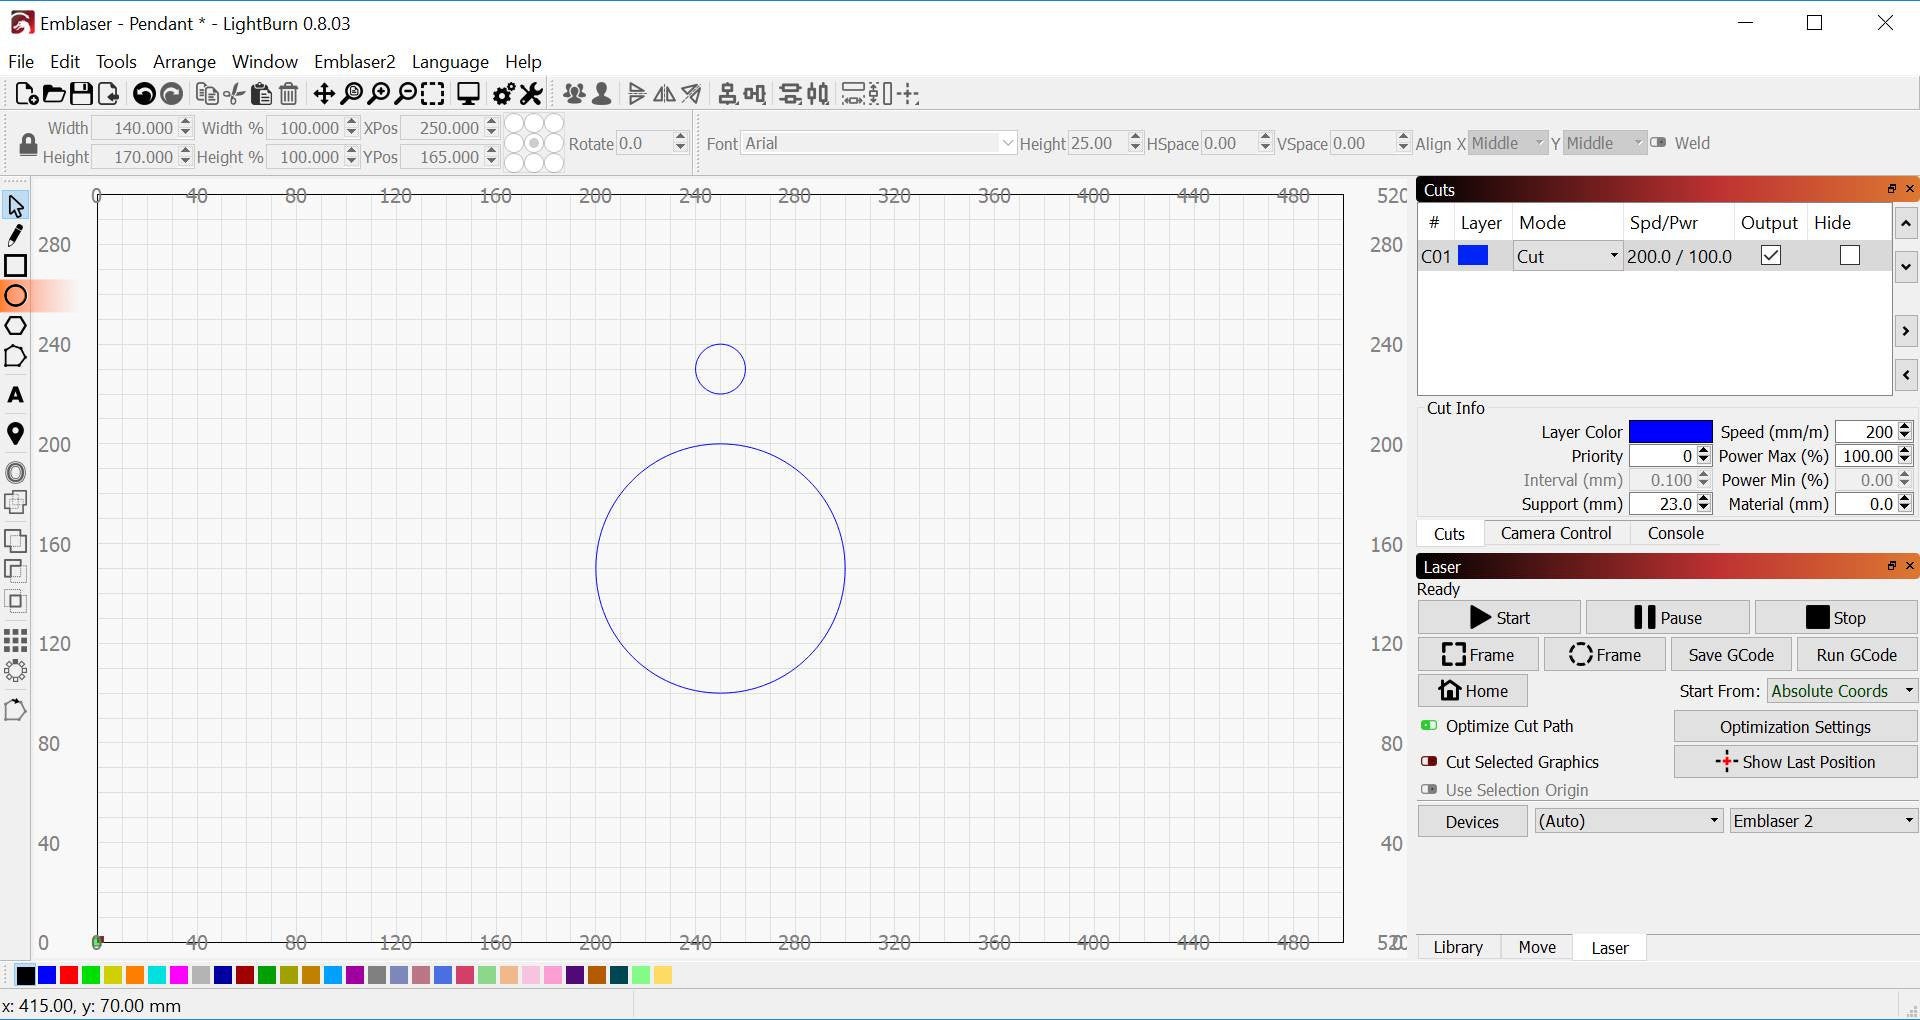
Next, return to the Select Tool and click on the shape you have just drawn.
Doing this will allow you to edit the shapes position and dimensions accurately, and since we are going to be aligning several shapes, it is important to get this right.
For the XPos enter 250.0, and for the YPos enter 150.0. This is the exact center of the Emblaser workspace. For the Width enter 100.0. This should automatically change the height to match.
Tip: The aspect ratio is locked by default. However, if the values do not match exactly, you can click the Lock Icon to enable you to change them individually, before re-locking the aspect ratio.

Now add another circle with the following values: Width = 20.0, Height = 20.0, XPos = 250.0, YPos = 230.0.
LightBurn - Creating Guides With Lines
Once your circle is complete it is time to add some guide lines. We will use the intersections of these lines to align the nodes of our pendant shape.
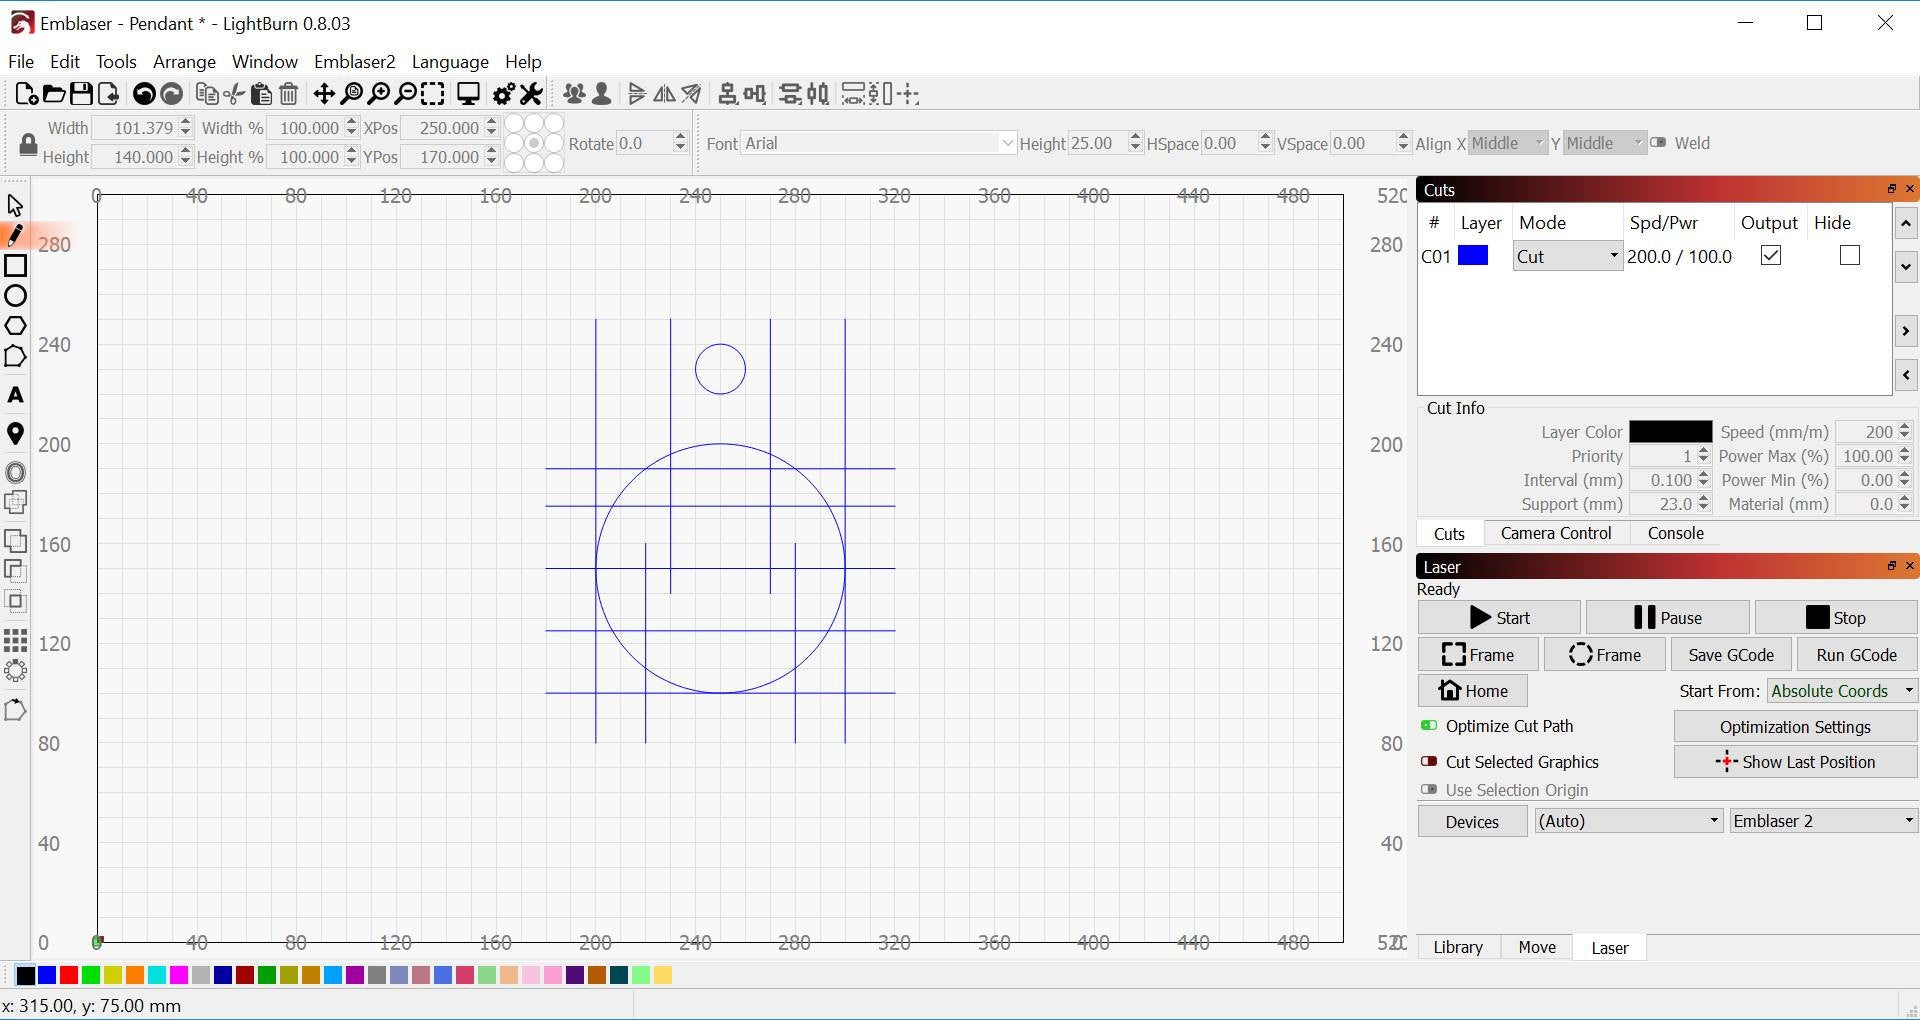
Click the Line Tool (Ctrl + L). Hold down Ctrl to active snapping, then click (not click and drag) on the start point of one of the lines as shown in the image above. Click again to add another point to the line, then press (Esc).
Continue to add each of the lines as shown.
Tip: Making sure the lines are starting and ending on grid points helps to insure they are correctly aligned to the grid.
LightBurn - Drawing the Pendant Outline
Now that the guides are complete, it’s time to start on the pendant itself. For this we will again use the Line Tool.
But before we start, switch to the Black Layer in the Cuts Pallet.
Tip: If you have ever used Adobe Illustrator, the Line Tool is similar to the Pen Tool in Illustrator. Though in LightBurn there are a few key differences in the way it works. For example, nodes have to be converted to ‘smooth nodes’ after the shape is drawn, not while drawing with a click-drag, as in Illustrator.
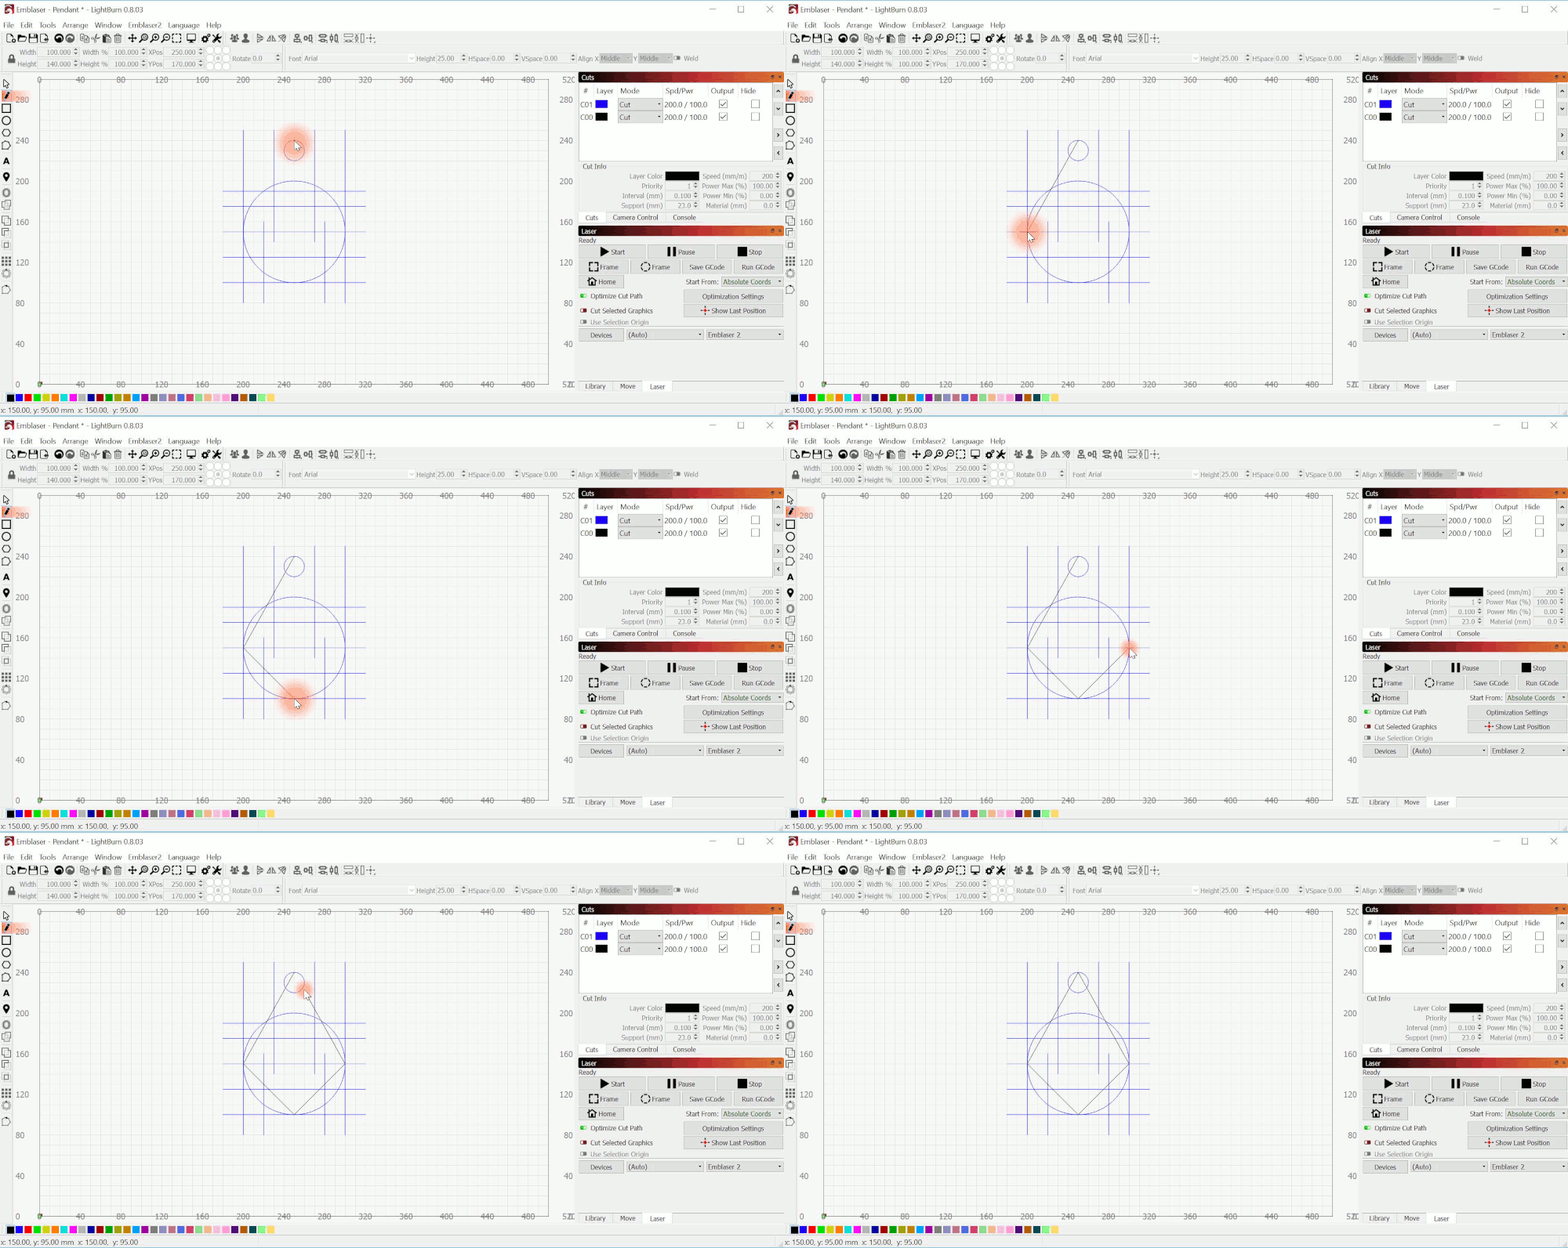
Select the Line Tool and click on the highest point of the top circle where it meets the centre line. Now click on each of the four points in order around the pendant, as shown in the image above. Make sure you click on the start node again before hitting ESC to end the shape.
LightBurn - Changing Nodes to Smooth Nodes
So, we have some guides, and a diamond shape. It’s now time to use those guides and give your pendant it’s smooth outline.
Click on the Edit Nodes Tool and select the diamond created in the last step. Hover your cursor over the lower most node and press the S key.
This will transform the node to a ‘smooth node’ giving you tangent handles which you can use to adjust the curve.
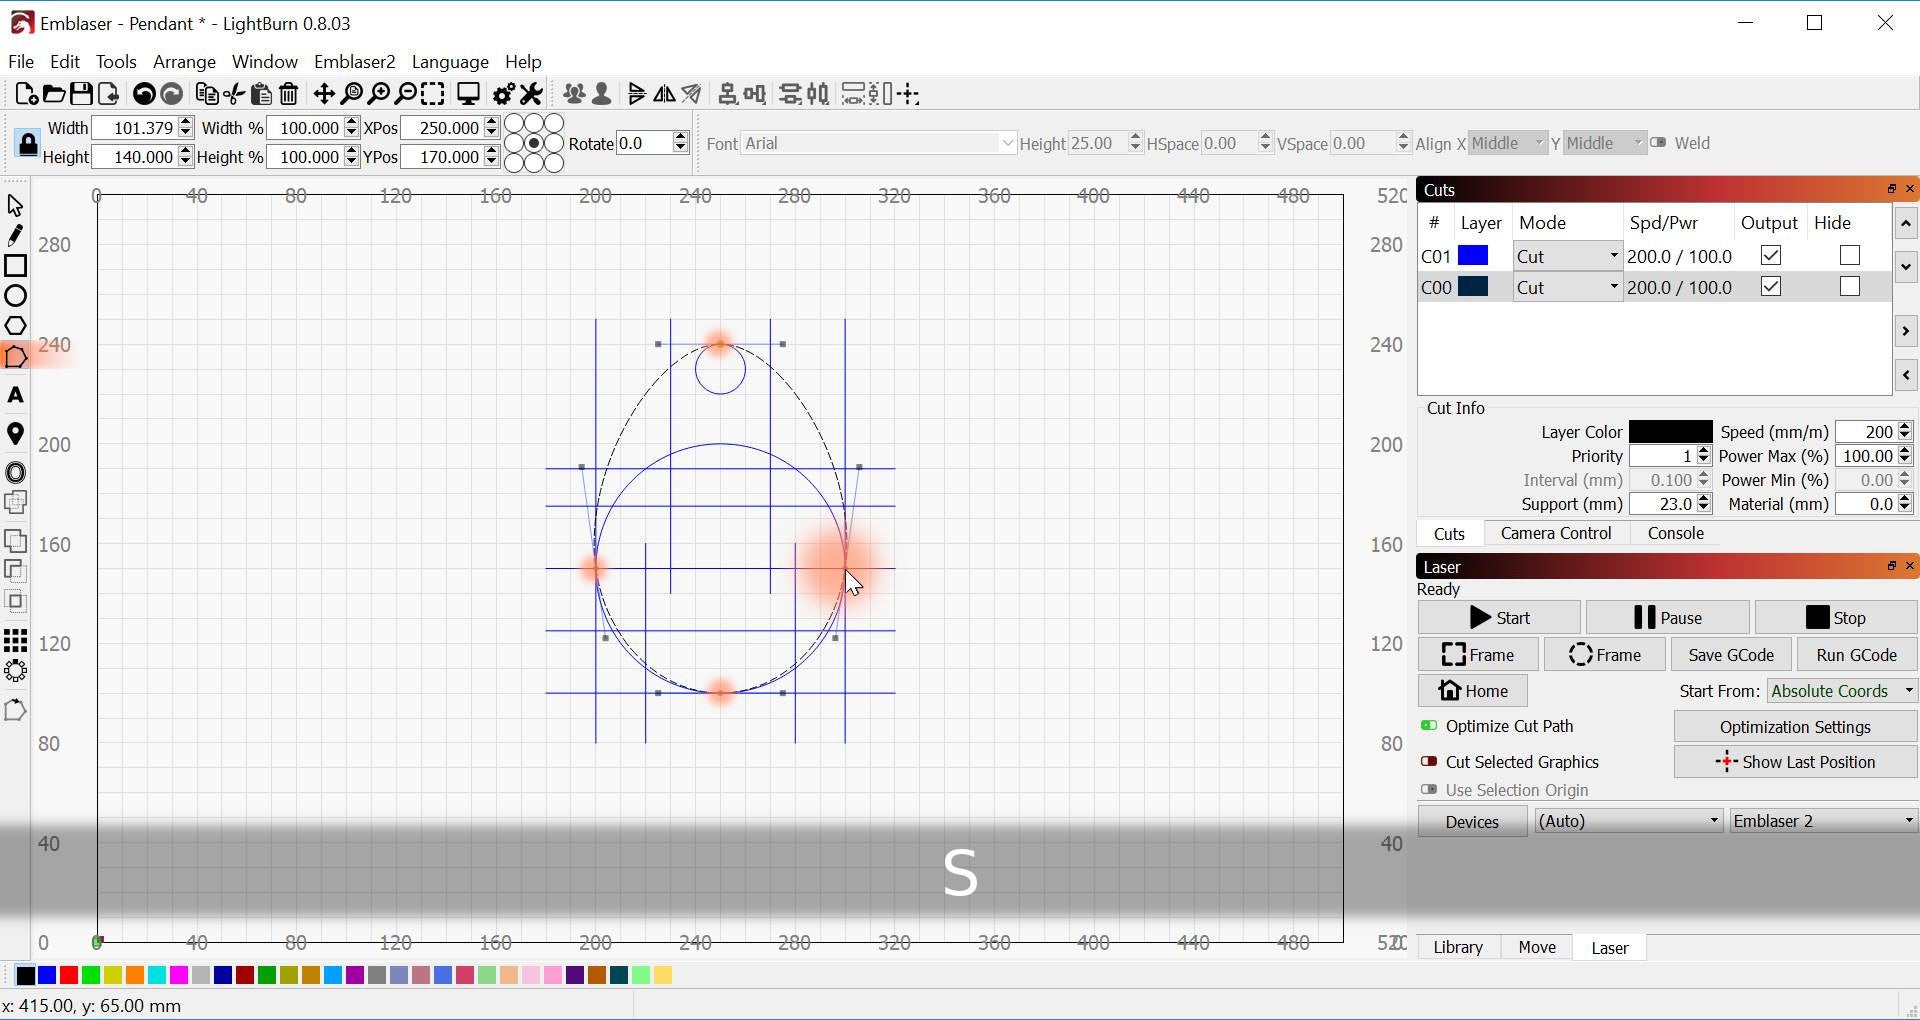
Follow the step above for each node, transforming each one to a ‘smooth nodes’.
Next click on the tangent handles for the first node then drag the handle to the guide points we created earlier.
Tip: When aligning the tangent handles, you may have to zoom in on the point you want it to intersect to get it to line up correctly.
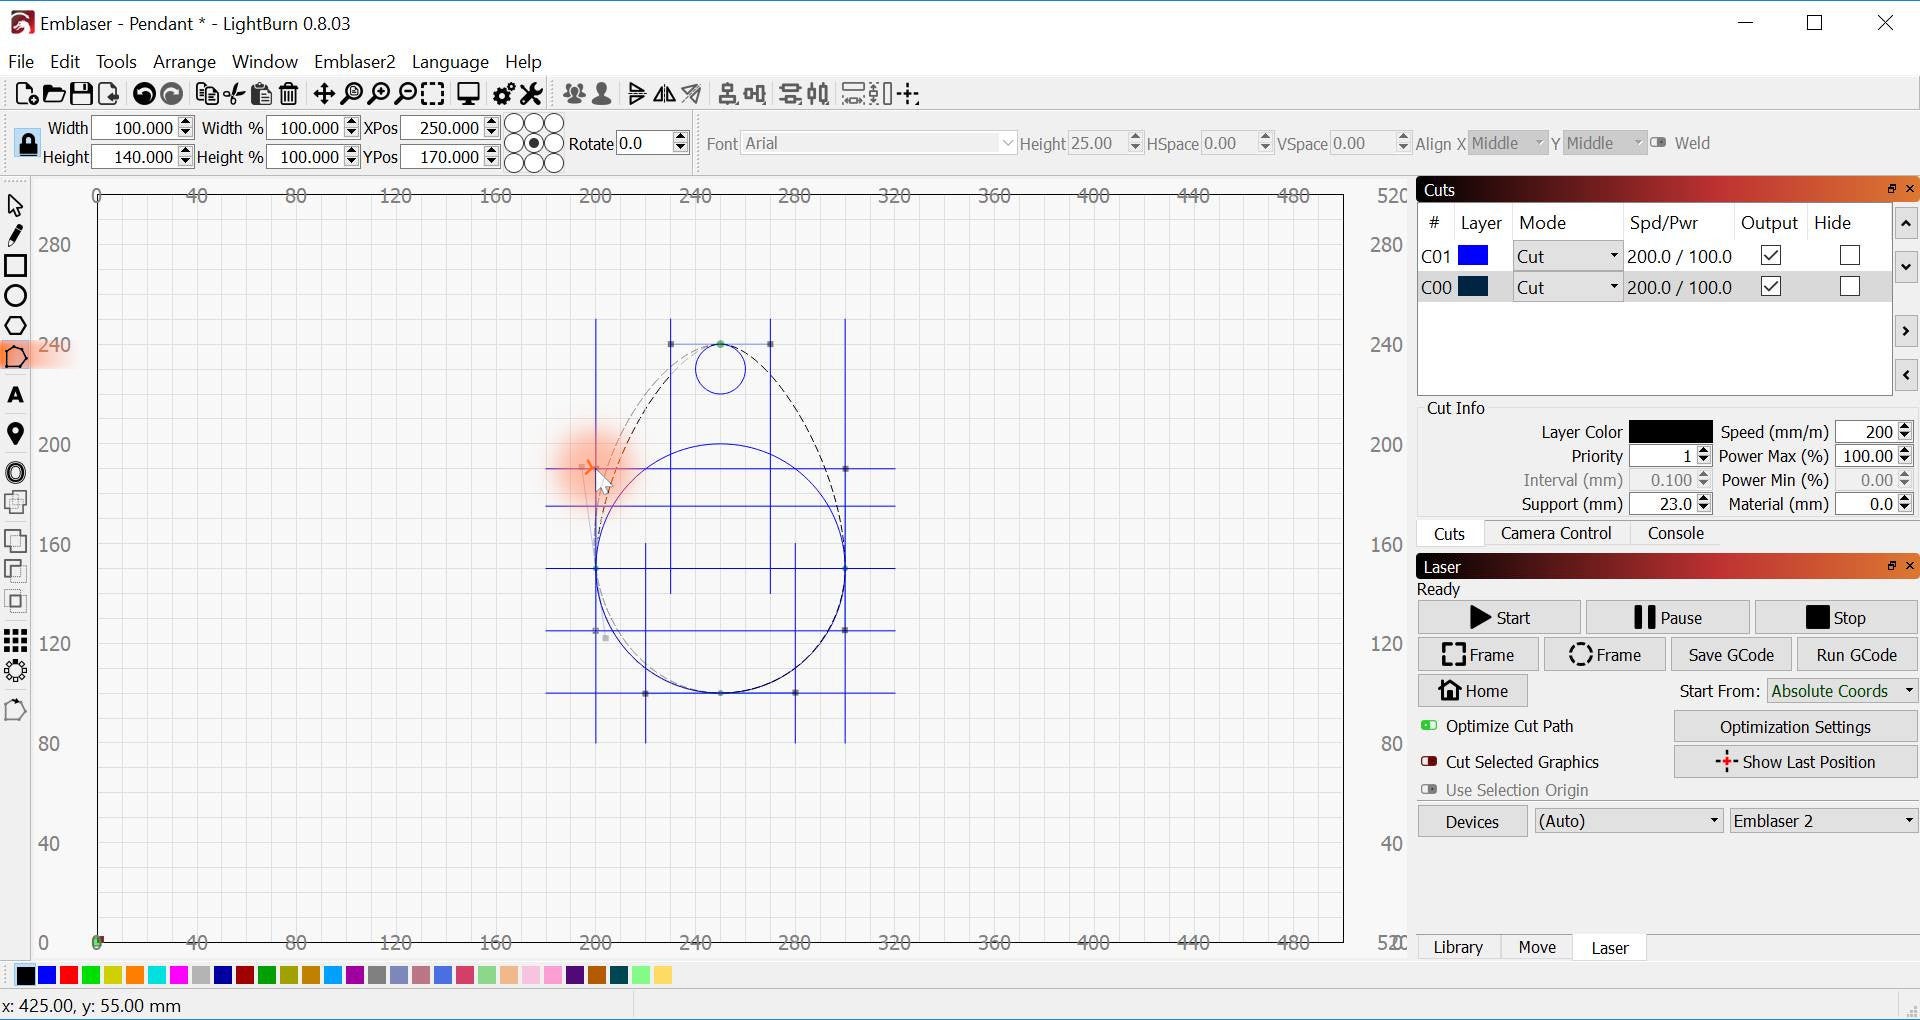
Again, repeat for each node until your pendant shape matches the one in the image.
LightBurn - Circular Arrays
With the outline done we can add a mounting point and the internal features.
You already know how to draw a circle with the Ellipse Tool, so add the internal cut outs, as shown in the image above.
Next click the Circular Array Tool, then select the lower circle. In the dialog window enter the values shown to define the origin as the center of the workspace (250.0x, 150.0y). Change the quantity to 10.
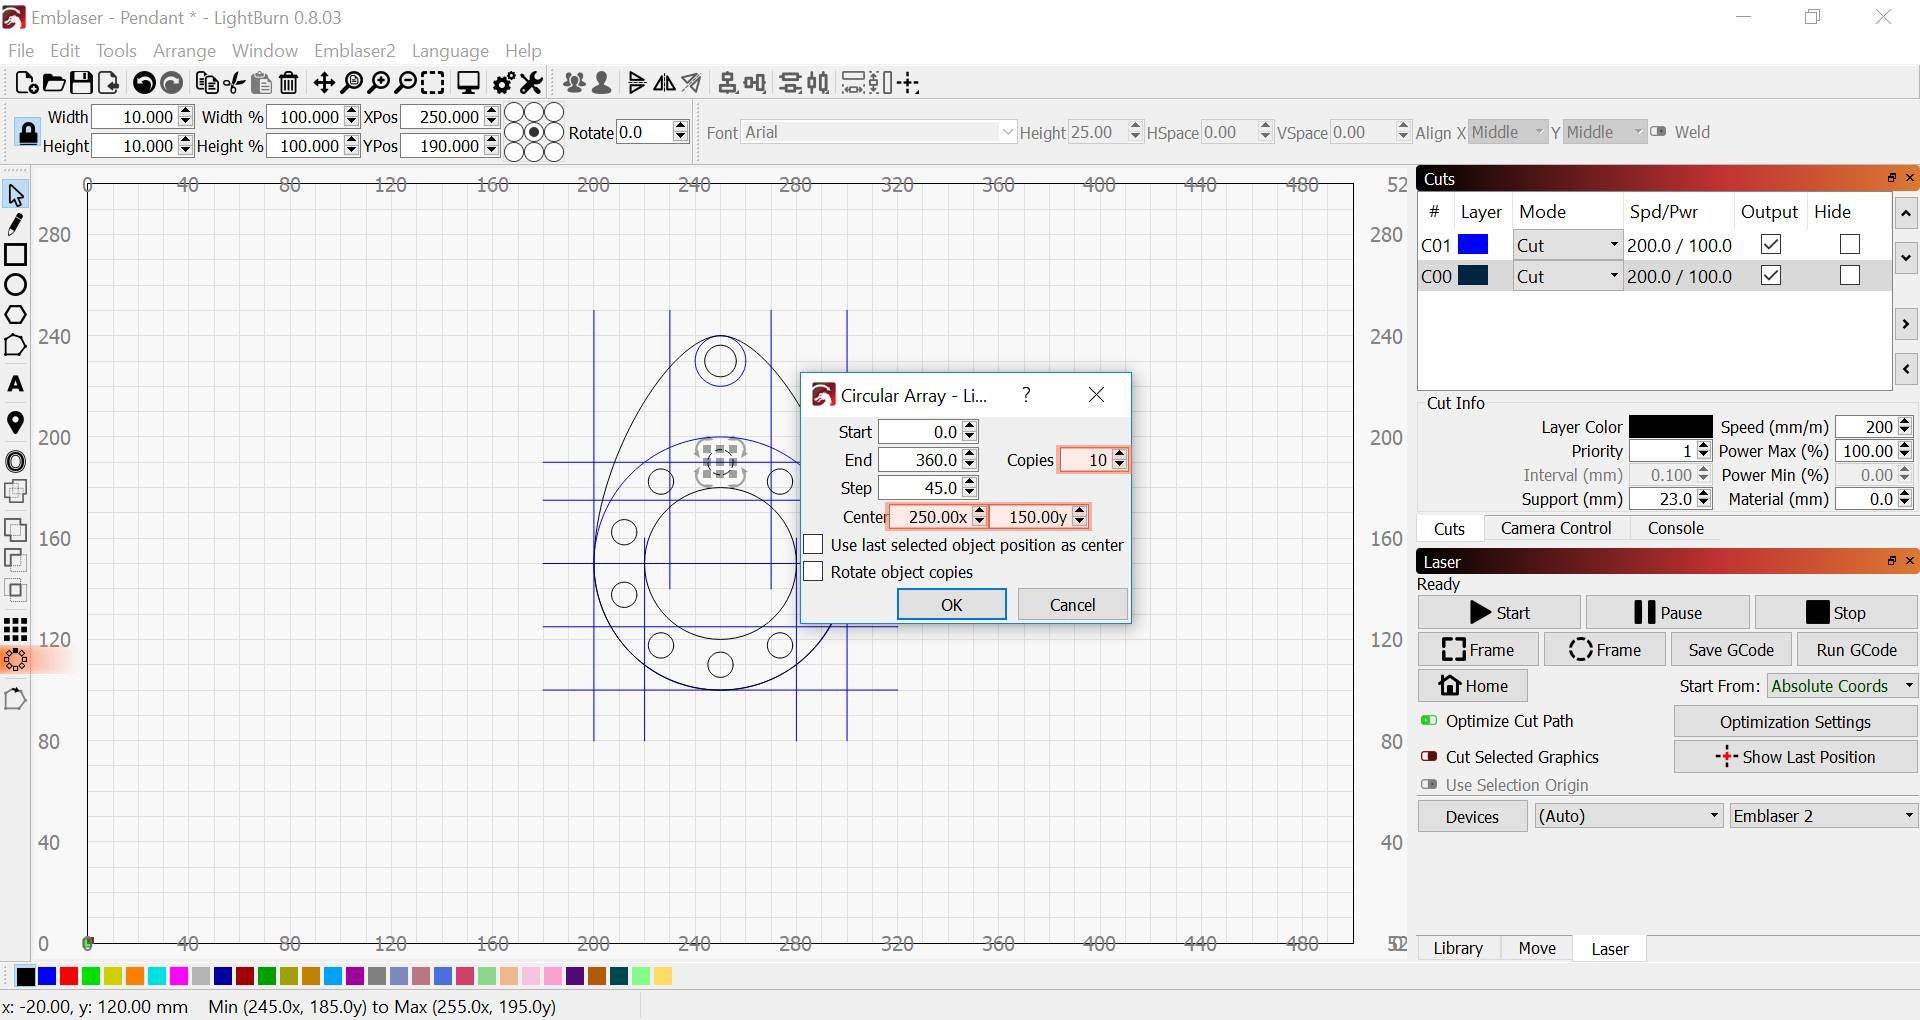
You can use any quantity you like here, just be sure to leave enough gap between each hole, remembering we will shrink the design down.
LightBurn - Moving Things Accuratly
Our design is looking good, but the hole that the top doesn’t leave as much material above it should.
Use the Select Tool and click on the top hole, then press Ctrl and the down arrow to move the hole down 2.0mm (two down arrow presses).
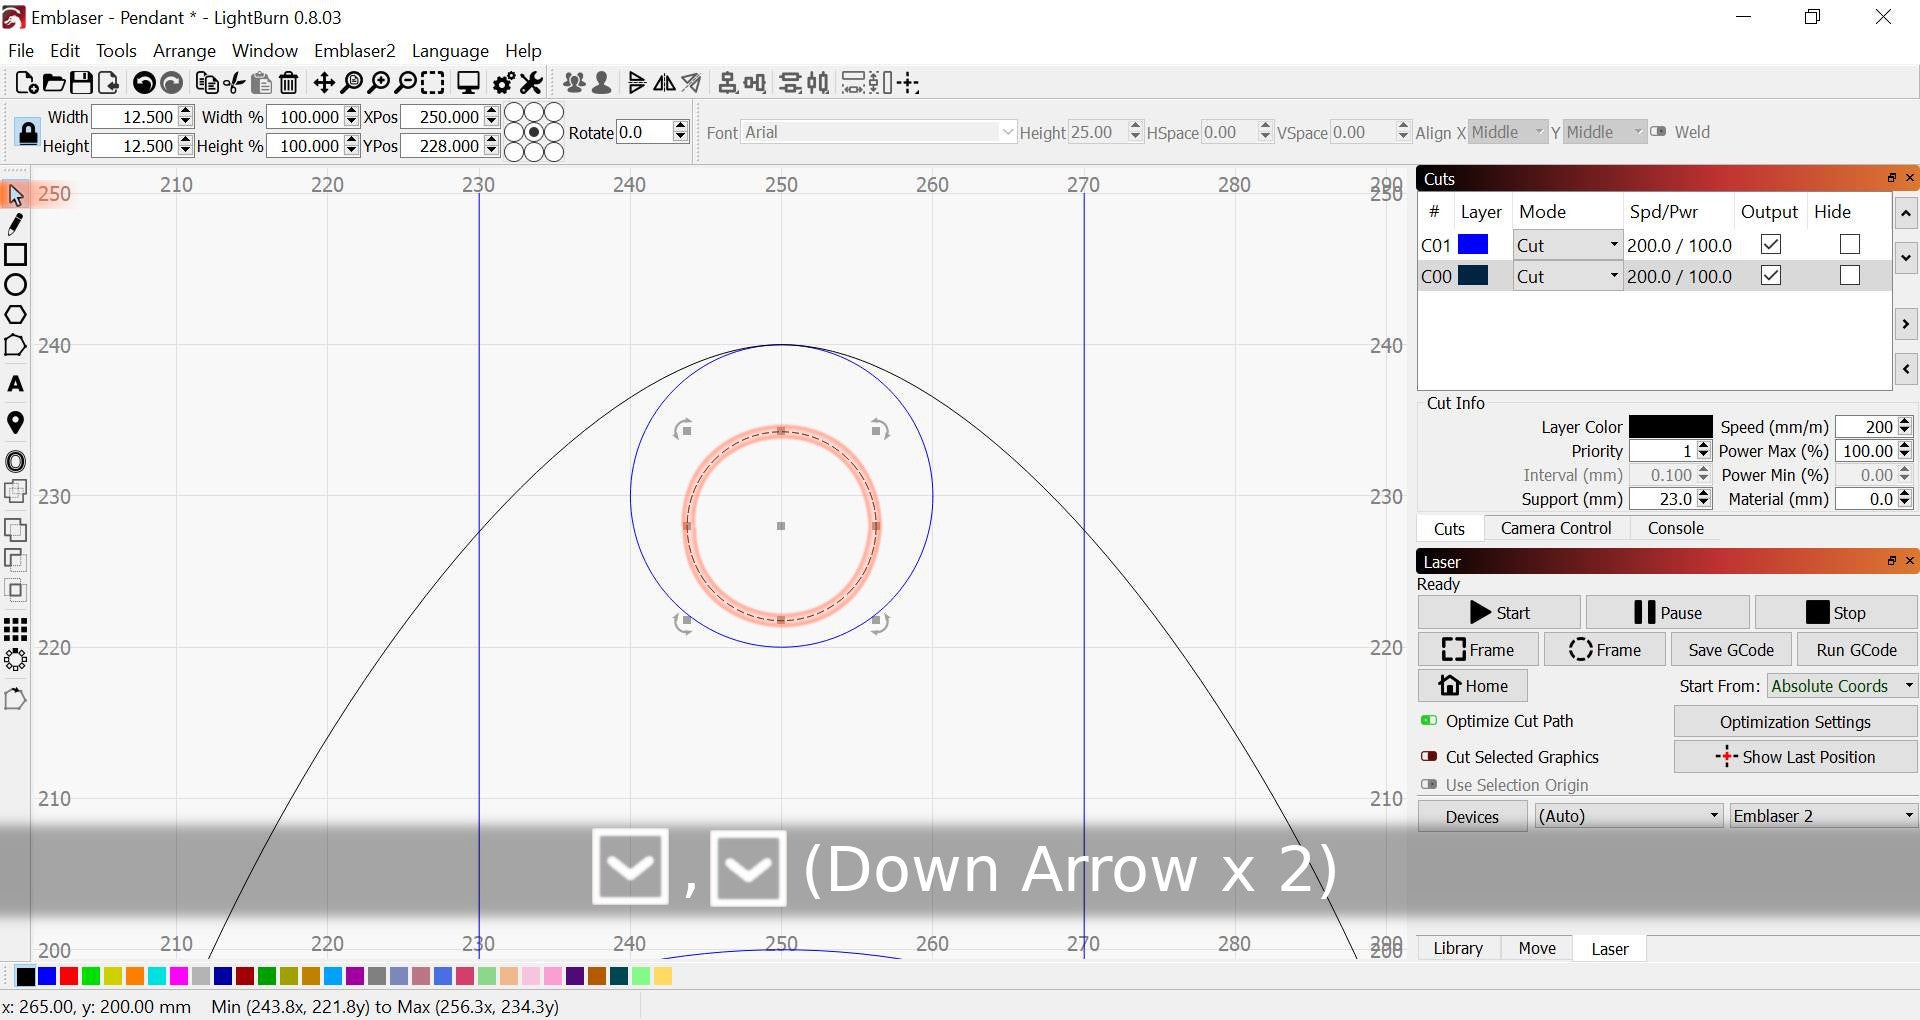
Tip: LightBurn actually has a great feature where you can move object in course (Shift + Arrow), medium (Arrow), or fine (Ctrl + Arrow) steps.
LightBurn: Creating Groups, Duplicating and Scaling
Choose the Selection Tool and drag to select your design. Next, hold down Ctrl and click on any guide lines you may have selected, this will remove them from the selection.
Next, use the Group Tool (Ctrl + G) to turn your selection into a group.
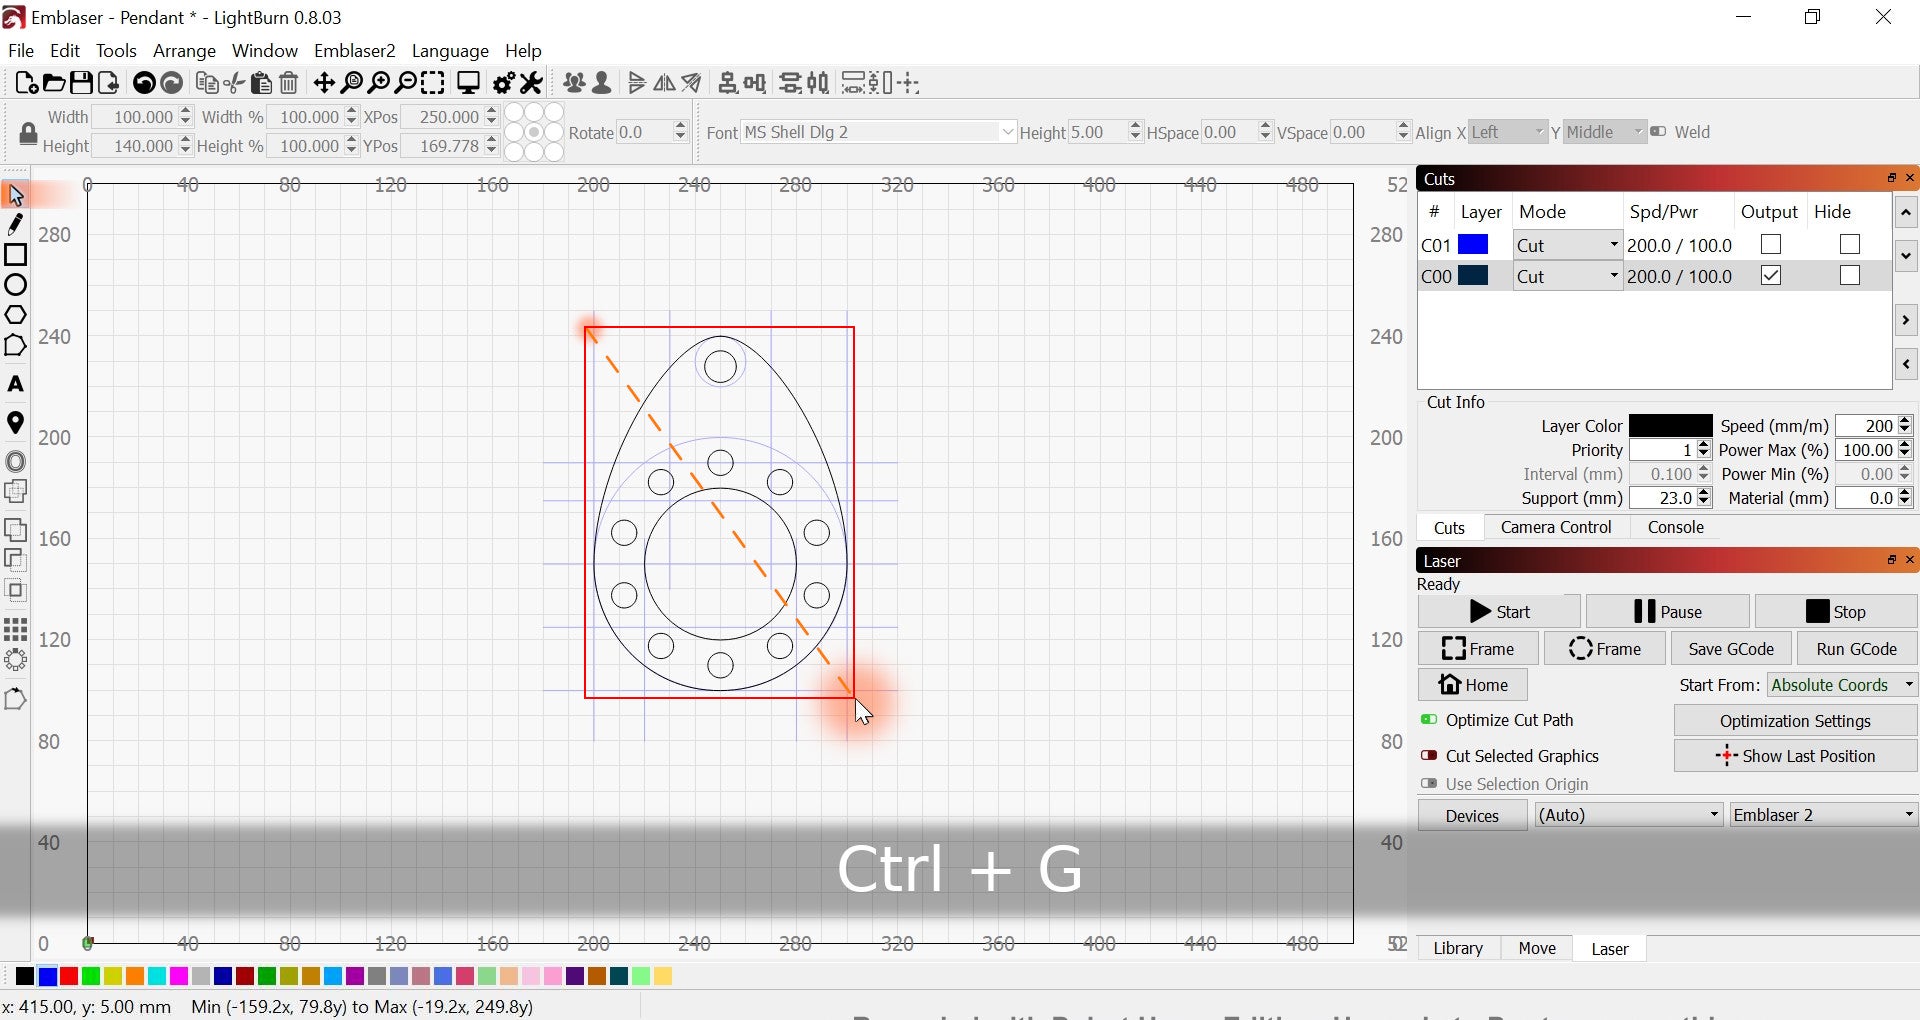
I like to keep my original deign with guides, just in case. So to do this, select everything once more, then use the Duplicate Tool (Ctrl + D). Then hold Ctrl (snap to grid) and drag the design to the side.
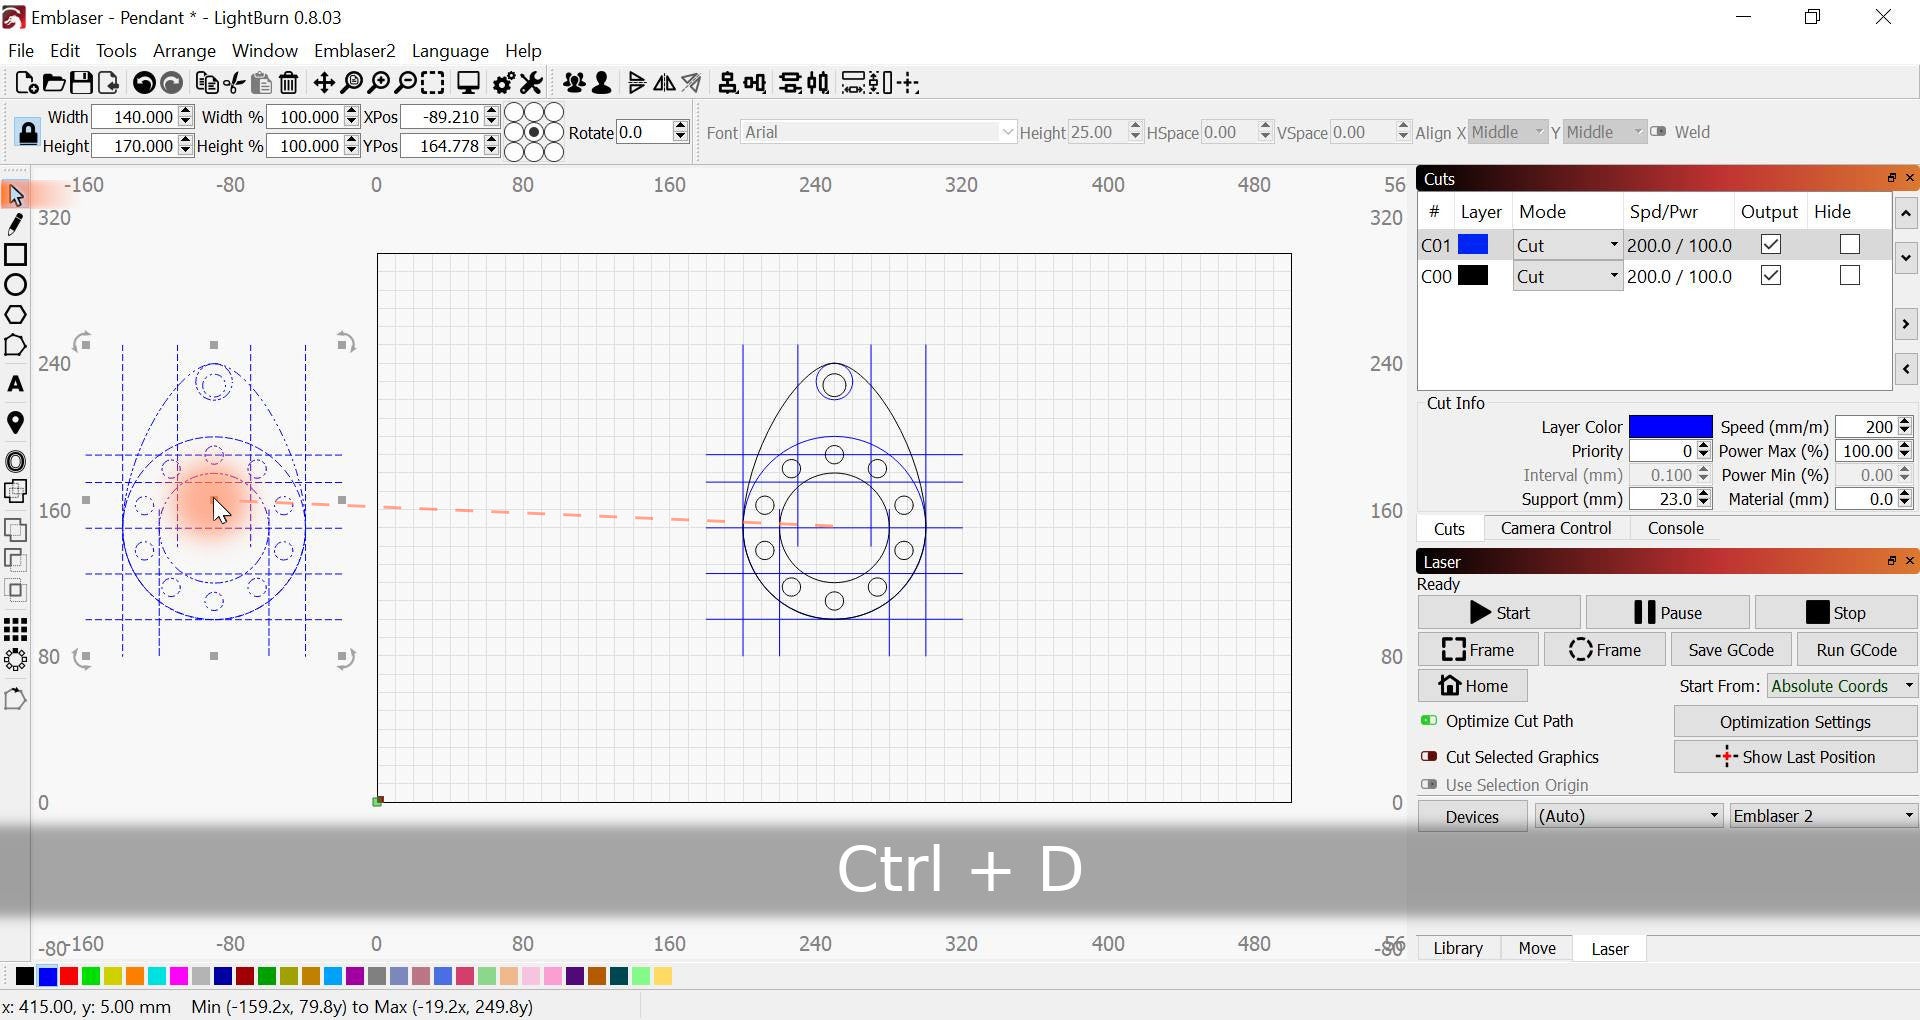
While it is still selected, it’s a good idea to move this design to the blue guides layer.
Now we can go back and delete our original guides.
If you find that you’ve grouped a guide by mistake, you can simply use the Ungroup Tool (Ctrl + U), then delete the guide before regrouping again.
Now to scale your pendant.
With the group still selected enter 35.0 in the Height field. Then press Enter. Next, drag your design to the lower left corner of the workspace.
WARING! Make sure you put the original design on the blue, guide layer. If you don’t and the job is run, the laser may try to move past it’s mechanical limits.
Make sure you un-check the Output box in the Cuts Window for the blue guides layer, as shown in the next step!
LightBurn - Cut Settings
In the Cut Window you will see a list of the colours you have used
Make sure you un-check the Output box for the Blue layer we used for guides!
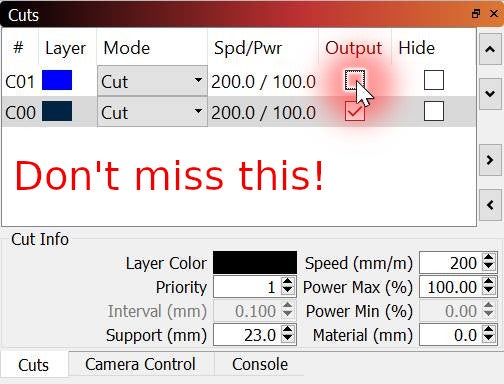
Next, make sure the Mode for the black layer is set to Cut.
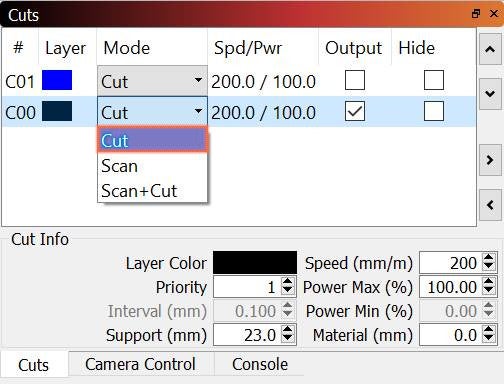
Then double click on Spd/Pwr for that layer.
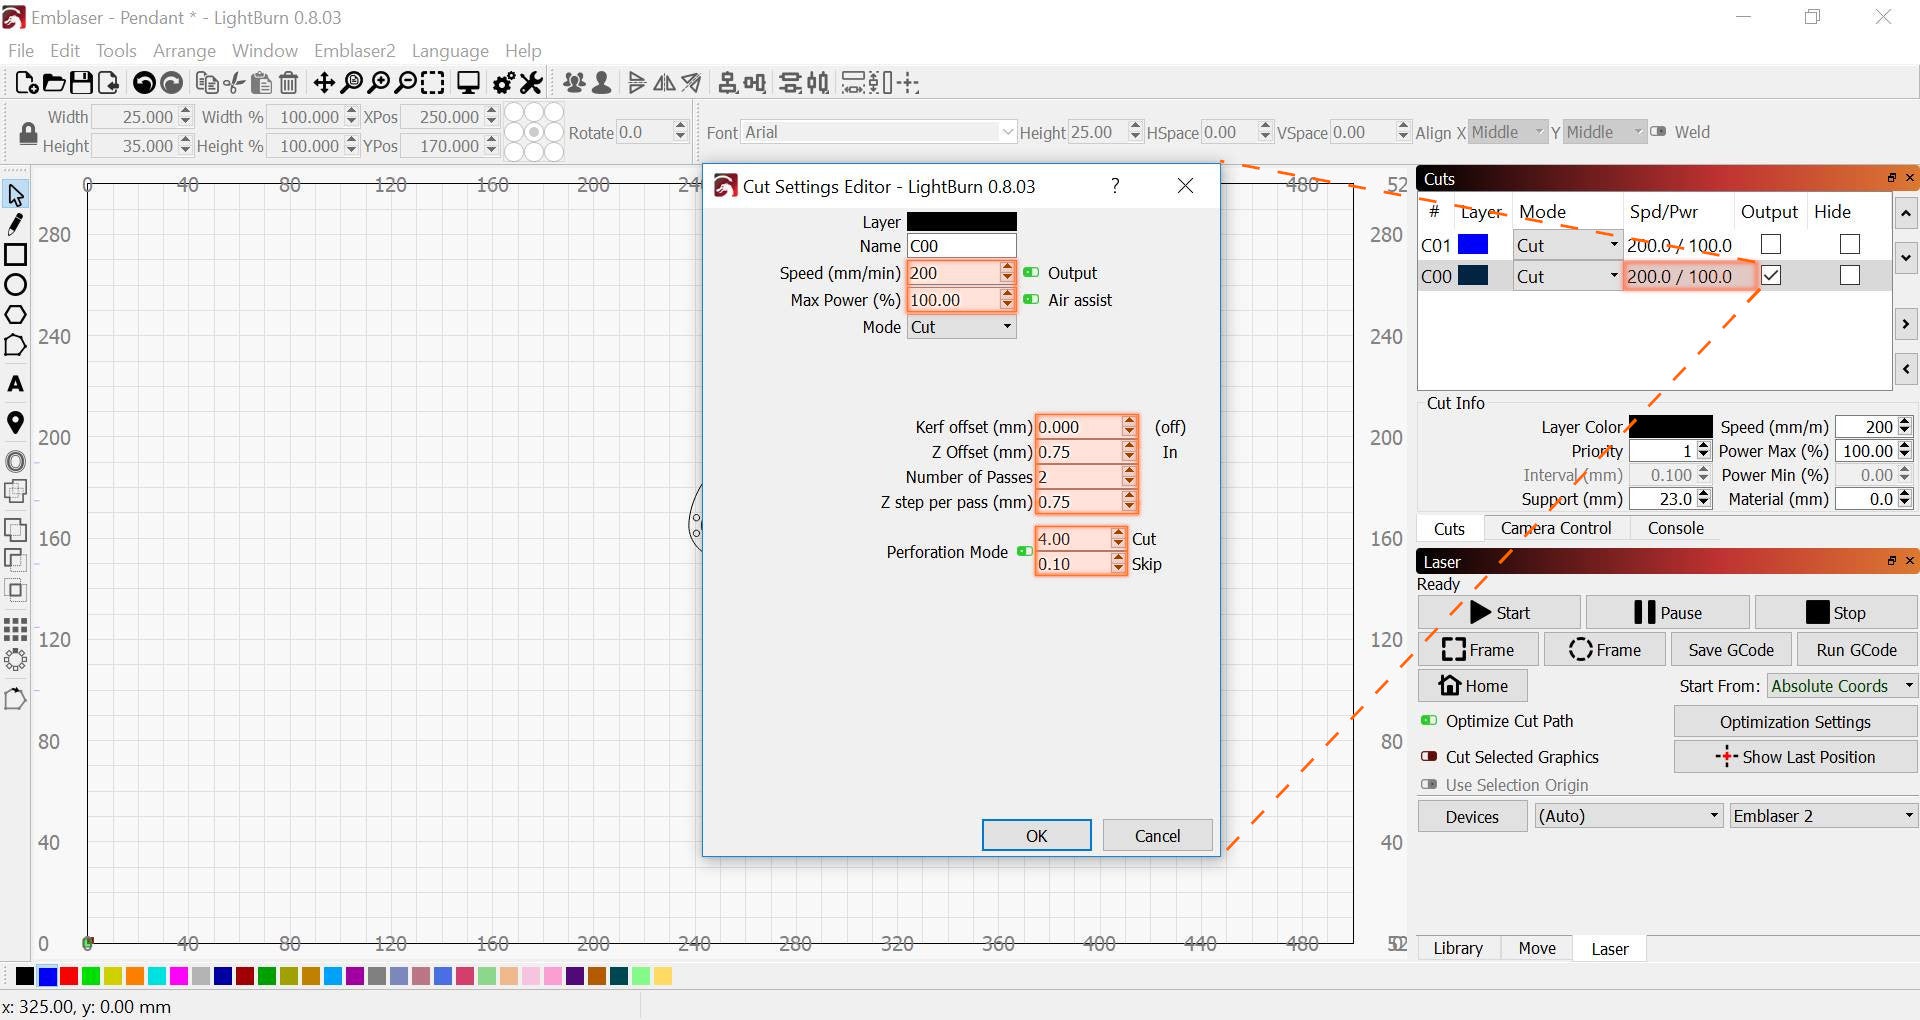
In the Cut Window, change the values to match the image above.
I am using 2.3mm Eucalypt Ply, so my setting are tuned for my machine to cut that material. If you are using the same material, your can use these settings, though some adjustment may be required depending on plywood manufacturer, etc.
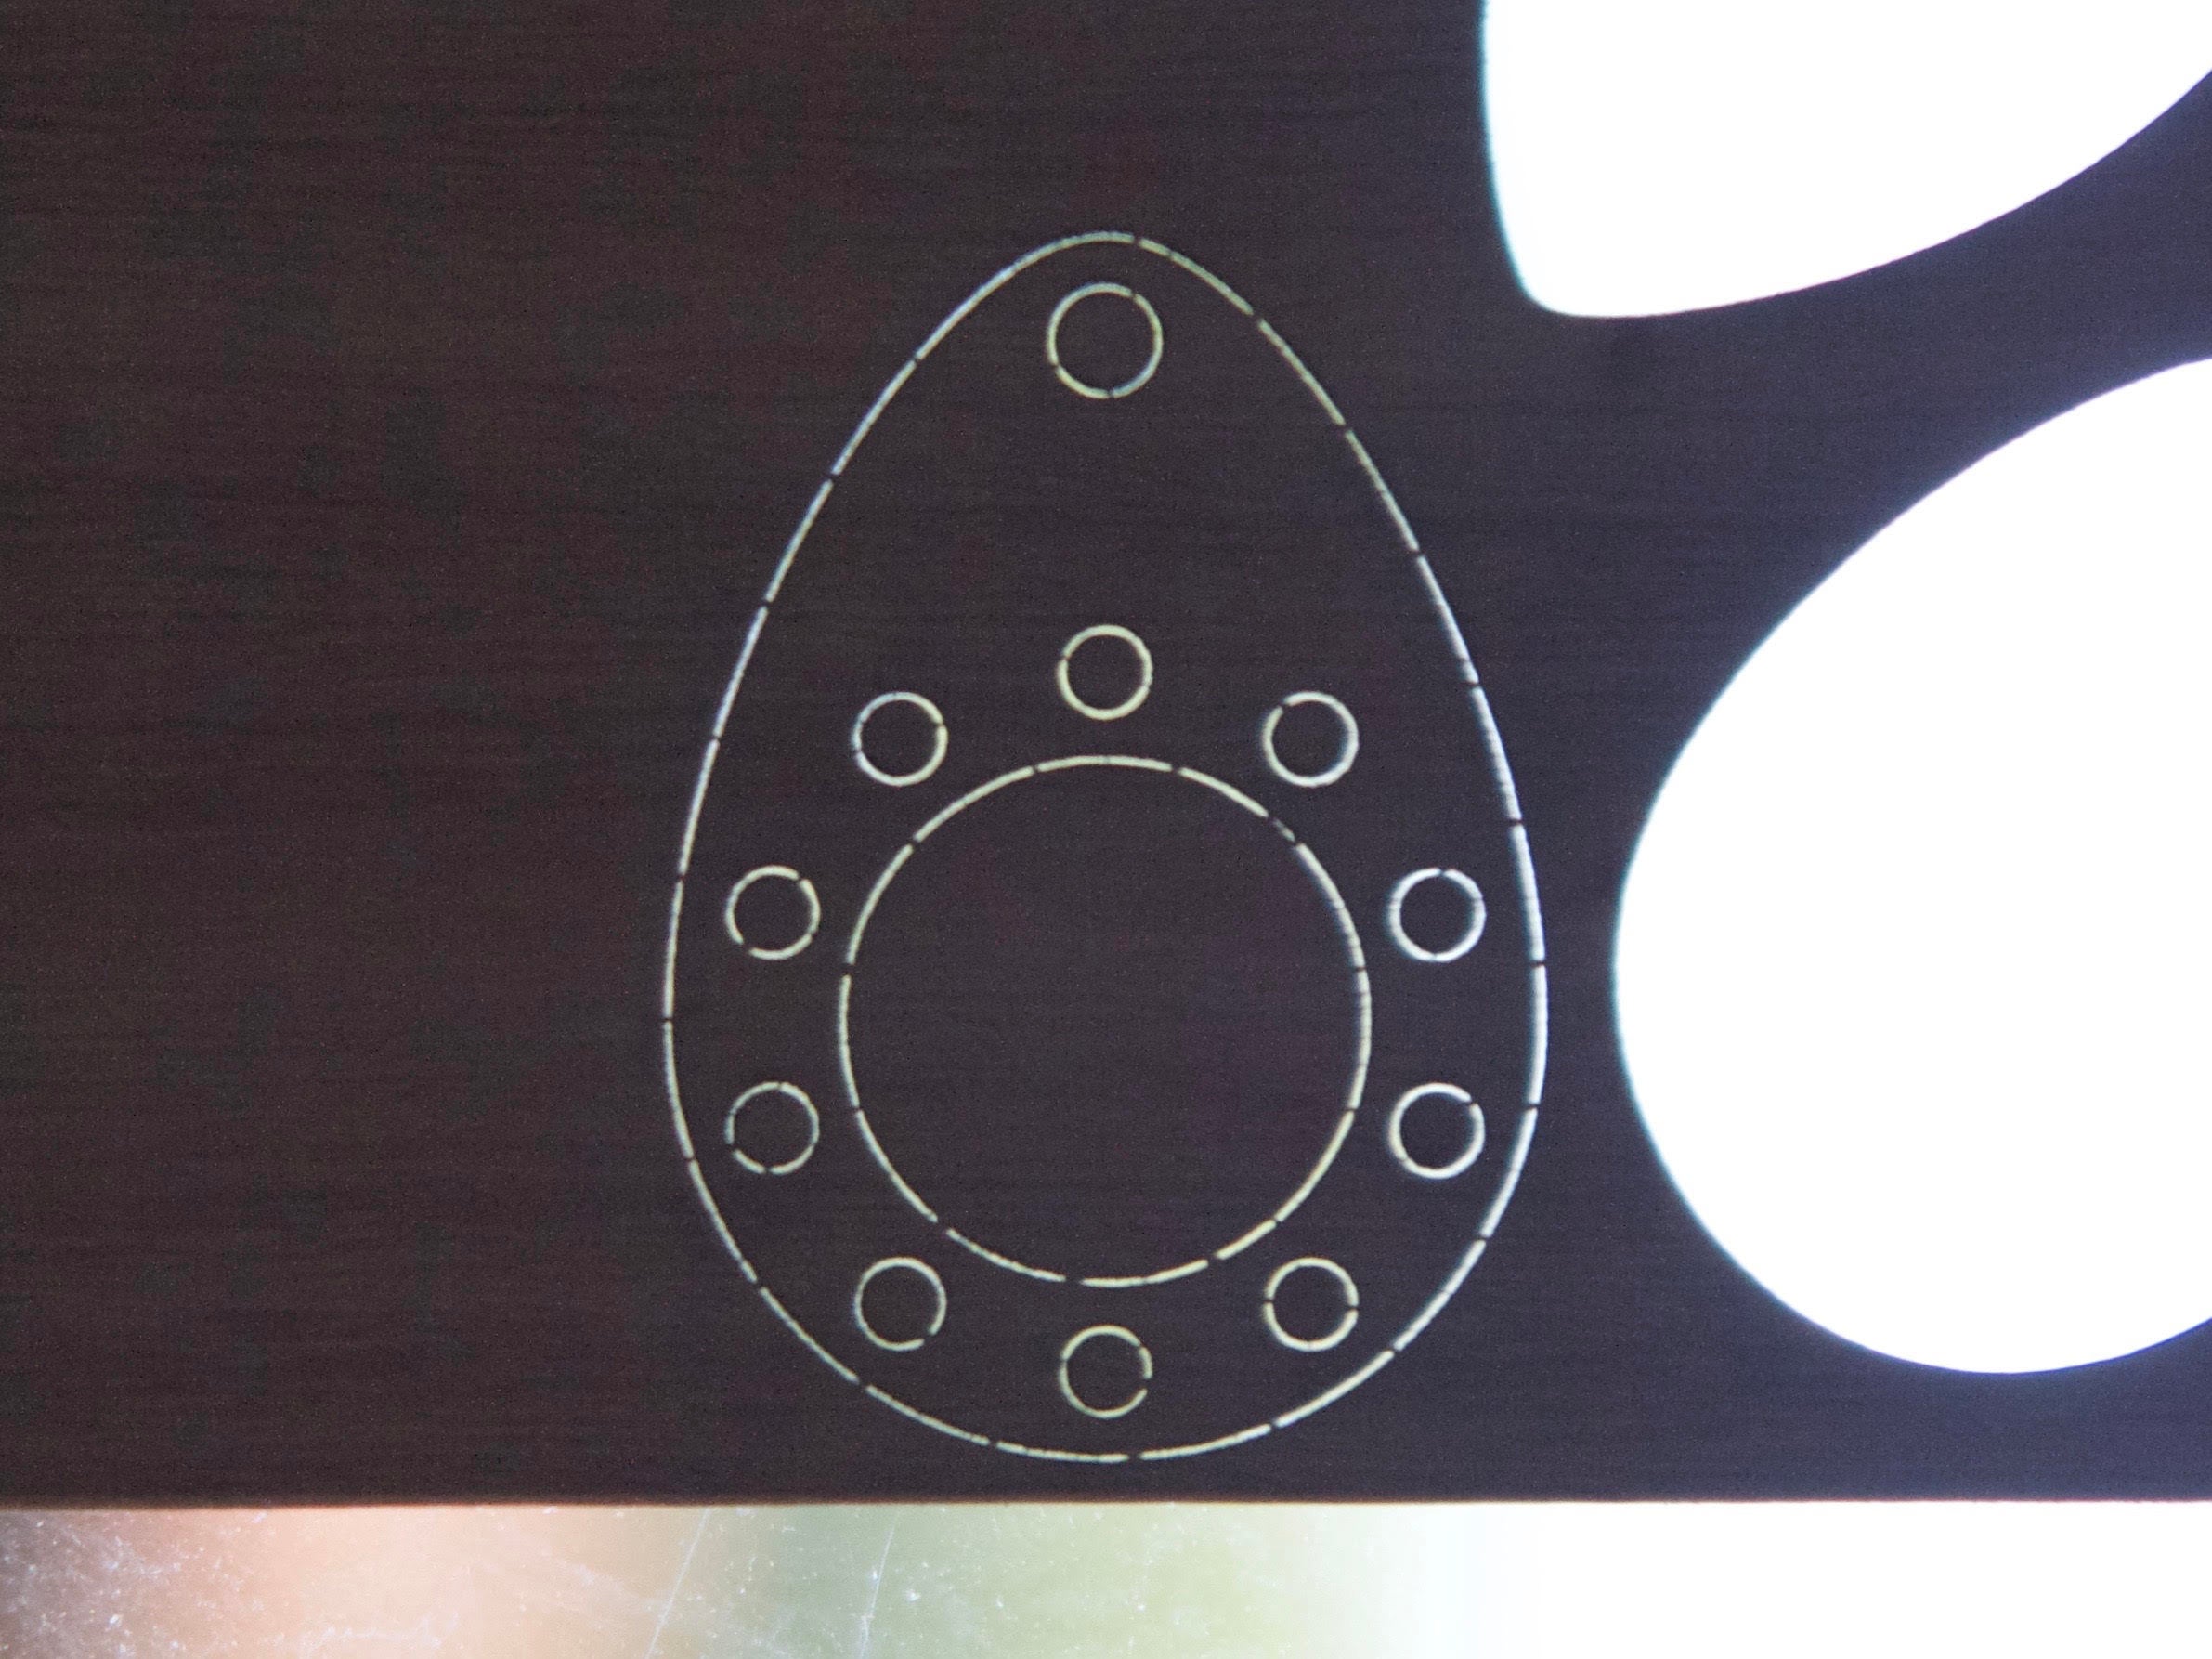
This image shows the effect of the perforation mode setting. These tiny tabs keep the job in the material, allowing it to be easily removed once the job is complete.
LightBurn > Emblaser 2 - Material Set Up and Cutting
.jpg)
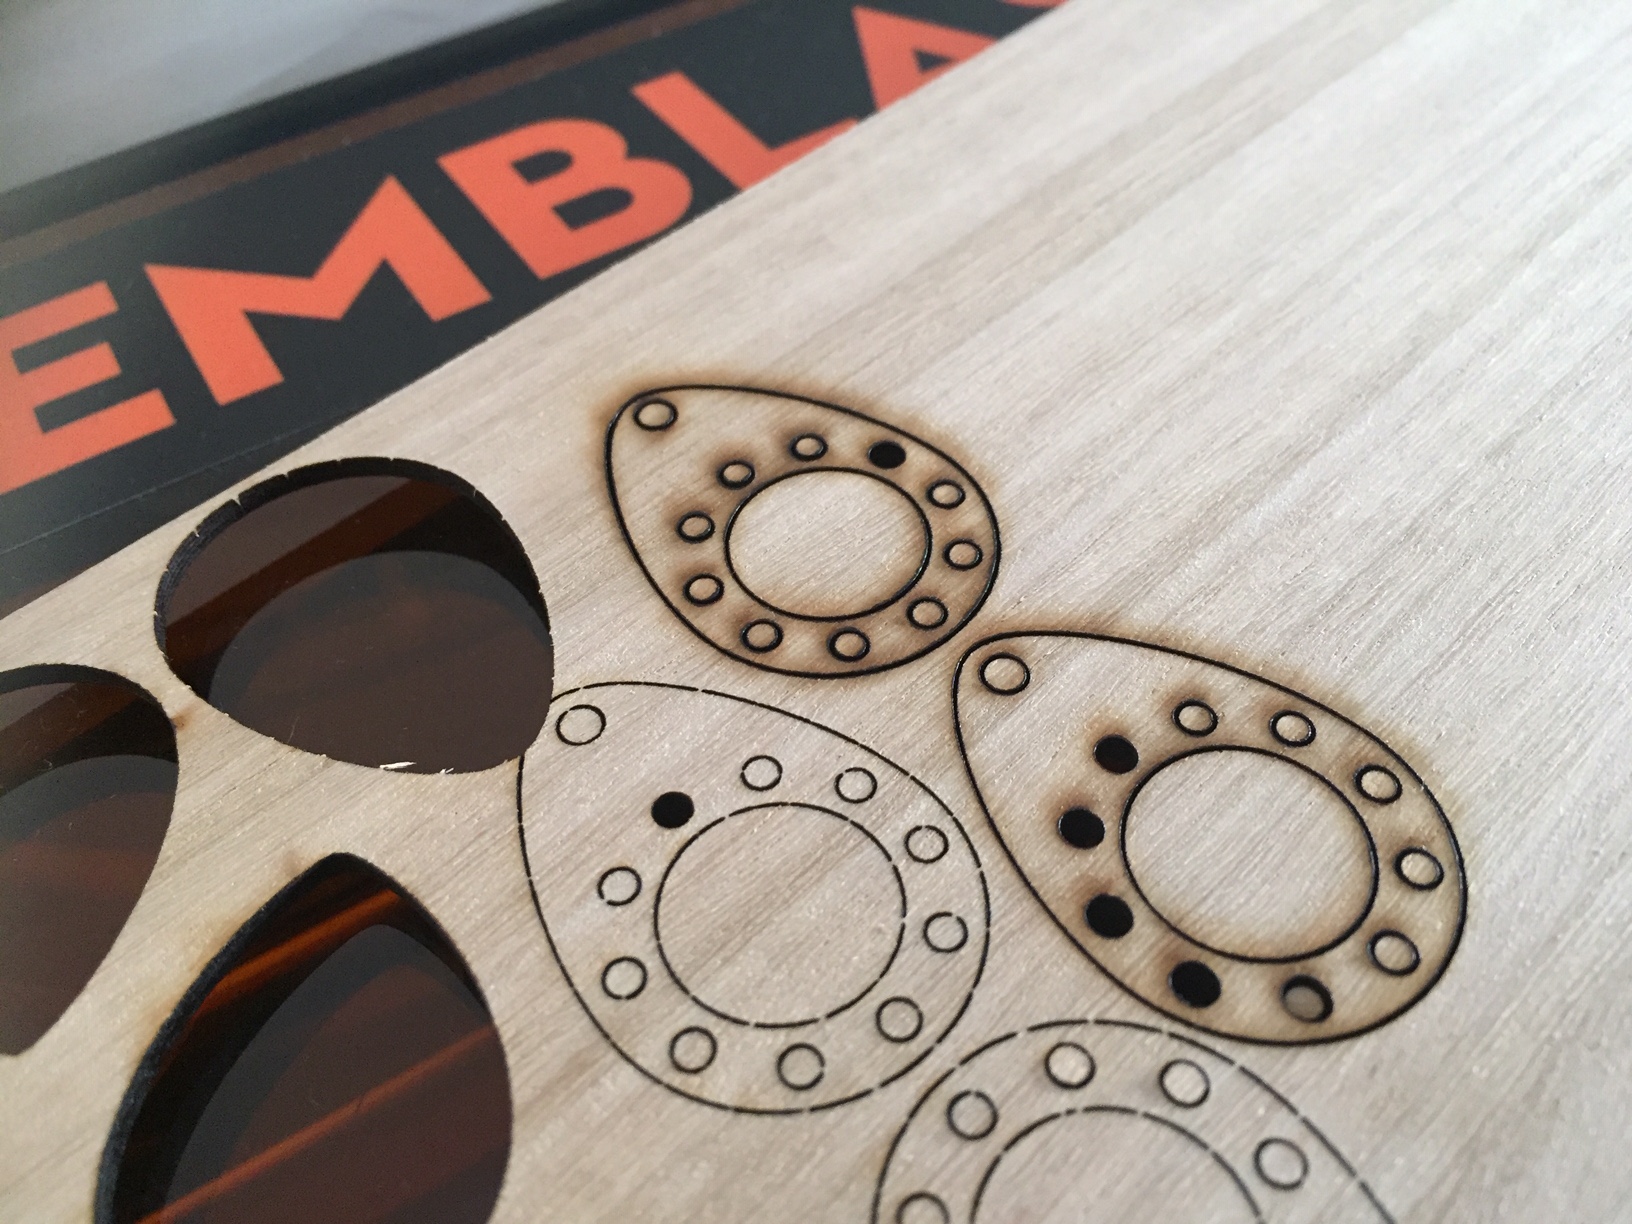
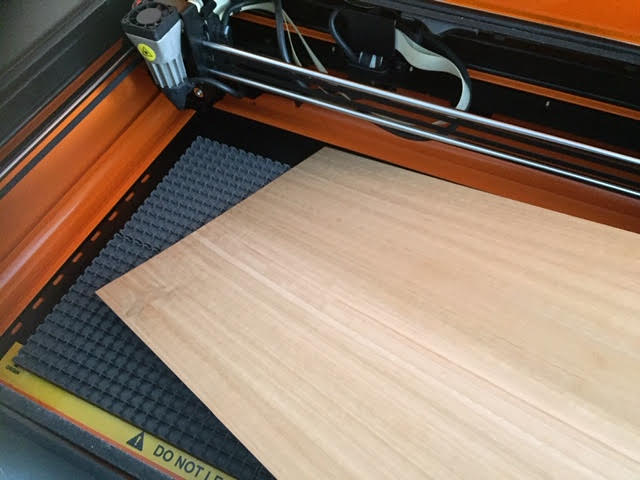
Place the material in the Emblasers' workspace, aligning it to the cut area. I use stand-offs to elevate the material above the base. This increases the longevity of the silicon mats.
With your material in mind, in LightBurn move the design to an empty space on the sheet.
You may want to consider the grain direction of your material at this point, for aesthetic reasons.
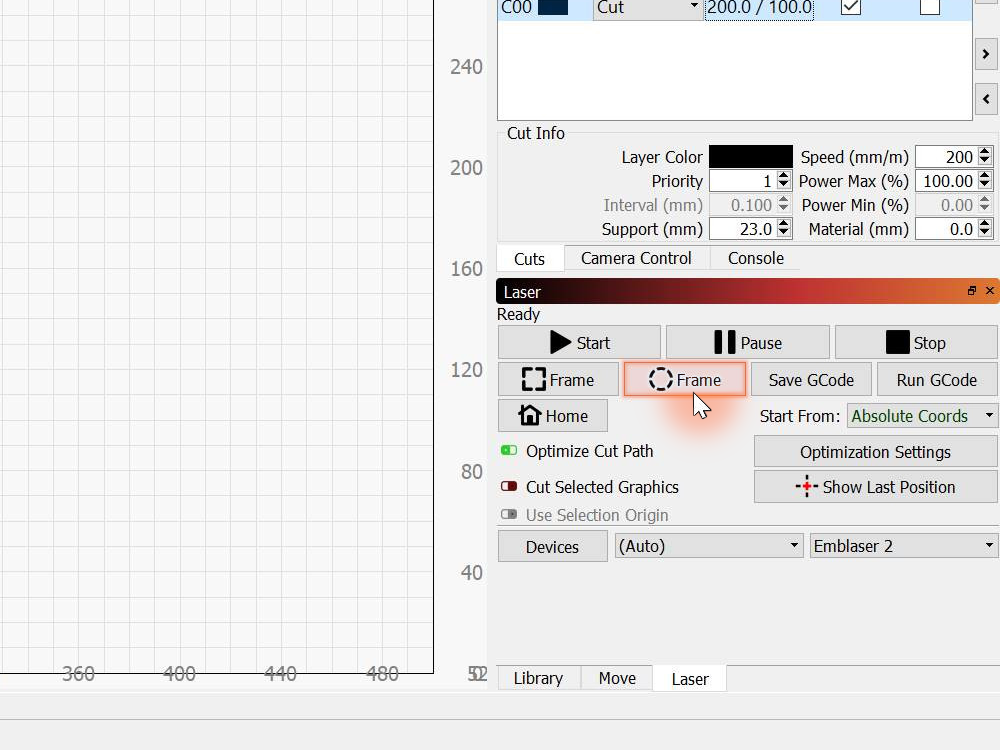
Tip: It is helpful to use the Frame Tool to trace an outline of the objects to be cut. Enabling the laser will allow you to see the laser on the material in low power mode.
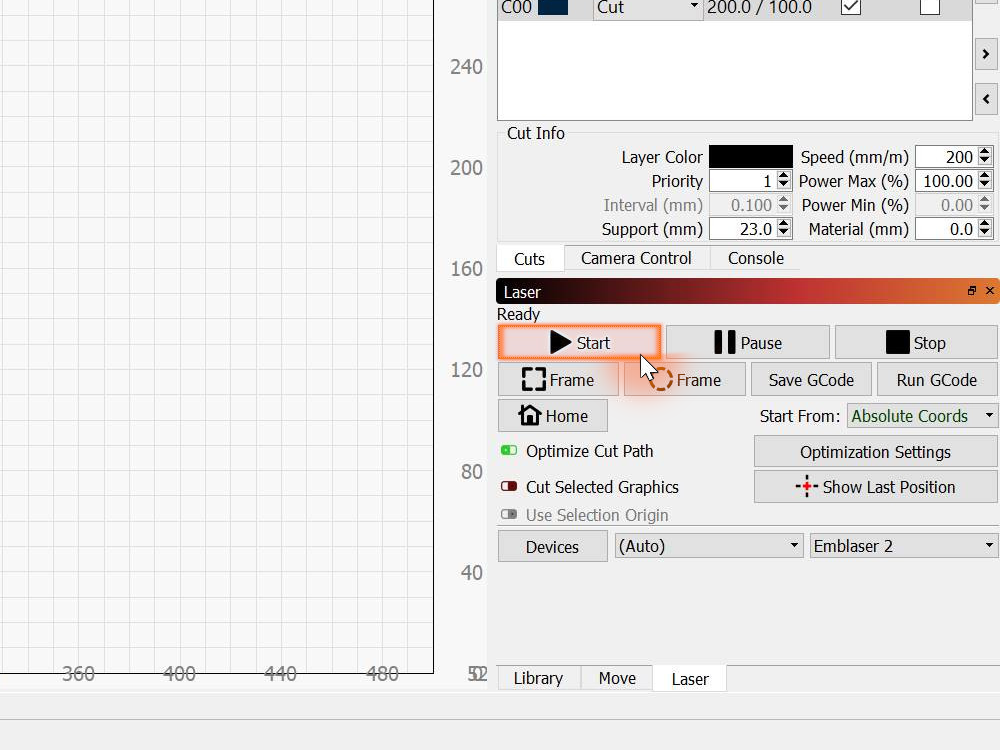
Finally, it is time to cut out your design. Enable the laser on your Emblaser. Then, in LightBurn click the Start Button and watch as the pendant is cut out.
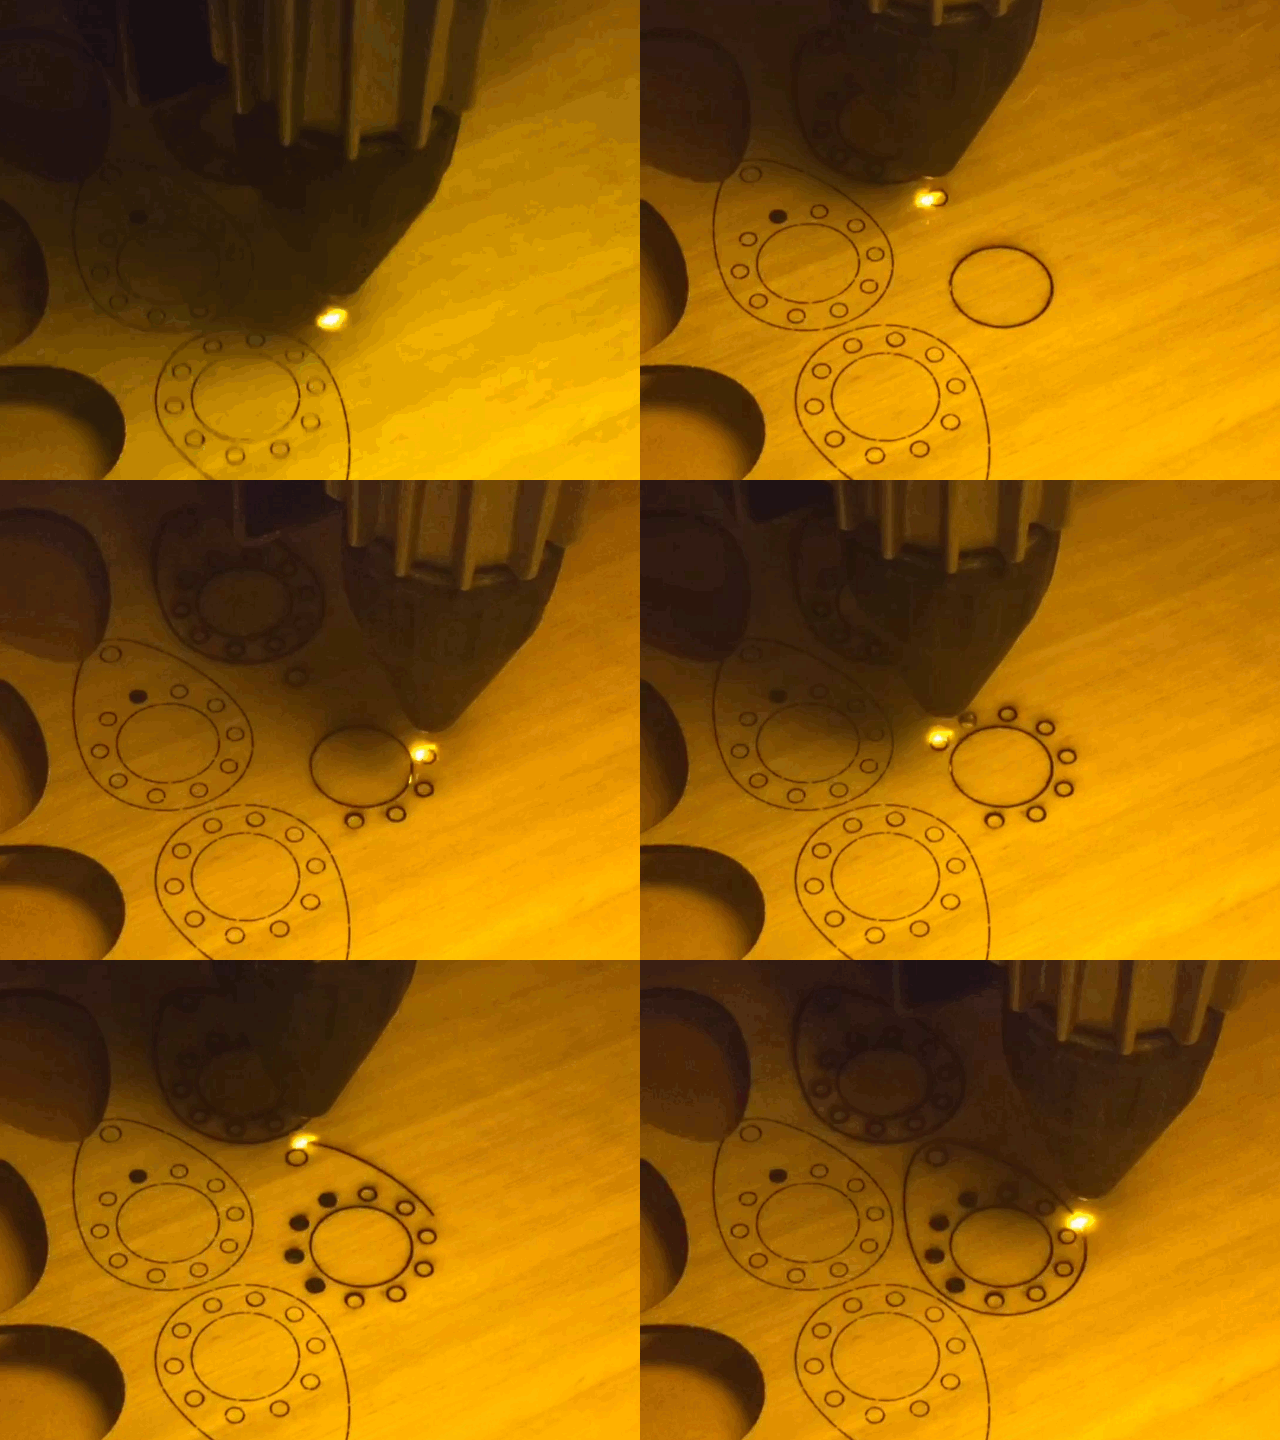
WARING! Never leave any laser cutter unattended when it is operational.
Although uncommon with an Emblaser 2, as with any laser, there is potential for the material to ignite if incorrect speed/power settings are used. Always pay close attention at the start of each job, to ensure you have not made a mistake entering the cut settings.
Finishing - Clean Up
Carefully remove the pendant from the sheet, and push out the small holes with your tweezers.
Give the faces of the pendant a light sand to remove any soot marks and smooth the edges, then wipe the parts with a cloth to remove any dust.
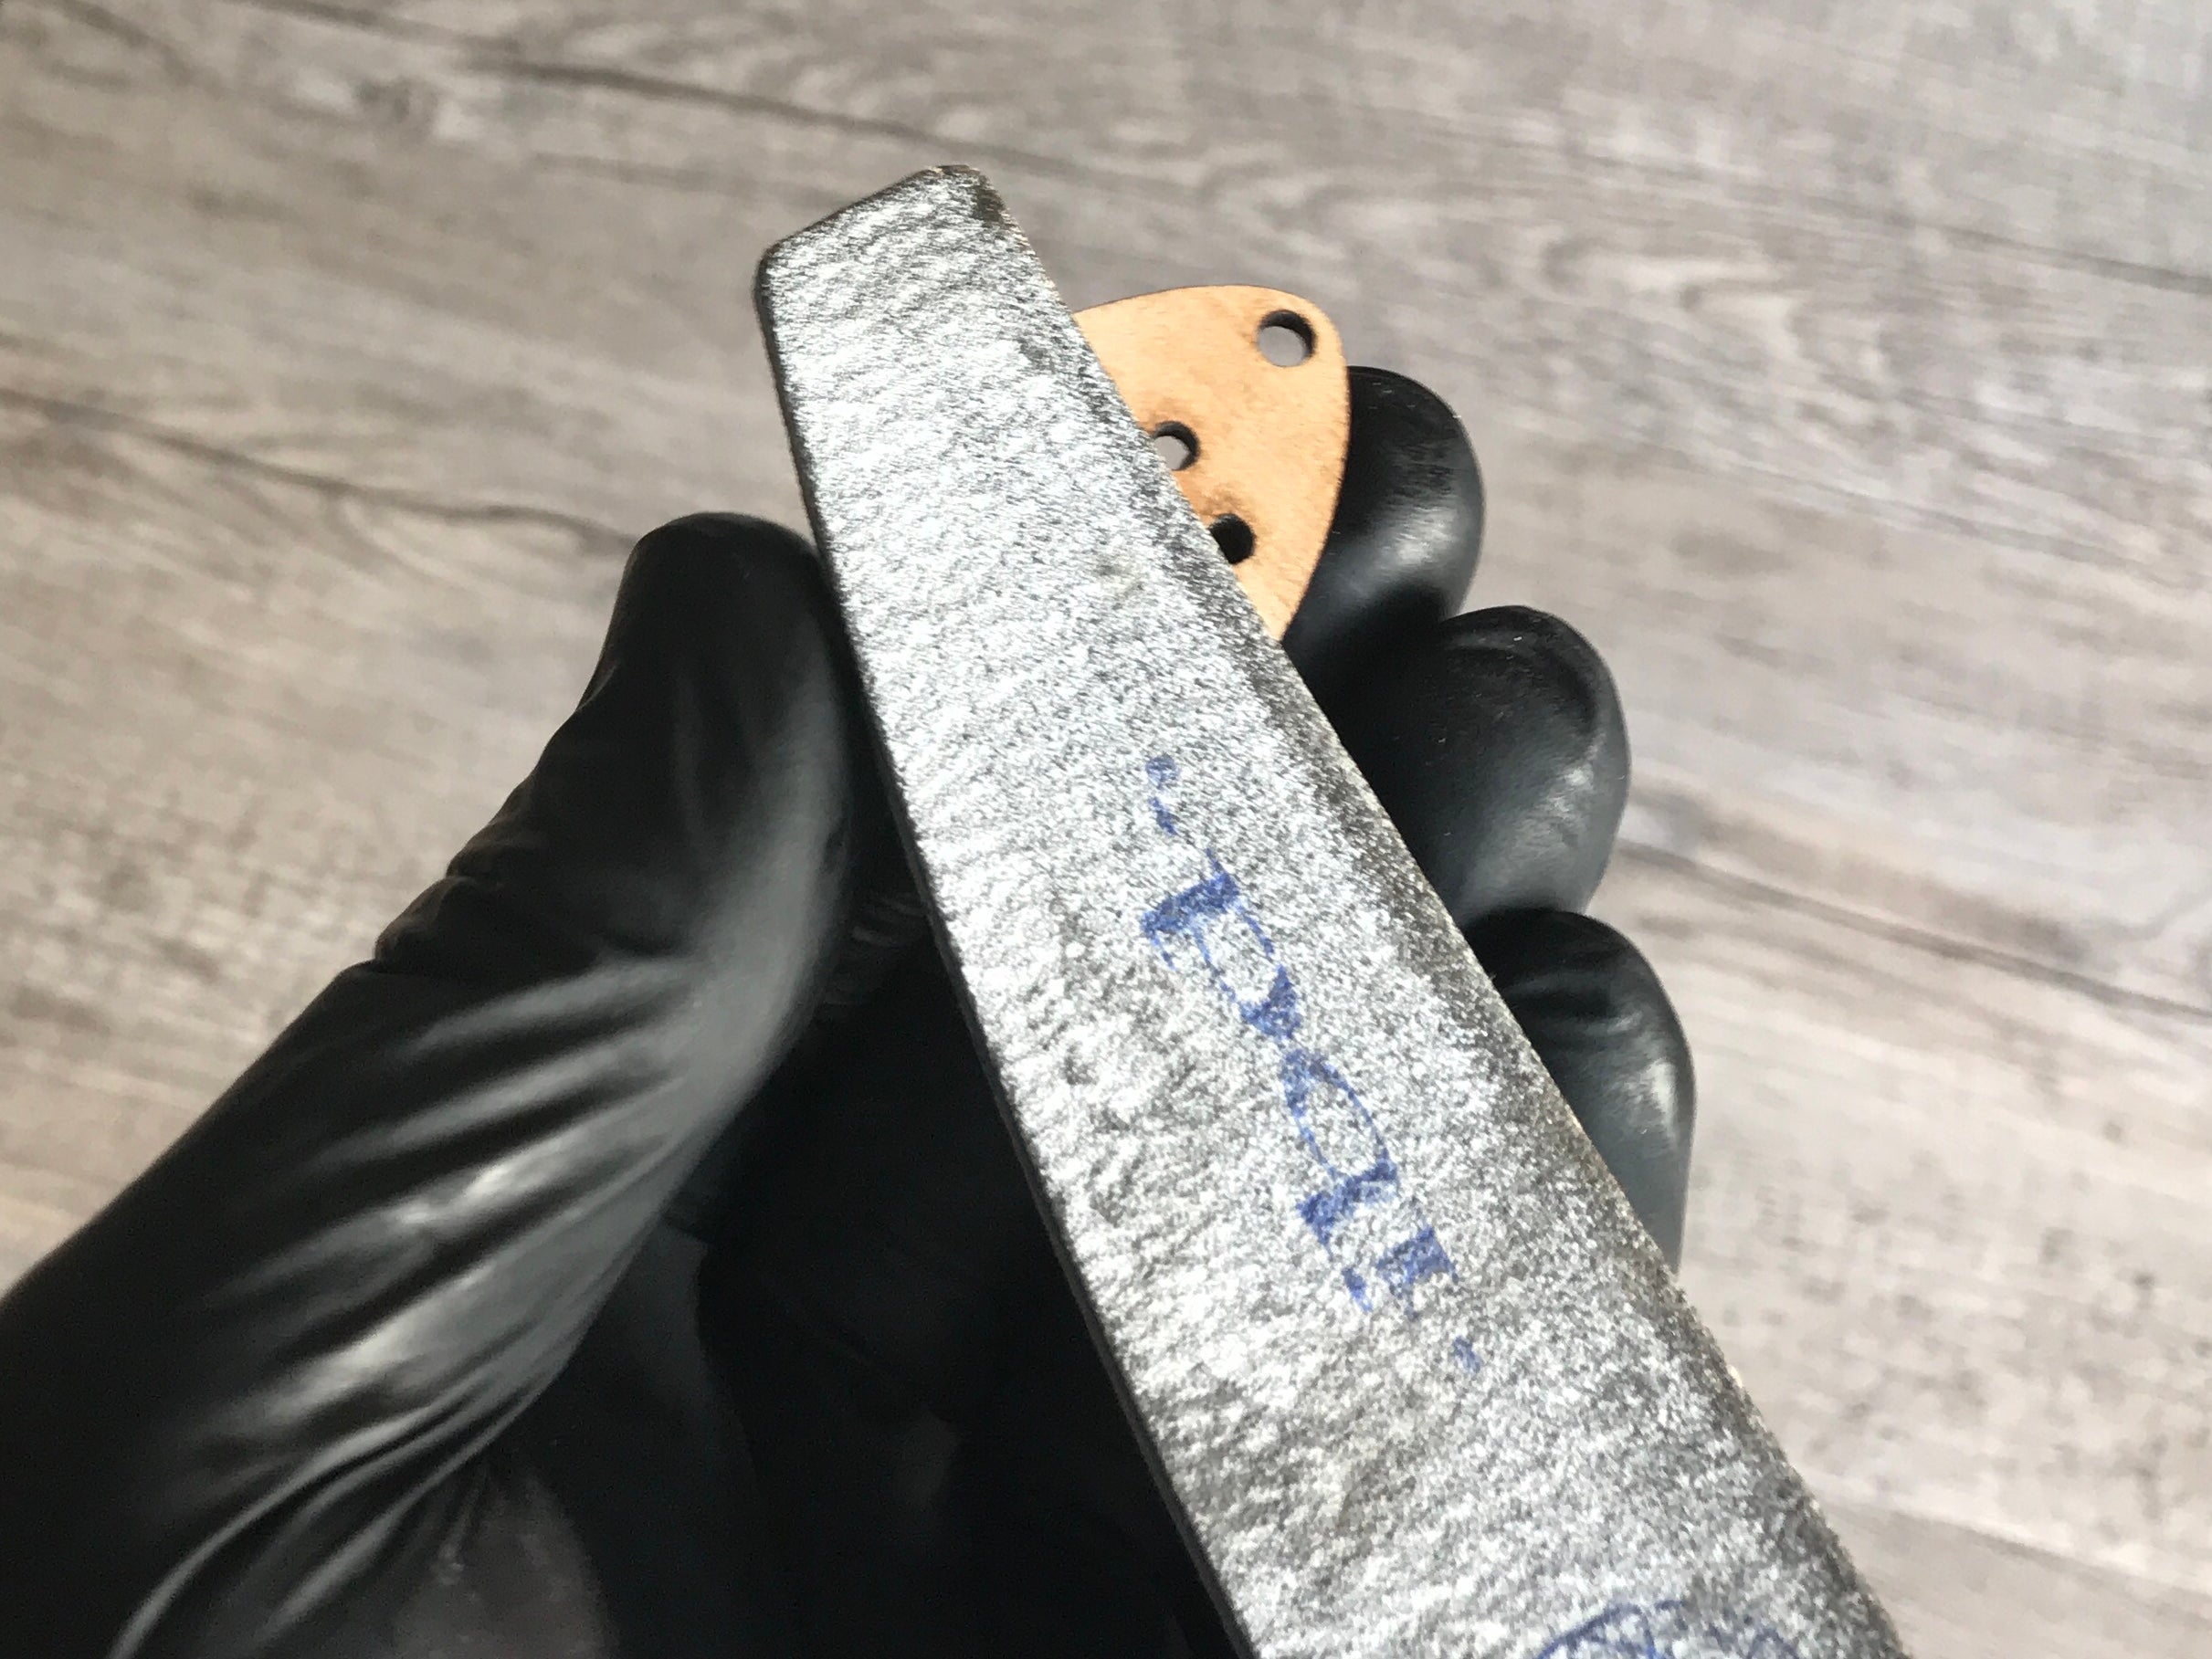
Finish the parts if desired with your chosen sealant. I used 2 layers of Tung oil on the pendants shown in most of the image shown, following the directions on the tin. I also tried a black stain.
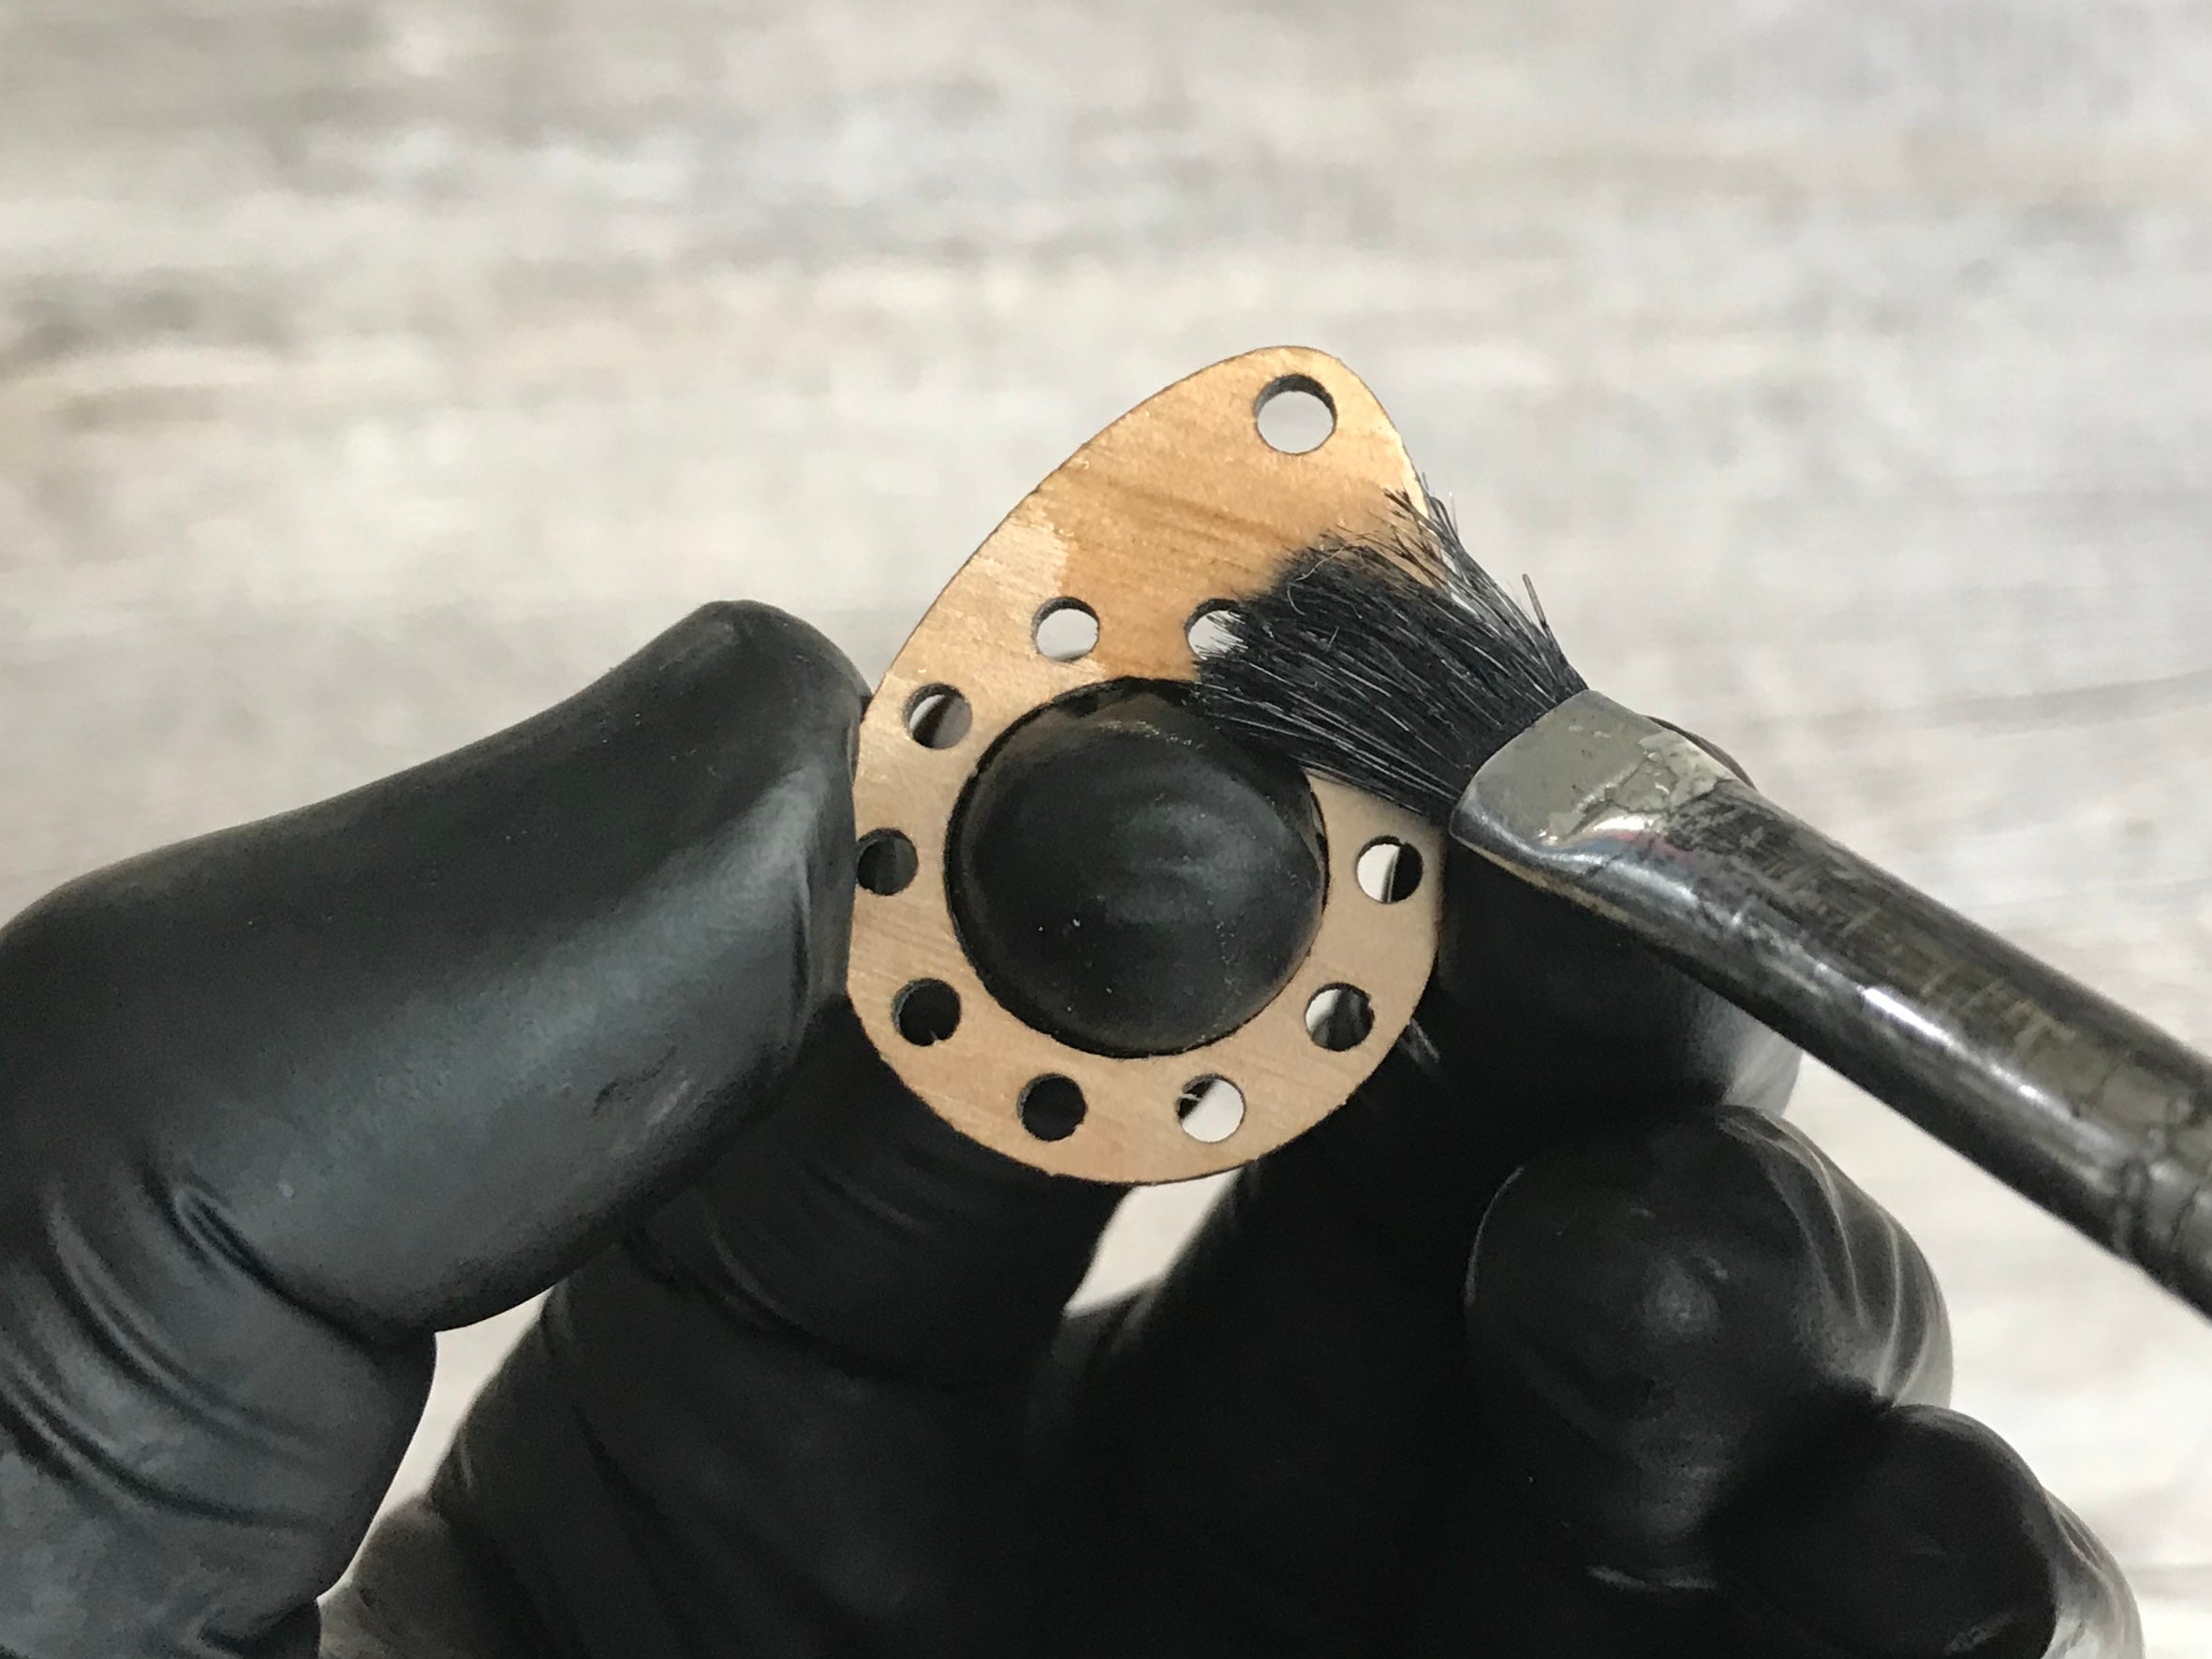
Finishing - Threading the Cotton
Once your pendant is dried, you can begin on the Pearle Cotton pattern.
You can try different designs until you find one that appeals to you, or, follow the steps below to replicate the pendant shown.
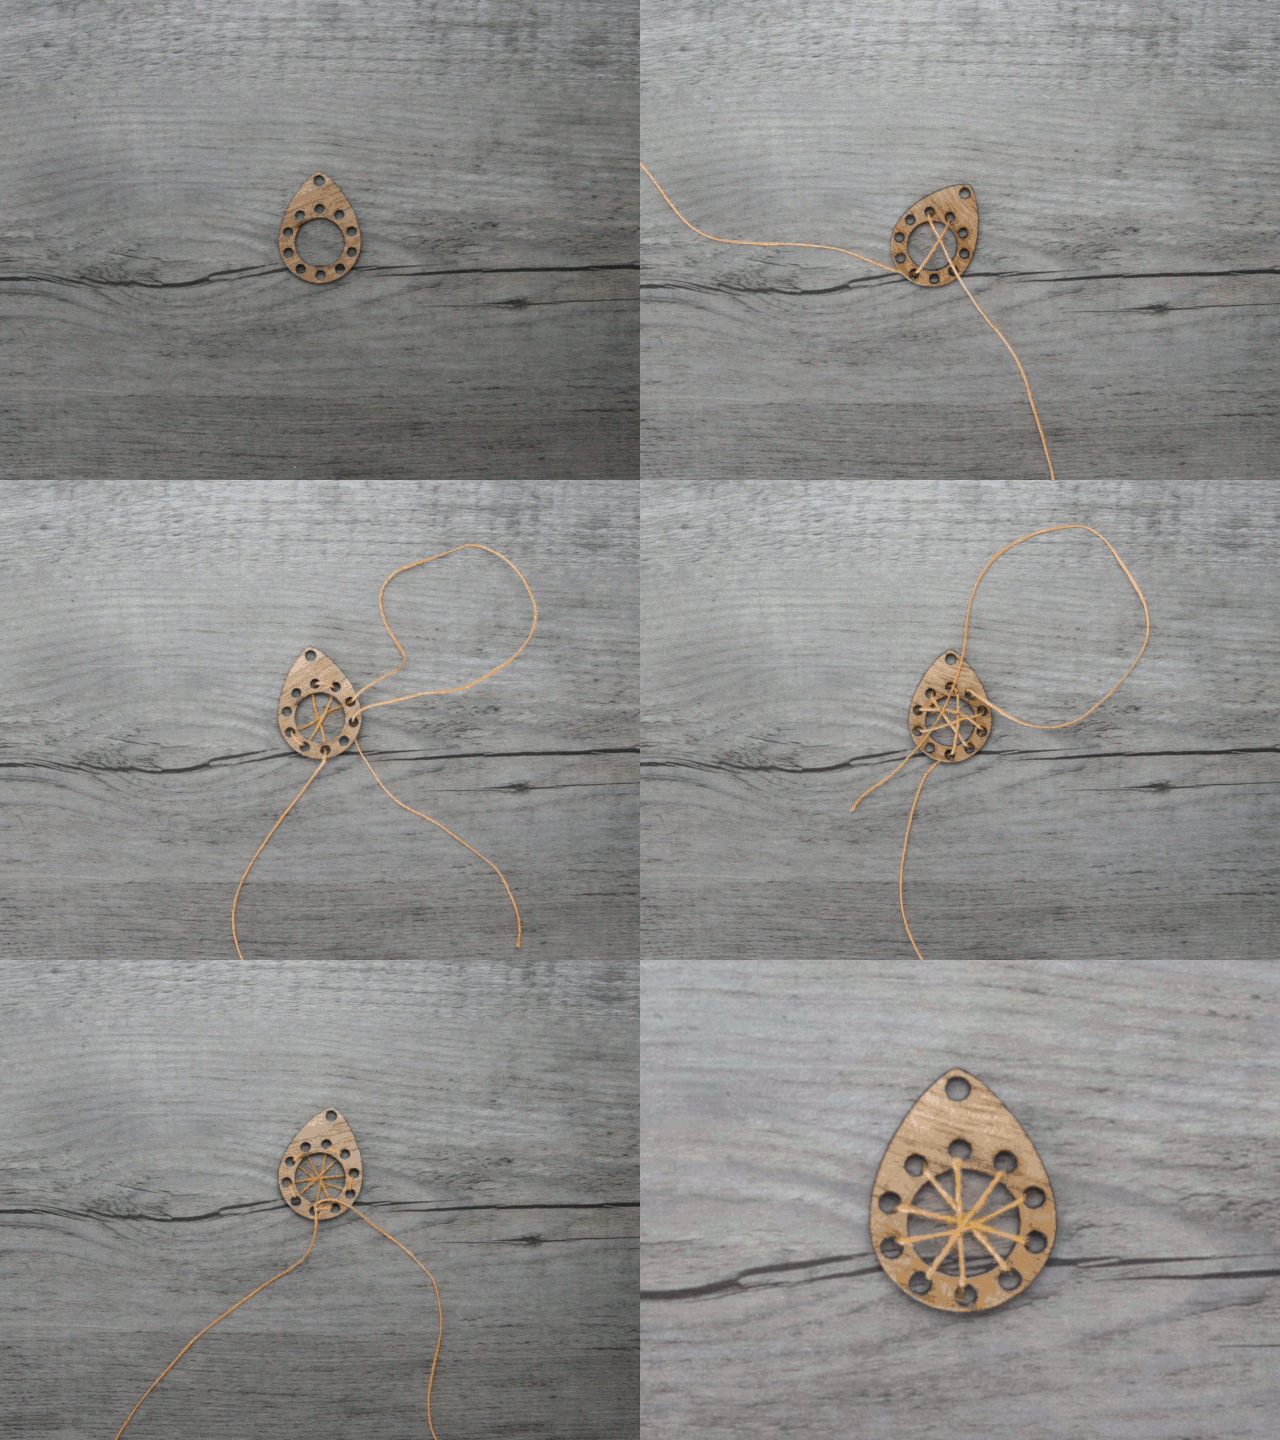
I followed a few simple rules to create this pattern.
A: Start by threading the cotton up through the lowest hole at the back side of the pendant.
B: Moving diagonally across the large hole to the opposite side, then push the cotton through this hole to the back face, pulling about 30cm through.
C: On the back face, push the cotton up through the hole to the right. Then take it diagonally across the large hole again, this time going under the thread from the previous crossing.
D: Thread through this hole to the back face, then up the next hole to the right.
E: Repeat step C and E, going around the pendant in order.
F: When you have returned to the start point, carefully pull each thread tight, then tie a small knot close the lowest hole.
G: Using super glue, apply a small drop to the knot before trimming the excess off (a toothpick can help to apply a small amount). If done right, you should be able to tuck the knot into the hole, making it invisible.
Bonus! - Gift Box
.jpg)
.jpg)
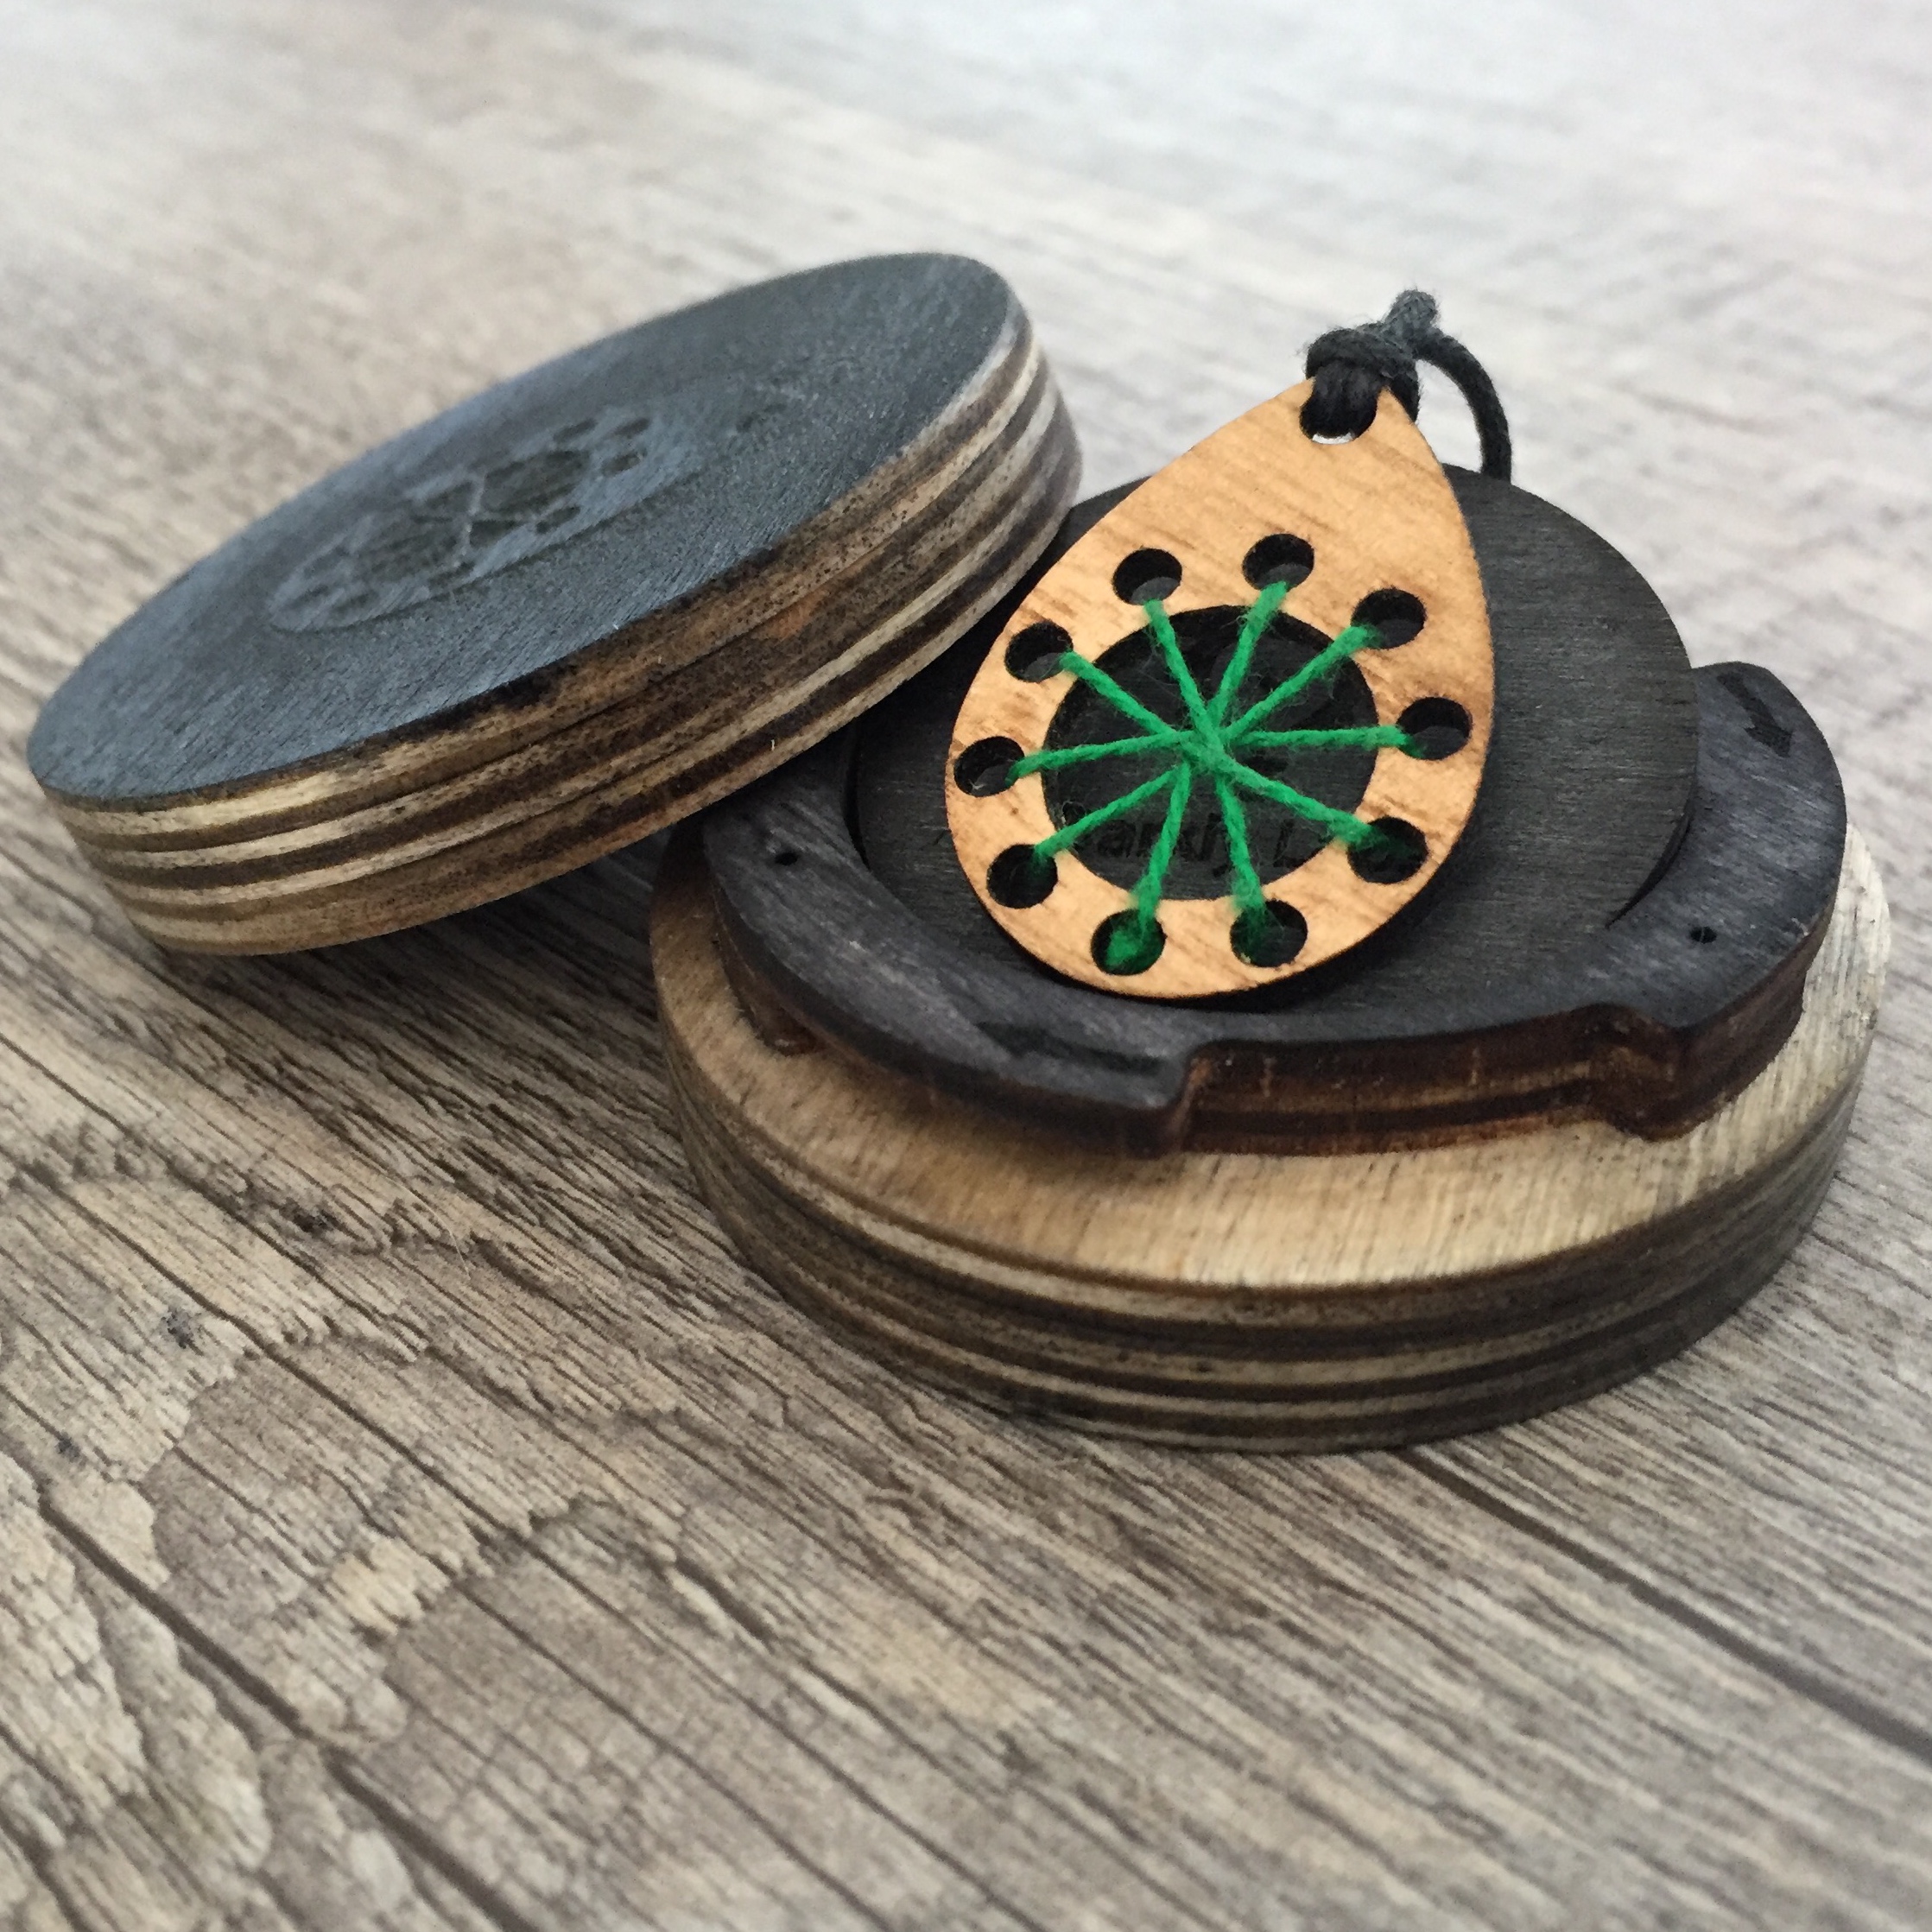
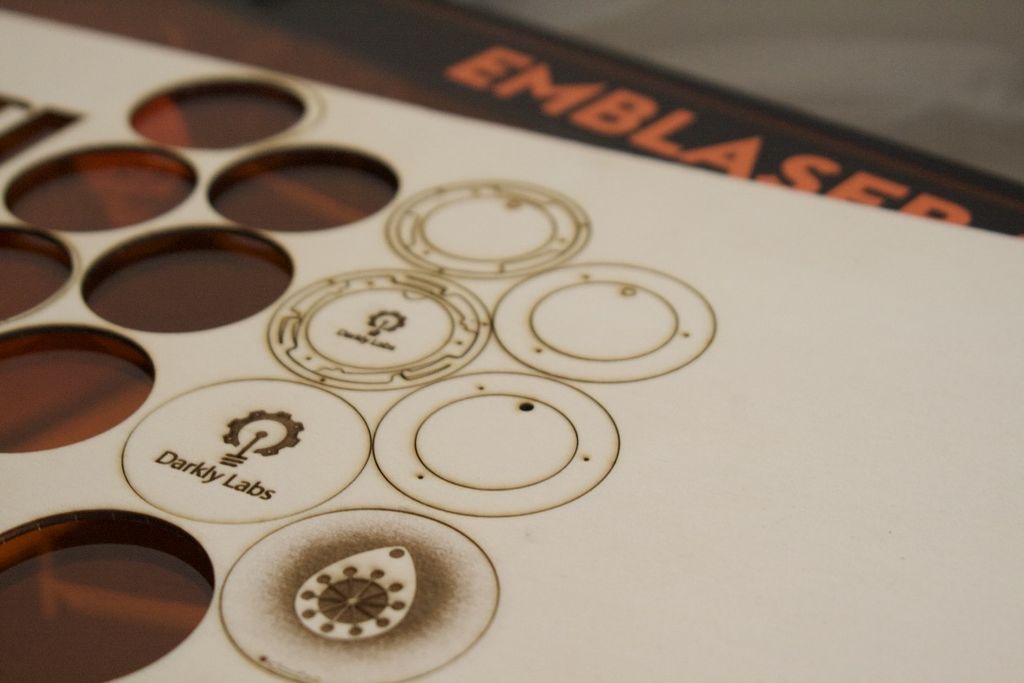
If you made it this far, you should now have your own pendant. Go you!
Because you have complicated such a great looking project, why not cut a nice box to put it in.
The files attached were designed with 3.0mm poplar plywood in mind, though should work with any plywood.
Follow the process used for the pendant to cut the box components, adjusting settings as required. Once cut, carefully press out the pieces, and clean up as before.
There are 3 small holes in each part, which can be used for alignment.
Using superglue sparingly, stick each layer together. I used some pins in the alignment holes to help me.
All you need to remember is that the engraved/cut side goes up, for all but the bottom layer.
Finally, to ensure your box and lid fit properly together, you will need to sand the top layer of the box and the bottom layer of the lid a little. Just enough to prevent them jamming together when the lid is in place.
You can edit this file in LightBurn to add your own text, logo, or anything else you like to make it your own!
Downloads
Files
In case you need the files for reference, or you really get stuck...