Wood Inlays With Fusion 360
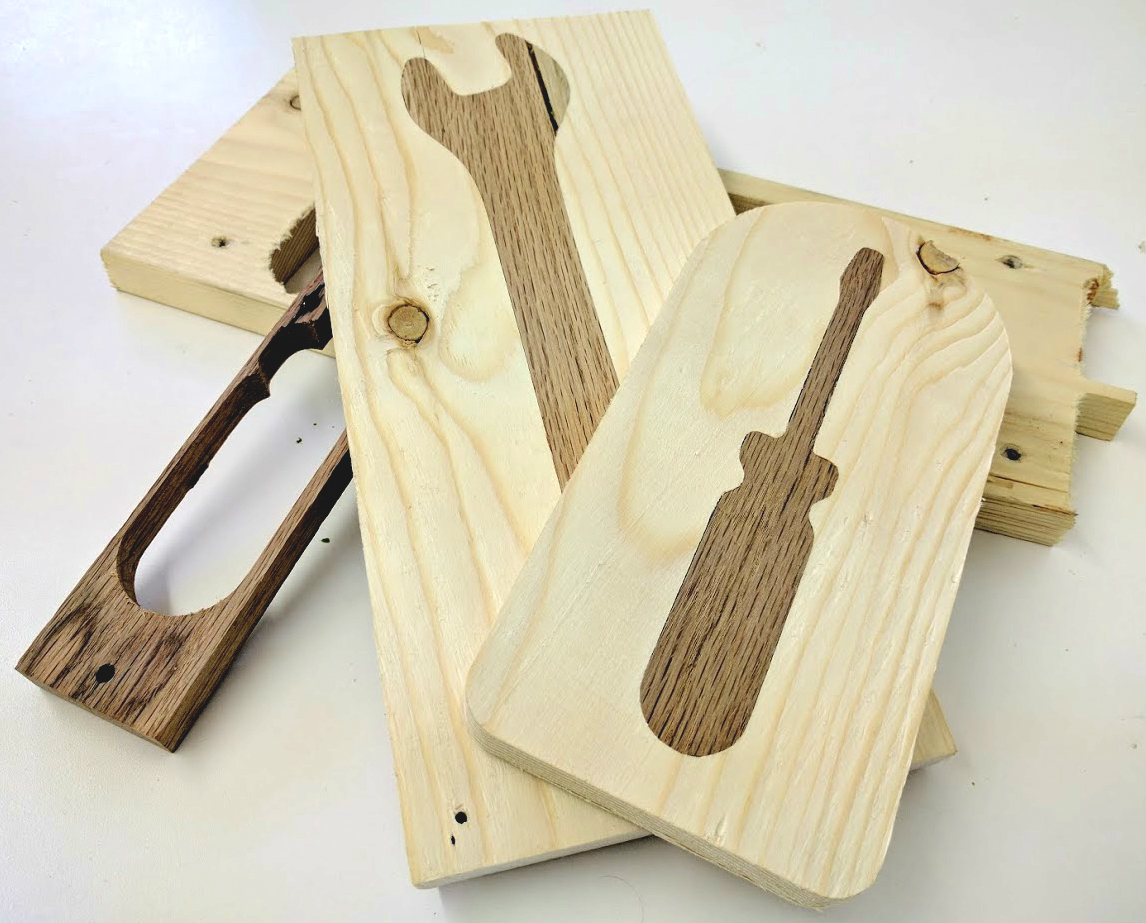
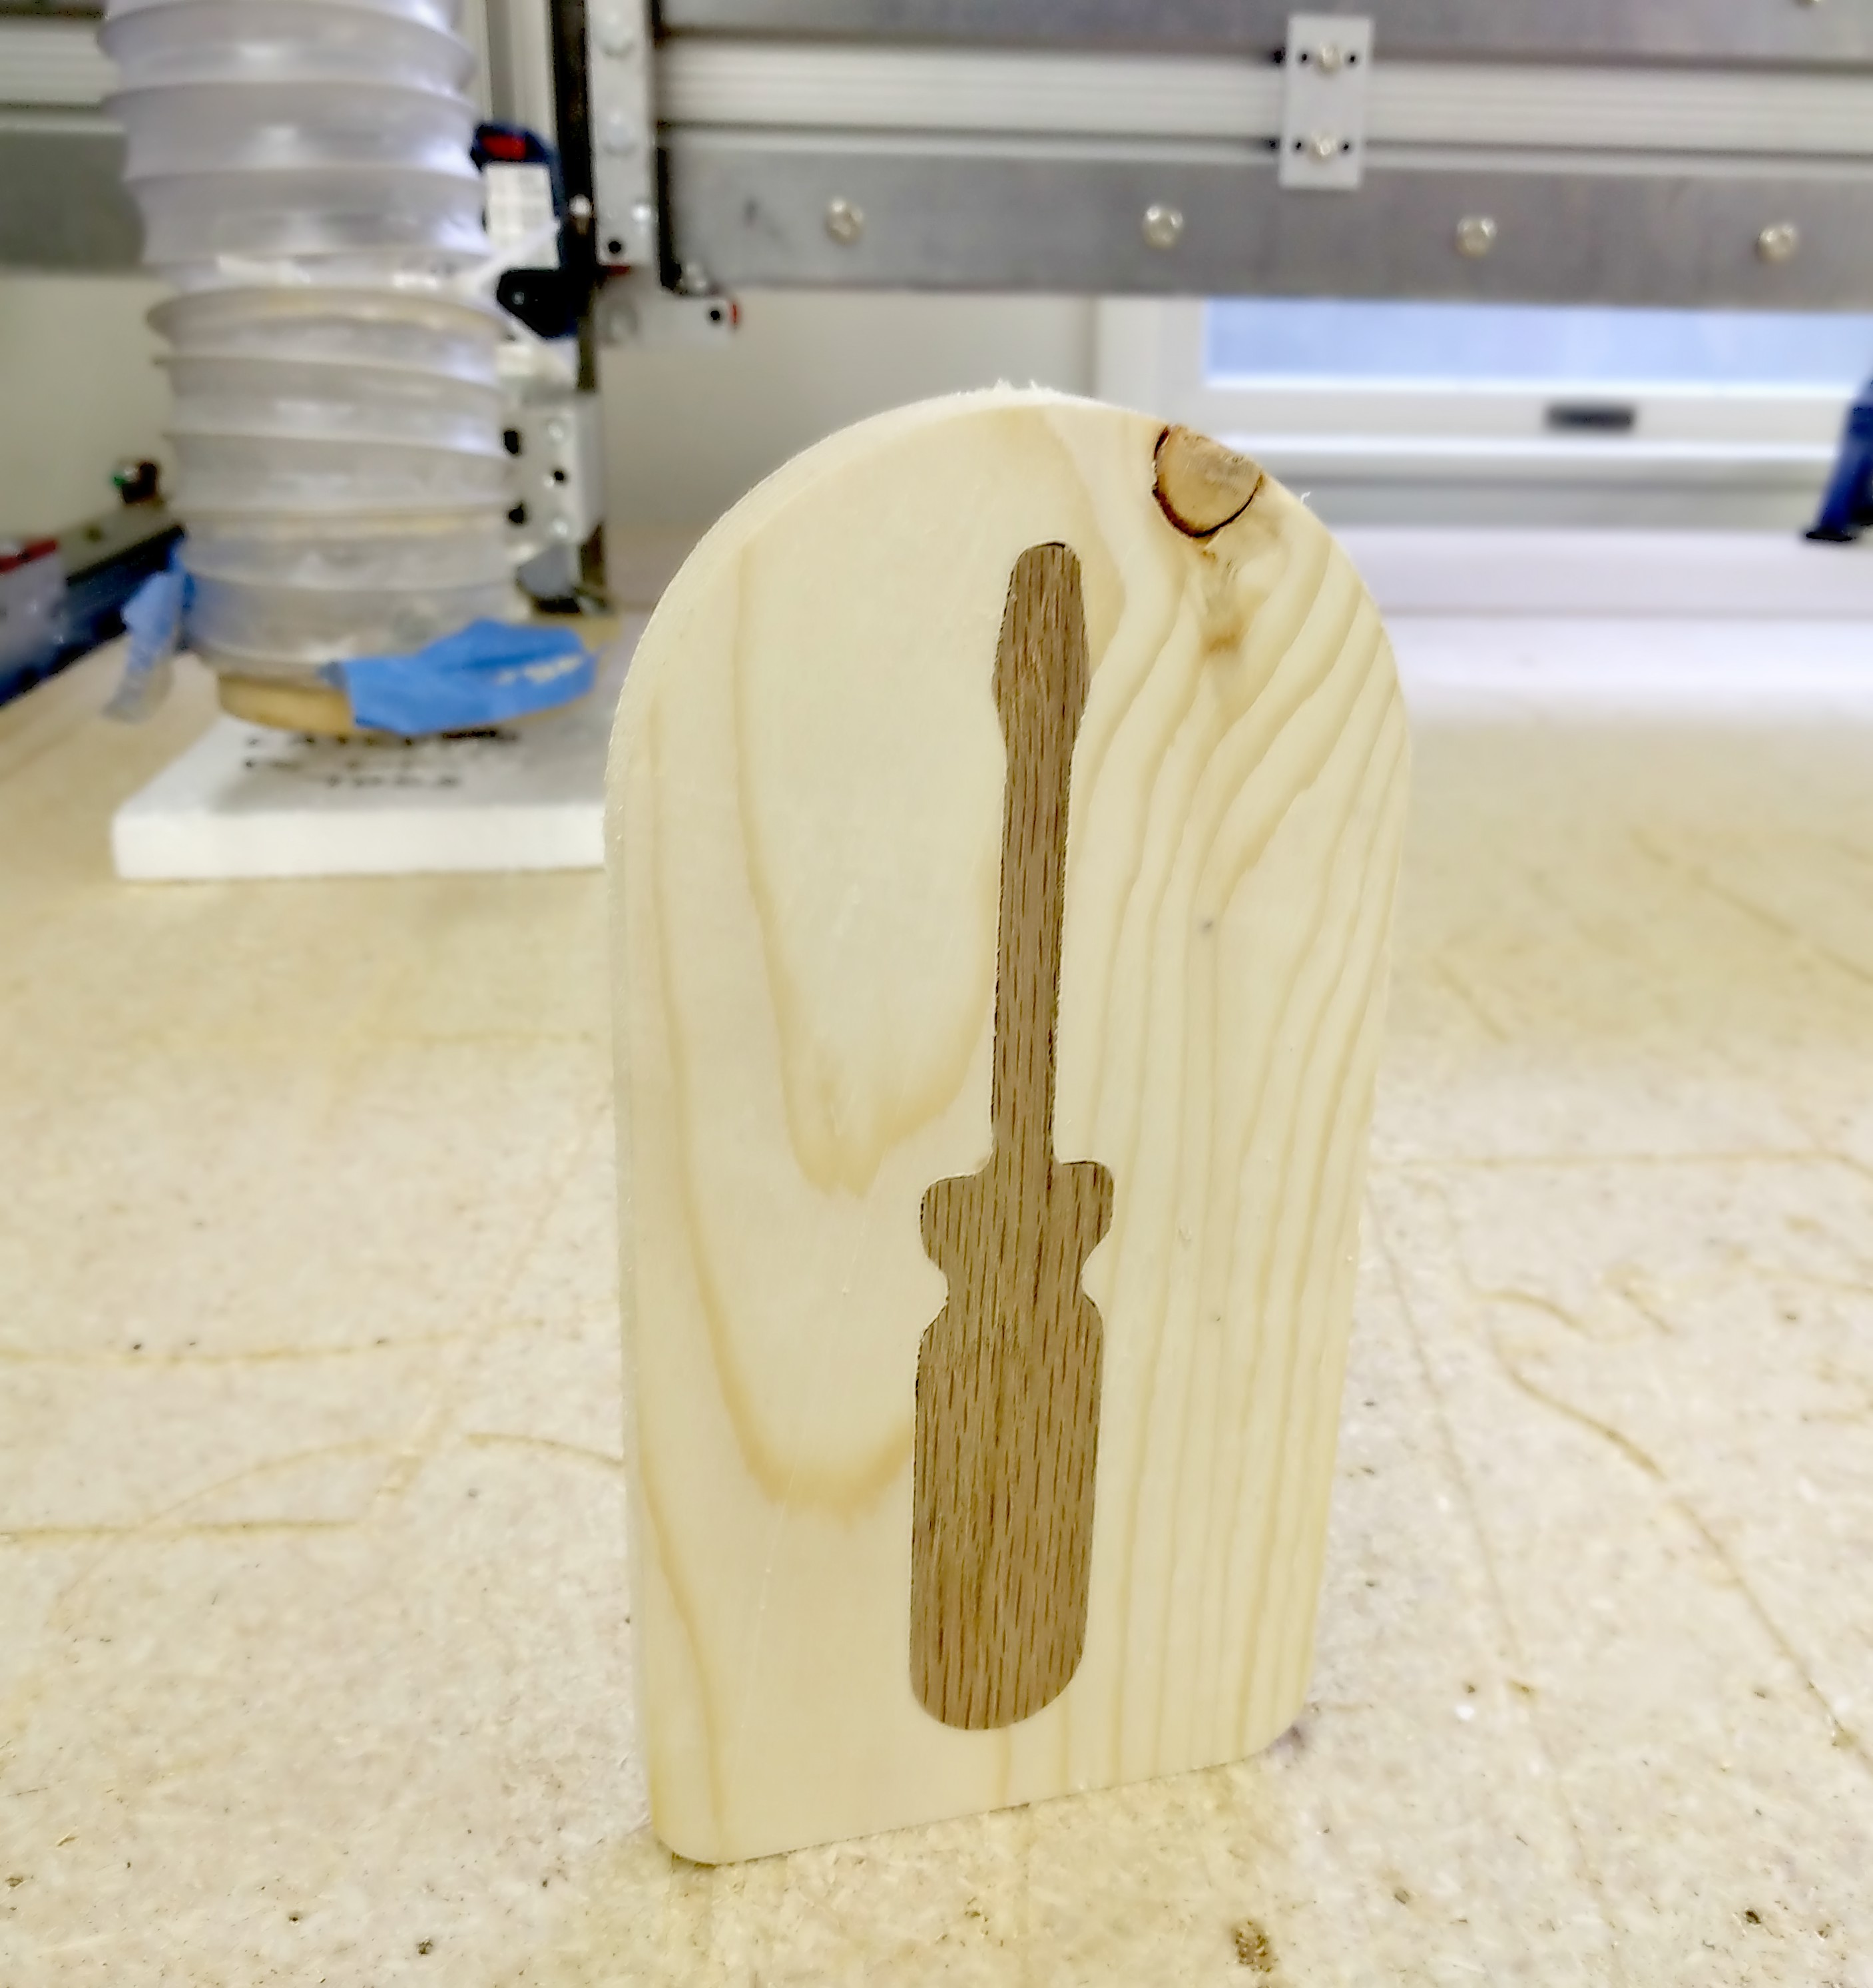
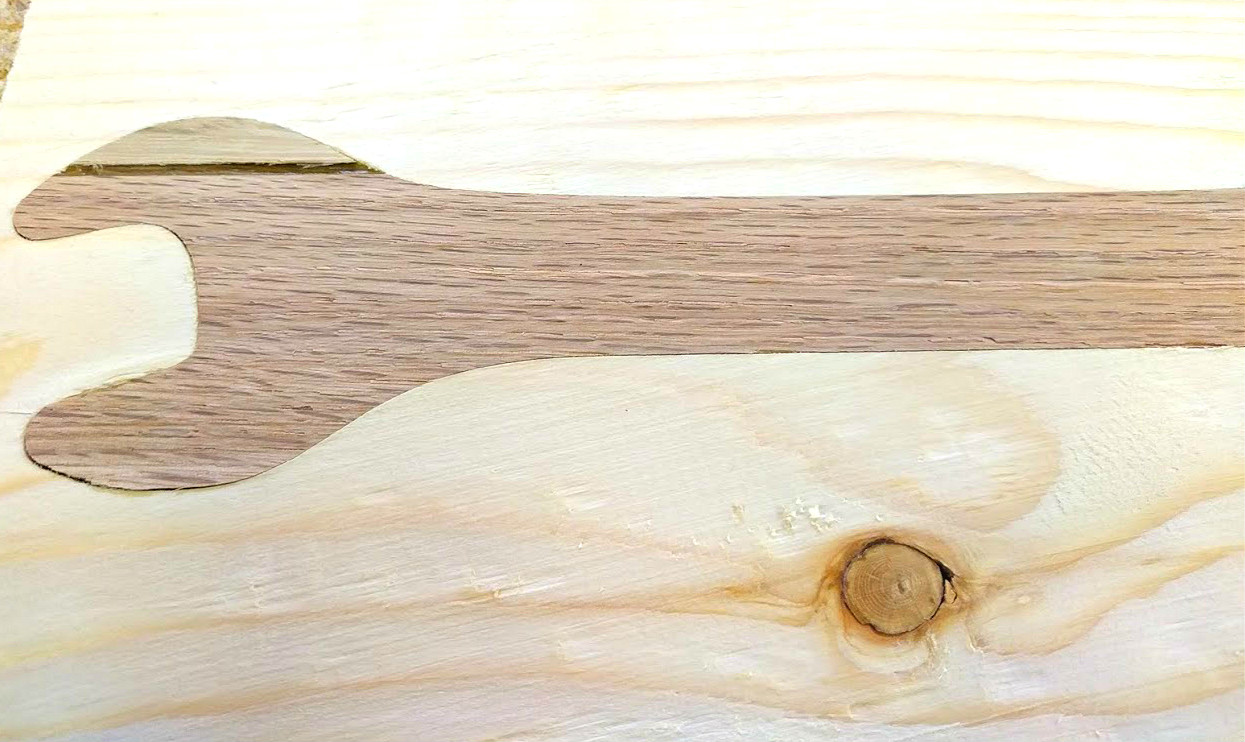
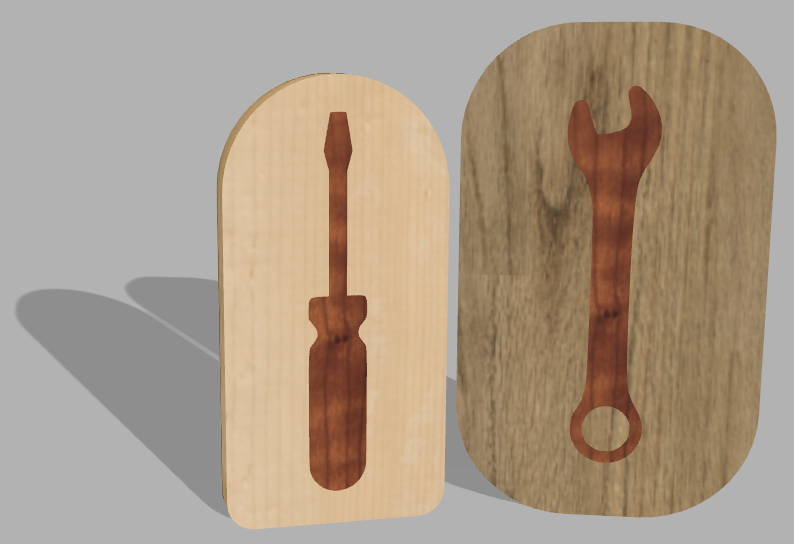
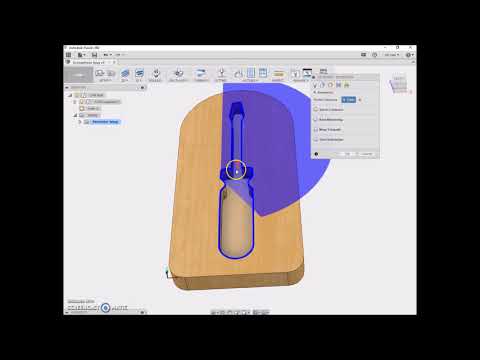
From fancy guitars to handmade furniture to ornate wooden boxes, wood inlays are both stunning works of art and impressive examples of design that demand the question: how is that done? Traditionally, inlays are the result of careful craftsmanship and hours of tedious cutting and carving. The modern era has simplified the process with the introduction of CNC routers and capable software to do the hard work for you. However, the software generally used for creating inlays costs several hundred dollars- quite of bit of money for a hobbyist or curious maker.
That is where Fusion 360 comes in. Fusion 360 is a powerful all-in-one tool that incorporates all forms of 3D modeling in one easy to use and free package. This Instructable will describe a method for making wood inlays that I have found to work well. A design is imported, modeled in CAD, and then loaded into the built in CAM environment to generate toolpaths for a CNC machine.
This project is intended to be a beginner project for those getting started with Fusion 360 modeling and CAM. It would be helpful to be familiar with the basics such as sketches, constraints, and basic 3D operations. I would recommend starting with the first couple sections of this this tutorial by the Fusion 360 team. After designing the inlay, we will add toolpaths to tell the CNC machine what and how to cut.
I have included both written/pictorial instructions as well as a screencast video accompanying each CAD/CAM step. There is also a video attached above that compiles all of the steps in one CAD/CAM video walk-through.
These are a couple of terms that I will be using throughout the project:
- inlay- the inlay is the part of the project that will fit in the recessed area cut from the perimeter stock.
- perimeter- the perimeter is the piece of wood that surrounds the inlay.
Choose a Design
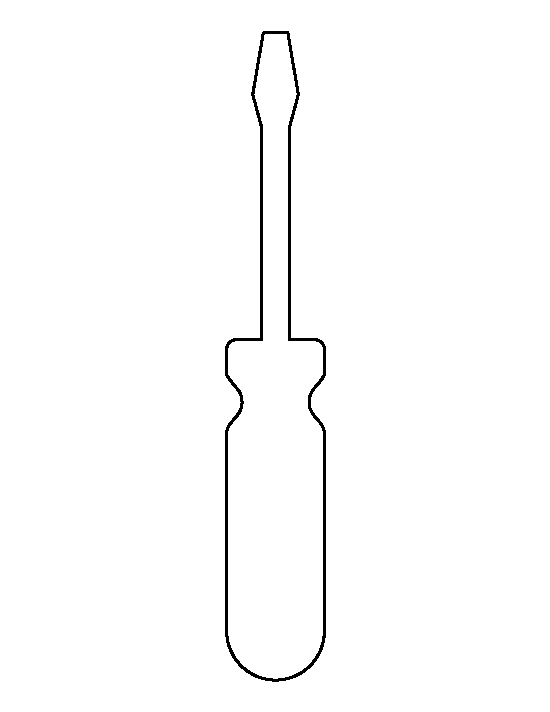
To get started, you must first obtain a design. The easiest way to do this is to find an existing image from the internet. Later, we will make some modifications and extrude this into a 3D shape. The image should be black and white and minimally detailed. Try searching for "_______ outline" in your favorite image search engine. For example, if you wanted the outline of a screwdriver, search "screwdriver outline."
Save the design to your computer.
Try to avoid designs that have sharp corners or small details. CNC routers cannot cut sharp corners because the end mill will always leave a round radius and cannot reach inside corners. Also, details that are narrower than the diameter of your end mill are simply not possible to machine. In later steps, we will discuss some workarounds to these problems such as rounding corners and scaling the design.
Convert Your Design to an SVG
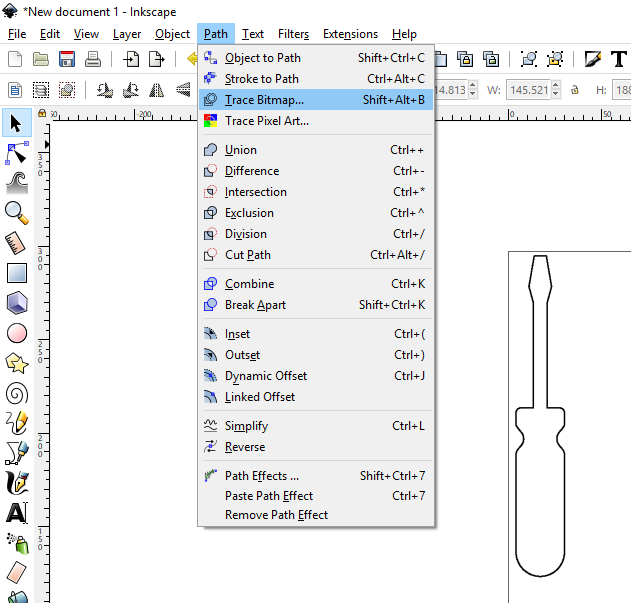
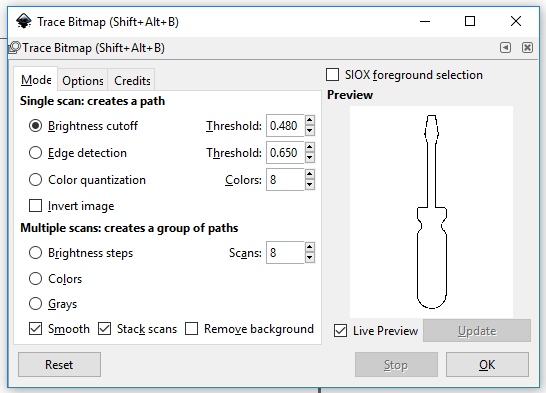
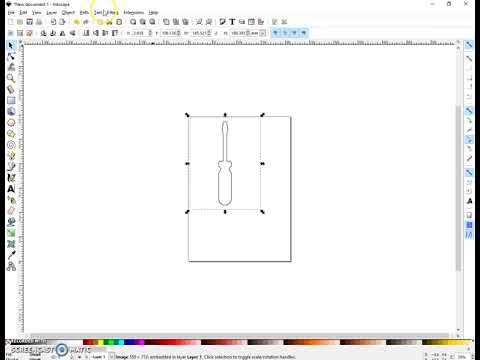
The image that you downloaded likely wasn't in SVG (Scalable Vector Graphic) format. To convert from other file types, import your downloaded image into Inkscape. Inkscape is a free, open-source graphics editor that can be downloaded from here. Accept the default import settings.
With your imported image selected, choose Path -> Trace Bitmap.
Check the Live Preview box and adjust the Brightness cutoff threshold until a good outline of your design is displayed in the preview box. Often, the default setting will work fine. Click OK and close the window.
Click File -> Save As and save the file as an SVG (default) to your computer.
Import Design Into Fusion 360
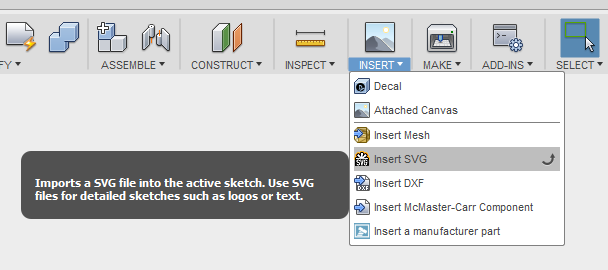
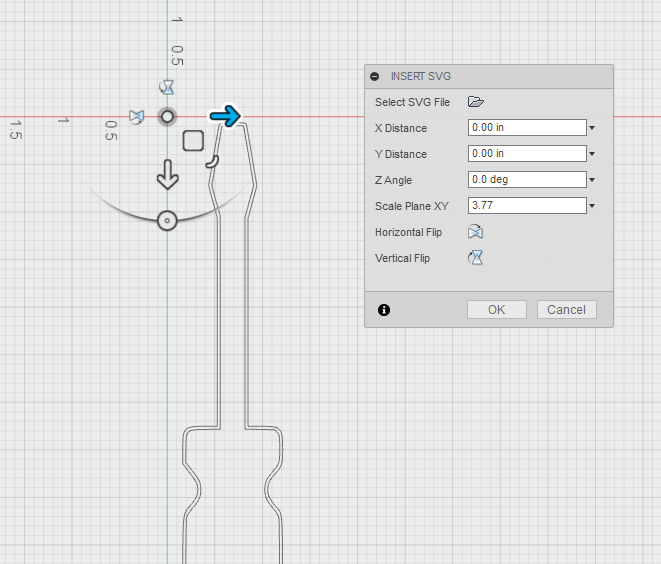
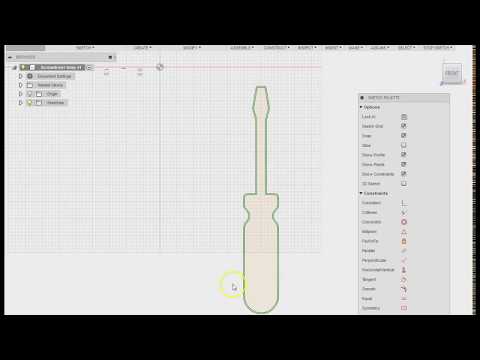
Now that an SVG version of your design has been created, it is time to move over to Fusion 360. In a new design (in the Model workspace), choose Insert -> Insert SVG. Select a workplane to place the sketch on (the XY plane, between the green and red lines, is a good choice for later steps). Click Select SVG File and browse to the file you just saved in Inkscape.
Fusion will load the SVG outline into the sketch on the selected plane. You are given the option to translate, rotate, and scale the design. Just click OK for now.
You should now notice that your design is composed of selectable line segments that form a closed loop. Sometimes, as in the case of the example screwdriver, the design will load with two outlines. This is okay.
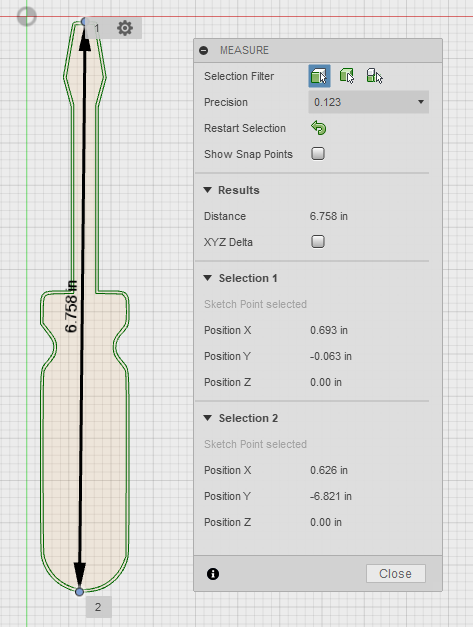
To scale the design to the desired size, you must first measure the design. Click Inspect (yellow ruler) and select two points on your model. The distance between the points will be displayed. Take note of this number. Delete the design and re-import it as described above. This time, however, type the scale factor into the option for Scale Plane XY in the insert SVG tab. For example, if I wanted my screwdriver to be 6.75" long and it measured to be 1.79", then my scale factor would be 6.75 / 1.79 = 3.77.
Make sure to measure any narrow portions of your design at this point. If any part of the design is narrower than your end mill, it will need to be enlarged to accommodate the end mill.
Draw a Perimeter
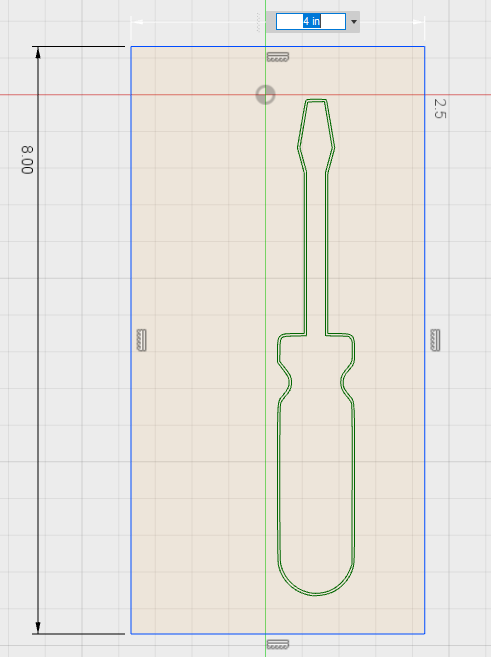
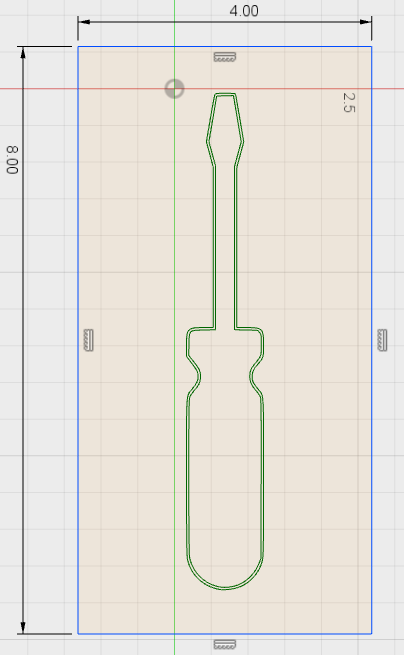
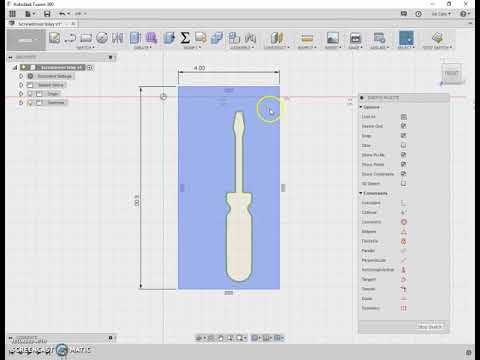
Now that the design has been added to a 2D sketch, a perimeter should be added. The perimeter will end up being the piece of wood that surrounds the design; this will be the contrasting color that makes the design stick out.
For this tutorial, I will make a simple perimeter with rounded corners. Start by choosing 2-Point Rectangle (R) from the Sketch menu. Draw the rectangle around the design. Next, give the rectangle your desired dimensions by choosing Sketch -> Dimension (D). My design will be 4"x8".
Drag the perimeter until the design is centered within. To get the design exactly centered, you can use Sketch Constraints to align the centers of the two entities.
Fix Sharp Corners
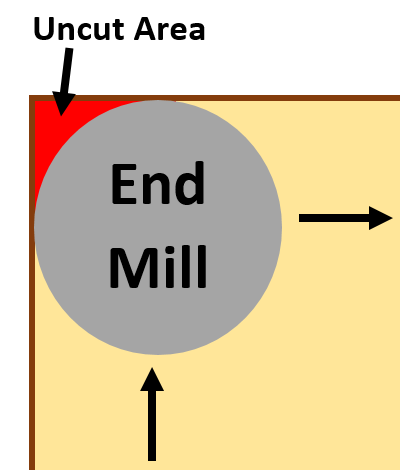
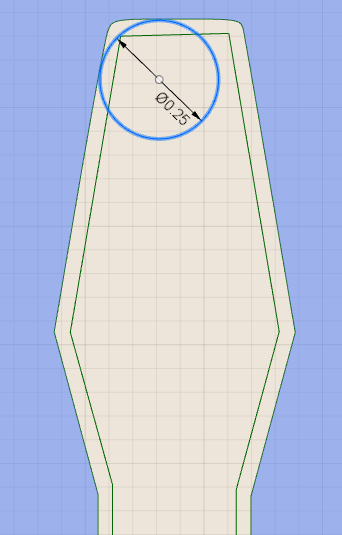
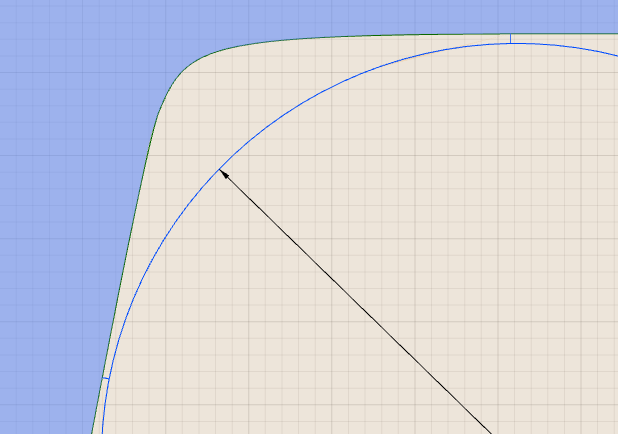
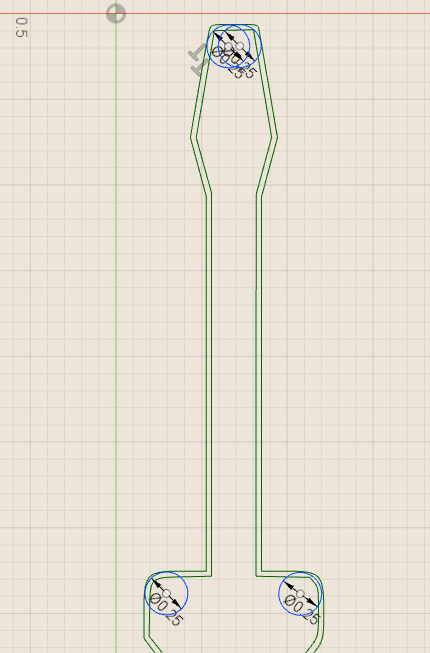
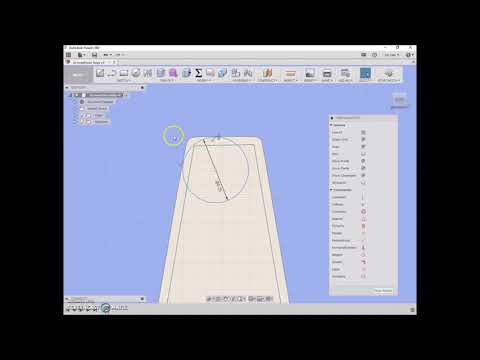
In order to create a tight fitting inlay free of gaps, you must round any corners in your model. This will accommodate for the end mill leaving round radii in the place of sharp corners. Identify any locations in your model that have a sharp corner. Draw a center diameter circle (Sketch -> Circle (C)) equal to the diameter of your end mill. Drag the circle until it is tangent to the sharp corner, effectively rounding the corner. After moving the circle as close to the corner as possible, zoom in with your mouse wheel. Draw lines (Sketch -> Line (L)) between the circle and the design outline to close the area. You can try to use the tangent Sketch Constraint, but I found that it generally doesn't work with imported SVG sketches (probably because the lines are organic and not straight). Repeat this process for all corners that the end mill will not be able to reach. For my screwdriver example, I had to draw circles at the tip and at the bottom of the handle. When you are finished, you can use Sketch -> Trim to clean up unnecessary lines.
Extrude
Extrude the perimeter
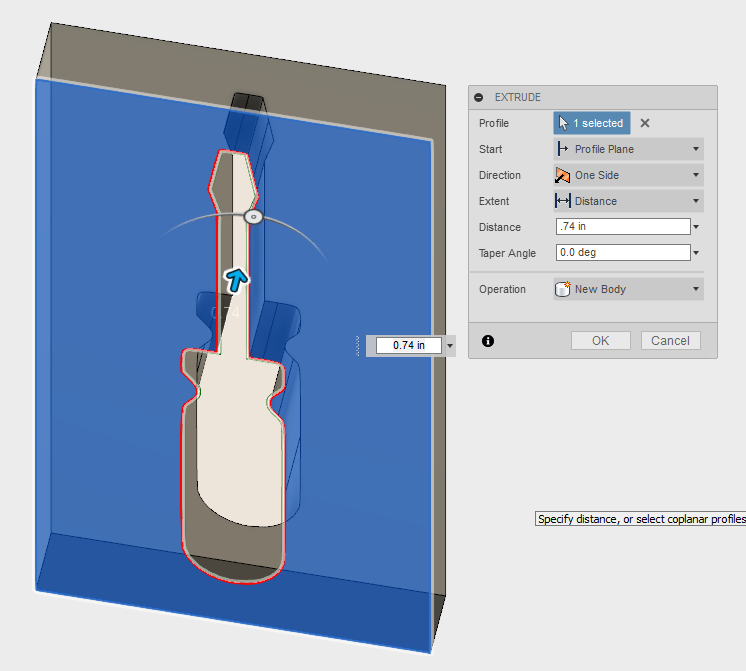
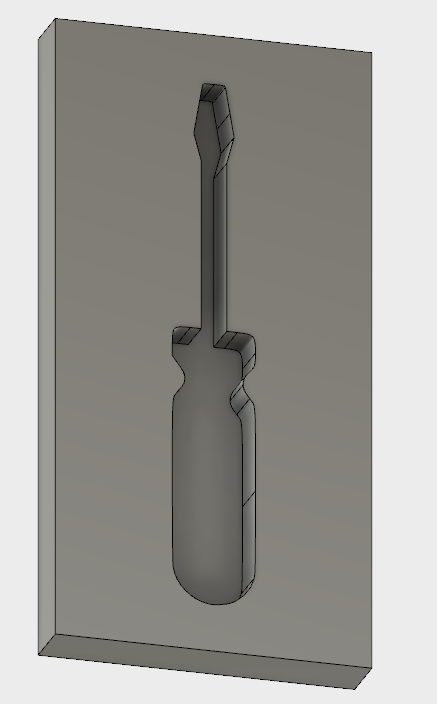
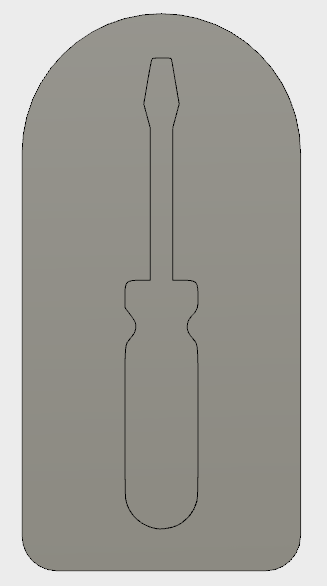
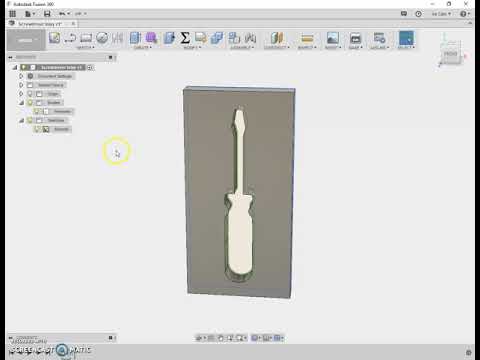
A 2D profile of your design has now been created. To make this 3D, we must extrude the 2D shape. Choose Stop Sketch and click Create -> Extrude (E). Click on the perimeter area of your design. Also make sure to include the areas created in the previous step that the end mill will not be able to reach. The area should turn blue. The extrusion Distance should be set to the thickness of the wood you intend to cut for the perimeter. My wood was .74". Click OK. You should now have a 3D solid with a hole in the shape of your inlay. In the filetree on the left, you can rename the new body to something more informative, such as "Perimeter."
Unhide the sketch
You may notice that the sketch that you just drew disappeared after extruding. To fix this, expand the Sketches branch of the filetree by clicking the arrow. Click the dim lightbulb next to Sketch1 to unhide the sketch.
Create a bottom for the inlay (optional)
Depending on your design, you may not want the inlaid piece of wood to go all the way through the perimeter. I will be using a thicker piece of wood for the perimeter and a thinner piece of wood for the darker inlay. Extrude the imported design to this the difference between these two thicknesses. For example, my perimeter piece of wood will be .74" thick and my inlaid piece of wood will be .55" thick; therefore the extrusion distance is .74" - .55" = .19".
Extrude the inlay
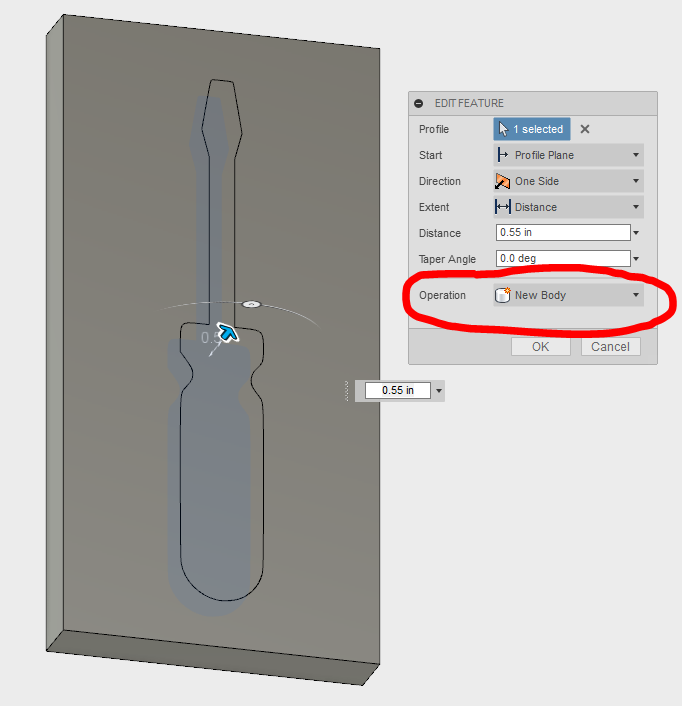
Extrude the inlay piece a distance equal to the thickness of your inlay wood stock. In my case, this value is .55". Make sure to choose New Body instead of Join as the operation type. Your model should now appear to be a solid block with an outline of your inlay design.
Fillets and rounded corners
If you want rounded corners, choose Modify -> Fillet (F) and select the edges. I did 2" fillets on the top and .5" fillets on the bottom of my design.
Change the Physical Material
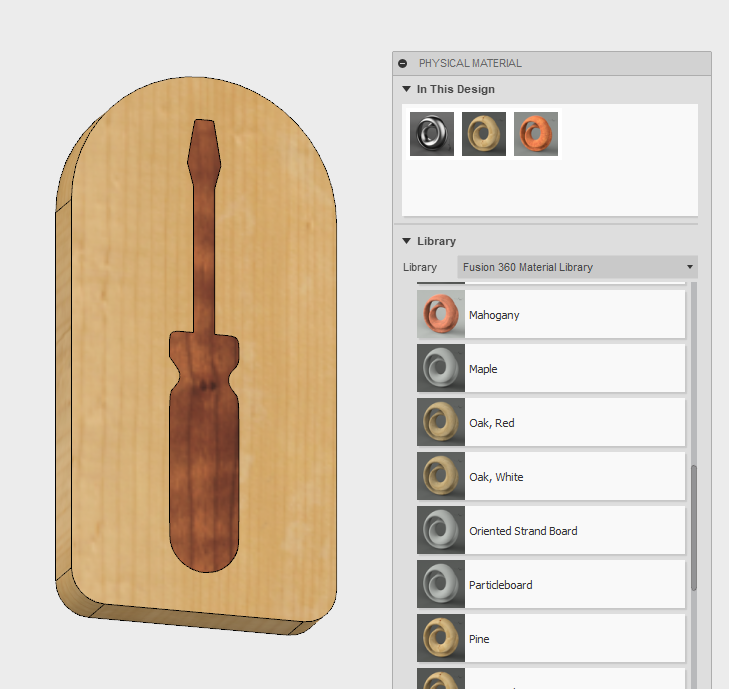
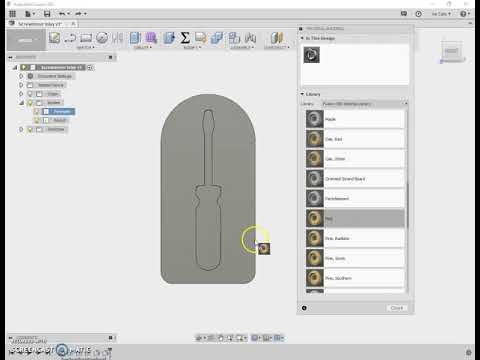
Time to change the appearance of the model from plain gray to what the finished project will look like. Choose Physical Material from the Modify menu. A window will open containing different materials that you can apply to your project. To add a material, click and drag it onto the model. Since we created two bodies (the perimeter and inlay) in the previous step, you will be able to add two different materials. I chose pine for the perimeter and cherry for the inlay.
CAM: Perimeter Setup
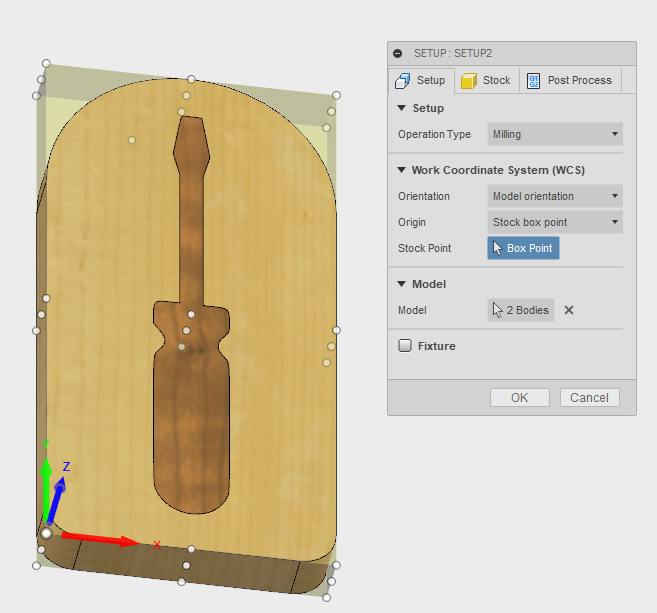
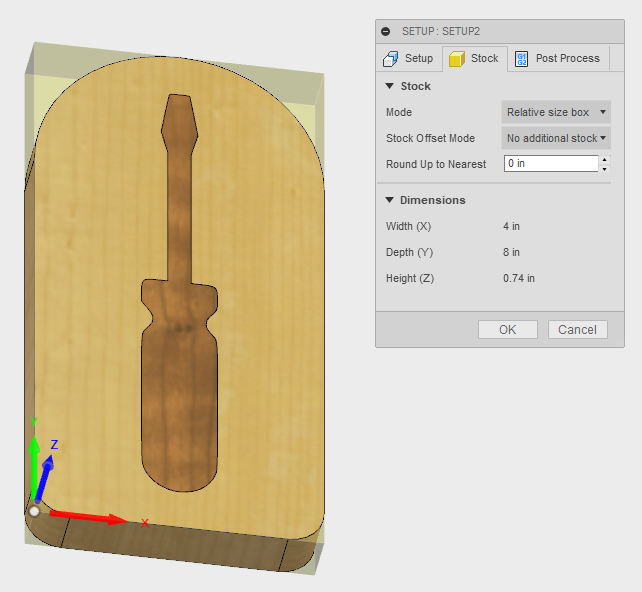
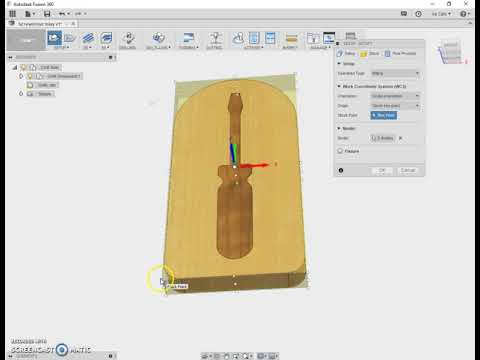
The model is now complete. It is now time to create toolpaths for the CNC machine to interpret. In the upper left corner, click the dropdown and select the CAM workspace. We have now exited the 3D modeling environment and entered a workspace designed solely for creating toolpaths.
A note about CAM and toolpaths
You will find that there are a ton of different settings and options when it comes to setting up and creating toolpaths. All of these choices can be overwhelming at first. However, with a bit of patience and trial and error, you will soon master this powerful software. If you ever are wondering what a particular setting does, hover your mouse over the setting until a tooltip appears. The tooltip will include an explanation and diagram that can be very helpful.
Coordinate system
Before a toolpath can be created, a Setup file must identify things such as stock size and coordinate directions. Choose Setup -> New Setup. Select a point for the origin to be. This is generally set to the lower left corner at the top of the stock. If your Z (blue) axis is not pointed up, align it using the Orientation option.
Stock
Click on the Stock tab. If your design matches the size of the stock piece of material you will be cutting, choose Relative Size Box (with No Additional Stock). Otherwise, choose Fixed Size Box and enter the dimensions of your material.
Click OK. Rename the setup to a more useful name, such as "Perimeter Setup."
CAM: Perimeter Pocket
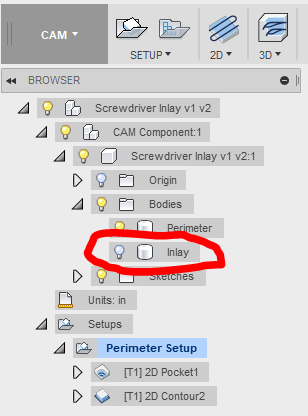
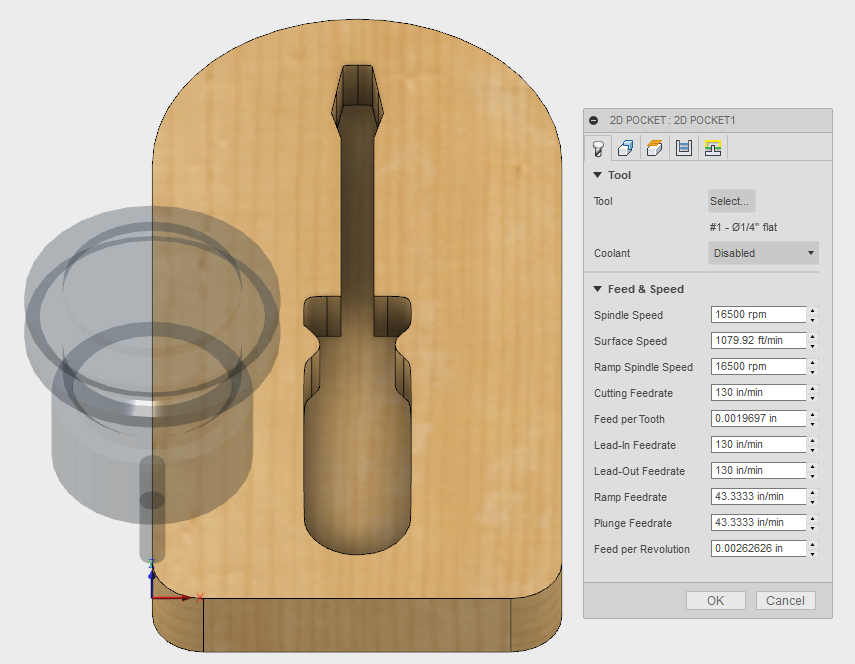
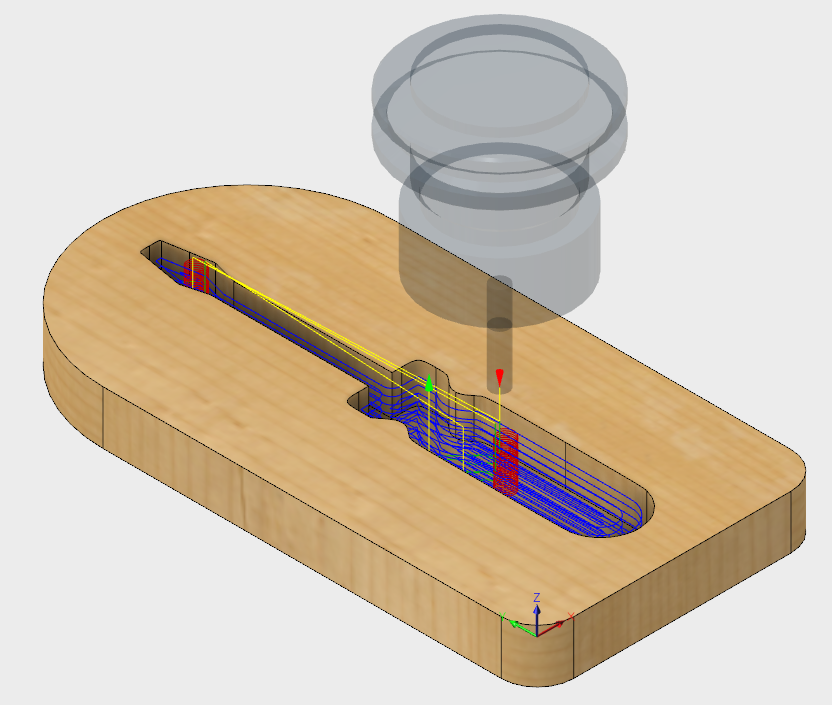
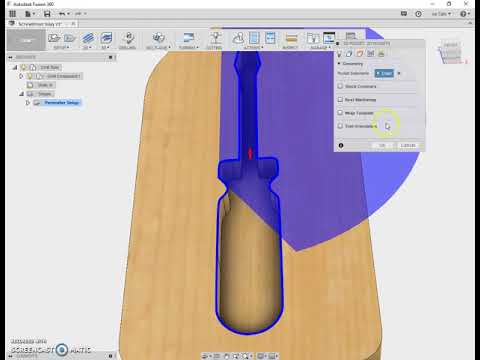
We will start by making the toolpath for the perimeter piece- the part that the inlay will fit into. First, hide the inlay part of the design so that it is out of our way. To do this, expand the filetree and click the lightbulb next to the Inlay body.
Next, click 2D -> 2D Pocket to create a new toolpath. This toolpath will be contained within the Setup that you just made. A window will open with all of the settings and options for the toolpath. I find that it is best to work through the settings tab by tab, top to bottom, to make sure that nothing is missed.
Tool and Feeds/Speeds
First, you should select a tool that matches your endmill. Click Select to open the Tool Library. Click the +Tool icon (looks like end mill) in the upper right. Enter the specs that match your end mill. The most important settings are tool diameter and flute number. I will be using a .25" diameter, 4 flute, HSS end mill. Also make sure to enter feeds and speeds for your end mill. Read this article by Make: Magazine for some useful information about feeds and speeds. Click OK when you have finished configuring your tool; the Feed and Speed fields should fill with the information you just entered.
Geometry
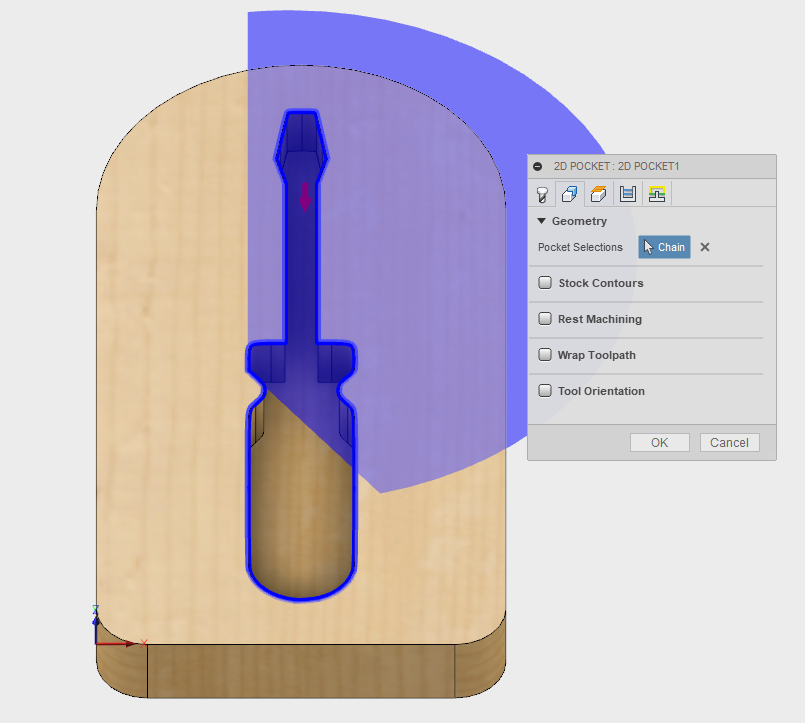
Move on to the next tab in the 2D Pocket window; geometry. Click the top edge of your design to select the area that should be pocketed. The red arrow tells the machine on which side of the selected line to cut; make sure that the red arrow is within the pocket.
Heights
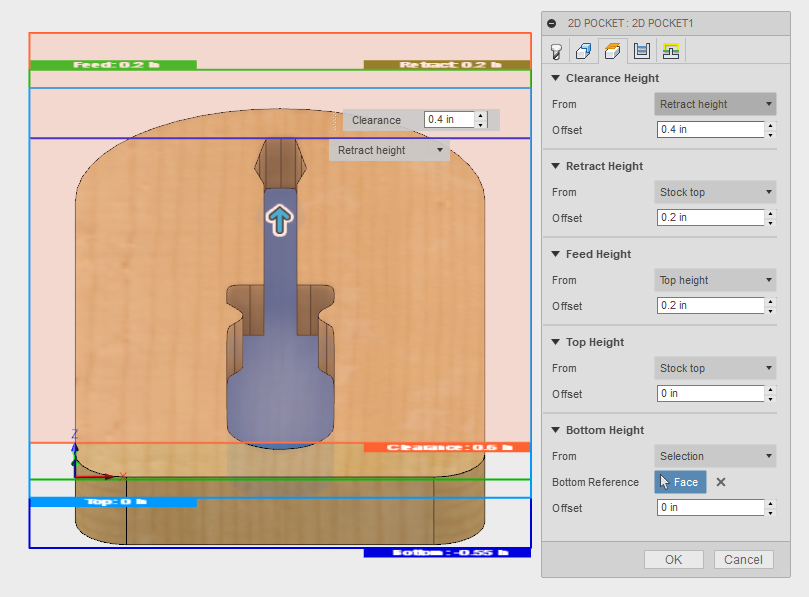
Click on the heights tab and rotate the model so that you are viewing it from the side. There are a bunch of different height options. The main one to worry about is the Bottom Height. In the Bottom Height box, choose Selection from the list. Rotate the model until the bottom of the pocket is visible; click on this face. If you opted to carve the inlay all the way through the model, choose Stock Bottom from the list.
Passes
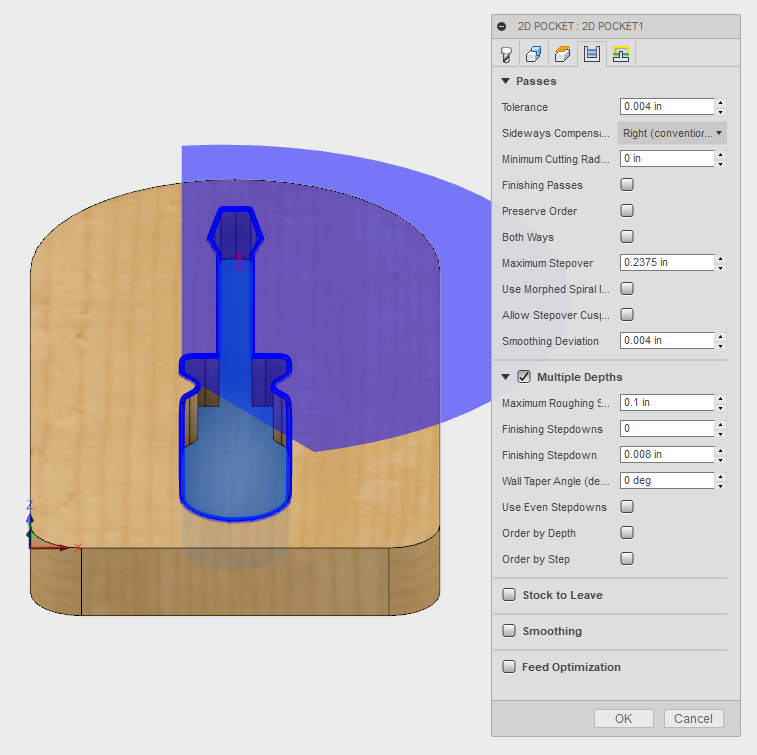
On to the Passes tab. Change Sideways Compensation to Right (conventional milling). Disable Stock to Leave by unchecking the box. Enable Multiple Depths and choose a stepdown based on your previous feed/speed calculations. I opted for a .1" stepdown.
Linking
The default settings are generally acceptable in the linking tab.
After all of the settings have been configured, click OK to generate the toolpath.
CAM: Perimeter Contour
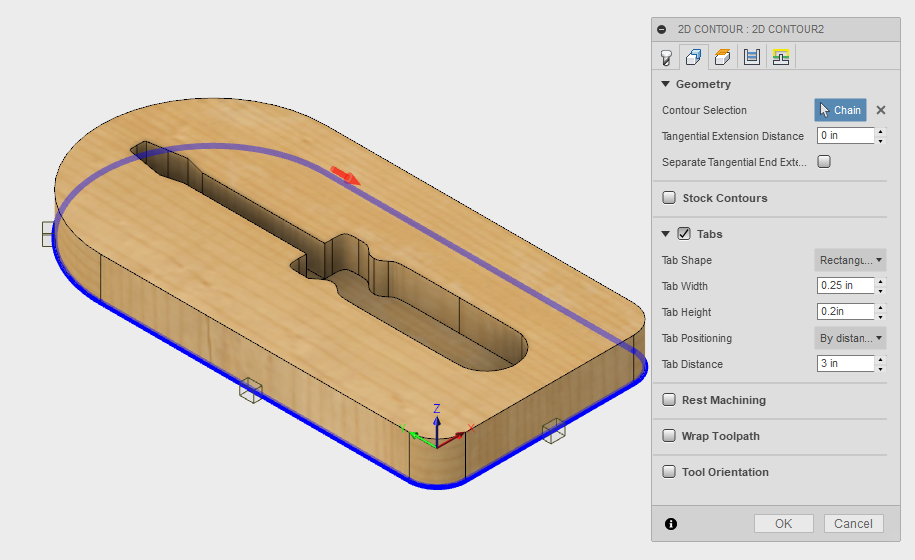
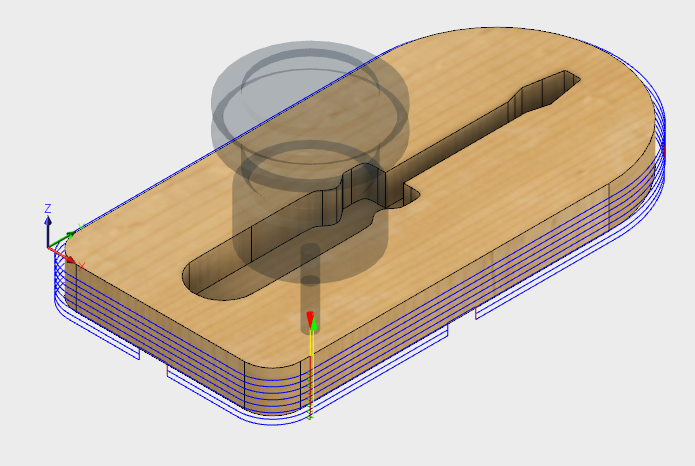
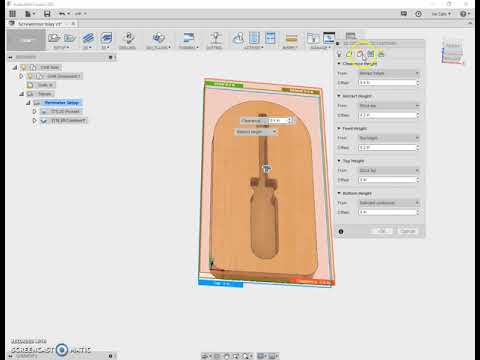
If you would like to cut a unique shape out of the perimeter stock, follow this step. Click 2D -> 2D Contour to create a new toolpath.
Tool and Feed/Speeds
Use the same settings as the previous step.
Geometry
Select the bottom perimeter edge of your stock and make sure that the red arrow is on the outside. We don't want the piece to come loose during machining, so select the Tabs checkbox. I used a series of .25" x .2" tabs placed about every 3 inches.
Heights
Set the Bottom Height to Stock Bottom. I added an offset of -.05 to make sure the piece was cut all the way through.
Passes
Use the same settings as the previous step.
Linking
Use the same settings as the previous step.
Generate Toolpath
Generate the toolpath and ensure that everything looks correct.
CAM: Inlay Setup
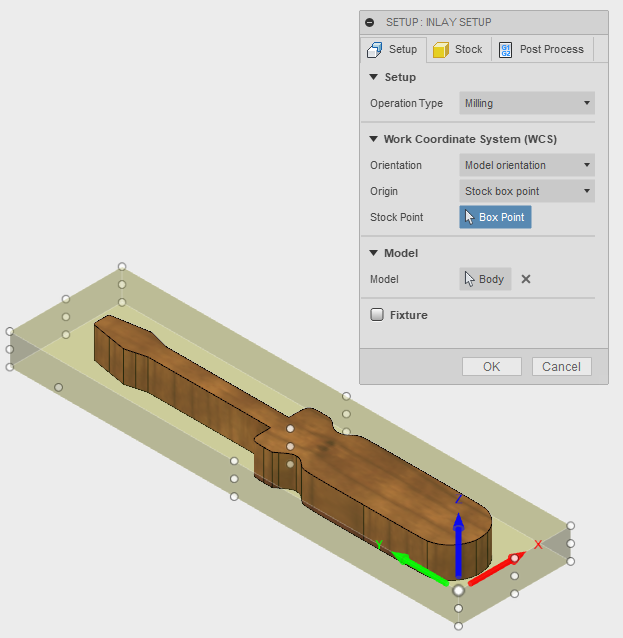
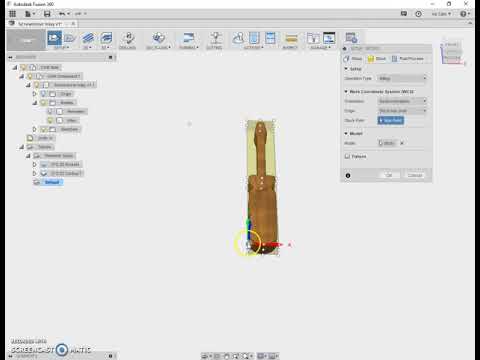
The cutting of the inlay will take place in a different piece (hopefully a different kind/color, too) of wood. Therefore, we need to define a new Setup. In the filetree, hide the Perimeter body and create a new Setup (Setup -> New Setup). Rename the setup "Inlay Setup."
Coordinate System
As before, orient the origin such that the Z axis is pointed up. Choose the lower left corner at the top of the stock as the origin. Choose the Inlay body as the Model.
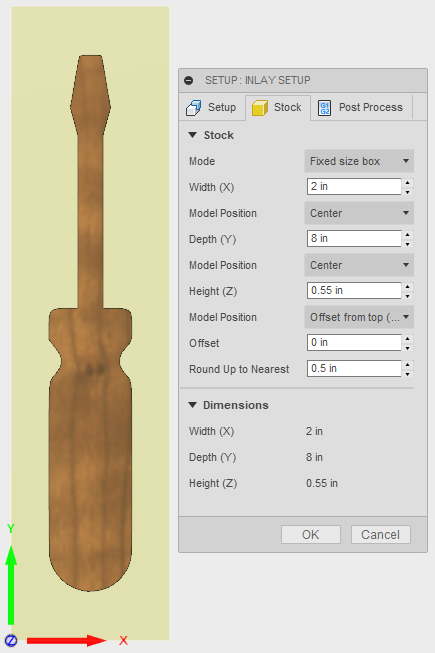
Stock
Choose Fixed Size Box as the Mode and enter the dimensions of your stock piece of wood. Your stock height should match the height of your inlay piece.
CAM: Inlay Contour
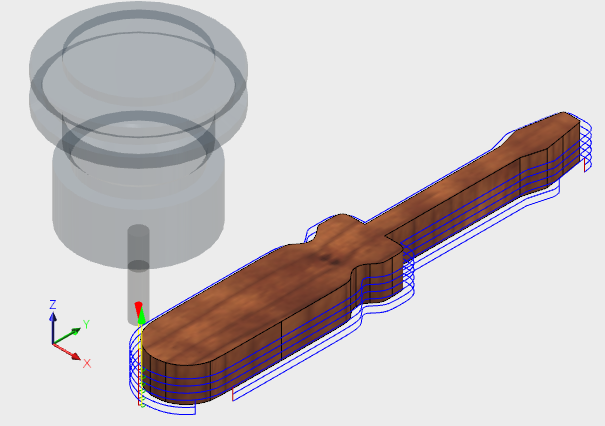
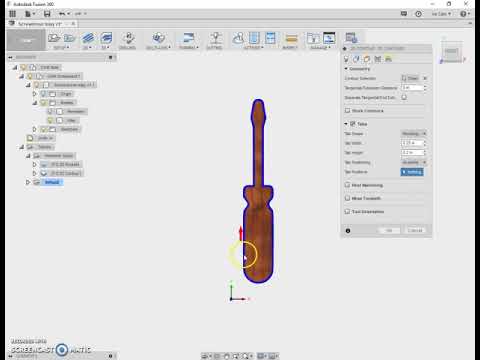
Our final toolpath! Create a new 2D Contour. Choose the bottom edge of the inlay design for the geometry. Make sure that the red arrow is on the outside. All of the other settings should match those in Step 10. Don't forget to add tabs!
Post Process and Machine
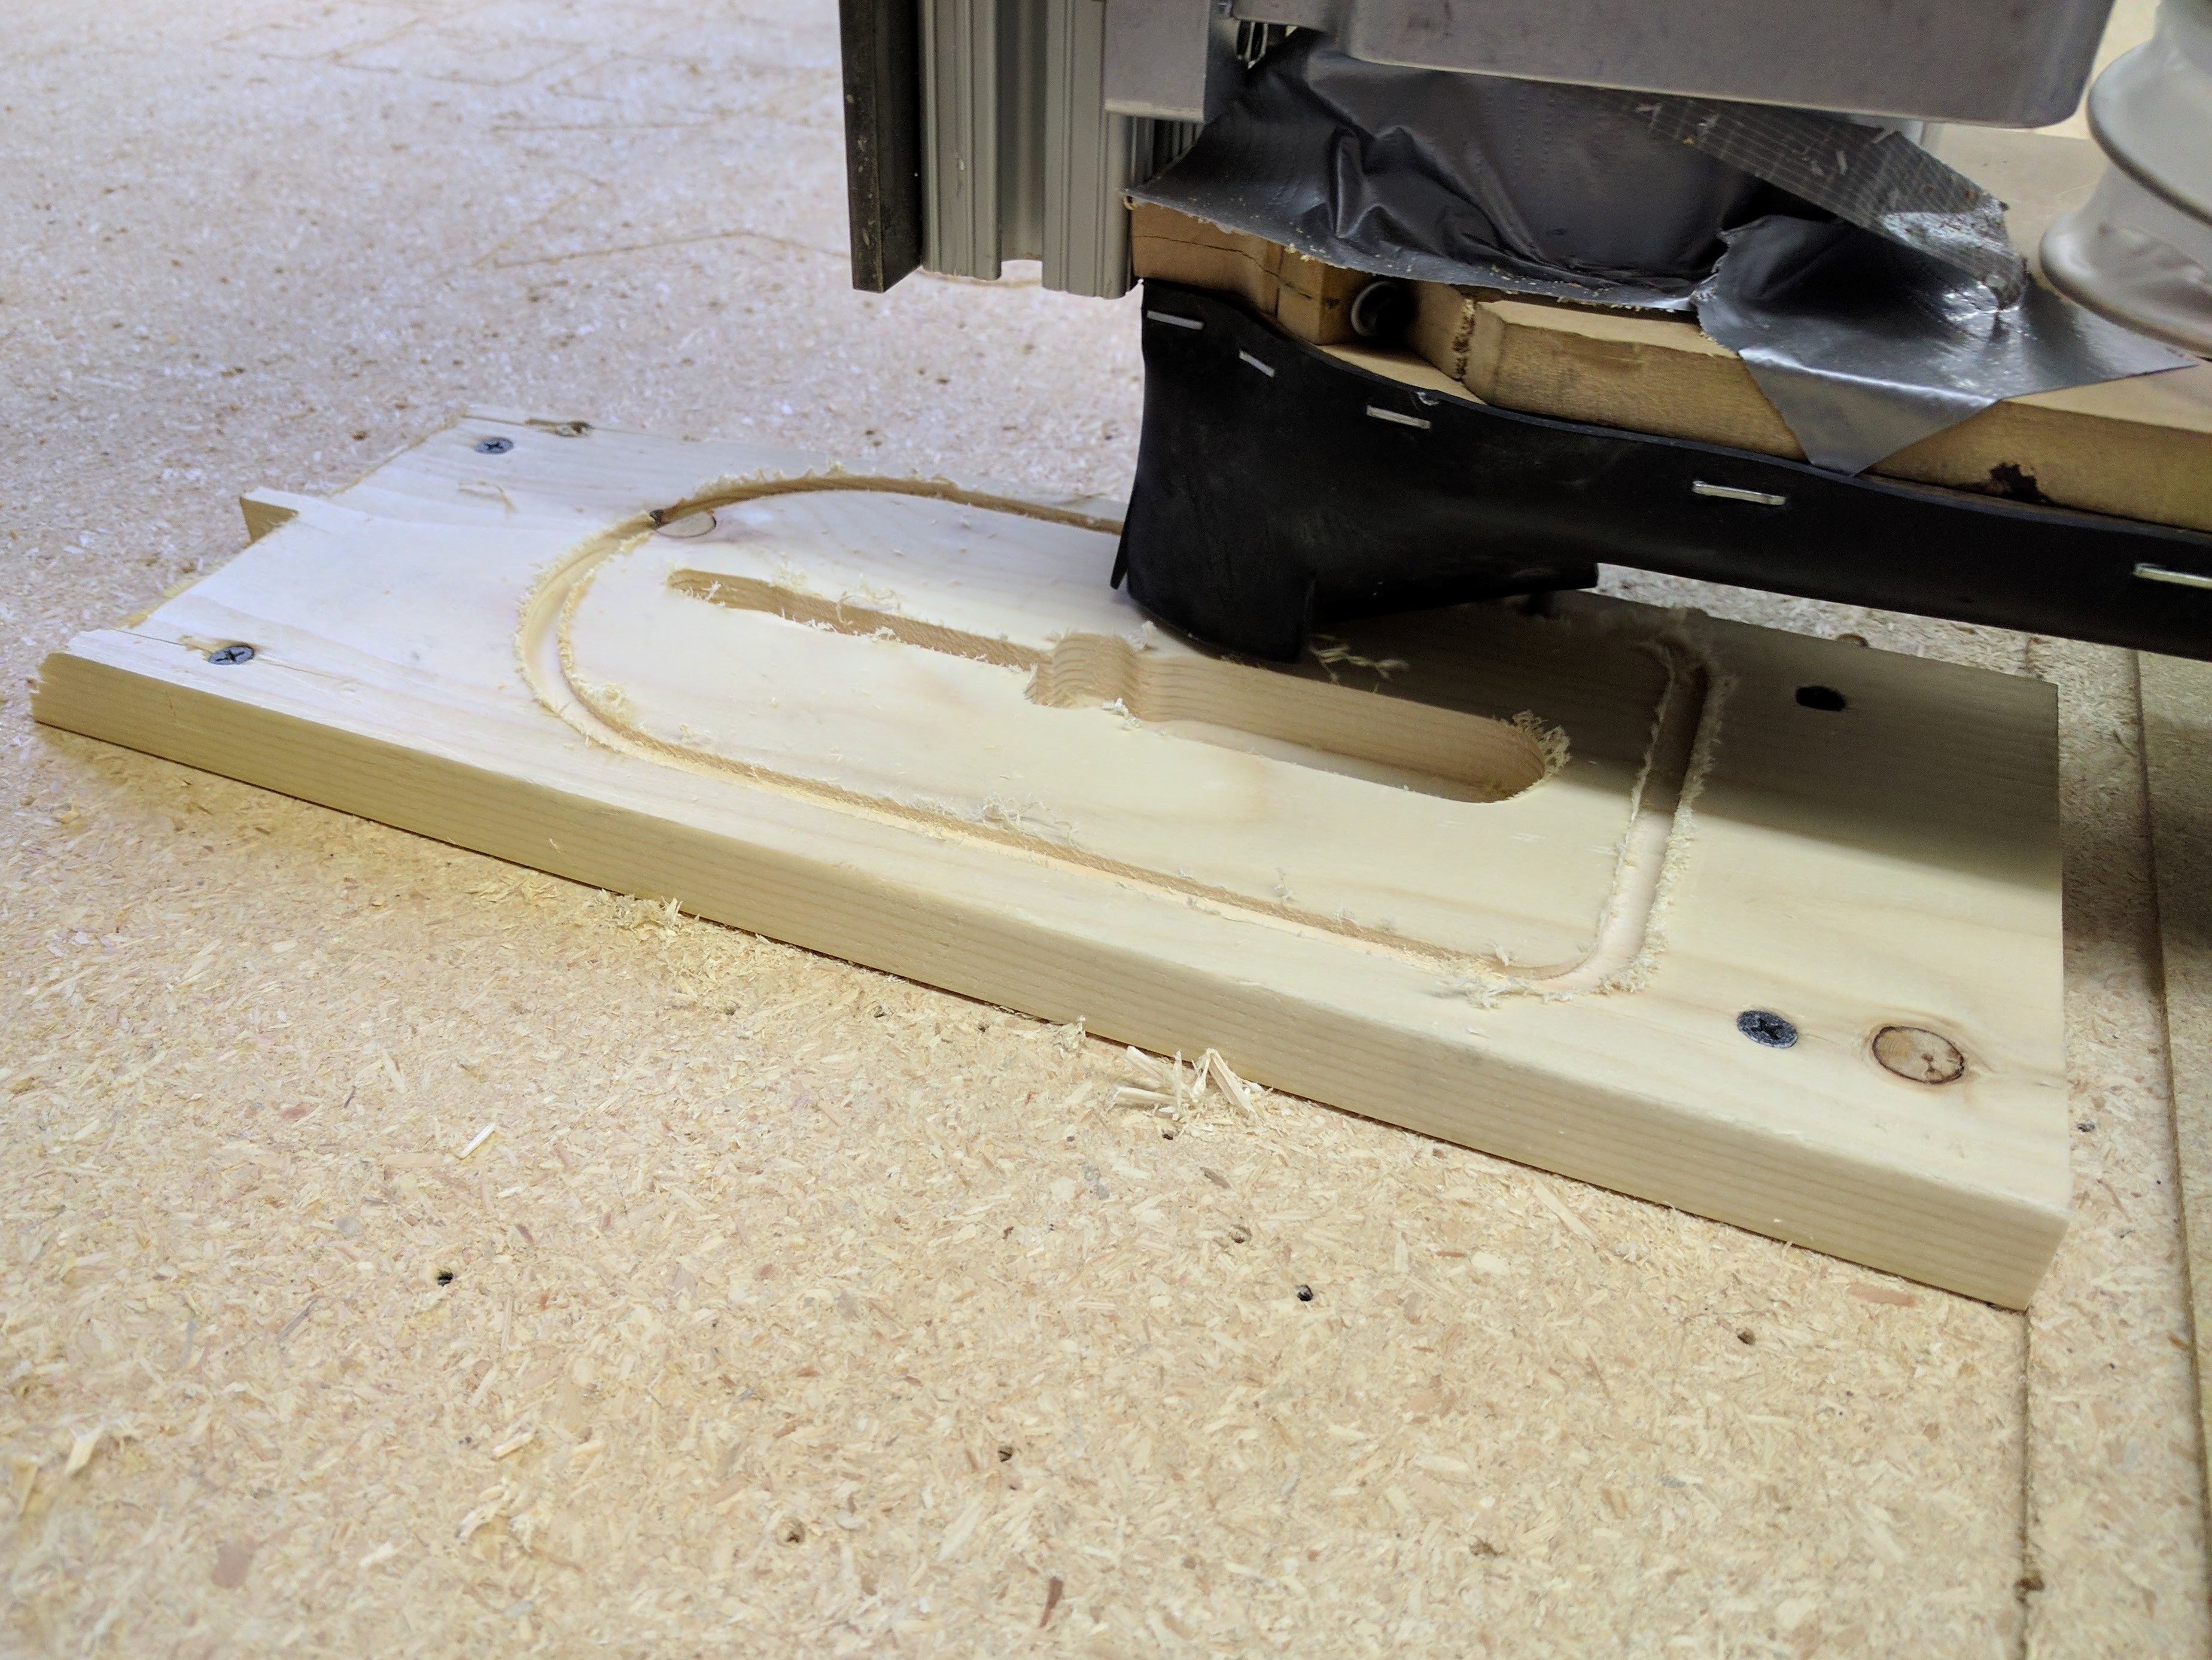
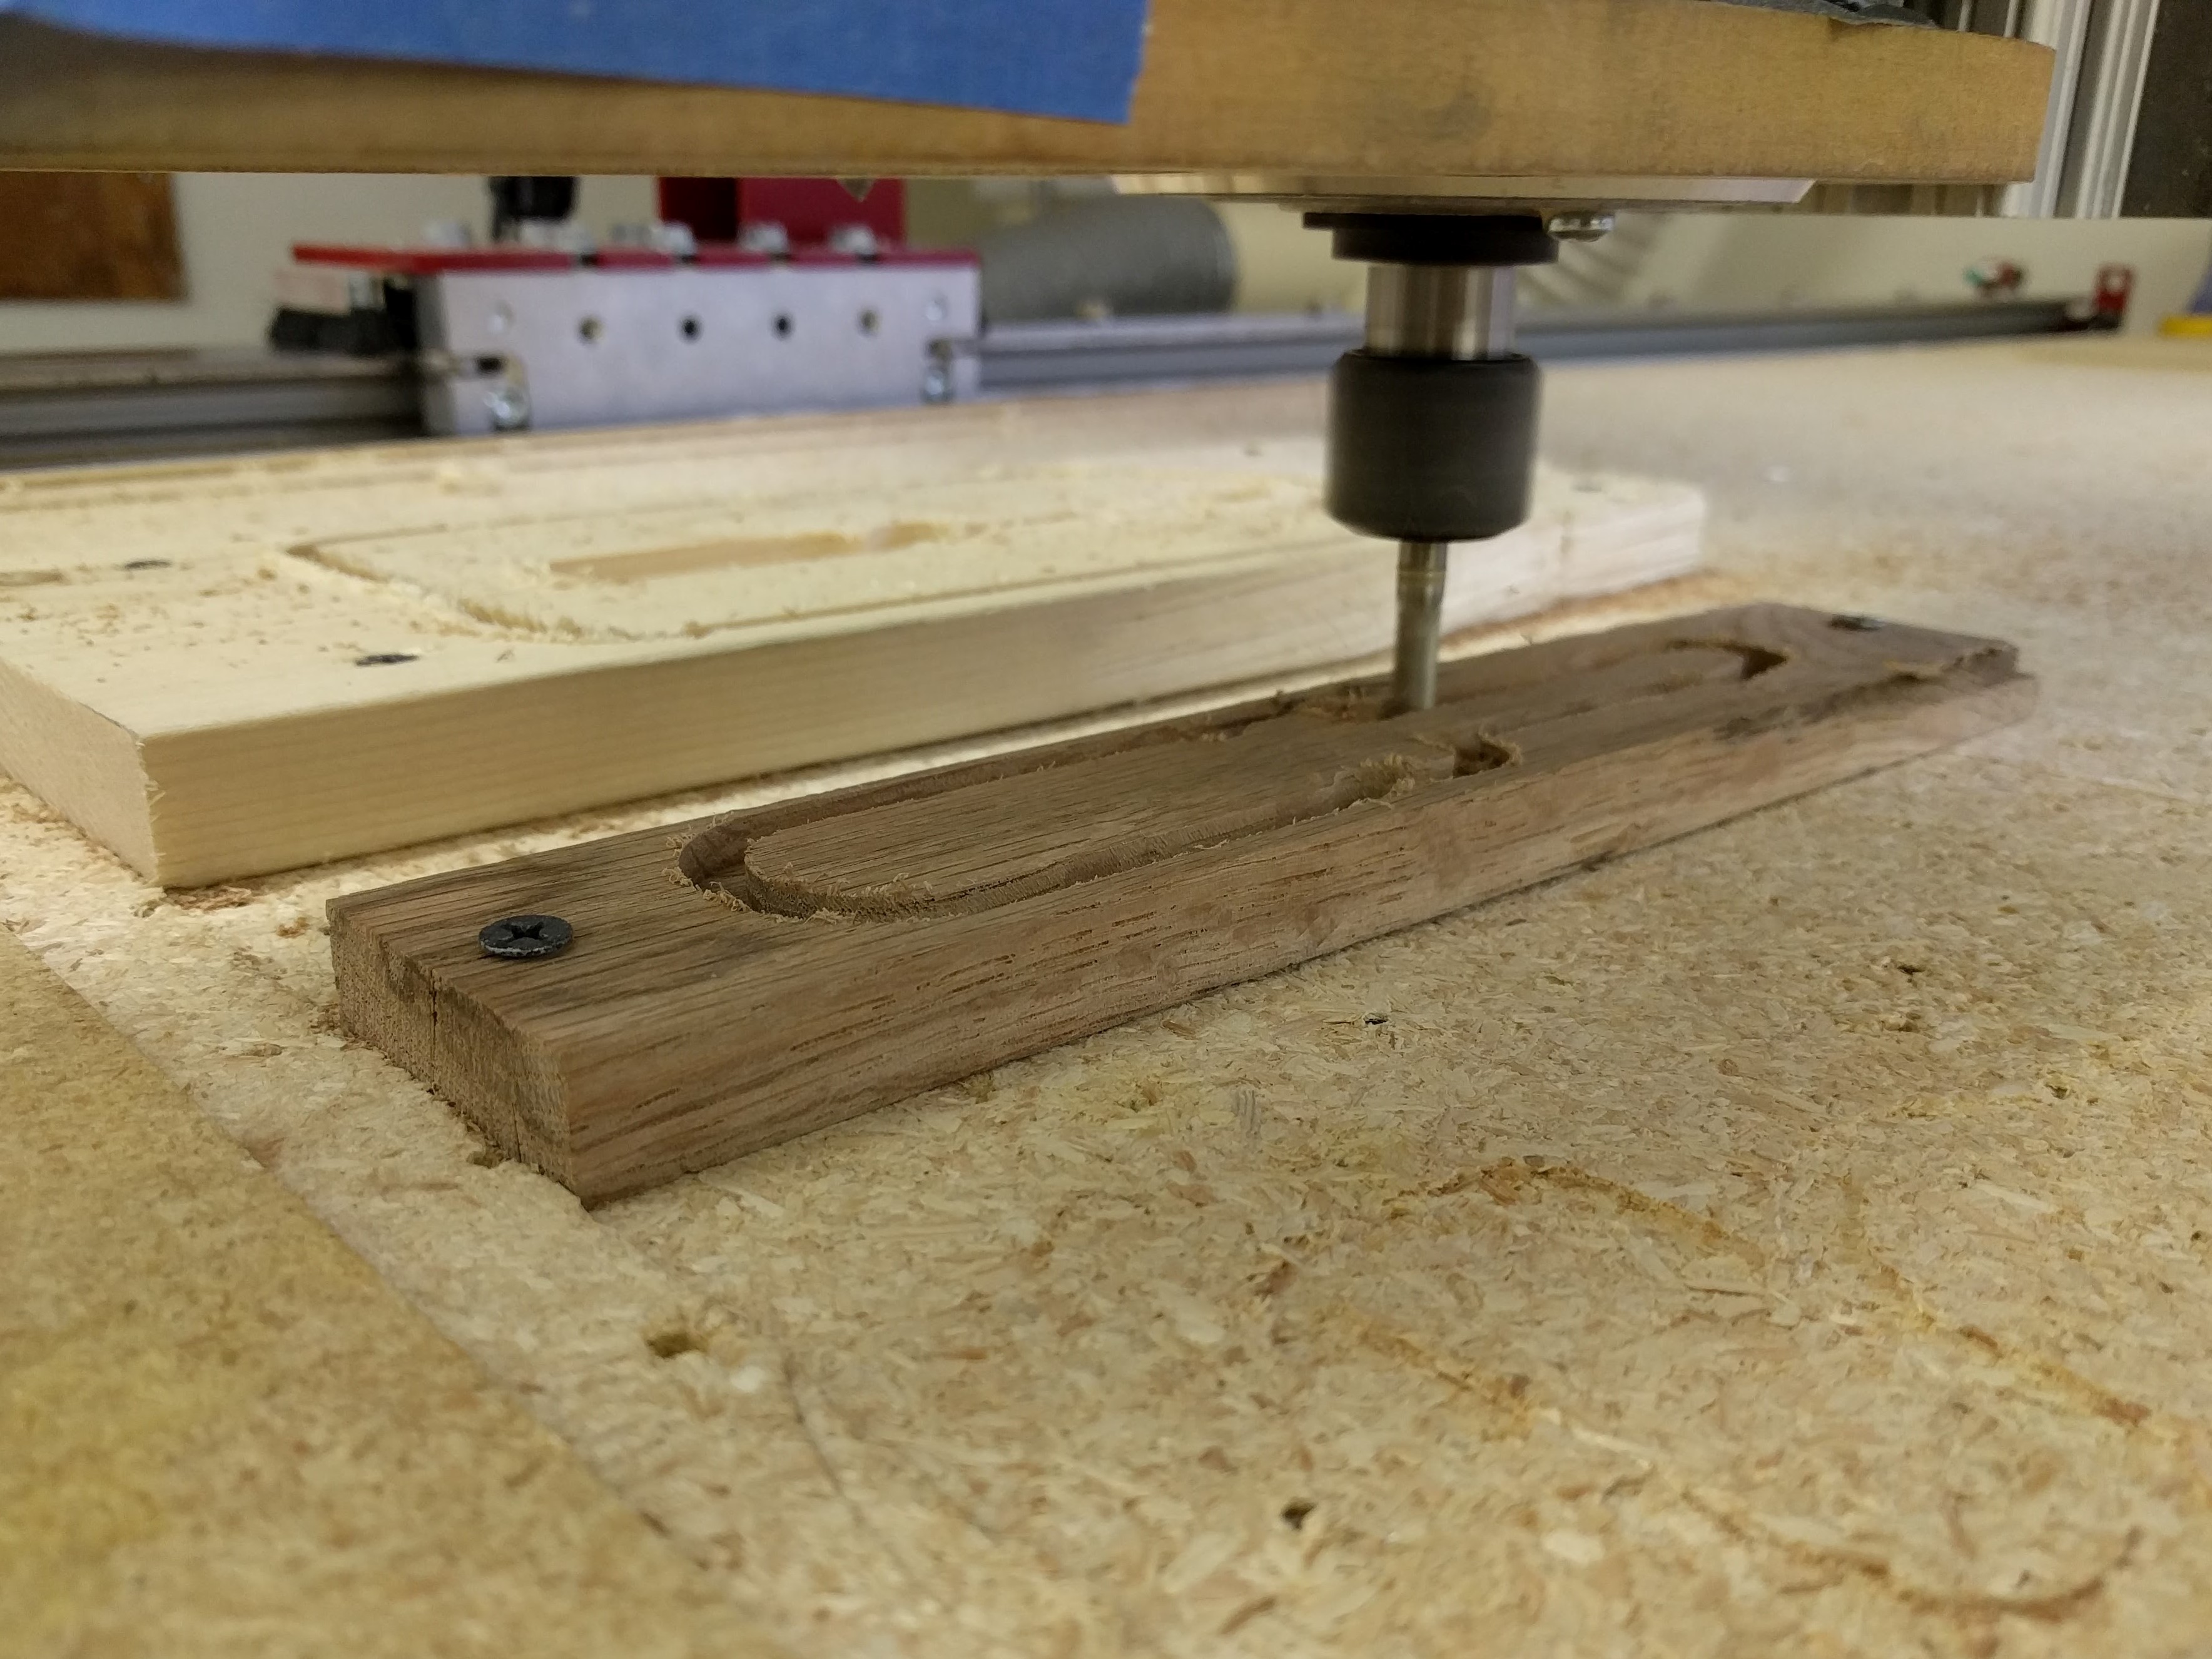
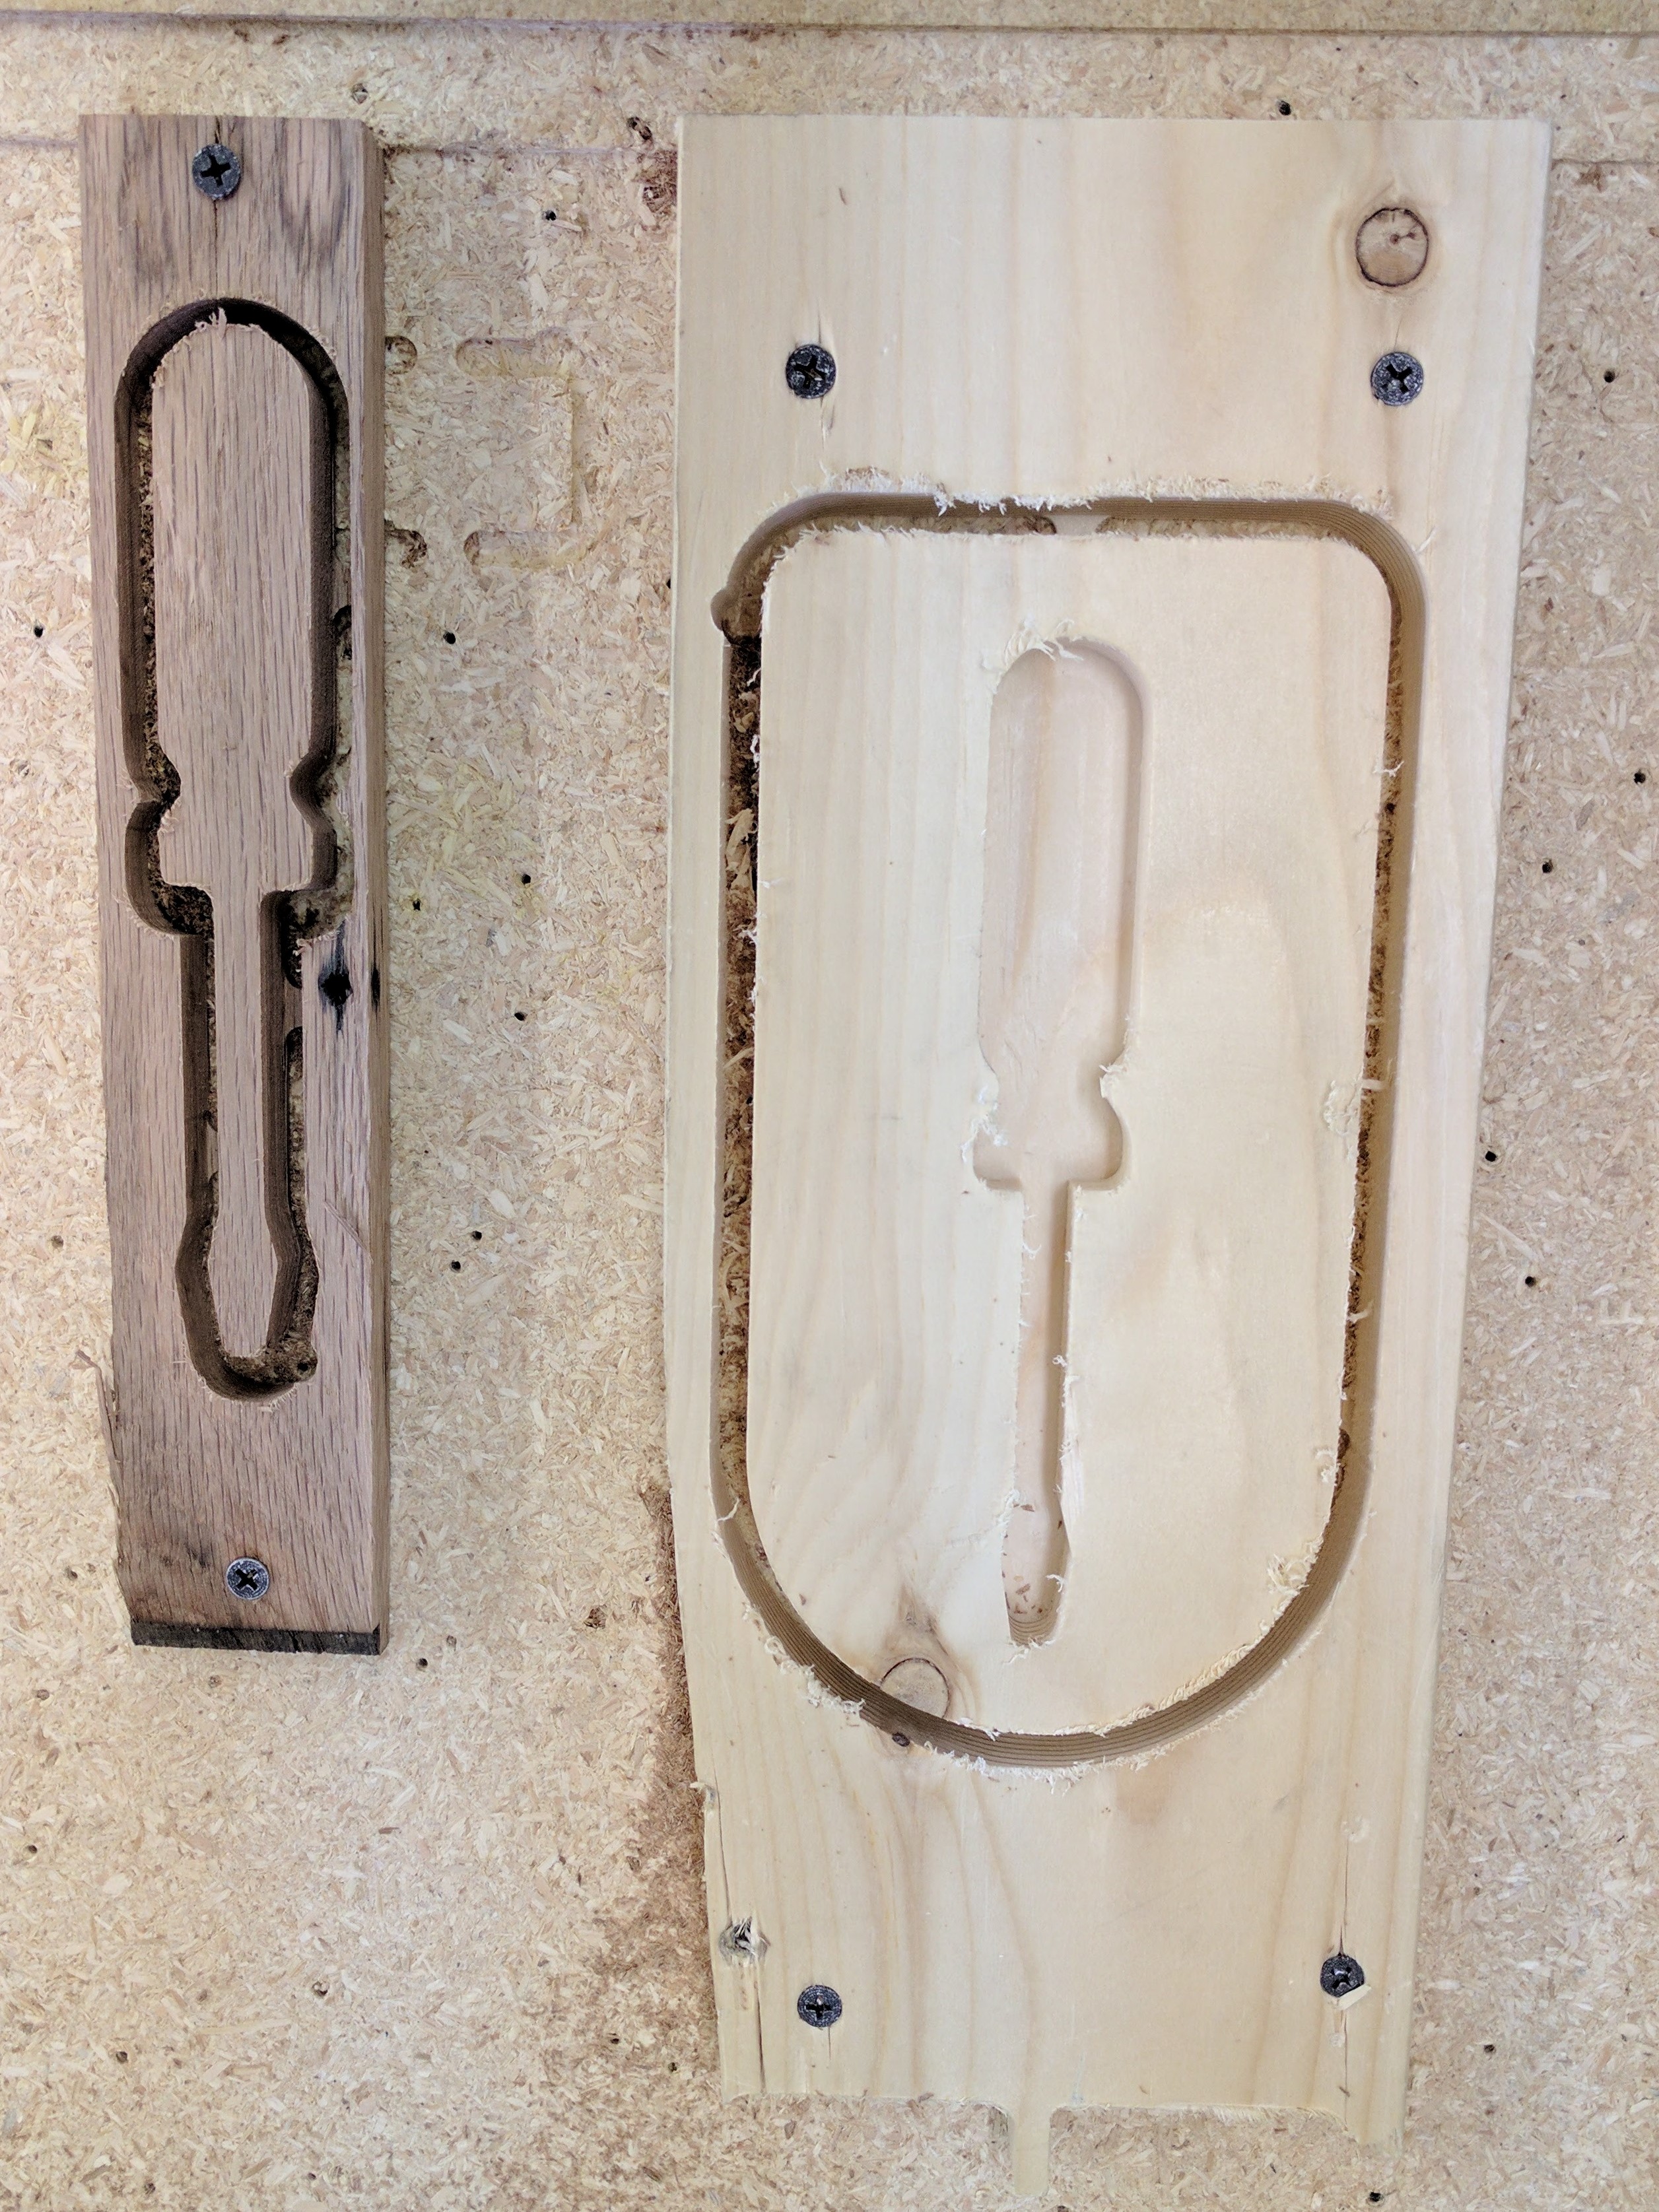
It is time to send the toolpaths to the CNC machine. To export the toolpaths, choose Actions -> Post Process. Make sure to select the Post Processor from the list that matches your CNC machine. You will want to export the two Setups as separate files since they will be machining different pieces of wood.
Depending on your setup, you will likely load the exported file into a controller software. Don't forget that your origin should be set to the lower left corner of the top of your stock. I am using Mach3 running a CNCRouterParts 4'x4' machine.
Assemble and Finish
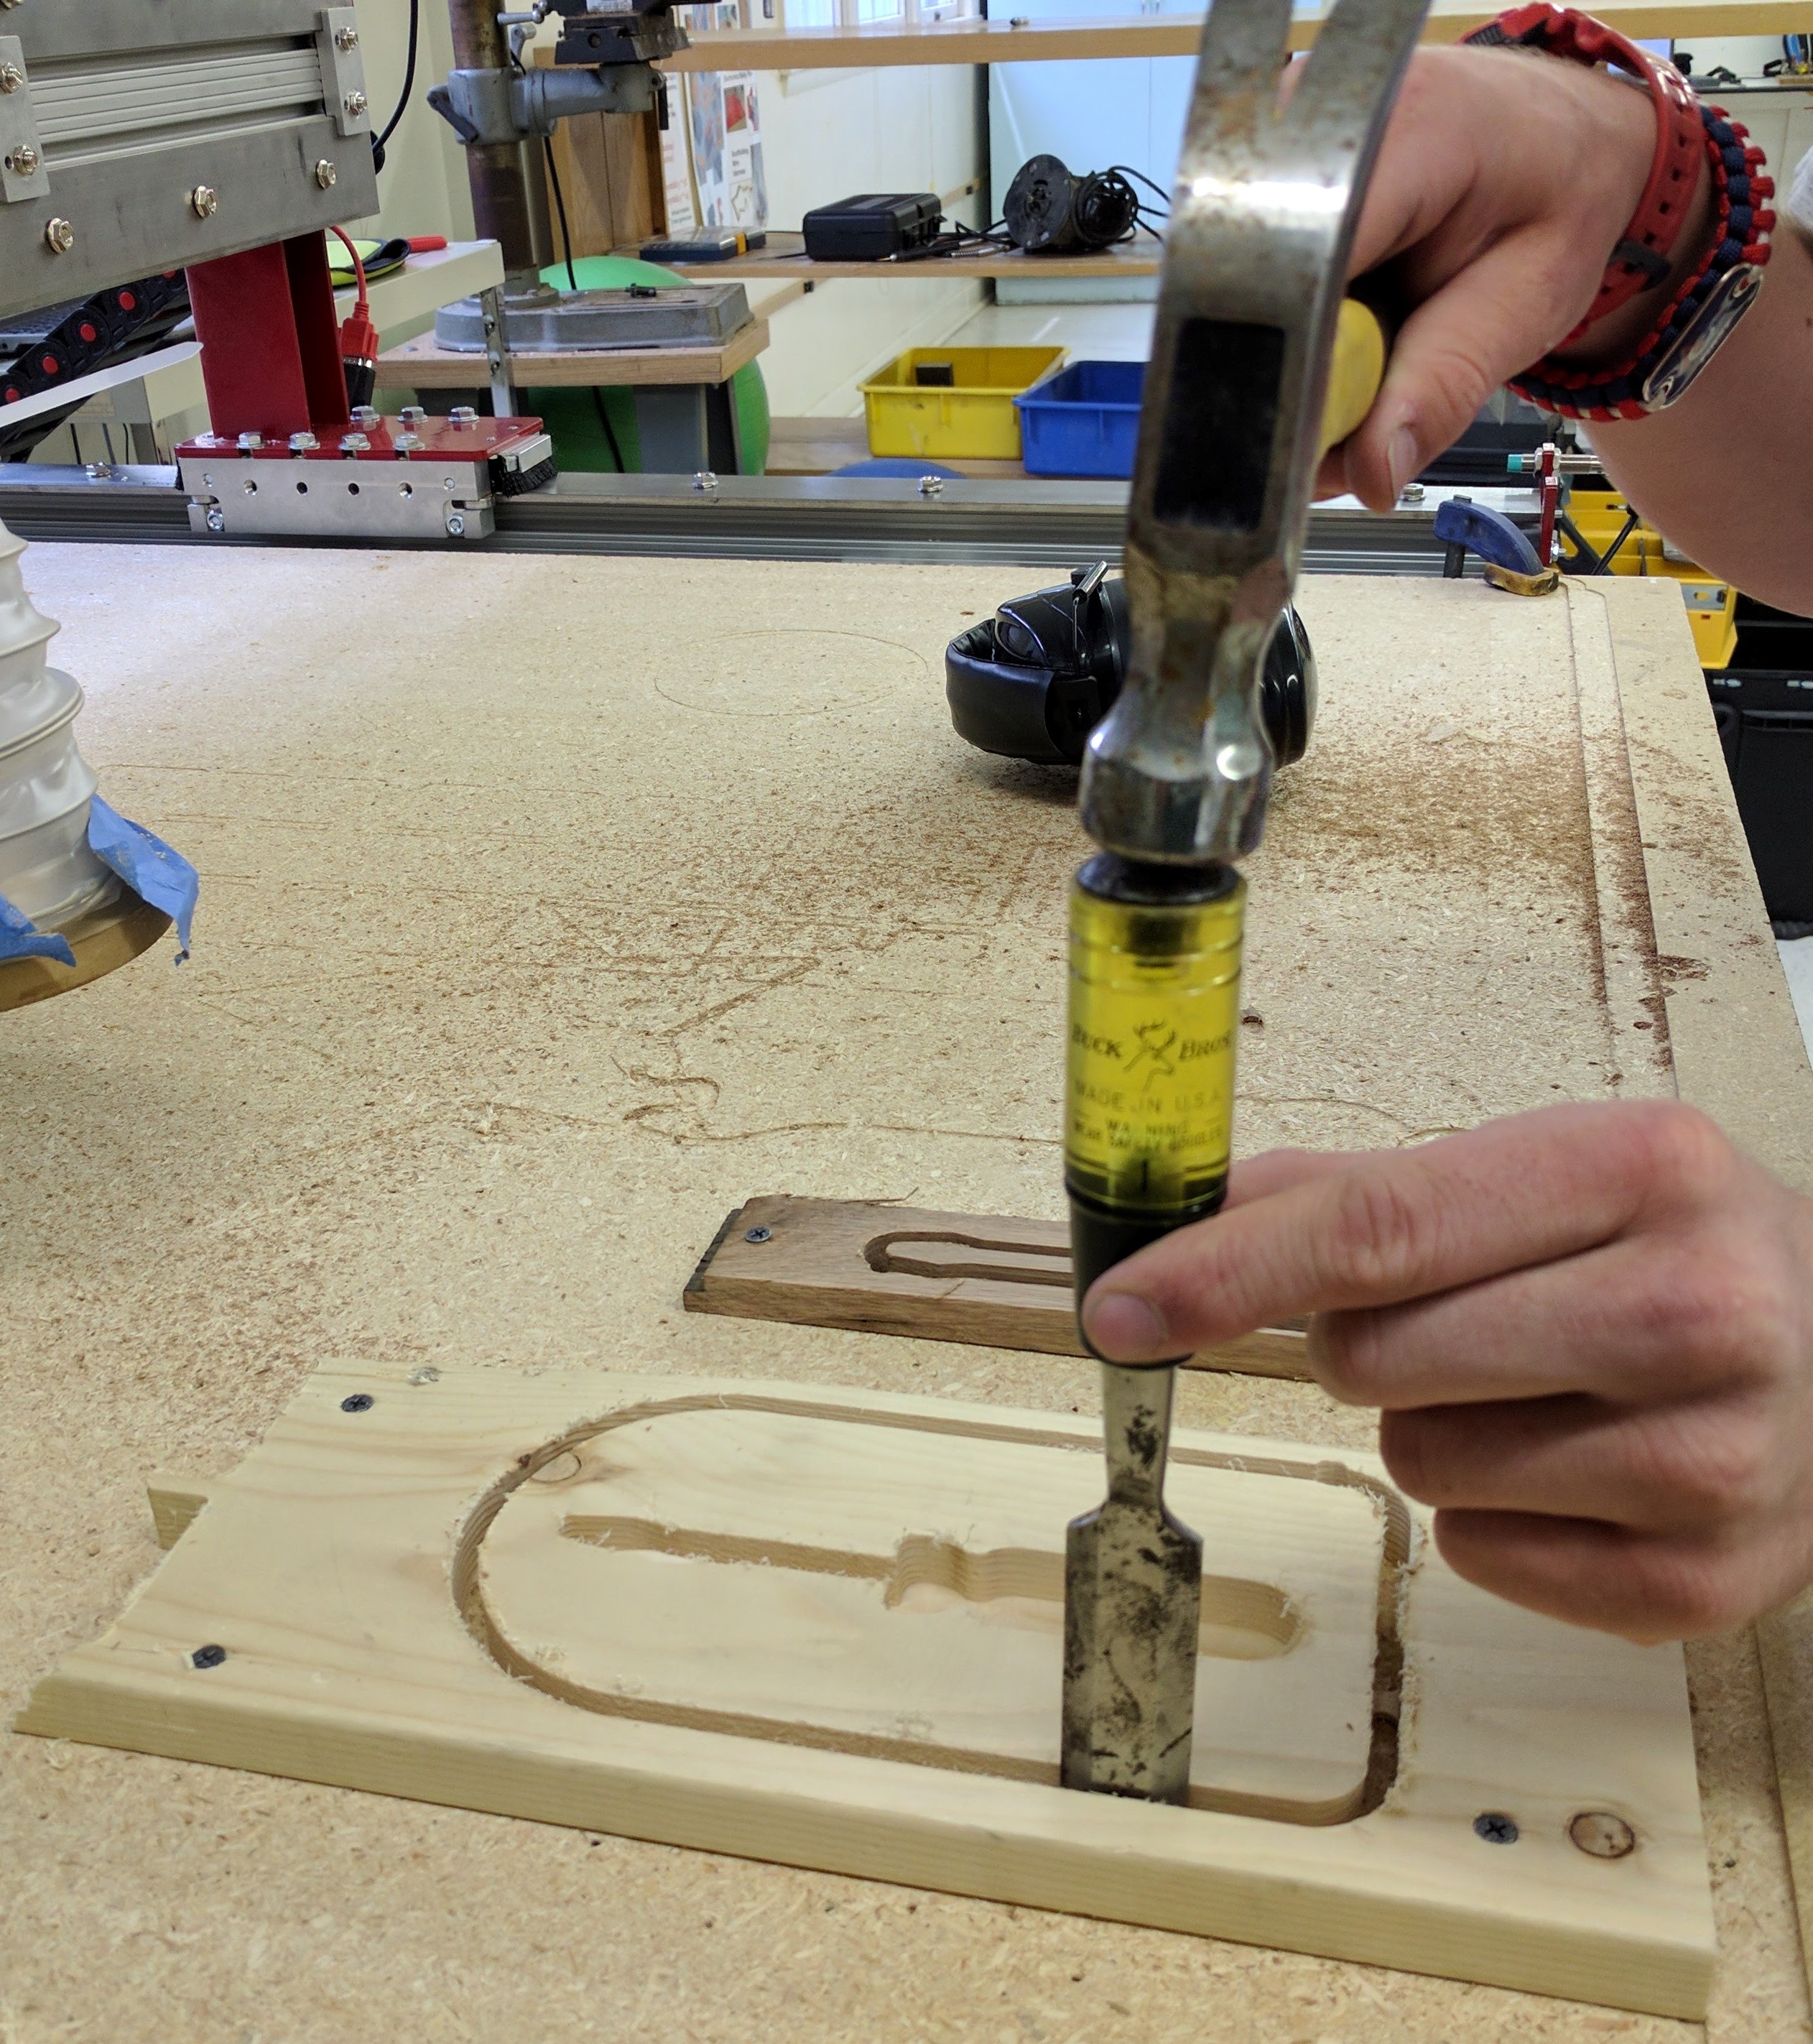
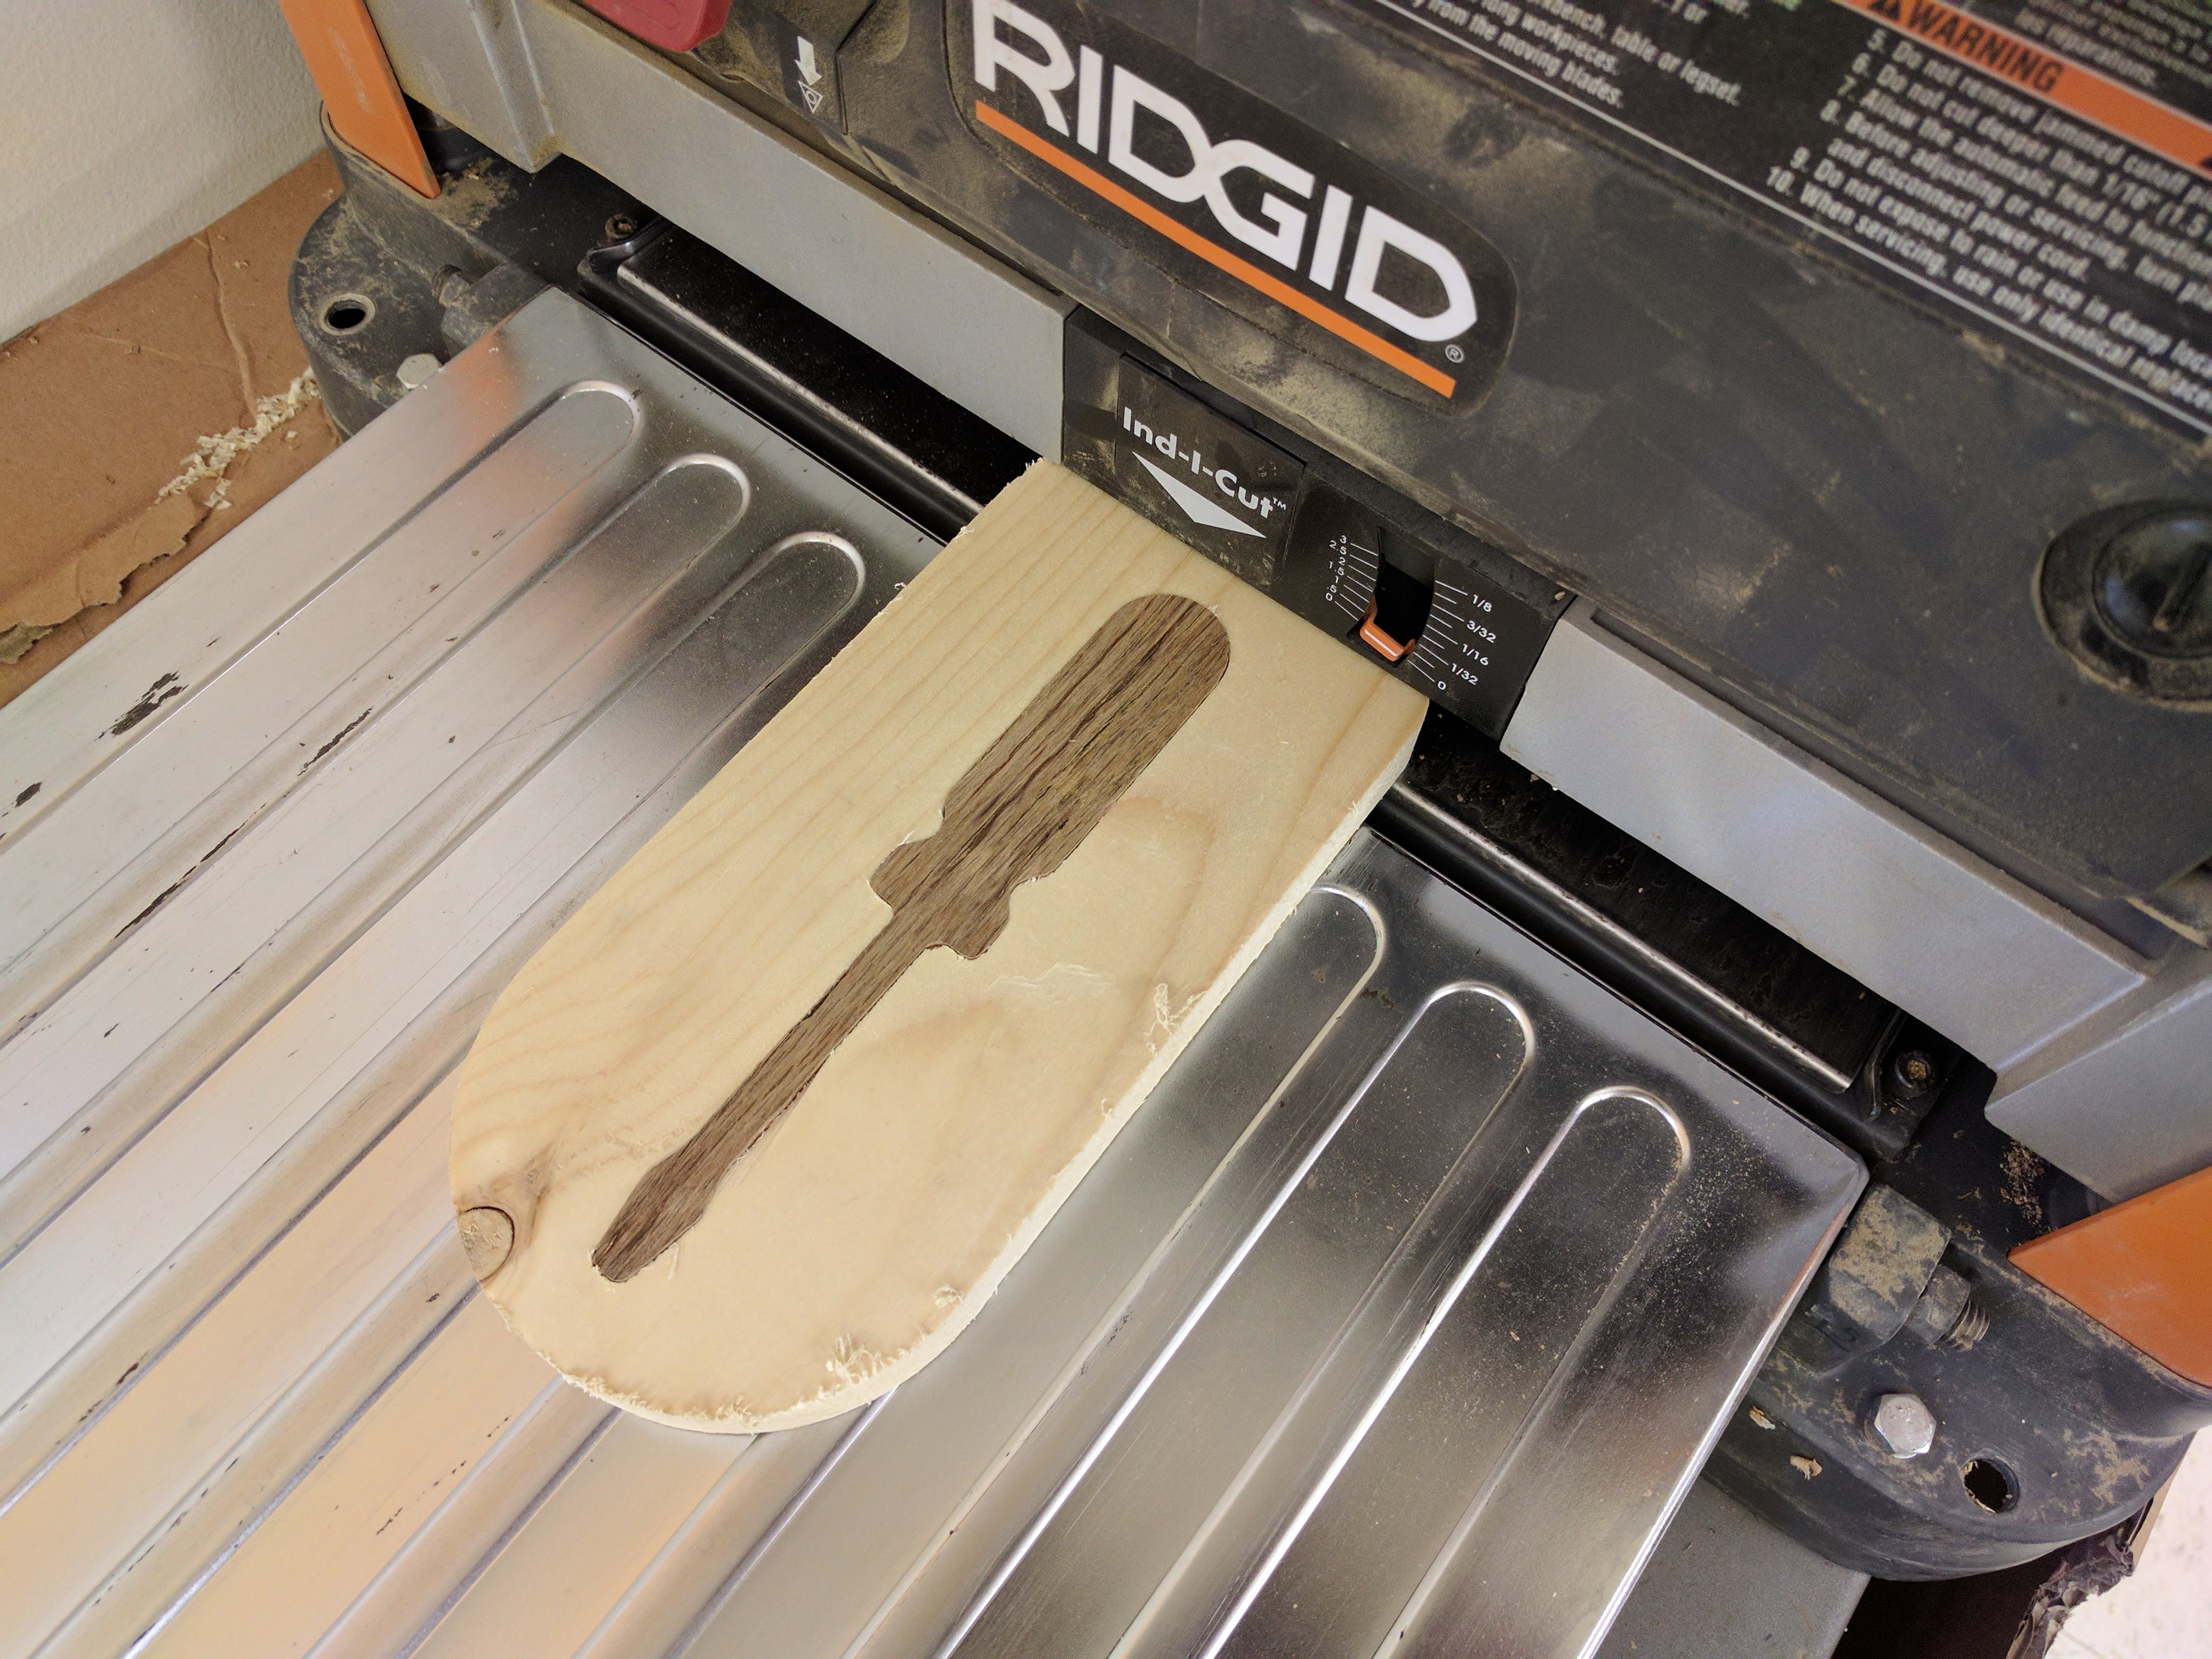
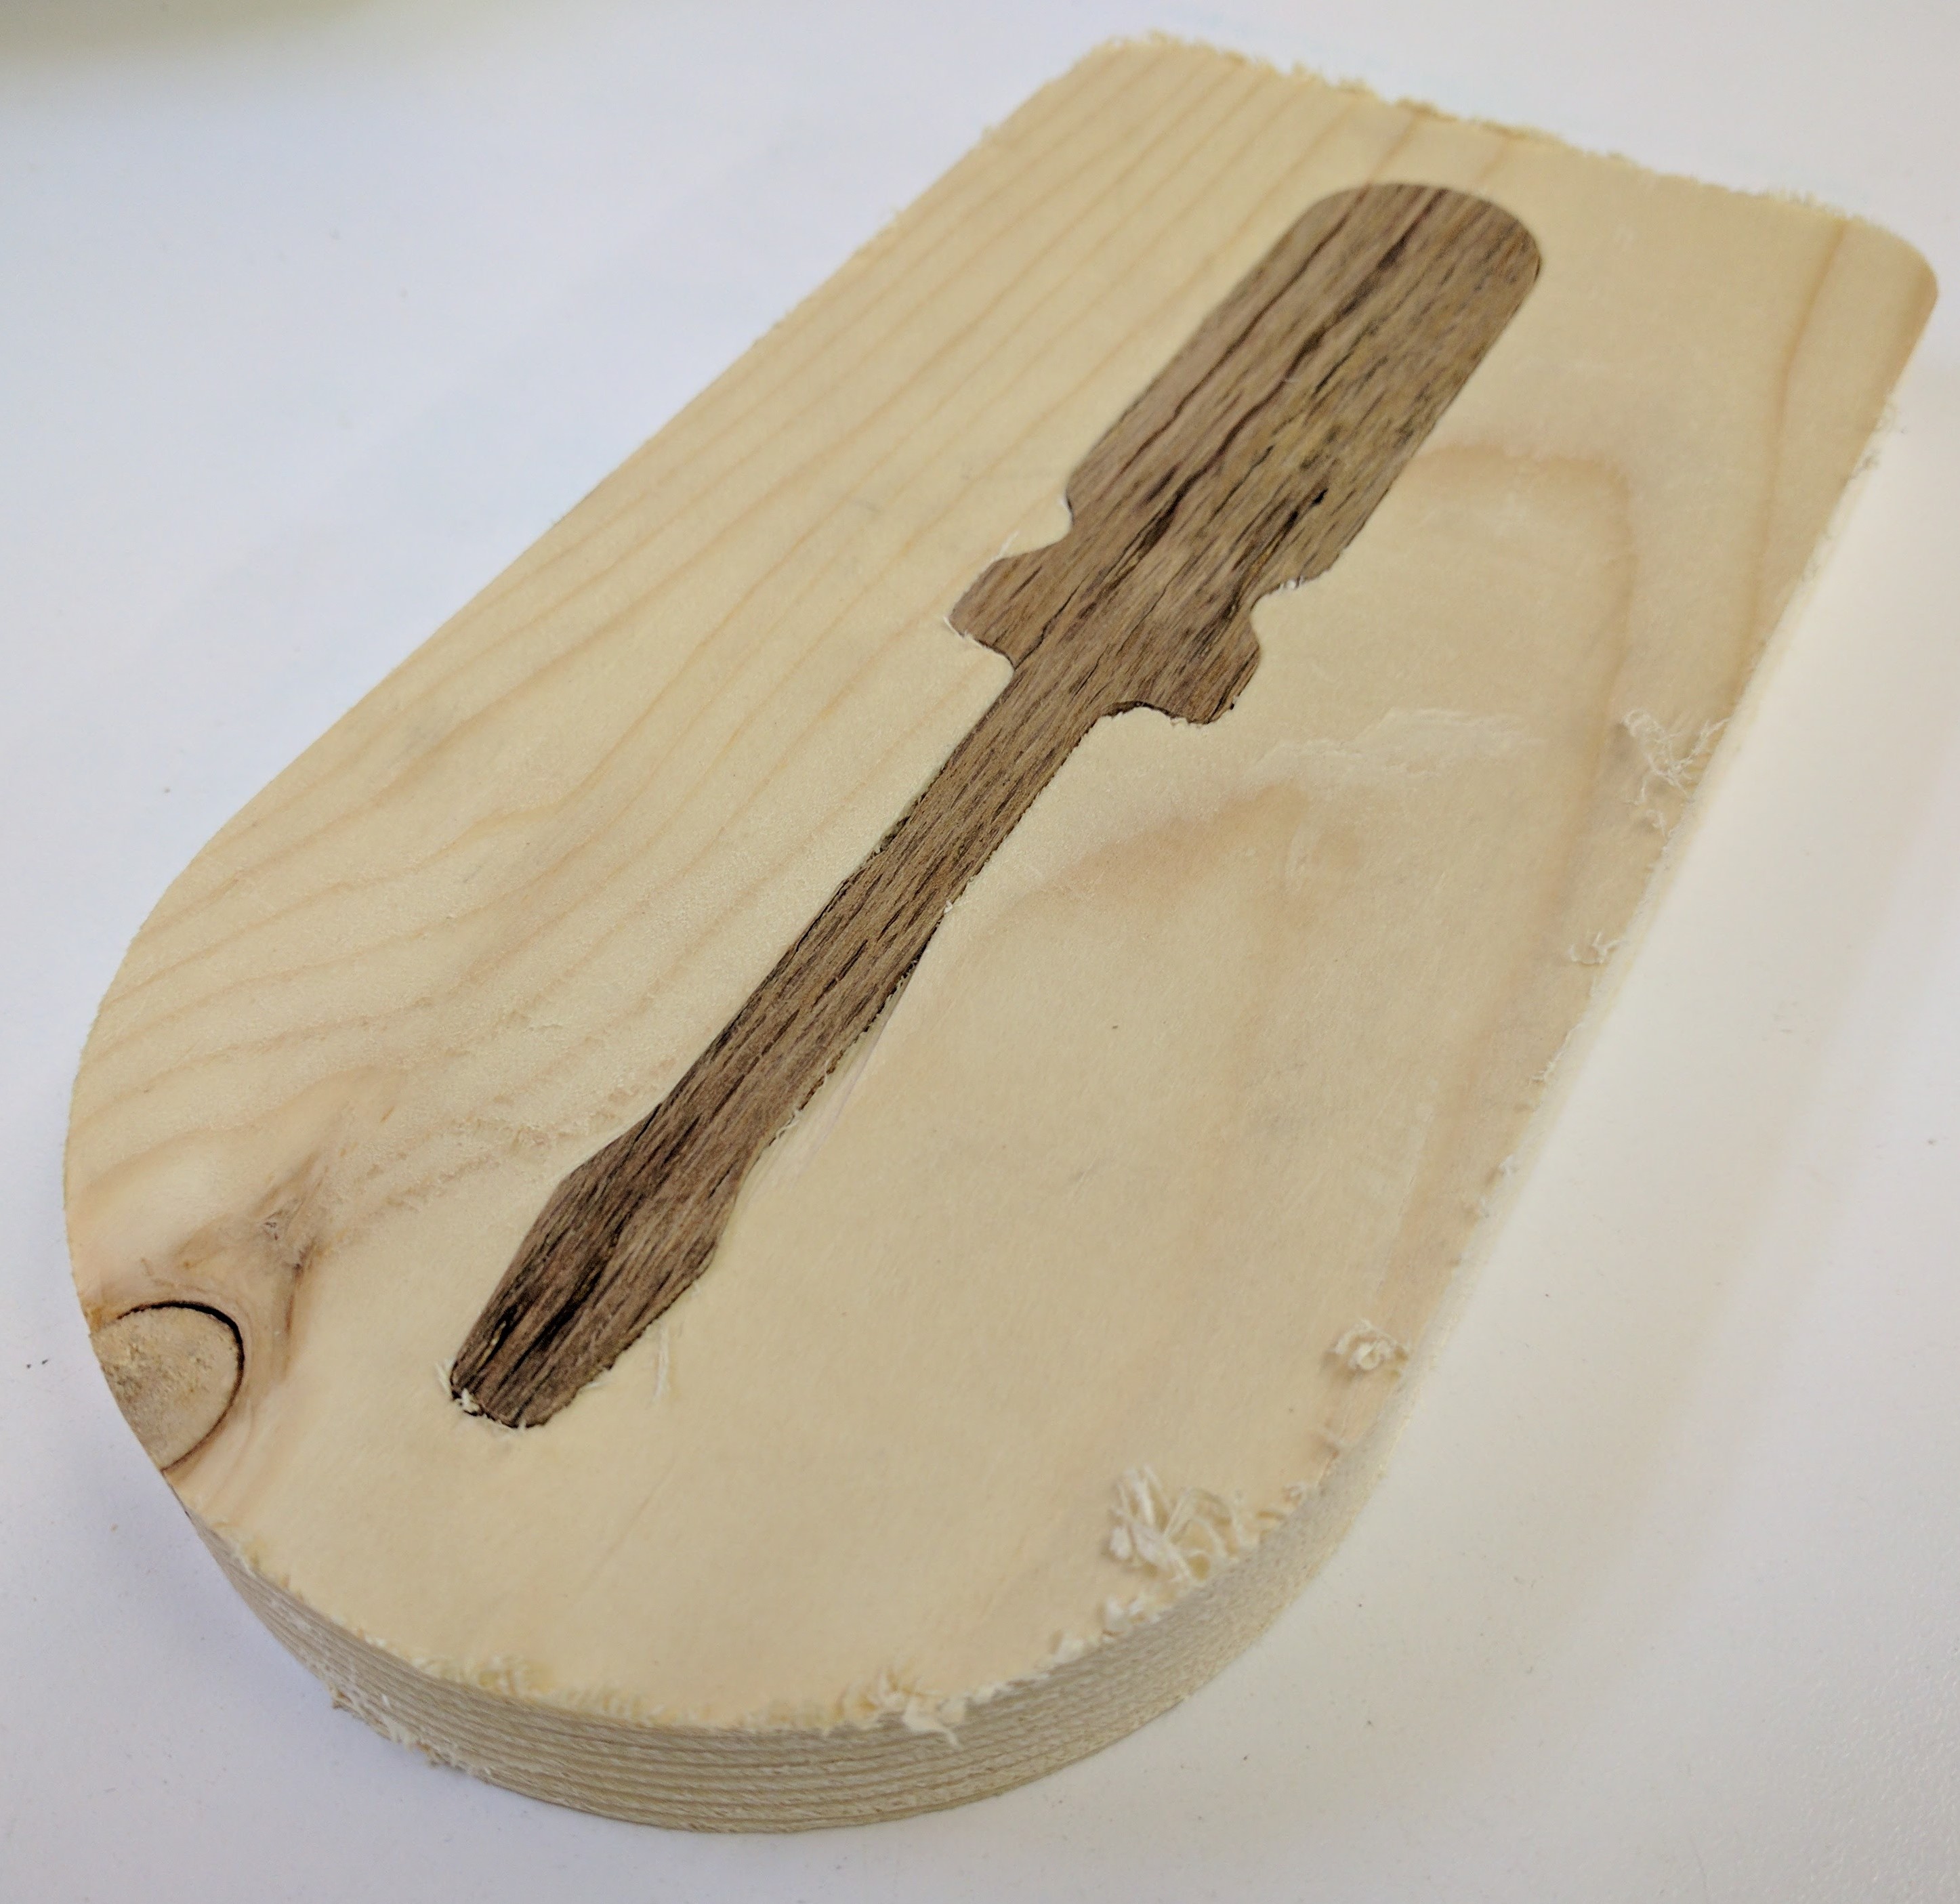
After the pieces have been machined, the tabs can be removed with a chisel and hammer. Use sandpaper to smooth any rough spots on the two pieces.
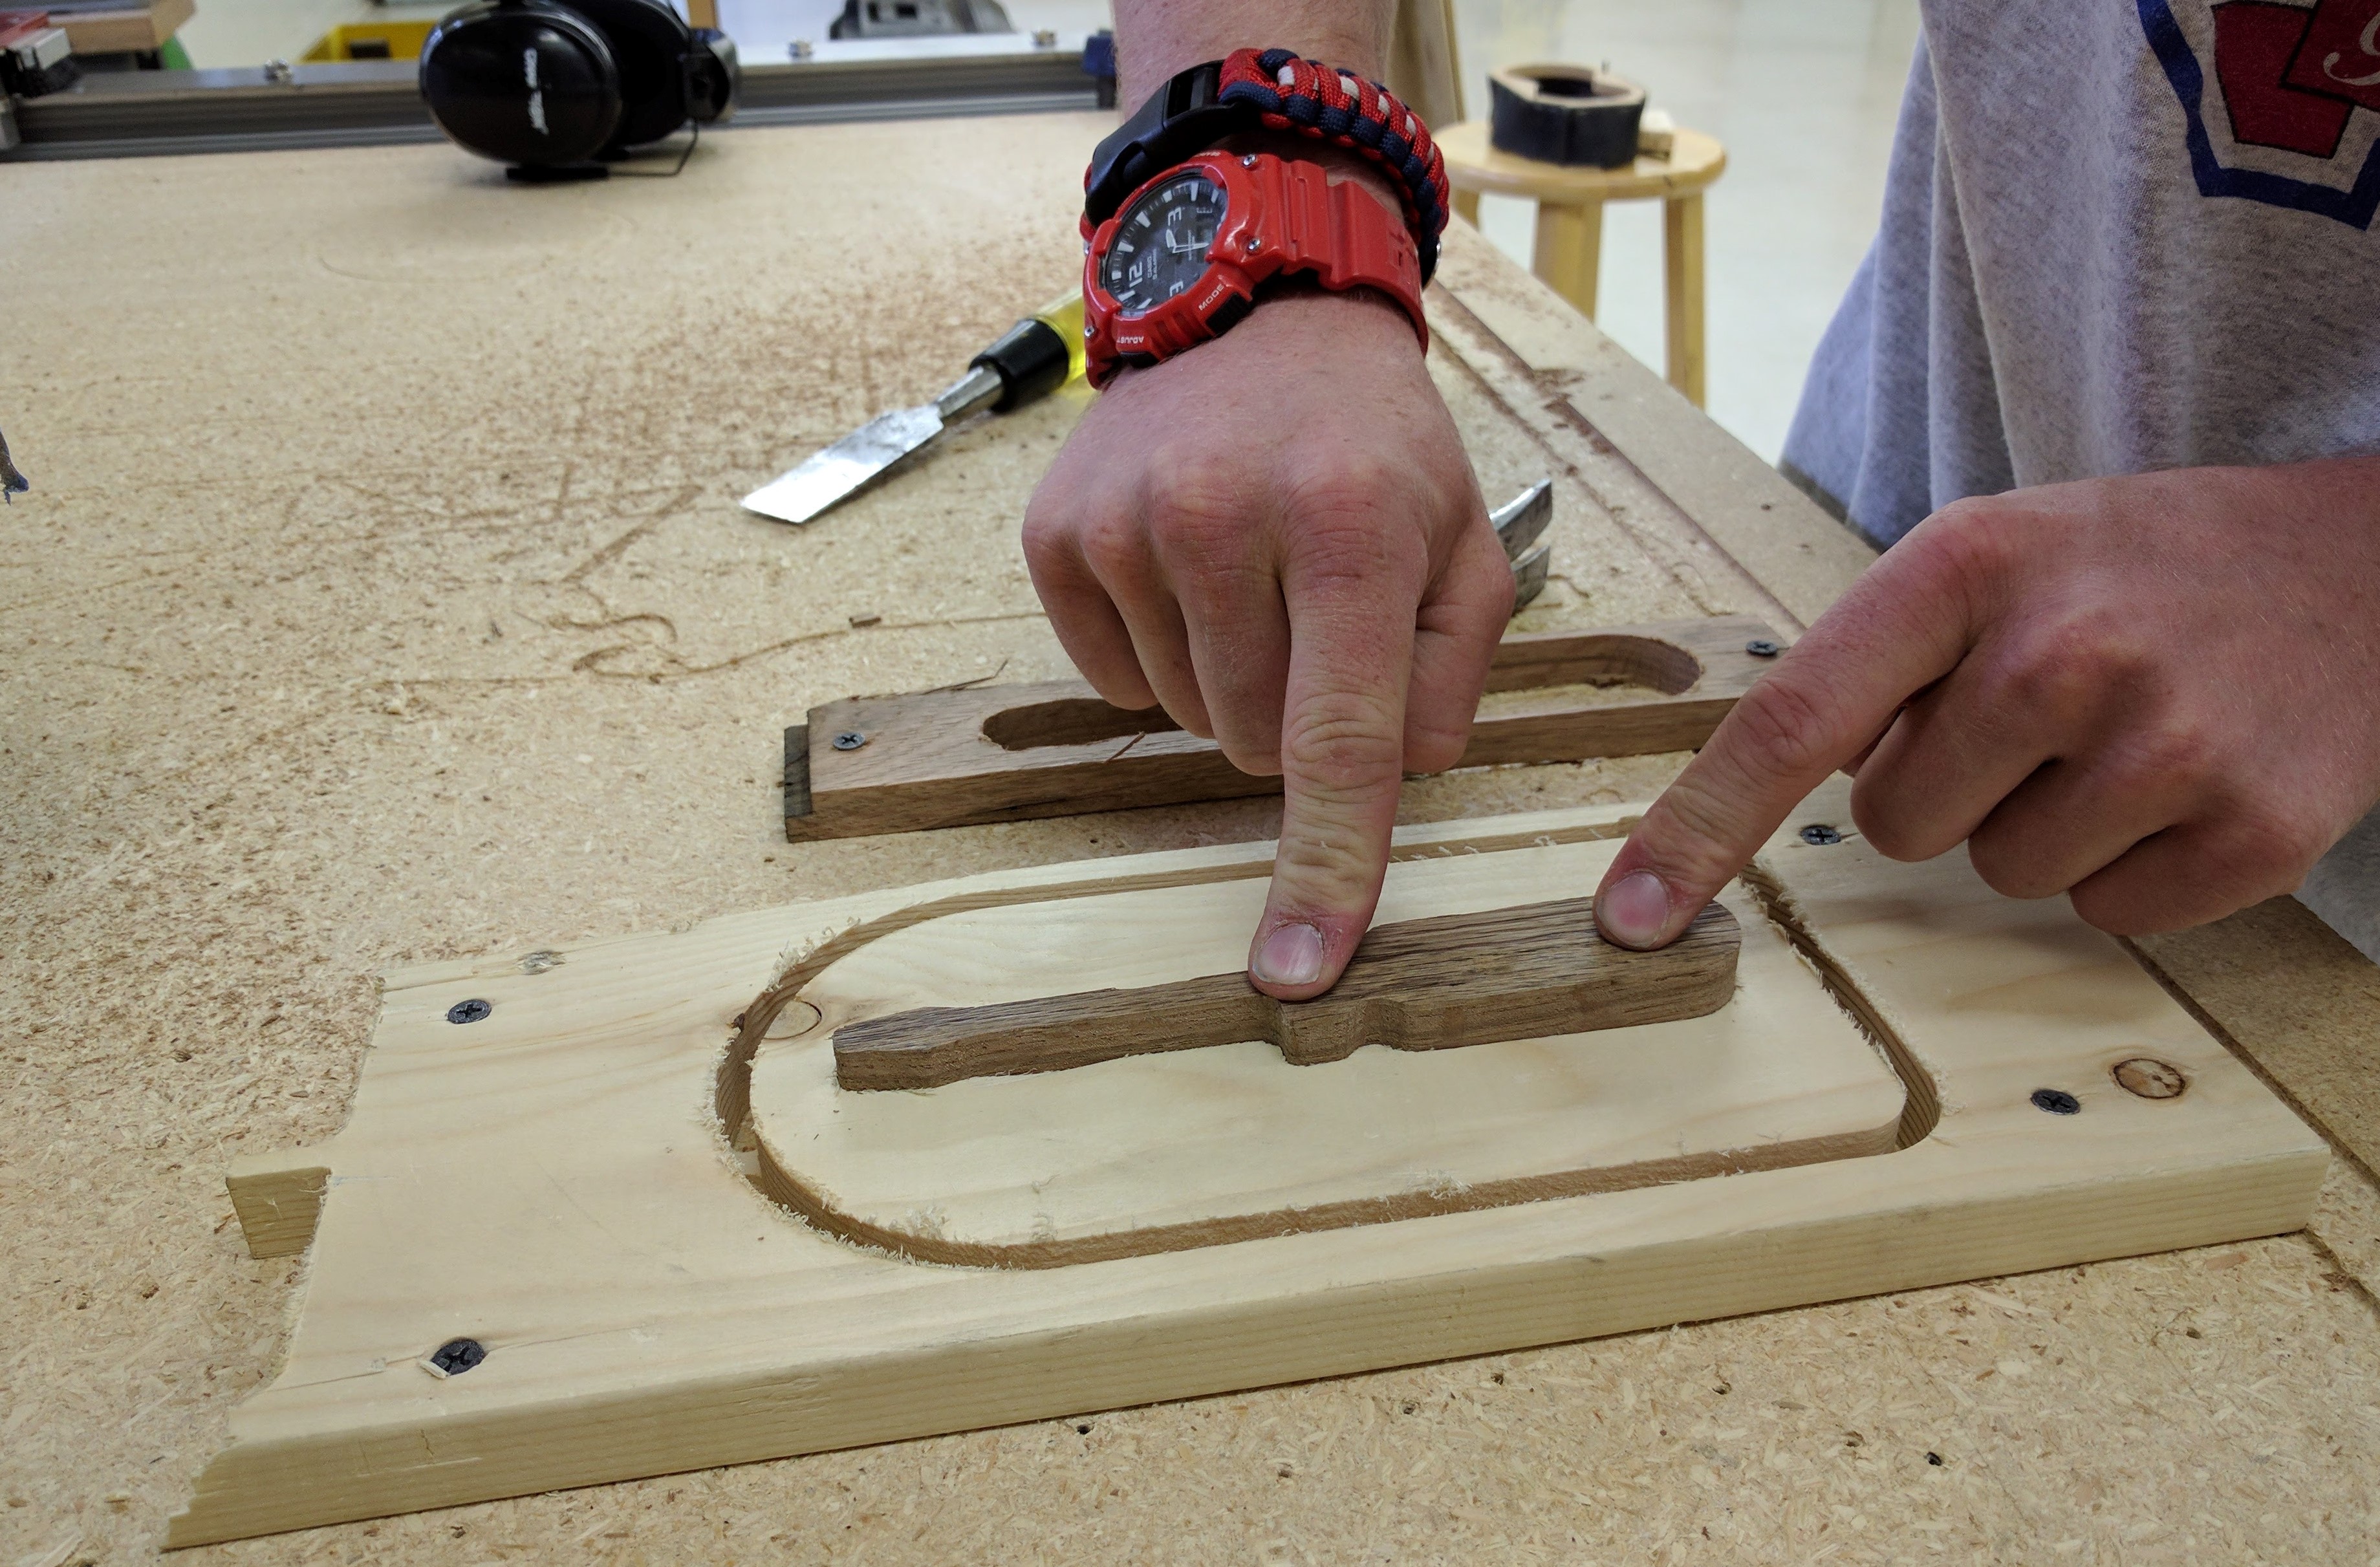
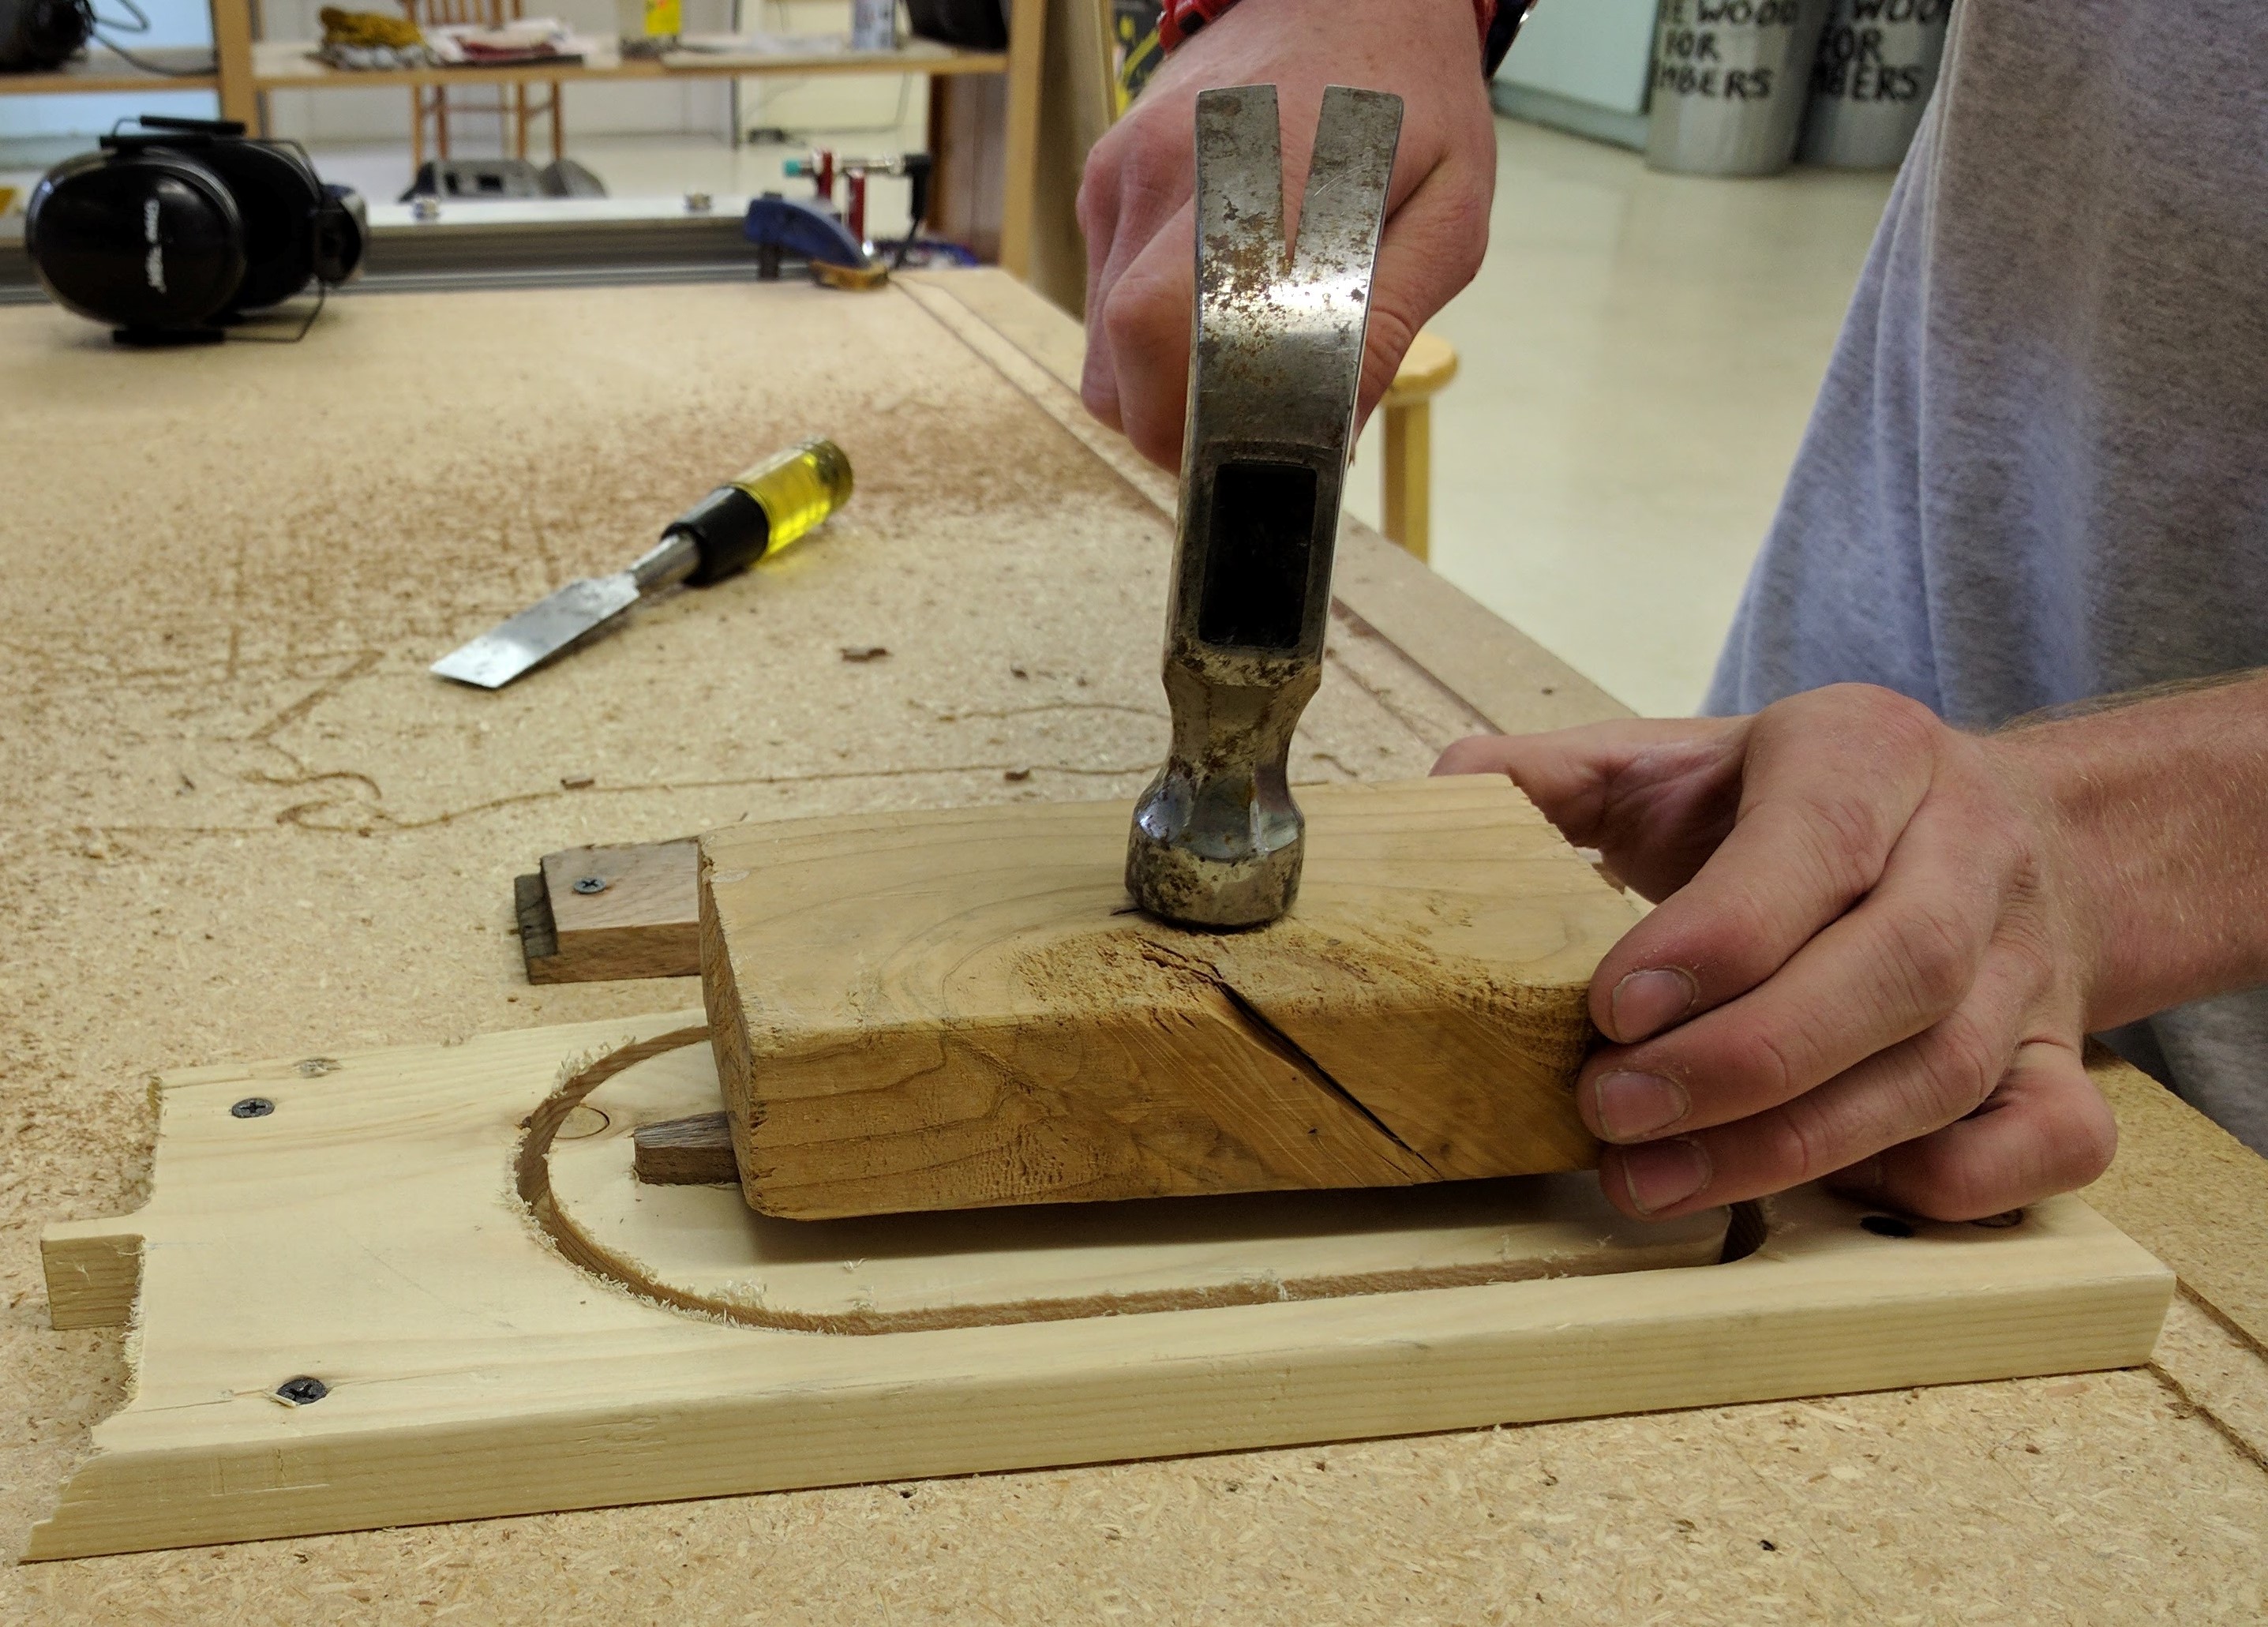
Next, carefully start the inlay into the perimeter by pressing gently with your fingers. The fit should be tight, but not impossible. After pressing in as far as possible by hand, a hammer and block of scrap wood can be used to force the inlay the rest of the way into the perimeter.
Finish the project by running it through a planer a couple of times. If desired, stain and varnish the project for a beautiful finish. Now that you have learned the process, you can add custom inlays to all sorts of projects- boxes, furniture, and maybe even a homemade musical instrument.
I hope that you found this project enjoyable and informative. Please post questions/comments and pictures of your own inlays below.