Wireless Keyboard With Arduino
by sistemasymicros in Circuits > Arduino
37776 Views, 43 Favorites, 0 Comments
Wireless Keyboard With Arduino
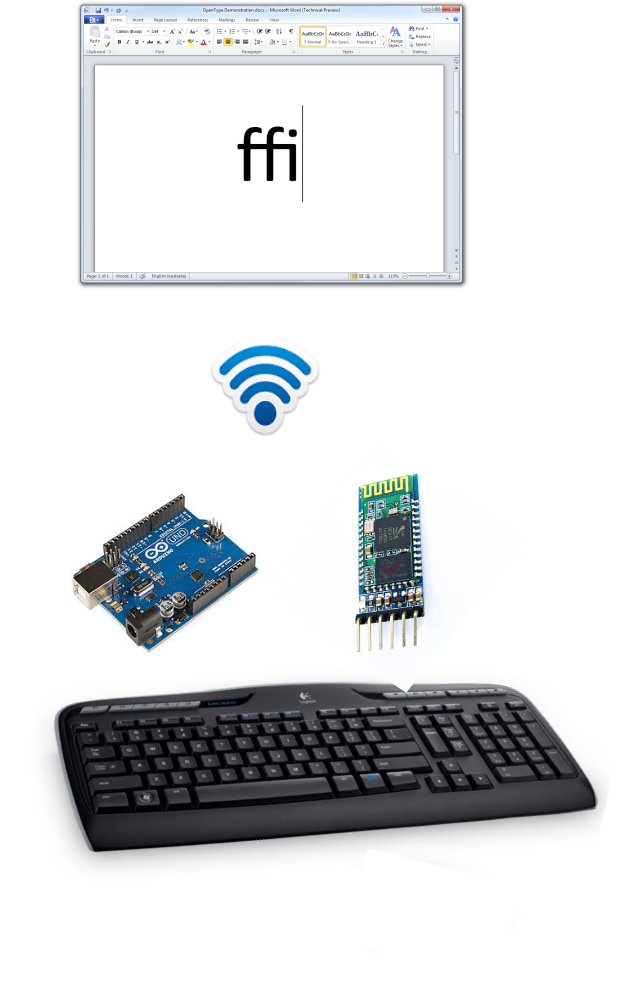
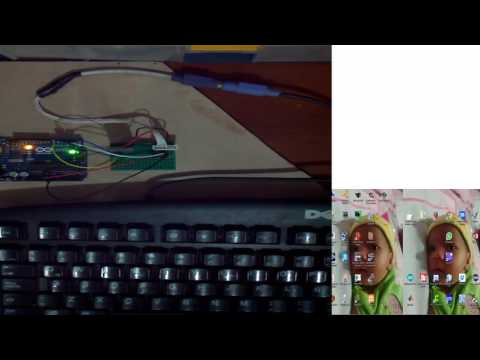
Hi everyone, in this tutorial i am going to show how to build a wireless keyboard with arduino and bluetooth that allows to write remotely to our Pc with Os windows.
See video
The program only allows to send the following letters, due to limitations of the library used.:
-
Alphanumeric characters in lower and uppercase
- Enter, Tab, delete and backspace.
- up, down, left and right arrows.
- PARTS
- Arduino One
- Keyboard Ps2.
- Bluetooth module HC-05.
- Jumpers.
Connect Ps2 Keyboard to Arduino
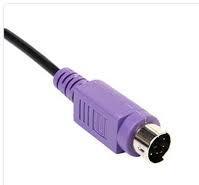
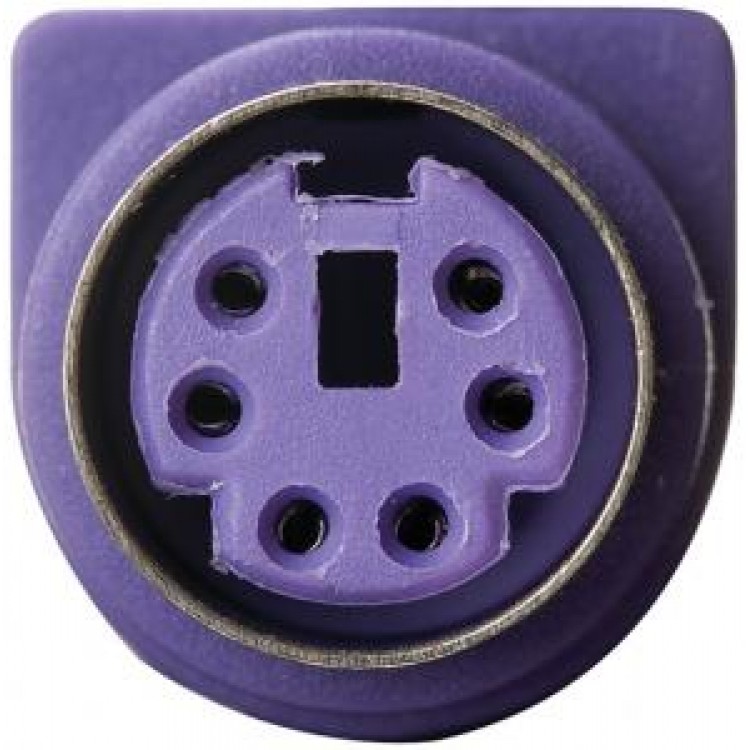
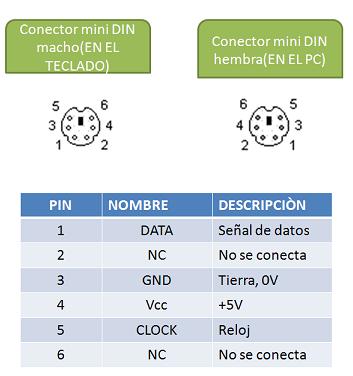
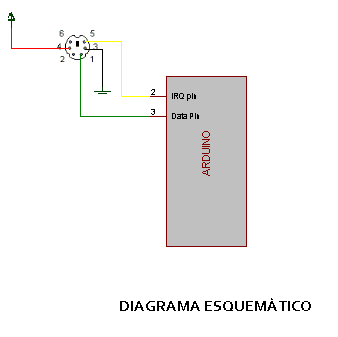
Following is the pin-out of the Connector. There are 4 wires coming
from the keyboard and their connections to arduino Digital pins are as follows.
PS2 connector - Arduino One
- 5V (pin 4) - 5V
- Ground (pin 3) - GND
- Clock (pin 5) - Pin 2
- Data (pin 1) - Pin 3
Downlad the Ps2Keyboard and import to the new sketch.
#include <PS2Keyboard.h>
Next step we are going to connect the bluetooth module...
Become Wireless...
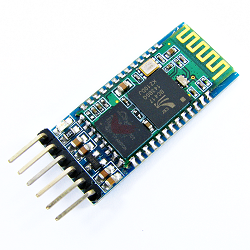
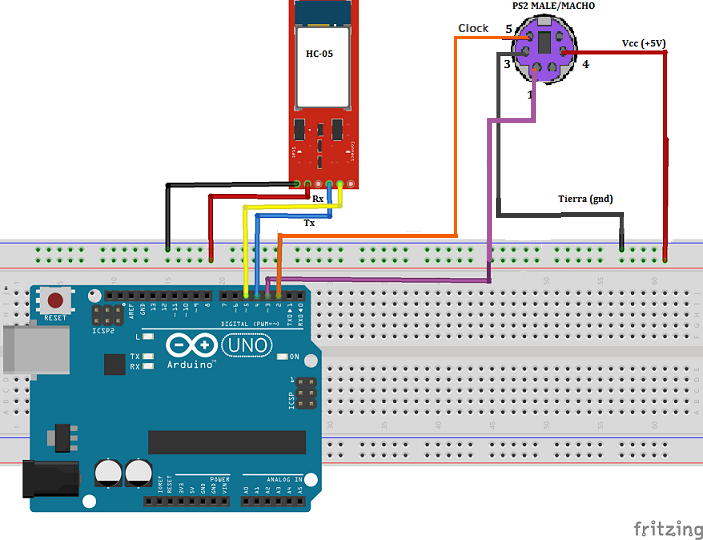
Lets use the pins 4 and 5 of the arduin for the serial communication, so there is to import the library SoftwareSerial:
[code]
#include <SoftwareSerial.h>
[/code]
Create an object called blue and set the data rate in 9600.
[code]
SoftwareSerial blue(4,5); //Rx,Tx
blue.begin(9600);
[/code]
The full code is:
[code]
#include <PS2Keyboard.h>
#include <SoftwareSerial.h>
char rec;
SoftwareSerial blue(4,5); //Rx,Tx
const int PinData = 3;
const int PinClock = 2;
PS2Keyboard teclado;
void setup()
{
delay(1000);
teclado.begin(PinData, PinClock);
blue.begin(9600);
}
void loop()
{ // If the keyboard is available
if (teclado.available())
{ // Reads the pressed key
char c = teclado.read(); // Checks some special keys
if (c == PS2_ENTER)
{
blue.println("ent");
}
else if (c == PS2_TAB)
{
blue.println("tab");
}
else if (c == PS2_ESC)
{
blue.println("esc");
}
else if (c == PS2_BACKSPACE)
{
blue.println("bsp");
}
else if (c == PS2_PAGEDOWN)
{
blue.println("pgd");
}
else if (c == PS2_PAGEUP)
{
blue.println("pgu");
}
else if (c == PS2_LEFTARROW)
{
blue.println("lft");
}
else if (c == PS2_RIGHTARROW)
{
blue.println("rgt");
}
else if (c == PS2_UPARROW)
{
blue.println("upk]");
}
else if (c == PS2_DOWNARROW)
{
blue.println("dwn");
}
else if (c == PS2_DELETE)
{
blue.println("del");
}
else
{ // Print the normal characters
blue.println(c);
}
}
}
[/code]
Download here the code for arduino.
Next step receive the keys send...
Writing in Our Pc
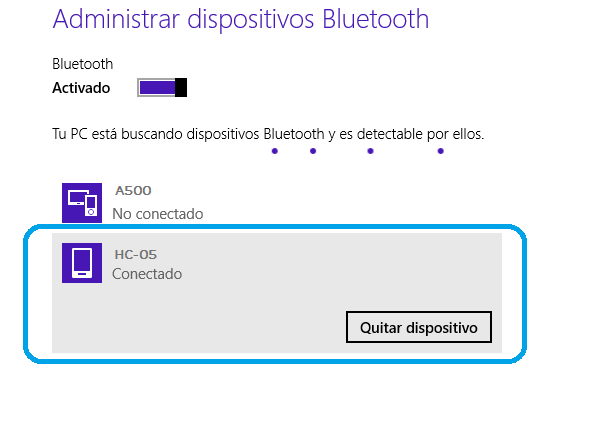
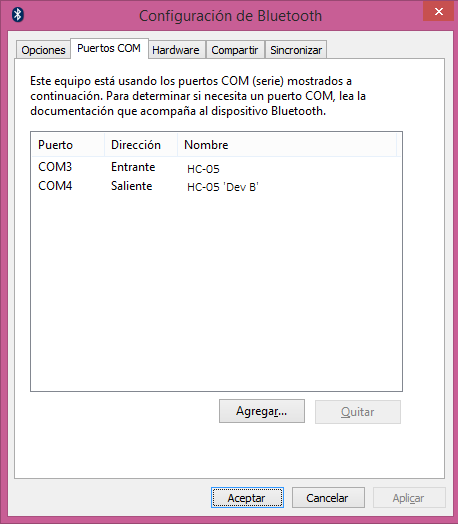
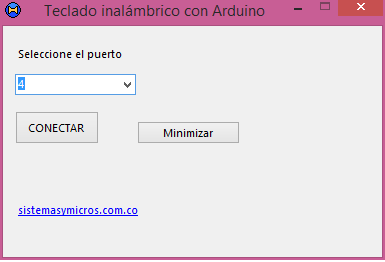
For receiving the characters send by the keyboard we need a program that capture the data and send the keys to the desired program in our Pc. Download this program and follow the next steps for a correct communication between our Pc and the bluetooth module:
- Turn on the bluetooth in the Pc.
- Connect and pair the bluetooth module HC-05 with our PC.
- Open the configuration window of the bluetooth in the Pc, select the tab (ports com) and looks for the output port number. (This port number will be assigned to the serial port of the program in visual basic)
- Execute the program, select the port number of the last setp and press the connect (conectar )button.
- If you got no errors, open notepad for example, start to write in the keyboard and the pressed keys must be shown in the notepad.
Download here the program in visual basic 2010.
I hope you liked this project and vote for it in the sensor contest.
If you have any suggestions, comments please let me know it.