Windows Movie Maker Tutorial

Have you ever wanted to make a video to post on YouTube, Twitter, or Facebook? With this tutorial, you will be able to add music, transitions and effects to images and video clips in order to make fun videos to share with your friends. Our Instructable is designed so that no prior knowledge of the software is required, but you will need to have a Windows computer and it will helpful to already have a folder with images or video clips, and at least one music file.
Search for “Movie Maker” by Opening the Windows Start Menu.

*If you search for “Movie Maker” and it is not found on your computer, don’t worry! It can easily be installed by following this link to Microsoft’s download page and clicking on the “Download Now” button. http://windows.microsoft.com/en-us/windows-live/movie-maker
Open Movie Maker and Name Your First Project


Part 1: After finding Windows Movie Maker on your computer, (or downloading it from Microsoft’s website), click and open it for the first time.
Part 2: Now that you’ve opened up Windows Movie Maker, you’ll see that it has created a blank project for you to start with. Before adding anything to this project, click the “Save” button in the top left of the screen. While you're working on the project, you may accidentally mess up and want to take a step back/undo your actions. In order to do that, you can use the "ctrl" + "Z" hotkey, or simply click on the "Back arrow" button located right next to the "Save" button.
Add a Video Clip or Photo


Windows Movie Maker has a convenient “Add videos and photos” button on the top left of the program. Click on it to open up Windows Explorer and navigate to the pictures or video clips you’d like to add. These will most likely be under your “Pictures” or “Videos” folders which you’ll see on the left side of the Windows Explorer window. If you’d like to add all of the photos or videos from one of your folders, press “ctrl” + “A” to select all and then click on “Open” in the bottom right.
After successfully adding your photos/videos to your movie,
you will see the Windows Movie Maker has already arranged them into a slideshow, with each picture lasting 7 seconds.
Add a Title Screen to Your Movie
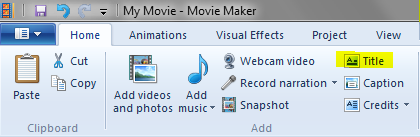


Part 1: Now that your movie is starting to take shape, you most likely will want to add a title. Windows Movie Maker has a useful “Title” button in the top left of the program.
After you click on the “Title” button you will see that Windows Movie Maker has automatically created a title page for your movie and opened up the formatting options so you can customize it as you see fit.
Part 2: Windows Movie Maker will automatically give you the title “My Movie” which you can change within the black box on the left. You will also notice that the taskbar up top has changed, giving you options for formatting the text and transition effects for the title screen. In the top left you can change the font and size of your title, and in the top right you will see many different transition effects to choose from.
Part 3: Before moving onto the next step, you will need to click on the “Home” tab in the top left, which will change the taskbar back to its original state.
Adding Credits to Your Movie


Part 1: Now that you’ve clicked back to the Home toolbar, you’ll see the “Credits” button. Click on this button, and Windows Movie Maker will automatically add a Credits screen to the very end of your movie.
Part 2: Just like with the Title screen, you will be able to add your name to the Credits screen. The “Format” taskbar from before allows you to change the font and also add different transition effects to the credits slide.
Part 3: When you’re finished formatting the credits slide to your liking, be sure to return to the Home toolbar by clicking on the “Home” button in the top left.
Add Music to Your Movie


Part 1: Now that your movie has a title and credits screen, you may want to add music to it. Click on the “Add music” button to open up Windows Explorer and navigate to an audio file saved on your computer. If you don’t have any music on your computer, or are looking for something different than what you have, you can click on the little arrow next to the “Add music” button and find something from the “Free Music Archive” website.
Part 2: Once you’ve uploaded a music file to your project, you’ll see that it shows up in green in the overview window on the right side of the Windows Movie Maker program.
Finish Your Movie by Adding an AutoMovie Theme


Part 1: Click on the “Home” button once again, and take a look at the AutoMovie Themes located in the center of the top toolbar. By selecting one of these AutoMovie Themes, Windows Movie Maker will automatically add in transitions for all of your pictures/videos, while still keeping your music and title/credit screens.
Part 2: Take a look at your movie after the AutoMovie Theme has been added, by pressing the small “Play” button under the preview on the left side of the Windows Movie Maker program.
Part 3: After seeing your movie in full, you may want to increase or decrease the amount of time that your pictures are shown. This can easily be done by selecting the individual picture on the overview and then changing the “Duration” within the Edit toolbar on the top of the screen.
Upload and Share Your Movie

Once you’re happy with your movie and ready to upload it so the rest of the world may enjoy it, click on one of the “Share” options in the top right under the Home toolbar. In order to upload to a social media site, you will need to connect your Microsoft account and enable it to post videos on another site. Windows Movie Maker will guide you through those steps quite easily and you should end up at a screen that looks like the one above. Once you hit "Publish", your video will automatically be published to the account you set up and can be seen by anyone you want. Thanks for following along with our tutorial, we hope it was helpful to you!