WiFi Friendship Lights
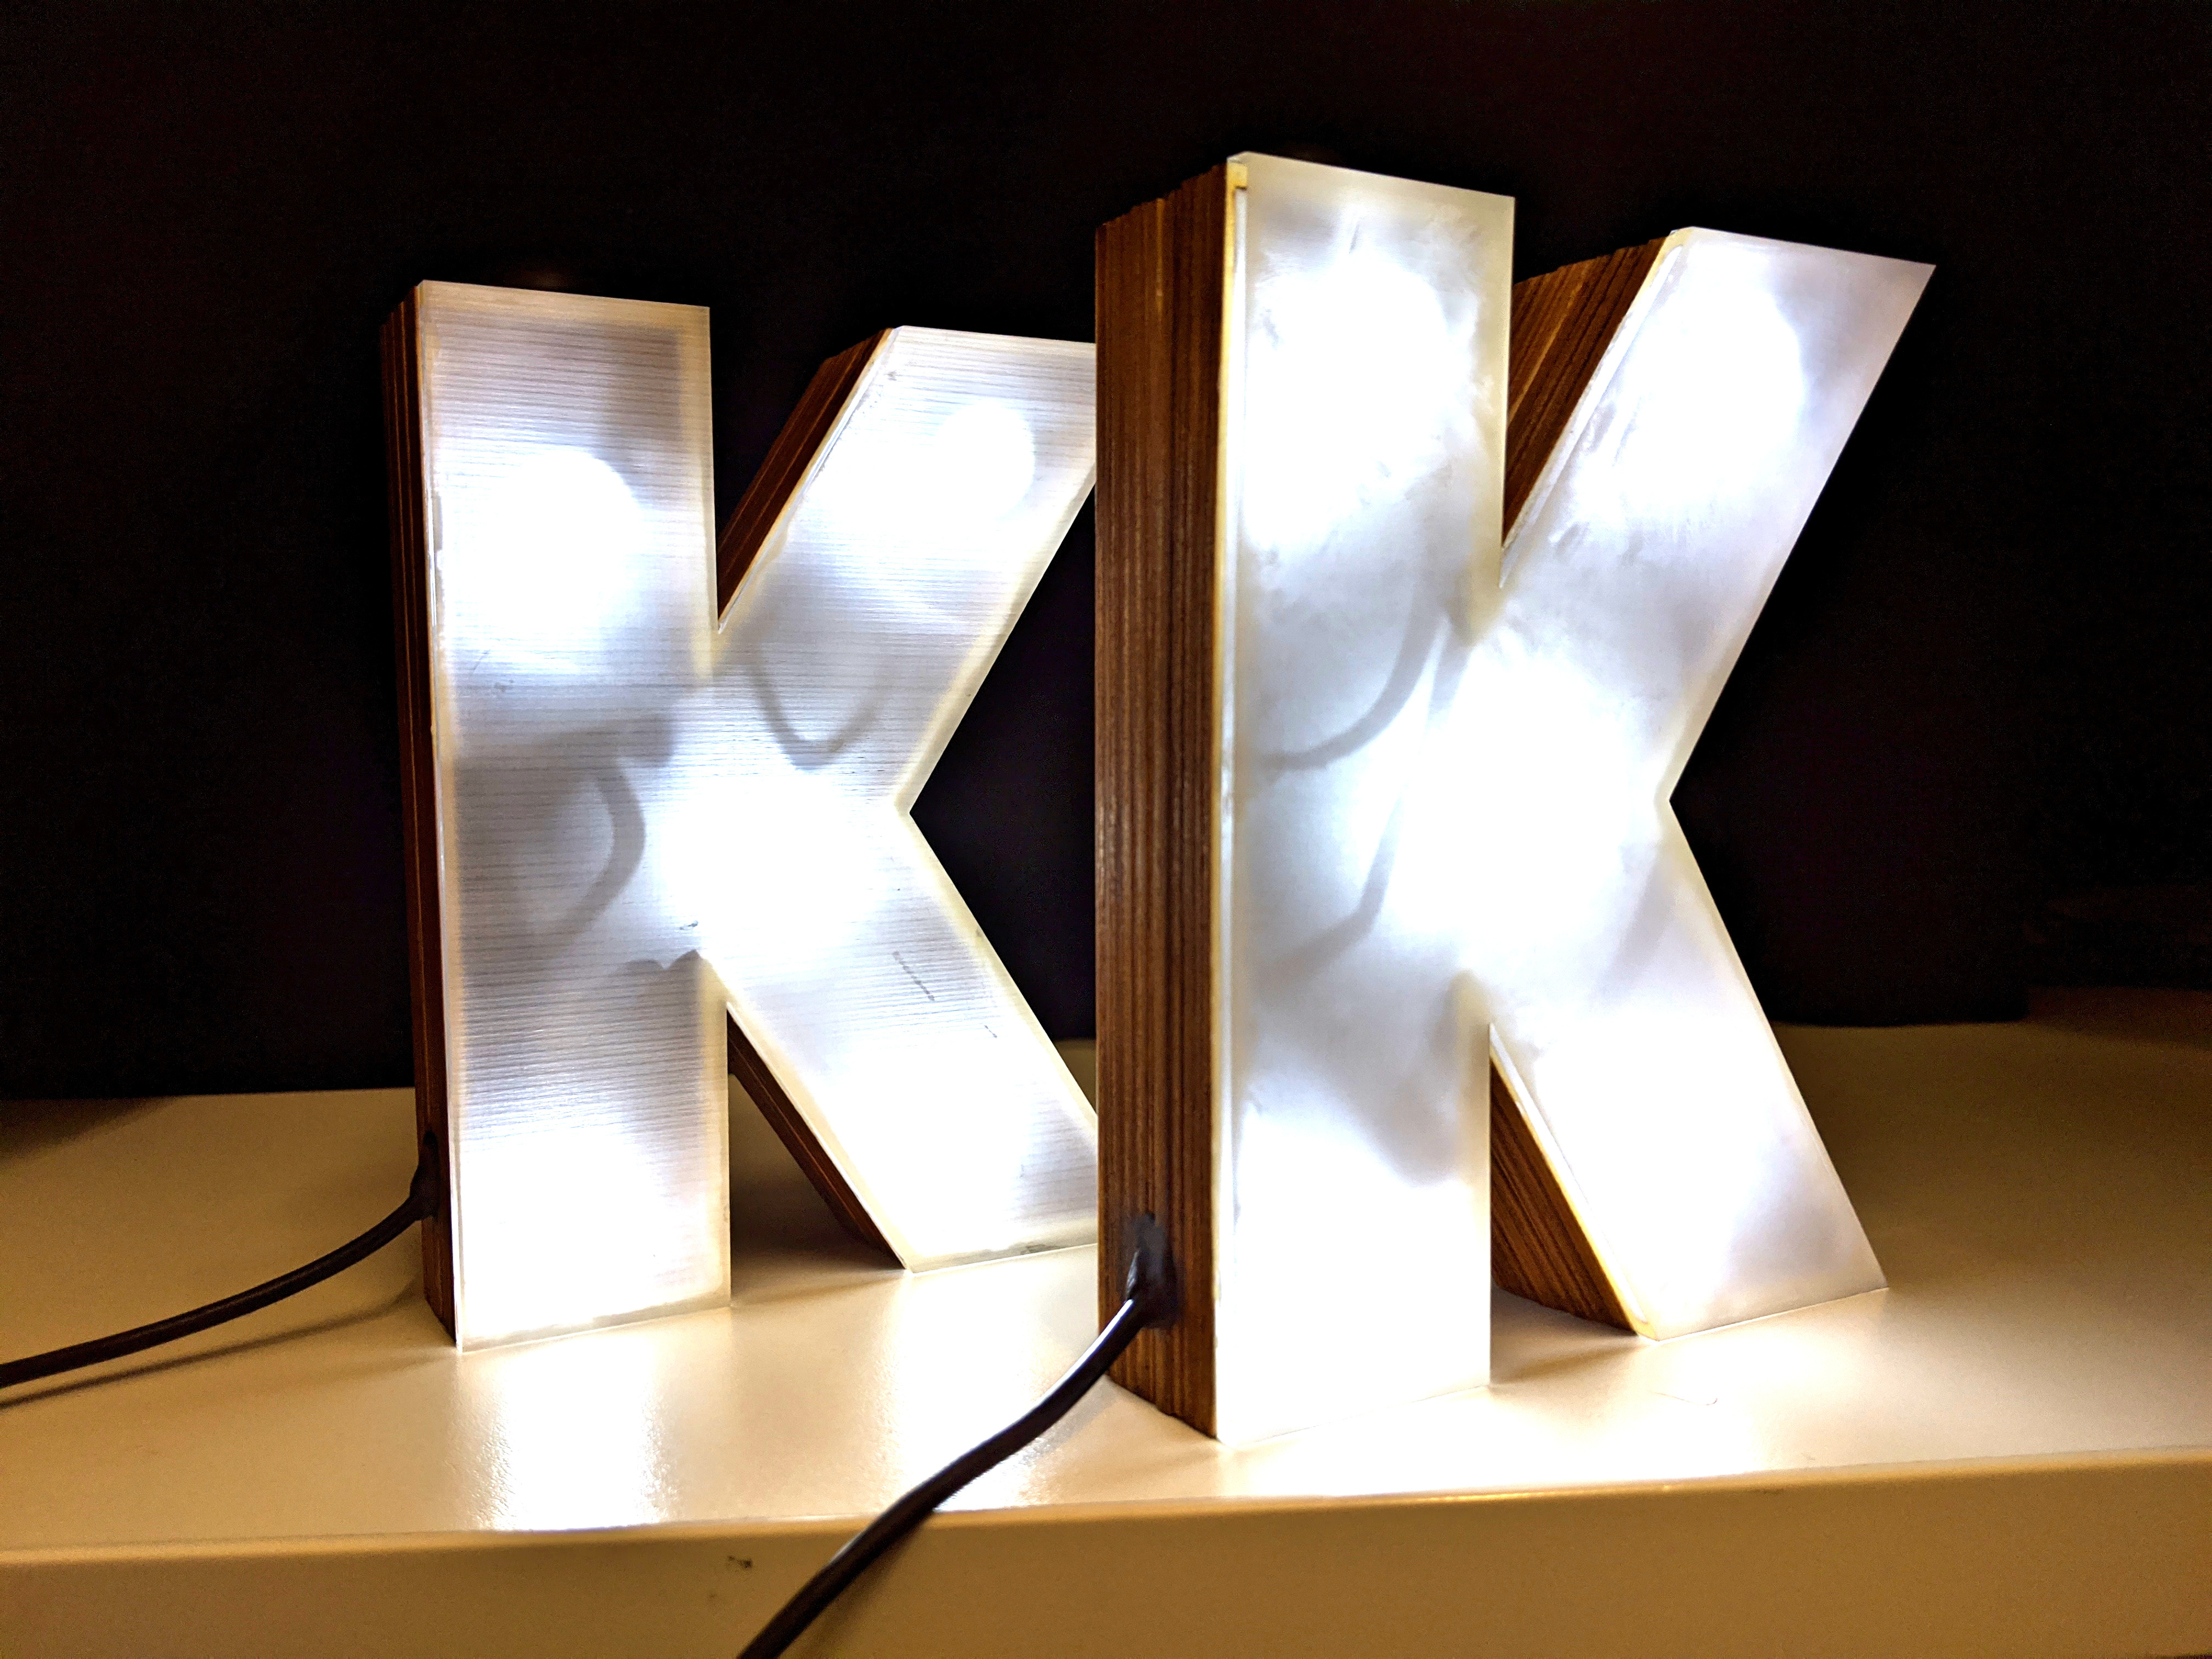
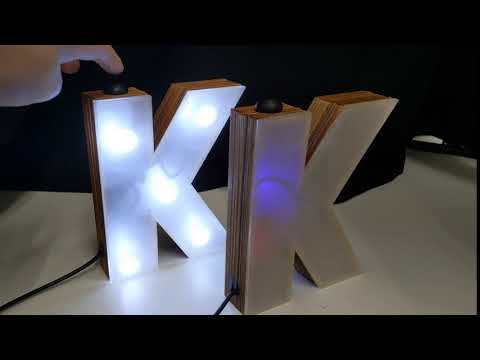
These WiFi connected lights let you stay connected to someone when you're apart. When you press the button on one, the other lights up to let your friend know you're thinking about them.
This pair was made for a friend who wanted a gift for someone who was moving away (both their names begin with the letter K).
Supplies
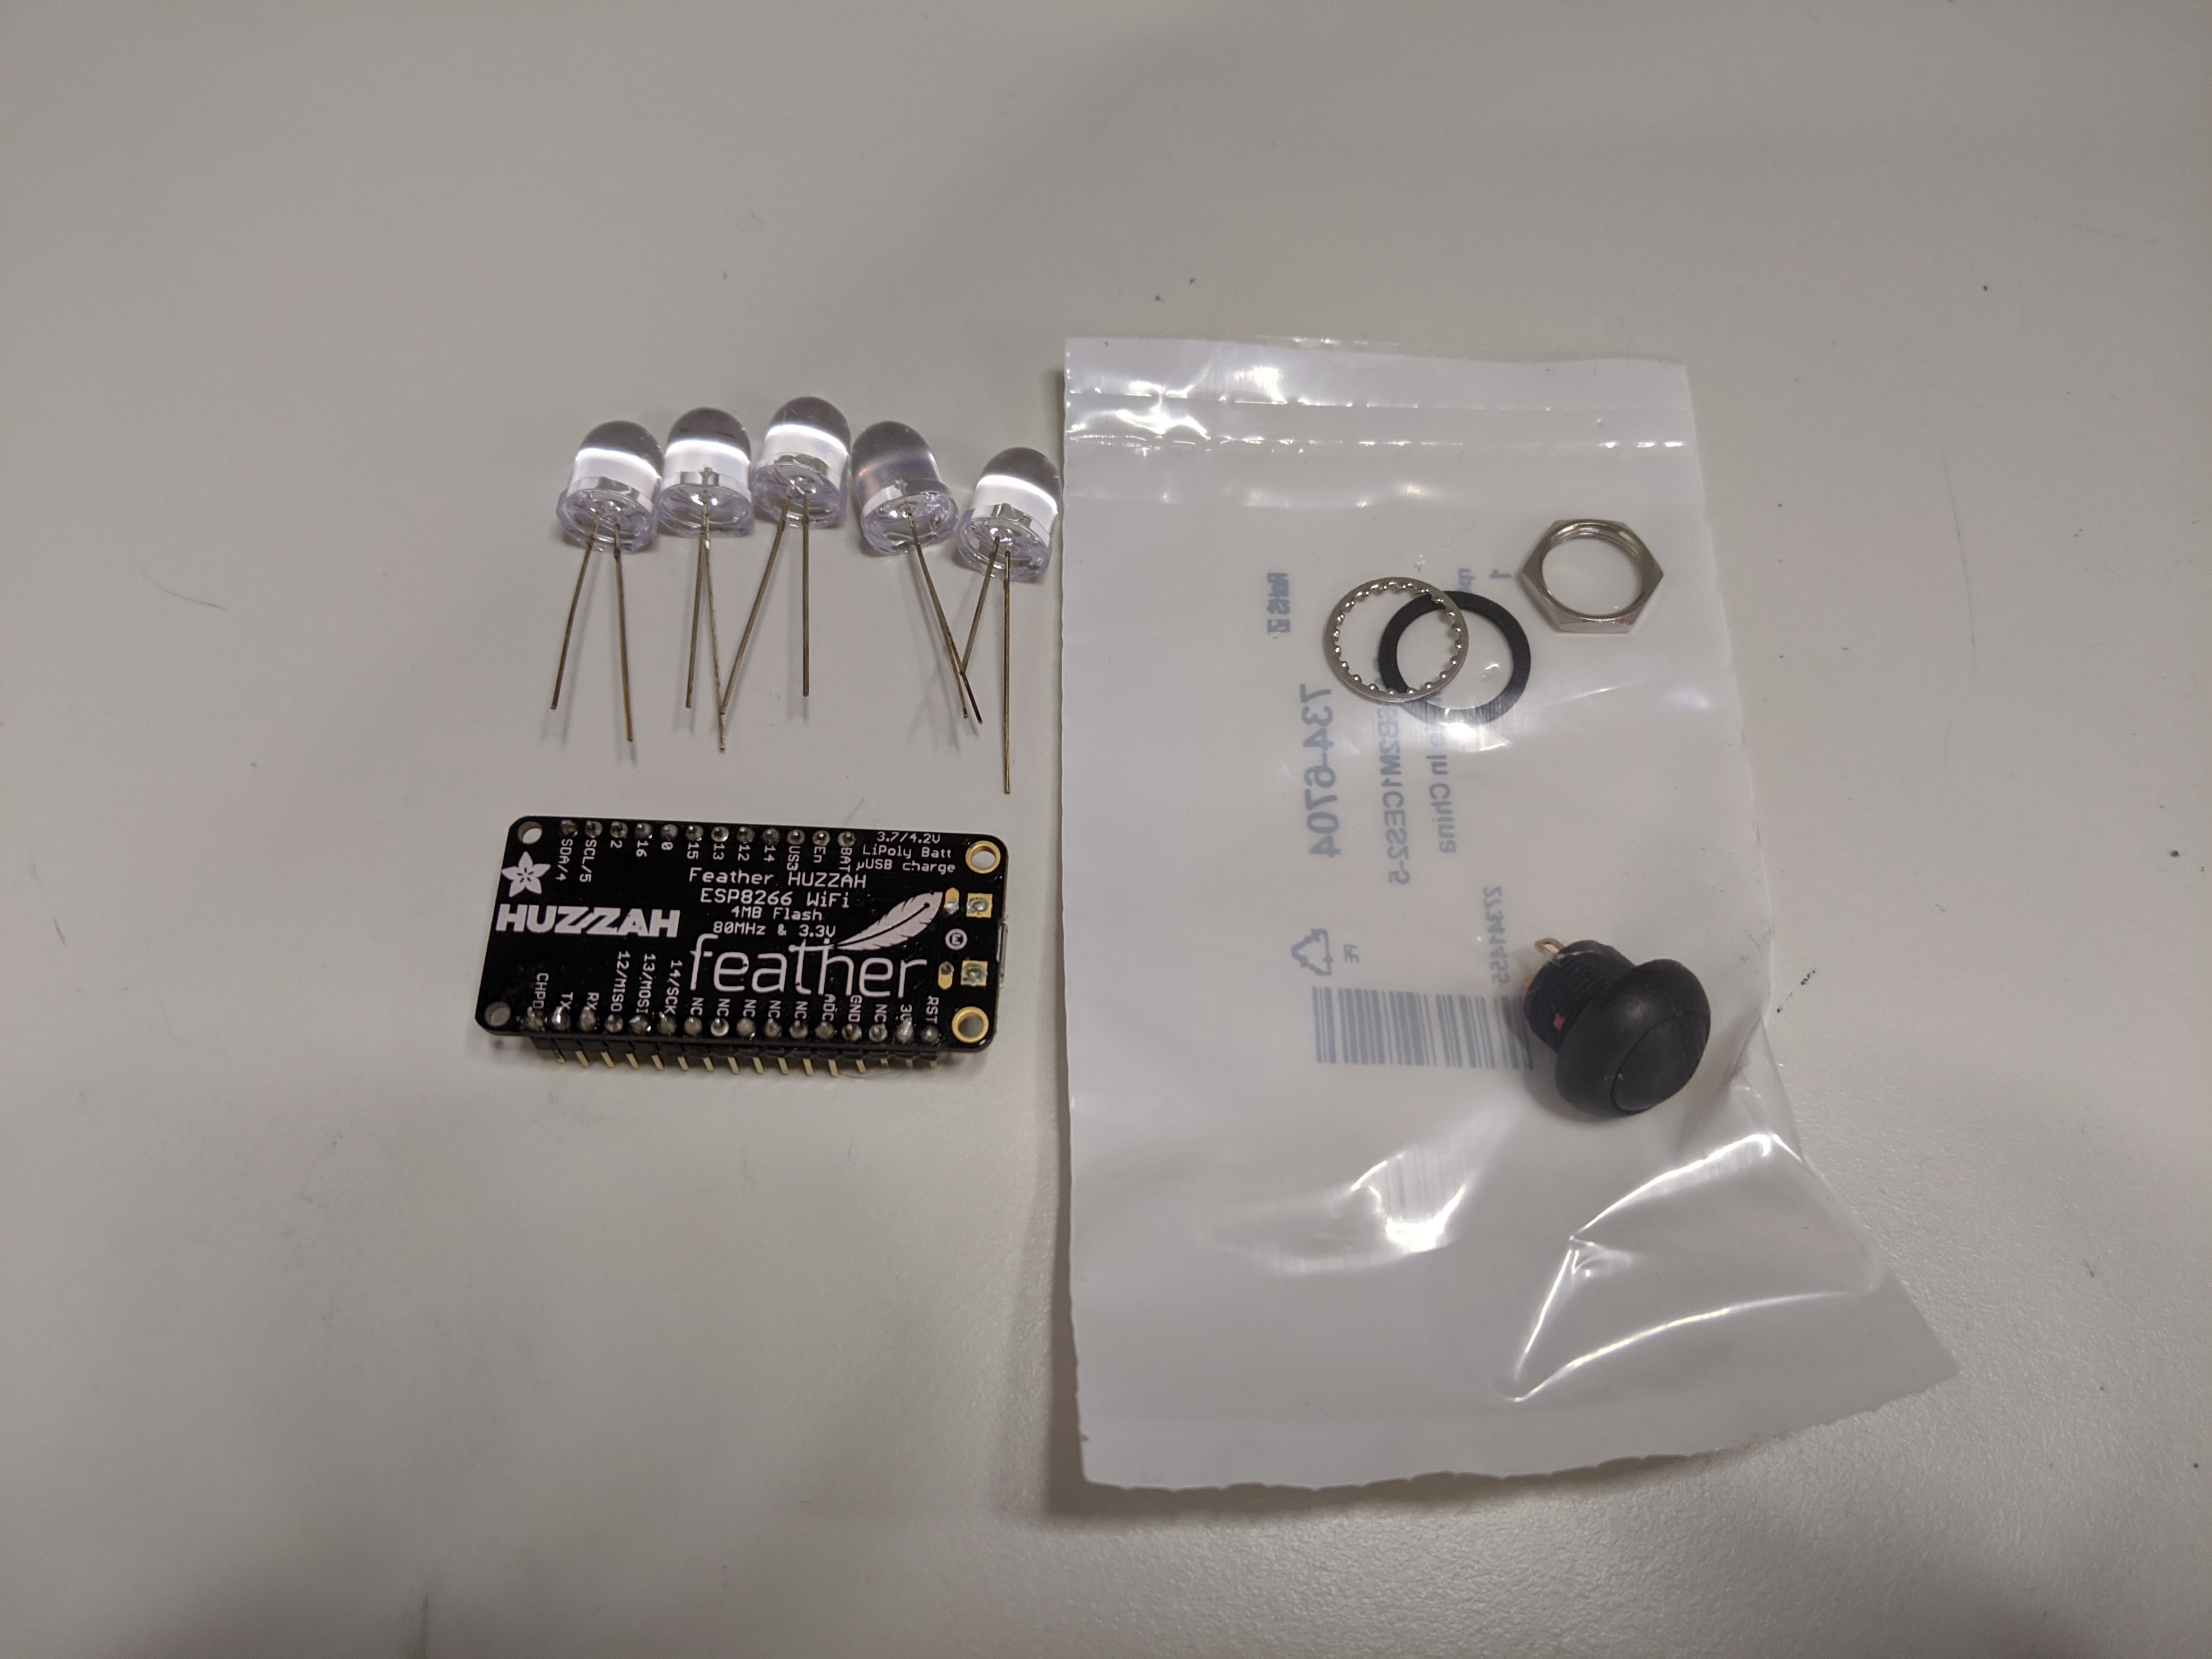
10 x 10mm white LEDs
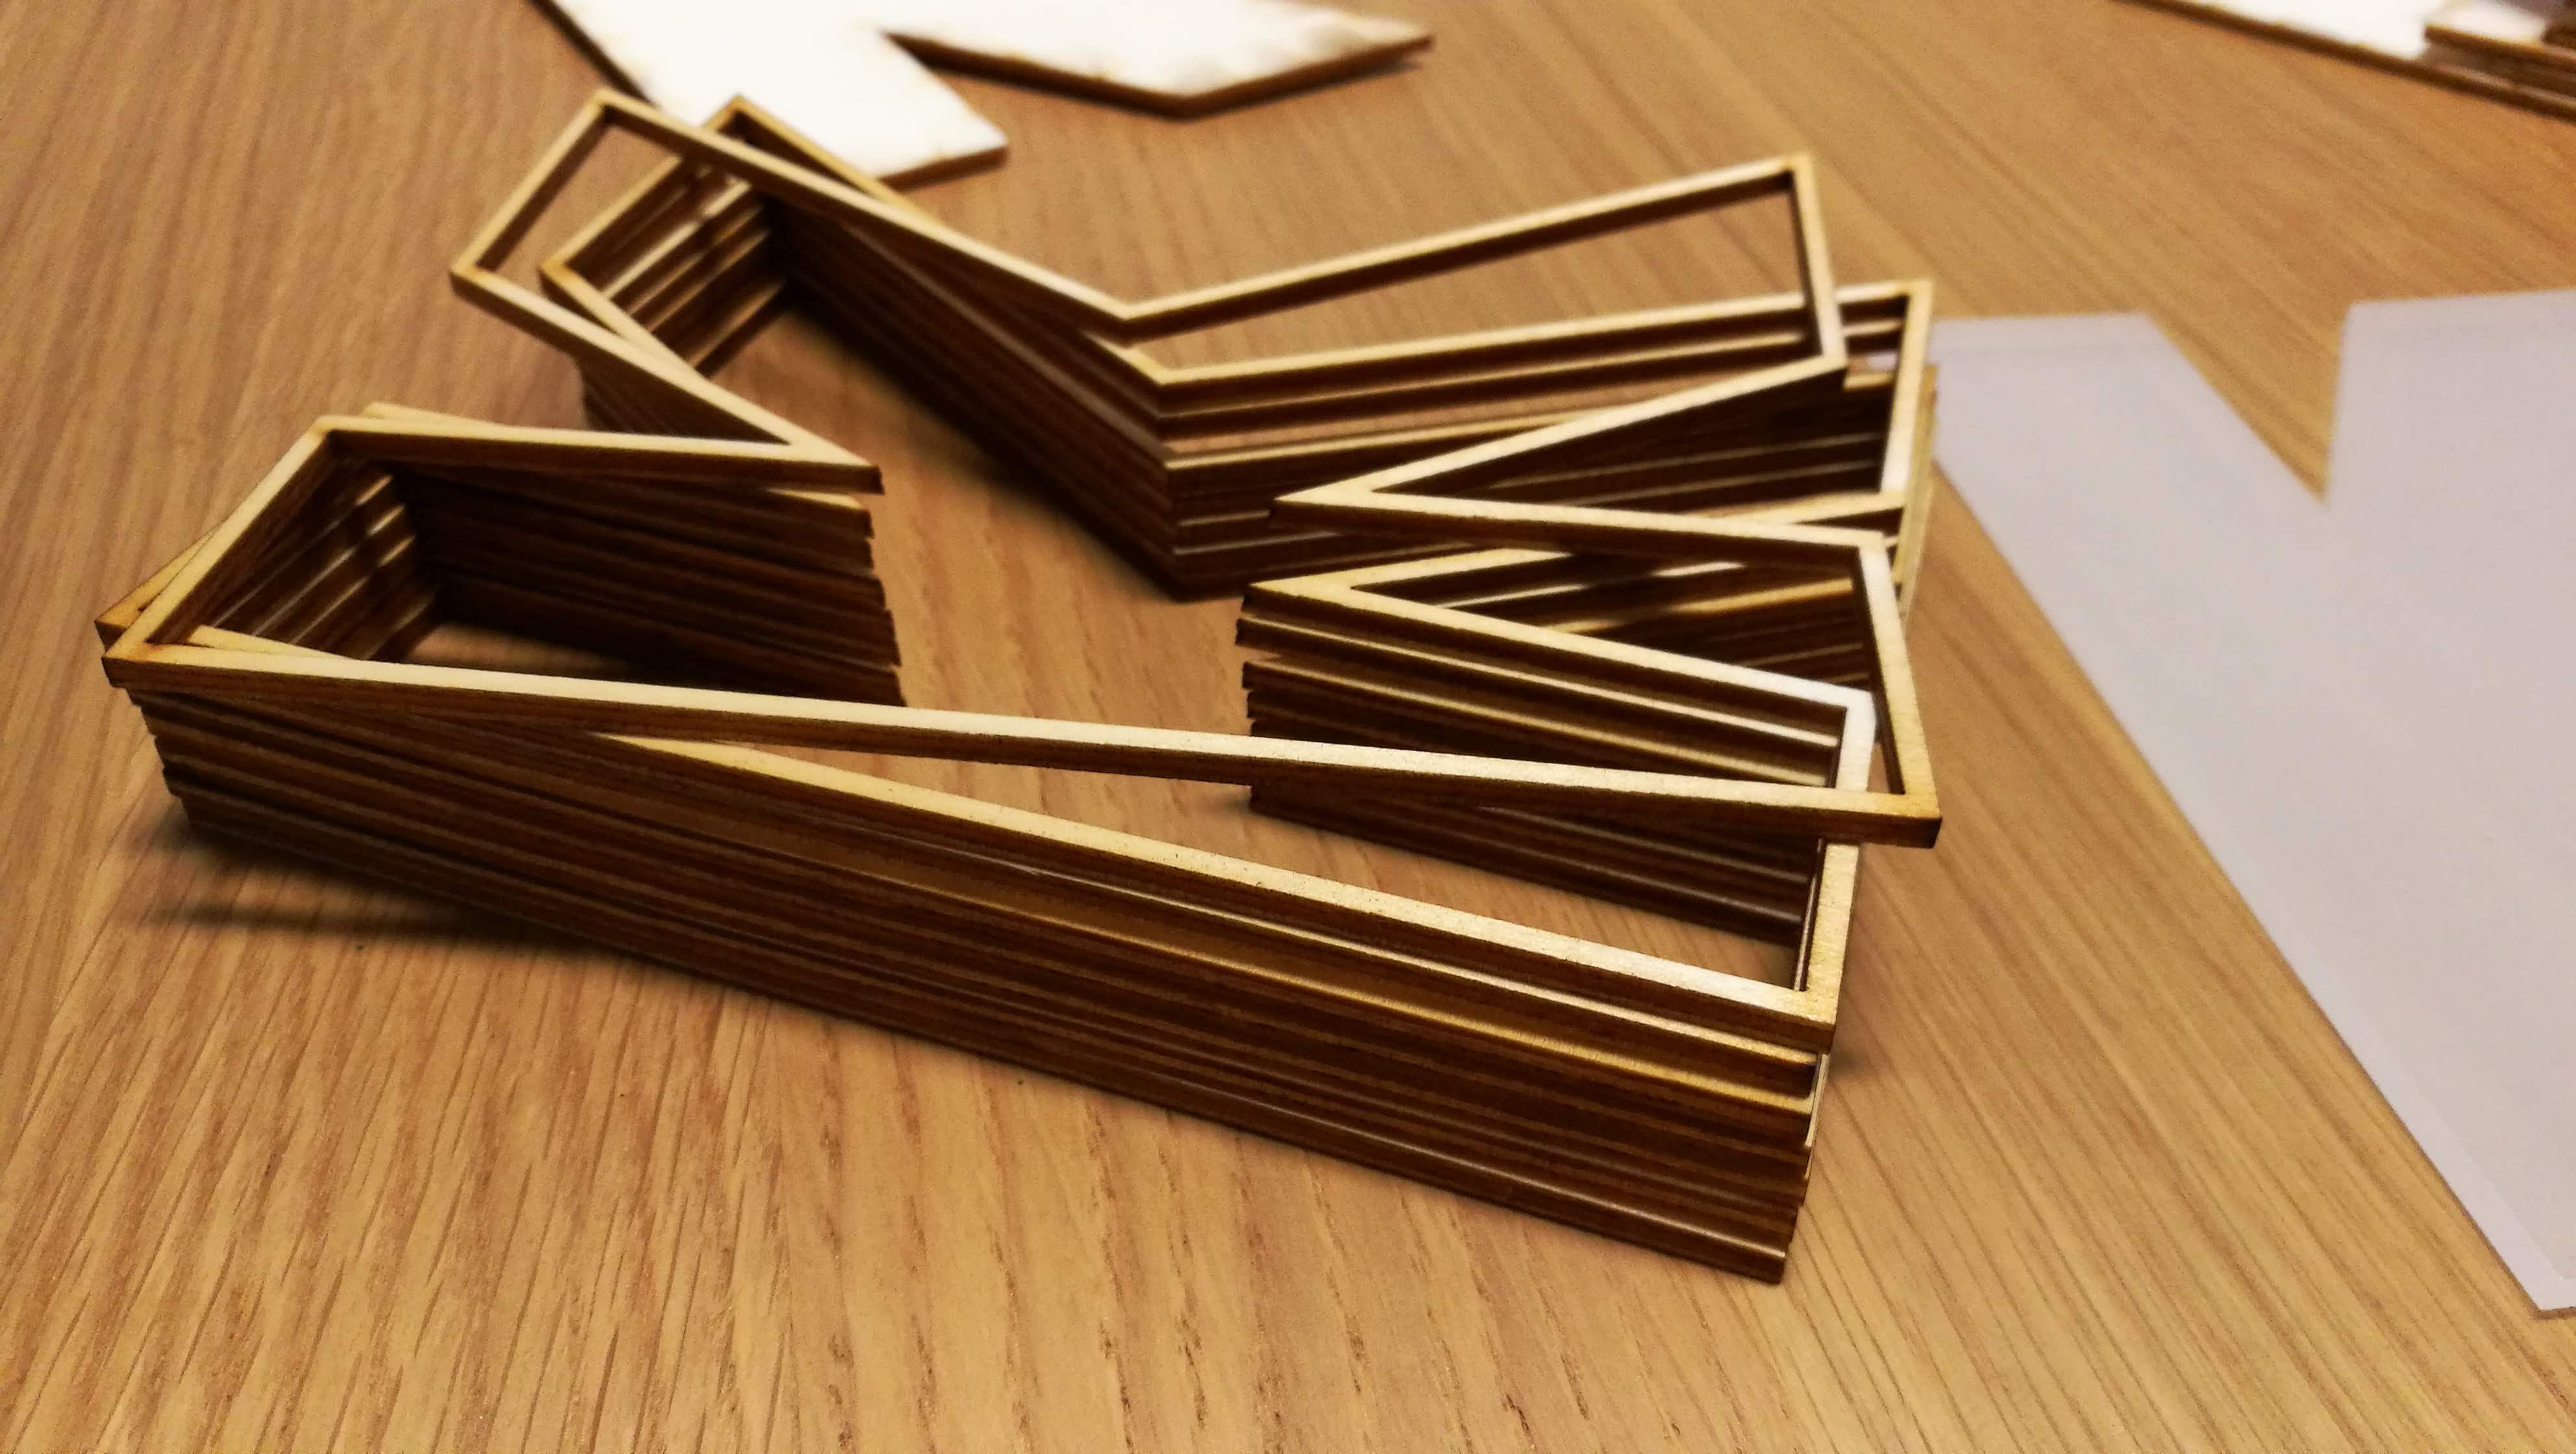
Housing for the lights, in my case two stacks of lasercut K outlines with a back panel and an acrylic front.
Setting Up the HUZZAH Feather
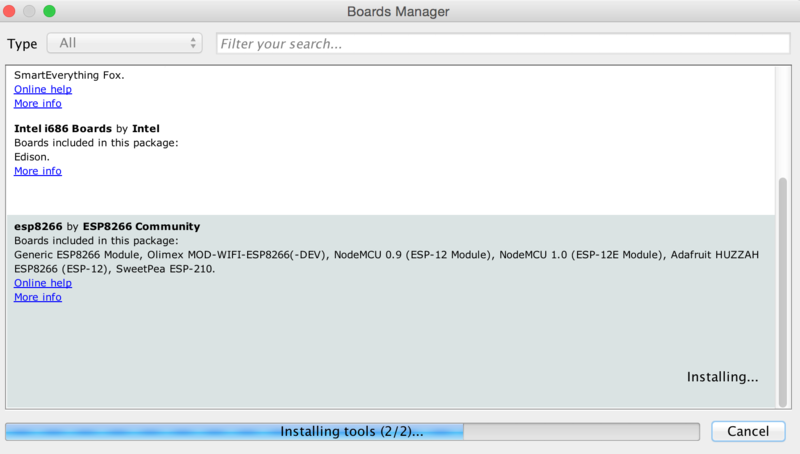
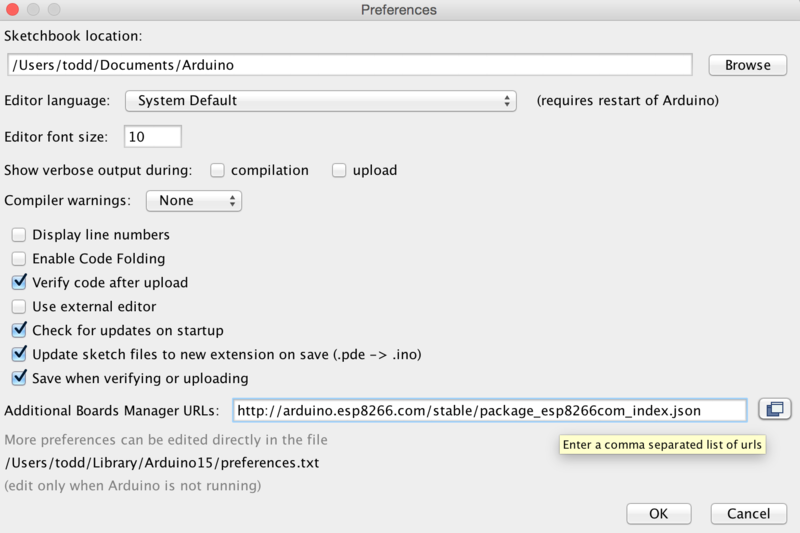
I followed the Instructables 'Internet of Things Class' to get started with the HUZZAH feather board, which you can find a link to here: https://www.instructables.com/class/Internet-of-Th...
The first step is to set up your Arduino IDE to be able to program the board. You will need to install a new driver and add the ESP8266 board package to the Arduino IDE, details on how to do this are found here: https://learn.adafruit.com/adafruit-feather-huzzah...
Configure your settings in Tools as follows:
Board: Adafruit Huzzah ESP8266CPU
Frequency: 80MHzFlash
Size: 4M (3M SPIFFS)
Upload Speed: 115200
Port: whichever one ends in SLAB_USBtoUART (Mac) or COMx (Windows)
Programmer: USBtinyISP
Check the board is set up correctly by testing it with the blink sketch found in Examples, or use the following code (the HUZZAH has an LED connected to pin 0).
void setup() {
	pinMode(0, OUTPUT);
}

void loop() {
	digitalWrite(0, HIGH);
	delay(500);
	digitalWrite(0, LOW);
	delay(500);
}
Hit Upload and if everything is configured and installed correctly, you should get a blinking light.
Setting Up Adafruit.io
We need more libraries installed for this project, so head to your Arduino IDE and navigate to Sketch > Include Library > Manage Libraries. Install the following libraries: ArduinoHttpClient, Adafruit IO Arduino and Adafruit MQTT.
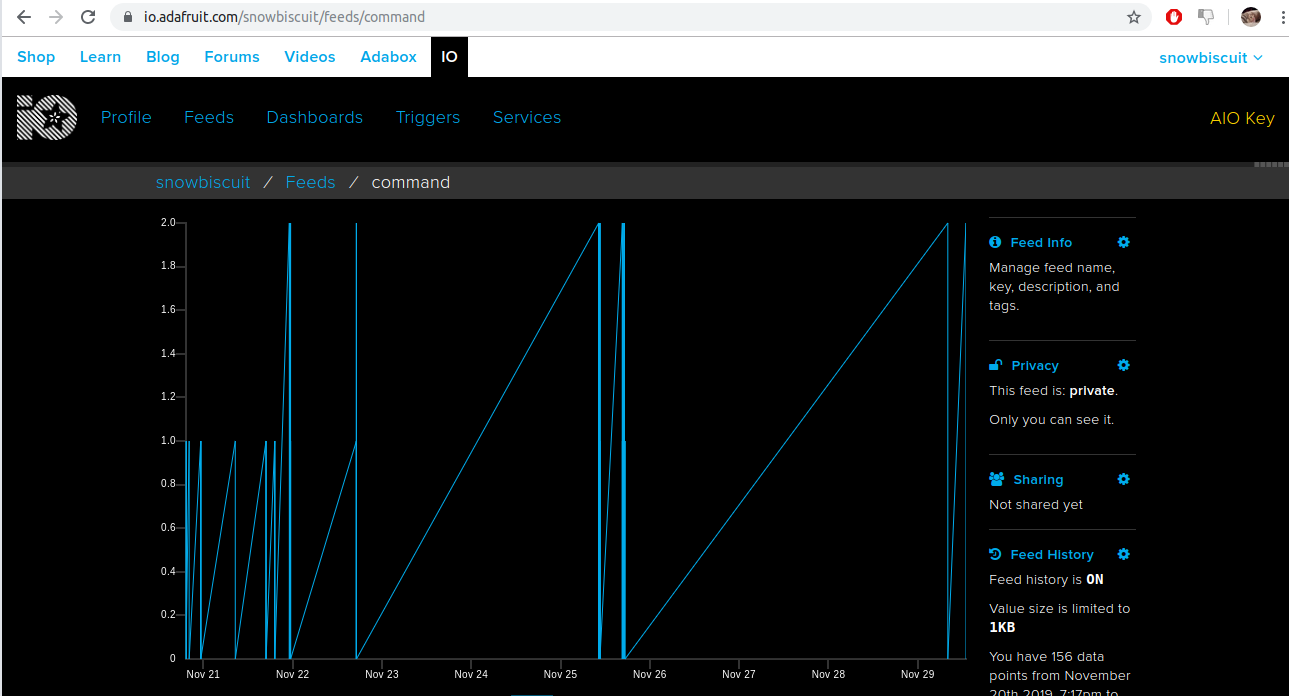
Create an account on io.adafruit.com. Create a new feed named "command" in your Adafruit IO account and find your AIO key on the Settings page.
We will use this account to keep track of when the lights are activated and which one needs to light up by passing it a value of either "1" or "2" when the buttons are pressed.
Each light is listening to the "command" feed which has a value of "0" when not in use. Light A sends the value "1" when its button is pressed and is listening for the value "2". Light B sends the value "2" and is listening for the value "1". When a light sees the value it is listening for, it lights up for 15 minutes.
Changing the Code and Testing
Attached to this step is the code for both HUZZAH boards. In both files, there is a section of code at the top which must be changed to include your Adafruit IO username and IO Key (from the last step). You will also need to add the Wifi details of the location each light will live at.
The section of code that needs to be changed looks like this:
/************************ Adafruit IO Configuration *******************************/

// visit io.adafruit.com if you need to create an account,
// or if you need your Adafruit IO key.
#define IO_USERNAME    "your-io-username-here"
#define IO_KEY         "your-io-key-here"

/******************************* WIFI Configuration **************************************/

#define WIFI_SSID       "your-wifi-name-here"
#define WIFI_PASS       "your-wifi-password-here"<br>
Once that has been changed, the code can be uploaded to the boards.
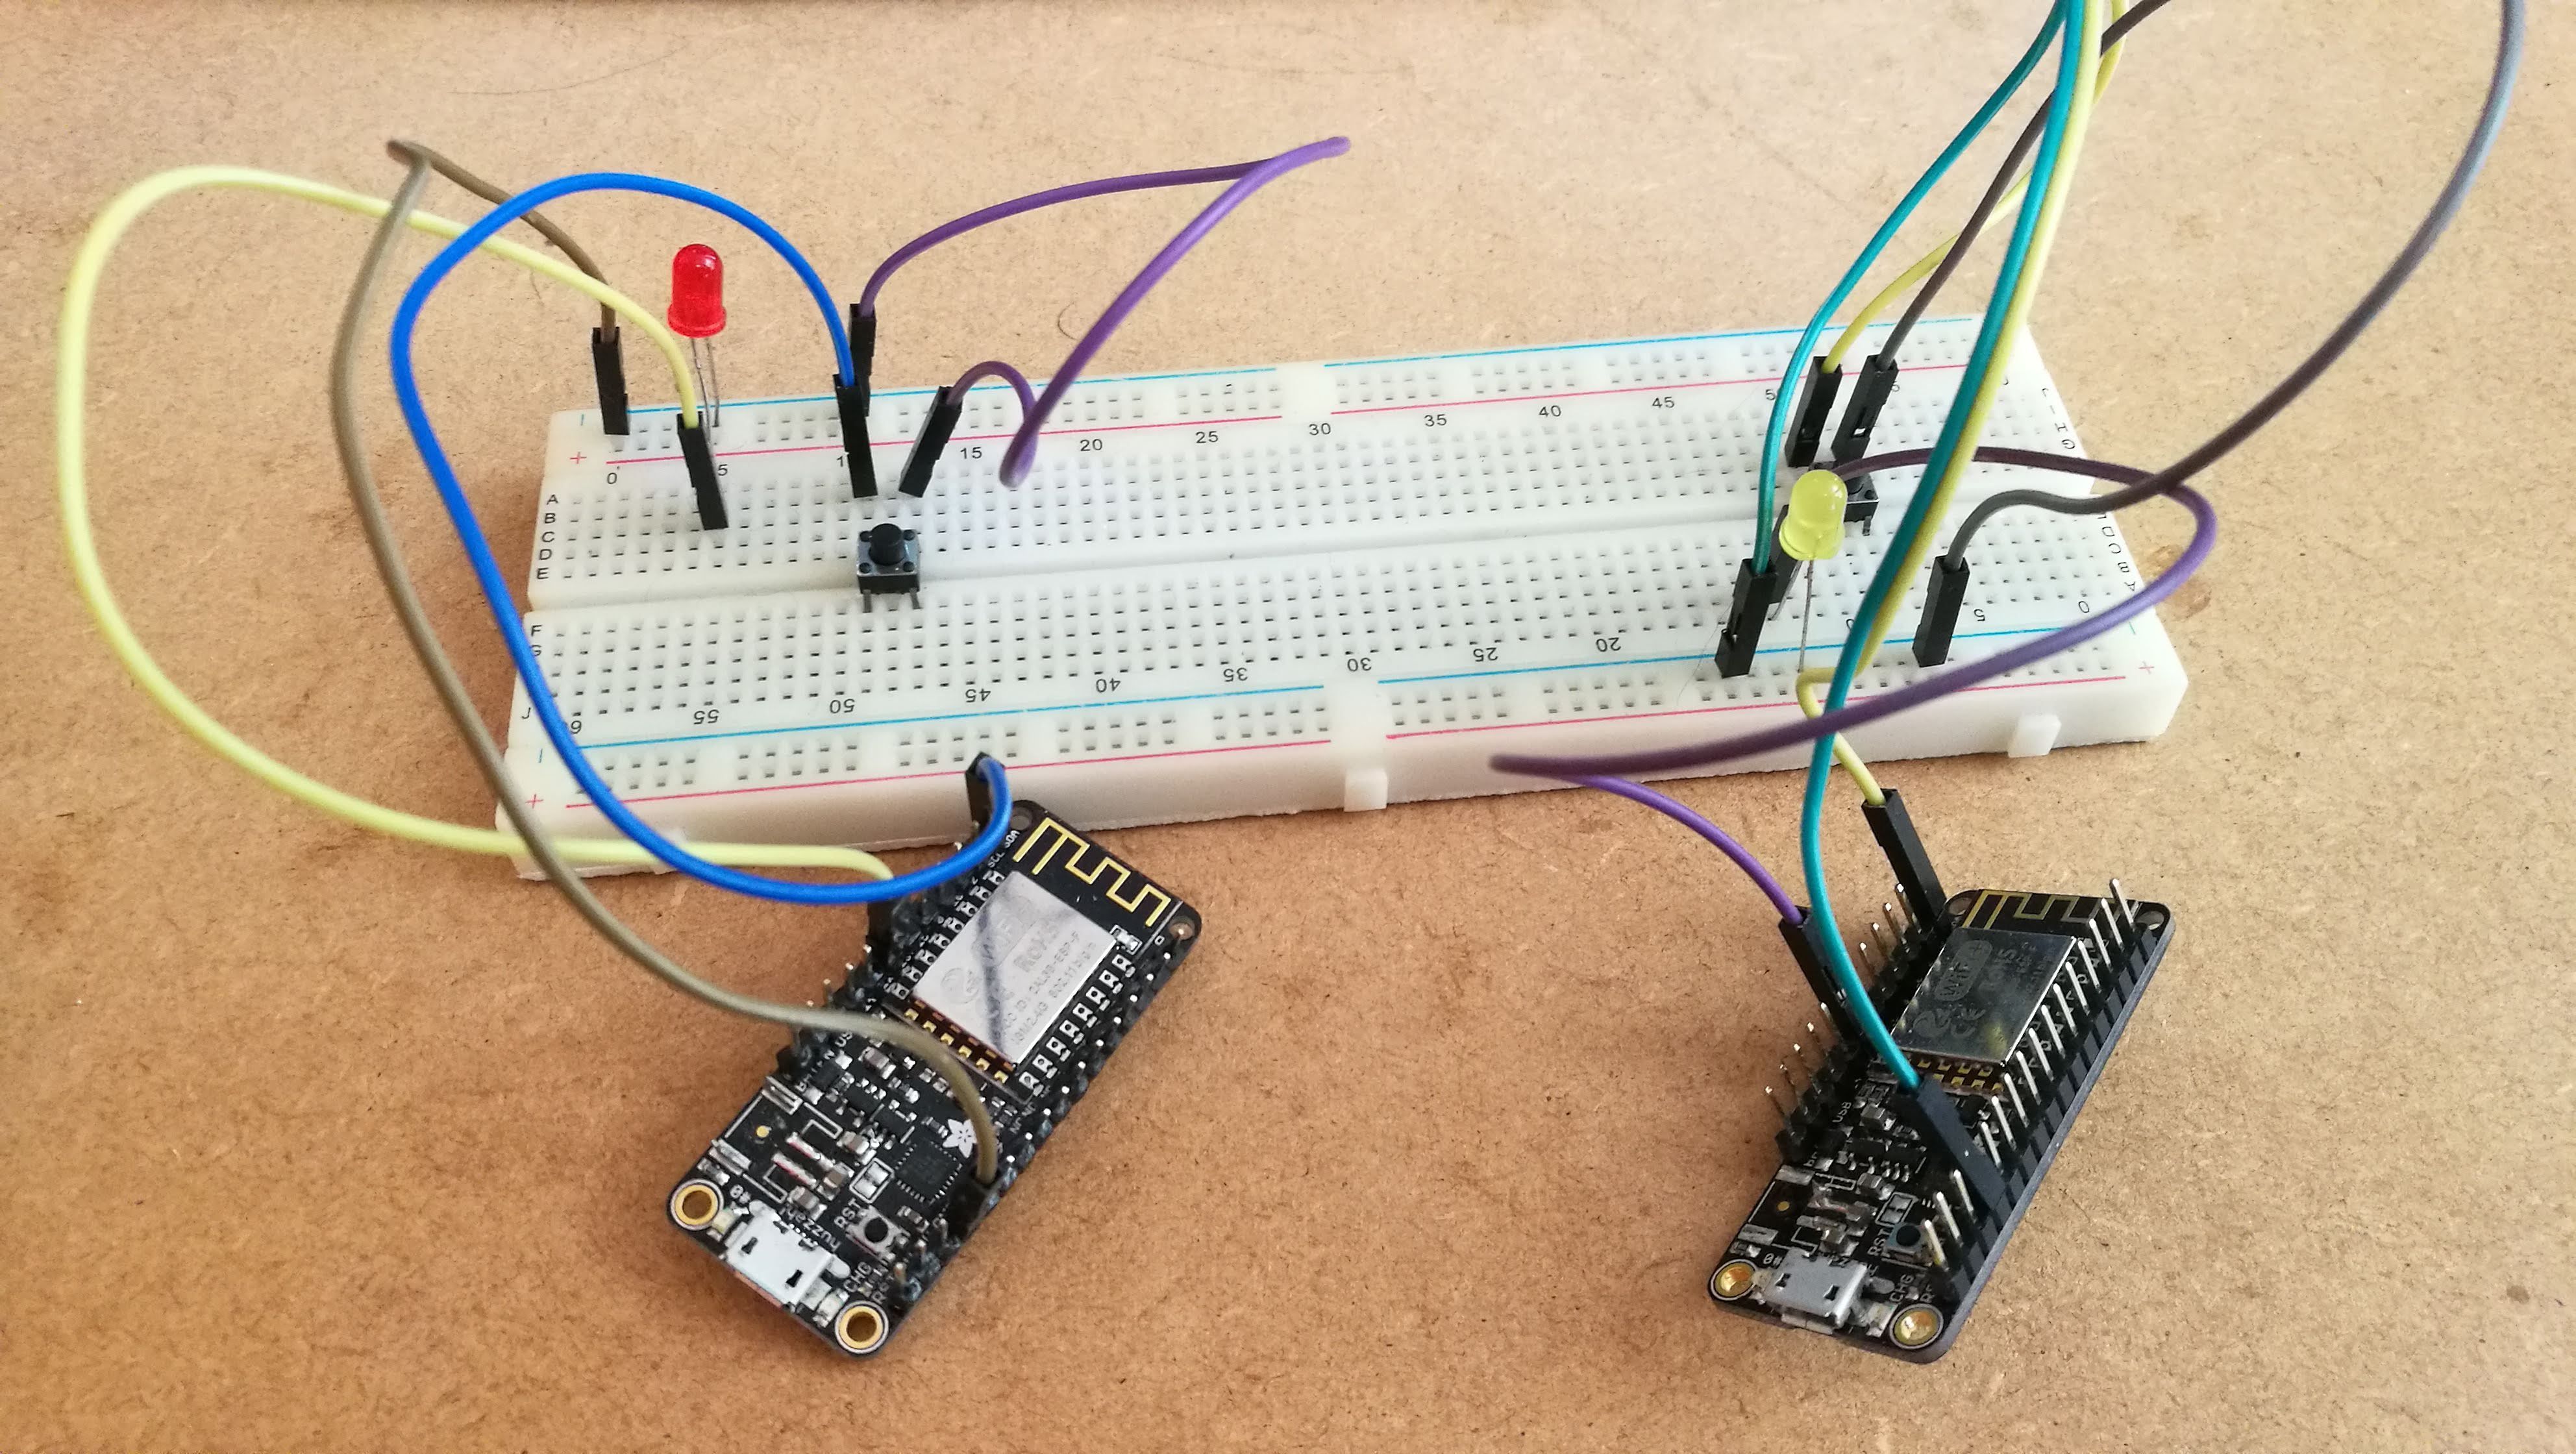
The code sets up 5 pins for LEDs, but we can test it with just 1 for now. Set up your board with a button attached to pin 4 and an LED on pin 13. Pressing the button on one should cause the LED on the other board to light up and the Serial Monitor in the Arduino IDE should show which button was pressed.
NOTE: as you will probably be testing these at the same location at first, make sure the WiFi details are the same in both files. You will need to re-upload the code with your friend's WiFi details before giving one away.
Glueing the Housing Together
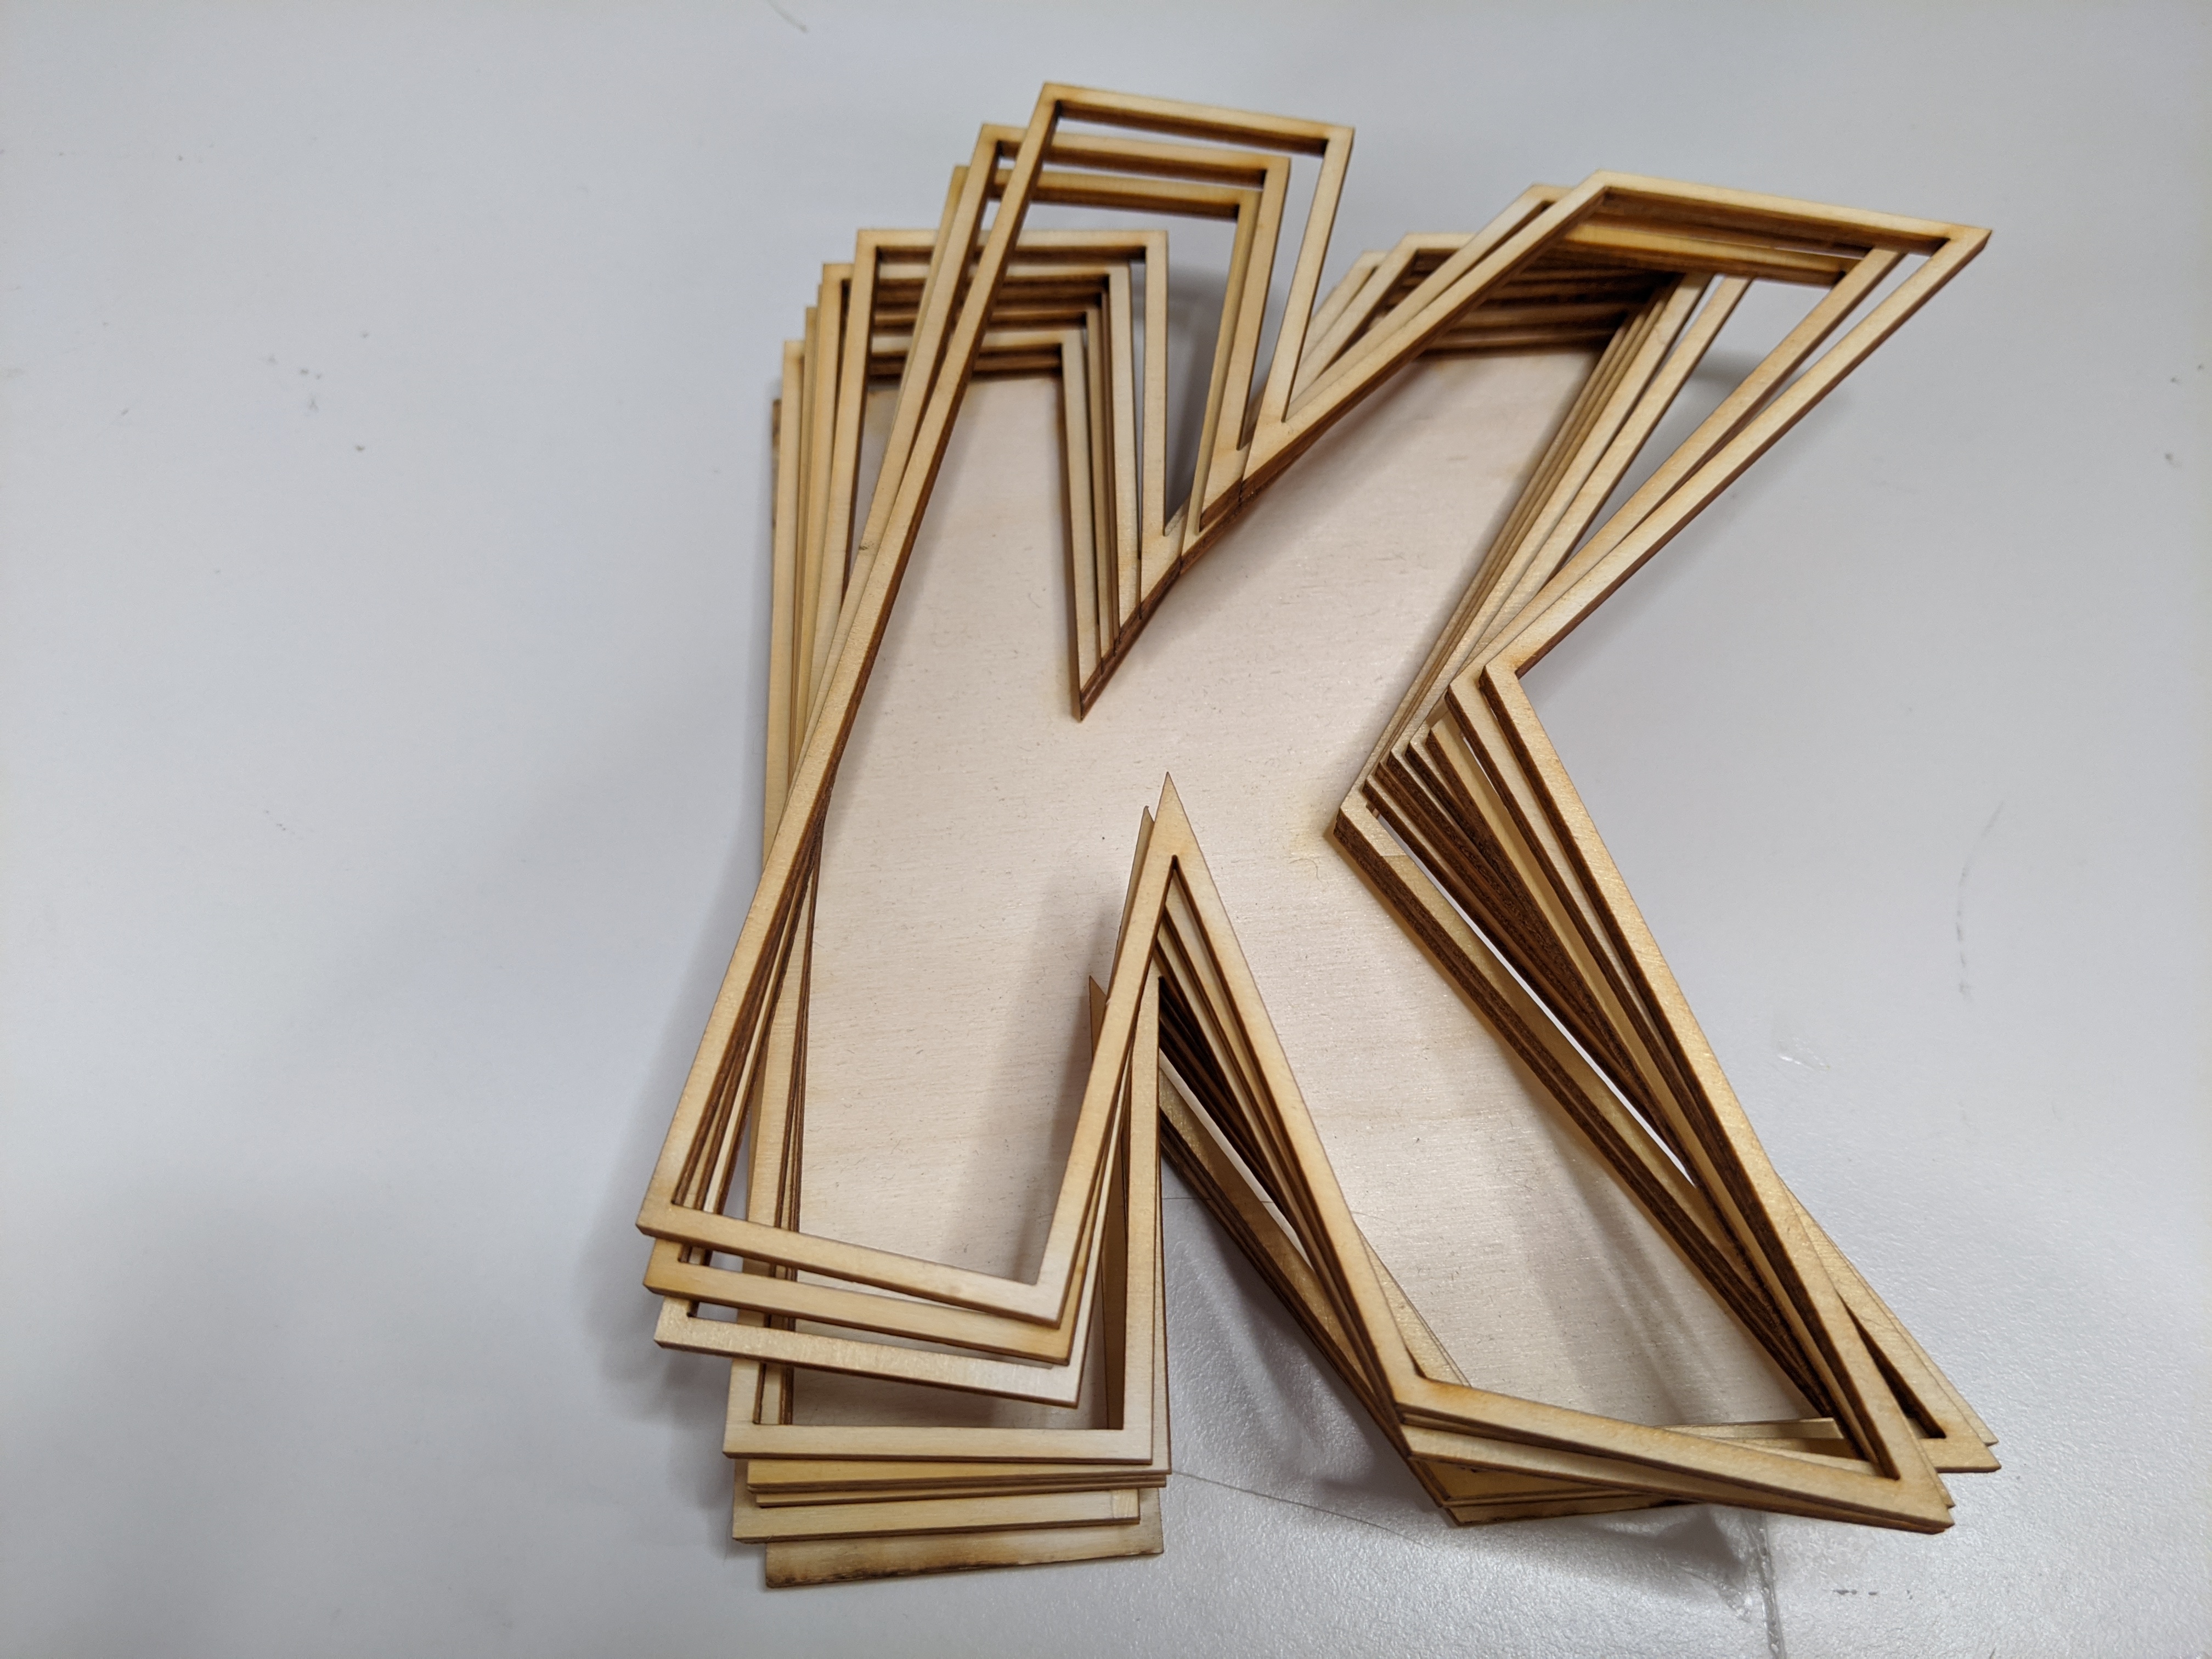
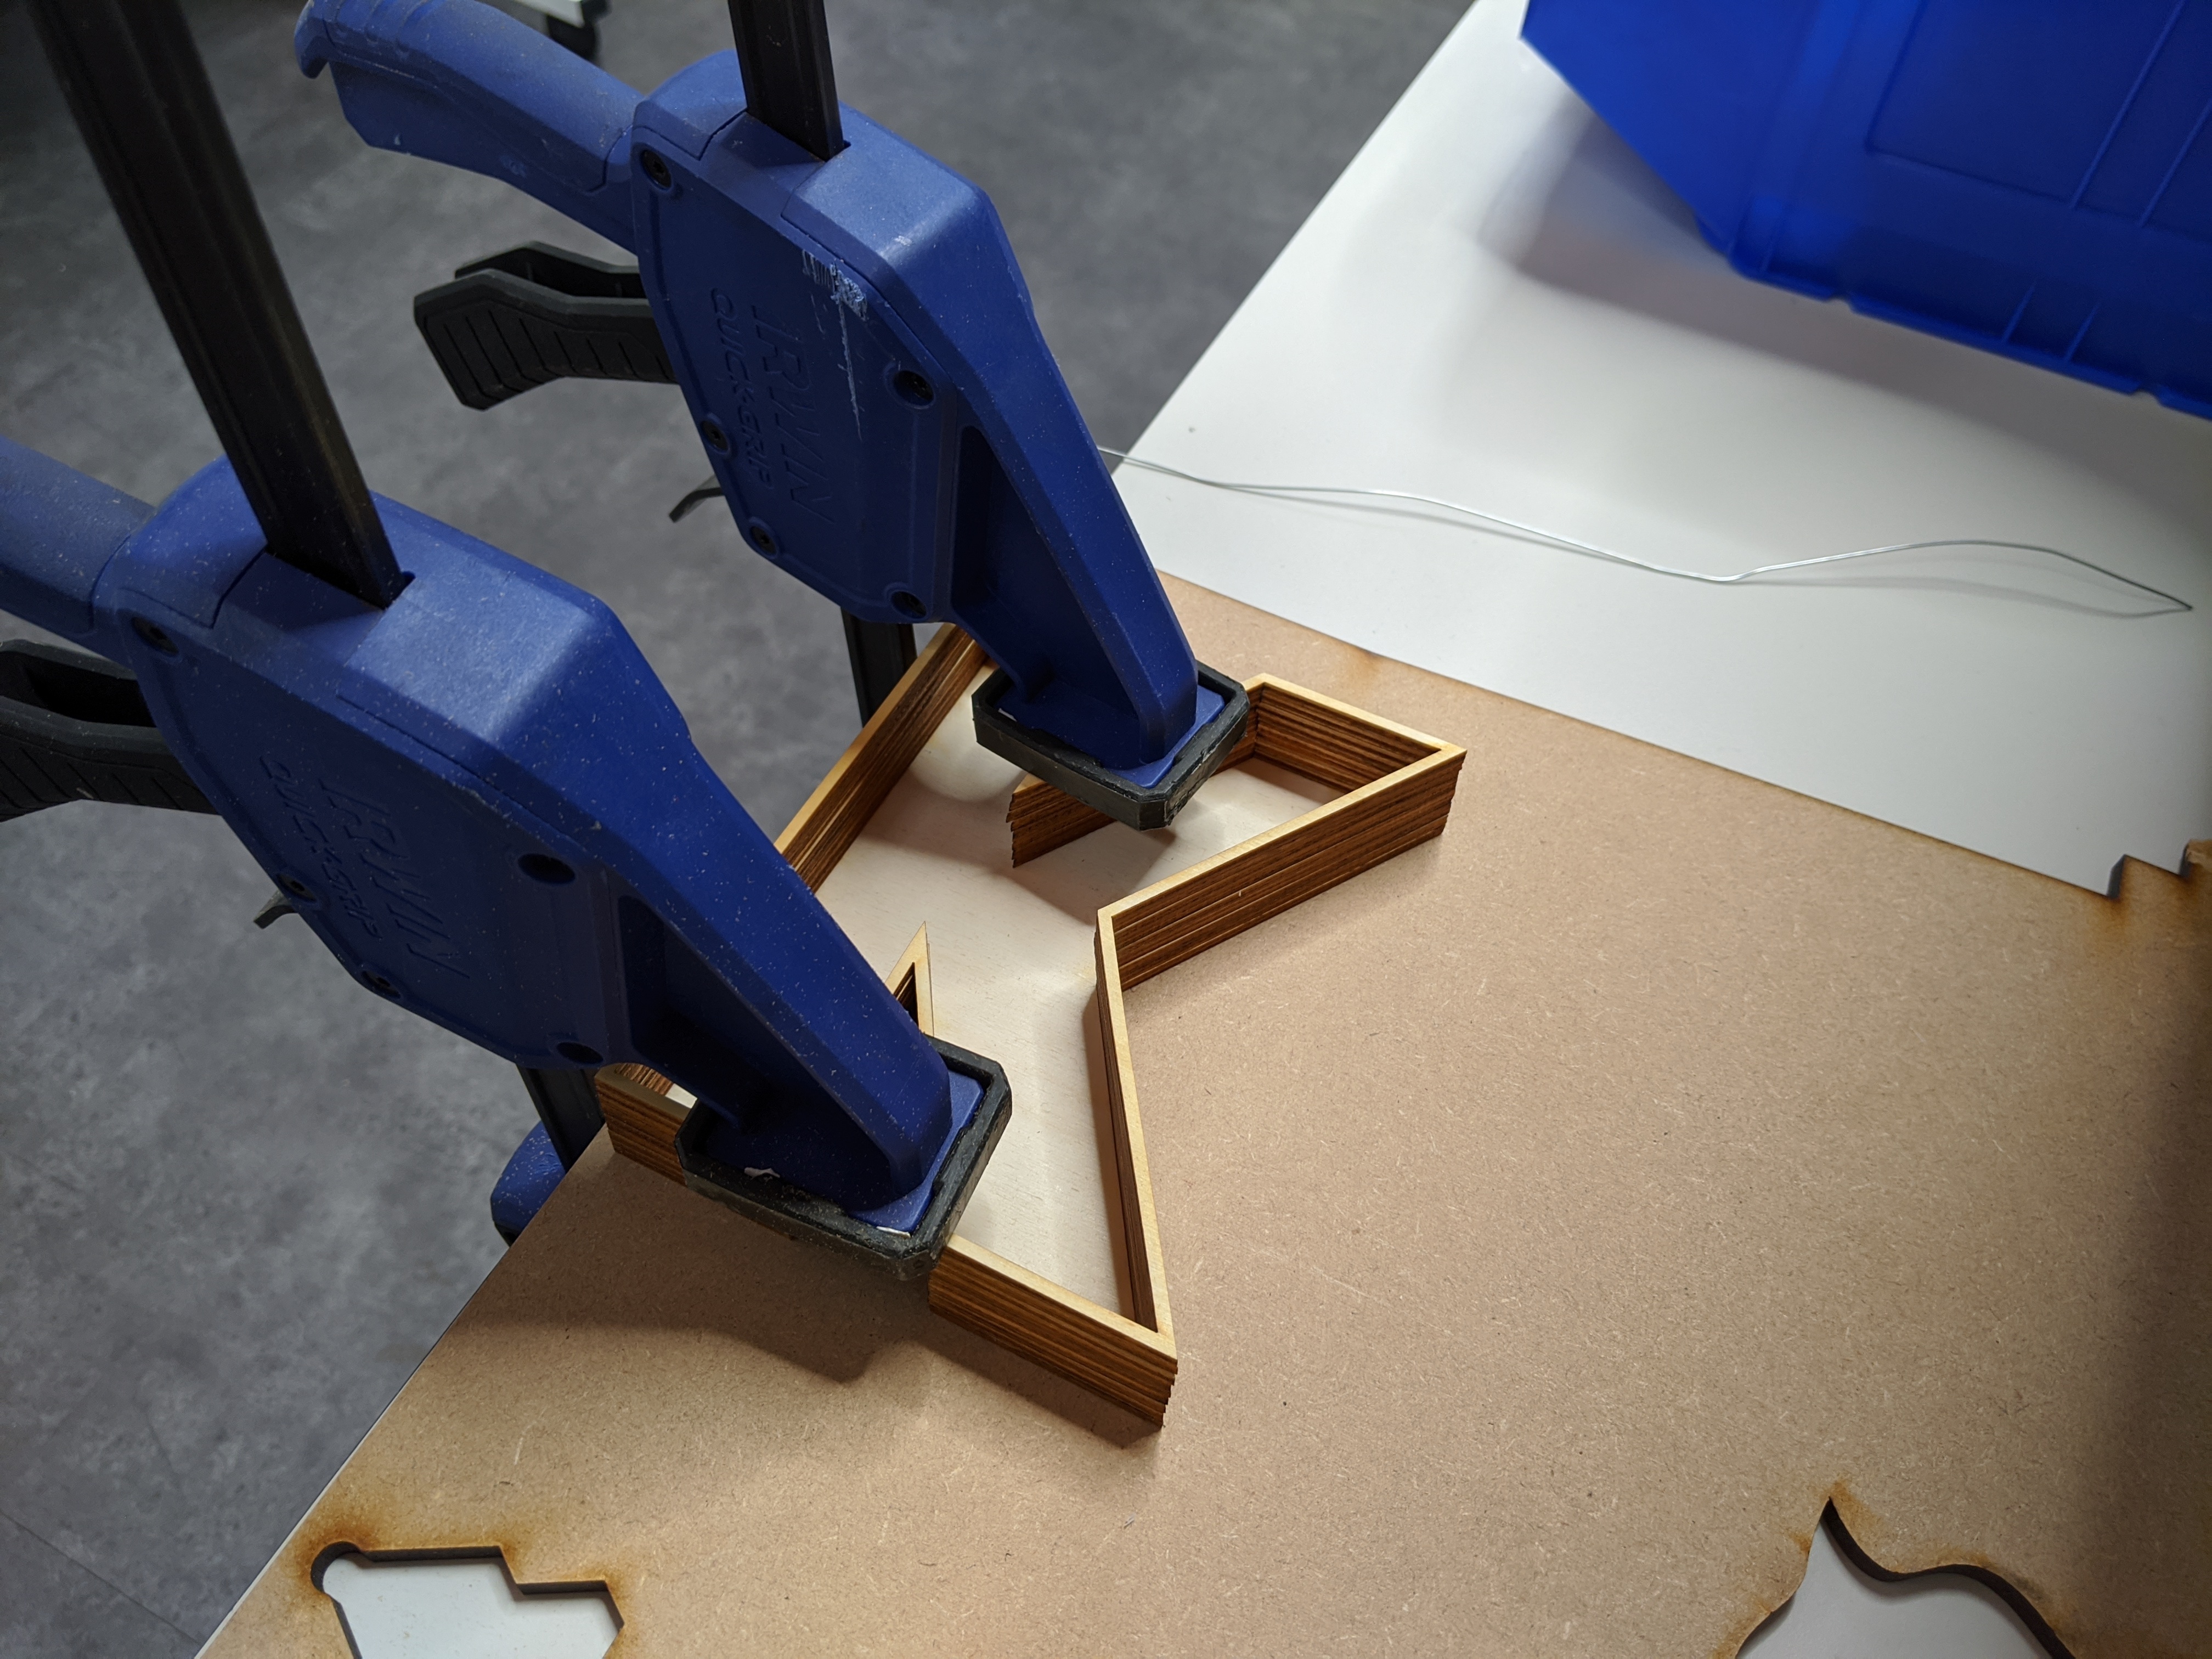
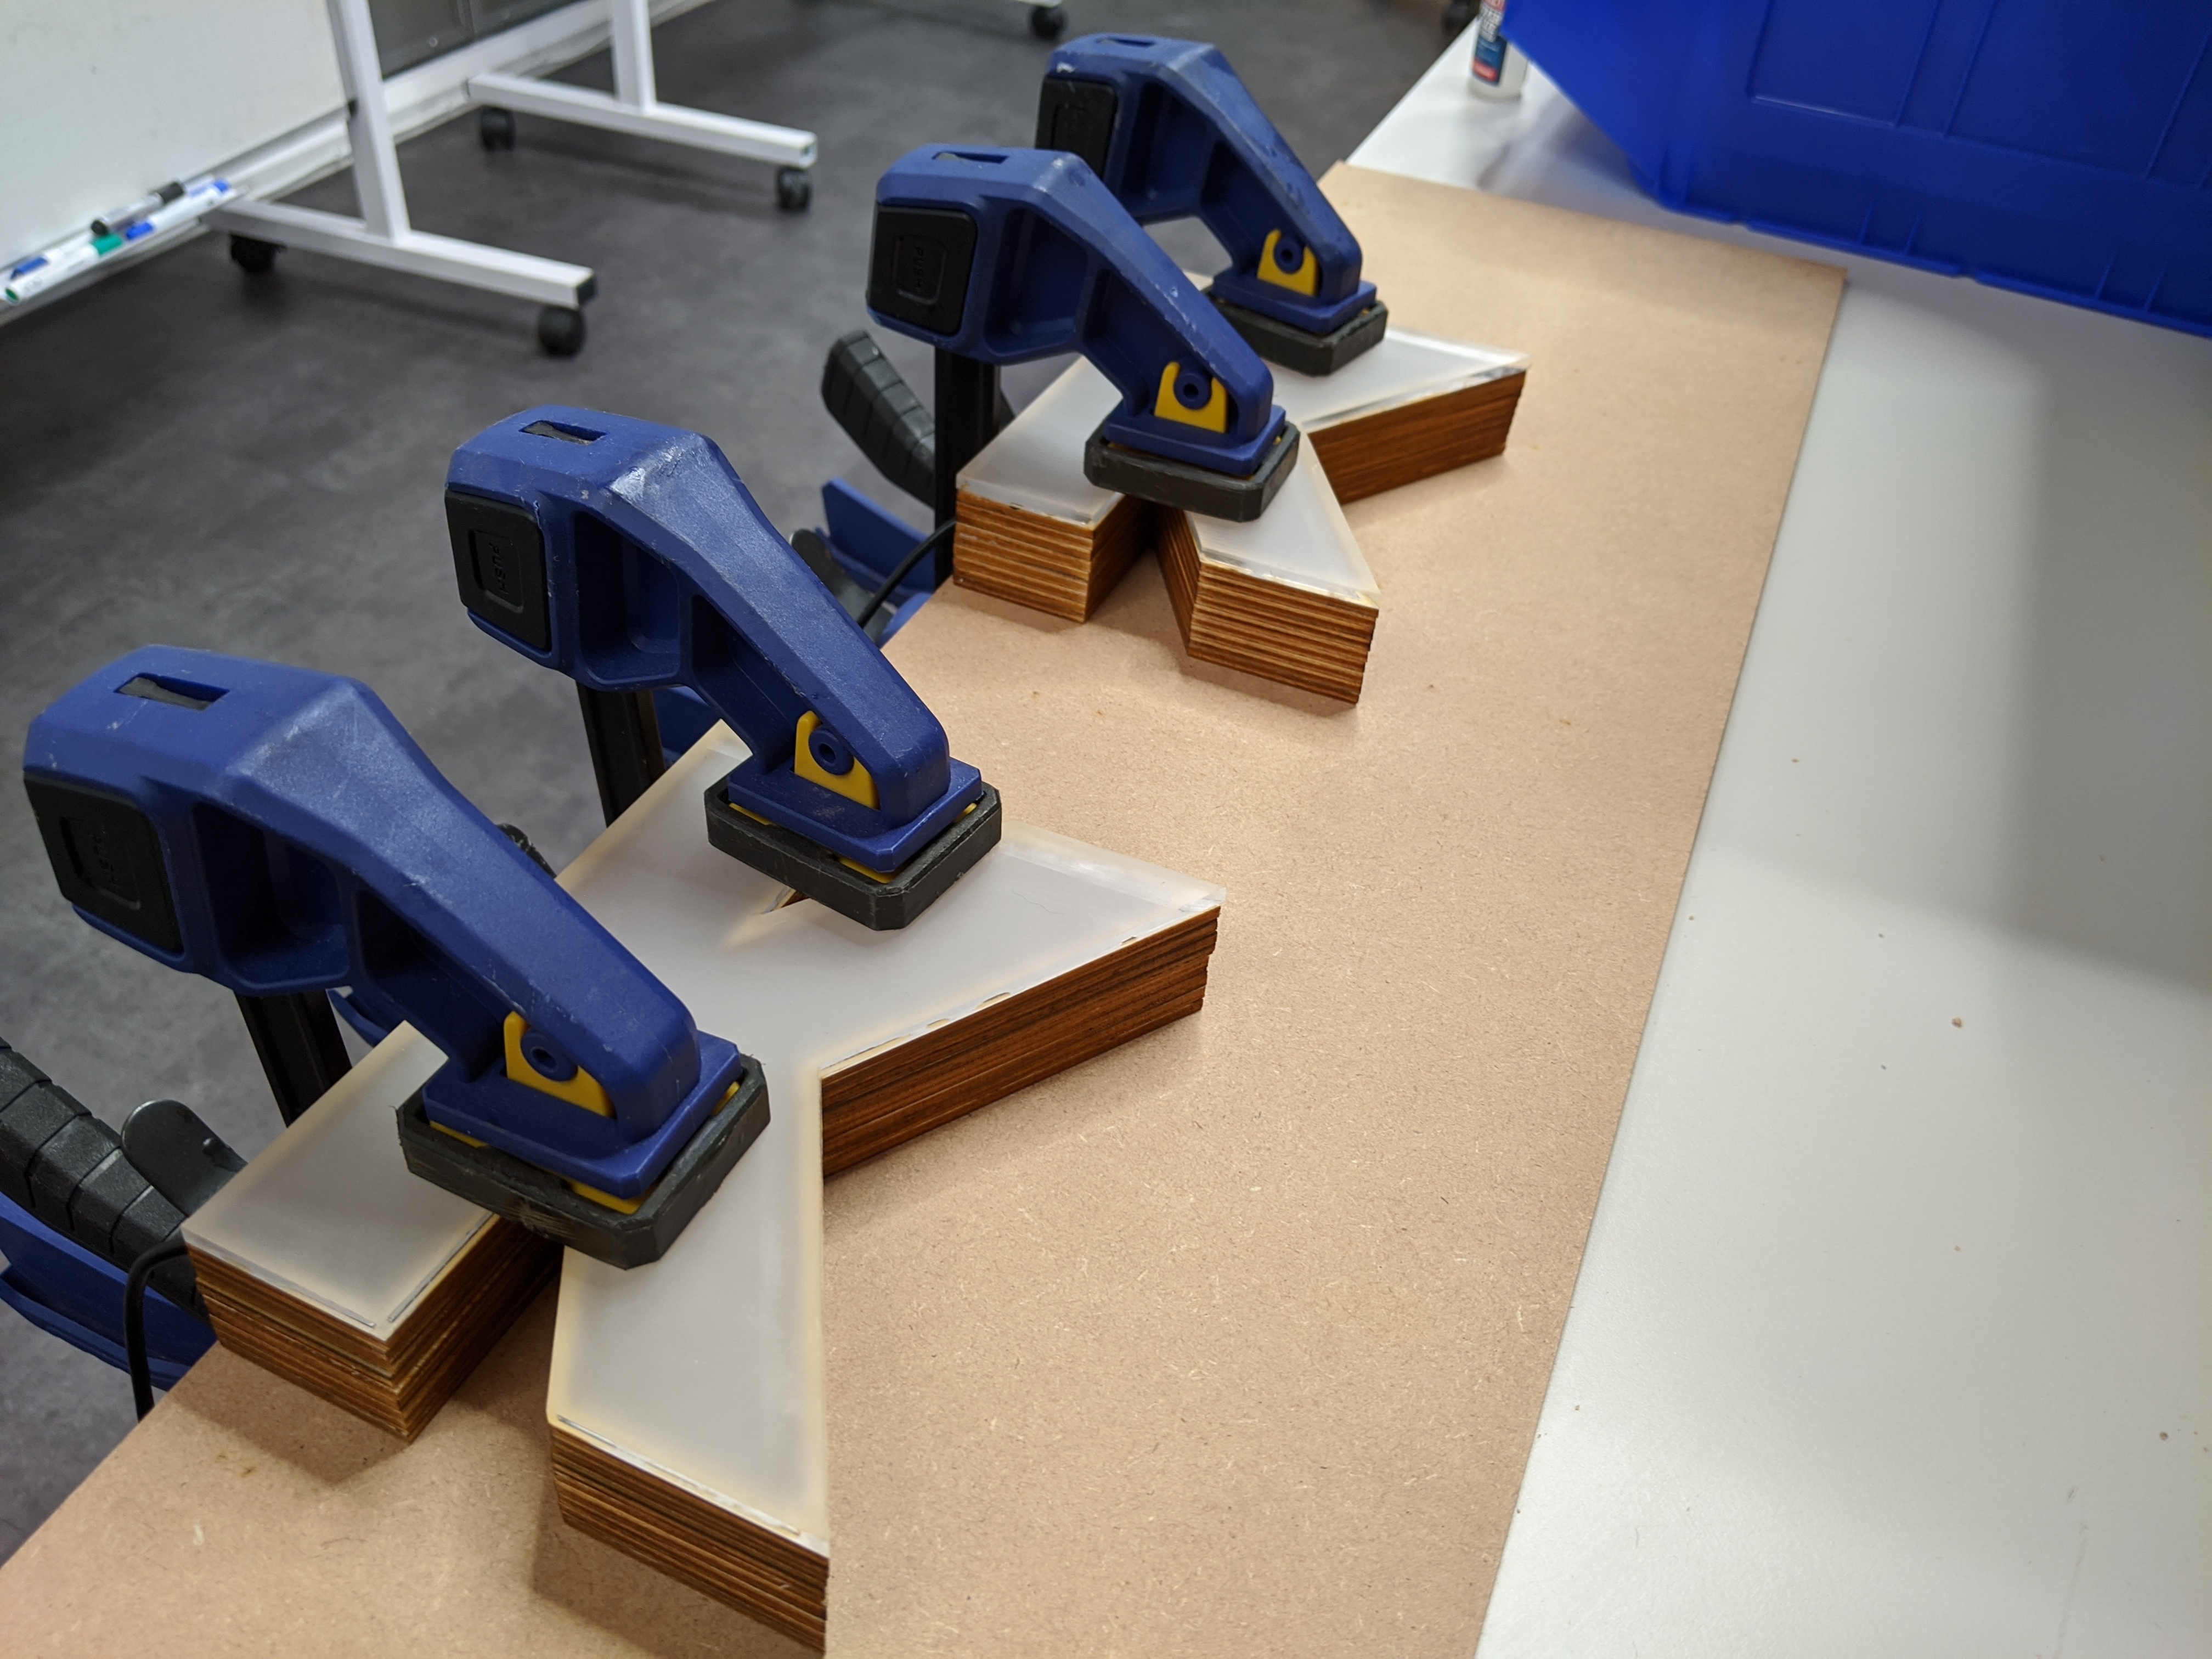
I built up the housing for these lights by gluing together lots of lasercut shapes (in my case the letter K). 3D printing this shape would also have worked, but I thought the wood texture looked nicer.
I used wood glue and clamped the outlines together for a strong bond.
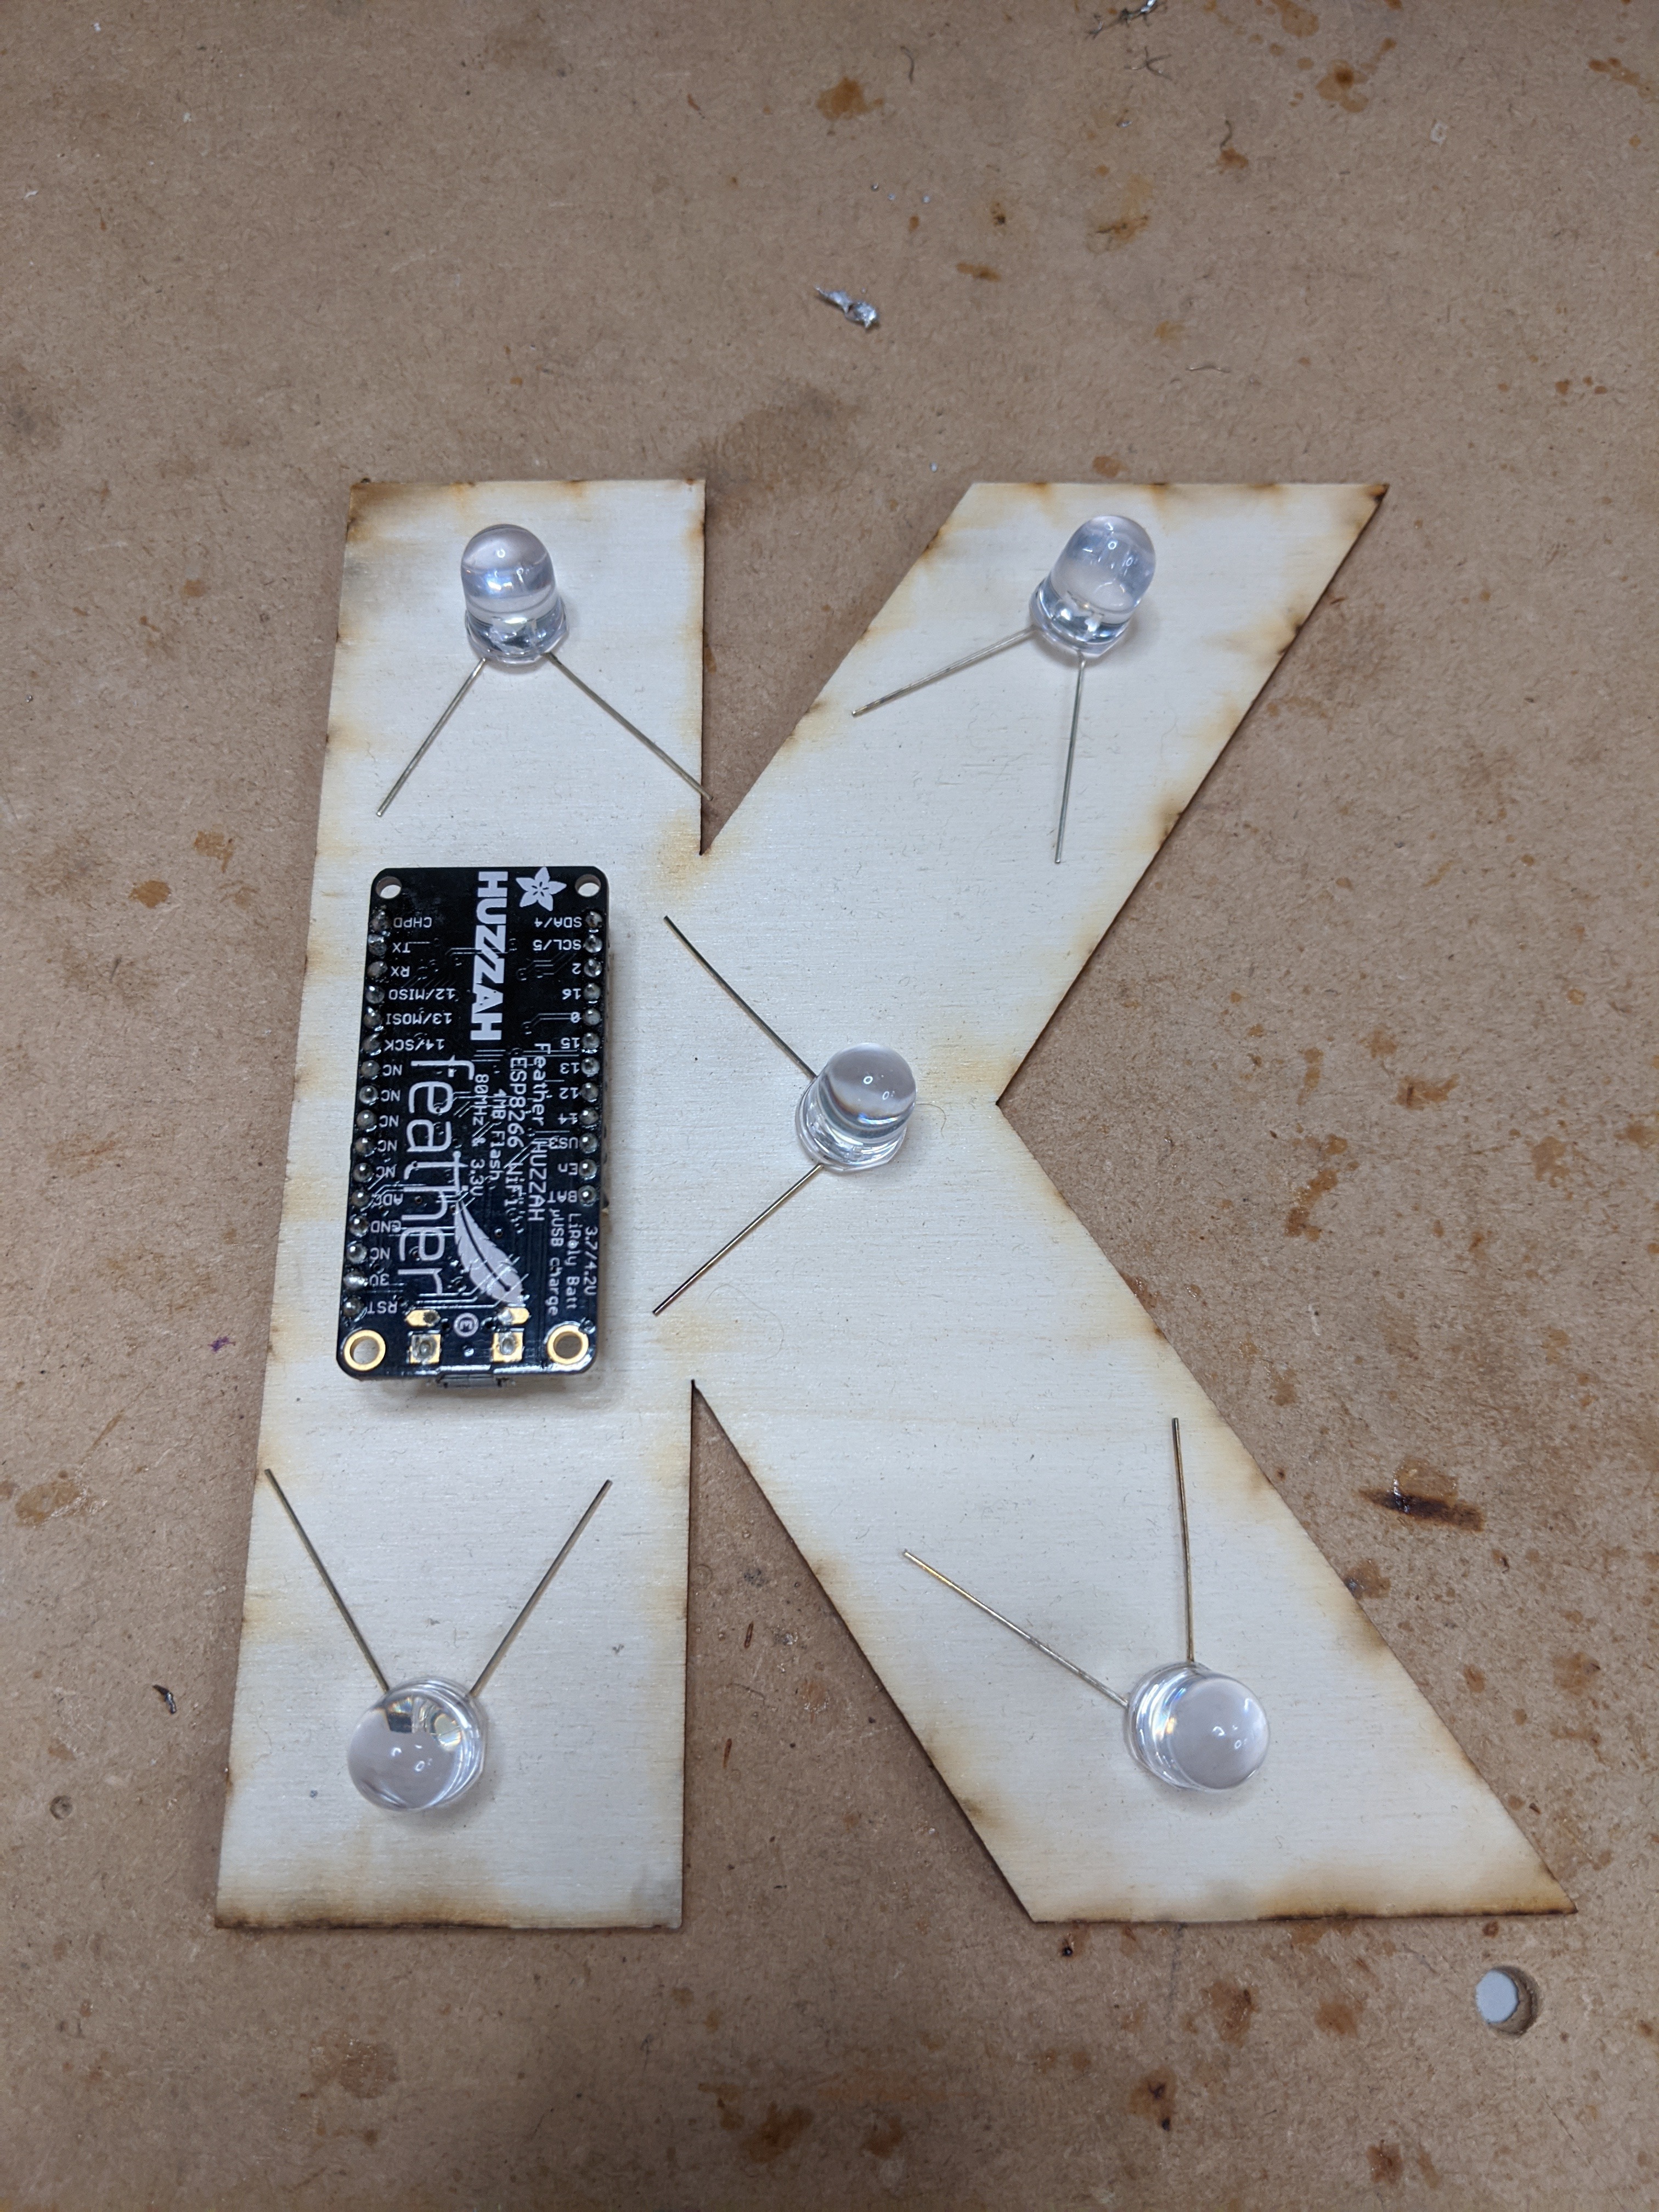
Whatever shape you choose to make your friendship lights, make sure there is enough room for all the electronics and lay out where you want the lights to go before gluing anything.
Soldering the Circuit
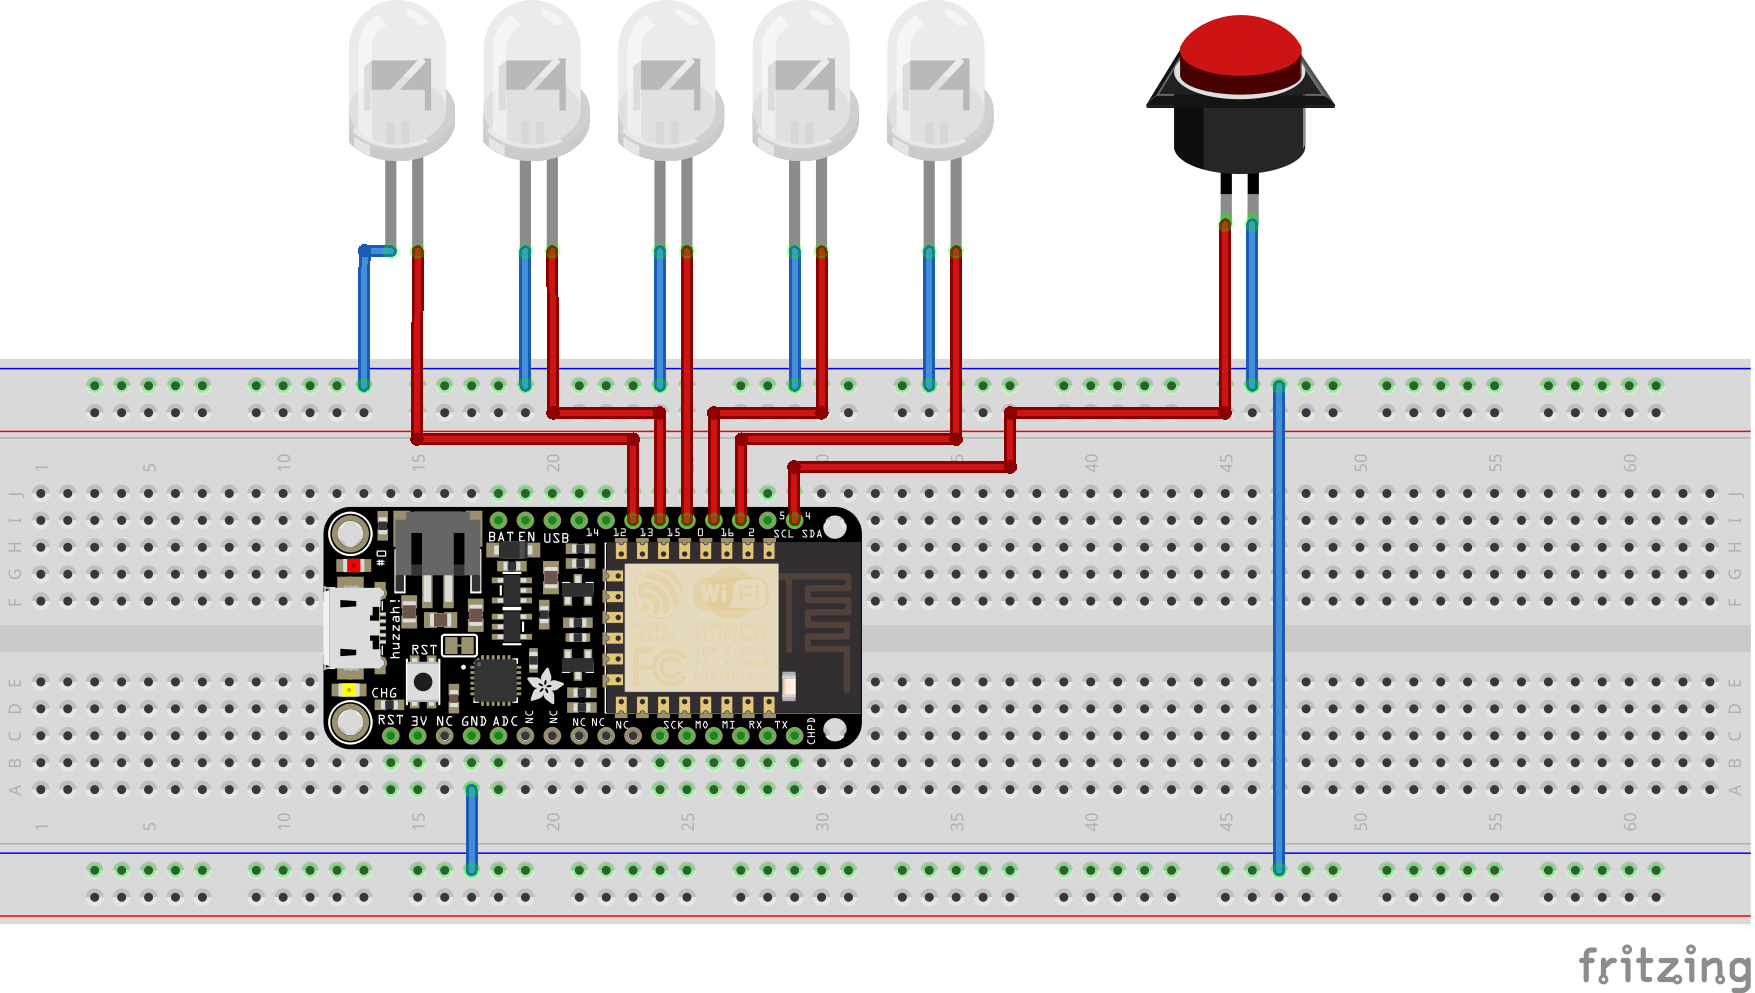
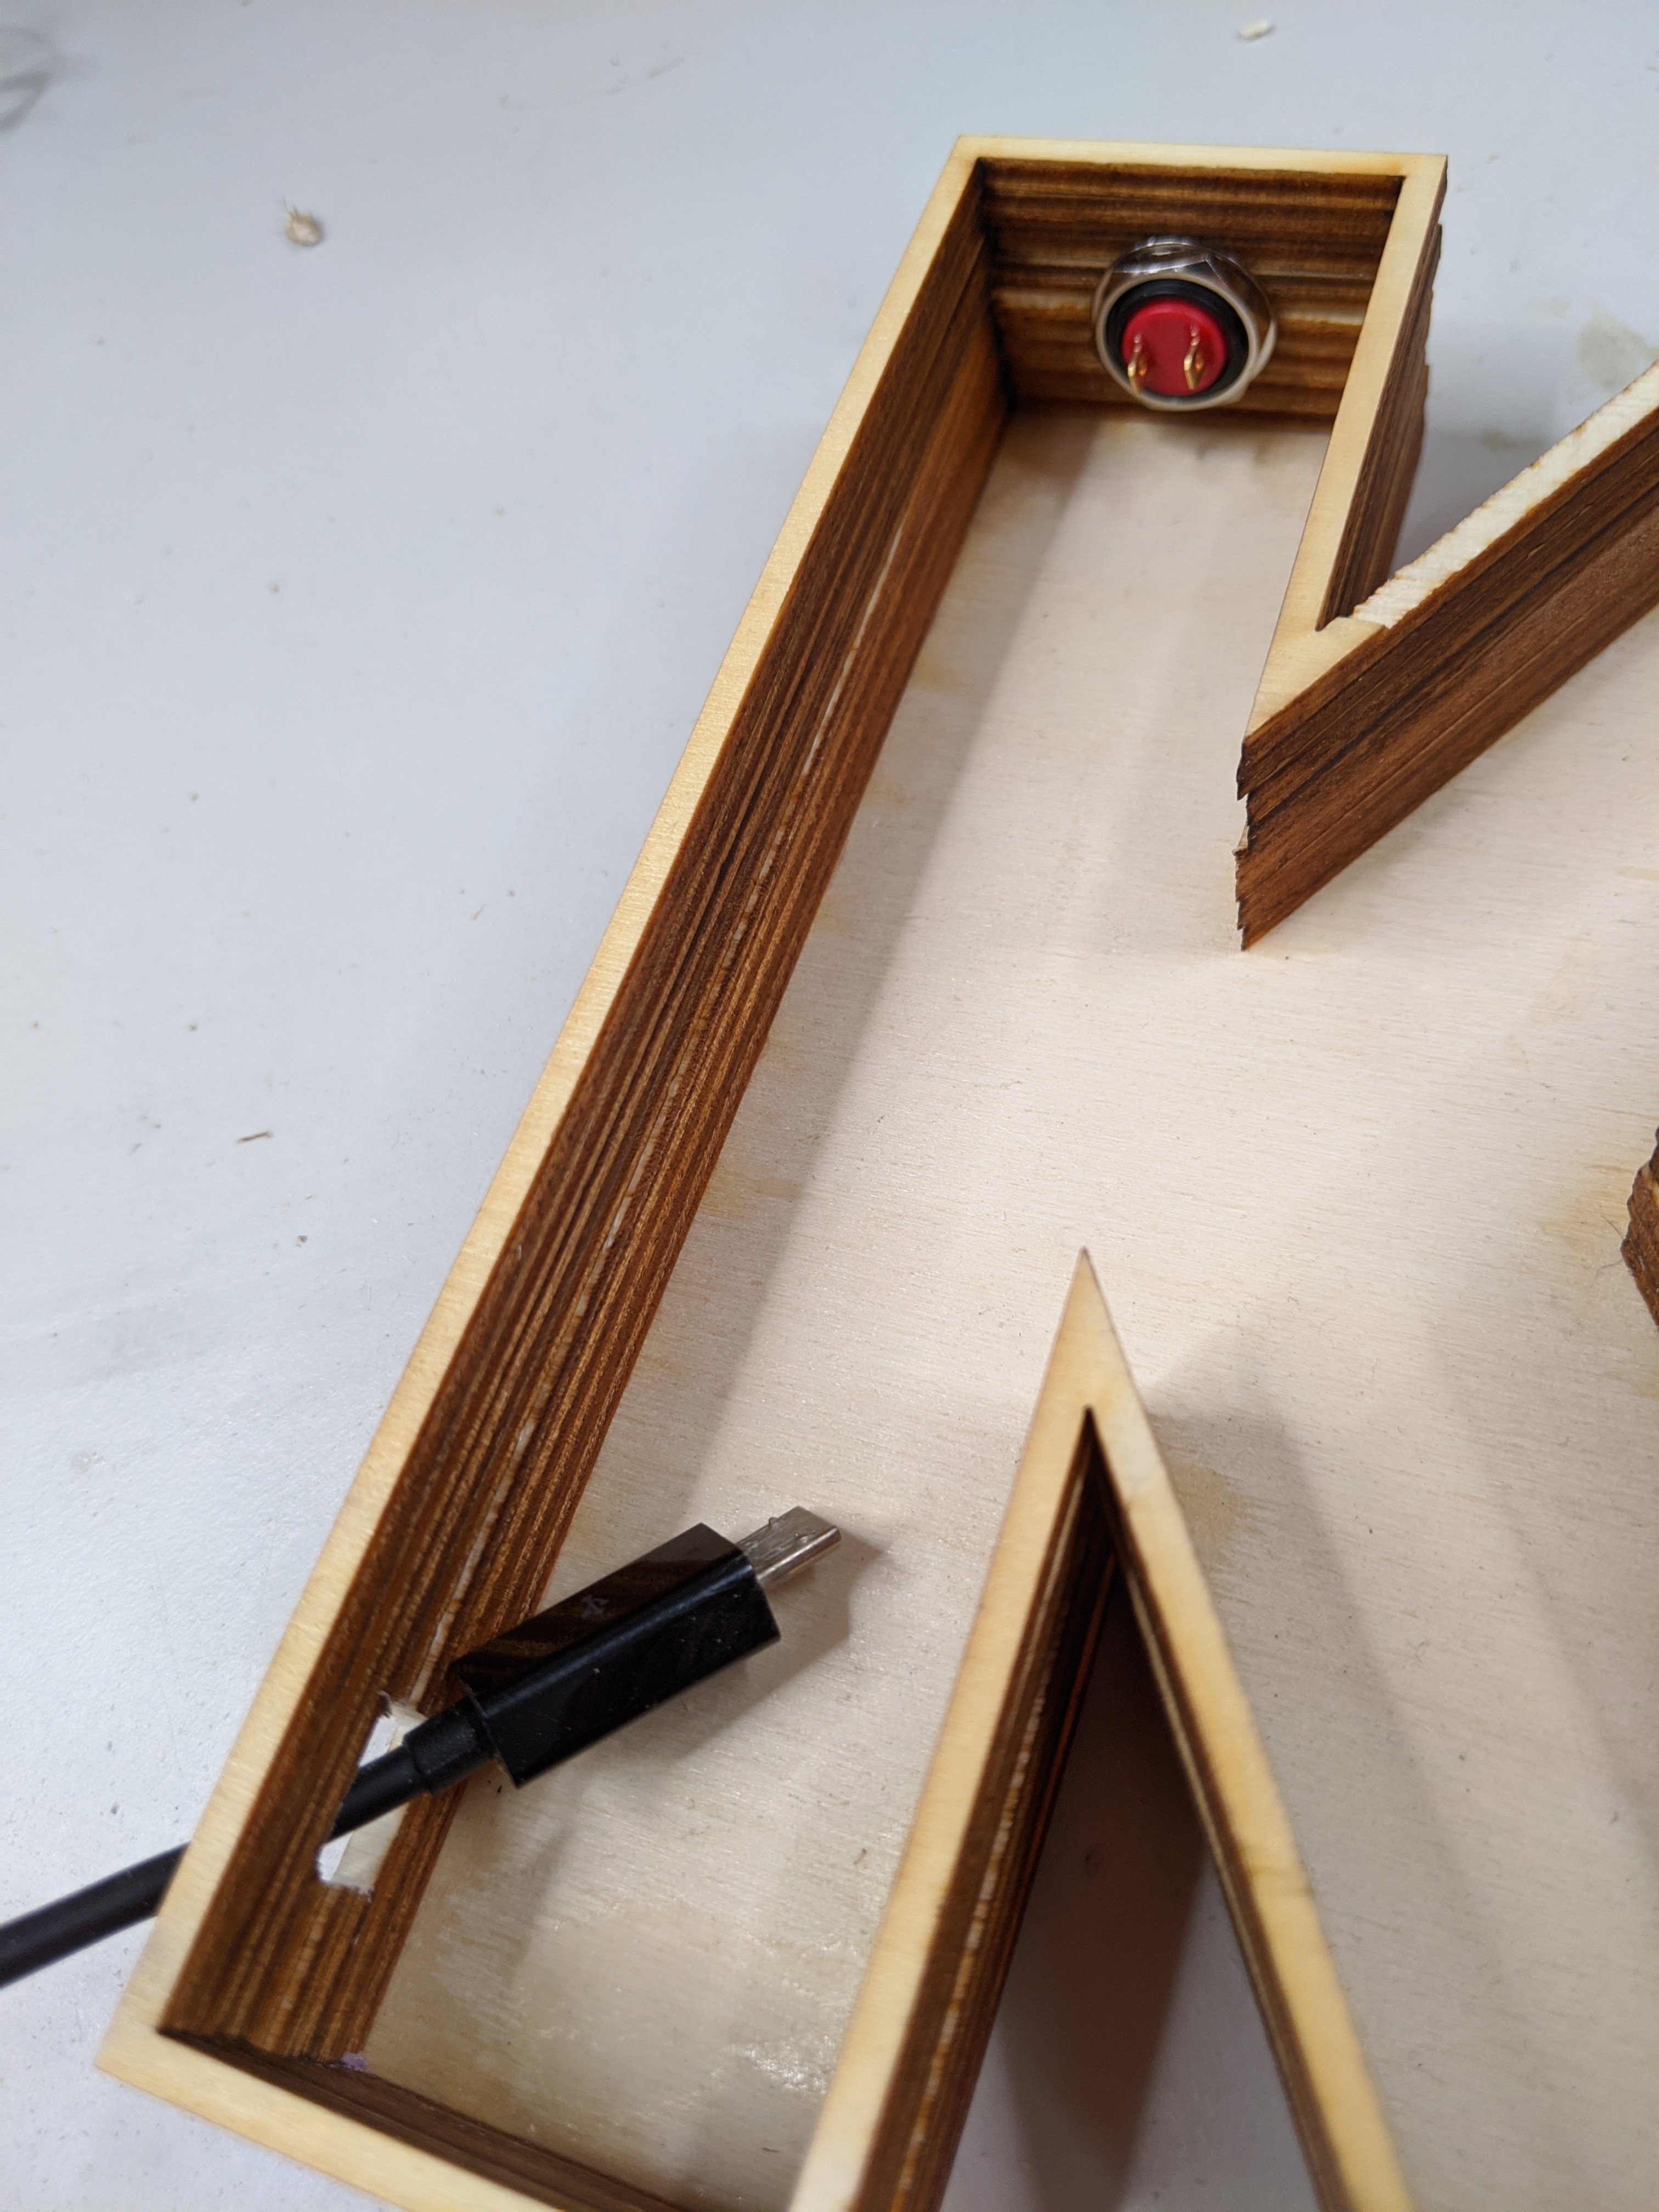
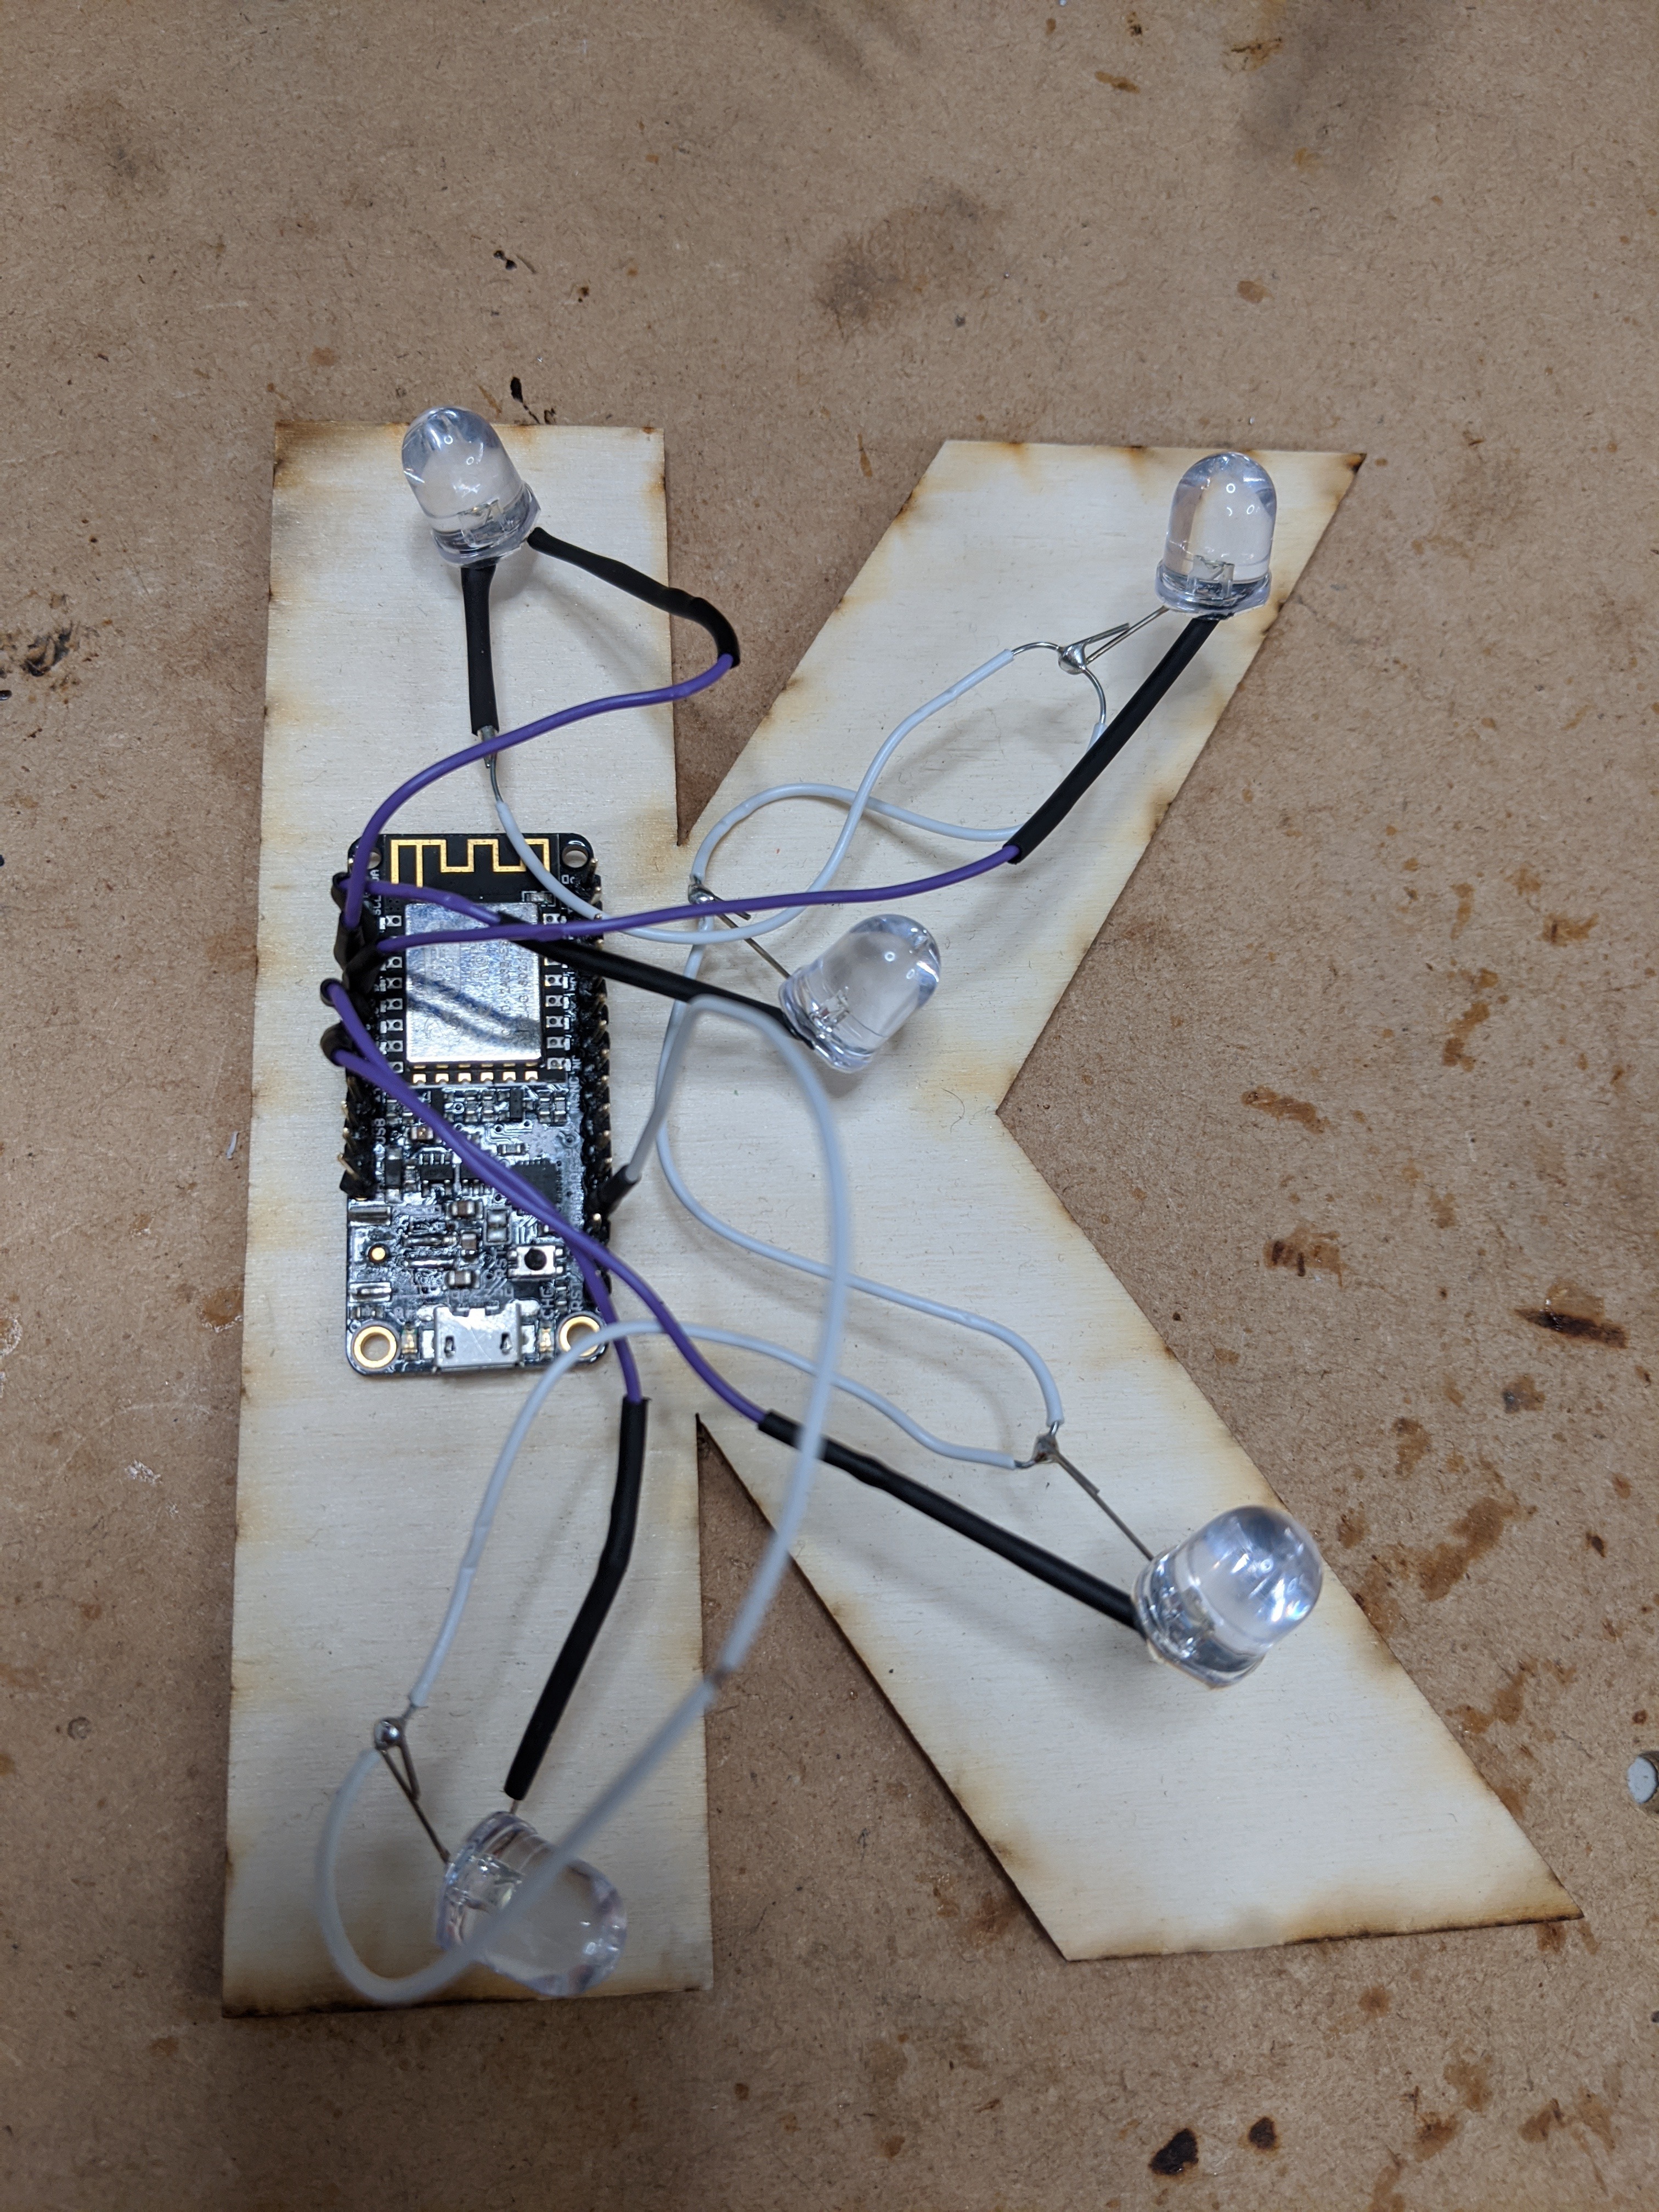
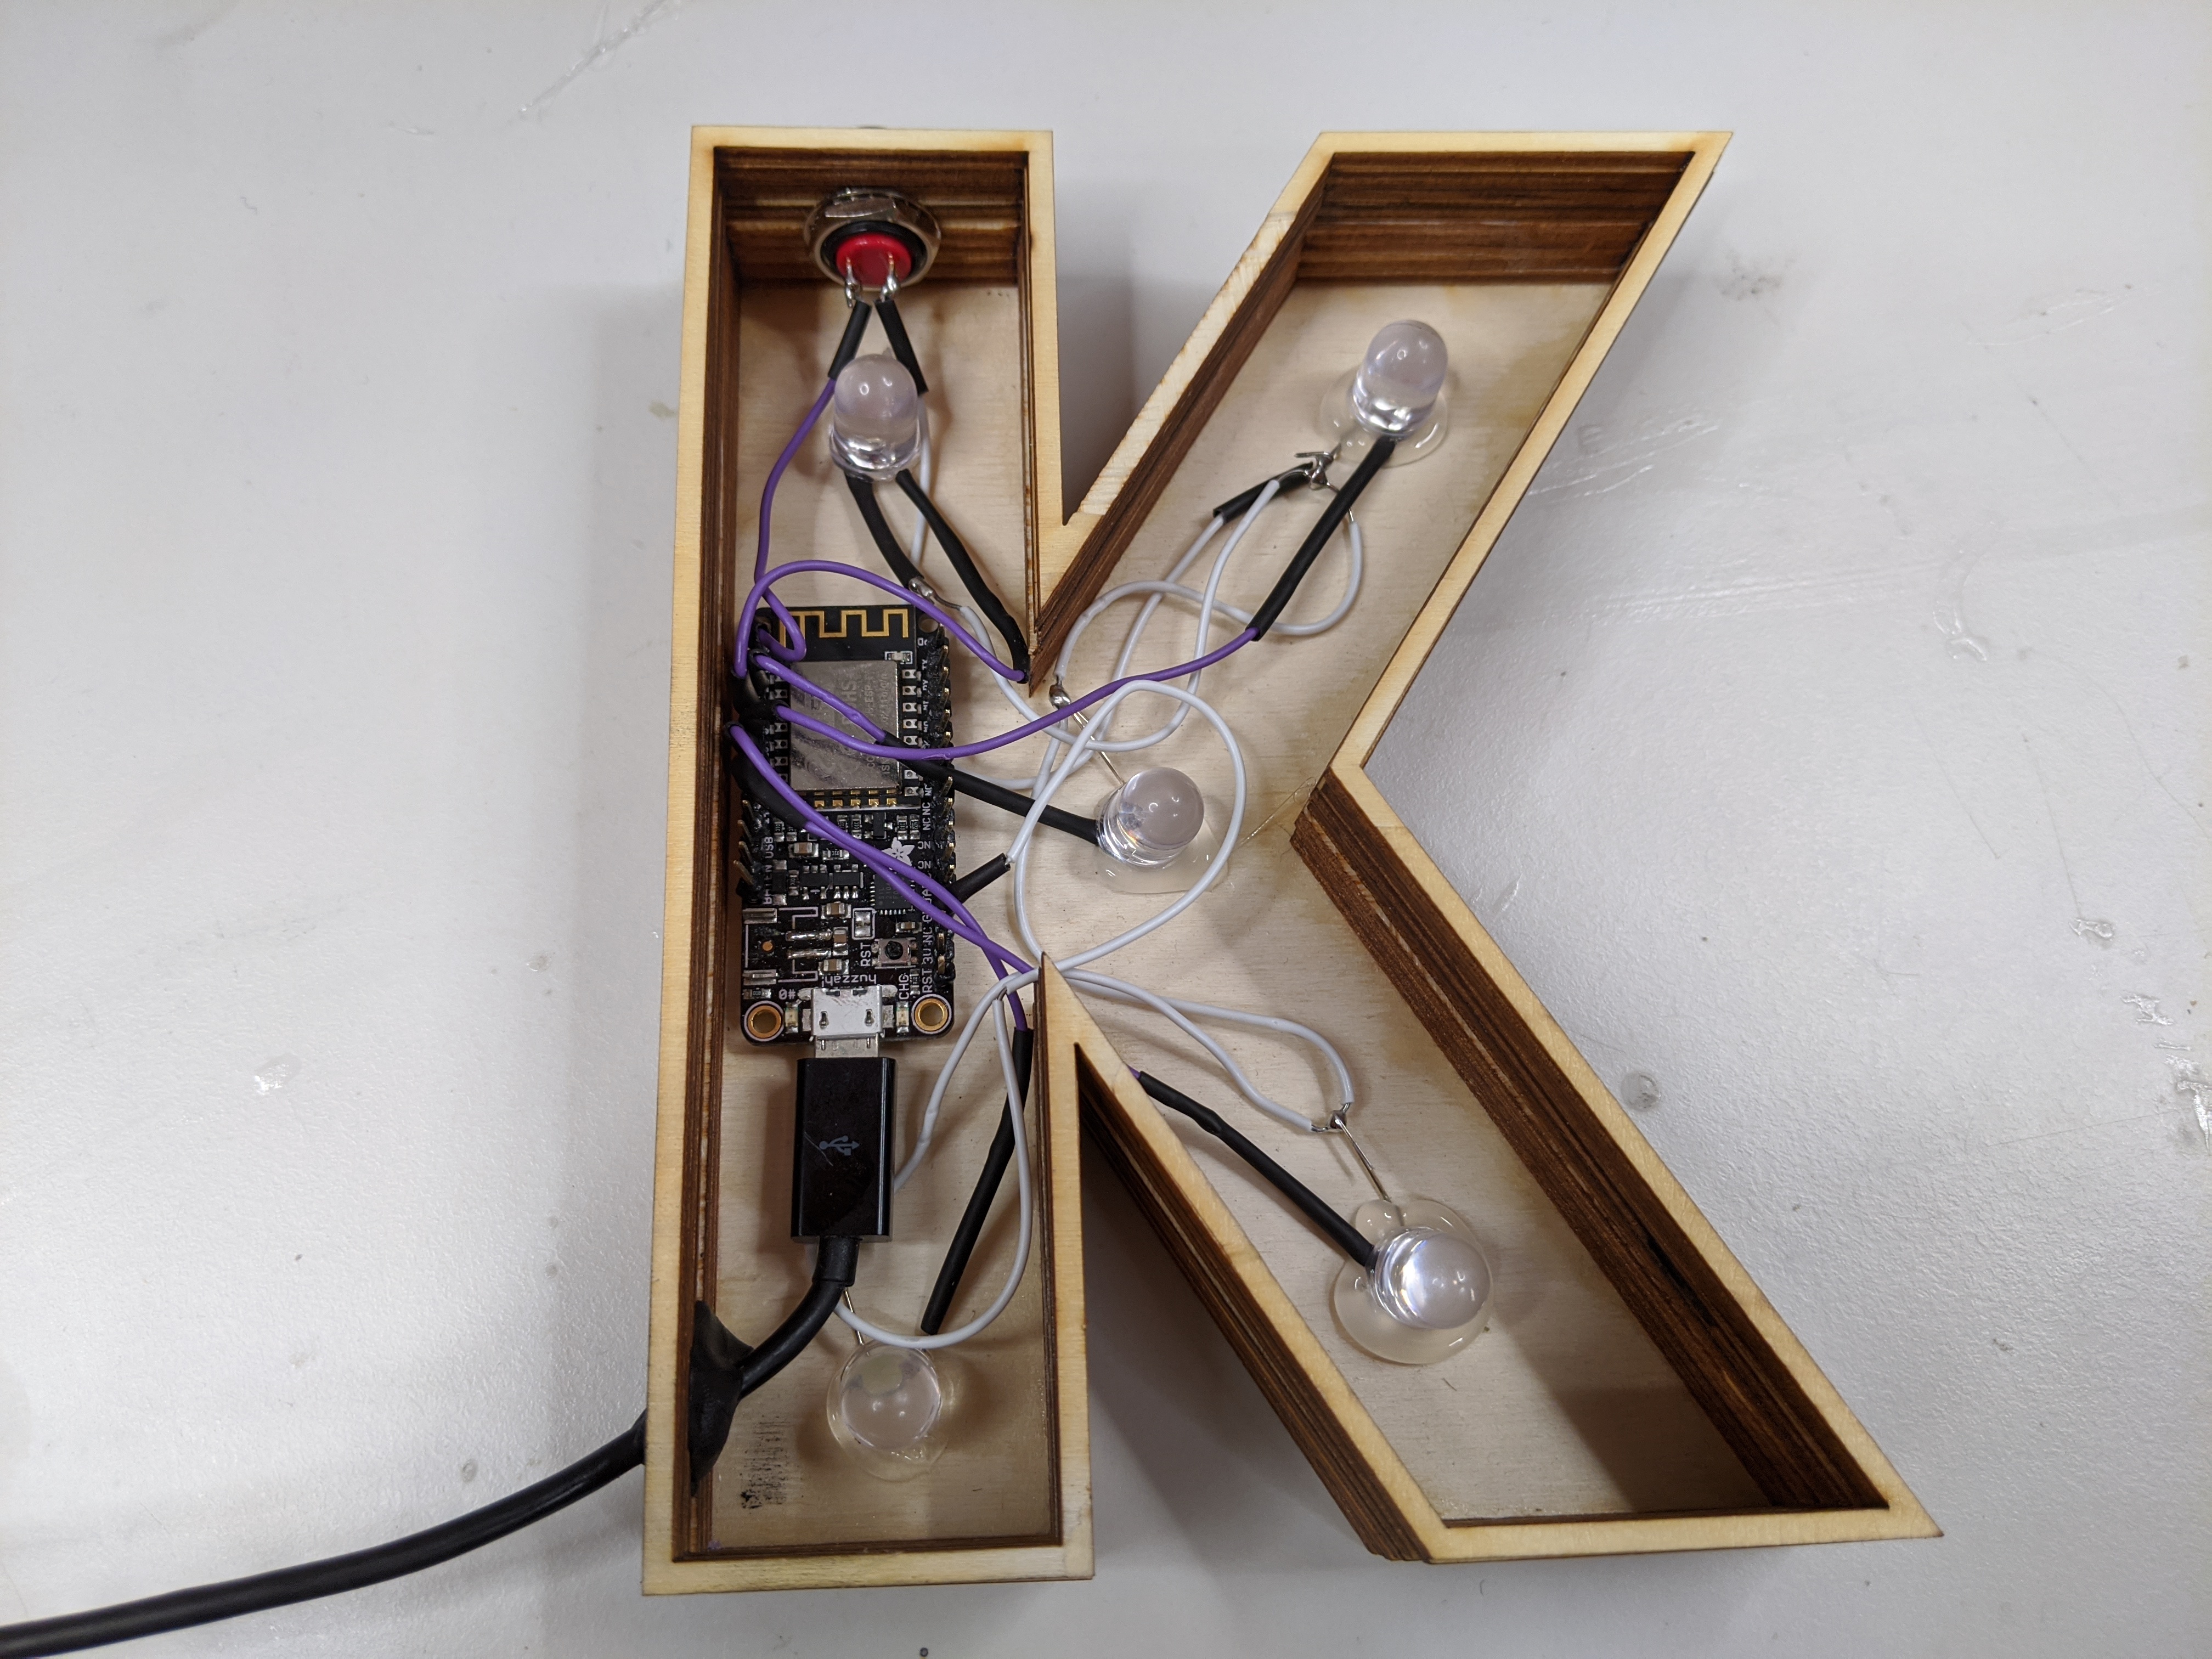
Now we know everything is working as expected, we can solder the LEDs to the board.
Connect the LEDs as shown in the diagram to pins 13, 2, 16, 0 and 15.
Cut a hole in the housing for the USB cable which will act as a power cable for the light and make sure it can reach the board when everything's in place.
Drill a hole for the button in the housing and mount it in place before soldering the button to pin 4.
Use a hot glue gun to fix the LEDs and the board to the back of the light.
Keep testing as you go to make sure all your connections are good and that everything is still working.
Finishing Touches
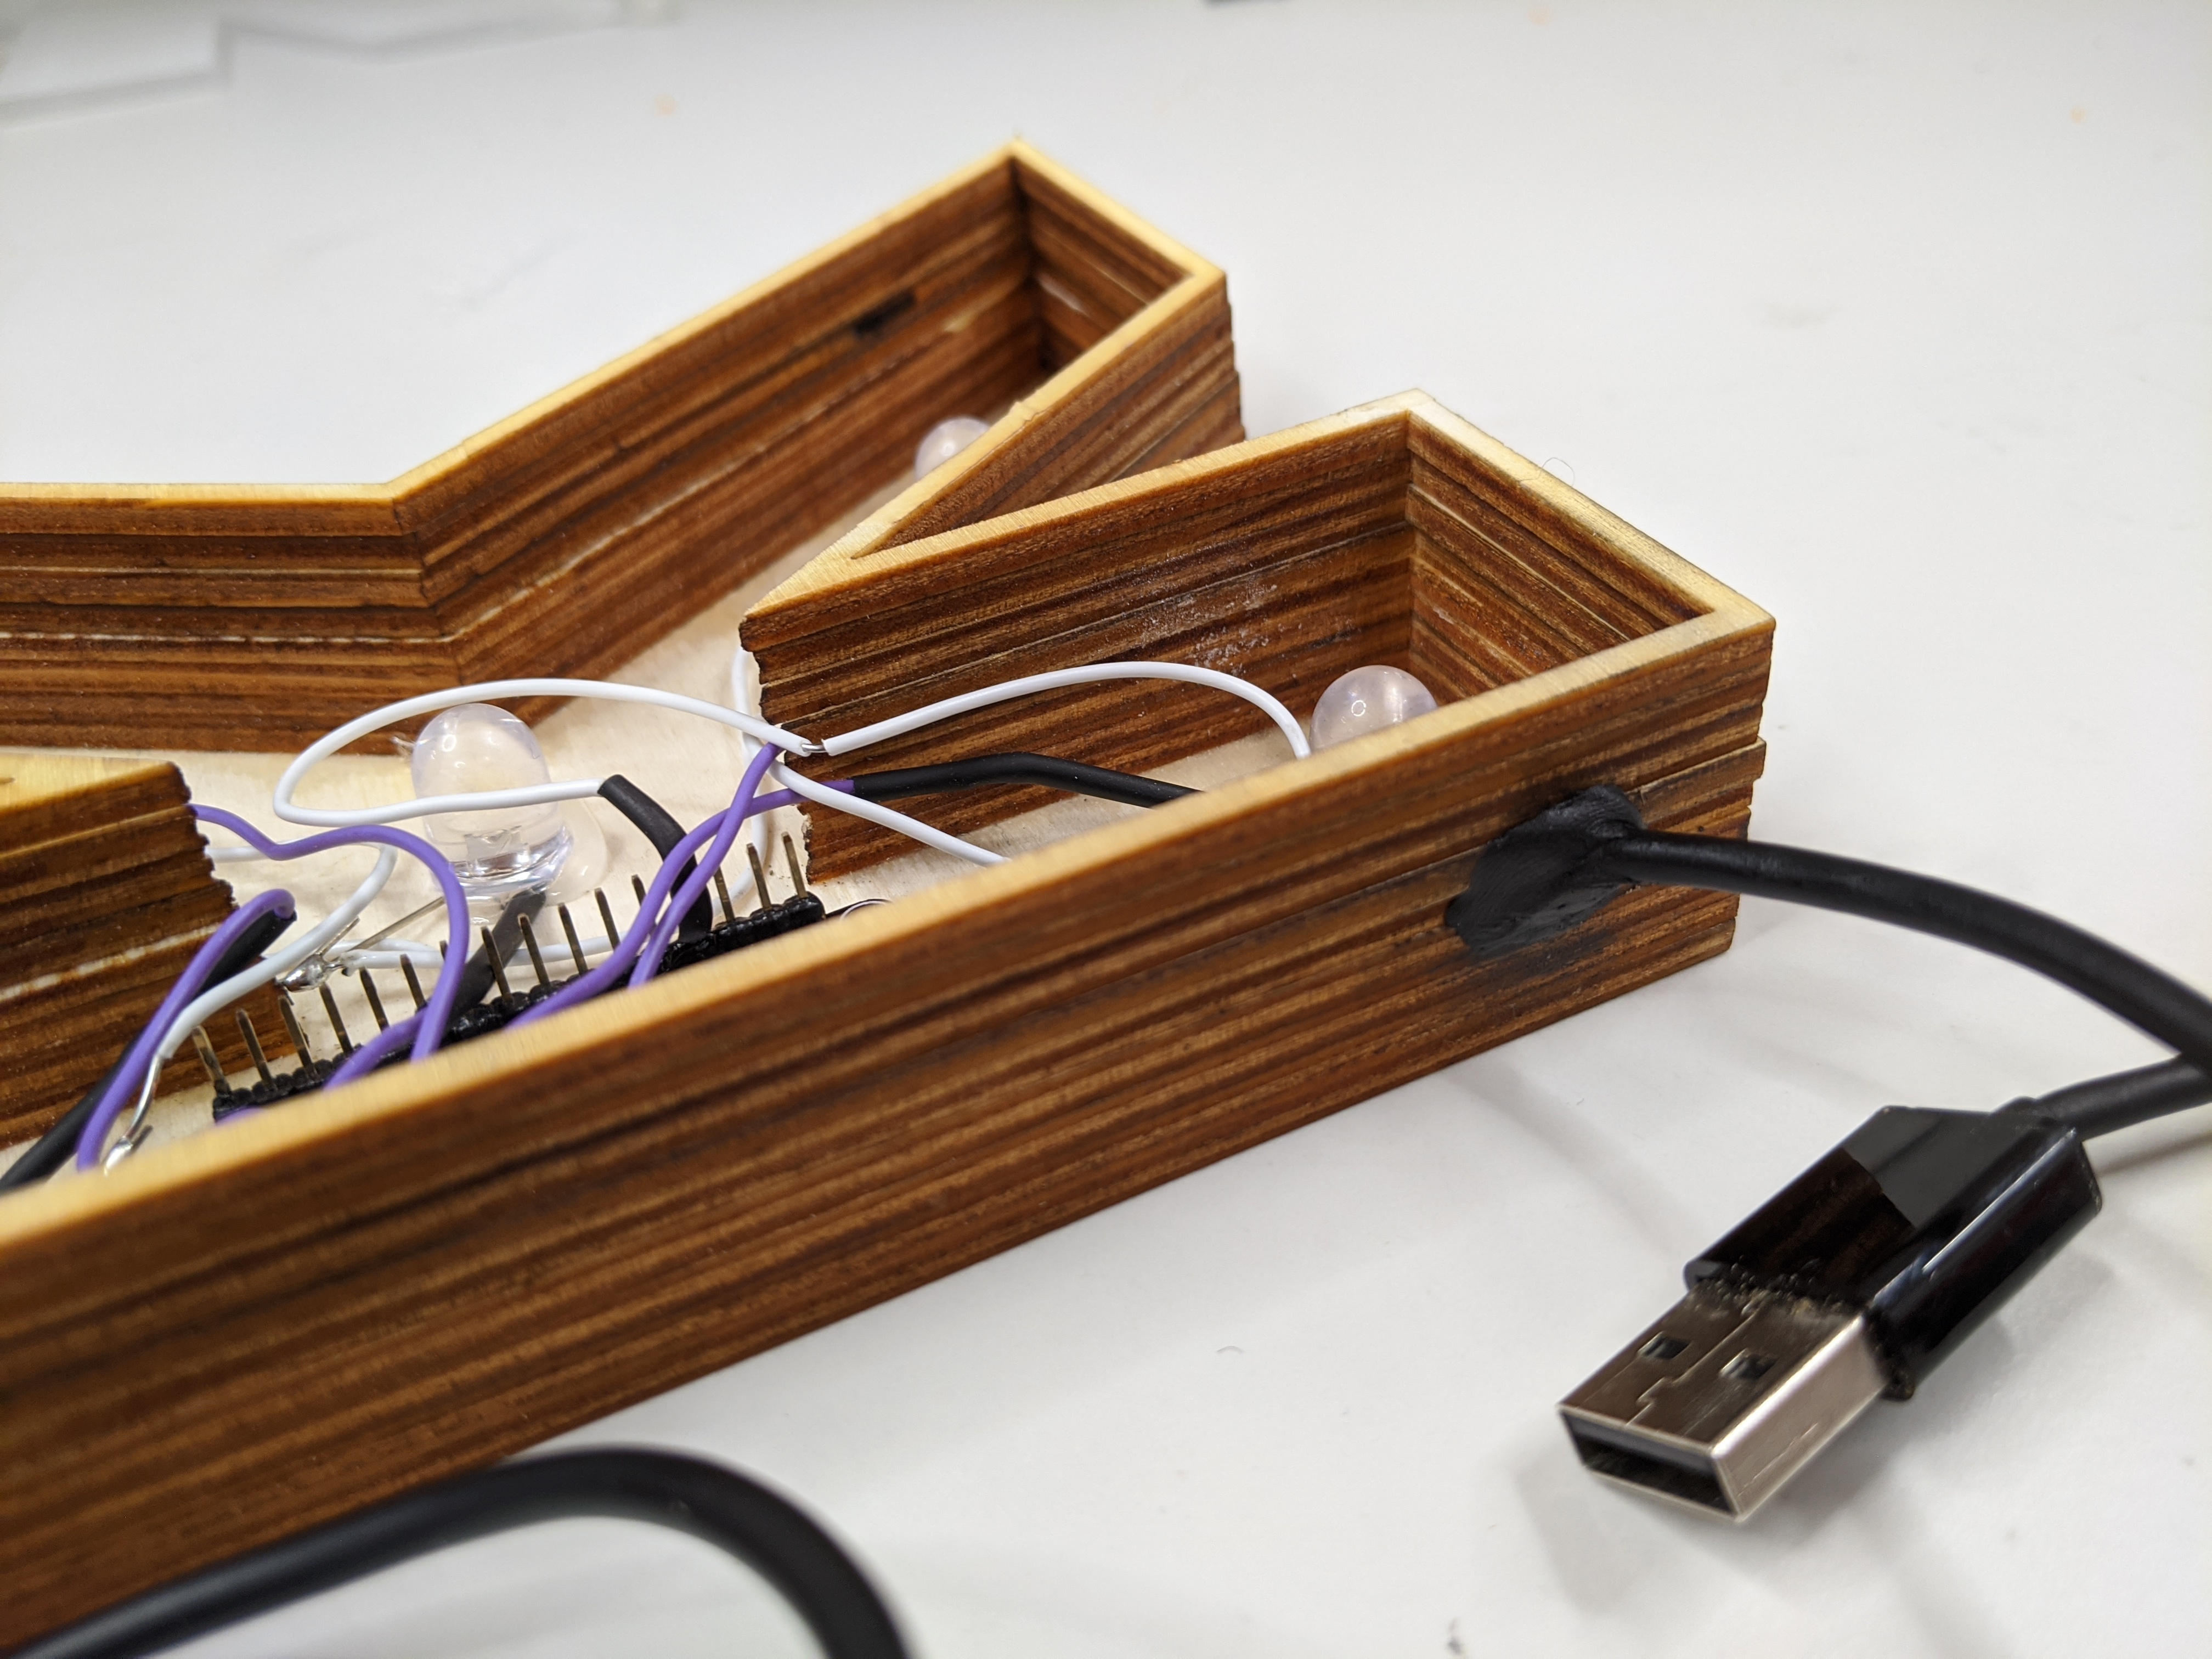
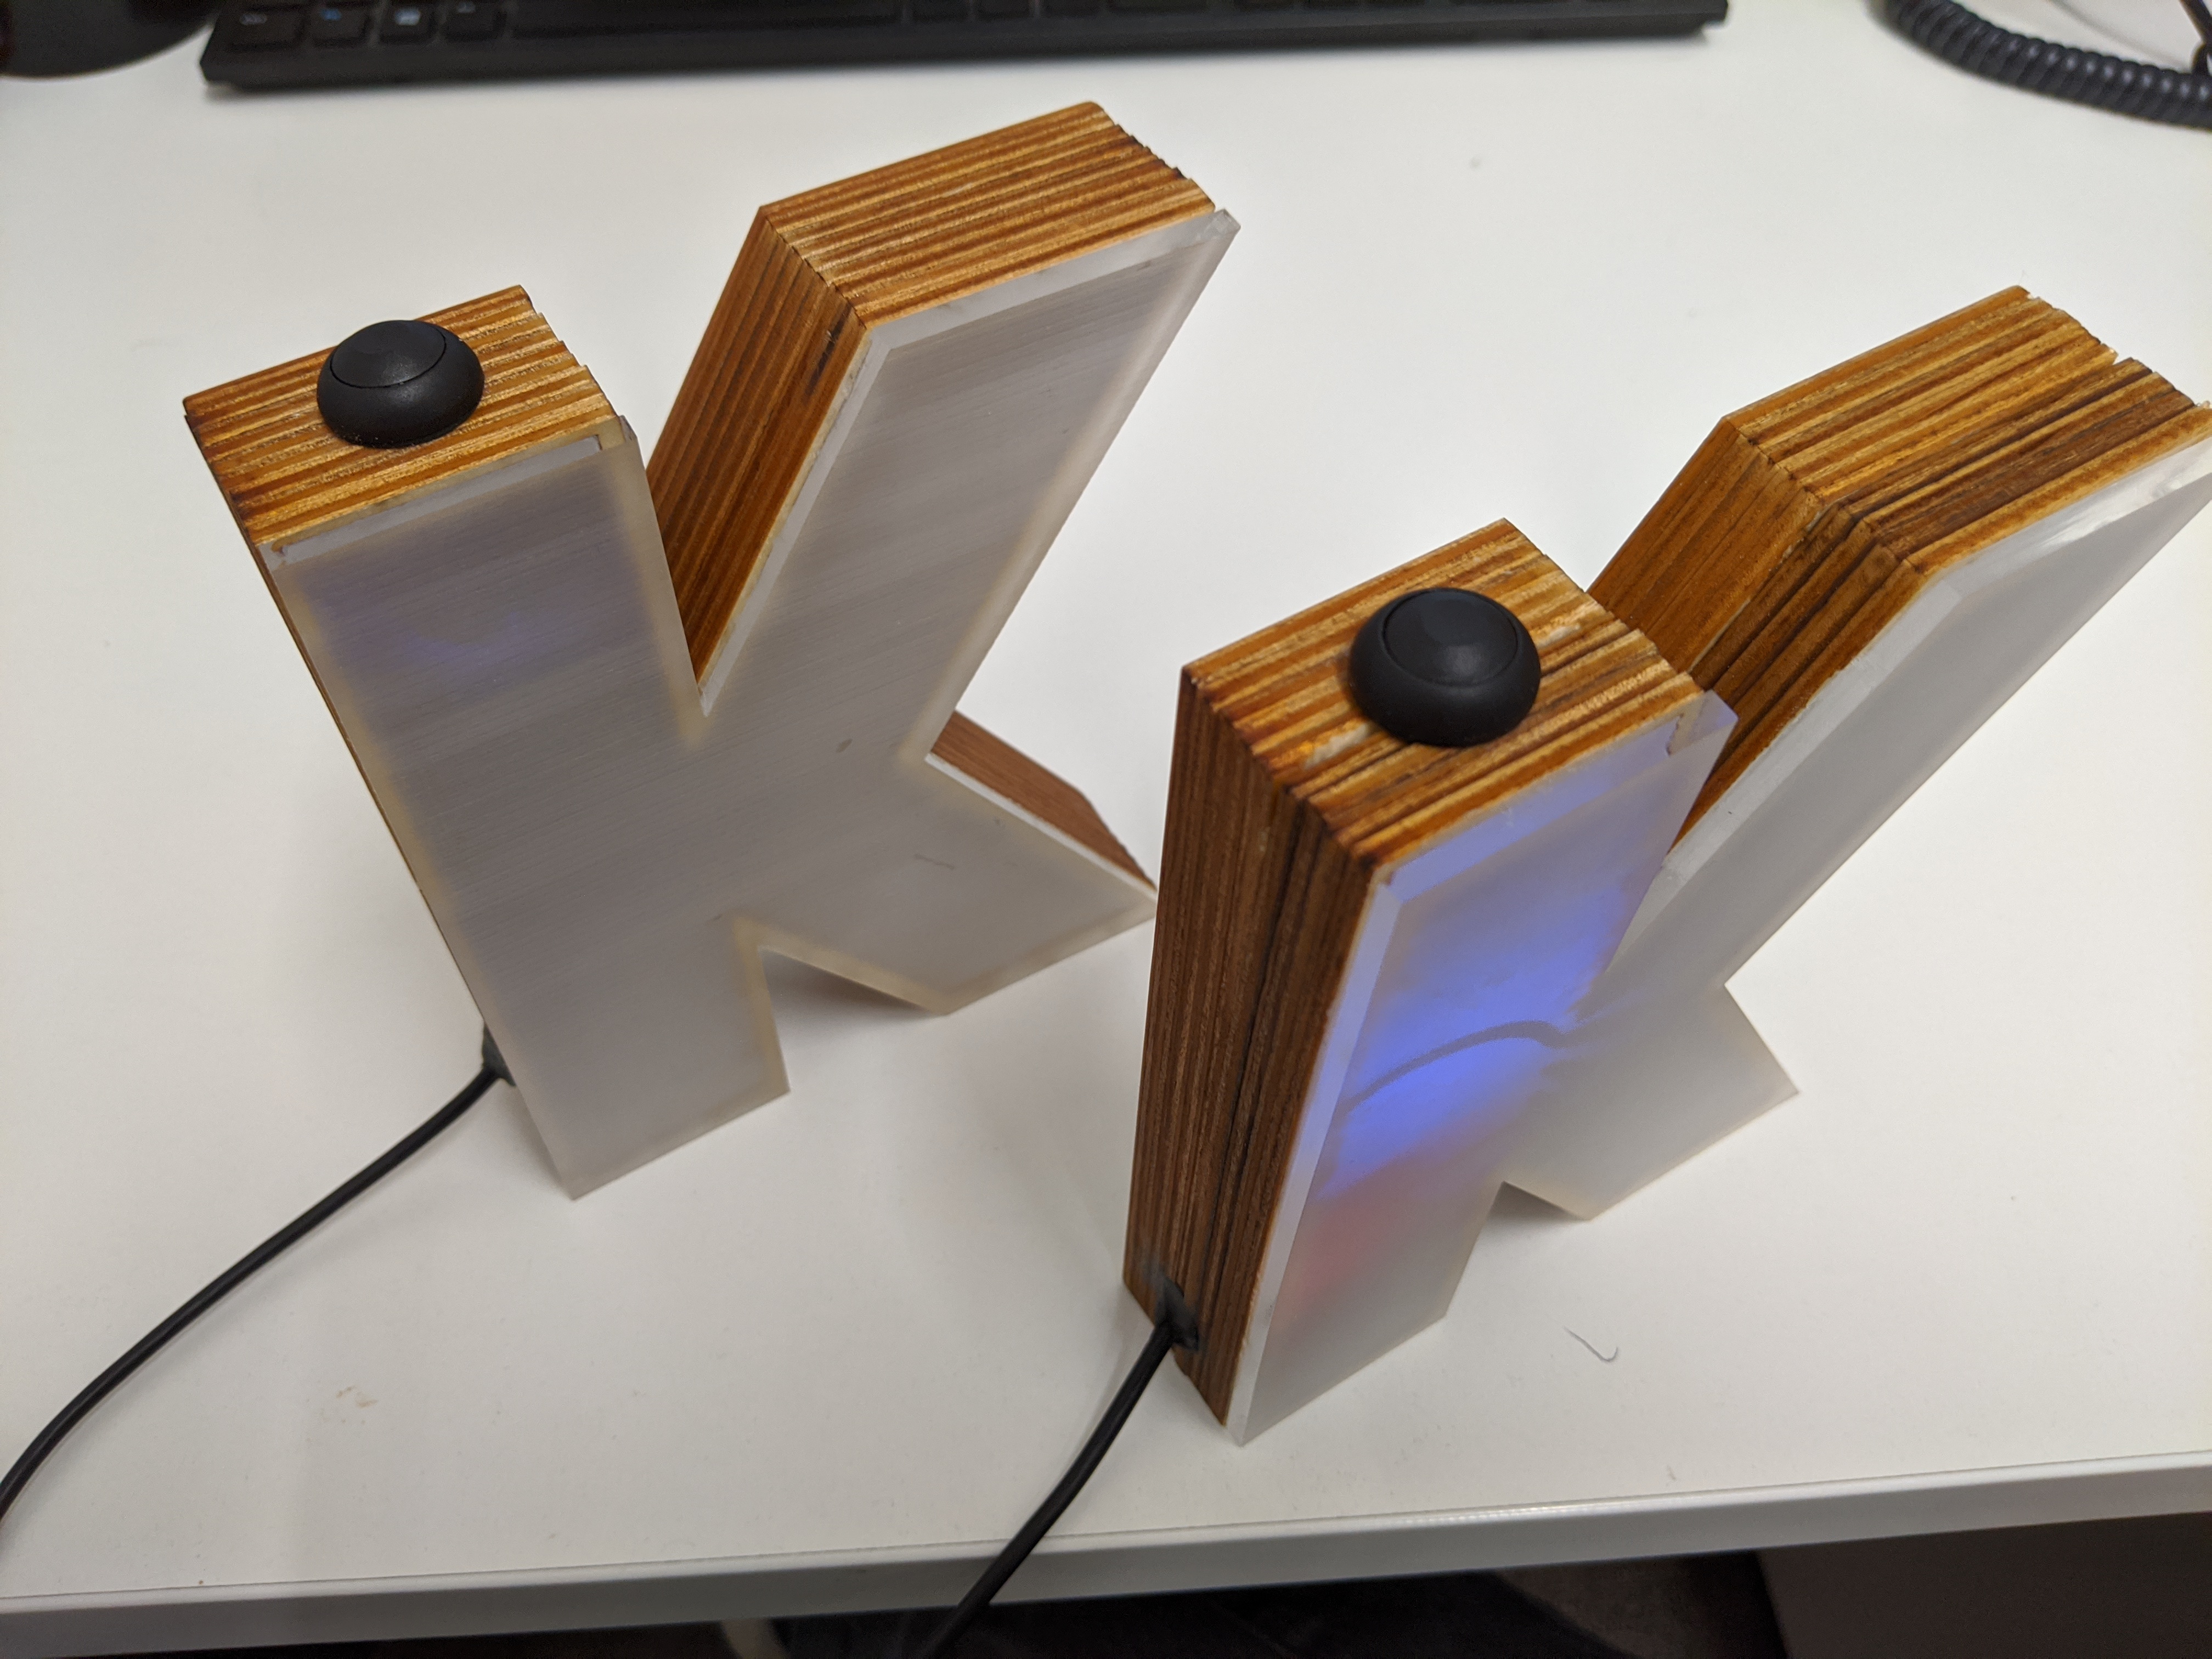
To keep the USB cable in place and tidy up the rough wooden edges, I filled the cable hole with black Sugru which hardens into a firm, rubbery texture.
The front of my lights was made by laser cutting clear acrylic and rastering over the surface until it was opaque. This gives the LEDs a nice diffuse light and hides the electronics well.
The acrylic fronts were glued on with super glue after a final round of testing to make sure nothing needed last minute changes.
Bring Joy!
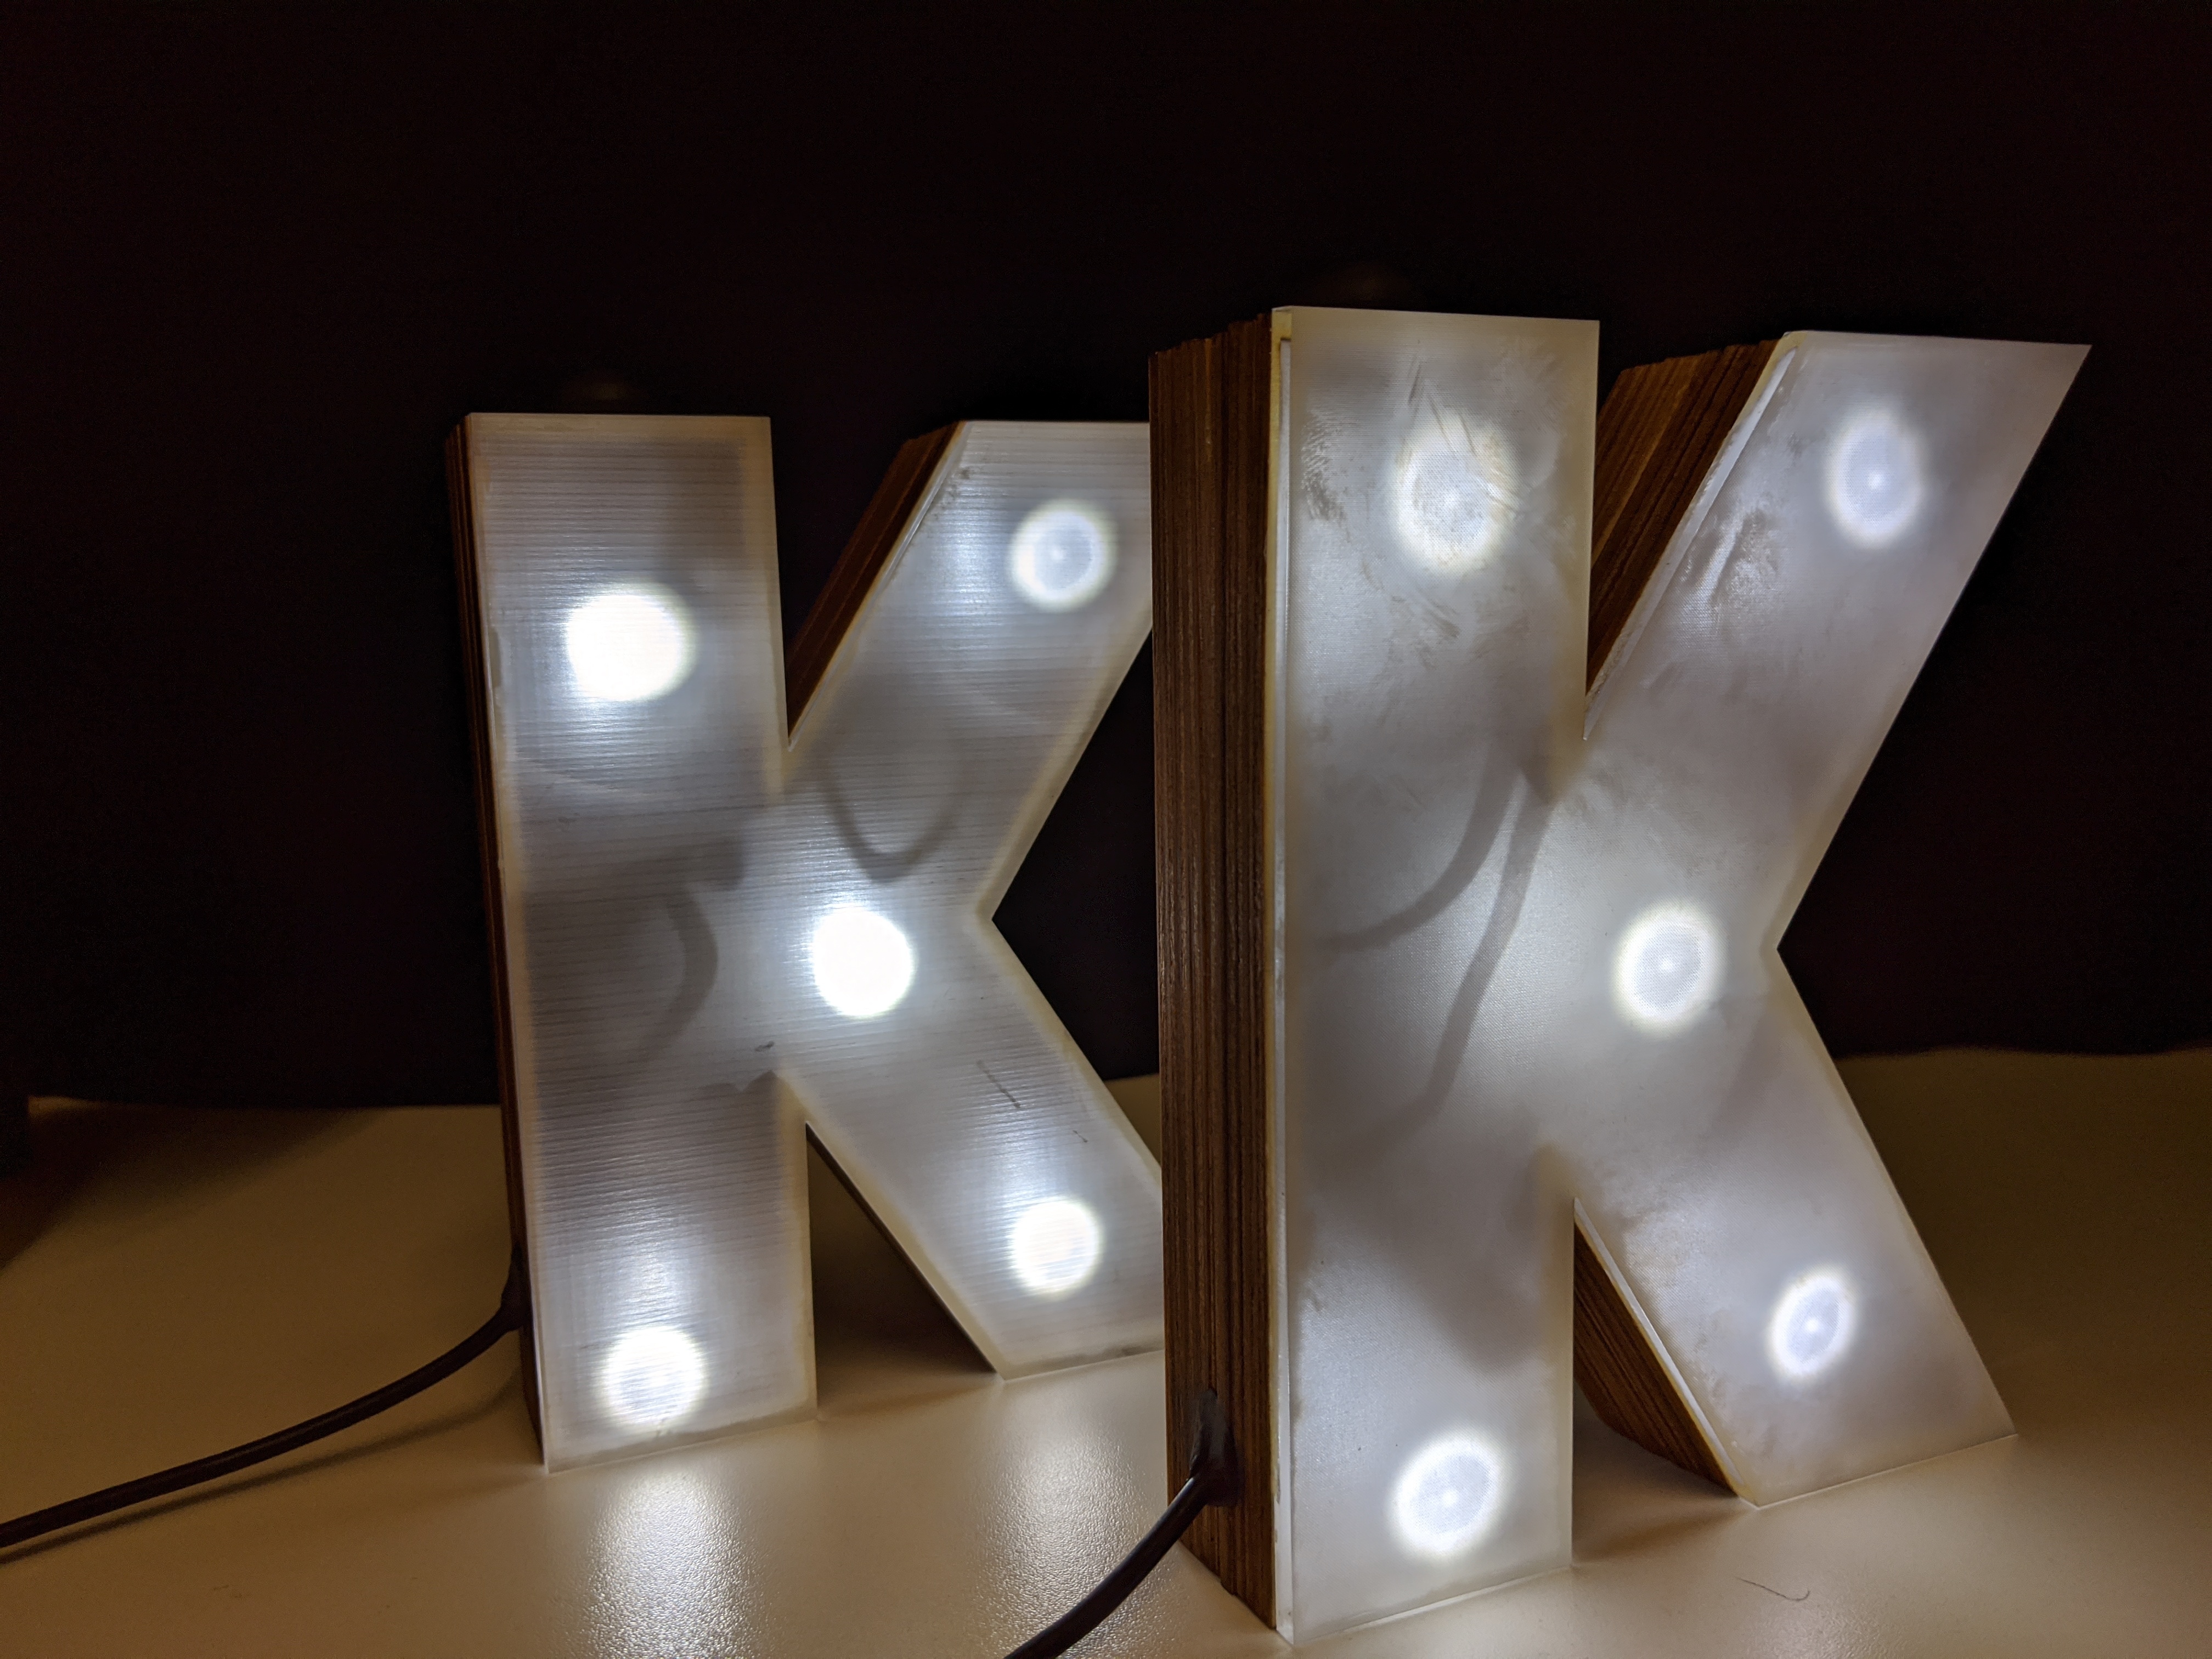
All done!
Don't forget to change the WiFi details to match your friend's house before giving this away, but as we're using a USB cable for power you can always access the board and change the code even after everything is glued together.