What's in the Light? Probing Around With My DIY Spectroscope
by indiantinker in Circuits > Gadgets
10864 Views, 54 Favorites, 0 Comments
What's in the Light? Probing Around With My DIY Spectroscope

I recently got a publiclab Desktop spectroscopy kit ! I really had a hell lot of fun building and probing light sources with it. Its an awesome kit with all the components required to get your own spectroscope.
The kit came in a nice cardboard box and had everything you need to make your own spectroscope. It has:
HD Webcam
Flexible Cable for USB
45 degree cut wooden piece for fixing the cam.
Good Quality Foam Tape
A Water proof aluminium Conduit box
A stencil/plan for the dark box
DVD as a diffraction grating
A very nice instruction manual
Lots of Fun

The assembling part is pretty straight forward a part of which will covered in this instructable. But by the end, We will be able to scientifically comment on a light source by looking at its spectrum.
Basics:
What is a spectrum?
The spectrum is the range of all possible frequencies of radiation. Light is a form of EM wave.
We all know that all colors are made of essentially 3 primary colors -RGB. Have you ever been able to see all of them separately?
The light bulb (the one with a tungsten filament) emits light in IR region. Yes we know it.
The tubelight has two excited states of Hg atom in it. which interacts with phosphor to produce white light. We have read this too.
How to choose between two light sources to install? Does sunlight actually contain UV and IR radiation?
How about seeing all this all by yourself?
Driven by the curiosity, i decided to make this kit and get spectroscavenging :)
Its not necessary to have your own kit though. It can be done using very simple parts as well.
You can even use your phone for the same.
Hope you like the instructable! Do vote for me by clicking the "VOTE" button on the top right corner.
Keep Experimenting! Stay Curious ! :D
How It Works?
This way we can build a spectroscope for almost nothing. After making mine,( and calibrating it ) i took a spectral shot of my tubelight and i found it almost similar to the one supplied by the manufacturer. Geez!
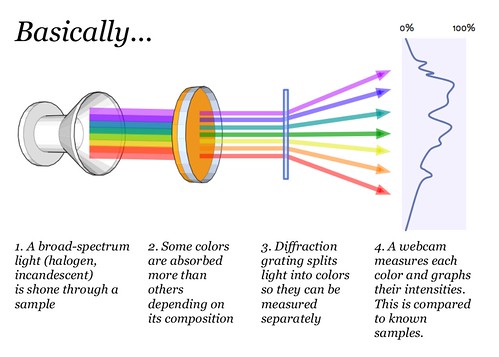
Credits: Publiclab.org
In our case, since we are not doing absorption/emission spectroscopy the sample is absent. The diffraction grating in a layer from an old DVD disk.
How can a DVD/CD act as a grating?
This is a side effect of their manufacture, as one surface of a CD has many small pits in the plastic, arranged in a spiral; that surface has a thin layer of metal applied to make the pits more visible. The structure of a DVD is optically similar, although it may have more than one pitted surface, and all pitted surfaces are inside the disc. This creates a grating somewhat similar to the Fresnel ones we use in physics Lab at my university.
Now Lets start building>>
Cut the Plans and Box 'em Up

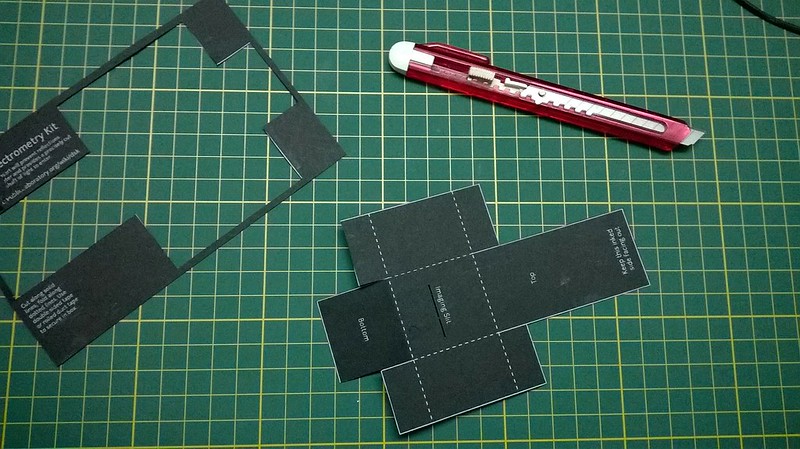
Make sure the inked/printed part stays outside. We dont want any reflections inside our dark room. Add the Foam Tape to secure the joints and add a piece of foam tape on the spot where its written “Bottom” . We will peel off the other end when we assemble all the components in the conduit.
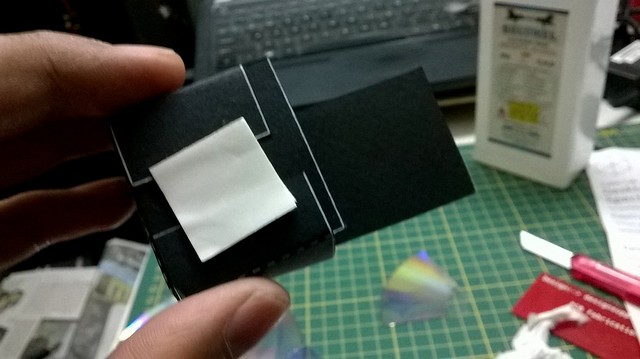
DVD Time

Wash your hands and make sure there is no oil. This is a critical part of the process.
I did it wrong twice :P
Take a small blade (in case you don't have big sharp nails) and try to apply force on the disk from the circular edge i.e the thin part and you will soon be able to separate both ends. Discard the shiny part and “cautiously” handle the second part. (Like a thief,No fingerprints)
You can see this (Warning:PDF) for more on the calculations and scientific part on preparation of grating part!
Now cut a sector of this disk and inspect it for fingerprints. Out of curiosity i applied some alcohol on the part with the intention to clean it but rendered it useless.The blue-ish pigment on the DVD reacts with it and comes off it. So DONT use alcohol.
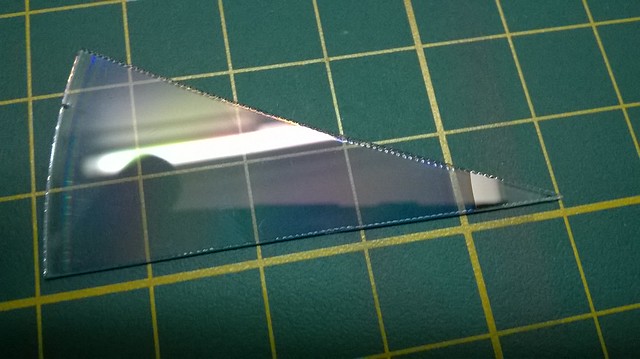
Next , cut a small portion from the farther end of the disk as tracks are more linear there.
Camera and Its Chair

Next mount the grating with the circular portion facing the camera. You also need to focus the camera by moving/unscrewing the upper black portion to about 9inches.I advise aligning it a bit angled and not straight as shown.

Now grab the piece of wood and stick foam tape on it as shown. Also use some tape on the sides for securing the wire for the USB camera.
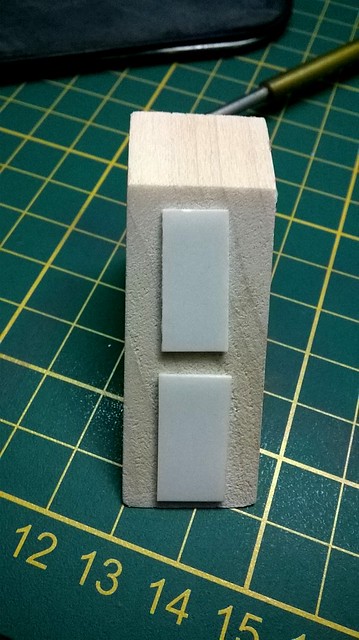
Now stick the camera unit on it and carefully stick the wire to the foam tape on the side. Be careful with the wire.
Spectroscope, Assemble!

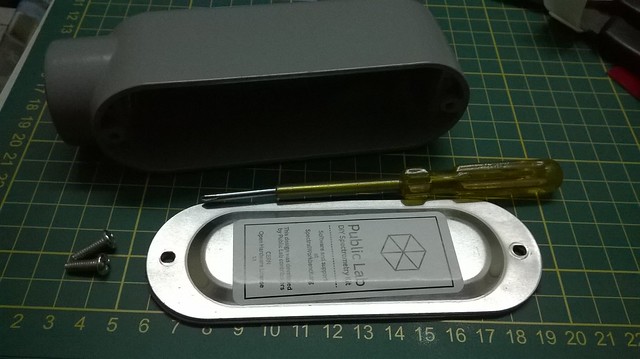
Mount the black box folded in the first part and use some foam tape to do so.
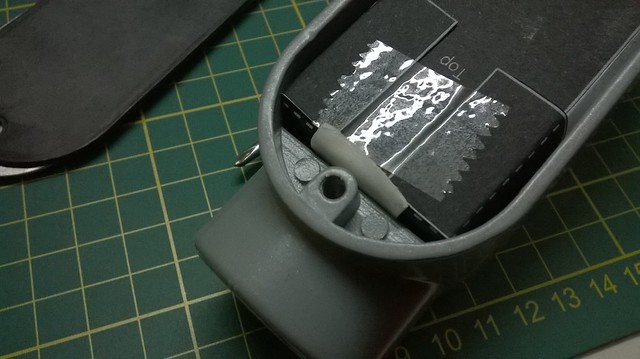
Now add the camera and slide the USB cable out. Carefully stick the wooden piece with the Foam Tape on its bottom to the conduit floor inside the region of the black flap.
You can see the imaging slit, which is pointed to the light source.
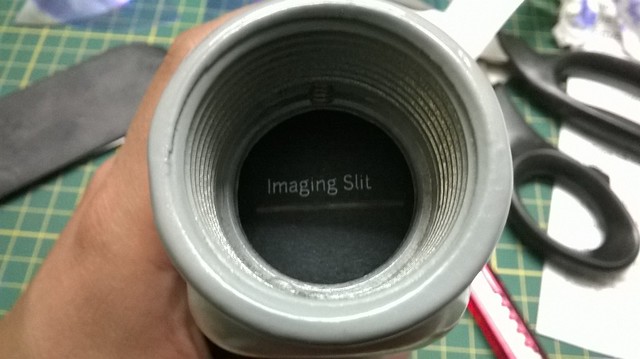
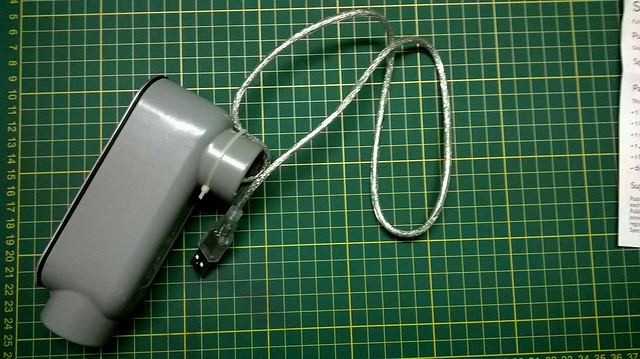
Your final USB Spectroscope!
Calibration.. Calibration..

The CFL are manufactured the same way throughout the world and hence have more of less the same spectra. The process technically evaluates the peaks in the output of your spectroscope build and aligns it to a standard value. This way you get readings in nm (nanometers) on the scale! Hence, you eventually have your own "standardized" scope irrespective of your build!
Cool huh?
So, go to spectralworkbench . Make an a/c so that you can save the data.Next go to begin capture and follow the instruction on screen. Point your scope to a CFL lamp and you will see a live feed on the webpage. Try rotating the scope till you get a bright sample and then move the yellow bar to the spot. Make sure you get green first and then red on your spectra when moving Left to right (ProTip) .
If not you can click on flip button. When set click the “begin capturing” button.. and you can see all the stuff being done. When you are happy with a stable spectra click save and fill the form.
You will then be guided back to the site to calibrate. Once the spectra is saved you need to click the calibrate button and click as the dialog says (Be sure you are logged in or “Something went wrong” pops up).
After calibration you can see the wavelengths on the x-axis.
Let the Probing Begin! Part-1-LEDs


Now lets get probing! On my desk i have a lot of LEDs. So, i decided to see what's the frequency of light present,is it monochromatic ( one single color) and if possible, can i relate it to its Vf (forward drop) ?
I am already feeling like a scientist :)
Here is a test of the RED led which is a part of a RGB LED strip!

The spectrum peaks at 625nm. Using Plank's equation, E=Hv
We have E=1.984V ! Wow.. The value of vf according to the datasheet is 2.1V Typical and 1.8V actual. That's pretty close!
Similarly, for the blue one,

The peak here is at 470nm. Running the same arithmetic we get: Vf= 2.63V
Check the manufacturer's graphs. The results are so accurate..
Next i moved on to purple color. Purple Color is made of red and blue! Check the scope!

Bazinga!
You can similarly check other results at my public lab profile here
Let the Probing Begin Part 2: Bulbs

I always needed a proof of it ever since they taught this to me in 8th grade!
Here it is.

You can see after 700nm ( the point beyond which we cant see) , IR Region
The bulb has enormous amount of IR content.
Here is a link to the spectrum
Hence,Proved
Let the Probing Begin Part 3: Tubelight and Sunlight

Tubelights with 6500k color temperature are known to produce/render light almost like sunlight.
Here are spectrum's of both of them.

Tubelight ^

Sunlight^
You can see how vividly its true! The tubelight has a more peaky spectrum but the peaks are more or less aligned to the peaks/flats of the sunlight spectrum.
You also notice that sunlight has IR and UV content as well but tubelight doesnt!
Thats why people use sunscreen to protect them from UV!
You can even use the spectralworkbench to get to know about spectrums that have similar peaks! We are moving towards the shazam of materials!! Coool :)
Hence proved!
Hope you like the instructable! Do vote for me by clicking the "VOTE" button on the top right corner.
Keep Experimenting! Stay Curious ! :D
Conclusion
The following conclusions were broadly derived/studied:
- Bulb has a large amount of IR Content.
- Sunlight has UV and IR contents.
- LEDs are not monochromatic and we can closely calculate the Vf of the LED by looking at peaks in spectrum
- Various color and composition were studied
- It was scientifically 'proved' that Tube Light with 6500k color temperature render color closely to that of sunlight
- Science is Fun!
- You don't need a lot of money to buy your own spectroscope , you can build your own quite cheaply
I conclude that the experiment was successful ! :D