Web Controlled Camera Turret
by Henkeify in Circuits > Raspberry Pi
12463 Views, 177 Favorites, 0 Comments
Web Controlled Camera Turret
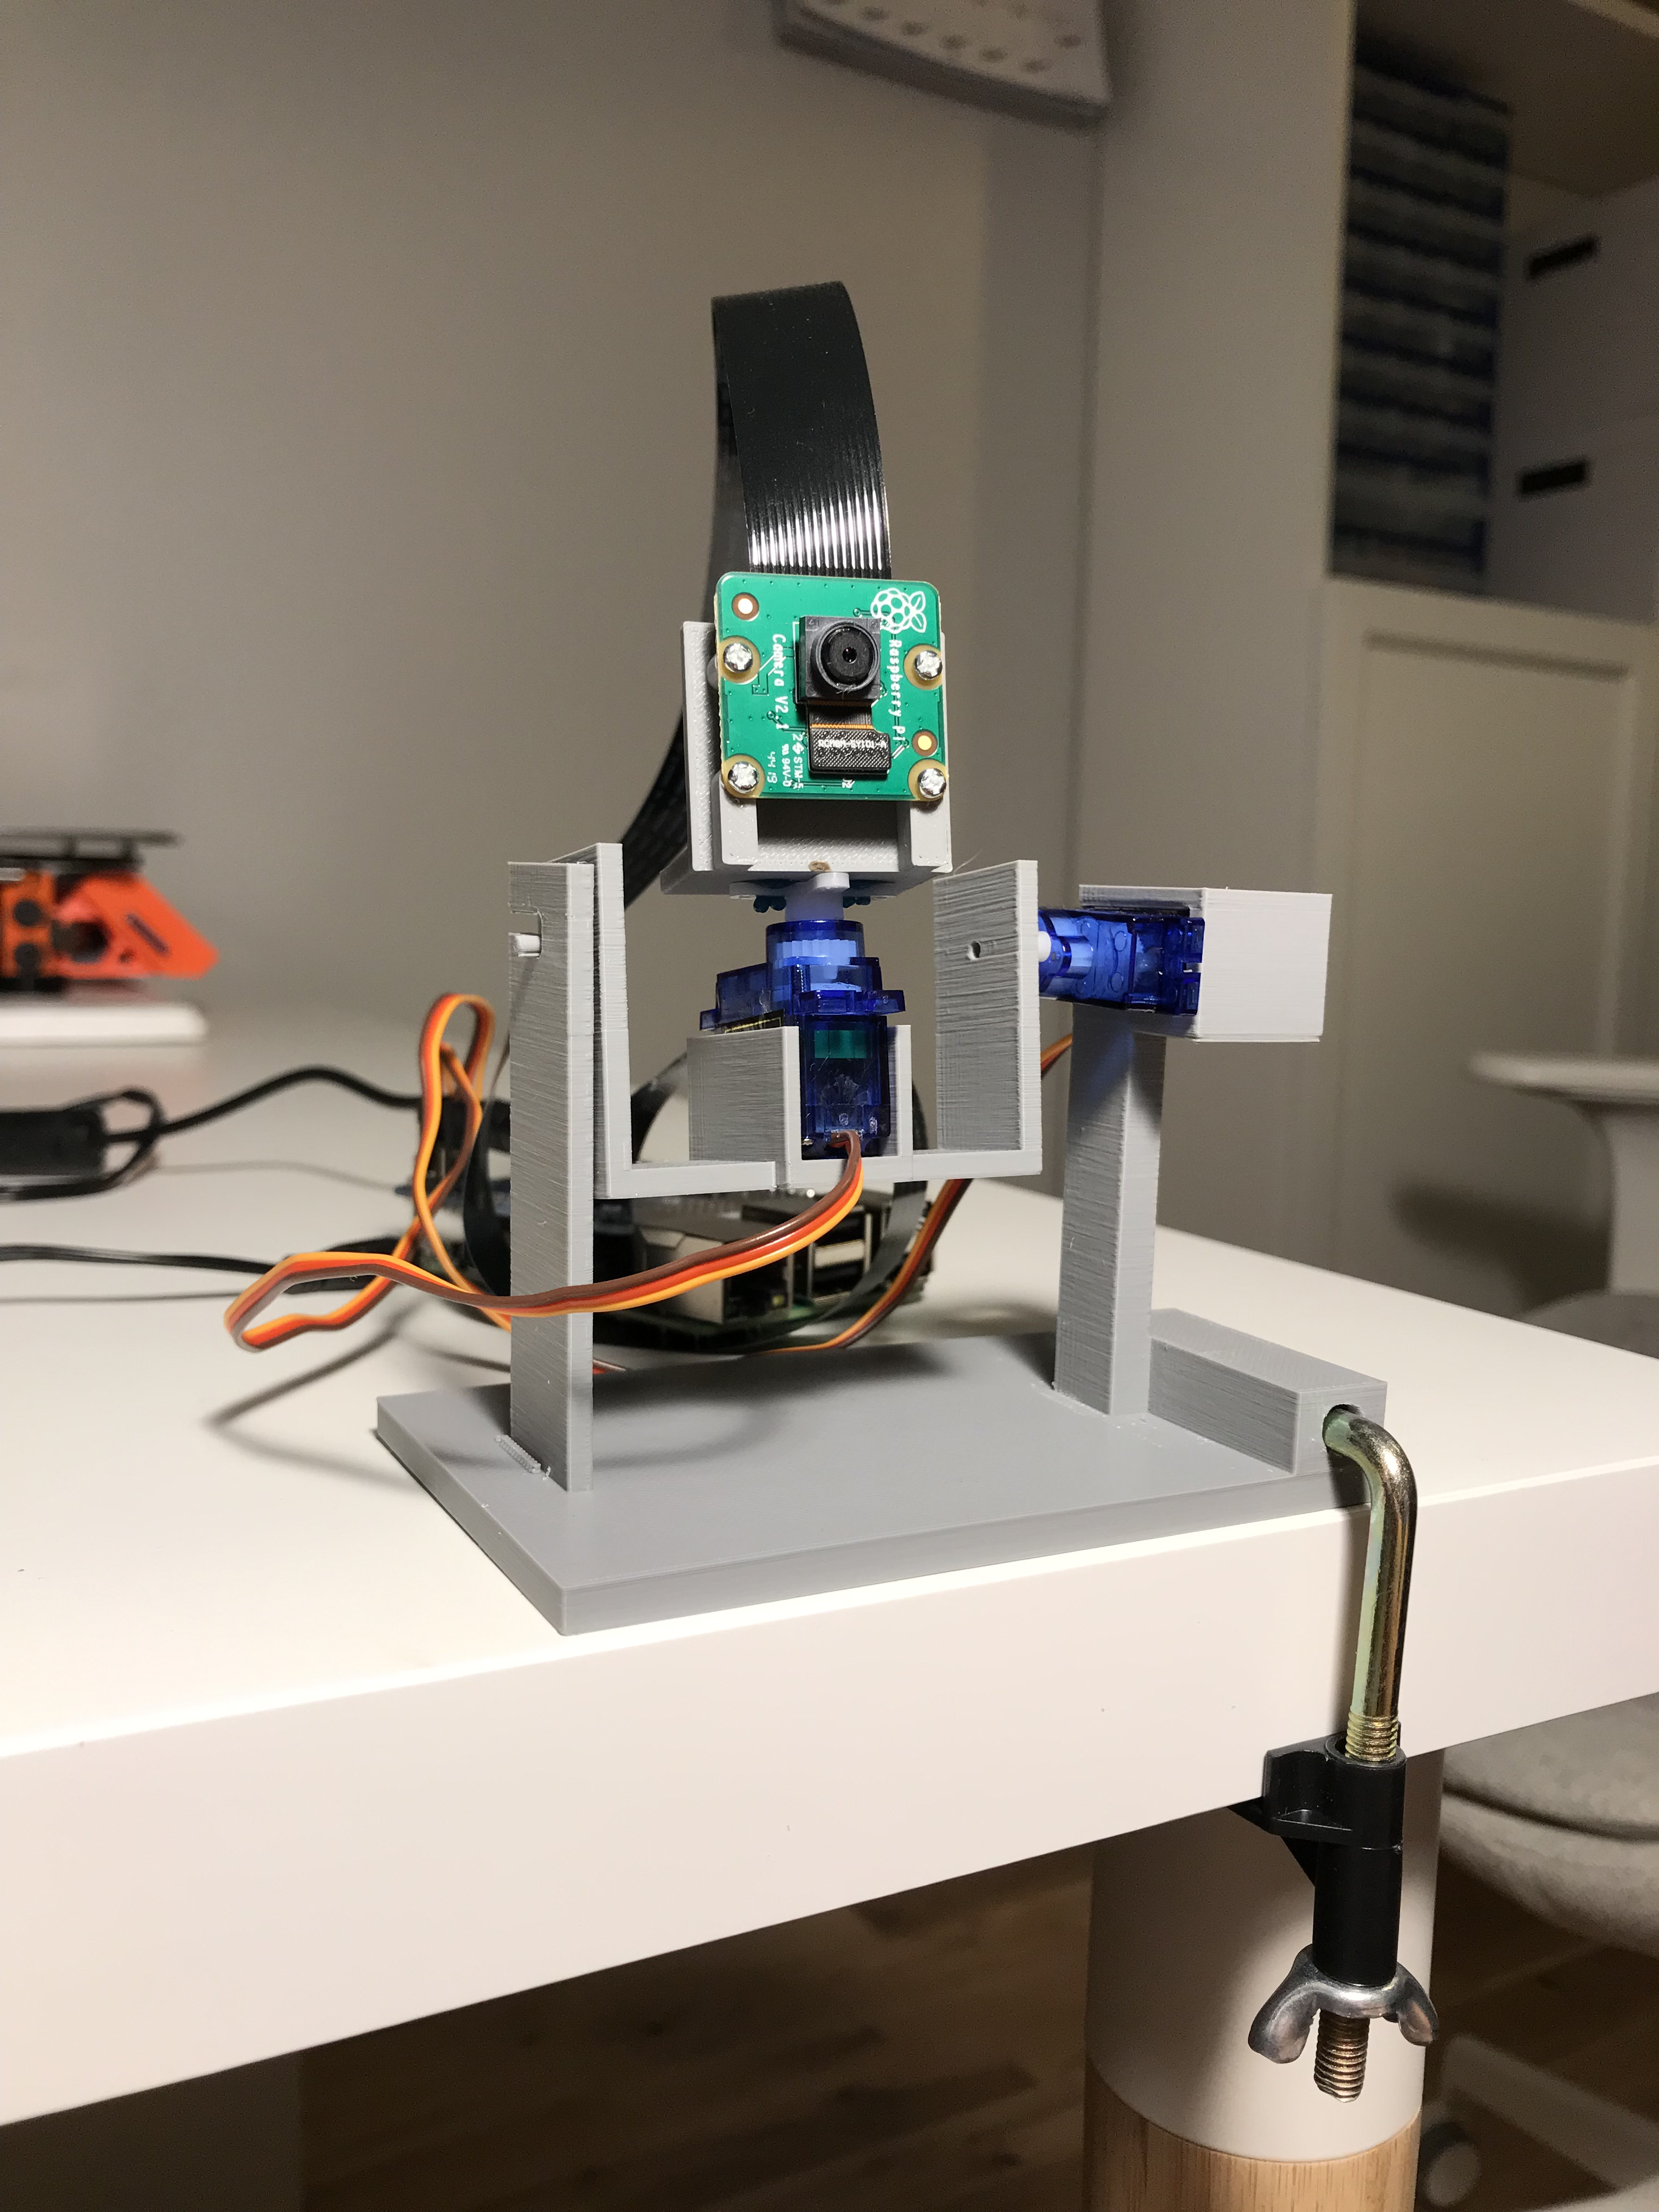
In this instructable I will walk you through the steps on how to make a a servo-driven turret with a raspberry pi camera module, which you control over the web.
Use it to spy on your cat or keep an eye on the kettle when you leave the room or any other situation where you need a third eye.
This is a fun and fairly beginner friendly introduction to servo-control with raspberry pi, servers, html, php and databases. It requires little to no prior knowledge on any of the mentioned subjects but will hopefully spark your interest and encourage you to learn more on those topics.
I will however assume you are a bit familiar with the raspberry and have used the camera module before, if not, check out a tutorial on how to set up and use the camera before starting this project.
I have used some 3D-printed parts for the turret (links are provided to STL-files) but if you dont have access to one of those, I will explain how you can make this project anyway.
Supplies
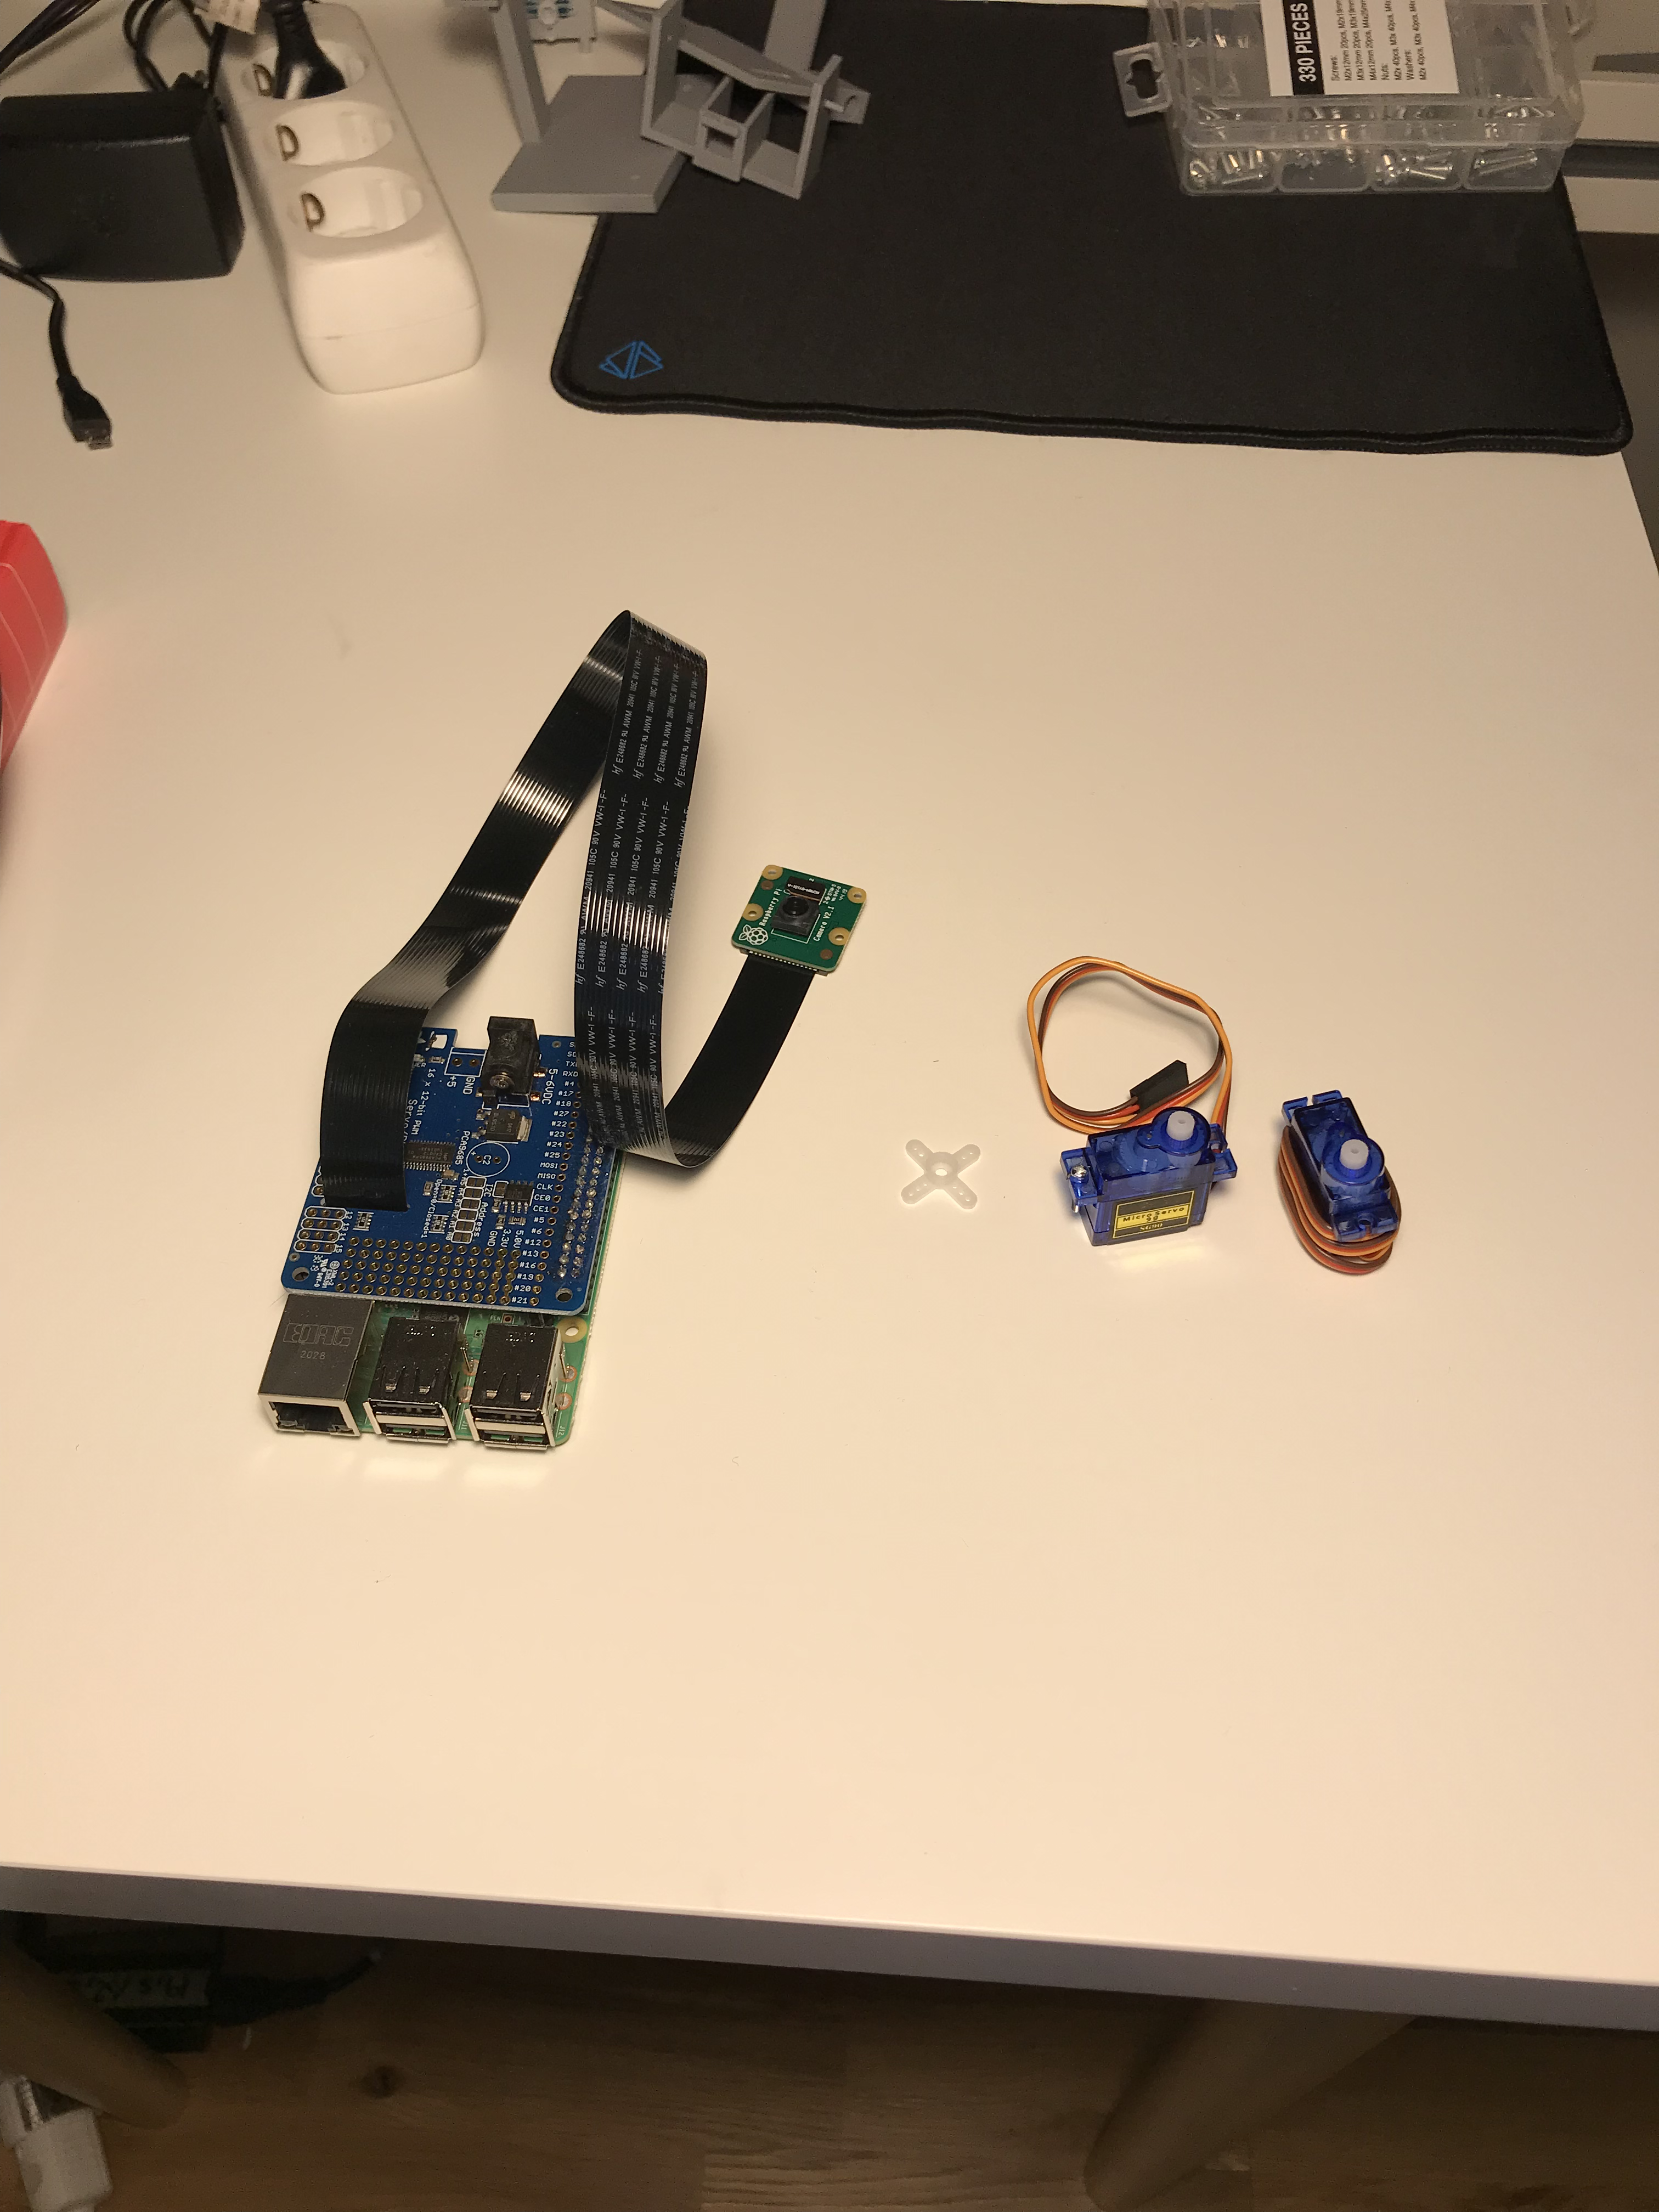
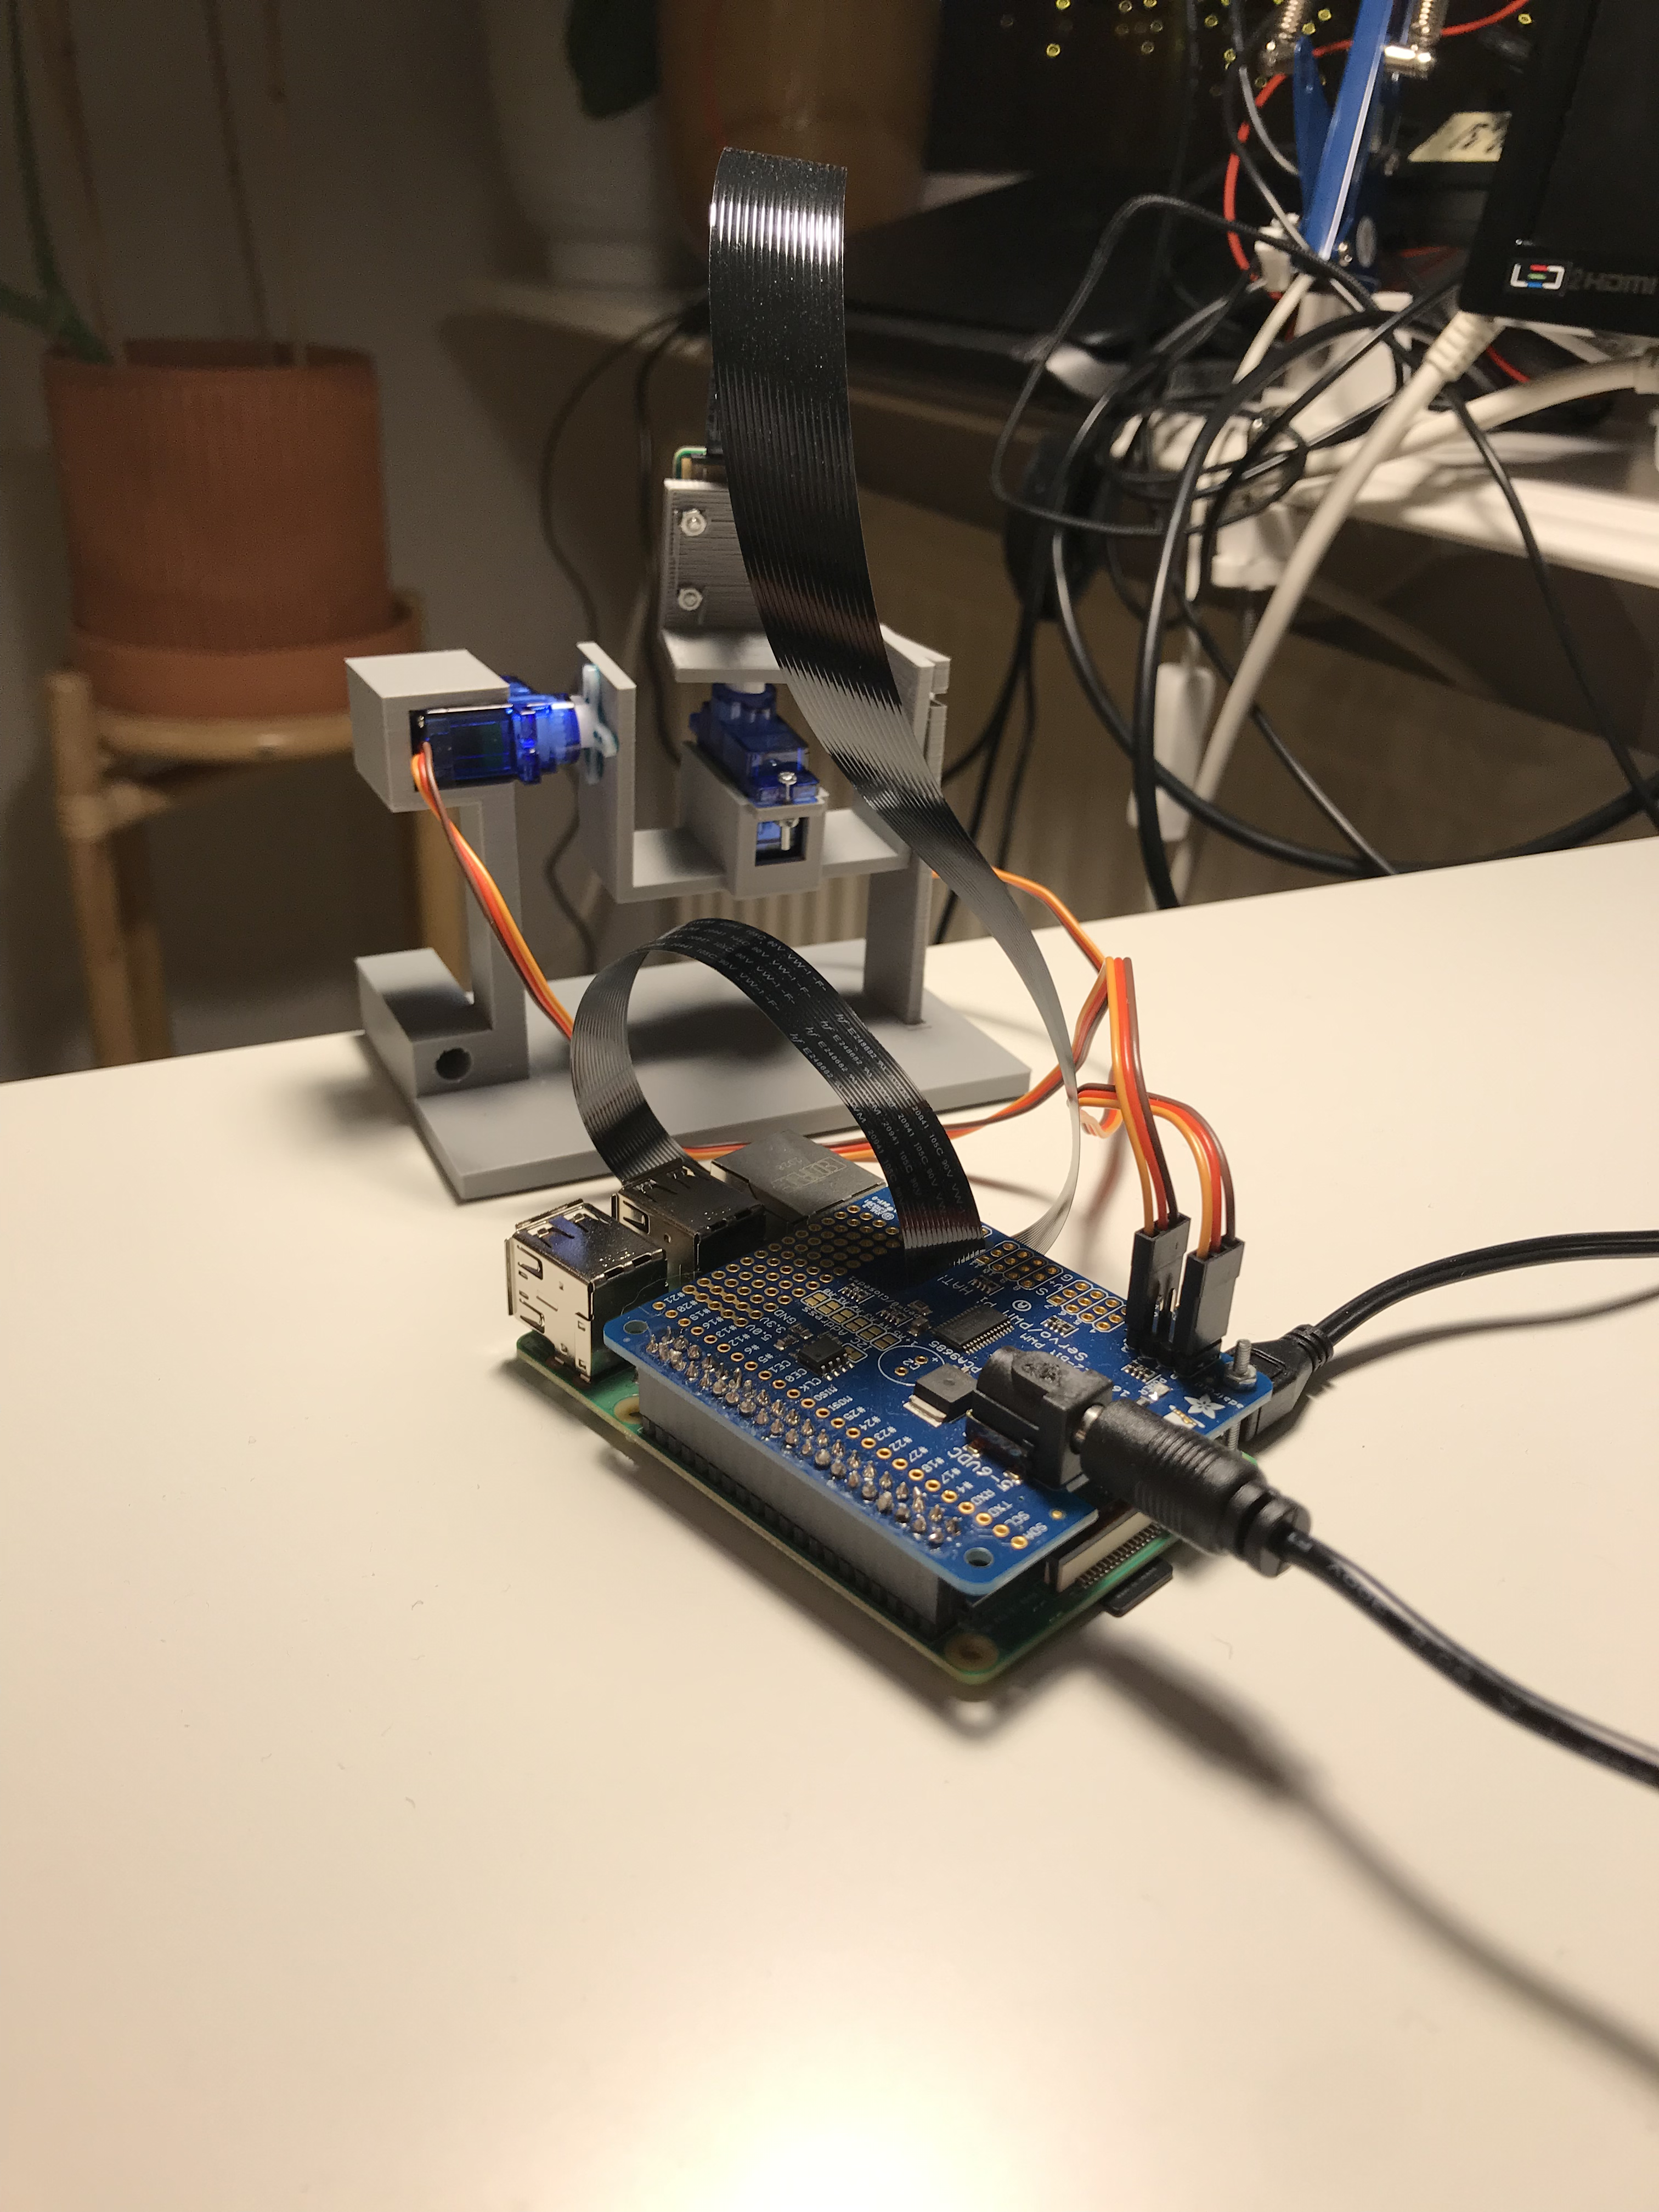
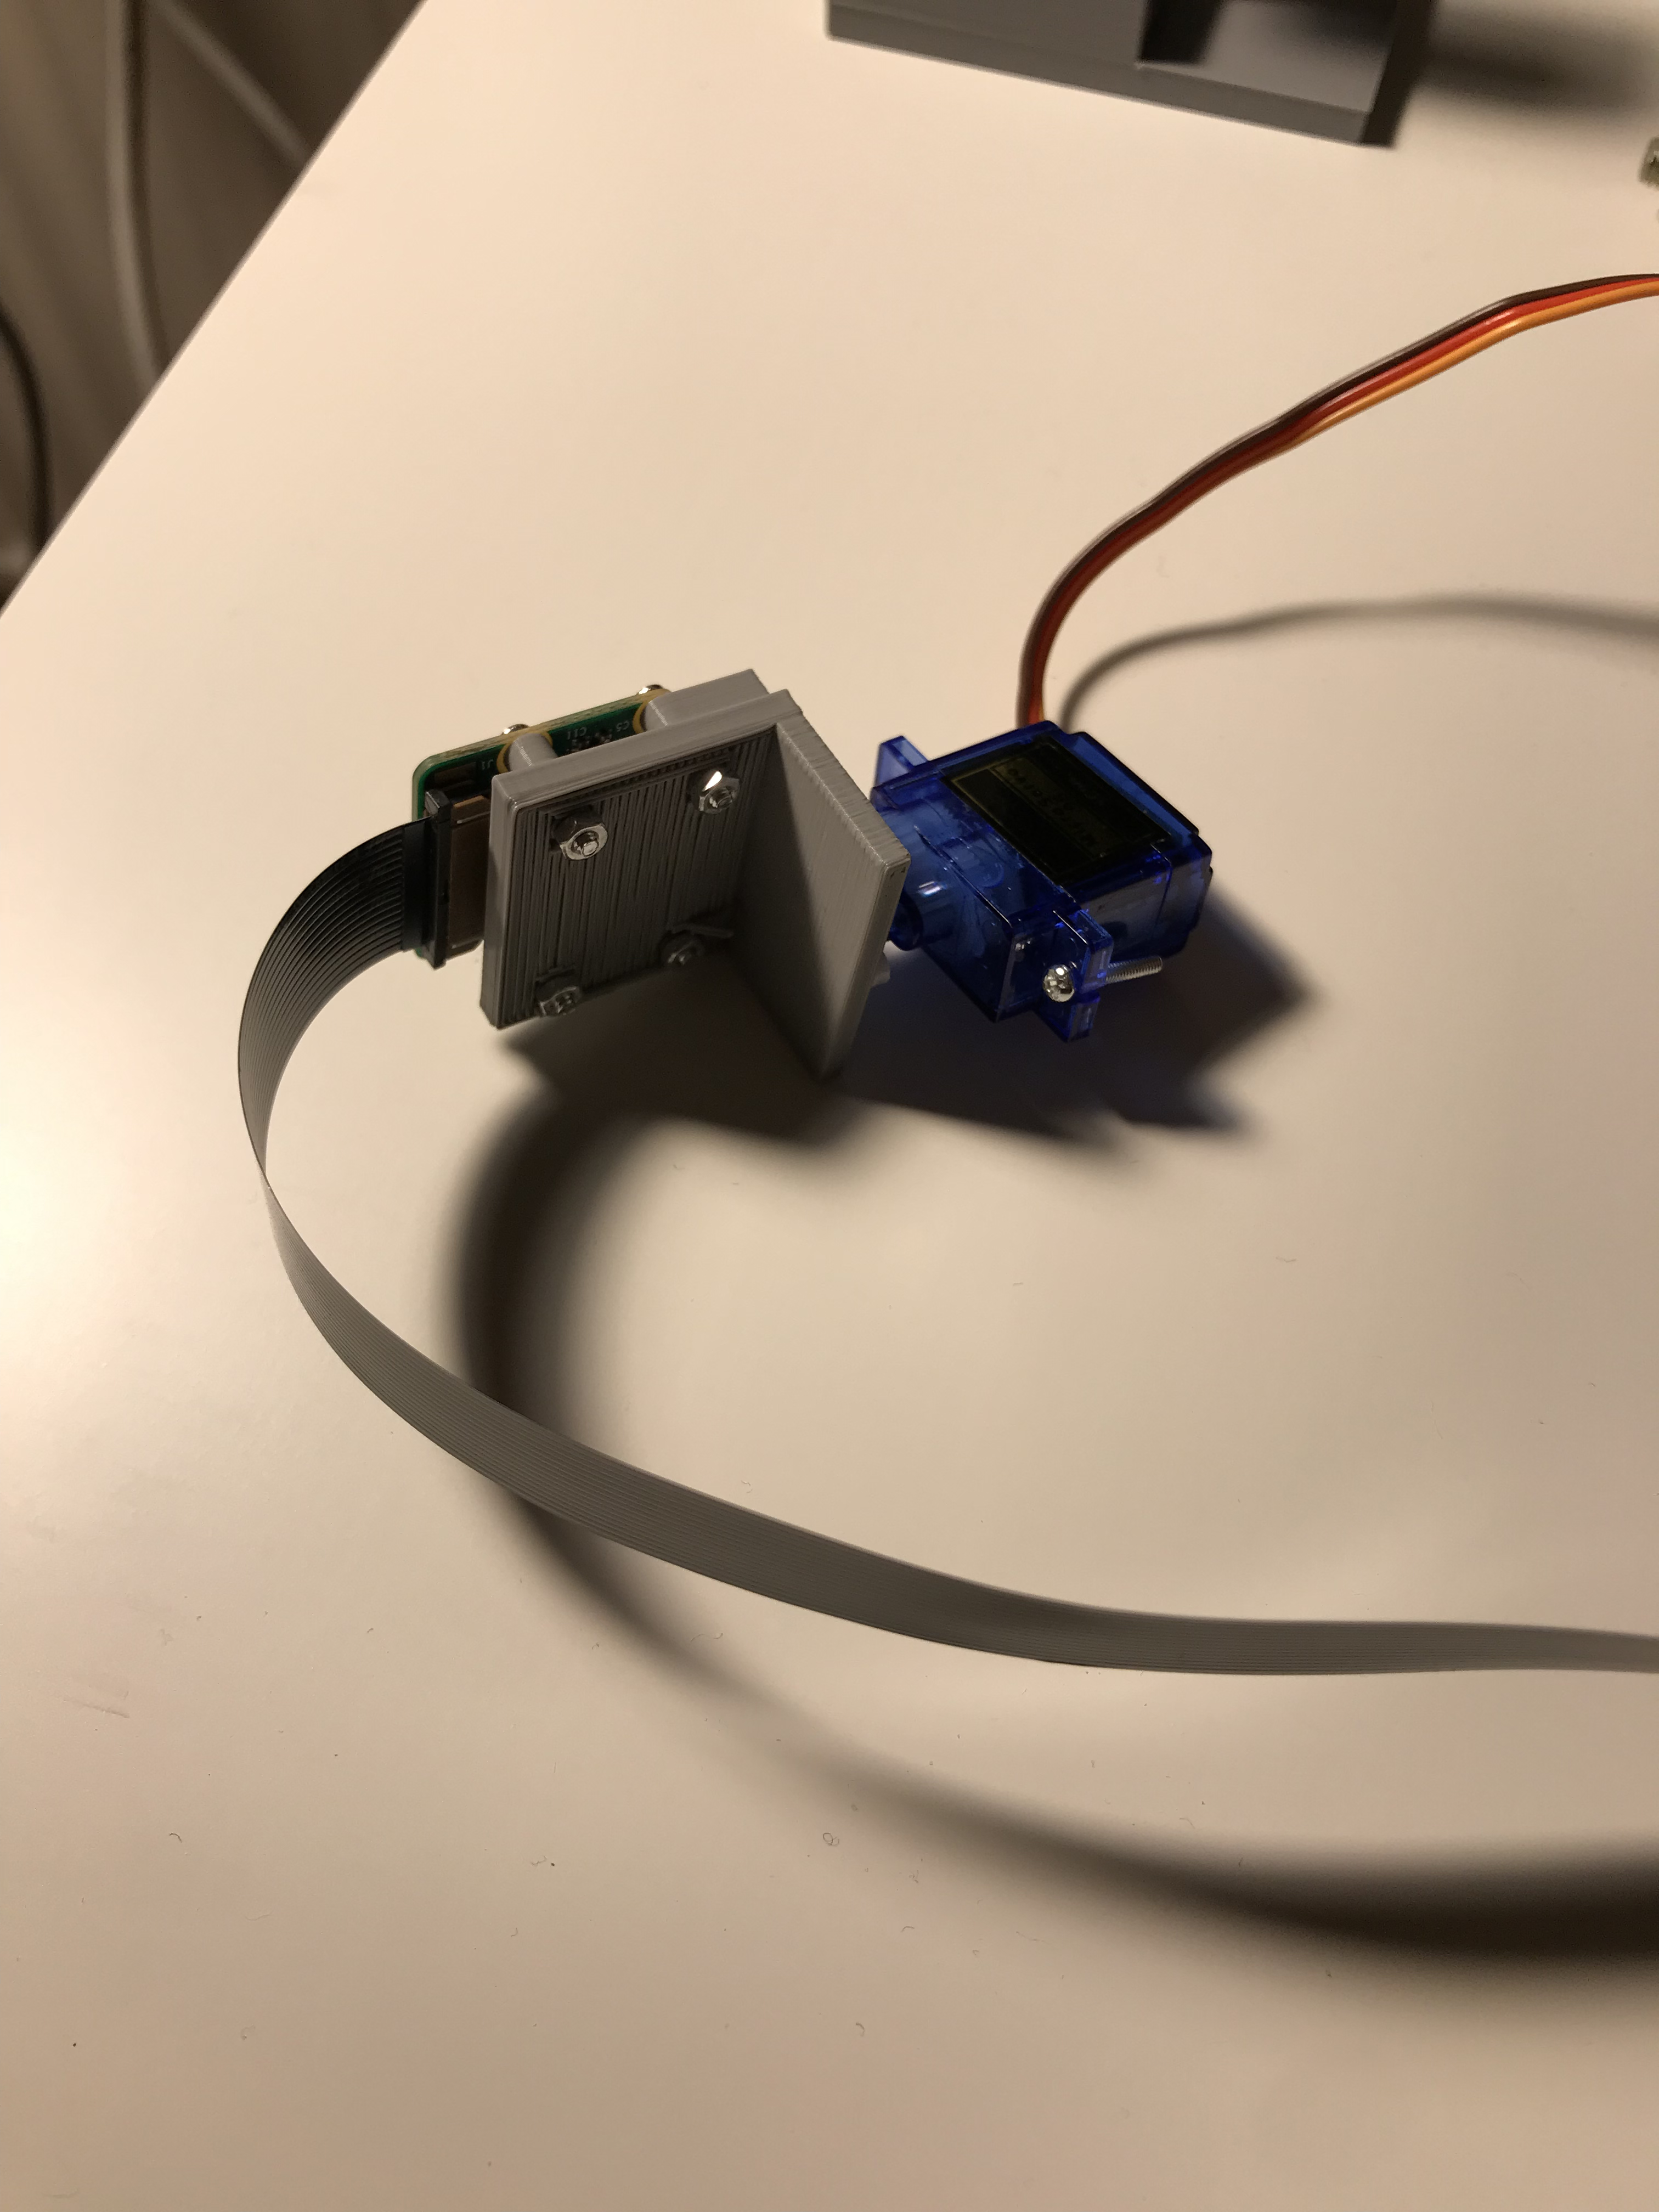
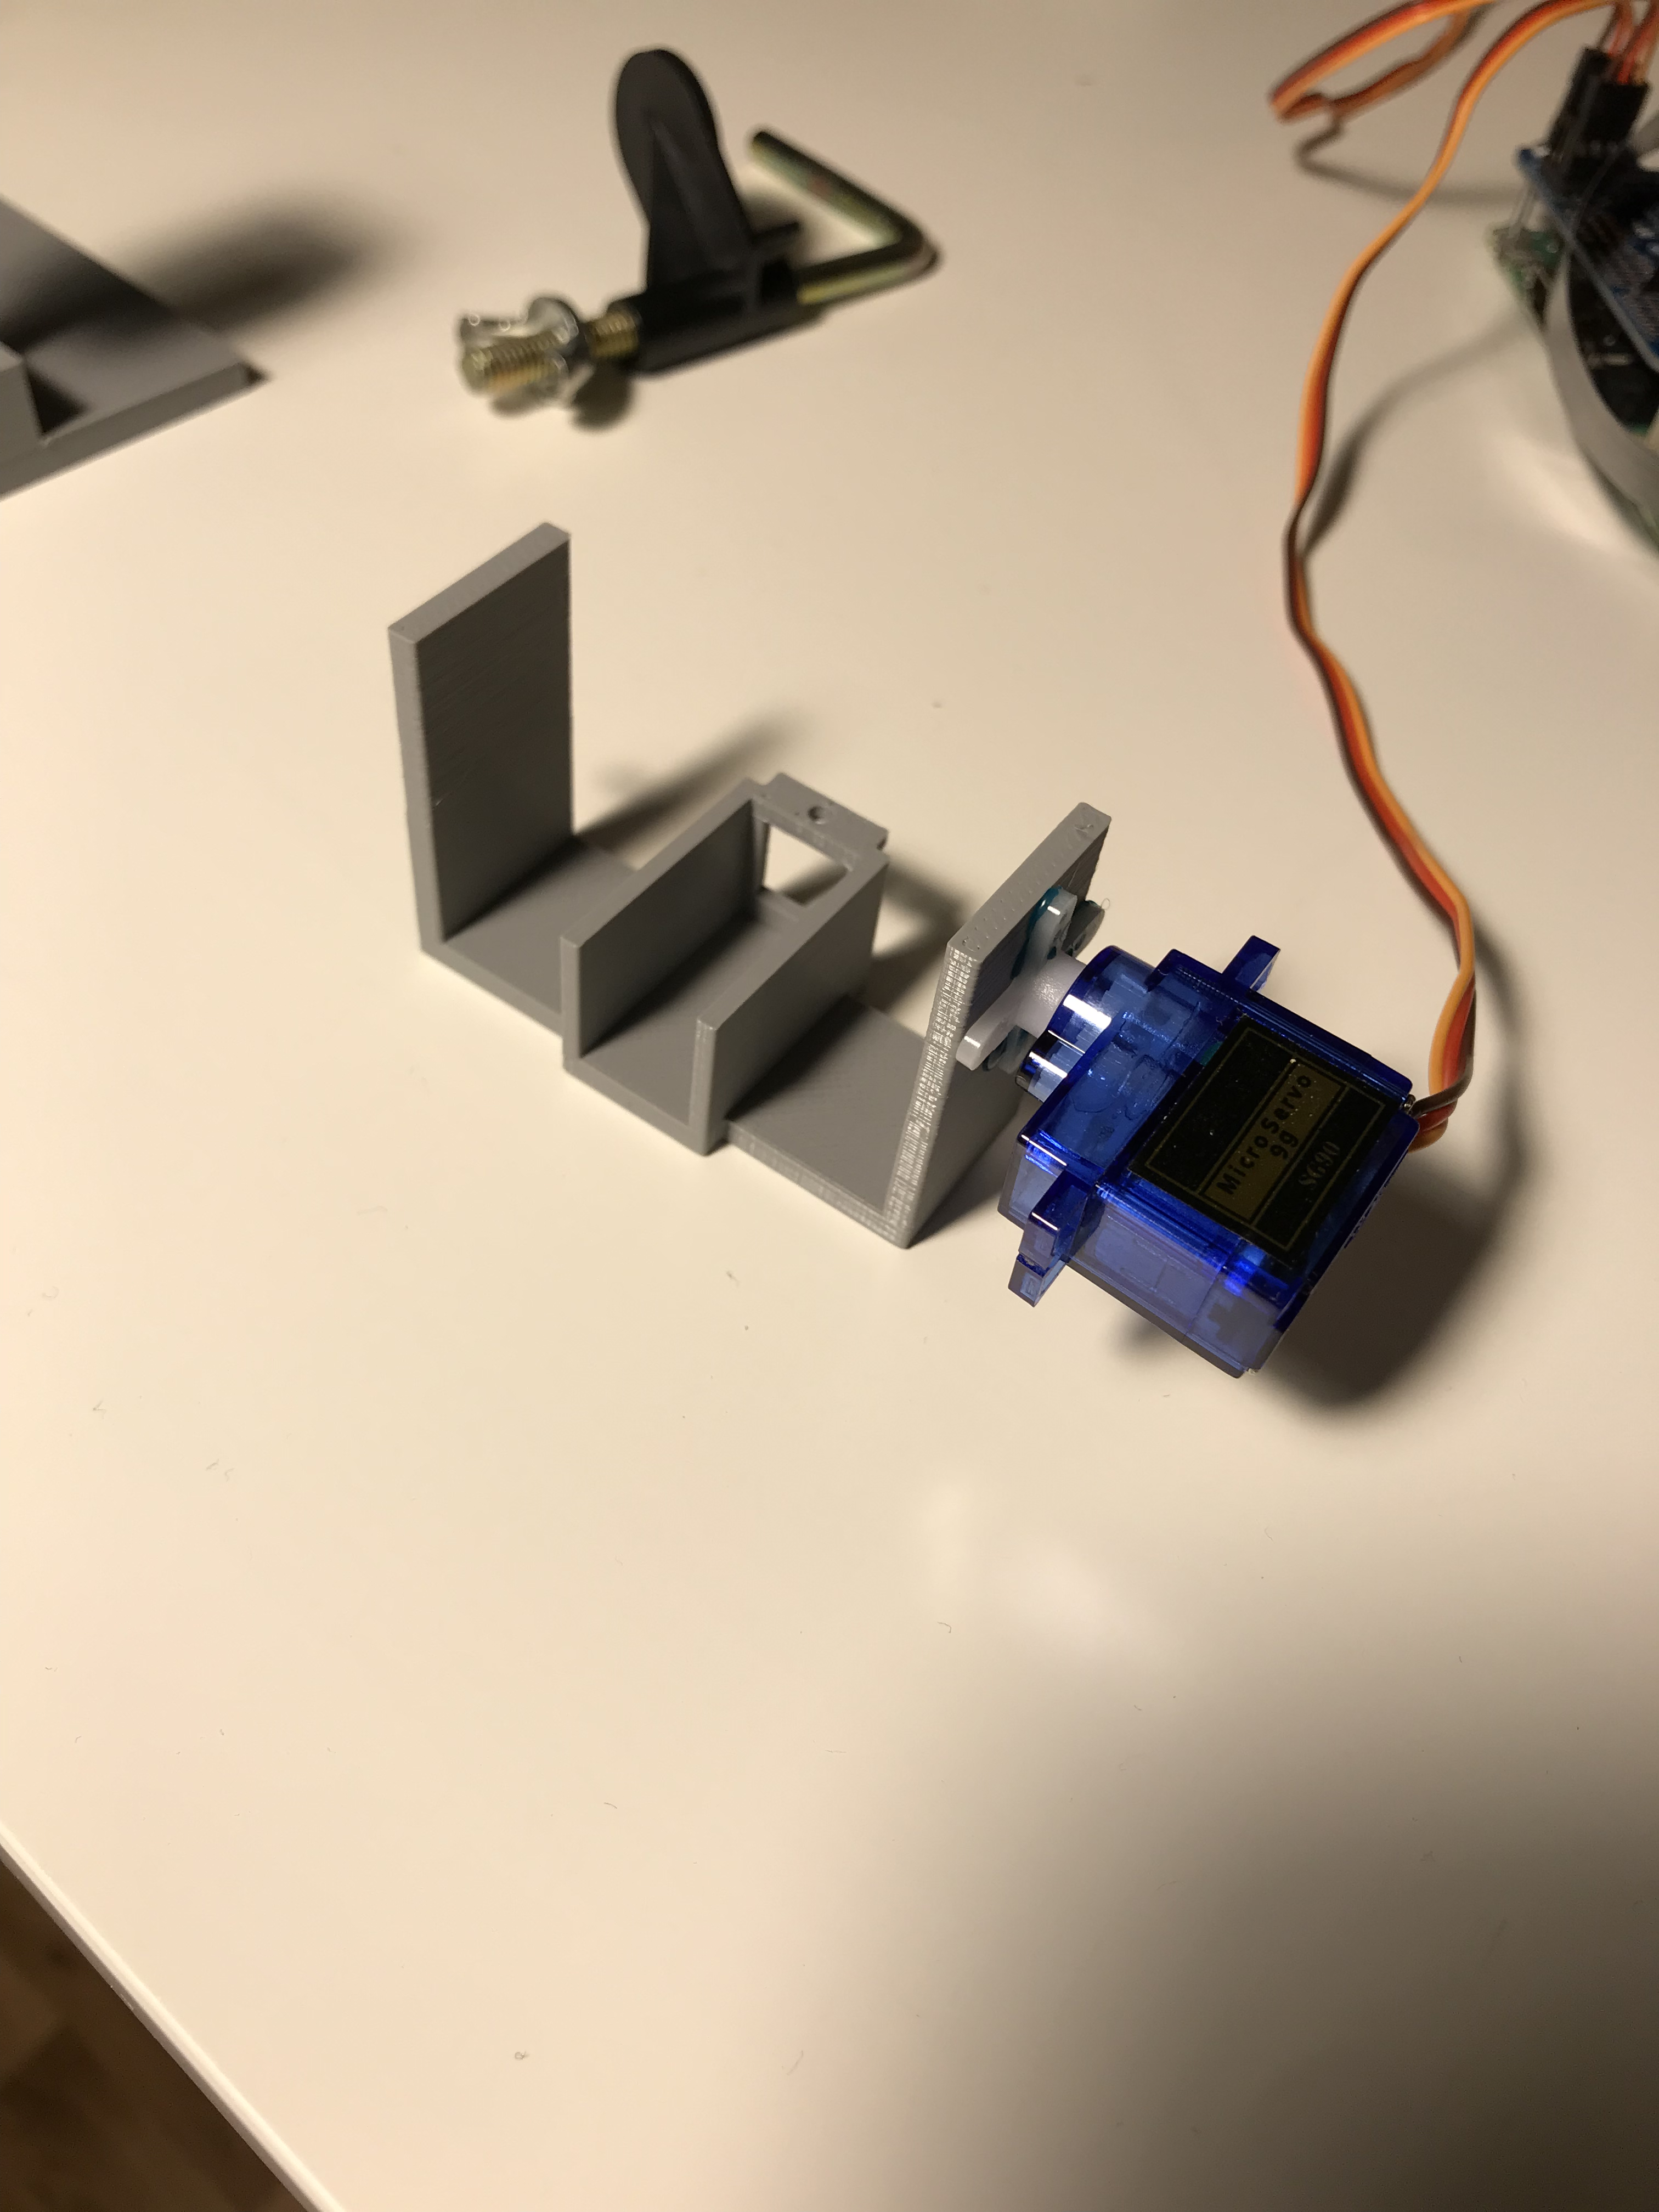
You will need:
- Raspberry pi (I use a 3B+, you can probably use any pi but I'm not sure a zero will be able to stream very fast)
- power supply
- microSD card
- Servo hat (I used this from adafruit: https://learn.adafruit.com/adafruit-16-channel-pwm-servo-hat-for-raspberry-pi/overview)
- Raspberry pi camera module
- 2 micro servo motors
Optional:
- 3D-printed parts
- 4-6 M2x12 screws with nuts
- Table clamp
- Hot glue gun
- Zip ties
Set Up Raspberry Pi and Make Sure Operating System Is Up to Date
I will assume you know how to set up your raspberry, if not, there are plenty of guides on other places that will explain this better than I can. You can probably do this with SSH but I recommend using screen and keyboard to your pi.
Attach the camera module to your pi with the ribbon cable.
After you have booted up your pi, run the following commands into a fresh terminal.
sudo apt-get update
sudo apt-get upgrade
Setting Up Camera Server
First you need to enable camera on your raspberry, enter the following commands on your terminal.
pi@raspberry:~ $ sudo raspi-config
Select interfacing options and enable camera control.
While you are in the configurations, enable i2c, we will need this later.
Then reboot your pi.
Now we will create a python script which will create a server with a camera stream, open Thonny or the code editor of your choice and enter the following code:
# Web streaming example
# Source code from the official PiCamera package
# http://picamera.readthedocs.io/en/latest/recipes2.html#web-streaming

import io
import picamera
import logging
import socketserver
from threading import Condition
from http import server

PAGE="""\
<html>
<head>
<title>Raspberry Pi - Surveillance Camera</title>
</head>
<body>
<center><h1>Raspberry Pi - Surveillance Camera</h1></center>
<center><img src="stream.mjpg" width="640" height="480"></center>
</body>
</html>
"""

class StreamingOutput(object):
    def __init__(self):
        self.frame = None
        self.buffer = io.BytesIO()
        self.condition = Condition()

    def write(self, buf):
        if buf.startswith(b'\xff\xd8'):
            # New frame, copy the existing buffer's content and notify all
            # clients it's available
            self.buffer.truncate()
            with self.condition:
                self.frame = self.buffer.getvalue()
                self.condition.notify_all()
            self.buffer.seek(0)
        return self.buffer.write(buf)

class StreamingHandler(server.BaseHTTPRequestHandler):
    def do_GET(self):
        if self.path == '/':
            self.send_response(301)
            self.send_header('Location', '/index.html')
            self.end_headers()
        elif self.path == '/index.html':
            content = PAGE.encode('utf-8')
            self.send_response(200)
            self.send_header('Content-Type', 'text/html')
            self.send_header('Content-Length', len(content))
            self.end_headers()
            self.wfile.write(content)
        elif self.path == '/stream.mjpg':
            self.send_response(200)
            self.send_header('Age', 0)
            self.send_header('Cache-Control', 'no-cache, private')
            self.send_header('Pragma', 'no-cache')
            self.send_header('Content-Type', 'multipart/x-mixed-replace; boundary=FRAME')
            self.end_headers()
            try:
                while True:
                    with output.condition:
                        output.condition.wait()
                        frame = output.frame
                    self.wfile.write(b'--FRAME\r\n')
                    self.send_header('Content-Type', 'image/jpeg')
                    self.send_header('Content-Length', len(frame))
                    self.end_headers()
                    self.wfile.write(frame)
                    self.wfile.write(b'\r\n')
            except Exception as e:
                logging.warning(
                    'Removed streaming client %s: %s',
                    self.client_address, str(e))
        else:
            self.send_error(404)
            self.end_headers()

class StreamingServer(socketserver.ThreadingMixIn, server.HTTPServer):
    allow_reuse_address = True
    daemon_threads = True

with picamera.PiCamera(resolution='640x480', framerate=24) as camera:
    output = StreamingOutput()
    camera.rotation = 180
    camera.start_recording(output, format='mjpeg')
    try:
        address = ('', 8000)
        server = StreamingServer(address, StreamingHandler)
        server.serve_forever()
    finally:
        camera.stop_recording()
Save the file as camera.py
The credit for this piece of code goes out to Random Nerd Tutorials, go to https://randomnerdtutorials.com/video-streaming-with-raspberry-pi-camera/#more-41863 to see the source of this part. They offer more interesting projects, it is a really cool place.
Open the terminal again and enter the following to start the streaming sever:
pi@raspberrypi:~ $ python3 camera.py
Note the piece of code near the end:
camera.rotation = 180
This will rotate the camera 180 degrees, which we will need later since we will mount the camera upside down but if your video is rotated weird, you may need to tinker with this (it is in degrees).
Now you need to know the ip of your pi, enter the following command:
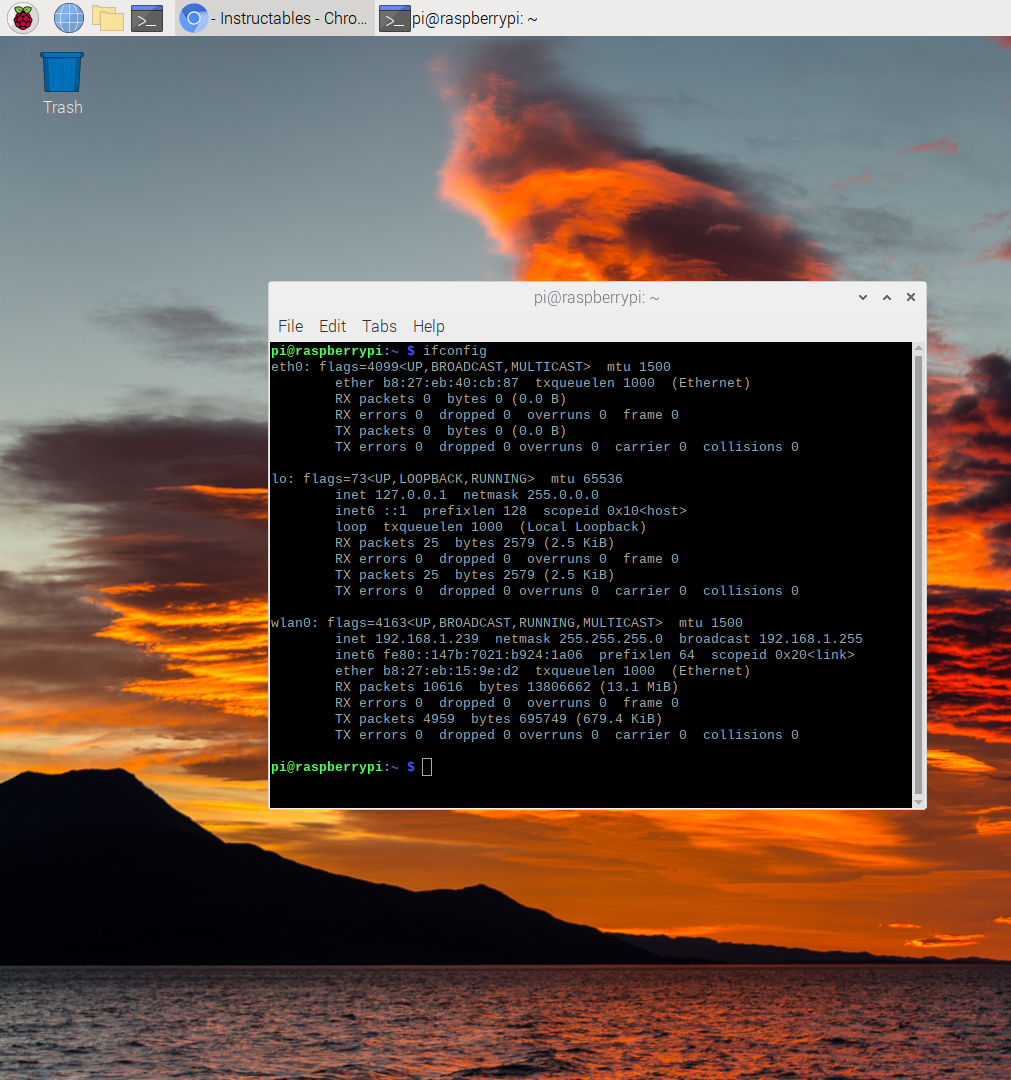
pi@raspberry:~ $ ifconfig
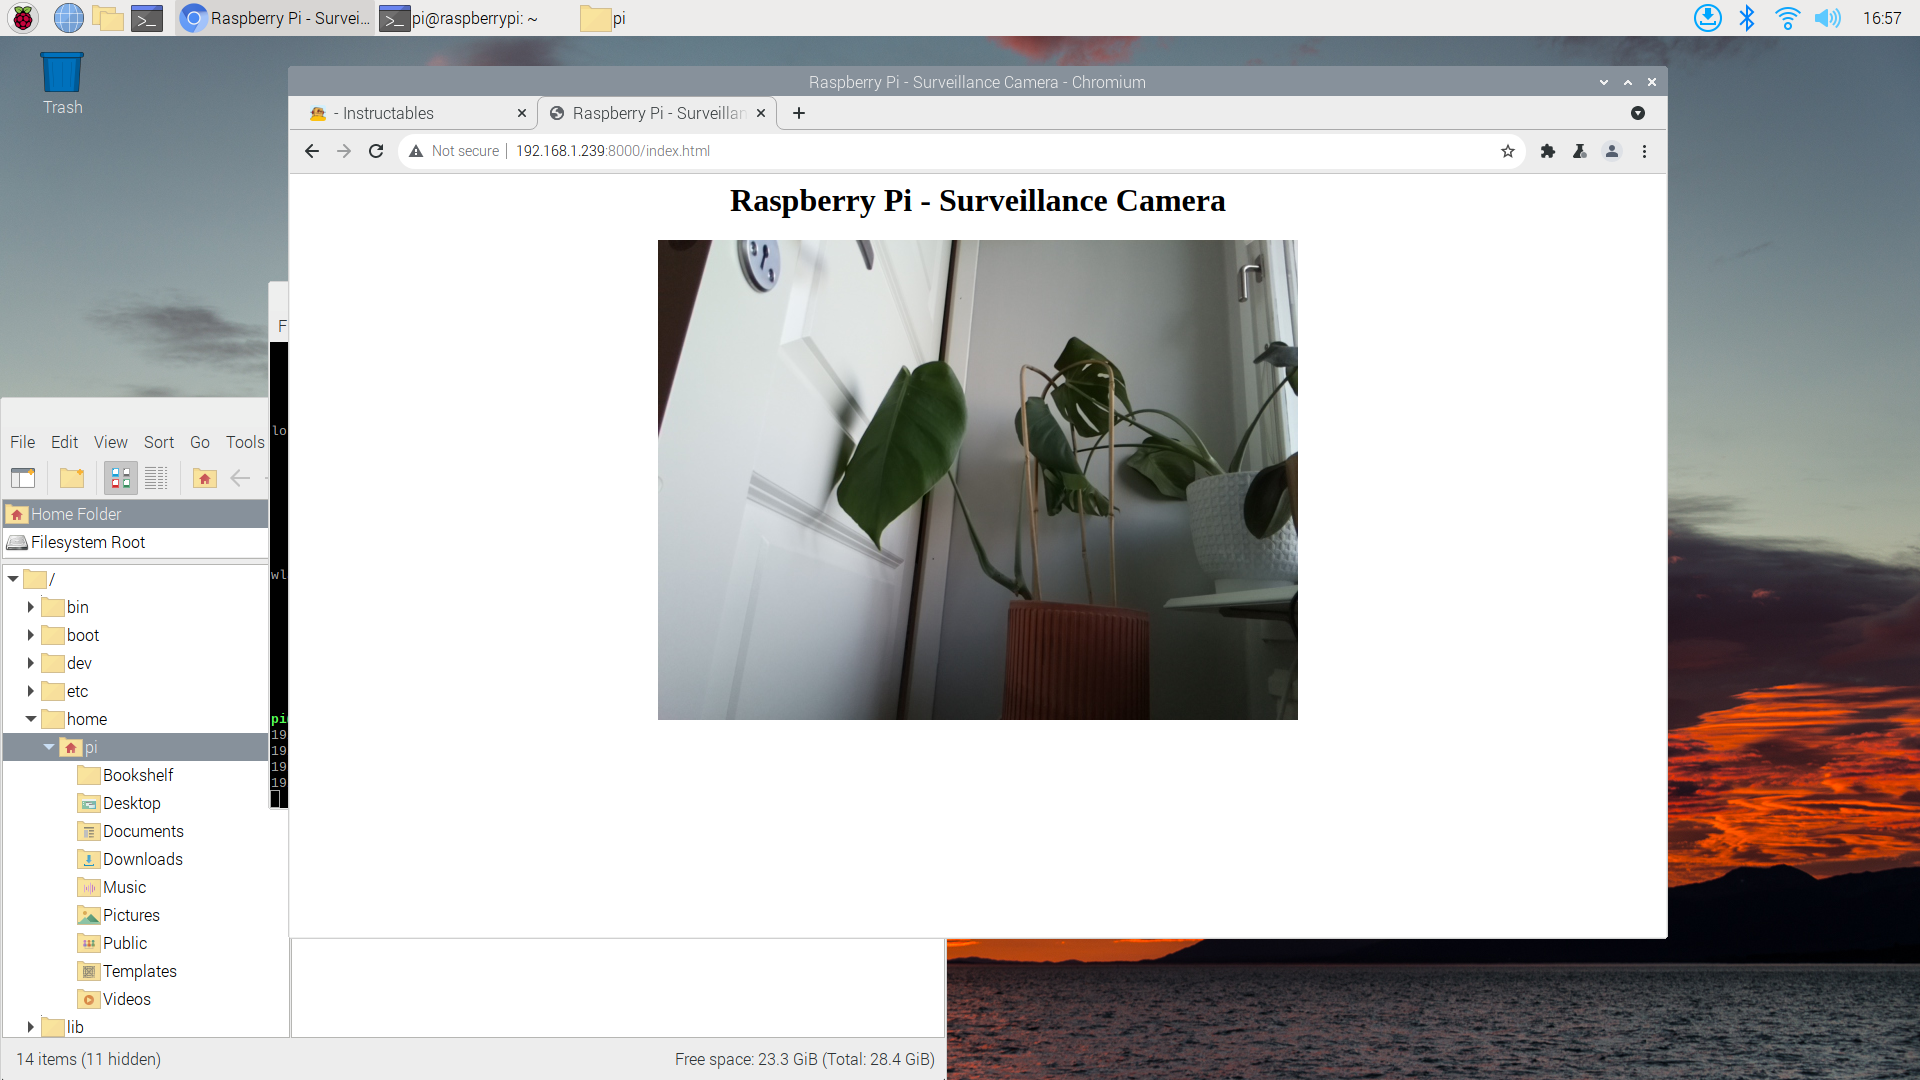
The pi:s ip is written in the beginning of the third block of text, after "inet addr:", copy this and enter it into a web browser, followd by ":8000" i.e. http://<Your_Pi_IP_Address>:8000
If you are met with a page with a functioning camera stream, continue to the next step.
Create an Apache Web Server
This step will guide you through the process of installing apache web server, create a web page, create a databse and add the ability to edit the database from the web page.
In a new terminal window, enter the following code:
pi@raspberry:~ $ sudo apt-get install apache2
Go to the following directory by entering in and list the files:
pi@raspberry:~ $ cd /var/www/html
pi@raspberrypi:/var/www/html $ ls
If a file is presented named index.html, everything worked out.
Open a new web browser and enter the pi:s ip adress like before but skip the :8000 at the end. Hopefully you are met with the Apache Debian Default Page, otherwise something went wrong, try the previous step again.
To try your new server out, open the index.html file in the text editor of your choice, I use Geany for this.
Enter the text "Hello World" and save it. refresh the web page and your greeting should be displayed.
Install PHP
If you are unfamiliar with PHP, it is a programminglanguage used to program the back end of web pages. It is still very widely used even if more and more pages use server frameworks with javascript or python.
It is as easy as entering:
pi@raspberrypi:/var/www/html $ sudo apt-get install php
When the installation is done, remove the index.html file by entering:
pi@raspberrypi:/var/www/html $ sudo rm index.html
Then create a new file called index.php with the same greeting as before but created by PHP, in the same directory, you can do this by entering:
pi@raspberrypi:/var/www/html $ sudo nano index.php
and the enter the code
<?php echo "Hello World, but with PHP"; ?>
Then press CTRL + X and the Y to save.
Or you can create a new file in Geany, enter the code and then save it as index.php, either works.
Enter into the terminal window to refresh the server:
pi@raspberrypi:/var/www/html $ sudo service apache2 restart
Update the broswer window and you should be greeted with the text you just entered.
Install MySQL
It is time to install MySQL, which is a very popular database.
Just enter:
pi@raspberrypi:/var/www/html $ sudo apt-get install mariadb-server php-mysql
pi@raspberrypi:/var/www/html $ sudo service apache2 restart
pi@raspberrypi:/var/www/html $ sudo mysql_secure_installation
You will be prompted to set a root password, choose a good one and remember it as you will need it in a second. Then you will be promted to enter it again.
After this you will get a series of questions, just press Y to answer Yes to all of them. When this is done, you will be greeted with the text "Thanks for using MariaDB!".
Now you will need to update the permission on your web server files, I actually have no idea myself how this works but enter the followng code into the terminal:
pi@raspberrypi:~ $ cd /home
pi@raspberrypi:~ $ ls -lh /var/www/
pi@raspberrypi:~ $ sudo chown -R pi:www-data /var/www/html/
pi@raspberrypi:~ $ sudo chmod -R 770 /var/www/html/
pi@raspberrypi:~ $ ls -lh /var/www/
Now you are all set! Time to add some fancy code to your new server.
Create a Web Page and Attach a Database
Now we will create a new database and create a table in the database. In that table we will create a row which will have 2 columns which we will store the position of the servos which will controll the turret later.
Open the file index.php and clear all code previously in it.
Enter the following code to the file.
<?php
$servername = "localhost";
$username = "root";
$password = "raspberry";

// Create connection
$conn = new mysqli($servername, $username, $password);

// Check connection
if ($conn->connect_error) {
 die("Connection failed: " . $conn->connect_error);
}
echo "";

//Create database camproj2
$sql = "CREATE DATABASE IF NOT EXISTS camproj2";
if ($conn->query($sql) === TRUE) {
   echo "";
} else {
   echo "Error vreating database: " . $conn->error;
}

$conn->close();

//This time we will connect again but directly to the newly created database
$servername = "localhost";
$username = "root";
$password = "raspberry";
$dbname = "camproj2";

//Create connection
$conn = new mysqli($servername, $username, $password, $dbname);

// Check connection
if ($conn->connect_error) {
 die("Connection failed: " . $conn->connect_error);
}
echo "";

//Create a table called angles
$sql = "CREATE TABLE IF NOT EXISTS angles (
id INT(6) UNSIGNED AUTO_INCREMENT PRIMARY KEY,
pan INT(6) NOT NULL,
tilt INT(6) NOT NULL
)";

if ($conn->query($sql) === TRUE) {
   echo "";
} else {
   echo "Error creating table: " . $conn->error;
}

//Create a row in table angles. You only need to do this once
//If yo let this snippet be in the code after the initial creation,
//You will create another row everytime you run the script
$sql = "INSERT INTO angles (pan, tilt) VALUES ('90','90')";

if ($conn->query($sql) === TRUE) {
   echo "";
} else {
   echo "Error: " . $sql . "<br>" . $conn->error;
}

//Check if the HTML form have submitted new values updating current fields
if(!empty(($_POST['pan']))) $pan = $_POST['pan'];
if(!empty(($_POST['tilt']))) $tilt = $_POST['tilt'];
$sql = "UPDATE angles SET pan=$pan, tilt=$tilt WHERE id=1";
$conn->query($sql);

//Checking if the newly stored values are valid and messages the user otherwise
$sql = "SELECT pan, tilt FROM angles WHERE id=1";
$result = $conn->query($sql);

if ($result->num_rows > 0) {
   while ($row = $result->fetch_assoc()) {
      $pan = $row["pan"];
      if ($pan <0){
         $pan = 0;
         $panMessage = "Angles must be greater than 0 and smaller than 180";
      } elseif ($pan > 180){
         $pan = 180;
         $panMessage = "Angles must be greater than 0 and smaller than 180";
      } else {
         $panMessage = "";
      }

      $tilt = $row["tilt"];
      if ($tilt <0){
         $tilt = 0;
         $tiltMessage = "Angles must be greater than 0 and smaller than 180";
      } elseif ($tilt > 180){
         $tilt = 180;
         $tiltMessage = "Angles must be greater than 0 and smaller than 180";
      } else {
         $tiltMessage = "";
      }
   }
} else {
   echo "0 reults";

}


$conn->close();


//HTML code
echo <<<_END
   <html>
   <img src="http://192.168.1.239:8000/stream.mjpg">

   <h1>
      Pan is: $pan<br>
      Tilt is: $tilt<br>
   </h1>
   <form method="post" action="index.php">
   Pan
   <input type="int" name="pan">
   <p>$panMessage</p>
   <br>Tilt
   <input type="int" name="tilt">
   <p>$tiltMessage</p>
   <input type="submit">
   </form>
   </html>
_END;


?>
The code chunks which I have marked with used once is only used once and can therefore be removed from the script once the script has successfully been run. It will not hurt the performance to leave it in so if you are uncomfortable with php and don't want to mess with it, you can leave it. The worst that will happen is that you may get one more row every time you run the script, but since we will only use the first one, this doesn't matter.
Restart the apache server again by entering:
pi@raspberry:~ $ sudo service apache2 restart
And the update your web broswer window with the ip adress in the search bar.
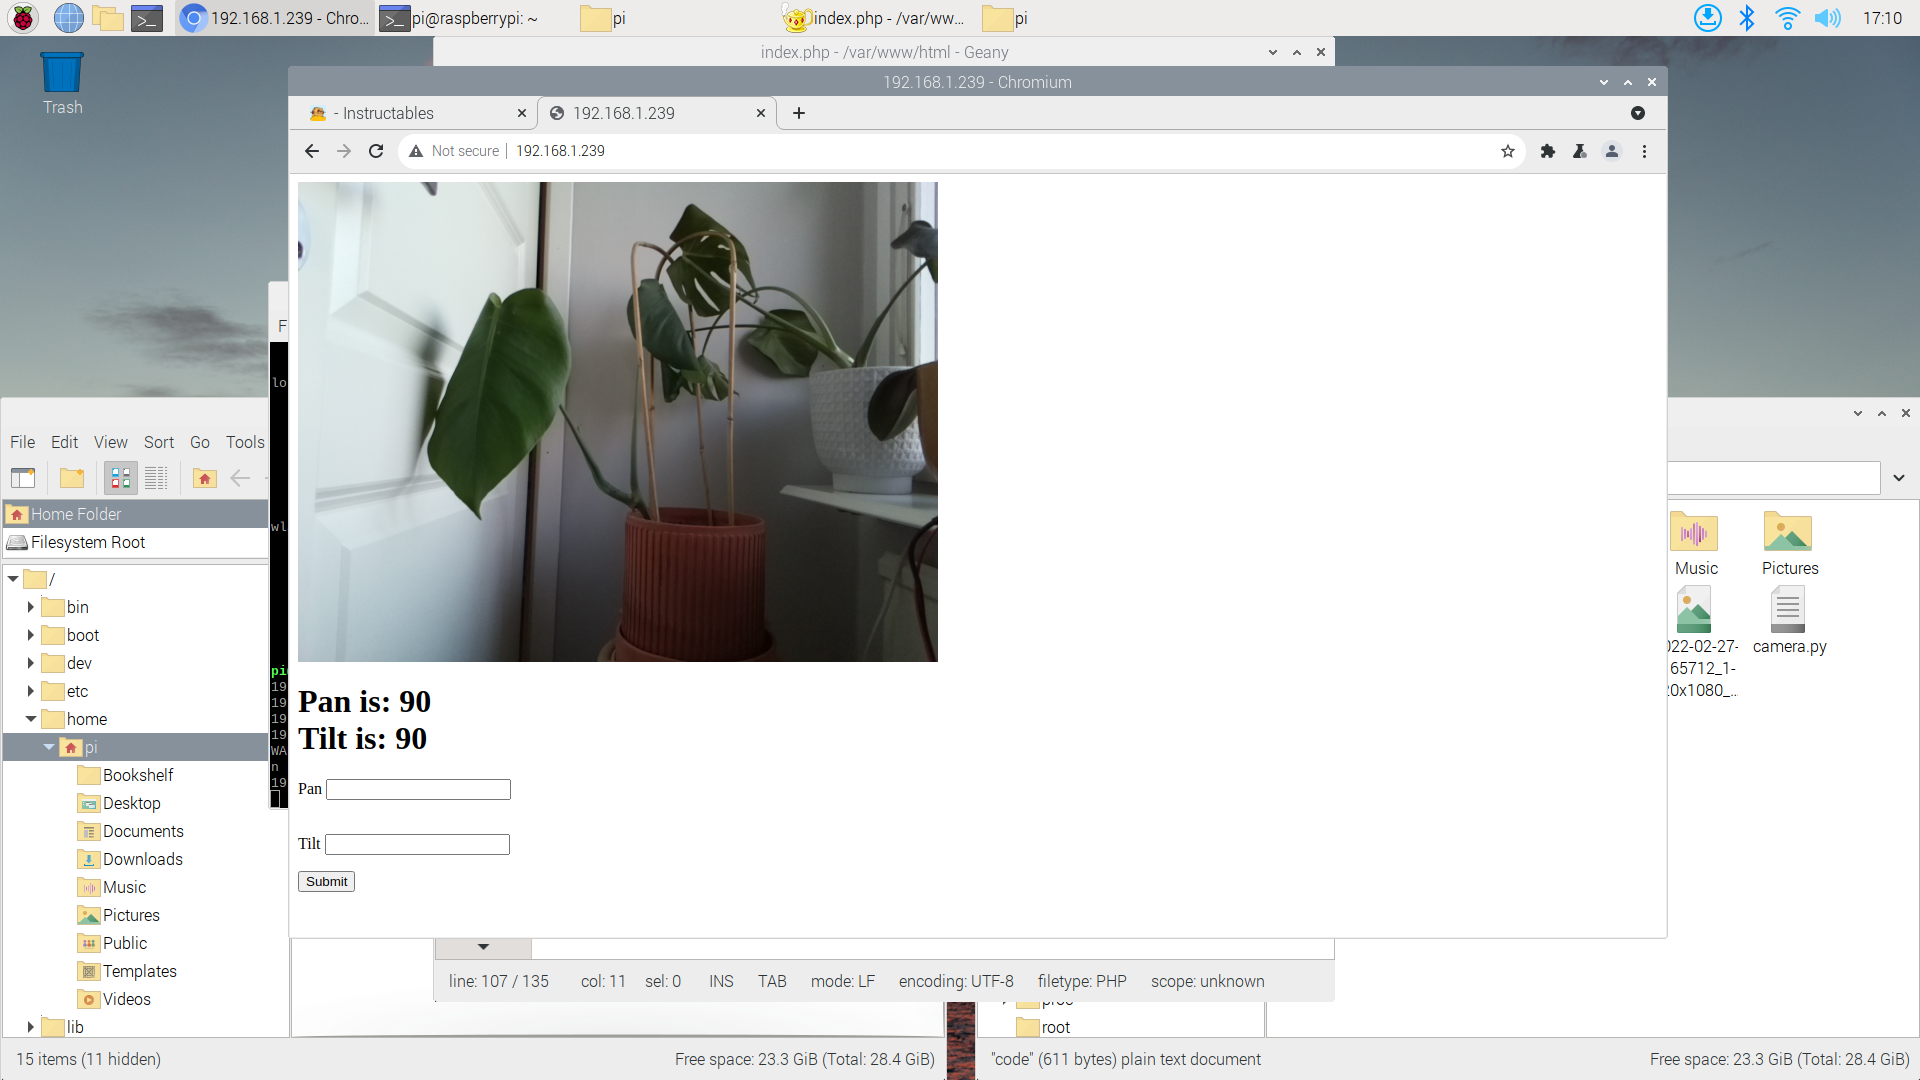
Hopefully you will be met with something lile this.
Try to enter new values for the pan and tilt fields and click submit (or Enter).
If the text updates, the databse works.
But notice how the camera didn't move, we need to fix that next.
Mount the Motors and Camera on Turret
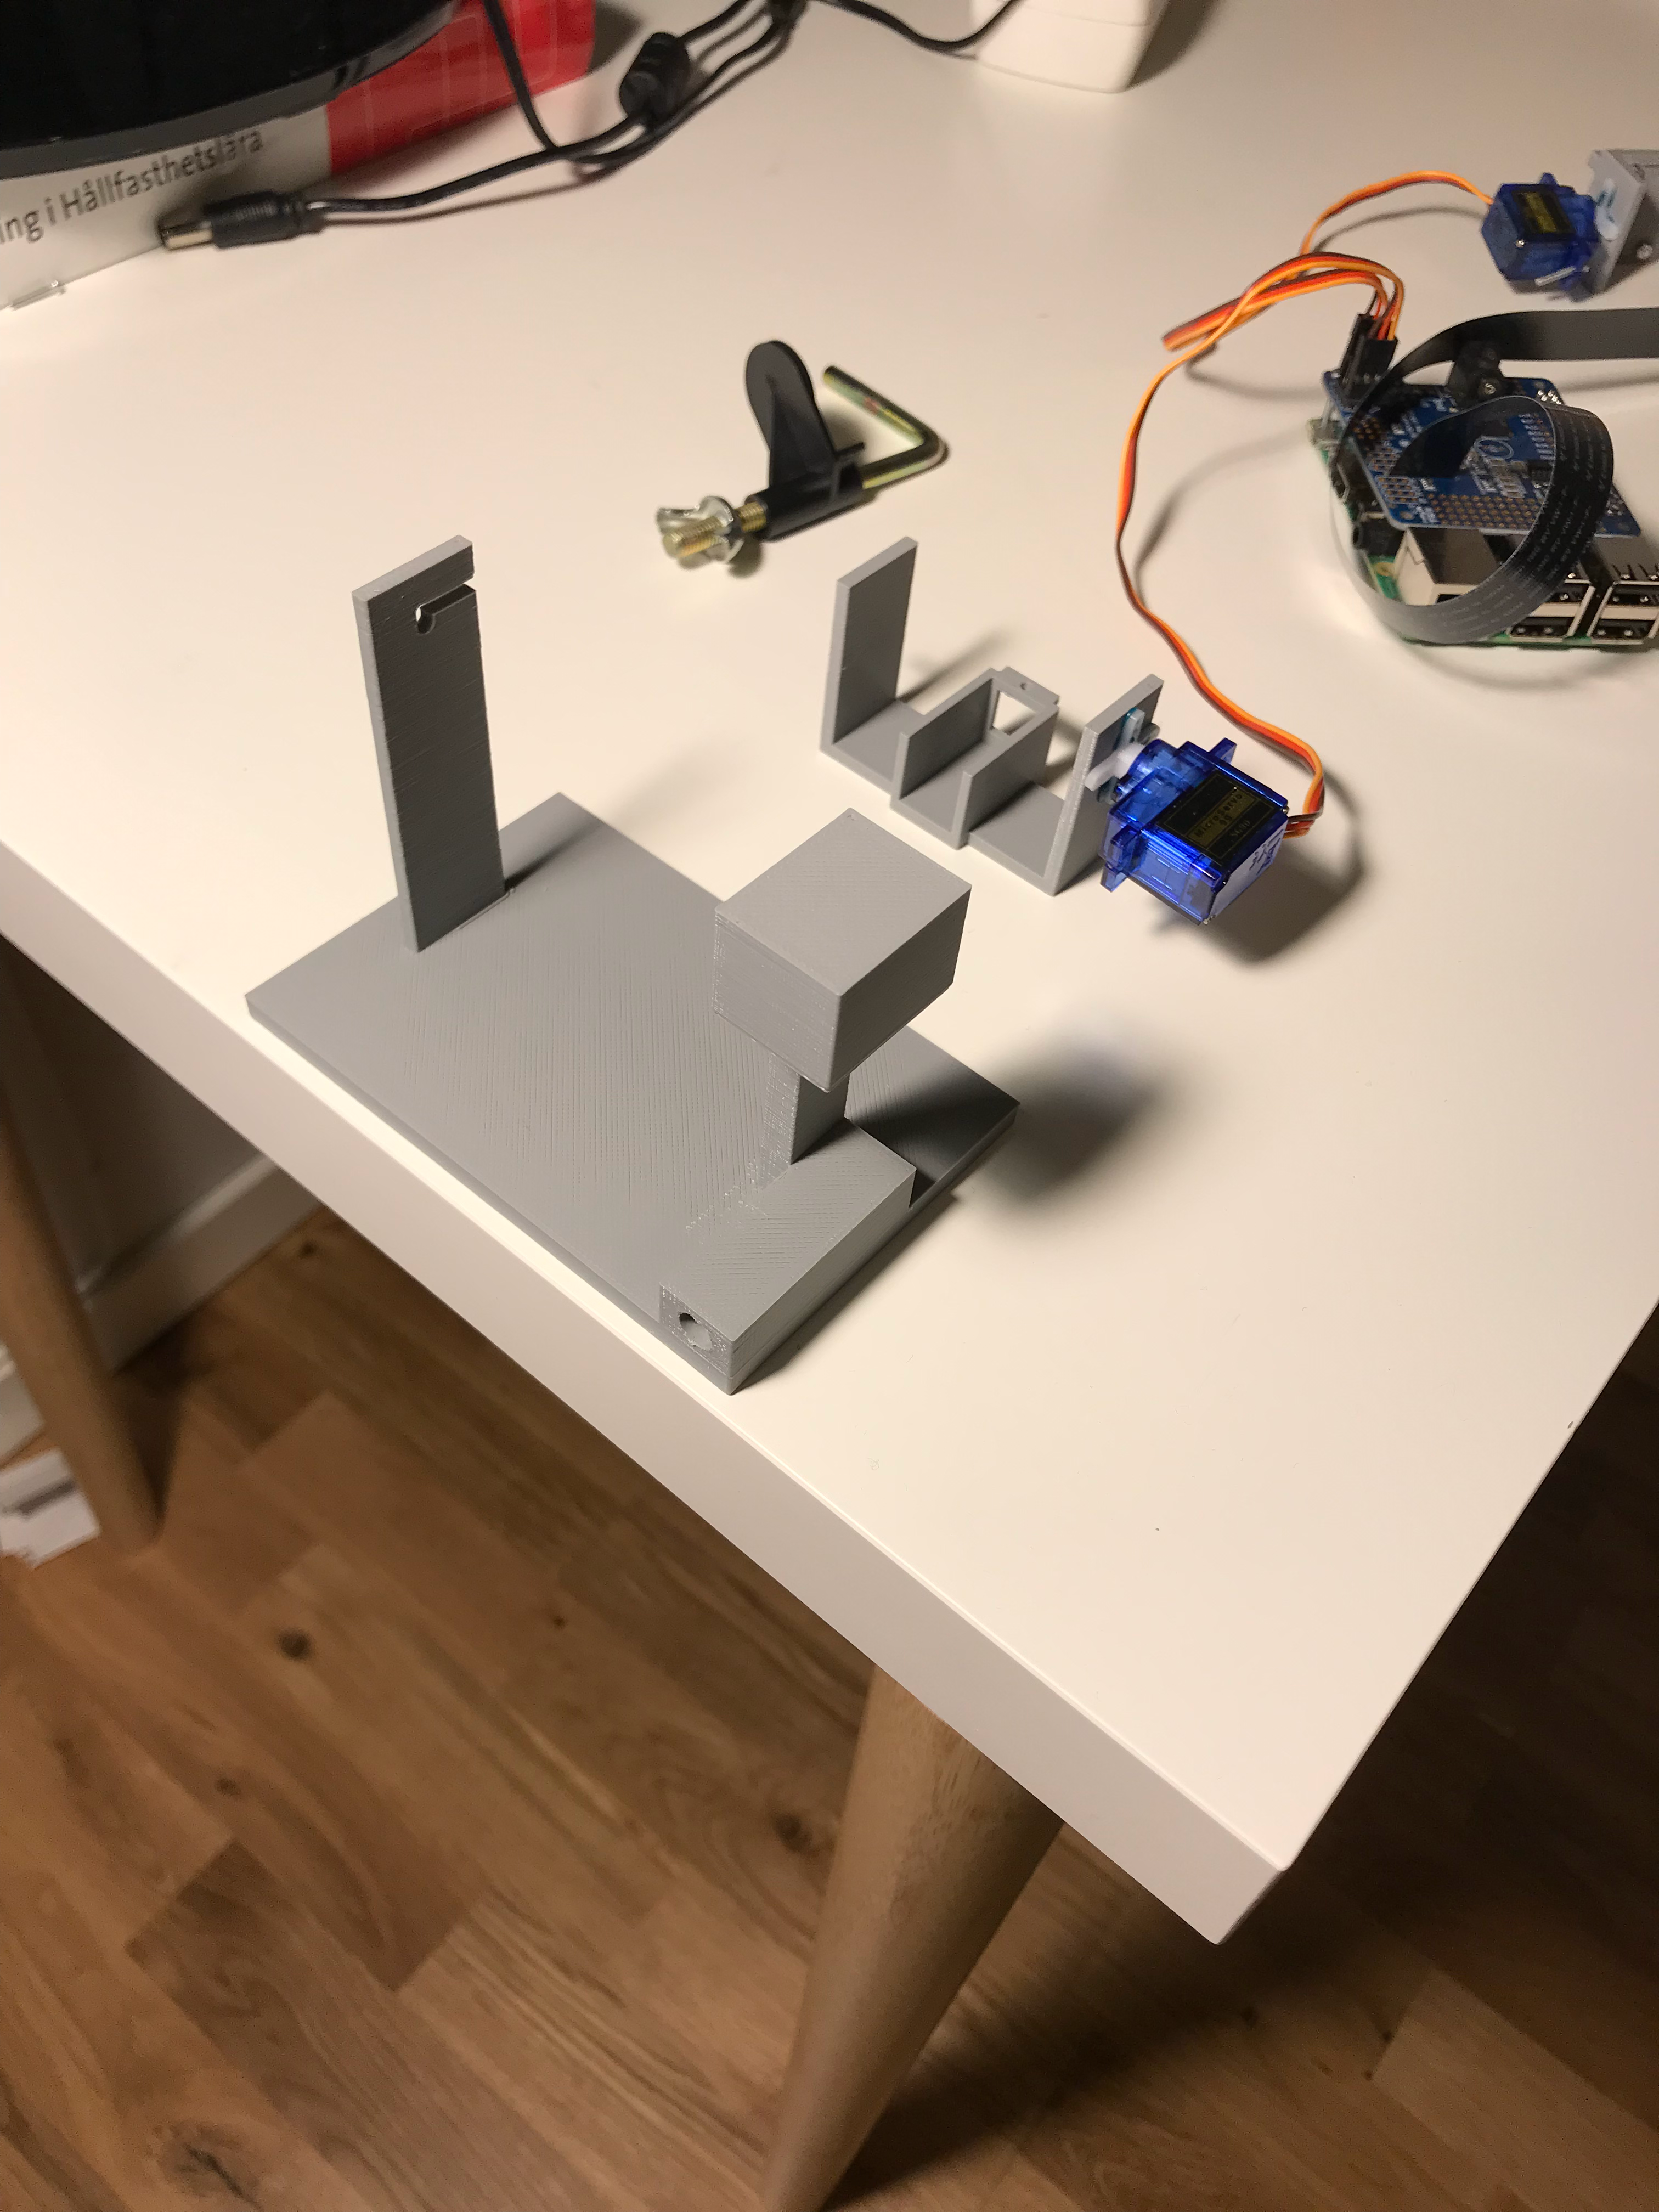
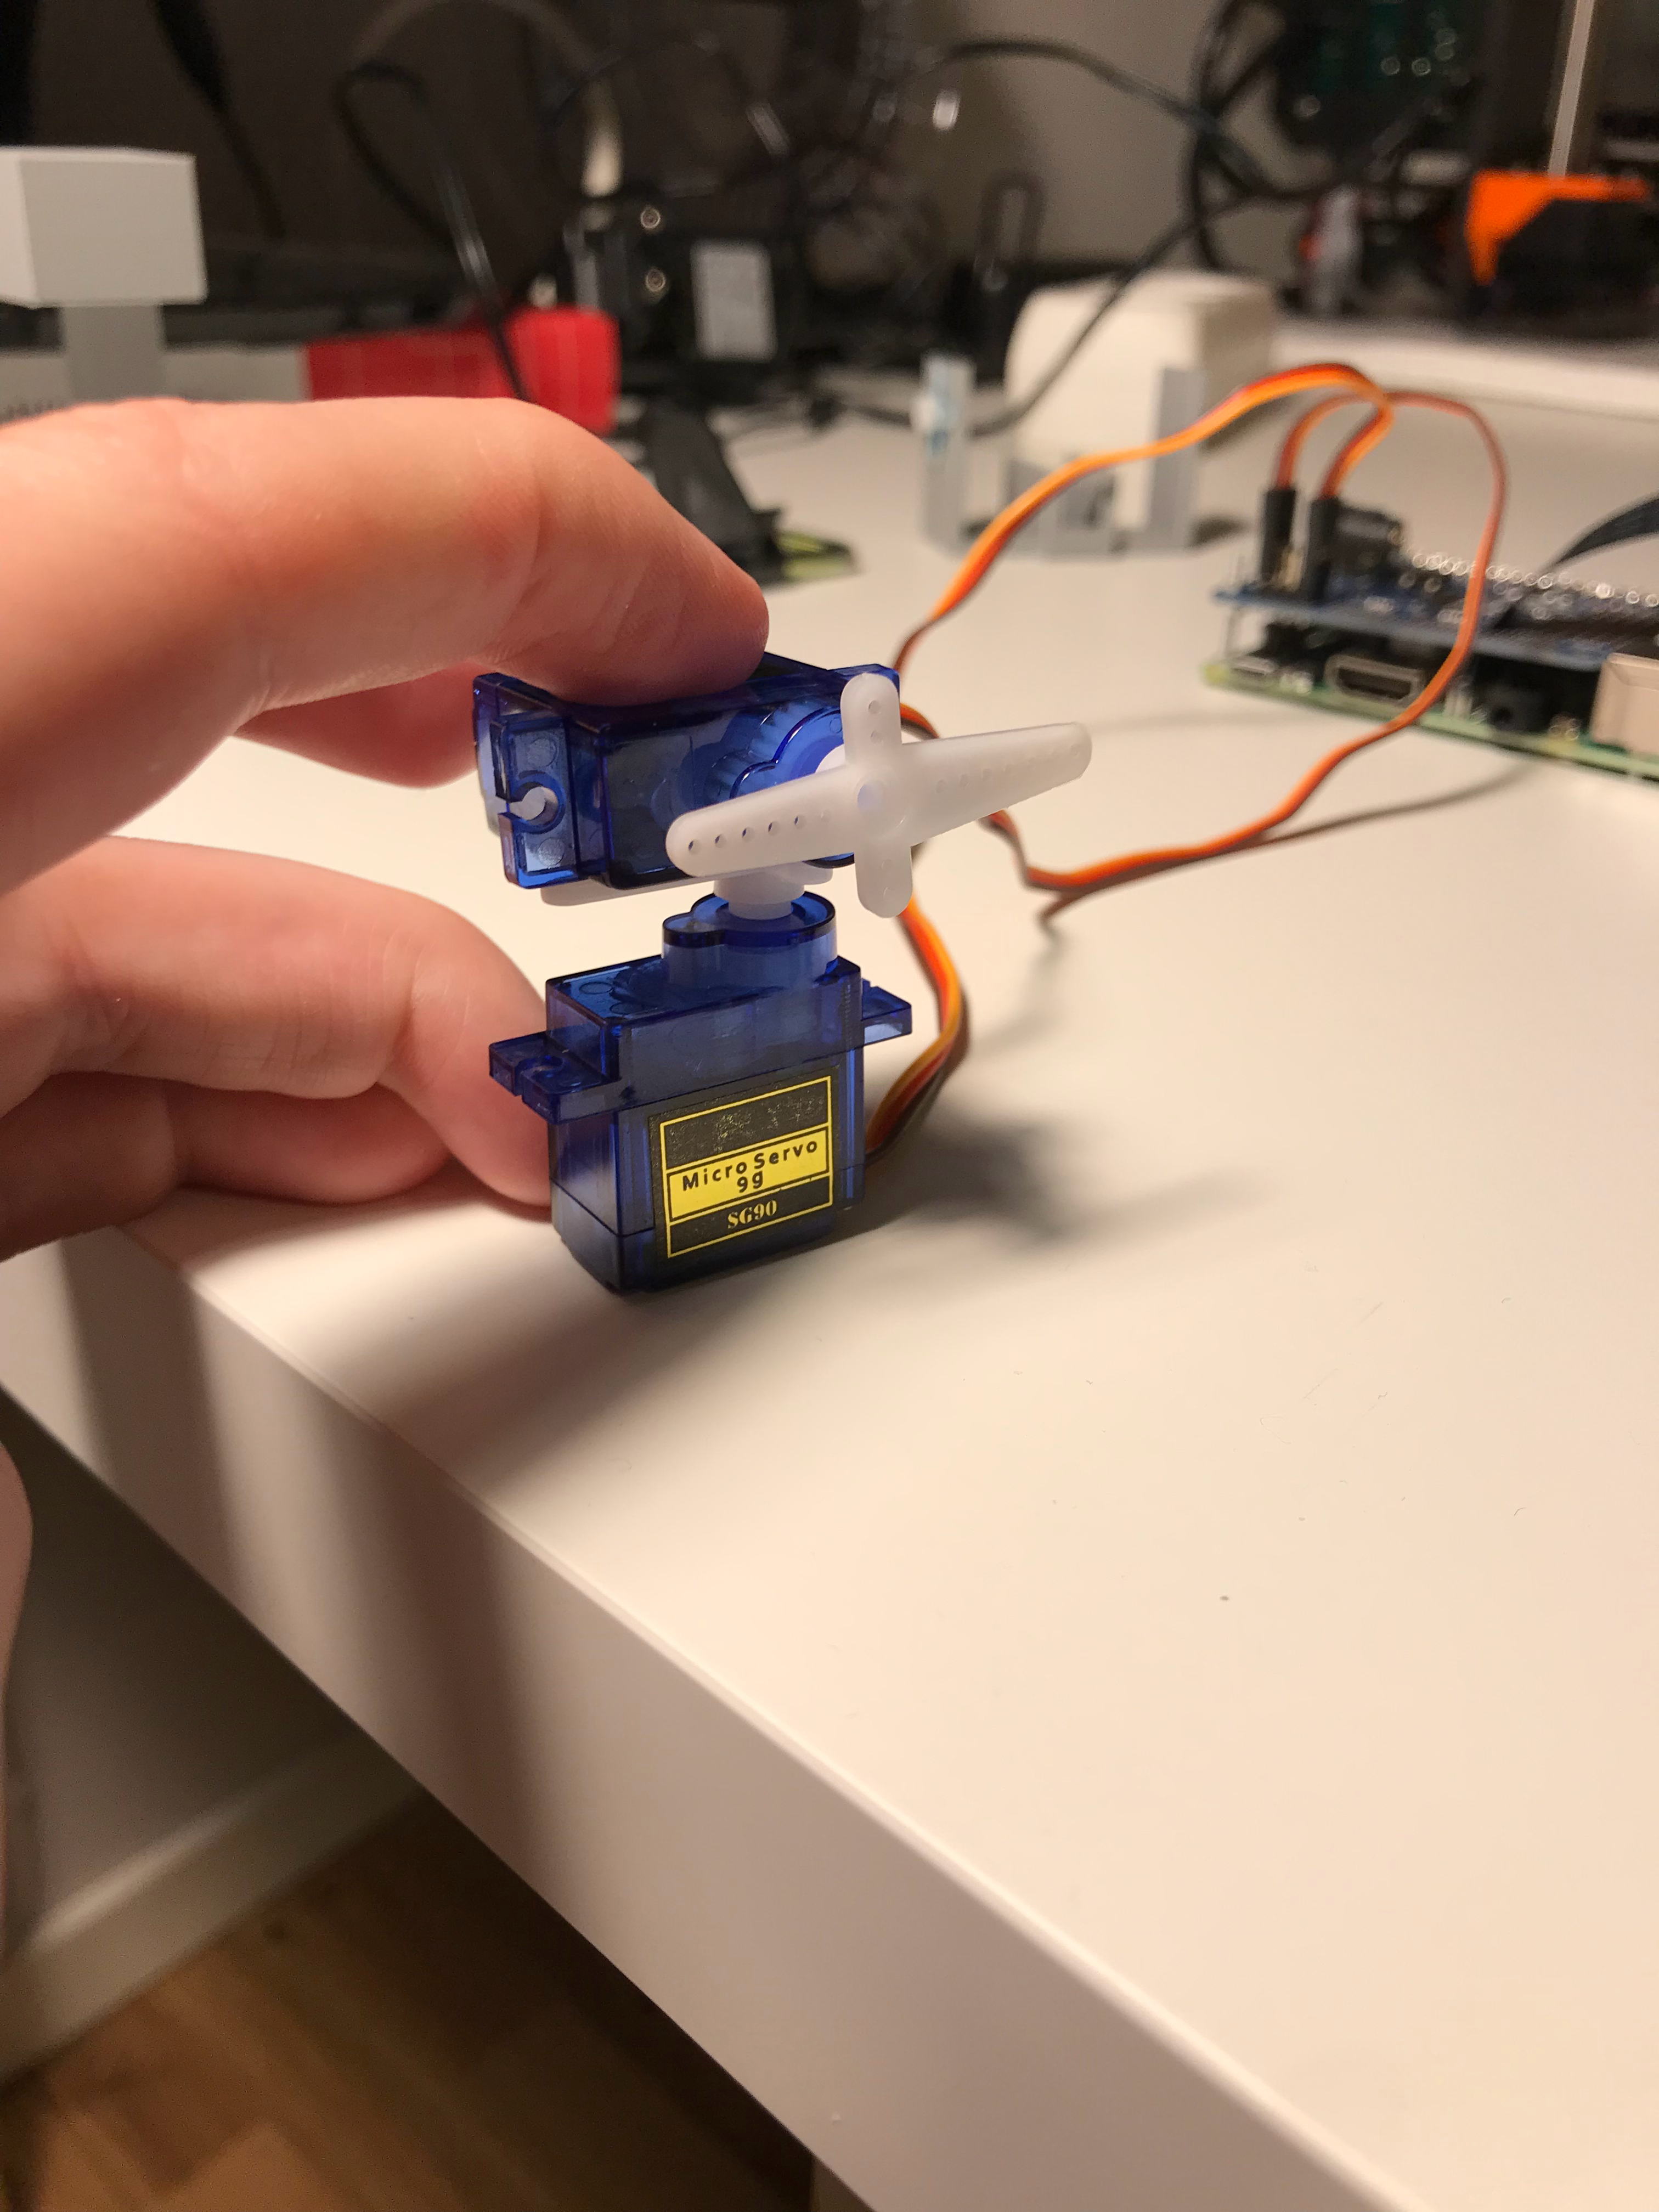
If you have access to a 3D-printer you may print the files provided. If you do not have a 3D-printer at hand you will have to get a bit creative and create a similair rig with e.g. cardboard or some other building material. If you wish to make this as minimalistic as possible you can just glue one motor to the table (or preferrably a board of some kind) and the glue the other motor to that one and glue the camera to the second motor. The Important thing is that you achieve two axis of motion and that nothing collides when moving.
If by the end of this tutorial everything works but when you try to alter tilt, pan changes instead, you can adjust this in the code later on or you can just change which motor does what.
I noticed that I needed to zip tie the motor to the fram because of the rigidity of the cables, this may not be an issue for you.
Control the Servo Motors
If you haven't already enabled ic2 on your pi, enter
pi@raspberry:~ $ sudo raspi-config
into the terminal and enable i2c, this is because the pi uses ic2 protocol to communicate with the hat. Then reboot the pi.
Before we write the python code needed, we have to install a package which is needed for the pi to control the servos. In the terminal enter the following code
pi@raspberry:~ $ sudo pip3 install adafruit-circuitpython-servokit
Then open a new Thonny file and name it something like motors.py and fill it with the following code.
from adafruit_servokit import ServoKit
import mysql.connector
import time

kit = ServoKit(channels = 16)

pan = 90
tilt = 90

#Function for moving motors
def goTo(port, angle, target):
   while angle < target:
       angle += 1
       kit.servo[port].angle = angle
       time.sleep(0.01)
   while angle > target:
       angle -= 1
       kit.servo[port].angle = angle
       time.sleep(0.01)

   return angle

#Main loop
while True:
   #Connecting do database
   mydb = mysql.connector.connect(
       host = "localhost",
       user = "root",
       password = "raspberry",
       database = "camproj2"
       )

   cur = mydb.cursor()

   #This is the code which fetches the angles from the database
   cur.execute("SELECT pan, tilt FROM angles WHERE id=1")

   result = cur.fetchall()

   #Checking if angles have changed
   if result[0][0] != pan:
       newPan = result[0][0]
       pan = goTo(0, pan, newPan)

   if result[0][1] != tilt:
       newTilt = result[0][1]
       tilt = goTo(3, tilt, newTilt)

   #Important to close database after operation
   cur.close()
   mydb.close()
Make sure the power cable is attached to the servo hat, otherwise it cant control the motors.
Now go to the web browser again and enter some new values for the angles pan and tilt. The motors (at least the most common ones) have 180 degrees of rotation so the script sets them to 90 if no other value is given from the database.
Hopefully the camera will move and you will be able to see it in the web page! This will work on any device that's connected to the same network as the pi. You can use port forwarding to reach the page from other devices but that's a bit advanced and not recommended since it may leave your network vulnerable. But if you wish to test it, the next step will briefly explain how to do it.
Downloads
(Advanced) Port Forward to Reach the Page From Any Device
Note that we have no authentication or any security in this project so anyone who get hold of your IPv4 adress may snoop in on your camera feed. Do this step at your own risk.
This step will depend a lot on what router you use so I will explain how it is done on a Netgear router.
Open up a new broswer window and enter the following adress: 192.168.1.1 and login with your specific credentials.
Press the "WAN"-button in the left column and then press "Virtual server / Port forwarding" in the upper ribbon.
Then press the button "Add profile"
You may leave most of the fields blank or as they are, make sure protocol is set to TCP though. Enter something like "Camera control server" or the name of your liking in the "Service name" field to easier identify the application.
In the field "External Port" enter something like 8001 (or any port number which is unused, since we used 8000 for the camera server, don't use that one)
Enter the pi:s ip adress in the field "Internal IP adress" and press OK.
Now you need to get to know your networks IPv4 adress. This is really beyond my expertise so there may be better or easier ways to do this but I just google "whats my IP adress" and copy it from there. Then you can enter that ip adress into a browser followed by ":8001" (if that's the port you declared earlier).
Now you need to alter the code in index.php a bit, exchange the previous adress from where the camera feed was fetched (your pi:s ip adress follwed by :8000) to your networks ip adress folloed by :8000.
Now you should be able to reach the camera feed from any internet device using that adress and see the feed and control the camera. Note that the pi may have problem handling the streaming when you do this and the framerate may drop.
Good luck!