Weatherstation With Flask and Mysql
by jannesDR in Circuits > Raspberry Pi
3738 Views, 44 Favorites, 0 Comments
Weatherstation With Flask and Mysql
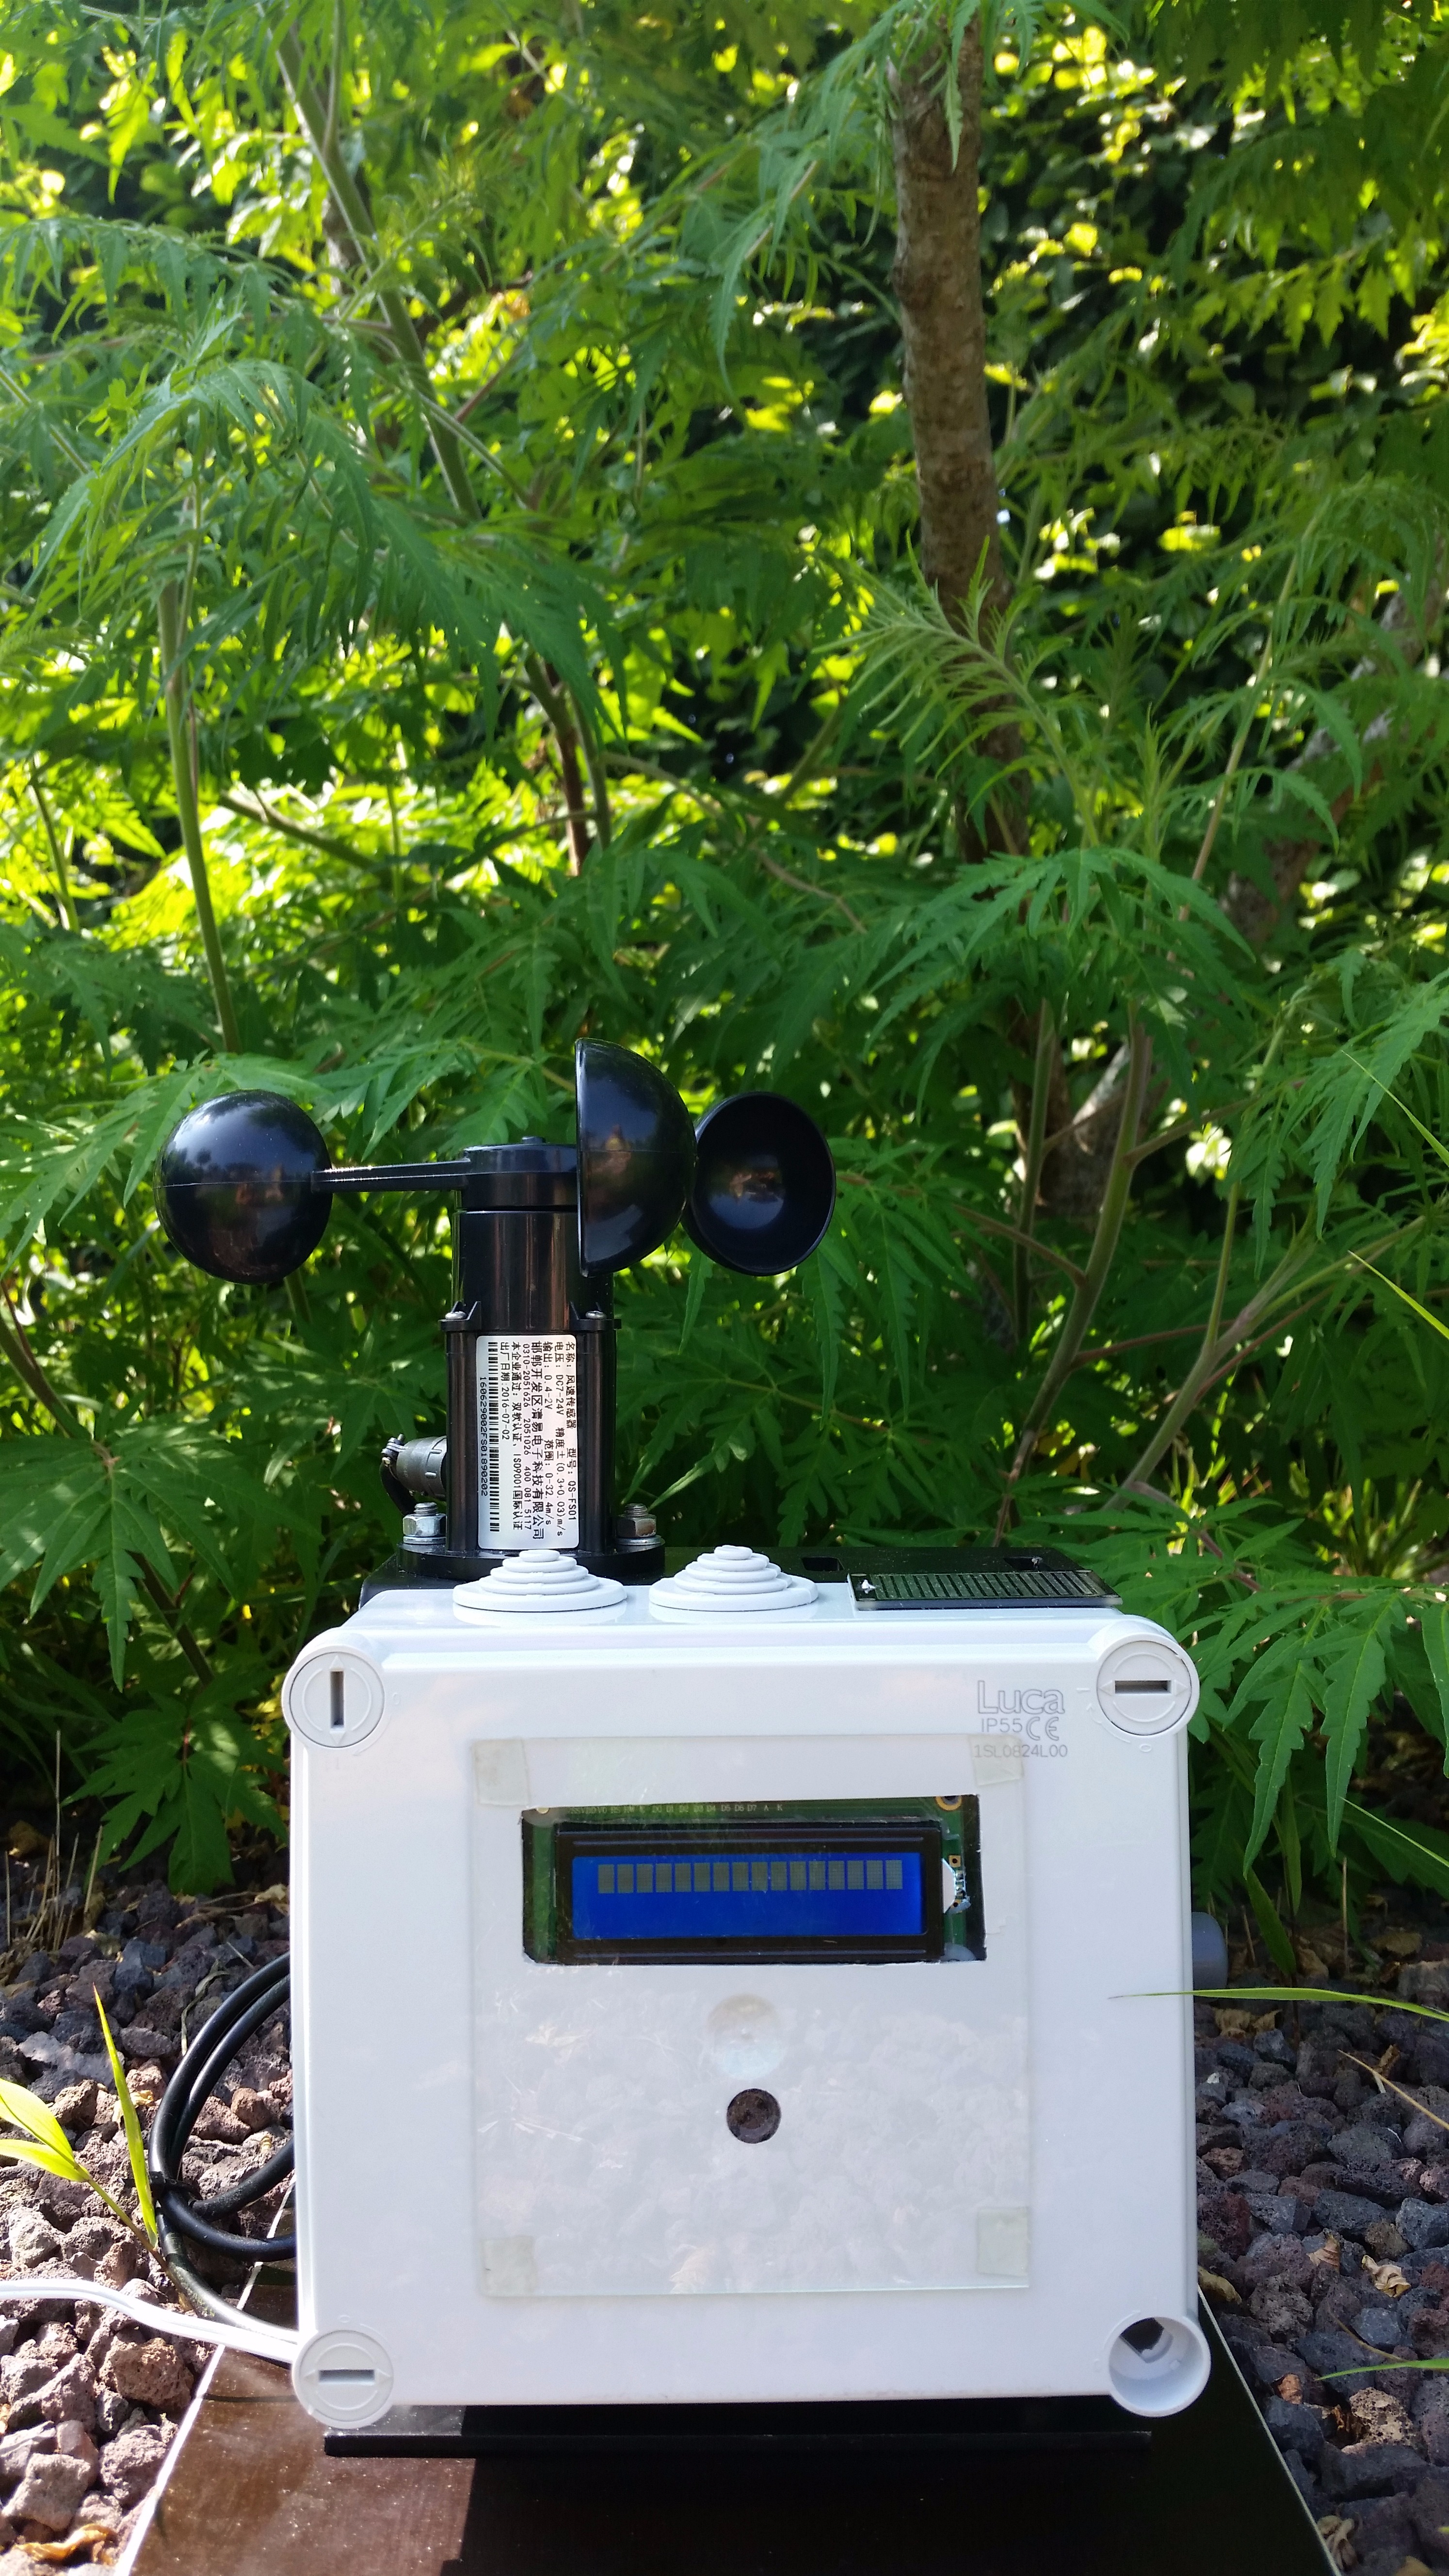
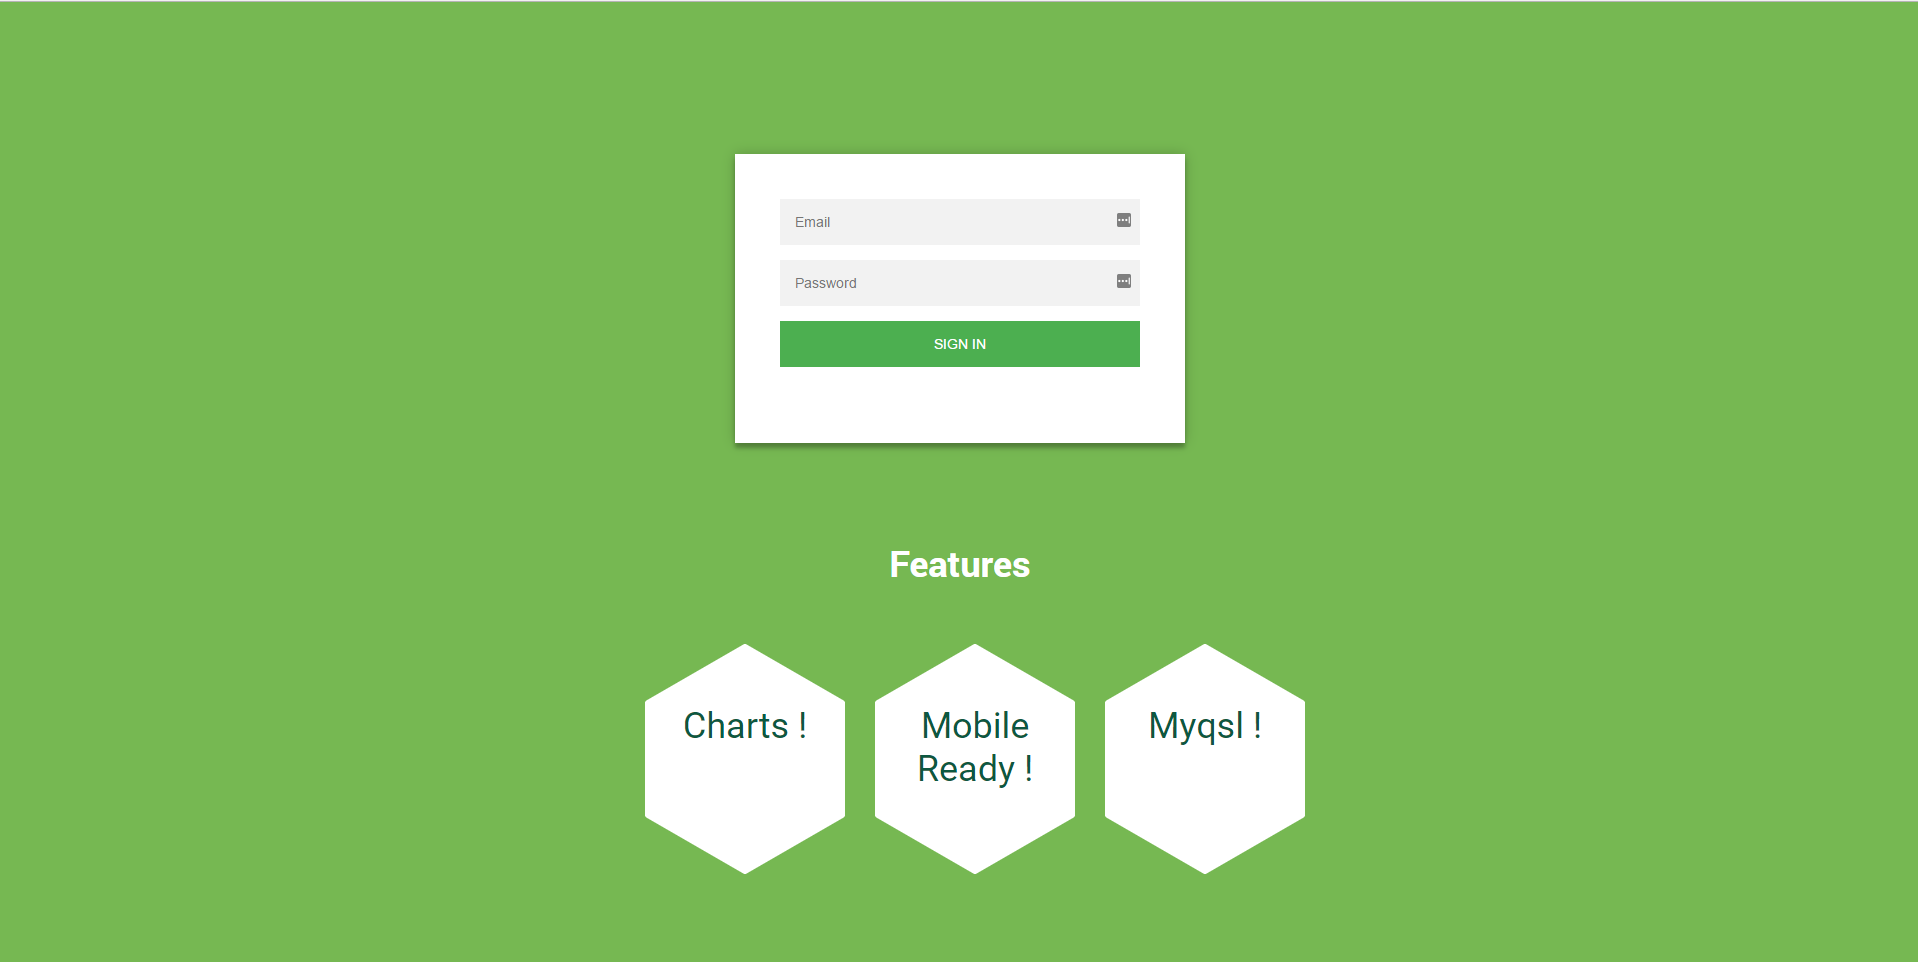

In this project, we will be making a weatherstation that measures temperature, rain drops, humidity and windspeed using Raspberry pi. All the data will be saved and collected in a Mysql database and put on display on a LCD display and website.
The website is responsive and useable on smartphone
List of Materials
For this project i used :
- Raspberry pi 3b (i recommend to get a starter kit which will get you a network cable, power supply, and a micro SD card)
- GPIO T-cobbler plus breadboard
- PiCamera
- An Adafruit BME280 (temperature, humidity and pressure sensor)
- Anemometer wind speed sensor with analog voltage output
- LCD-Display 16*2
- Rain drop module
- Perfboard plates
- Some sort of case or tools to make one (make sure it's waterproof)
- Velcro
- Solder
- Soldering iron
- Silica gel to keep water and moisture out of your case
Setting Up the Pi
First you will have to enable some config files and download some packages for your raspberry pi.
- Type sudo-raspi config and go to interfacing options in this menu you will want to enable camera and i2c
- Type sudo apt-get update && sudo apt-get upgrade, now that our pi has updated the list of available packages we start downloading the required packages.
- sudo apt-get install python3
- sudo apt-get install python3-picamera
- sudo apt-get install pip
- pip install apscheduler
- pip install flask-apscheduler
If you're asked if you want to continue with yes or no always select YES.
Setting up a wireless connection with the raspberry pi
Adding a wireless connection
Open the wpa-supplicant file in nano: sudo nano /etc/wpa_supplicant/wpa_supplicant.conf
network={
ssid= "SSID_FROM_YOUR_NETWORK"
psk="YOUR_WIFI_PASSWORD"
}
adding a static ip address
open the dhcpcd file: sudo nano /etc/dhcpcd.conf
interface wlan0
static ip_address=192.168.0.100/24
make sure you the ip address is in the correct range, if you are having problems finden the ip address of your rpi I suggest installing the FING app.
Creating/Downloading Project and Setting Up Flask
Pycharm
We will now have to create a new project folder or download my project folder and configure some settings inside pycharm so that we are able to connect with the raspberry pi.
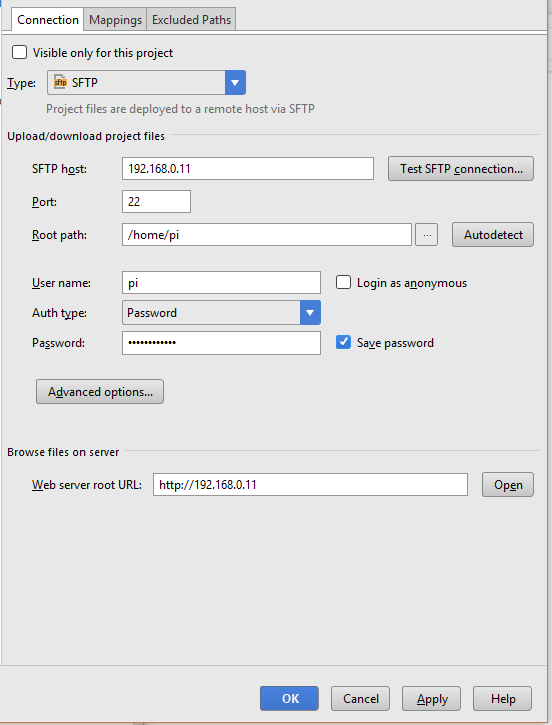
Go to file --> settings --> Build, Execution, Deployment --> Deployment
Create a new SFTP connection.
SFTP host --> ip address or hostname of the raspberry pi click on test SFTP connection if the connection has succeeded you can go to the next step.
port: 22
root path: /home/username
username : username of the root user of the raspberry pi
auth type: password
password: password of the root user
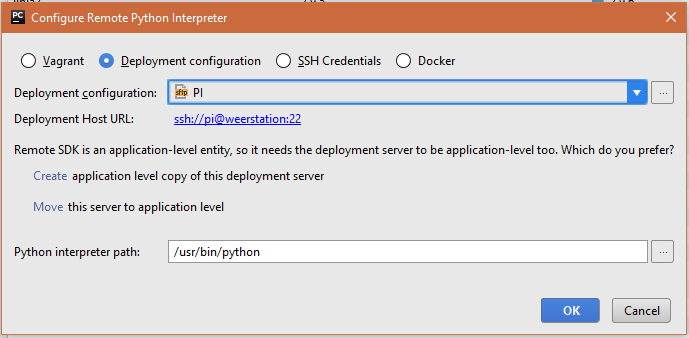
Go to file --> settings --> project:"project name" --> project: interpreter
click the cogwheel in the upper-right corner and select deployment configuration. In the drop down menu select the SFTP connection you just made and click on Create application level copy of this deployment server. apply everything and close the settings menu.
Now you should be able to upload python files from pycharm to your raspberry pi.
Setting Up Mysql
On the raspberry pi
install all the latest updates and upgrades
- sudo apt-get update && sudo apt-get upgrade
install mysql server
- sudo apt-get install mysql-server
To connect with the database we need a client. use underlying command to install mysql-client
- sudo apt-get install mysql-client
To make a connection between python and the MySql database we need to install MySQL connector.
- sudo apt-get install python3-mysql.connector
now we will create a new mysql user.
mysql -uroot -p
CREATE USER 'your_username'@'%' IDENTIFIED BY 'your_password' ;
GRANT ALL PRIVILEGES ON *.* TO 'your_username'@'%'
WITH GRANT OPTION;
quit
Now hop back to pycharm
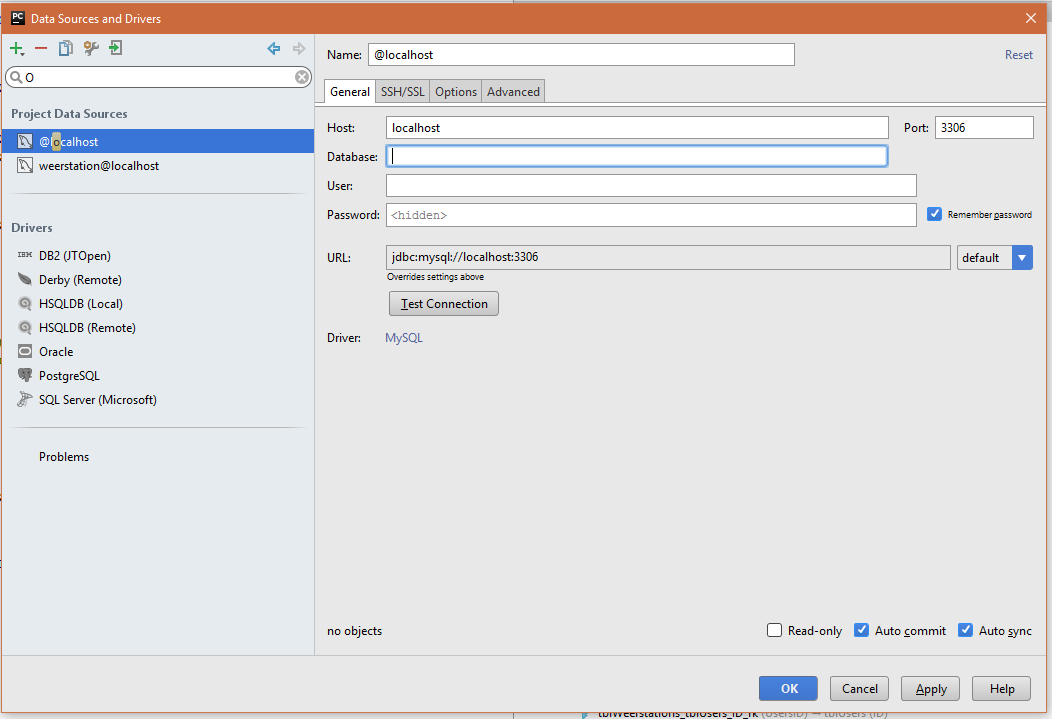
use the shortcut ctrl+shift+a and search for database, press enter. Now you should see a new screen on the right. press the green add button and select datasource-->mysql
In the general tab add the name of the database and username and password of the mysql user we created earlier.
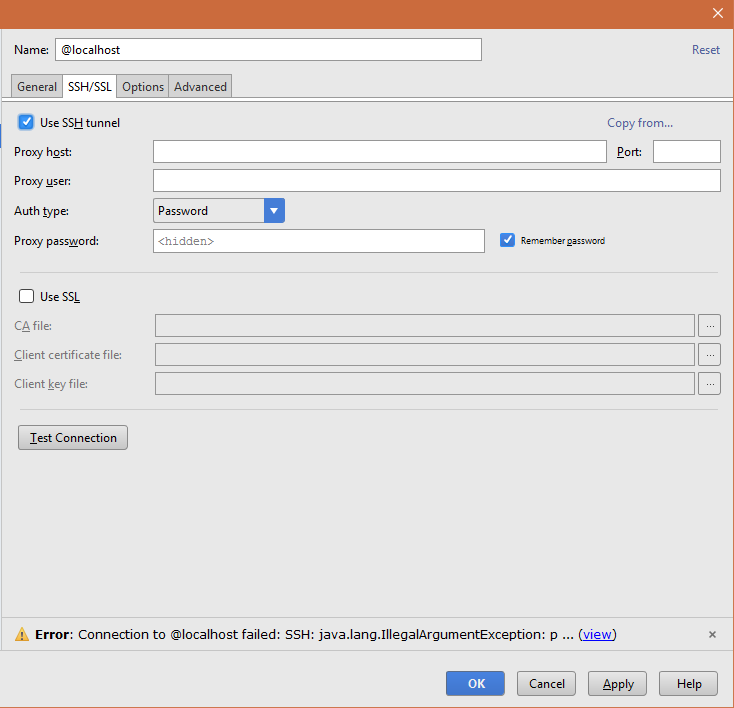
In the ssh/ssl tab check use ssh tunnel.
- Proxy host is the ip address of the raspberry pi
- we use port 22
- proxy user --> root user of the raspberry pi
- auth type = password
- proxy password --> password of the root user.
Add tables:
In my project i've created 4 tables, a contact table, weatherstation table, user table and a table measurements. My database meets the requirements for BCNF. the user table and contact table is actually not necessary but it was something i wanted to expirement with. If you dont want those 2 tables in your database you can just delete them but make sure to also delete the html pages and the code in flask.
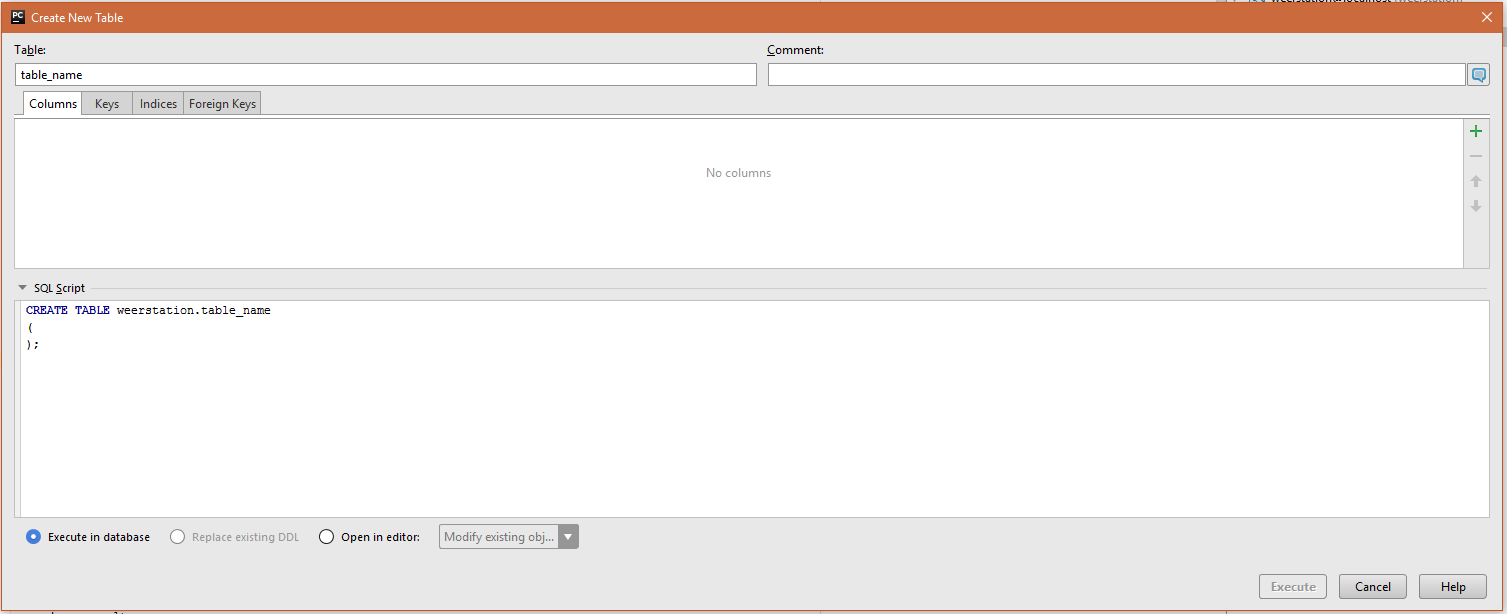
To add a table you need to right click on your schema → new → table.
Lets start with our first table called measurements.
at the bottom of the pop-up you should see a box with sql-script written above it. Paste following code into the box and press execute.
CREATE TABLE tblMeasurements
( ID INT(11) NOT NULL AUTO_INCREMENT, WeerstationID INT(11) NOT NULL, RainDrop VARCHAR(25), DateTime DATETIME NOT NULL, Temperature DOUBLE, Windspeed DOUBLE, Humidity DOUBLE, CONSTRAINT `PRIMARY` PRIMARY KEY (ID, WeerstationID), CONSTRAINT fk_meting_weerstations1 FOREIGN KEY (WeerstationID) REFERENCES tblWeatherstations (ID) ); CREATE INDEX fk_meting_weerstations1_idx ON tblMeasurements (WeerstationID); CREATE UNIQUE INDEX tblMetingen_ID_uindex ON tblMeasurements (ID);
Do the same thing for all the other tables:
Table WeatherStations
CREATE TABLE tblWeatherstations
( ID INT(11) PRIMARY KEY NOT NULL AUTO_INCREMENT, UsersID INT(11) NOT NULL, CONSTRAINT tblWeerstations_tblUsers_ID_fk FOREIGN KEY (UsersID) REFERENCES tblUsers (ID) ); CREATE INDEX tblWeerstations_ID_index ON tblWeatherstations (ID); CREATE INDEX tblWeerstations_tblUsers_ID_fk ON tblWeatherstations (UsersID);
Table Users
CREATE TABLE tblUsers
( ID INT(11) PRIMARY KEY NOT NULL AUTO_INCREMENT, Email VARCHAR(100) NOT NULL, Password VARCHAR(100) NOT NULL ); CREATE UNIQUE INDEX tblUsers_ID_uindex ON tblUsers (ID);
Table Contact
CREATE TABLE tblContact
( ContactID INT(11) PRIMARY KEY NOT NULL AUTO_INCREMENT, USERID INT(11), subject VARCHAR(50), message VARCHAR(255), CONSTRAINT tblContacct_tblUsers_ID_fk FOREIGN KEY (USERID) REFERENCES tblUsers (ID) ); CREATE UNIQUE INDEX Contact_ContactID_uindex ON tblContact (ContactID); CREATE INDEX tblContacct_tblUsers_ID_fk ON tblContact (USERID);
What We Will Be Using and How Everything Works


Picamera
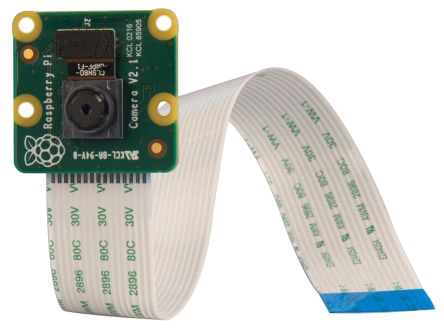
For the picamera I used a library called python-picamera.
python-picamera is a pure Python interface to the Raspberry Pi camera module.
The library is written and maintained by Dave Jones.
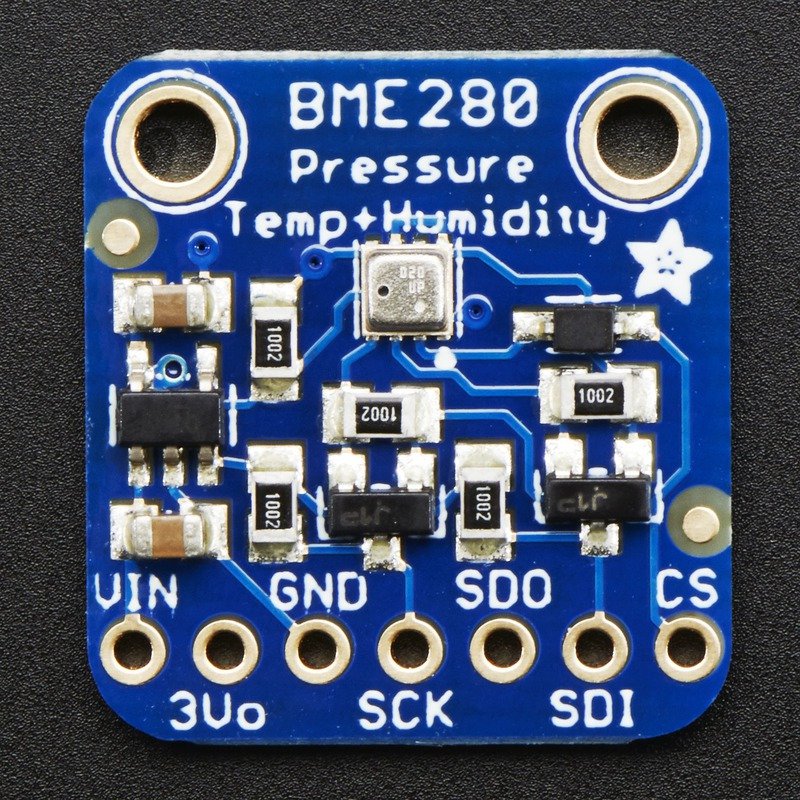
BME280
The BME280 is as combined digital humidity, pressure and temperature sensor. It works on I2C or SPI. In this project I used I2C because it needs fewer connections.
The BME280 consists of ADC output values. Each sensing element behaves differently. Therefore the actual pressure and temperature must be calculated using a set of calibration parameters.
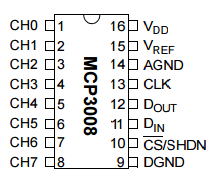
MCP3008
This chip will add 8 channels of 10-bit analog input. It uses SPI.
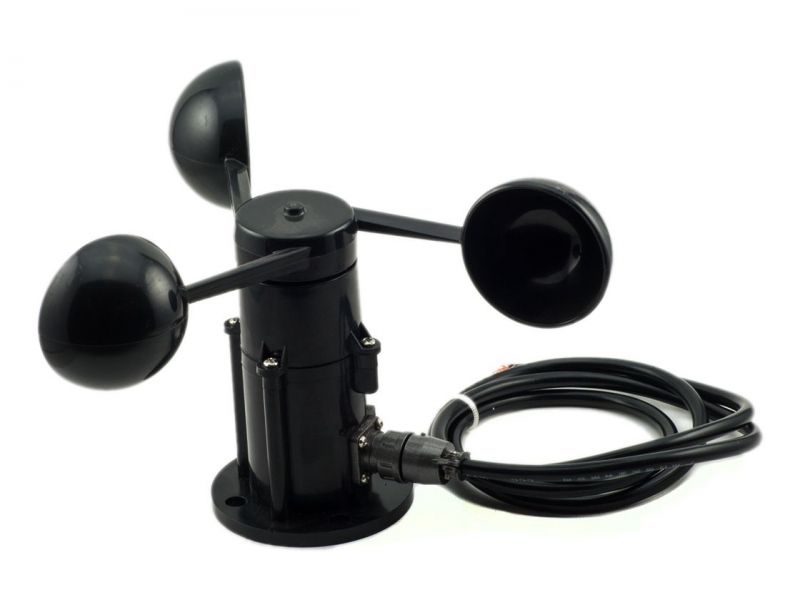
Anemometer
An anemometer is a device used for measuring wind speed. We will connect this with the MCP3008 to read the analog value of the windspeed
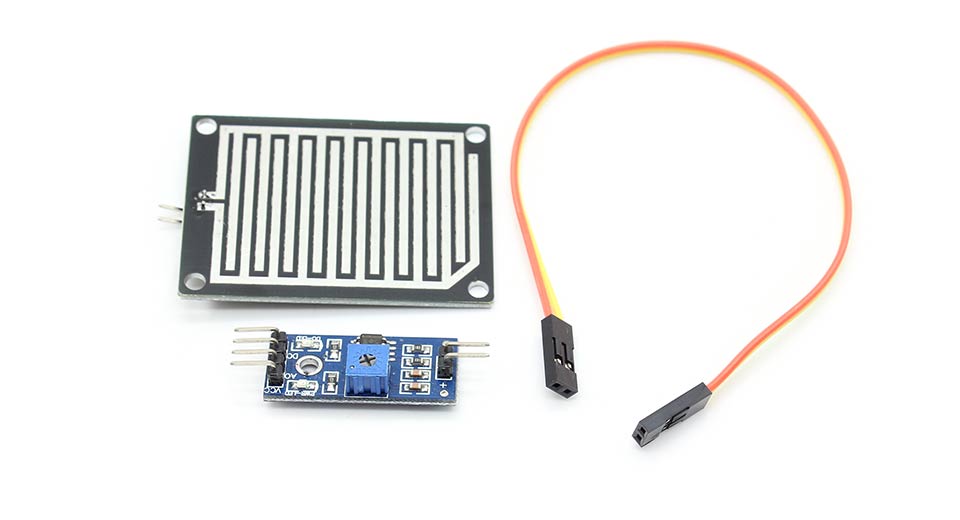
YL-83 water drop sensor and board
The YL-83 can be connected to a digital pin as well as to the MCP3008 to get an analog value. The digital output is a 0 or 1 and the analog output is in a range of 0-255
In this project I connected my YL-83 to a digital pin because I just wanted to know if it was raining or not.
LCD
Last but not least is the 2*16 LCD that shows us some viable information on the housing of our project.
Hardware Connections
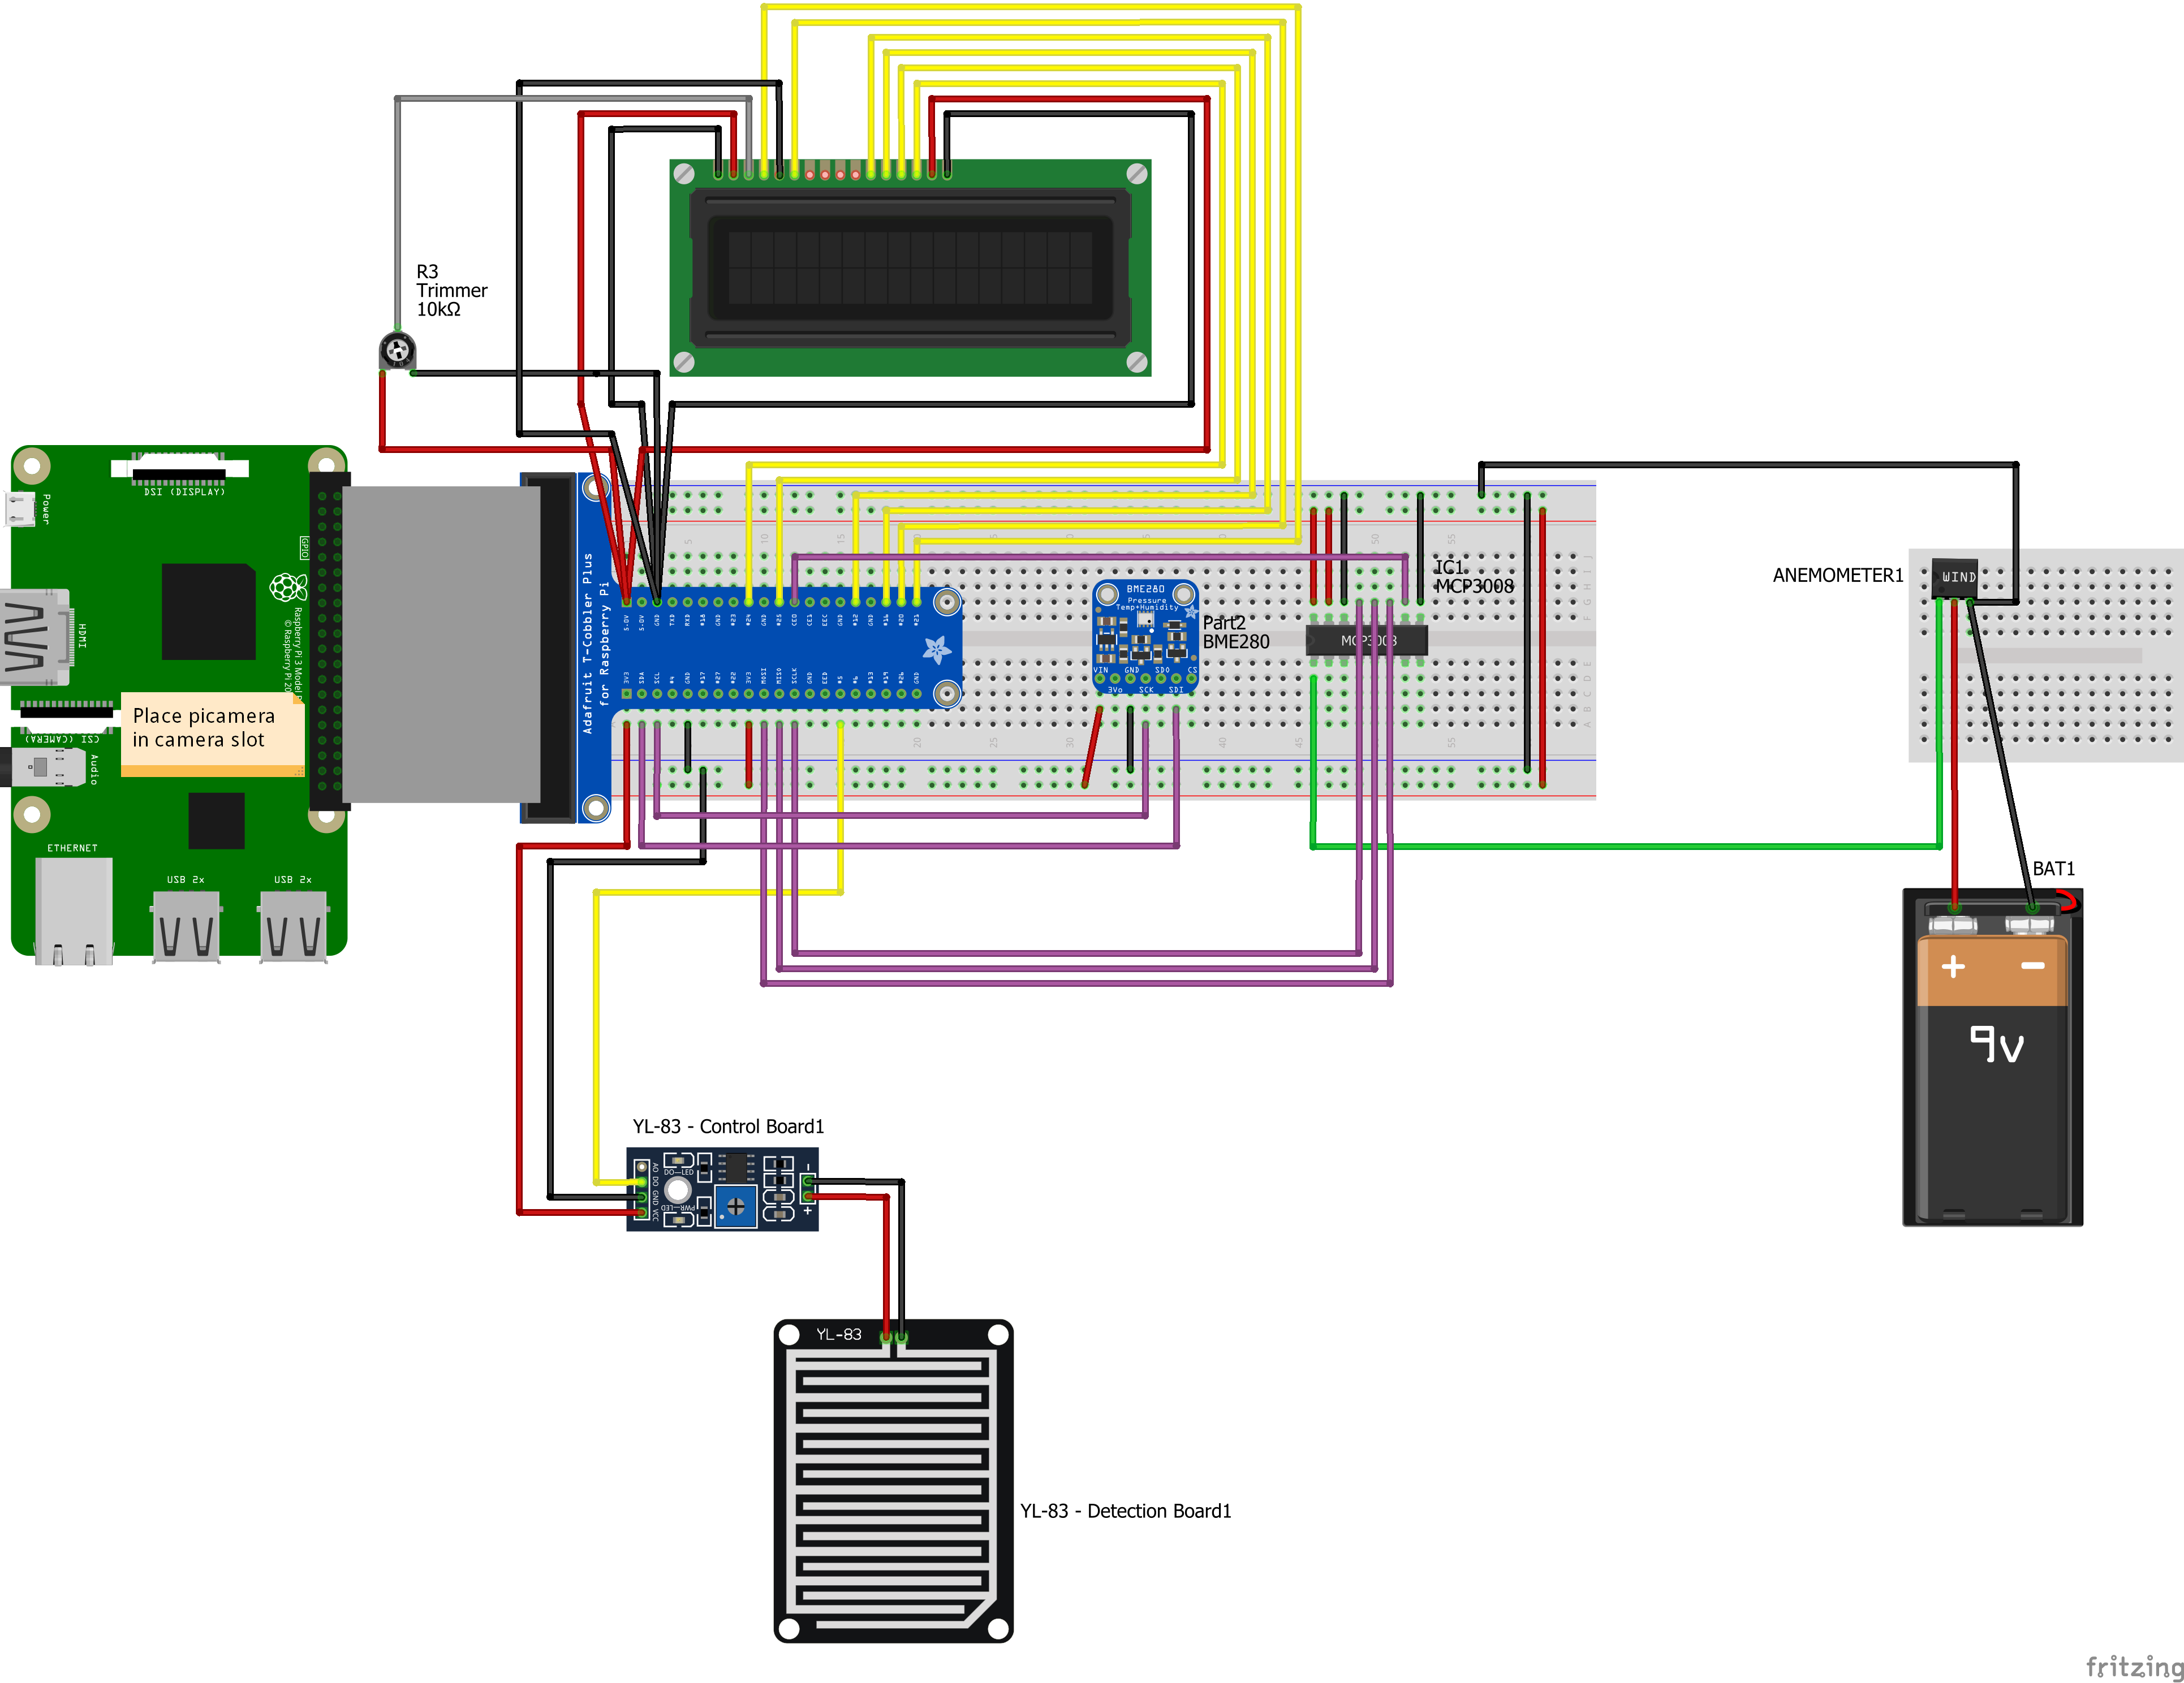
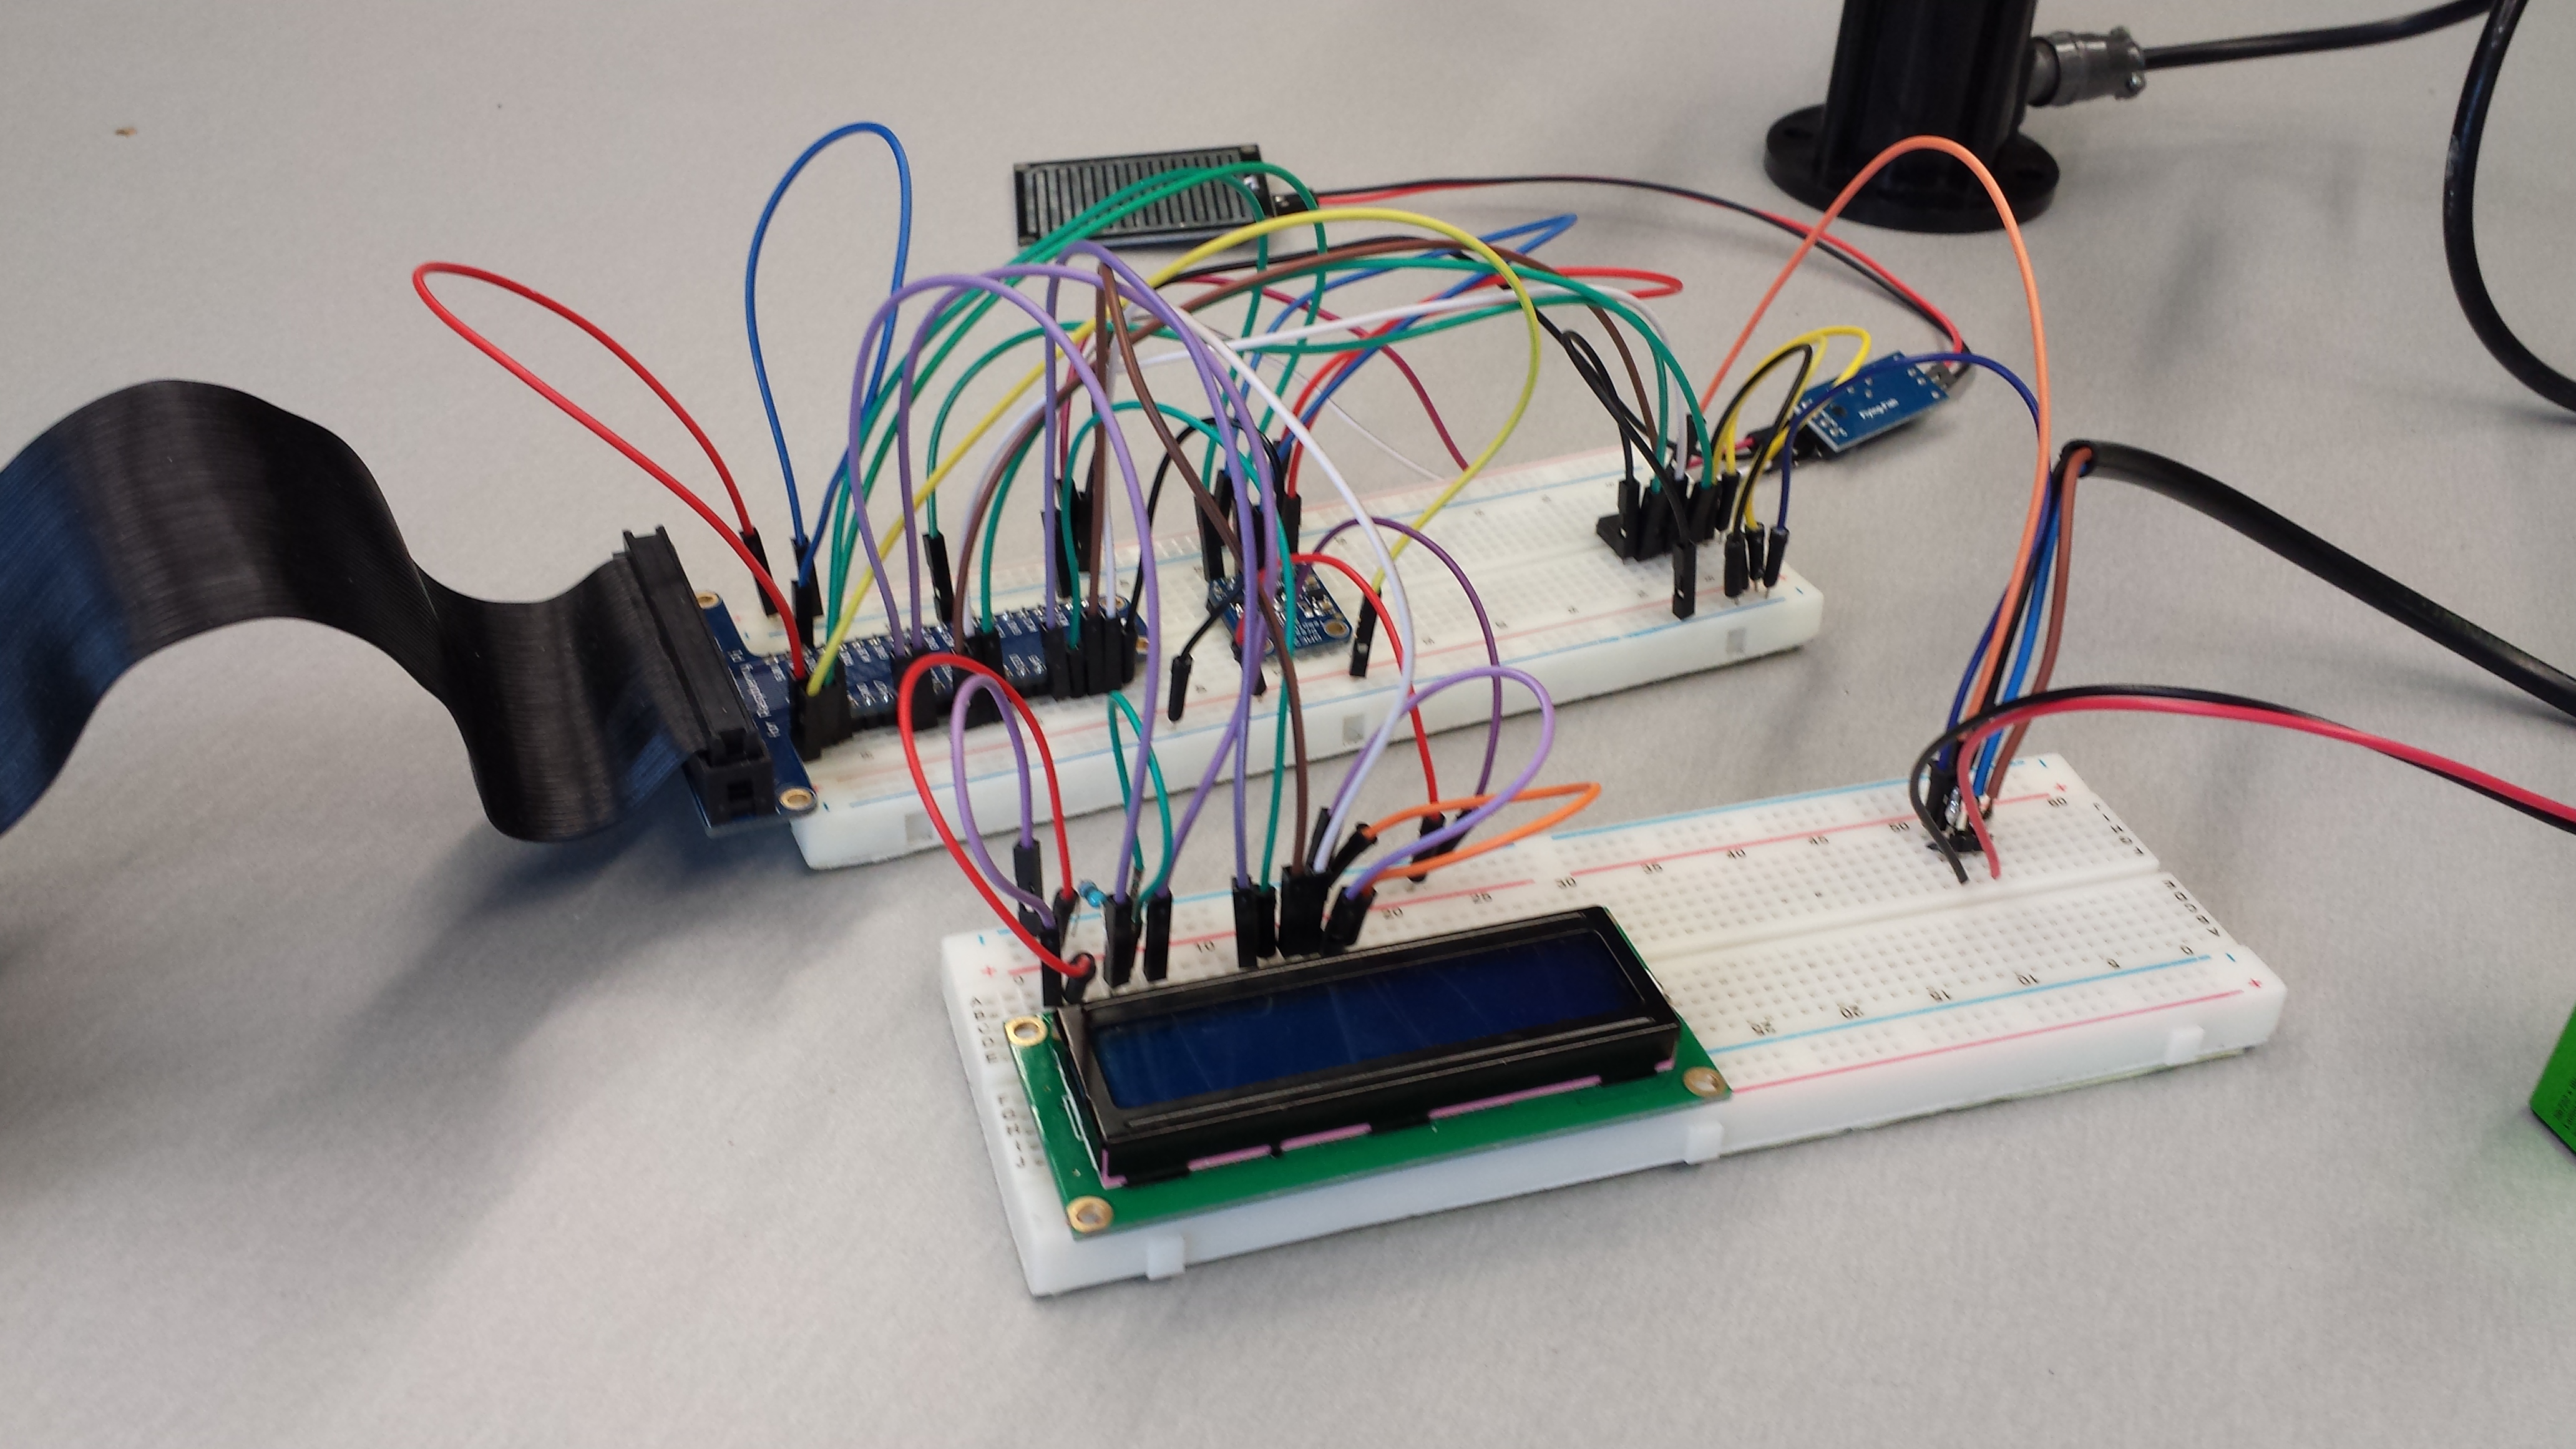
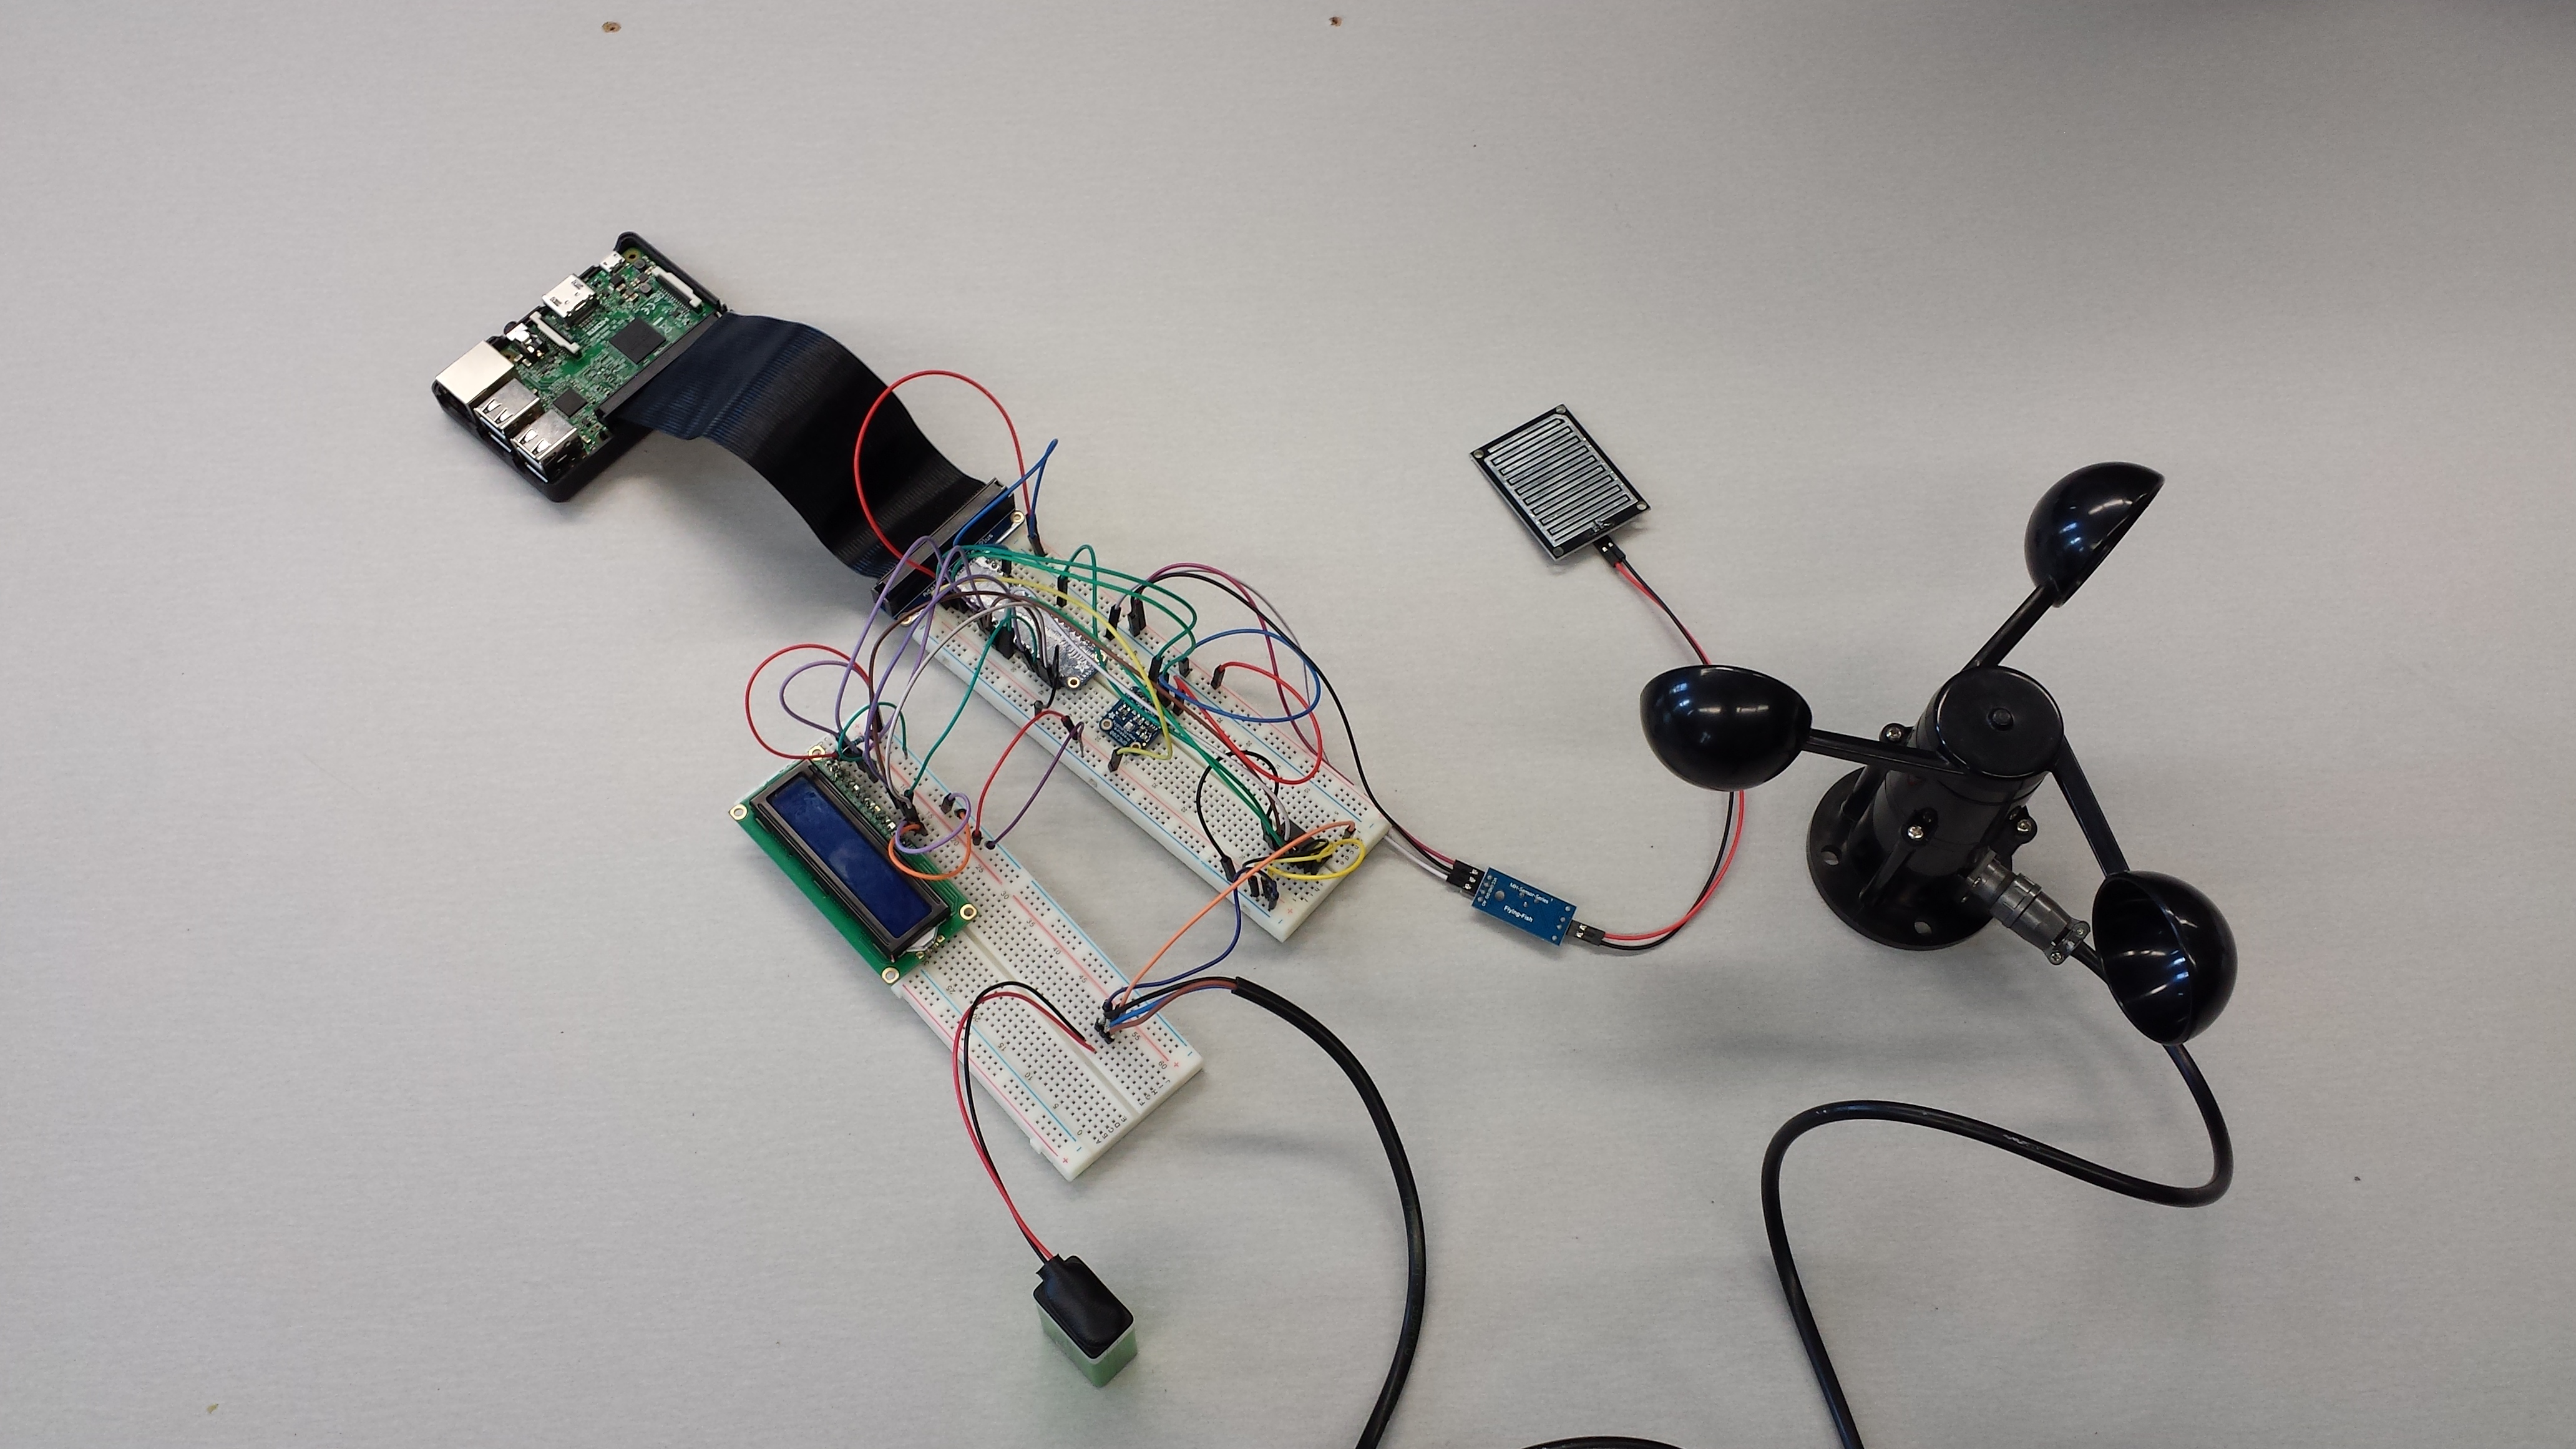
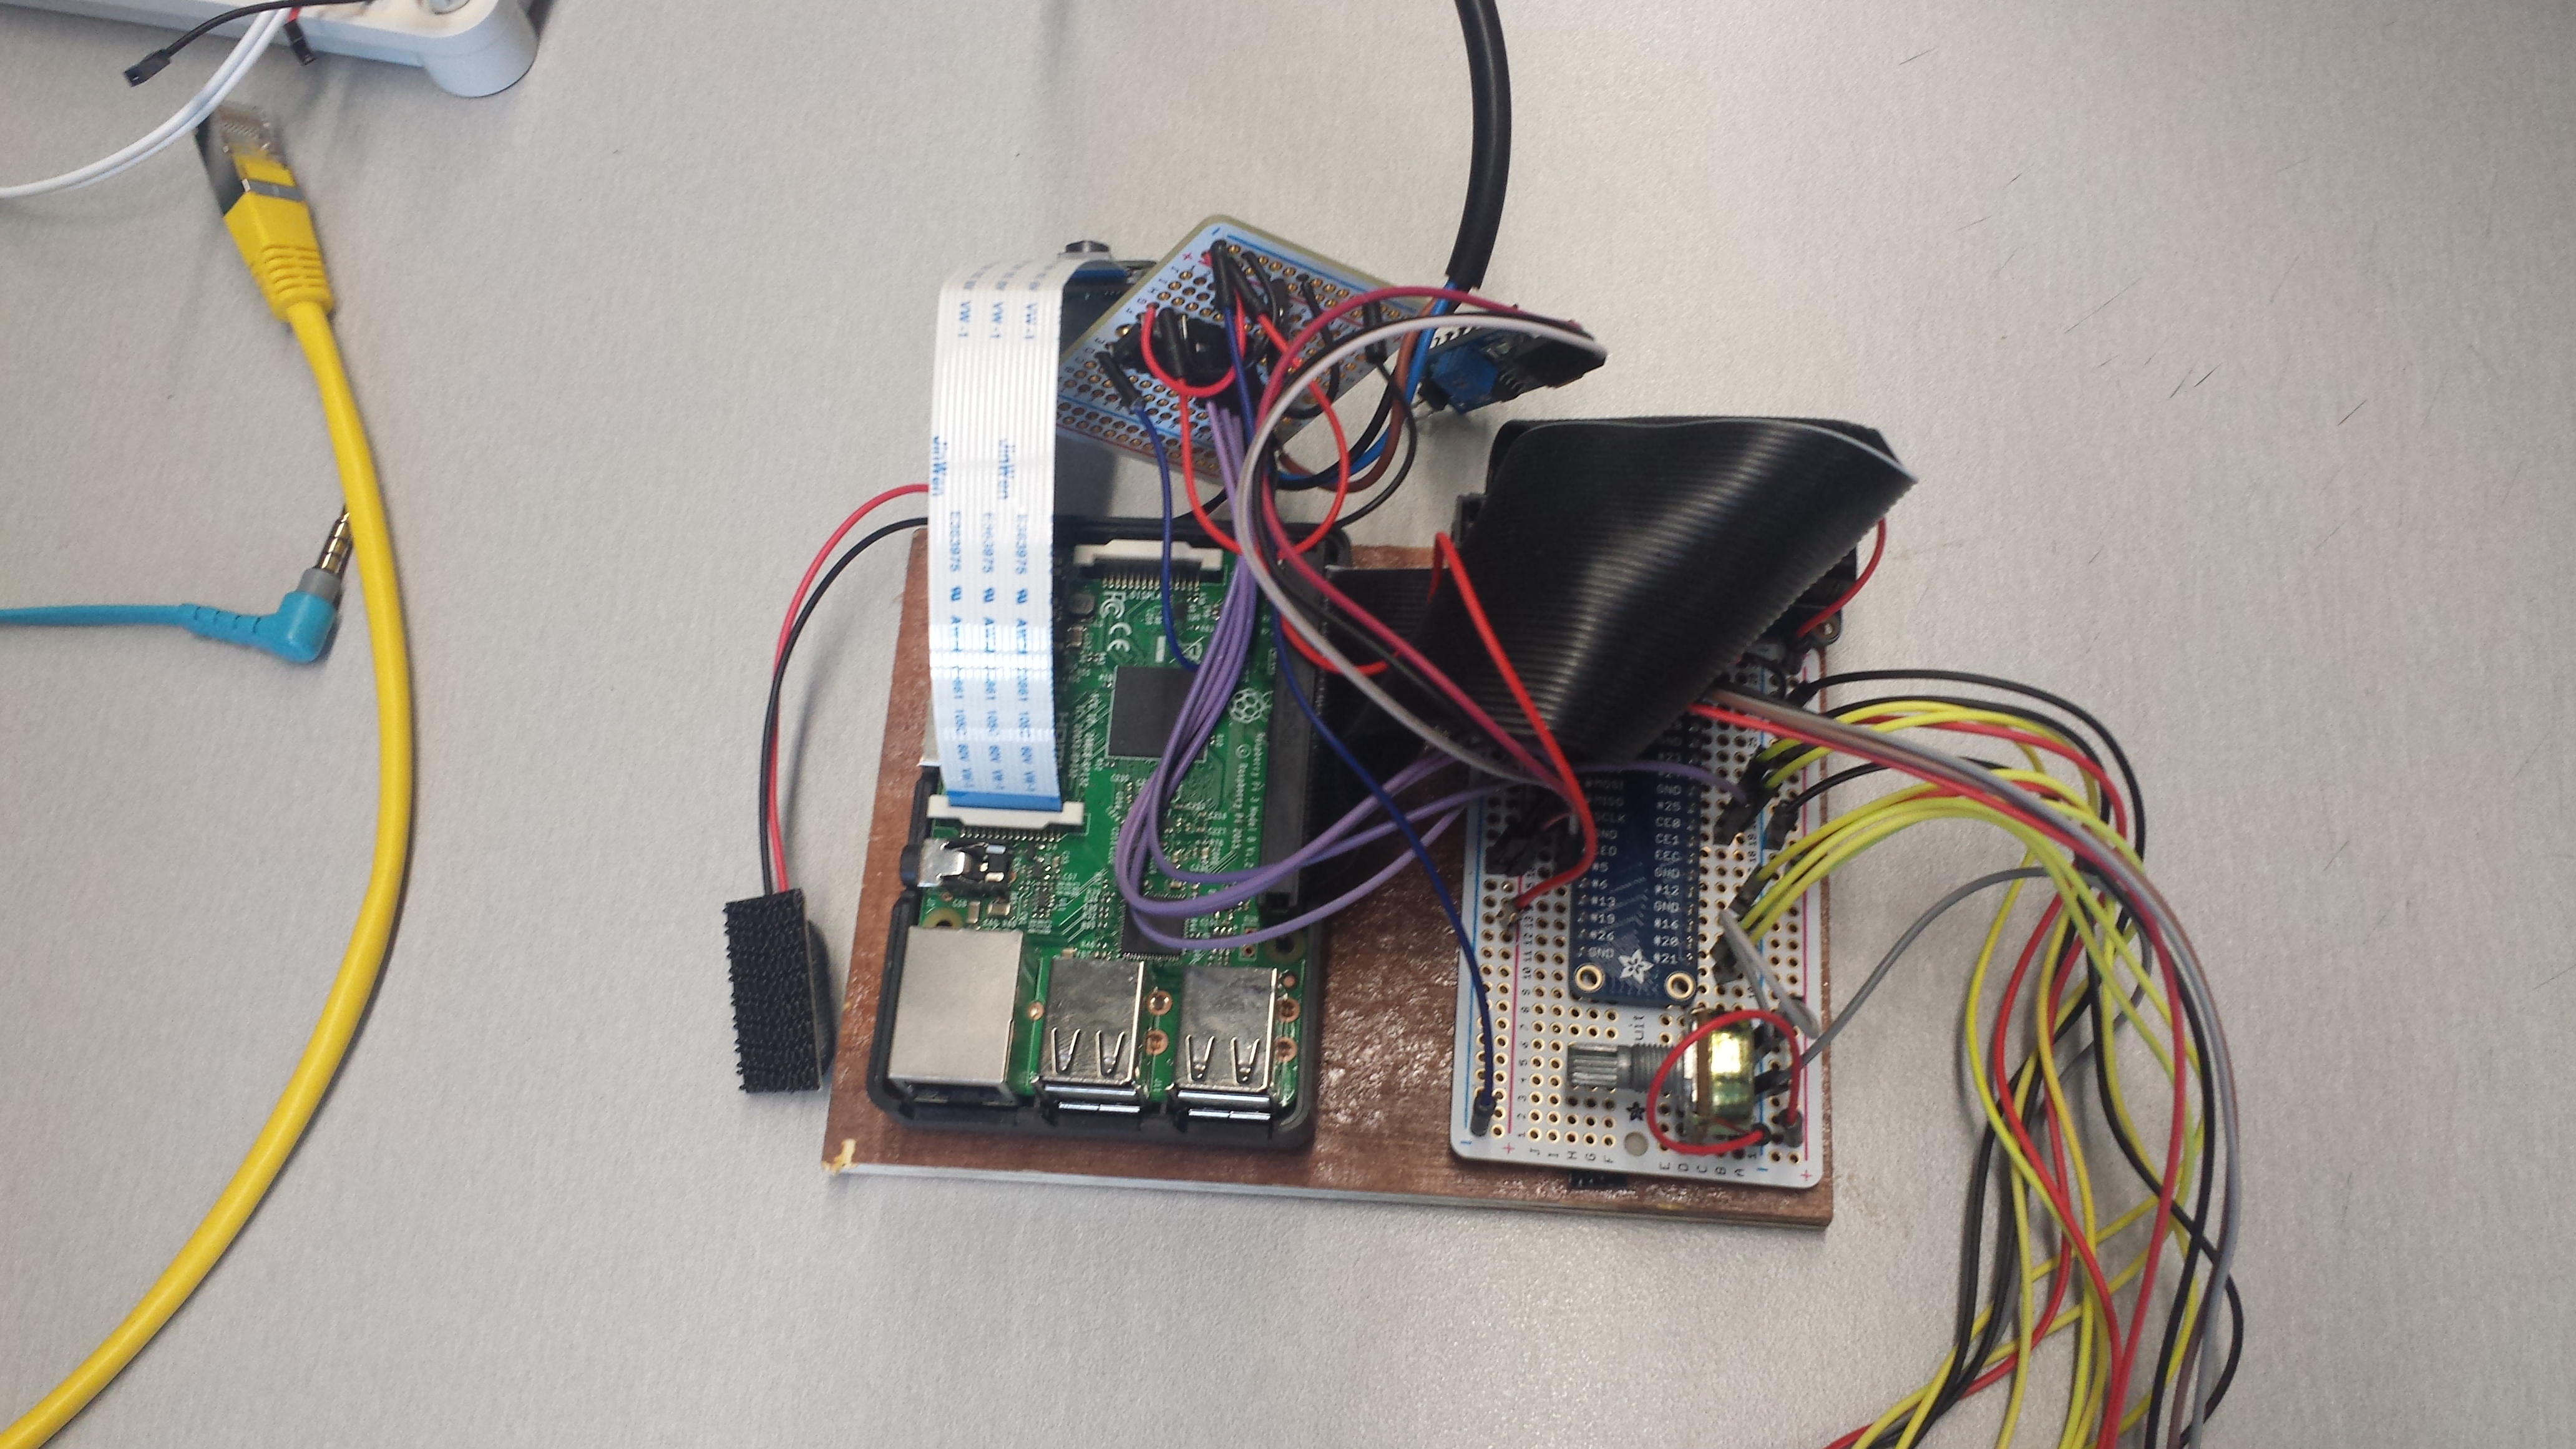
Connect the T cobbler to the GPIO pins on the raspberry pi and place it on a breadboard
Gently push the picamera into the picamera slot.
BME280
- Connect the vin pin to 3v3
- Connect the GND pin to the ground
- Connect the SCK pin to the SCL pin
- Connect the SDI pin to the SDL pin
MCP3008 and anemometer
MCP3008
- Connect the VDD pin to 3v3
- Connect the VREF pin to 3v3
- Connect the AGND pin to GND
- Connect the CLK pin to SCLK
- Connect the Dout pin to MISO
- Connect the Din pin to MOSI
- Connect the CS pin to CEO
- Connect the DGND pin to GND
Anemometer
In order for the anemometer to work properly we will need a power supply of atleast 7Vdc and a maximum of 24Vdc
I used a regualr 9v battery.
- Connect your 9v power supply's GND to the same GND rail your RasPi and MCP3008 are using.
- Connect the anenometer's black wire to that same GND rail.
- Connect the anenometer's brown wire to 9v.
- Connect the anenometer's blue wire to the MCP3008's CH0 pin.
YL-83 water drop sensor and board
The YL-83 can both measure analog and digital values. Since we just want to know if it rains or not we will be connecting the digital pin. When we read a 0 it means it is not raining and when we read a 1 it means it is raining.
Control board
- Connect the D0 to a GPIO pin I used #5 note if you use another gpio pin you will have to change this in the code aswell.
- Connect the GND pin to GND
- Connect the VCC pin to 3v3
Detection board
Connect one pin to the + on the control poard and the other to -
LCD
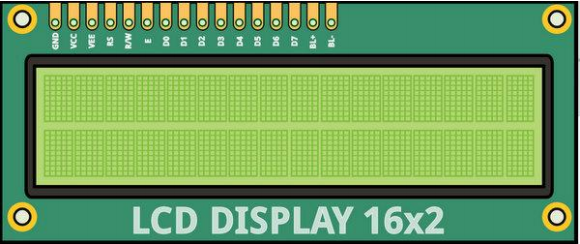
We will be using the LCD in 4bit mode. This means we will need less pins to interface the LCD.
- Connect the GND pin to GND
- Connect the VCC pin to 5v
- Connect the VE pin to a trimmer
- Connect the RS pin to GPIO-pin 21
- Connect the RW pin to the GND
- Connect the E pin to GPIO-pin 20
- Do not connect D0 - D3
- Connect D4 to GPIO-pin 16
- Connect D5 to GPIO-pin 12
- connect D6 to GPIO-pin 25
- Connect D7 to GPIO-pin 24
Upload Code and Run Code on Boot

Always upload the code to your raspberry pi after you've applied some changes or enable automatic upload.
If you want to run the code automatically when the raspberry pi boots you will have to edit the RC.LOCAL file.
In the raspberry pi command environment type sudo nano /etc/rc.local.
At the bottom of the file add python /home/pi/FlaskProject/FlaskProject.py &
Now restart your raspberry pi, open your favourite browser and visit the ip address of your rpi.
The Enclosure
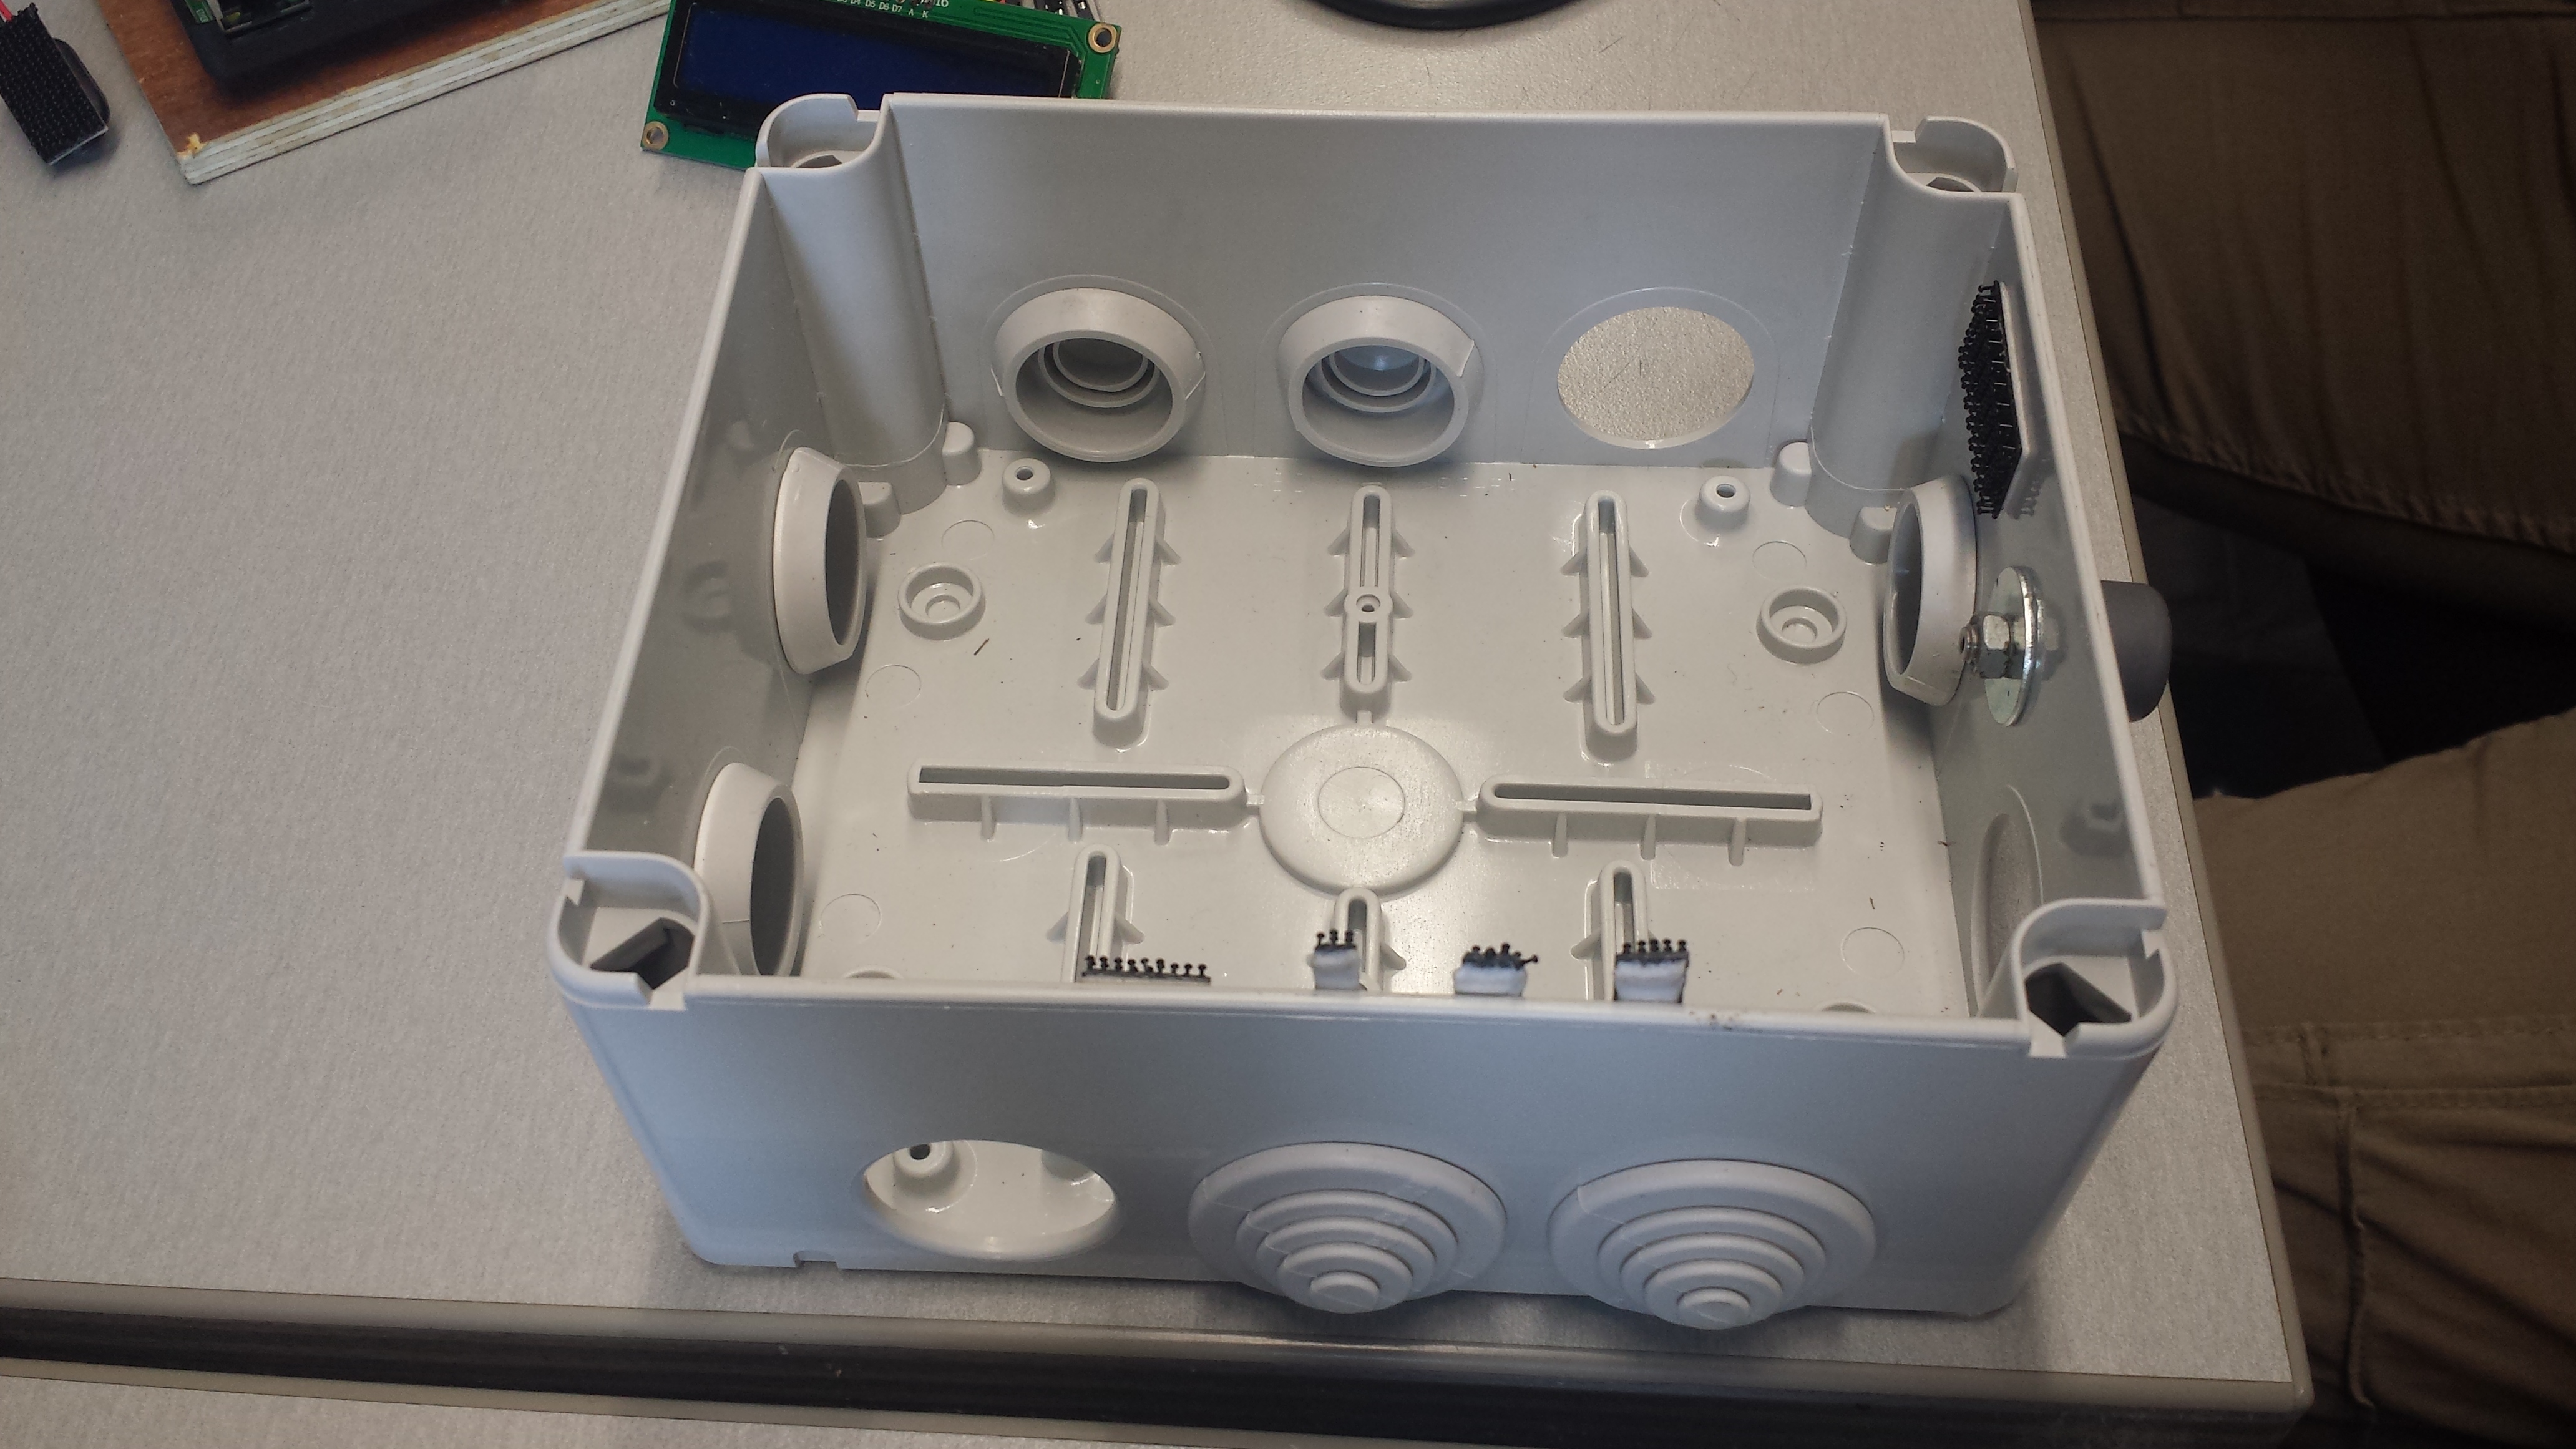
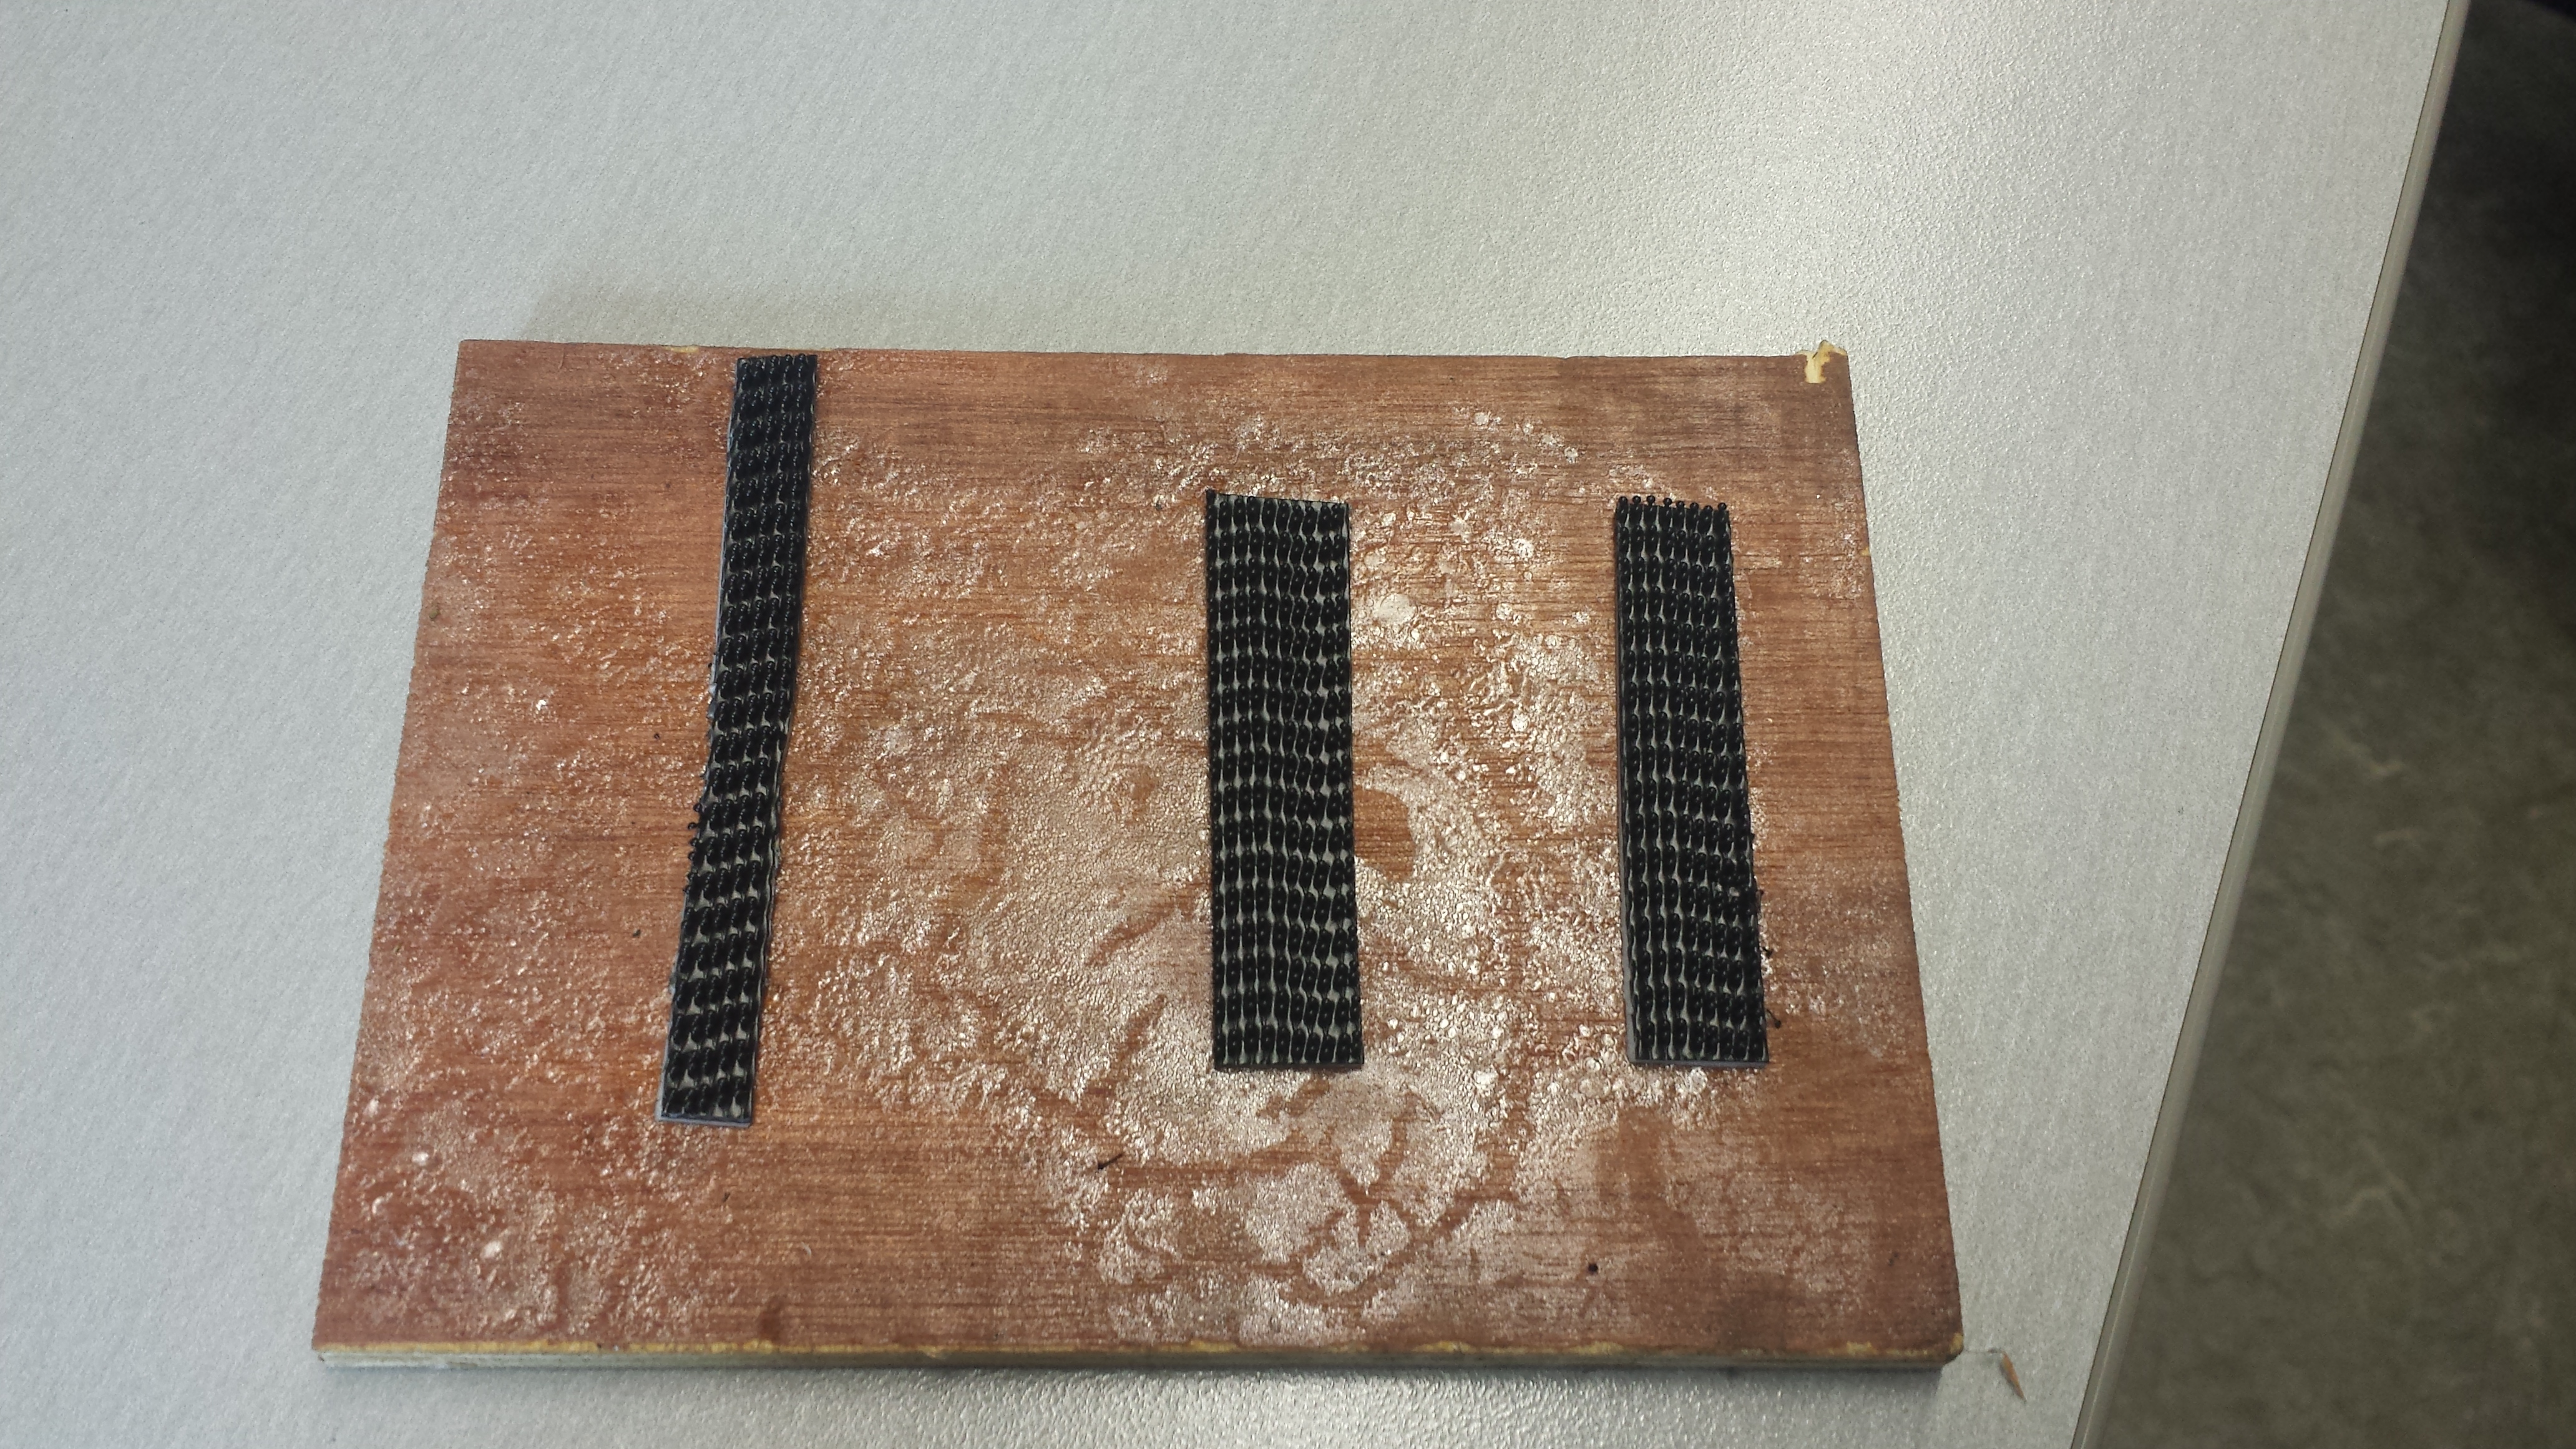
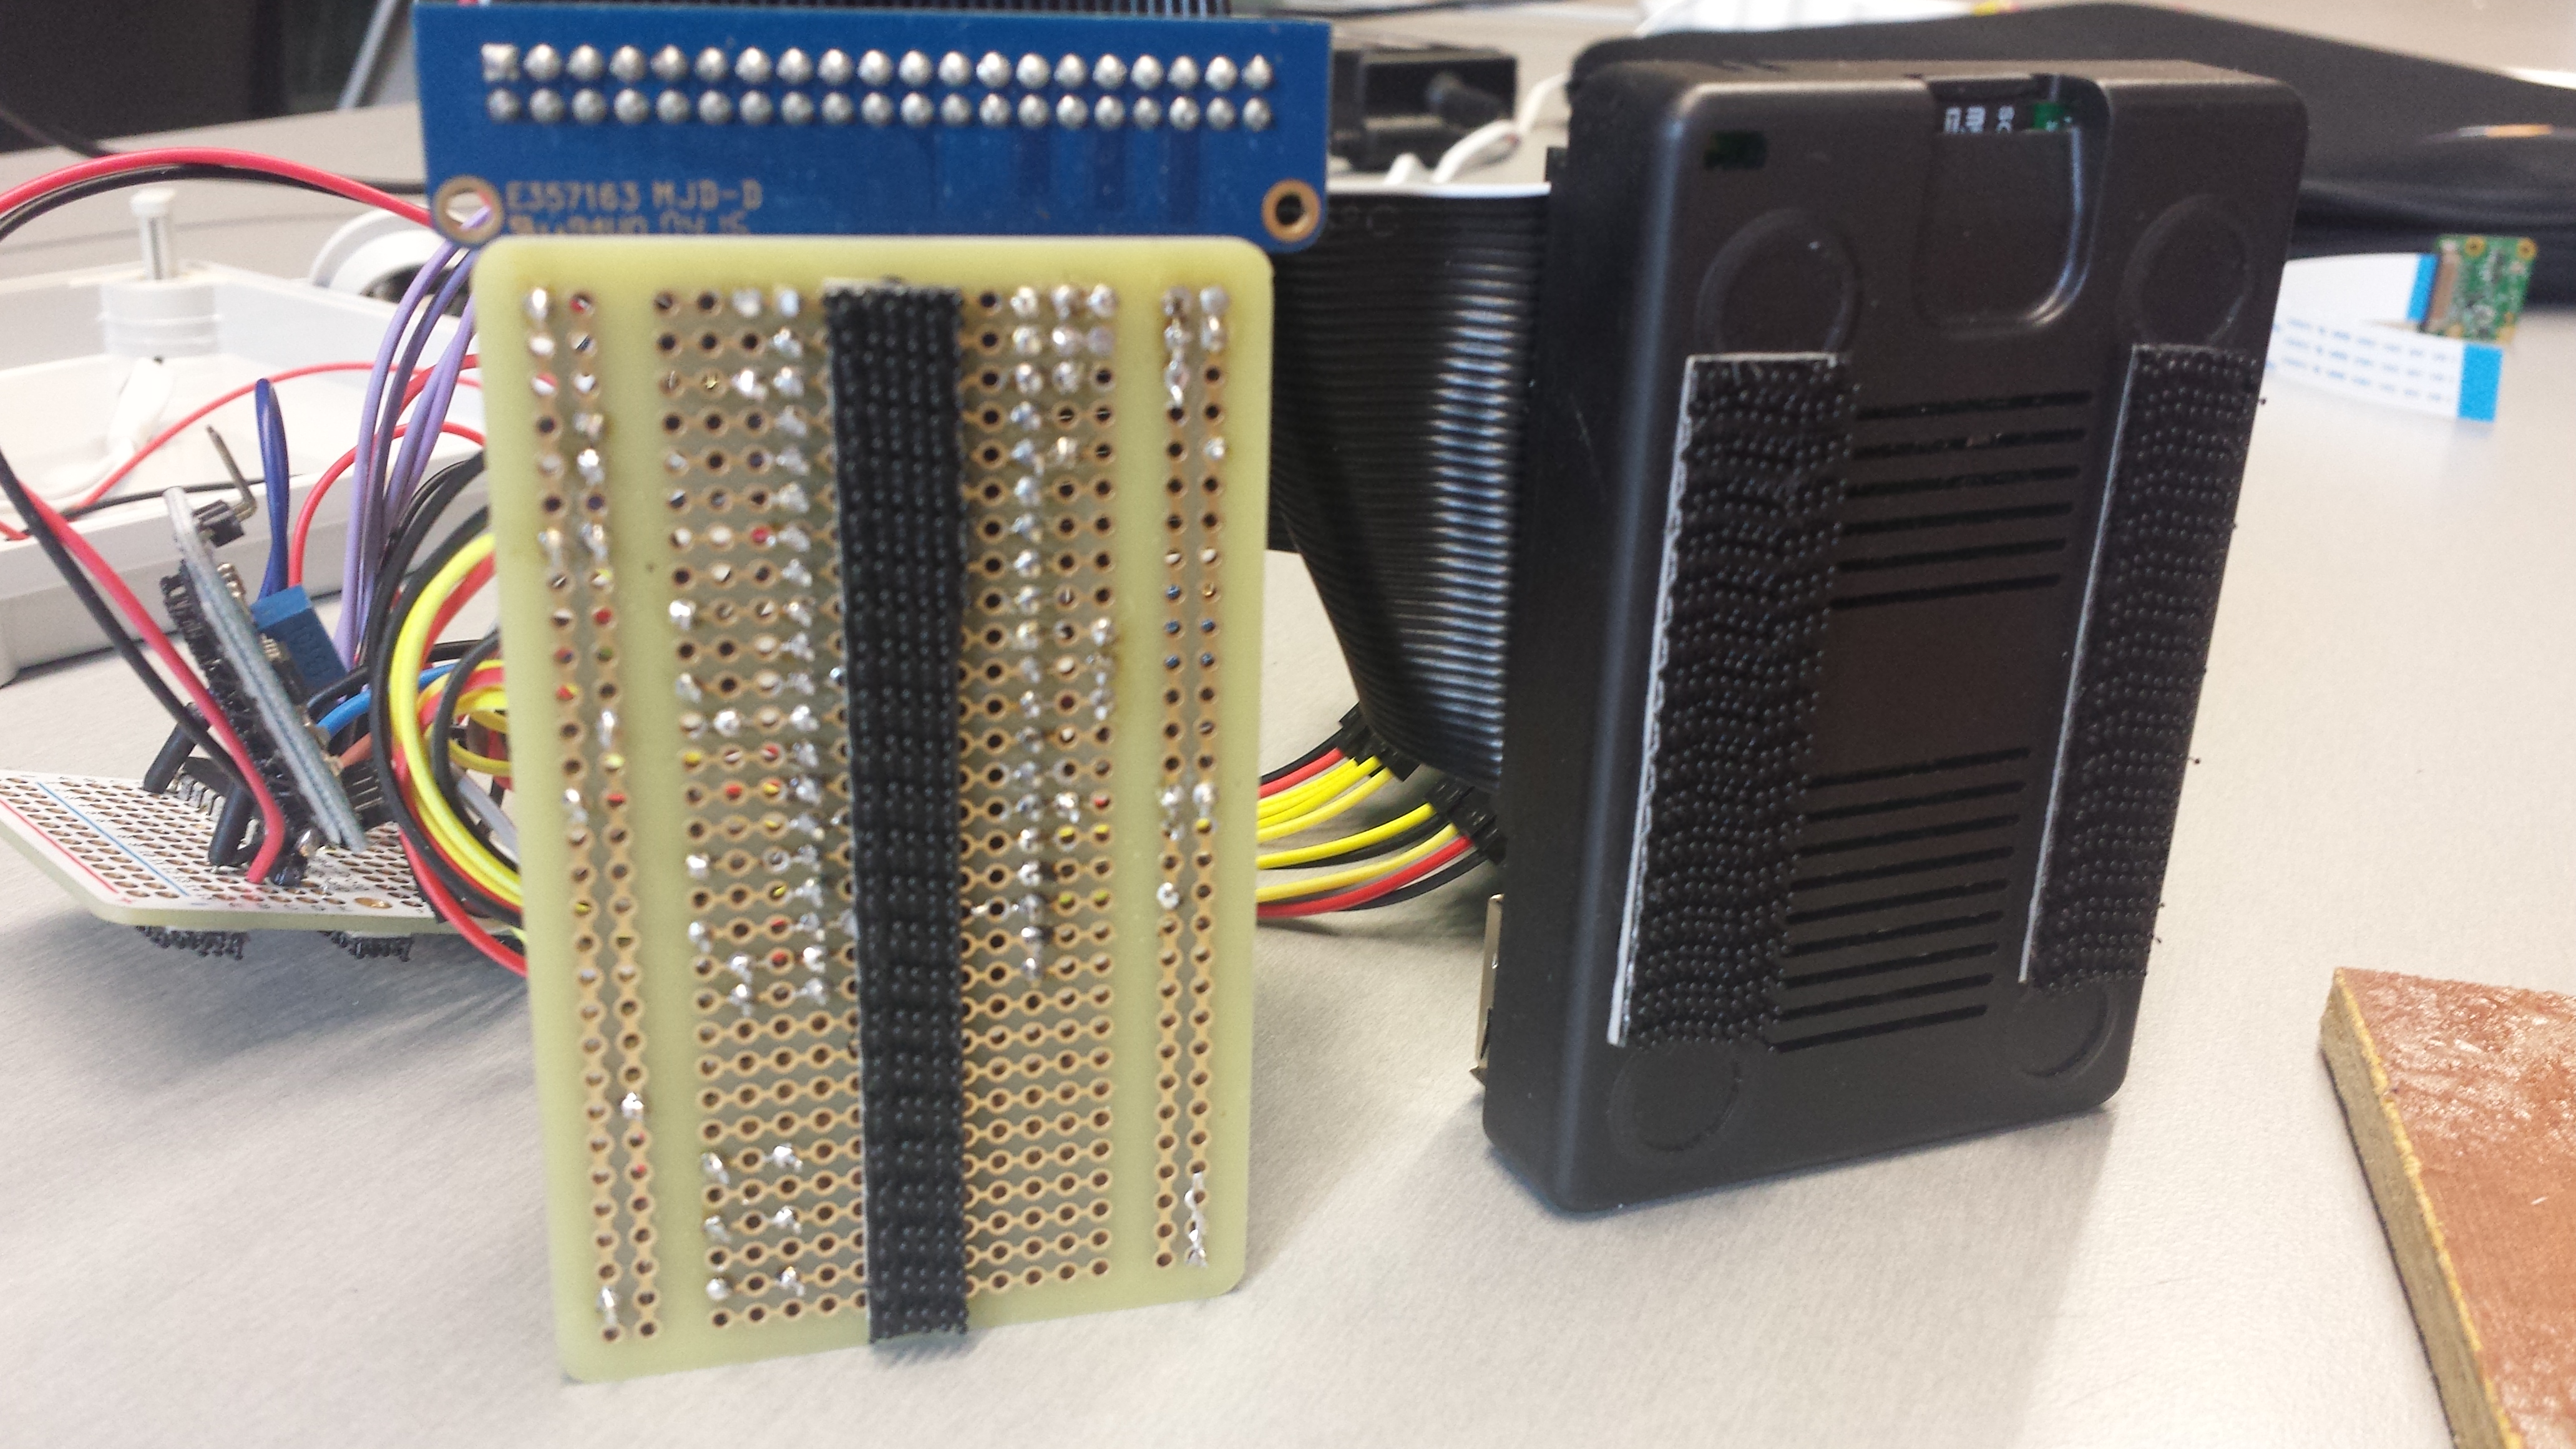
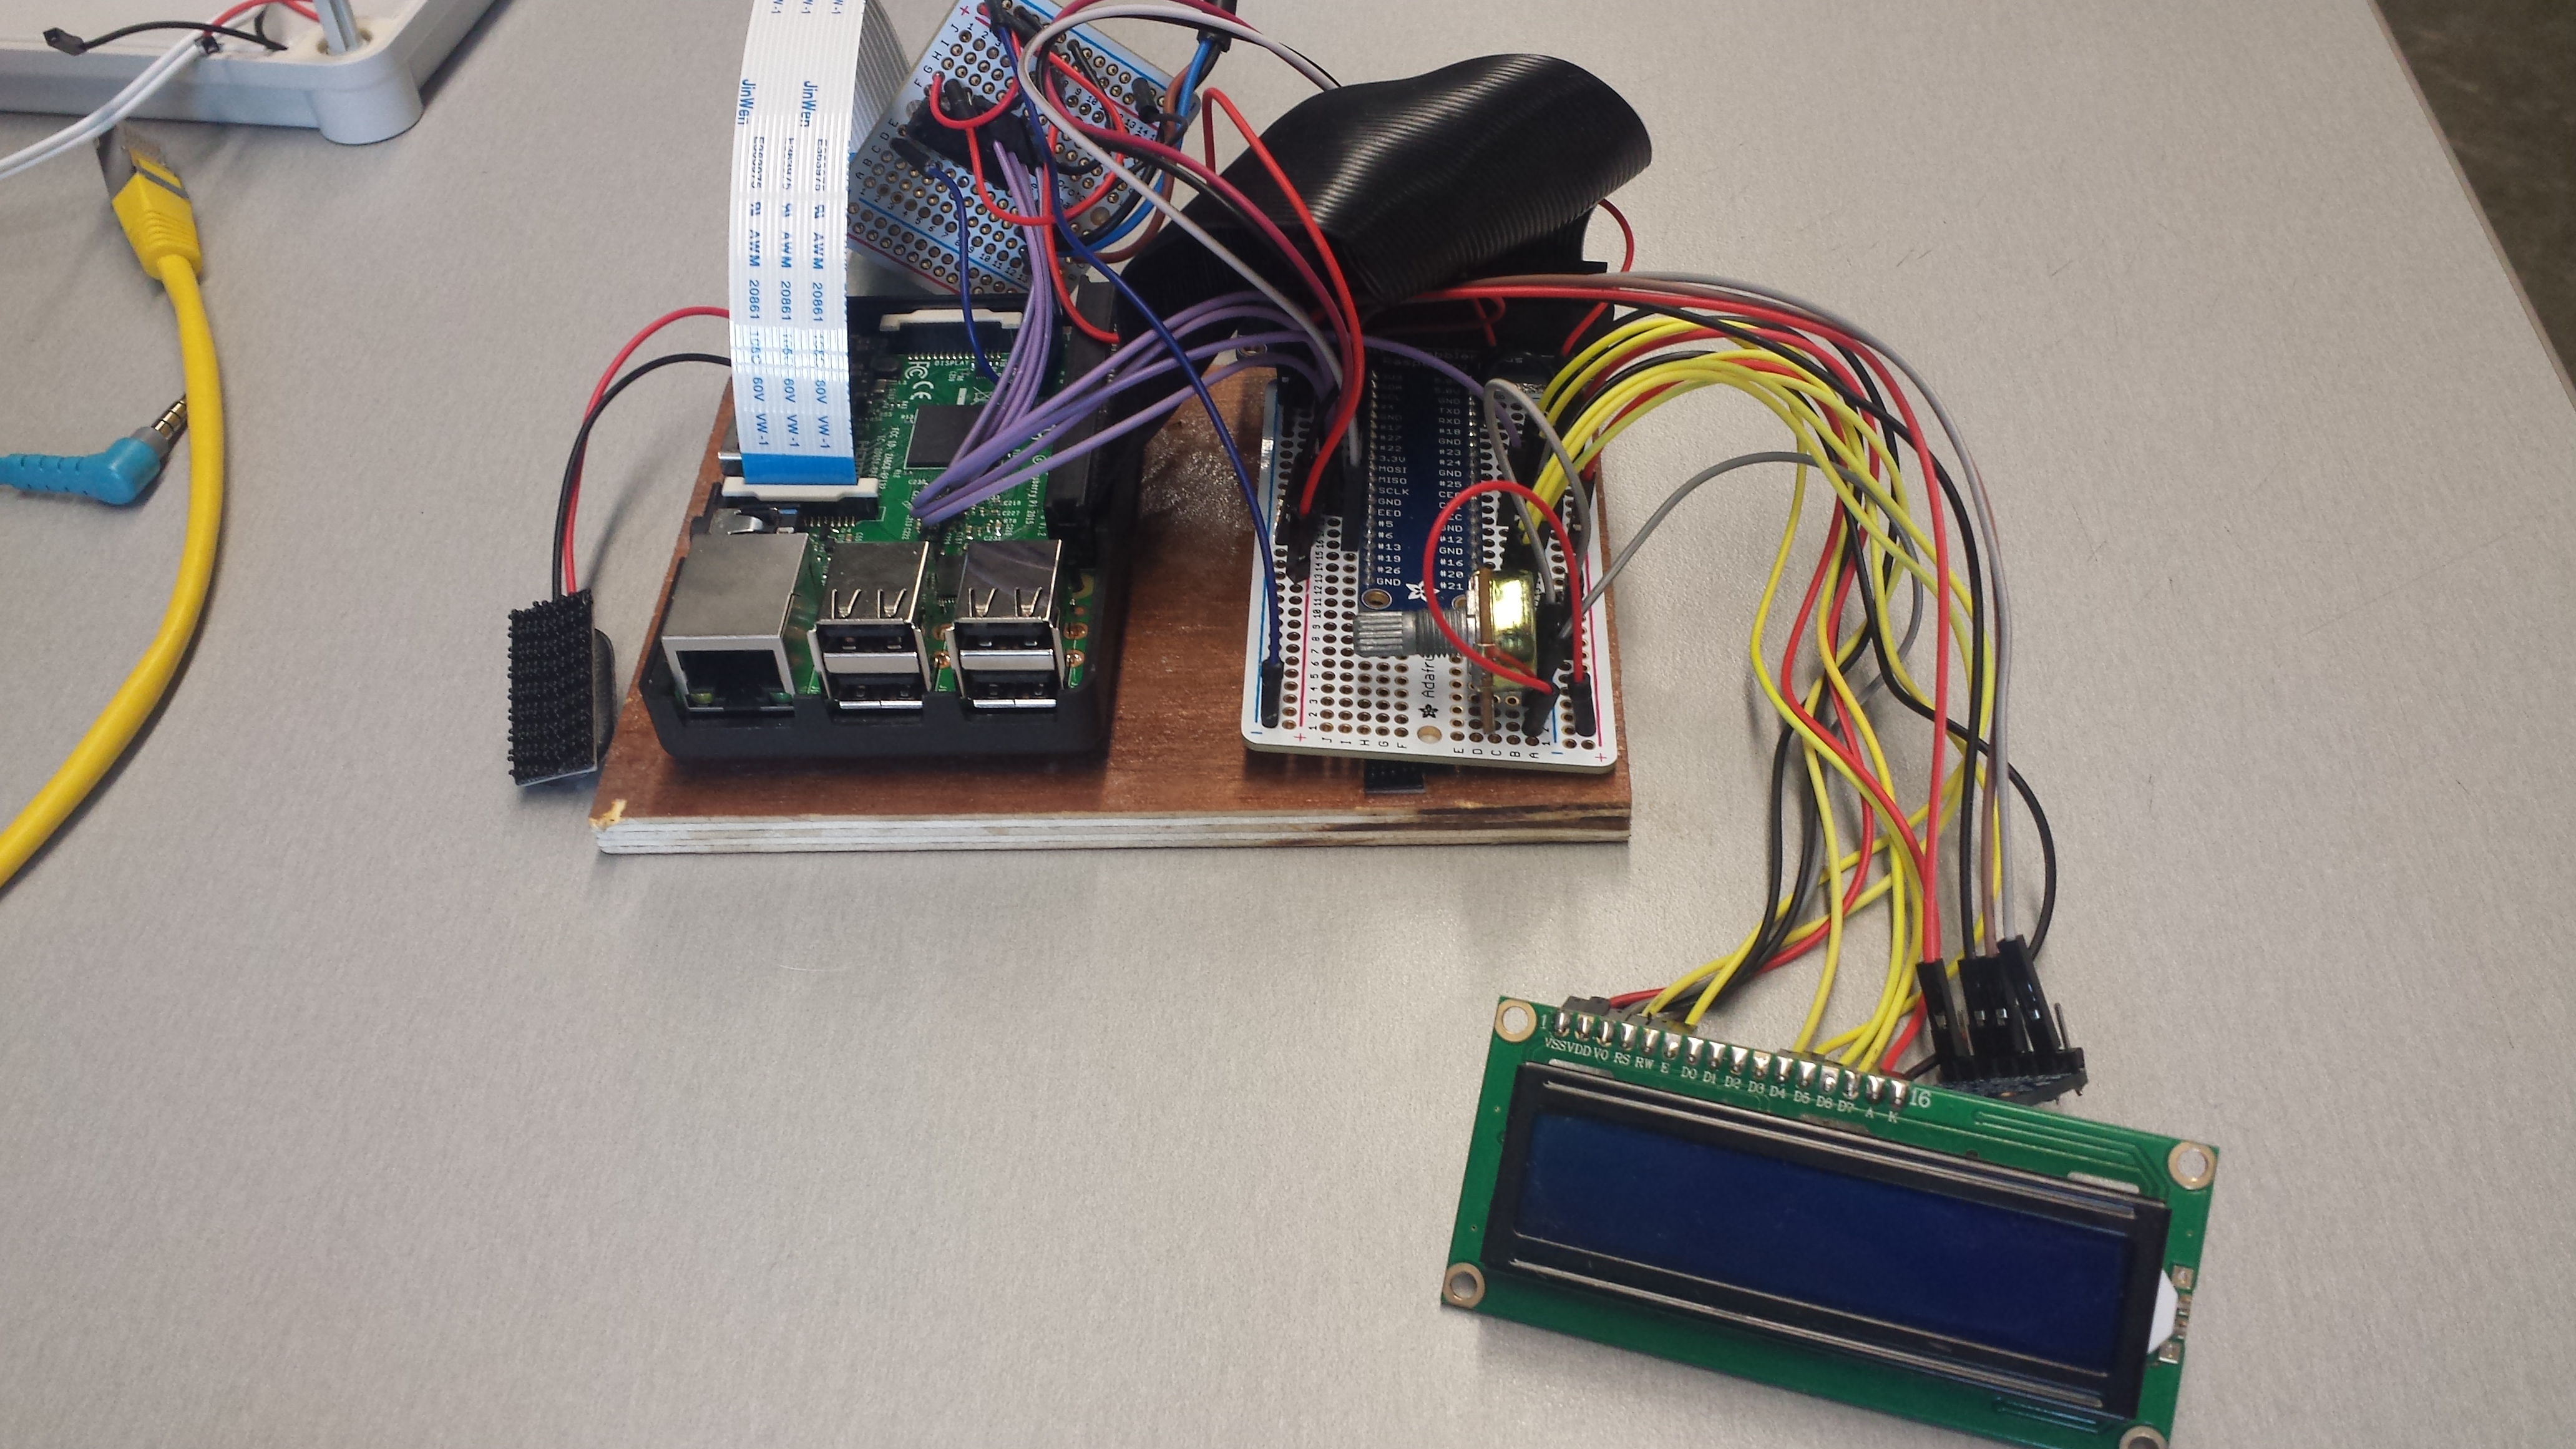

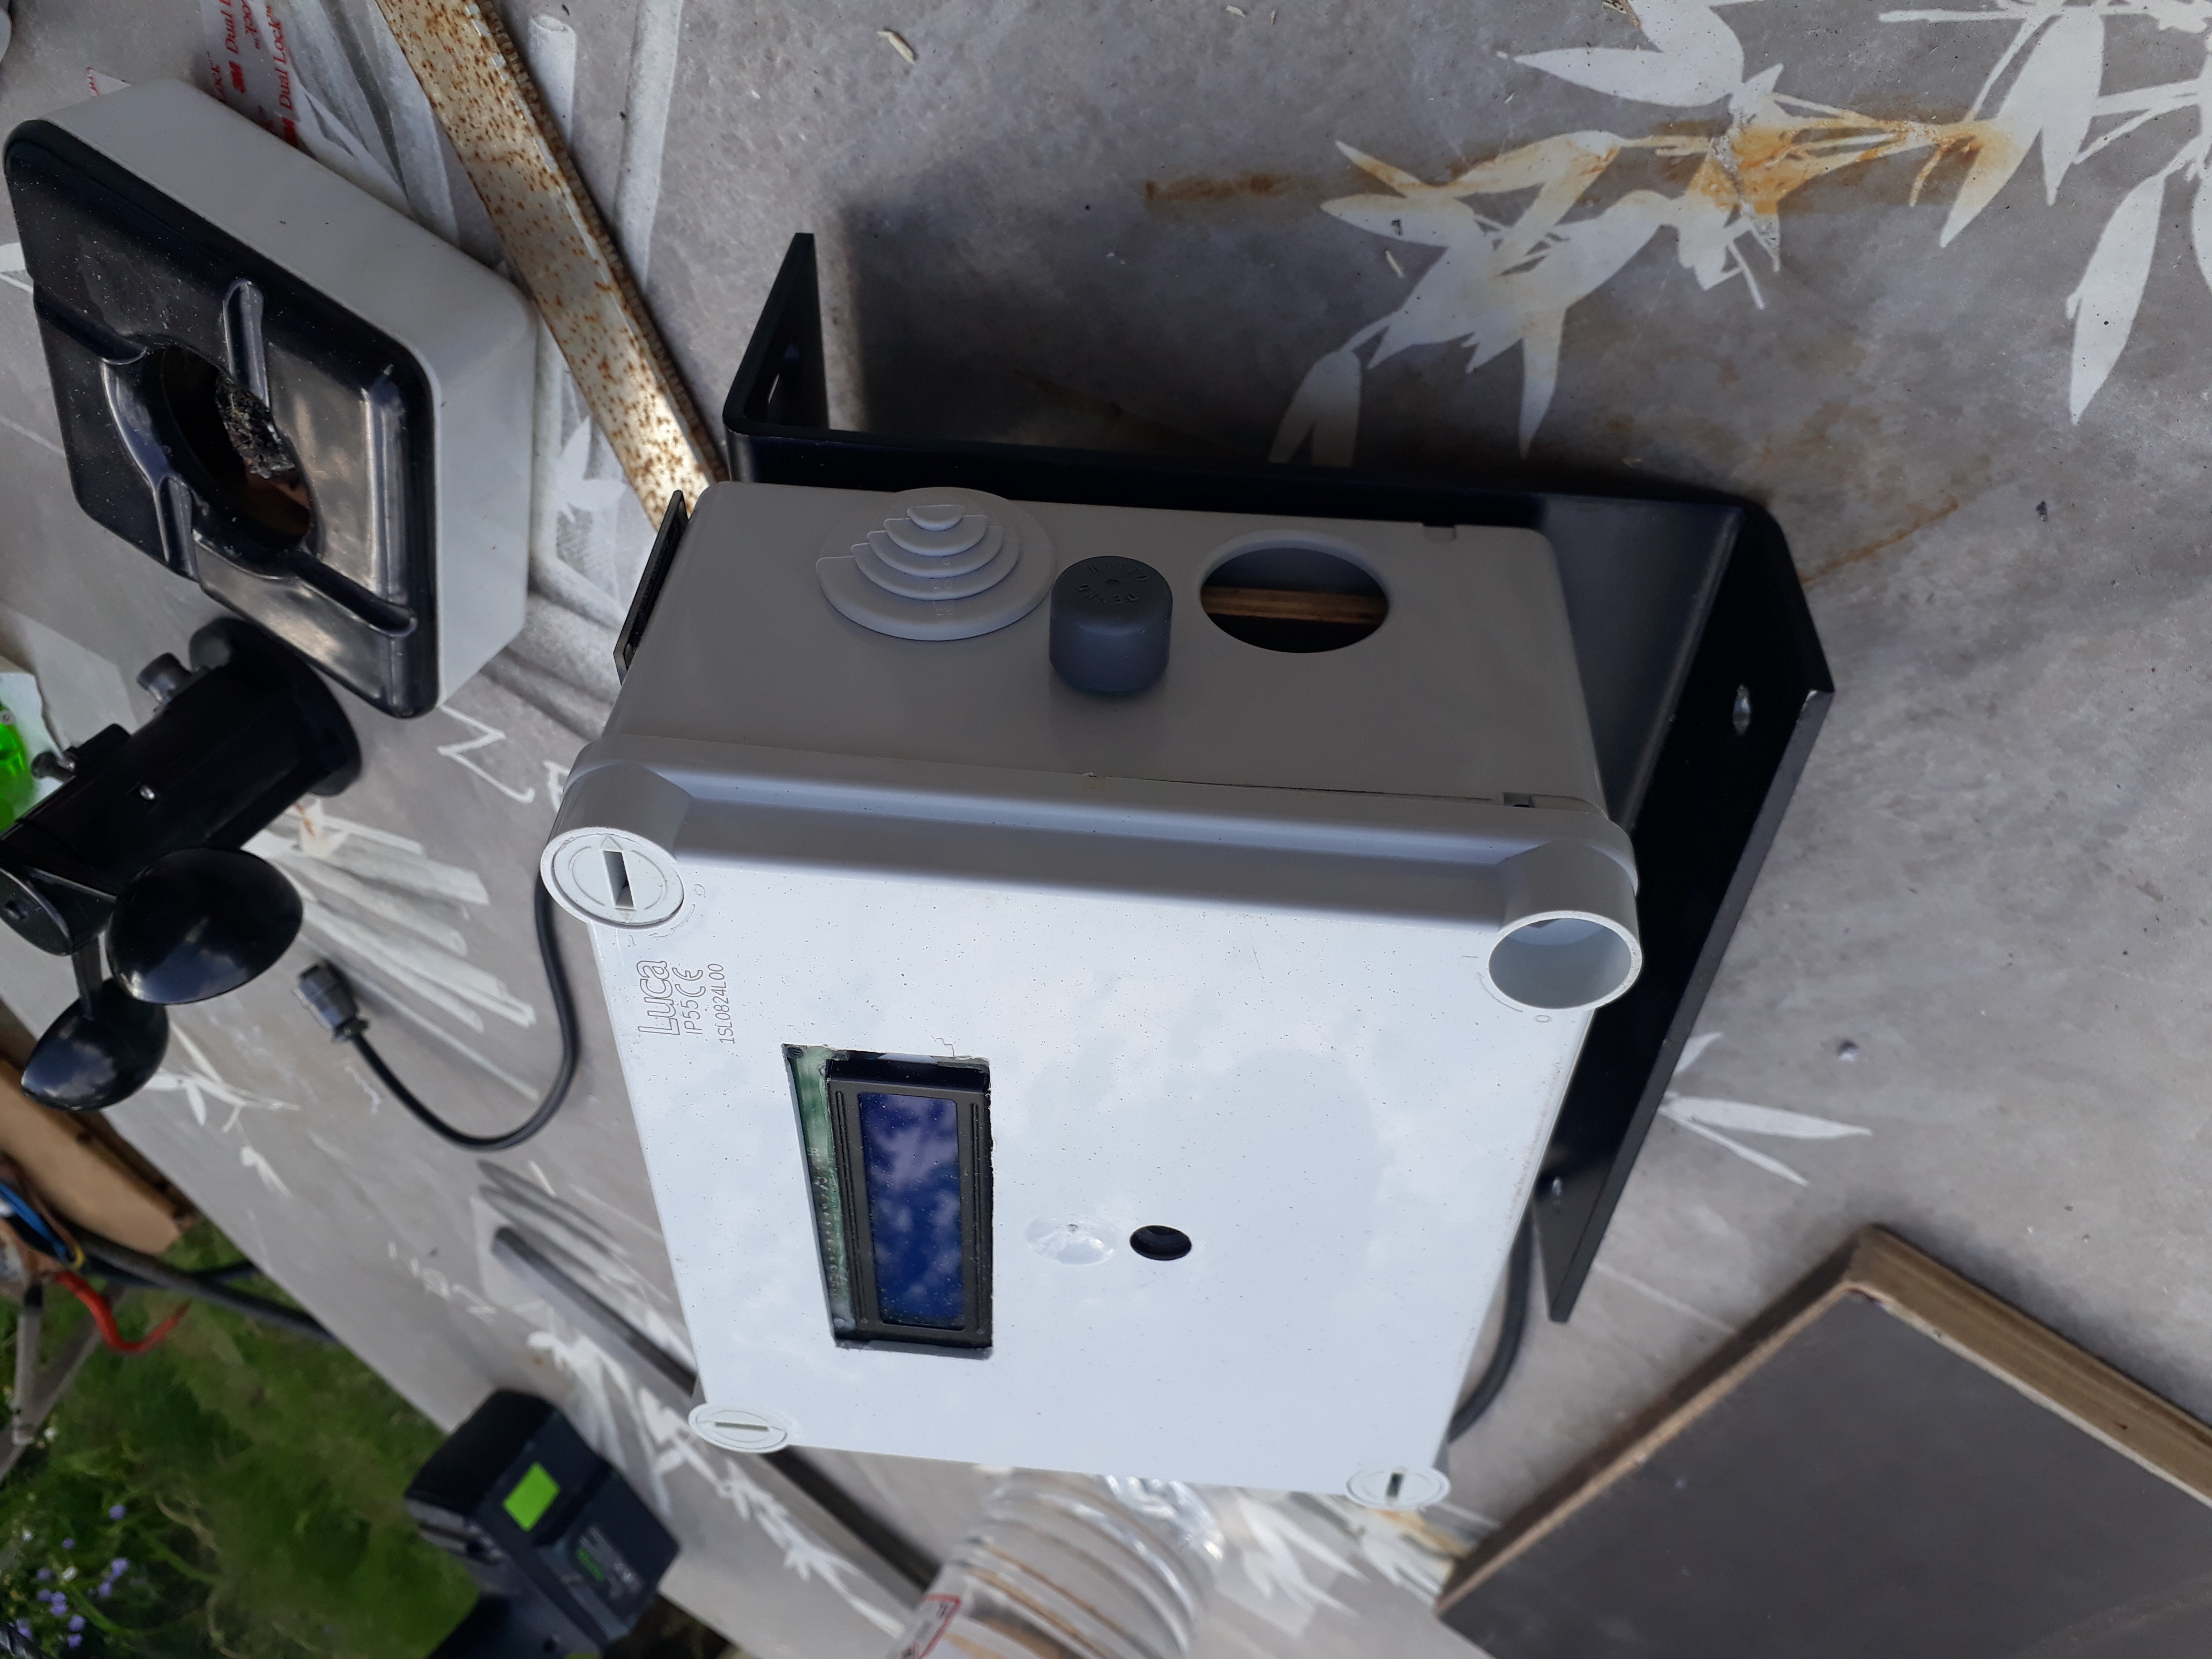
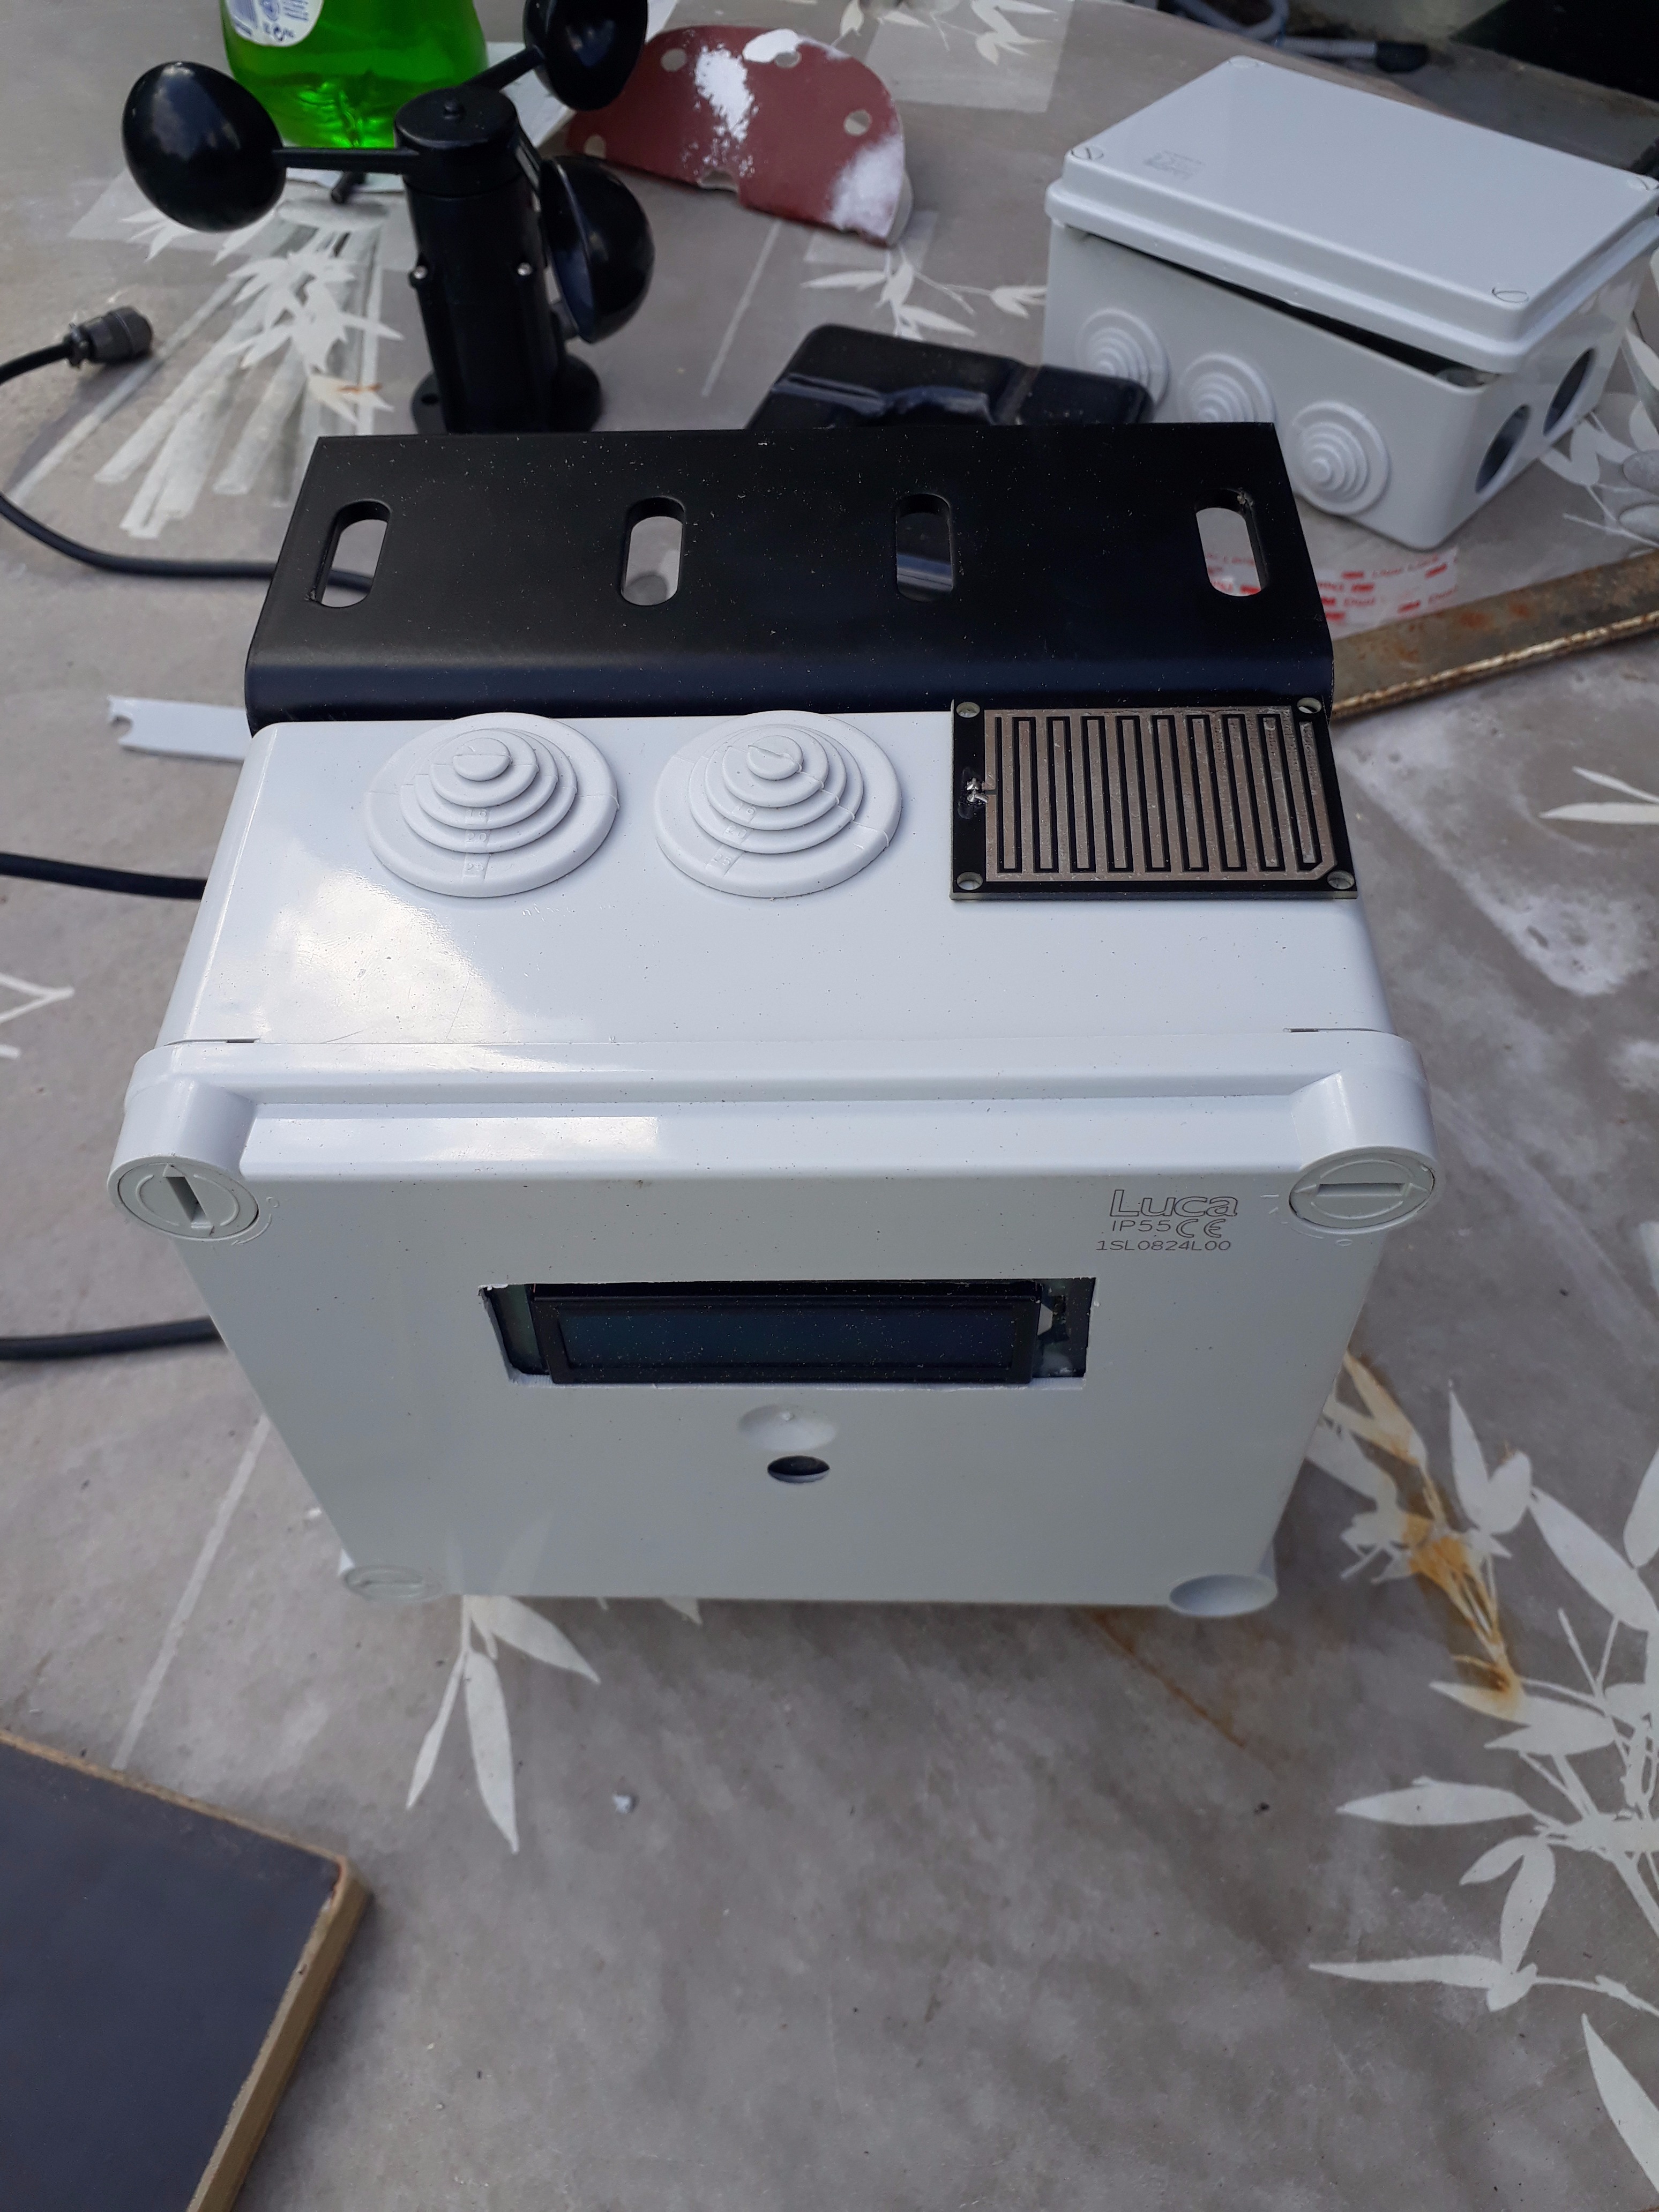
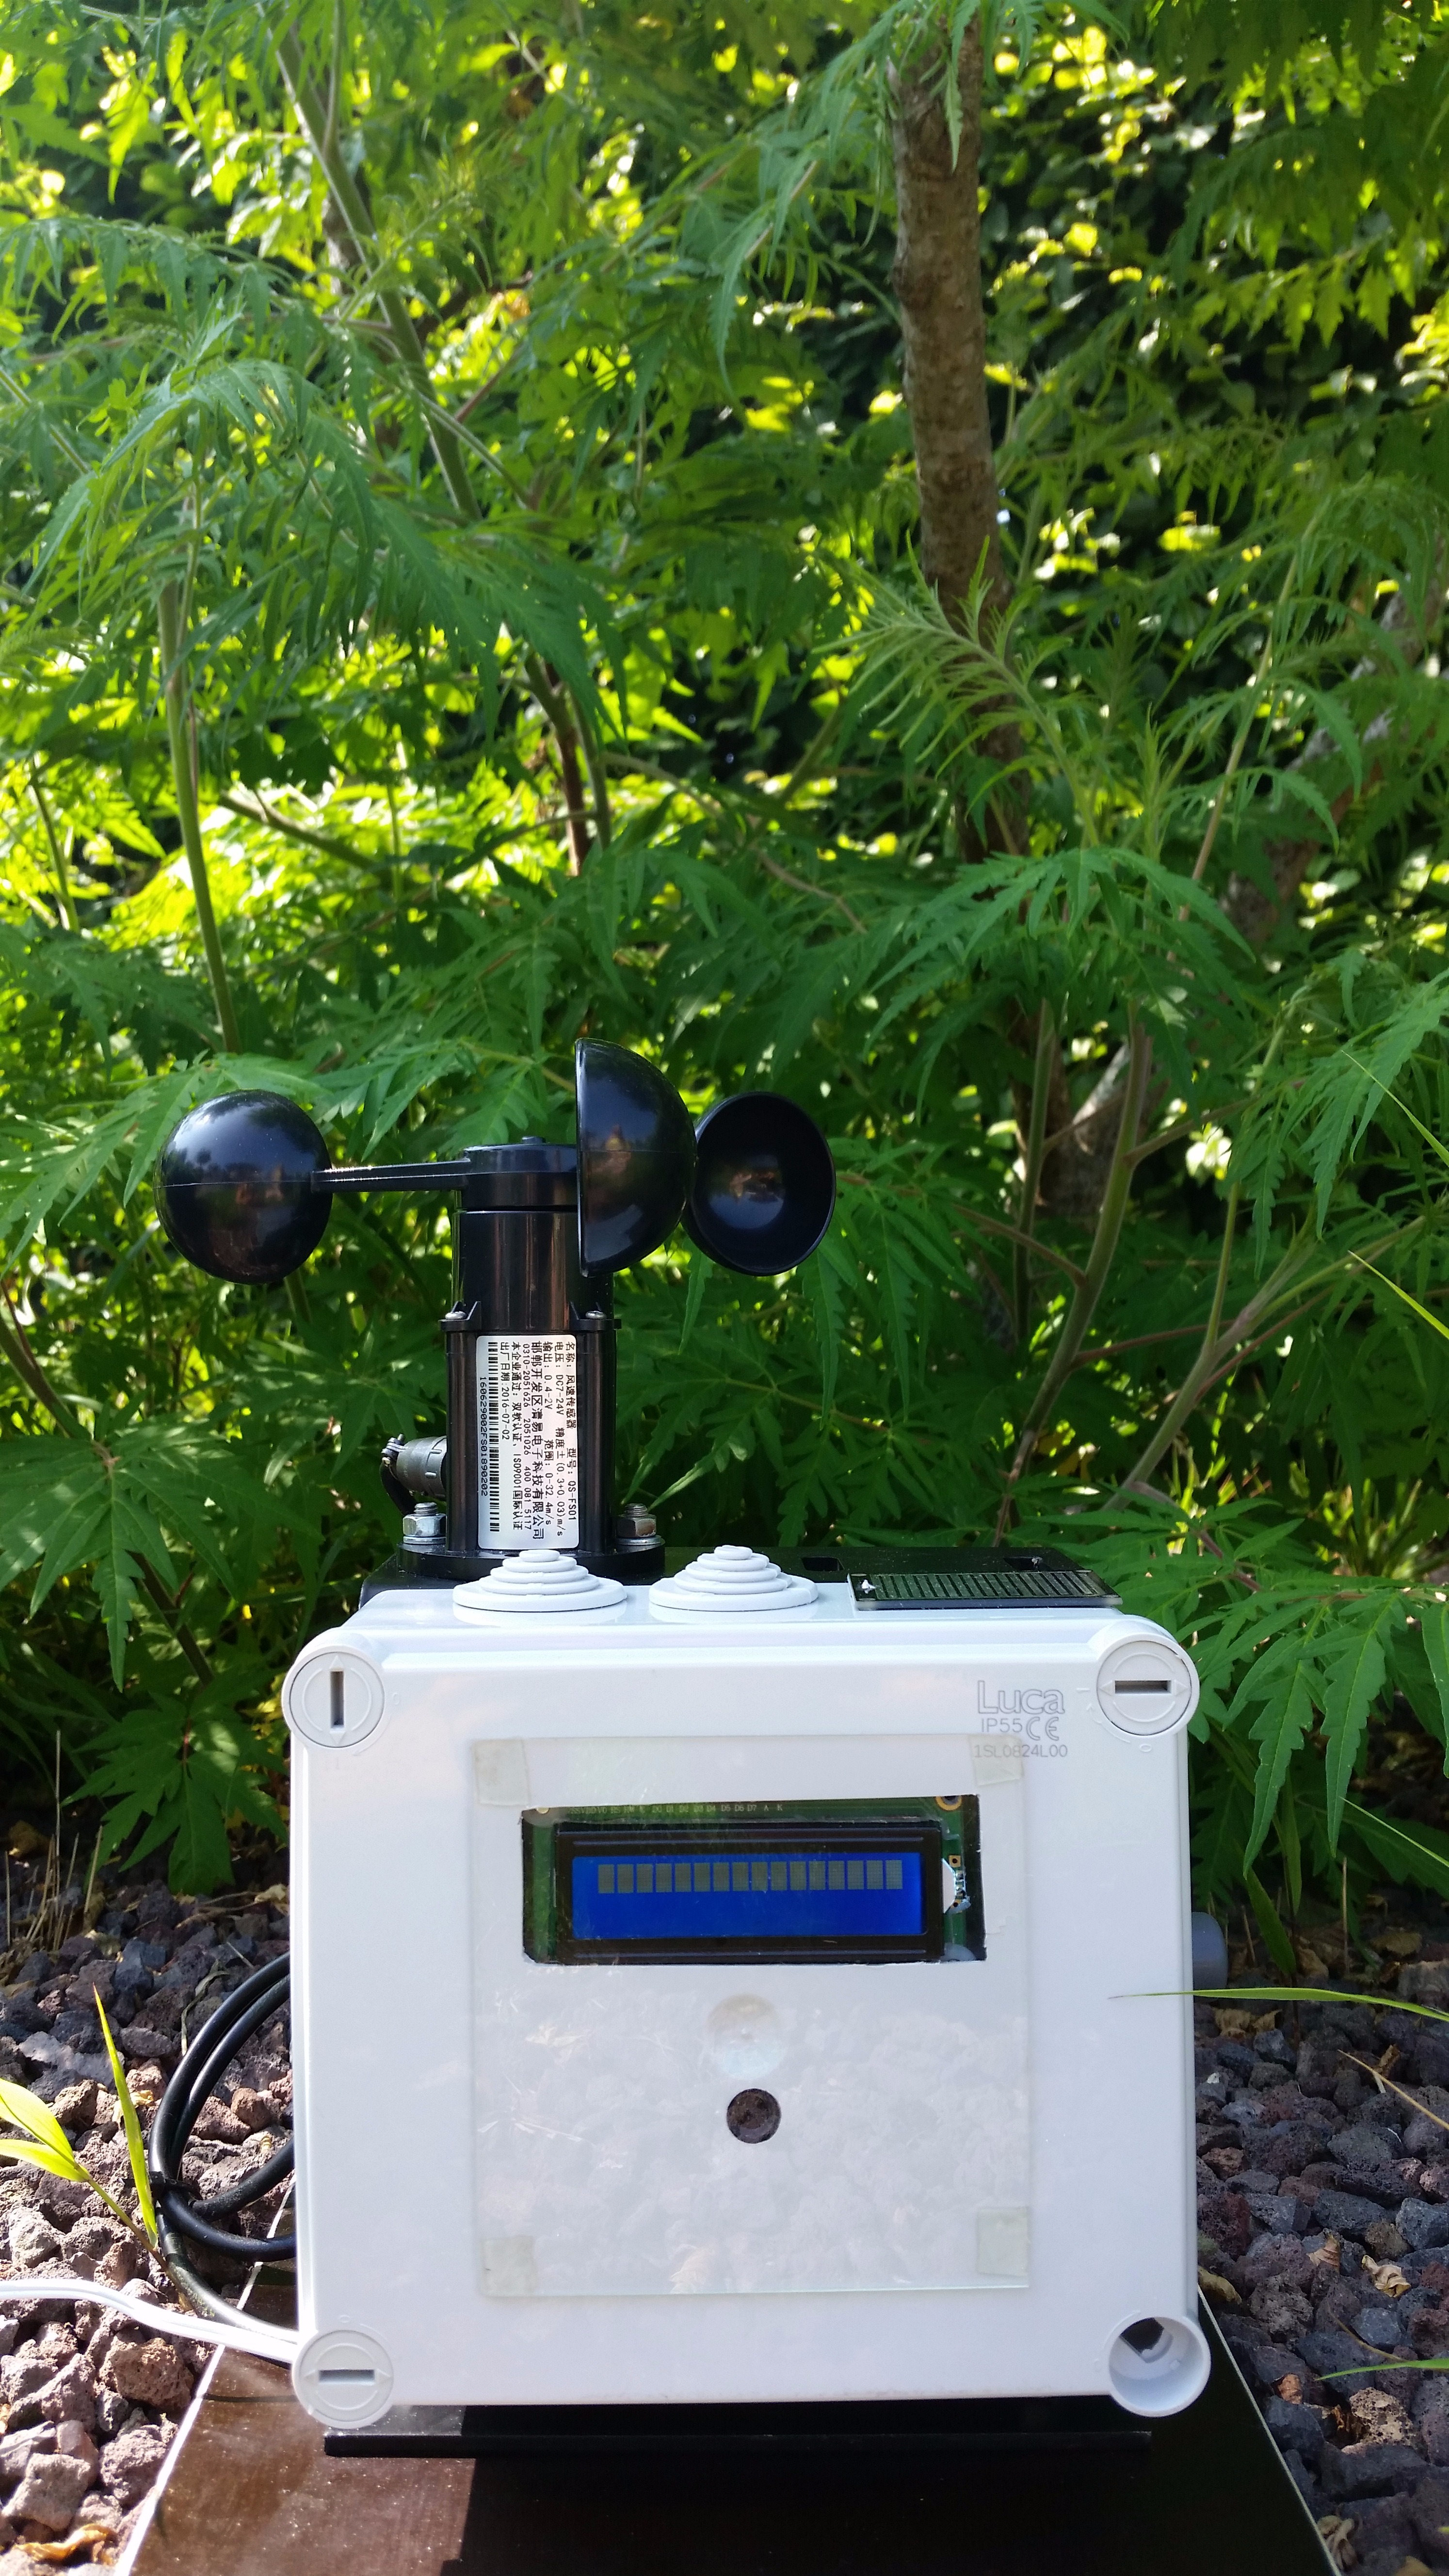
The enclosure I used for my project is a junction box.
I started with soldering all of my components on a perfboard. Then I placed the Raspberry pi and my perf board on a wooden plate.
I used a iron frame as support for my case and screwed everything together.
At the end I used a wooden plank as base.
To keep moisture and water outside my case I used a THEMIS CAPSEAL. This uses reversed osmosis.
TEMISH® is PTFE porous membrane superior to other plastic porous materials in water
resistance, air permeability, dust resistance, thermal resistance and weatherability. Having excellent air permeability and water resistance, it is suitable to extensive applications, such as waterproof and air vent for automotive parts, mobile communication equipments, and others.
You can also place some silica gel in your case.