Weather Data on OLED Using Pi Pico and MicroPython
by mahesh_jo in Circuits > Raspberry Pi
4589 Views, 8 Favorites, 0 Comments
Weather Data on OLED Using Pi Pico and MicroPython
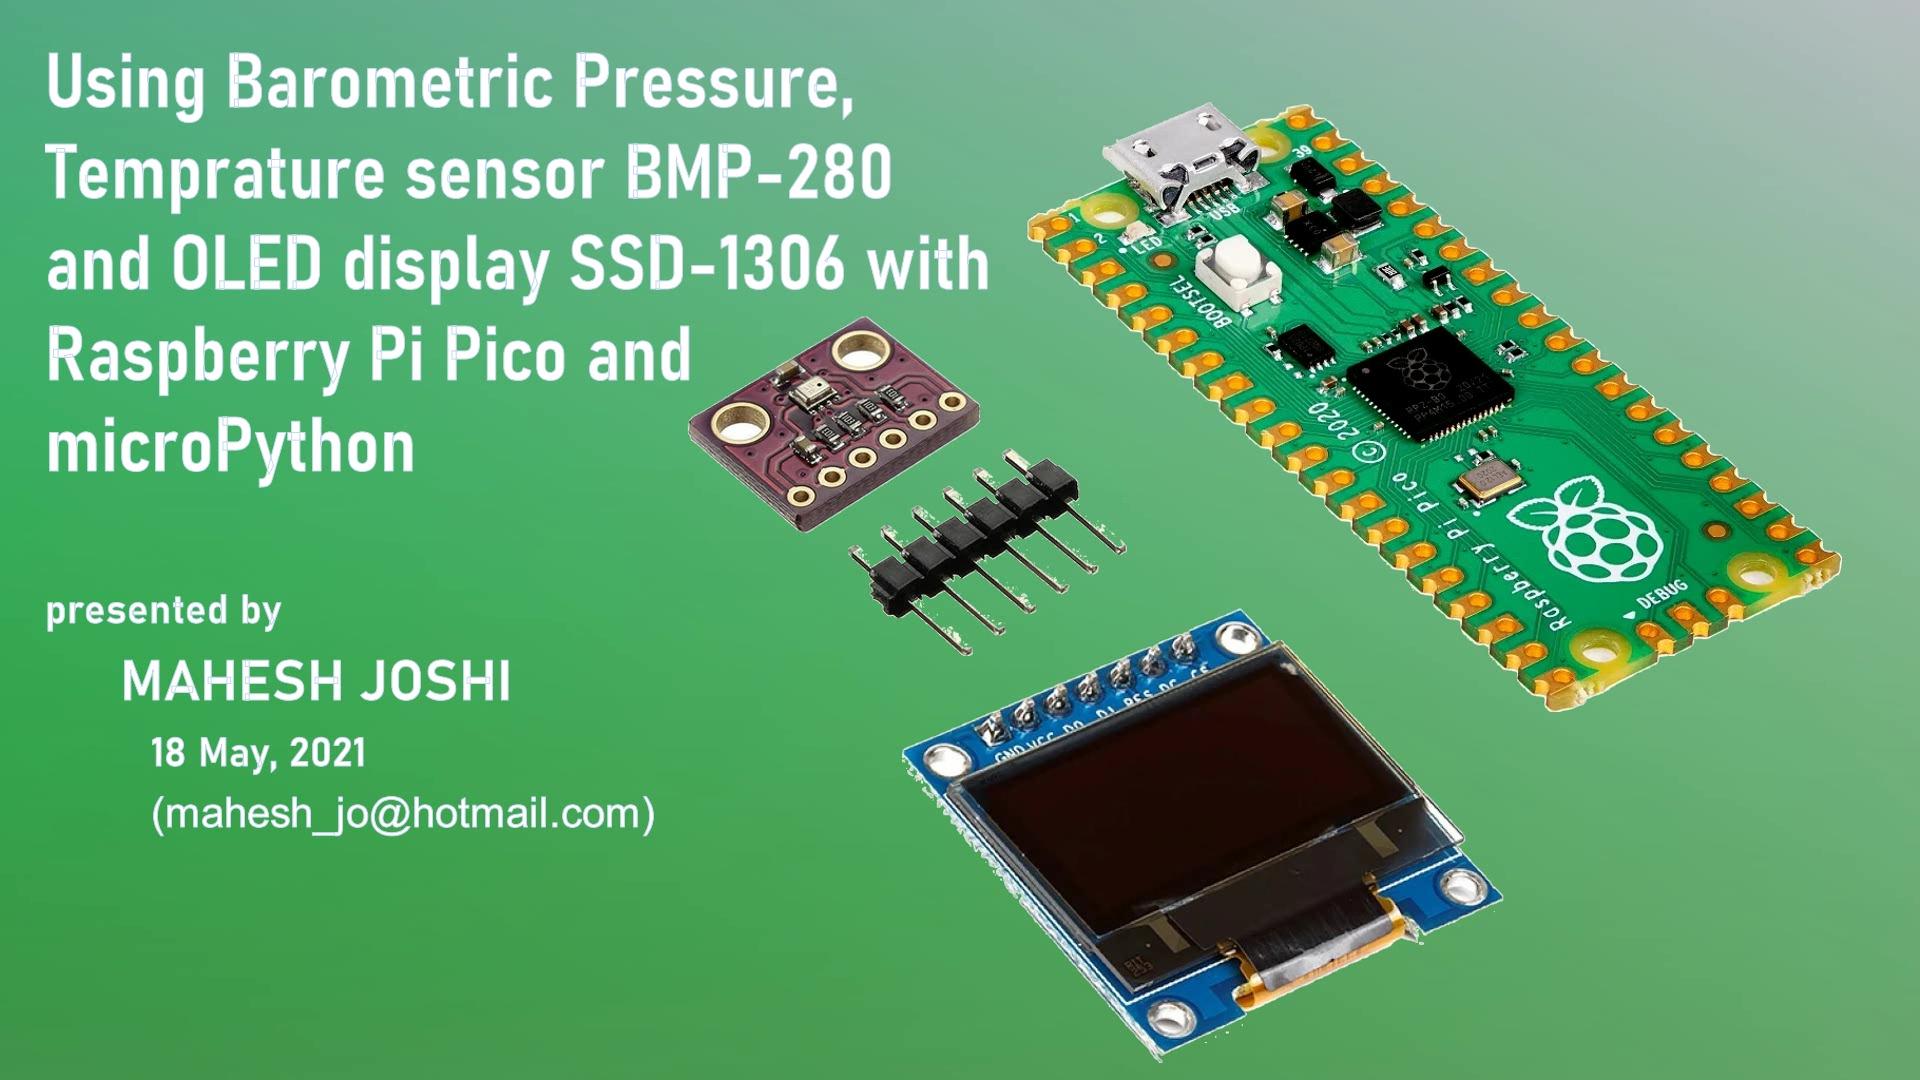
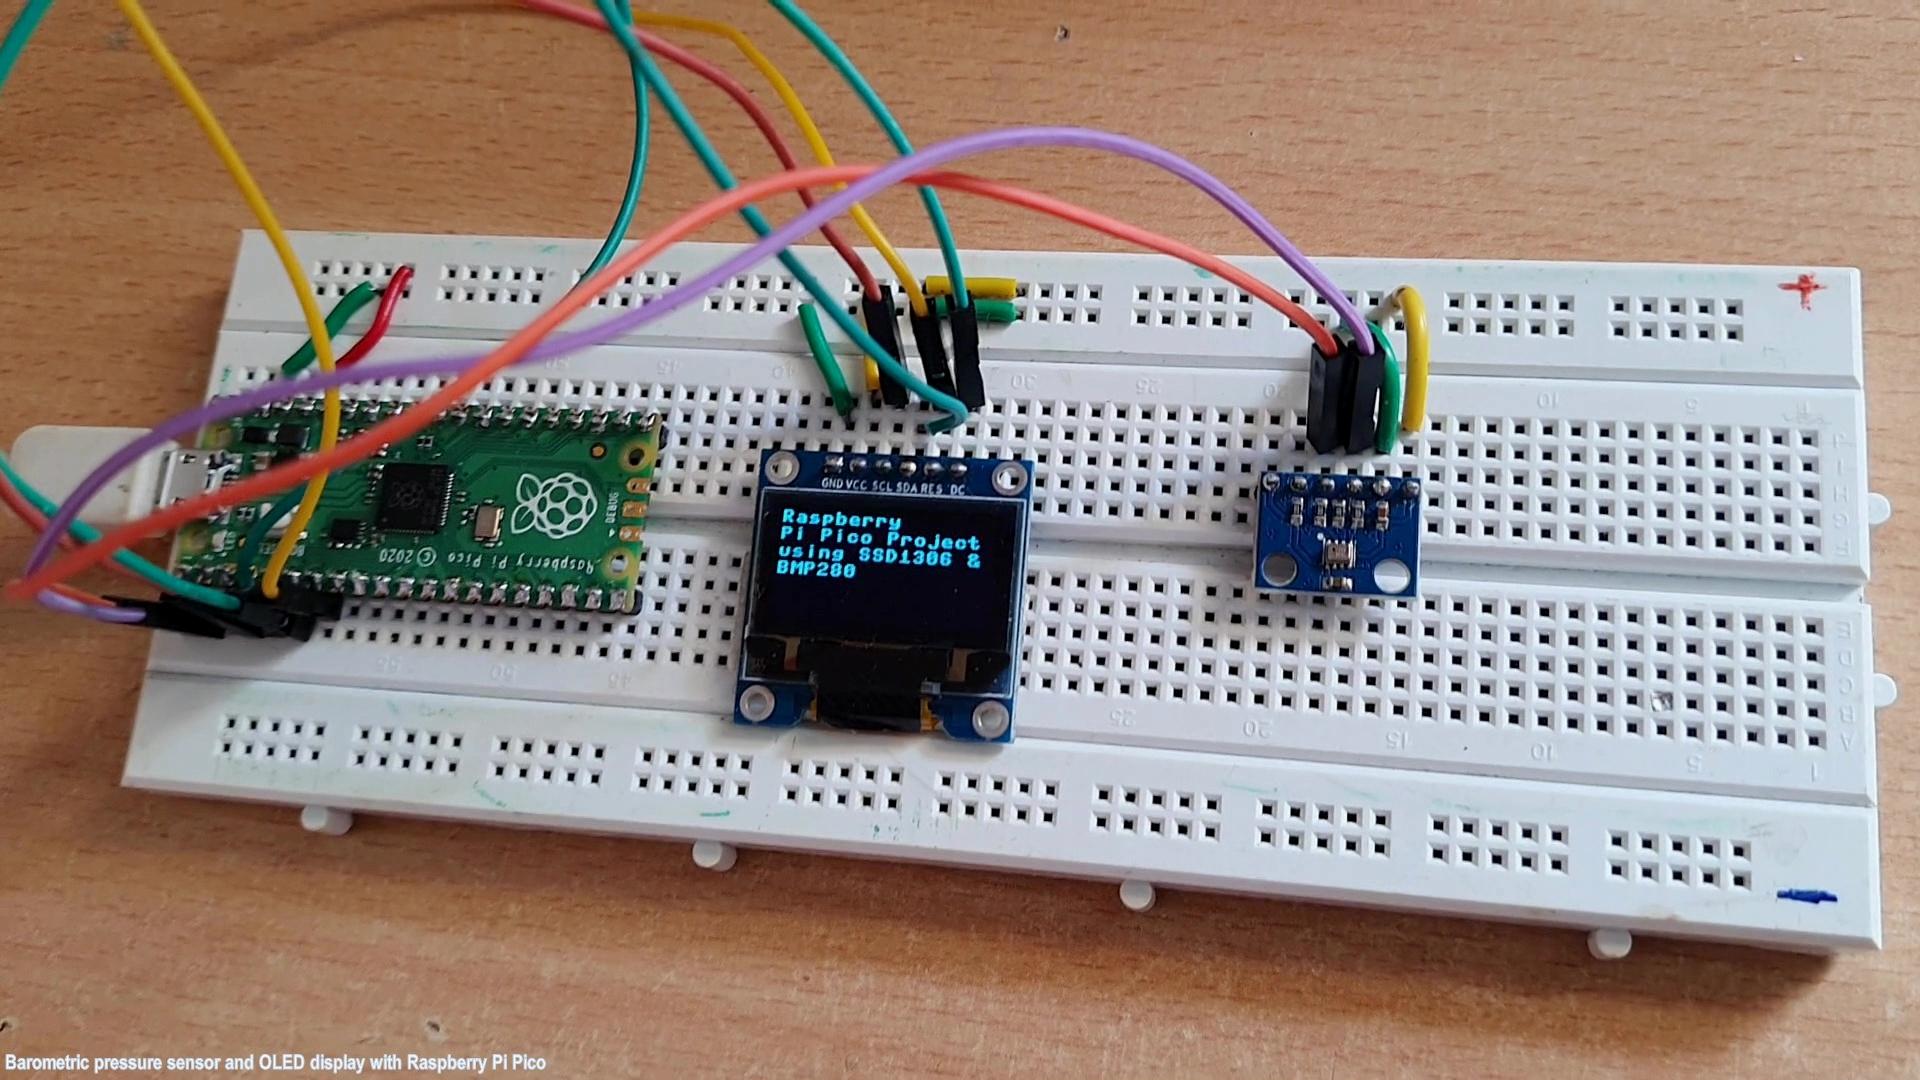
In this project we are connecting BMP-280 barometric pressure and temperature sensor and SSD-1306 OLED display using Raspberry Pi Pico and showing barometric pressure and temperature using microPython coding.
Supplies
- Raspberry Pi Pico board
- BMP-280 Barometric Pressure and Temperature sensor wit I2C support
- SSD-1306 OLED 0.96" display with SPI support
- Breadboard and few jumper wires
- and a Windows/Linux Computer having Thonny installed on it
Attach Pi Pico on Breadboard
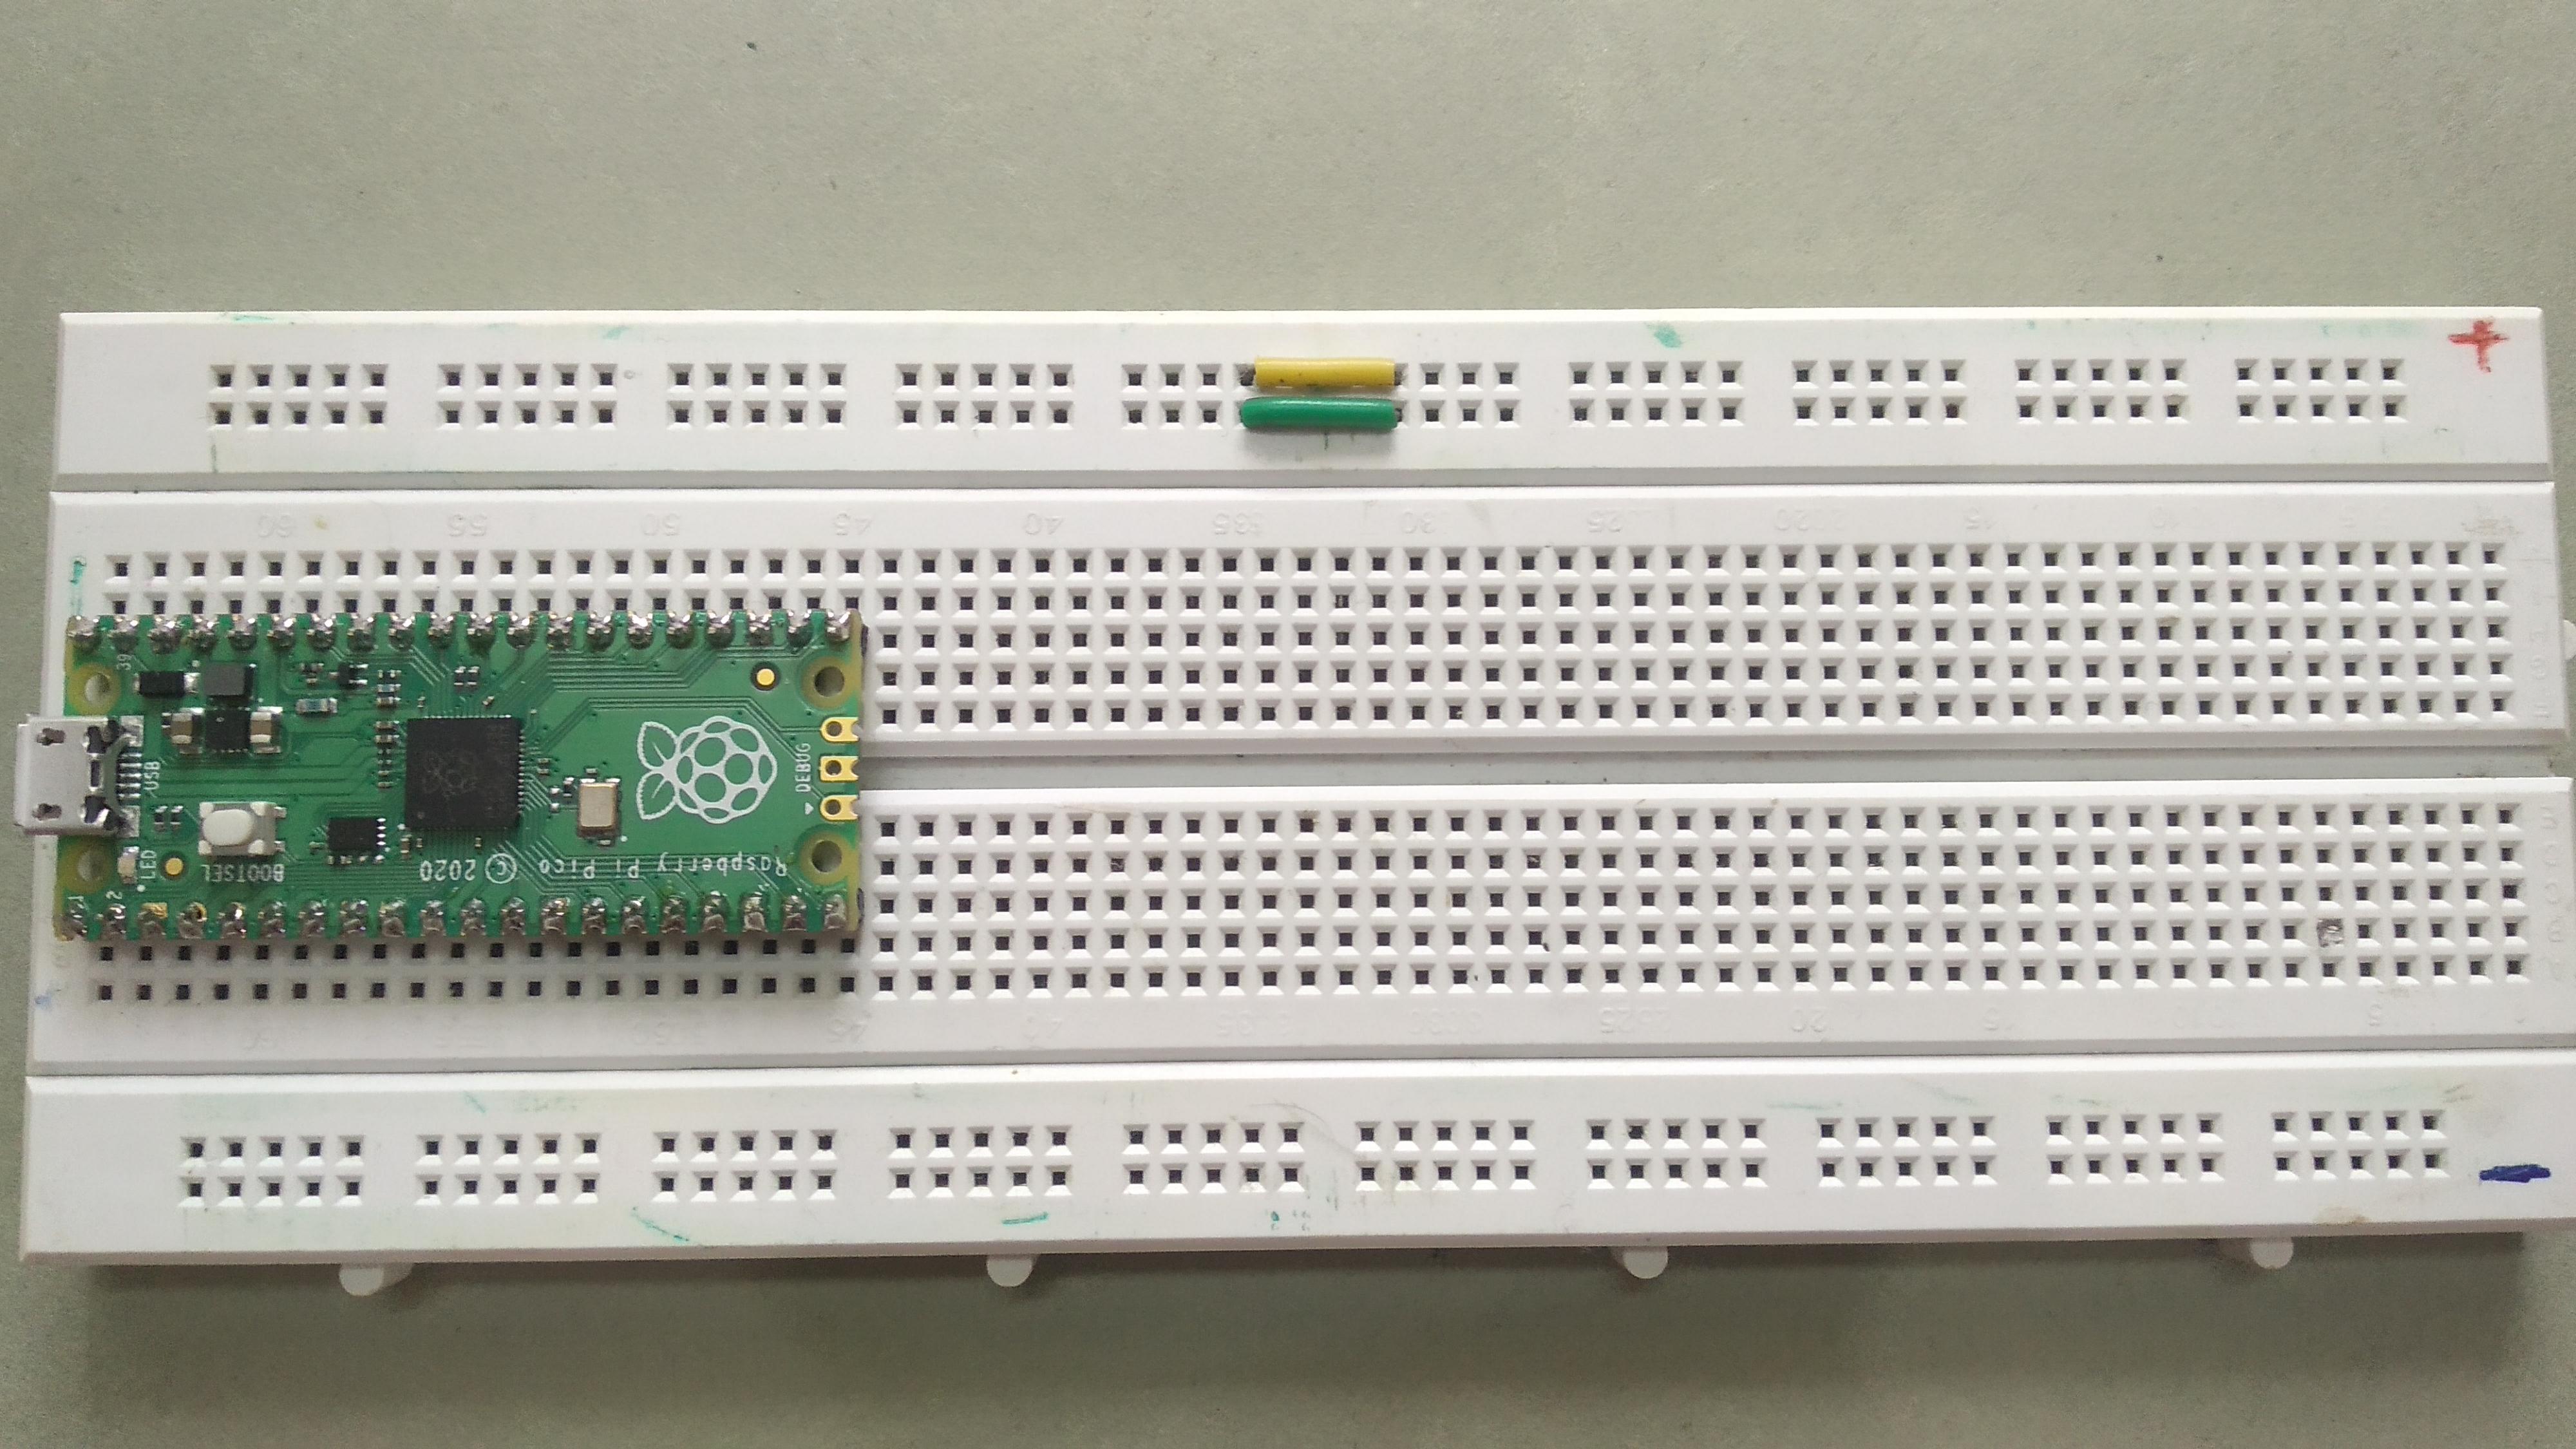
Attach Pi Pico on breadboard such that the micro USB port should point outside of breadboard.
Attach BMP-280 and SSD-1306
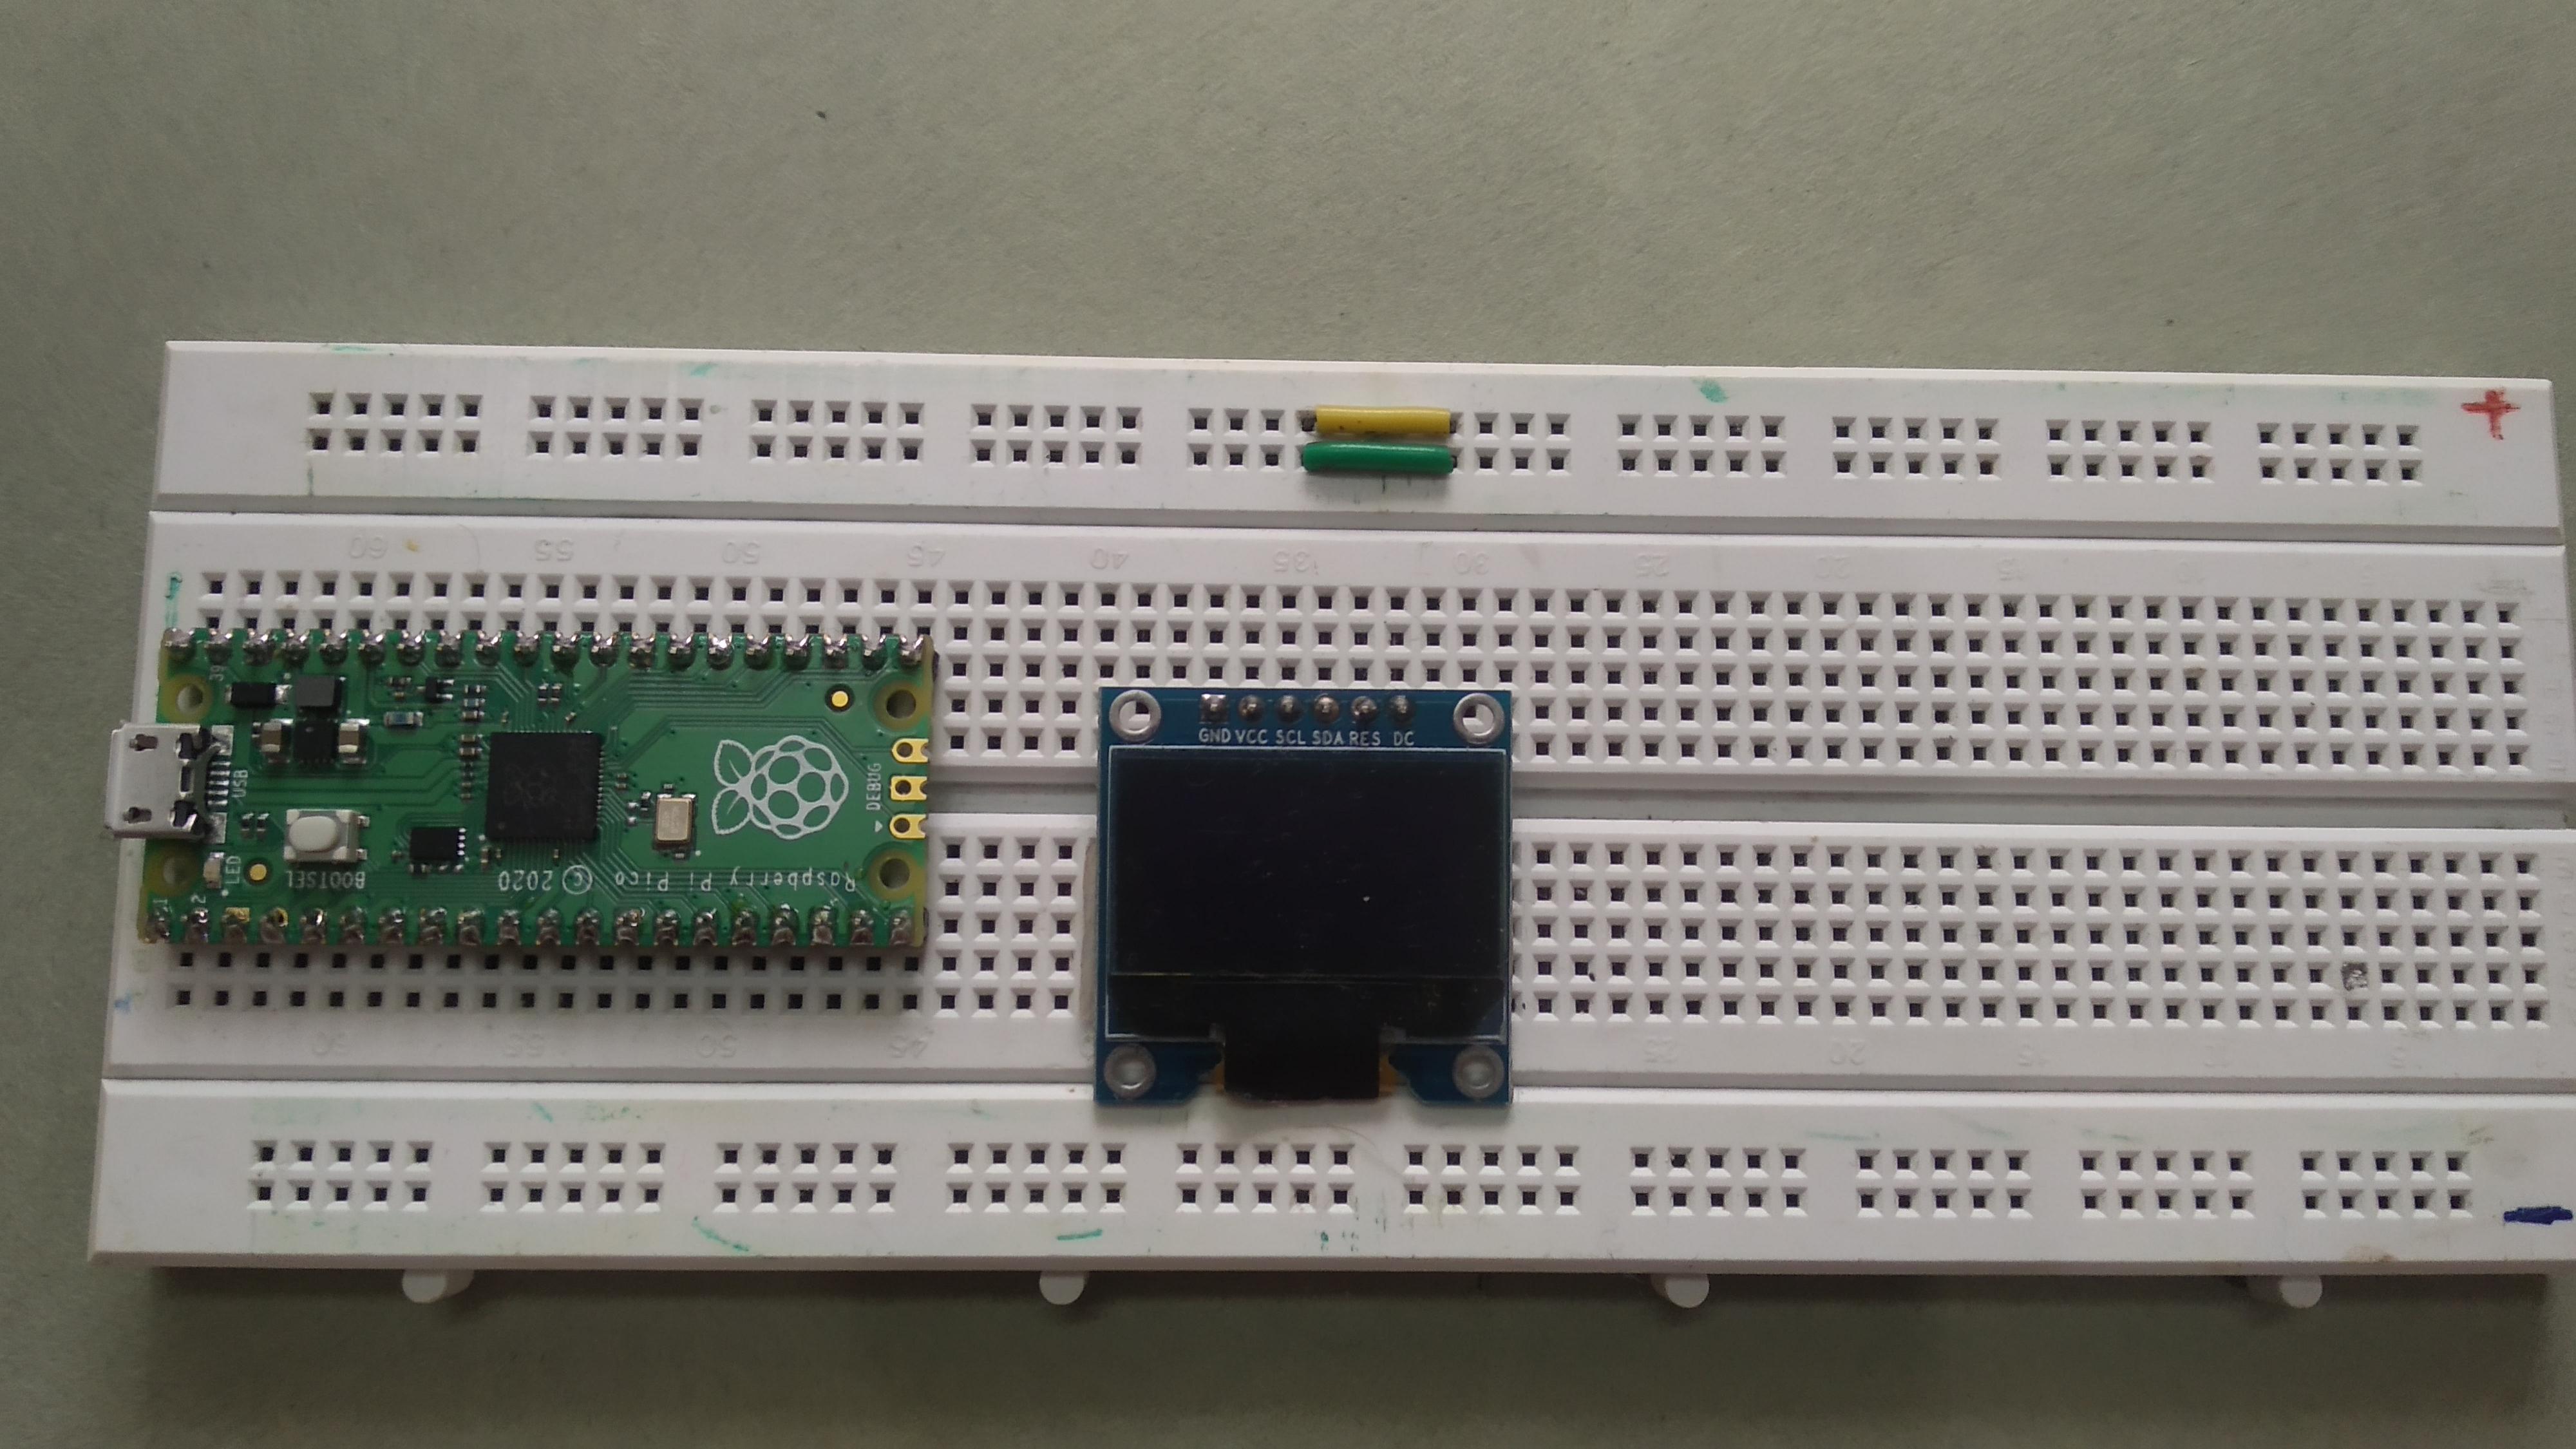
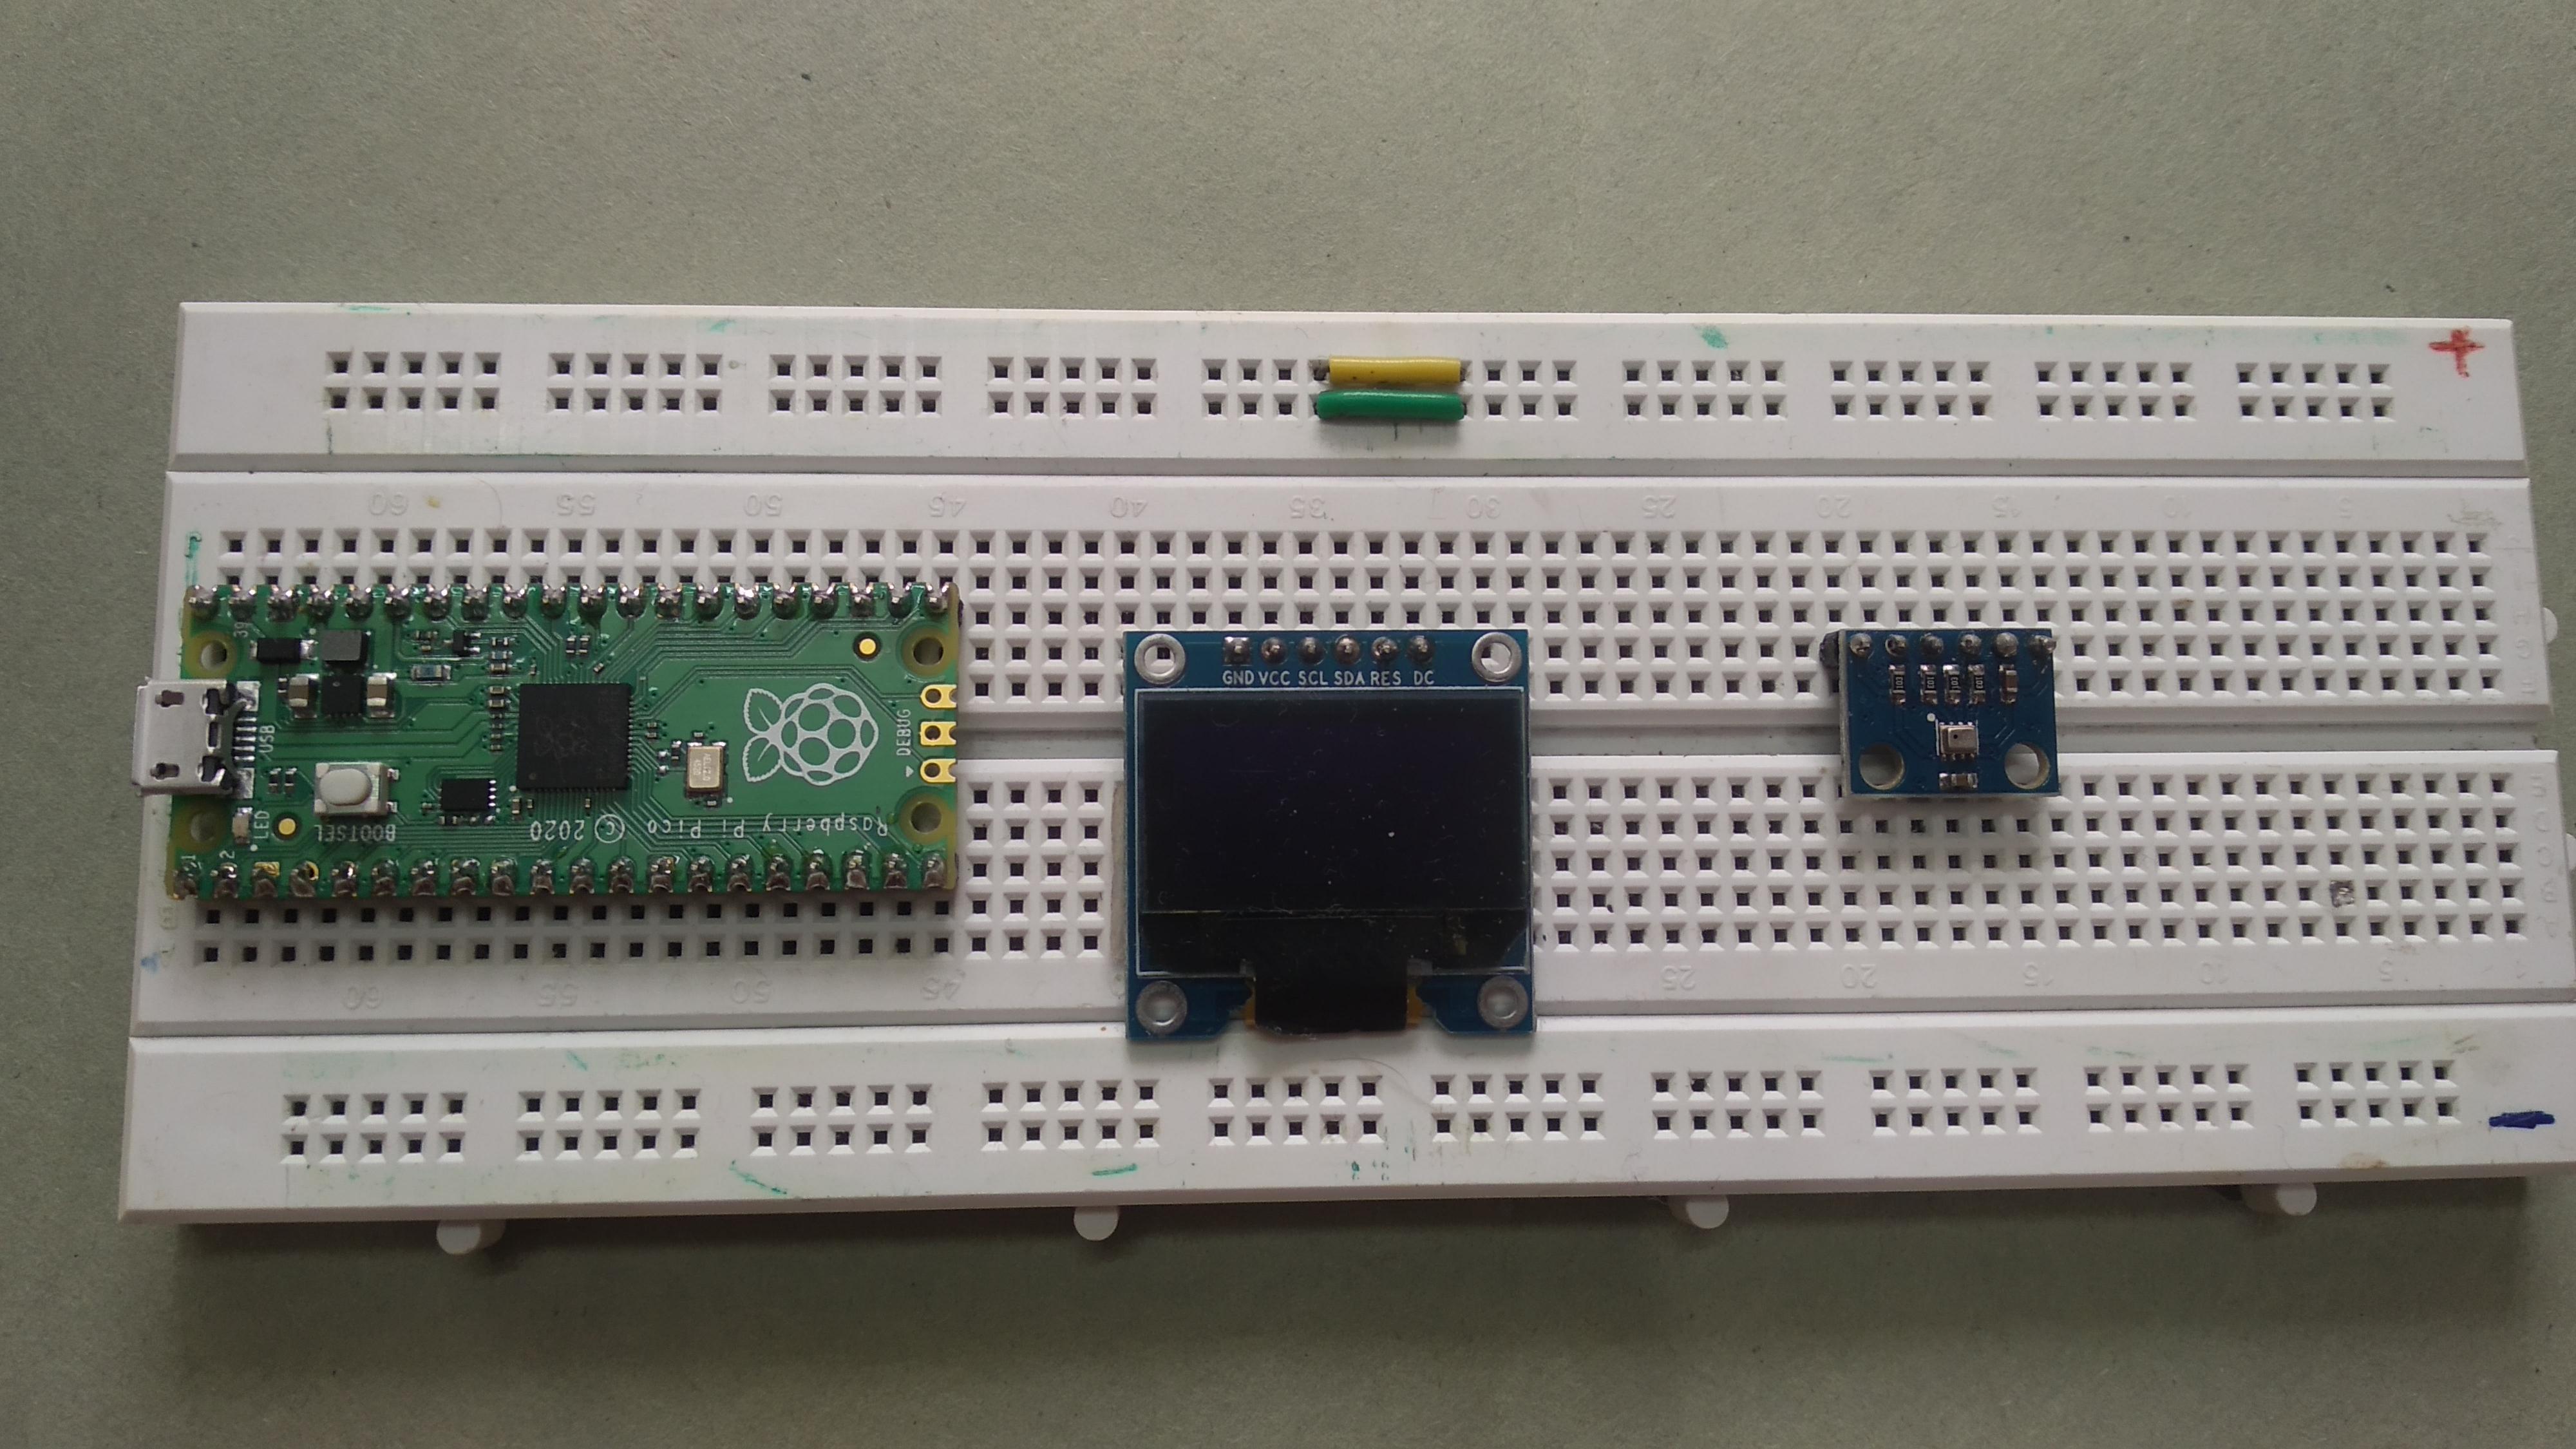
Attach BMP-280 and SSD-1306 such that their pins point toward the power supply rail of breadboard.
Connect Power Rail
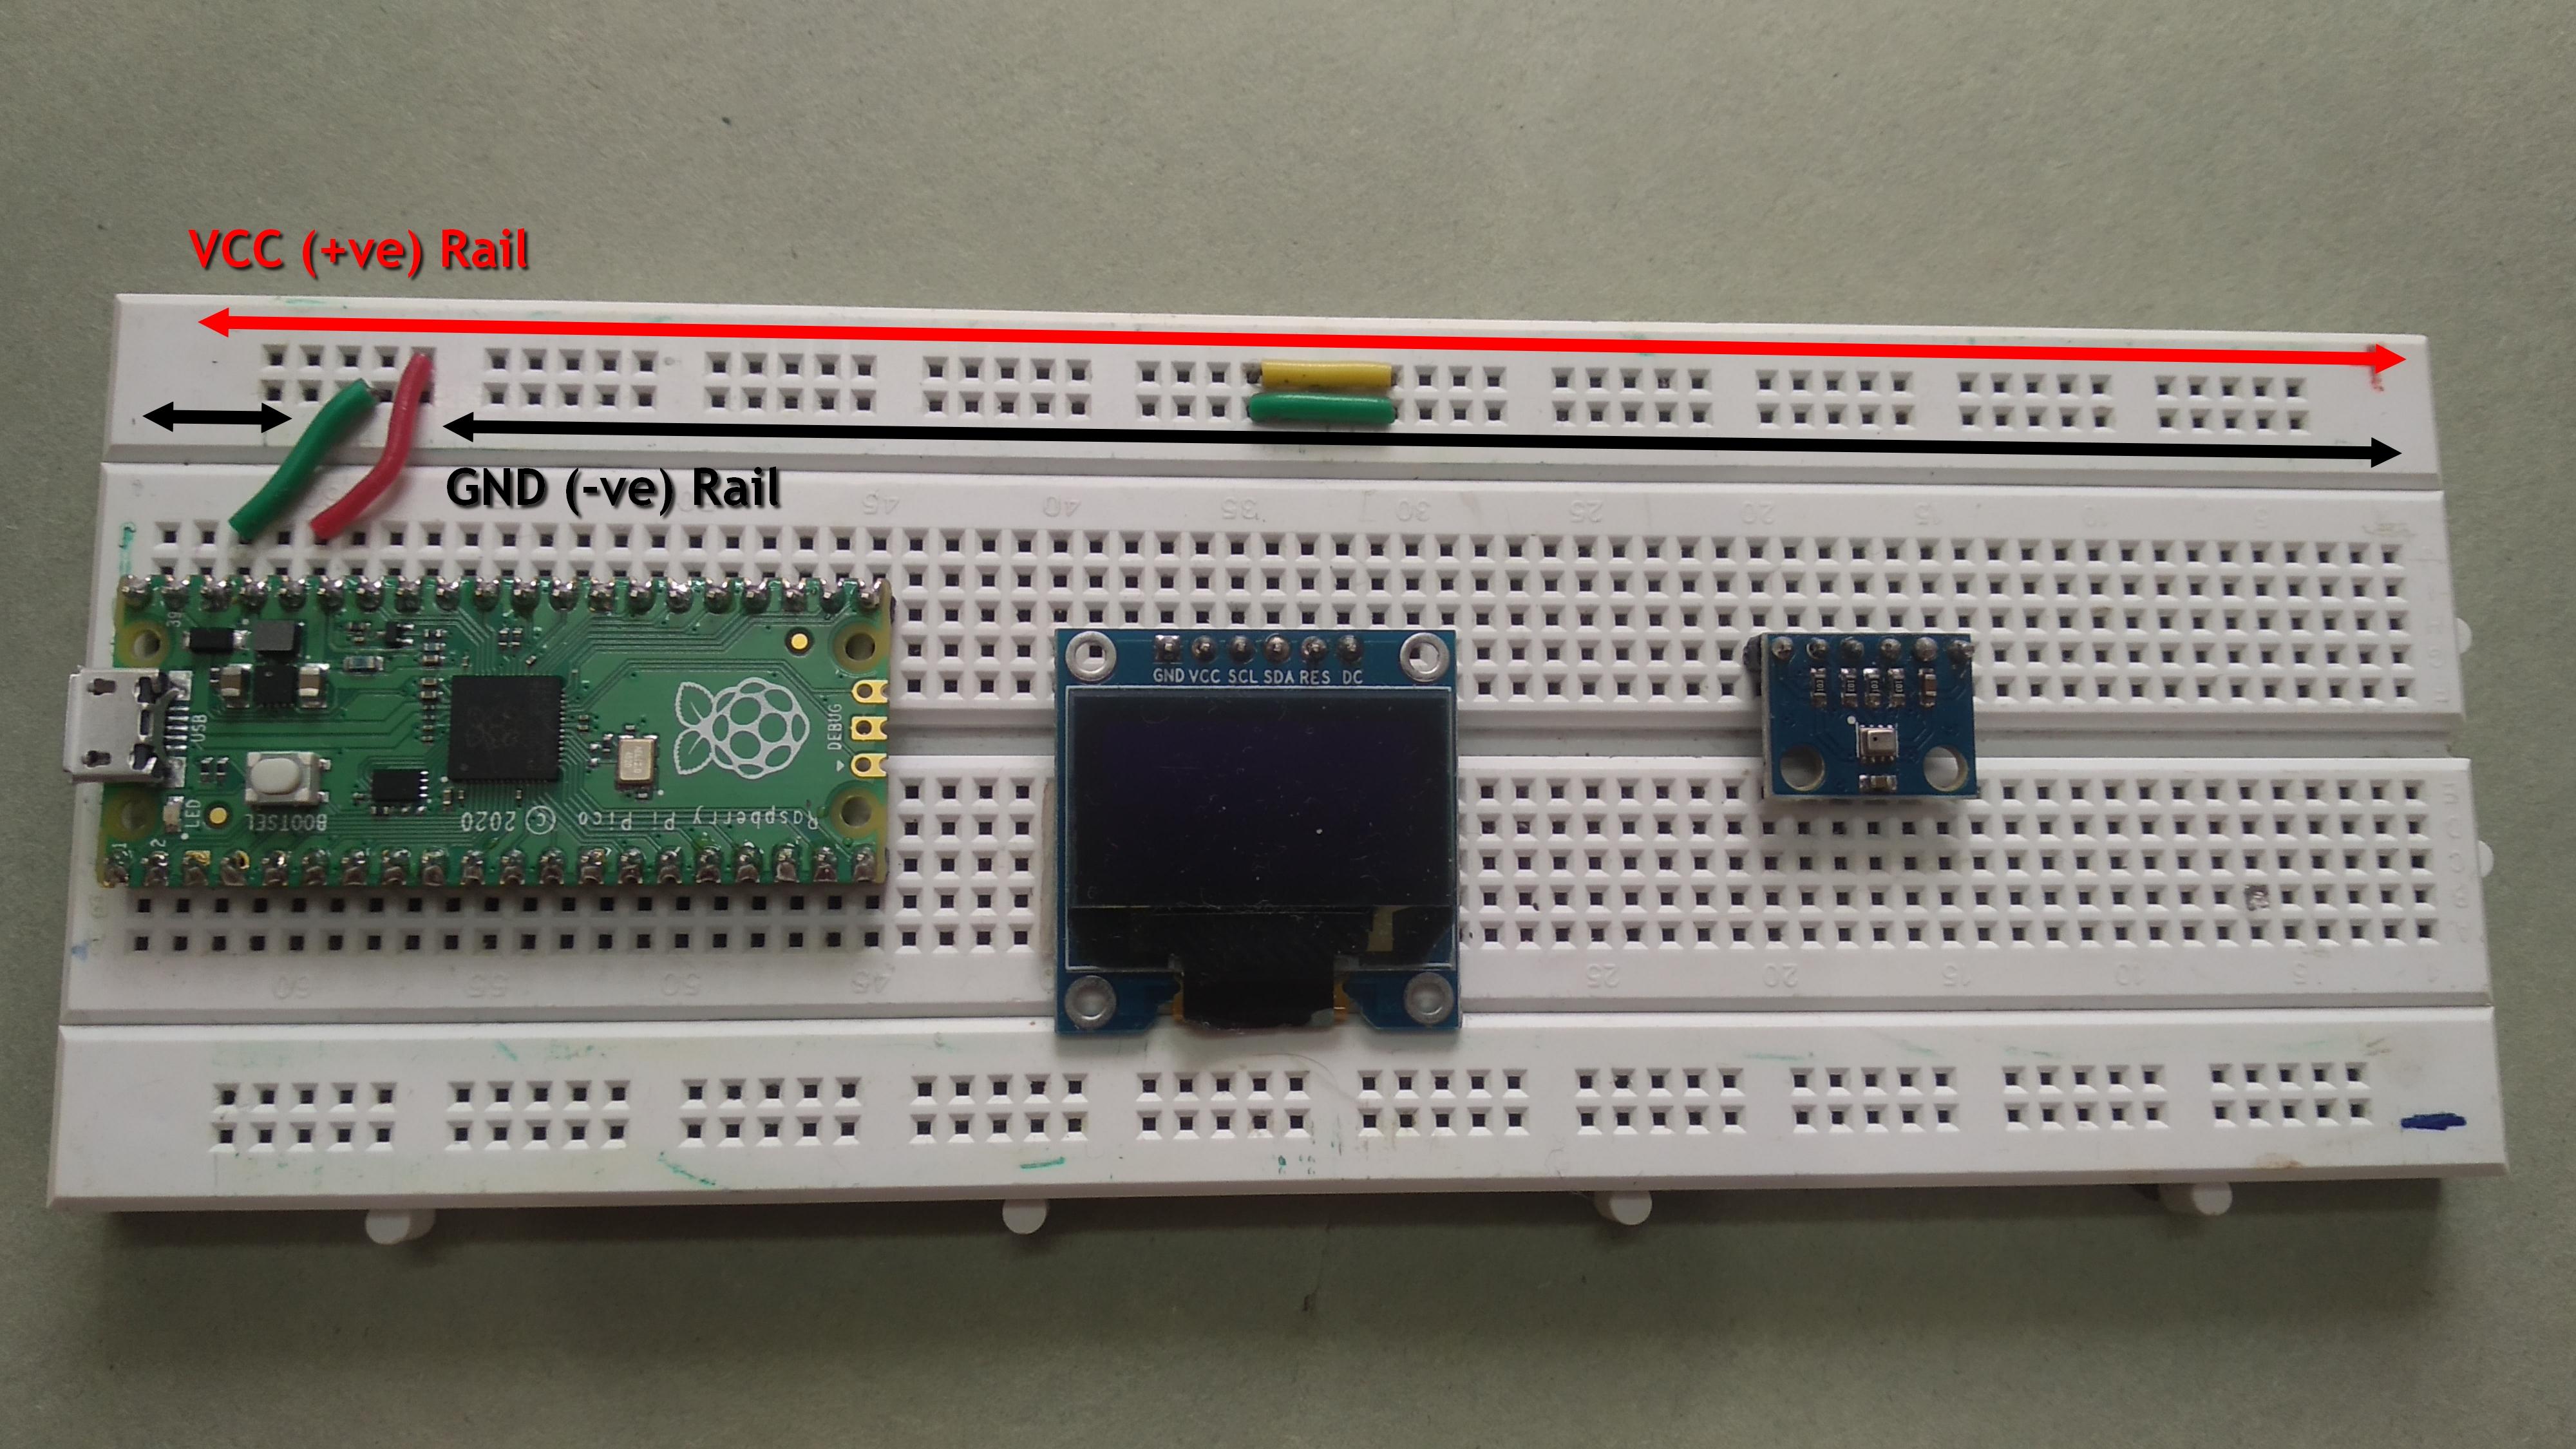
Connect pin 38, ground pin, of Pi Pico to bottom power rail and pin 36, 3.3 volt, to upper power rail of breadboard.
Connect Power to BMP-280 and SSD-1306

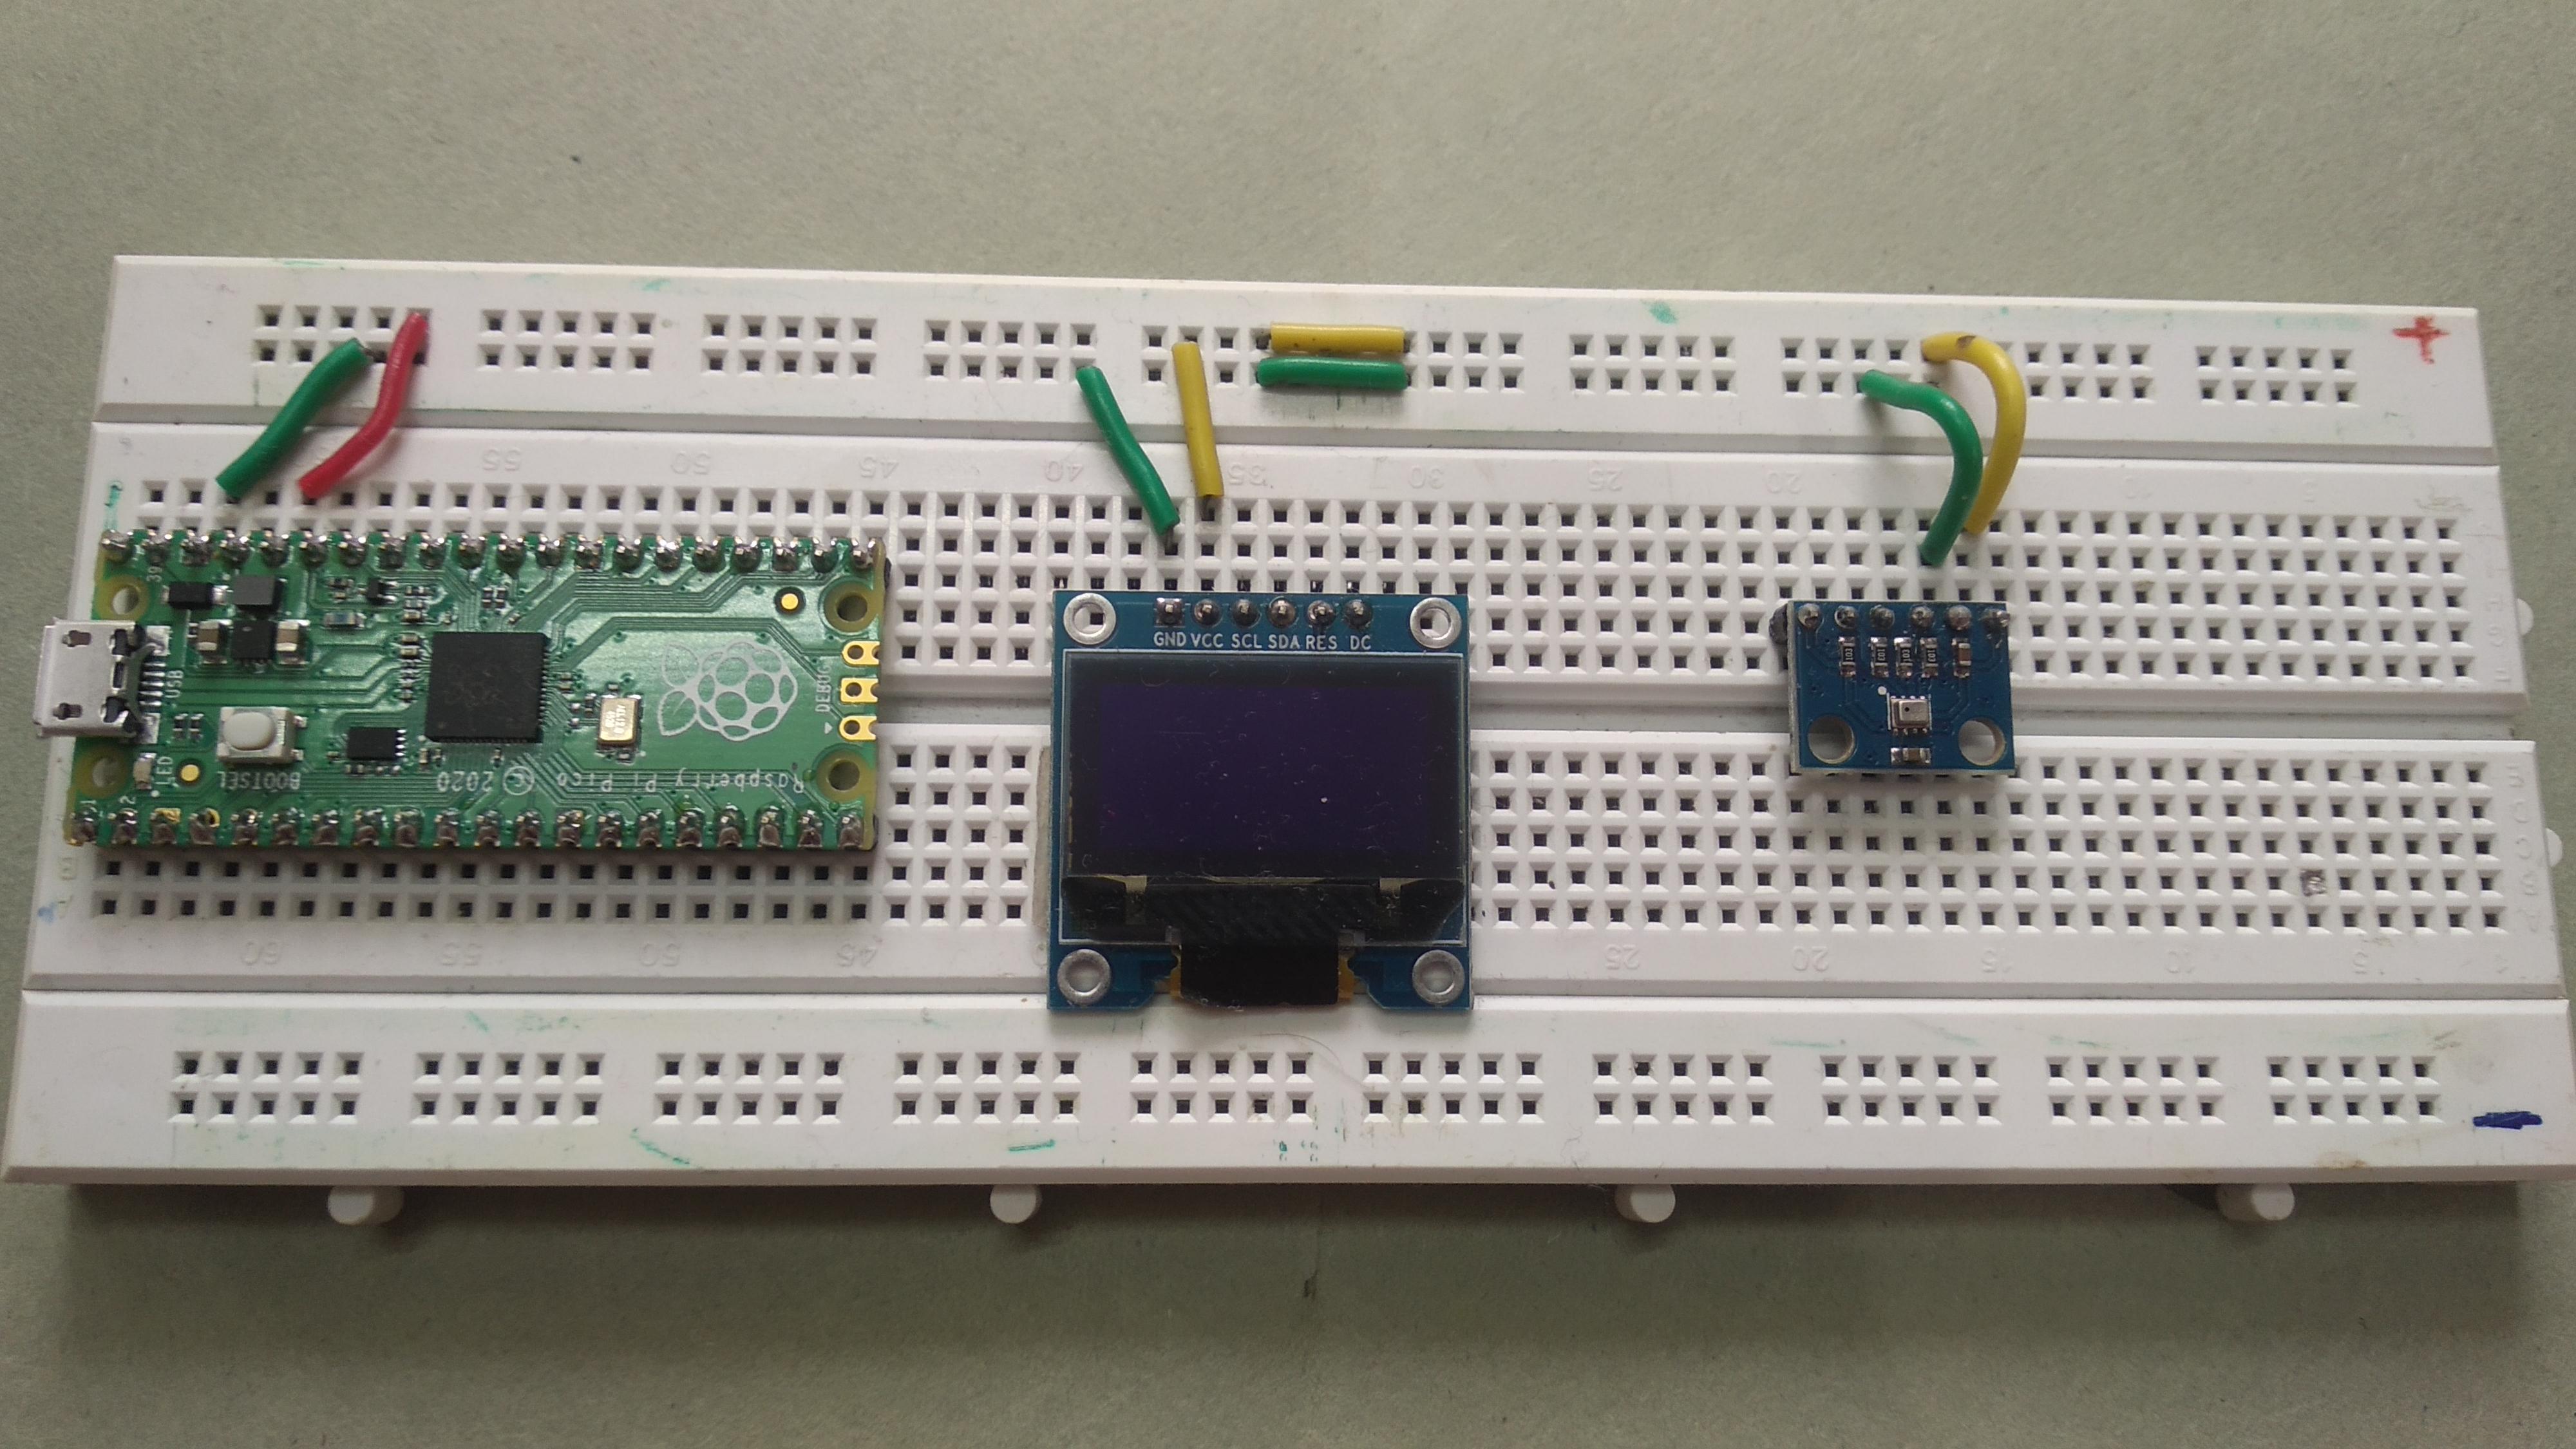
Now connect VCC pins of BMP-280 and SSD-1306 to upper power rail i.e. 3.3 volt from Pi Pico.
Connect GND pins of BMP-280 and SSD-1306 to lower power rail i.e. GND of Pi Pico.
Connect SSD-1306 Data Lines
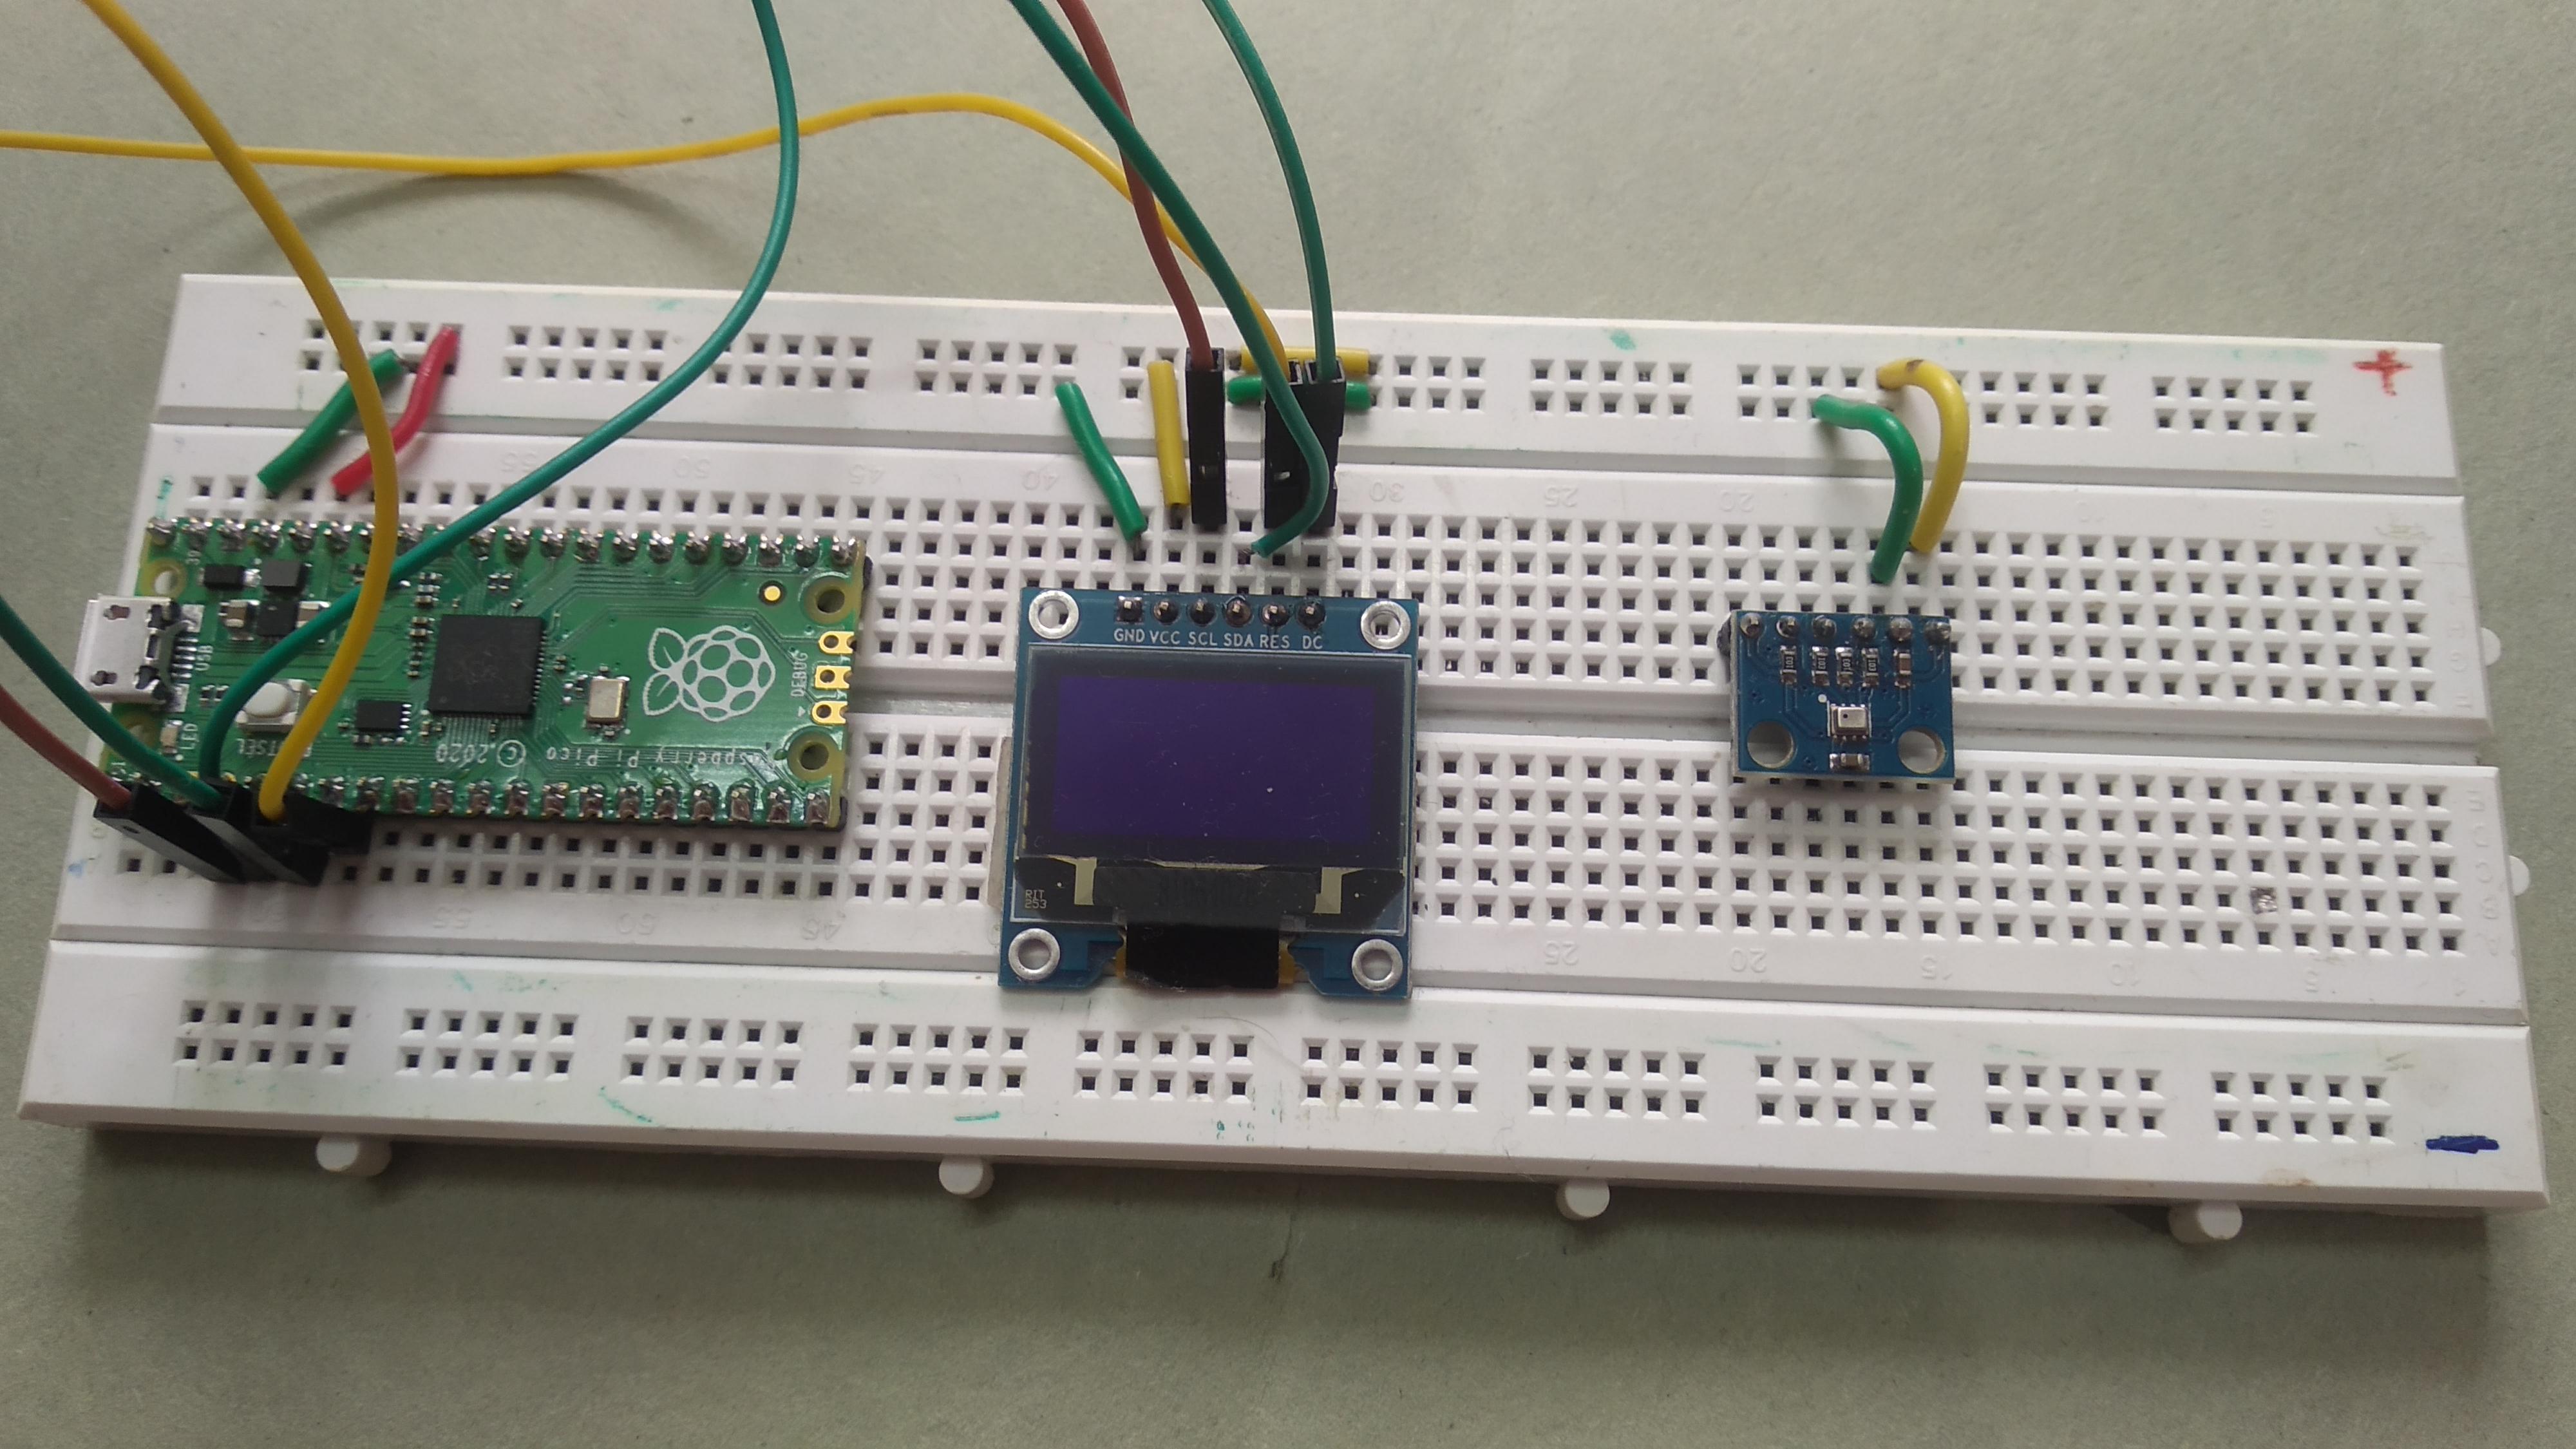
Connect SSD-1306's other pins to Pi Pico, using jumper wires, as given below:
- SCL of 1306 to GP2 of Pico
- SDA of 1306 to GP3 of Pico
- DC of 1306 to GP4 of Pico
- RES of 1306 to GP5 of Pico
Connect BMP-280 Data Lines

Connect BMP-280's other pins to Pi Pico, using jumper wires, as given below:
- SDA of 1306 to GP0 of Pico
- SCL of 1306 to GP1 of Pico
Final: MicroPython Code
Download python code file baro.py and other 3 support libraries and open it in Thonny.
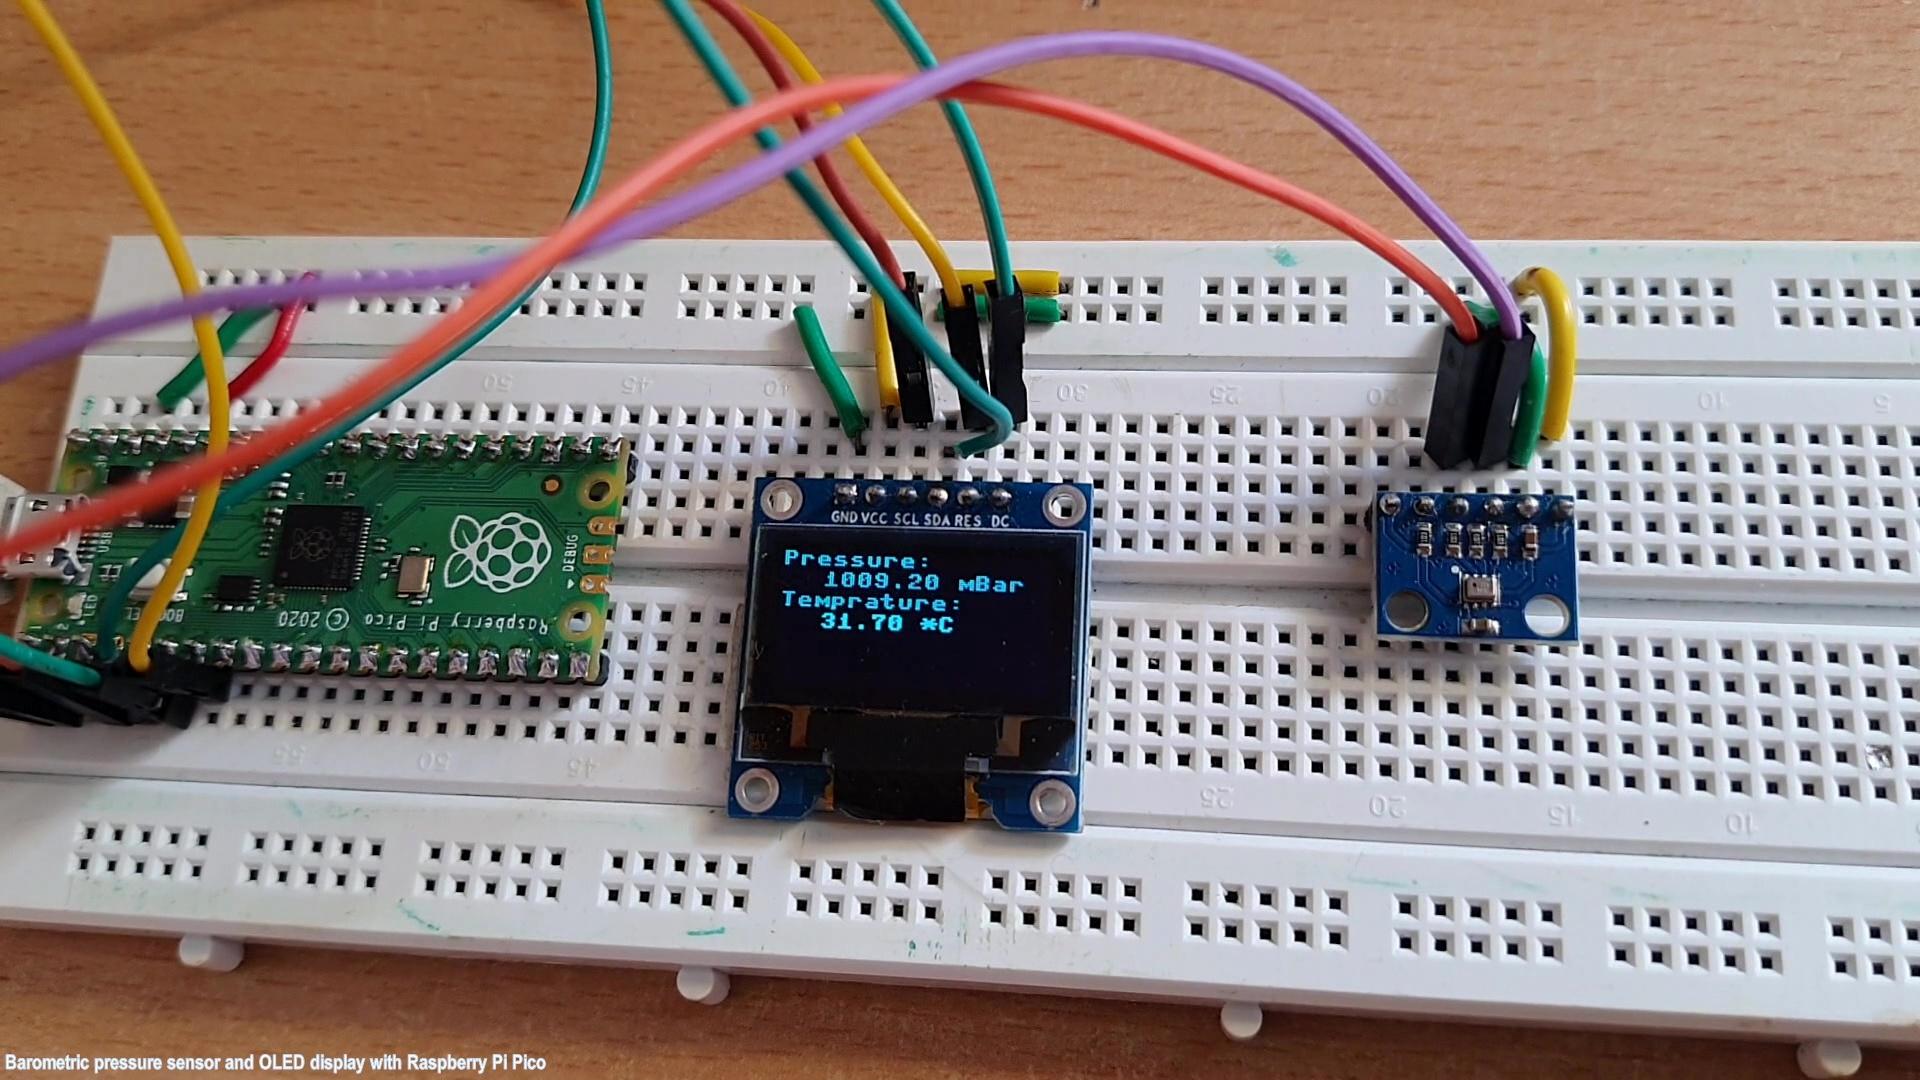
Press F5 or Run/Current Script to execute the code. The barometric pressure data and temperature from BMP-280 will be displayed on OLED display in every 2 seconds.
This code can be further modified to send this data to a server using WiFi board or can be stored on a SD card.