Weather Based Irrigation Controller
by svtanthony in Circuits > Microcontrollers
7009 Views, 69 Favorites, 0 Comments
Weather Based Irrigation Controller
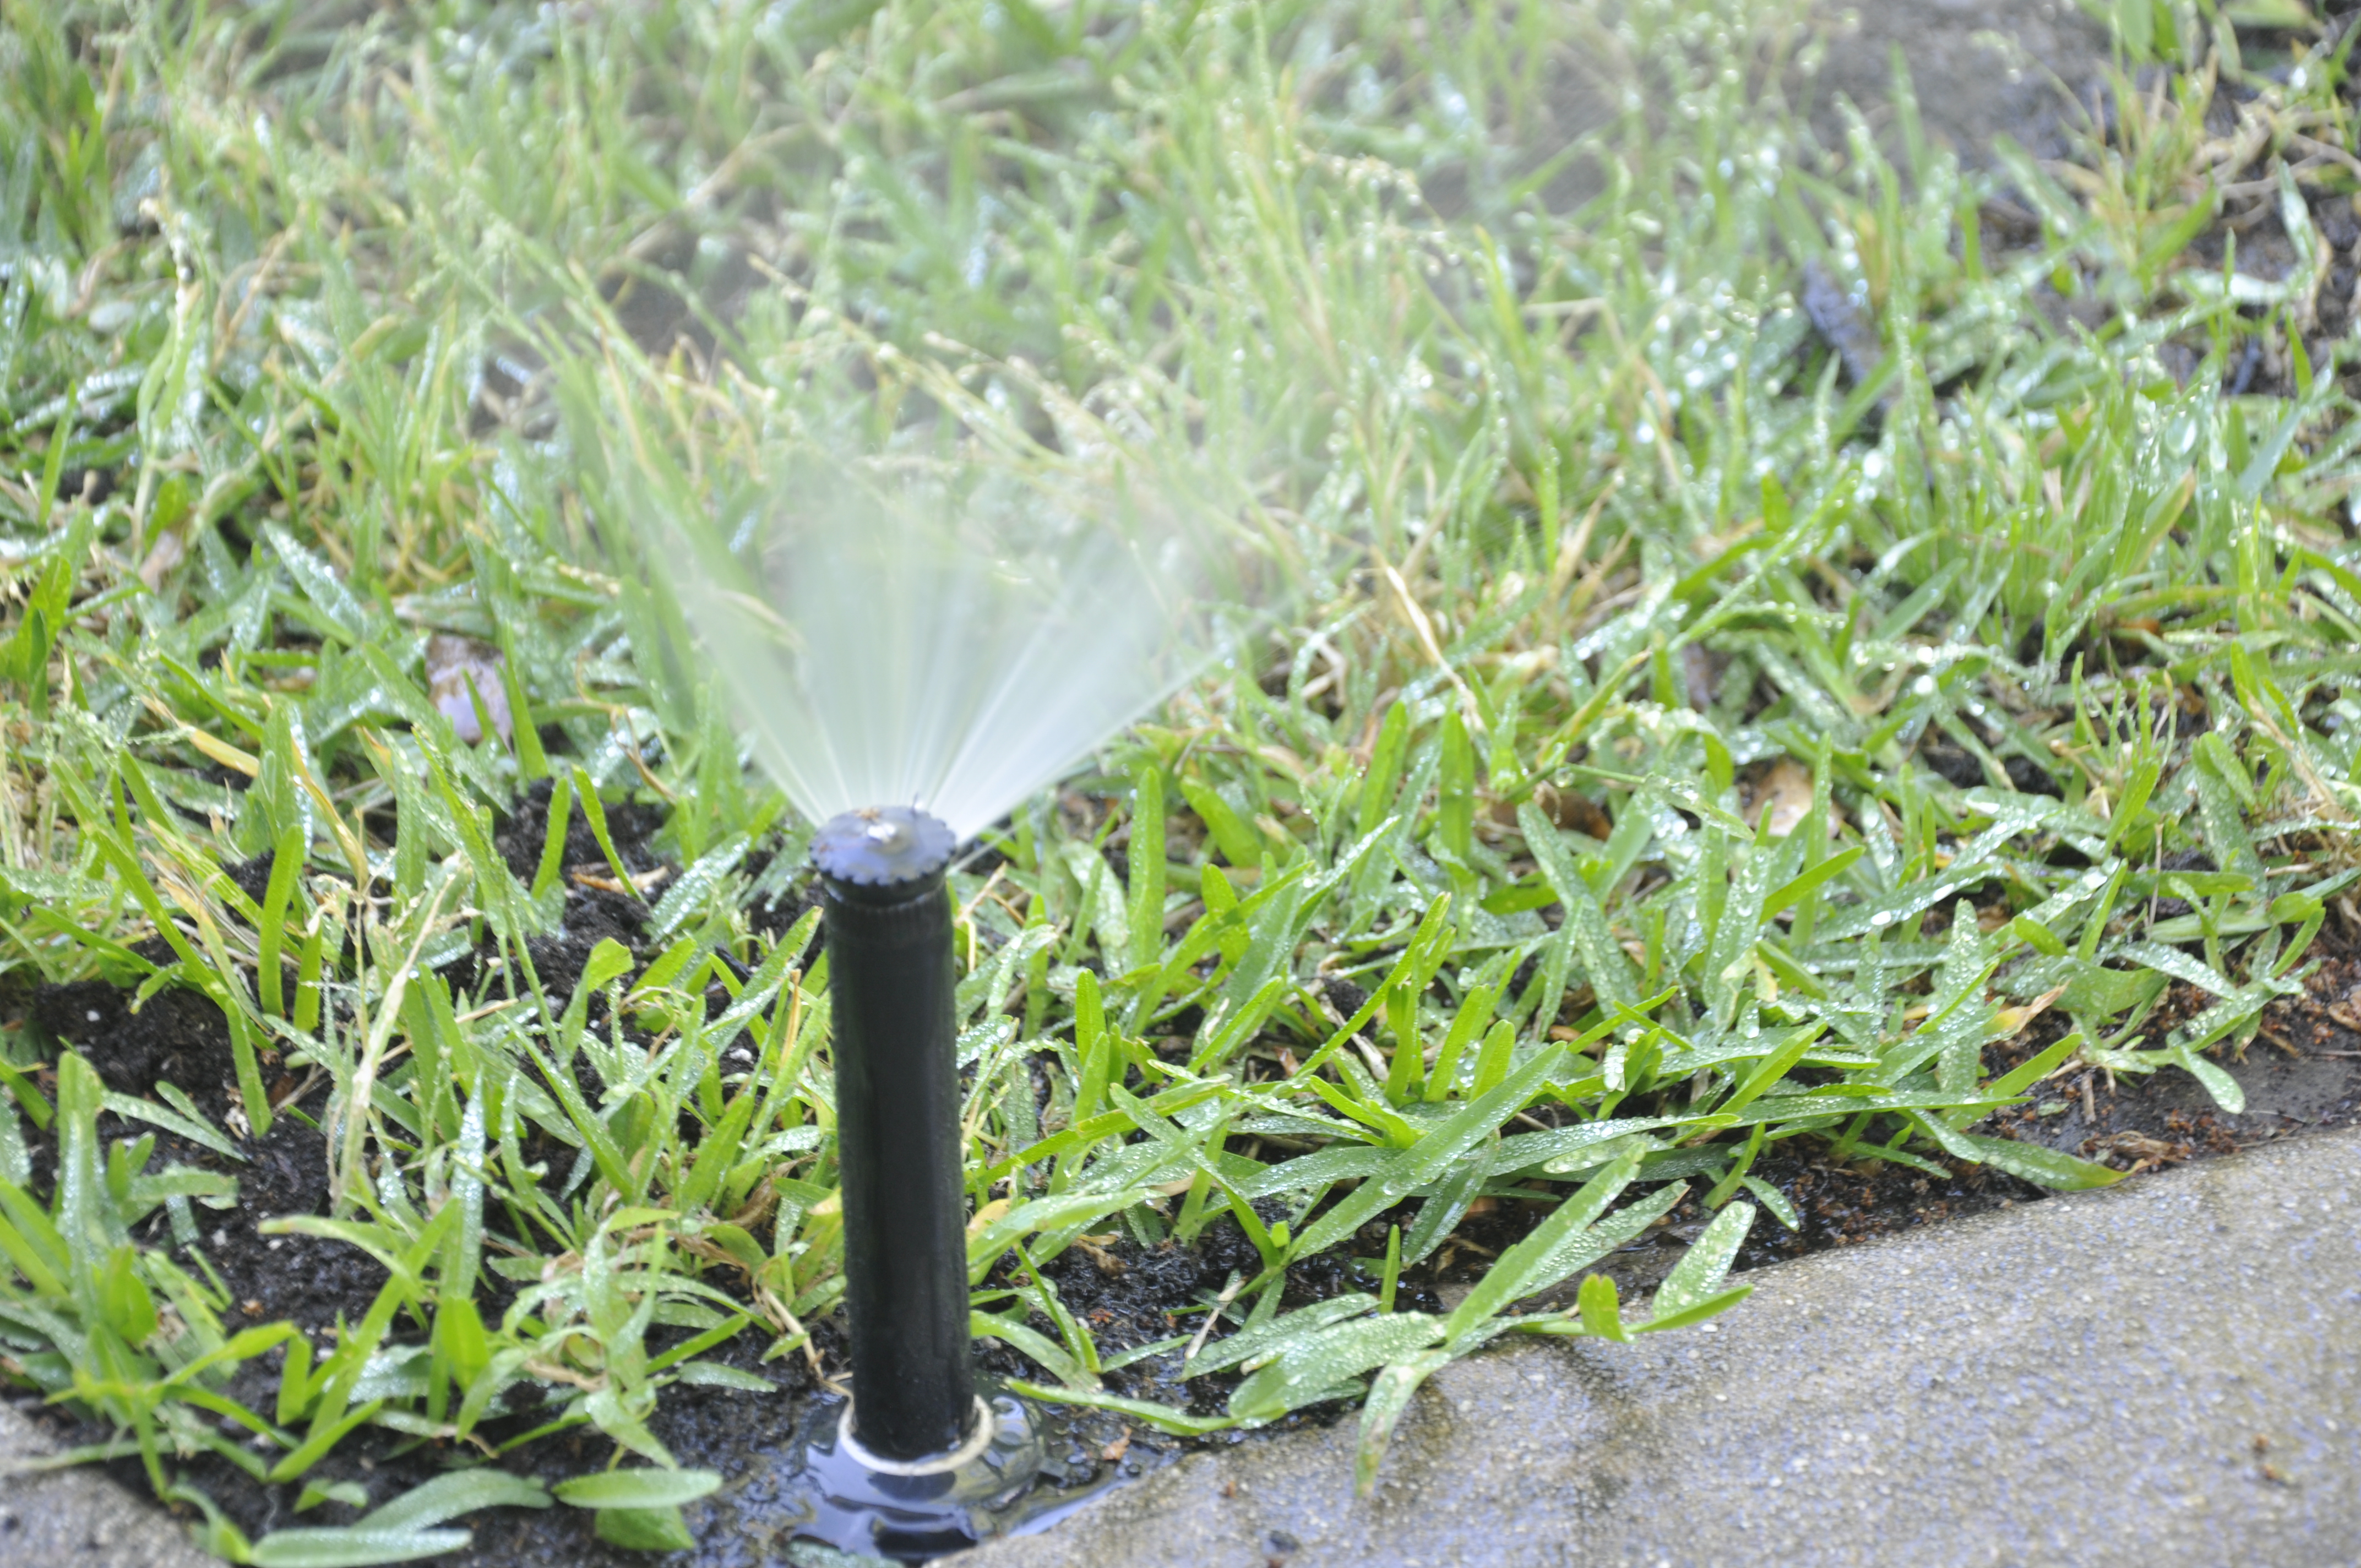

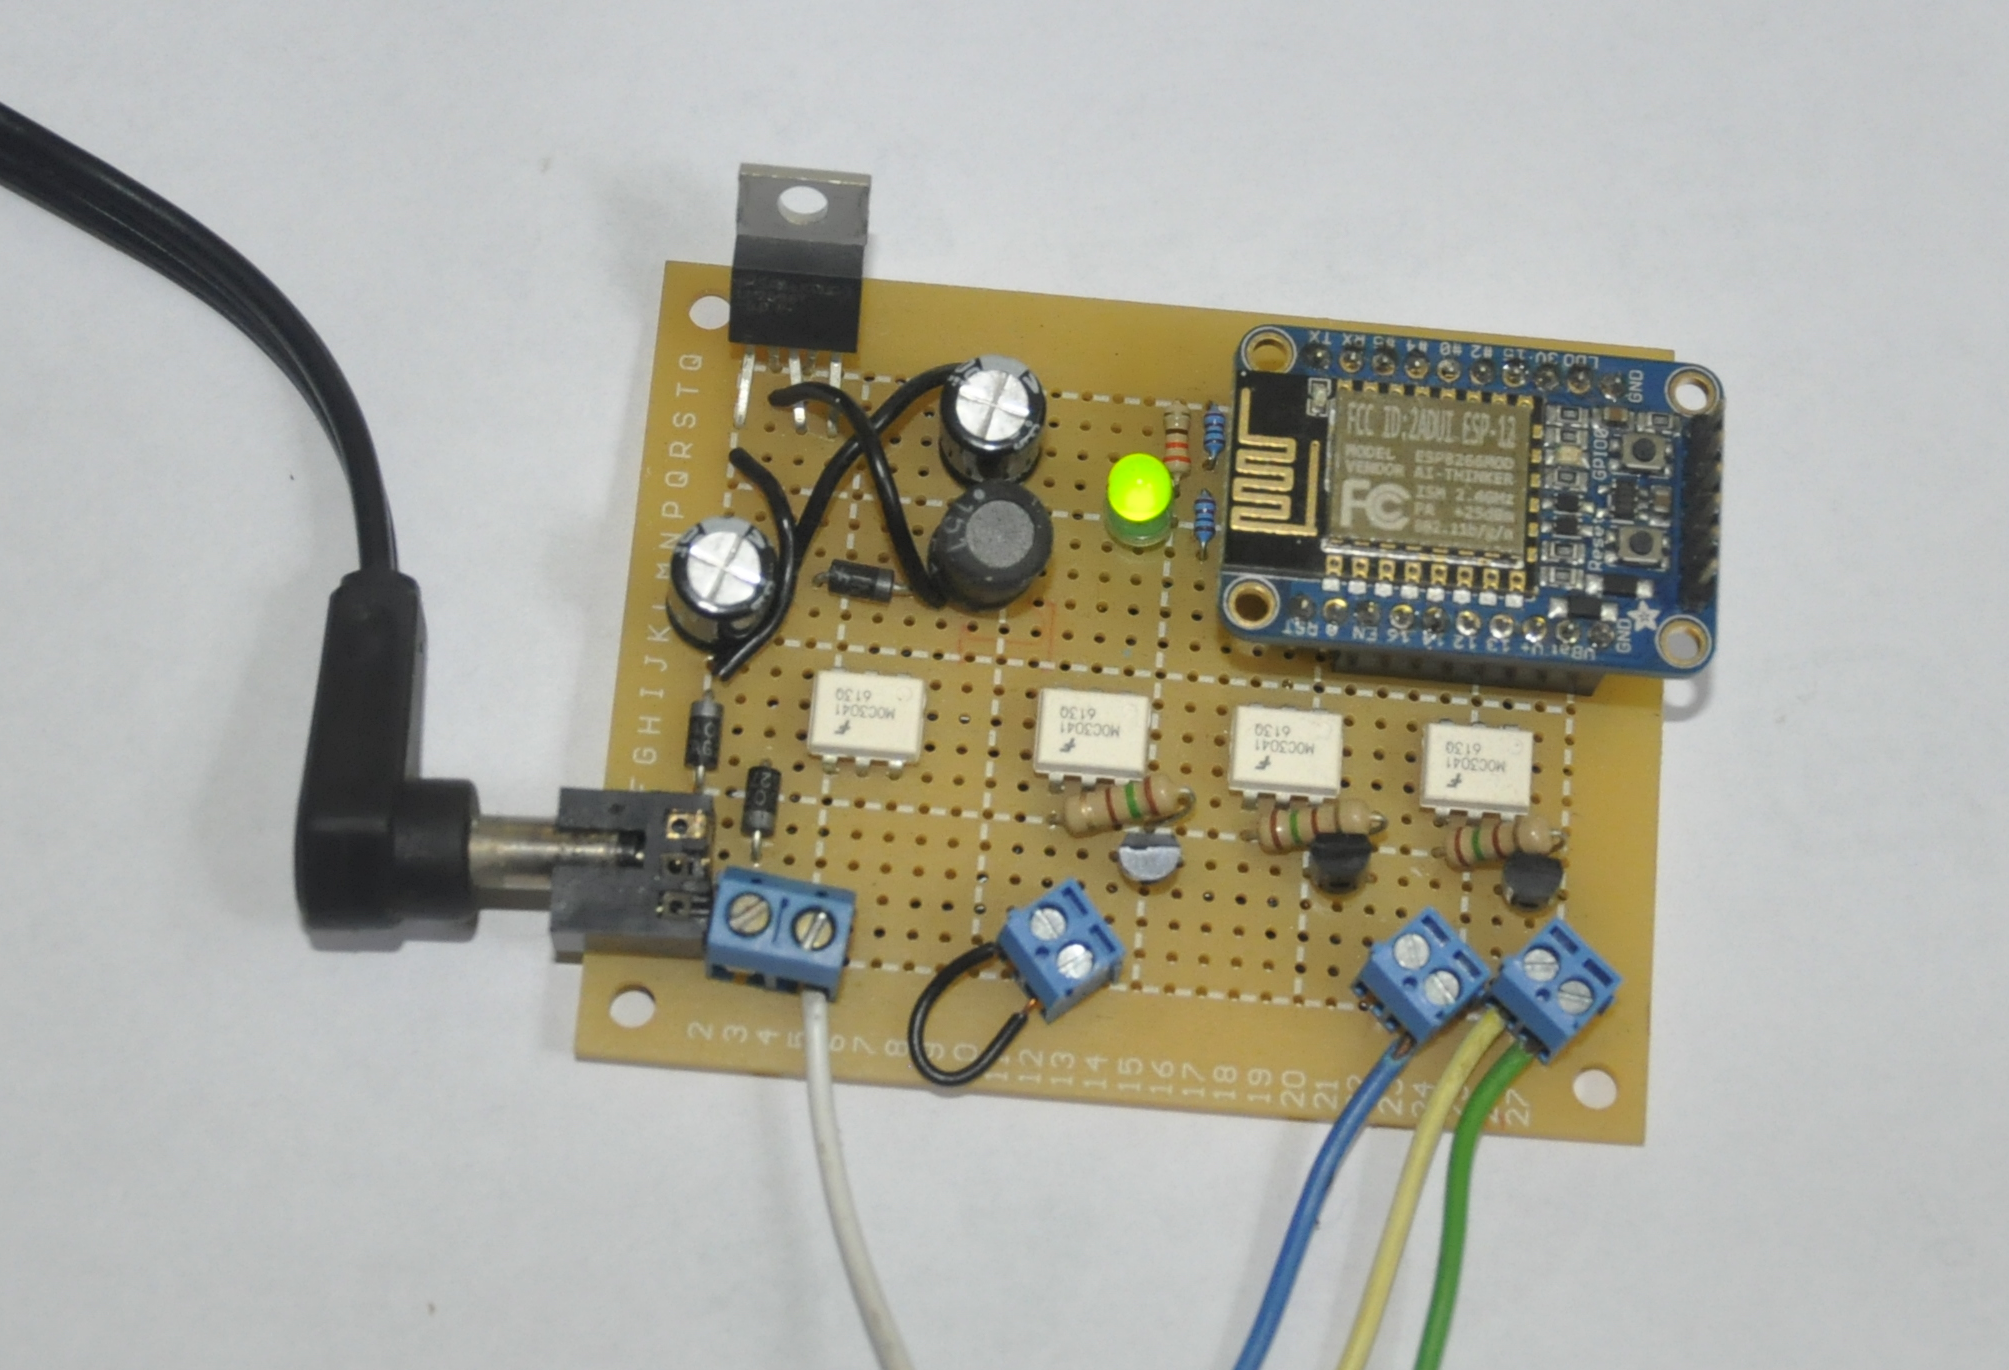
This Instructable is about making and setting up a weather-based irrigation controller. Through the use of a weather-based irrigation controller, we can deliver the precise amount of water the plants and turf require. In turn, we save water and keep or plants healthy. Details are given to allow customization of features and for general knowledge.
To use enter the days to water and the maximum time to water. The controller will scale the watering times to adjust for seasonal variations. The controller also inhibits watering if it has rained or if it will rain by using a rain sensor and the weather forecast.
Why: I wanted an irrigation controller that I can control from my computer, phone when I'm gardening, connect it to a home automation and all at a reasonable price.
Power Supply

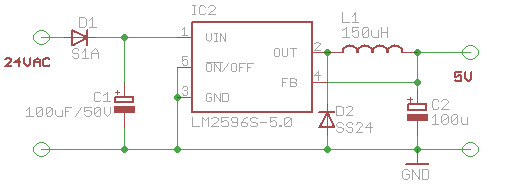
Requirements:
- 5V DC for the micro-controller and less than 100 mA.
- 24V AC to run the irrigation valves and approx 300 mA.
We will consider two different methods to power the node modules:
- Two different wall adapters with outputs of 5 VDC and 24 VAC.
- Using this method is easier but more cluttered.
- One wall adapter to power everything, this will require converting AC to DC electricity.
Implementation:
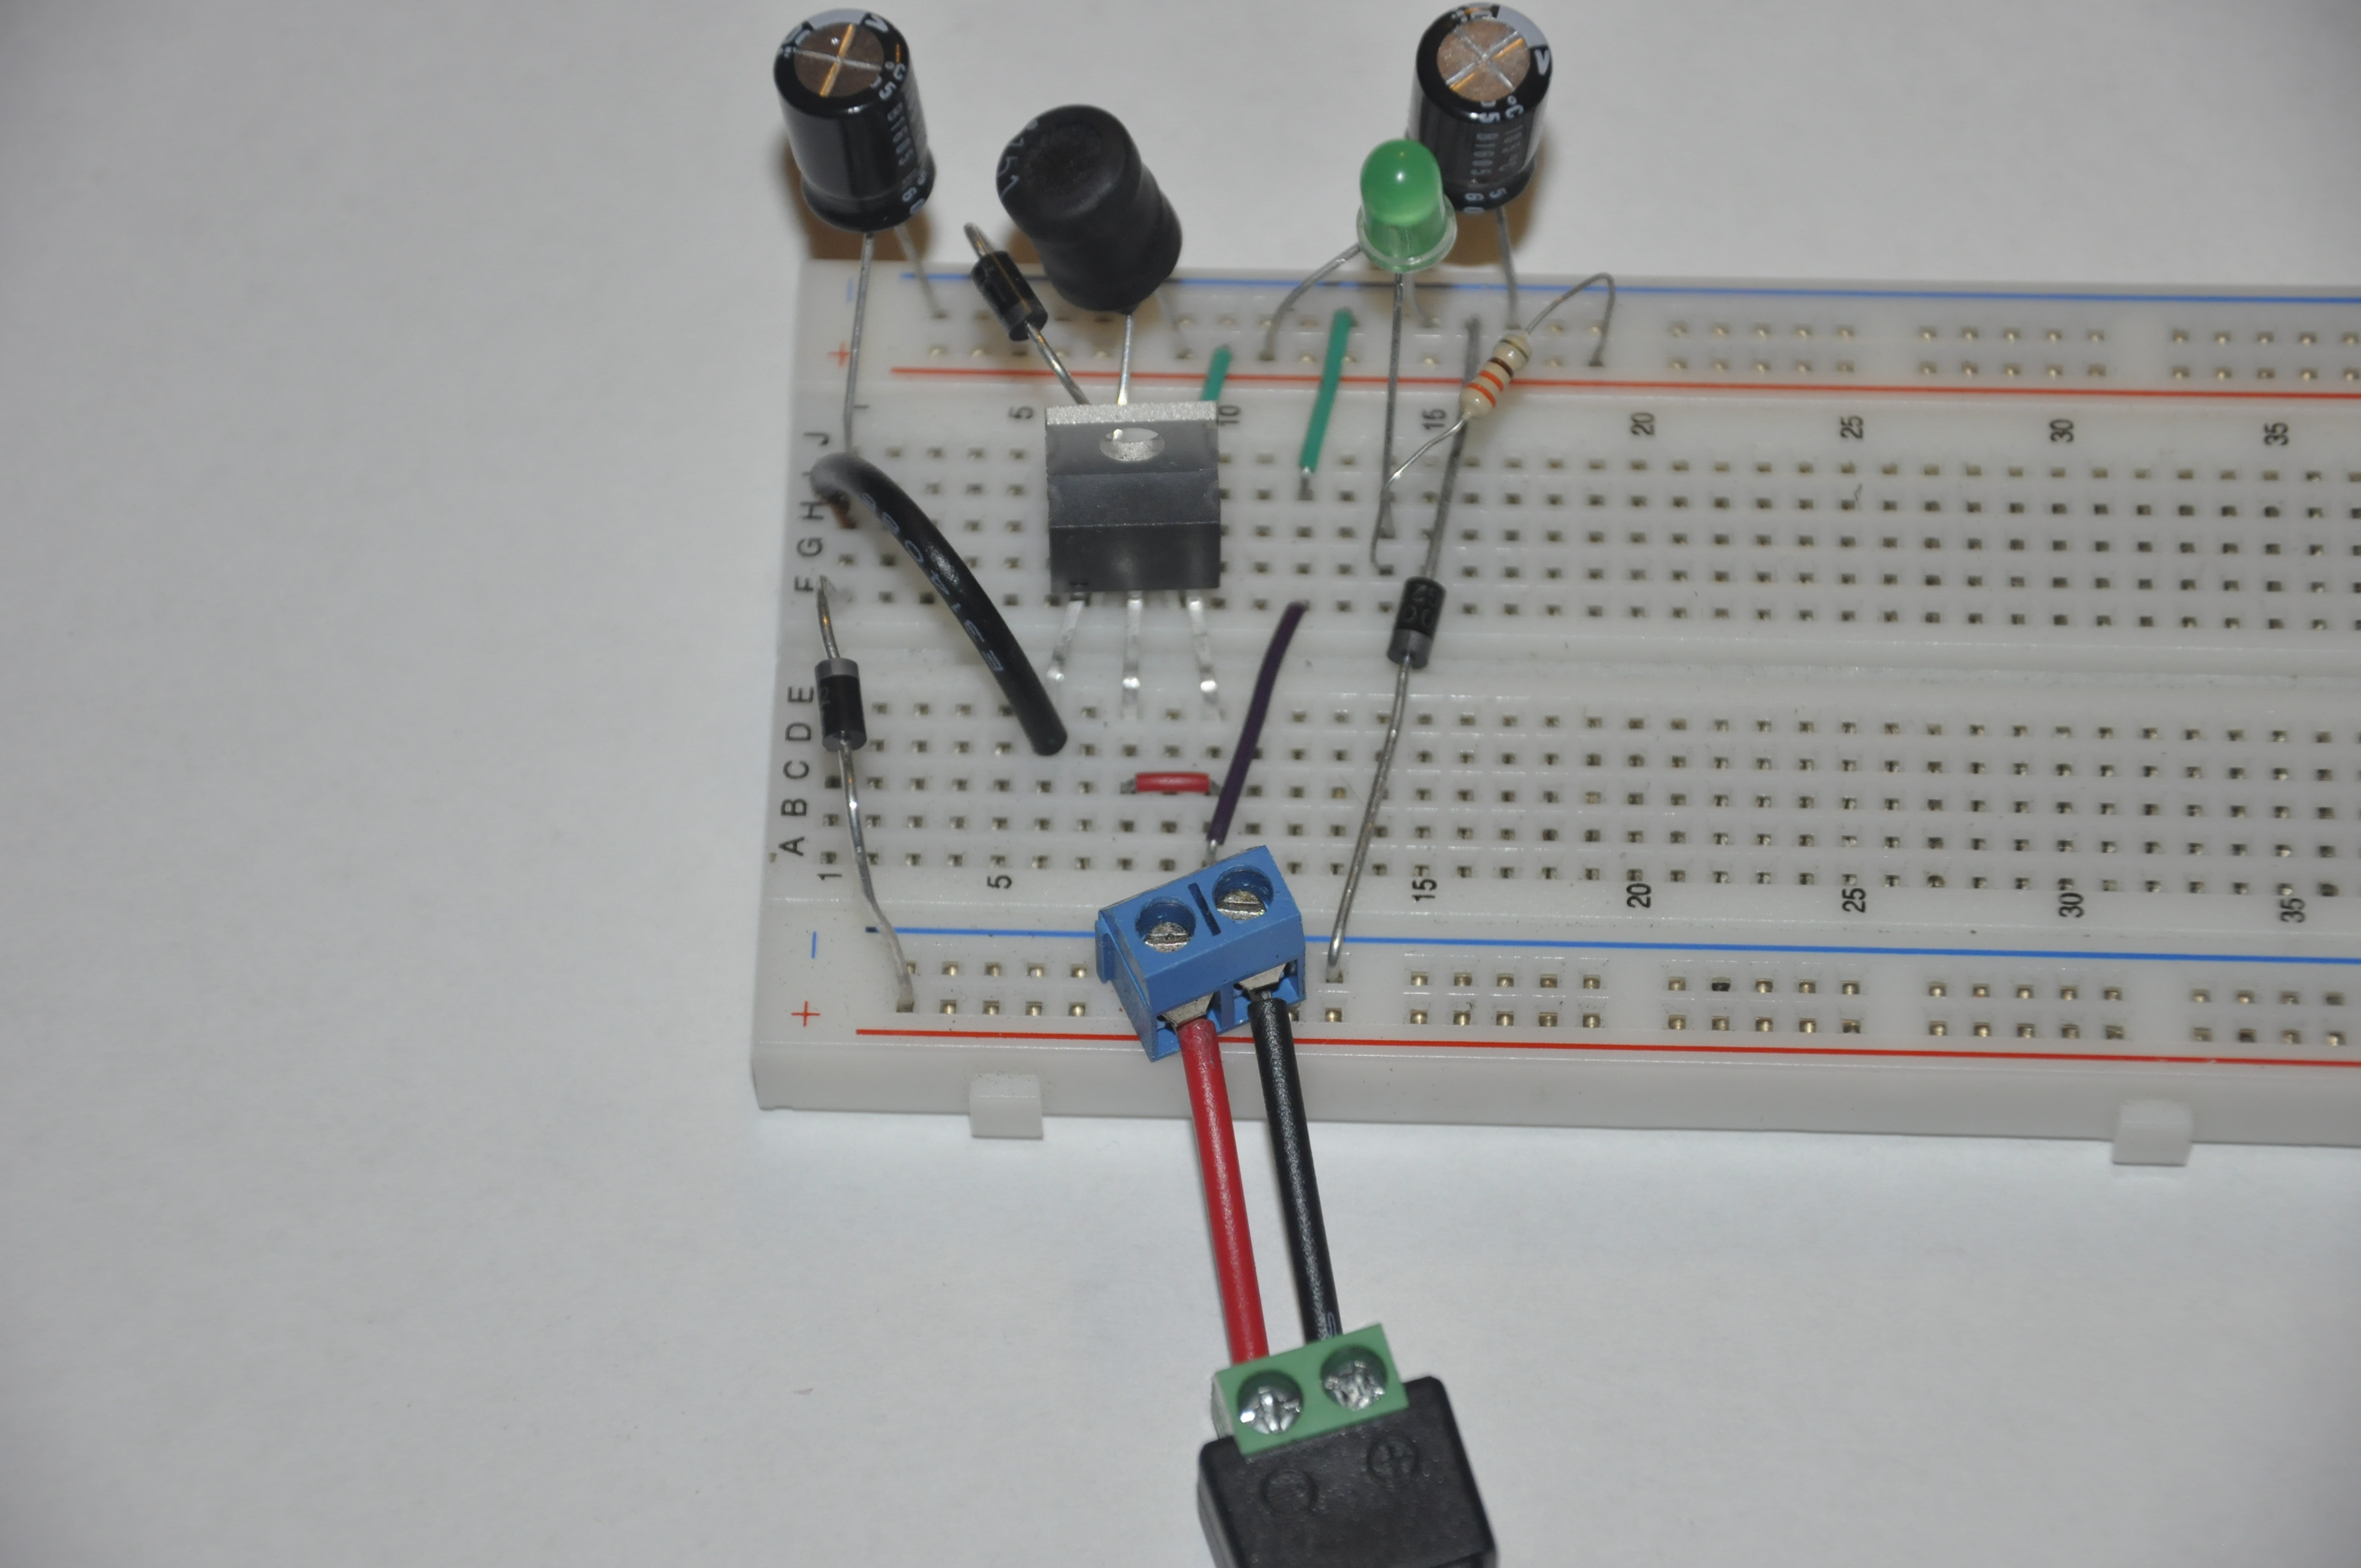
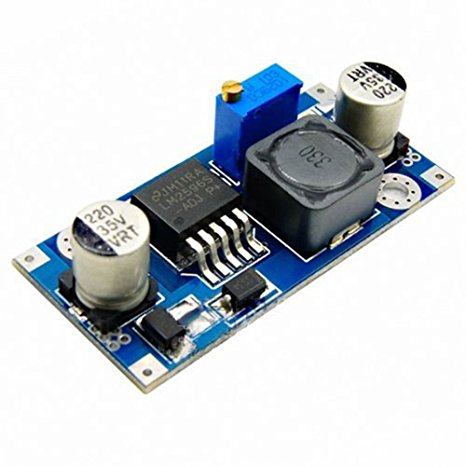
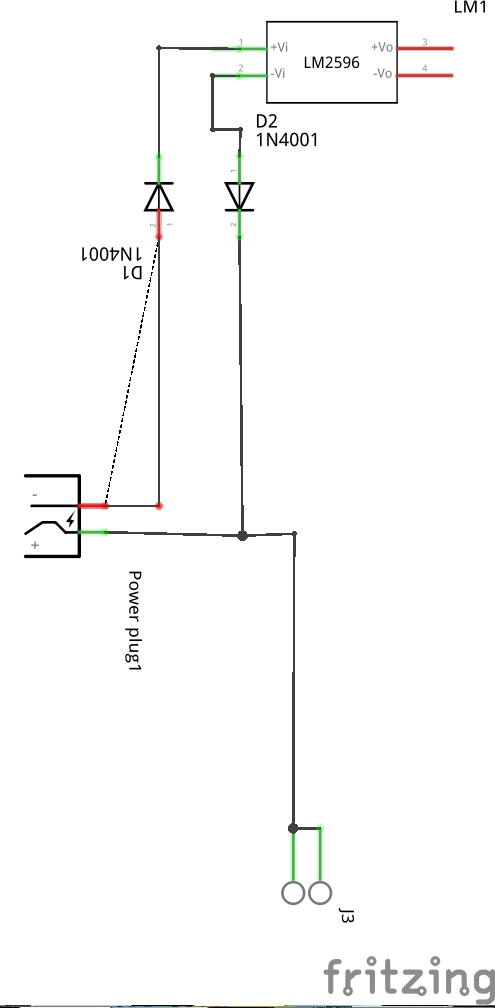
In this instructable, we will be powering our node(s) with a 24 VAC supply by rectifying, then stepping down the voltage. Using a half wave rectifier was used as it provides enough power for the microcontroller. To step down the power I used an LM2596(buck converter) due to the higher efficiency and less heat dissipation than the standard LM7805(linear regulator). See the Details section for the calculations used to determine the appropriate components.
Parts:
- 1N1007 x 2
- $ 0.25
- LM2596 Board (individual components cost about $7 total but ship in days instead of weeks)
- $ 1.00
Connect the rectifying diodes to the LM2596 board (or circuit) as shown in the last image.
Hardware (Relay or Triac)
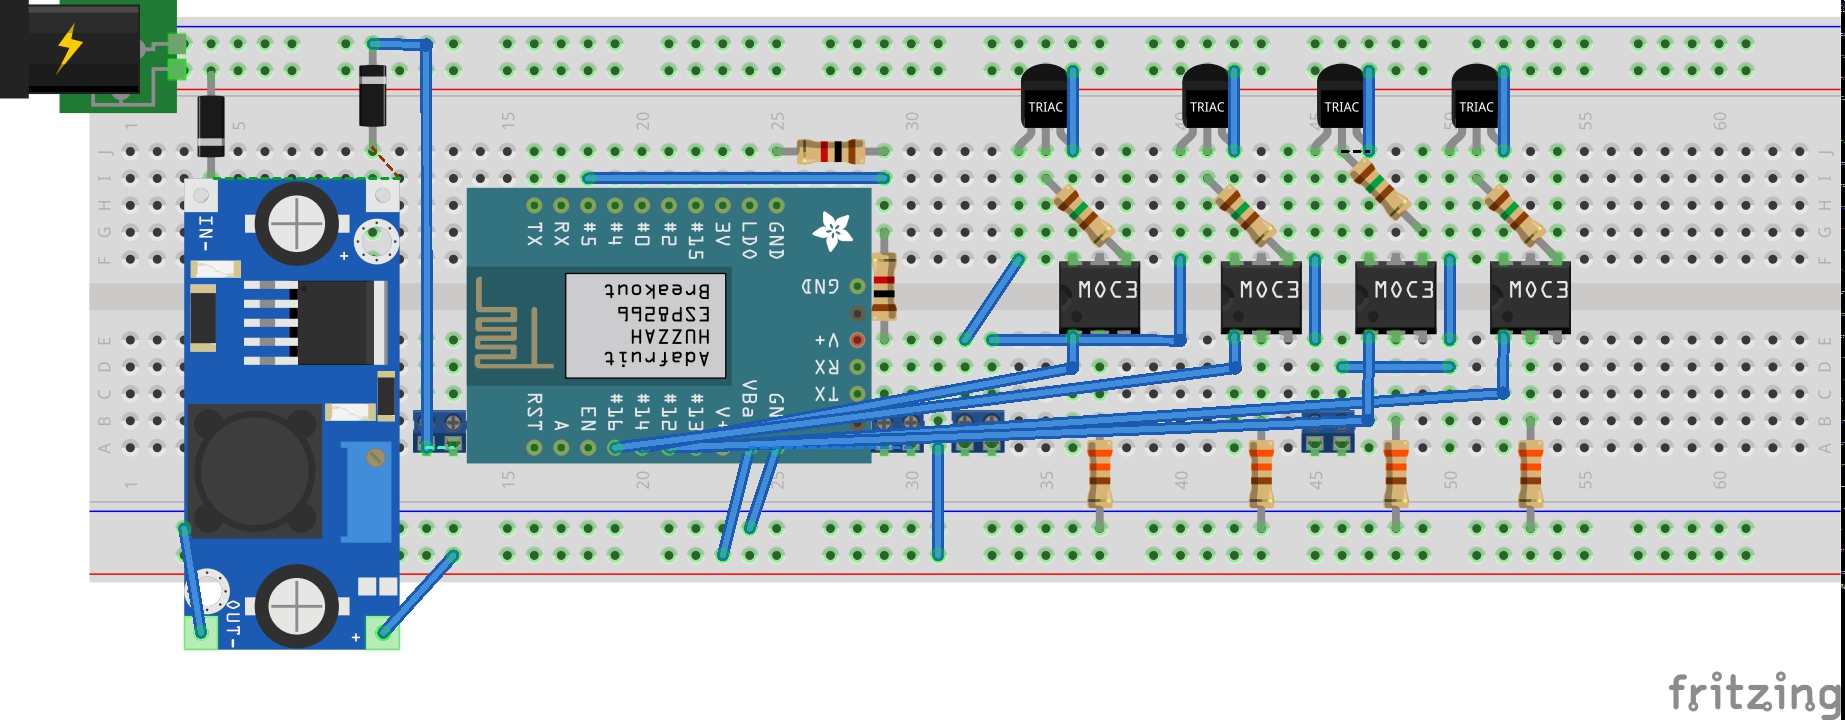
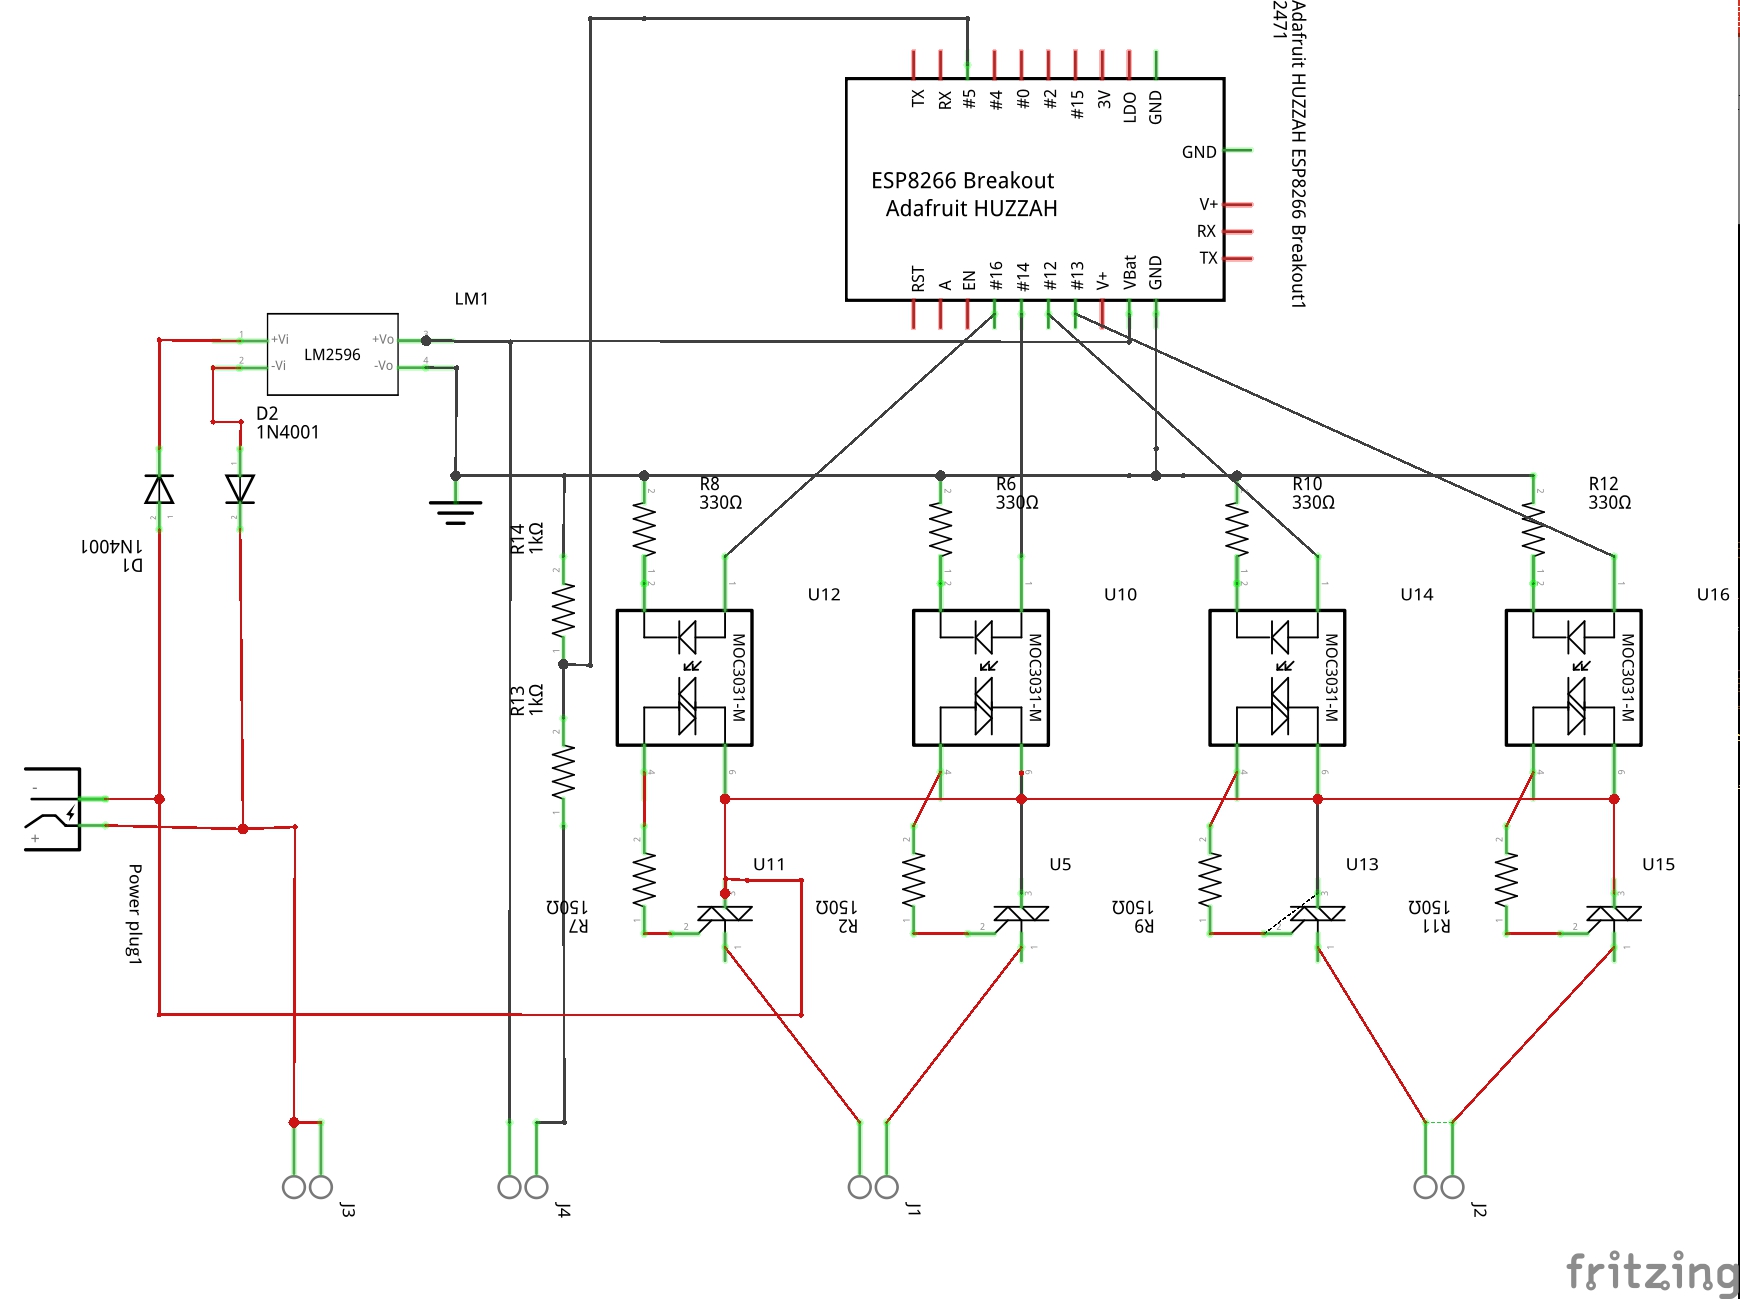
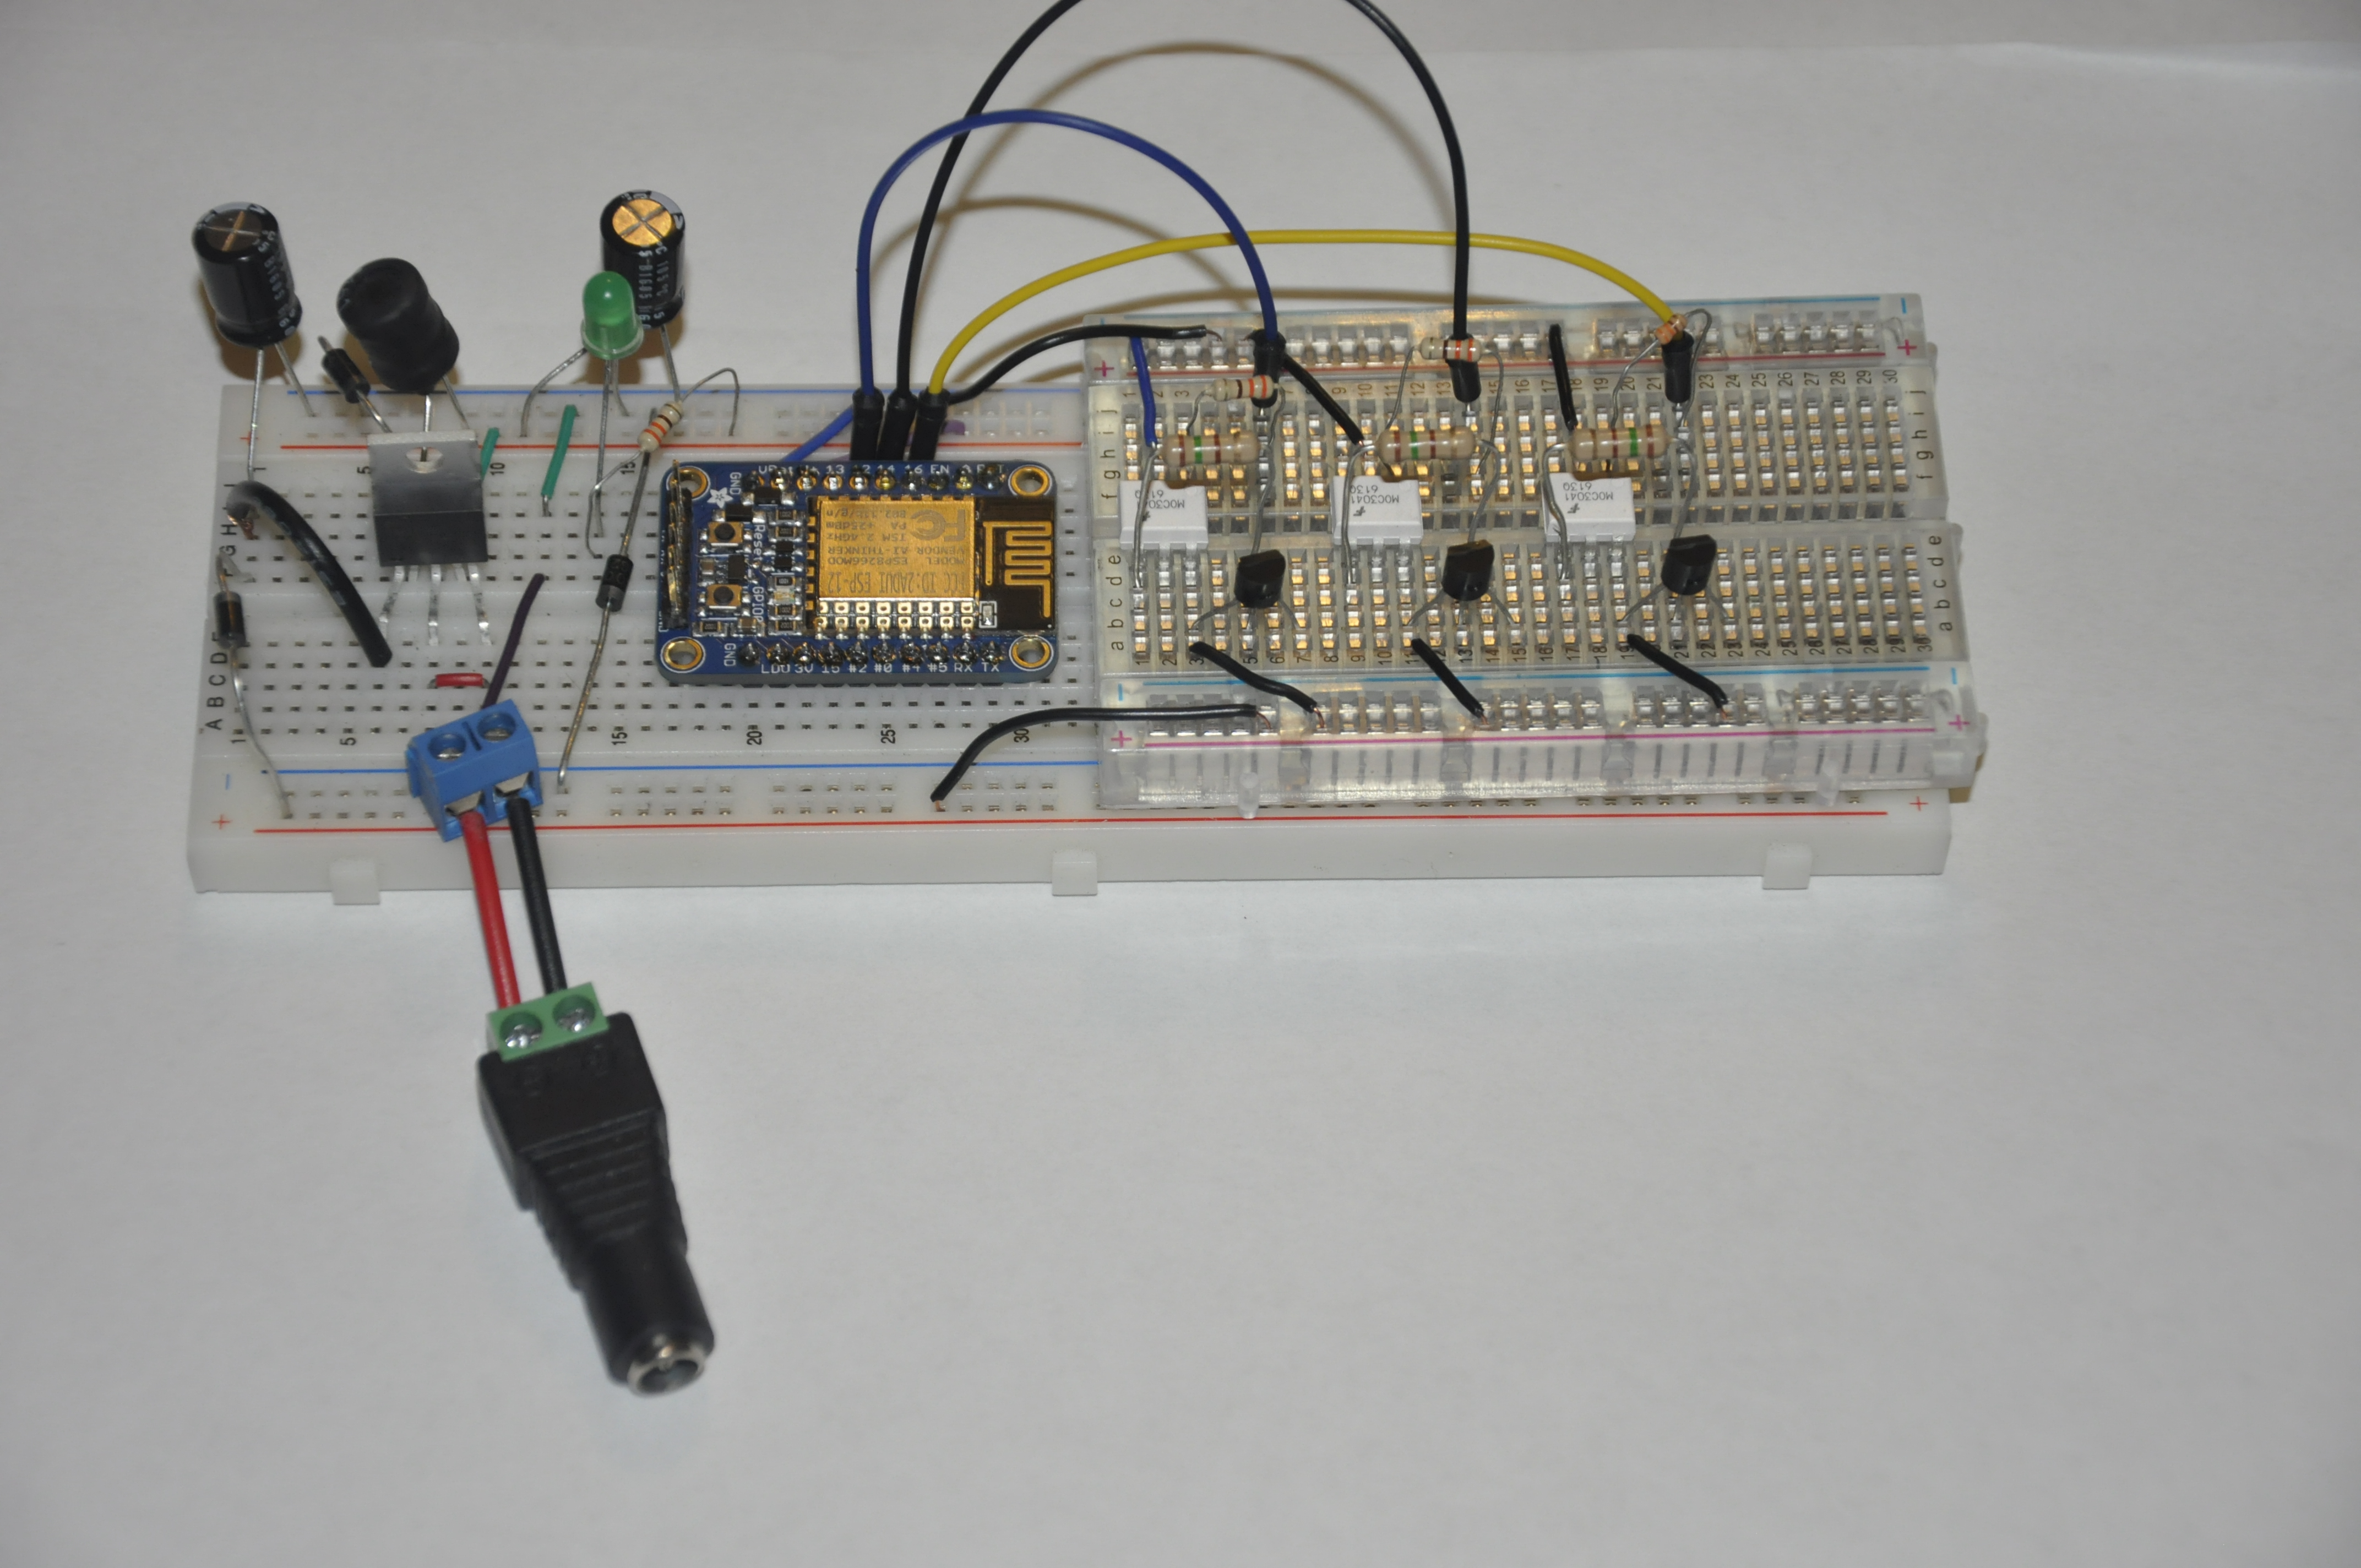
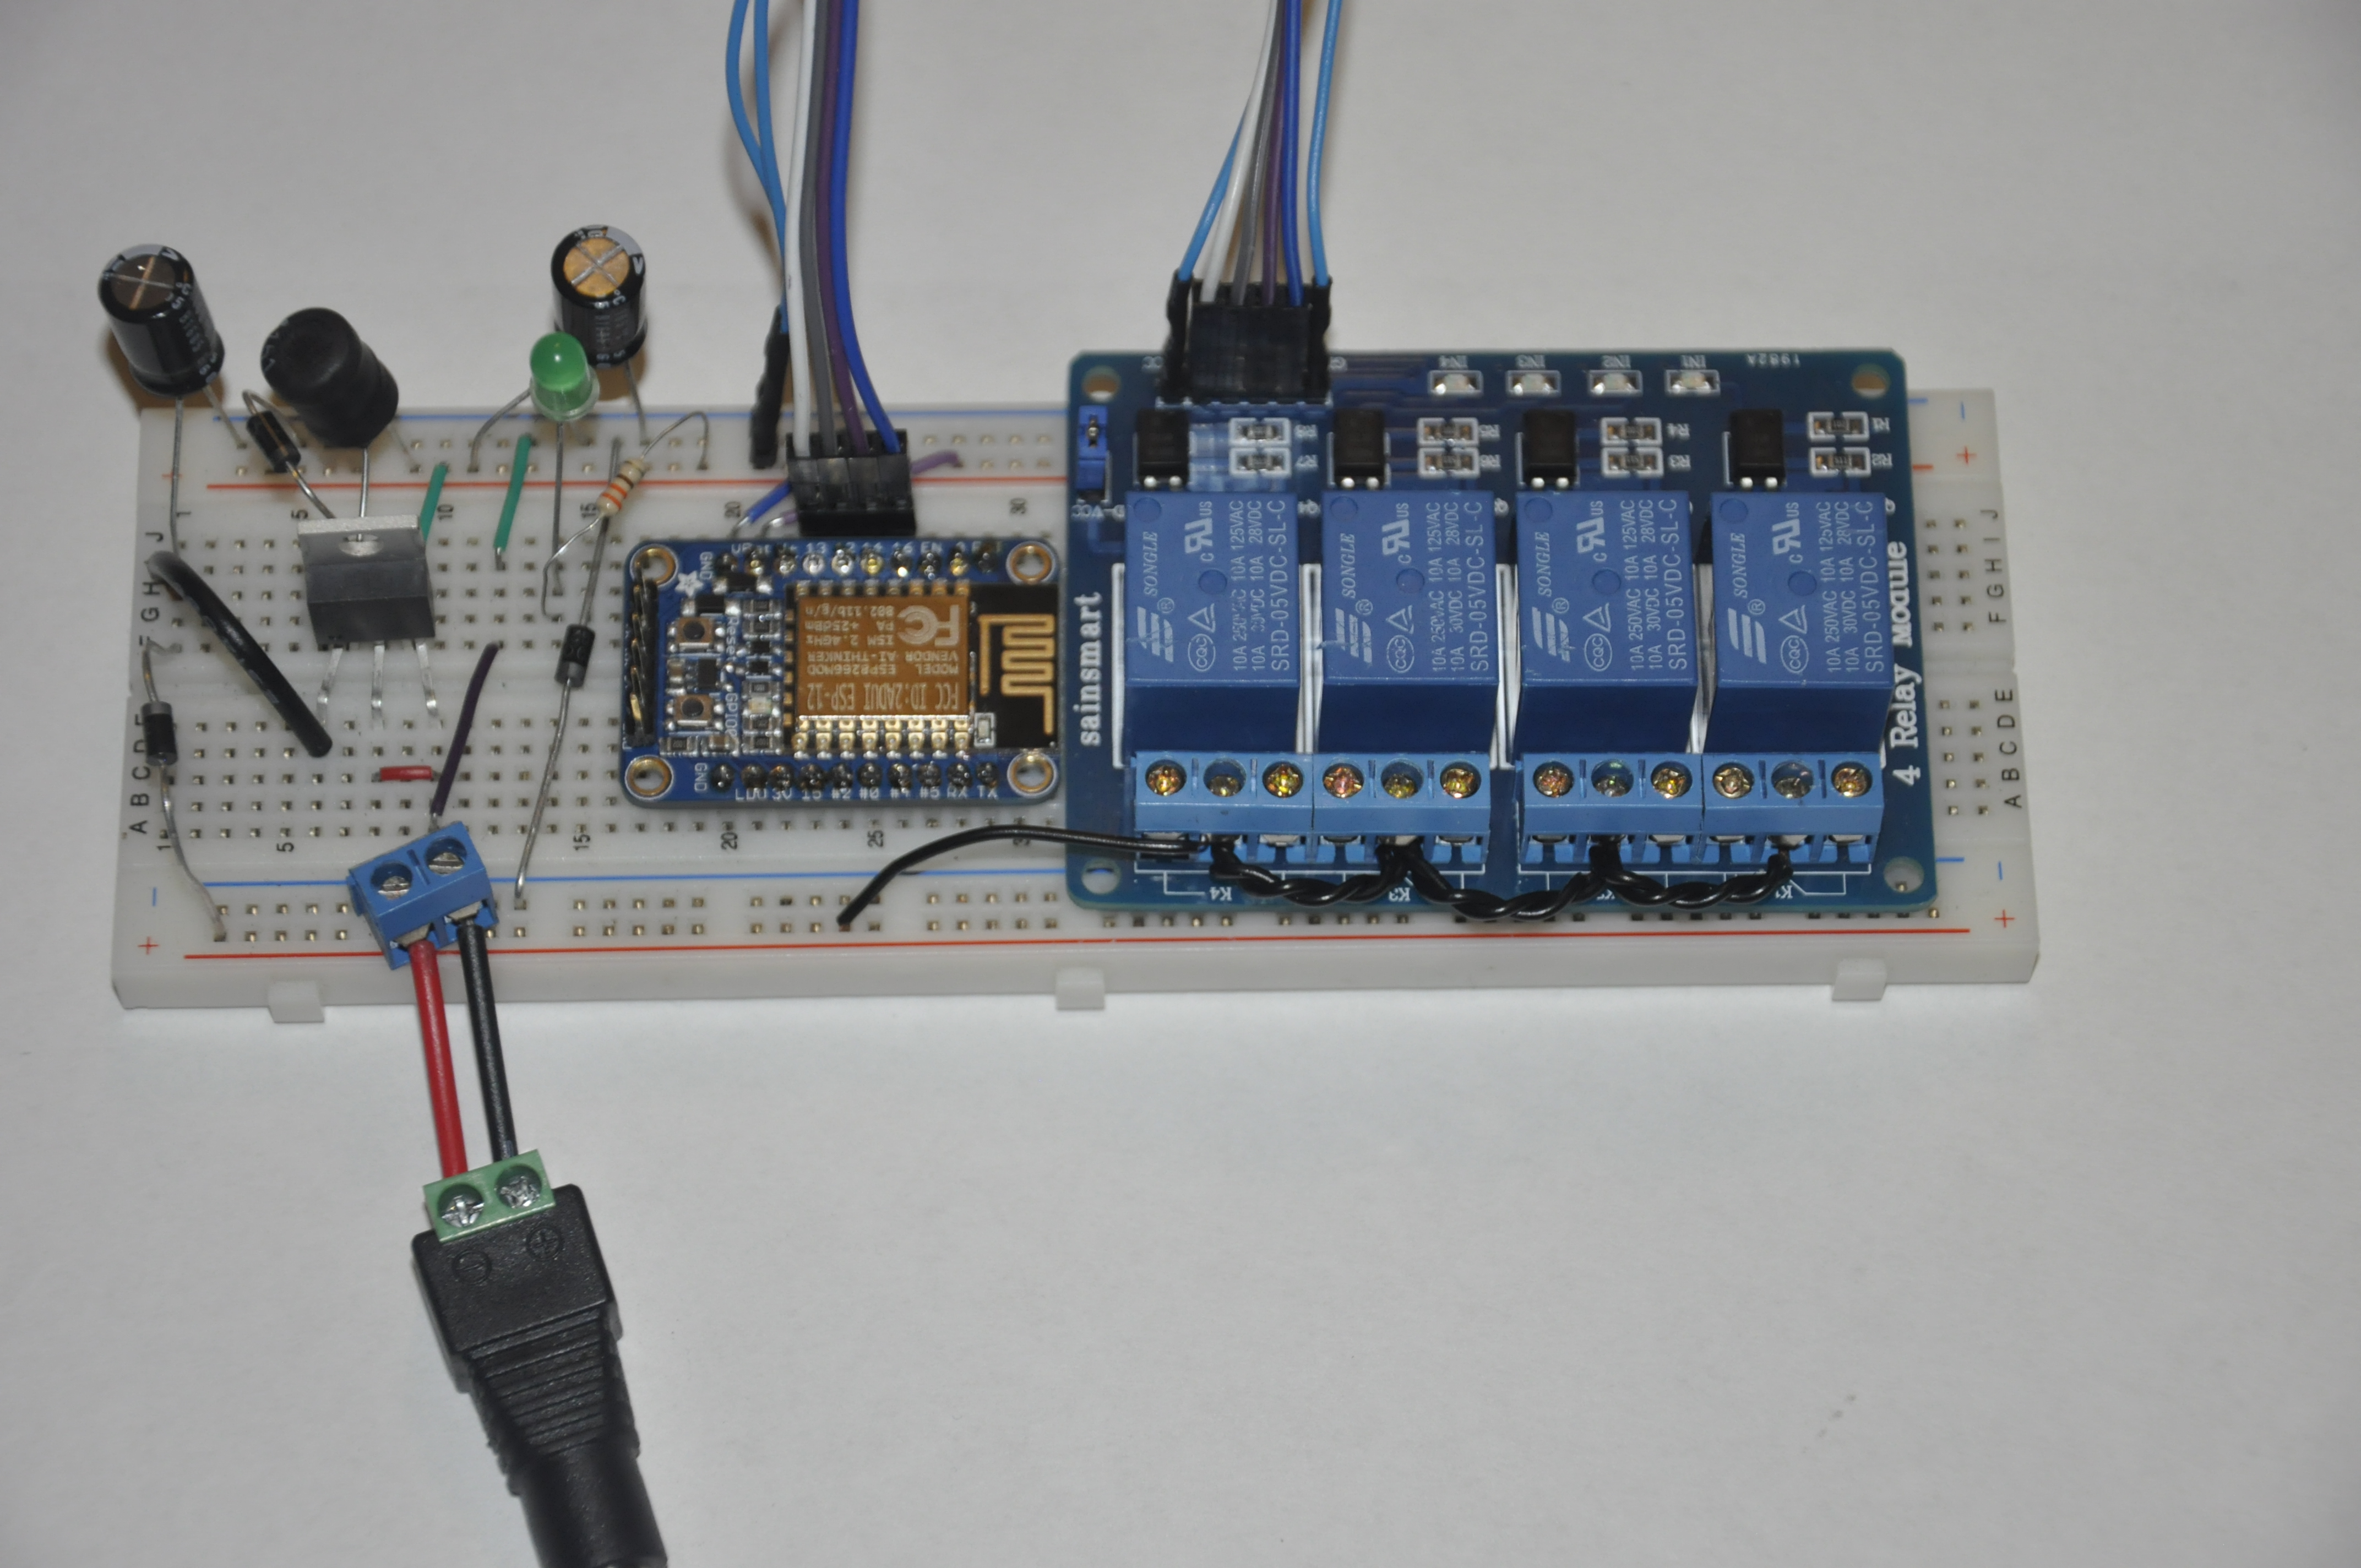
We will be using an ESP8266(12-E) microcontroller with built-in WiFi and either a set of relays or a set of Thyristors(Triacs) to control the AC current. Relays are electromechanical devices that require more space, Triacs are solid state devices that require less space. Both setups will be shown although the Triacs will be used on the protoboard.
Hardware:
- Adafruit Huzzah (Even though there cheaper boards, Adafruit provides many useful libraries)
- $ 9.95
Choose either Relay or Triac
- TRIACS
- Triacs x 4
- $ 0.40/unit
- Optoisolator x 4
- $ 0.735/unit
- Resistor (150 Ohm 1/2-Watt) x 4
- $ 0.75/pack
- Resistor(100 Ohm) x 4
- $ 0.75/pack
- Total: $ 6.04
- Triacs x 4
- RELAY
- Relay Board
- $10.00
- Relay Board
Connect the ESP-8266 module to the chosen hardware as shown in the schematic.
Software - Node


The node will receive commands from the web(IoT) or from a machine on the local network, which will cause an irrigation valve to be turned on/off for a given time, if no time is provided then a default time will be assigned. The node will manage the timings, communications, and web server. Below we will set up all the required items to ensure proper operation.
REQUIRED:
Set the following variables.
Relays are typically active Low and in this design triacs are active High.
#define ON HIGH // For Active (HIGH or LOW)
#define OFF LOW
WiFi:
const char* ssid = "Network Name";
const char* password = "Network Password";
Network Name:
When we want to view the web page, we can type in the IP address assigned to the node or we can use irrigation.local or any desired name. When using multiple nodes, it is necessary to change the local names so we can address the device we need without conflict or need to update IP addresses.
if (mdns.begin("irrigation", WiFi.localIP()))To have this functionality we can use a local Domain Name Server(DNS) or more simply, run zero-configuration networking software. More details on the next step (Software - Controller)
OPTIONAL:
IoT:
Using AdafruitIO we can test our software without connecting the irrigation controllers and we can access the nodes outside of the local network.
#define AIO_USERNAME "Adafruit_IO_userName"
#define AIO_KEY "key_obtained_from_Adafruit_IO"
Note: Here is an example of publishing to a feed. If the program is run and the feeds don't exist on AdafruitIO, they will be created.
Adafruit_MQTT_Publish pubValve1 = Adafruit_MQTT_Publish(&mqtt, AIO_USERNAME "/feeds/valve1");
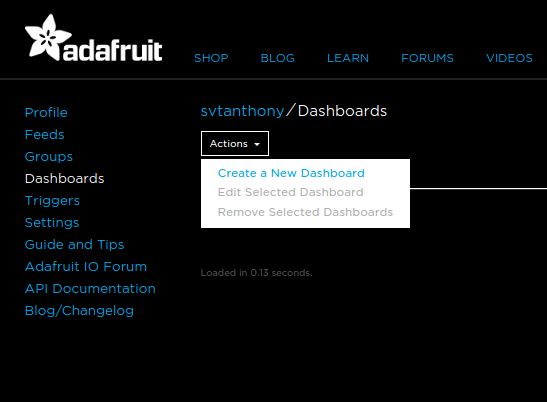
AdafruitIO
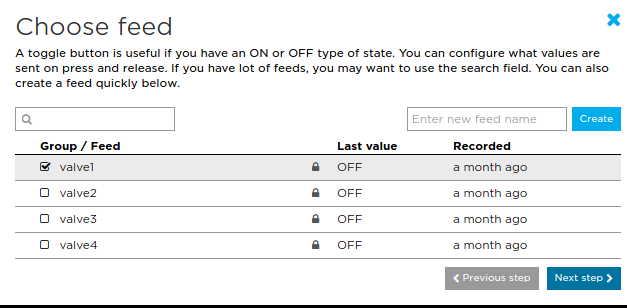
- After creating an account with AdafruitIO, go to feeds and create a feed for each valve.
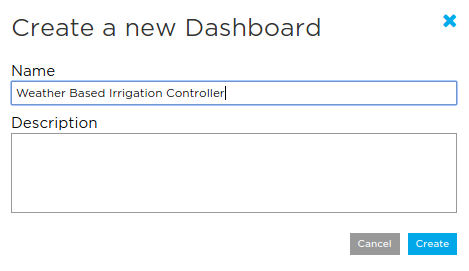
- Create the dashboard for the group of valves.
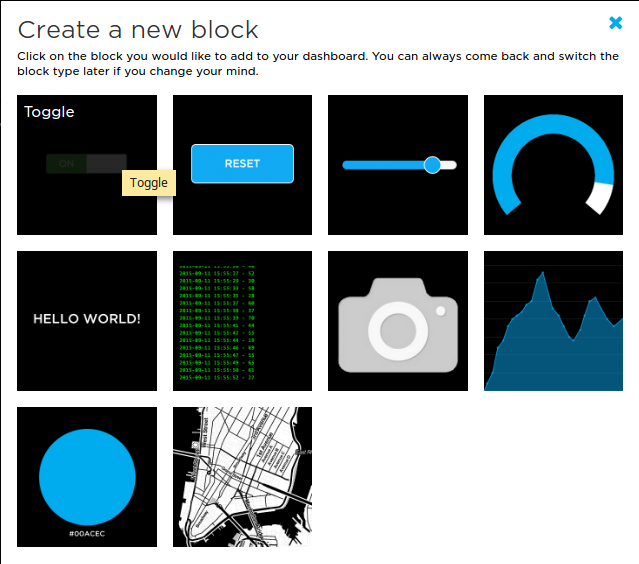
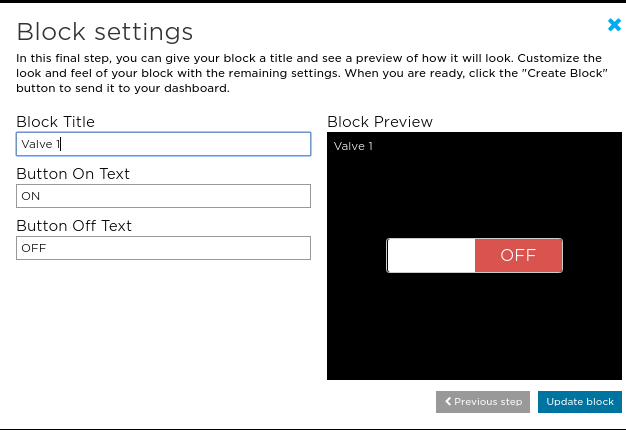
- Use a toggle button and bind the block to the feed.
Software - Controller


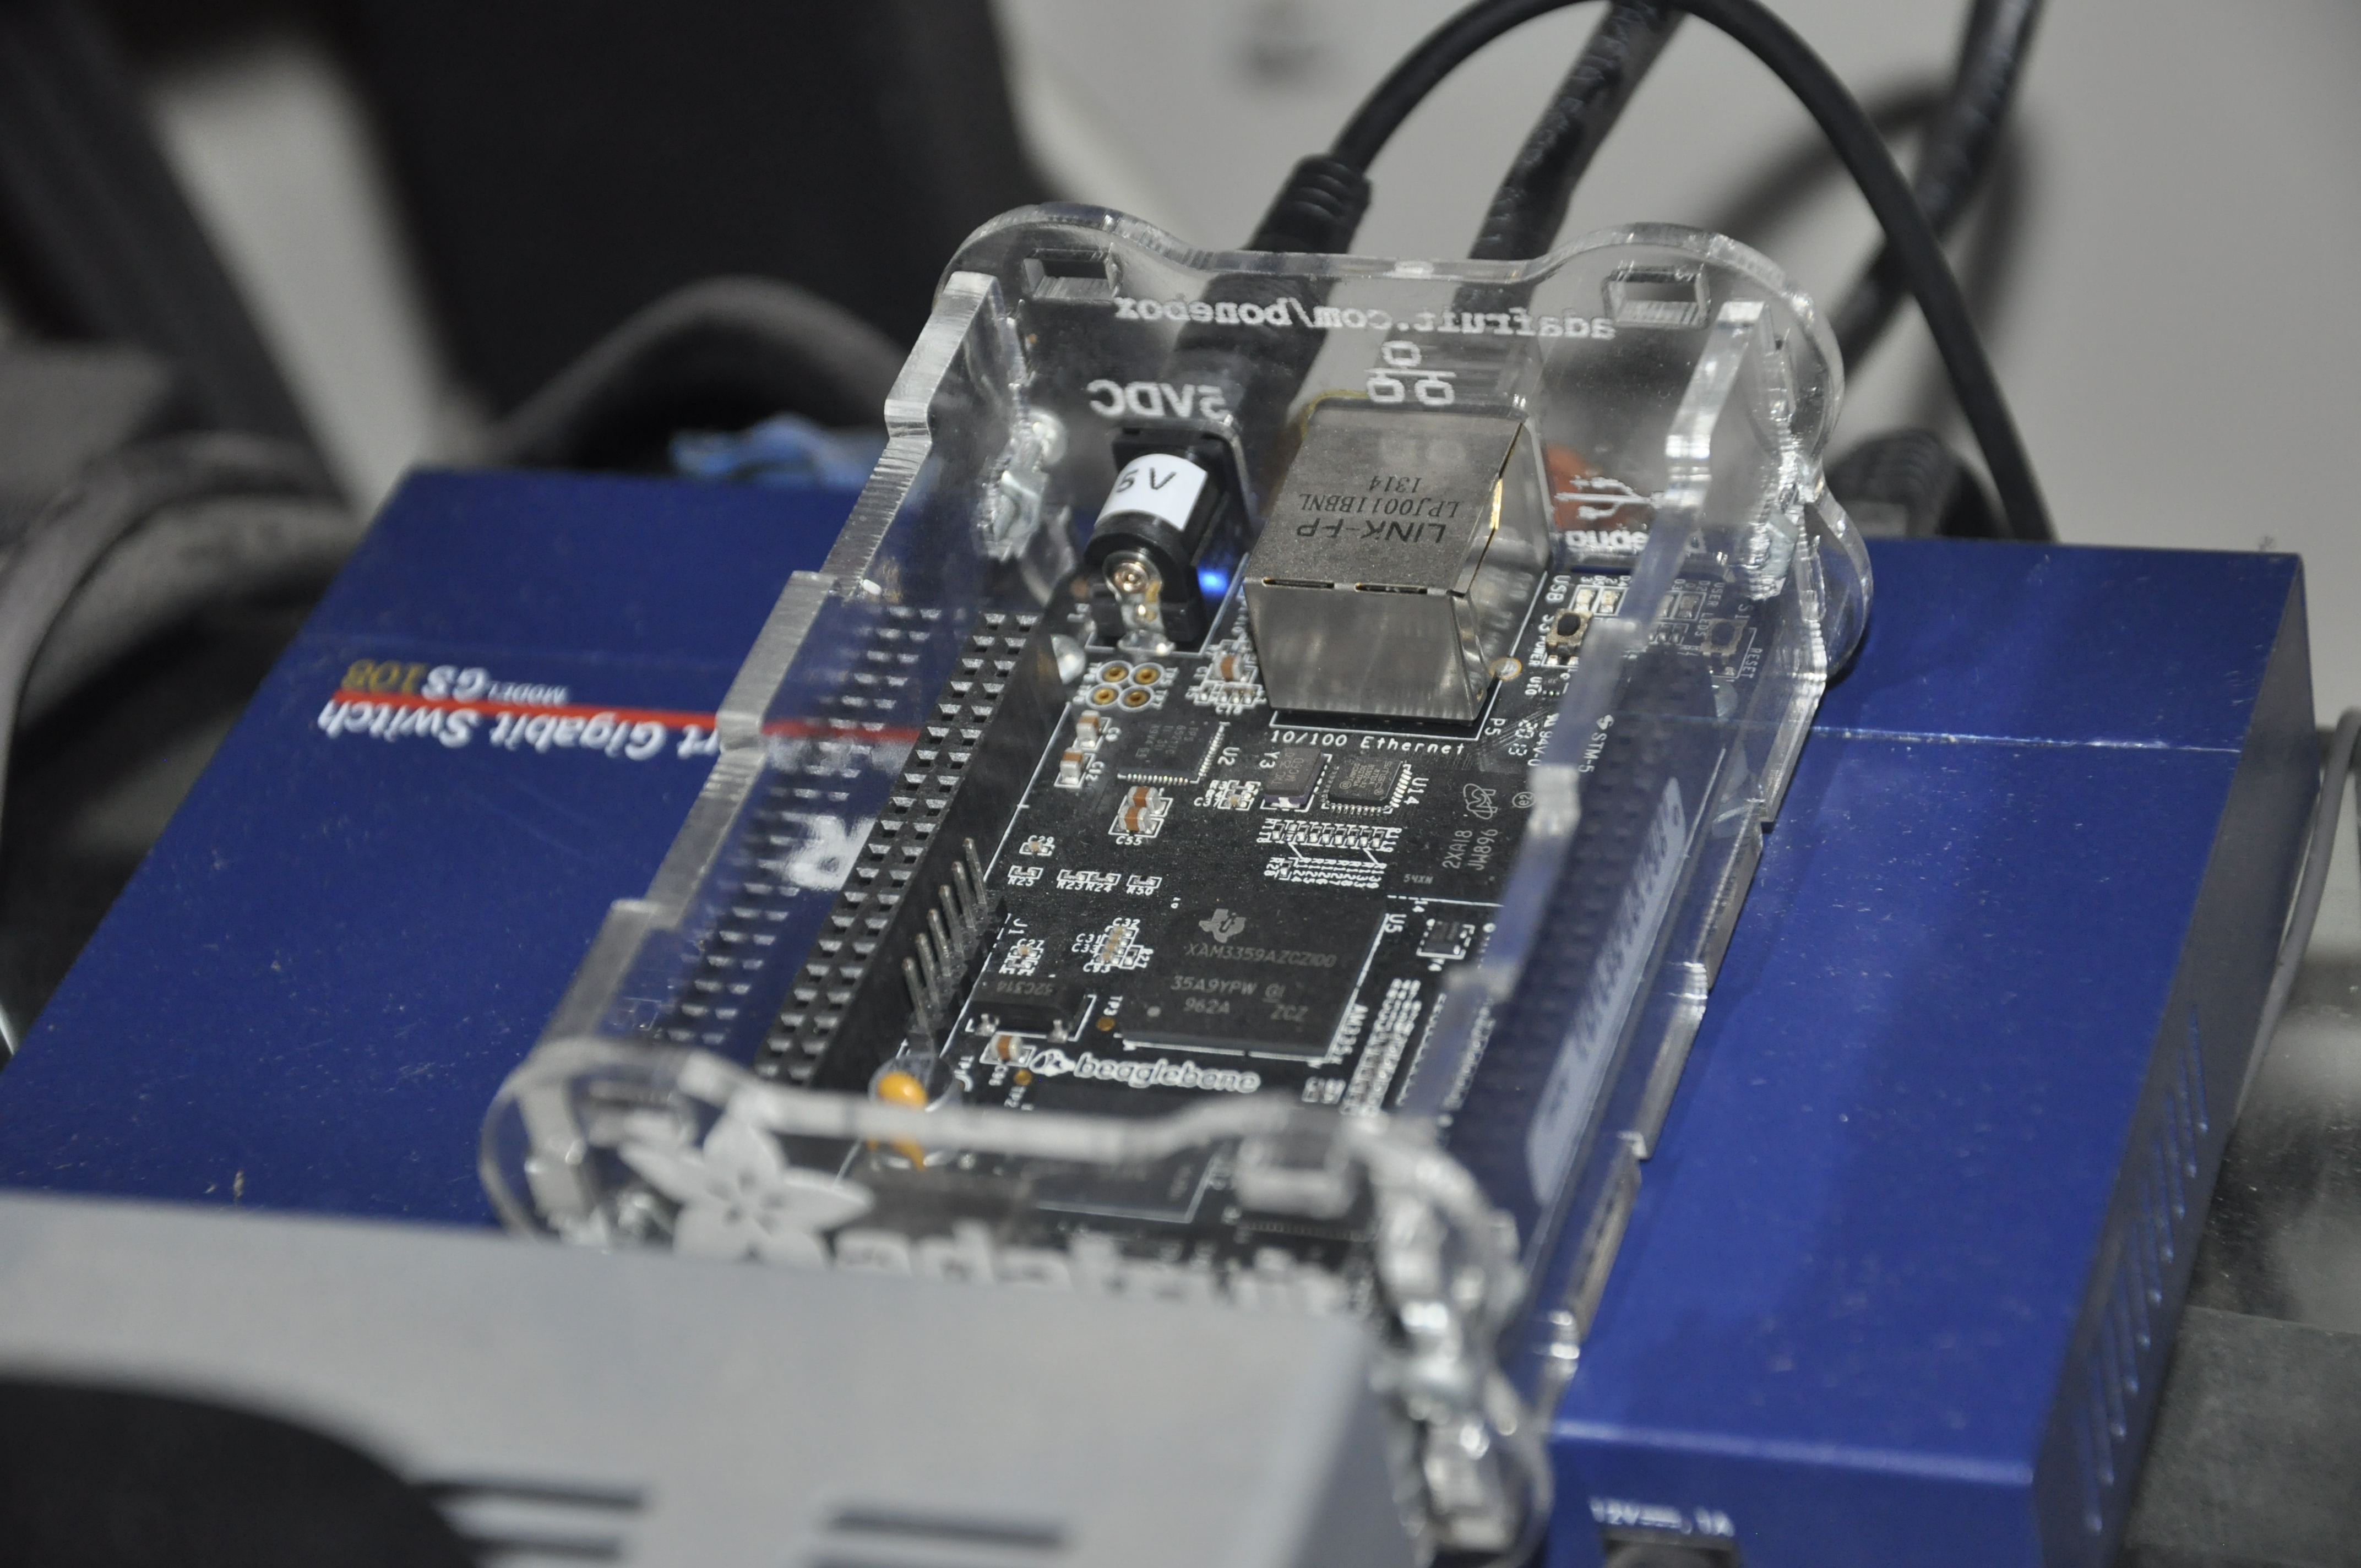
The controller can be any device capable of running python with network connectivity. In this case, I'm using a BeagleBone Black running Debian, as it's already running other services for the network. The best irrigation time is in the middle of the night due to decreased water evaporation as a result of the cooler temperatures. As such the controller should be on at that time and due to the low power consumption the beagle bone is ideal for the task.
Wunderground API Key
We will need to get forecasted weather information to decide whether or not the valves should operate.
- Go to Wunderground and register for a free account.
- Go to the developer's menu.
- Generate a free API key.
- Get a link for your local weather forecast with you API key. The API documentation provides an example, that can be further customized by replacing the City name with the zip code. API Documentation
-
http://api.wunderground.com/api/{key}/forecast/q/{state}/{city}.json
-
http://api.wunderground.com/api/{key}/forecast/q/{state}/{zip}.json
-
ex - http://api.wunderground.com/api/{key}/forecast/q/CA/San_Francisco.json
-
- Populate the python script with the key, state, and zip(or city)
key = "API key"
state = "state"
zip = "zip or city"
Rain Sensor
Connect a wired rain sensor to the node and provide the nodes URL to the python script.
sensorURL = 'http://irrigation.local/'
Evapotranspiration Rates
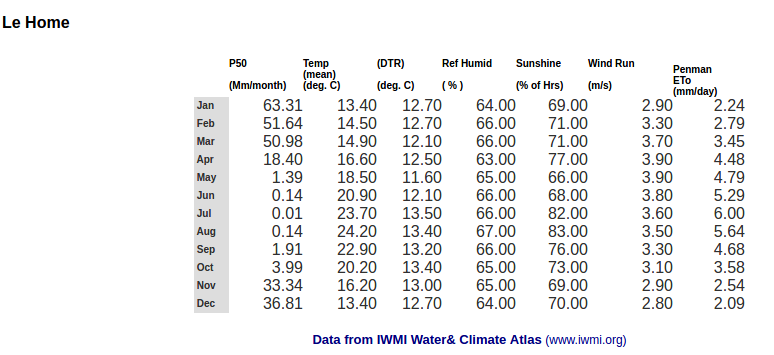
The evapotranspiration rates are the bread and butter of water conservation and beautiful landscapes. With this information, we can determine the precise amount of water that is required to maintain the plants and conserve water. For further details see the Details step.
What we require is the evapotranspiration rates specific to our area. There are two sites that have the information readily available. Once the data is obtained, enter it by month as seen below and note that the different sources use different units, but the data will be normalized and the units will not matter.
Enter the information into the "data" file.
{"Jan": ".07", "Feb": ".09", "Mar": ".11", "Apr": ".15", "May": ".17", "Jun": ".19", "Jul": ".21", "Aug": ".19", "Sep": ".18", "Oct": ".14", "Nov": ".08", "Dec": ".06"}Watering Times
Visit any of the following sites to calculate watering schedules for your plants and area. Just keep in mind that we are after the watering minutes per week, while some of these calculators split the times by days and further by scheduling a cycle multiple times a day. Simply multiply the minutes by cycle by the number of cycles per week and by the number of days per week to get the minutes per week. Also when scheduling, make sure to check with your local water utility for possible watering restrictions.
- http://bewaterwise.com/Calculator.shtml
- http://www.rainbird.com/support/RunTimeCalculator/
- https://www.sprinklerwarehouse.com/DIY-Determing-Zone-Run-Times-s/7943.htm
- UCANR - water_demand_calculators
To enter the data, we will split the minutes/week into the number of days desired and further by the number of times per day. Based on my area, I need to water turf for 41 minutes/week, thus I will have the following entry in the data file. Use different URL's for different nodes, the entries below are on two different nodes but controlled by the same script.
Valve 1; 780 sec; Tue,Thu,Sat; <a href="http://irrigation.local/" rel="nofollow"> http://irrigation.local/ </a>

Valve 1; 13 min; Tue,Thu,Sat; <a href="http://irrigation2.local/" rel="nofollow"> http://irrigation.local/ </a>
The format is as:
{Label} ; {Minutes or seconds per cycle} ; {Days of the week - comma separated} ; {Node URL}
Watering for too long a time will cause water run-off. To solve this issue we can reduce the watering time by half and schedule the script to run twice per day. Another way to solve this issue is to limit the watering duration per cycle and any excess time will be scheduled after a given delay. We set these values in the script.
#5min * 60sec/min = 300 sec
maxDur = 300

#20 min * 60min/sec = 1200 sec
delayTime = 1200
With these settings, a valve that is set to run for 13 minutes will:
- run for 5 minutes
- delay for 20 minutes (other valves can run in the meantime)
- run for 5 minutes
- delay for 20 minutes (other valves can run in the meantime)
- run for 3 minutes
Zero-Conf Networking:
Zero-Conf Networking allows devices to use names instead of IP addresses without the use of a local DNS server. Apple includes it with their OS, Windows PC's might have it with the latest version of Windows 10 or by downloading Bonjour which comes with Itunes, on Linux you can download Avahi-daemon.
Here are some more details and instructions on how to set it up. Adafruit ZeroConf
Program and Schedule
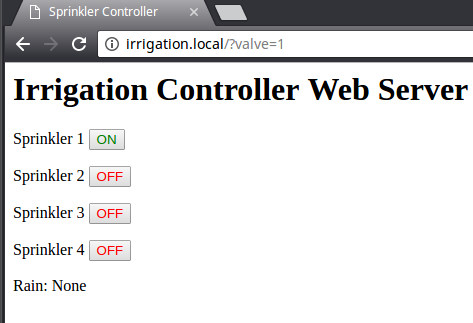
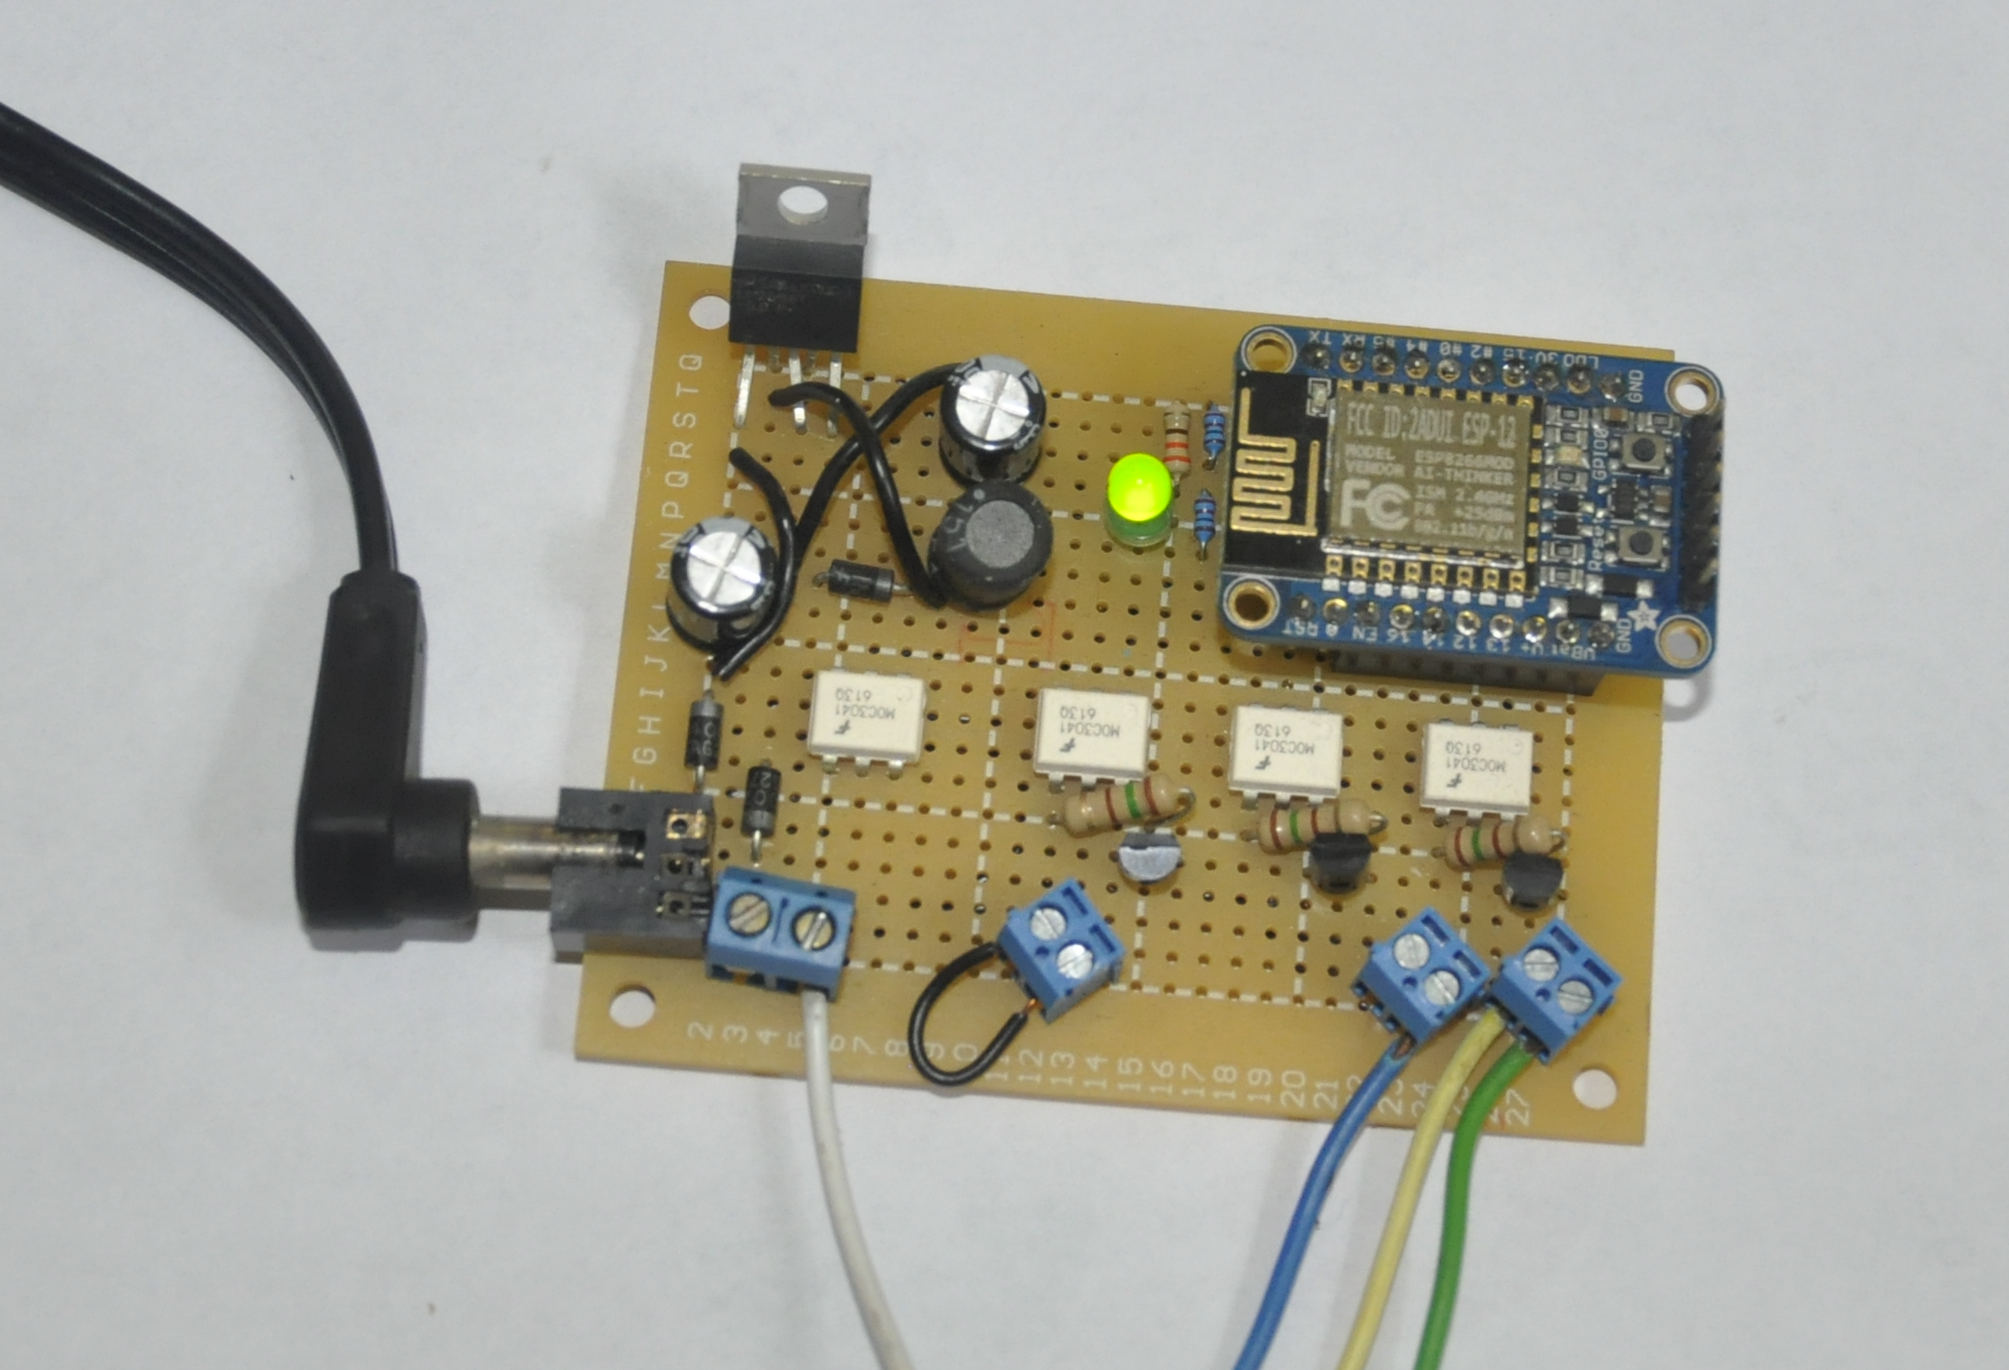
After all the settings are entered, the sketch will need to be compiled and uploaded to the microcontroller, then the python script will need to be scheduled.
Code
The code can be found on Github.
Node
To upload the sketch using the Arduino IDE follow the directions provided in the link.
Controller
For Linux scheduling, follow the tutorial below to understand how crontab is set up.
Here is my crontab entry.
* 3 * * * /usr/share/WBIX/controller/sScheduler.py /usr/share/WBIX/controller/data
The crontab (Linux scheduler) entry calls sScheduler.py to every day at 3:00 AM. Furthermore, it passes in the data file. If we want the valves to run multiple times a day we can enter multiple times by separating with a comma or adding another entry. If multiple run times a day are desired, remember to adjust the watering time per cycle as to not waste water.
Note: If the script is run but it is not a watering day, the irrigation valves will not activate.
Testing
Before connection the microcontroller to the rest of the hardware, the functionally can be tested by setting the node to be active high and connecting some LEDs. The built-in web server allows for manual triggering of the valves (or LEDs), which will also show up AdafruitIO or vise versa. Using the web server to trigger the On/Off states will set the duration to the default duration of 2 minutes. A custom duration can be entered by adding the duration variable to the URL. The link below will trigger valve 1 on the node (irrigation.local) for 60 seconds.
http://irrigation.local/?valve=1&dur=60
Home Automation
With the inclusion of Adafruit IO connectivity, we can use services such as IFTTT to modify the valve feeds and activate the solenoids. This also allows for triggering from smart devices to voice home automation such as Google Home or Amazon Alexa, it is even possible to replace the controller using such services.
Details(optional)
What is EvapoTranspiration
Here is a Wikipedia link to get a good understanding of what evapotranspiration is. In summary, it is the water loss from the soil through evaporation and plant transpiration with the given weather conditions. By knowing how much water is lost, we know how much we need to add to keep the plants healthy while conserving water.
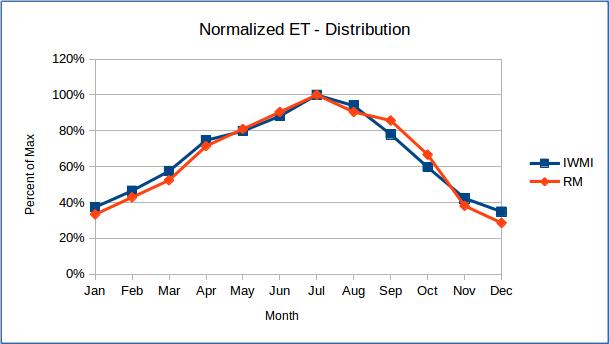
While some calculations use differing units, the approach taken was to eliminate the units by normalizing the data to get a distribution by month. We then use the distribution to adjust the calculated watering times, allowing for monthly irrigation variations. As seen on the data comparison, both data sources have a small variance from each other, indicating that either source can be used.
Rain Sensor and how to override it
If it's been decided to not use a rain sensor and use strictly forecasted data, the rain sensor functionality can be overridden. The hardware override is to simply connect the rain sensors connectors to each other, effectively closing the circuit. The software override is to not include the nodes URL causing the query to fail.
Modular Design
While it is certainly possible to have all the functionality rest in the nodes, the modular design allows multiples nodes to be controlled by a single controller. Furthermore, schedule changes can be made to the data file, not causing any reprogramming or system downtime. This design was also implemented in this fashion to allow shorter wire run from the valves to the controller. It might not be the case in every instance, but it definitely added ease in the wiring of the irrigation valves. The limitation is that the nodes and controller must all be on the same network, that is, be within WiFi range.
AC to DC Rectification + Voltage Step Down
Solenoids used in irrigation valves are typically 24 VAC. Using a transformer to get our AC voltage down to 24 V, we will need to rectify the 24 V, which is done through rectifying diodes. I measured around 27 V from the transformer, giving a peak DC voltage of 34-39 V. In this case, the 1N4002 diodes were used for rectification, with plenty of room to spare.
After rectification, we are working with a maximum of 39 V, making it ideal for the LM2596 chip and circuit. The LM2596 is a high-efficiency step-down voltage regulator (buck converter), that will get us an output of 5V with very little heat. We now have access to both 24 V AC and 5 V DC to actuate the solenoids and for the microcontroller to operate.
Next Steps...
- Add a flow meter to detect leaks
- Message a designated user when a leak is detected
- Message to be sent at appropriate times (not watering times)
- Case - 3D printed?