Waterproof Headlamp Wearable

Our goal is to create a wearable headlamp that is waterproof to make it safer in bad conditions. The wearable should be comfortable, easy to put on and take off, and is easy to use.
Supplies
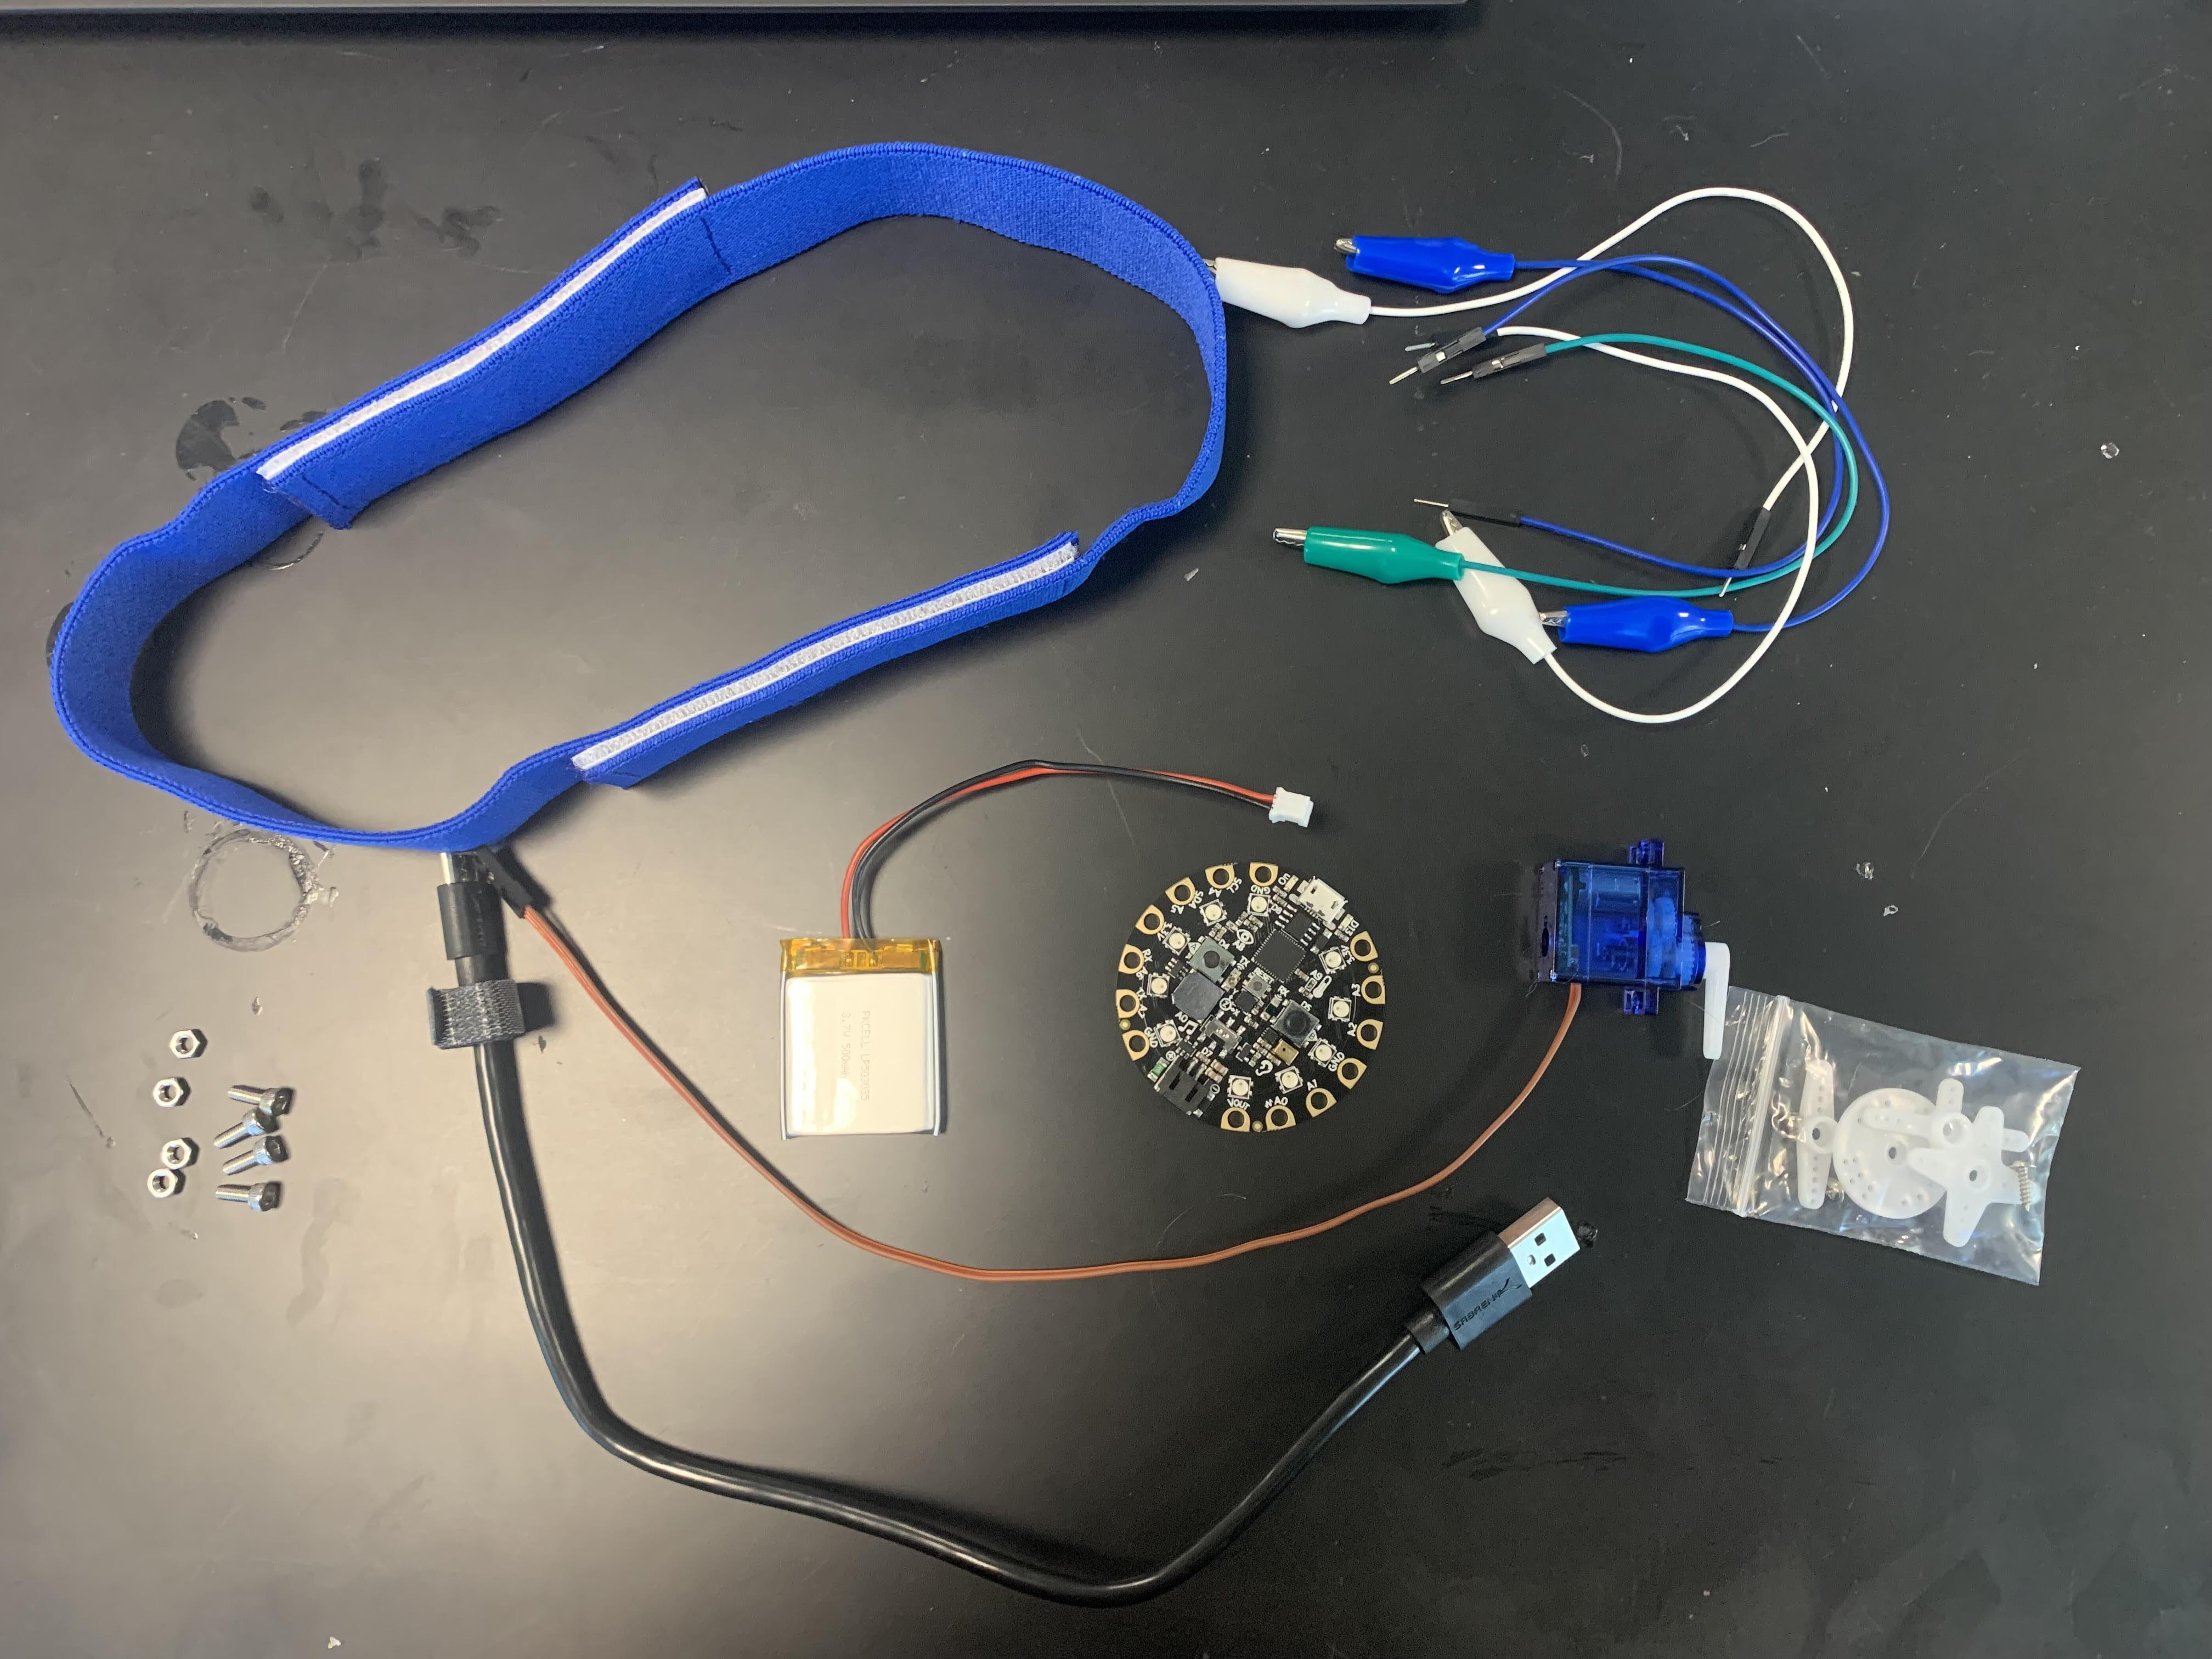
- Adafruit Circuit Playground Express (CPX): https://www.adafruit.com/product/3333
- Continuous Rotation Servo: https://www.adafruit.com/product/2442
- USB-A or USB-C to micro-B data cable
- Li-Ion battery: https://www.adafruit.com/product/258
- USB li-ion charger: https://www.adafruit.com/product/1304
- MakerBot PLA
- 3D Printer
- M3 screws
- Glue gun
- Glue
- Foam
- Wires
- Plastic sheet
Creating CPX Holder

First, you need to use tinkercad.com to create the CPX holder for the headband. Here is the CPX holder: https://www.tinkercad.com/classrooms/kufC1ncGqbN/activities/ckr1lxe7Wwx
Creating CPX Holder
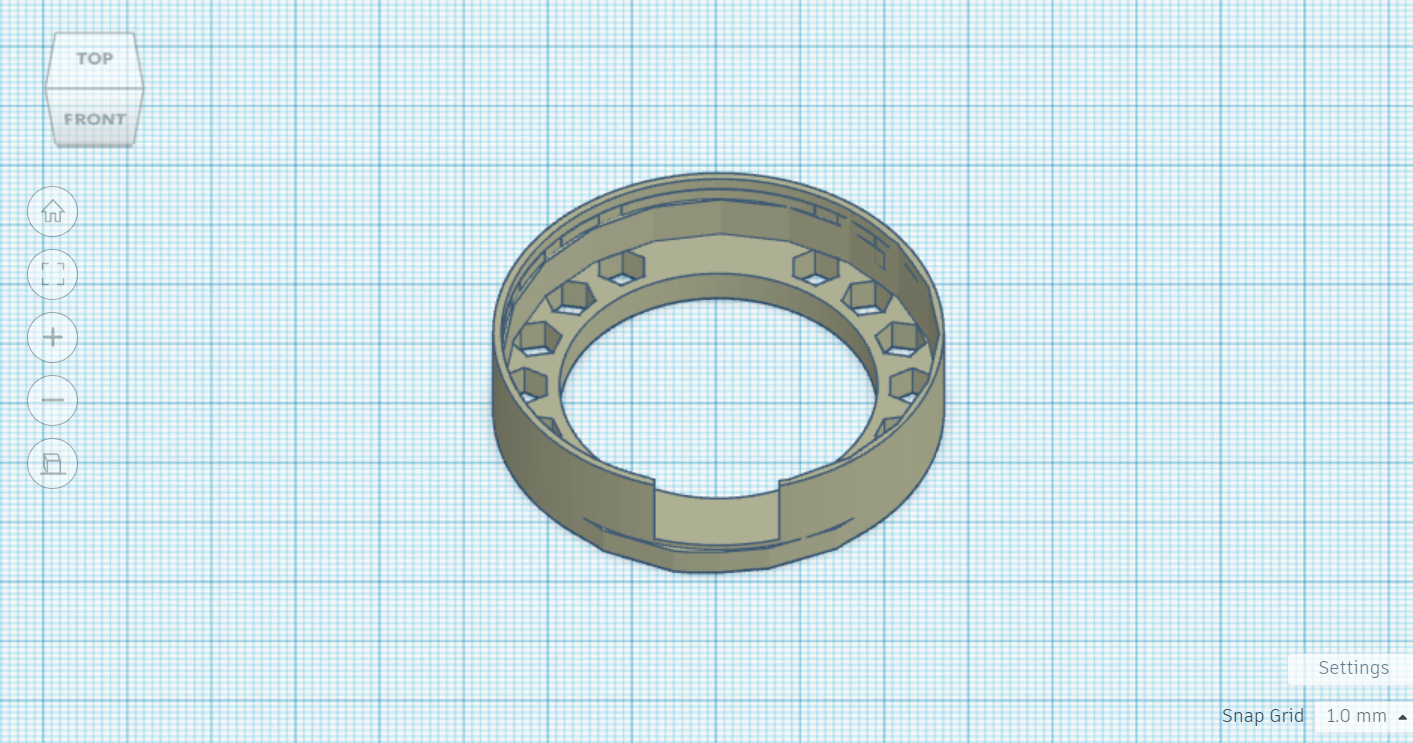
Edit the CPX holder to however works best for you. We used https://www.tinkercad.com/things/3h5aQQAp64x-copy-of-cpx-holder/edit?sharecode=AdYzo8FpwW8xxnz9nXRT0q9F6hU46cnD_TlLHLSCQ0c
Printing CPX Holder
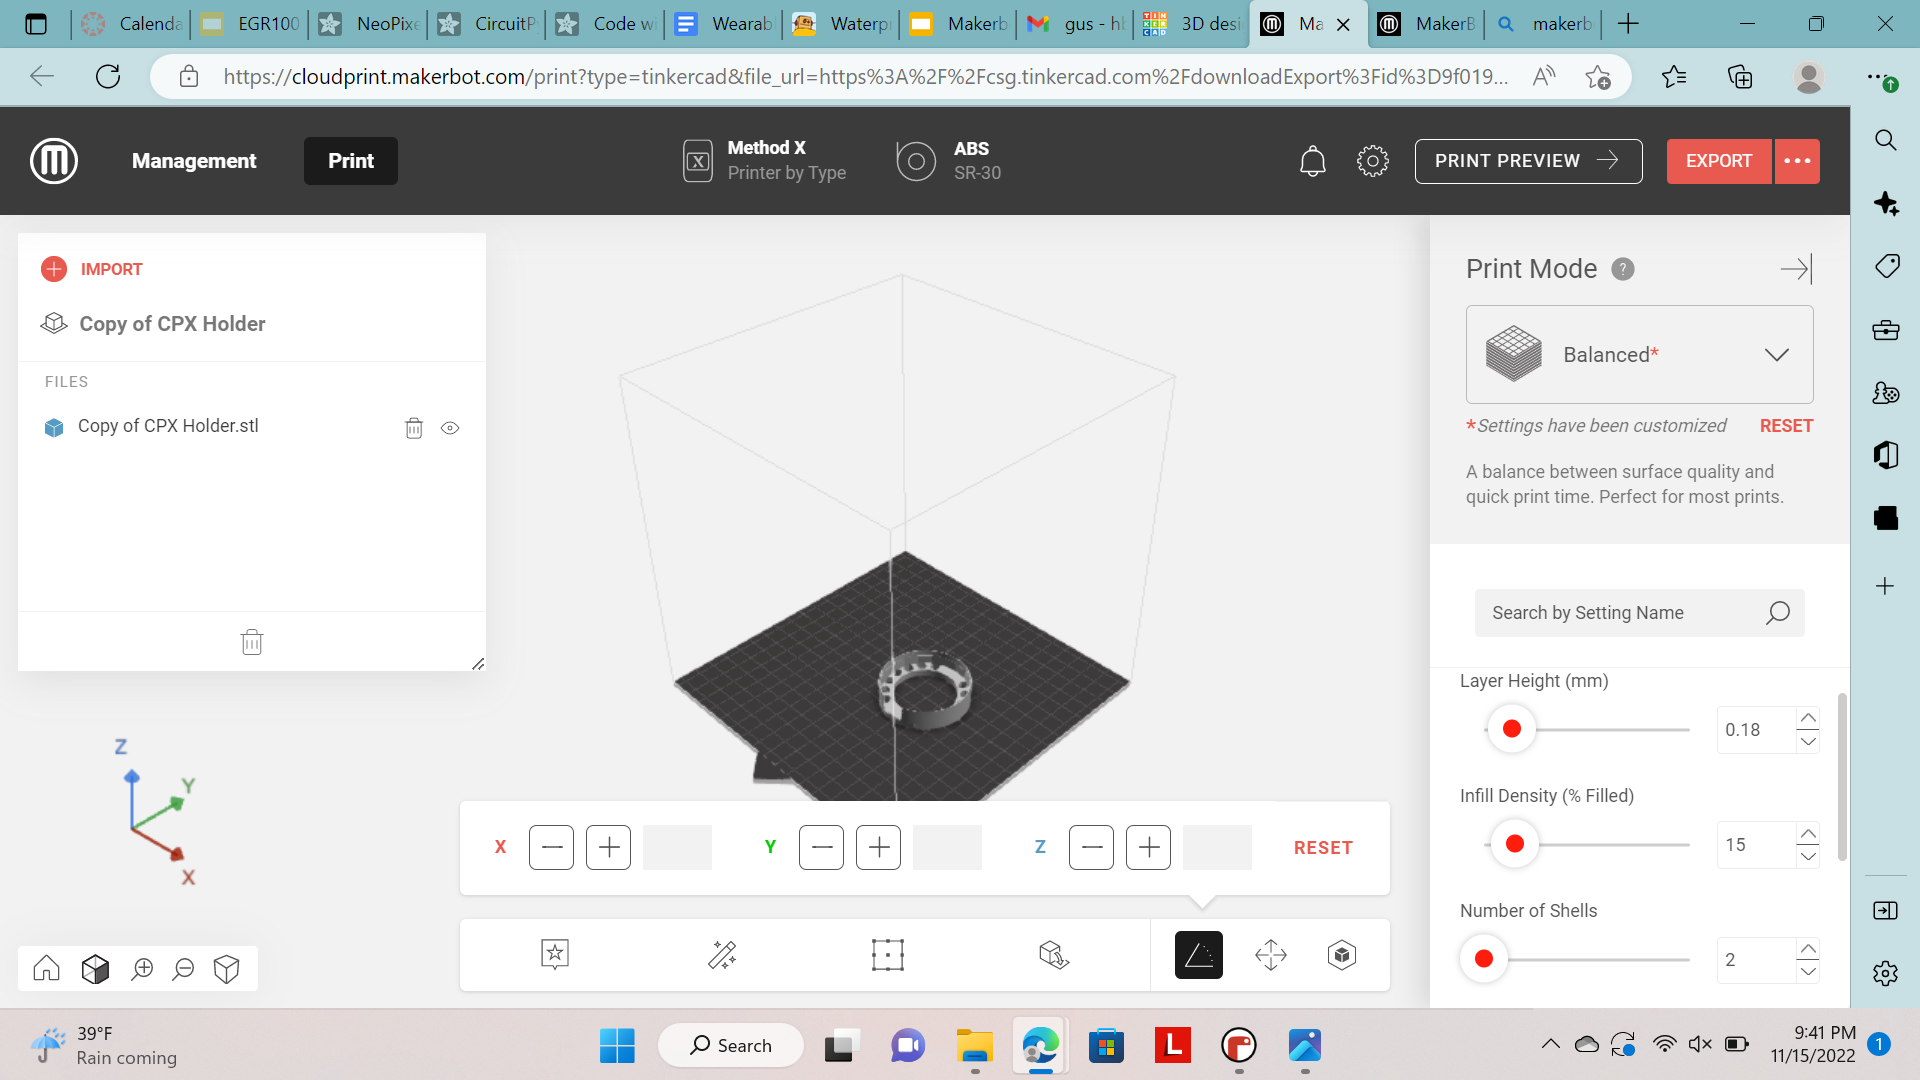.png)
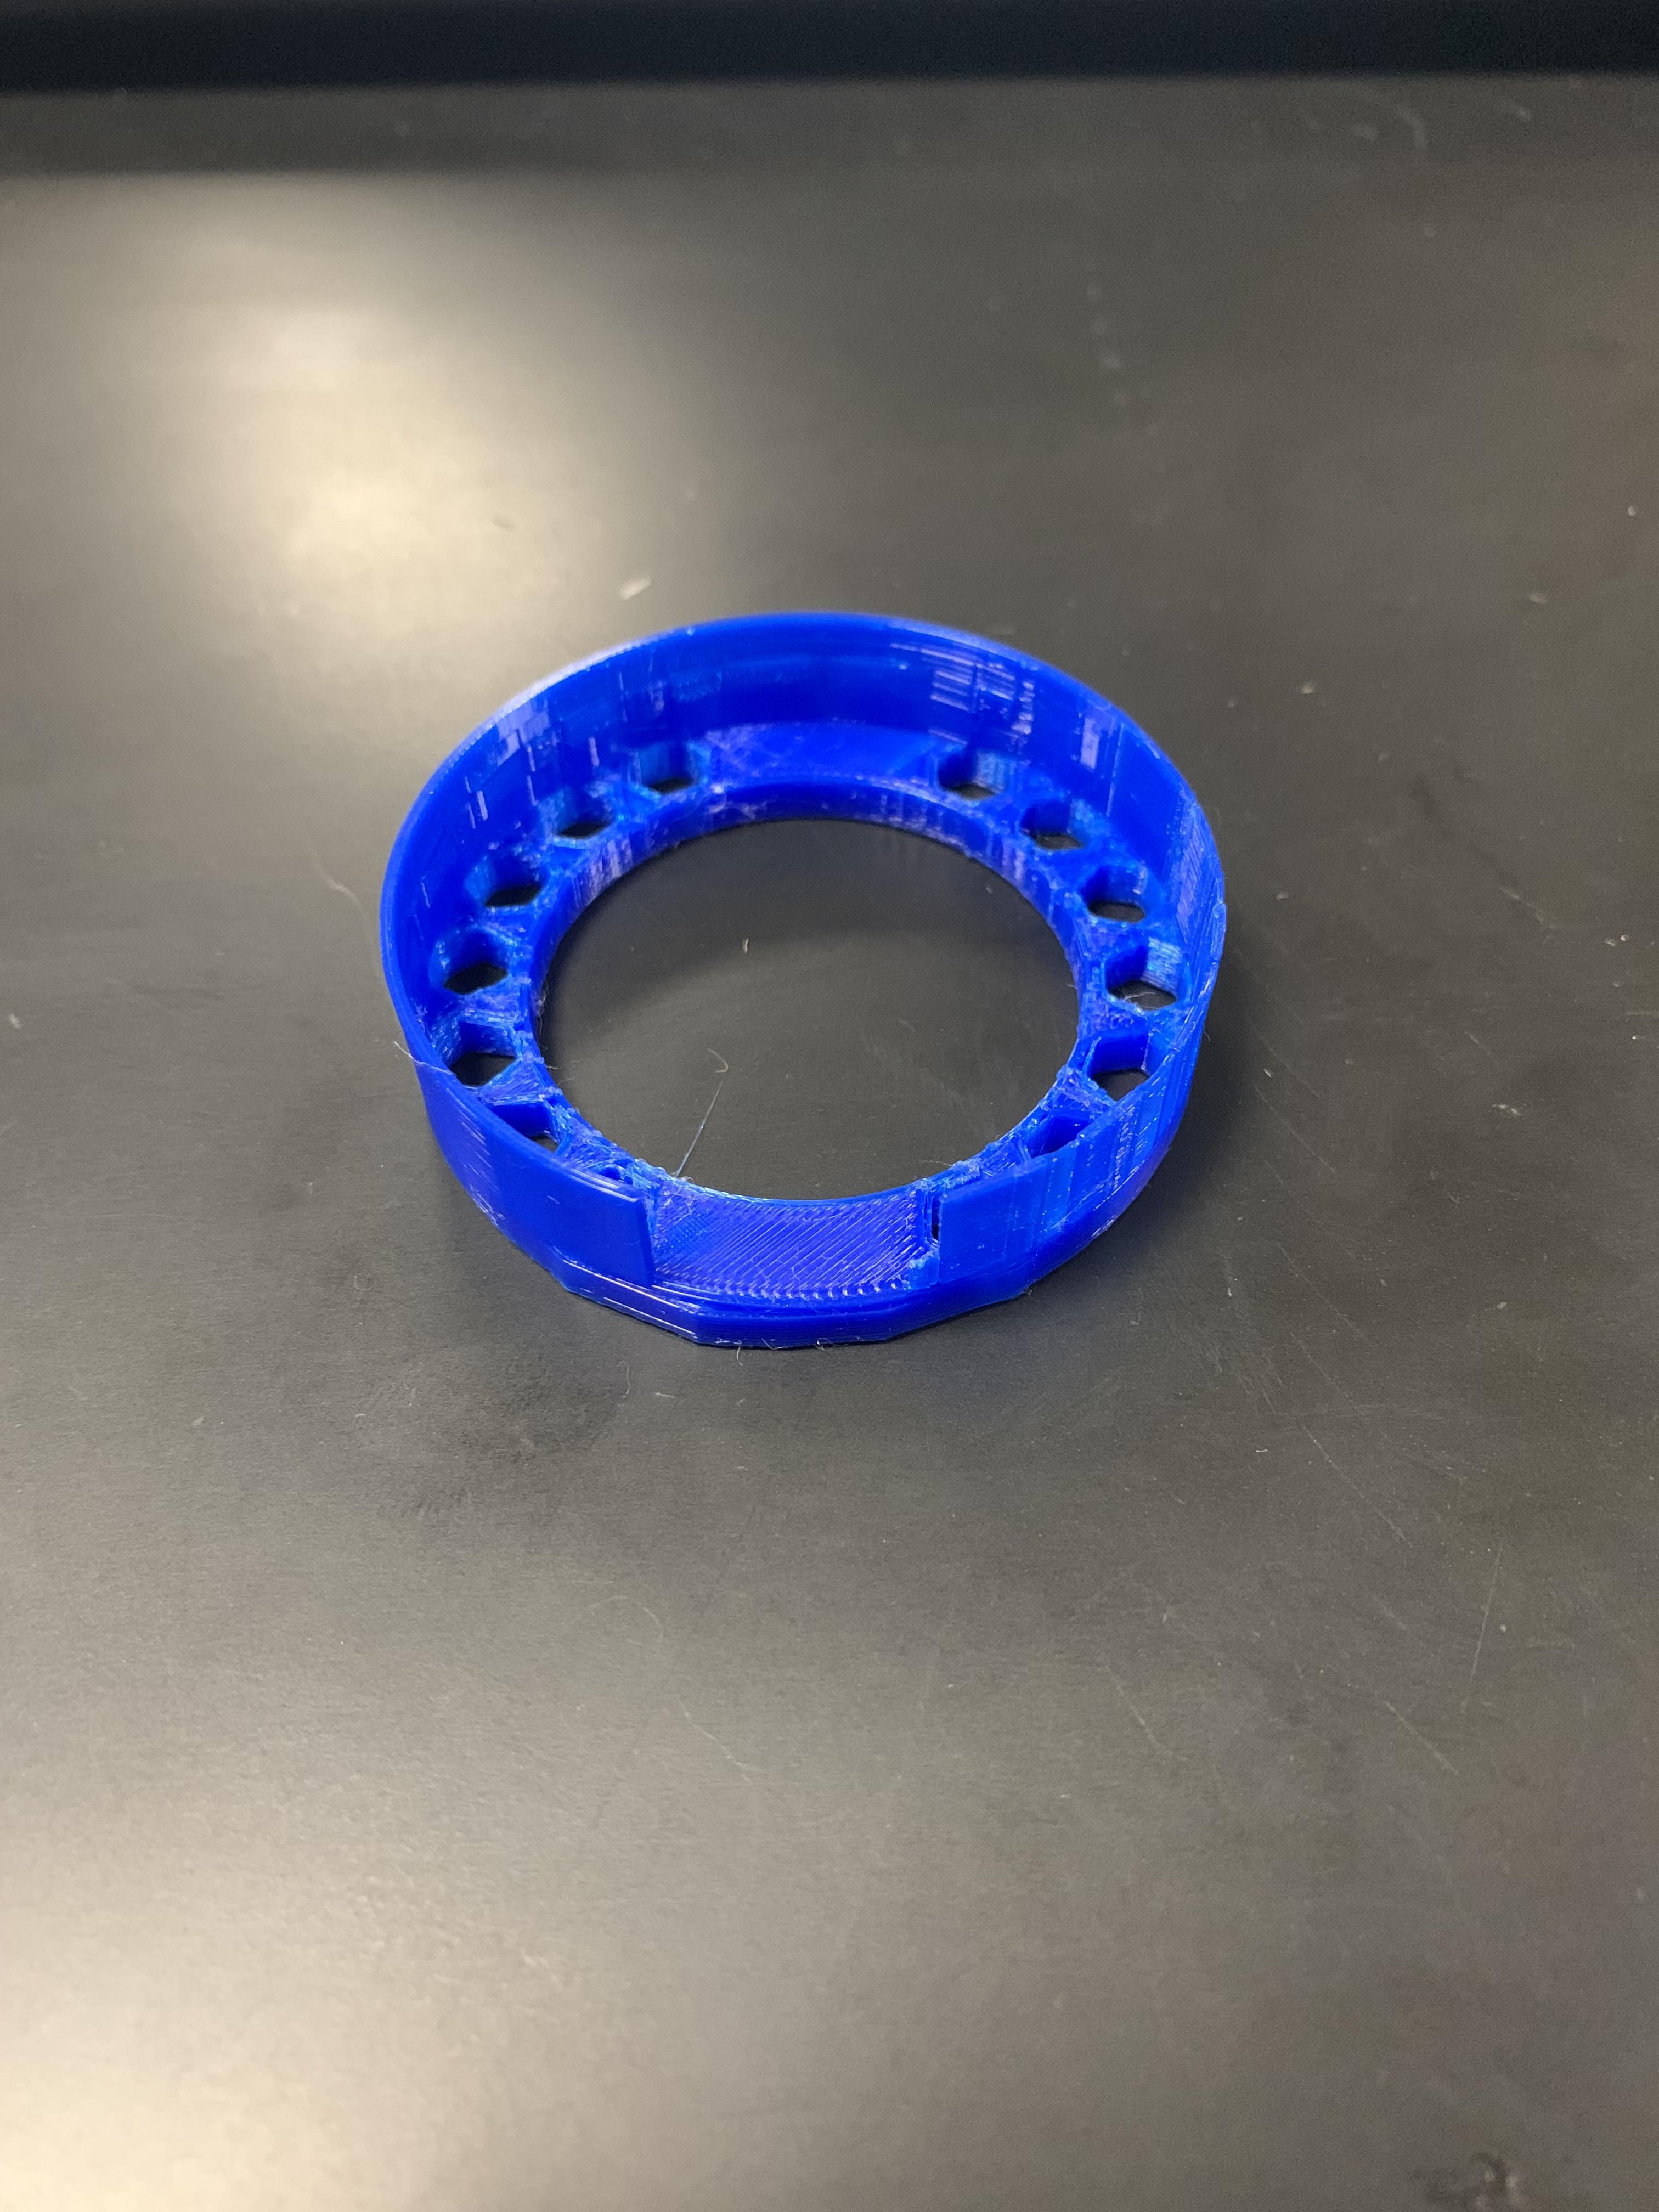
Print out the completed CPX holder using MakerBot and your 3d printer. You can find how to print here: Makerbot Intro to 3D Printing - Google Slides. Infill density should be set to 15 percent, and number of shells should be set to 2, and layer height should be set to 0.18. The design should be printed with the support type as breakaway - model material and base layer as a raft.
Coding
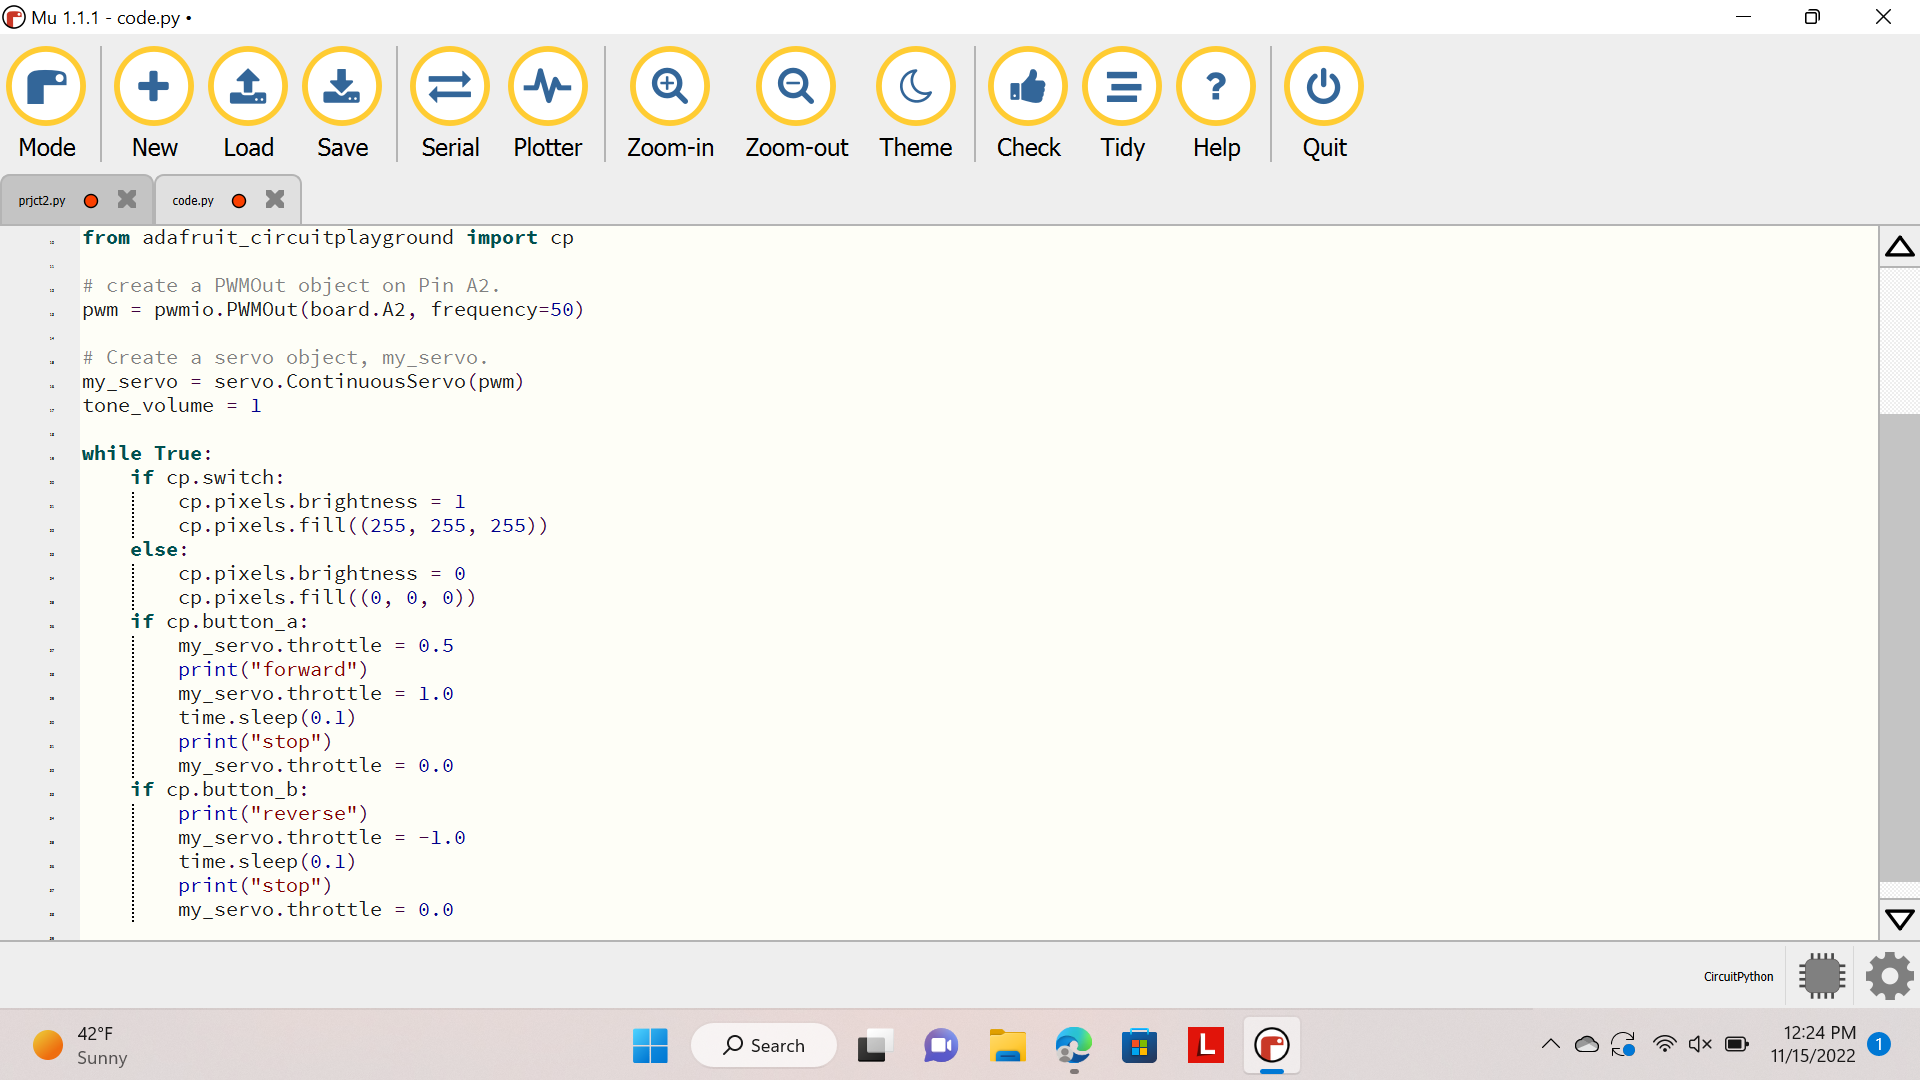.png)
Now, you can work on coding your CPX to do the tasks you want. To code our CPX, we used adafruit's instructions on the website Circuit Playground Library. This website shows the basics of coding and gives steps you can copy and paste to use in your own designs. We used code to move the waterproof cover up using the servo and turn the light on with the switch. Our code can be copied here: Project 2 code and be pasted into python.
Downloading Code

After you copy the code or finish coding, you can download it by plugging the CPX into your computer and saving the code to the CPX. It should blink green when it saves.
Attaching Servo Motor to CPX
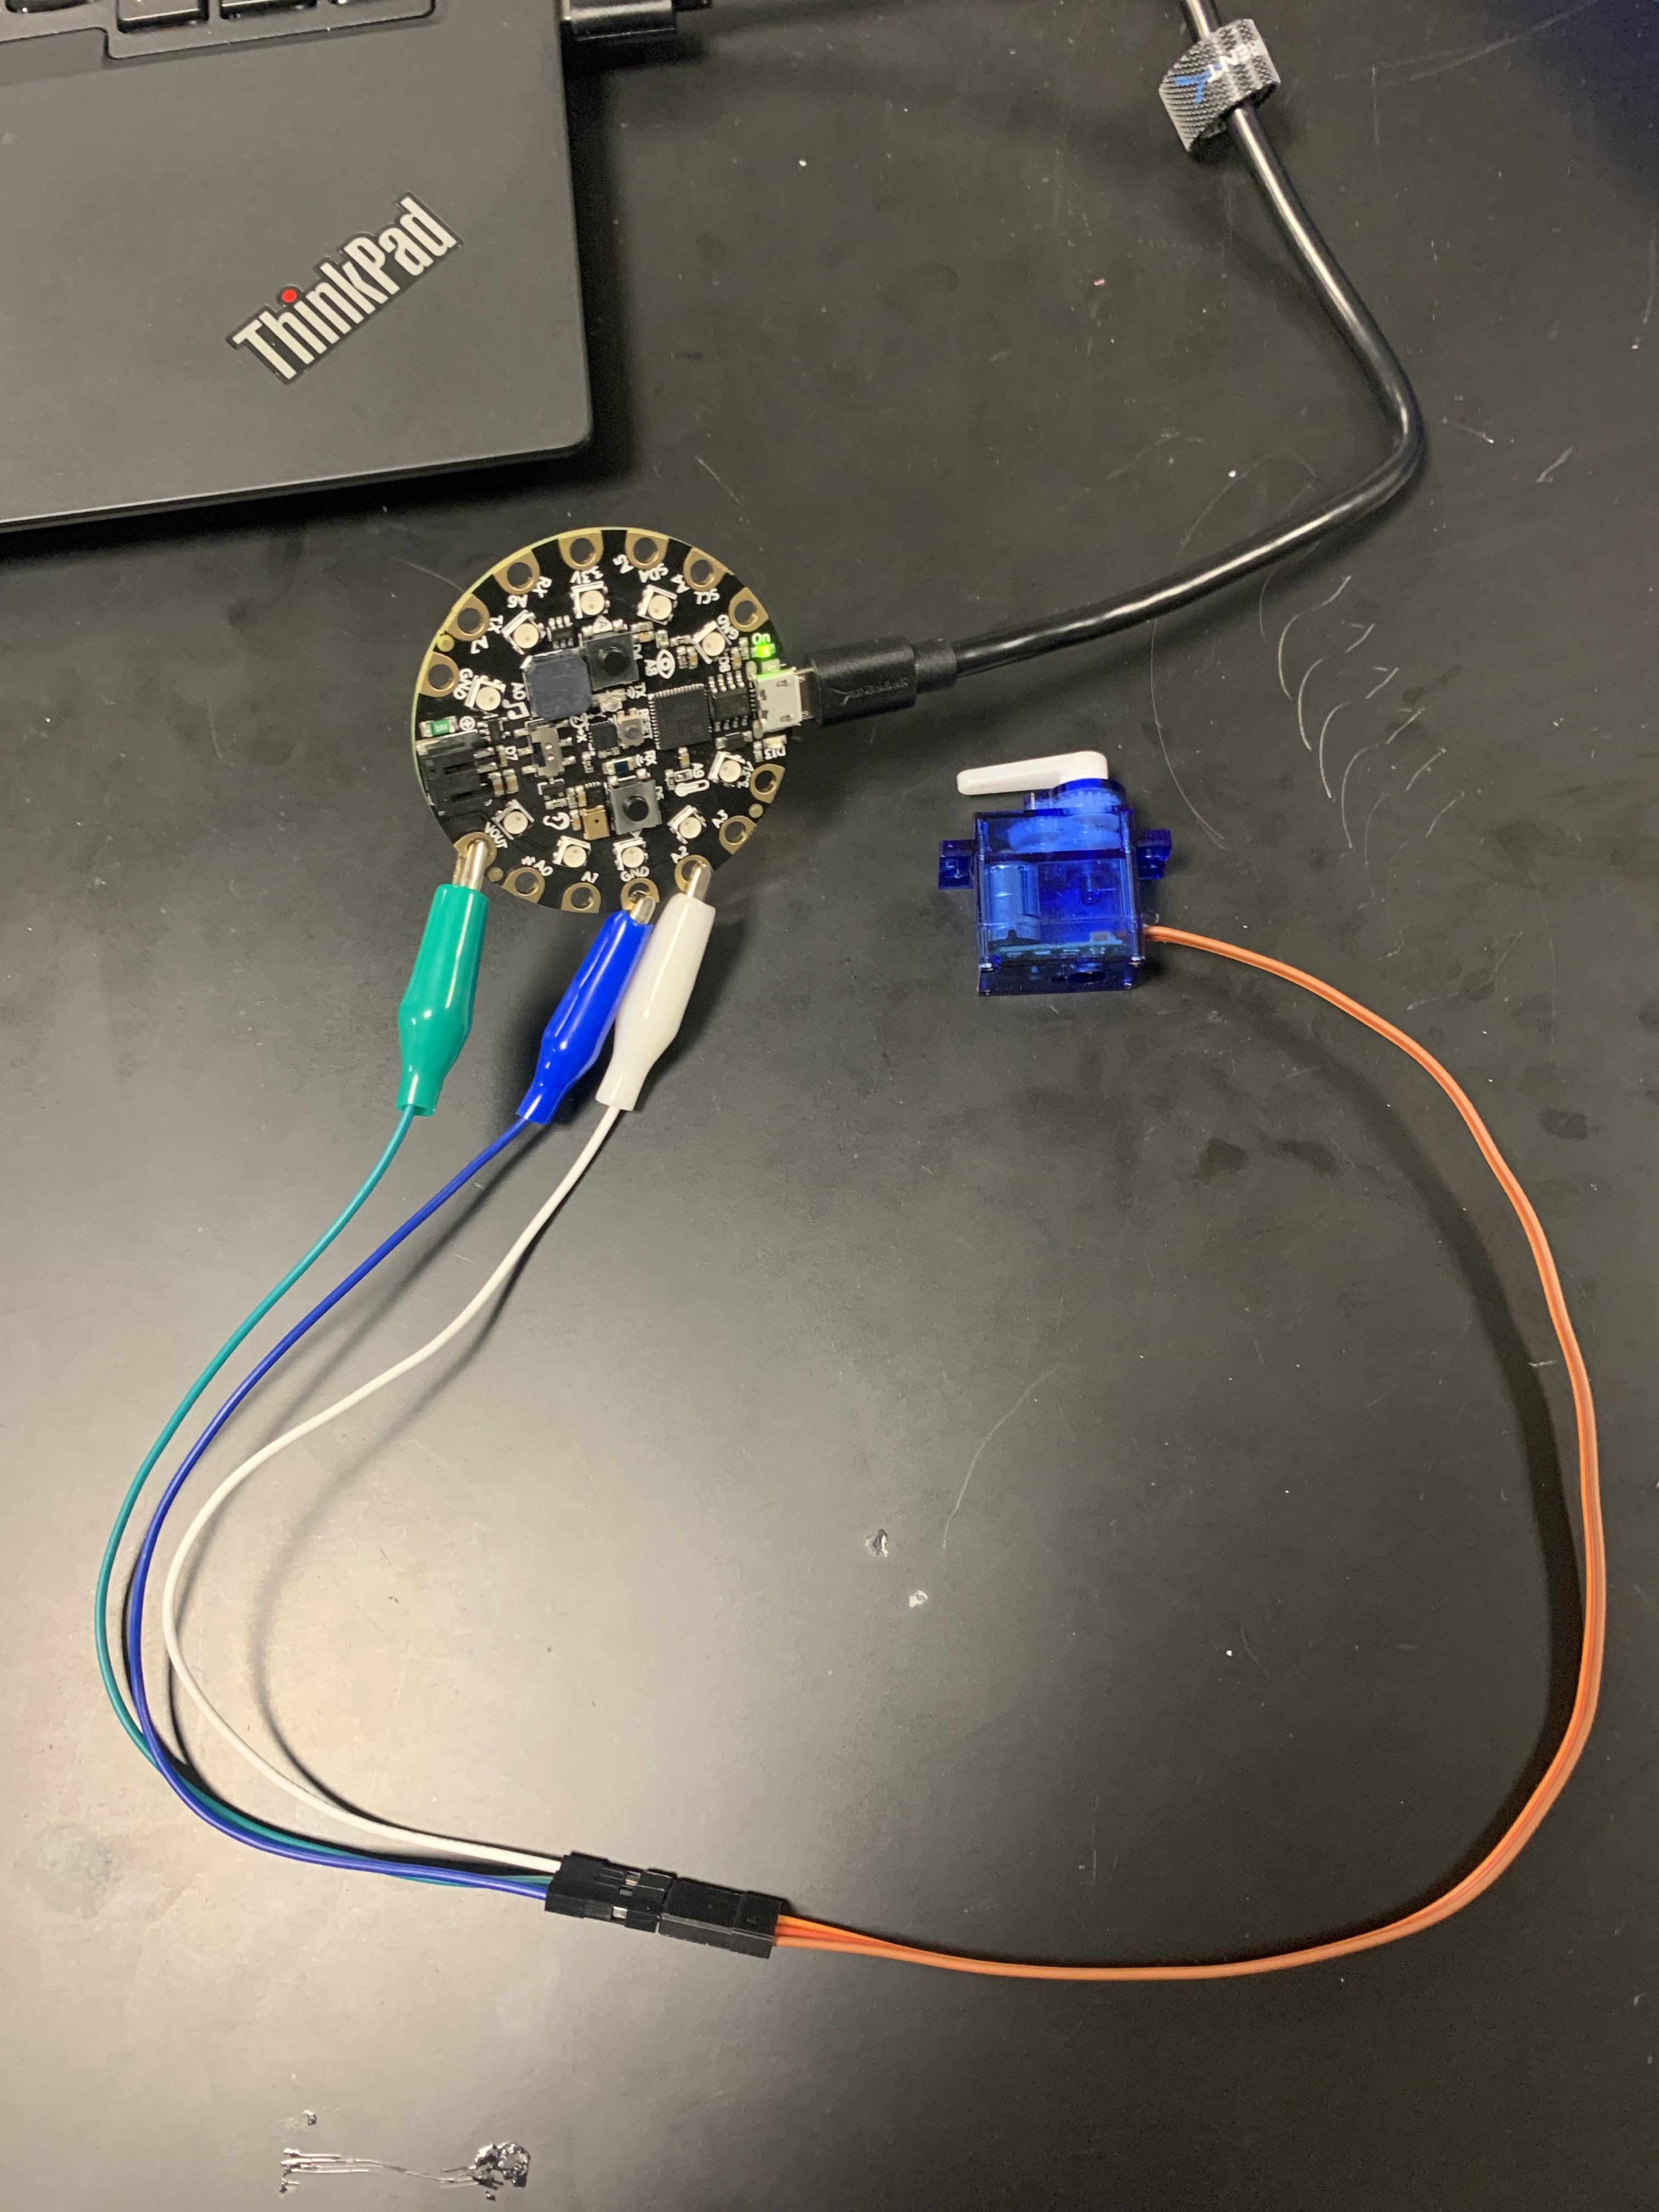
Plug in the wires from your servo to the CPX like this. Red should go to VOUT, brown should go to GND, and orange should go to A2. While it is plugged into the computer, press the buttons or switch to make sure it works!
Making the Cover
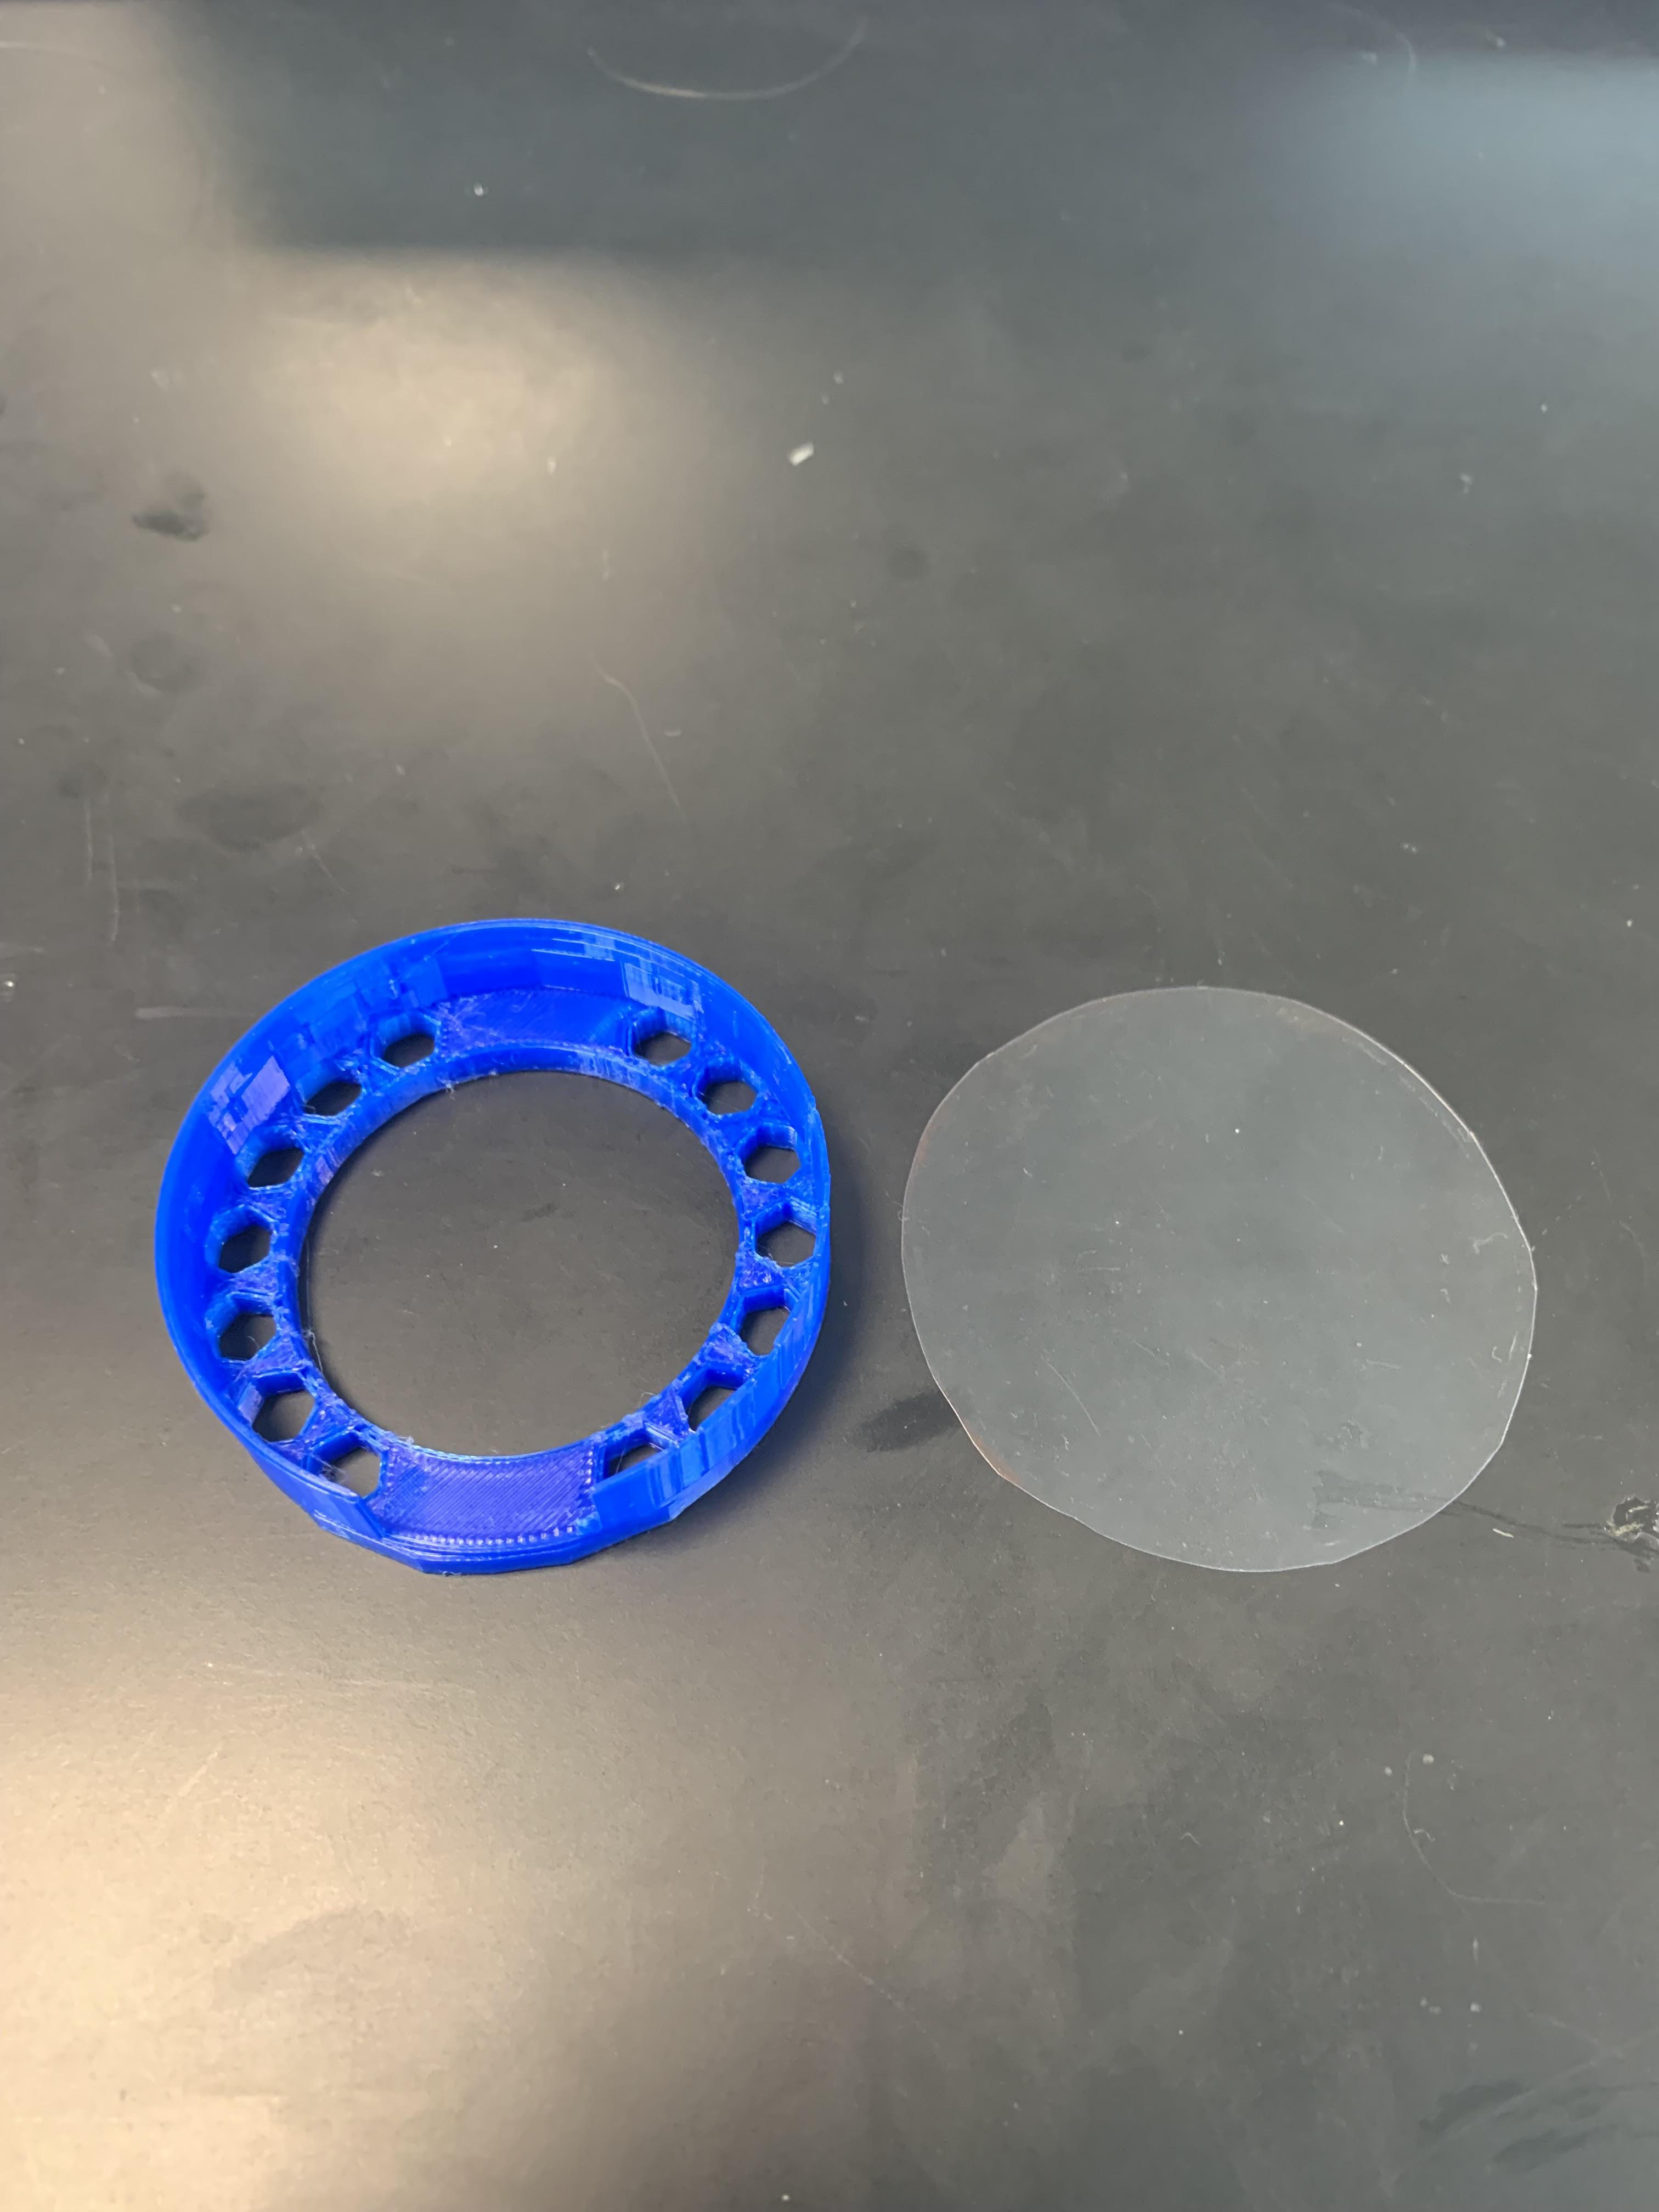
Cut out a small circular piece of the plastic sheet that is the same size or slightly bigger than the CPX holder to cover it.
Cutting Foam
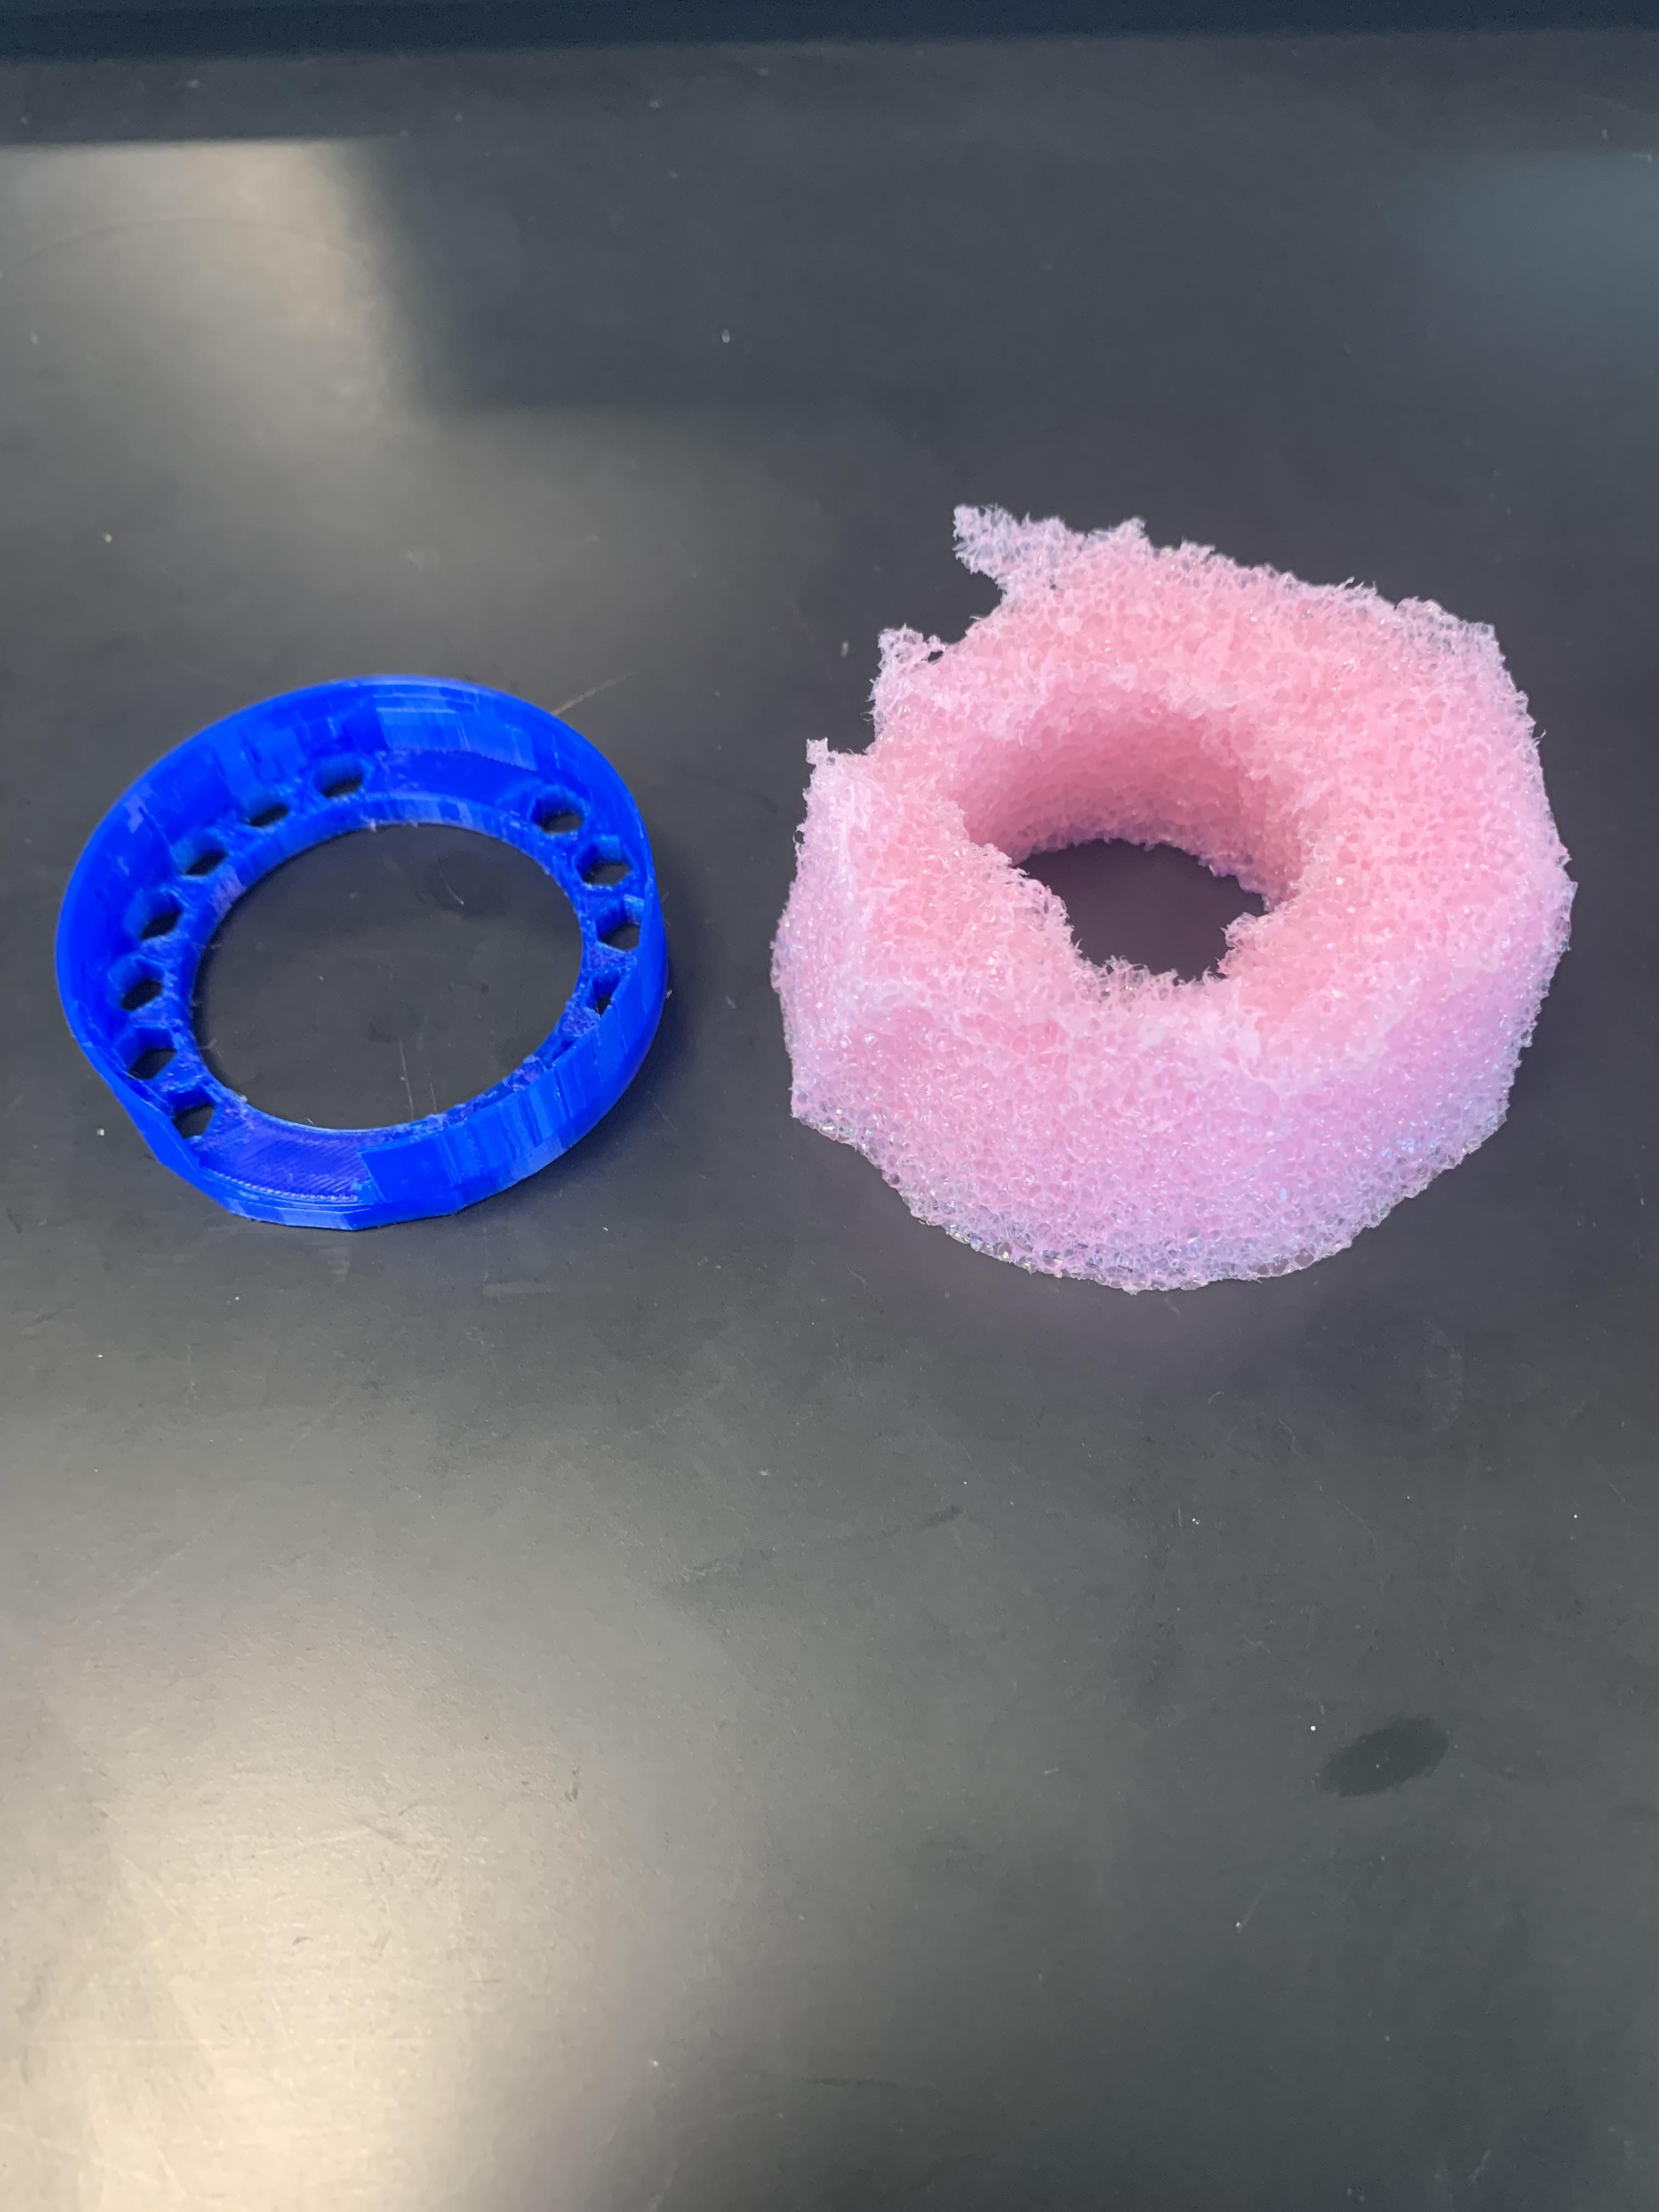
Cut out a piece of foam the same size as the CPX holder to go underneath it. This makes the CPX holder more comfortable.
Assembly
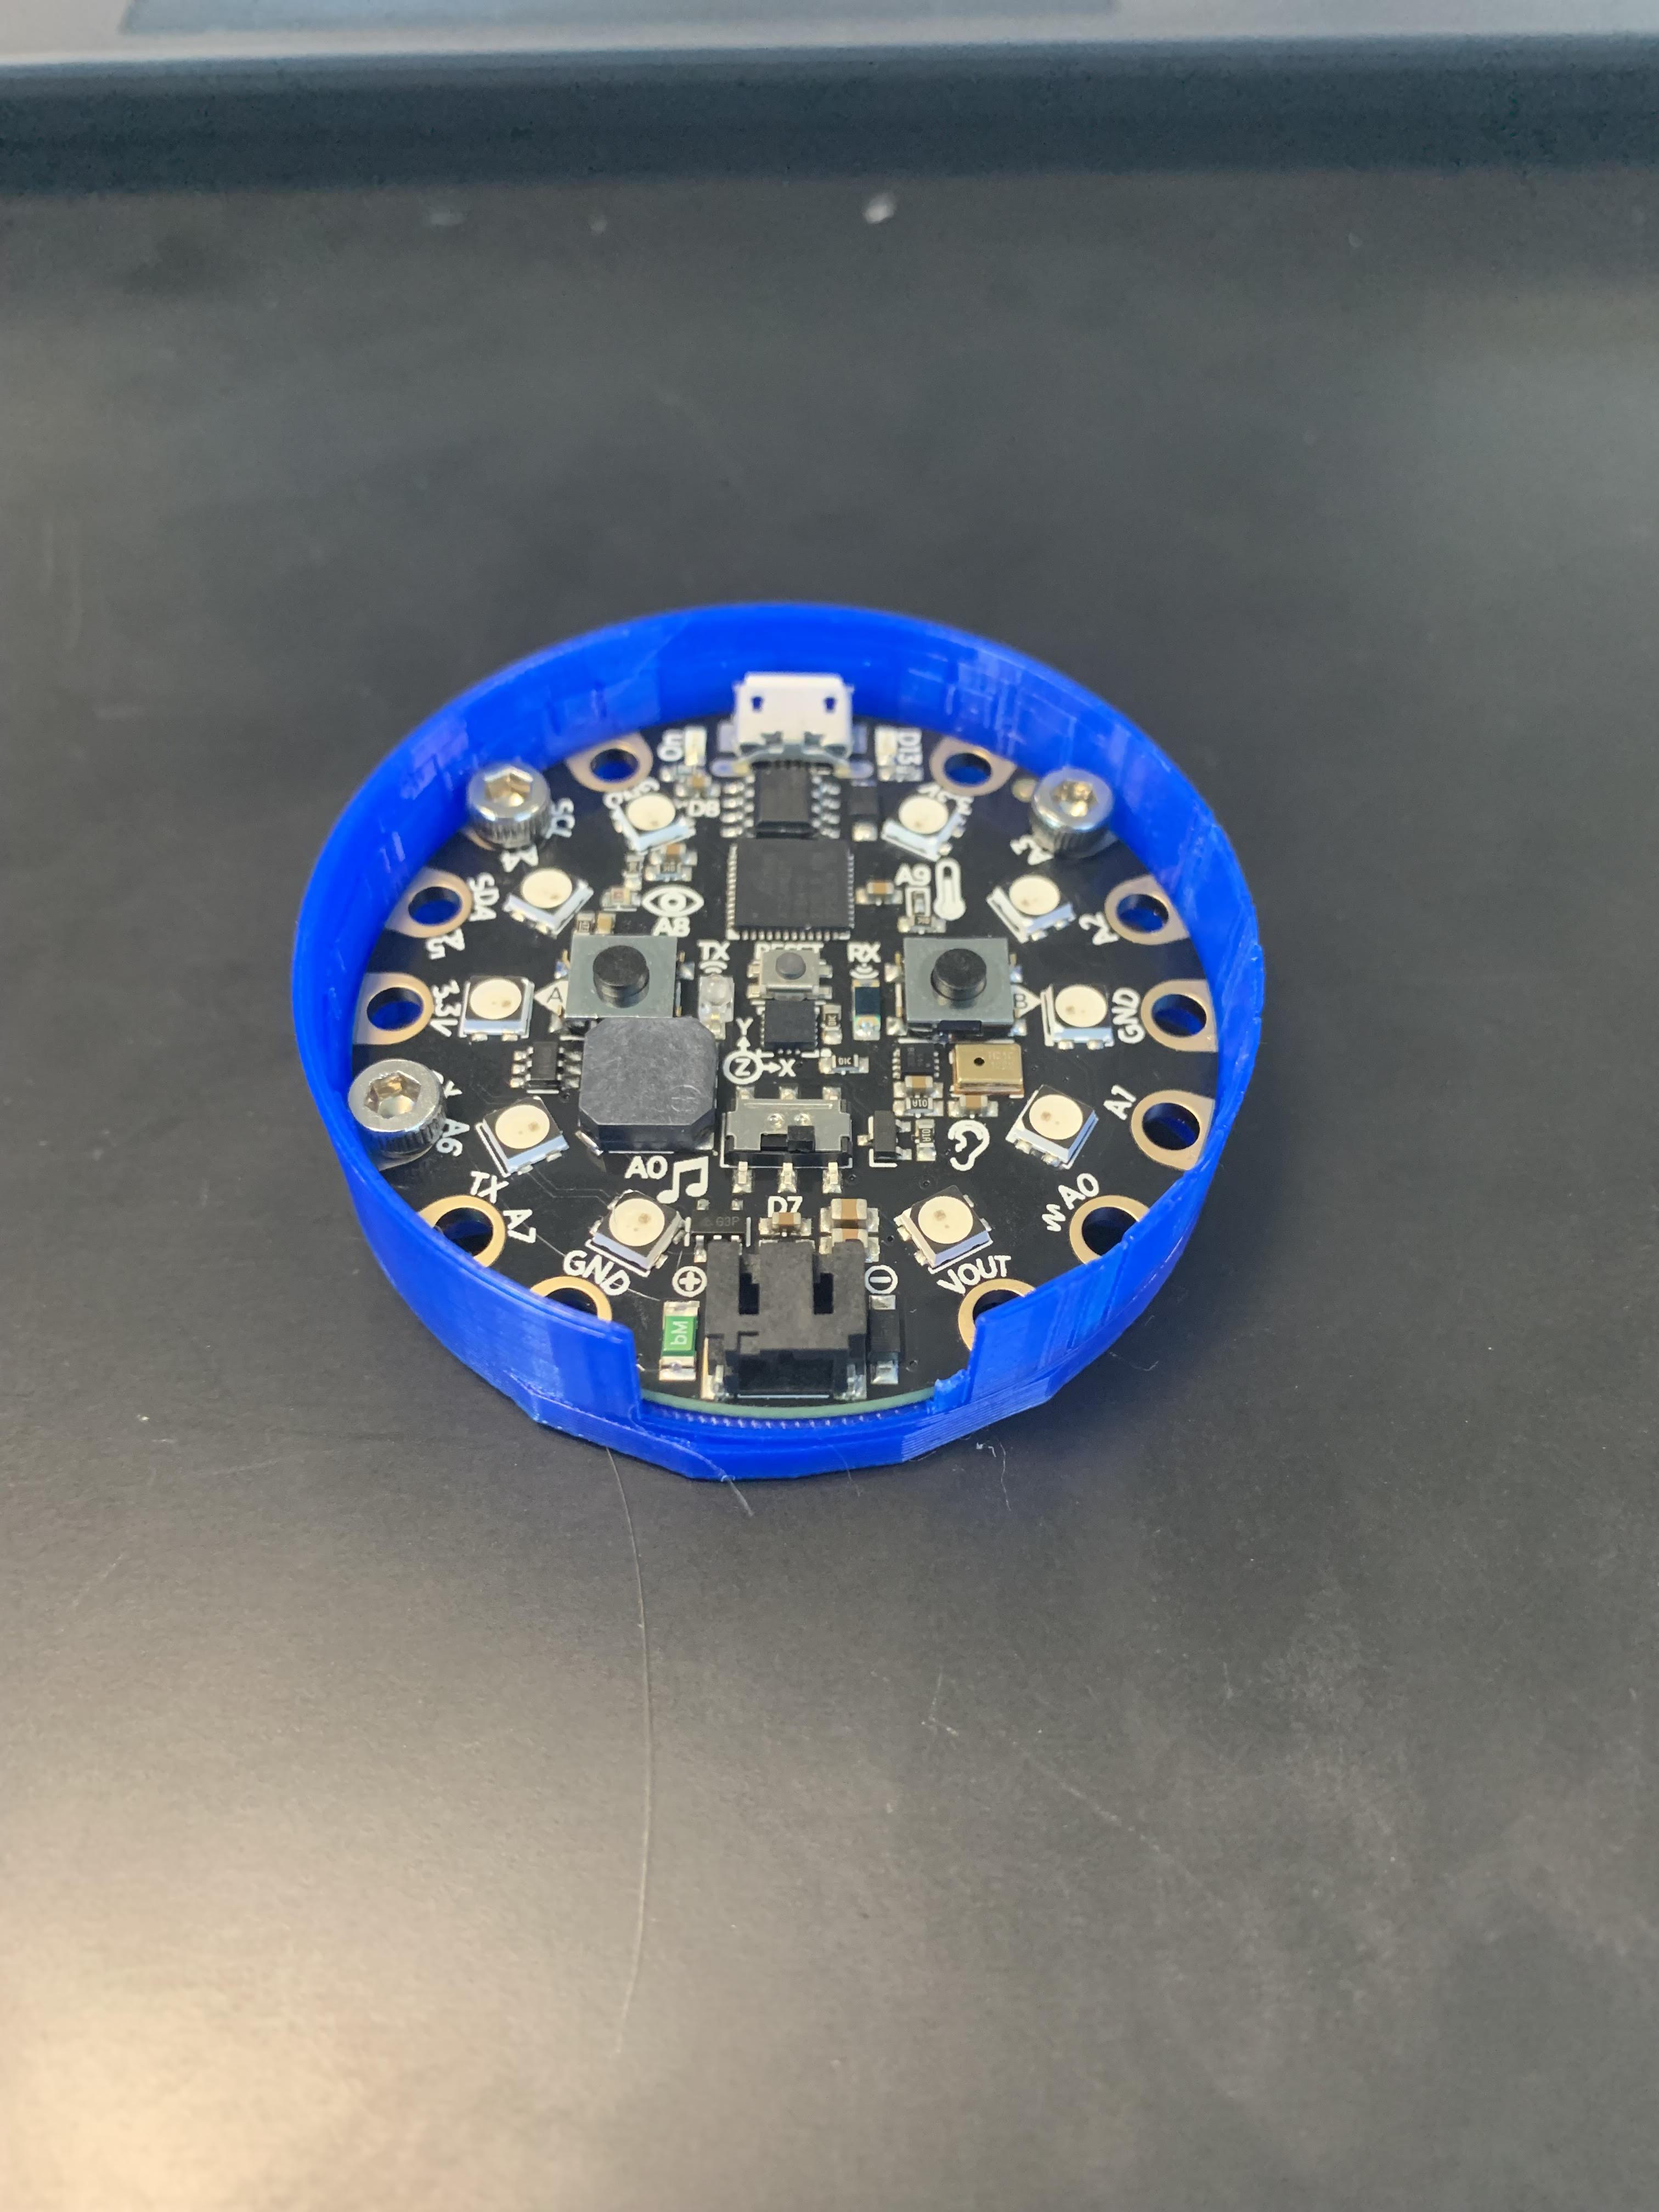
Now, you have all the pieces ready. To start putting it together, screw the CPX into the holder. Make sure there are no screws in the hole wires are going in.
Assembly
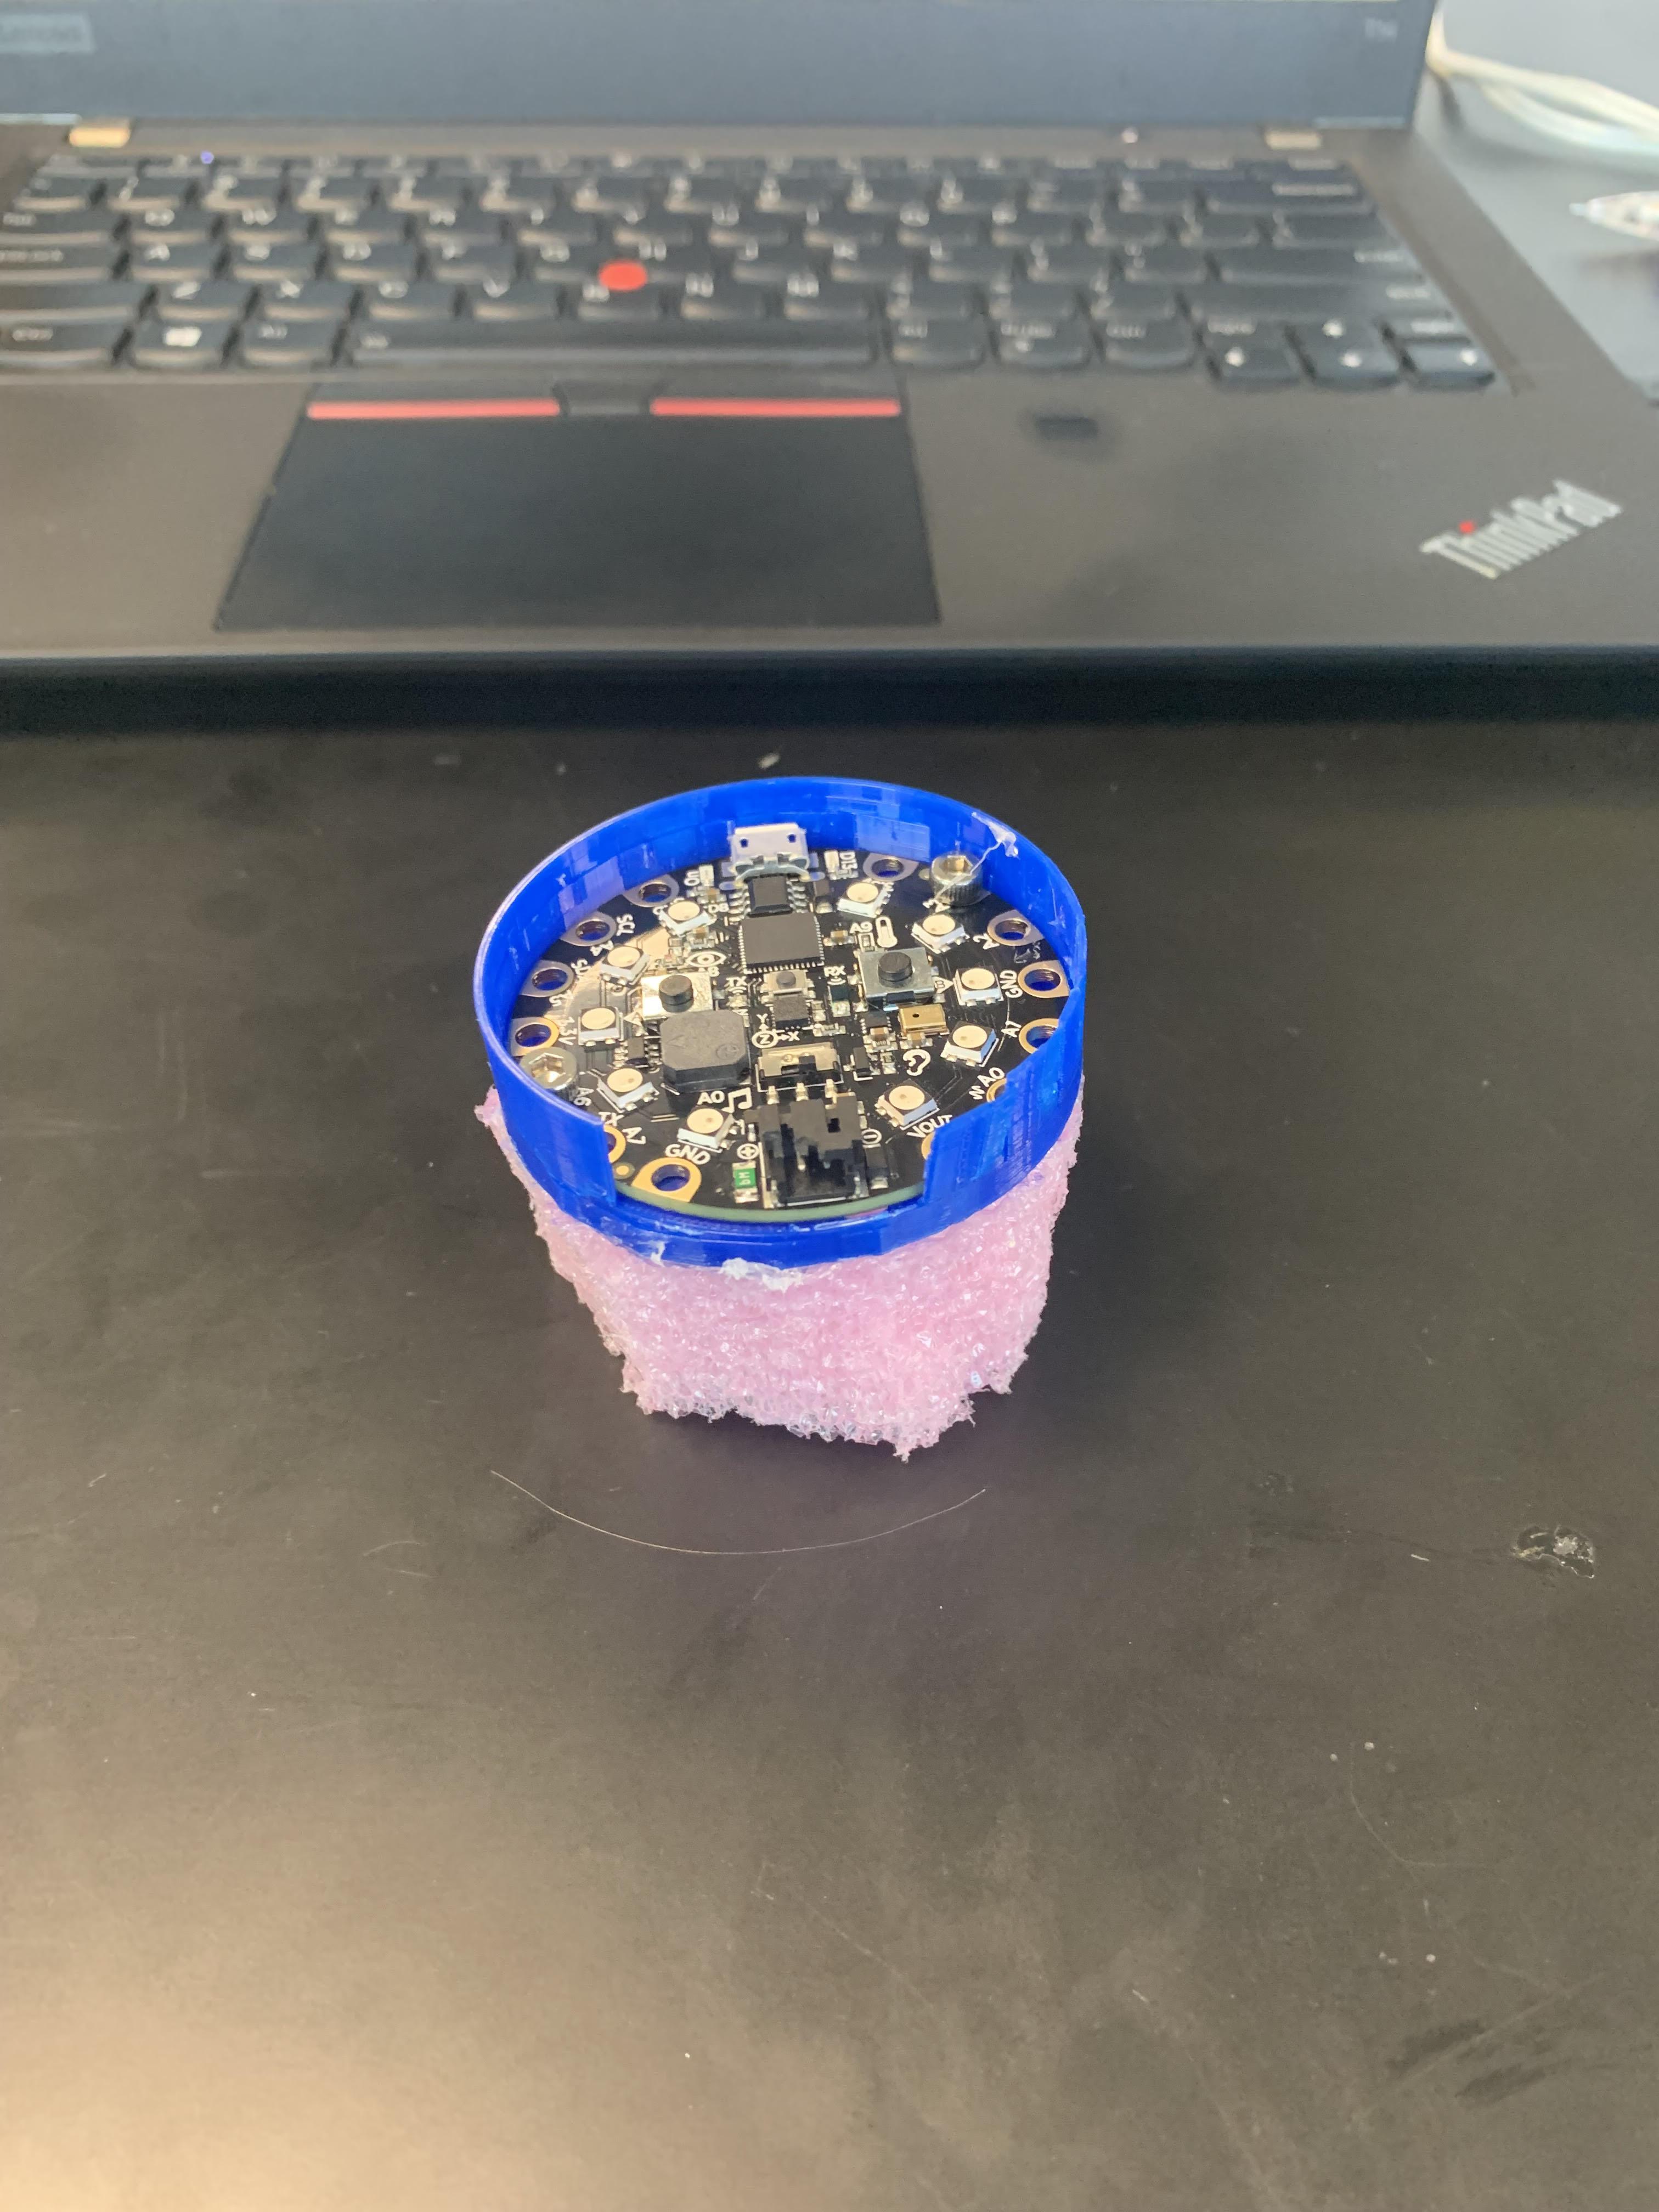
Next, glue the foam to the CPX holder.
Assembly
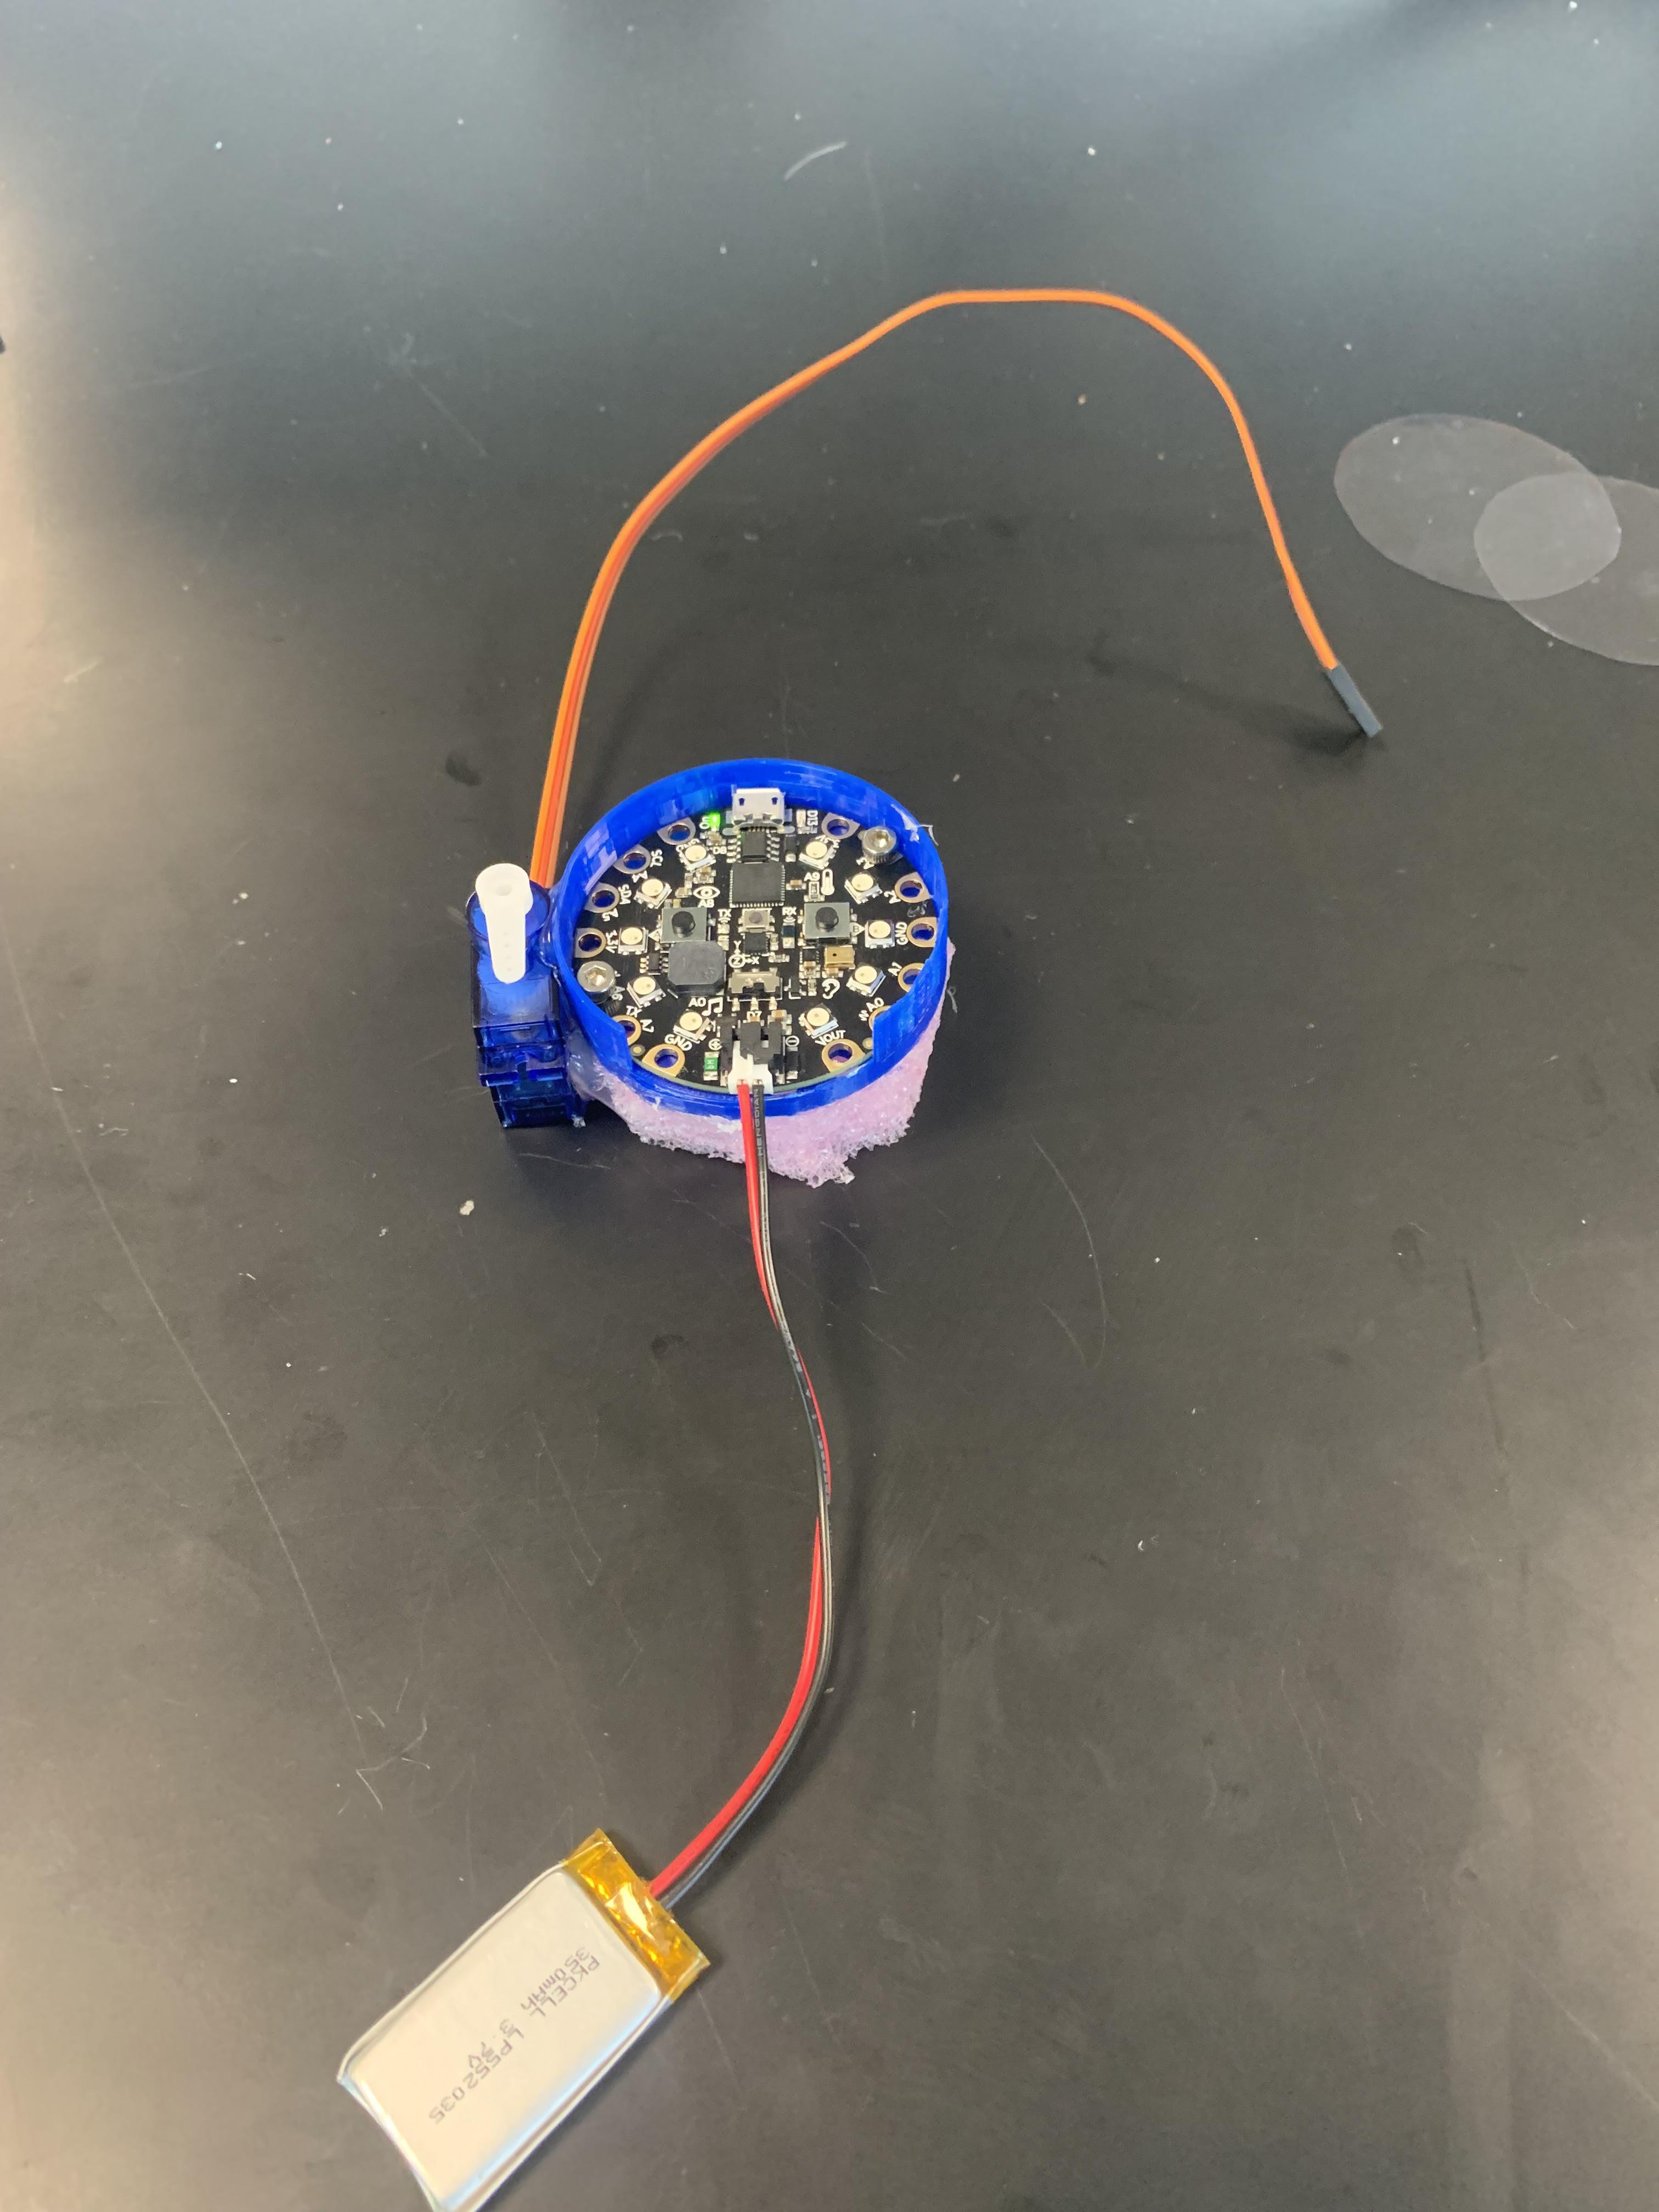
Attach the servo to the CPX holder.
Assembly
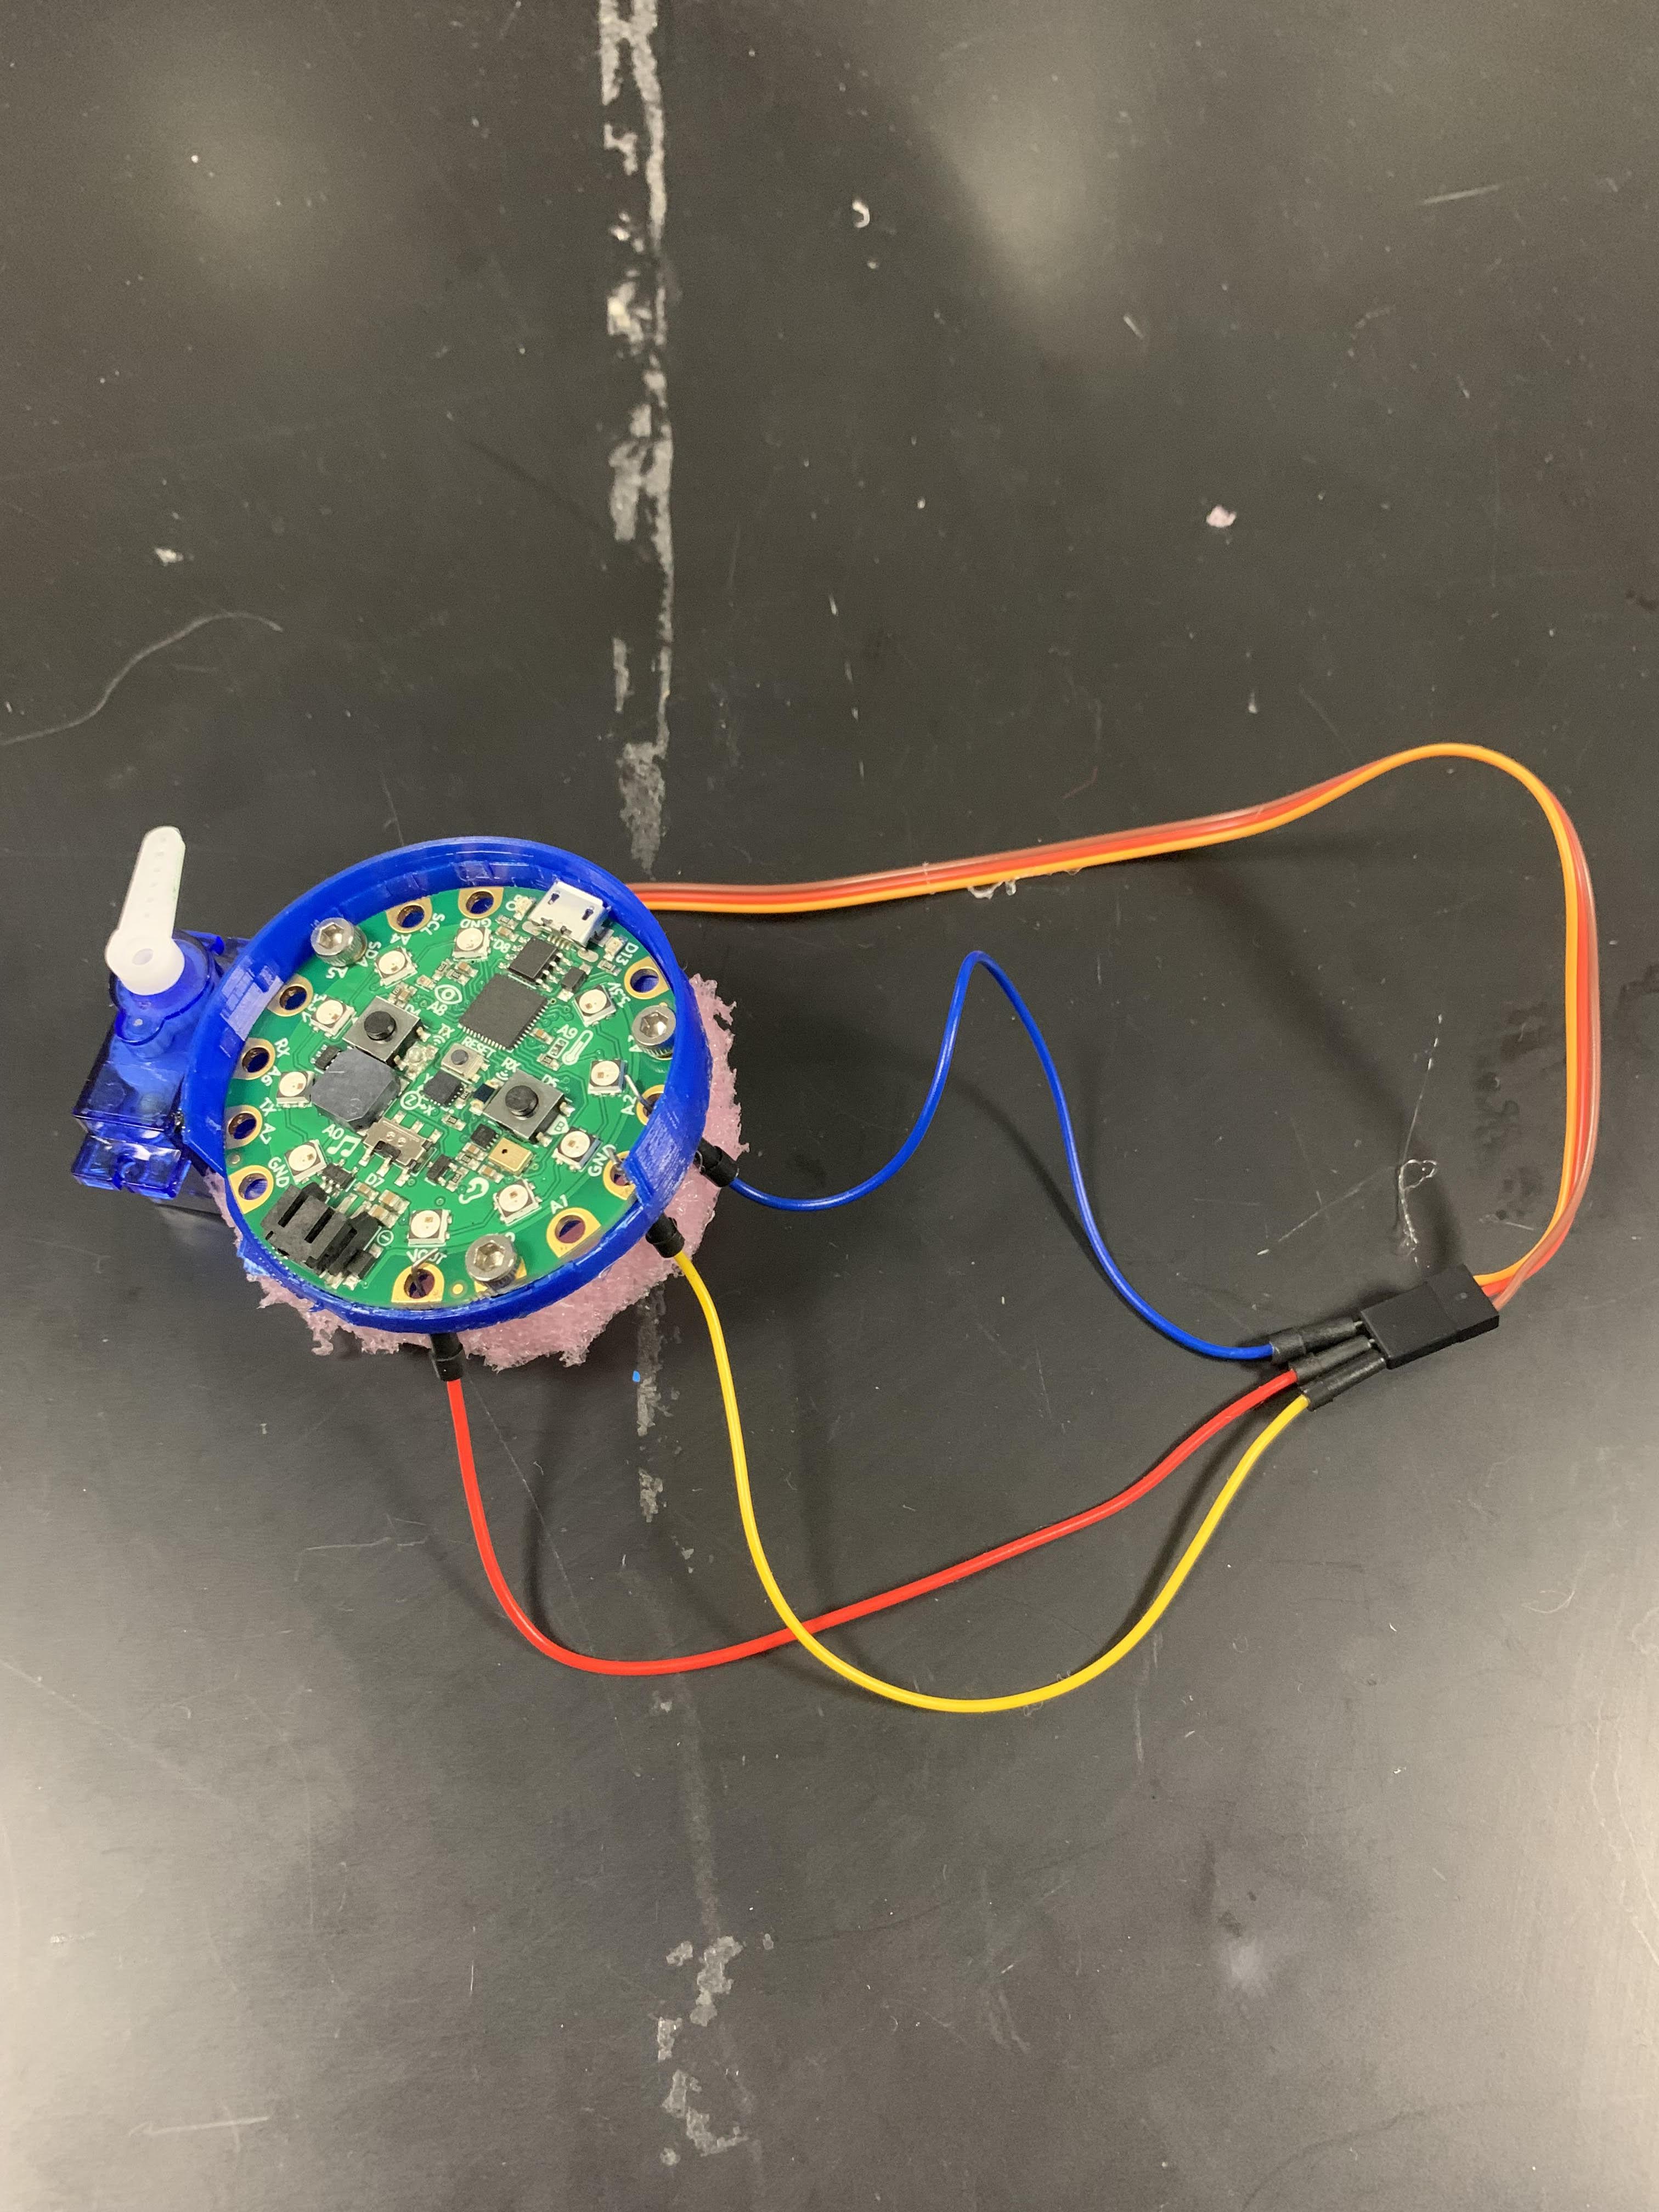
Put the wires through the foam to the right spots. Red goes to VOUT, brown goes to GND, and orange goes to A2.
Assembly
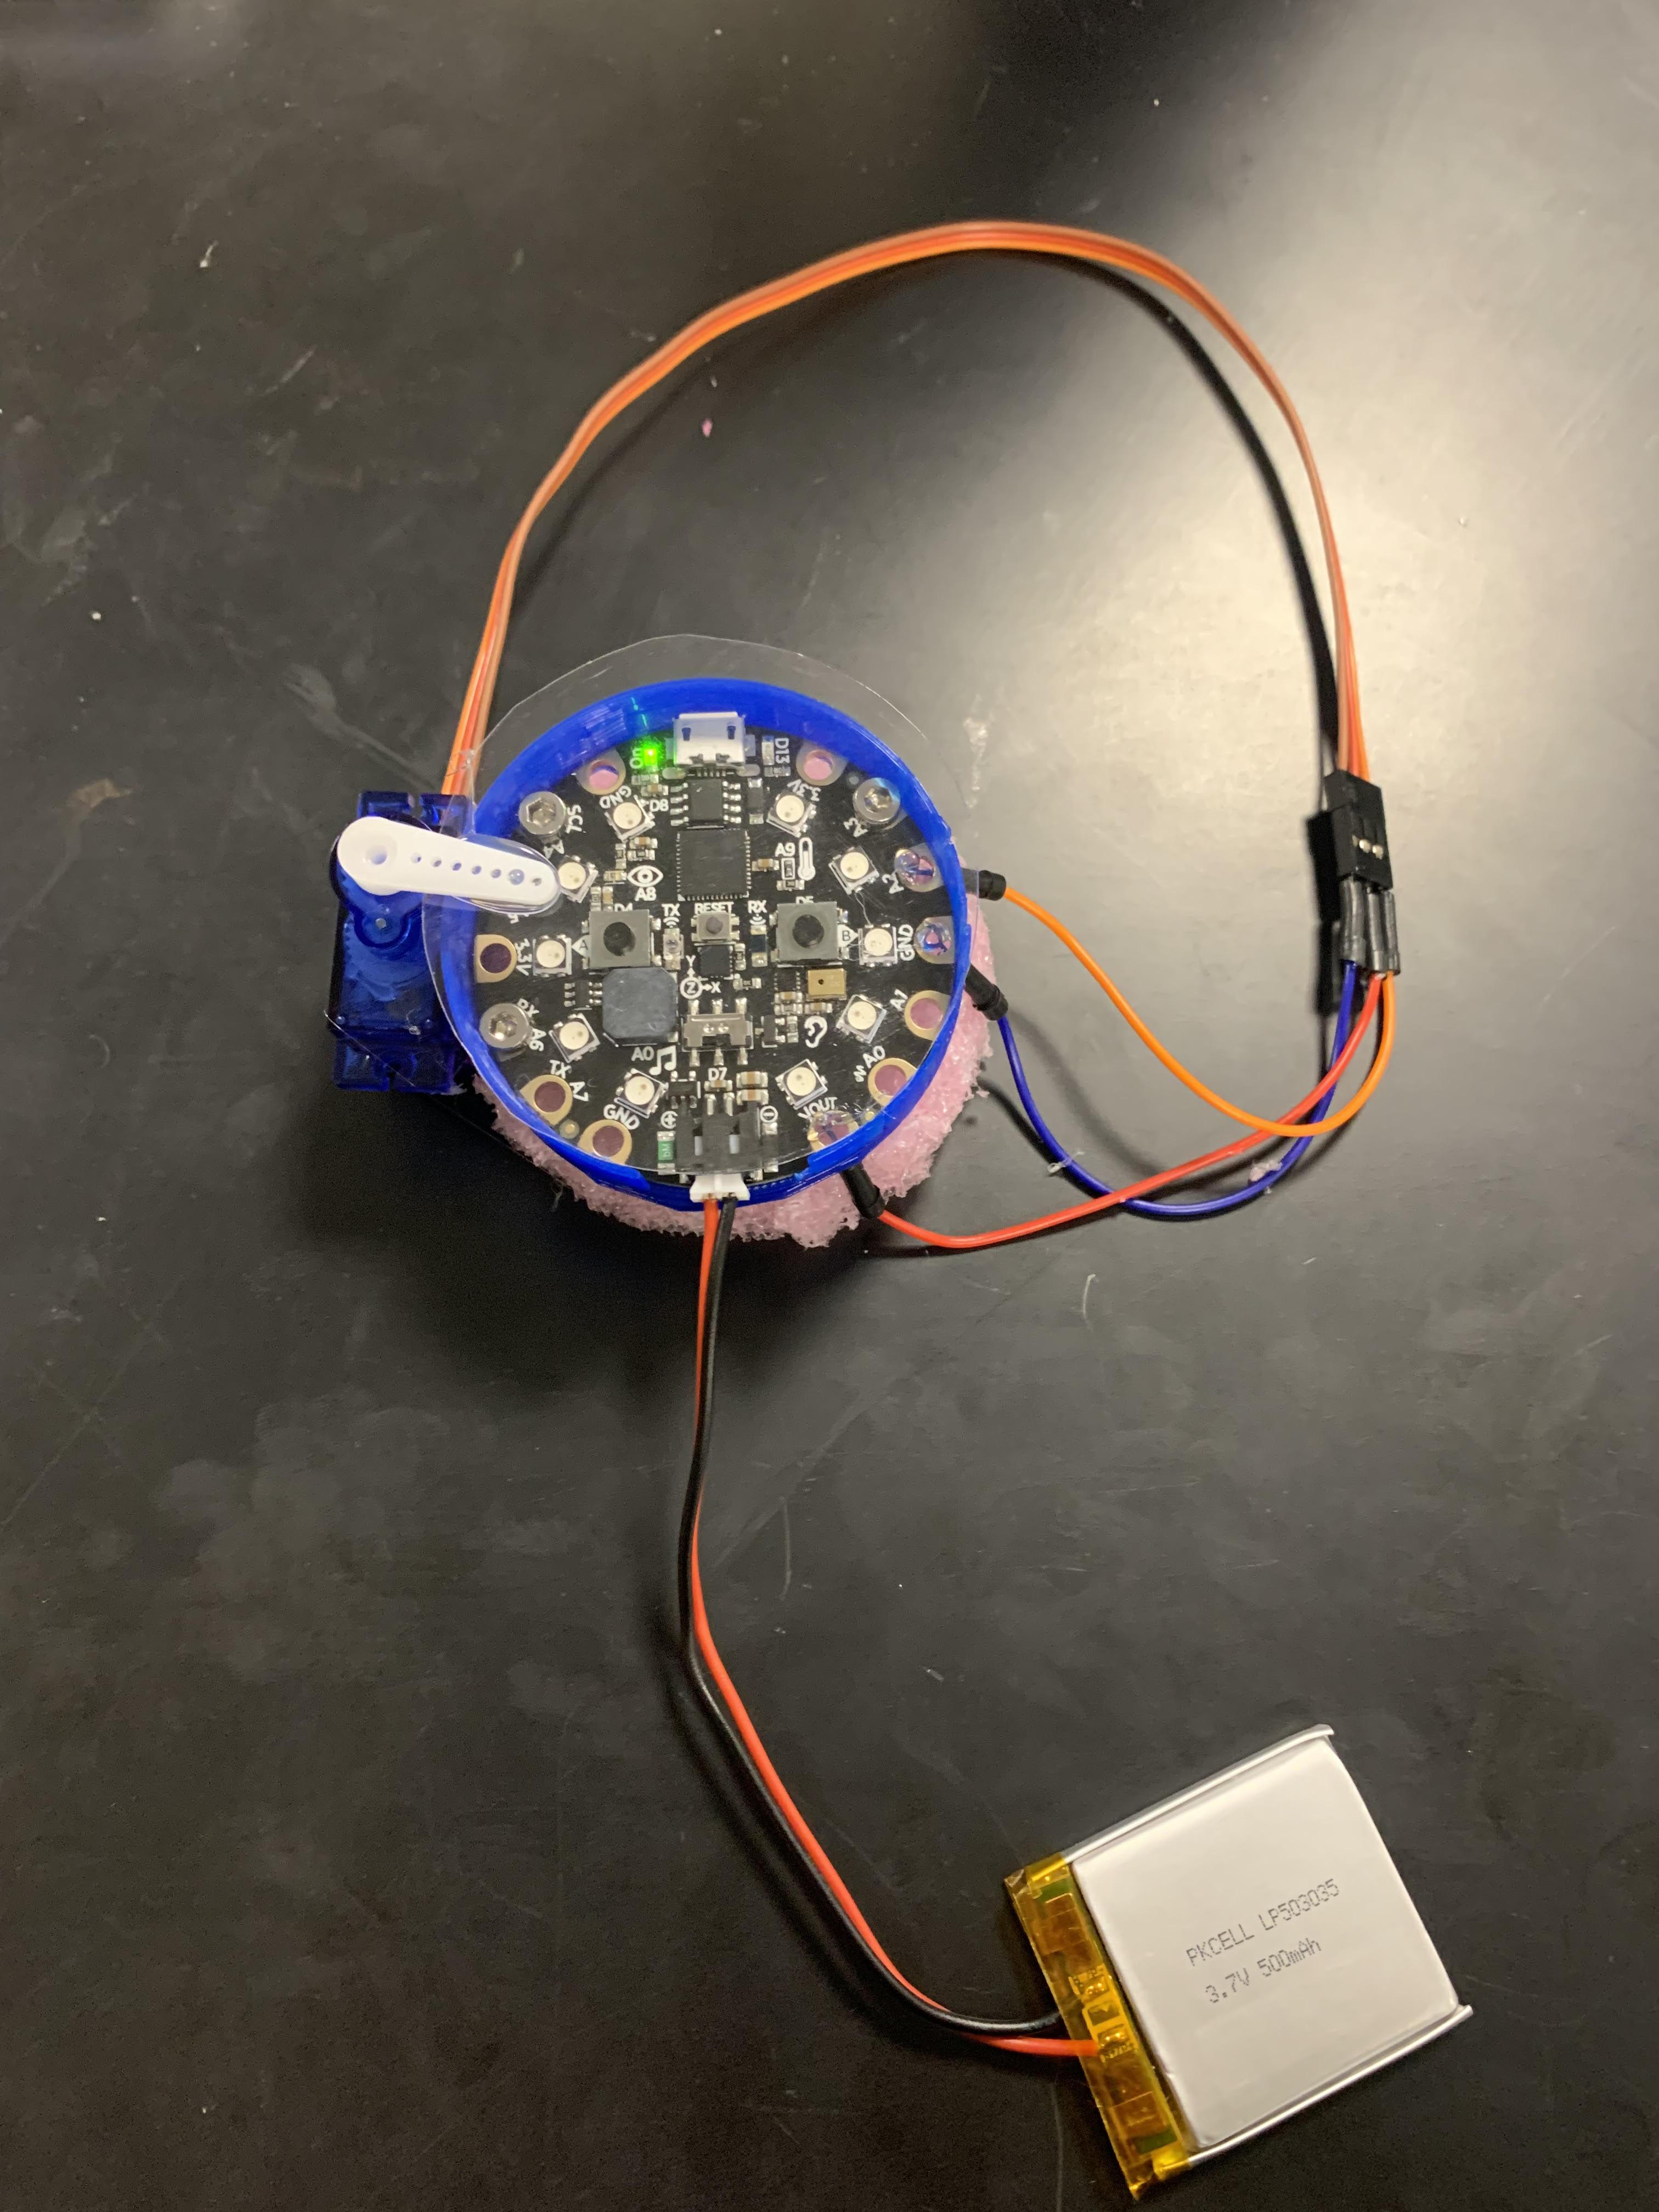
Glue the plastic circle onto the servo.
Assembly
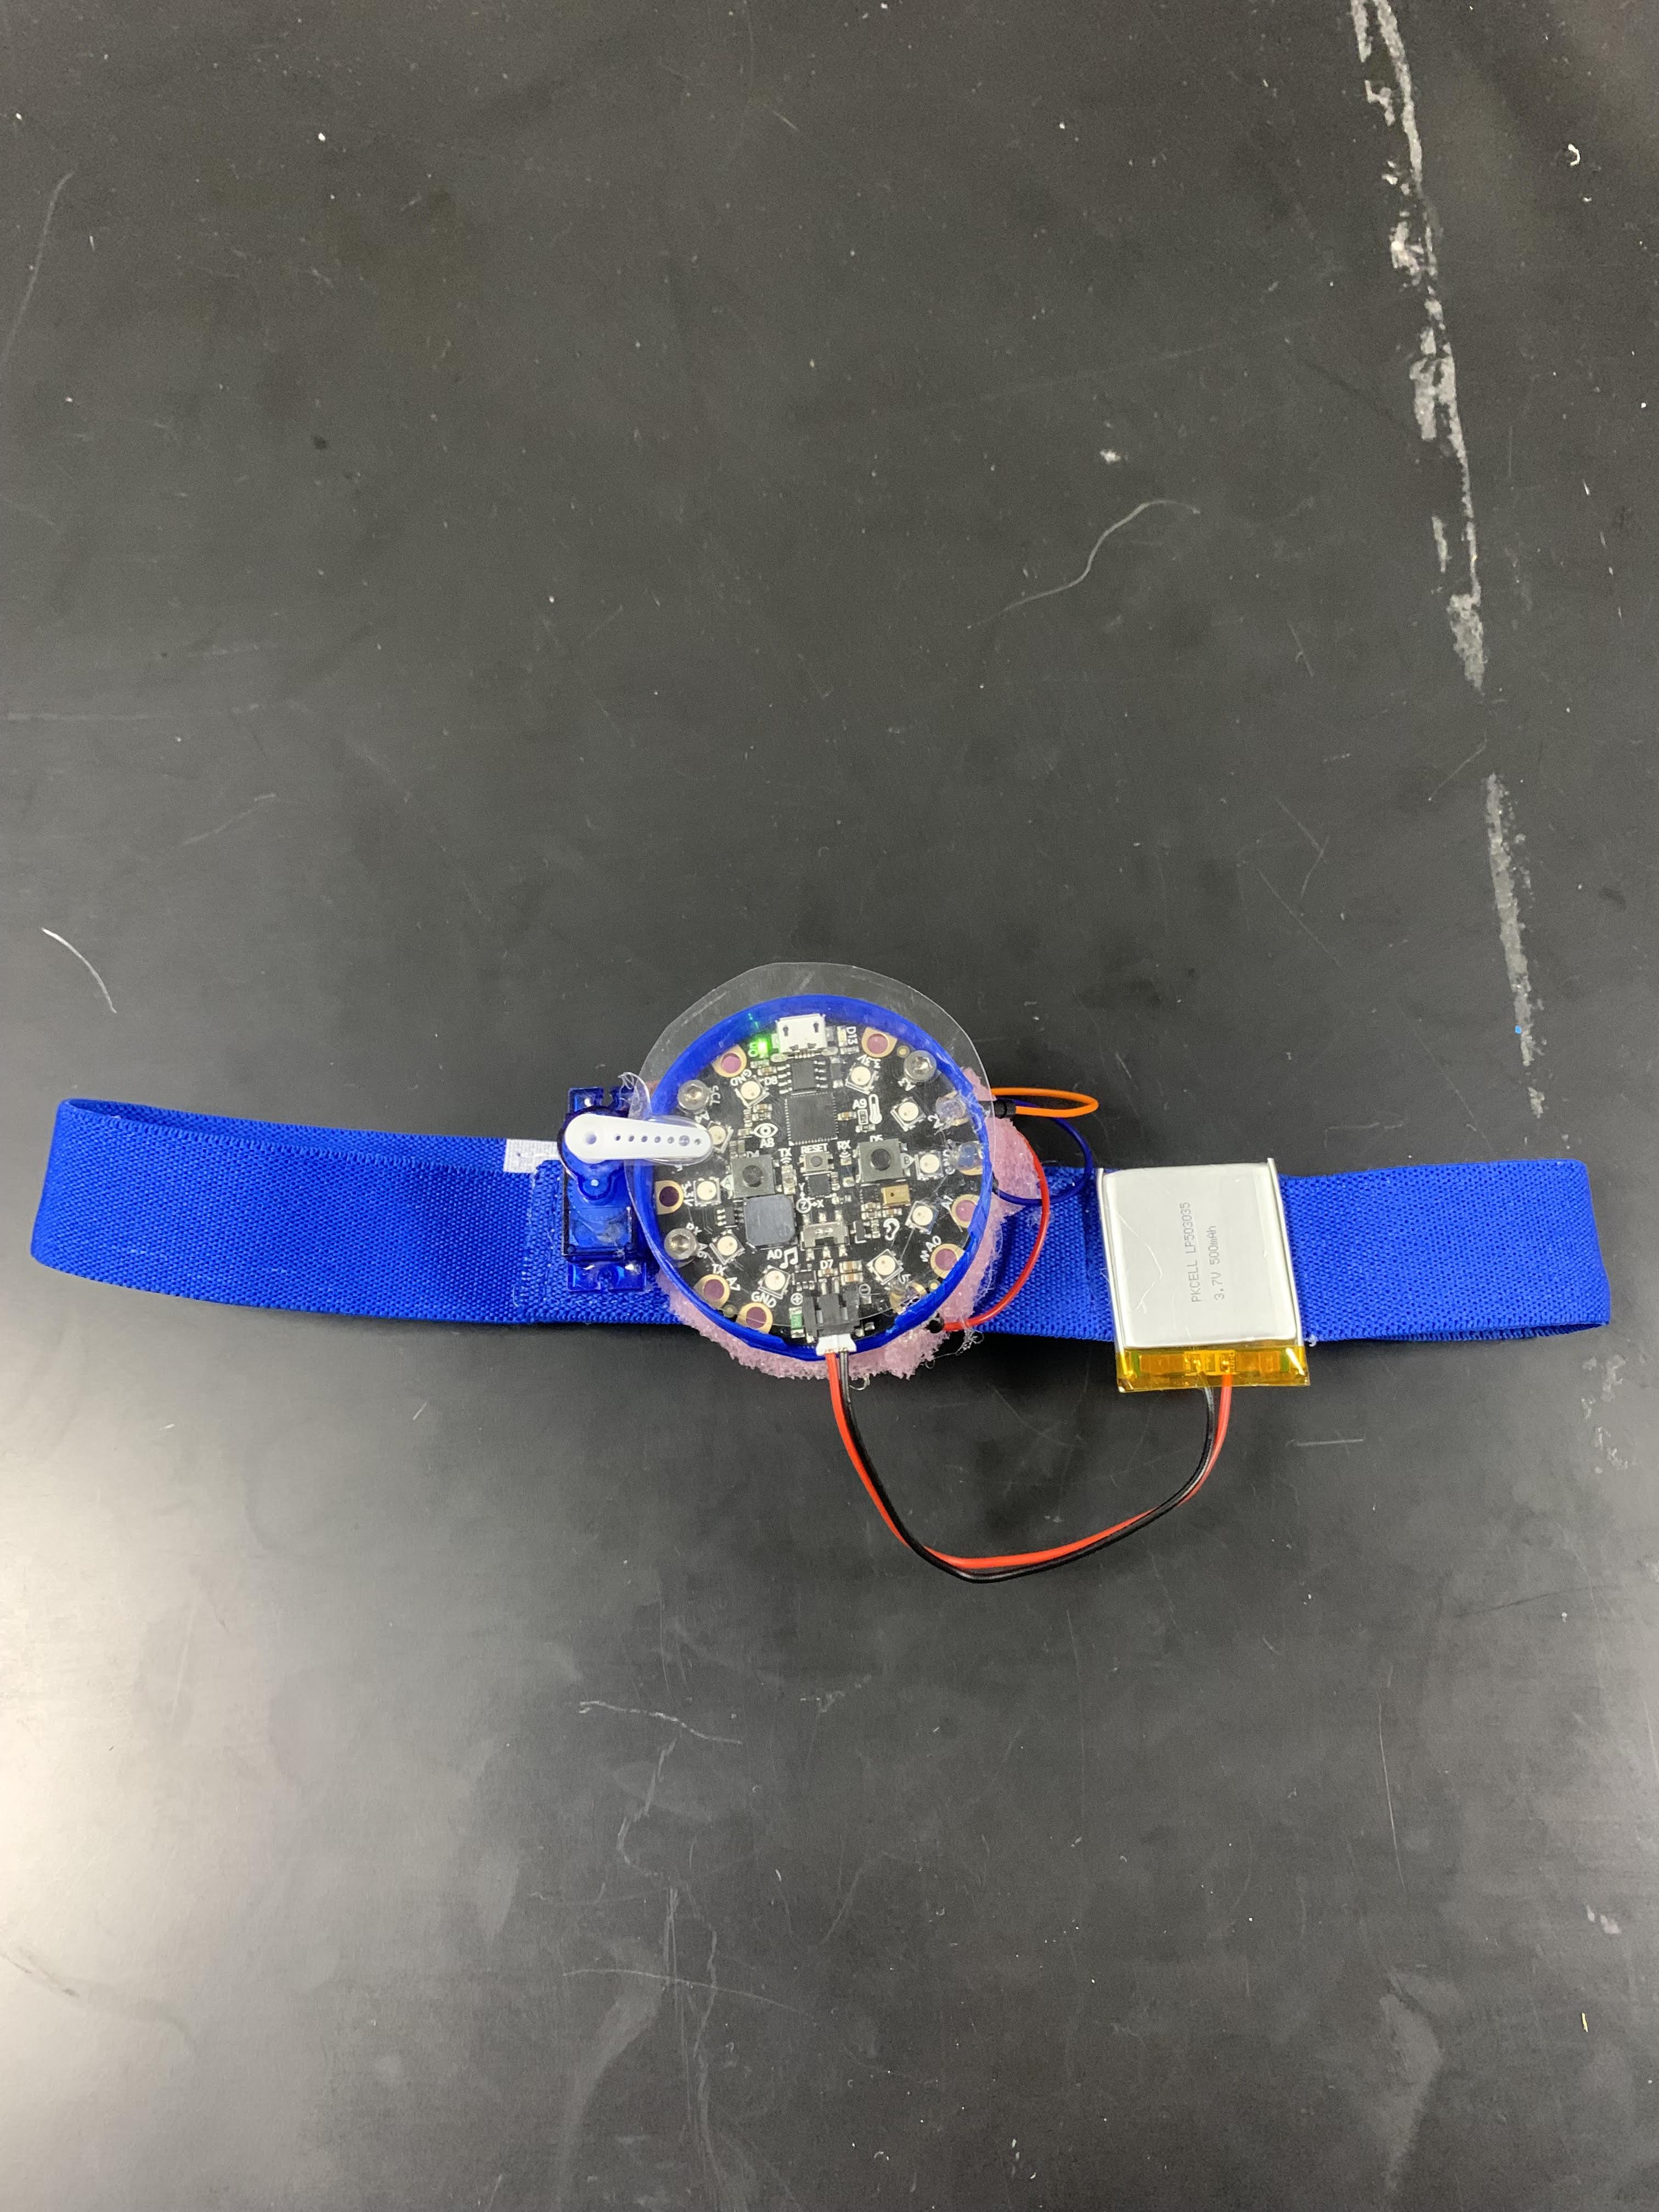
After this, glue the CPX holder onto the headband by the foam. You can put all the wires underneath your CPX before you glue it.
Placing the Battery

Attach the battery by gluing it to the outside of the headband.
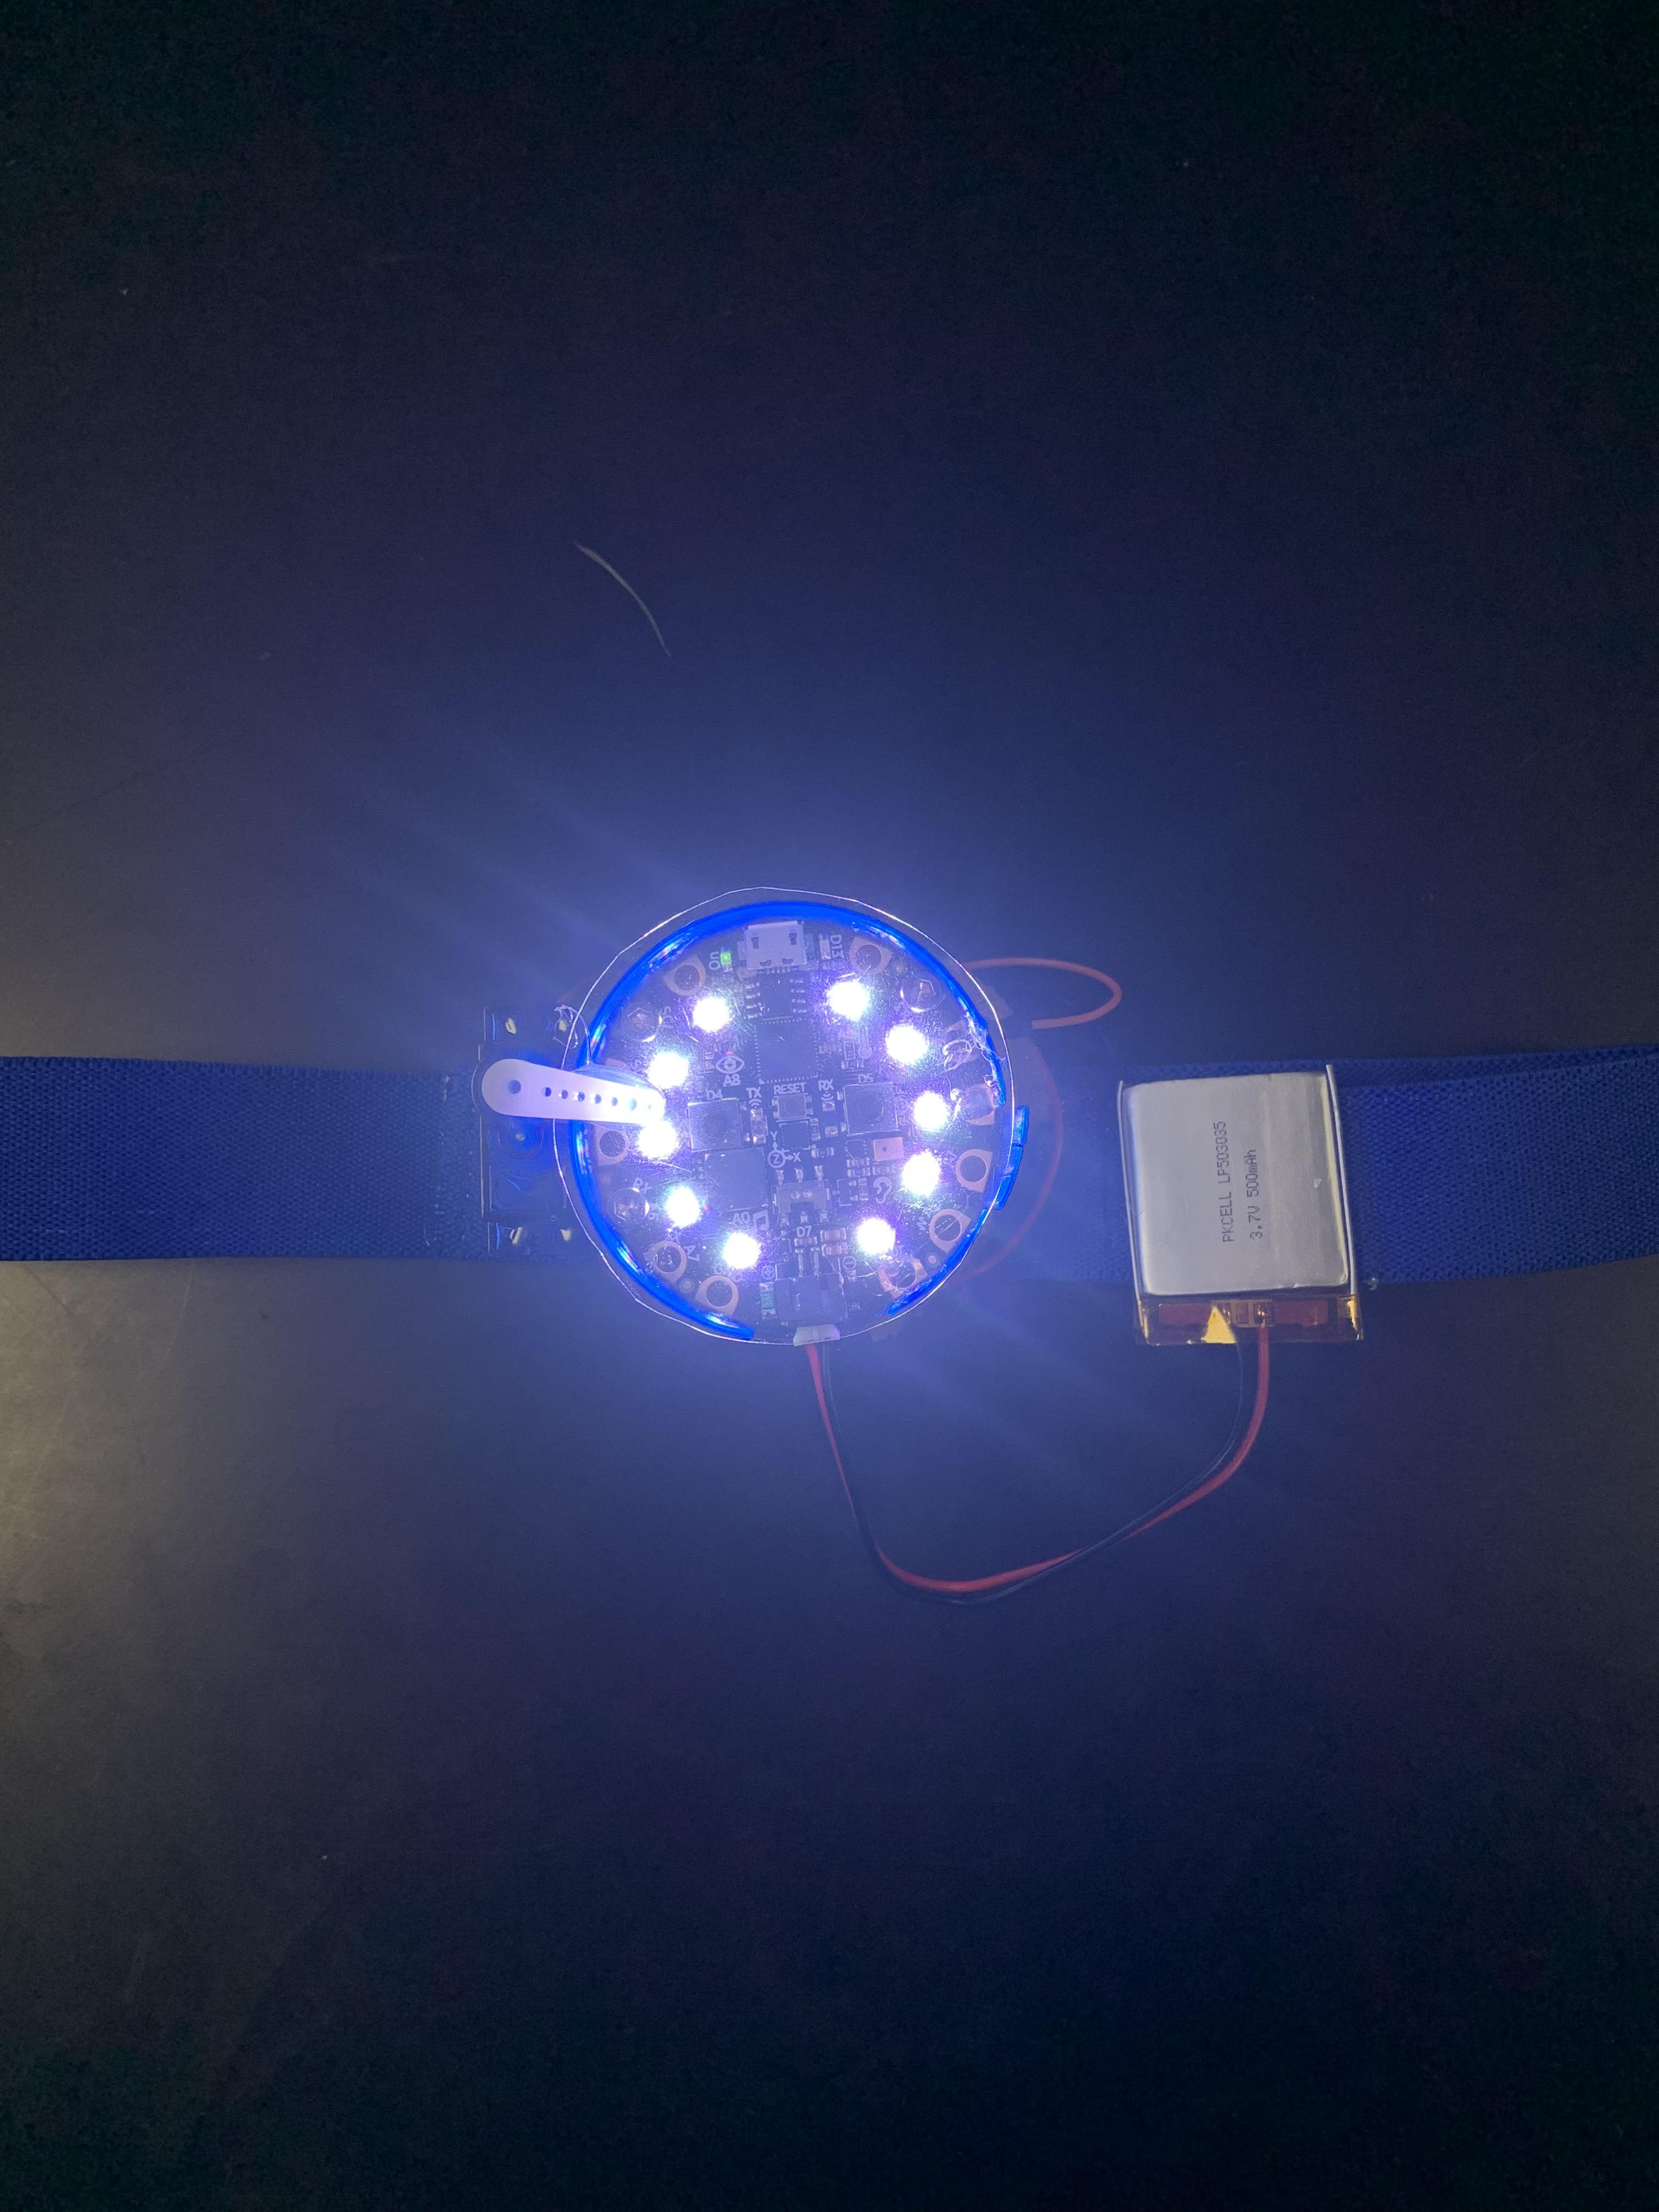
Final Design
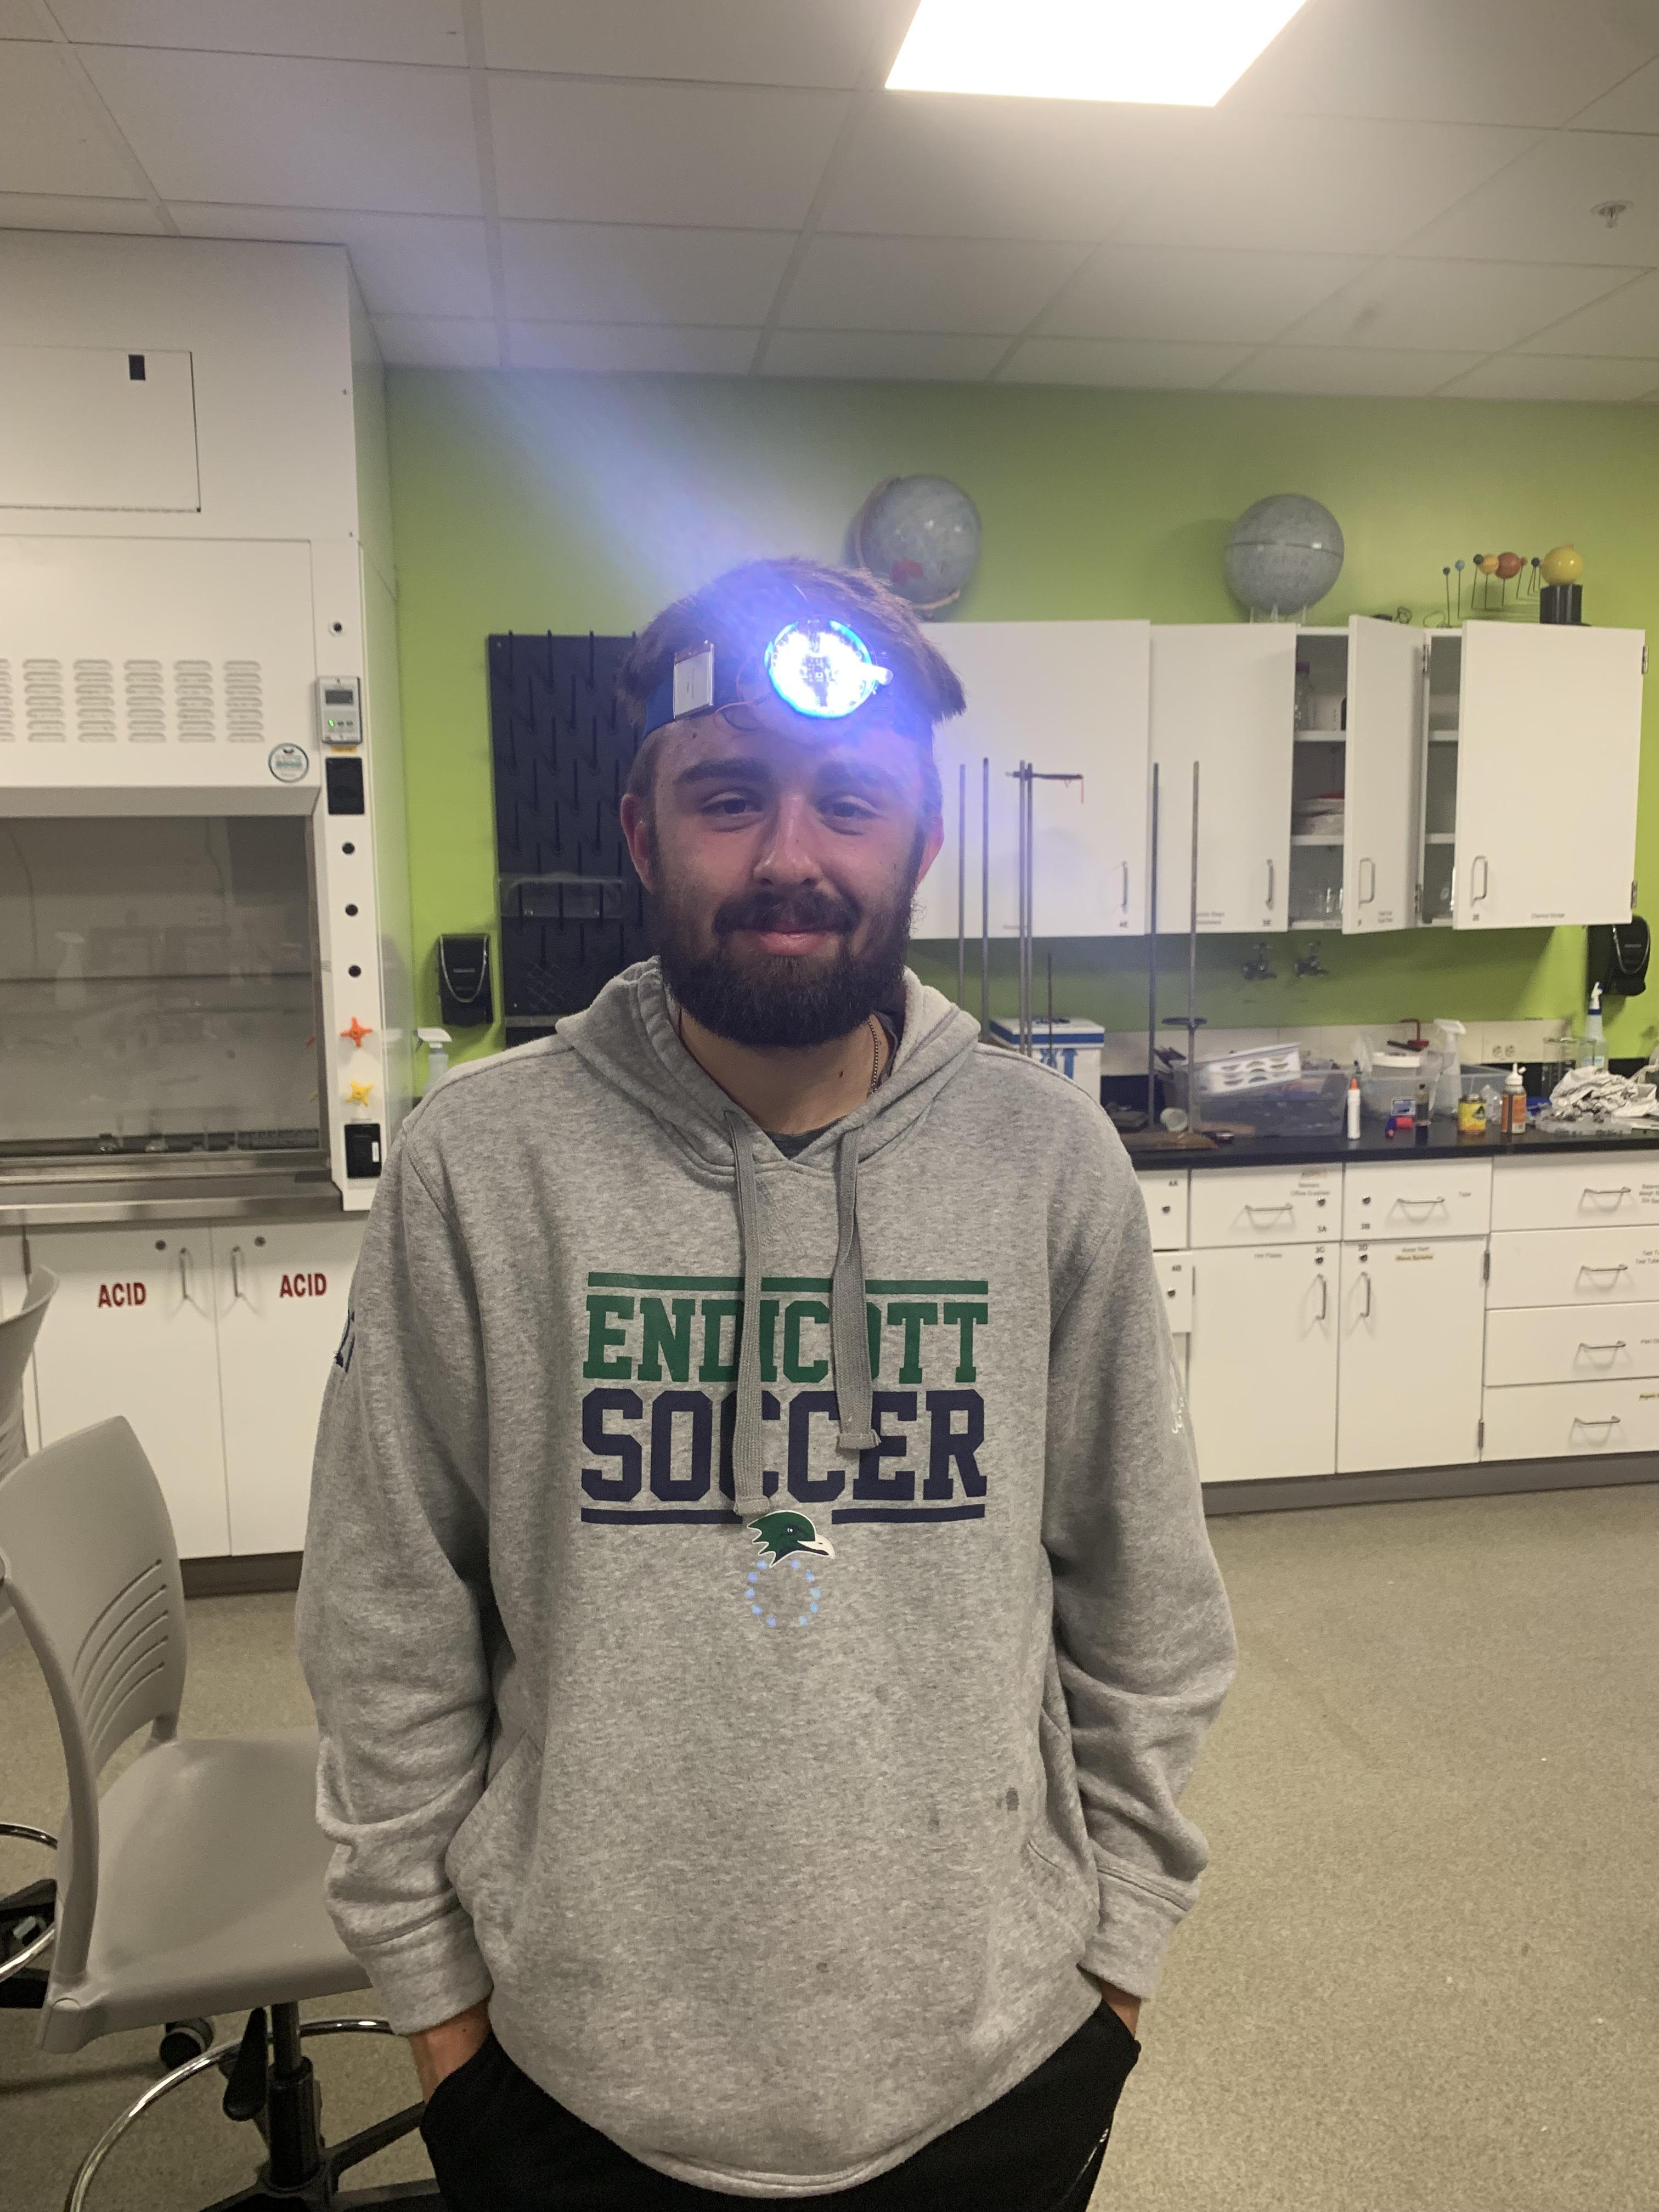
Once the steps are complete, this is the final design. Thank you for listening!