Water Quality Monitoring Using MKR1000 and ARTIK Cloud
by imjeffparedes in Circuits > Arduino
6296 Views, 74 Favorites, 0 Comments
Water Quality Monitoring Using MKR1000 and ARTIK Cloud
Introduction
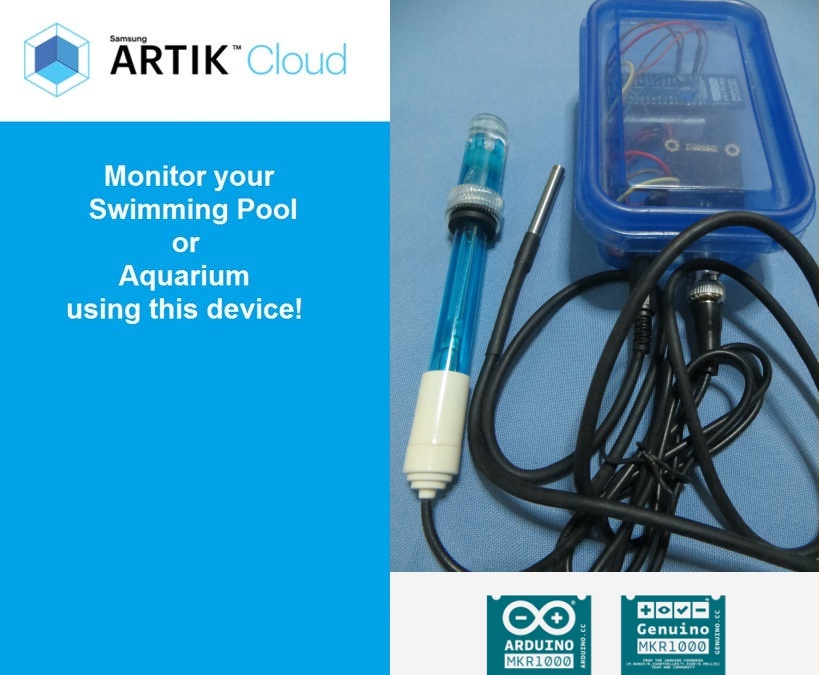
The primary objective of this project is to use MKR1000 and Samsung ARTIK Cloud to monitor the pH and temperature levels of swimming pools.
We will be using Temperature Sensor and pH or Power of Hydrogen Sensor to measure the alkalinity and acidity of water.
Measuring temperature is a must because it can affect the level of pH. An increase in any solutions' temperature will cause a decrease in its viscosity and an increase in the mobility of its ions in solution. As pH is a measure of the hydrogen ion concentration, a change in the temperature of a solution will be reflected by a subsequent change in pH(1).
The effects of temperature on ph level are as follows.
- Temperature effects that diminish the accuracy and speed of response of the Electrode.
- Temperature Coefficient of Variation effects on the material being measured by the sensor, whether it be calibration buffer or sample.
Why do we need to balance our swimming pools?
This will be a long discussion. You can skip this to Step1 :)
Swimming pools, or at least man-made watering holes for bathing and swimming – go back as far as 2600 B.C.E. at the minimum. However, mainly due to the potential sources of microbes such as people swimming in the pool, animals such as dogs, dead wildlife, and debris from around the property such as leaves, grass and dust, swimming pools are oftentimes contaminated and thus contain a range of germs, including bacteria and algae that can cause health problems such as ear, nose and throat infections. And so as to prevent, or at least minimize this, swimming pools are regularly maintained through filtration, chlorination, total alkalinity, calcium hardness, and pH level regulation.
pH can be viewed as an abbreviation for power of Hydrogen – or more completely, power of the concentration of the Hydrogen ion. It is also the measure of how acid/ alkaline the swimming pool water is. pH levels range from 0.0 up to 14.0. The ideal range for pH in swimming pool water is 7.2 up to 7.8. A pH of 7.0 is neutral – below 7.0 is acidic, above 7.0 is alkaline. If the pH level is kept at the same level as that in our eyes, which is typically 7.2 to 7.4, the side effects of burning eyes is kept to a minimum.
When the pool is too acidic, it will begin to dissolve the surface, creating a roughness which is ideal for pool algae growth. A similar result occurs in the grouting of tiled swimming pools. Metals also corrode, which includes swimming pool equipment, pipe fittings, pump connections, and the like. Sulphates are formed from these surface, grouting, and metal corrosions. These sulphates are released from the water onto the walls and floor of the swimming pool causing ugly brown and black stains. Moreover, chlorine, which is used as a disinfectant in the swimming pool water, is activated, lost to the atmosphere very quickly, and thus rendered useless as it loses its ability to sanitize the water. Lastly, the swimmers’ eyes and nose burn, their swimwear fades and perishes, and their skin gets dry and itchy.
On the other hand, when the water is too alkaline, the calcium in the swimming pool water combines with carbonates and forms scale which is seen most at the waterline where it traps dust and dirt, turning black with time. The swimming pool water also starts to become cloudy or murky as it loses its sparkle. The calcium carbonate also has a tendency to plate out on the sand in the swimming pool filter, effectively turning it into cement. So if the swimming pool’s sand filter becomes a cement filter, it loses its ability to trap dirt from the pool water. Another effect to note is that as the pH rises, the power of the chlorine to act on foreign particles is lost. An example is that at a pH of 8.0, the pool can only use 20% of the chlorine dispensed. Finally, in alkaline swimming pool water, the swimmers’ eyes and nose may also and burn and their skin may also get dry and itchy.
Shout out to my group mates Alysson and Aira for this awesome research.
Gather Materials and Software Needed
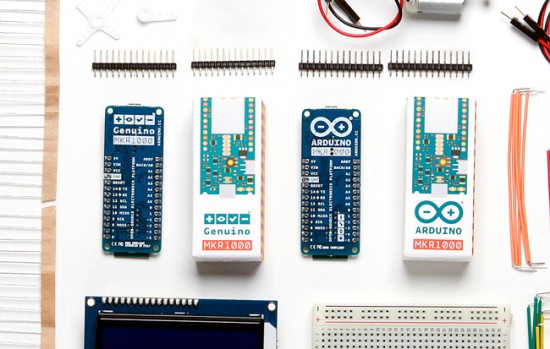
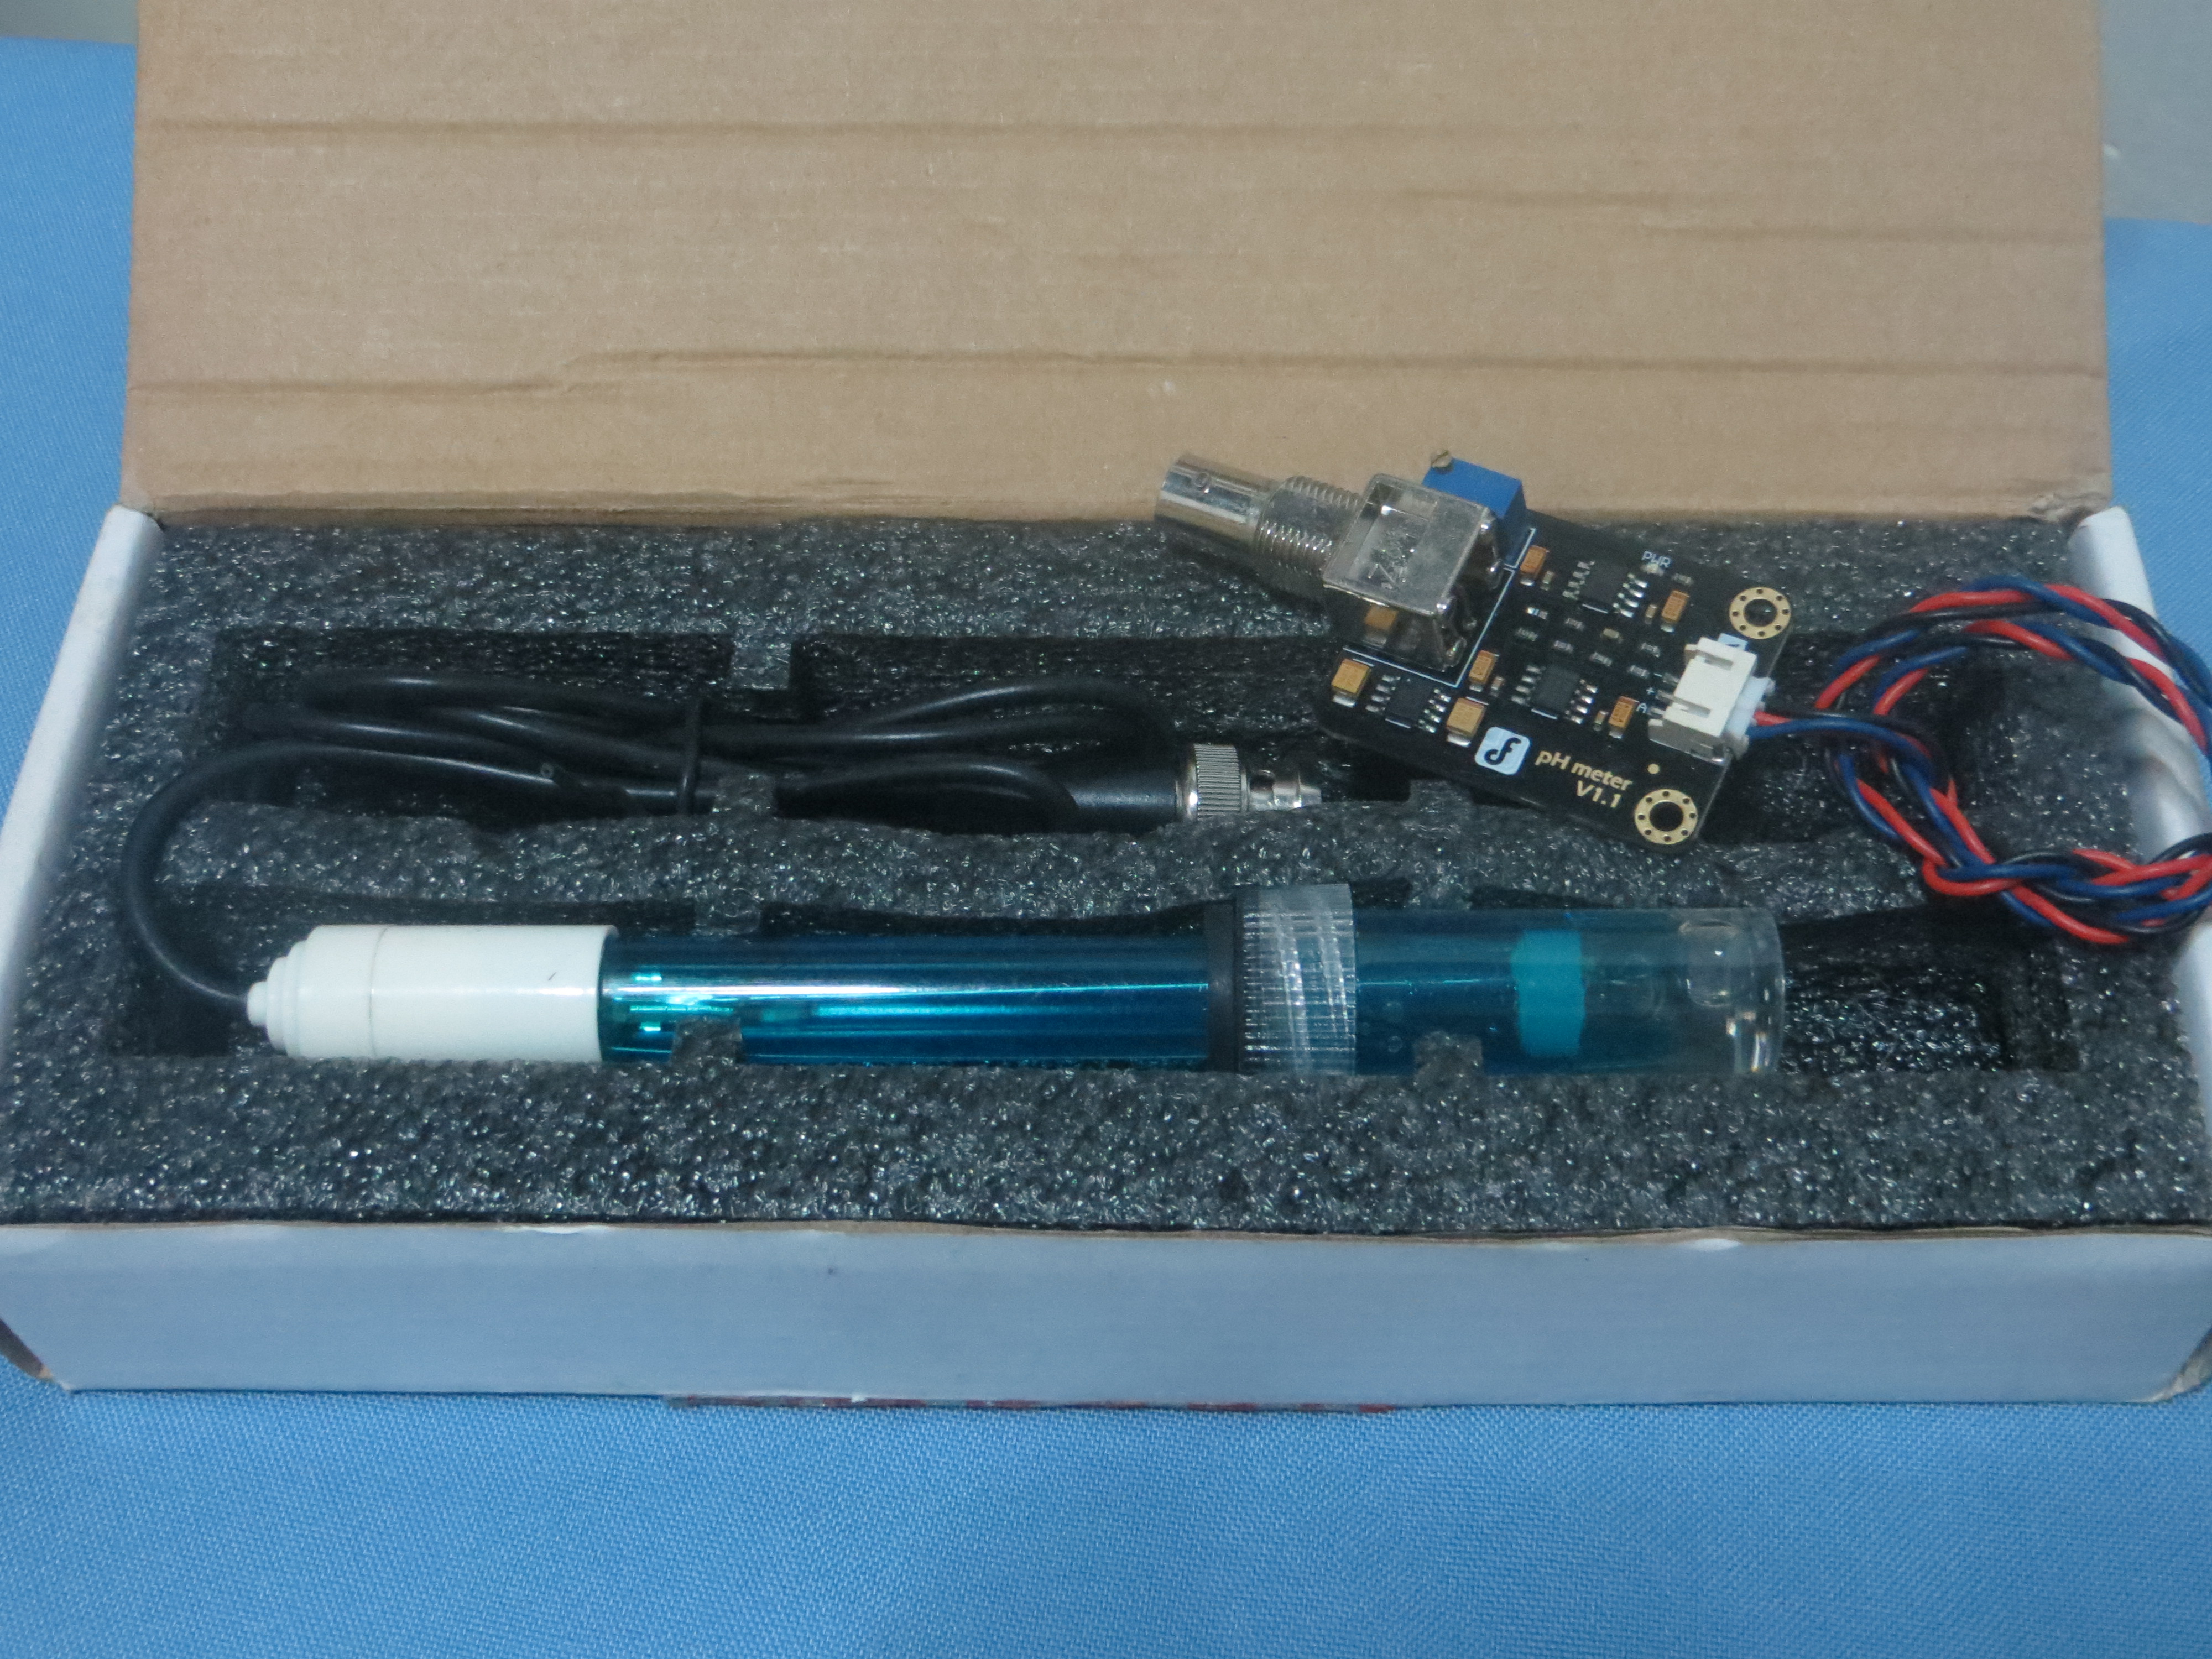
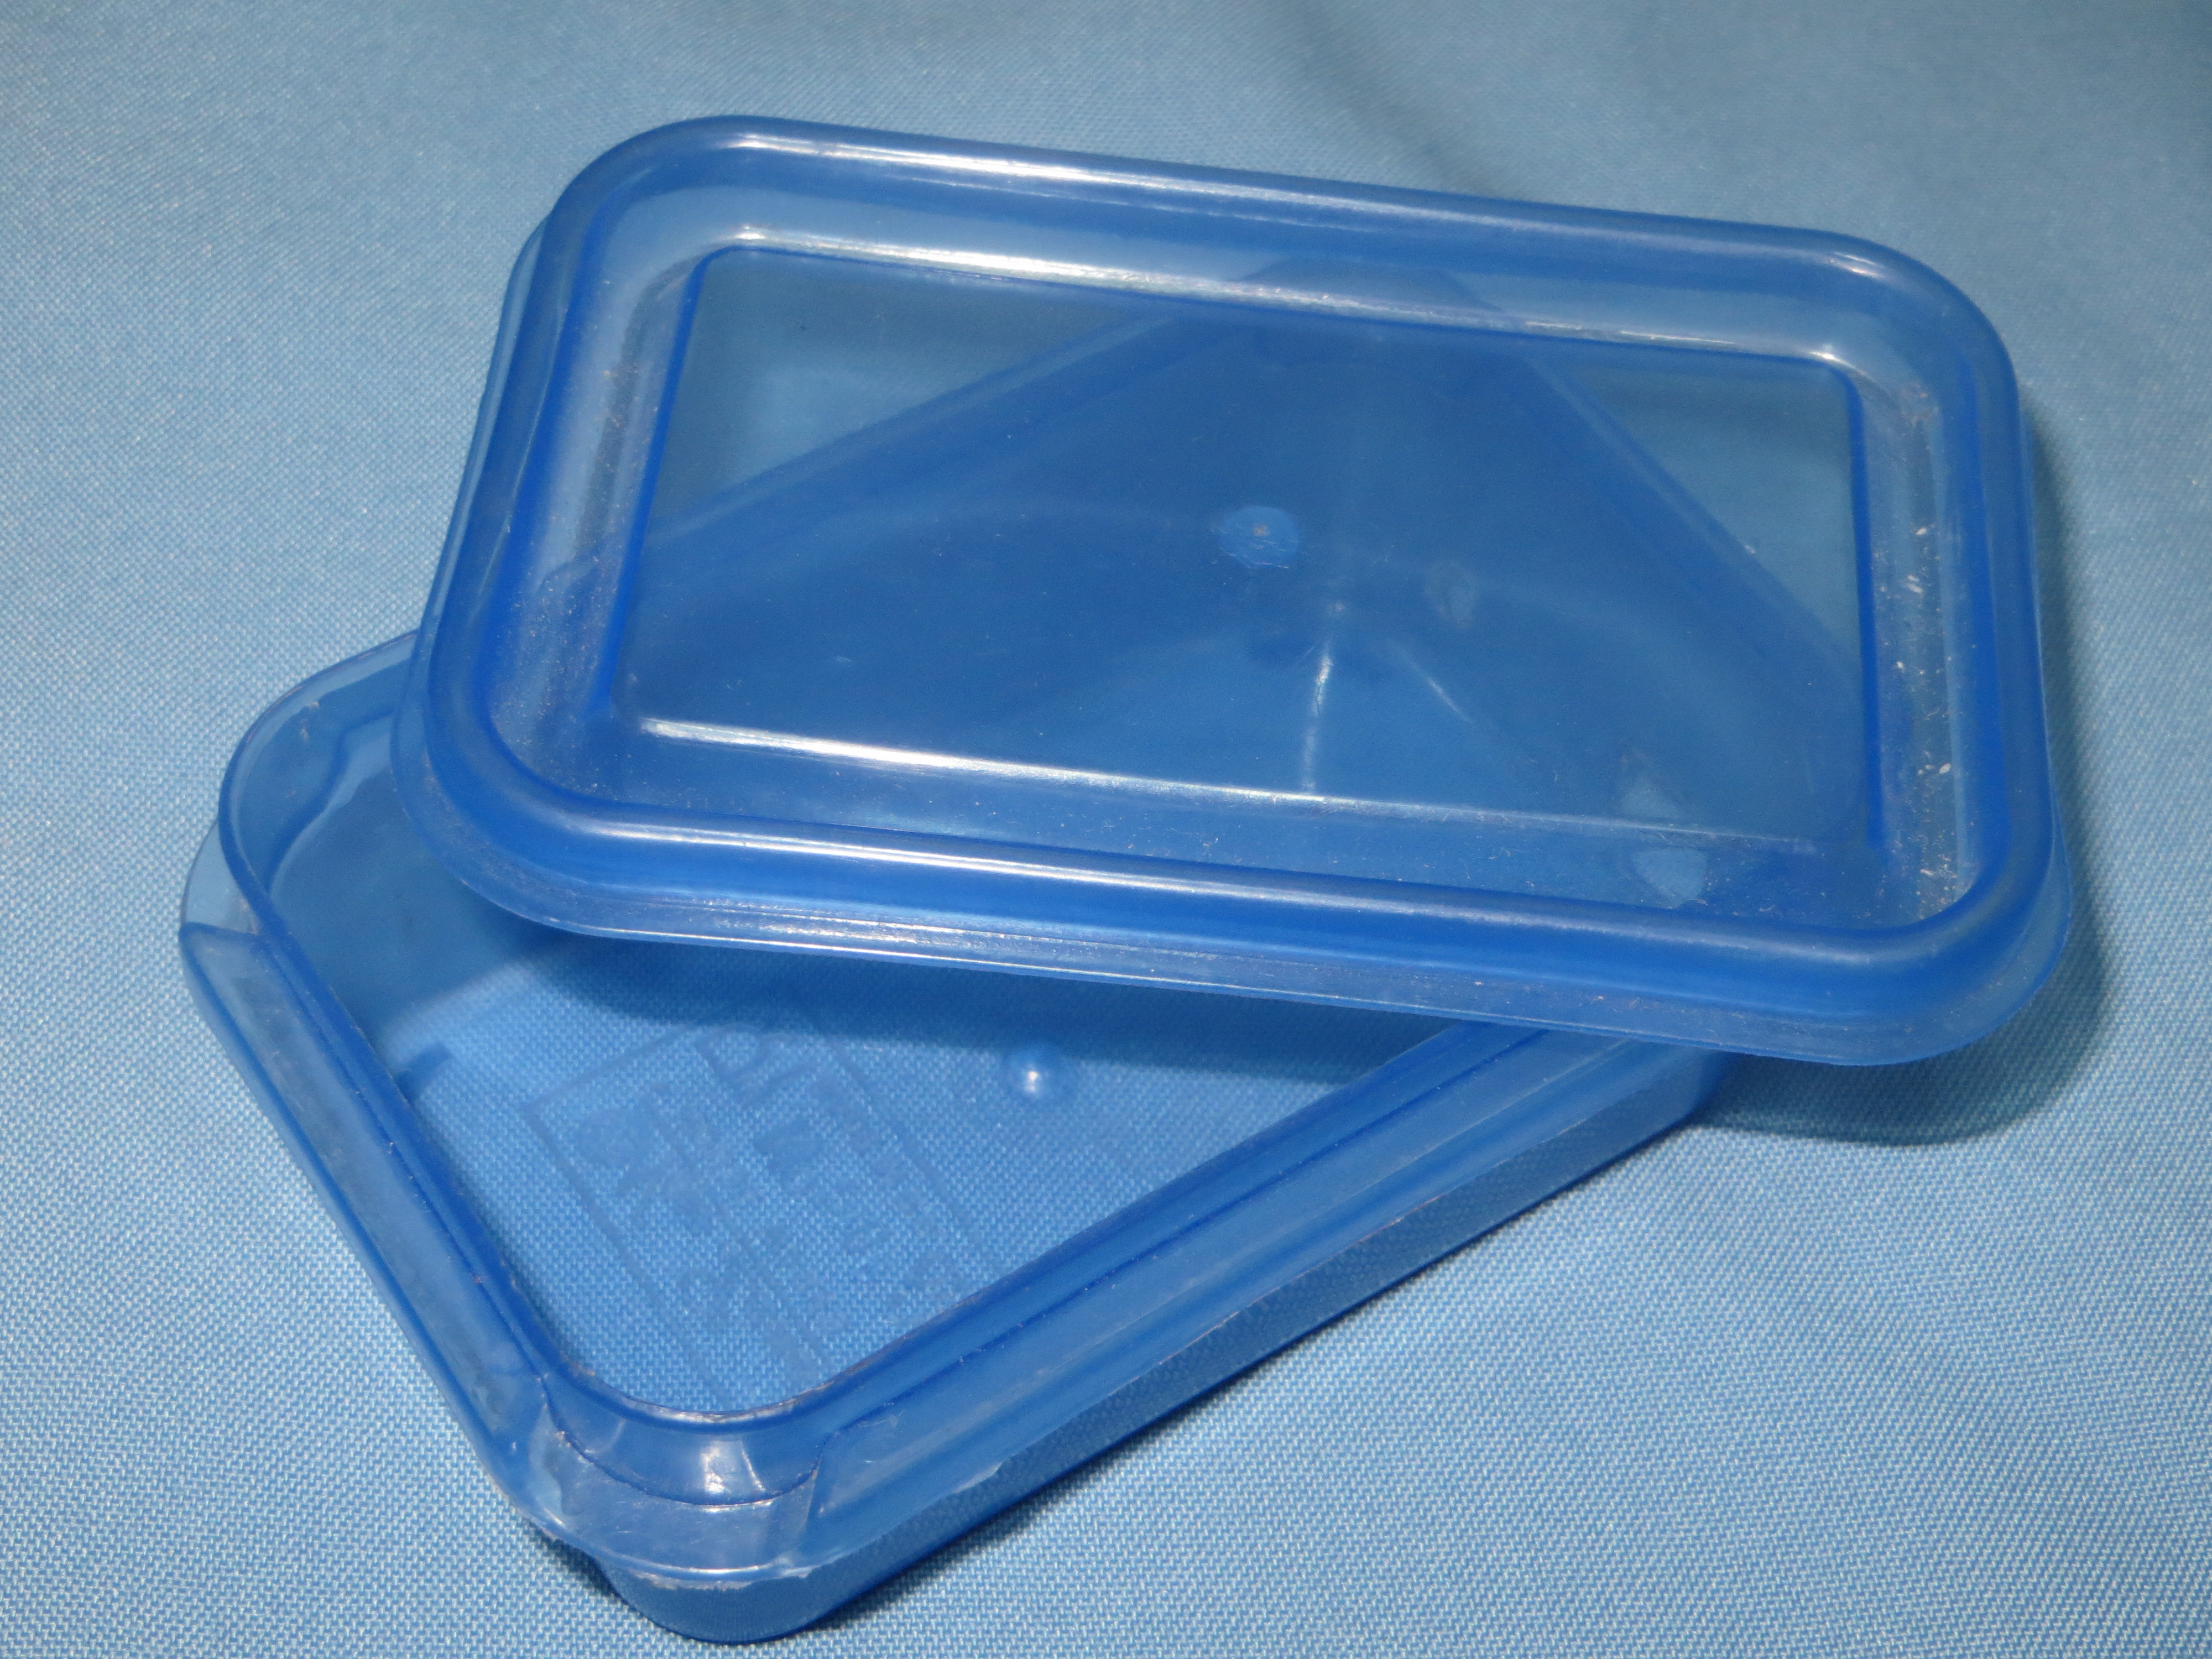
- Arduino / Genuino MKR1000
- Arduino IDE
- Samsung Artik Cloud Account
- Jumper Wires
- 3 Male Pin Headers
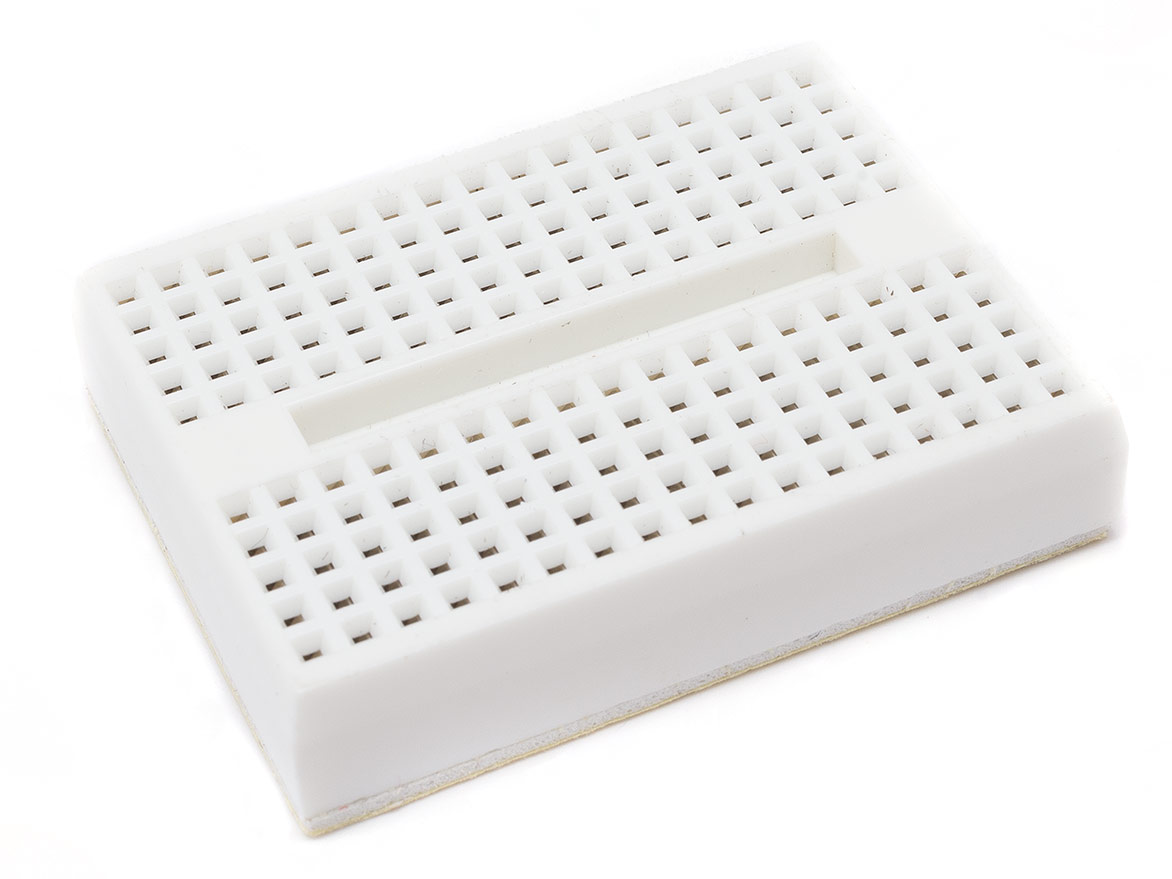
- 170 Pin Beardboard
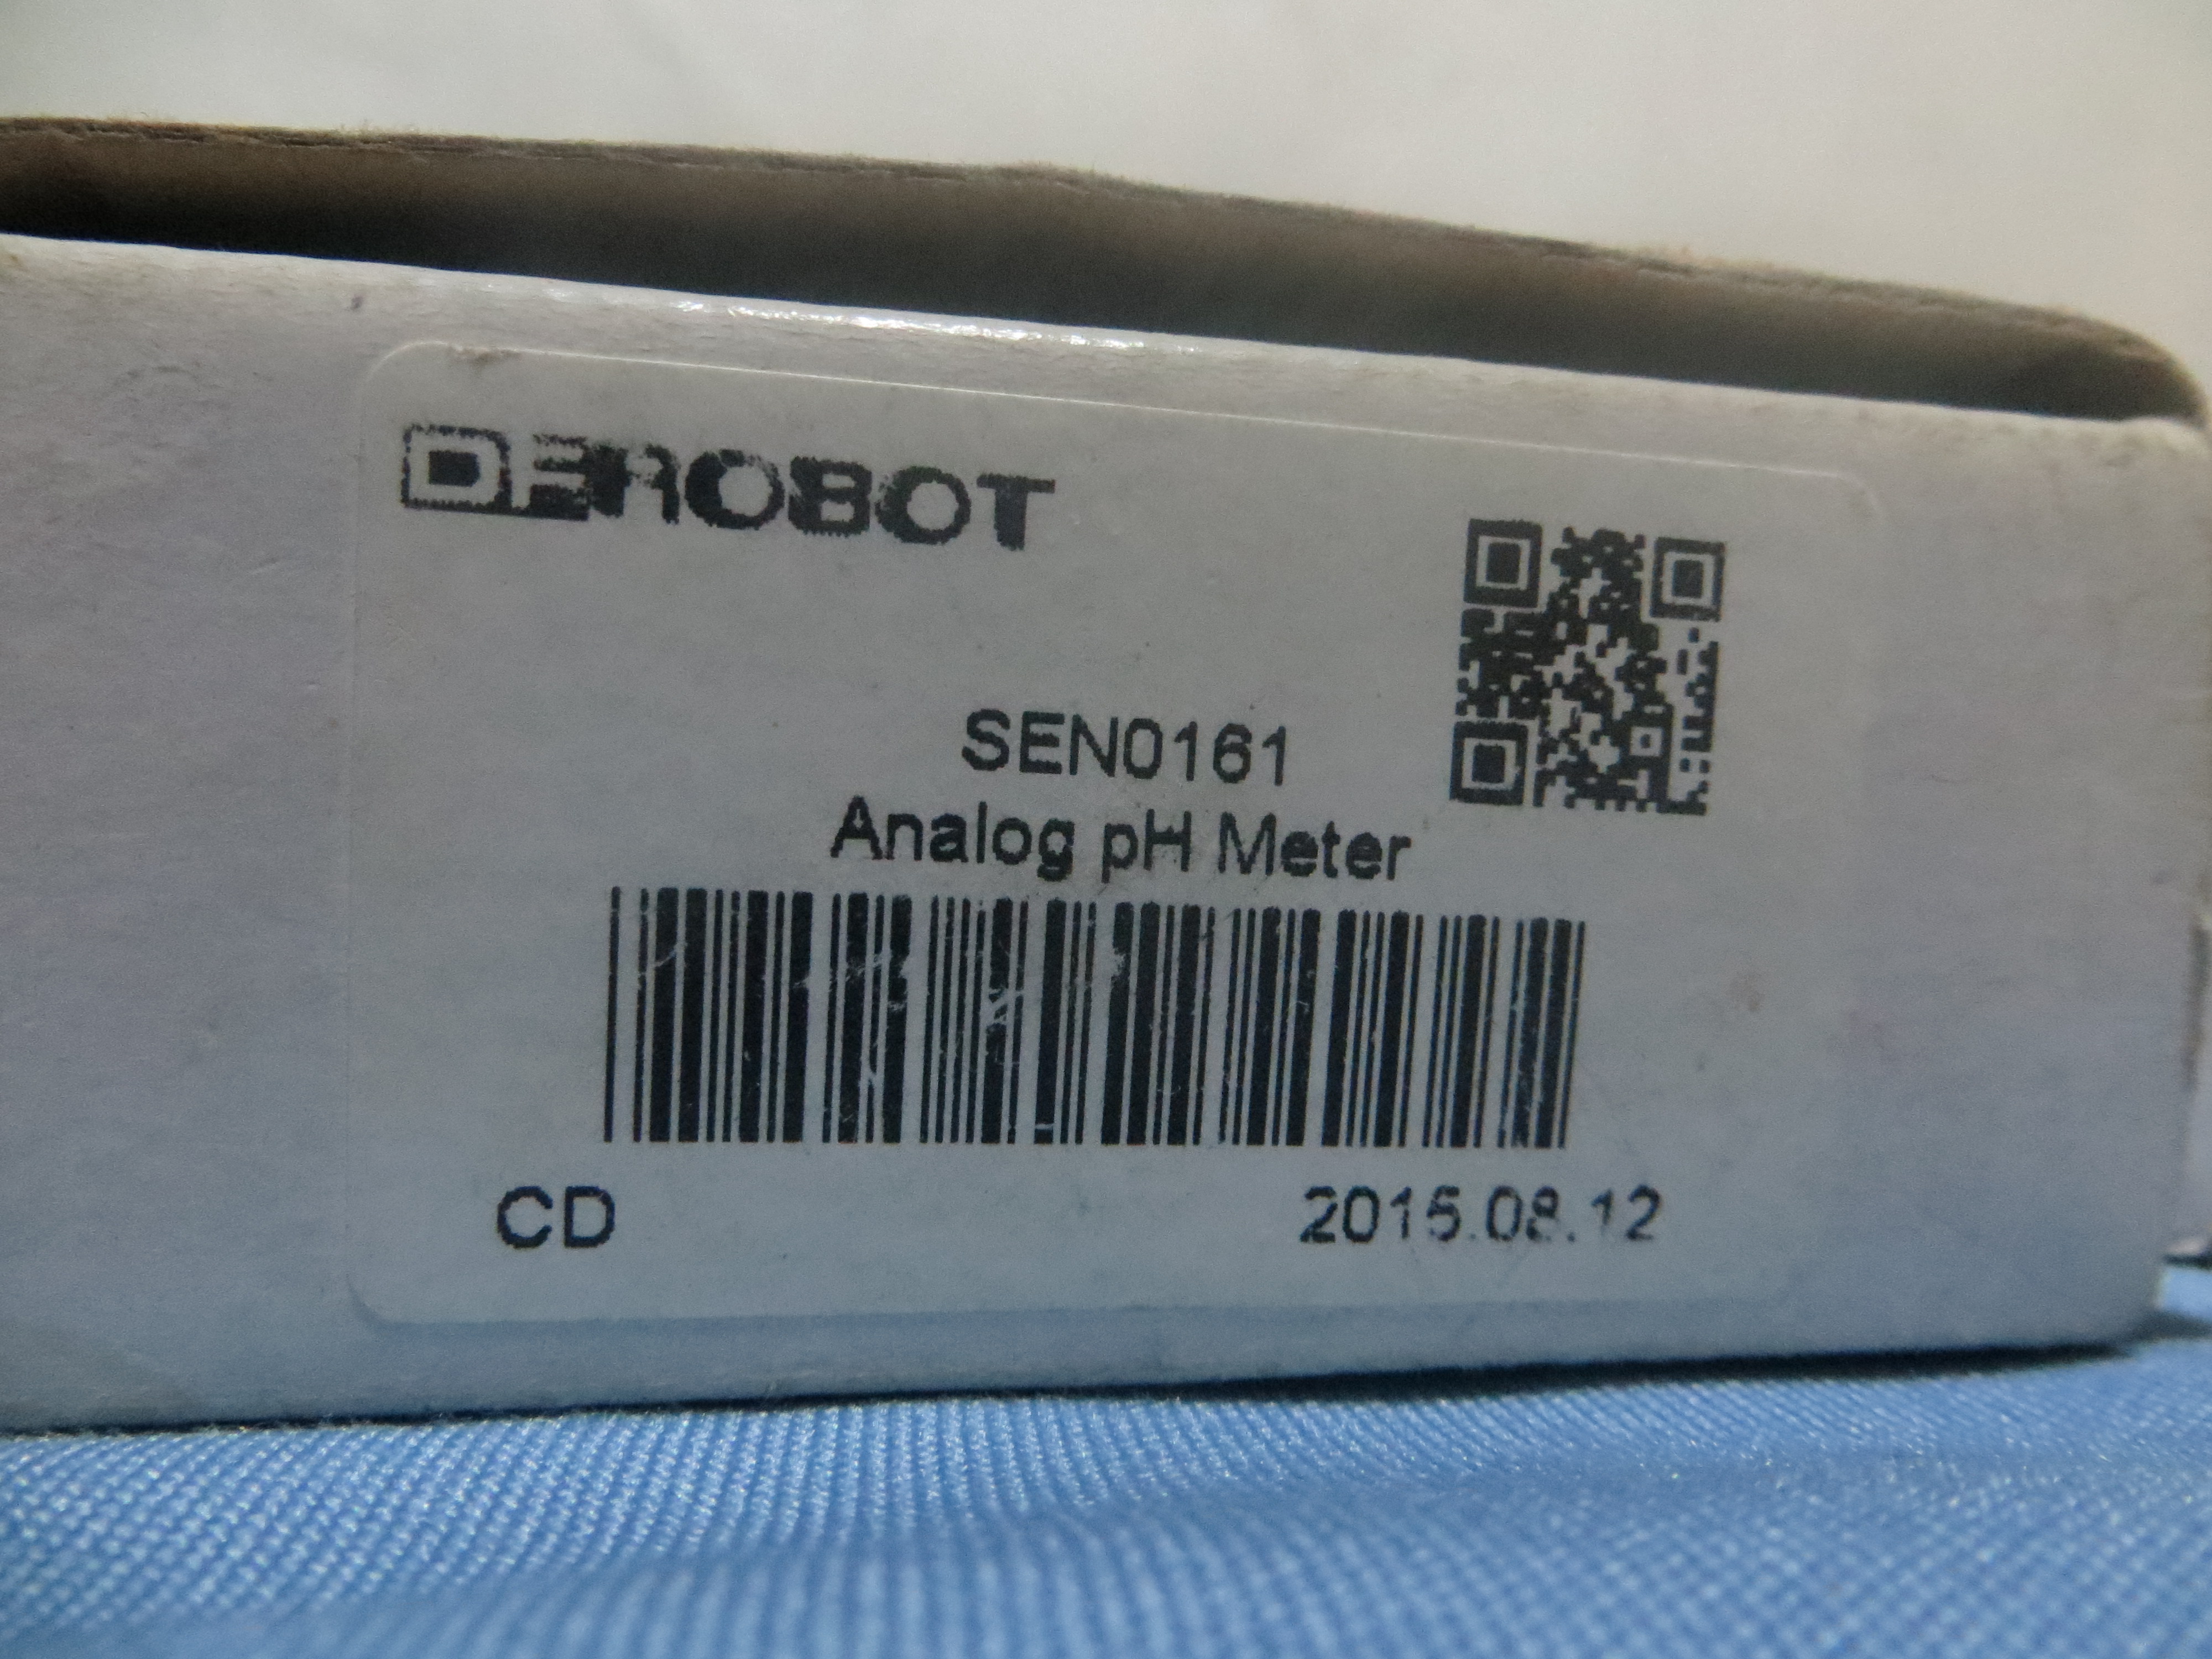
- DFRobot pH Meter
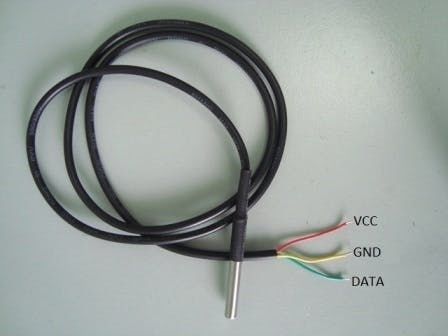
- DS18B20 Waterproof Temperature Sensor
- 4.7K Resistor x1
- 200 ohms Resistor
- 2x3 inch plastic container
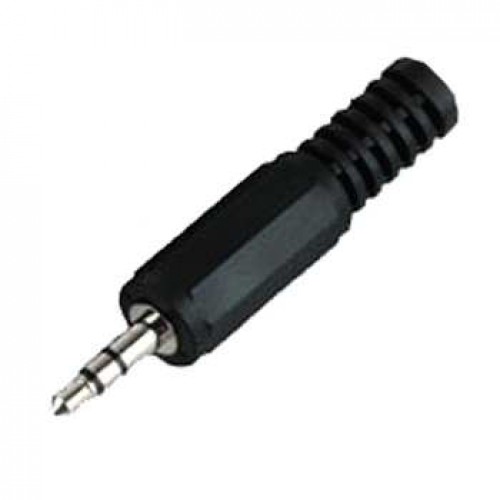
- male and female audio connector
- Soldering Iron and Lead
- Small soldering PCB
Since 4.7k resistor is out of stock I used 2.4k x 2 = 4.8k ohms
Create Your ARTIK Cloud Device Type
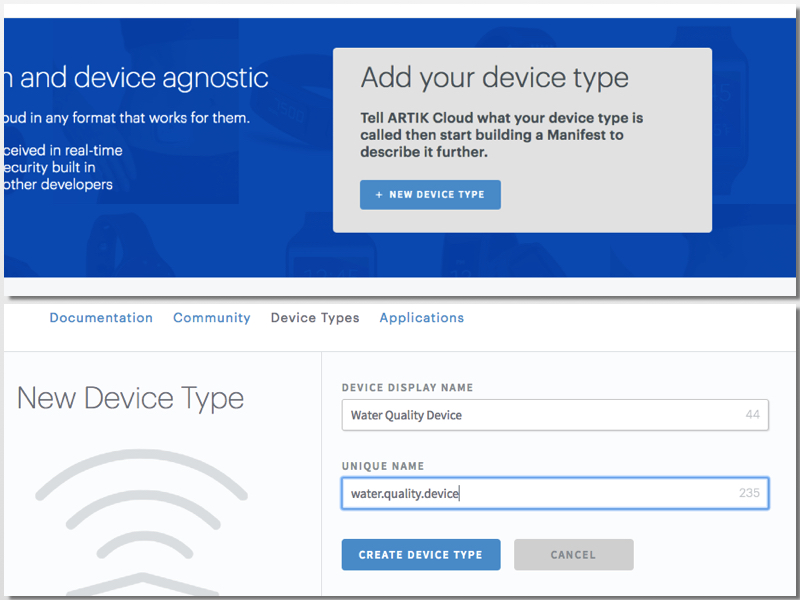
Sign up with ARTIK Cloud. Go to developer site and create new "device type".
Devices in ARTIK Cloud can be sensors, appliances, applications, services, etc.
Usually one user will own one or more devices, and devices can send messages or be used to send messages into ARTIK Cloud. learn more
Then, enter your desired display and unique name.
Create New Manifest for Your Device Type
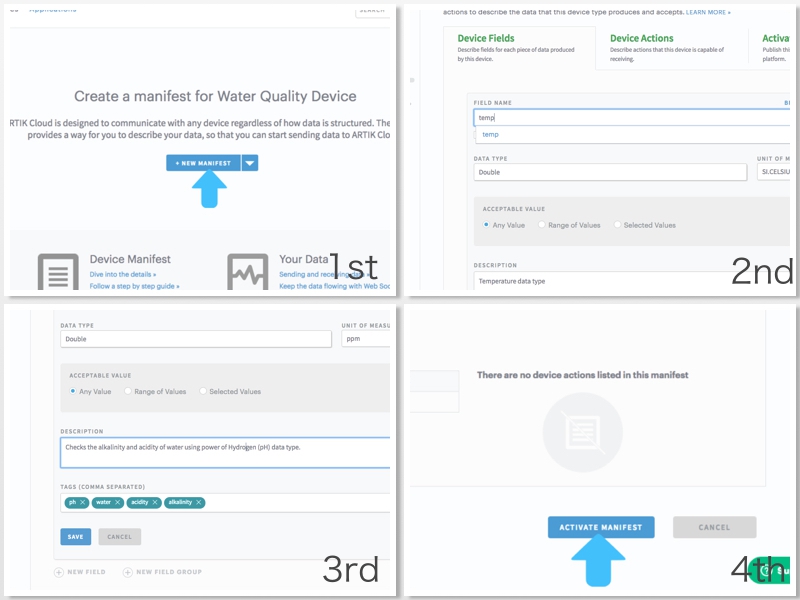
On your device type, create new Manifest.
The Manifest, which is associated with a device type, describes the structure of the data. When an application or device sends a message to ARTIK Cloud, the Manifest takes a string as input that corresponds to the data, and outputs a list of normalized fields/values that ARTIK Cloud can store. learn more
Enter temp as data fields it will automatically set to celcius.
Add another data field and name it ph . use ppm or parts per notation.
ph or power of Hydrogen is used to balance the Alkalinity and Acidity of water.
Temperature can affect the value of ph.
A rise in temperature is associated with increased molecular vibrations, upon increasing the temperature, the observable Hydrogen Ions also increases due to a decreased tendency of forming Hydrogen bonds, thus leading to a reduction in the pH. learn more
Skip Action Rules as we won't be needing it.
Then Activate your manifest file.
Create Your Application
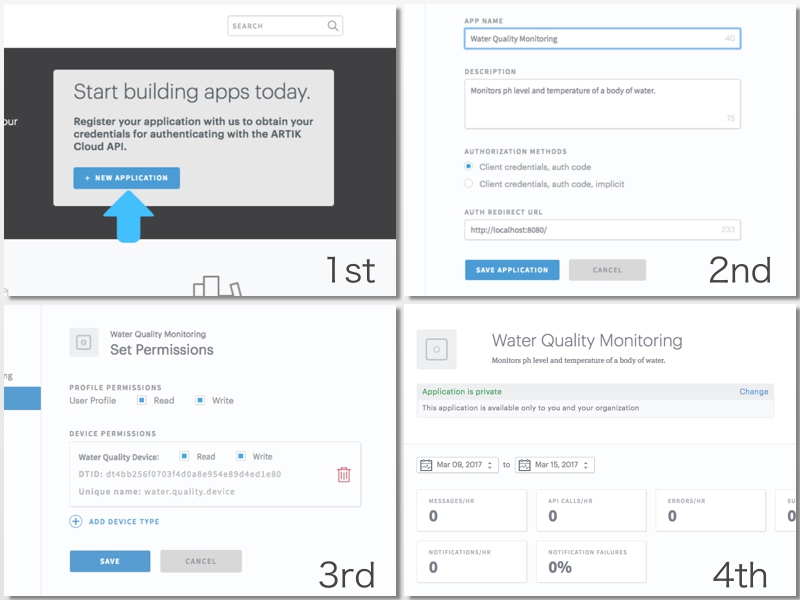

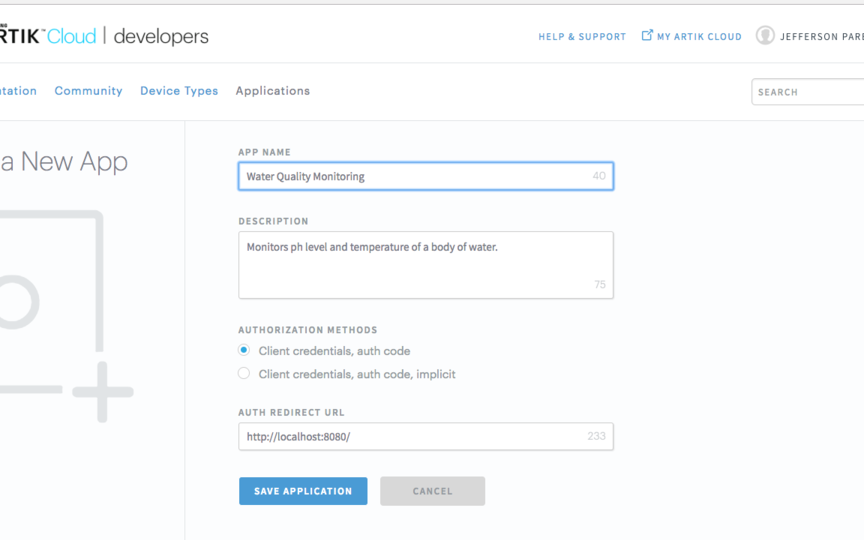
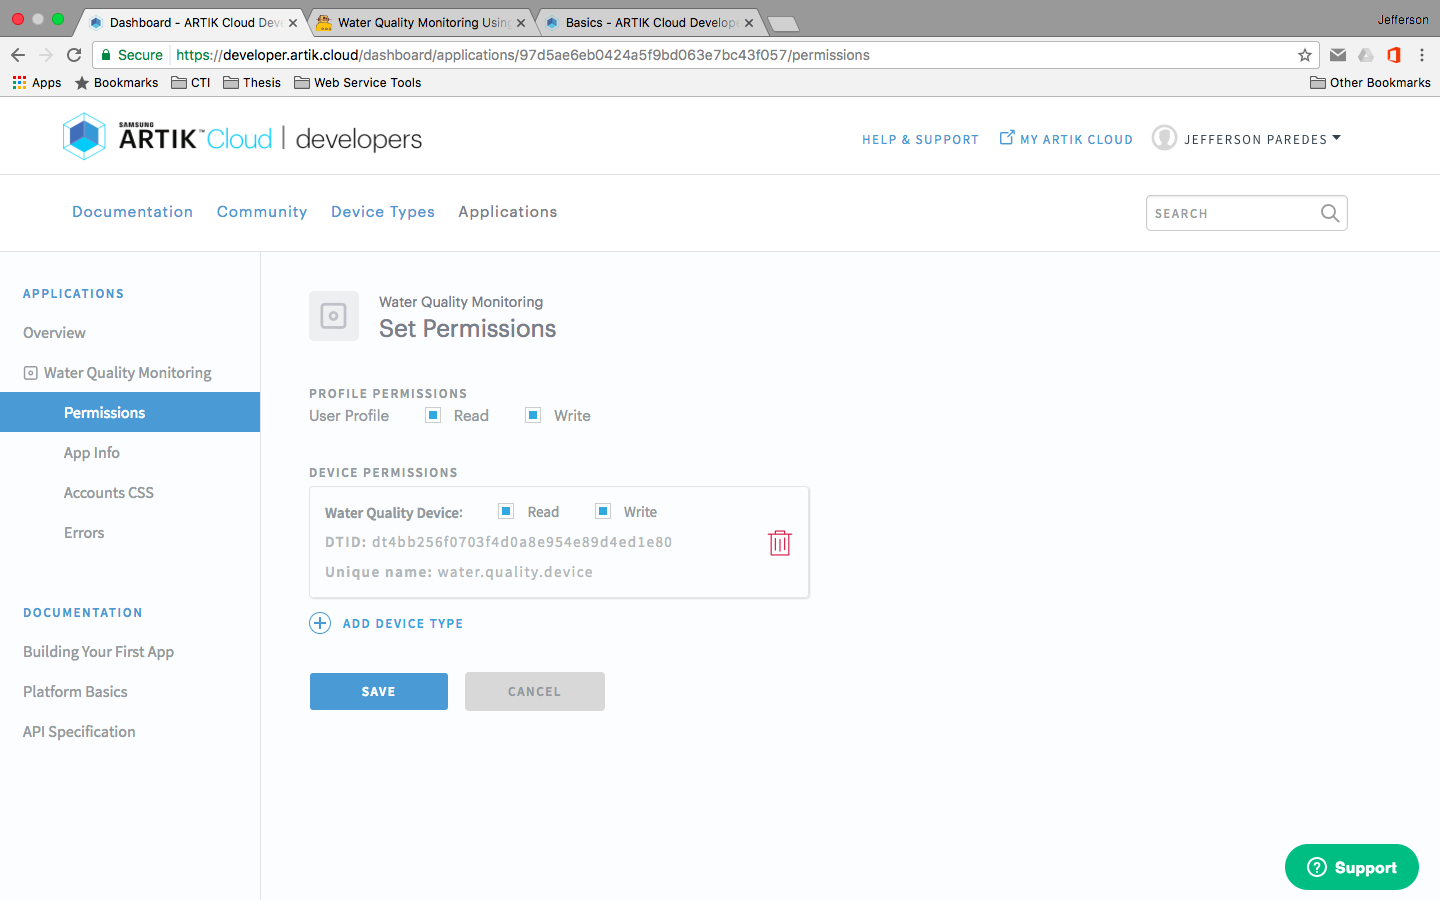
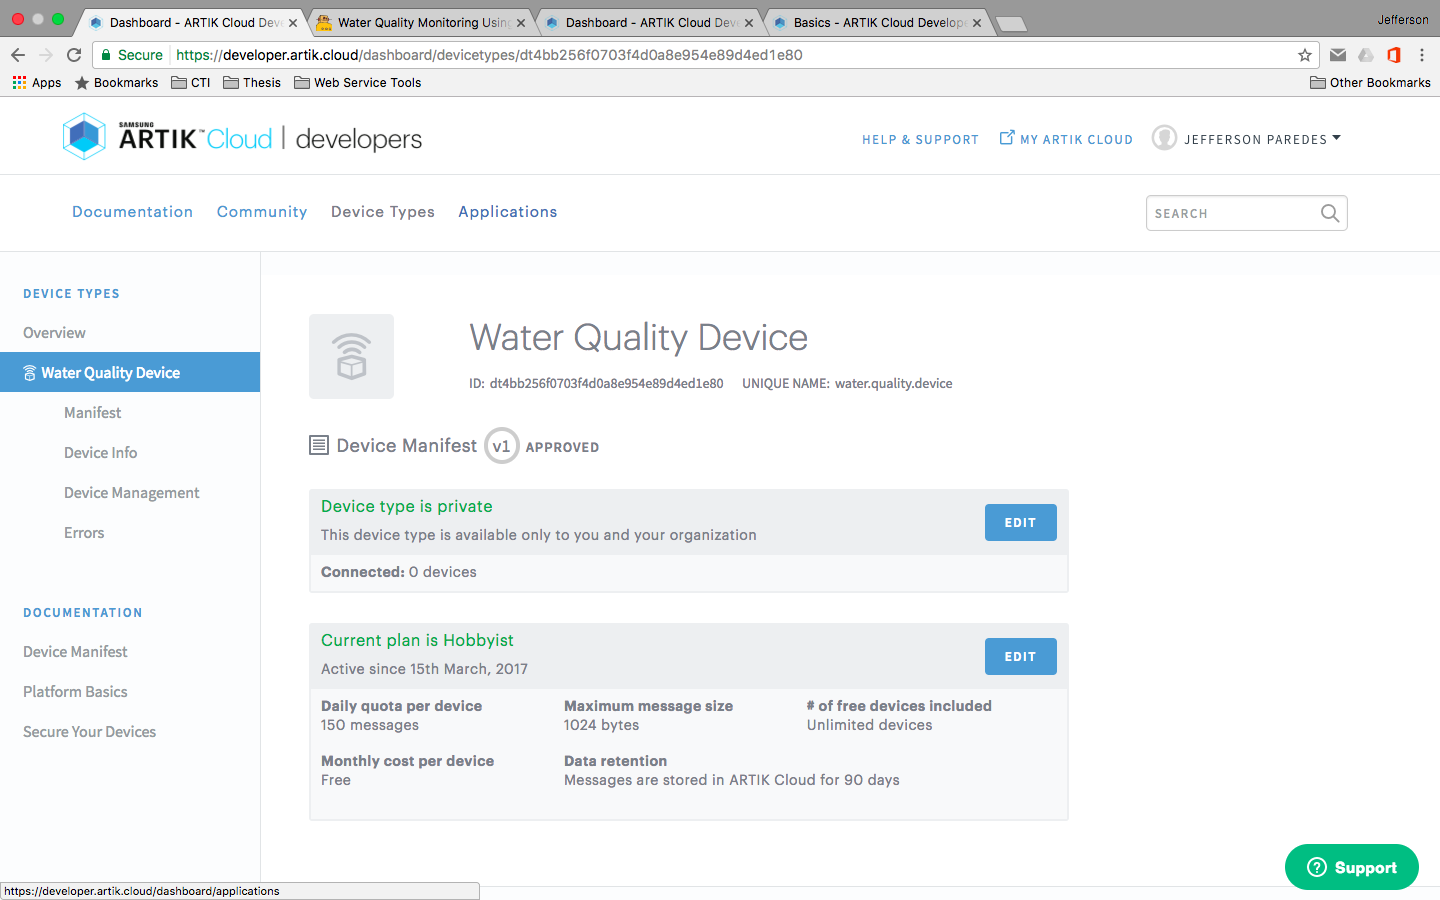
Navigate to ARTIK Cloud Applications and click new application.
Each application is assigned a unique ID by ARTIK Cloud. An application ID is required to obtain an OAuth2 access token and to request data from an application, provided that the user has granted access. learn more
Enter your desired application name and authentication redirect url.
Note that the authentication redirect url is required. It is used to authenticate the users of this application, hence will redirect to this url if in need of login. We used http://localhost/8080/ for sample.
Now set your application permission to read and write, navigate to your device then save.
Congratulation you now have your application!
Connect ARTIK Cloud to Your Device
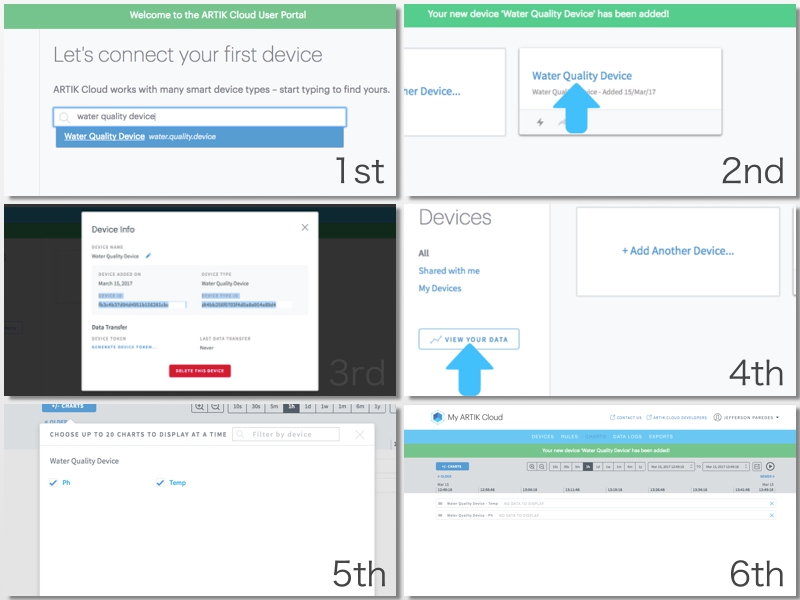
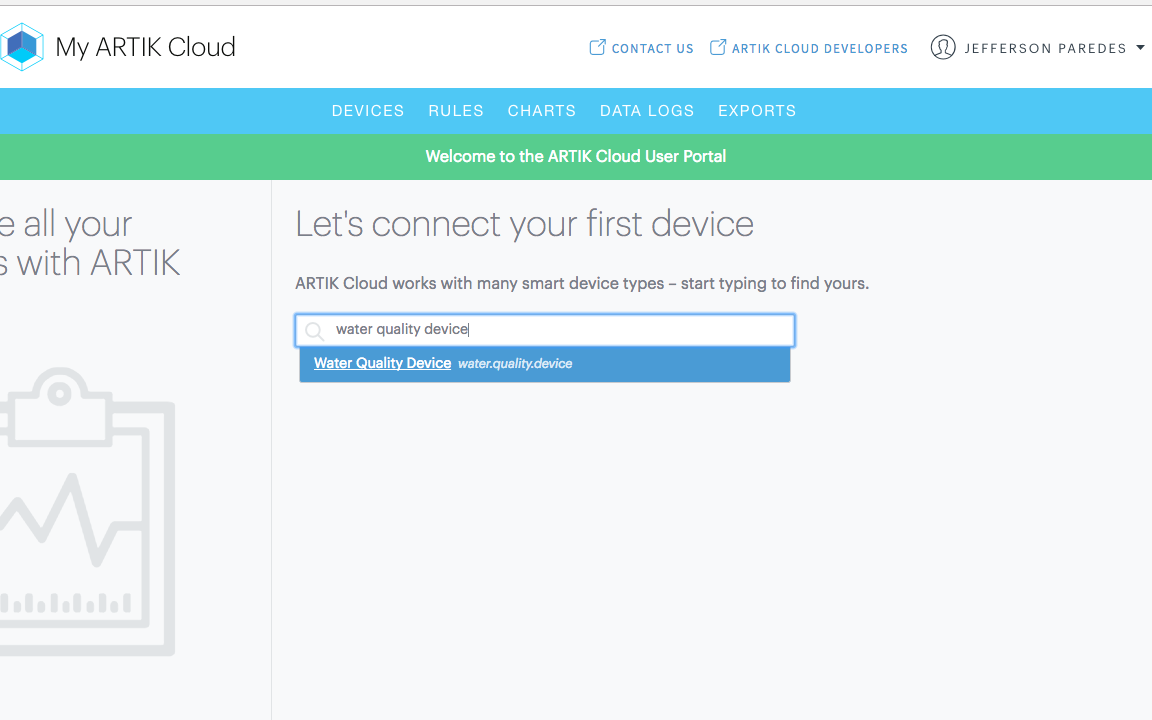
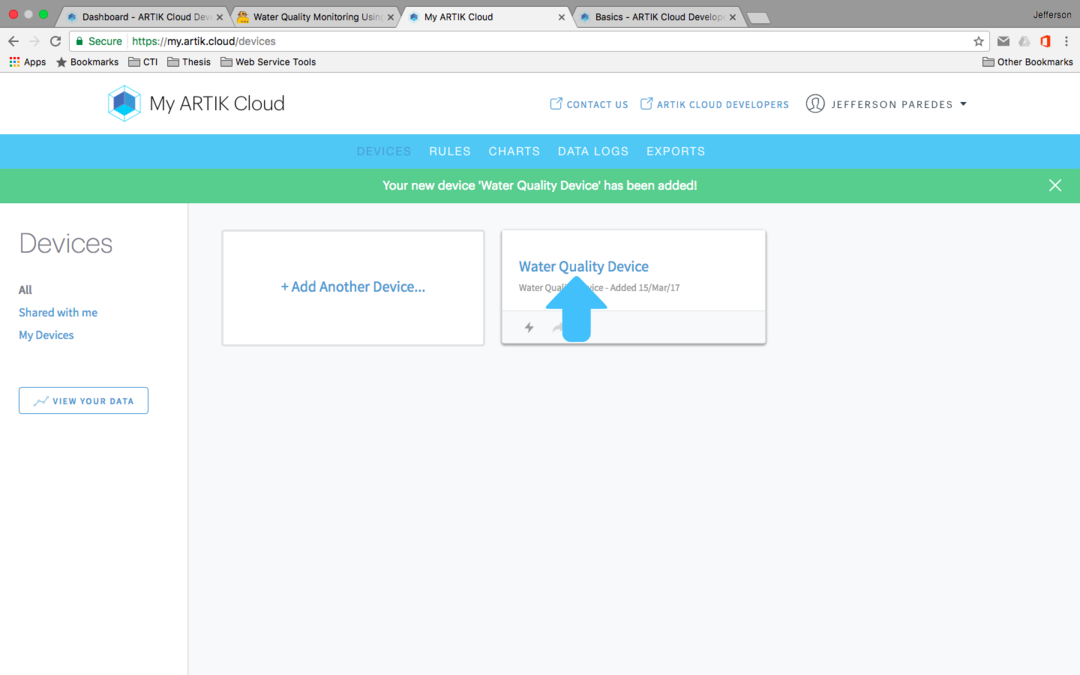
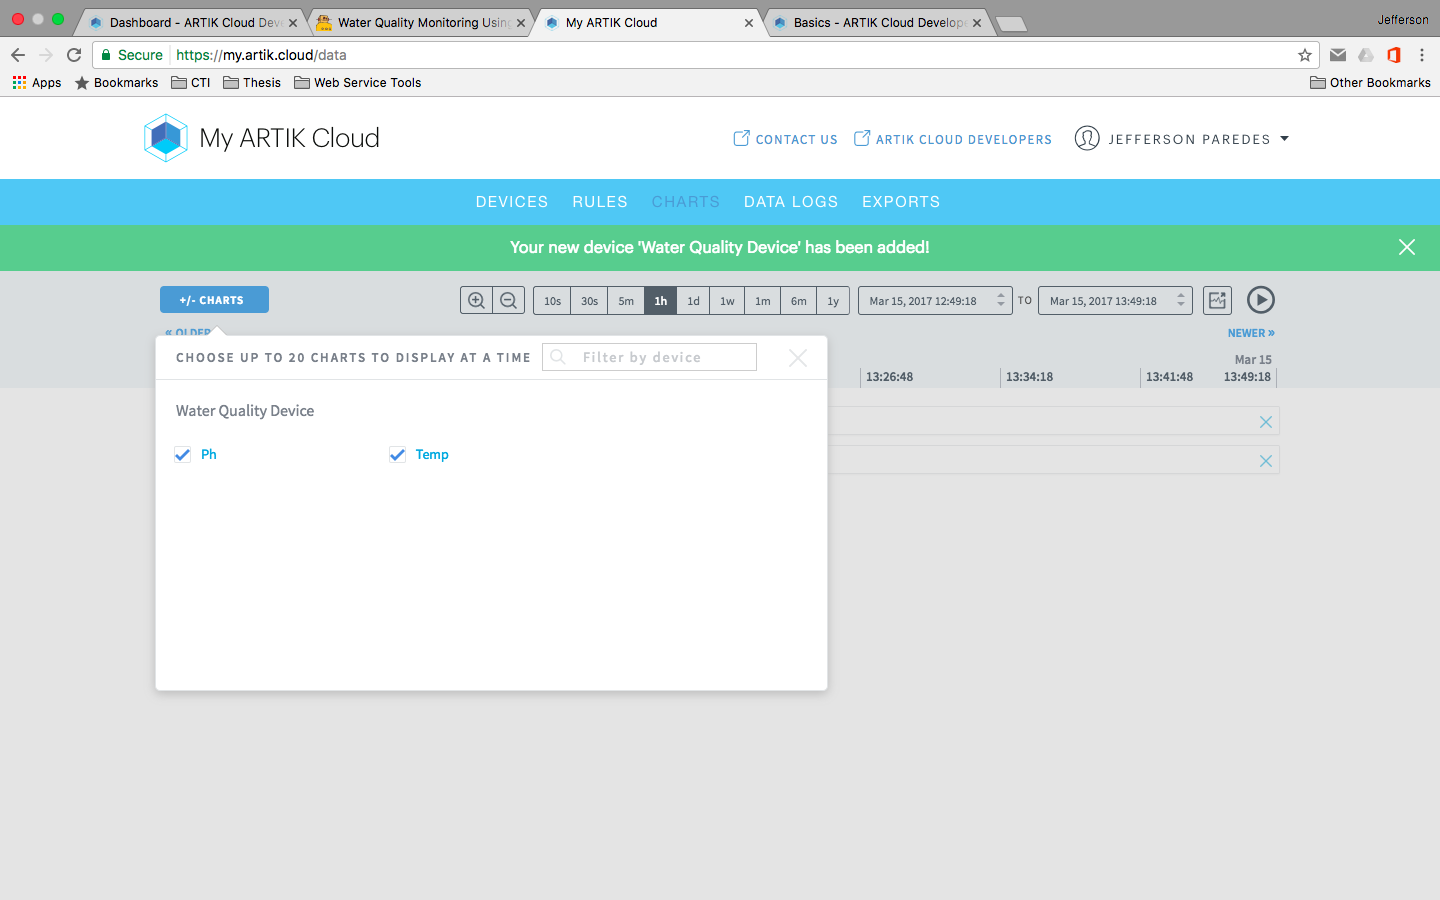
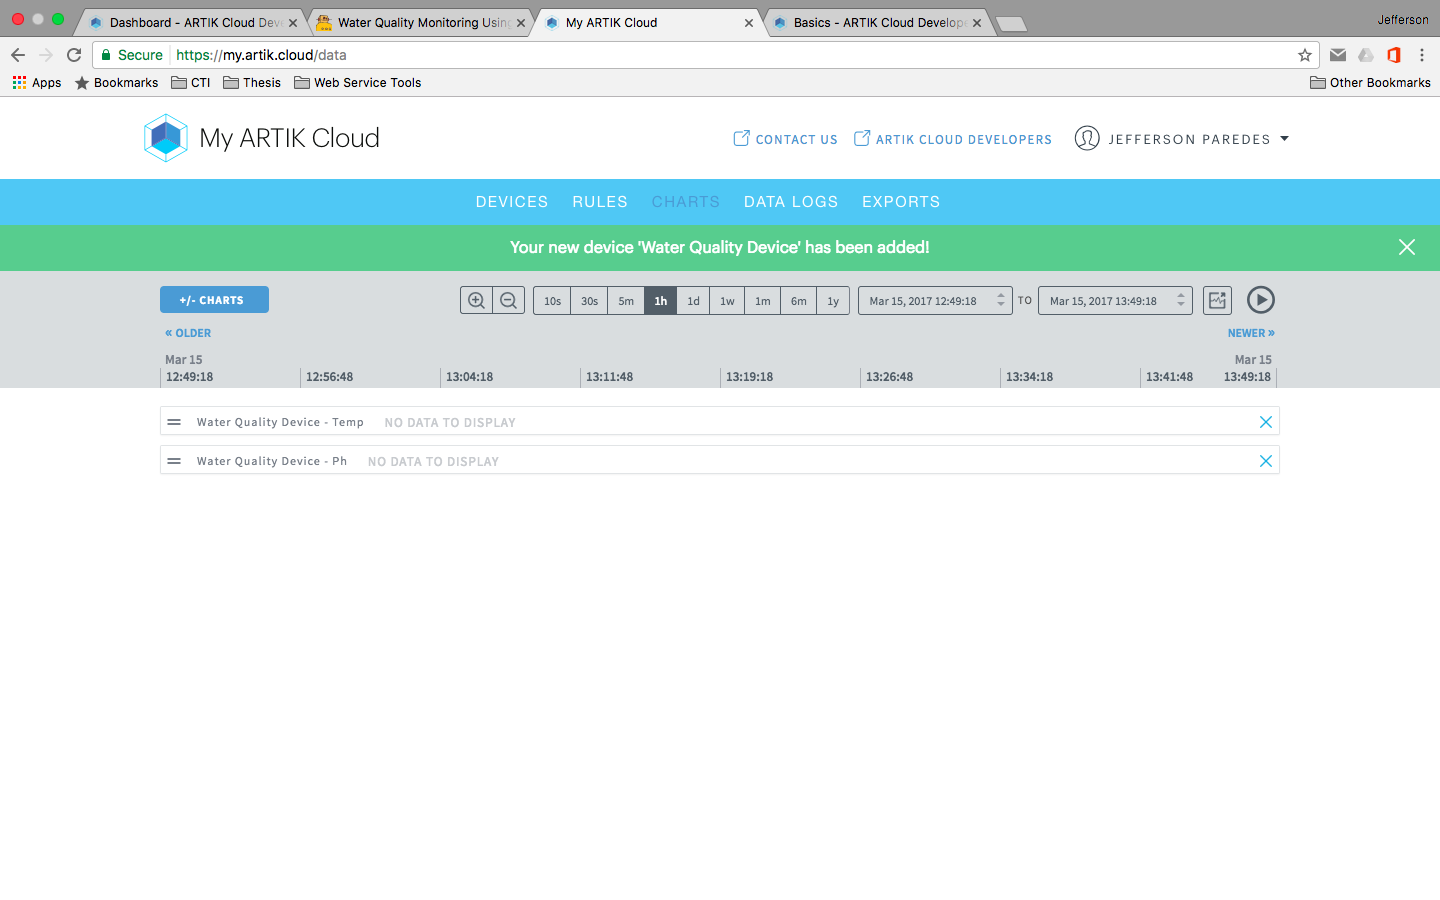
Now that your backend is ready. Lets go to your ARTIK Cloud Charts to view your data.
Navigate to my devices and click connect another device.
Search and Click your new device type created earlier then click connect device.
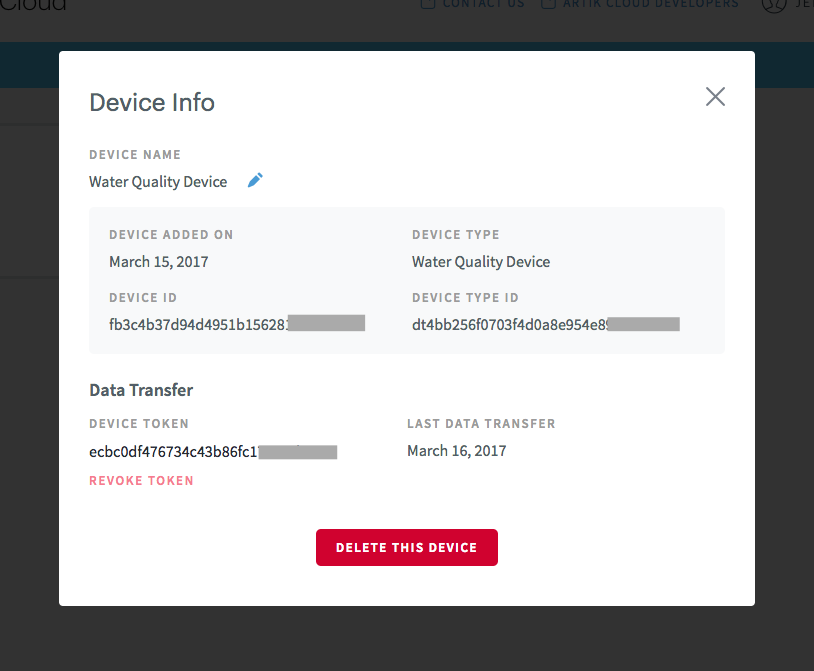
Click your connected device settings to show more info.
Take note of Device ID and Token as you will needed it on the next steps.
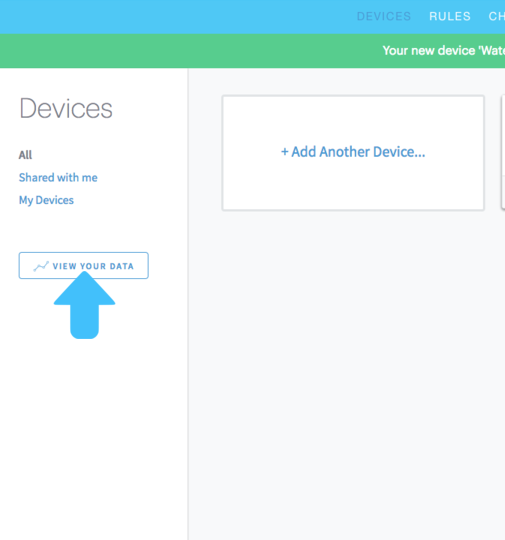
On the right side panel, click view your data.
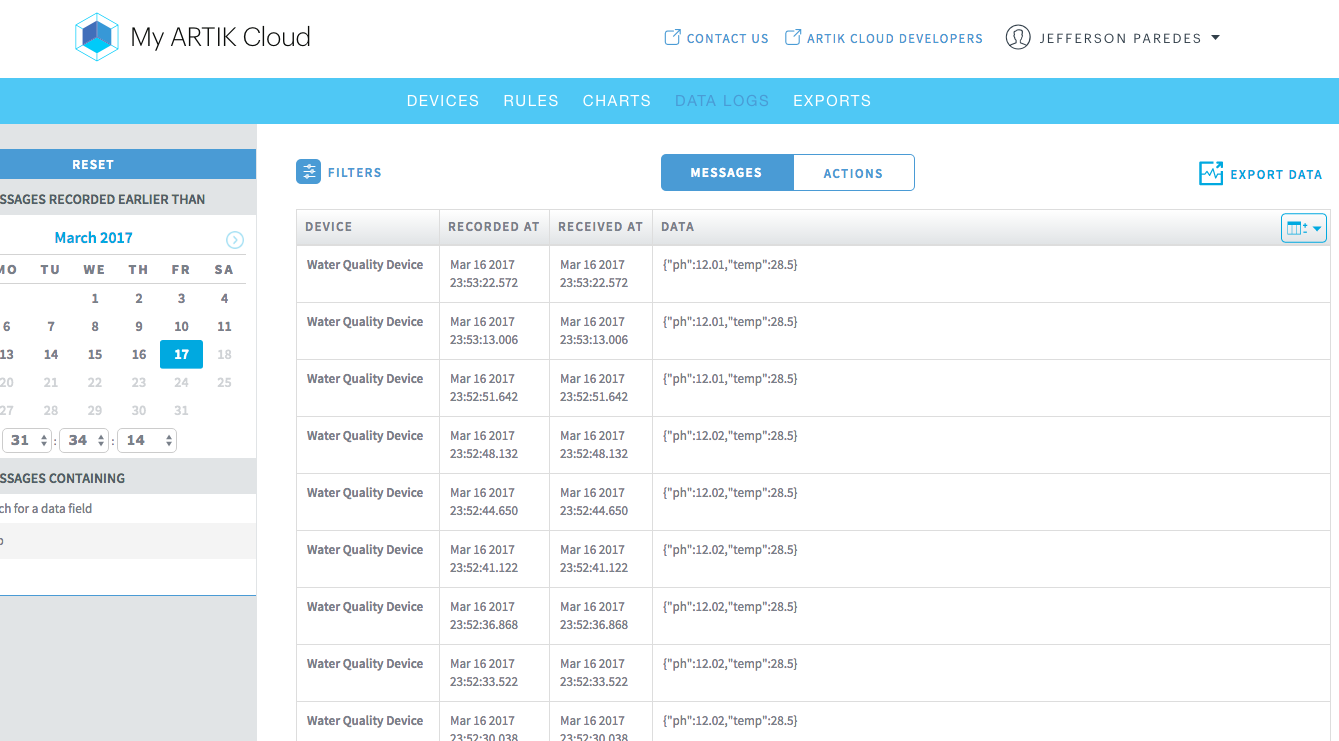
Once your hardware is up, the chart will have data.
Done for ARTIK Cloud setup. :)
Connect the Temp and PH Sensors to MKR1000.
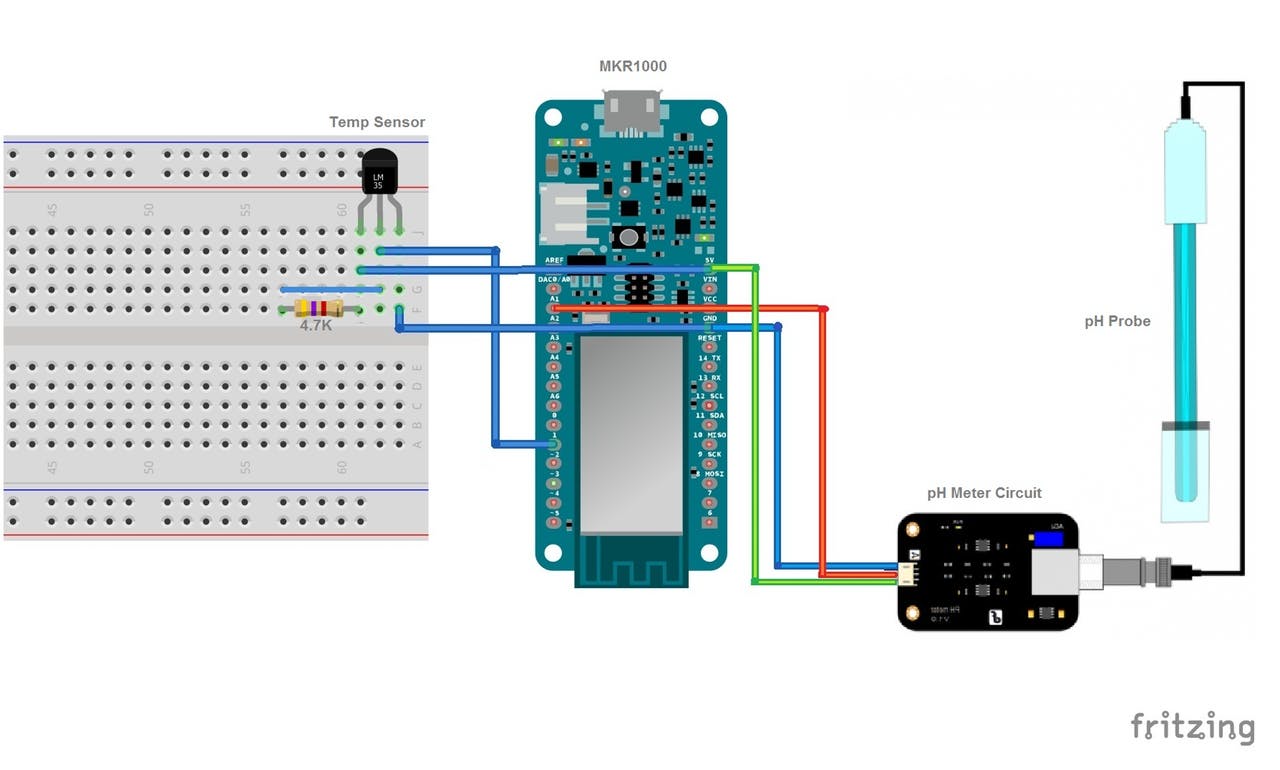
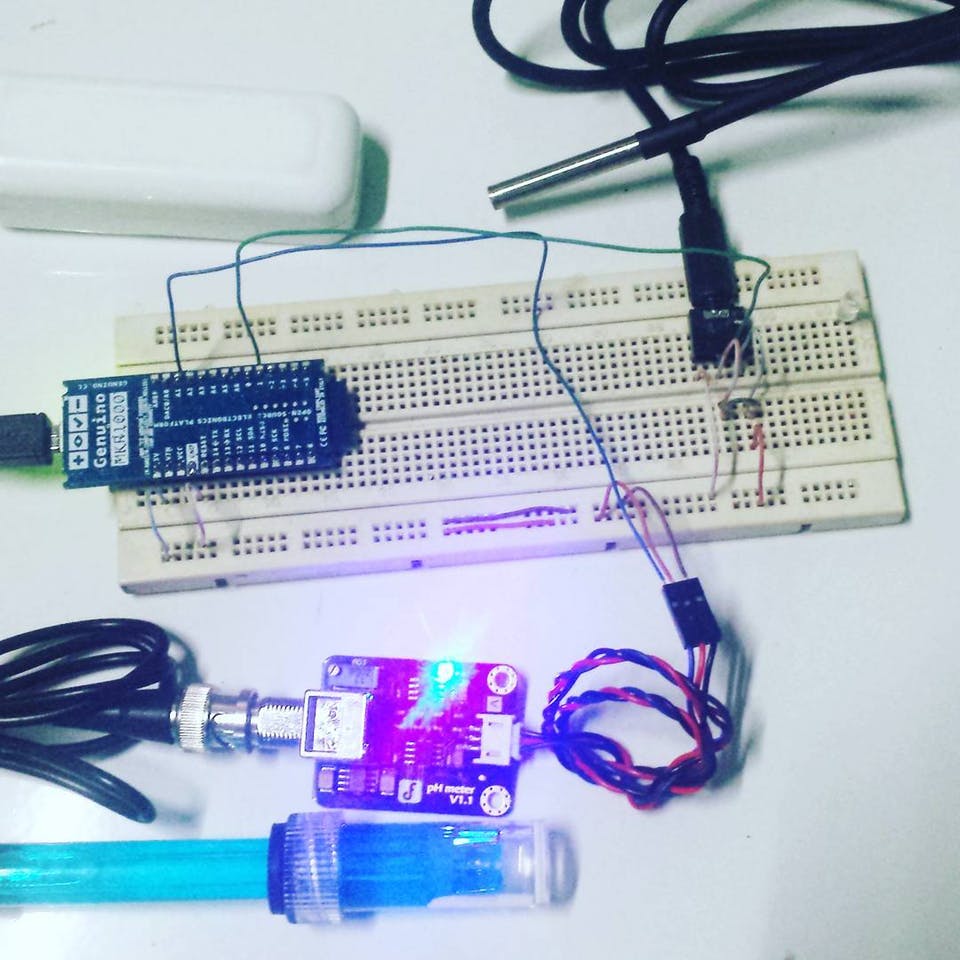
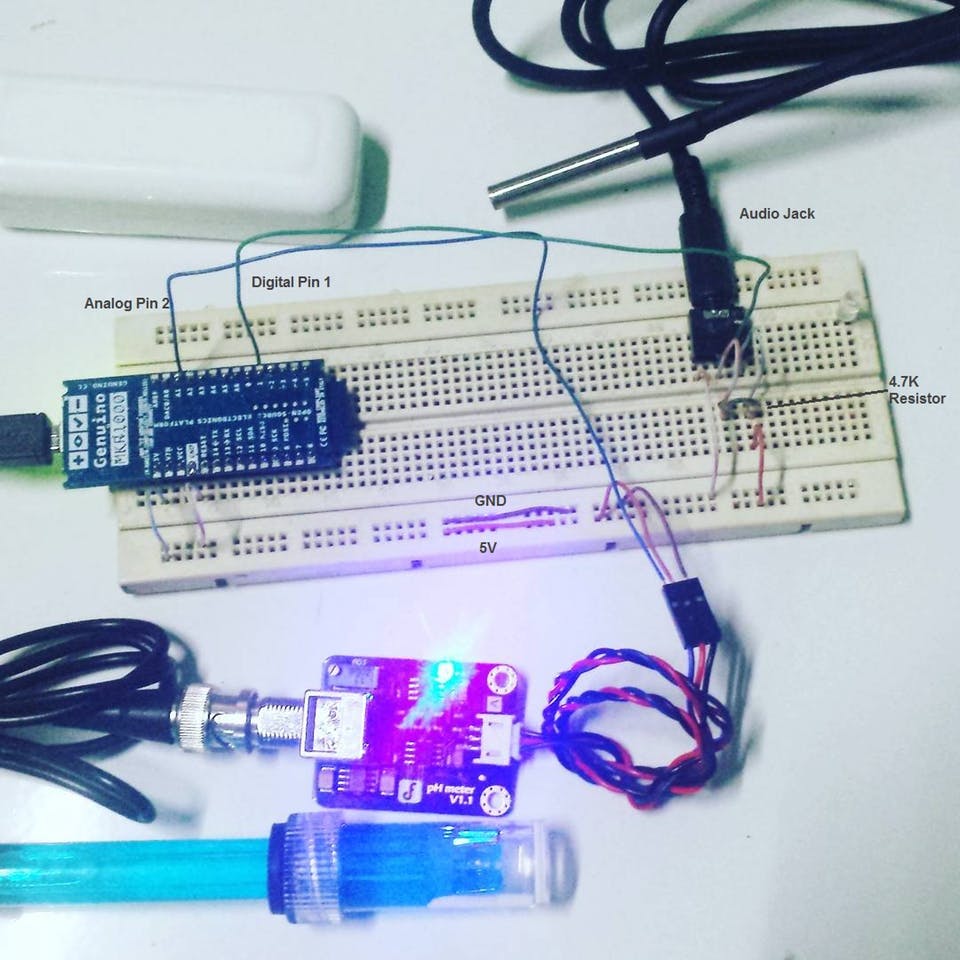
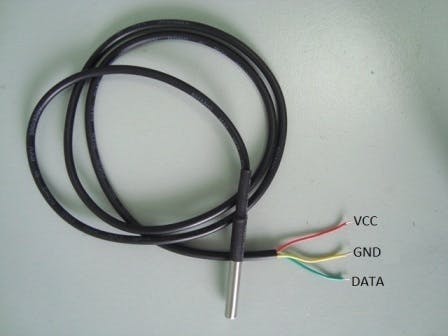
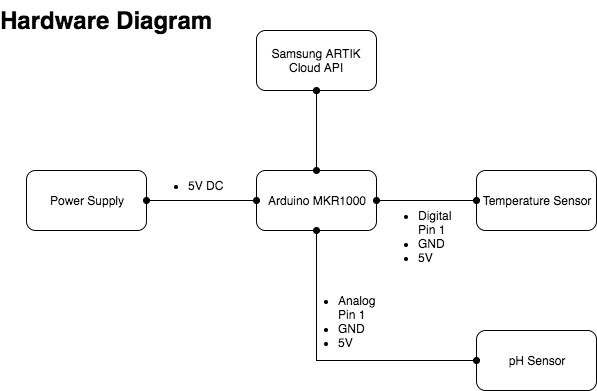
Here's the pin connection:
- Temp GND to MRK1000 GND
- Temp OUT to MKR1000 Digital pin 1
- Temp VCC to MKR1000 5V
- Connect a 4.7K resistor to Temp VCC and Temp OUT
- pH GND to MRK1000 GND
- pH OUT to MKR1000 Analog pin 1
- pH VCC to MKR1000 5V
Optional: We used an audio male and female connector for easy detaching of temperature probe.
Take a look at the images for more detailed instruction.
Setup Your Arduino IDE Board Manager
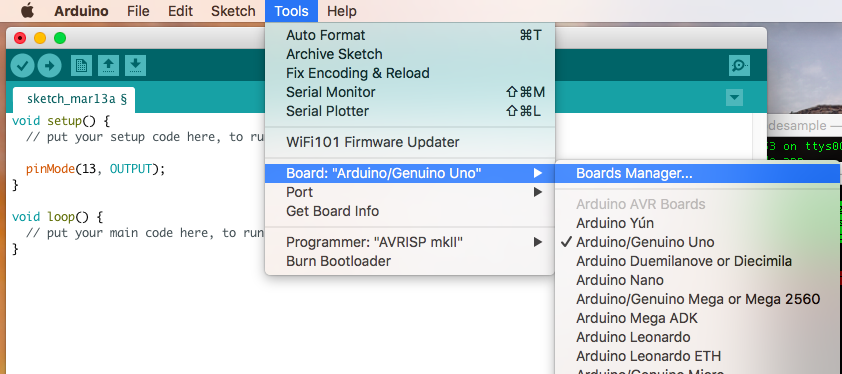
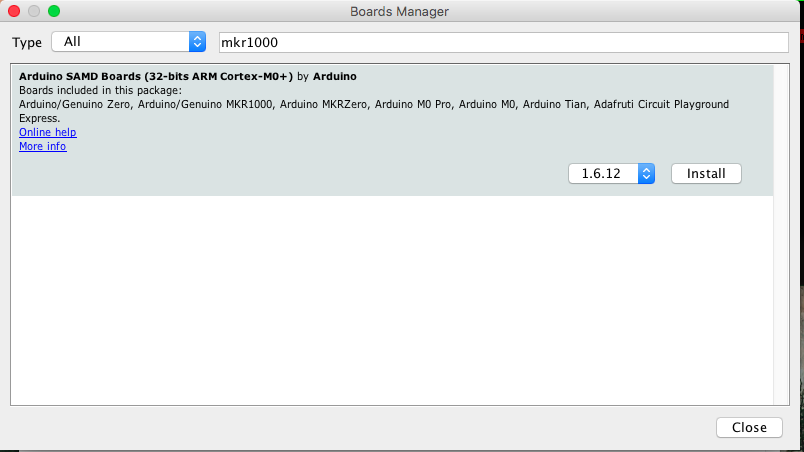
If you have already installed MKR1000 Board please skip this step.
Open your Arduino IDE.
Navigate to Tools> Board > Board Manager.
Then search for mkr1000.
Install the Arduino SAMD Board, it can support both Zero and MKR1000.
Add Required Libraries
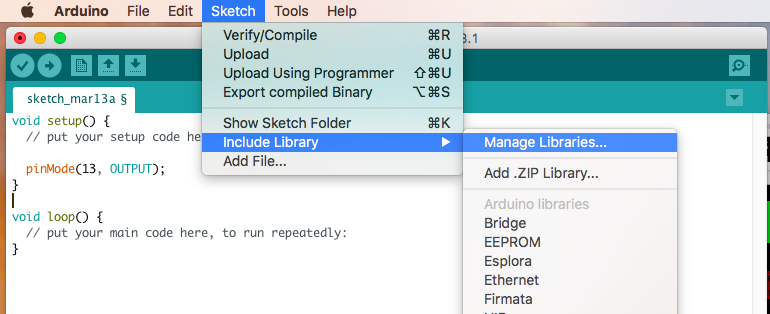
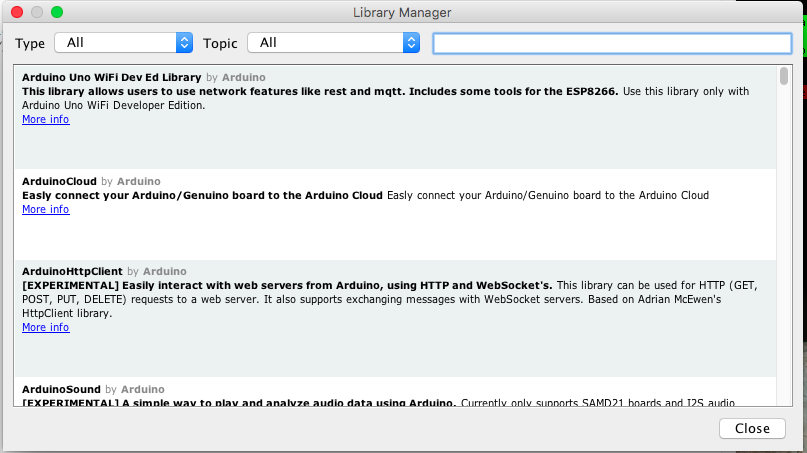
In order for our sensors and wifi to work, we will be needing the following libraries.
- FlashStorage - used to save the offset of pH calibration
- ArduinoThread - used it to read sensors in a separate thread.
- ArduinoJson - we'll be using this to send JSON data to ARTIK Cloud
- WiFi101 - used to enable wifi connection with mkr1000
- ArduinoHttpClient - host for connecting to API
- OneWire - needed to read digital input from Temperature sensor
- DallasTemperature - Dallas Temperature sensor required library
Navigate to Sketch >Include Library >Manage Libraries
Look for these libraries and download them.
Upload the Arduino Code
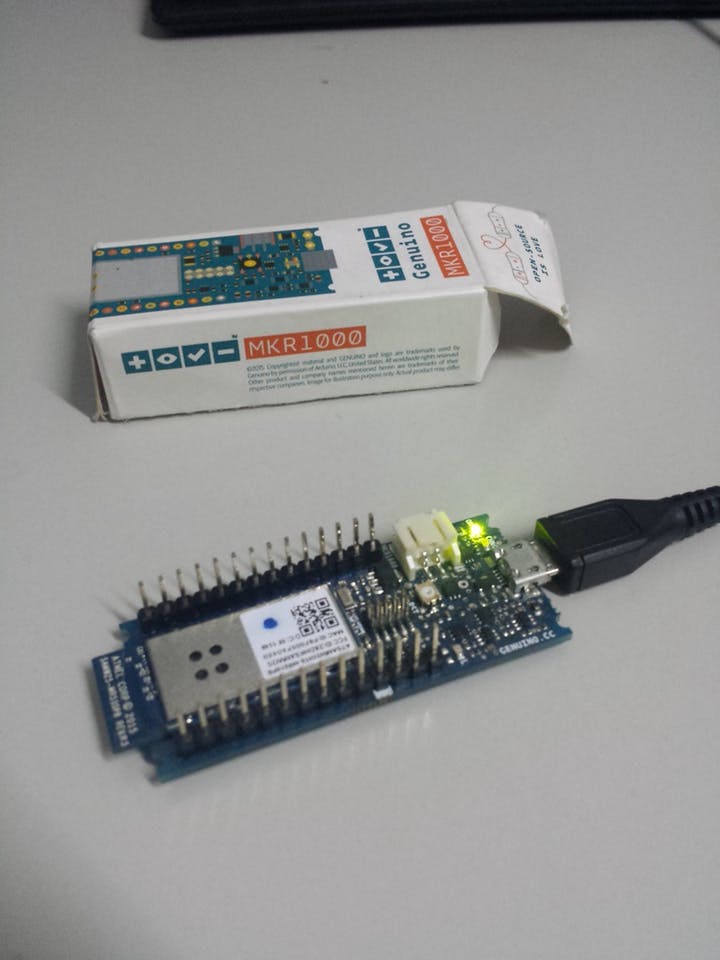
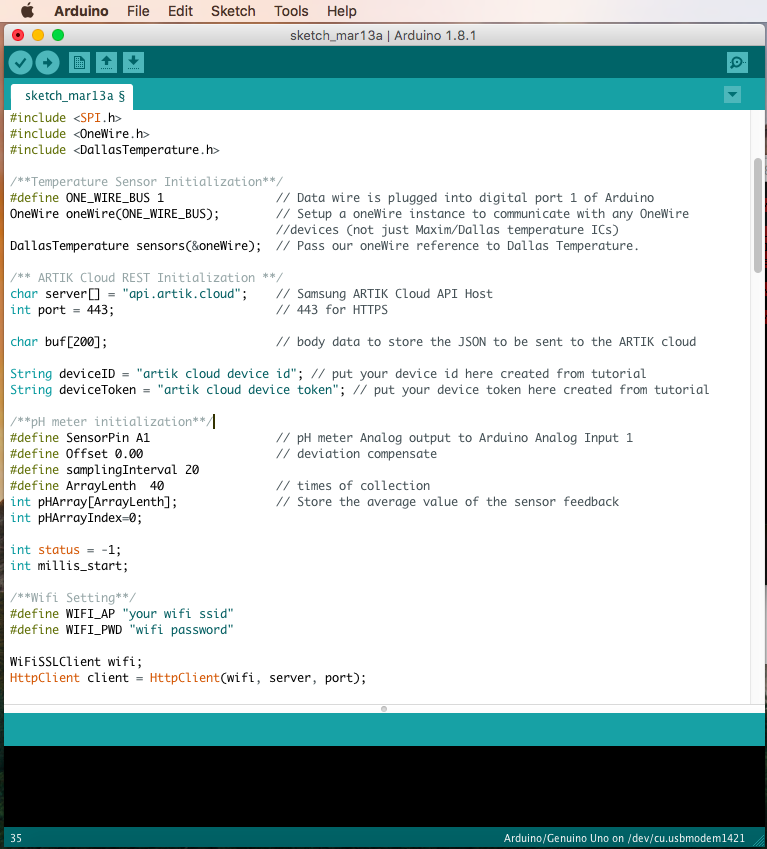
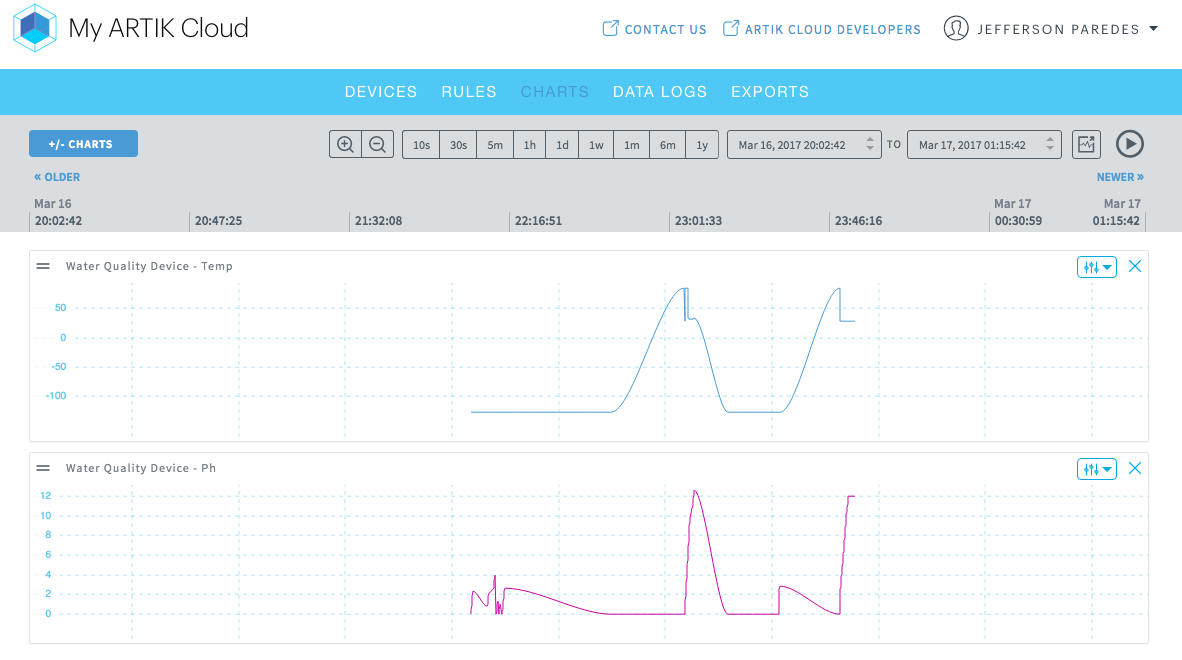
Now plug the MKR1000 to your PC/Laptop.
Your Arduino should automatically detect your MKR1000.
Otherwise set is manually.
Download the software on my GitHub here
Change your own ARTIK Cloud device id and token.
String deviceID = "artik cloud device id"; // put your device id here created from tutorial <br>String deviceToken = "artik cloud device token"; // put your device token here created from tutorial
Change your own wifi ssid/name and password.
/**Wifi Setting**/<br>#define WIFI_AP "your wifi ssid"
#define WIFI_PWD "wifi password"
Then Upload the Software Code to MKR1000 and start monitoring.
I add more tutorials of the code as soon.
Your WiFi must have internet connection
Go back to your ARTIK Cloud and check for running data.
I have integrated the calibration method from DFRobot to my code.
If your want to calibrate your pH Sensor, follow their Method 1 here.
Congratulations! You have successfully connected your Sensors over the cloud!.
Make It Portable! - Detachable Temperature Sensor
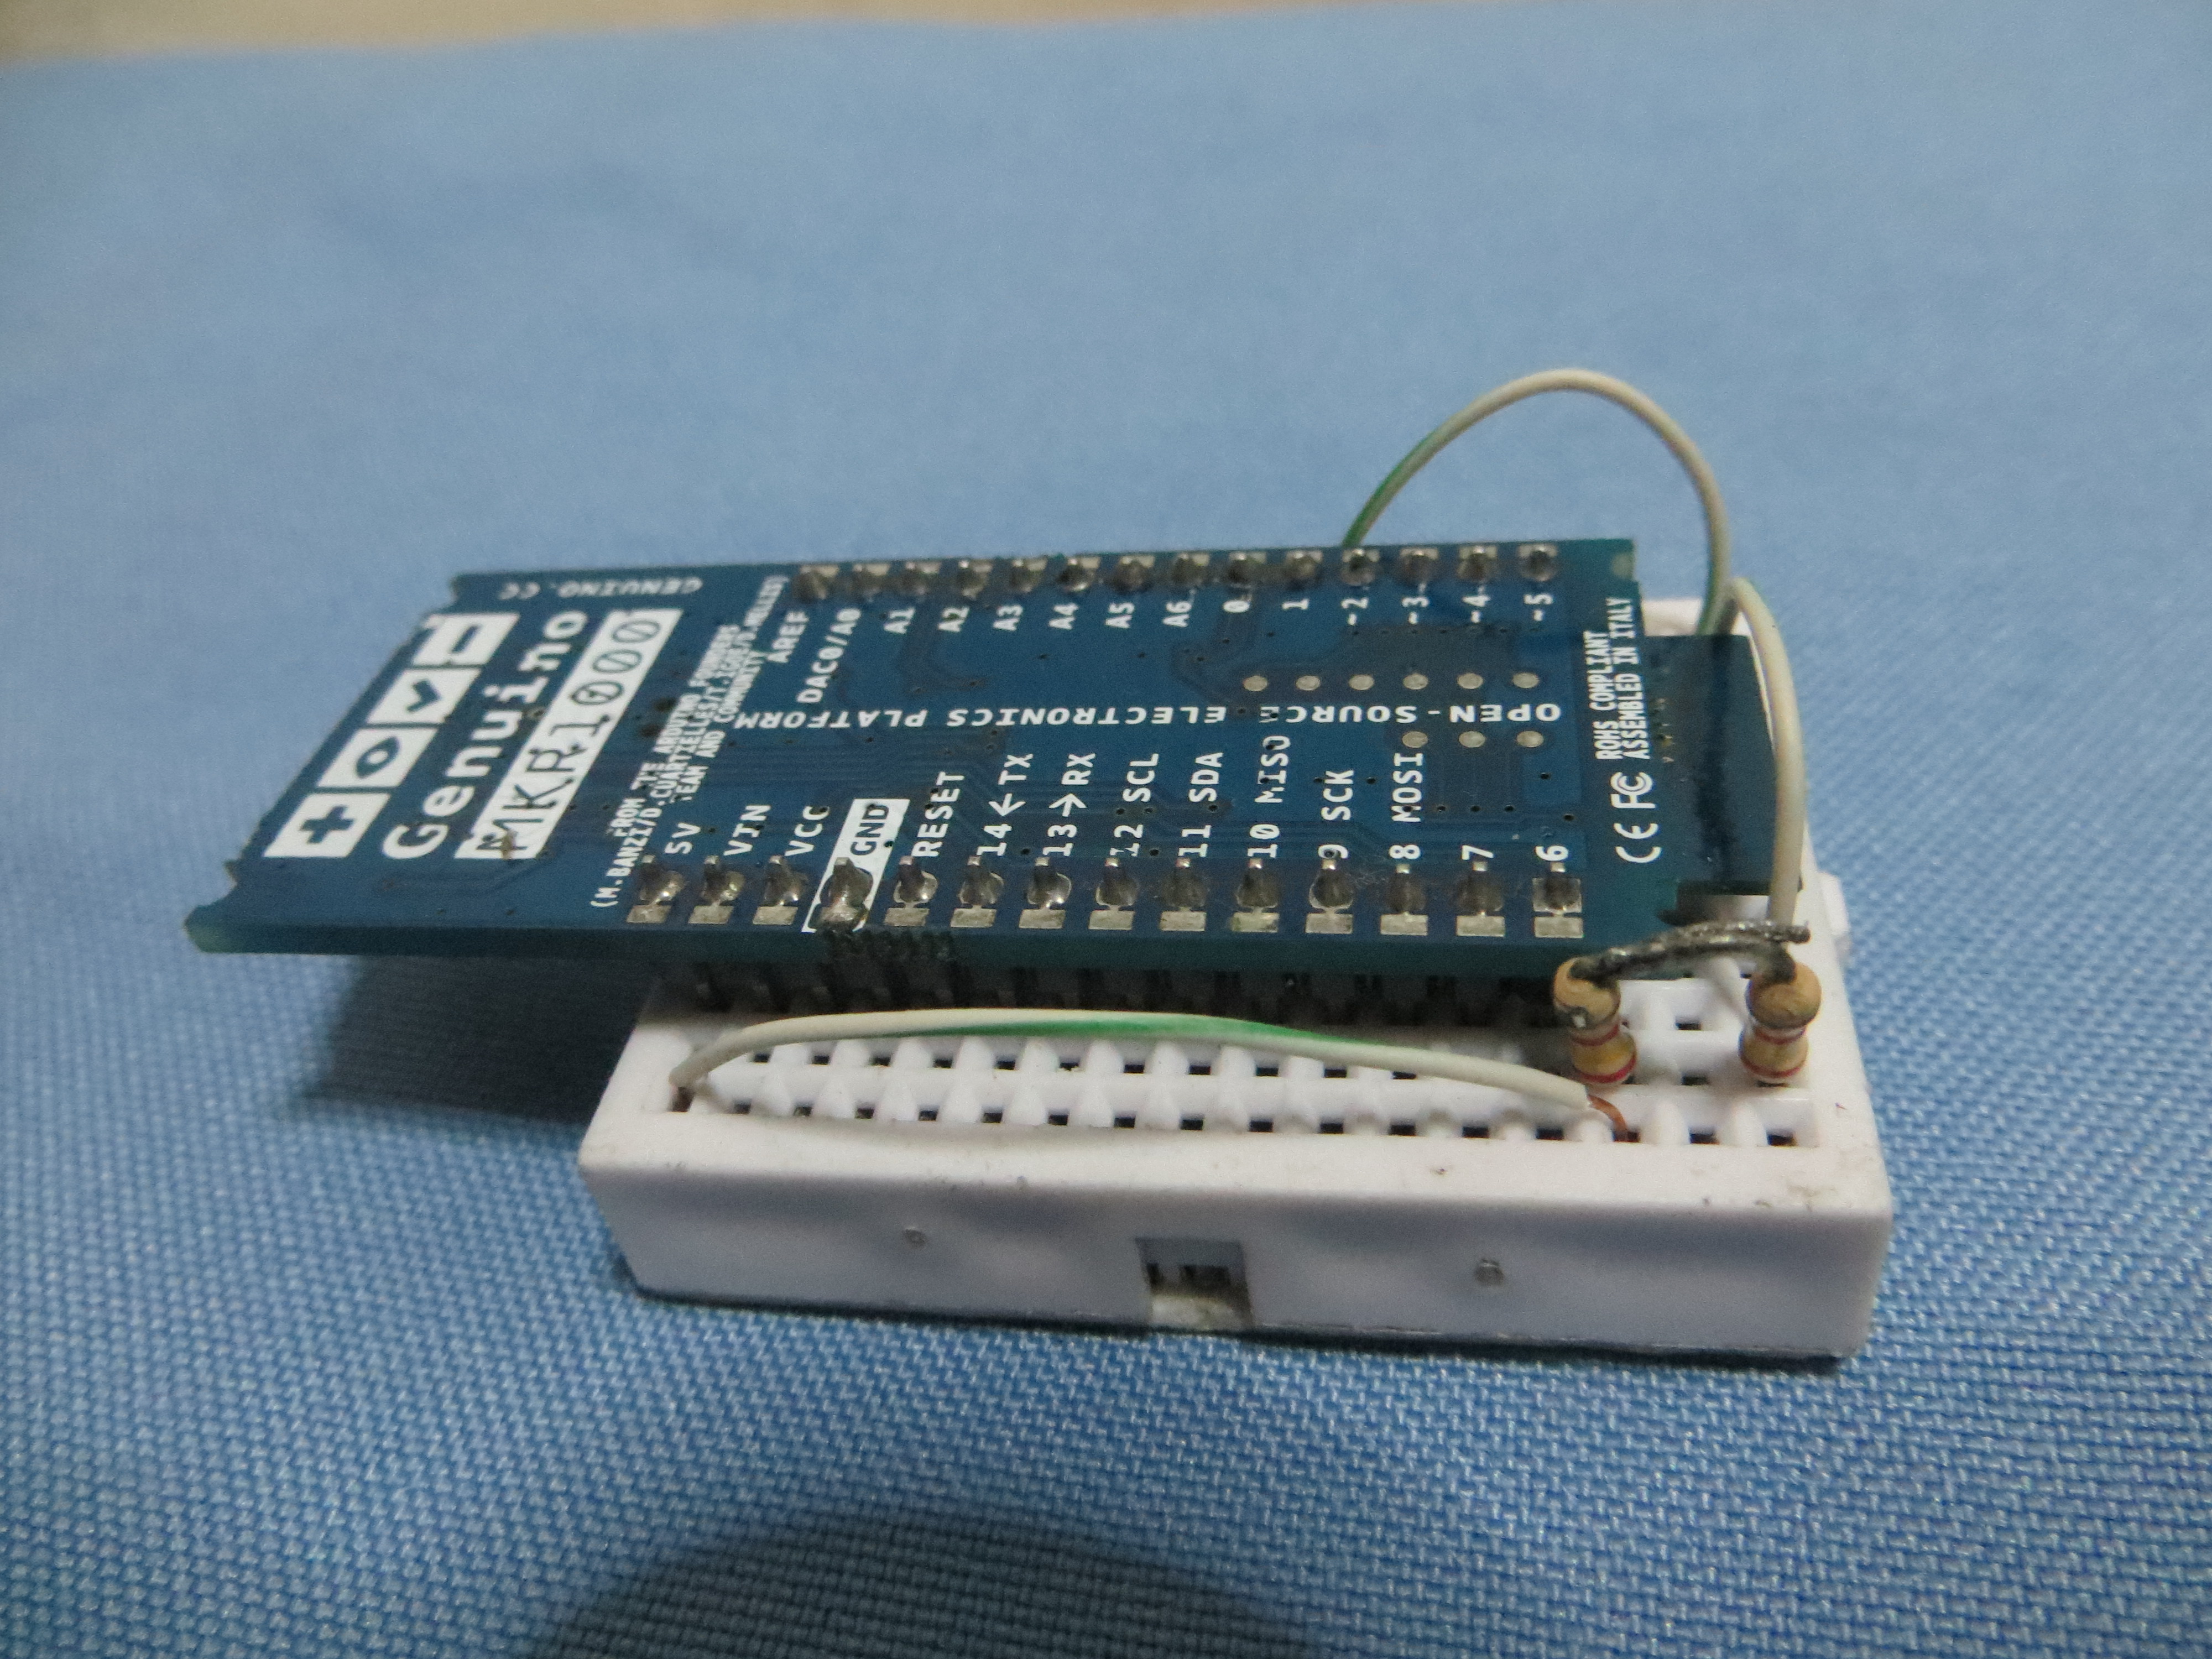
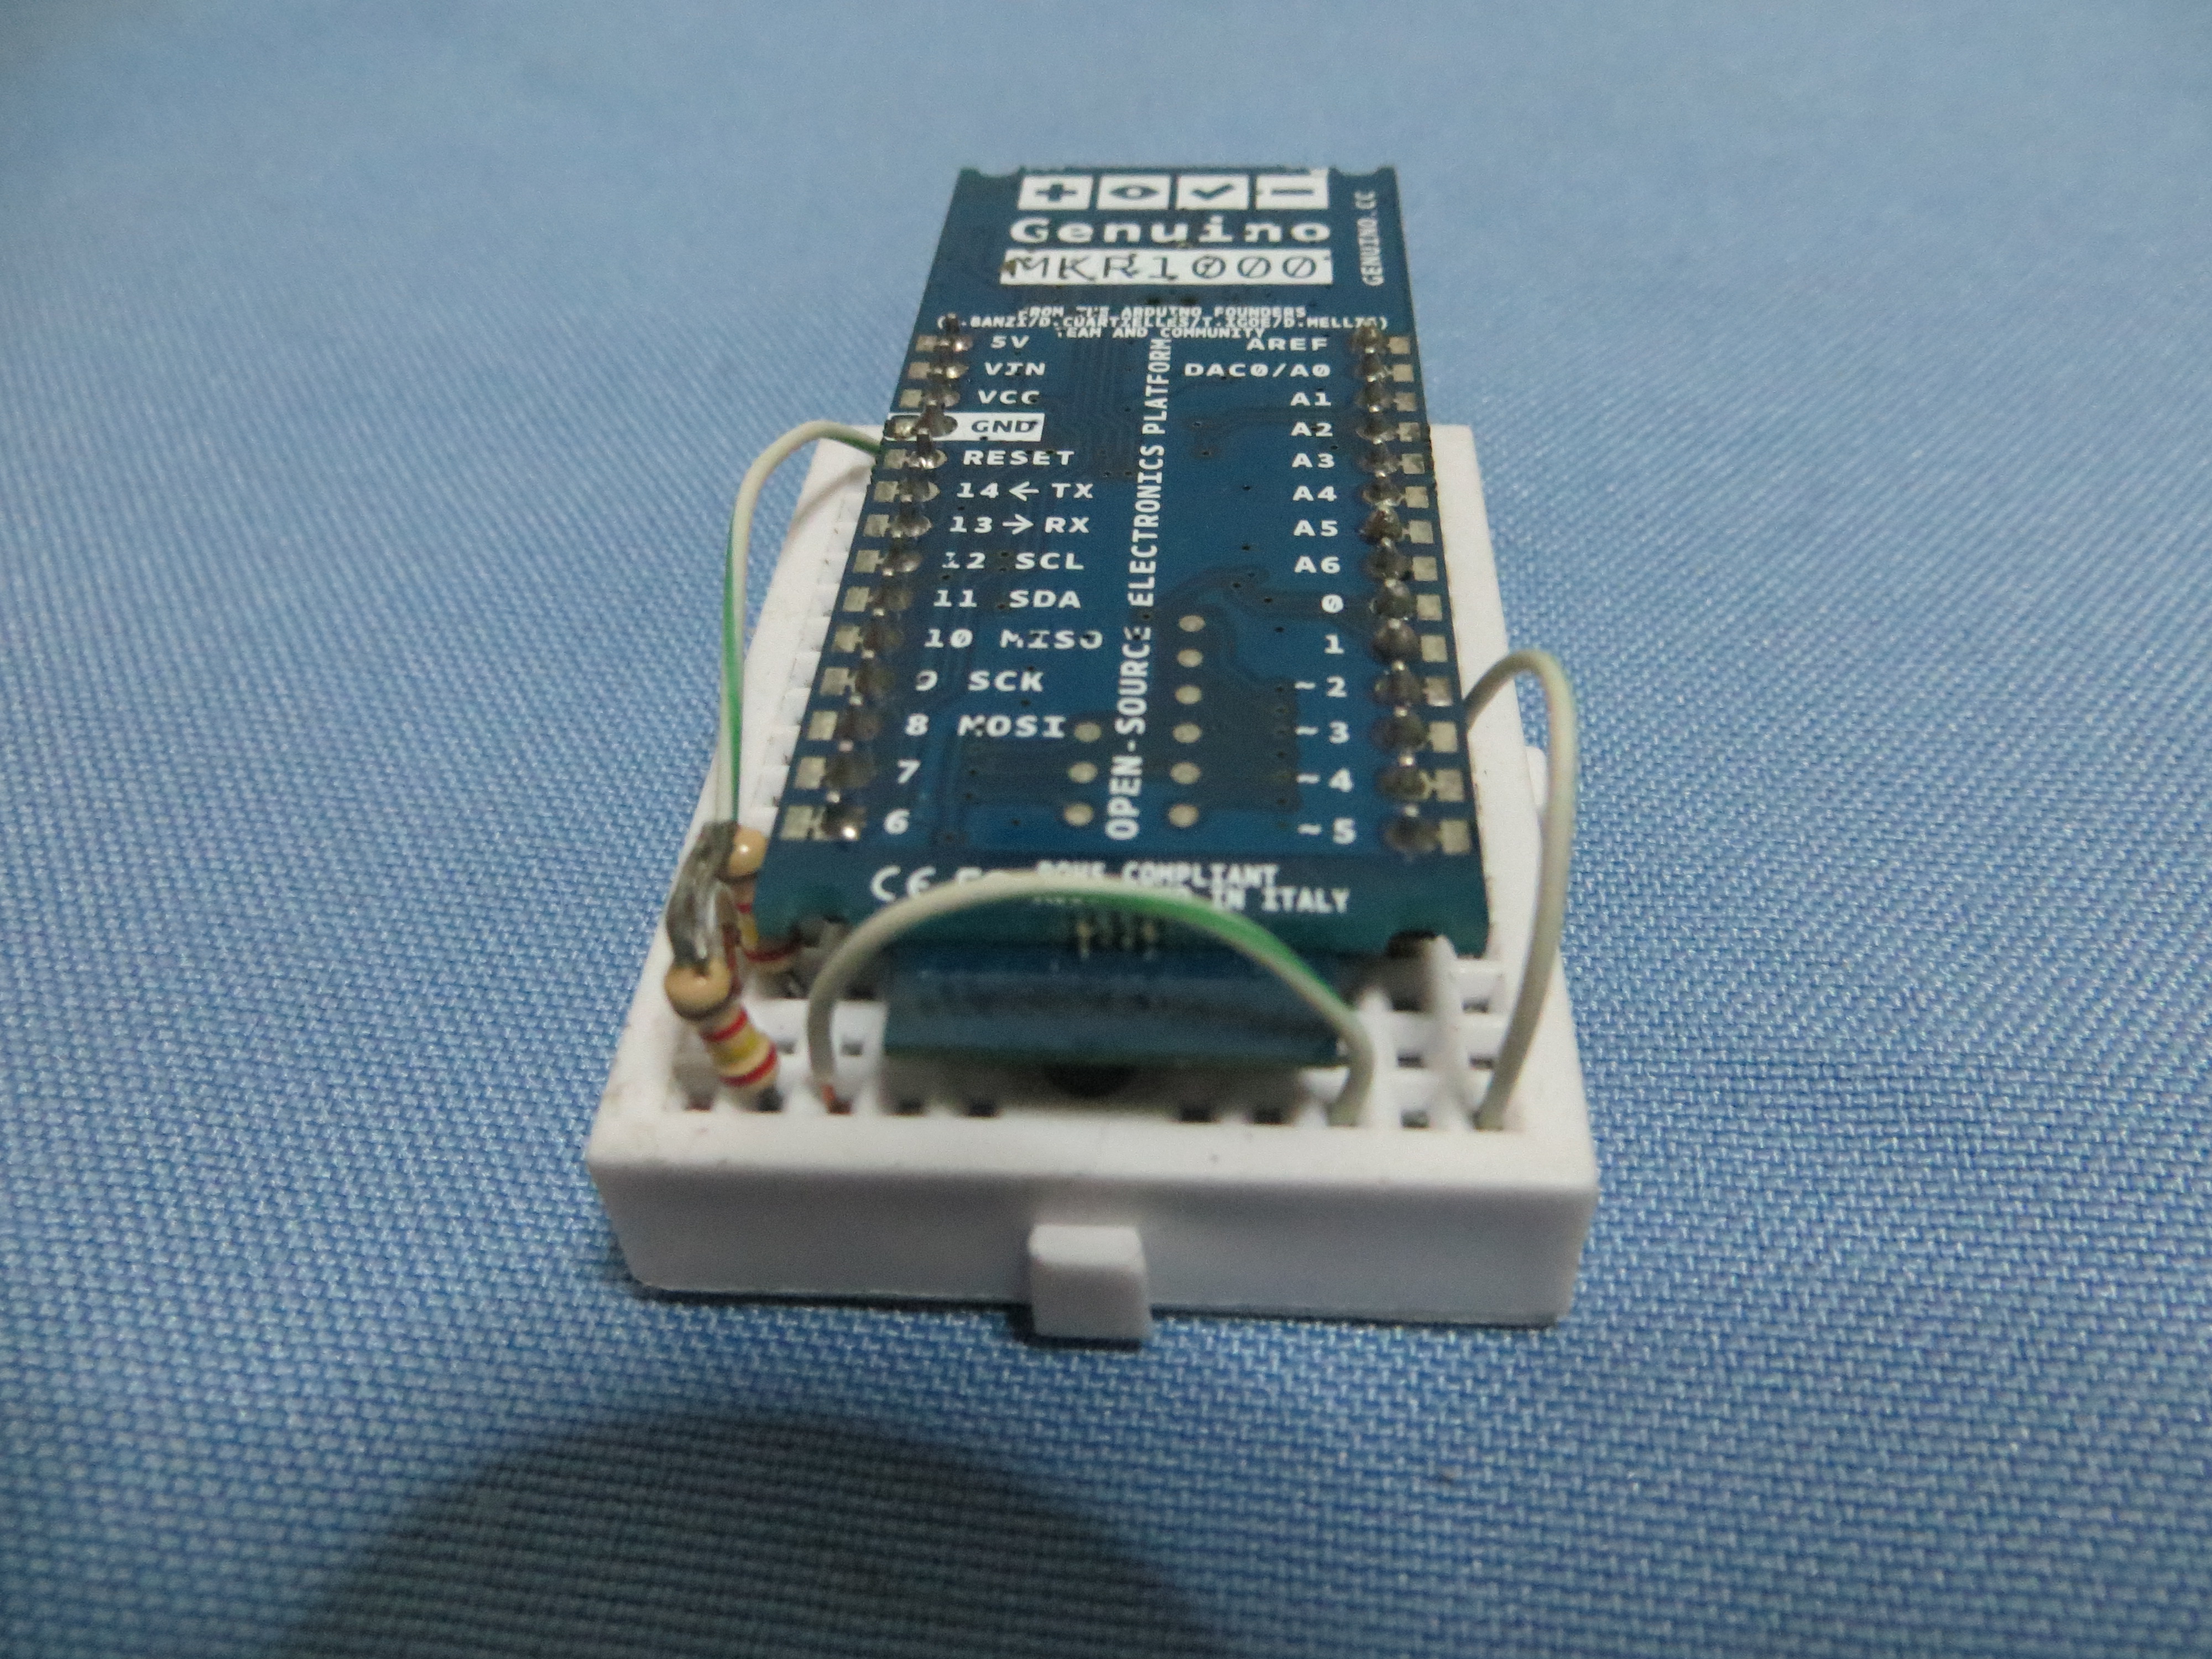
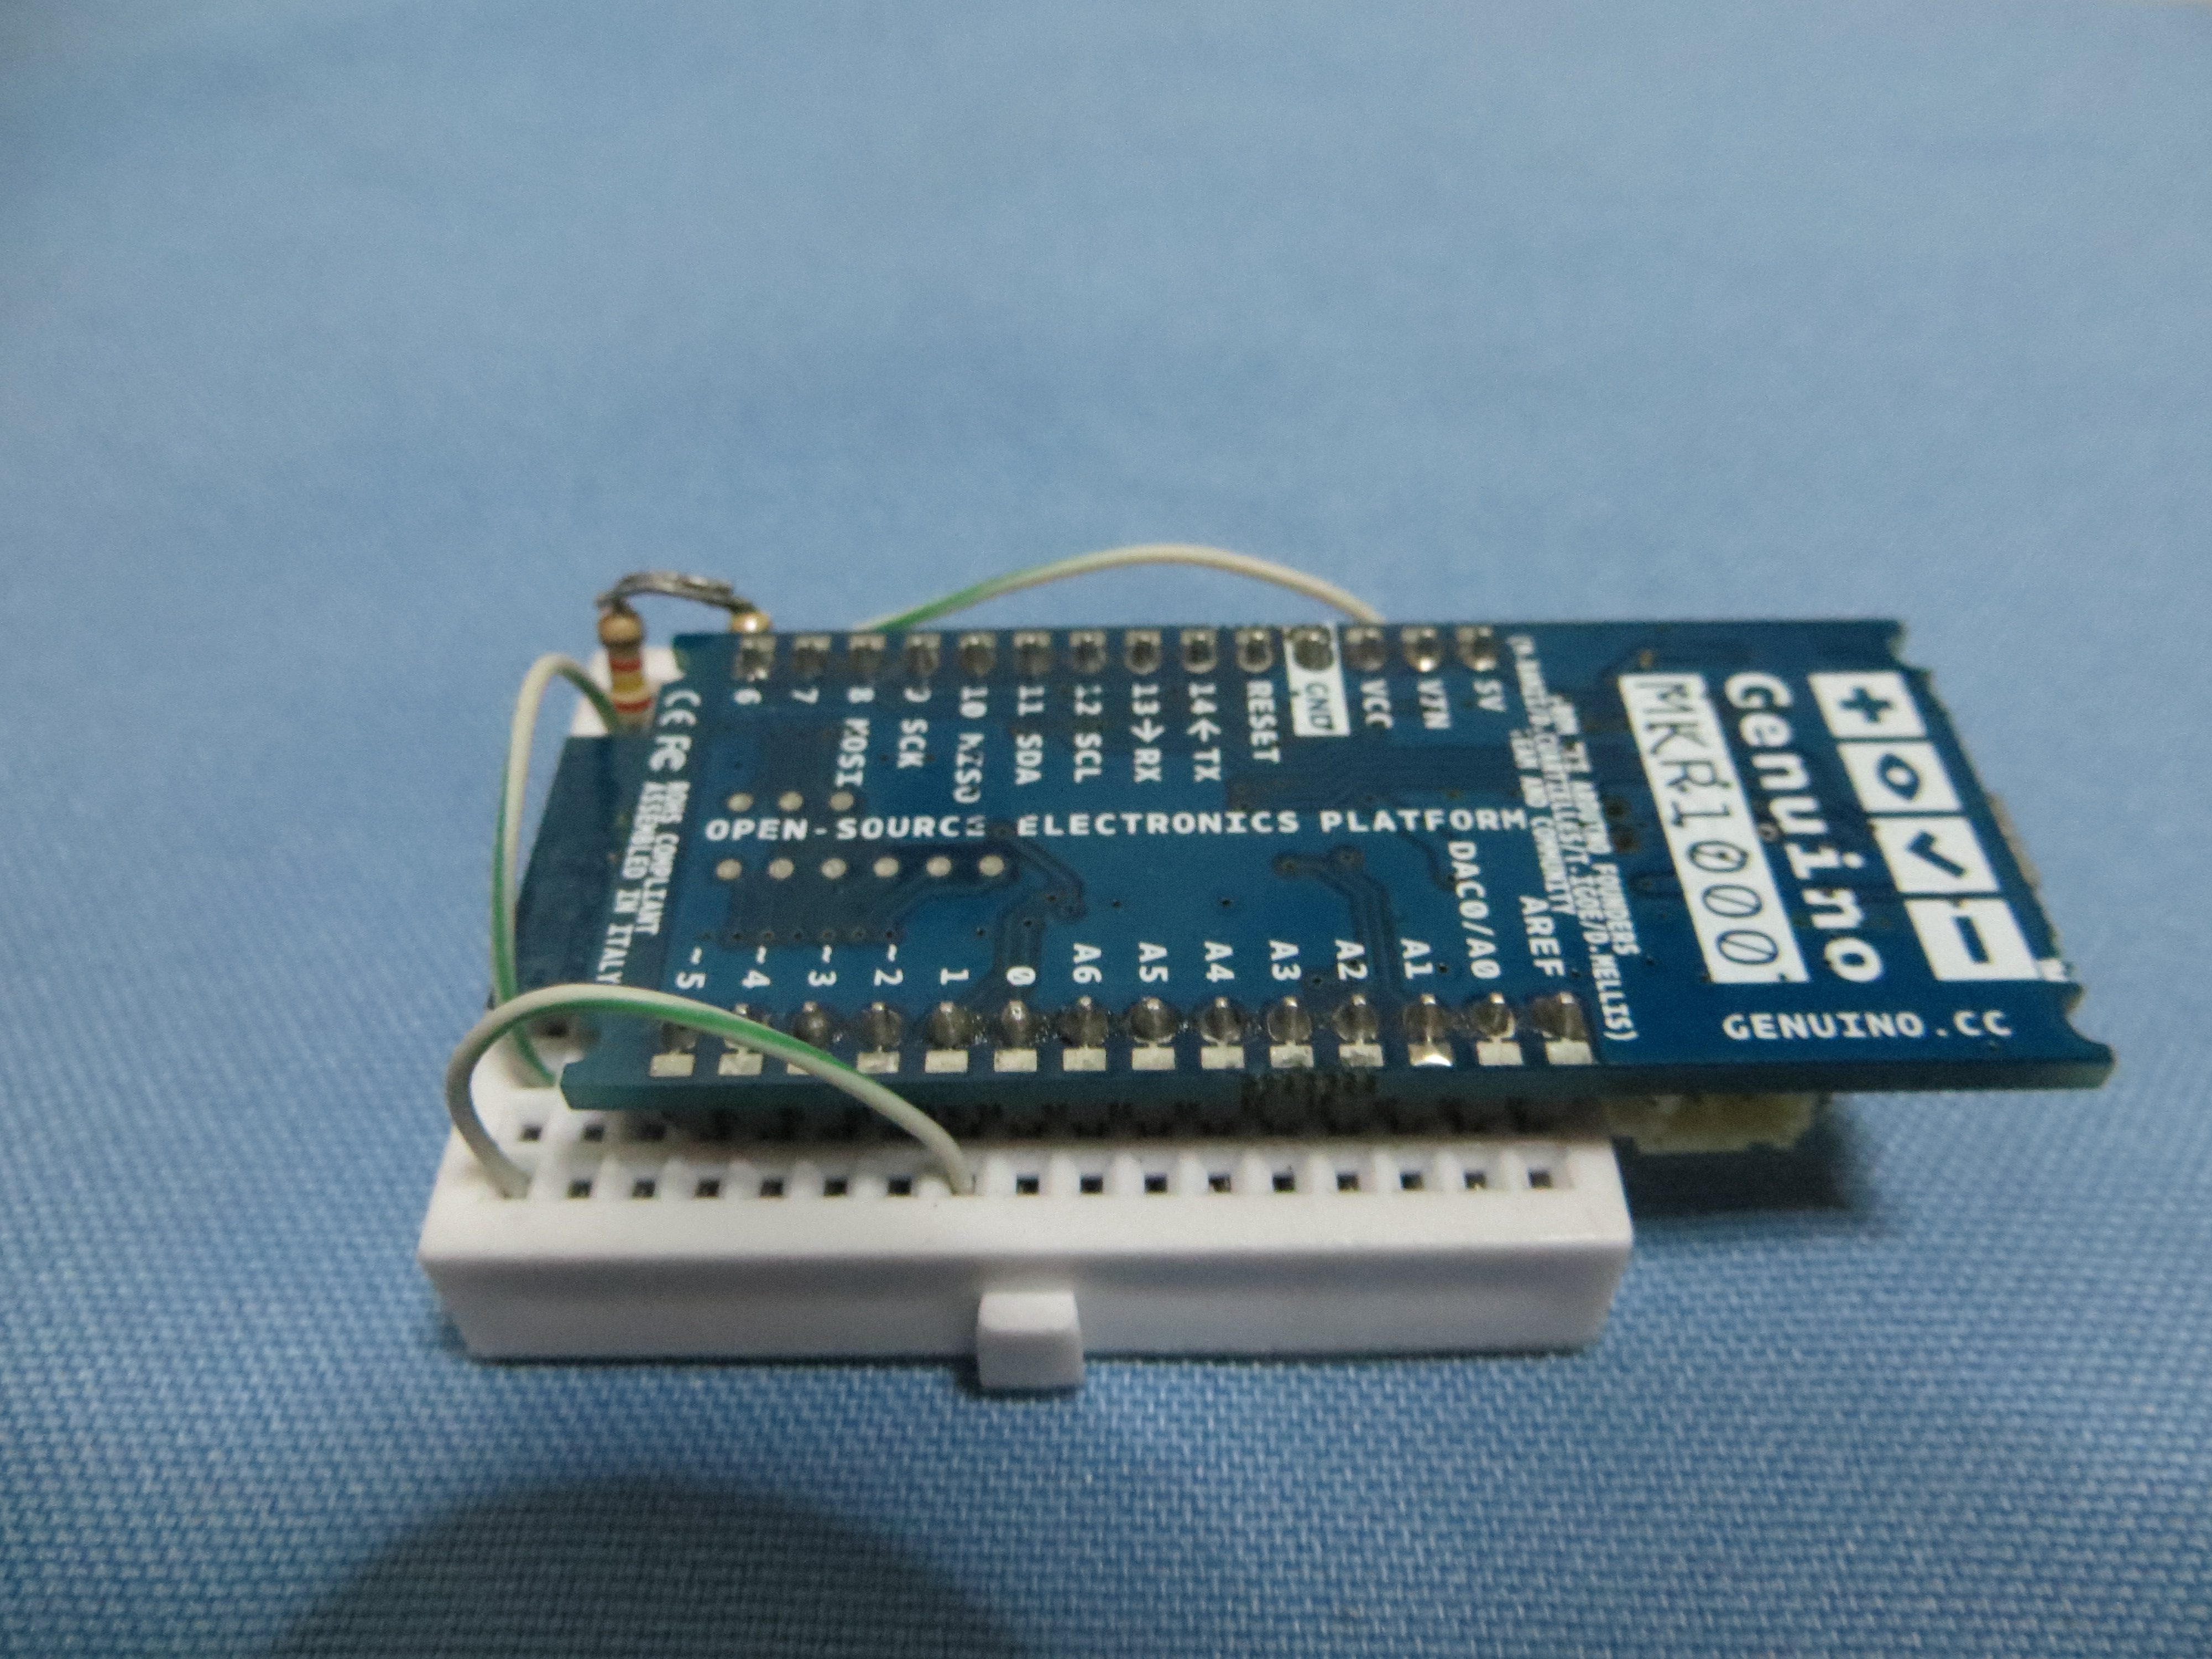
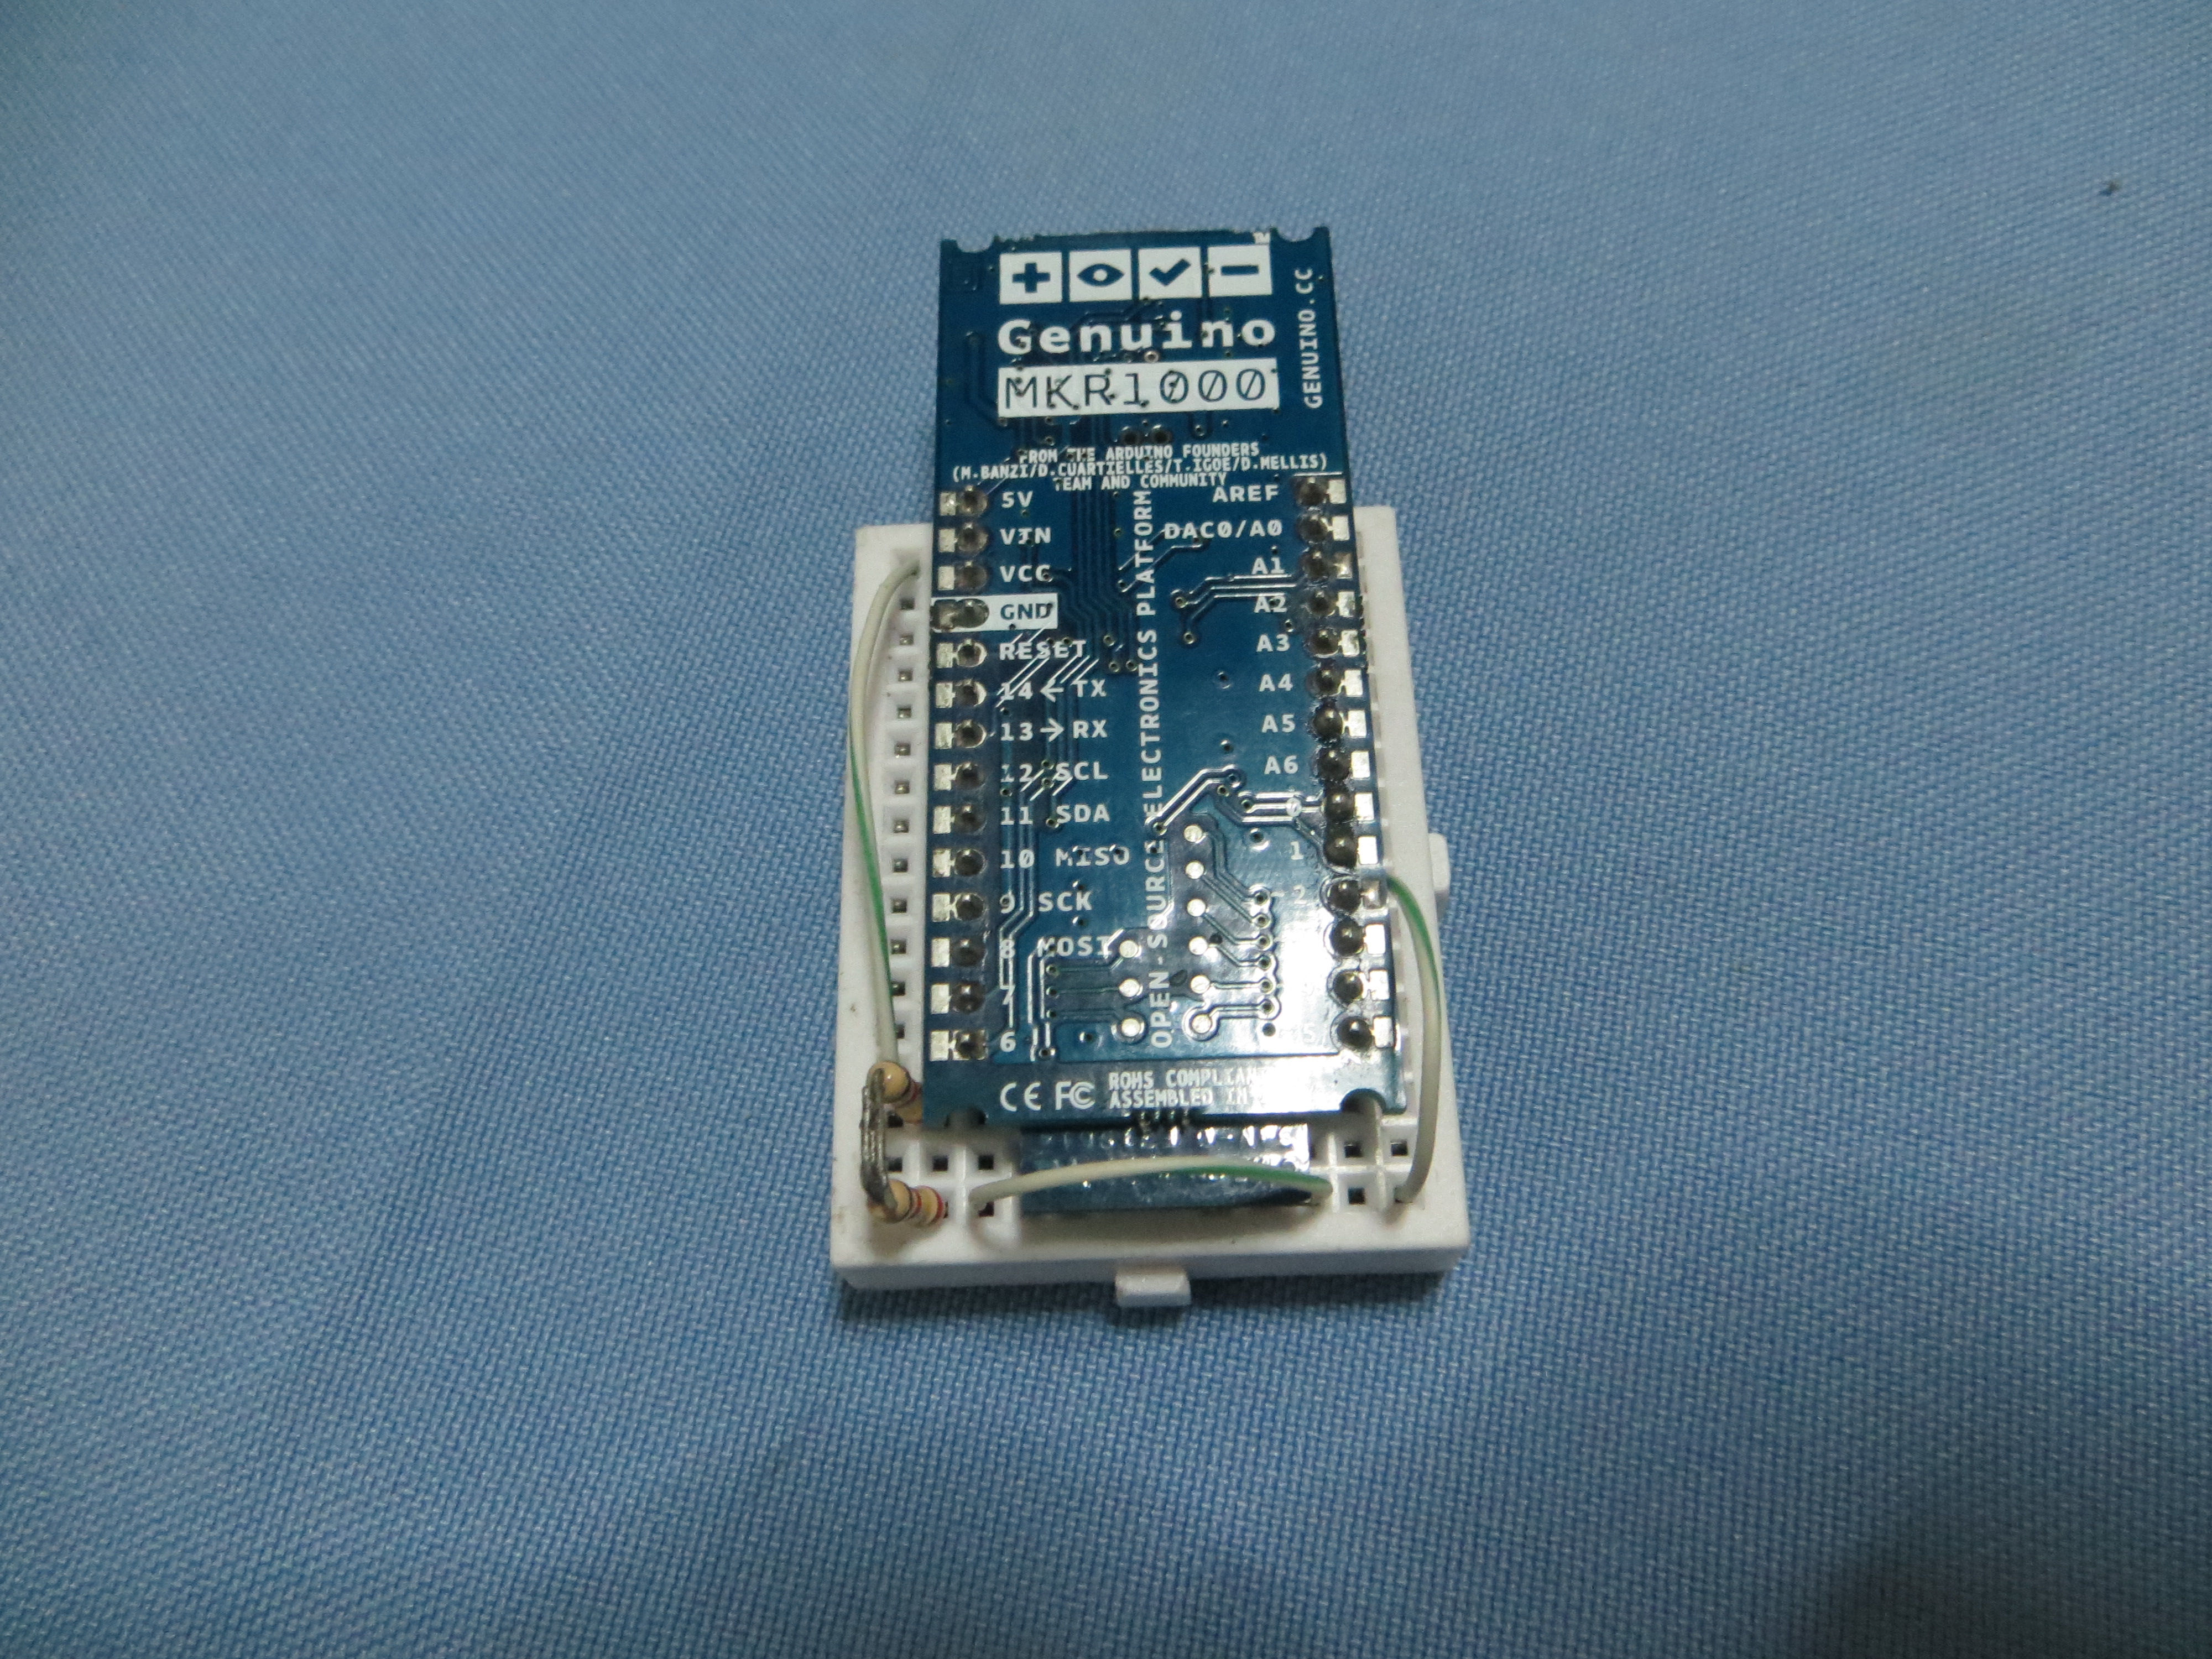
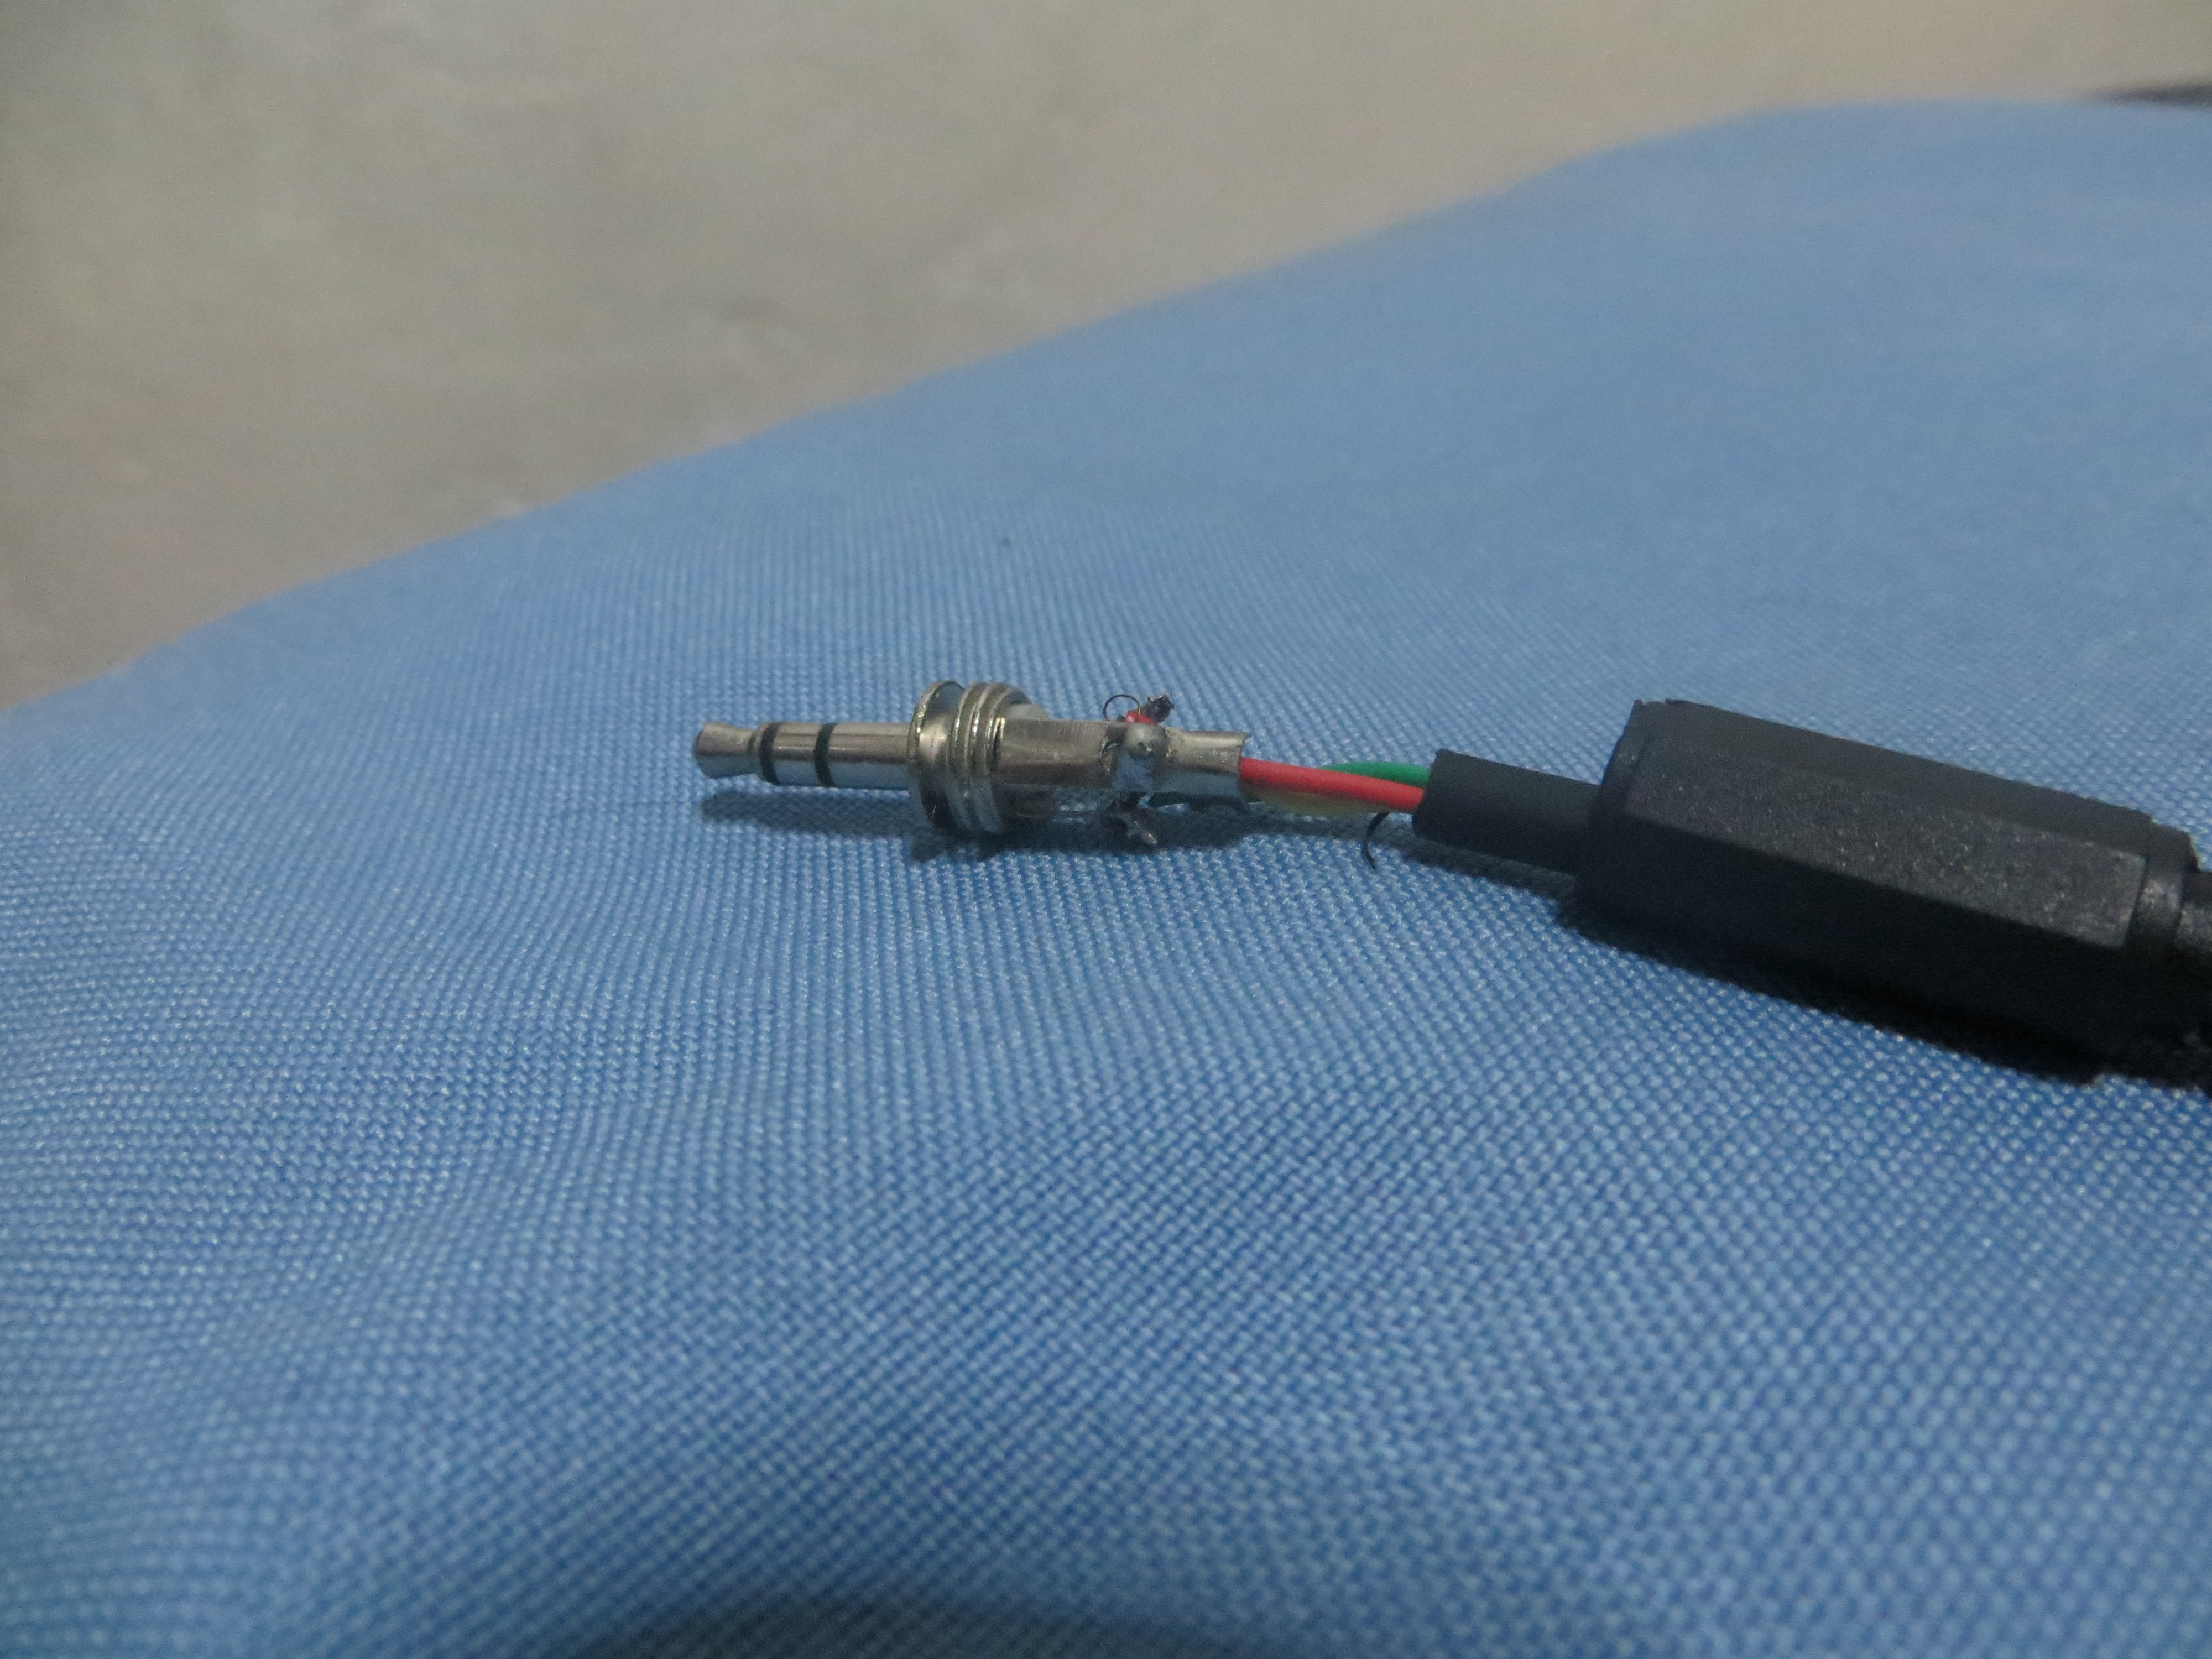
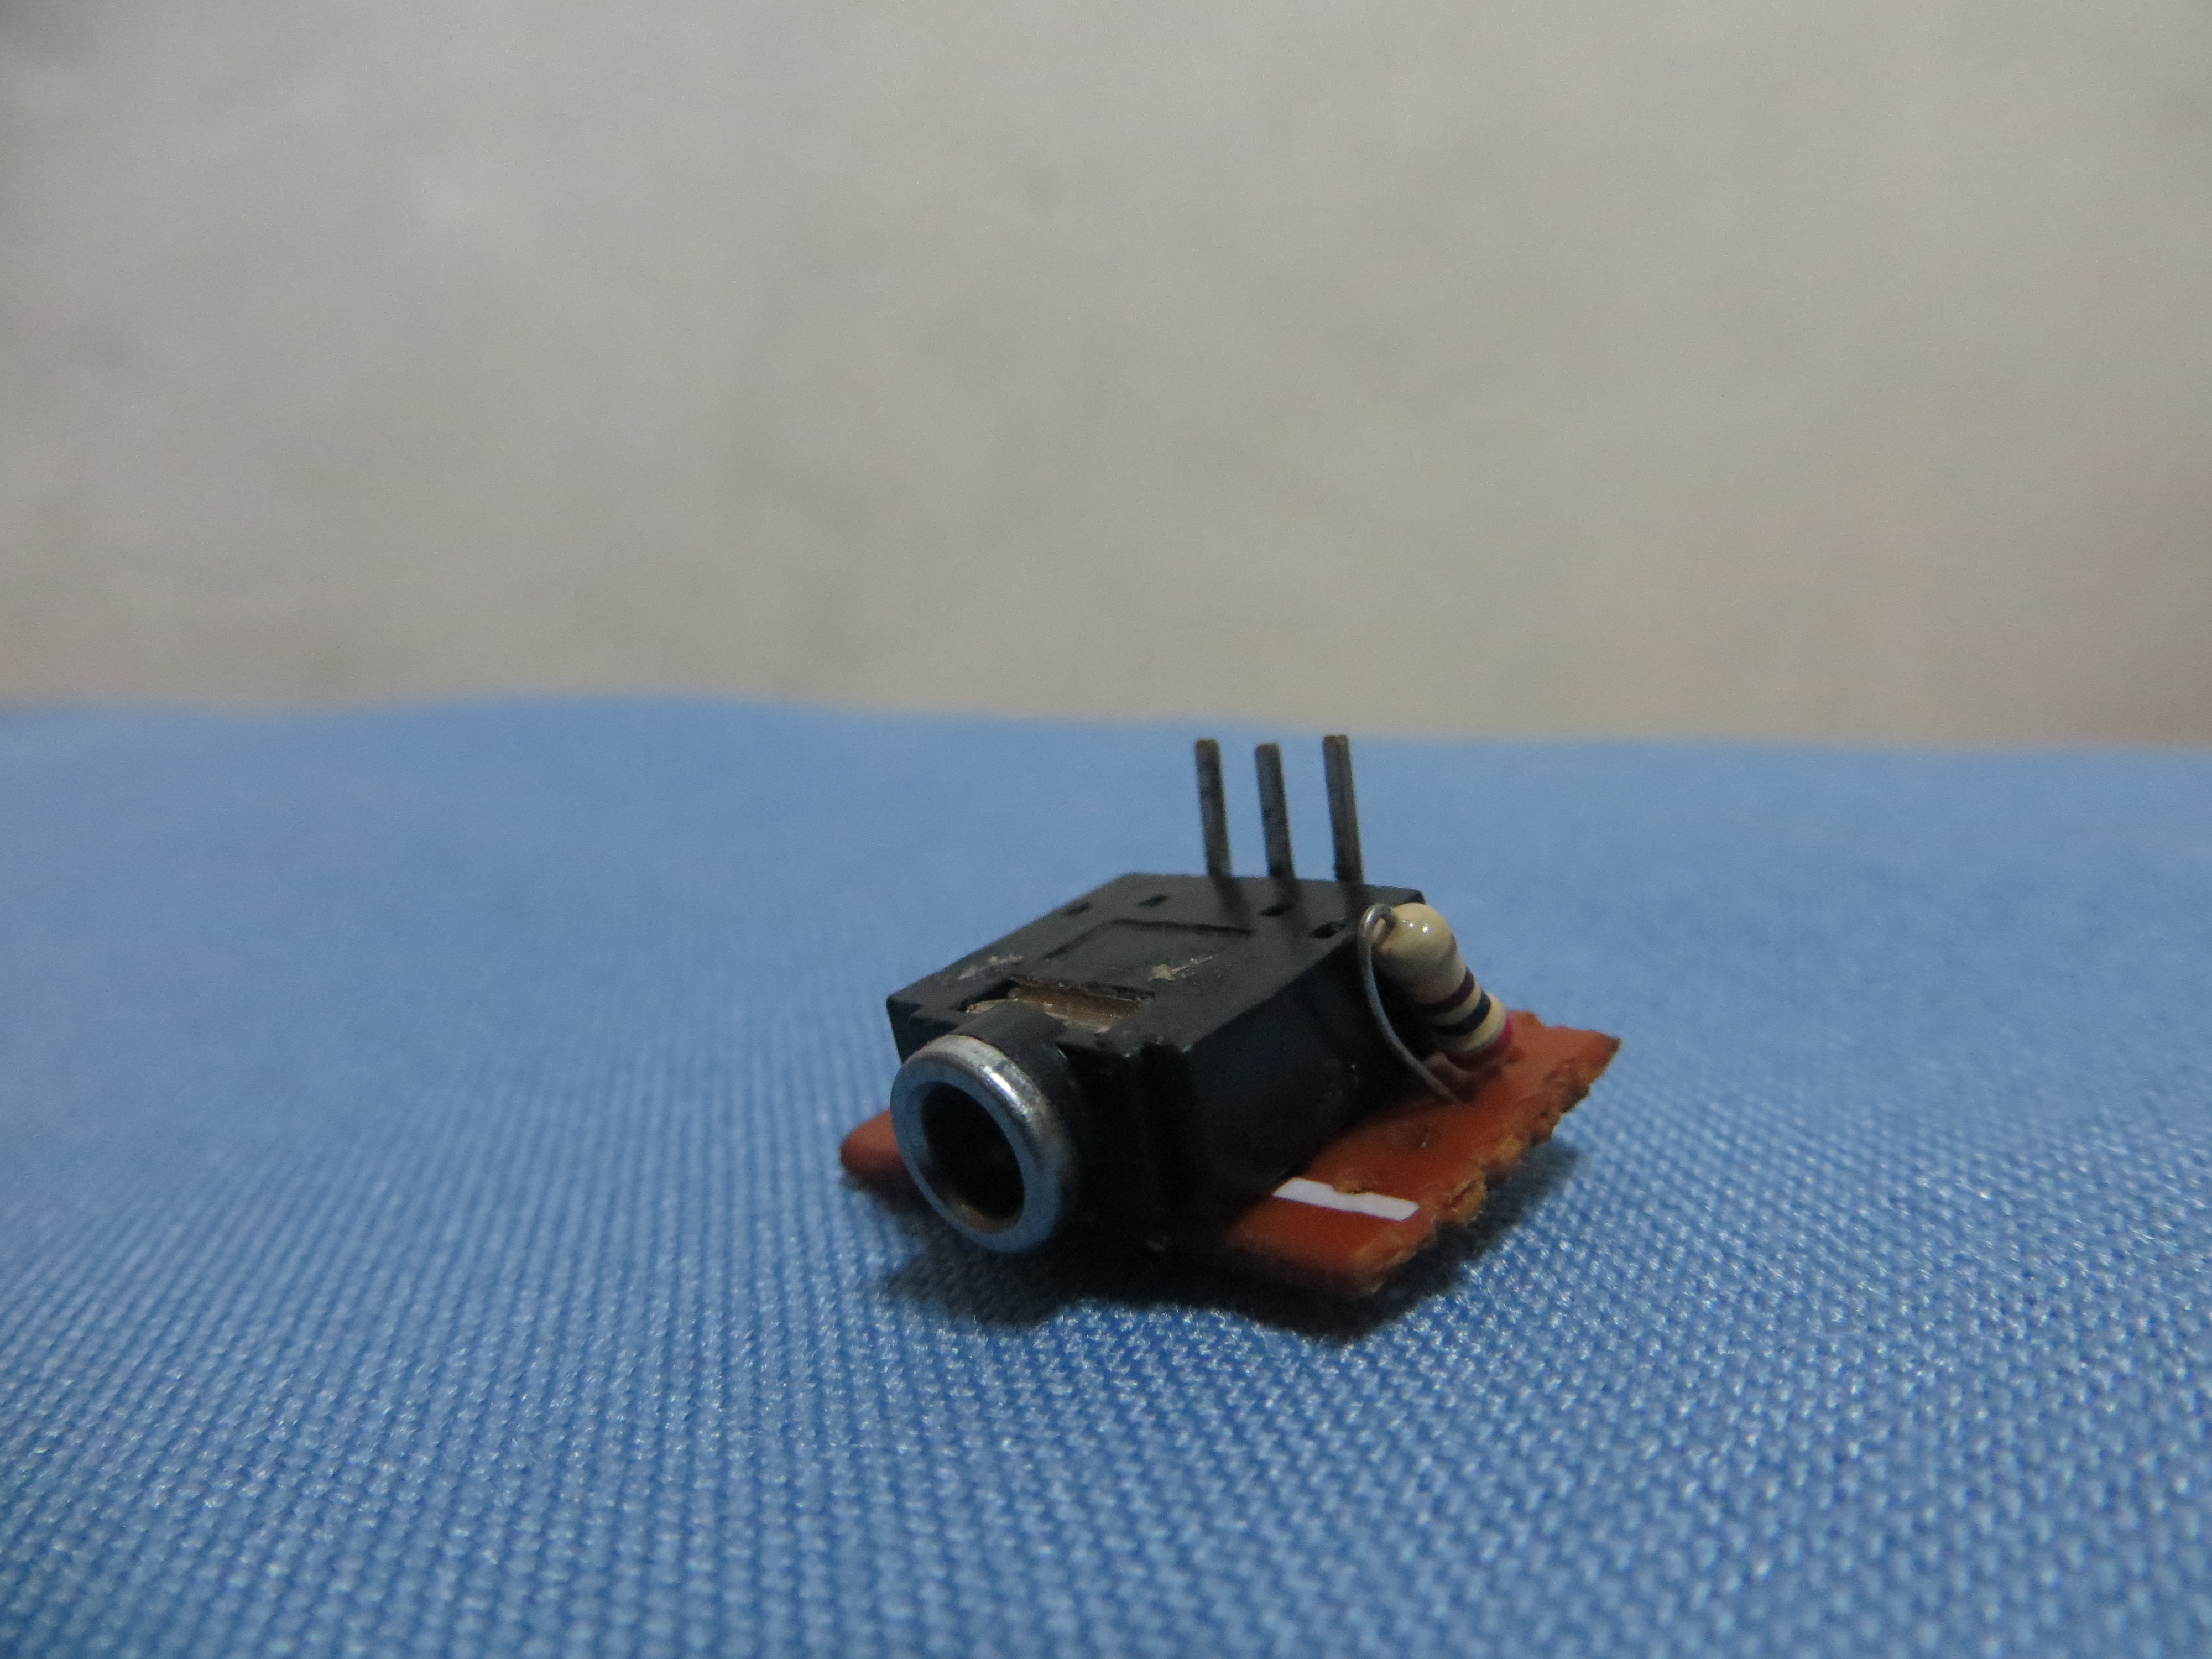
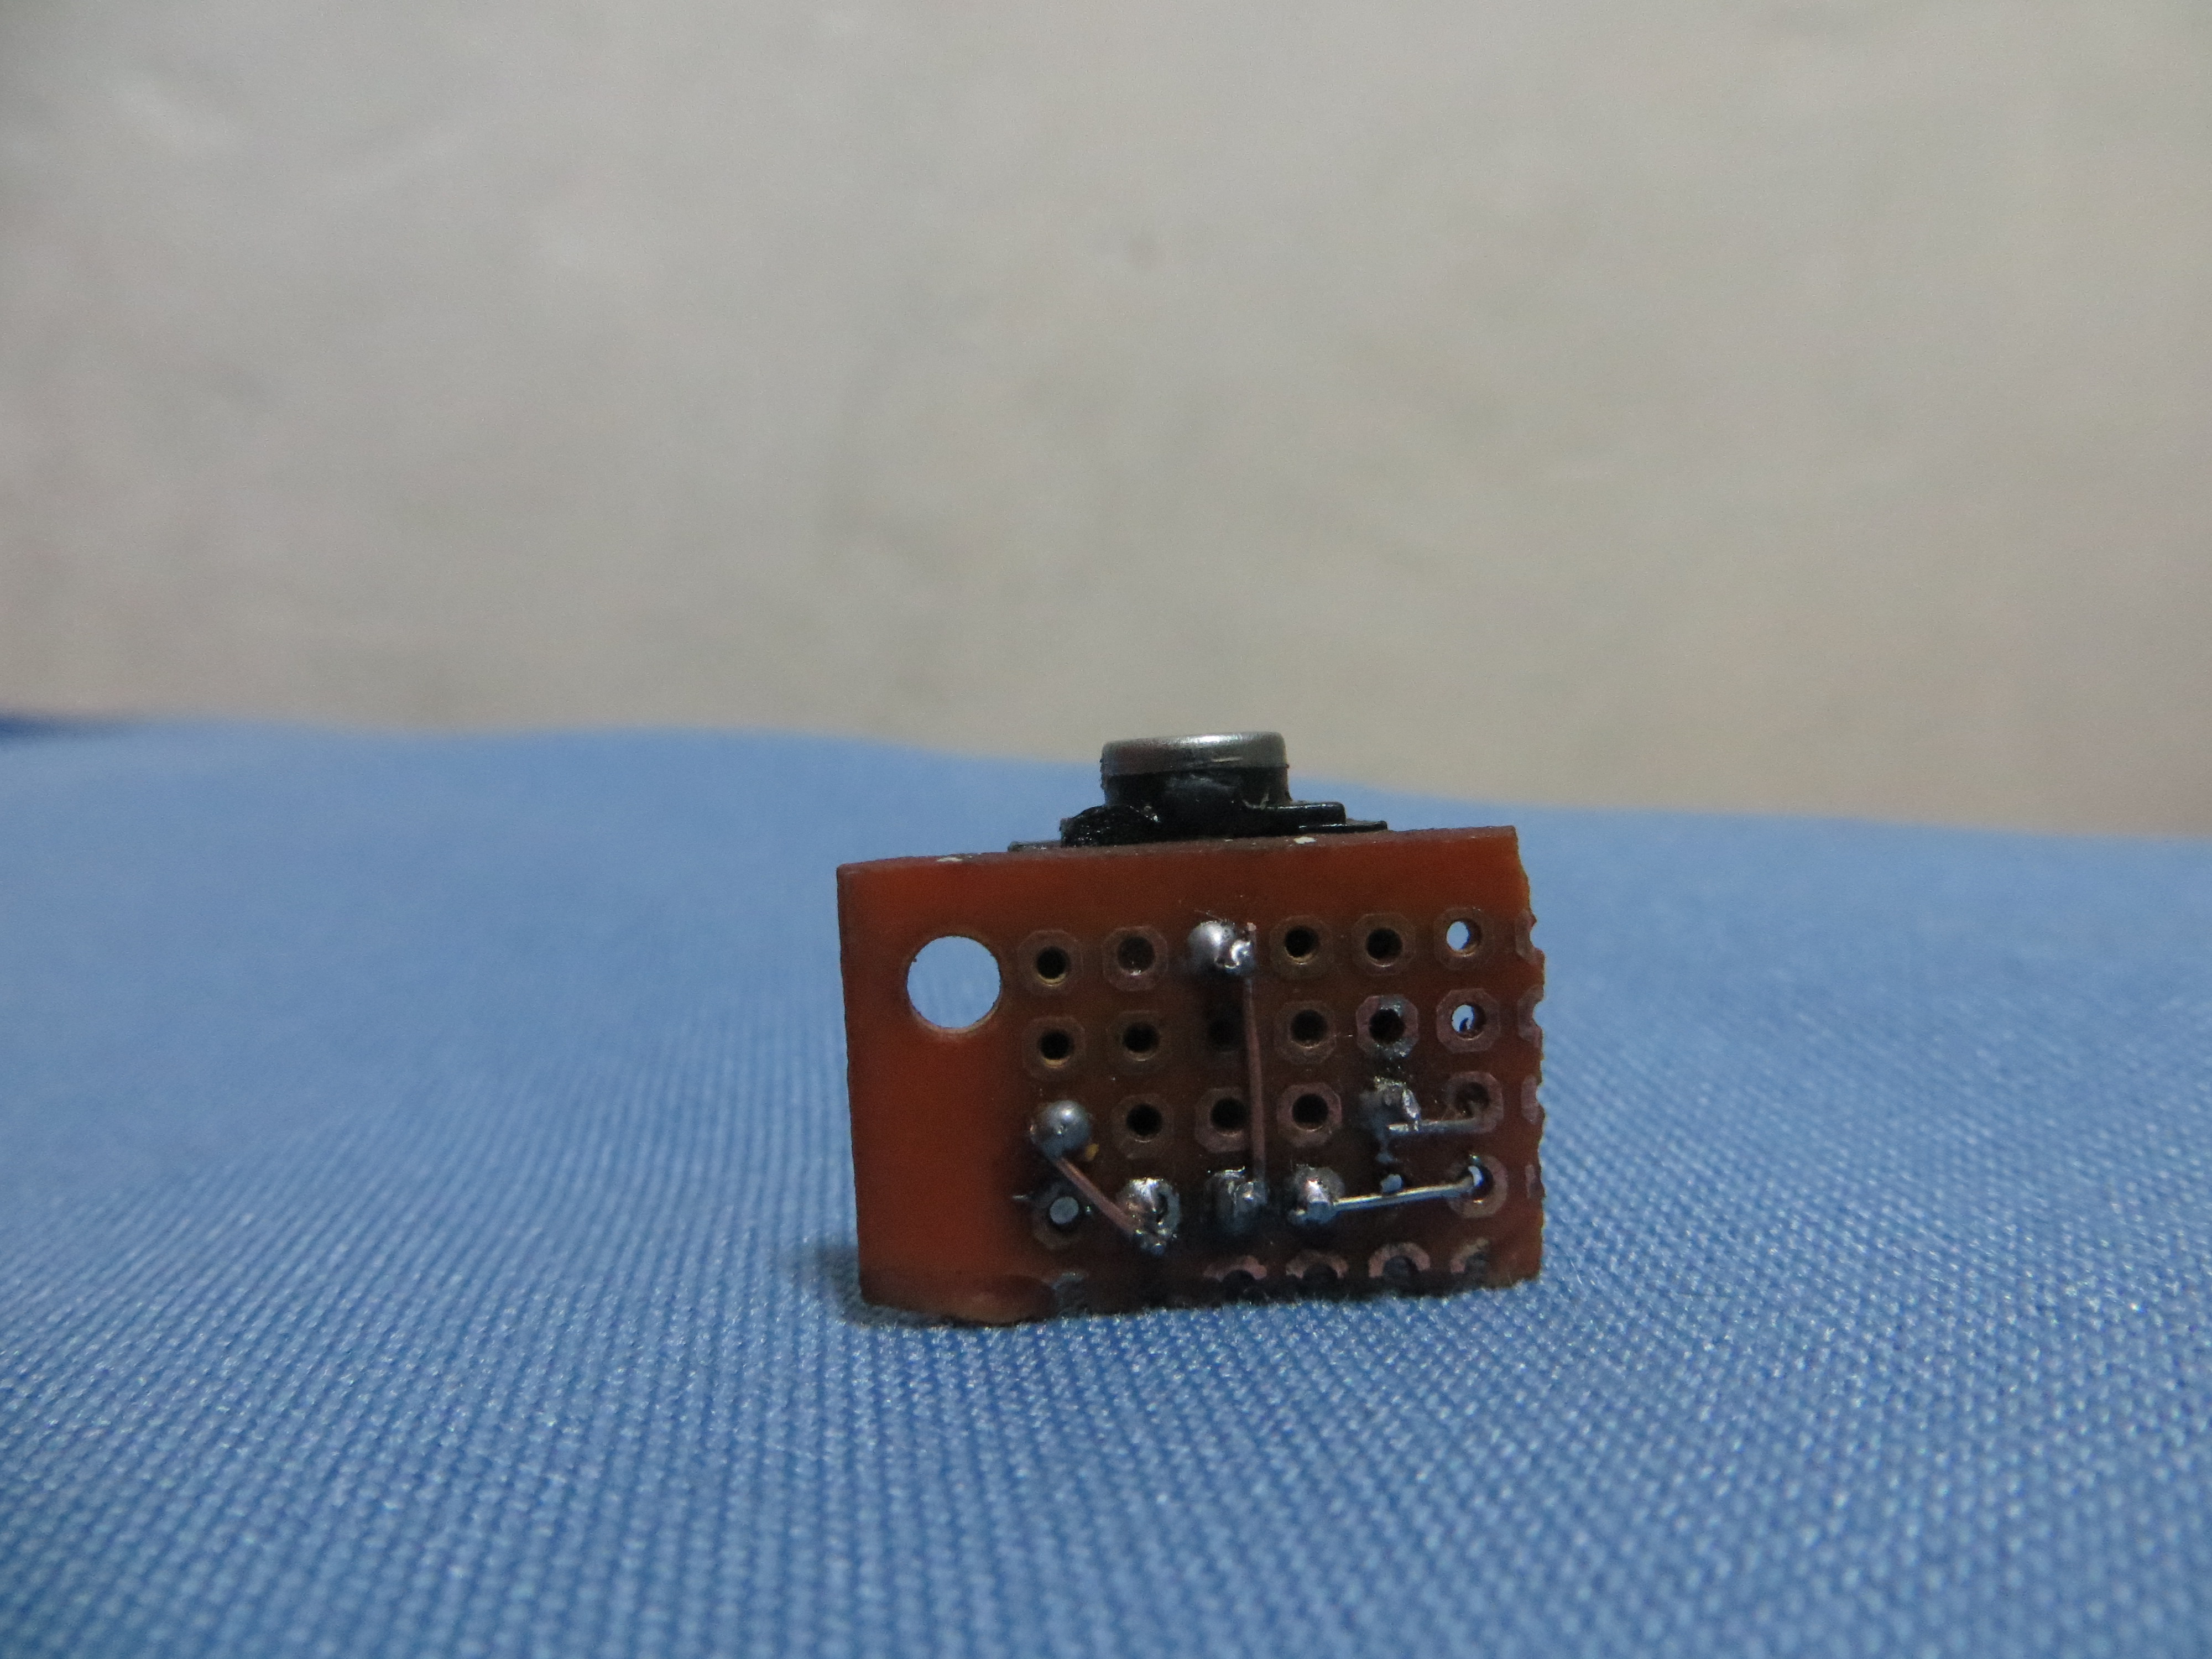
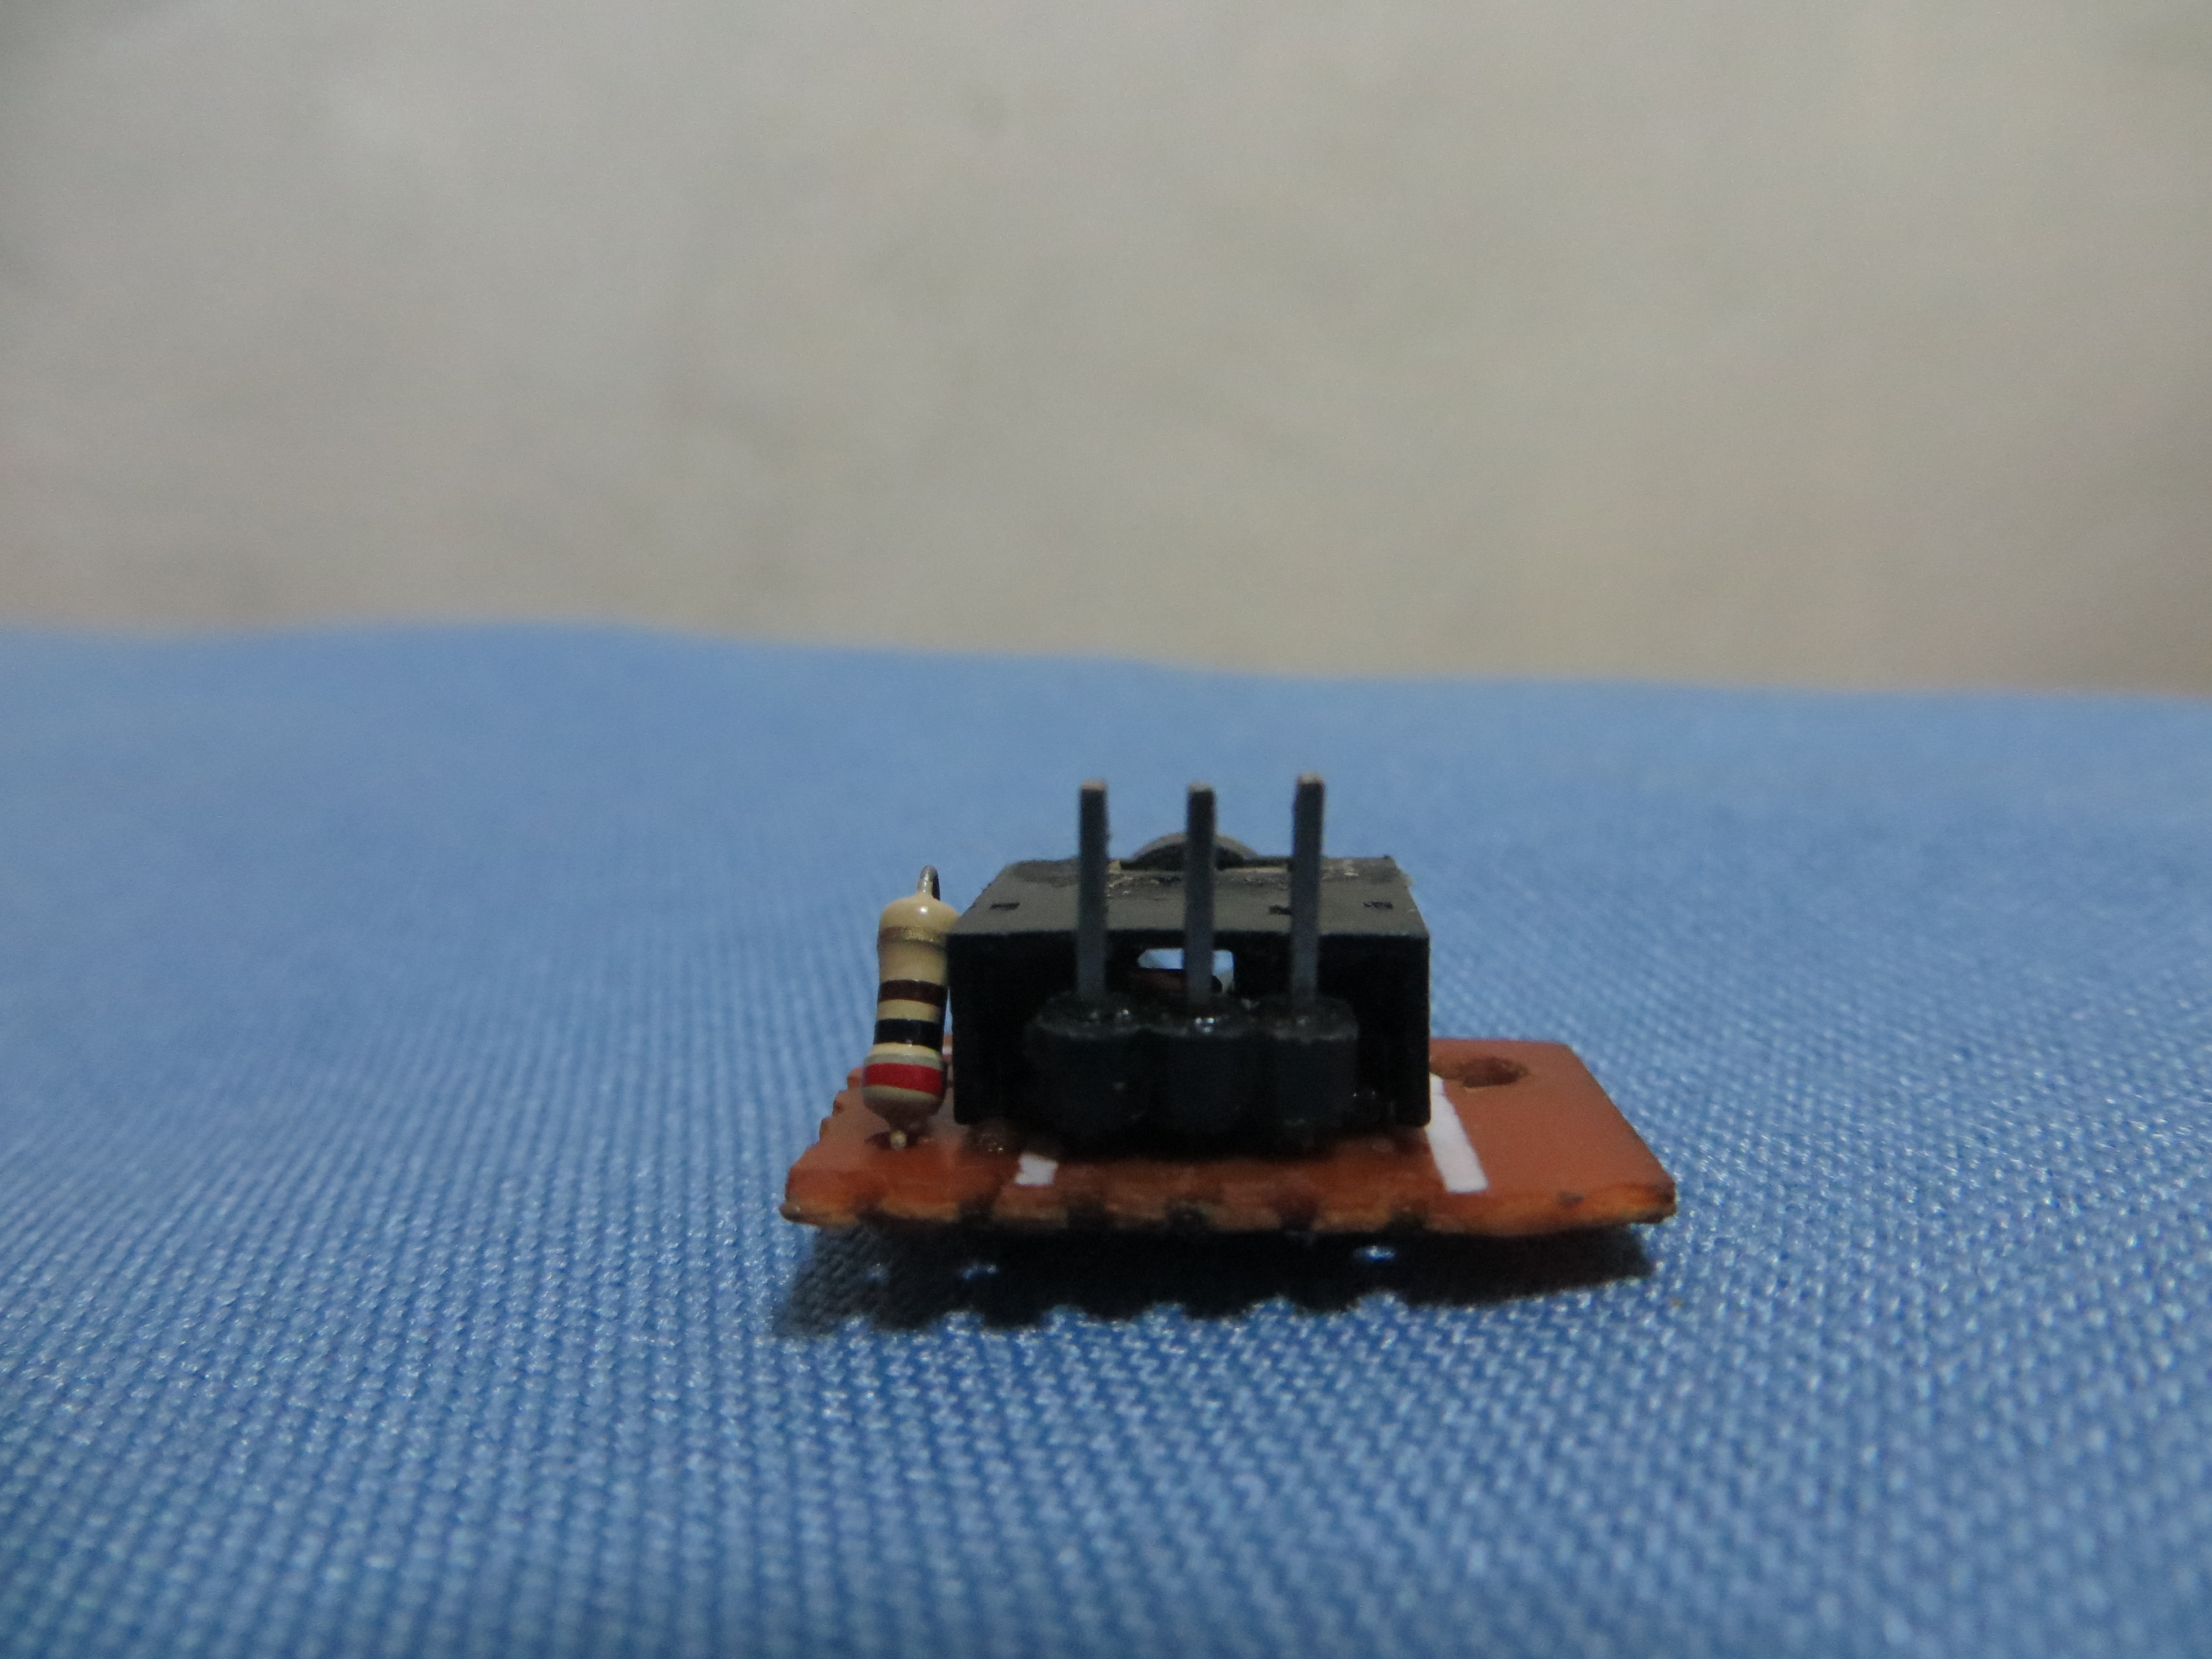
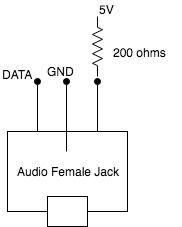
We will need to rearrange the connection of temp sensor to make it detachable.
This includes the wiring of resistors and the detachable connector.
First we'll put the 4.7k resistor and its connectors.
I used 2.4kohms x 2 = 2.8k omhs since its out of stock. But still we are good.
- Place the MKR1000 to 170 Pin Breadboard, the 5V pin should be on the first pin of the board
- Place the 4.7k resistor on the last pins or empty pins of the breadboard.
- Connect the first end of the resistor to 5V using jumper wire.
- Connect the second end to an empty pin on the other side.
- Connect that pin to Digital Pin 1.
If you are having difficulties, follow the images above.
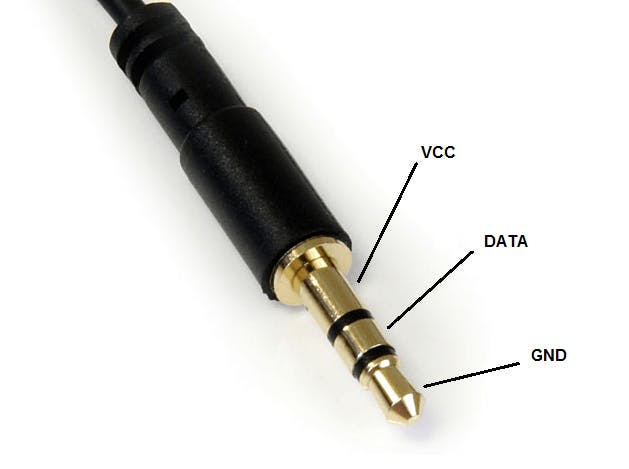
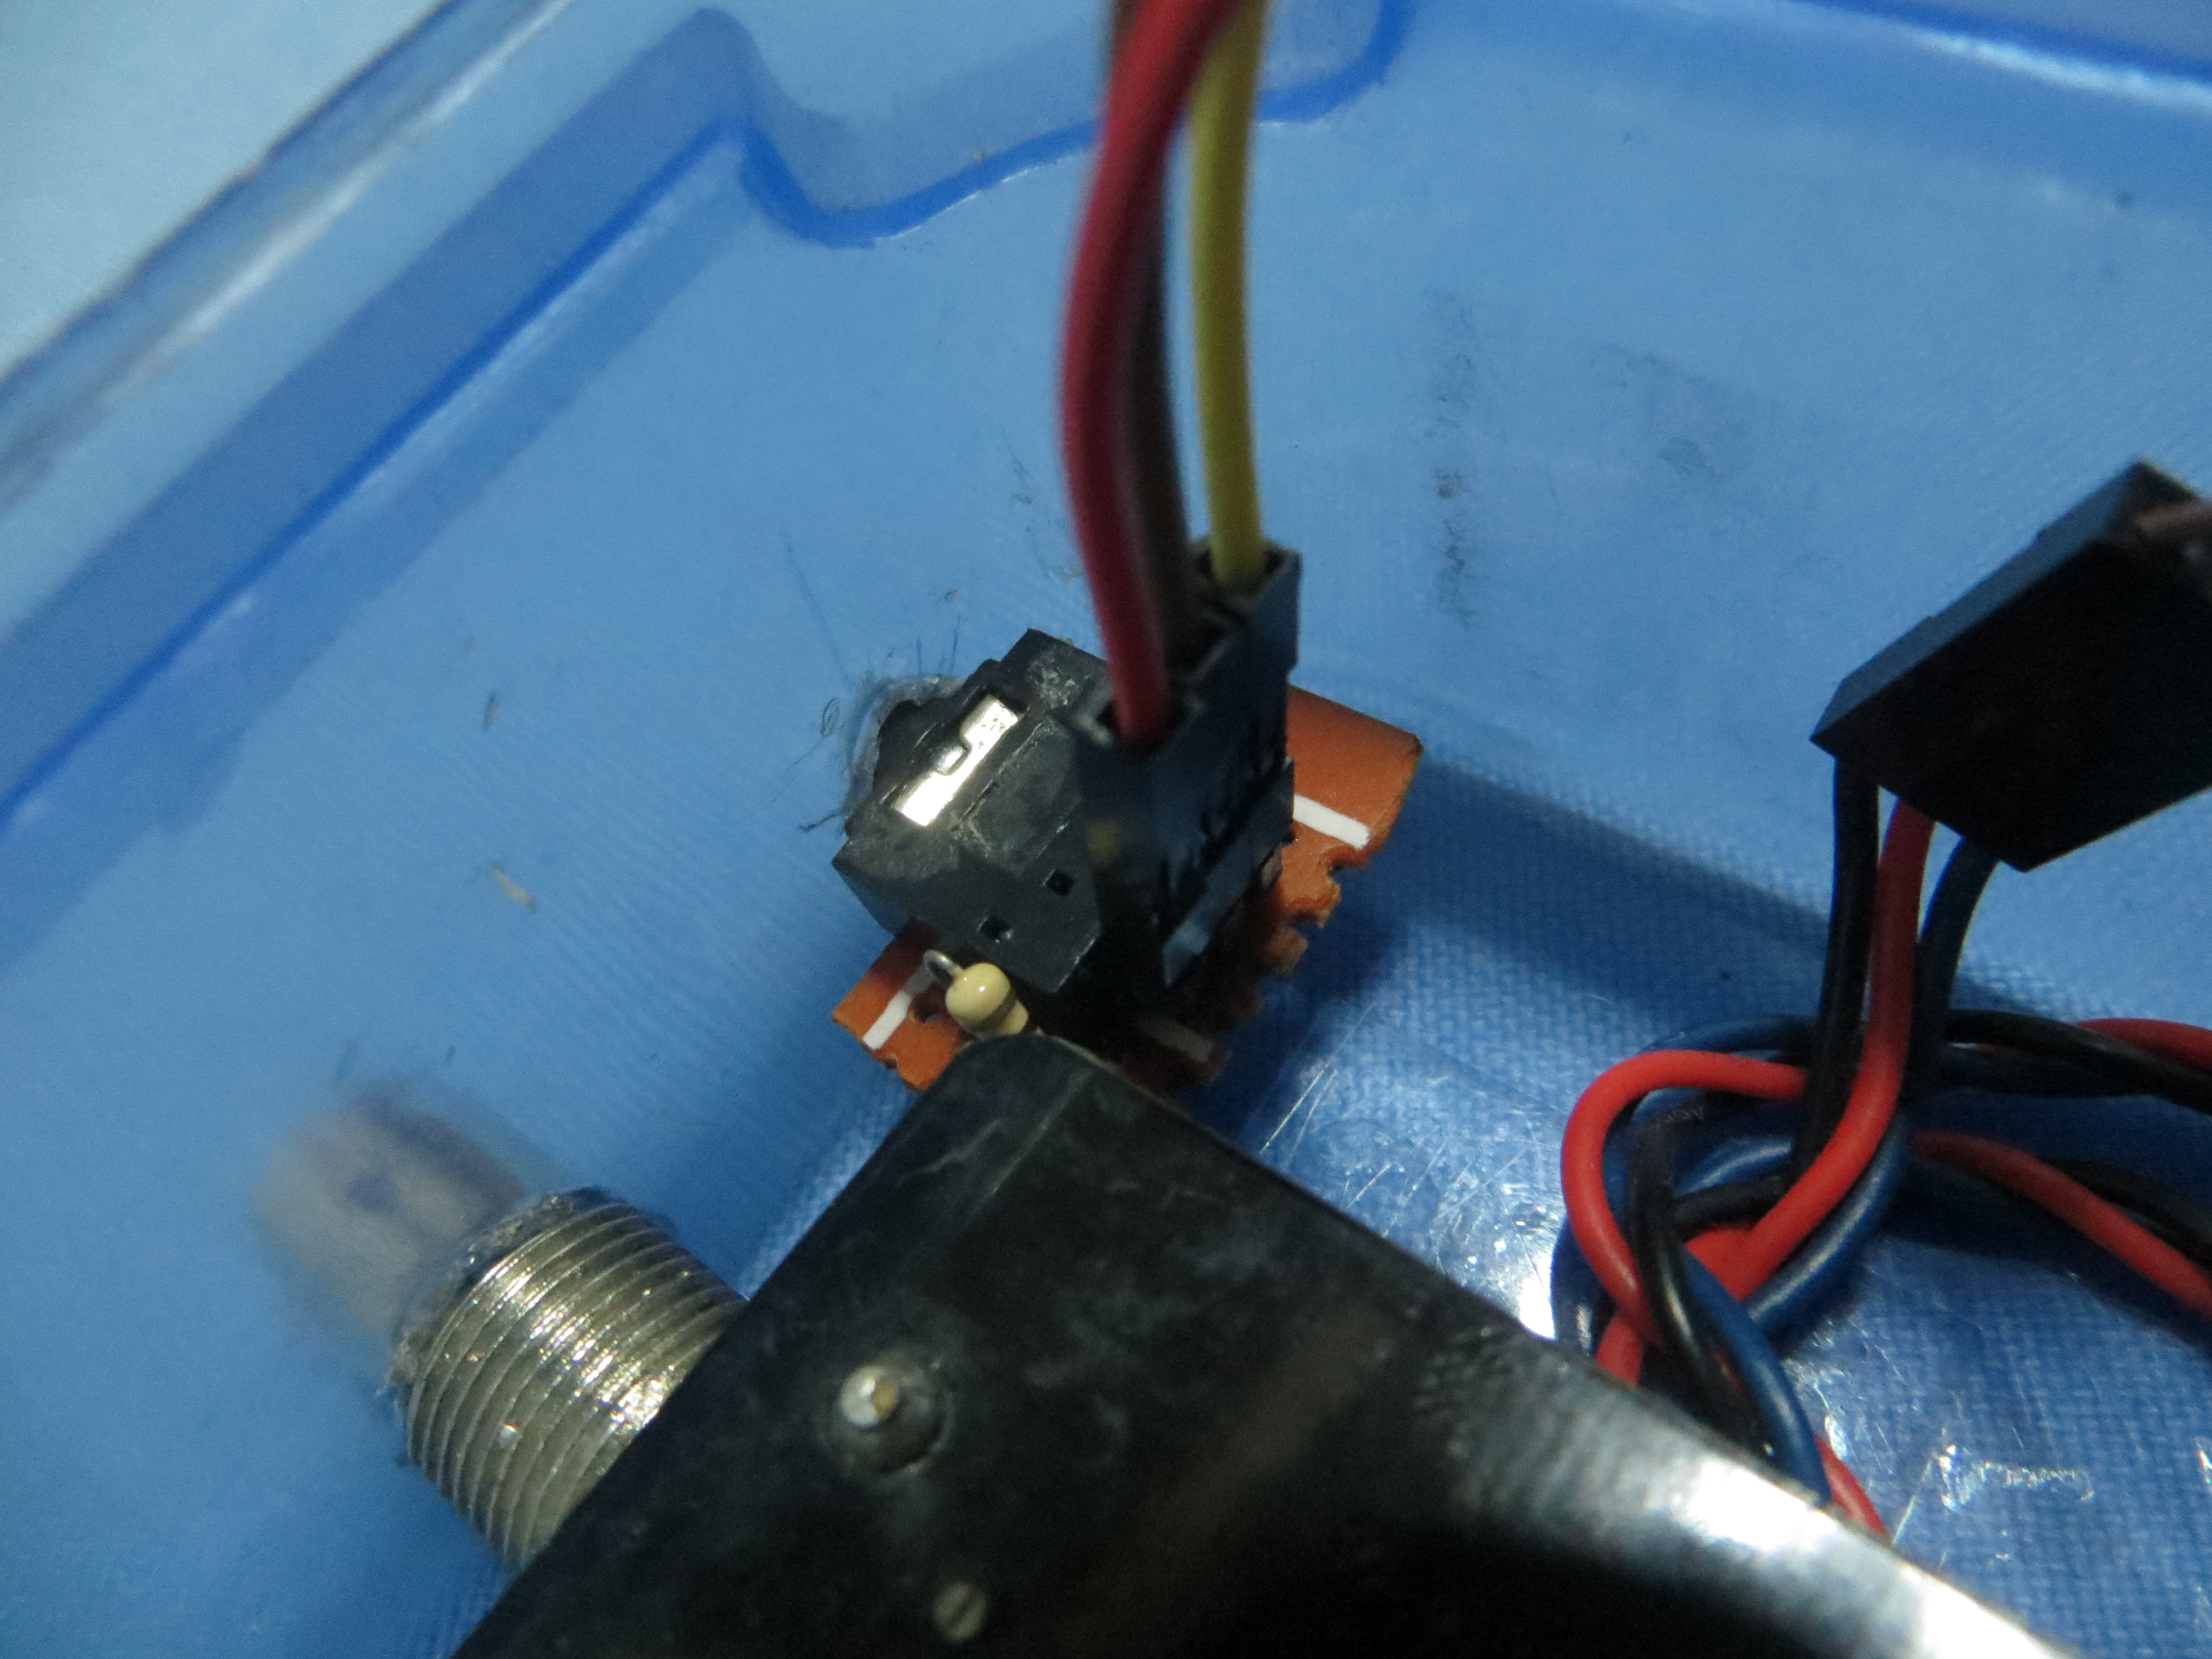
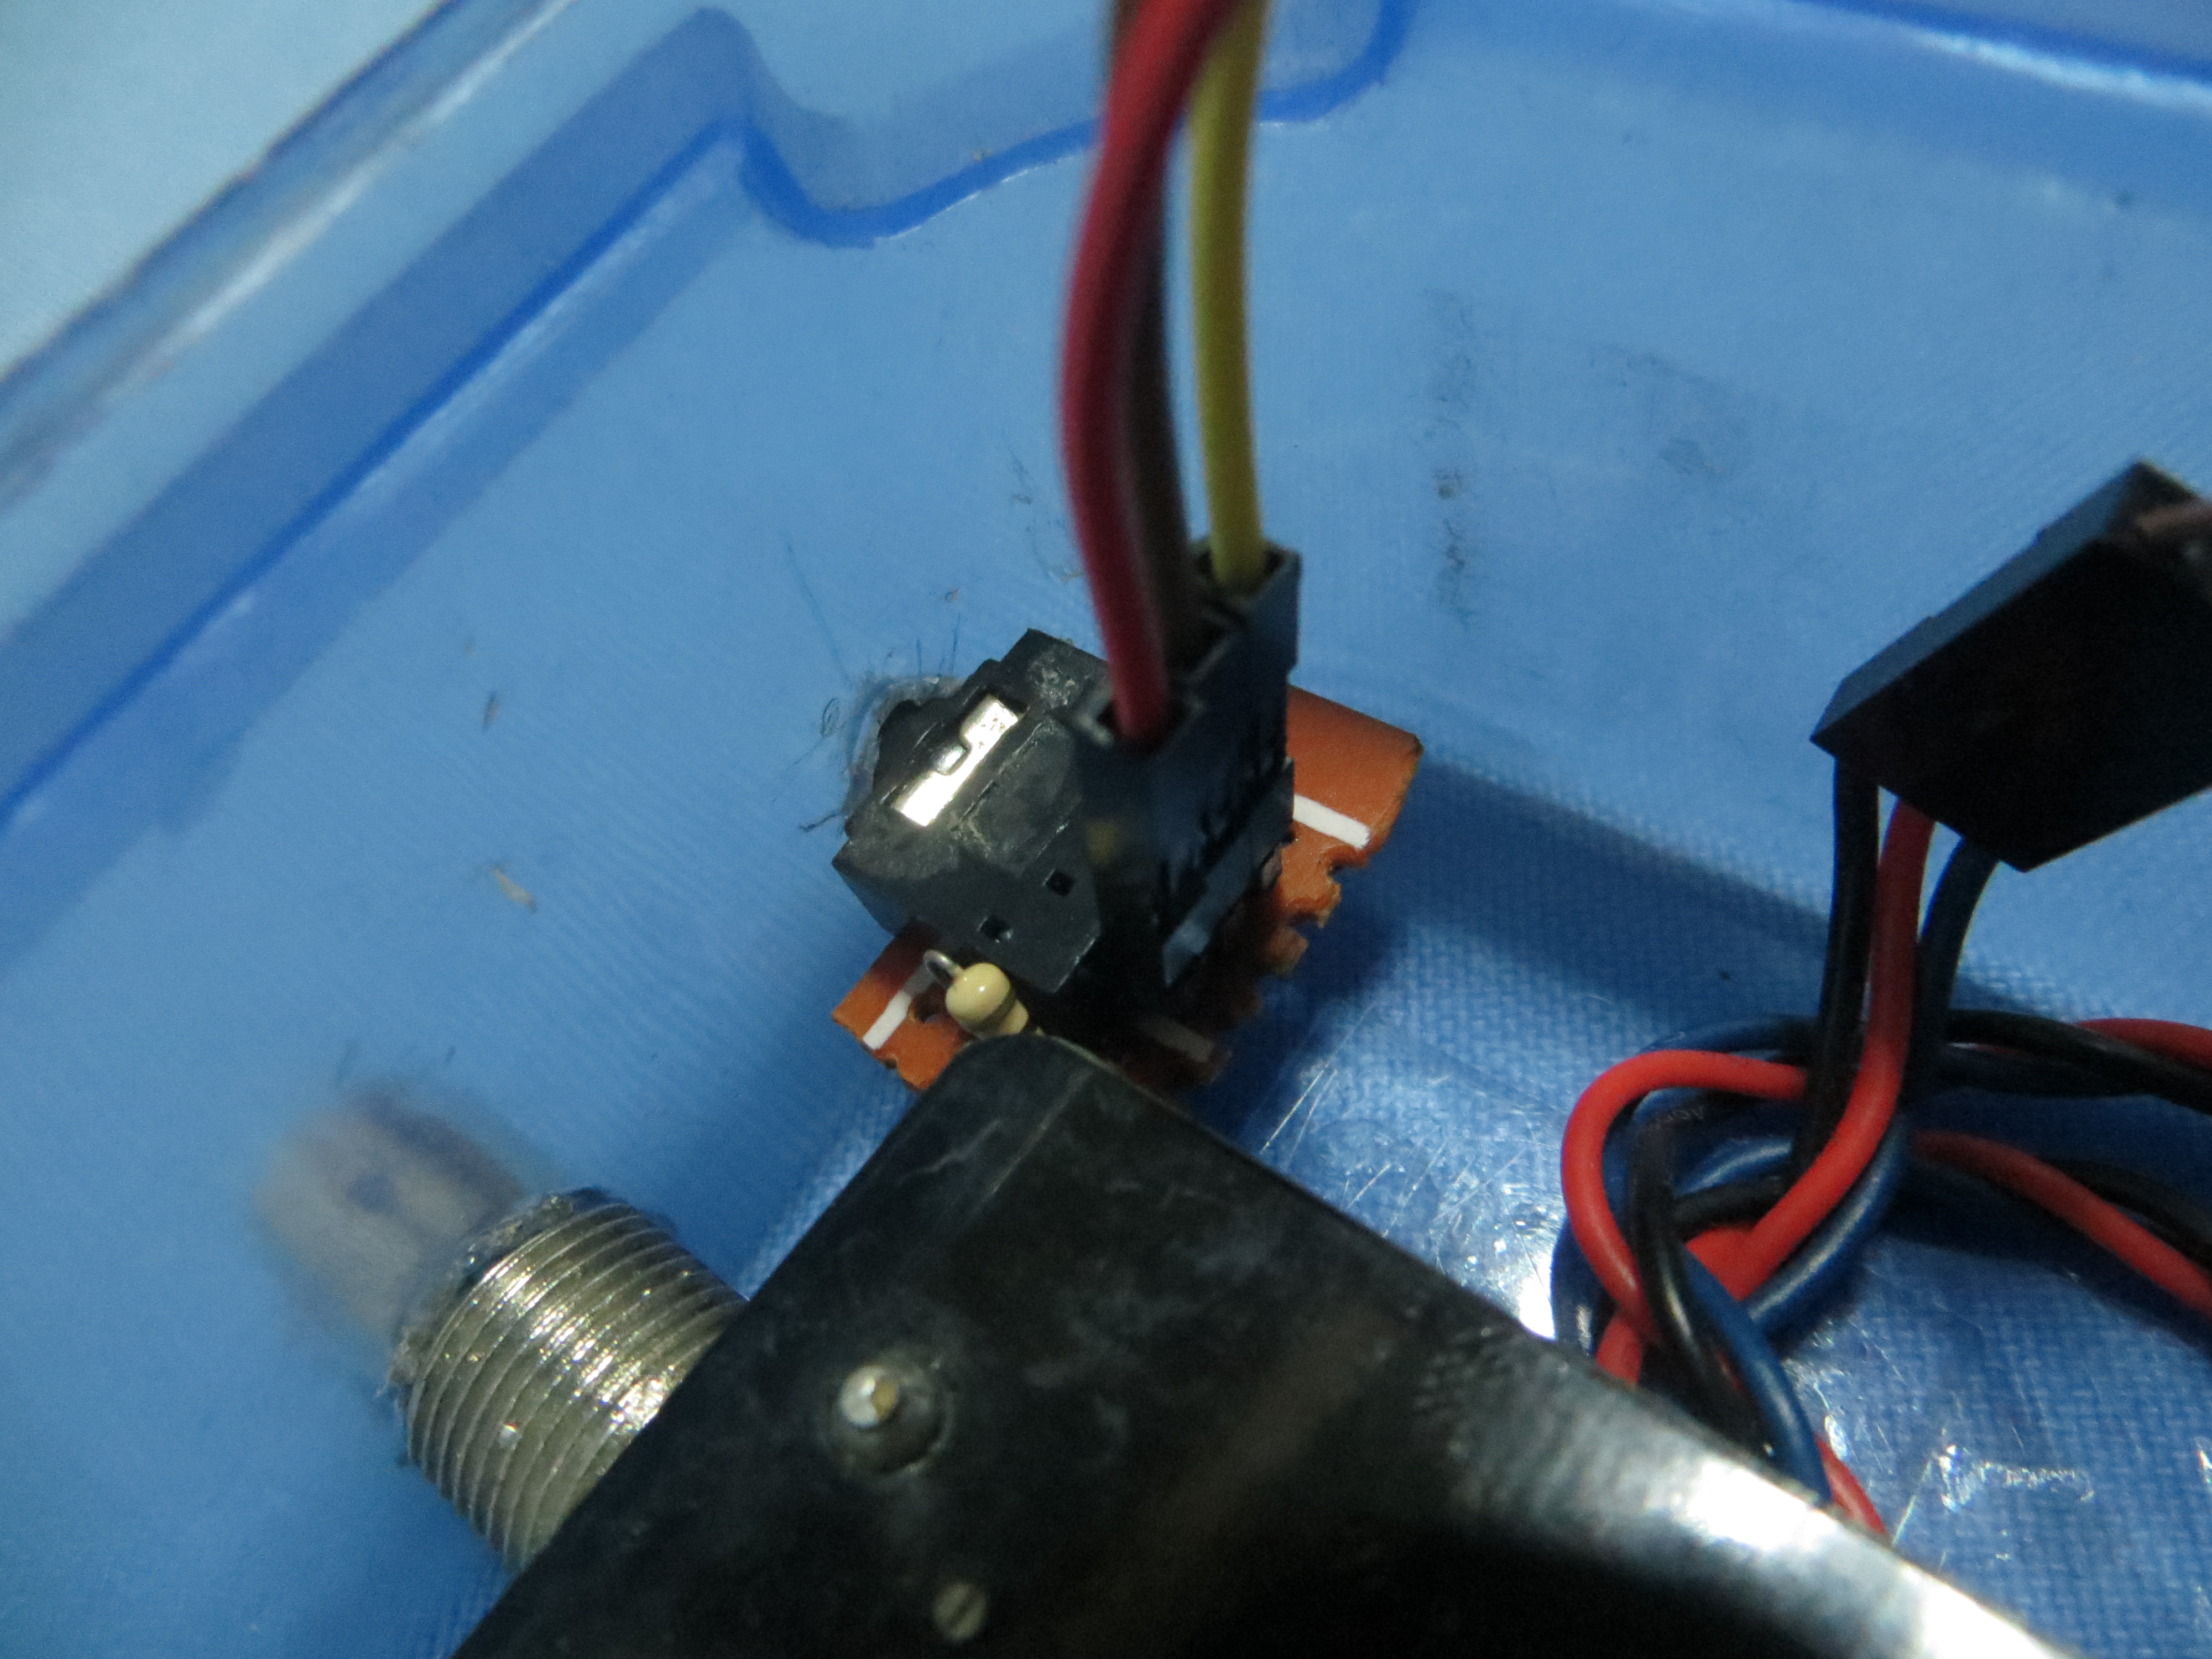
Next Solder our male audio connector to temperature sensor
- Red wire / VCC to top copper
- Green / GND to middle copper
- Yellow / Data to bottom copper
See 4th screen shot above.
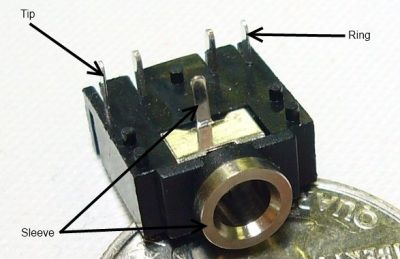
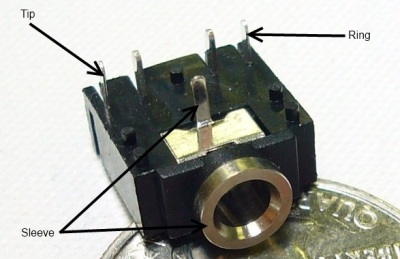
Next solder the female audio connector to PCB
- Place the female connector in PCB with 4x5 soldering hole.
- Insert the 3 pin header on the last row of the hole.
- Insert 200 omhs and solder end of tip pin of audio connector and the second end to the nearest header pin.
- Solder the remaining header pin of audio connector to header pin.
See 5, 6, 7, 8th screen shot above.
I used 200 ohms in series of to positive wire of temp sensor to avoid short circuit.
Make It Portable! - Placing the Sensors
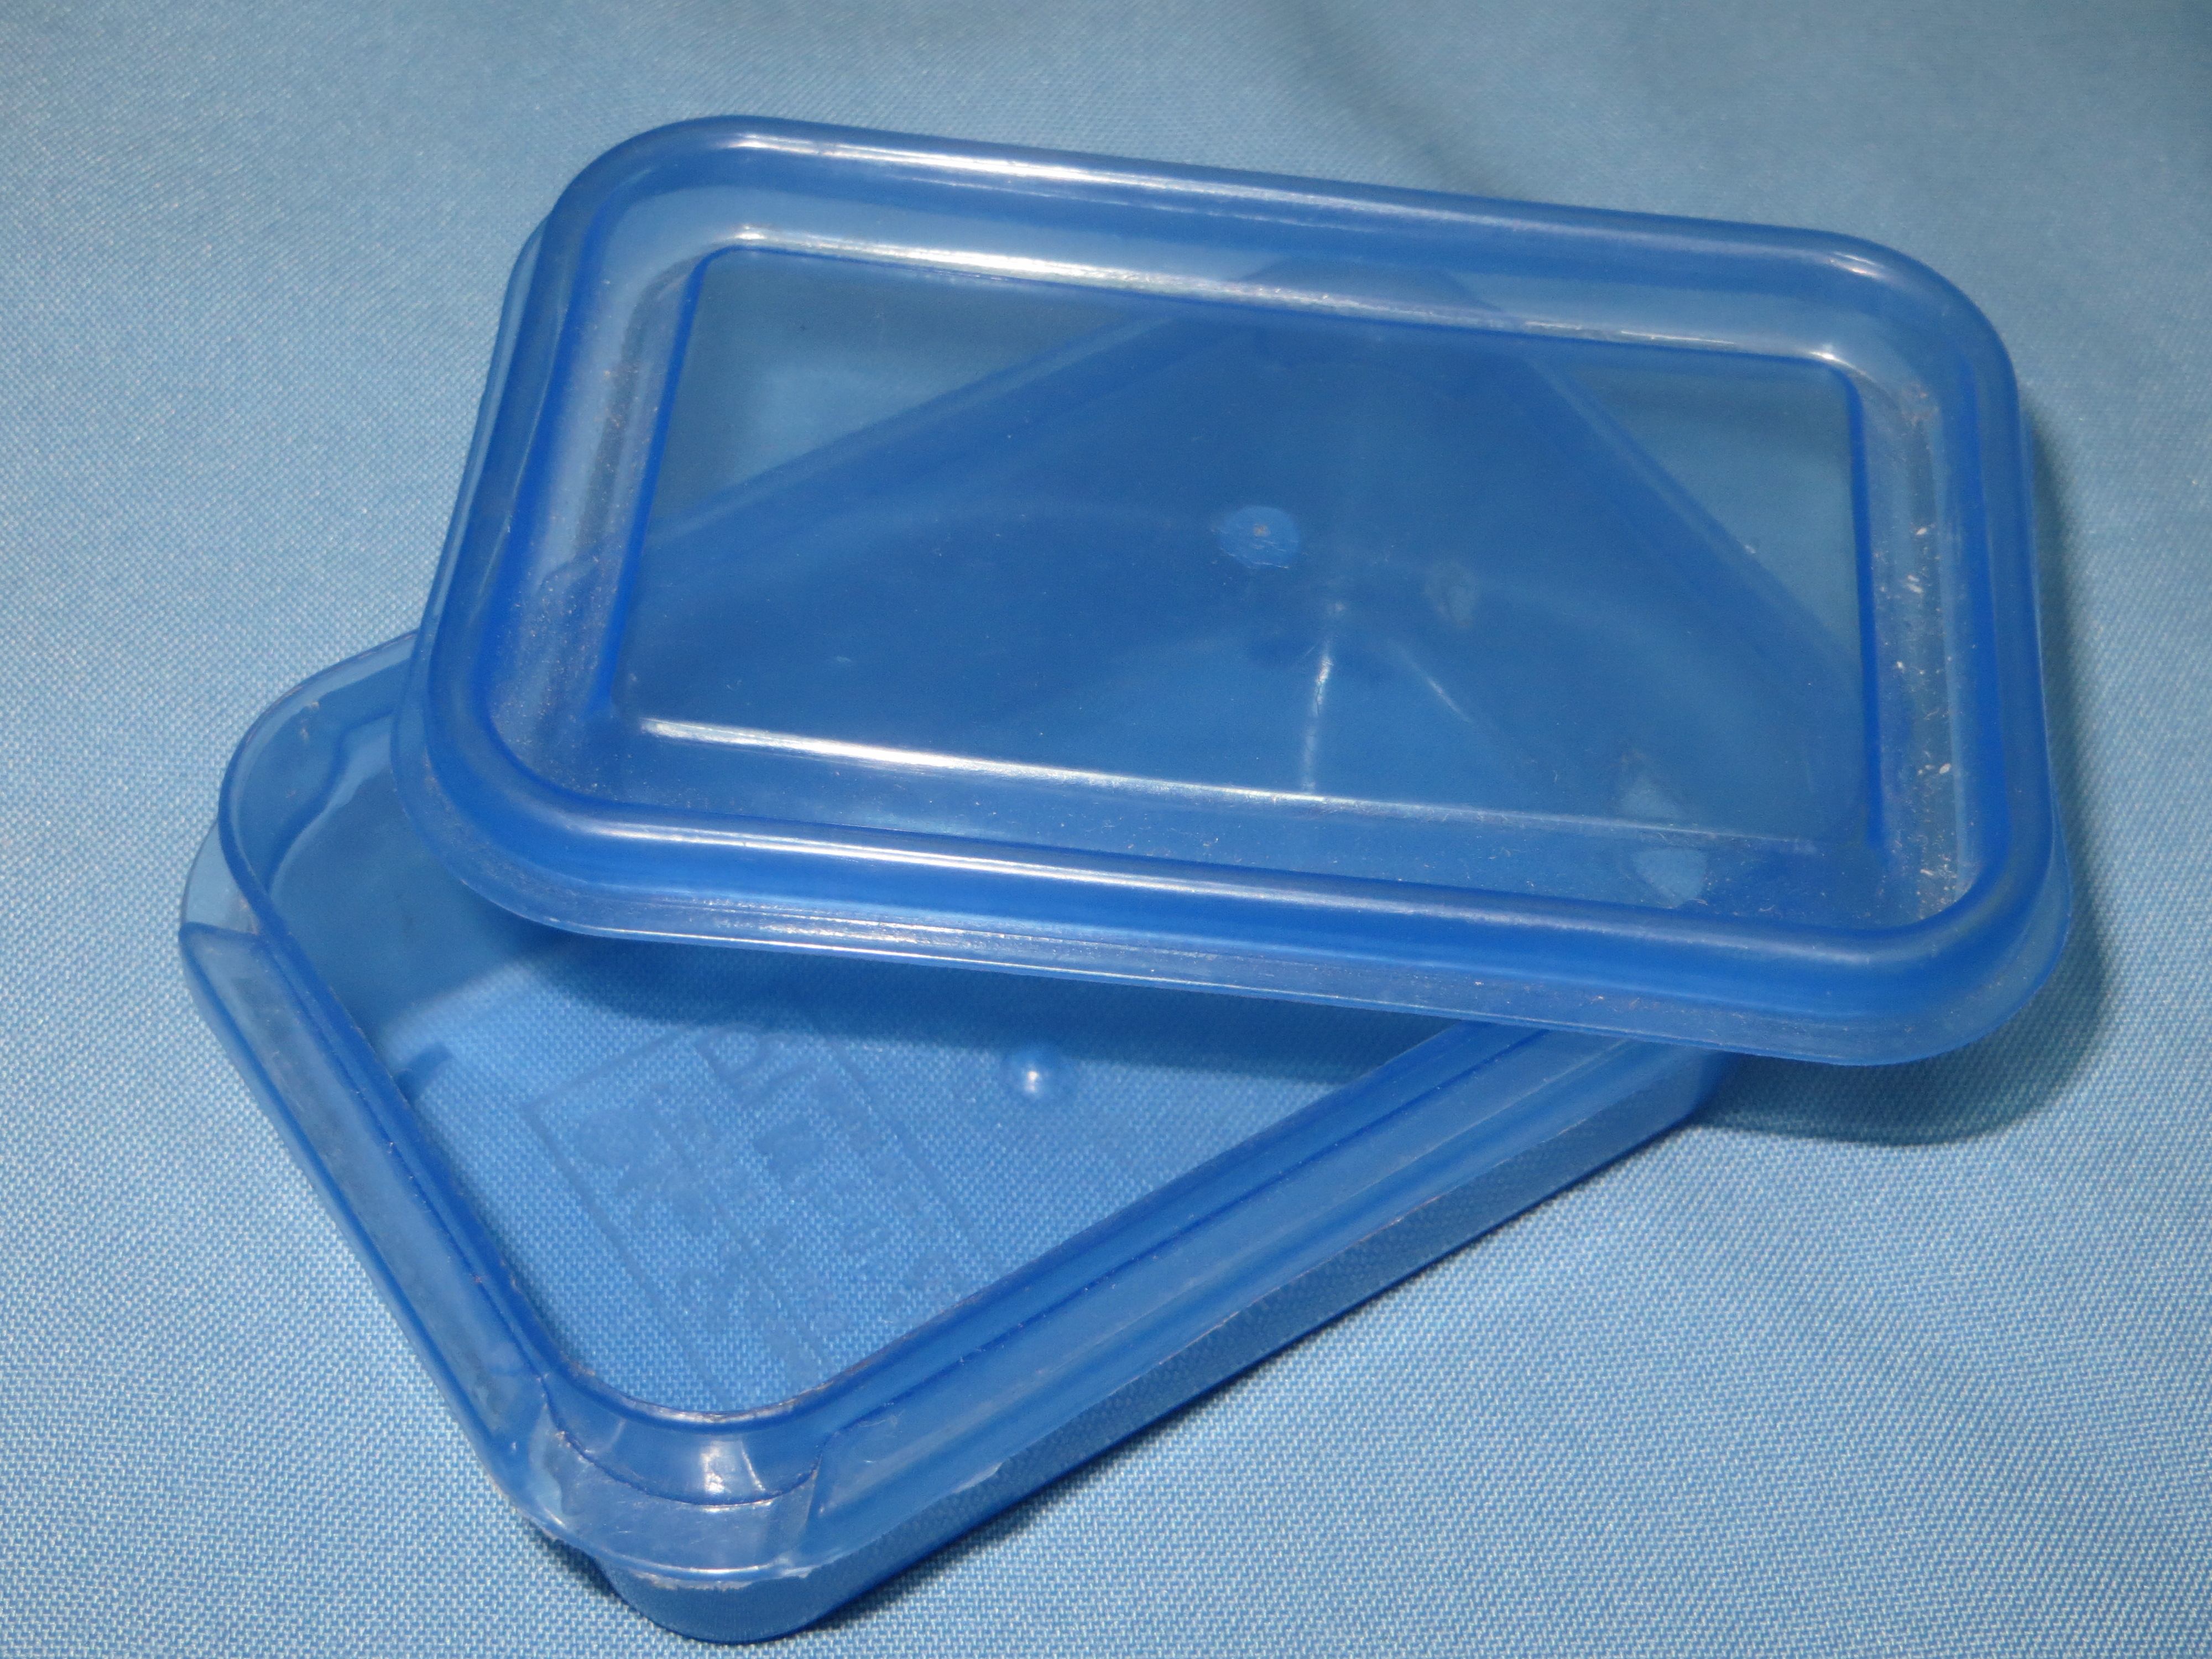
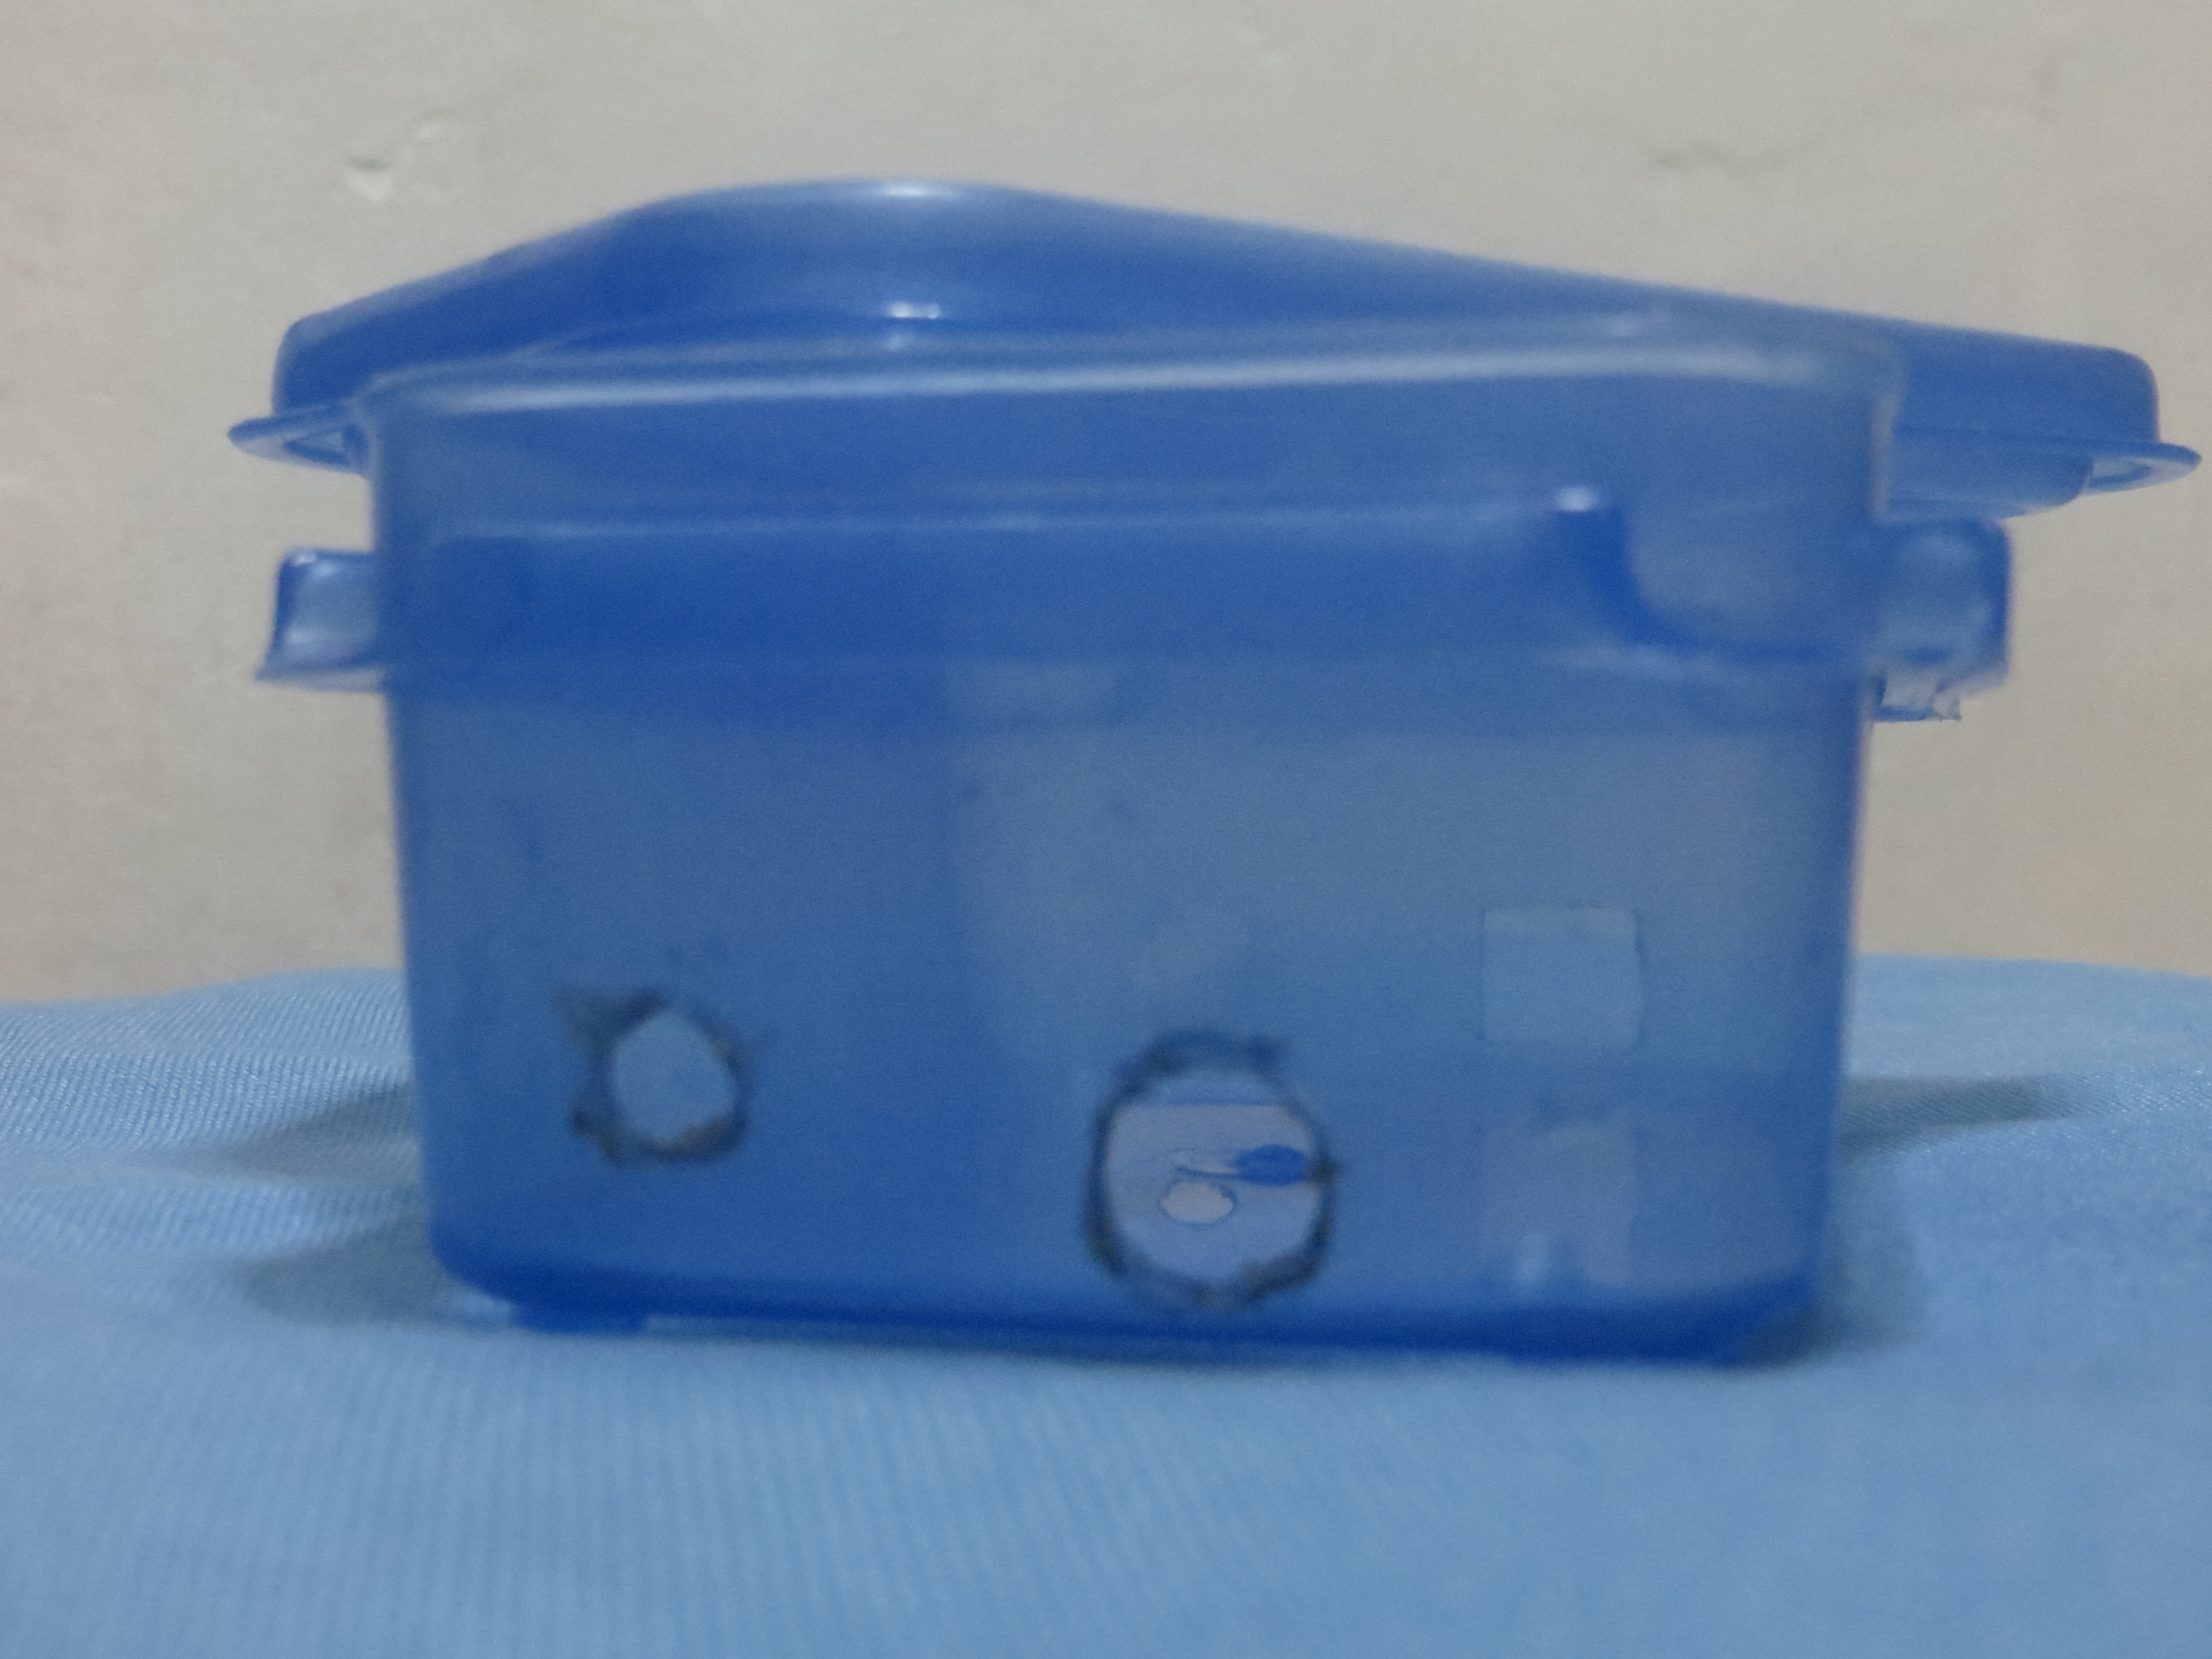
Get your 2x3 plastic container.
Make path hole for easy detaching of pH and Temp probe sensors.
- Draw a circle with a same circumference of female connector and BNC connector.
- Make sure that they are not so near or far.
- Carefully cut the circle using a hot knife or any drilling tool you want.
- Insert the BNC connector of ph Meter and female audio connector.
- Add Jumper wires on female audio connectors' pin headers
- Glue them together so it won't be easily removed.
Make It Portable - Add MKR1000 Connections
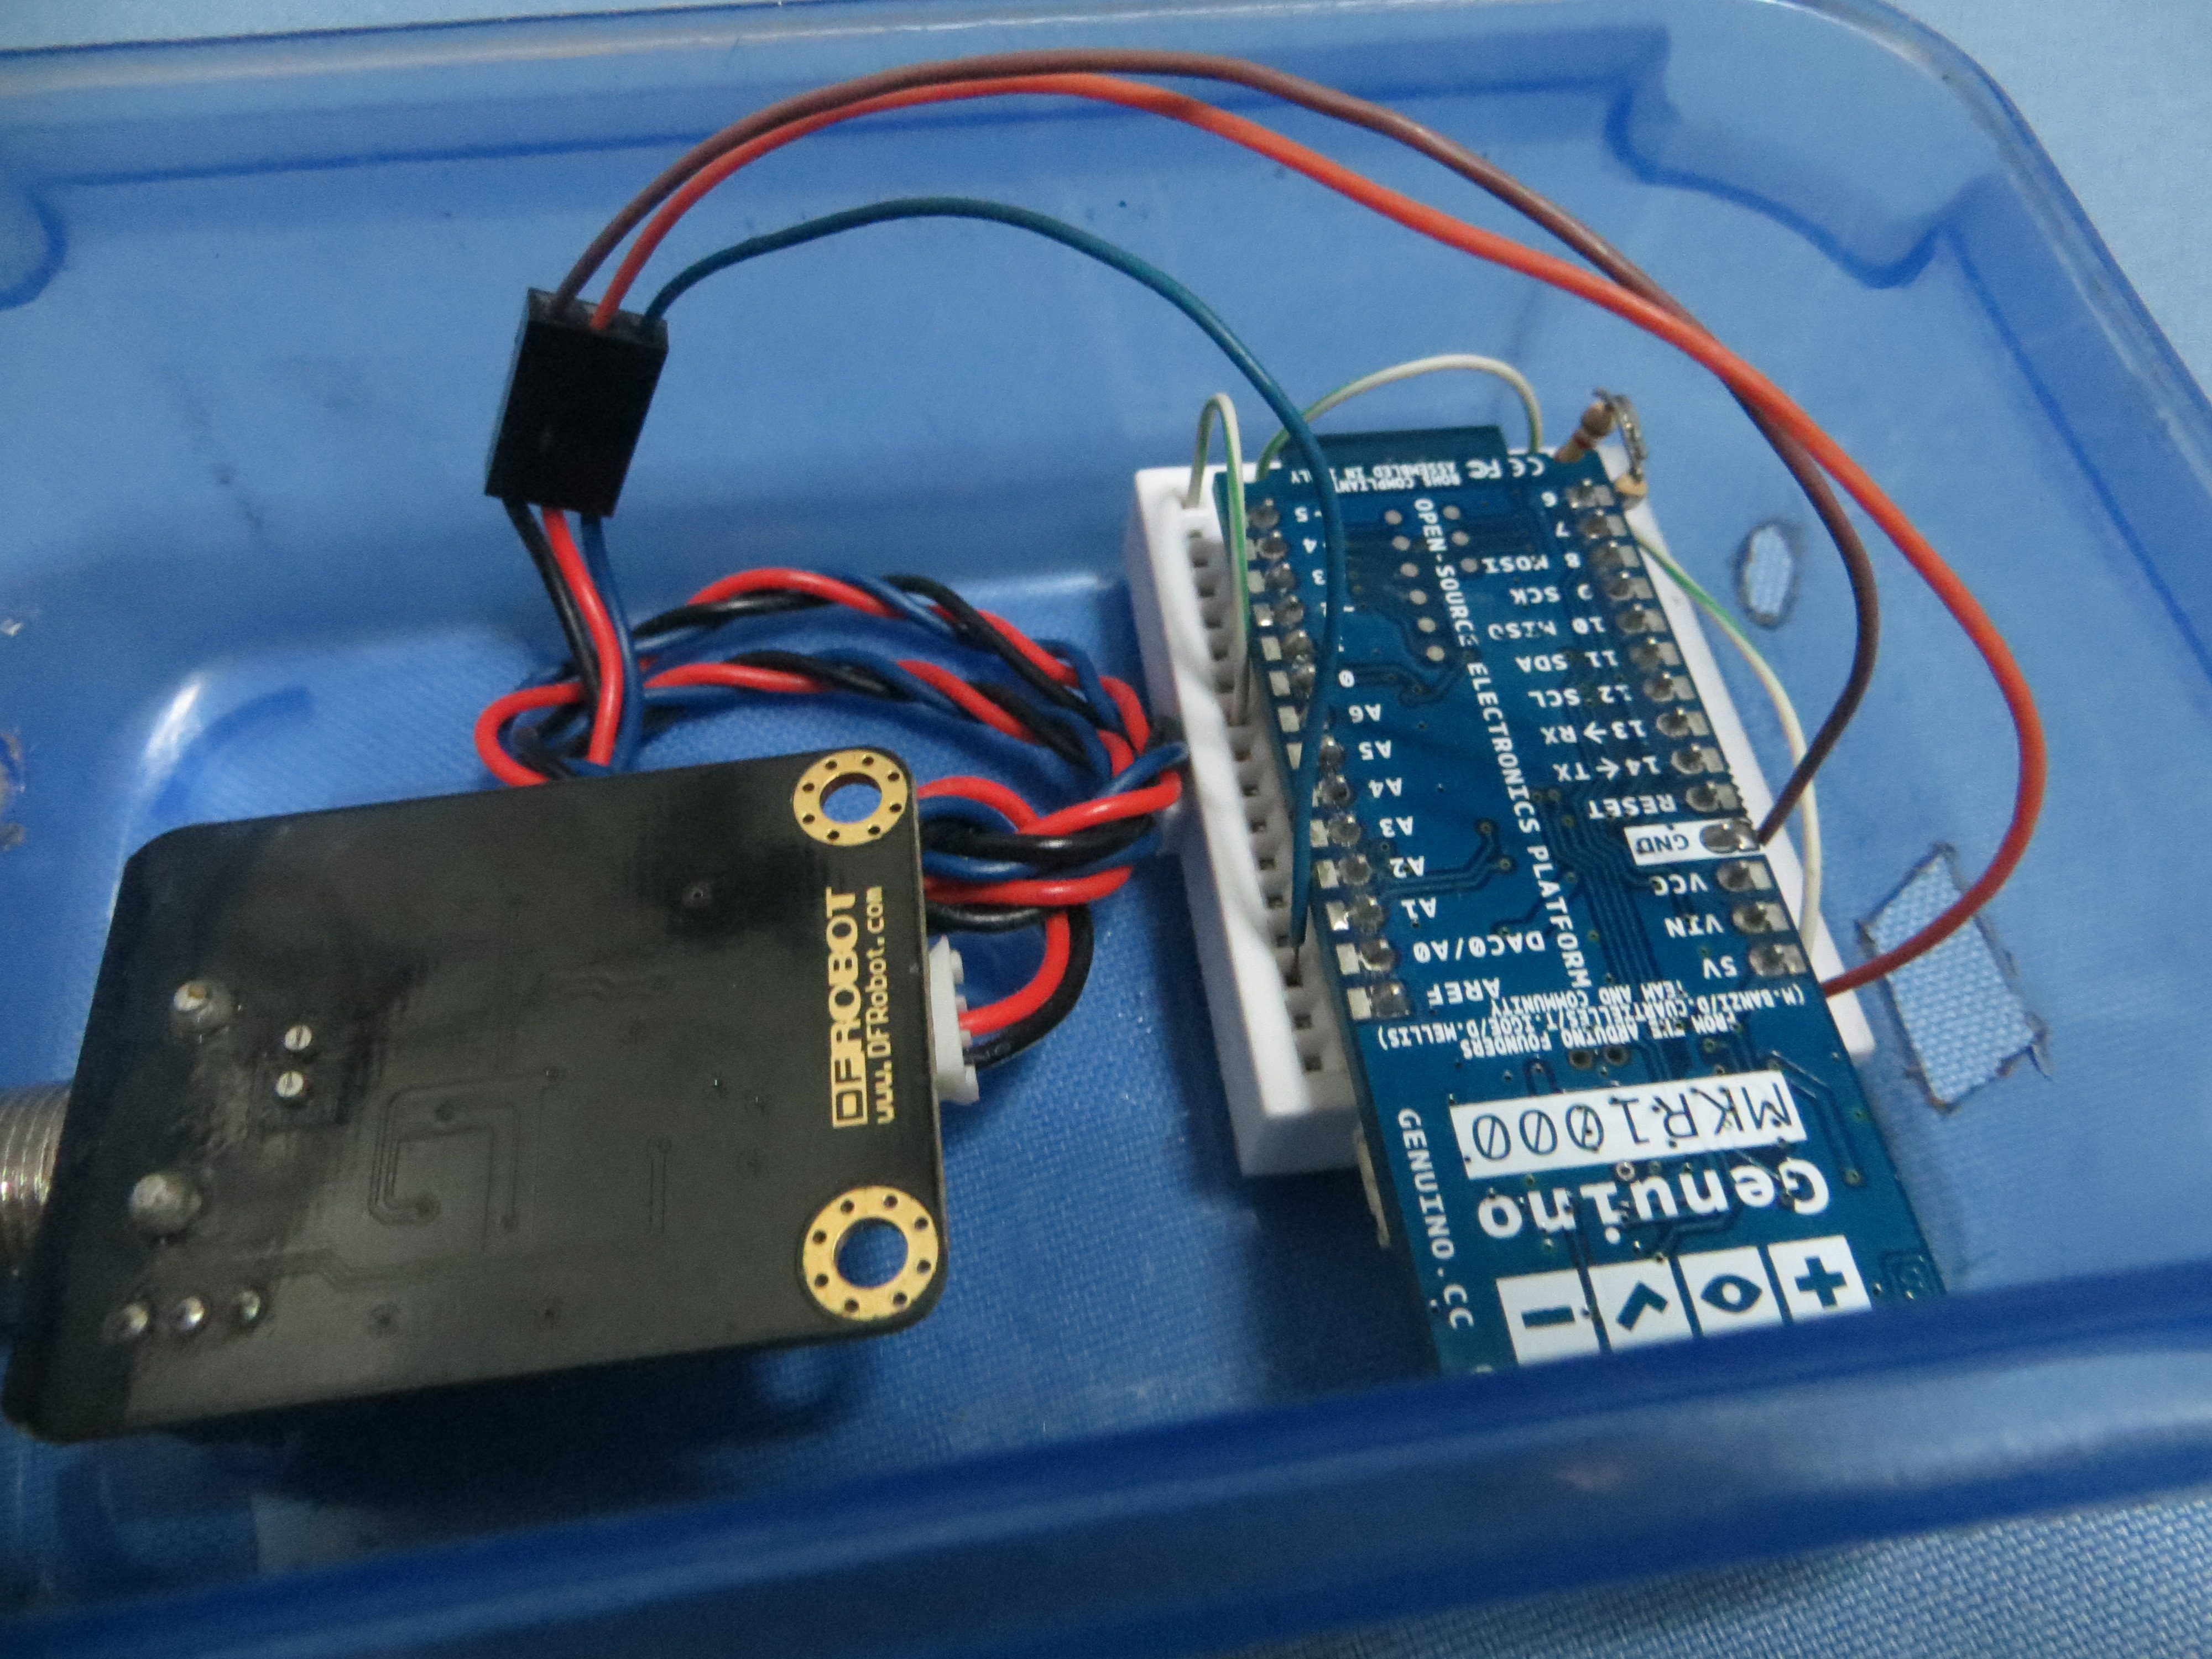
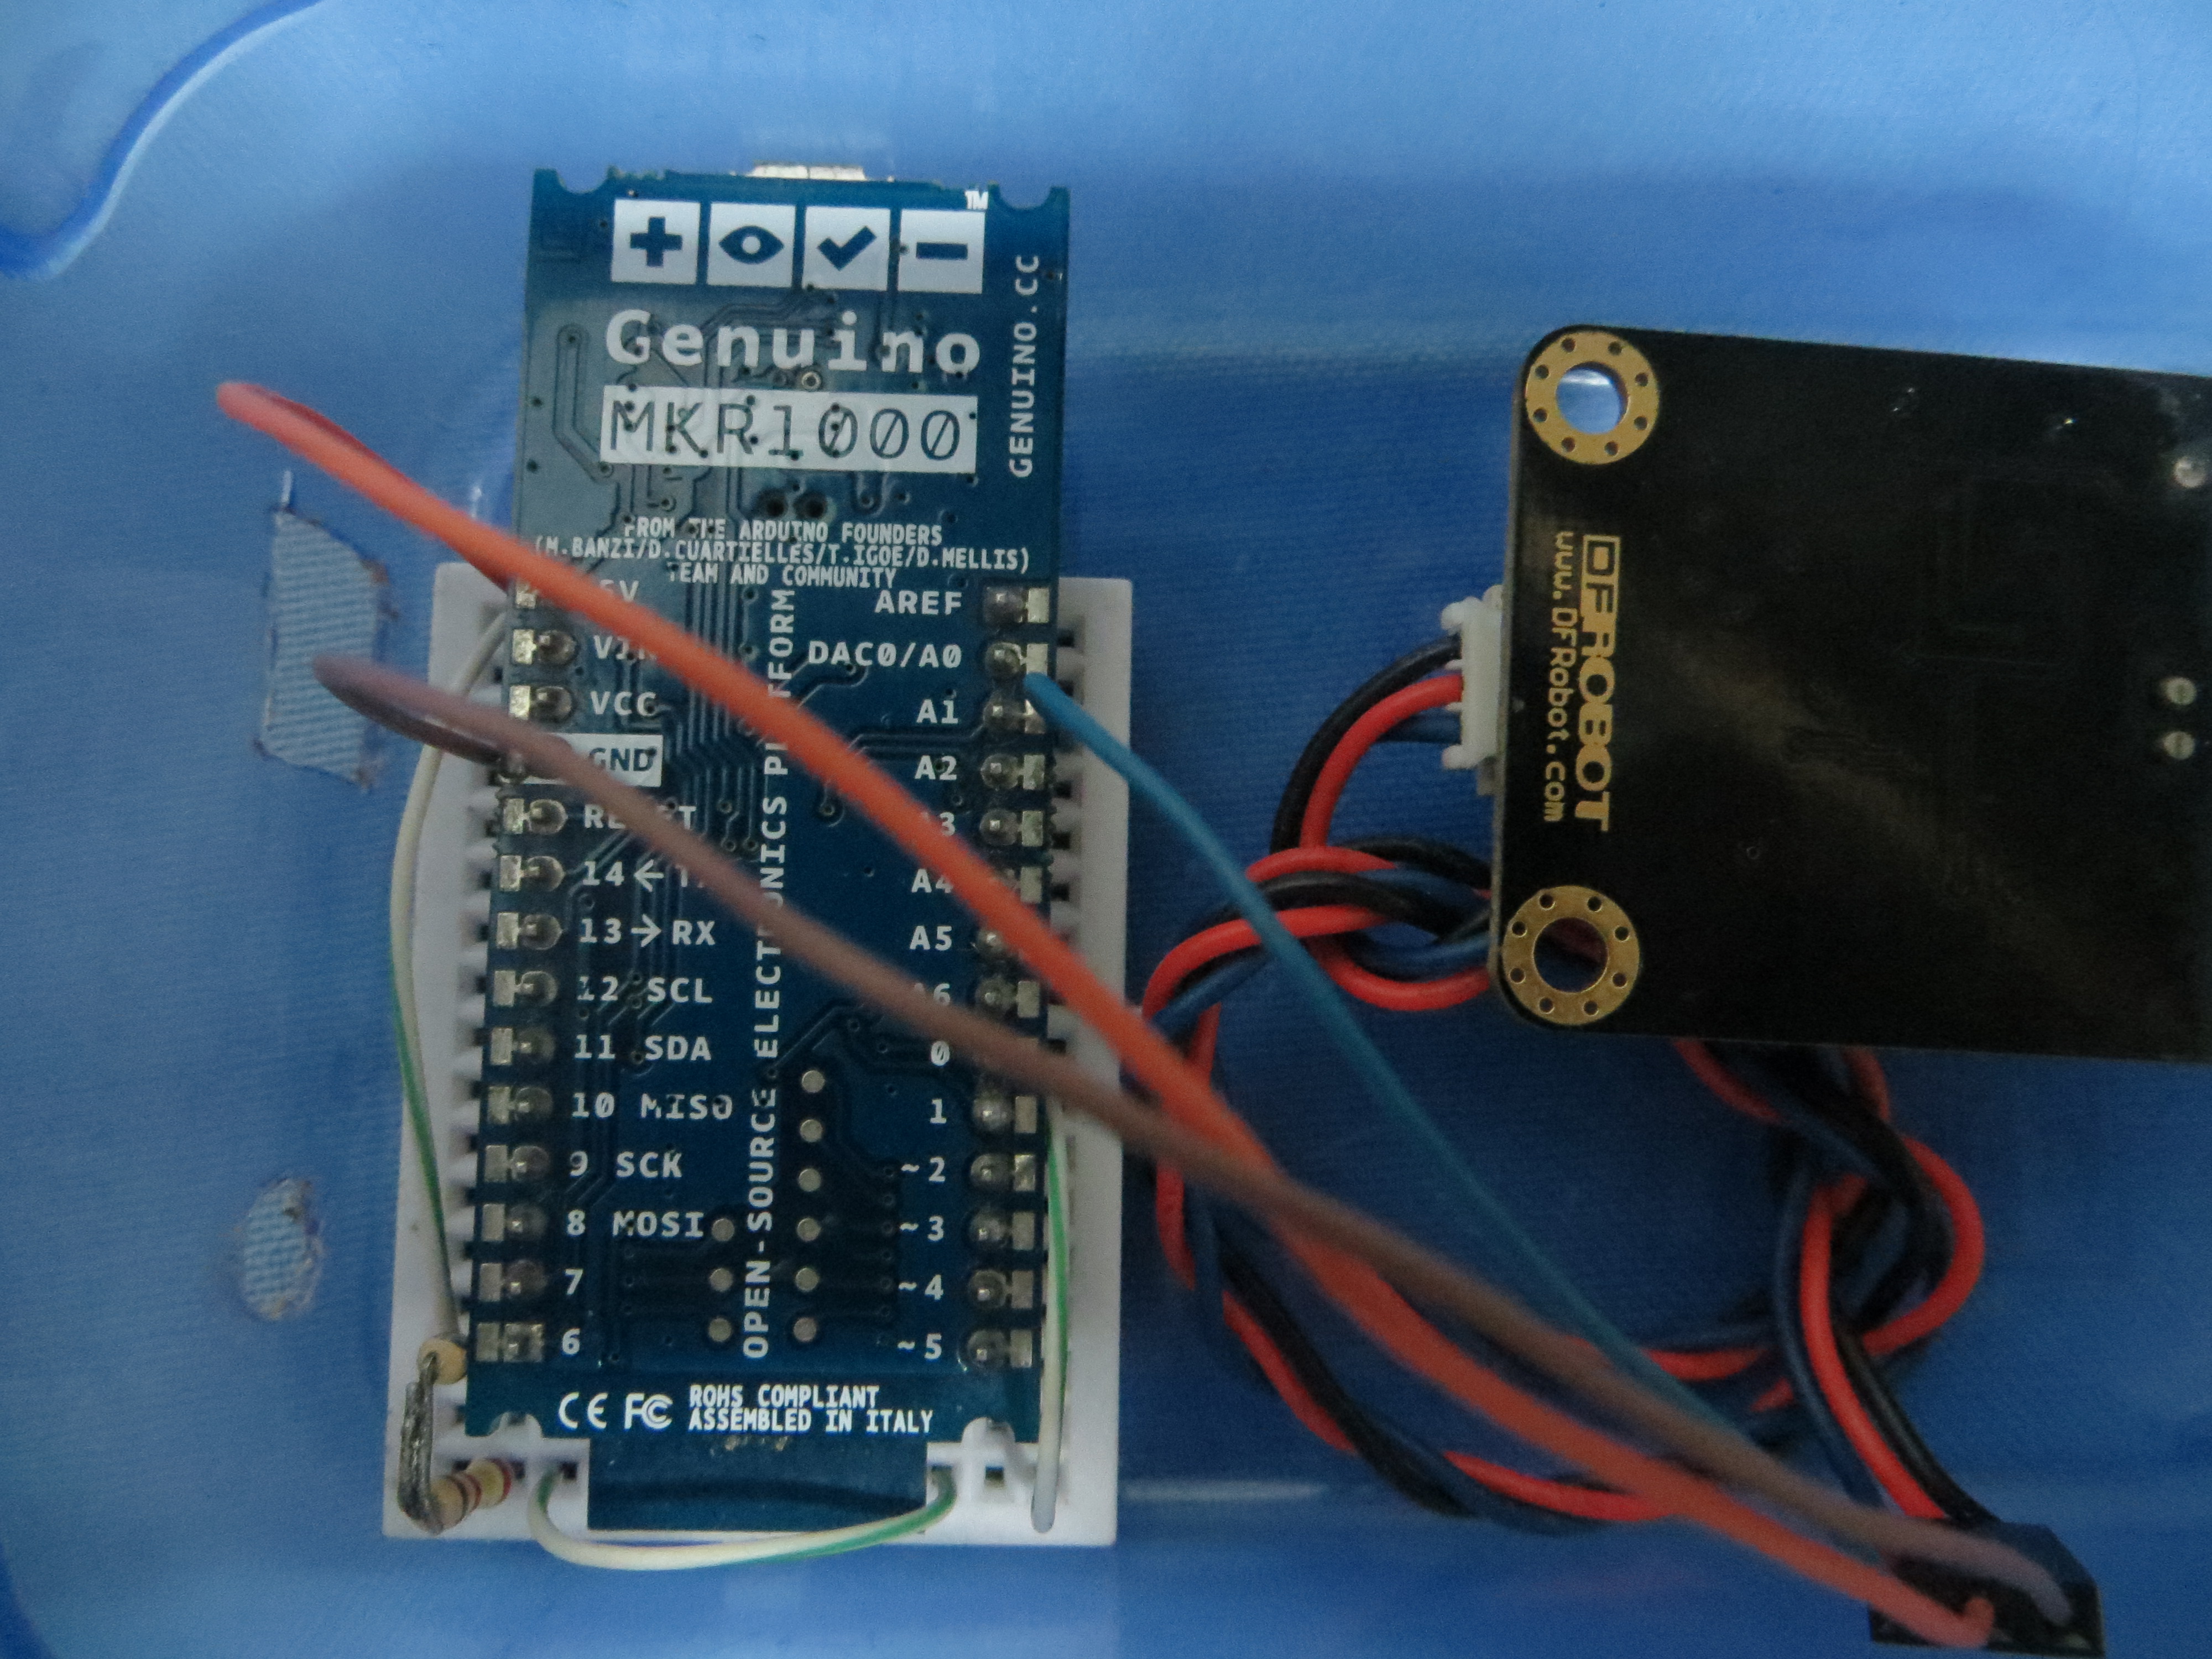
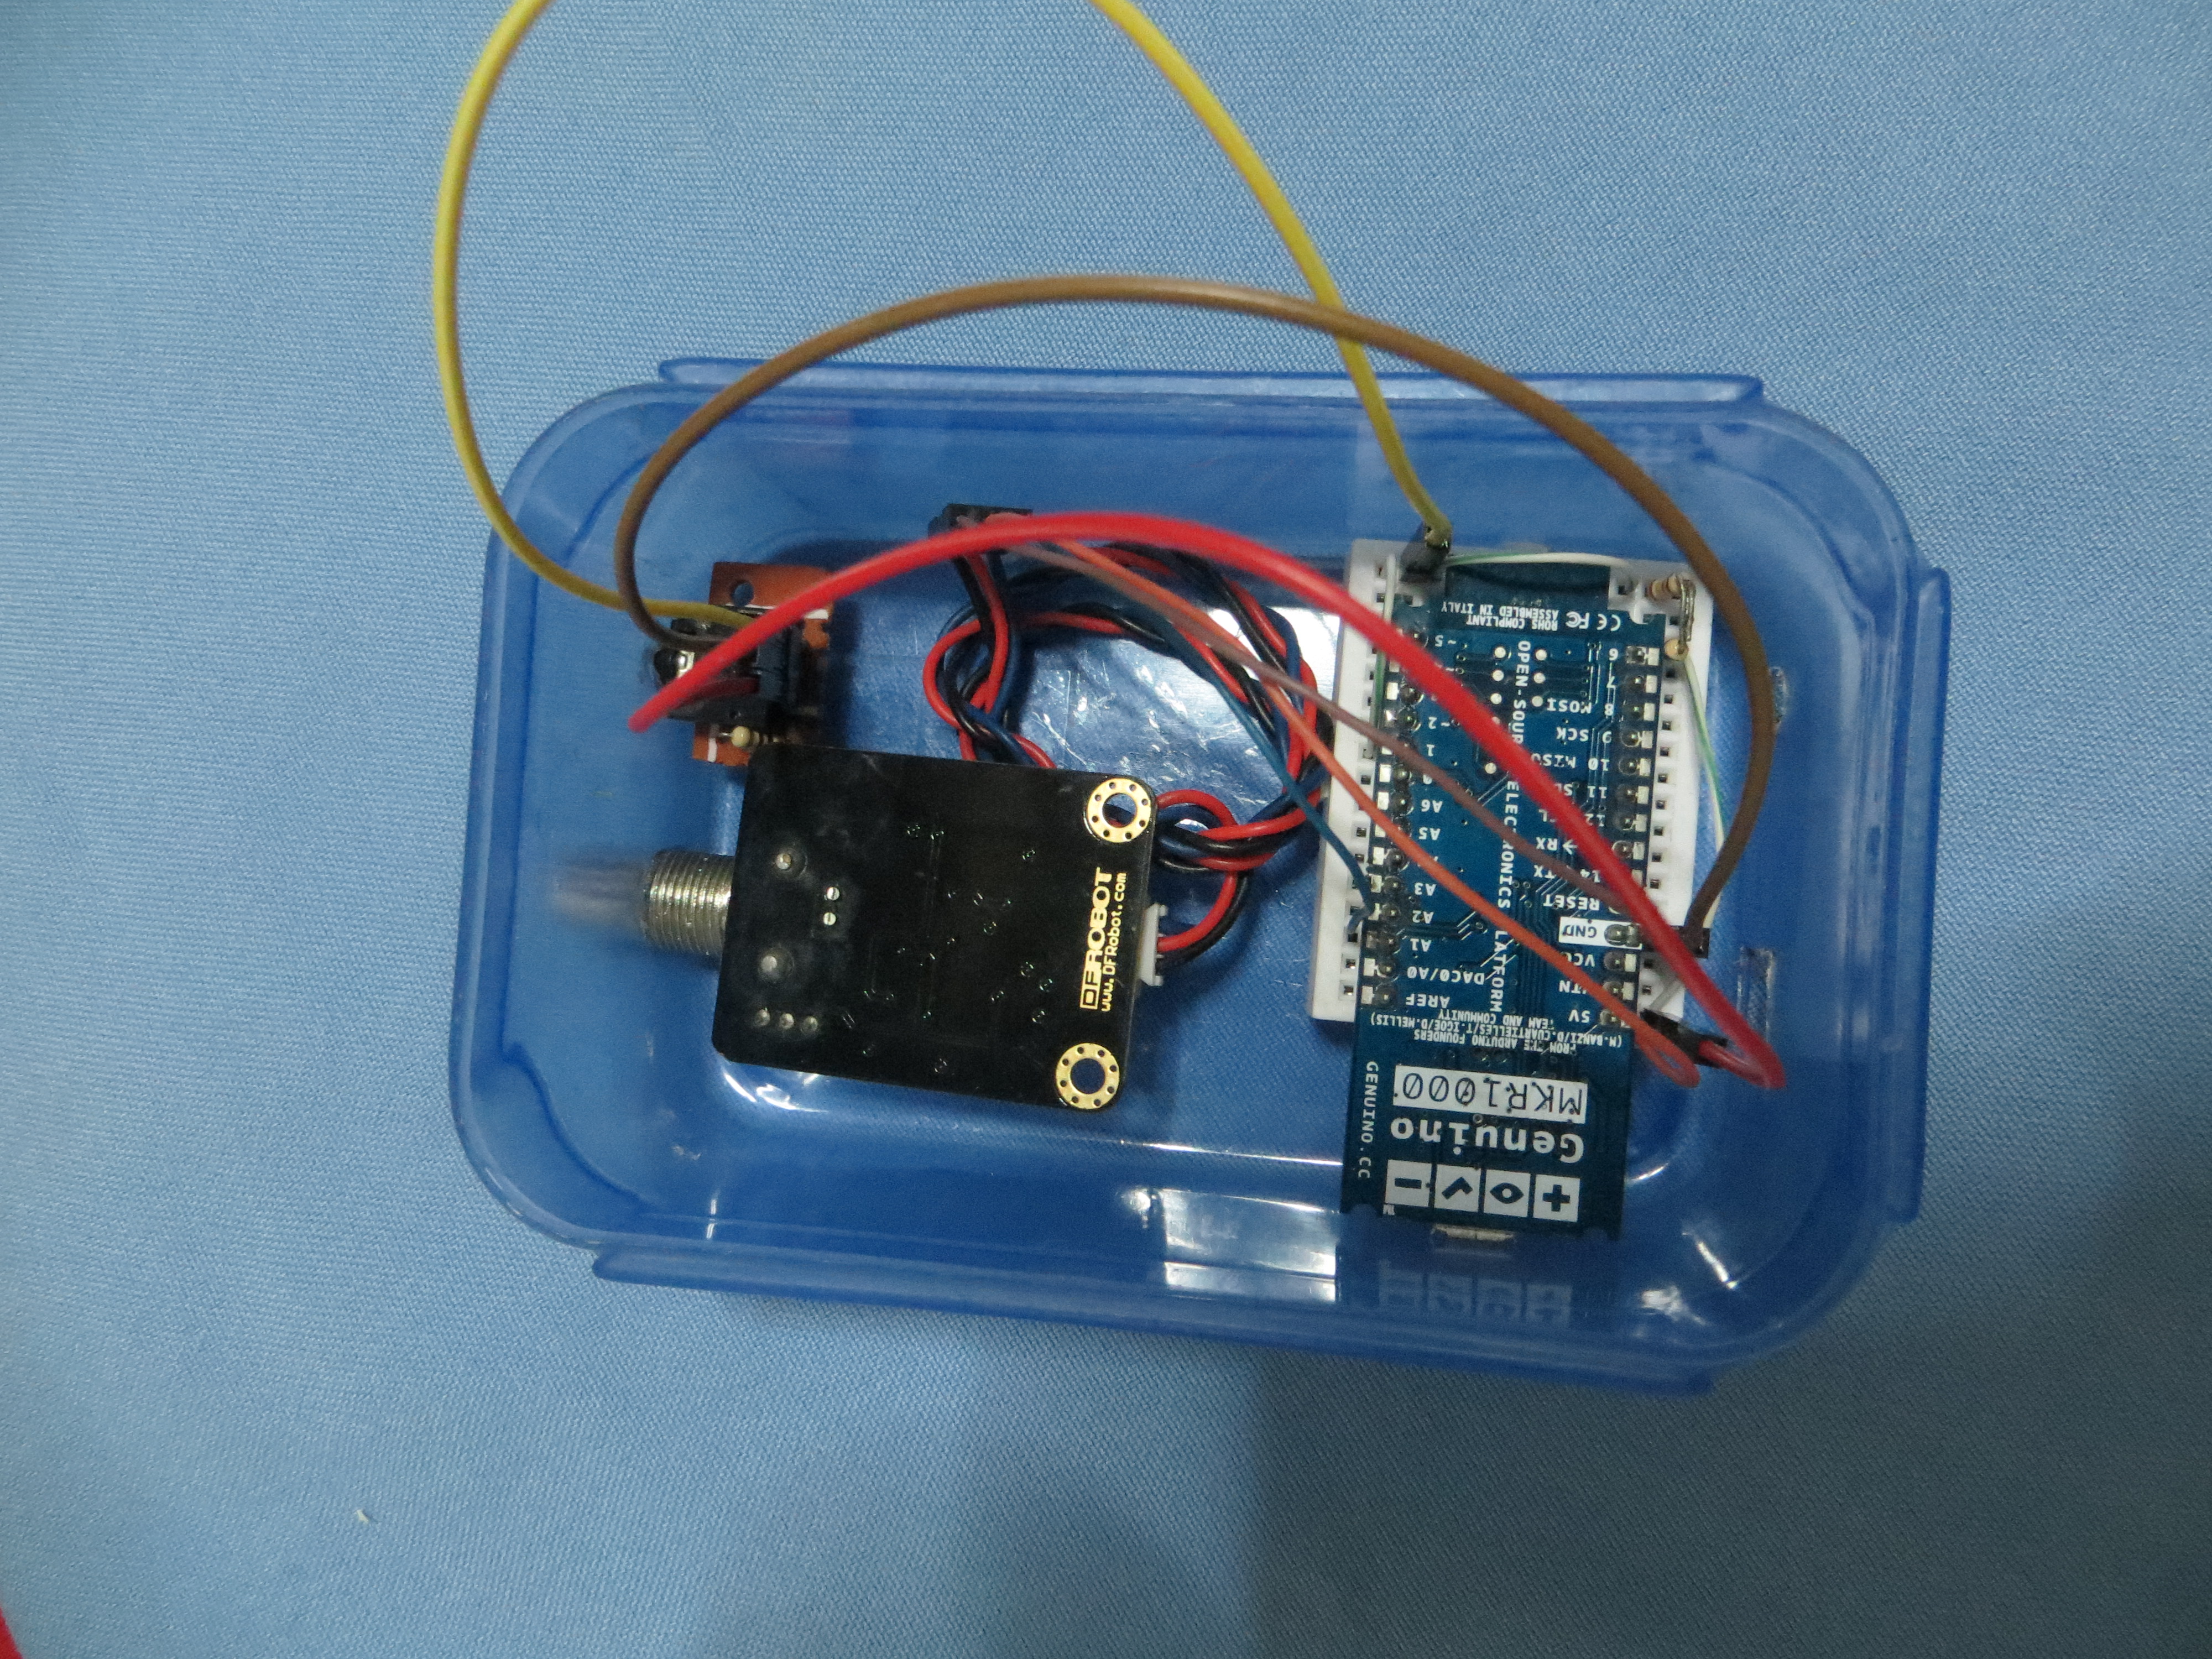
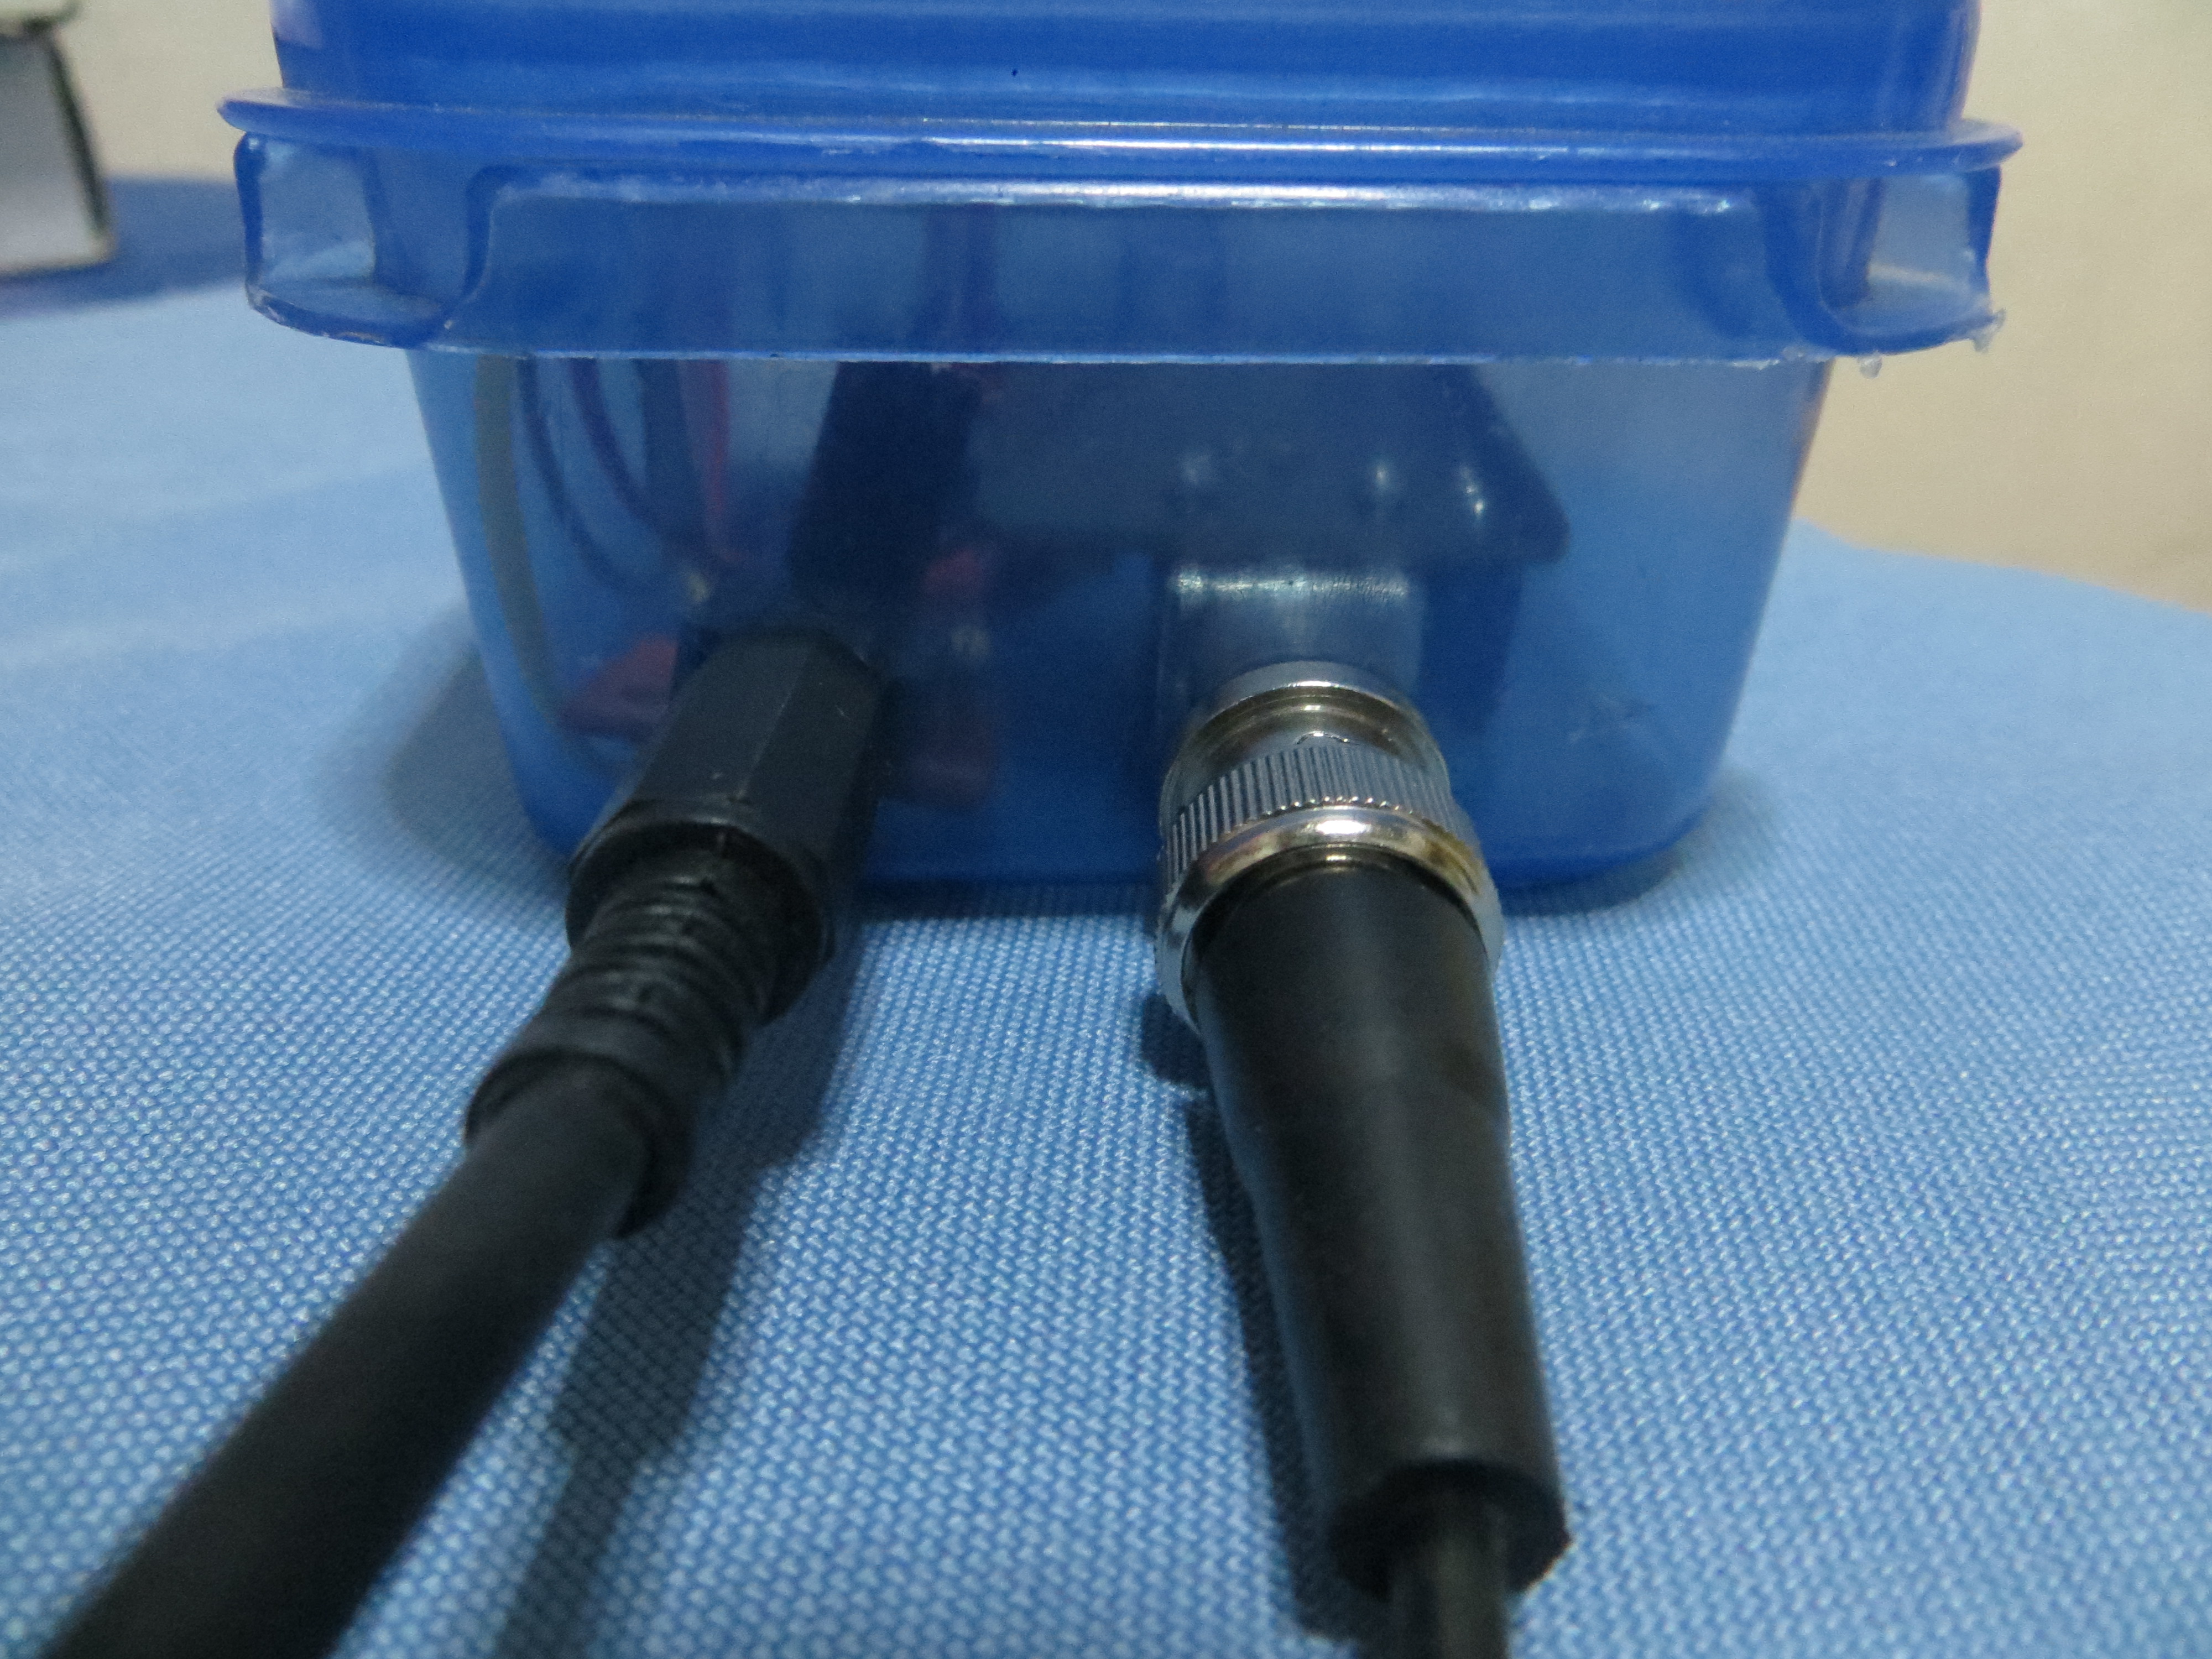
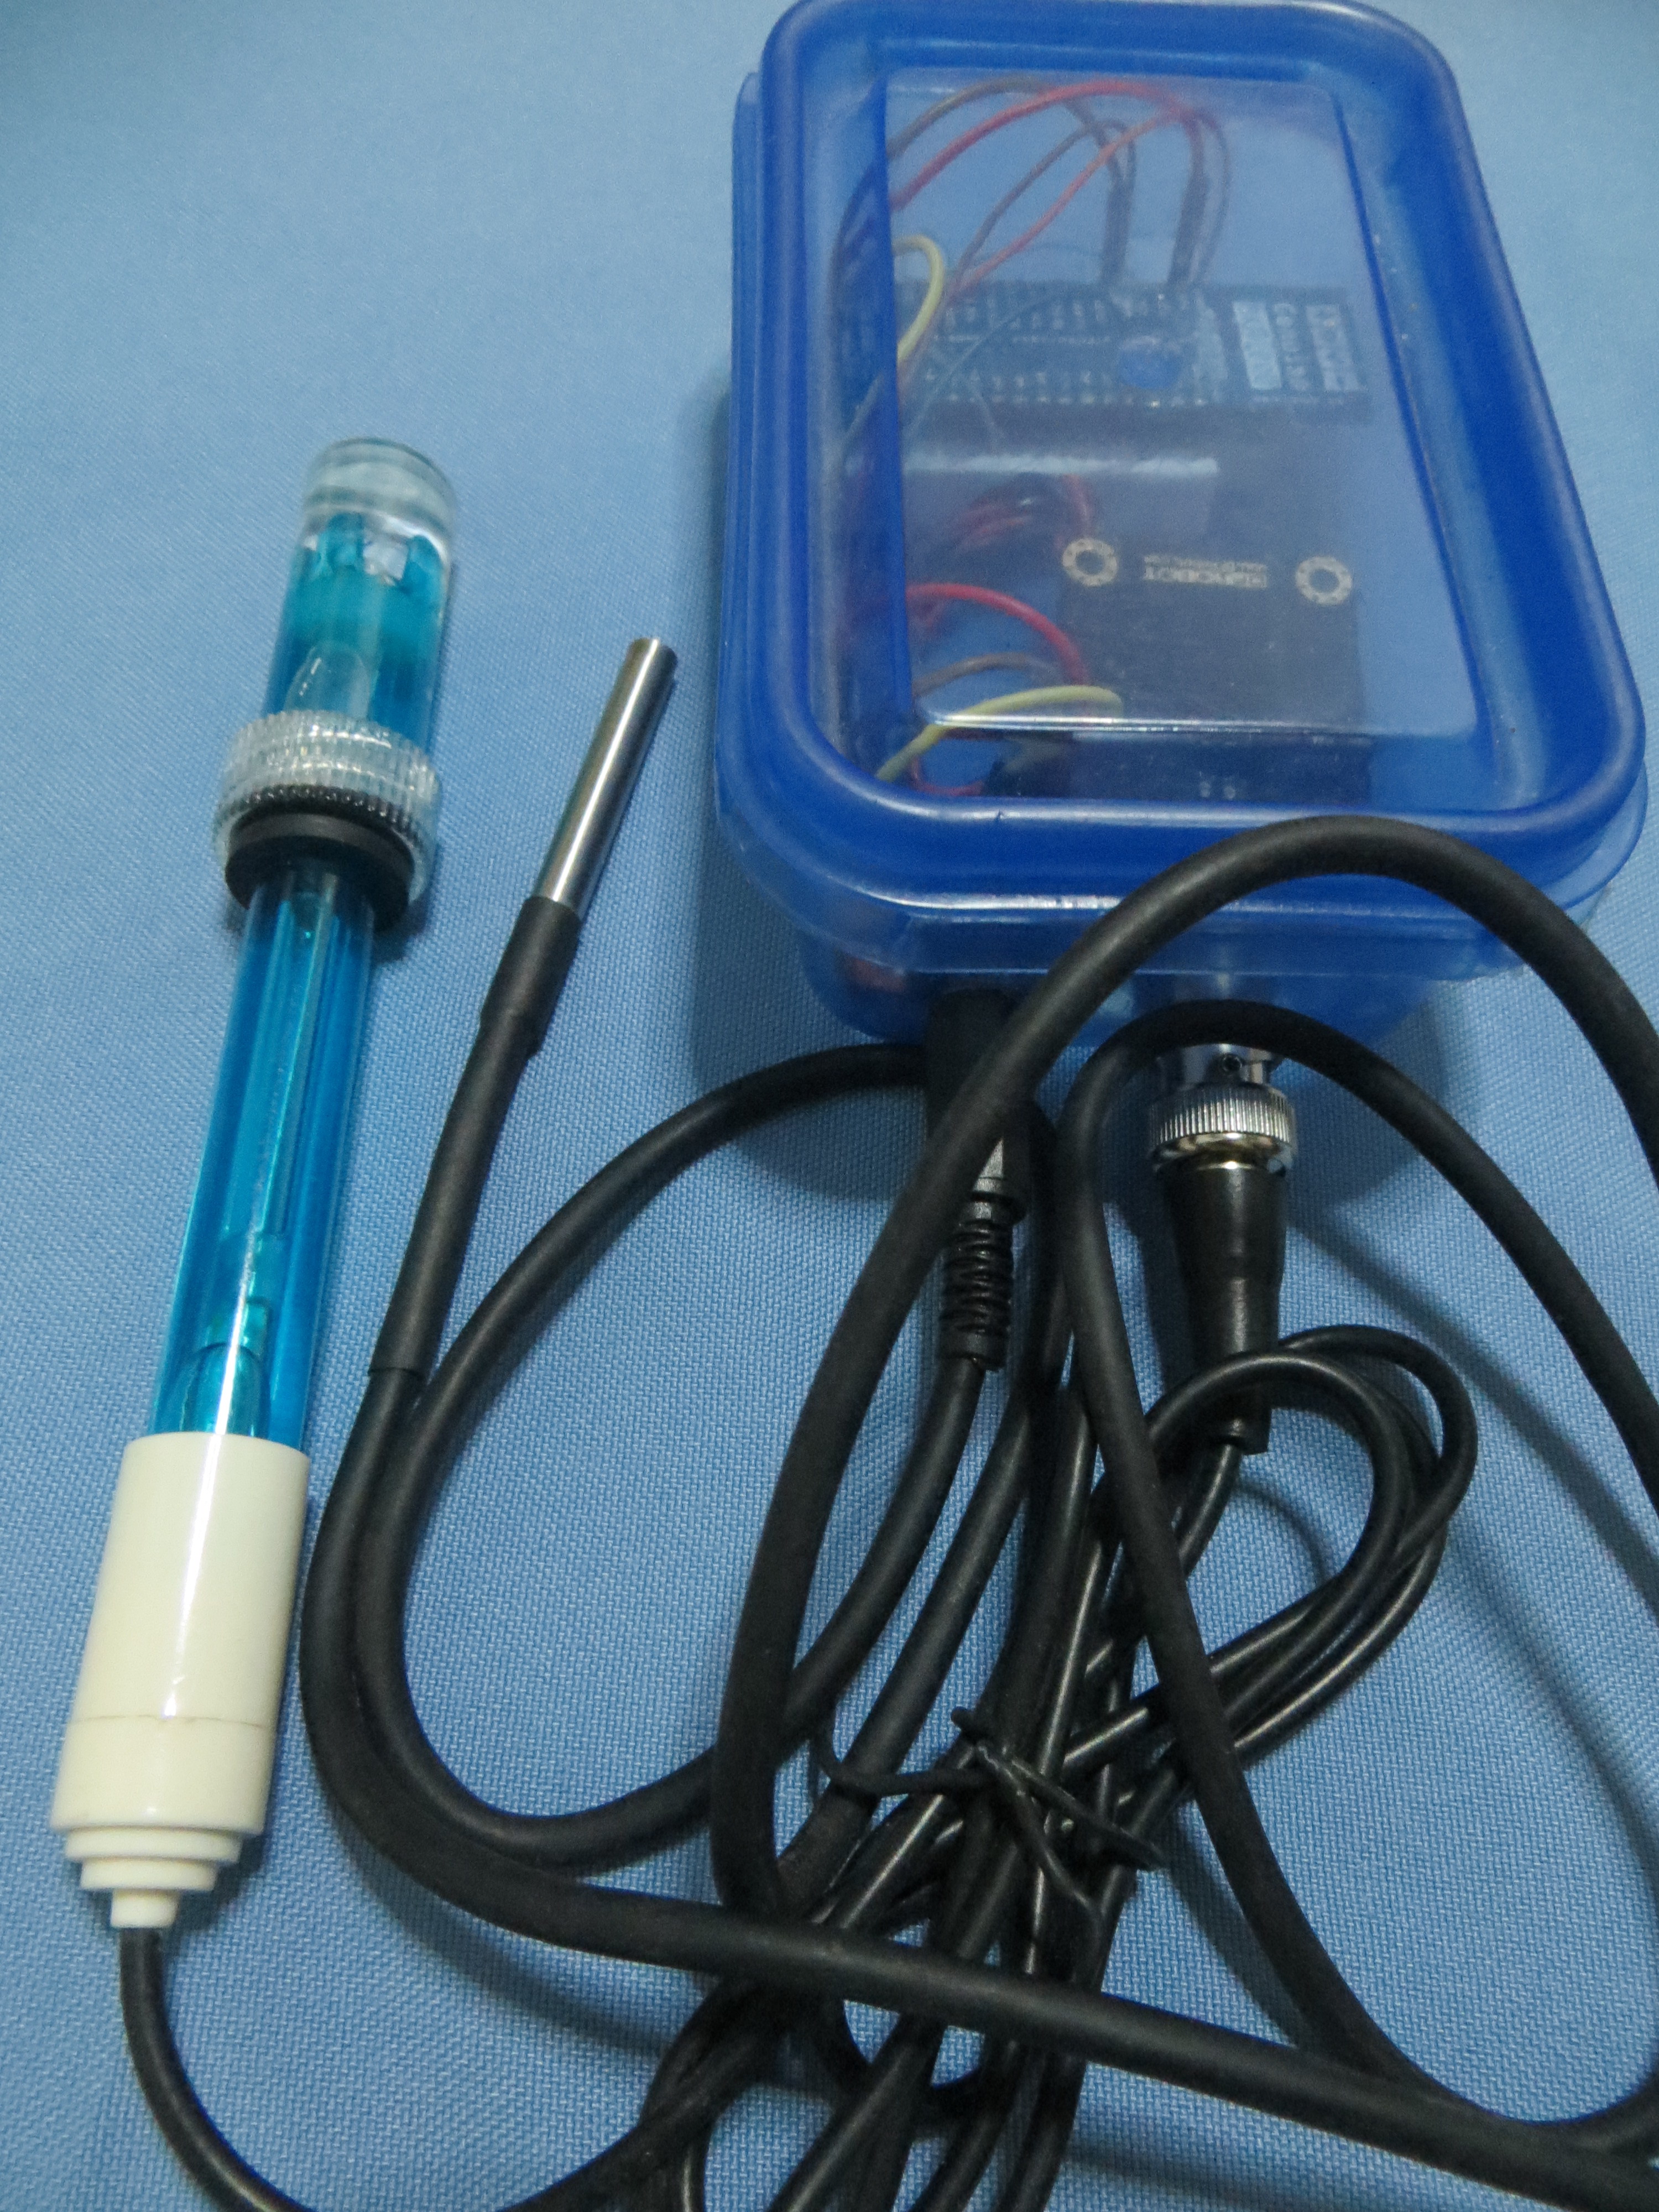
Connect pH Sensor:
- Connect 3 jumper wires from ph meter sensors' female header to MKR1000
- Place ph meter VCC to 5V, GND to GND and Data pin to A1
Connect Temperature Sensor:
- Place temp sensor VCC to 5V , GND to GND and Data to the extra pin of Breadboard where the 4.7k resistor has connection to Digital pin 1.
Connect the battery for MKR1000 and cover the container.
Finally, attached the temperature and pH sensor.
Viola! Congratulations you now have your pool monitoring device!
Finally! Test on Field!
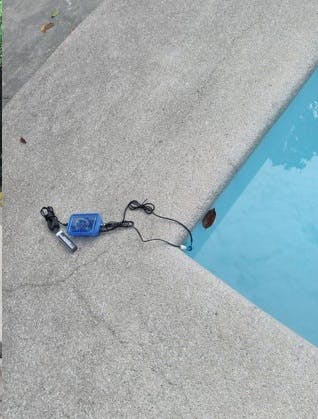
Once the MKR1000 is powered up and connected to wifi, it will start sending readings from the sensors,
The digital pin 13 LED will blink once per successful sent.
We have tested the hardware sensor to Private, Public and School Swimming Pool.
Collecting the data from these respondents' pool enabled us to analyze the capability of the hardware.
Placing the MKR1000 and sensor on a box allows it to avoid water contamination.
By doing this, you can monitor the quality of your water and normalize them by placing the desired chemicals.
Hope this instructables tutorial helps people to build their own DIY swimming pool water quality monitoring device. May there will be an increased awareness regarding the continuous degradation of the swimming pool water quality as people tend to focus more on the amenities that are offered instead of checking how safe they are. They also intend to contribute to the community by being able to provide a means to make water quality testing more efficient and effective without the unnecessary sacrifice of resources.
Feel free to replicate it and happy making cool things! :)