Waste Bin Monitoring With ESP32-CAM and Adafruit IO
by OwenY1 in Circuits > Sensors
2528 Views, 1 Favorites, 0 Comments
Waste Bin Monitoring With ESP32-CAM and Adafruit IO

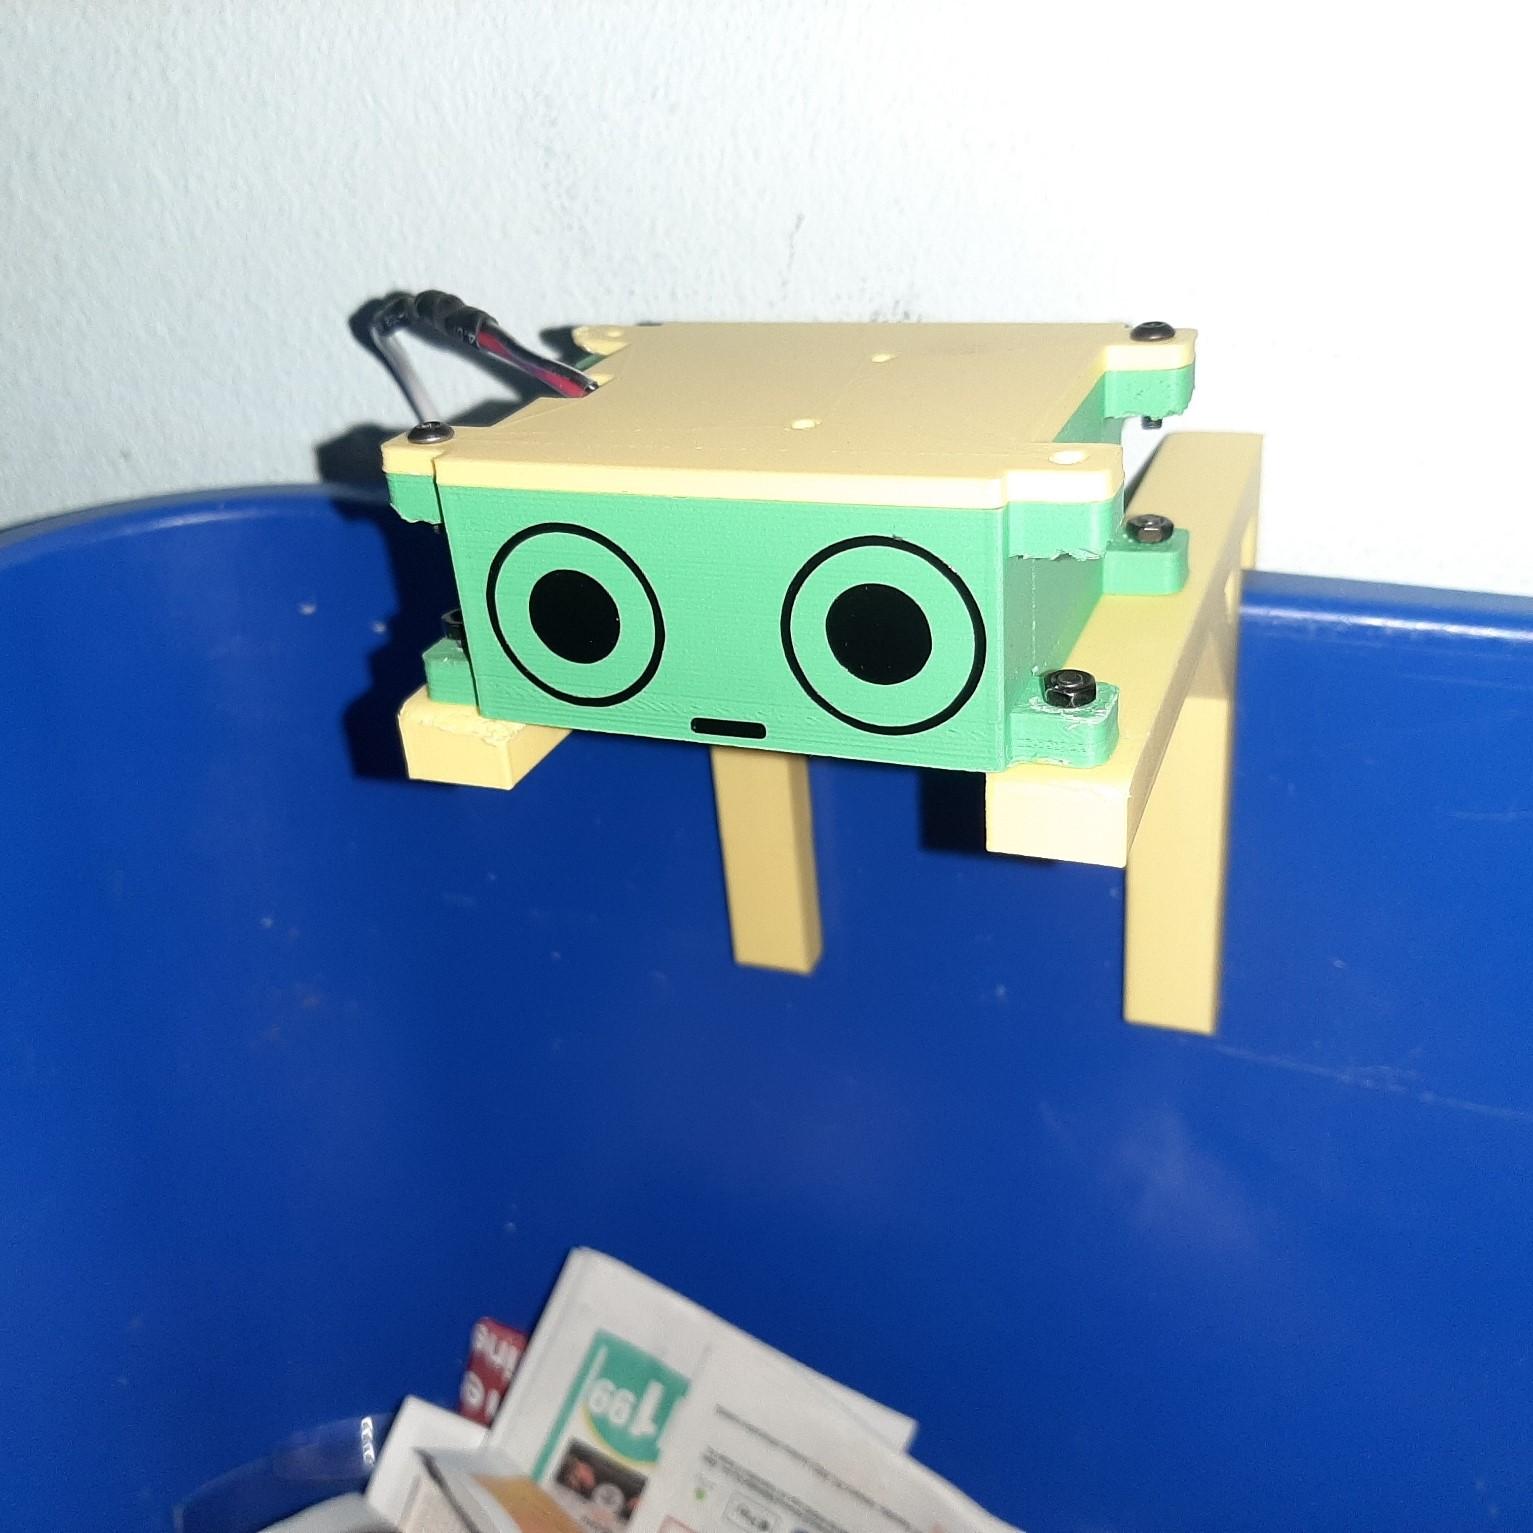
This project is called Waste Watcher, a project from ZotBins, which is an IoT based sensor module to help keep track of waste data metrics with real-time bin fullness data and waste images. This is intended to help quantify and promote actionable solutions to reduce waste 🌱.
If you need help with any of these instructions feel free to reach out in our discord server.
Features
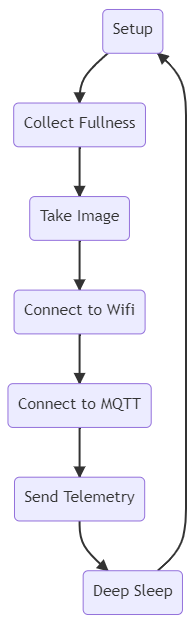
- 🗑 Collect waste bin fullness telemetry
- 📷 Capture image of inside the waste bin
- 🔧 Fully customizable (adjust data collection rate, tweak case design for your needs, change camera settings, etc.)
Why? ¯\(ツ)/¯
Simply put, we generate way too much waste here in the United States 🤧. According to the EPA, 267.8 million tons of trash were generated. And even though the US represents 4% of the global population we generate 12% of global municipal solid waste, right behind India and China ( Verisk Maplecroft, 2019). The trash itself also presents other harmful environmental impacts. US landfills are the 3rd largest source of human-related methane emissions (EPA). Waste also affects 43% of marine mammals (EPA 2017).
Waste monitoring systems already exist in commercial settings, ZotBins expands waste monitoring to the individual and community level. Some of these existing systems include Bigbelly, Compology, and Enevo. ZotBins is completely opensource. Built for people, by people. If you would like to contribute please checkout our Github repo.
Adafruit IO
This project, in particular, uses Adafruit IO, an off-the-shelf IoT platform. For now, Adafruit IO is a great addition to this project and helps in the following ways:
Supplies
Materials
- PLA Filament
- ESP32-CAM
- HC-SR04
- Solid Core Wire
- Waste Watcher PCB
- 6 of 12mm M3 Screws
- 6 M3 nuts
- 1 of the 2 Pin Screw Terminal
- 2 of the 1 x 8 Female header pins
- Spare USB cable
- Heat Shrink
Equipment
- 3D printer (or 3D Printing Service)
- Soldering Iron
- Helpings Hands for Soldering
- Wire Stripper
- Computer
- FTDI Adapter and 4 Female to Female Adapter
- Jumper Cap
3D Printing the Case
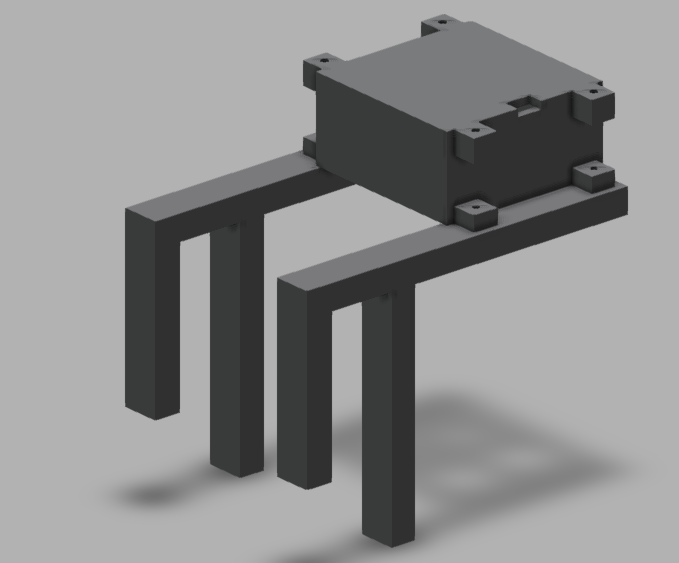
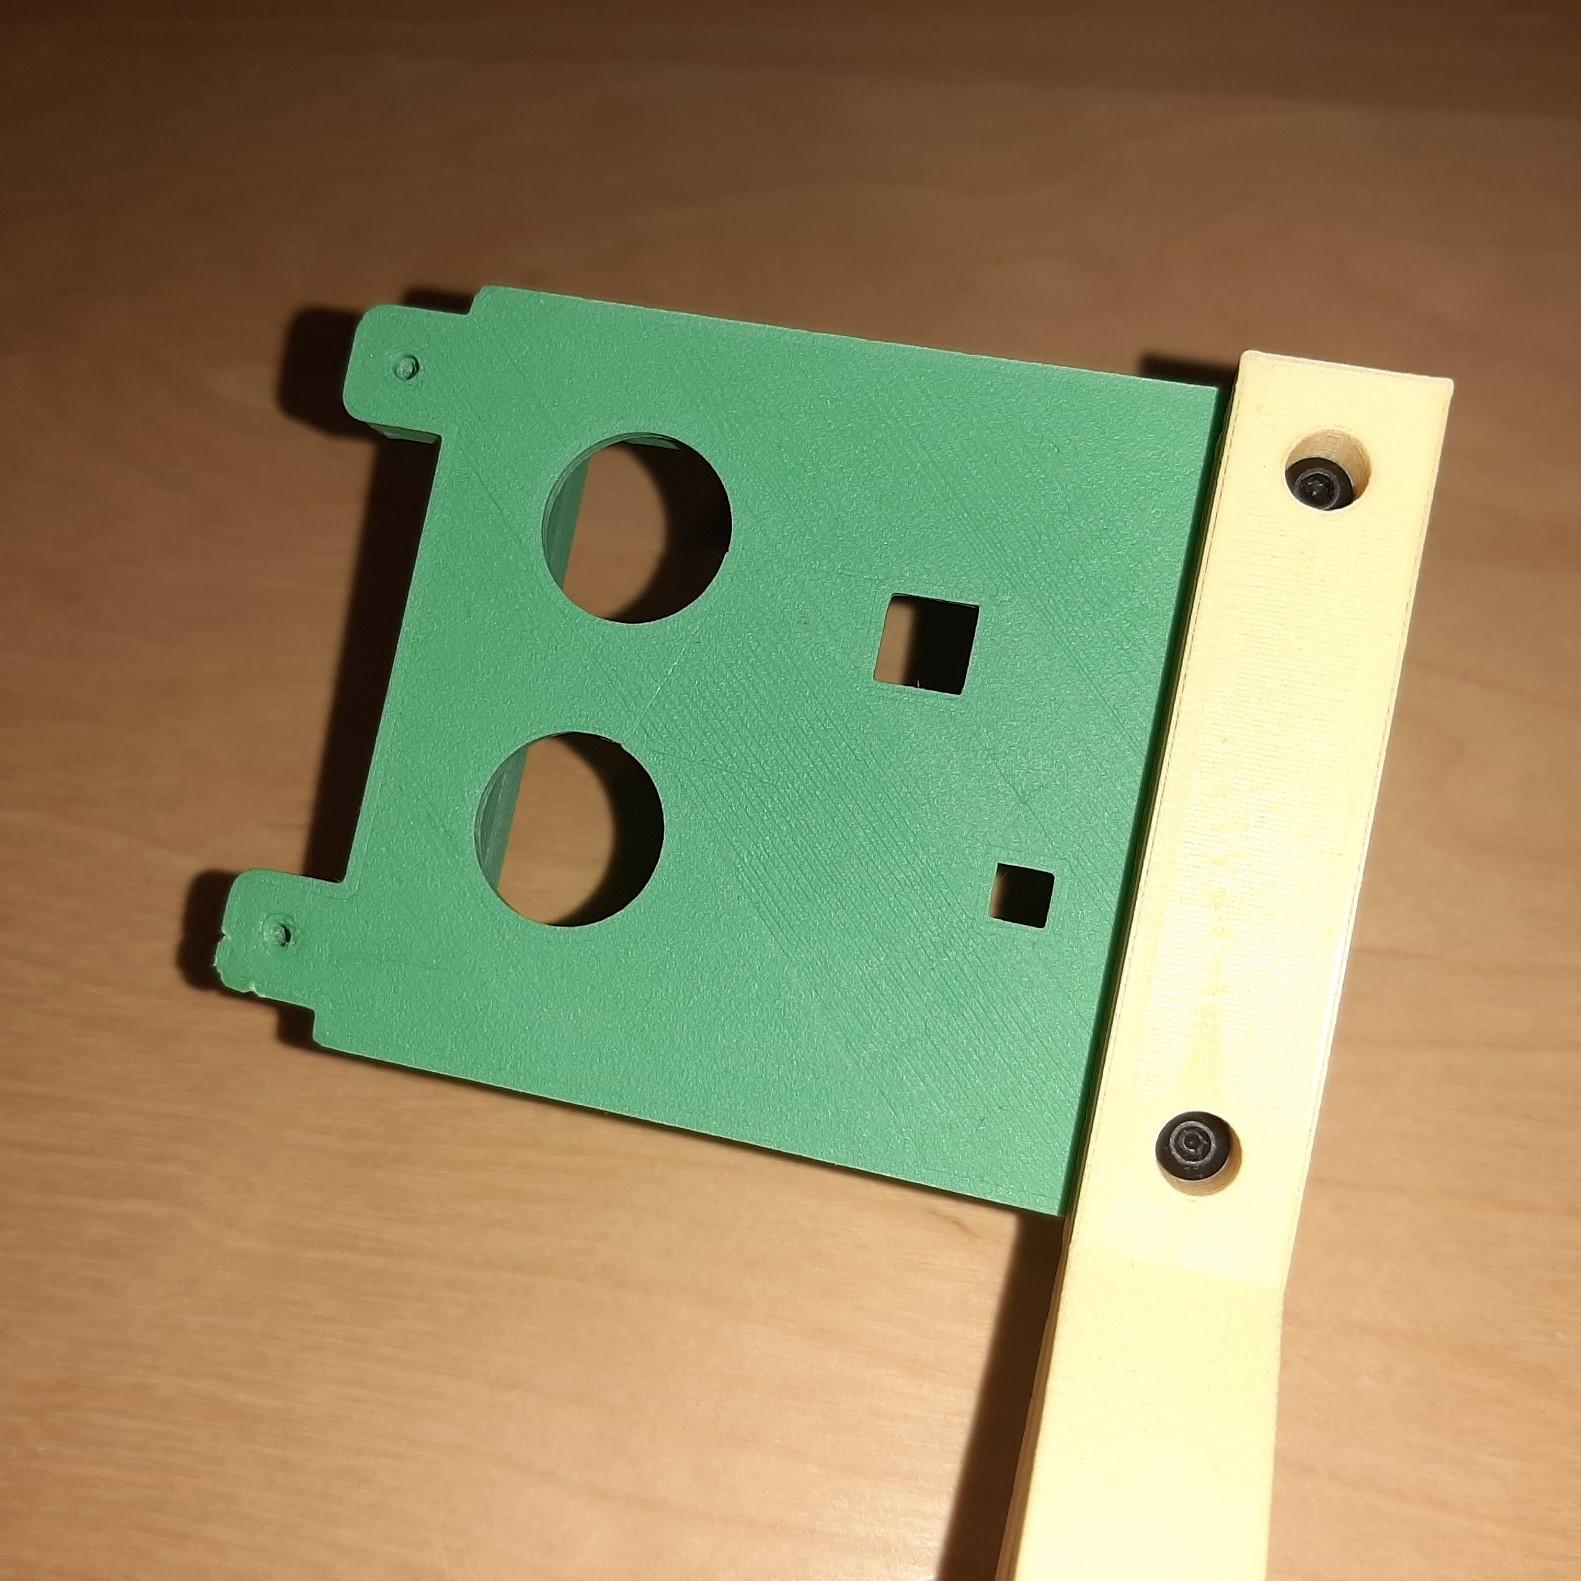
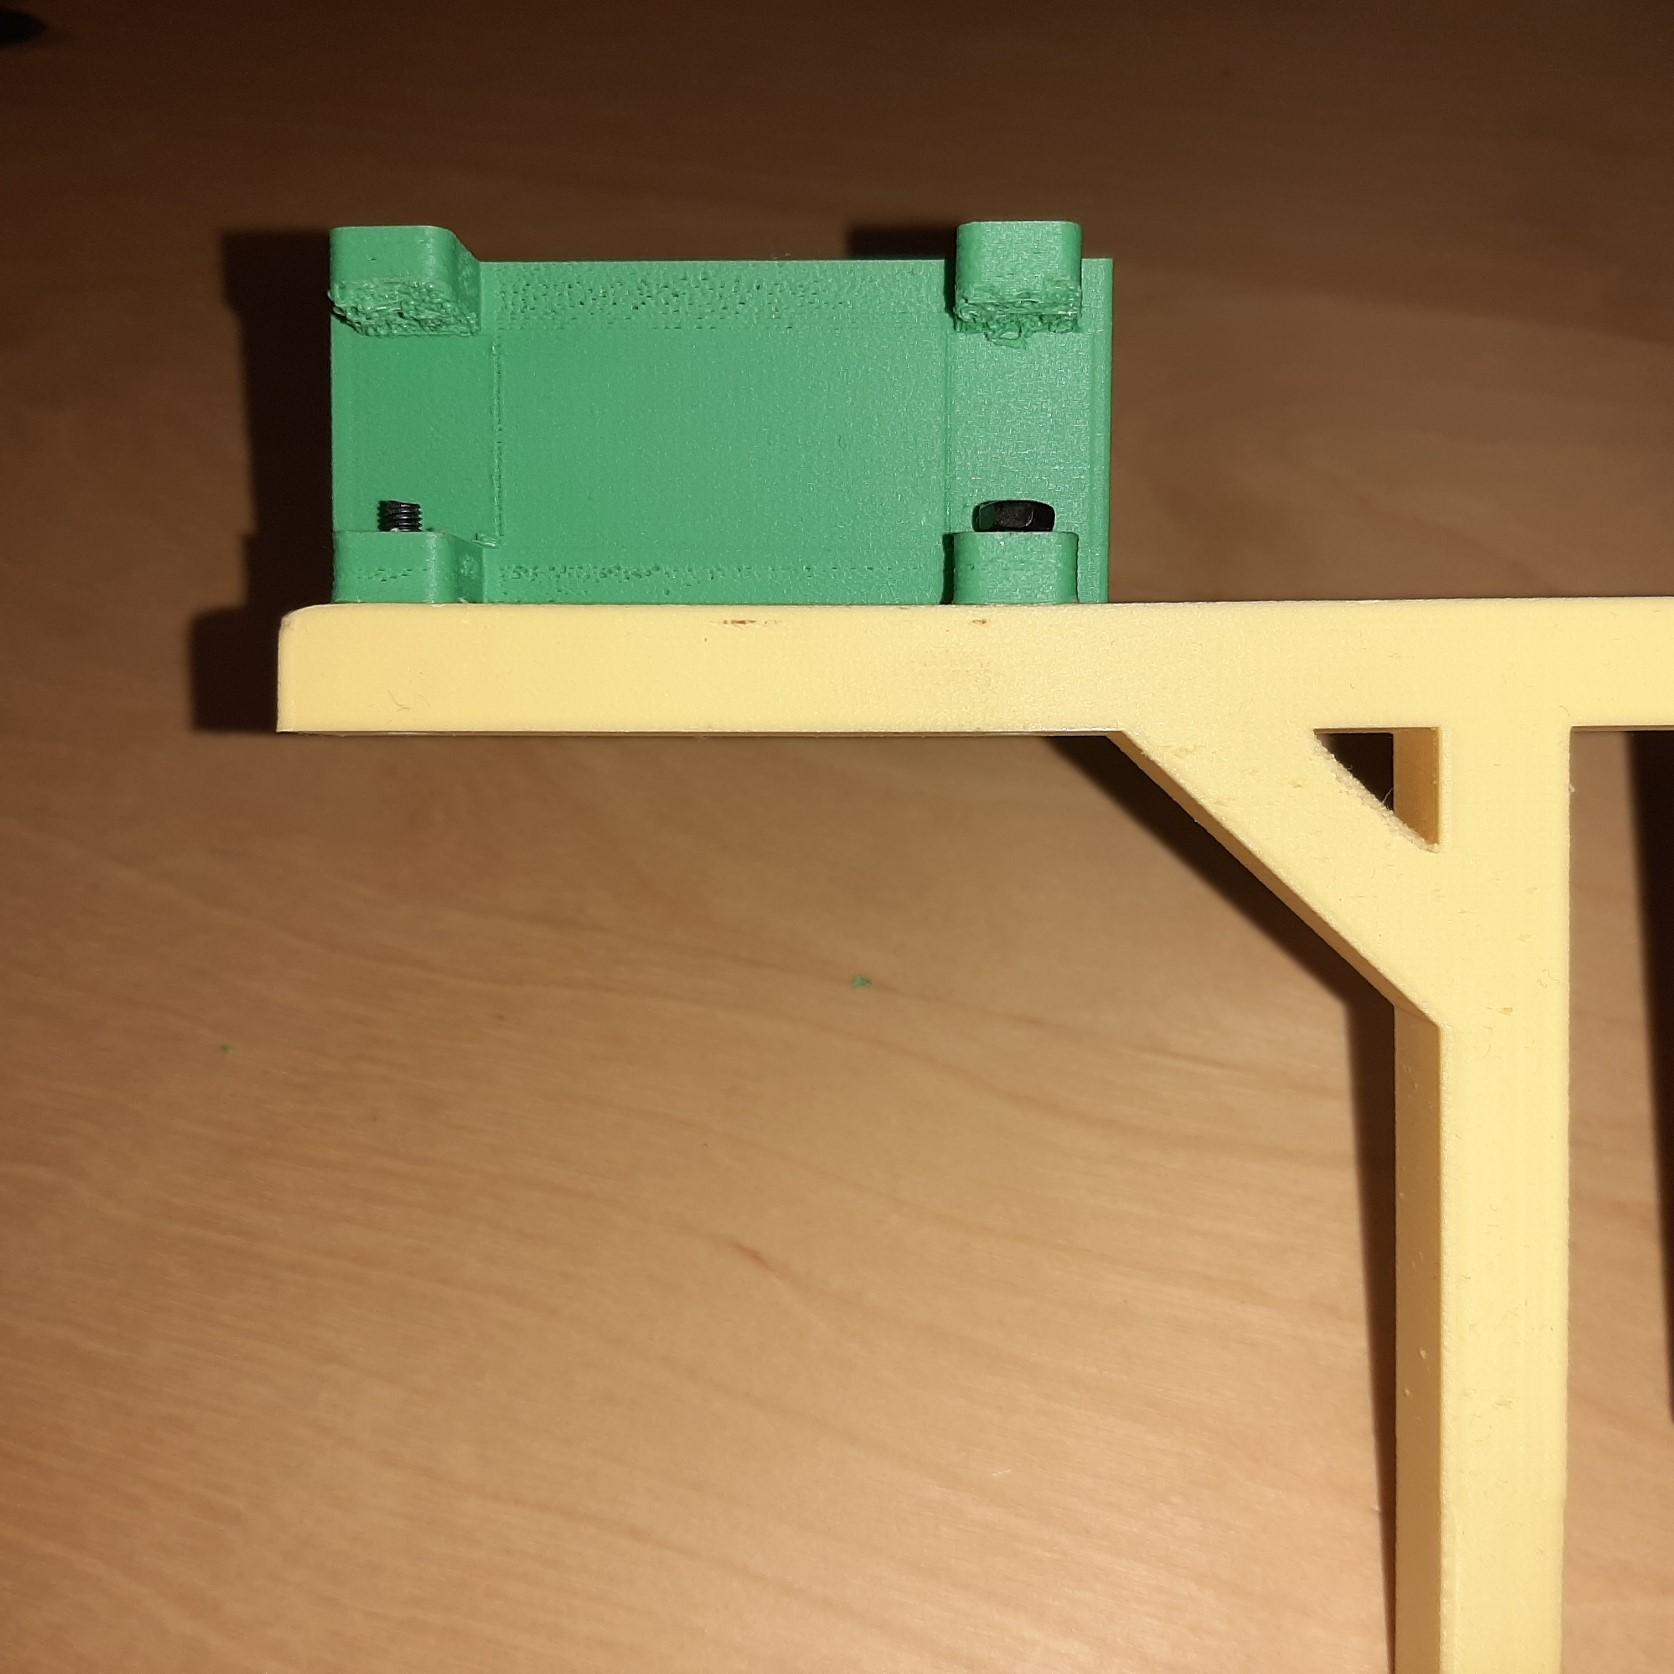
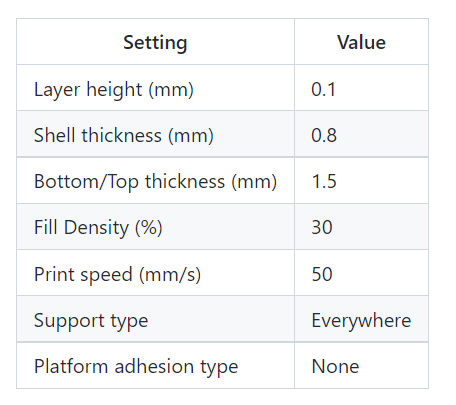
- Before starting make sure that your bin is compatible with the case. If not, you may need to modify or create different handles. (please share them if you do! 🙂)
- Refer to the settings below and print the following:
- 2 of the sensor_mod_handle.stl
- 1 of the sensor_mod_bottom_assembly.stl
- 1 of the sensor_mod_top_assembly.stl
- Screw on the handles
Building the Circuit

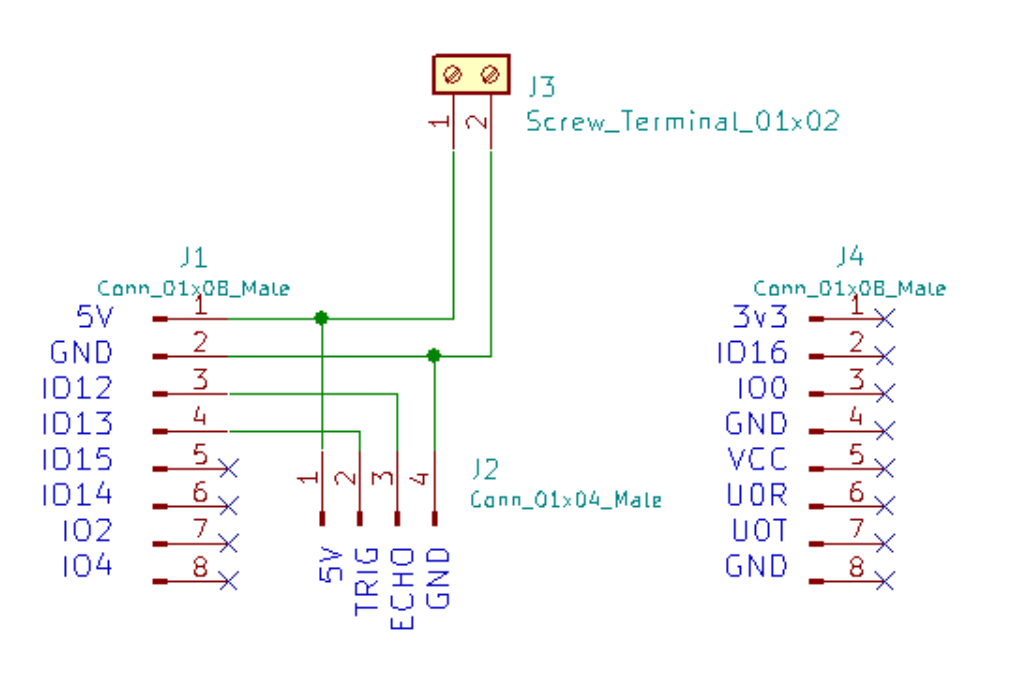
You can purchase the PCB from OshPark using this link. Or if you prefer, you can refer to the schematic/KiCad files in the pcb folder and create your circuit on a prototyping board.
- Let's recycle! ♻ Take your spare USB cable, cut the end, and expose the V+ (usually red) and GND (usually black)
- Solder the components onto the PCB
- 2 Pin Screw Terminal
- 2 of the 1 x 8 Female header pins
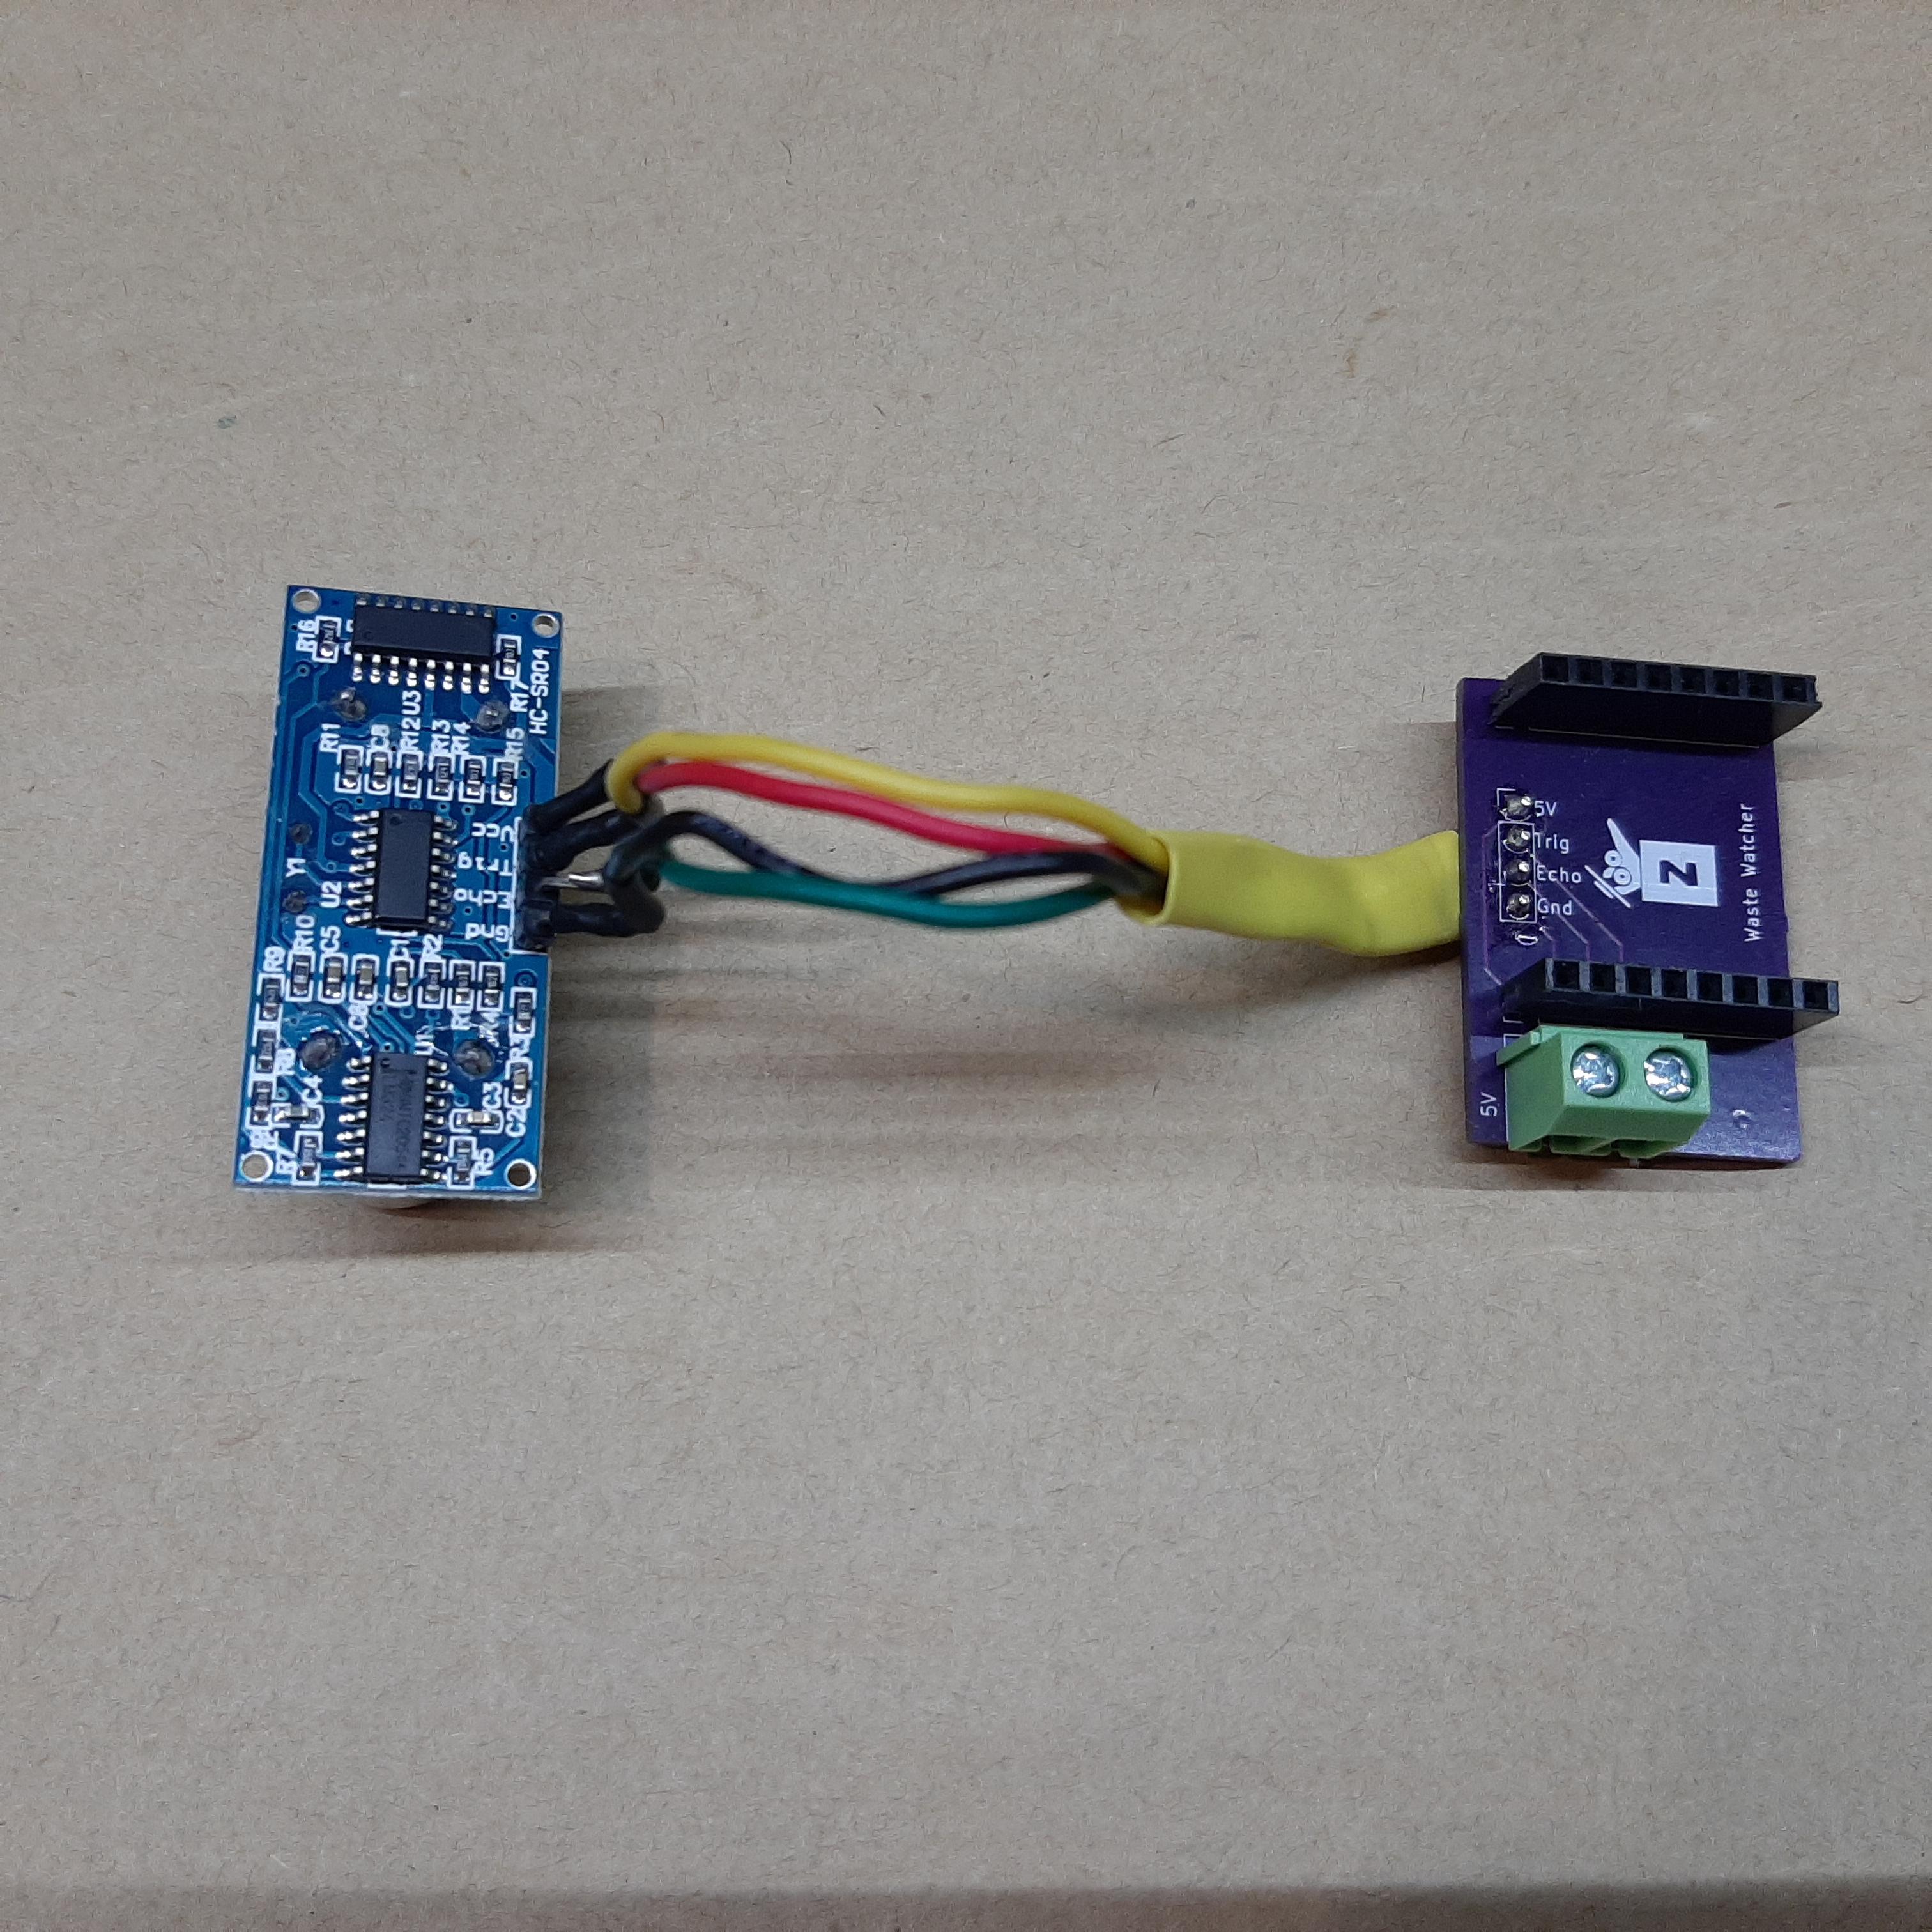
- Solder some wires onto the HC-SR04
- Heat shrink to insulate
- Solder the other ends of the wires into the PCB (use the labels to figure out which wire goes where)
- Your circuit is good to go 👍
Adafruit IO Setup

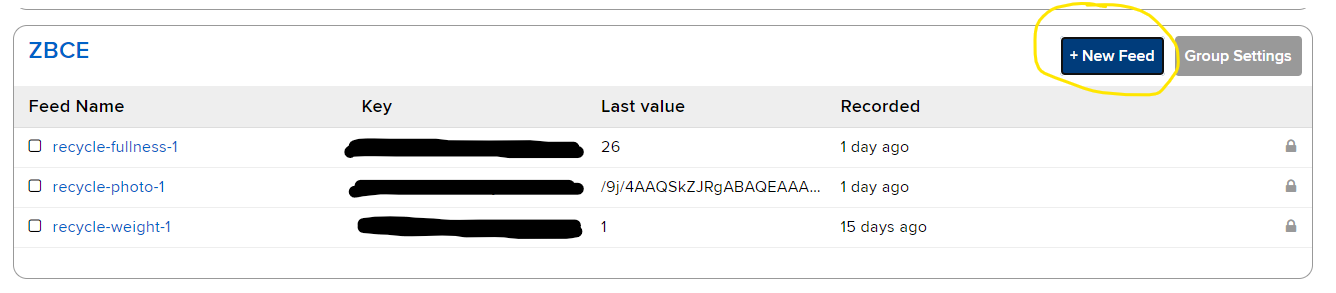
Refer to the images above ☝
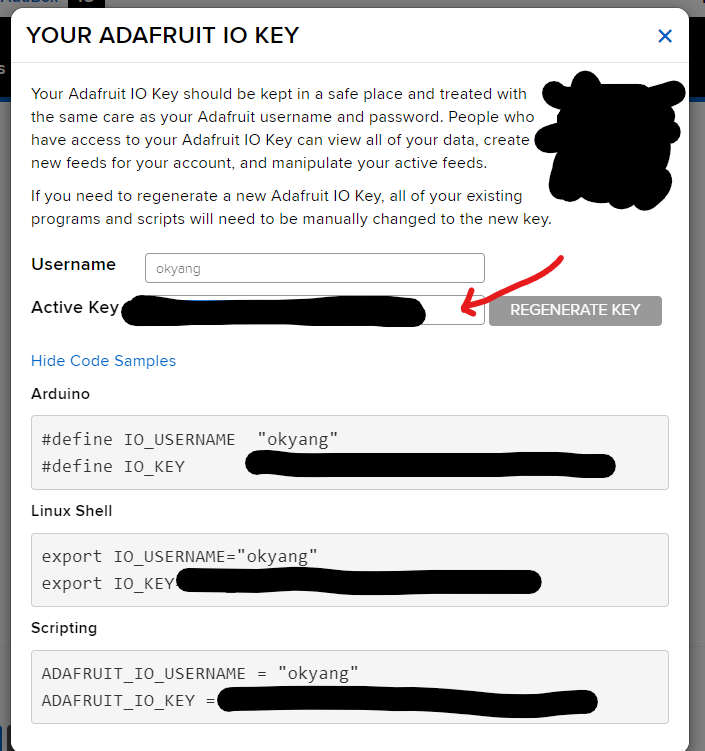
- Create an Adafruit IO account
- Take note of your Adafruit IO Username and Key
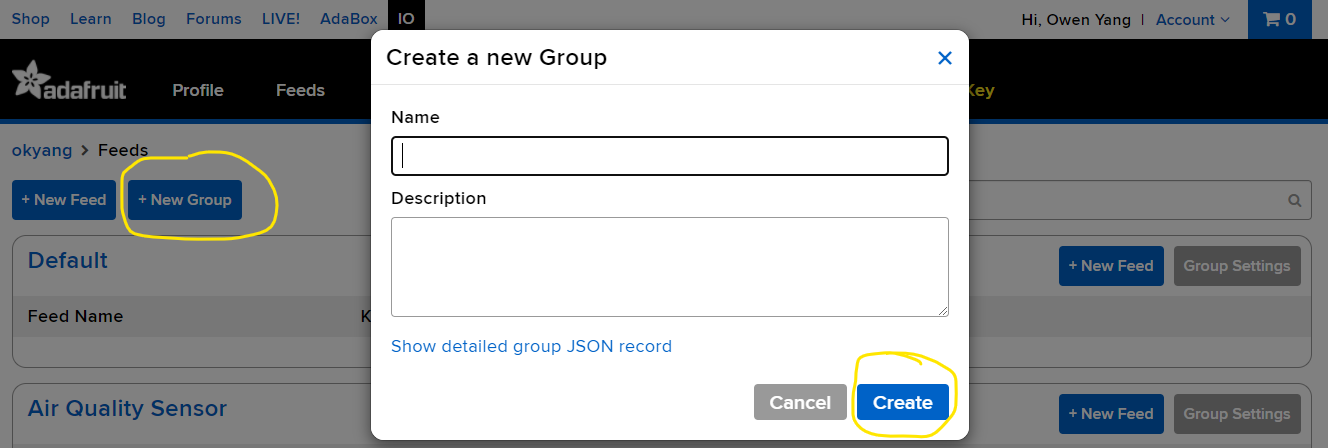
- Create a Group
- Create your feeds for
- Bin Fullness
- Waste Image
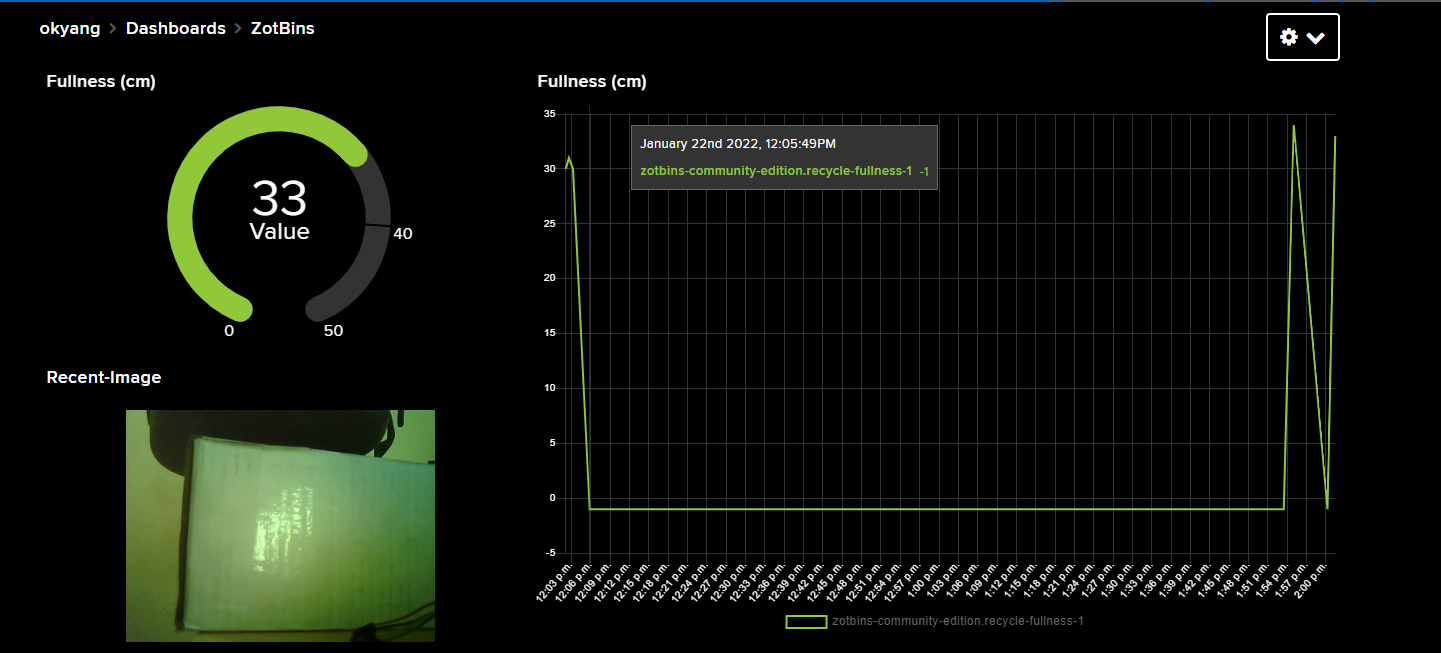
- Create a Dashboard for your feeds. The image above includes an example that I made.
Upload Code
Before getting started, make sure you satisfy these prerequisites below. If you need help feel free to reach out 🤗
- Visual Studio Code
- Platform IO Extension Installed
- Repo Code Downloaded:
- (Option 1) Download repo as zip and extract the contents
- (Option 2) git clone https://github.com/zotbins/Waste_Watcher_Adafruit_IO.git
- Open the subfolder waste_watcher_adafruitIO in Visual Studio Code
- Create the file config.h in the src folder
- Copy the contents of template-config into your config.h file
- Change the config settings for the following
- ssid - your wifi name
- password - this is your wifi password
- mqttClientID - just a unique id. You can generate one with https://guidgenerator.com/
- mqttUsername - this is your AdafruitIO username
- mqttPassword - this your AdafruitIO key in the form of <username>/feeds/<MQTT by Key>. The key! Not your account password.
- mqttFullnessTopic - the MQTT topic for the fullness feed you created
- mqttImageTopic - the MQTT topic for the image feed you created
- Measure the height of your bin and change binHeight value to reflect the height of your particular bin. That way the sensor module can calculate how full your bin is.
- Change the other config settings as you see fit
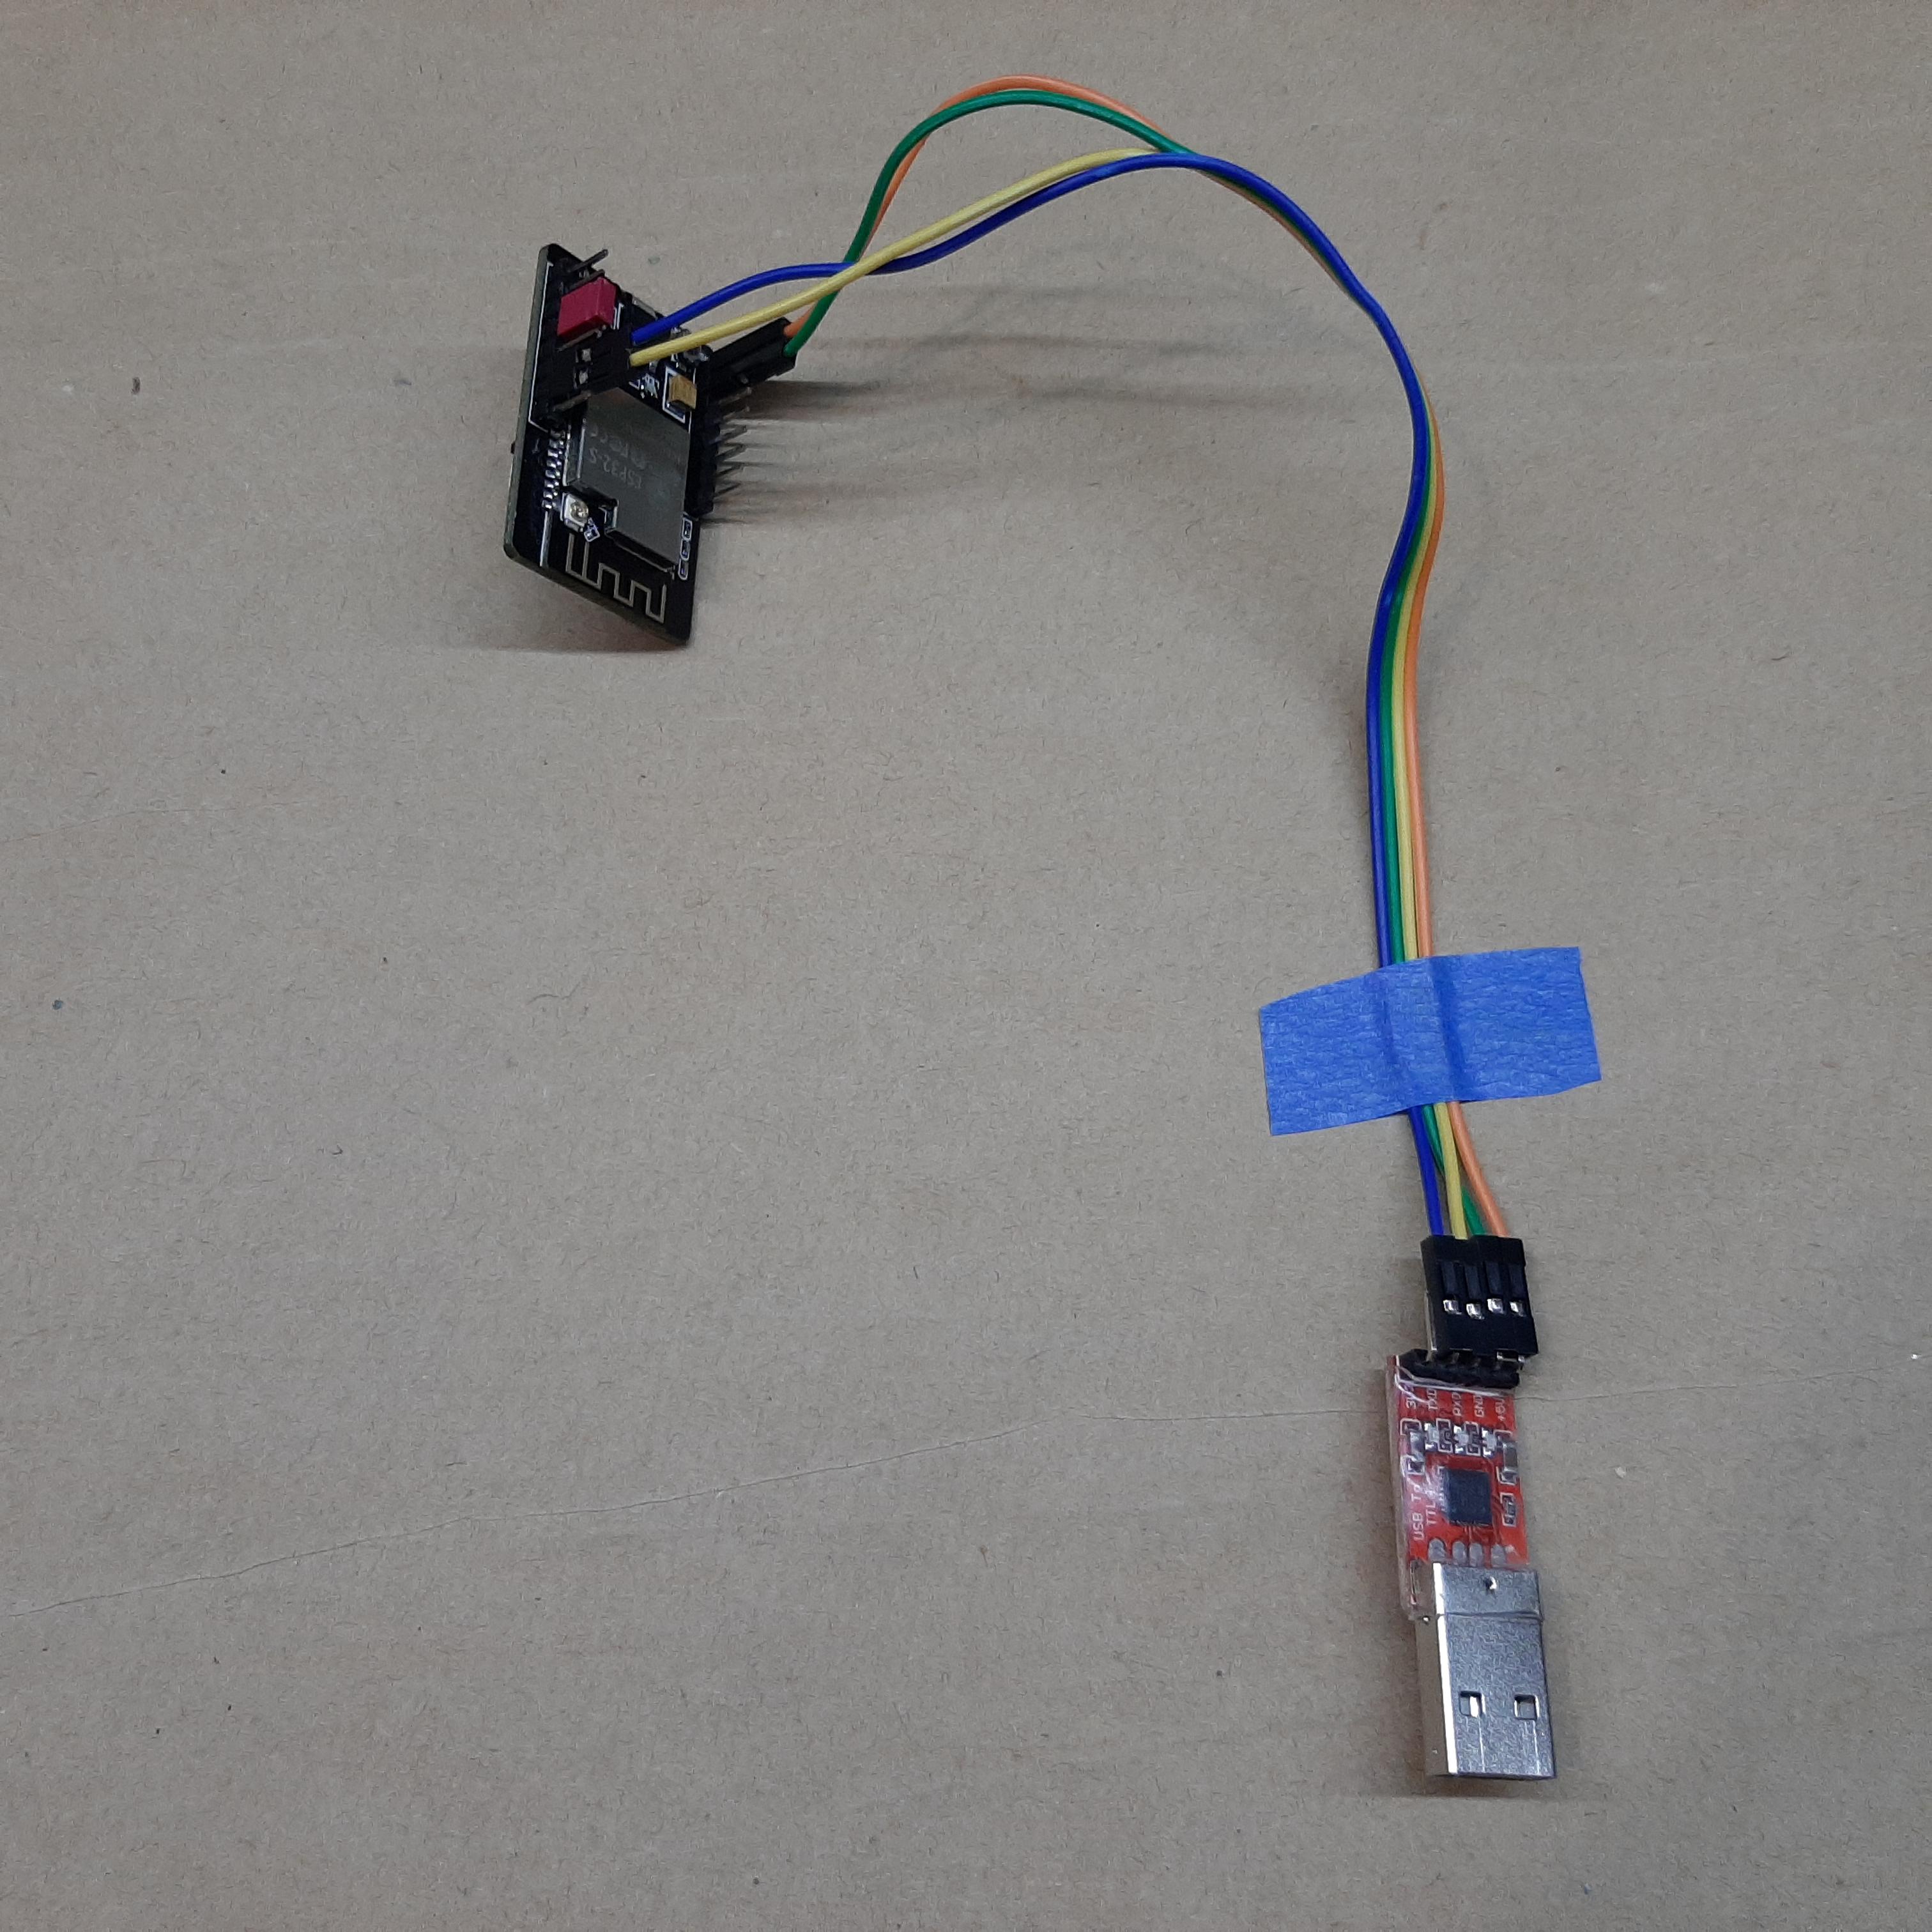
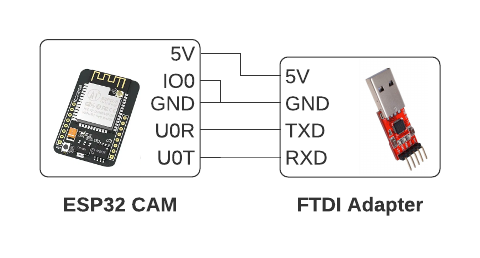
- Put a jumper cap on the ESP32-CAM IO0 and GND
- Plug in your FTDI Adapter to the ESP32-CAM as shown
- Plug in the FTDI Adapter into your computer
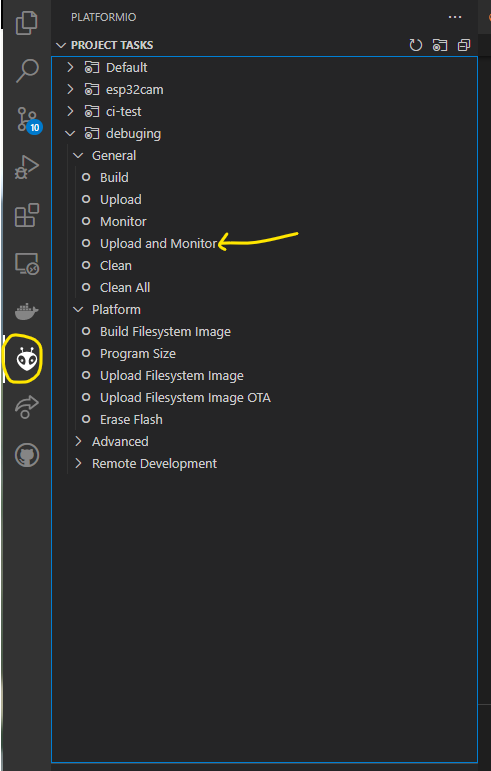
- Click on the PlatformIO icon on the left side panel, then click Upload and Monitor. Wait for this to finish.
- While leaving the ESP32-CAM plugged into the computer, Unplug the Jumper Cap and hit the reset button
- Wait for data to be sent in Adafruit IO
- Fullness data should be sent as -1 (because there is no HC-SR04 connected yet)
- Image should be sent
For troubleshooting the ESP32-CAM checkout this guide: ESP32-CAM Troubleshooting Guide
Monitor Waste and Create Actionable Solutions
- Plug your ESP32-CAM into your PCB
- Screw in the USB power wires as shown (do not mix up power and ground!)
- Put the HC-SR04 in and then the ESP32CAM in.
- Screw on the lid with the USB cable coming out of the rectangular hole on top
Besides just collecting data, here are some ideas that you can implement. Again the goal of this project is to help quantify and promote actionable solutions to reduce waste.
- 🎯 (Level 1) Create a goal to reduce the rate at which you fill up a bin
- 💻 (Level 2) Use the Adafruit IO Integrations (Zapier, IFTTT)
- Send a summary of weekly fullness rate
- Send alerts when bin is full
- 🤖 (Level 3) Use machine learning to identify what items are thrown always
- identify frequently thrown away items then try to reduce that waste (eg. plastic straws are identified frequently in the waste stream, so we can ban the straw or give sustainable alternatives)
- identify which waste items are incorrectly thrown away
Final Note
If you liked this project feel free to checkout the ZotBins Community Edition Blog. I write about developing open source projects like this with an overall mission to better inform people/communities/manufacturers with quantifiable data and promote actionable solutions to reduce waste.
Resources/Links
- Getting Started with VS Code and PlatformIO IDE for ESP32 and ESP8266 (Windows, Mac OS X, Linux Ubuntu) - A guide to install Visual Studio Code and the PlatformIO Extension by Random Nerd Tutorials
- ESP32-CAM Video Streaming and Face Recognition with Arduino IDE - Great introduction to the ESP32-CAM by Random Nerd Tutorials
- ESP32-CAM Troubleshooting Guide - common problems fixed for the ESP32-CAM by Random Nerd Tutorials