Warning System to Keep Kids From Fire
by Lola Wang in Circuits > Arduino
263 Views, 1 Favorites, 0 Comments
Warning System to Keep Kids From Fire

It may dangerous that kids playing around the kitchen.
So warning for both kids and parents are important.
This system beep when people approach,
in order to let parents notice that kids are in the kitchen, which is extremely dangerous.
Supplies
Arduino
Breadboard
Ultrasonic Distance Measuring Instrument
LCD Screen
Speaker
Various kinds of Wires
Nice looking box
Step 1-1: Build Up the LCD Screen
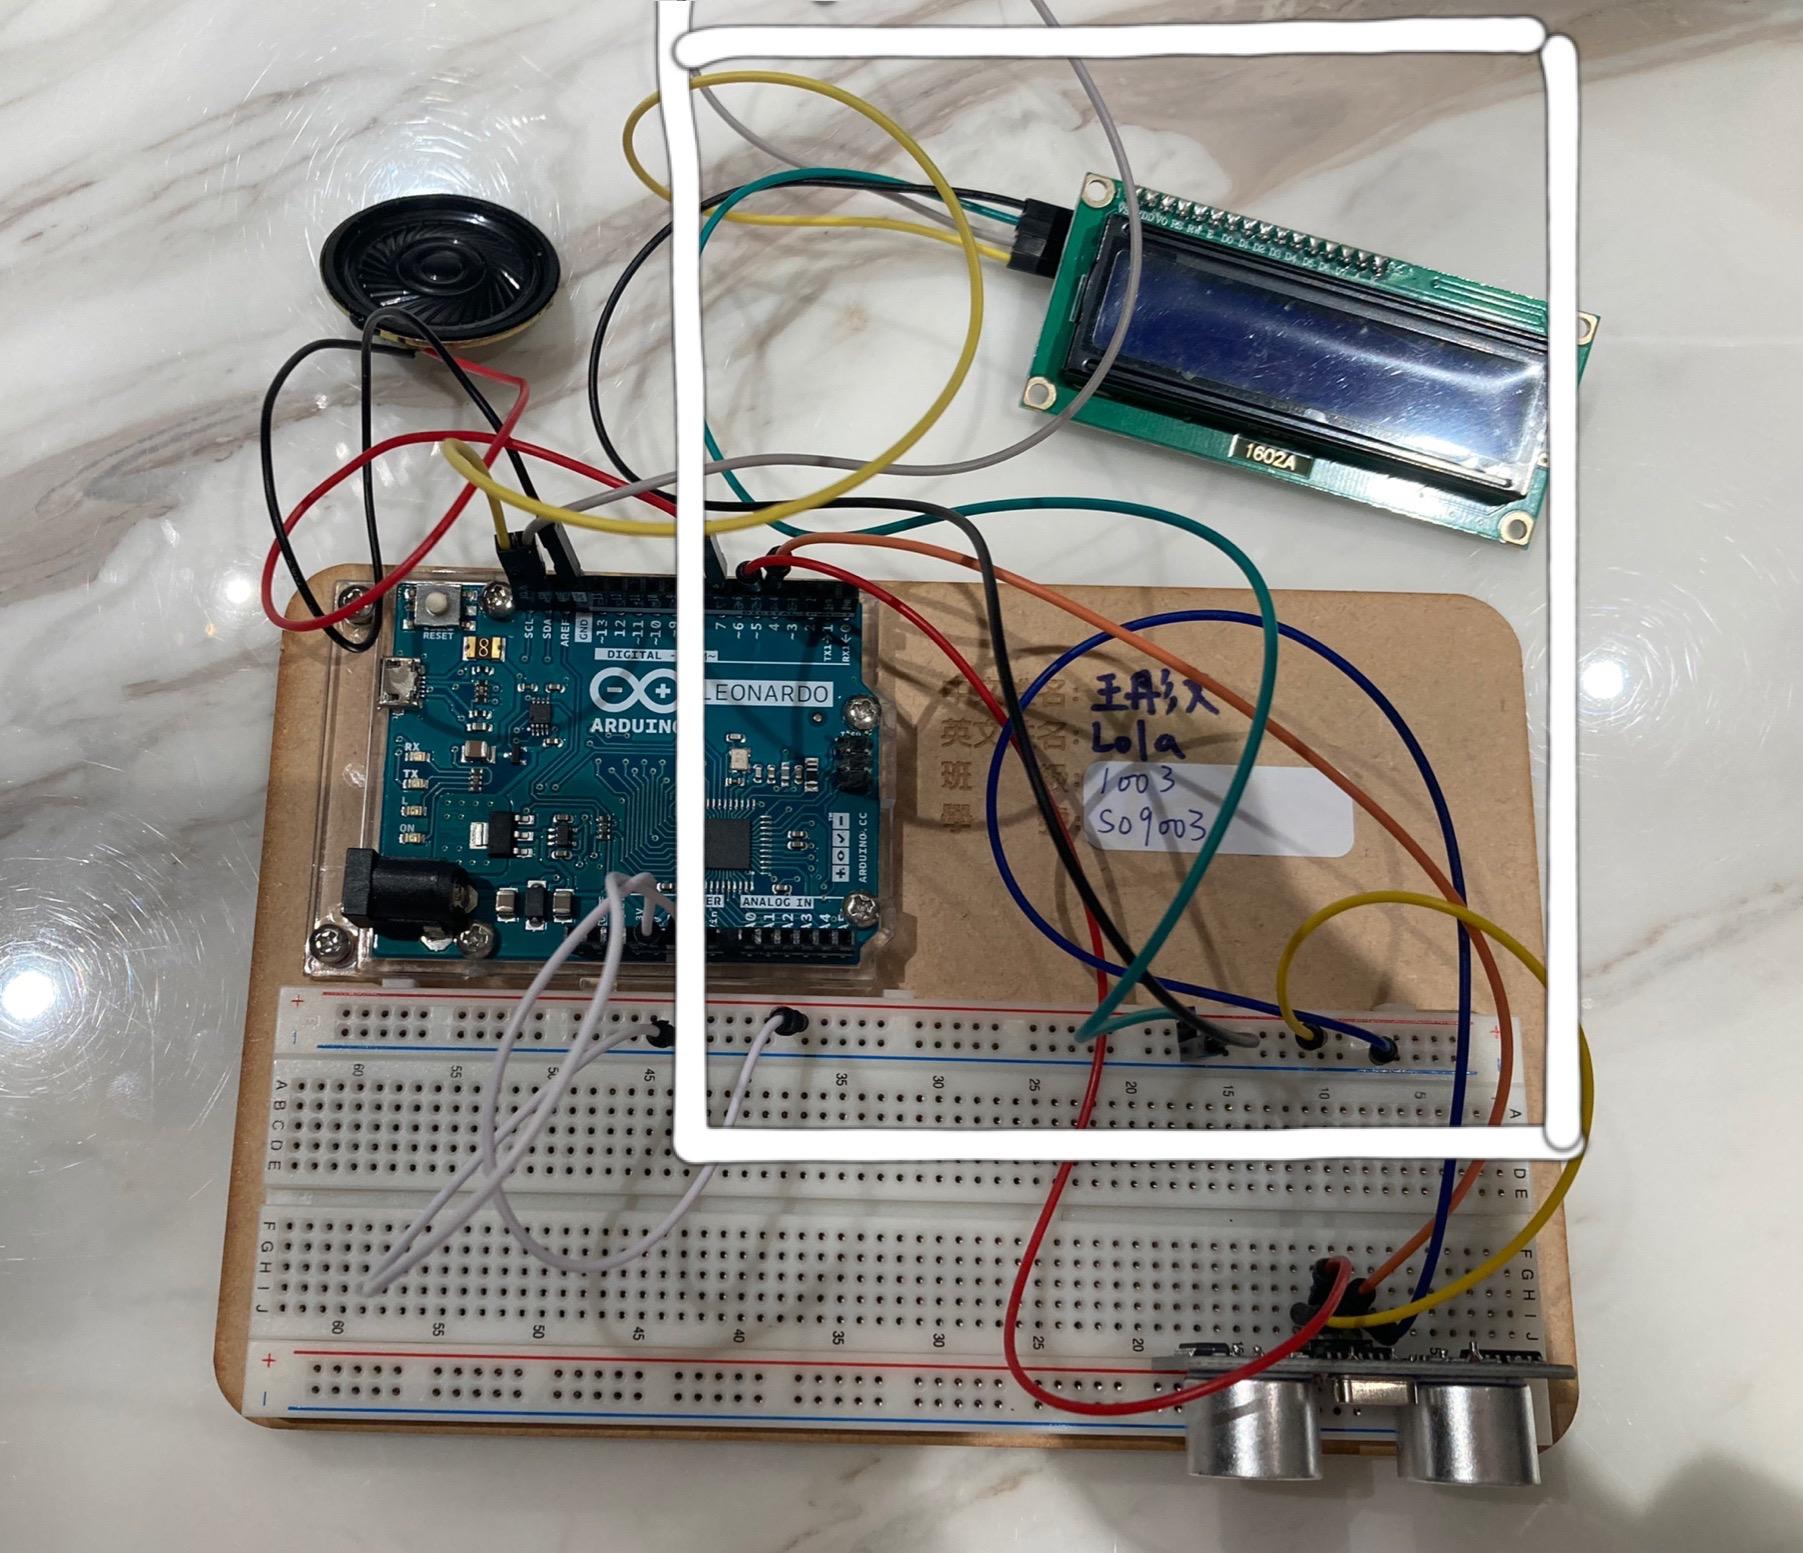
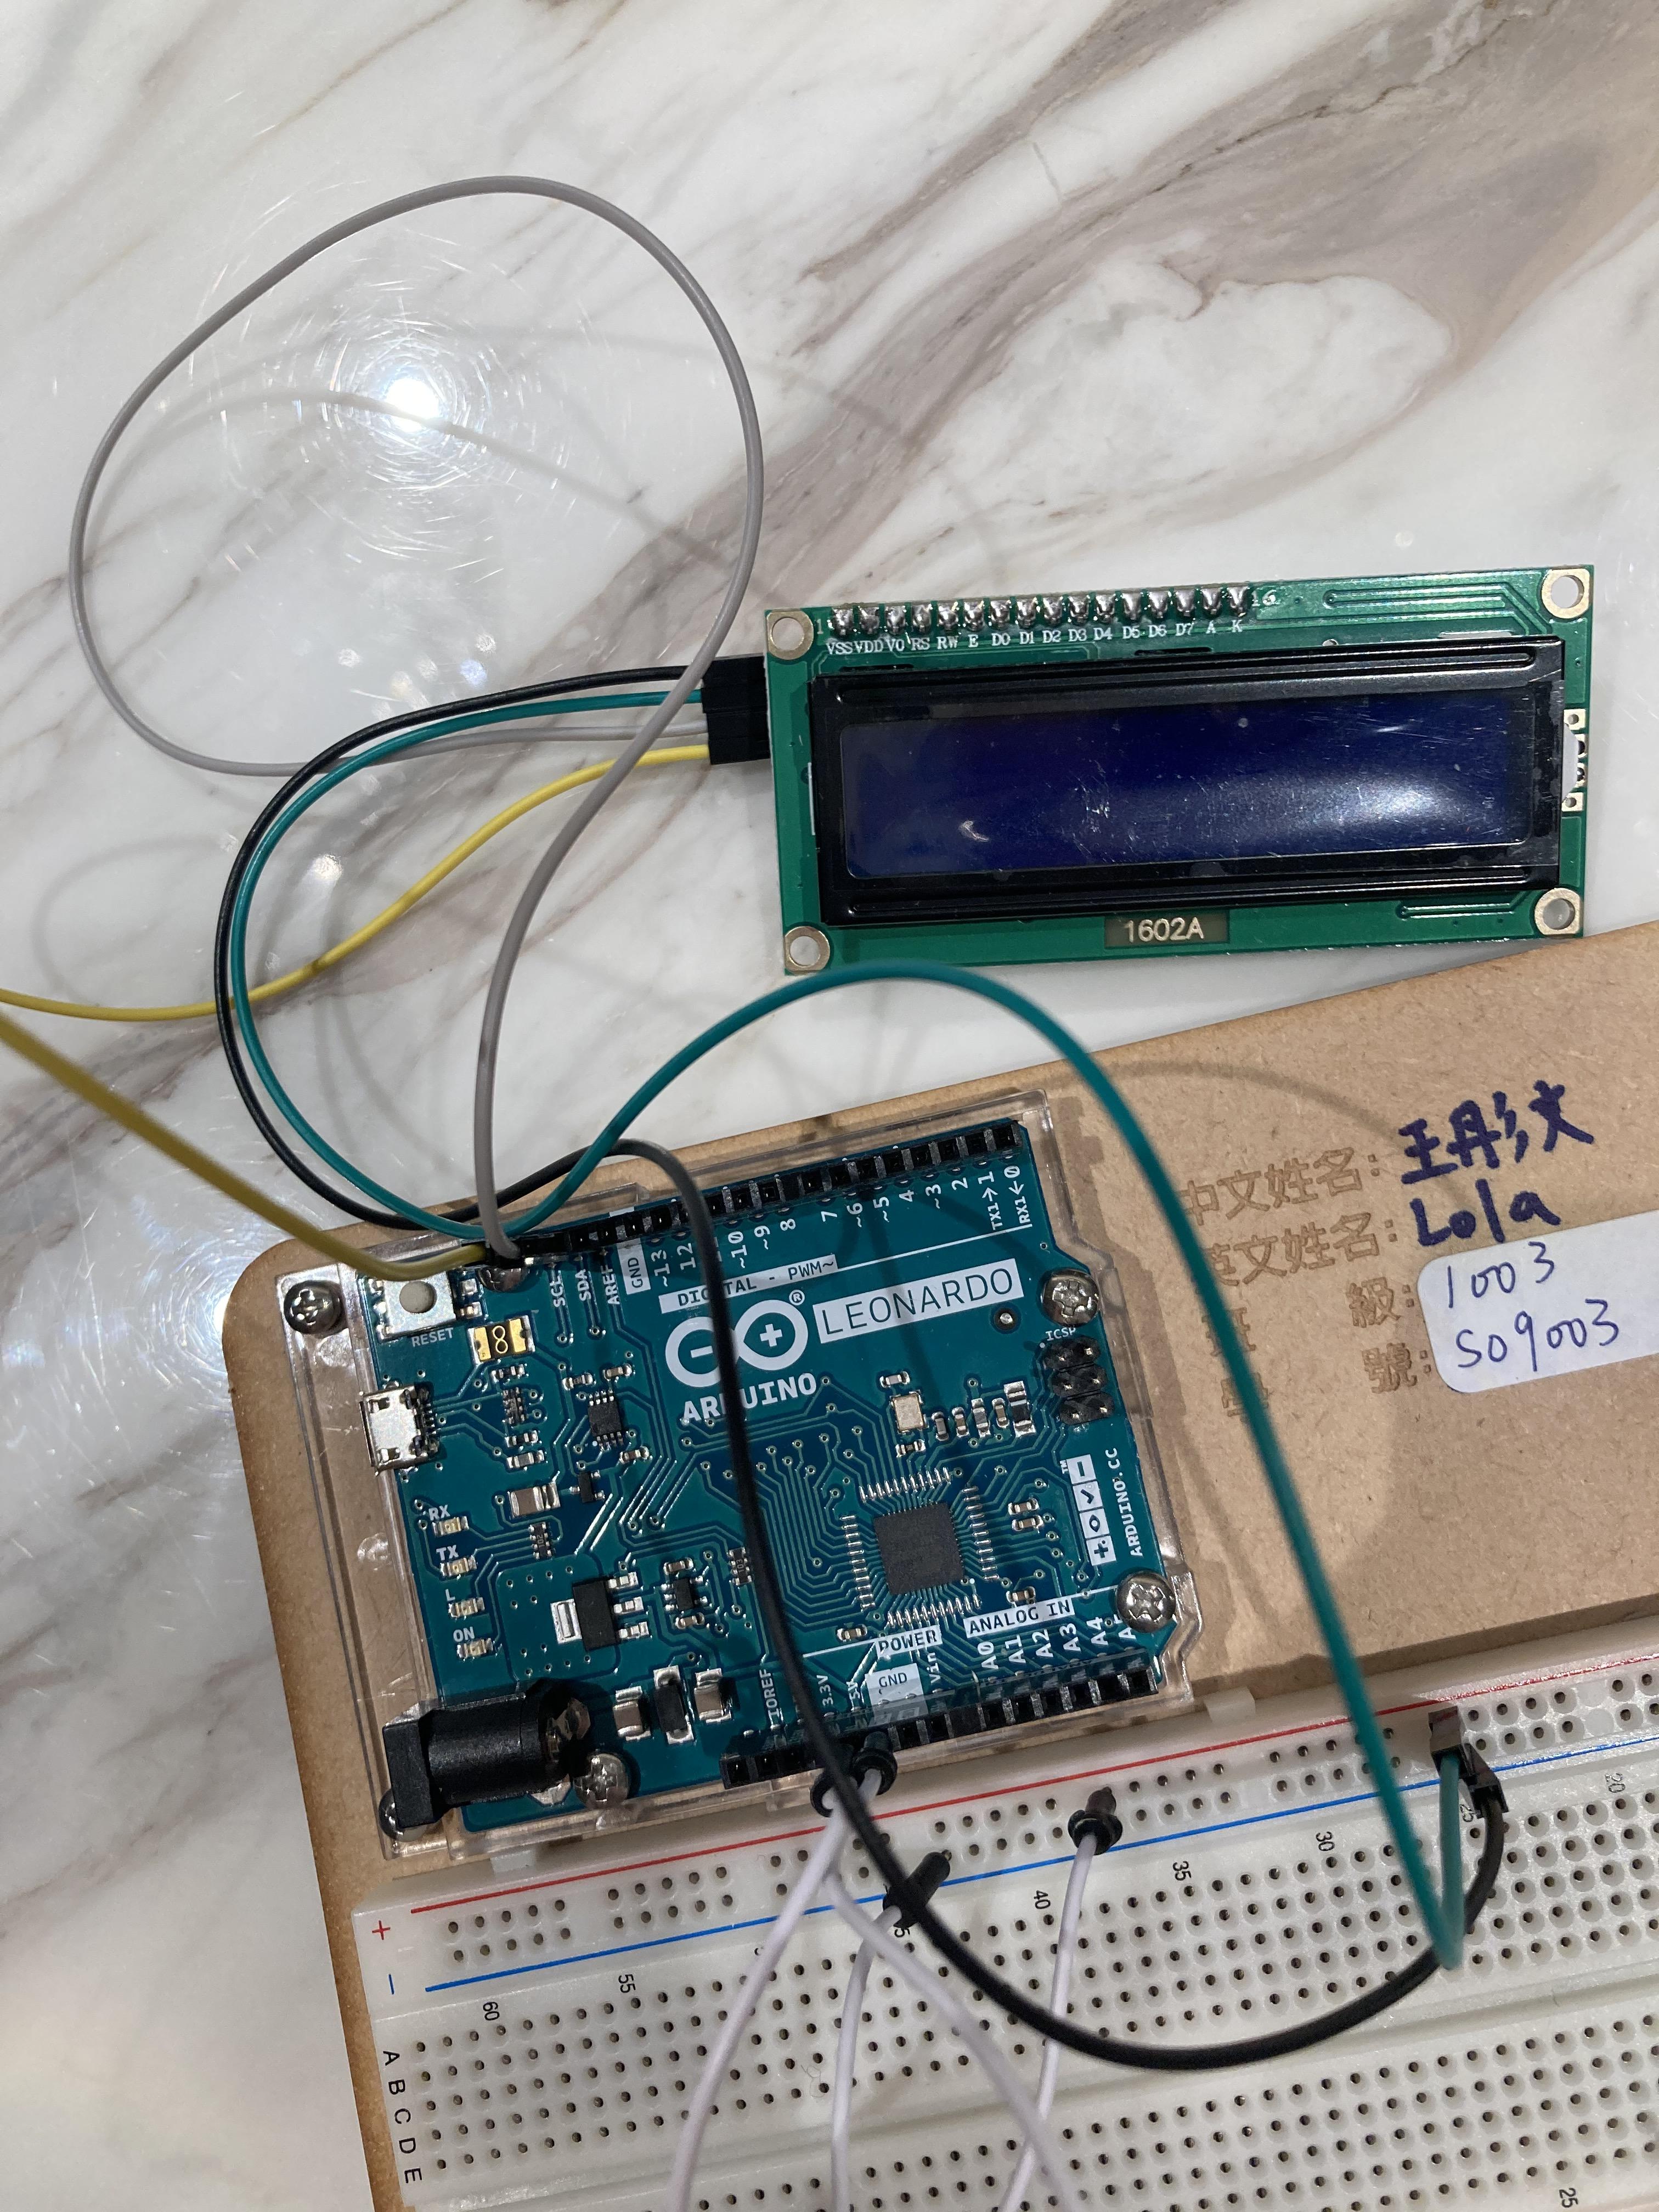
-Use wires to connect the LCD Screen and Arduino
GND--Negative
VCC--Positive
SDA--SDA
SCL--SCL
Step 1-2: Build Up the Ultrasonic Distance Measuring Instrument
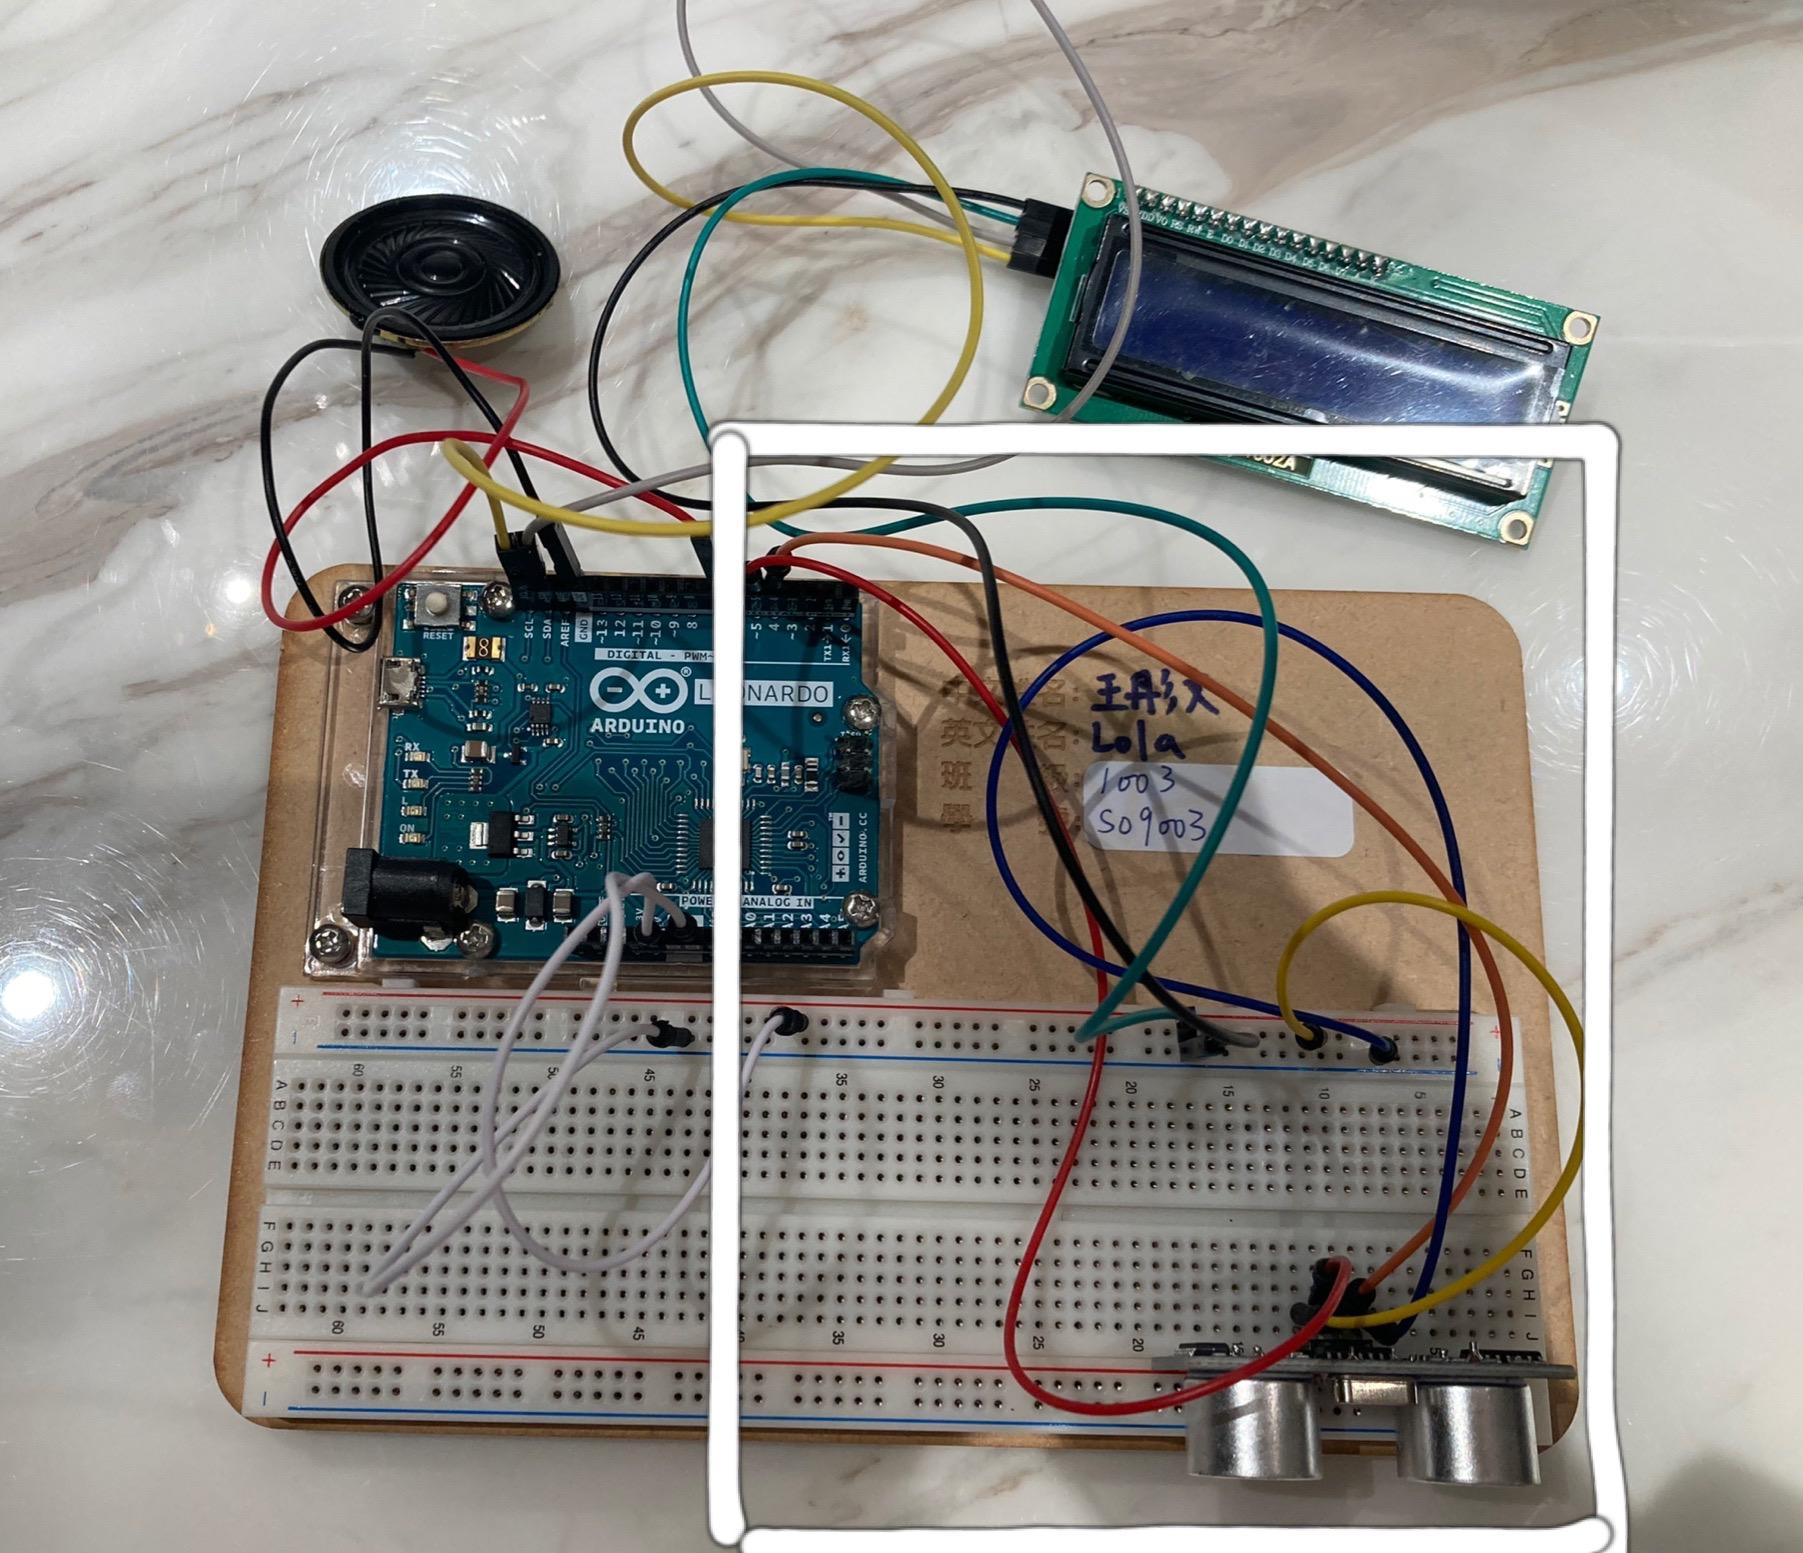
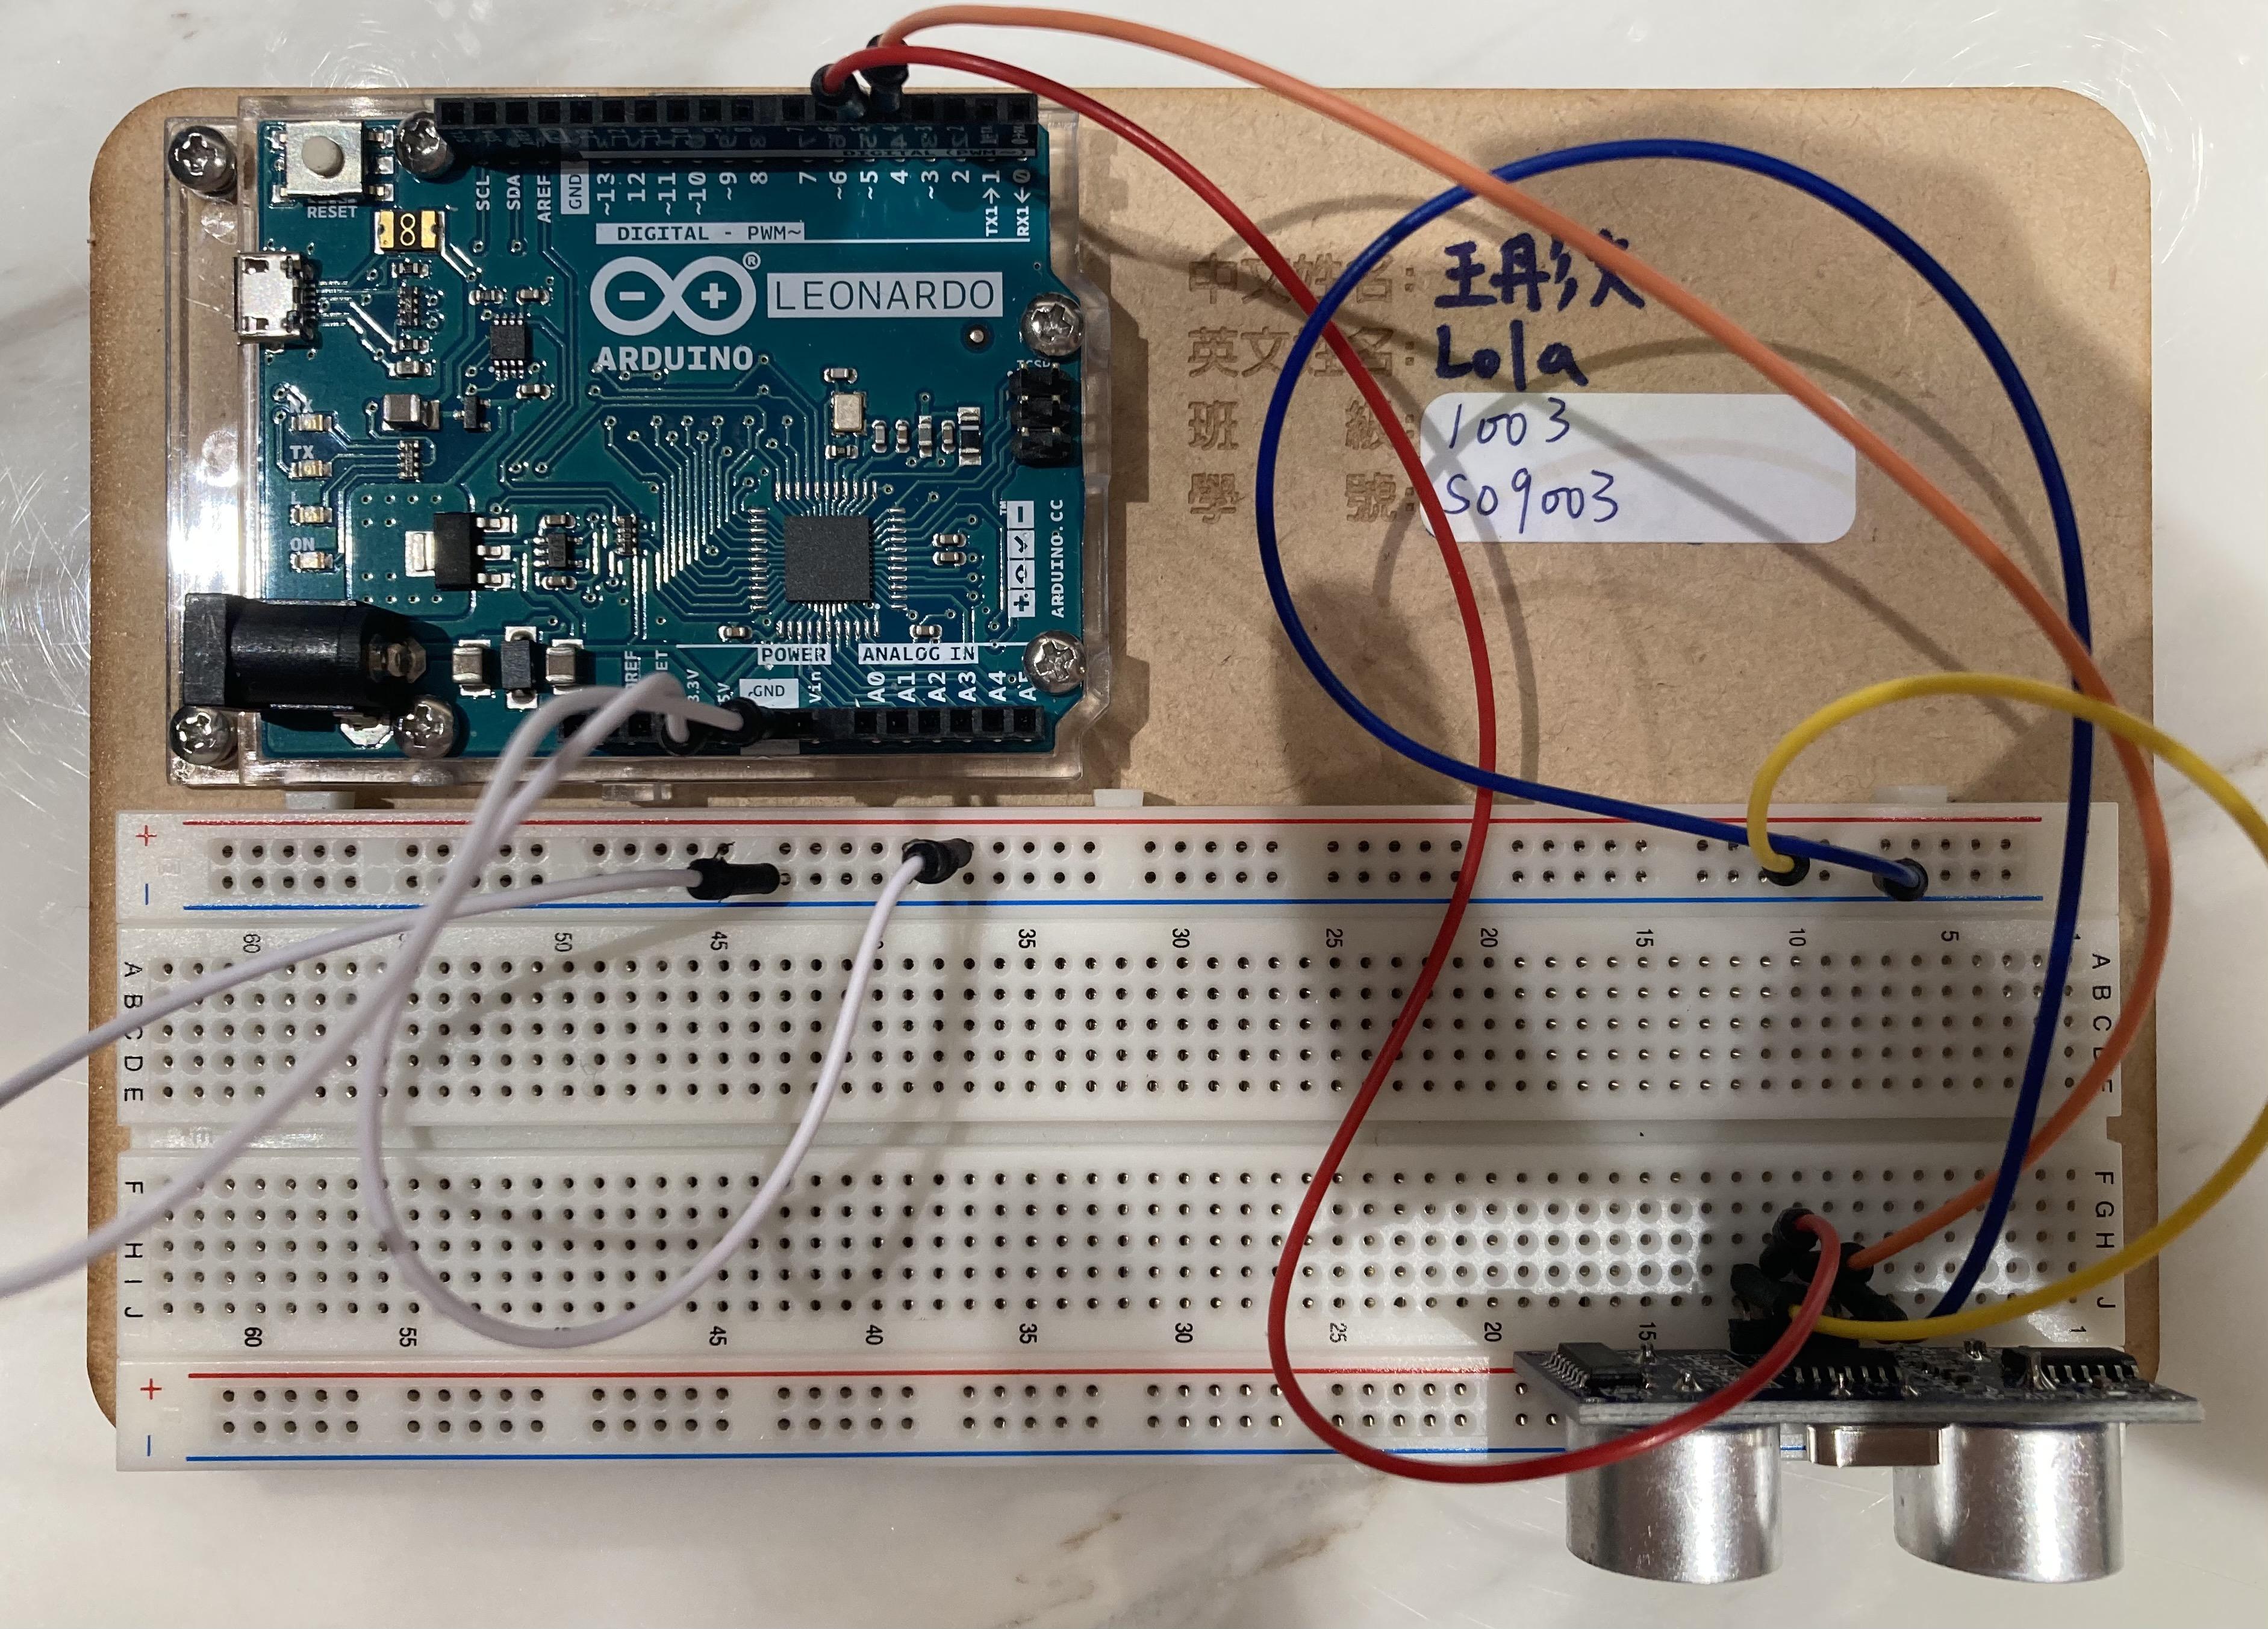
-Plugin the Ultrasonic Distance Measuring Instrument on the breadboard
-Use wires to connect the Ultrasonic Distance Measuring Instrument and Arduino
VCC--Positive
TRIG--Trig (D Pin)
ECHO--Echo (D Pin)
GND--Negative
*REMINDER*
!!DON'T FORGET TO CONNECT THE POSITIVE AND NEGATIVE FROM THE BREADBOARD TO ARDUINO!!
Step 1-3: Build Up the Speaker

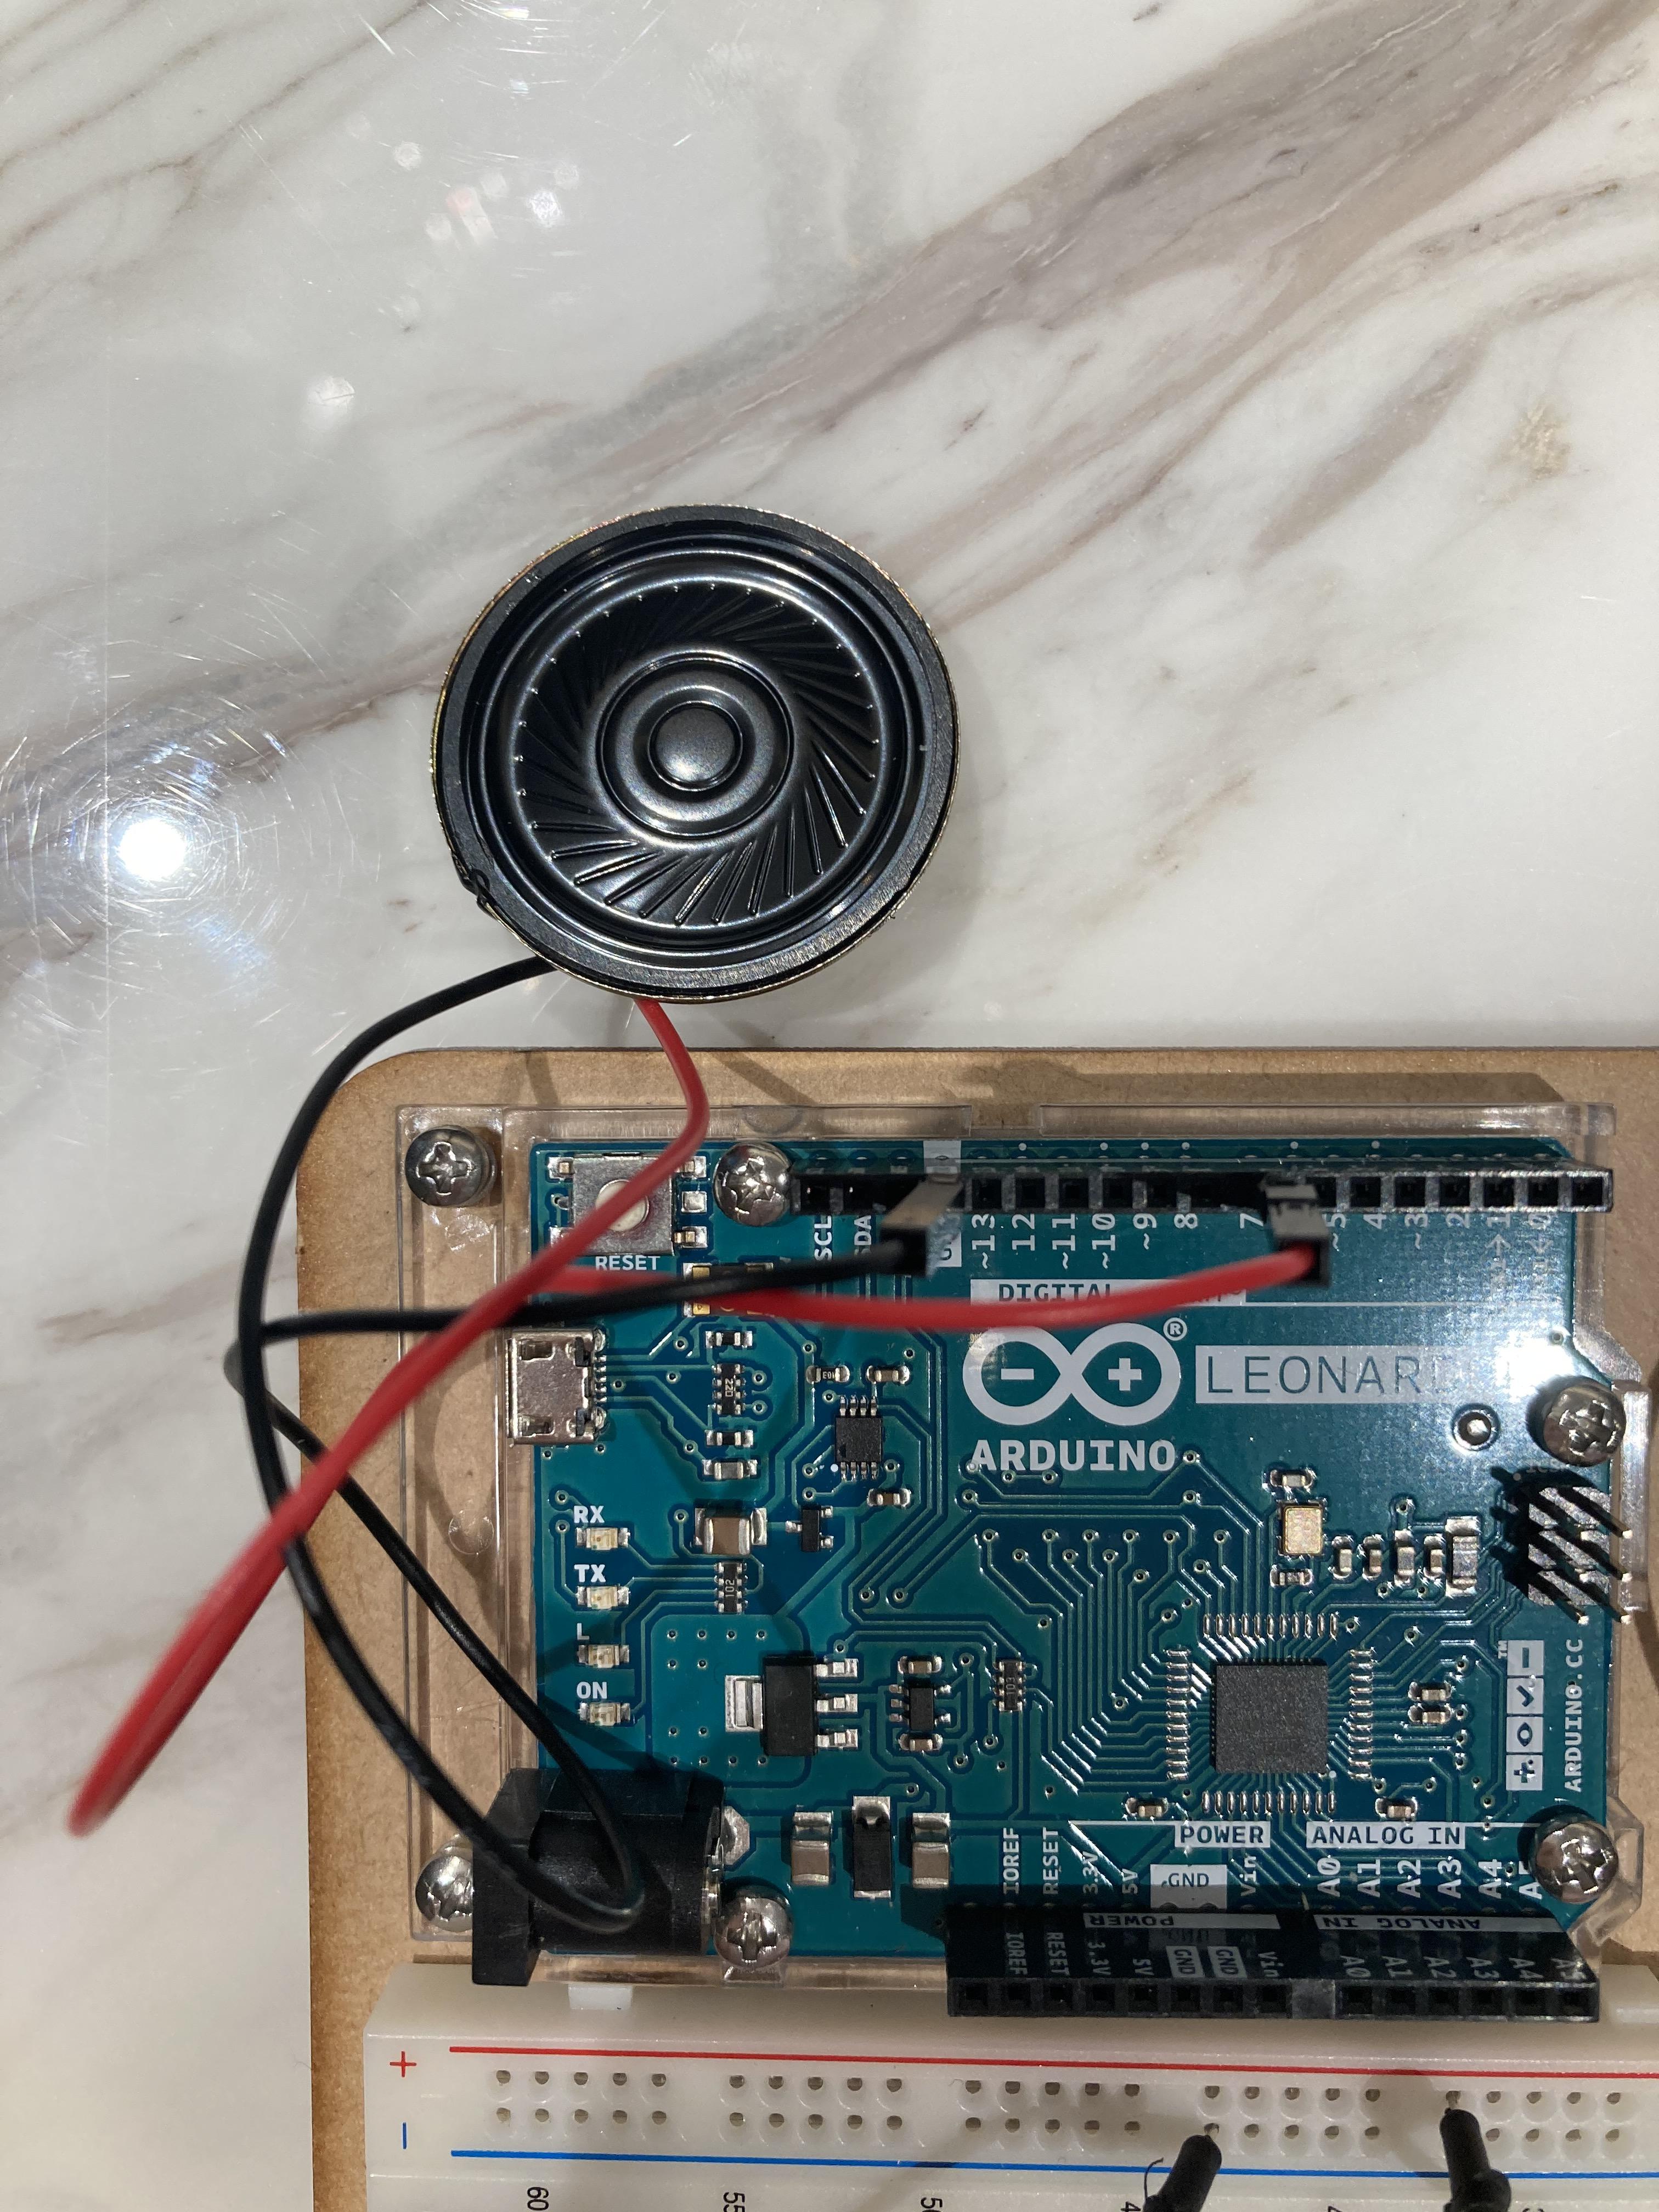
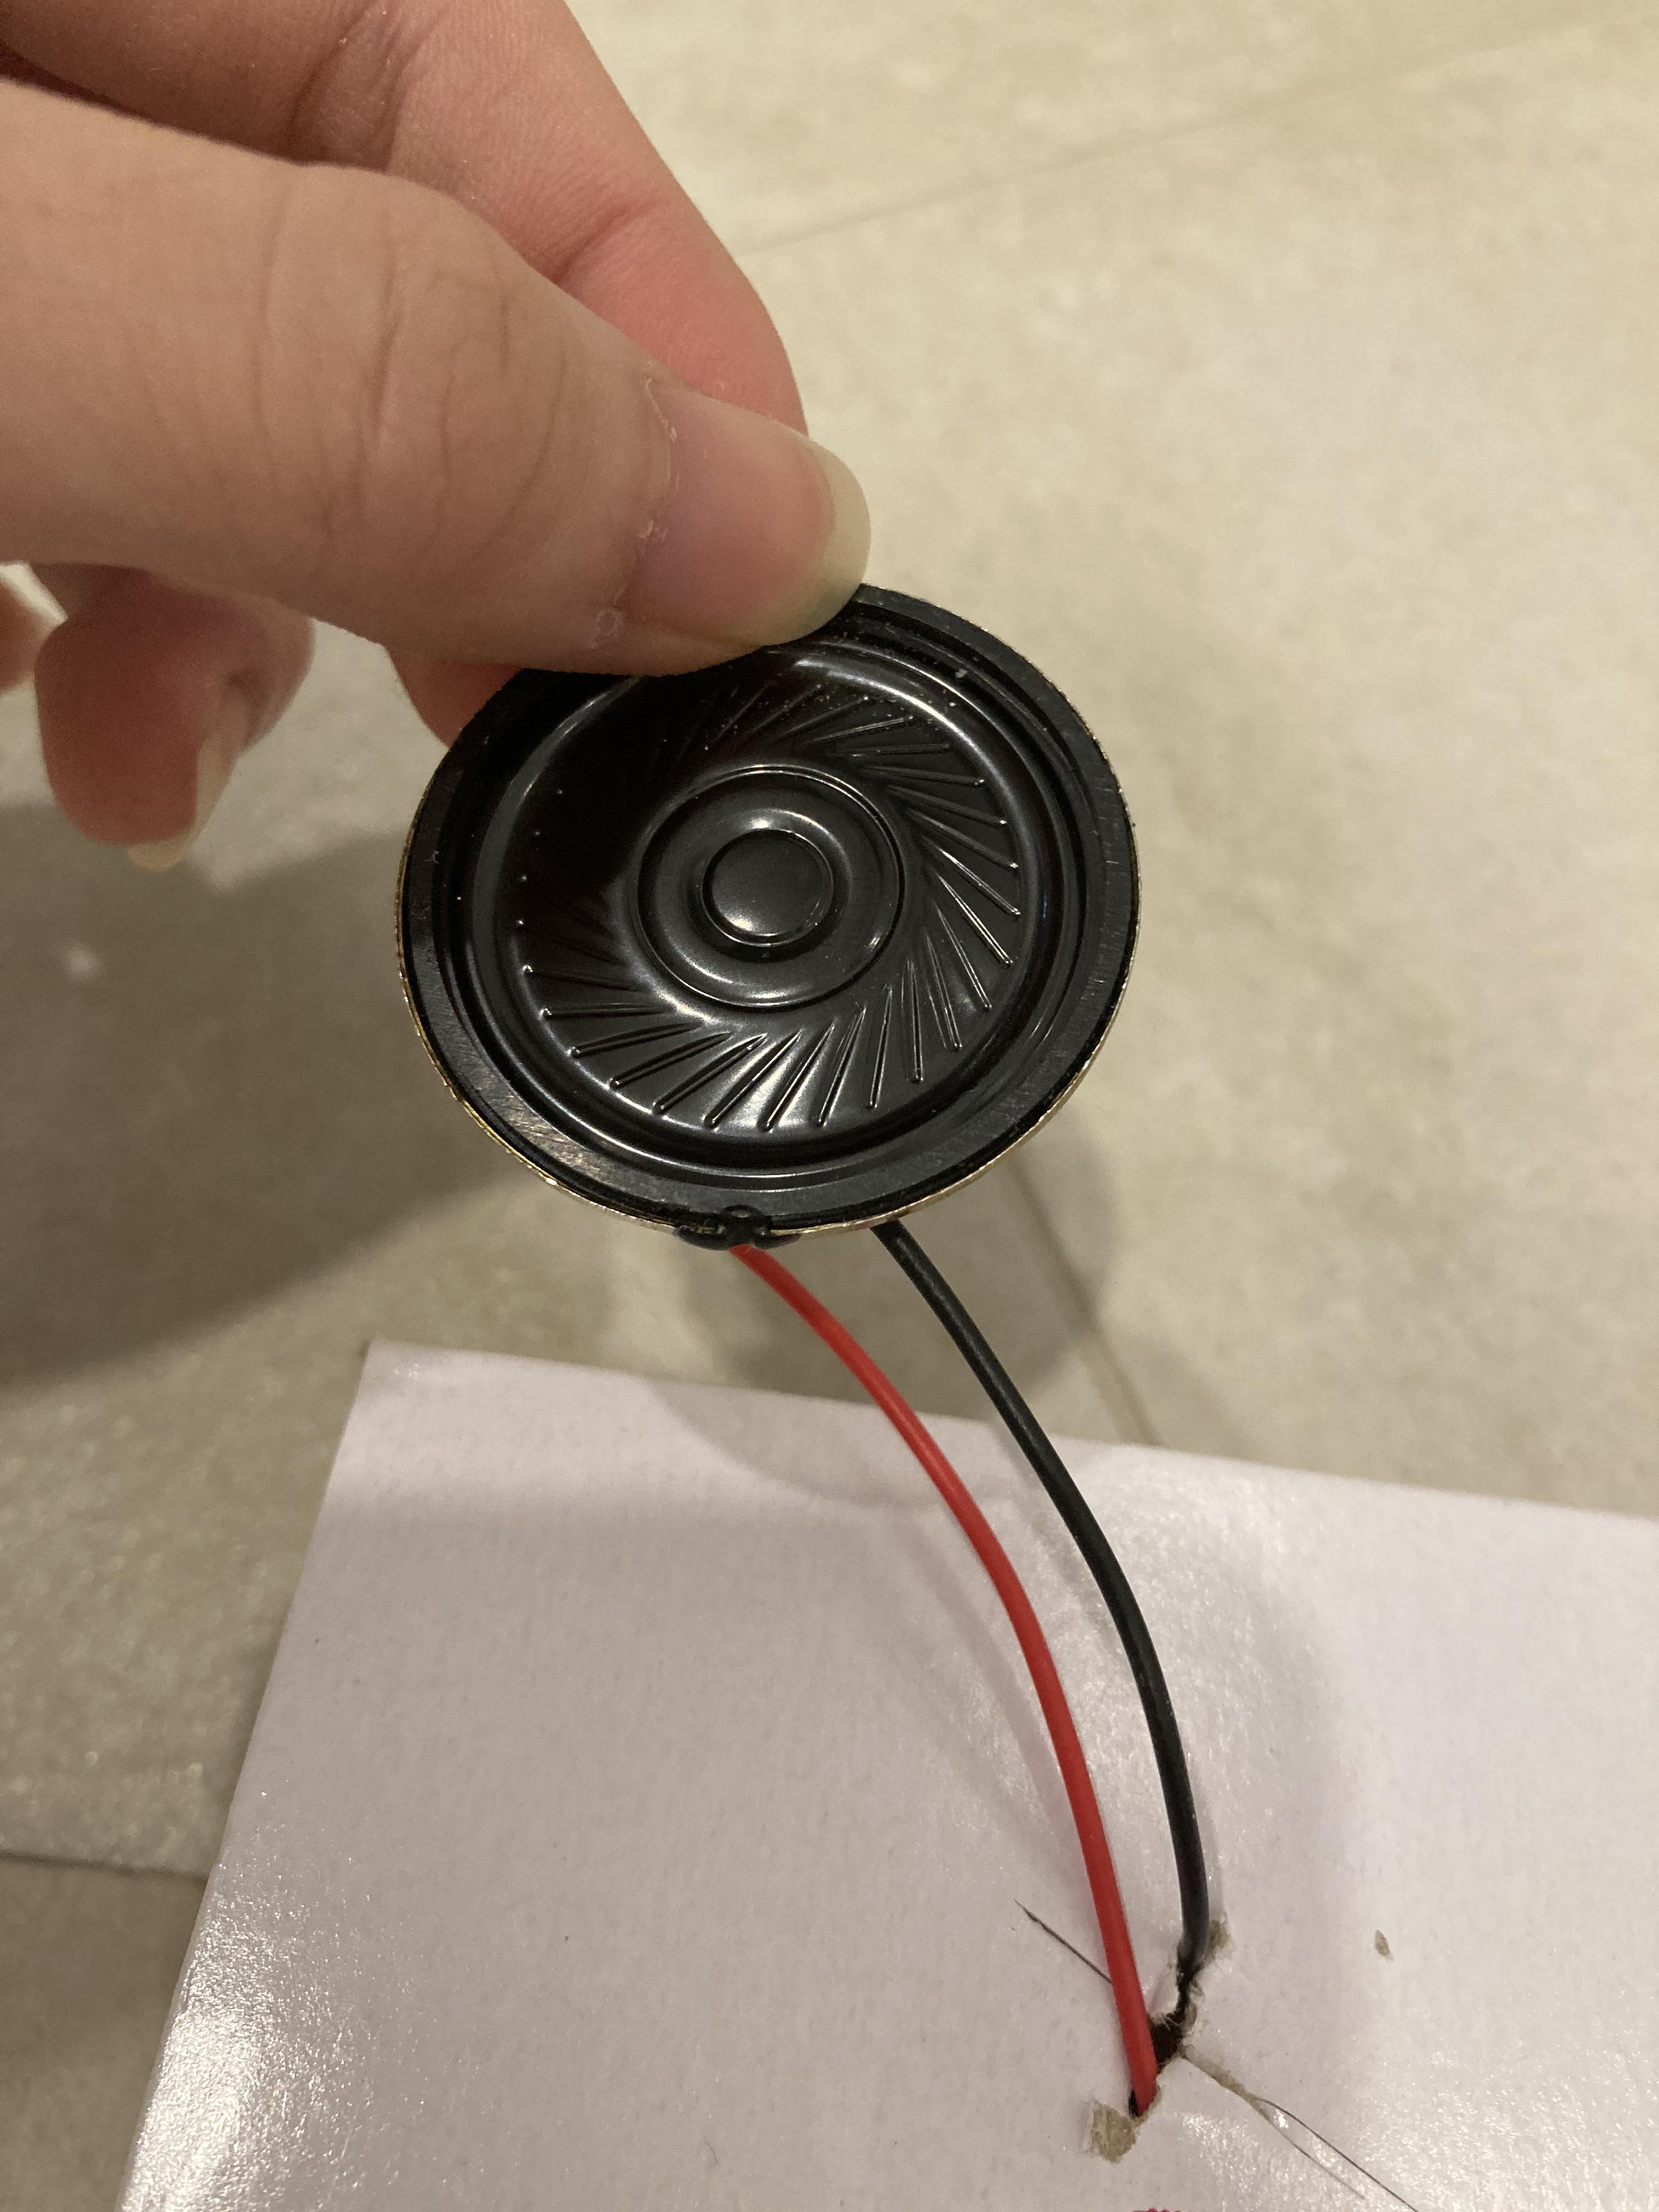
Black--Negative (GND)
Red--D pin
Step 2: Coding


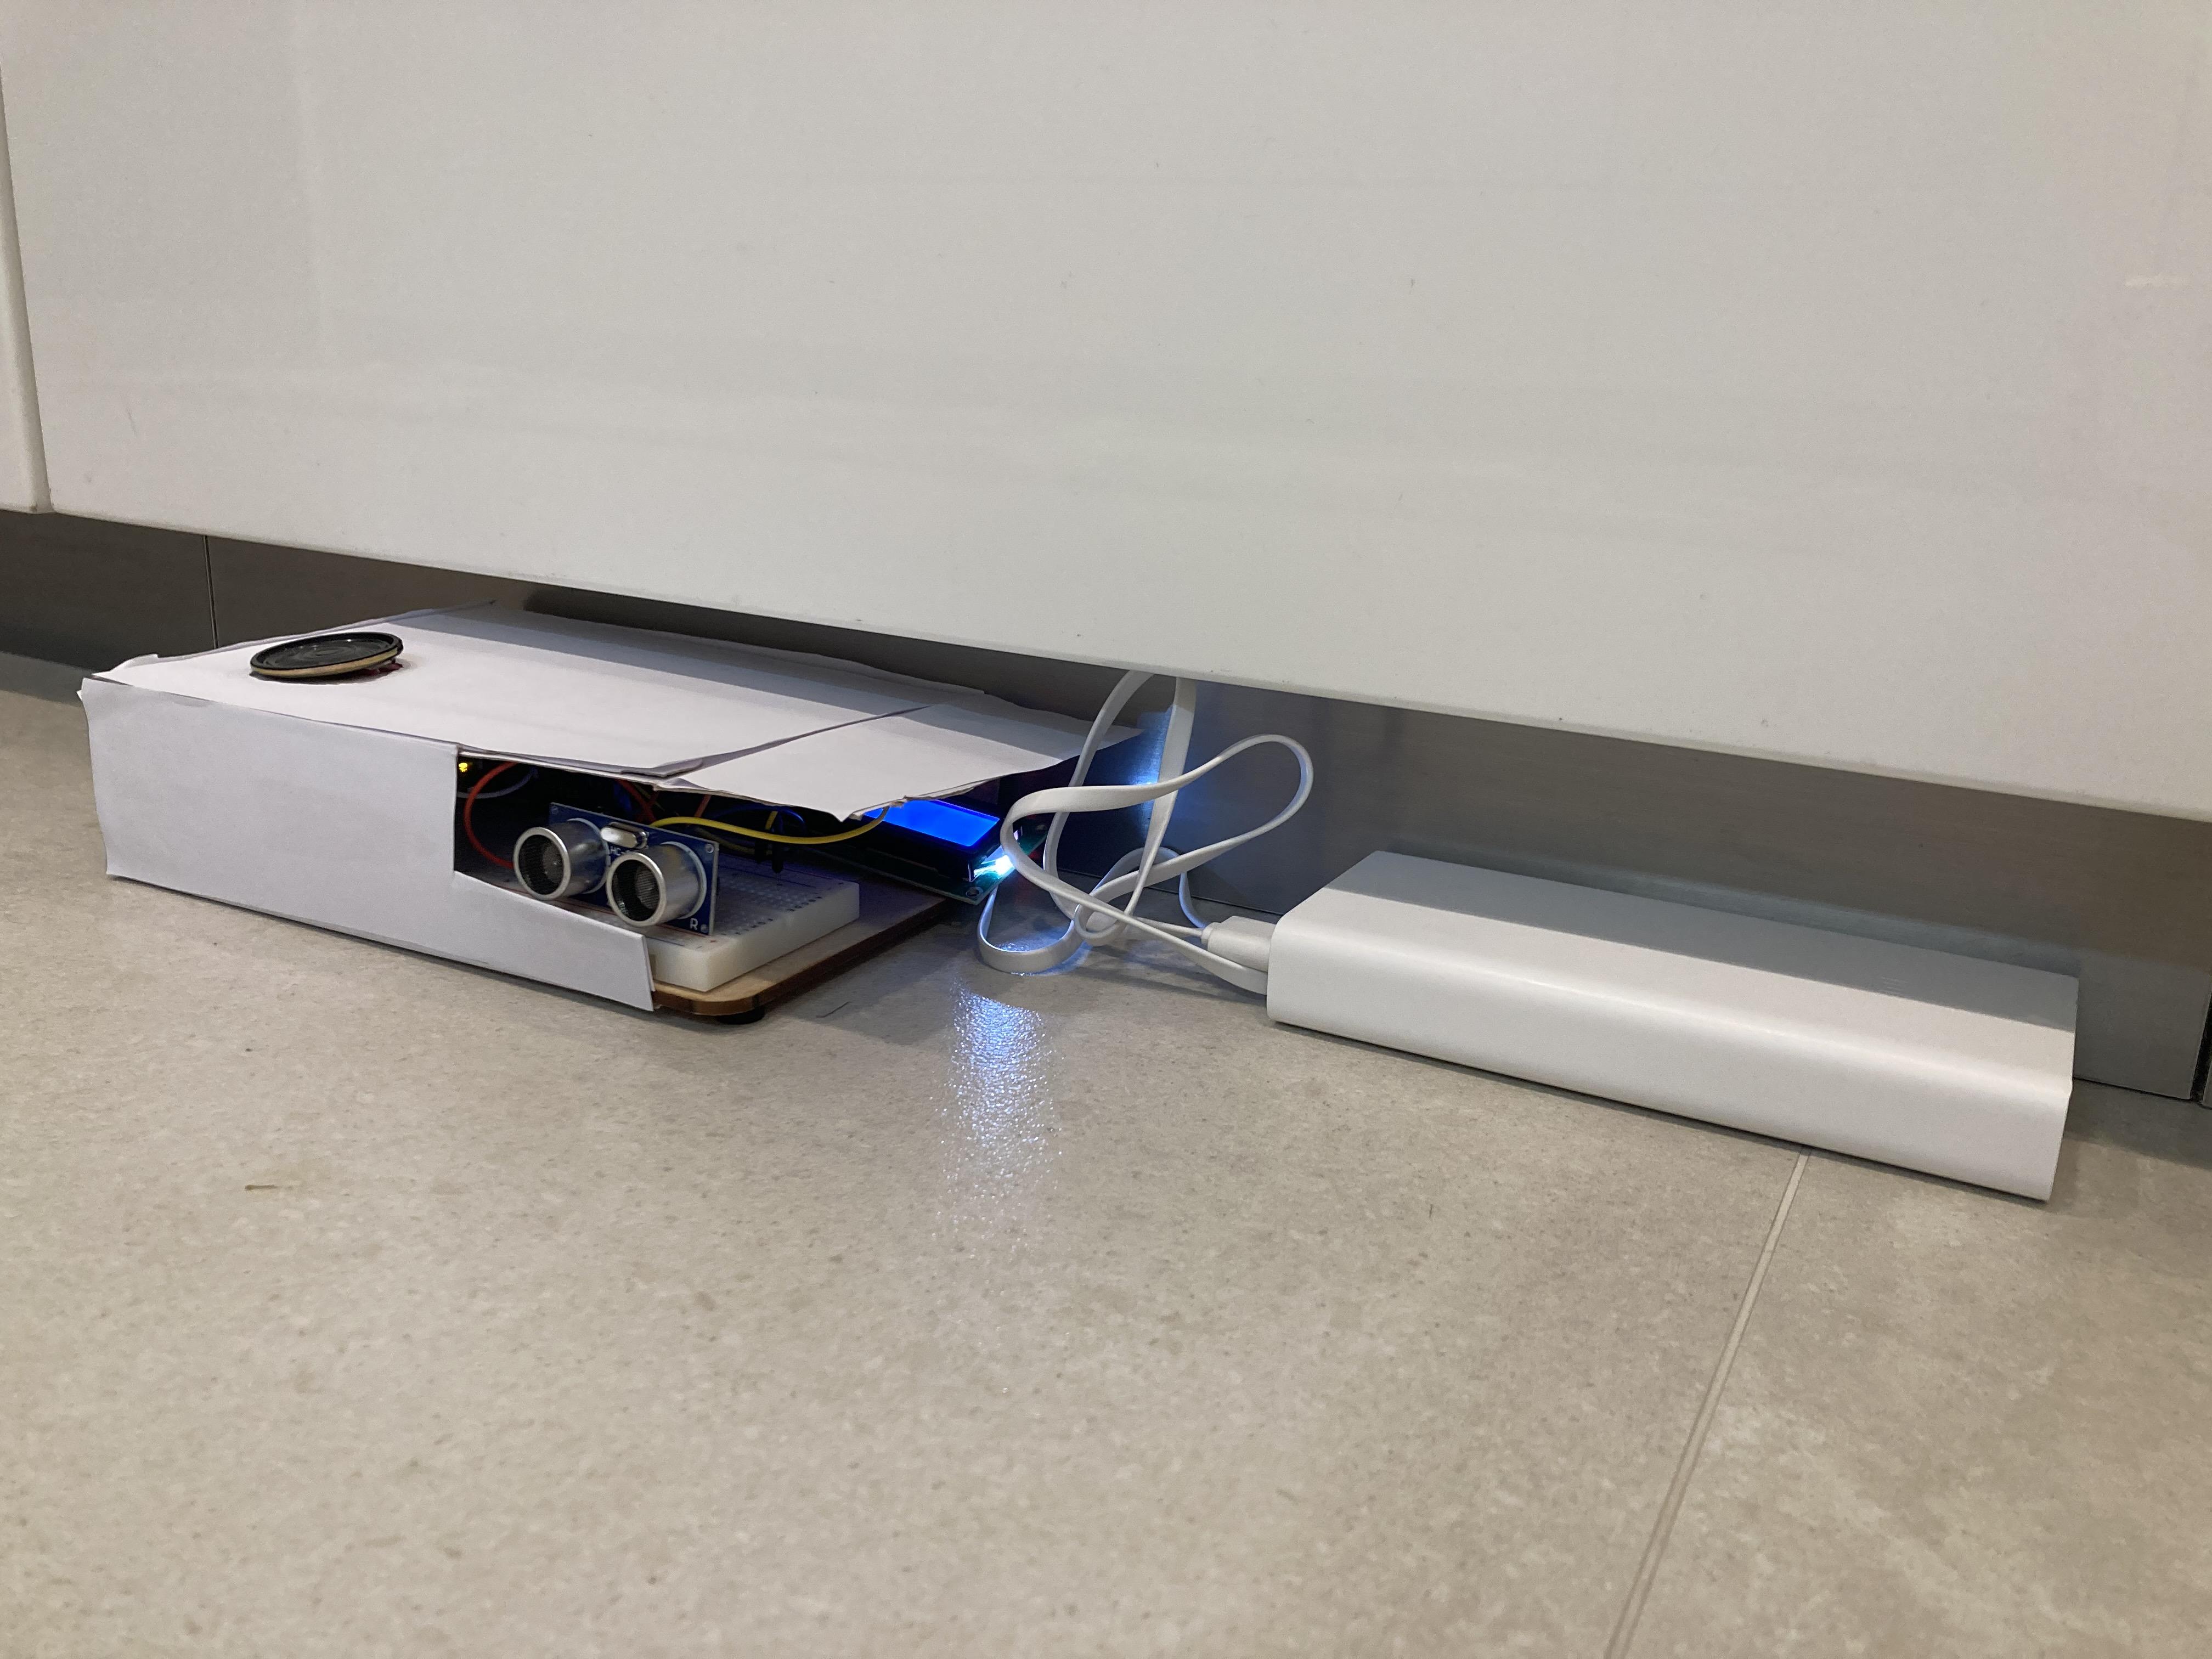
Step 3: Wrap It Up
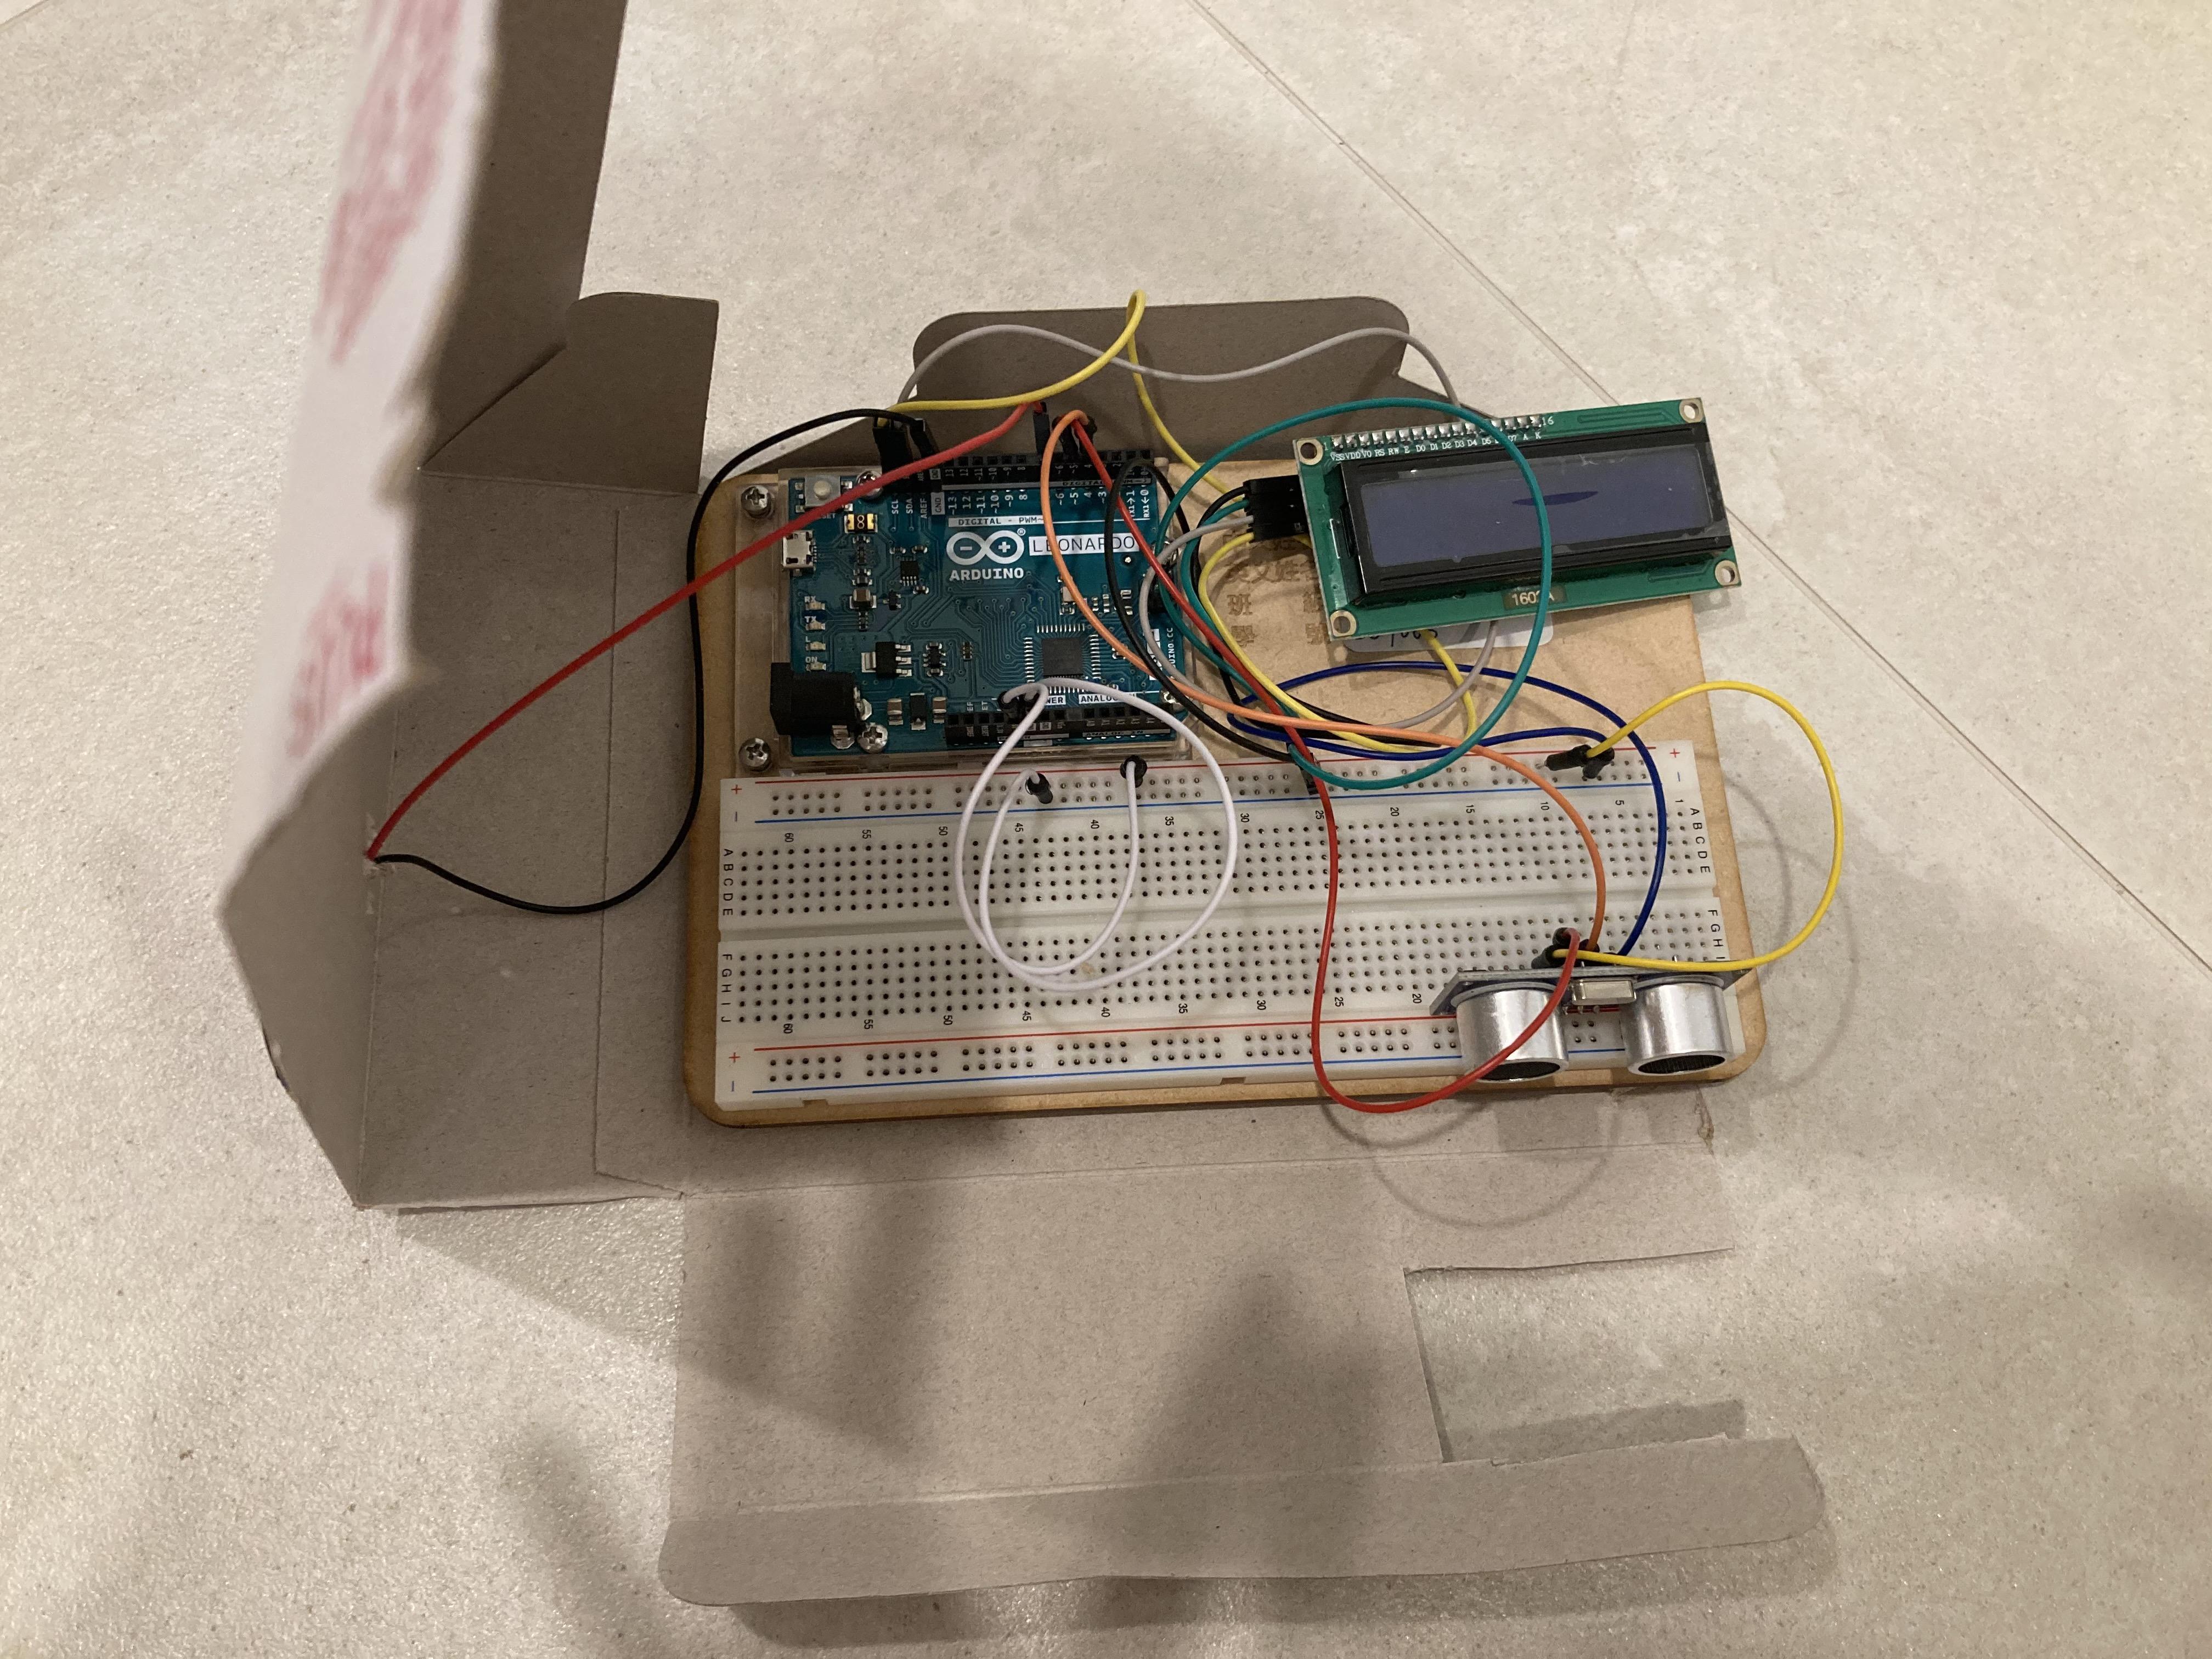
-Simply wrap up the whole thing in a box.
-Cover the box with paper to make it look nice
*REMINDER*
!!DON'T FORGOT TO MAKE WHOLE SO THE SPEAKER AND THE SENSOR CAN WORK!!
Step 4: DONE!