Walker Proximity Device
by Brunner8591 in Circuits > Assistive Tech
1106 Views, 0 Favorites, 0 Comments
Walker Proximity Device

Hello everyone!
We are a group of students from the Massachusetts Academy of Mathematics and Science at WPI. We recently completed an assistive technology project to aid a client with dementia at Seven Hills.
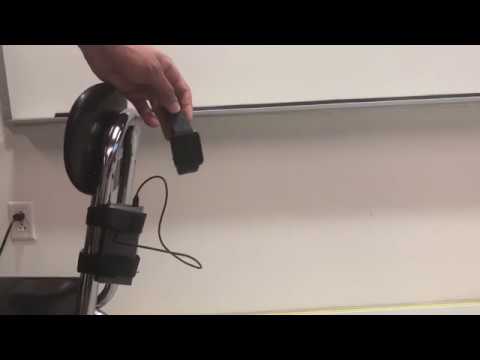
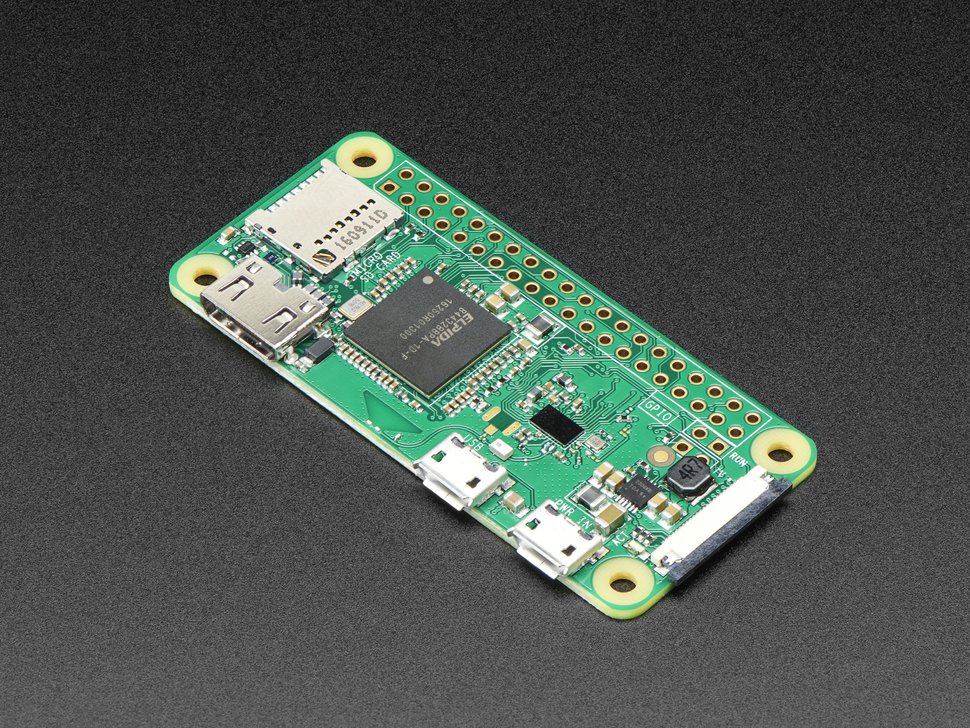
As a result of his dementia, the client sometimes forgets to bring his walker with him when he travels from one room to another. To help him remember, we created a Bluetooth-based proximity detector by utilizing a Raspberry Pi Zero W and a Bluetooth-enabled smart watch. This contraption can also be used by people with similar memory-loss conditions such as Alzheimer's and Huntington's disease.
You can use the following links to directly access our requirements, our background research, our competitor analysis, and our decision matrix, or download the files attached.
Materials

Below is a list of materials used to build this system:
- Raspberry Pi Zero W (1)
- Cost: $10.00
- Link: https://www.adafruit.com/product/3400
- Product ID: 3400
-
Smartwatch (1)
-
Cost: $17.99
-
Note: This can be replaced with any Bluetooth device (Level 3.0 or below) which can communicate with a Raspberry Pi and provide a MAC Address
-
-
Laptop (We used a Mac)
Portable battery pack: we used a personally supplied battery pack which is not commercially available, but any compact battery pack or lithium battery which can provide 5 volts of output will be sufficient.
MicroUSB cable for power supply to the Raspberry Pi
Setting Up Raspberry Pi
First, configure your Raspberry Pi according to the steps below:
https://styxit.com/2017/03/14/headless-raspberry-s...
Once you have Raspbian installed and have connected to your Raspberry Pi via ssh, install the required packages by executing the following commands:
sudo apt-get install bluetooth
sudo apt-get install python-bluez
git clone https://github.com/ewenchou/bluetooth-proximity.git
cd bluetooth-proximity
sudo python setup.py install
Now, find the Bluetooth address of your secondary device:
sudo bluetoothctl
scan on
When you see the name of your device, copy its Bluetooth address and store it in an easily accessible location. It should have the format XX:XX:XX:XX:XX.
Then, copy the file below to your Raspberry Pi, noting its absolute path. You may use Filezilla or a number of other tools to copy the file.
https://github.com/danramirez2001/buzzer.py
You will need to insert the Bluetooth address of your secondary device in the variable BT_ADDR. The threshold RSSI value is set to -15 by default, but you can adjust this to your needs on line 38.
Finally, to set up the script to run whenever the Raspberry Pi is turned on, execute the following command:
sudo crontab -e
Open the file in your desired text editor, navigate to the next available line, and enter:
@reboot python ~/your/path/to/file/here/buzzer.py
Save the file and exit, and the Raspberry Pi setup is complete!
Device Assembly
To connect the Raspberry Pi to a buzzer, LED, or any other simple electronic, simply solder the red and black wires from your accessory to the GPIO board. The black wire must be connected to a ground pin; in this project, it was attached to the third pin from the side of the Raspberry Pi containing the SD card on the outside row. Then, attach the red wire to the fourth pin on the inside row.
Once the electronic assembly is complete, print the casing below to complete the device:
(CAD link)
Once the casing is printed, insert the Raspberry Pi and a small portable battery pack. The device can be attached to a walker or any other object by inserting velcro straps through the slots, and any user wearing the smartwatch will be able to take advantage of the proximity warning system.
Improvements and Extension Projects
While this device does fulfill its intended role, there are several improvements that can be made which will enhance the capabilities of this device. One possible improvement is to use a smaller battery pack in the design of this device so that the overall size and weight are less. Another possible improvement to this device is to better secure all the wiring to ensure that device does not malfunction due to the unintended disconnection of wires. A third possible improvement is to make the device easier to charge and handle for people who might be using the device but are not familiar with the technology.
Possible Extension Projects:
- Do more testing to determine the correct equation which connects the device's RSSI signal strength and the distance between the device and another device.
- Develop better casing which is more lightweight and durable.
- Implement this system with Wi-Fi technology instead of Bluetooth and see which model is more effective at accomplishing the given task.
- Implement this system with an Arduino instead of a Raspberry Pi and see which device better addresses the initial goal.