Wakanda Forever: Black Panther Charcoal Tribute Drawing
836 Views, 2 Favorites, 0 Comments
Wakanda Forever: Black Panther Charcoal Tribute Drawing
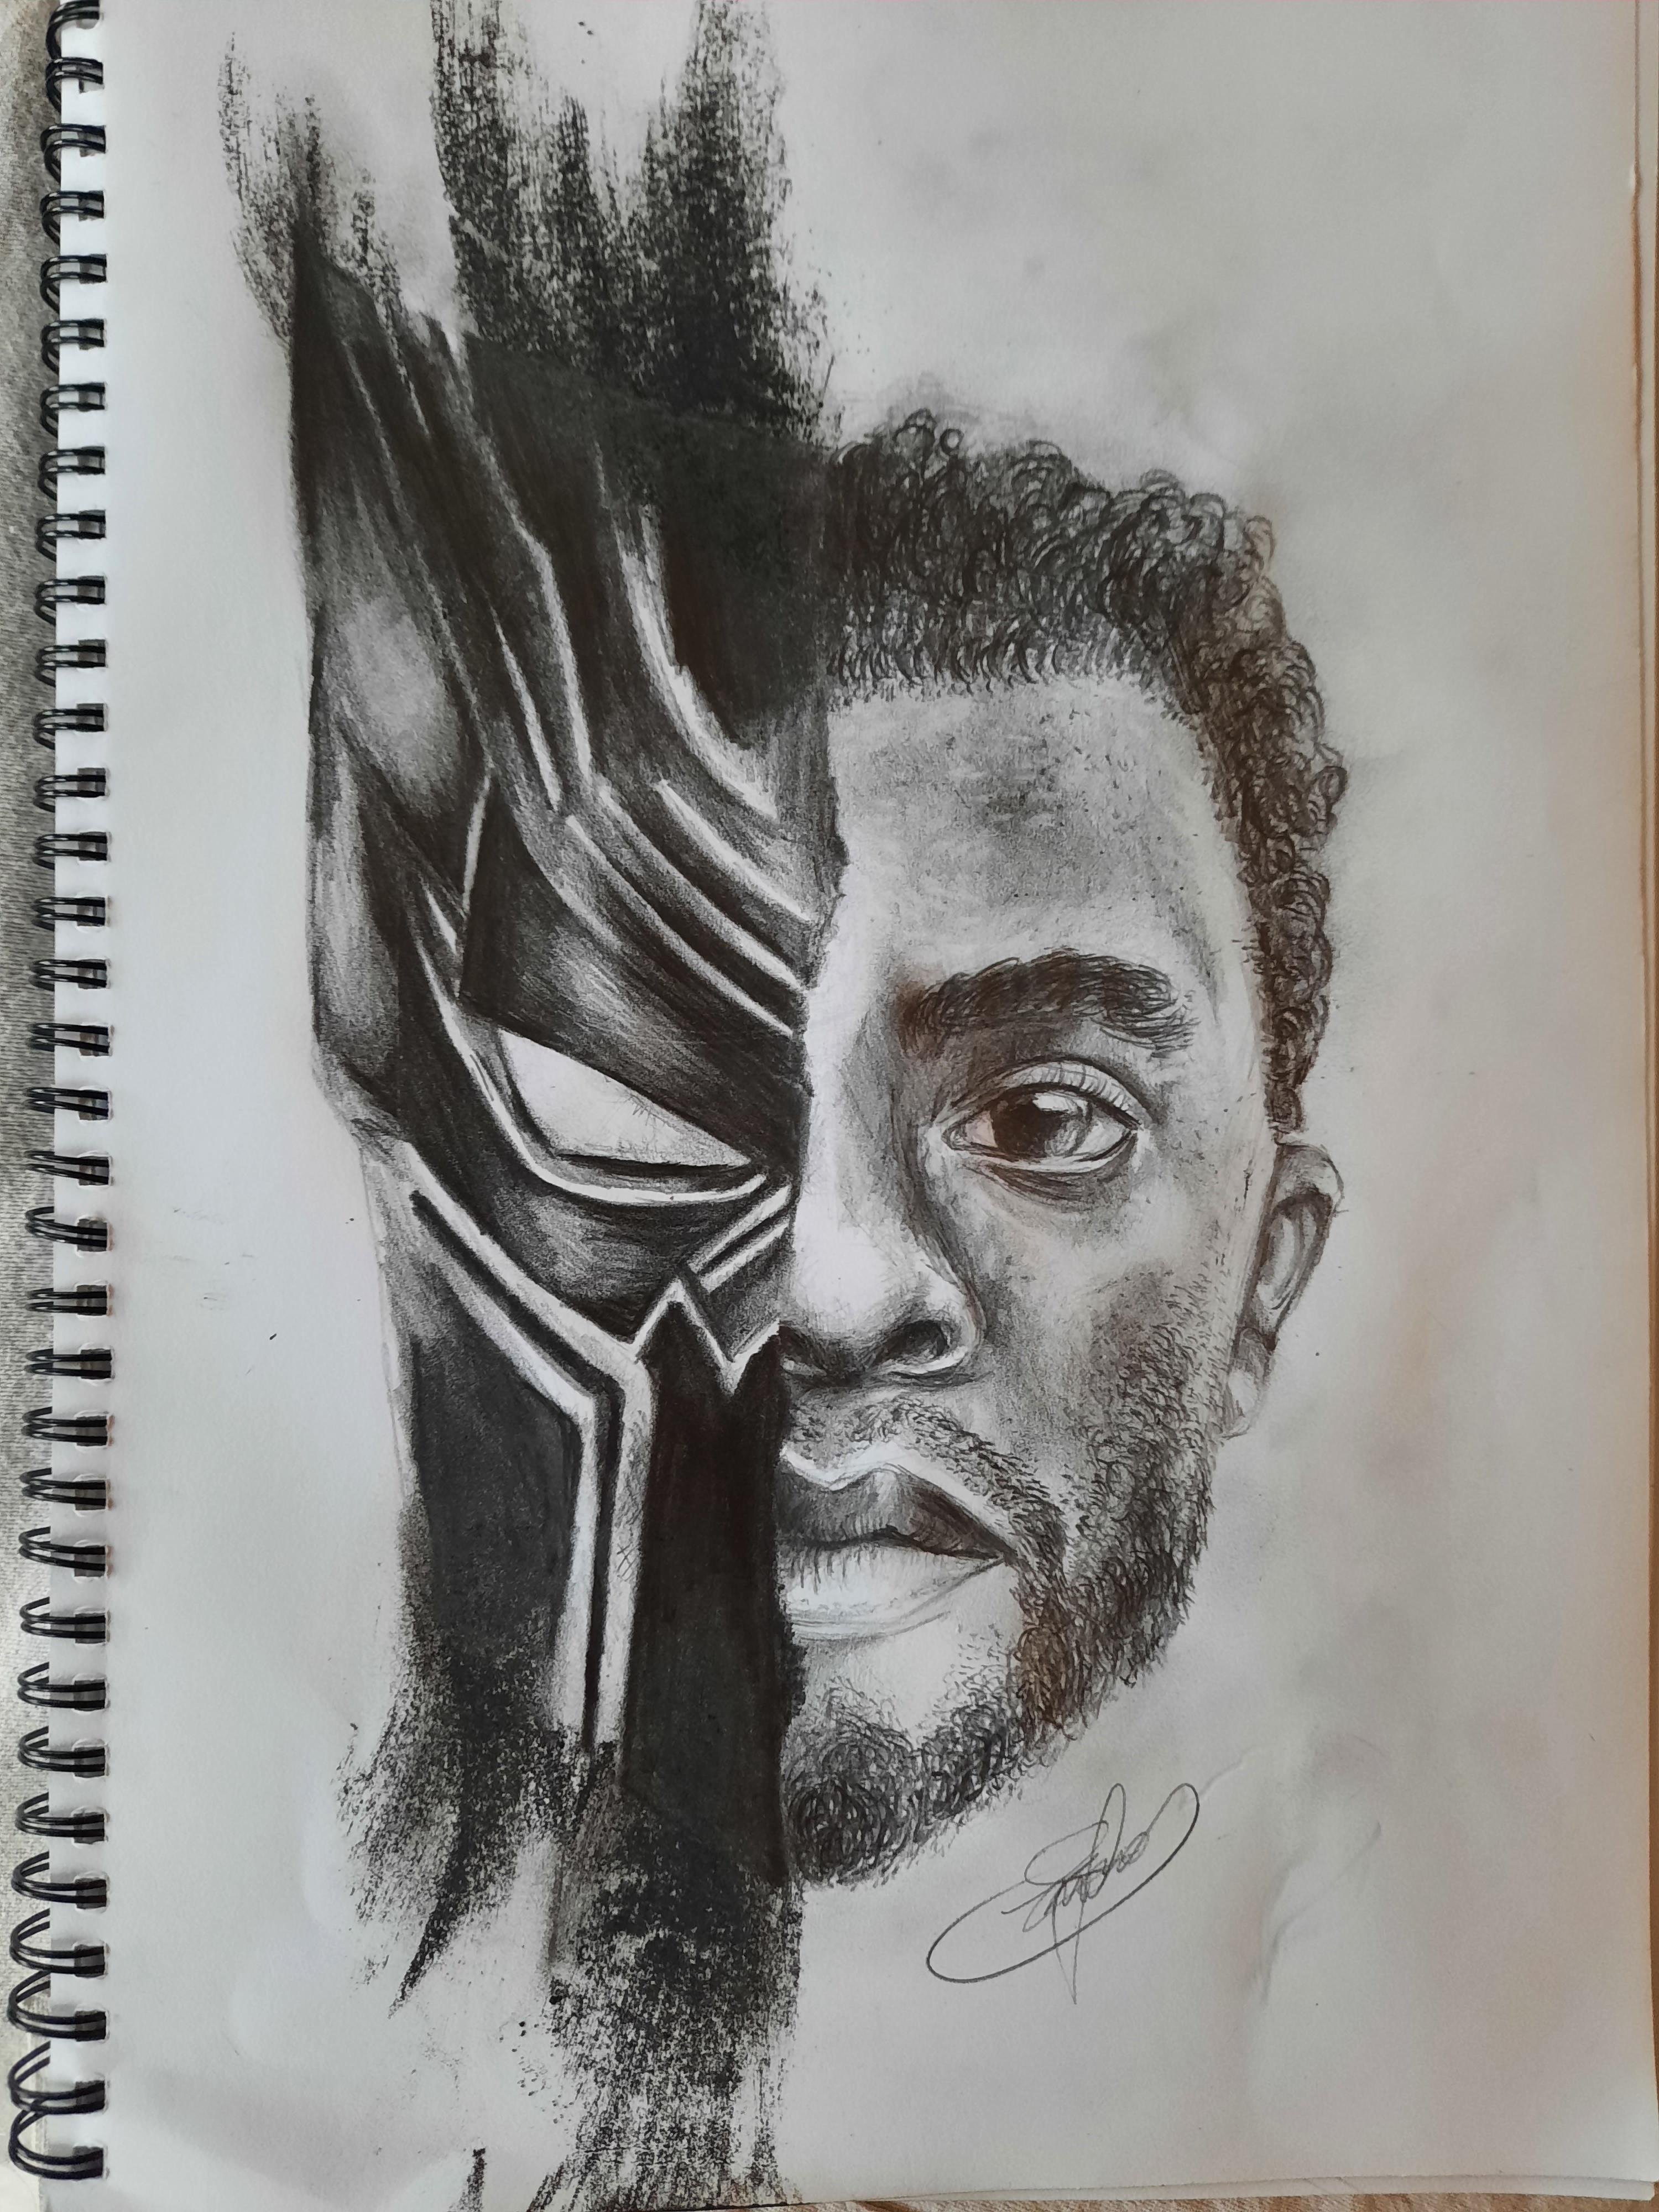
I drew a charcoal drawing of Chadwick Boseman's face with the black panther as a tribute to the lost hero. There is a new Black Panther movie coming out and it inspired me to do this drawing. I have never tried to do a very realistic drawing of someone's face before, so this was definitely a challenge. This is actually my first instructable so I hope this is okay :).
Enjoy and happy drawing.
Supplies
- Charcoal
- White Charcoal
- Charcoal pencils
- 2B, 5B pencils
- paper (Good drawing paper)
- Mouldable rubber
- Small rubber
- Sharpener
Sketch the Basic Outline
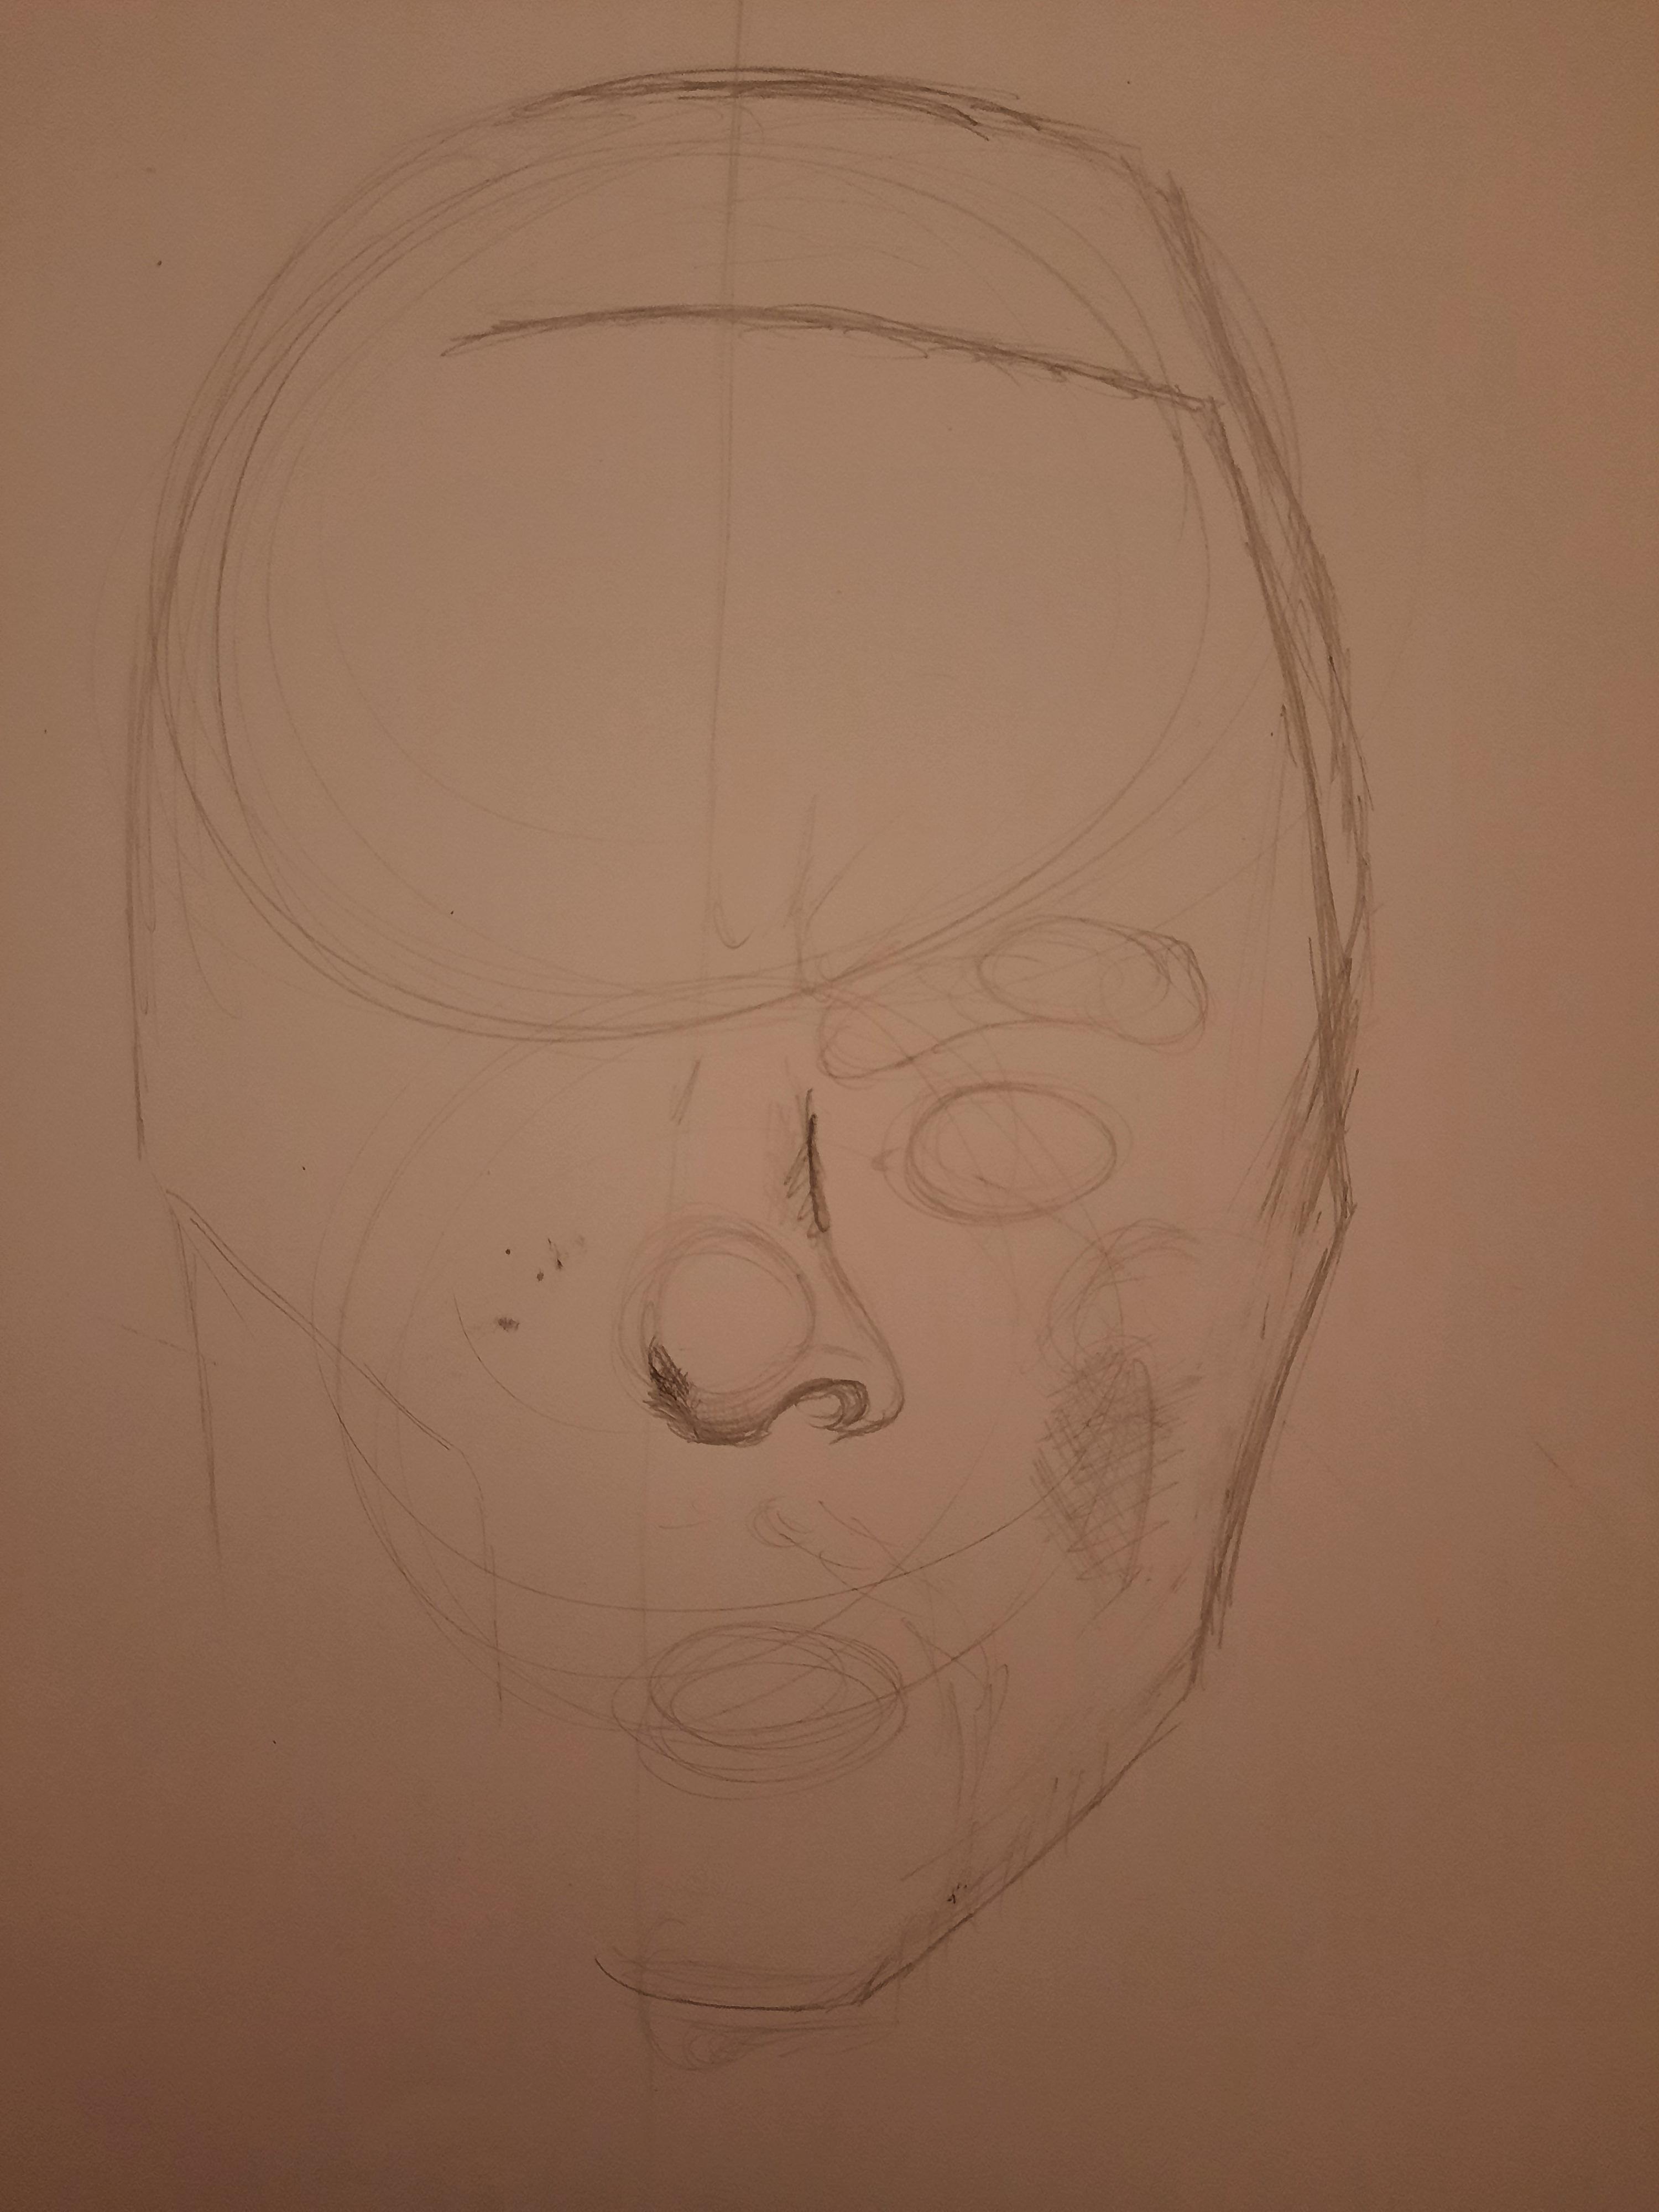
- First I sketched the basic outline of his face. I marked out where the dividing line would be between his face and the Black Panther mask so I would know where to start sketching his features.
- Then using a light pencil, I sketched the position of his eye, nose, lips, eyebrow and where the light hits his cheekbone. He has a very pronounced jawline which I also sketched in, leaving extra room for where his short-cut beard will be.
Start to Fill in the Basic Parts of the Nose and Eye
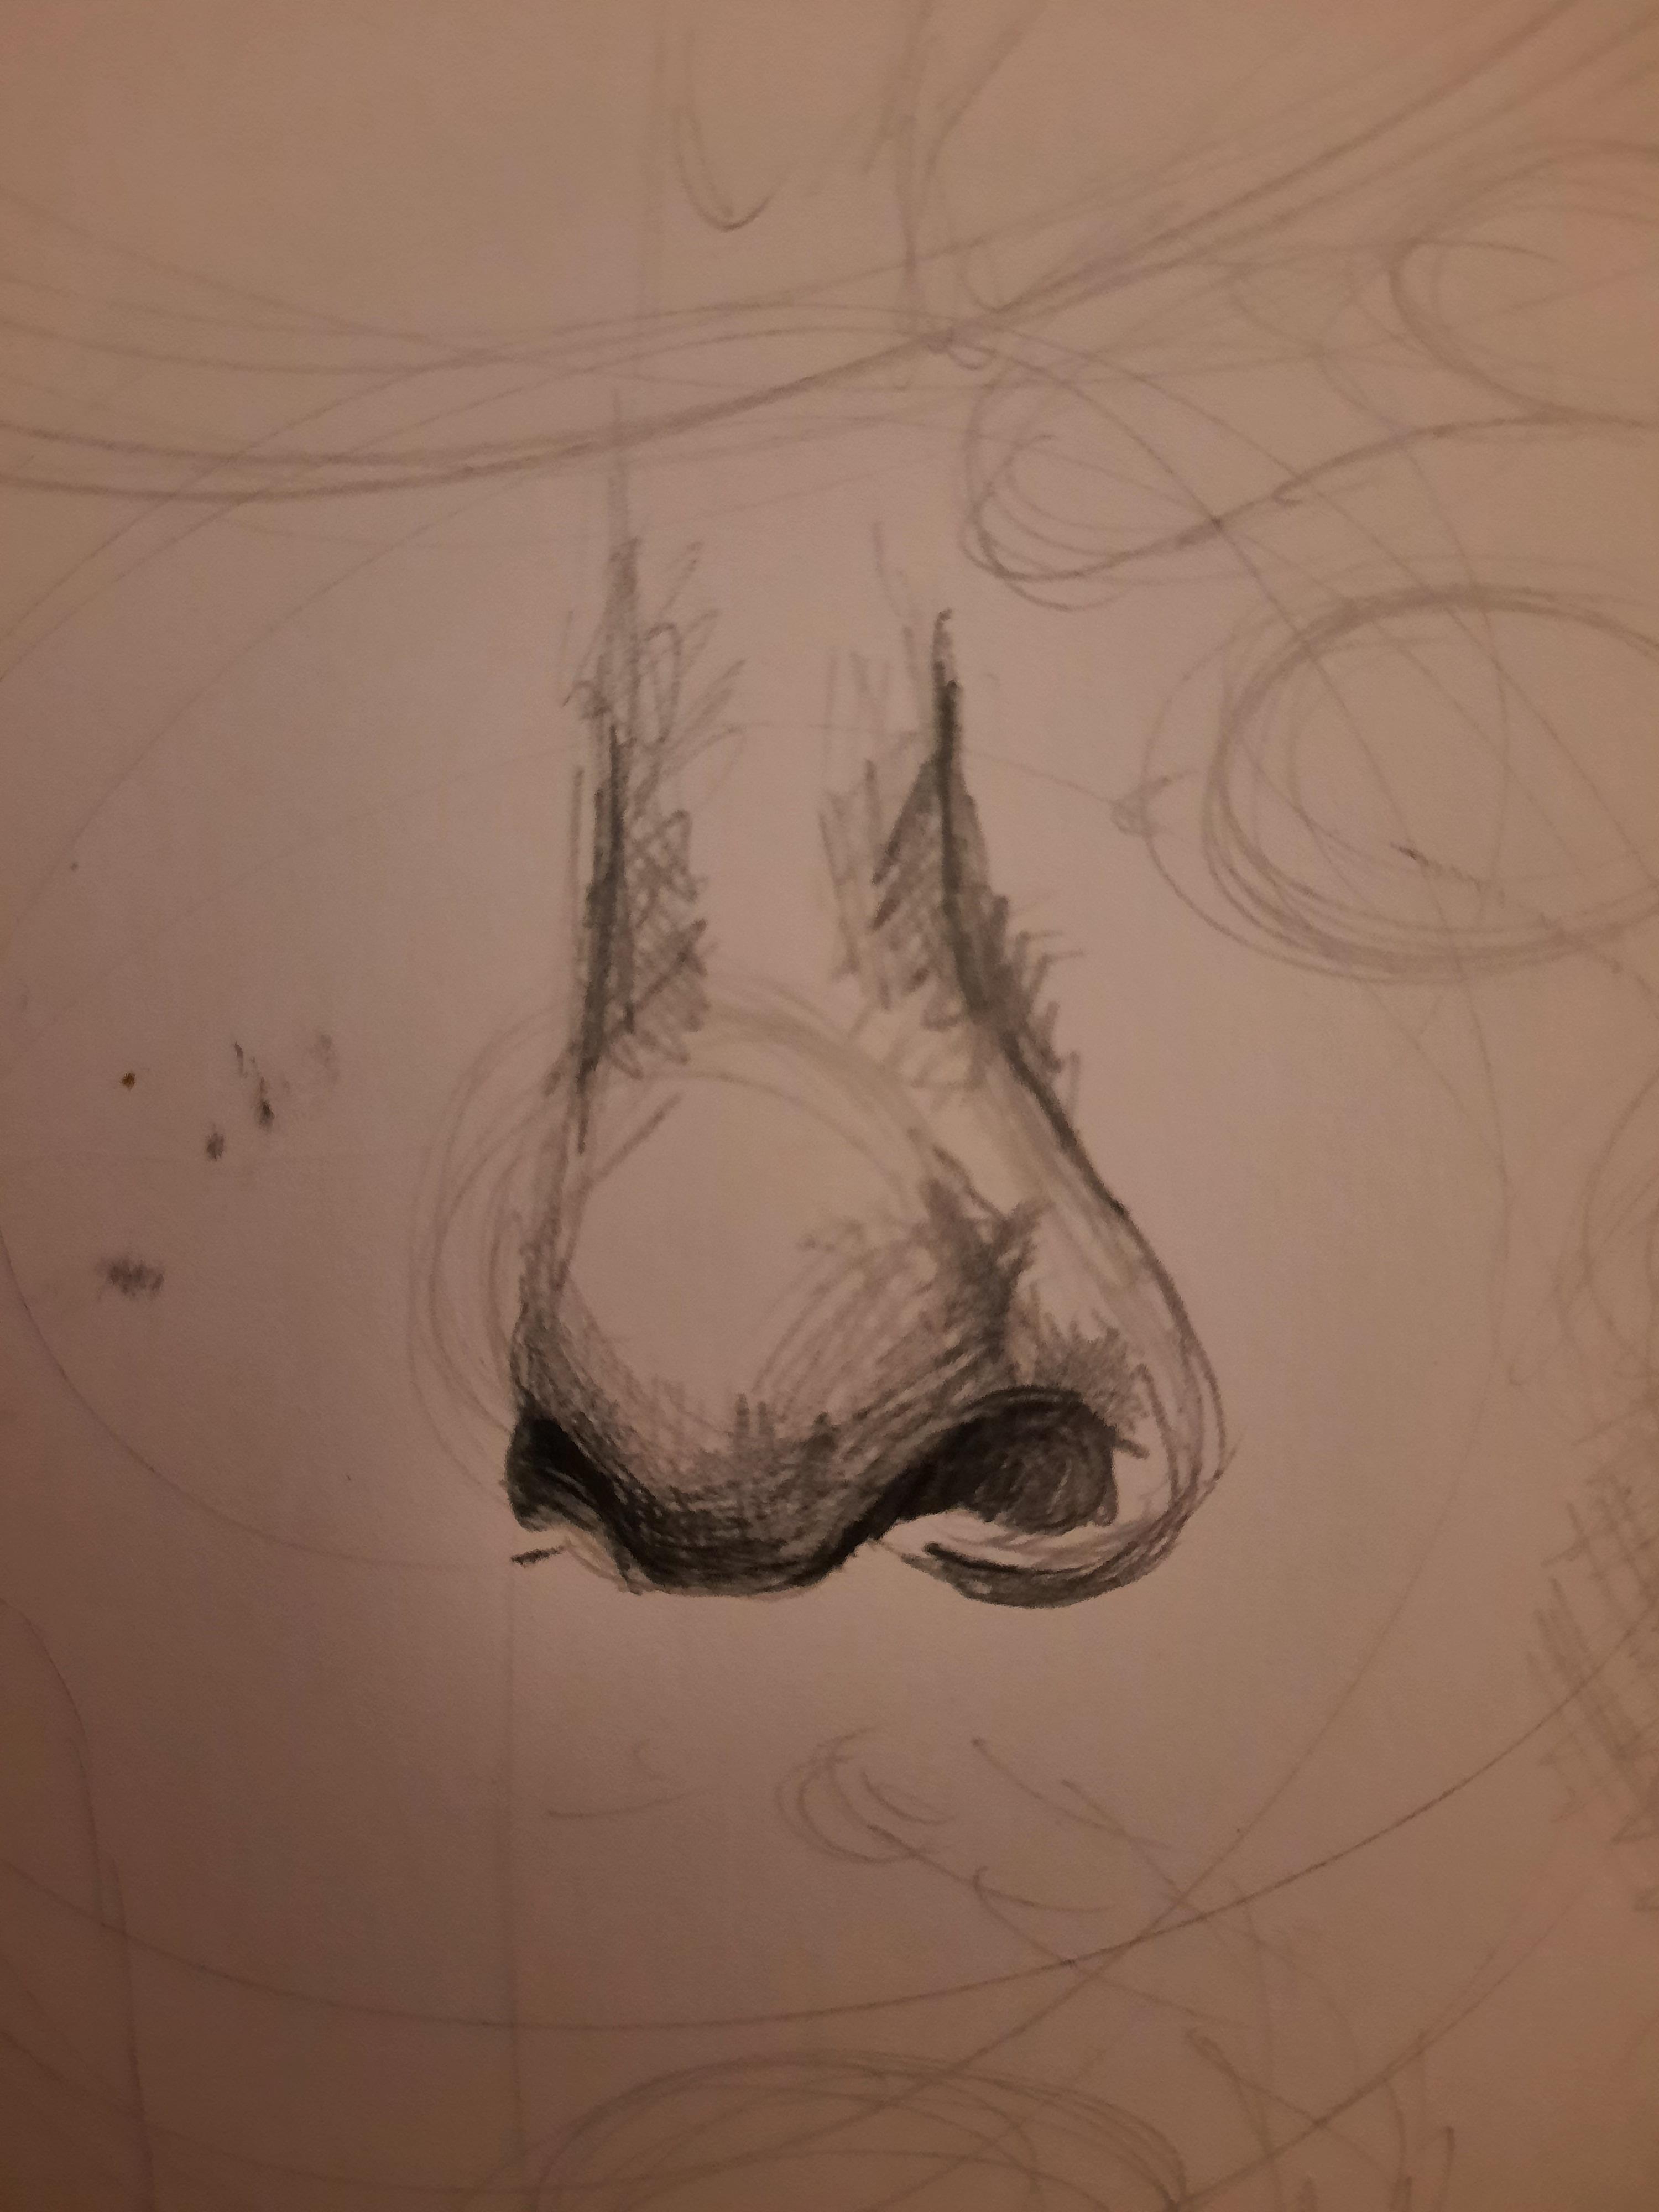
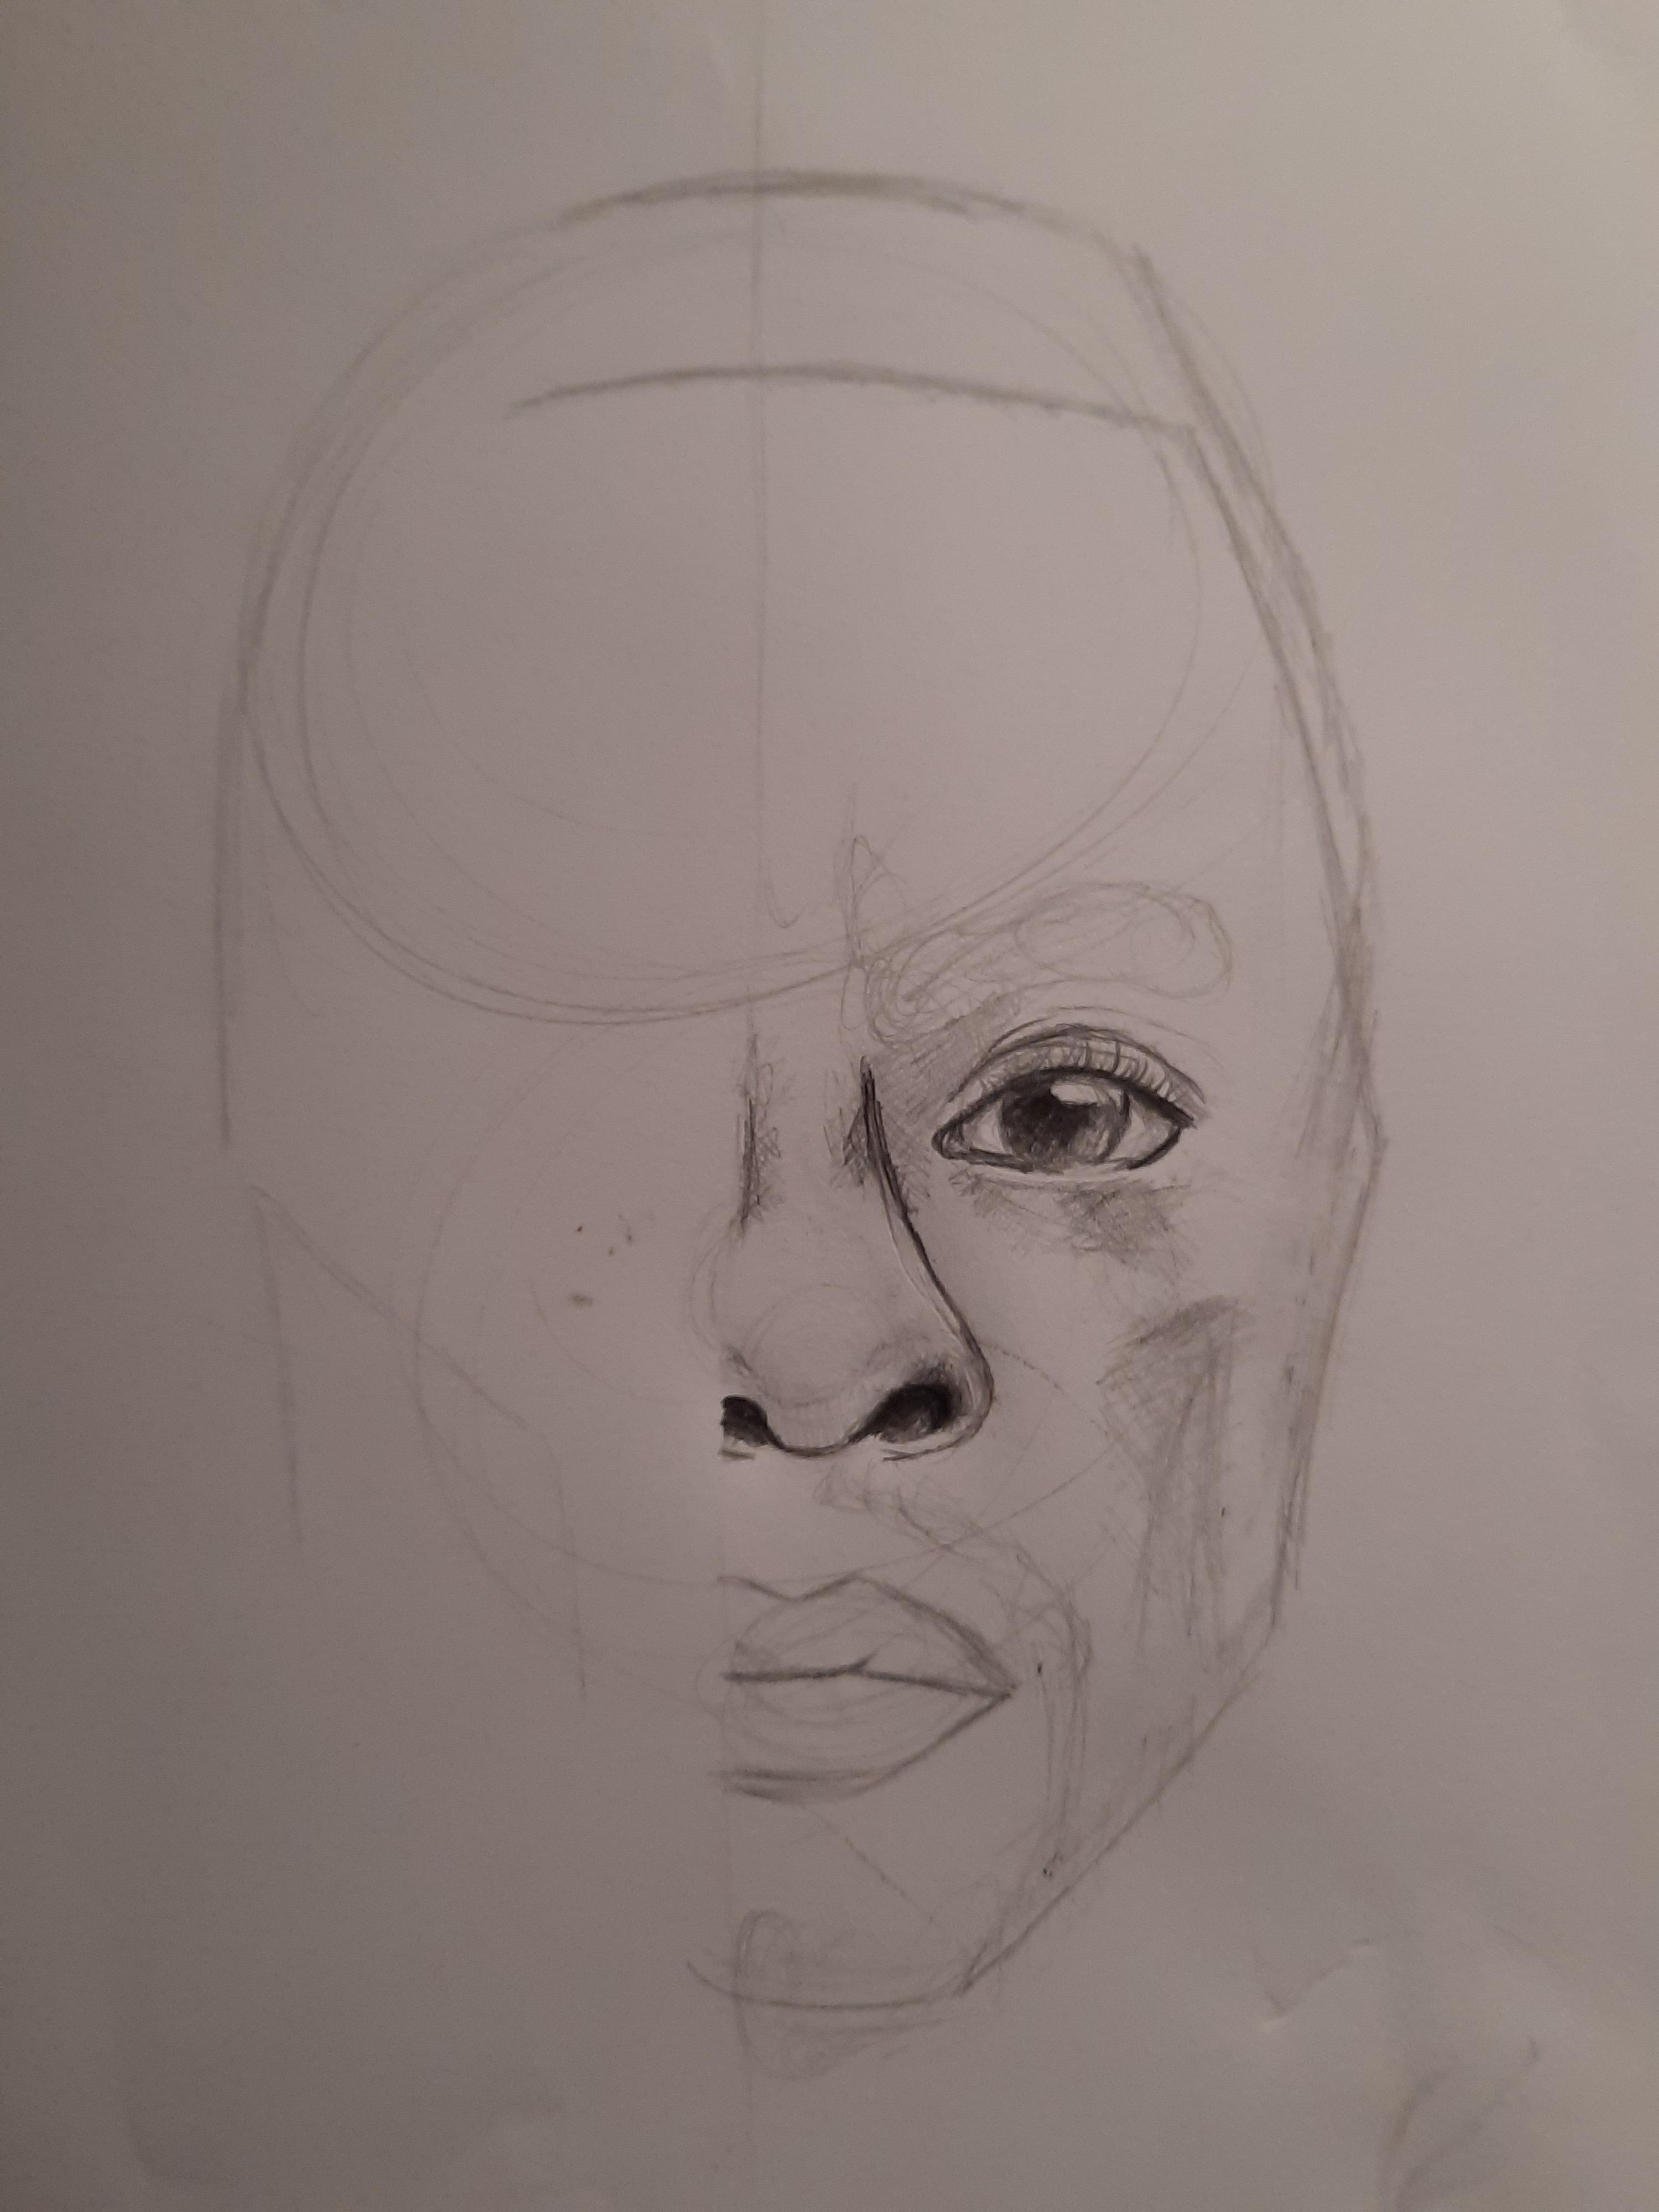
- Next, I filled in the shadows of the eye and nose. I started shaping the nose giving it more definition and volume. I added shadows and blended parts to add more of a definite structure.
- For the eye, I started by marking where the light would hit the eye and started shading in the pupil and the eye details; such as eyelashes, shadow, iris etc.
- I also added details to the eyebrow, ear and lips shading them and adding contours and form.
Shading
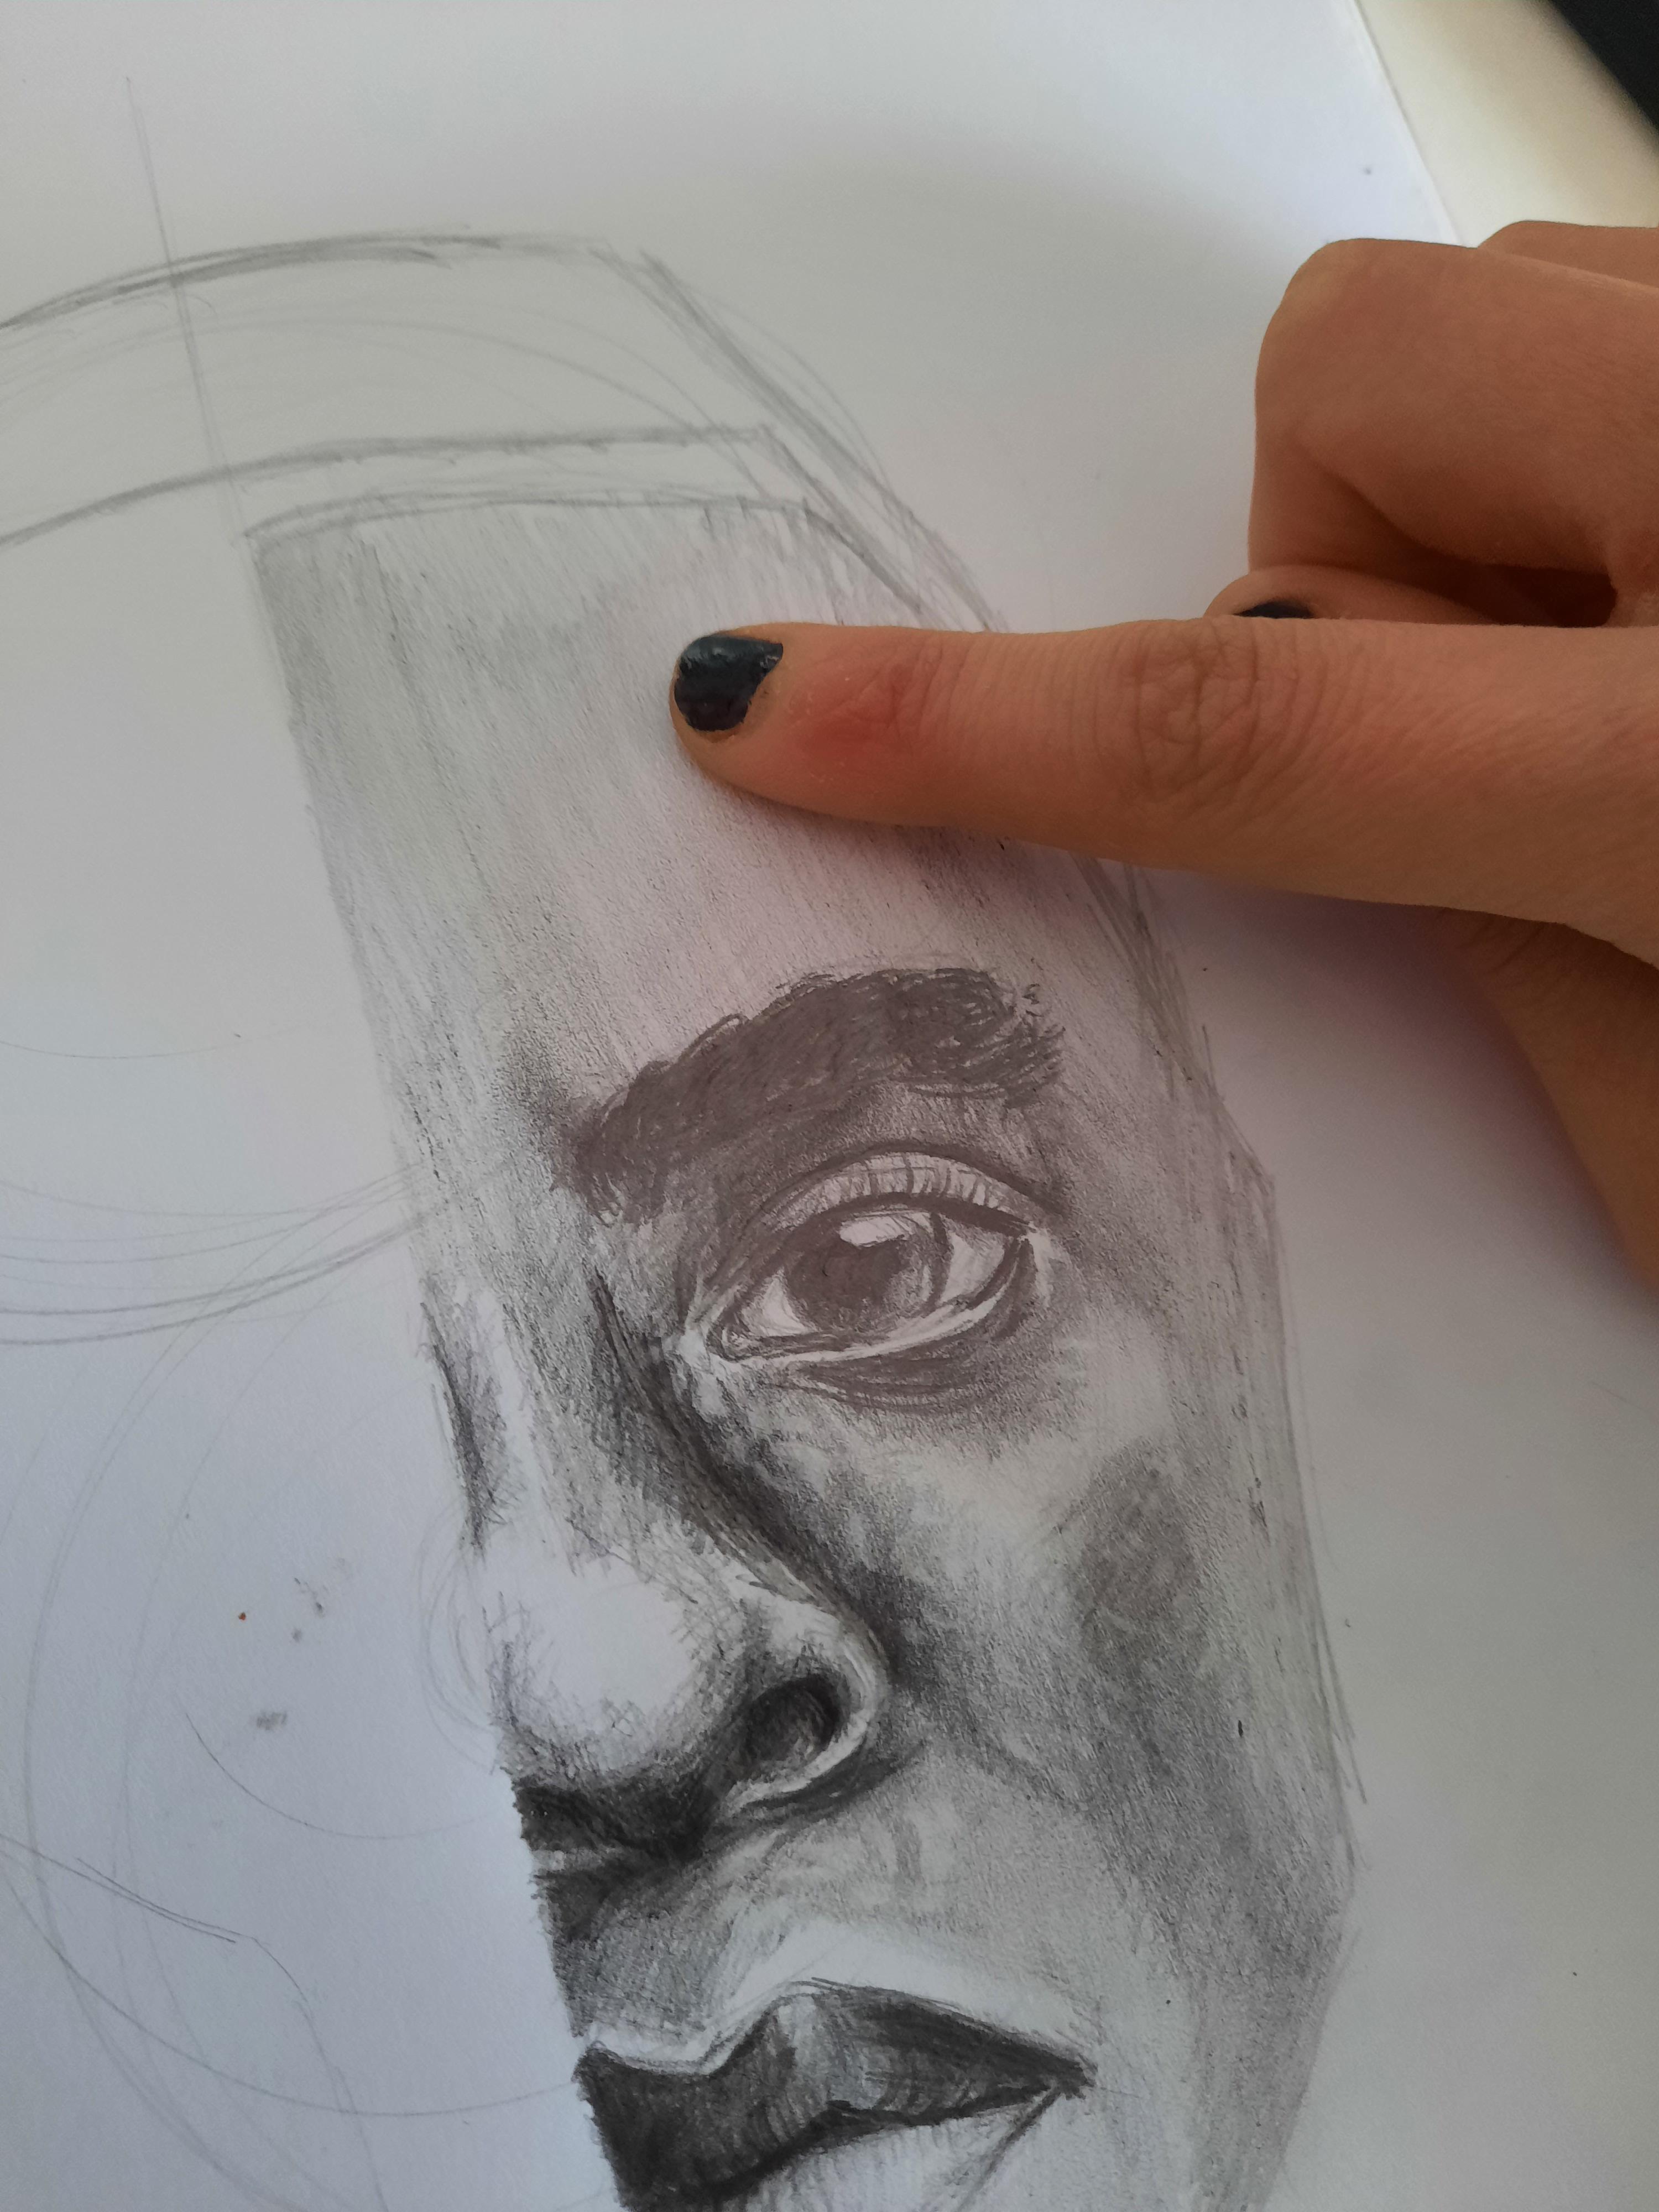
- Next, I started the shading. I added a thin layer of shading over the whole face making sure to leave the places where the light hit his face free of shading.
- Using my finger I spread the light shading making it blend in together like real skin.
- I also added in more shadows to the face in the nose crevices and under the eyebrow and lips.
- Second layer. I went in with my second layer, deepening the shadows on the face with a second layer of shading in the areas of the face that were darker or had more shadows.
Making Skin
- Using your small rubber rub out very small, thin lines in the same general direction usually where the light hits the face. This is to make the skin appear more realistic. You can also add a few into the darker areas to give it a more life-like appearance.
- Using a light charcoal pencil, add small light dots to add more realism to the skin.
Hair
- First mark out the area for the hair.
- Gently shade the area, blocking out the area needed for the hair. This forms the general background and adds more definition.
- Start by darkening some of the shades in the areas where the hair is in shadow.
- Add in dark lines, some straight and some curly.
- Keep on adding lines till you are satisfied with the hair.
- You can also add small joining lines that help to blend the hair together and link it to the forehead instead of making it stand out like a sore thumb. (I did this, it really helps)
Beard
- Draw small lines for the facial hair.
- First light so that you know where the beard/moustache is supposed to be and then darker to define it.
- Keep layering on the hair adding different lengths to create volume
Black Panther Mask
- First sketch out the basic shape.
- Add in shadows and contours to show where the deeper shadows are supposed to go.
- Identify where the light should hit the mask
- Add deeper shadows to the areas of the mask that are darker to give it a more defining deposition.
- You can use your White charcoal to enhance the light parts of the mask
Finishing Touches
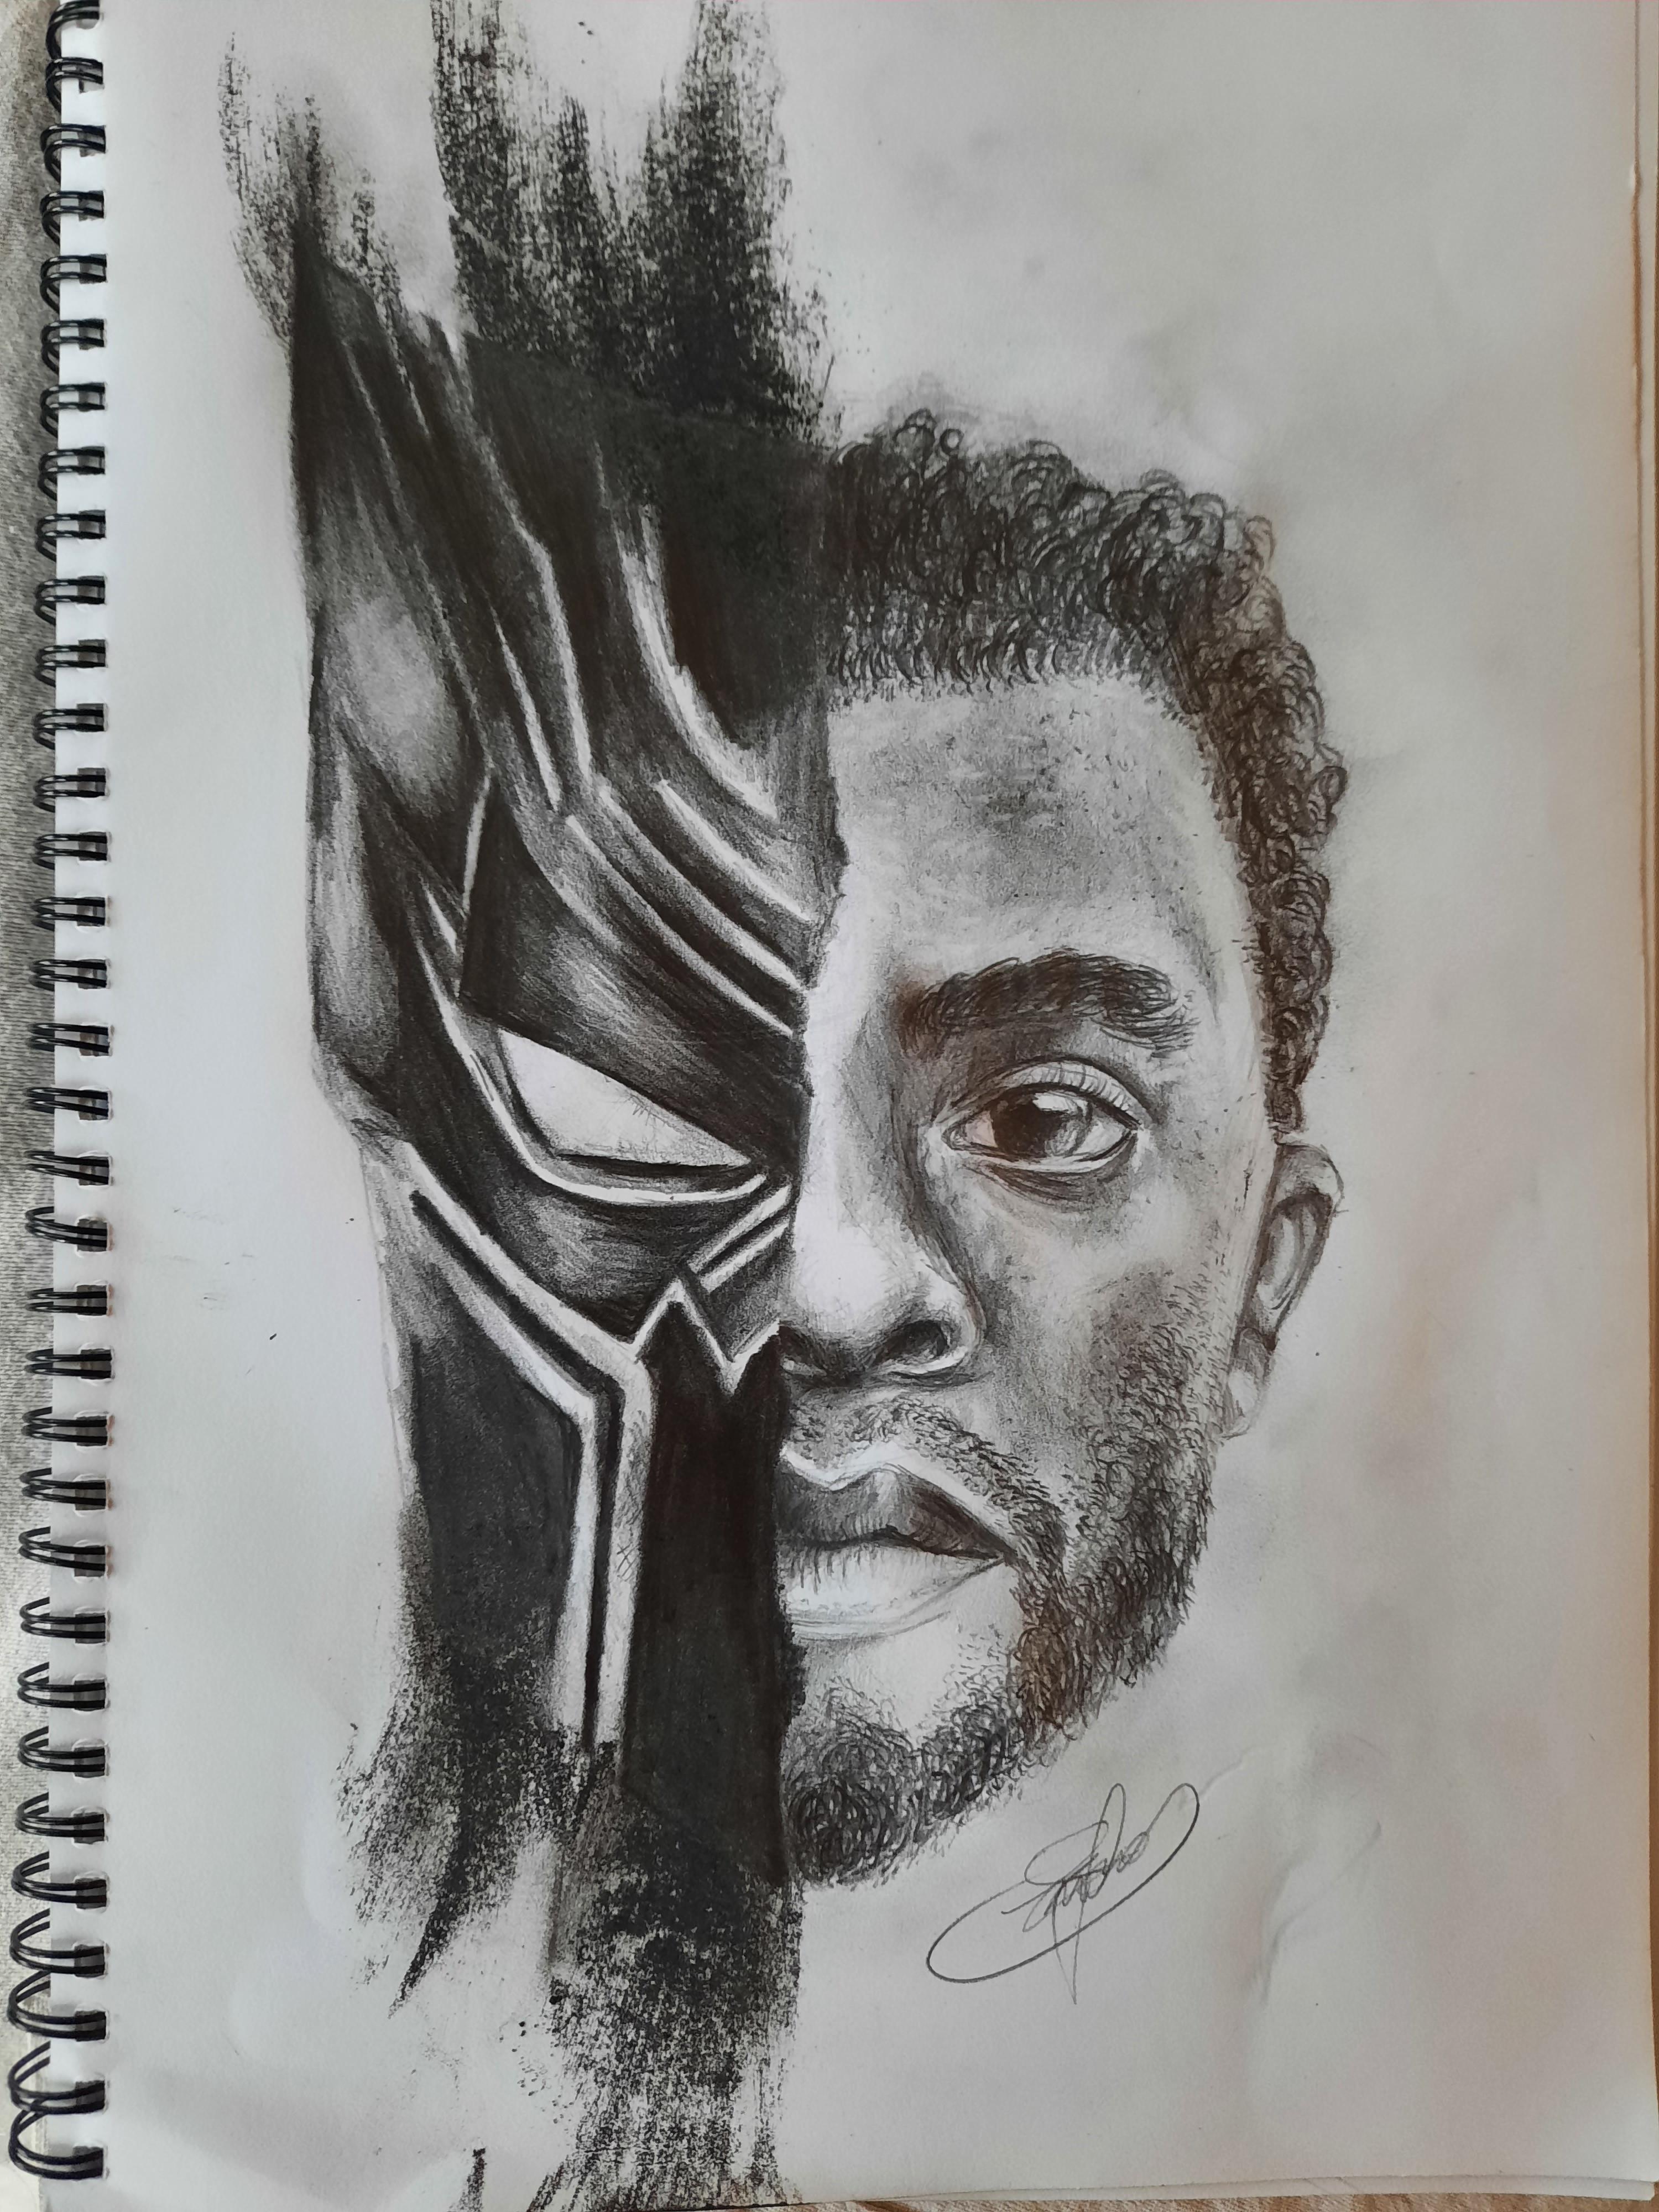
Last but not least, add in the final touches.
- Get your black charcoal and gently sketch up and down with gentle strokes.
- Try not to make it too dark, you want to make sure you can see the paper underneath and its like a thin brush stroke of a paintbrush.
AND YOUR DONE! :))))))