Vlogs: How to Make a Compelling Video About Your Day
by bshea1104 in Design > Digital Graphics
102 Views, 2 Favorites, 0 Comments
Vlogs: How to Make a Compelling Video About Your Day

Vlogs are a very fun way to document your lifestyle while incorporating techniques that are used in film or television production. They are something I have made in the past and I have been a big fan of them since I was younger. There are tons of major influencers today that have made or still make vlogs to this day, including people like Casey Neistat. This product can be used to document your life for your own enjoyment or to post on social media for others to enjoy, to hone your filming and editing skills, and many other applications.
This instructable will give you all the steps and list all the necessary tools you need to create a simple vlog that will be high quality and let you relive the moments you have captured for years to come.
Here is the link to the vlog created for this instructable: https://youtu.be/gMoFM7y21O4
Supplies
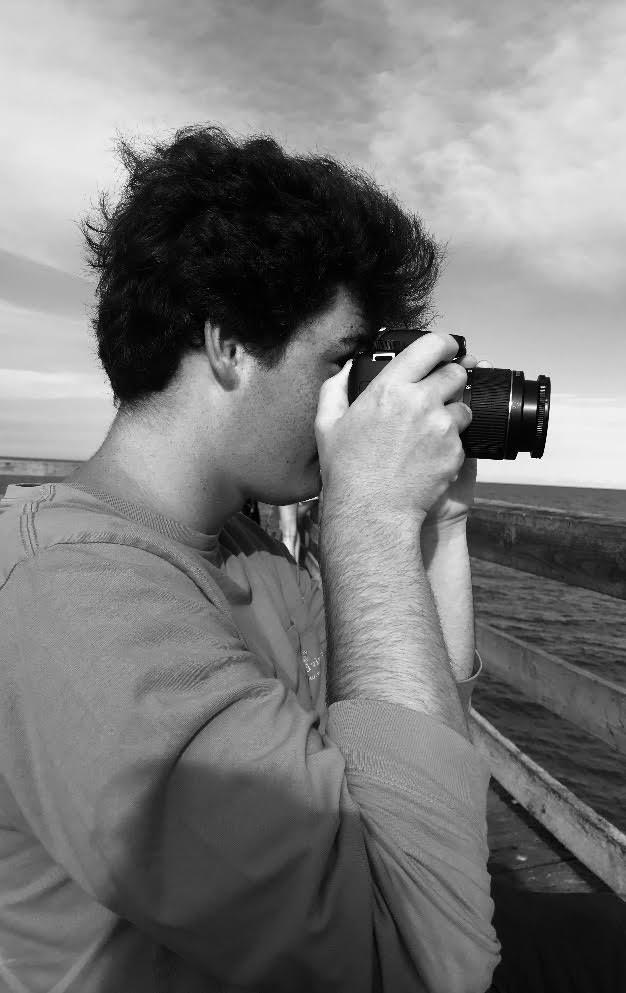
- Camera of some kind (can be iphone, dslr, point and shoot, whatever you have access to.
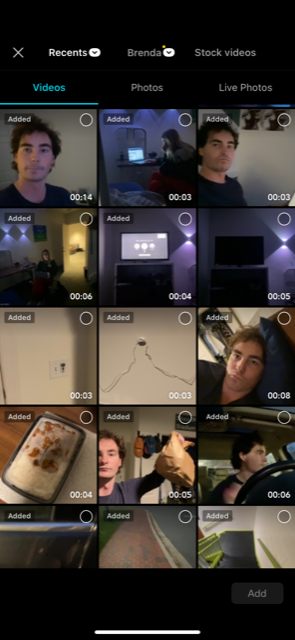
- Lots of footage (take videos of everything, it’s better to have unused footage than unshot footage)
- Editing software (I use adobe premiere on a laptop, and capcut on an iphone, but other softwares can be used)
- Music downloaded (technically part of editing, but you can go to separate websites to download music)
- Interesting things to film (an event, an interesting day, pretty much anything as long as it can be made entertaining)
Film Everything
Firstly, you need to figure out what exactly you are filming for your vlog. It can literally be anything, but there has to be something your vlog revolves around to give it a sort of structure or purpose. It can be a birthday party, a break from school, a day of classes. It can vary from something huge like a wedding to something super small like a study session depending on how you make it.
Once you have decided on your subject material, you need to film it! Make sure to get a ton of footage. Your vlog doesn’t necessarily have to be long, but it’s good to have a lot of variety in your footage. Try and get establishing shots of locations, b-roll of locations you are in and even you moving between locations. Get videos of your friends or whatever people are involved in your video. Capture fun moments. Make sure there are a decent amount of clips of you or others talking, it adds to the vibe of the vlog. You can even add extra context through videos of yourself talking, narration, or text on the screen. Long story short, you want to get footage that captures what the experience was like for you so you can transfer that experience into a video for others to experience life through you for a few minutes.
To recap, the footage you need is:
- Videos of the subject of the video (whatever event or moment or person you are capturing)
- Establishing shots of locations
- B-roll in general (of locations, traveling between locations, candid videos of people)
- Videos of interactions with others
- Videos adding extra context (you talking to the camera, whether in the moment or after the fact)
- Try and think of editing when you are filming. Try and think of cool transitions and editing tricks you can add on certain shots. You can even plan whole shots around editing.
- Anything else deemed necessary to add to the experience
- Photos can also be added if necessary
Editing the Footage Together
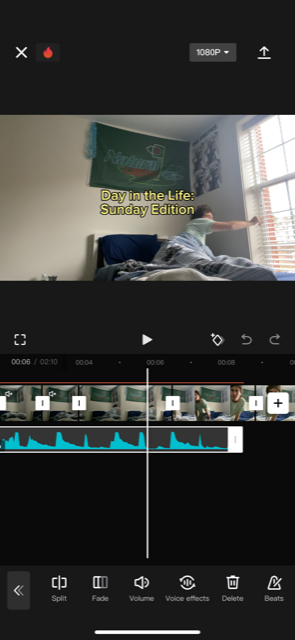
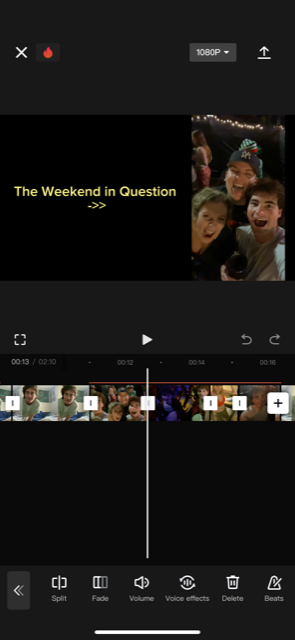
Editing is where the magic happens. If you don’t have one, download and sign up for an editing software. It doesn’t need to be a fancy one, as vlogs aren’t super labor intensive in terms of editing like actual films are.
Parse through your footage. If helpful, sort the footage by category (b-roll, footage shot at a certain location, footage of a certain person, sort however you’d like, or not at all). Most vlogs are edited so the footage is in chronological order, but you can play with this if you’d like if you think it would be more interesting. The most common way to do this is to have “talking head” style footage of yourself acting as a sort of narrator or glue holding the vlog together by explaining the context for things, cutting to and away from yourself and acting as a transition between footage.
Edit the footage together as you please, but here are some tips:
- If you have a lot of footage, add a lot of jump cuts in b-roll. The short time between cuts keeps people’s attention.
- Jump cuts are generally looked down upon in film for how evident they are, but they are actually incredibly useful and add a lot to a vlog. It can make it feel more fast paced and energetic than the footage itself actually is. (for example, if there is a still shot of a group standing and talking and moving around, add a few jump cuts so it seems like people are moving around a lot, it will add more life to it).
- Know when to slow down and let clips play, though. This is mostly applied to when people are talking in footage. Don’t add a ton of jump cuts or try to shorten it too much. This can also be applied to big moments (for example, footage of a group reacting to a 10-1 New Years Countdown would work better shown in full than with jump cuts), or for a particularly pretty or interesting shot.
- Add transitions. Transitions keep a flow going in the footage. They can look cheap, though, so use them somewhat sparingly and try to not make them jarring. The best transitions can also use the shots themselves as transitions instead of adding one in post (example: if one shot ends with a blur because you moved the camera down and another shot begins with a blur due to moving the camera to film, they can most likely be joined together to form a transition fairly easily.
Editing Final Touches
Editing the footage together is generally the biggest part of editing, but there is still a good chunk of editing left to do.
At this point, add transitions that the editing software provides if you have run out of manmade transitions or just would rather use them.
Color correction is also part of this step. This involves adjusting the color/look of each shot to make it pop more or serve a certain purpose. For example:
- Black and white can be used to signify something filmed in the past.
- Colors can be made to pop more in certain settings, like making the sky a very bright blue in a beach vlog, or have neon colors pop more than anything else in a big club video.
- More muted colors can be used for a sadder or more lowkey video.
Even generally, it’s best to color correct slightly just to make the footage look its best even if it’s not done for any specific purpose.
Adding text to your vlog is not a necessary step, but it is certainly one that can add more life to a video. It can be something as simple as adding subtitles and location headings, or can be used to act as a sort of narration or omnipresent voice for the audience to see and no one else. In that case it can be used pretty comedically at times. It’s definitely not a huge step, but it adds an extra oomph that I highly recommend using.
Music should also be added here. The music is something that should fit the overall feel of your vlog as much as possible. It is a very big part of the audience experience so it should be picked carefully. Lofi music is very popular for vlogs and is usually a pretty safe bet. Usually, having no lyrics lends itself well to being in a vlog, especially if it is the only song being used. Songs with lyrics can obviously be used, but they can occasionally take away from the video itself. The music shouldn’t overpower the vlog. It should be dimmed/off in sections of the vlog where people are talking or any sound related actions are occurring or in focus. However, during b-roll, feel free to turn the music up louder and have it be a focal point. These moments specifically are when you’ll realize if the music you chose was right or not.
After all of that, rewatch your vlog and make sure it looks how you want it to. Go back and make any changes you wish and you’ll be done editing.
Save and Export
This is the simplest part. Save your project and export it as an .mp4 file. This is a basic video file. It will probably take a few minutes, as the video has to render and then export and it sometimes takes an annoying amount of time depending on how fast your computer is. After you have exported, you can post it wherever you please or just keep it for yourself.
Now you’ll have a video you can be proud of and the memory/memories that you captured, and others can partake in that experience if you post it somewhere else, or just share it with your friends. Maybe you’ll even make more!