Visual Thermometer
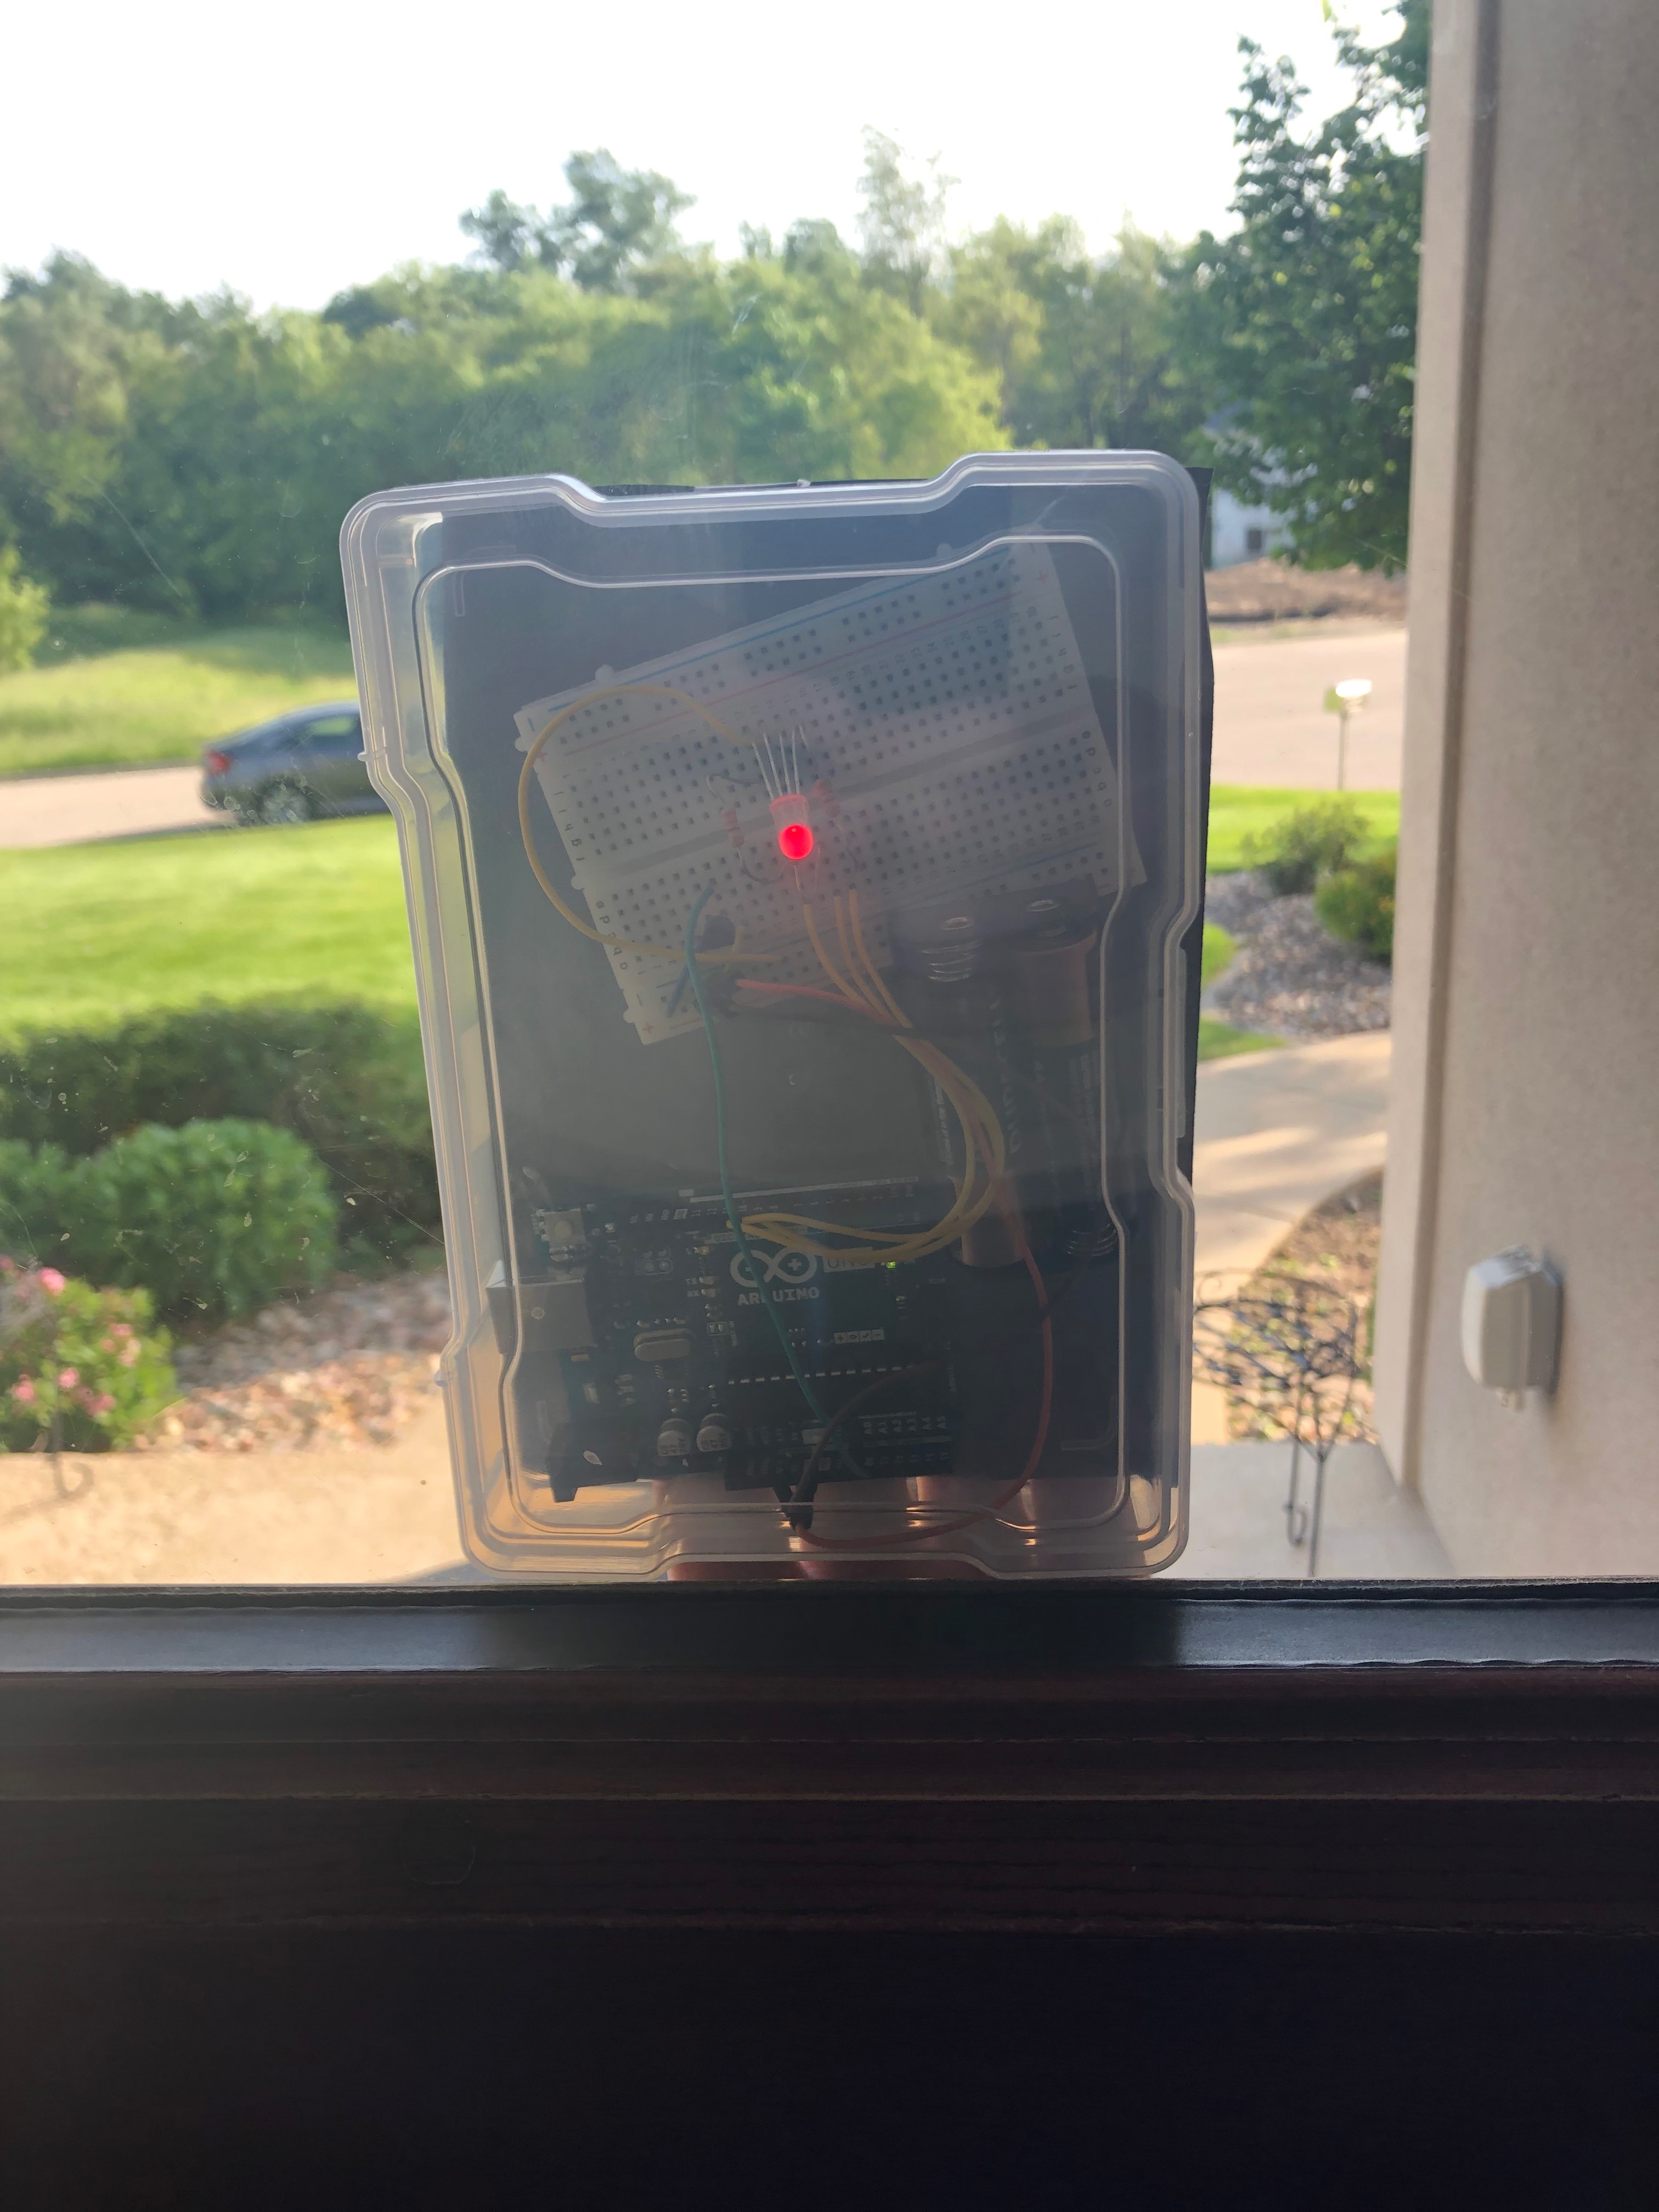
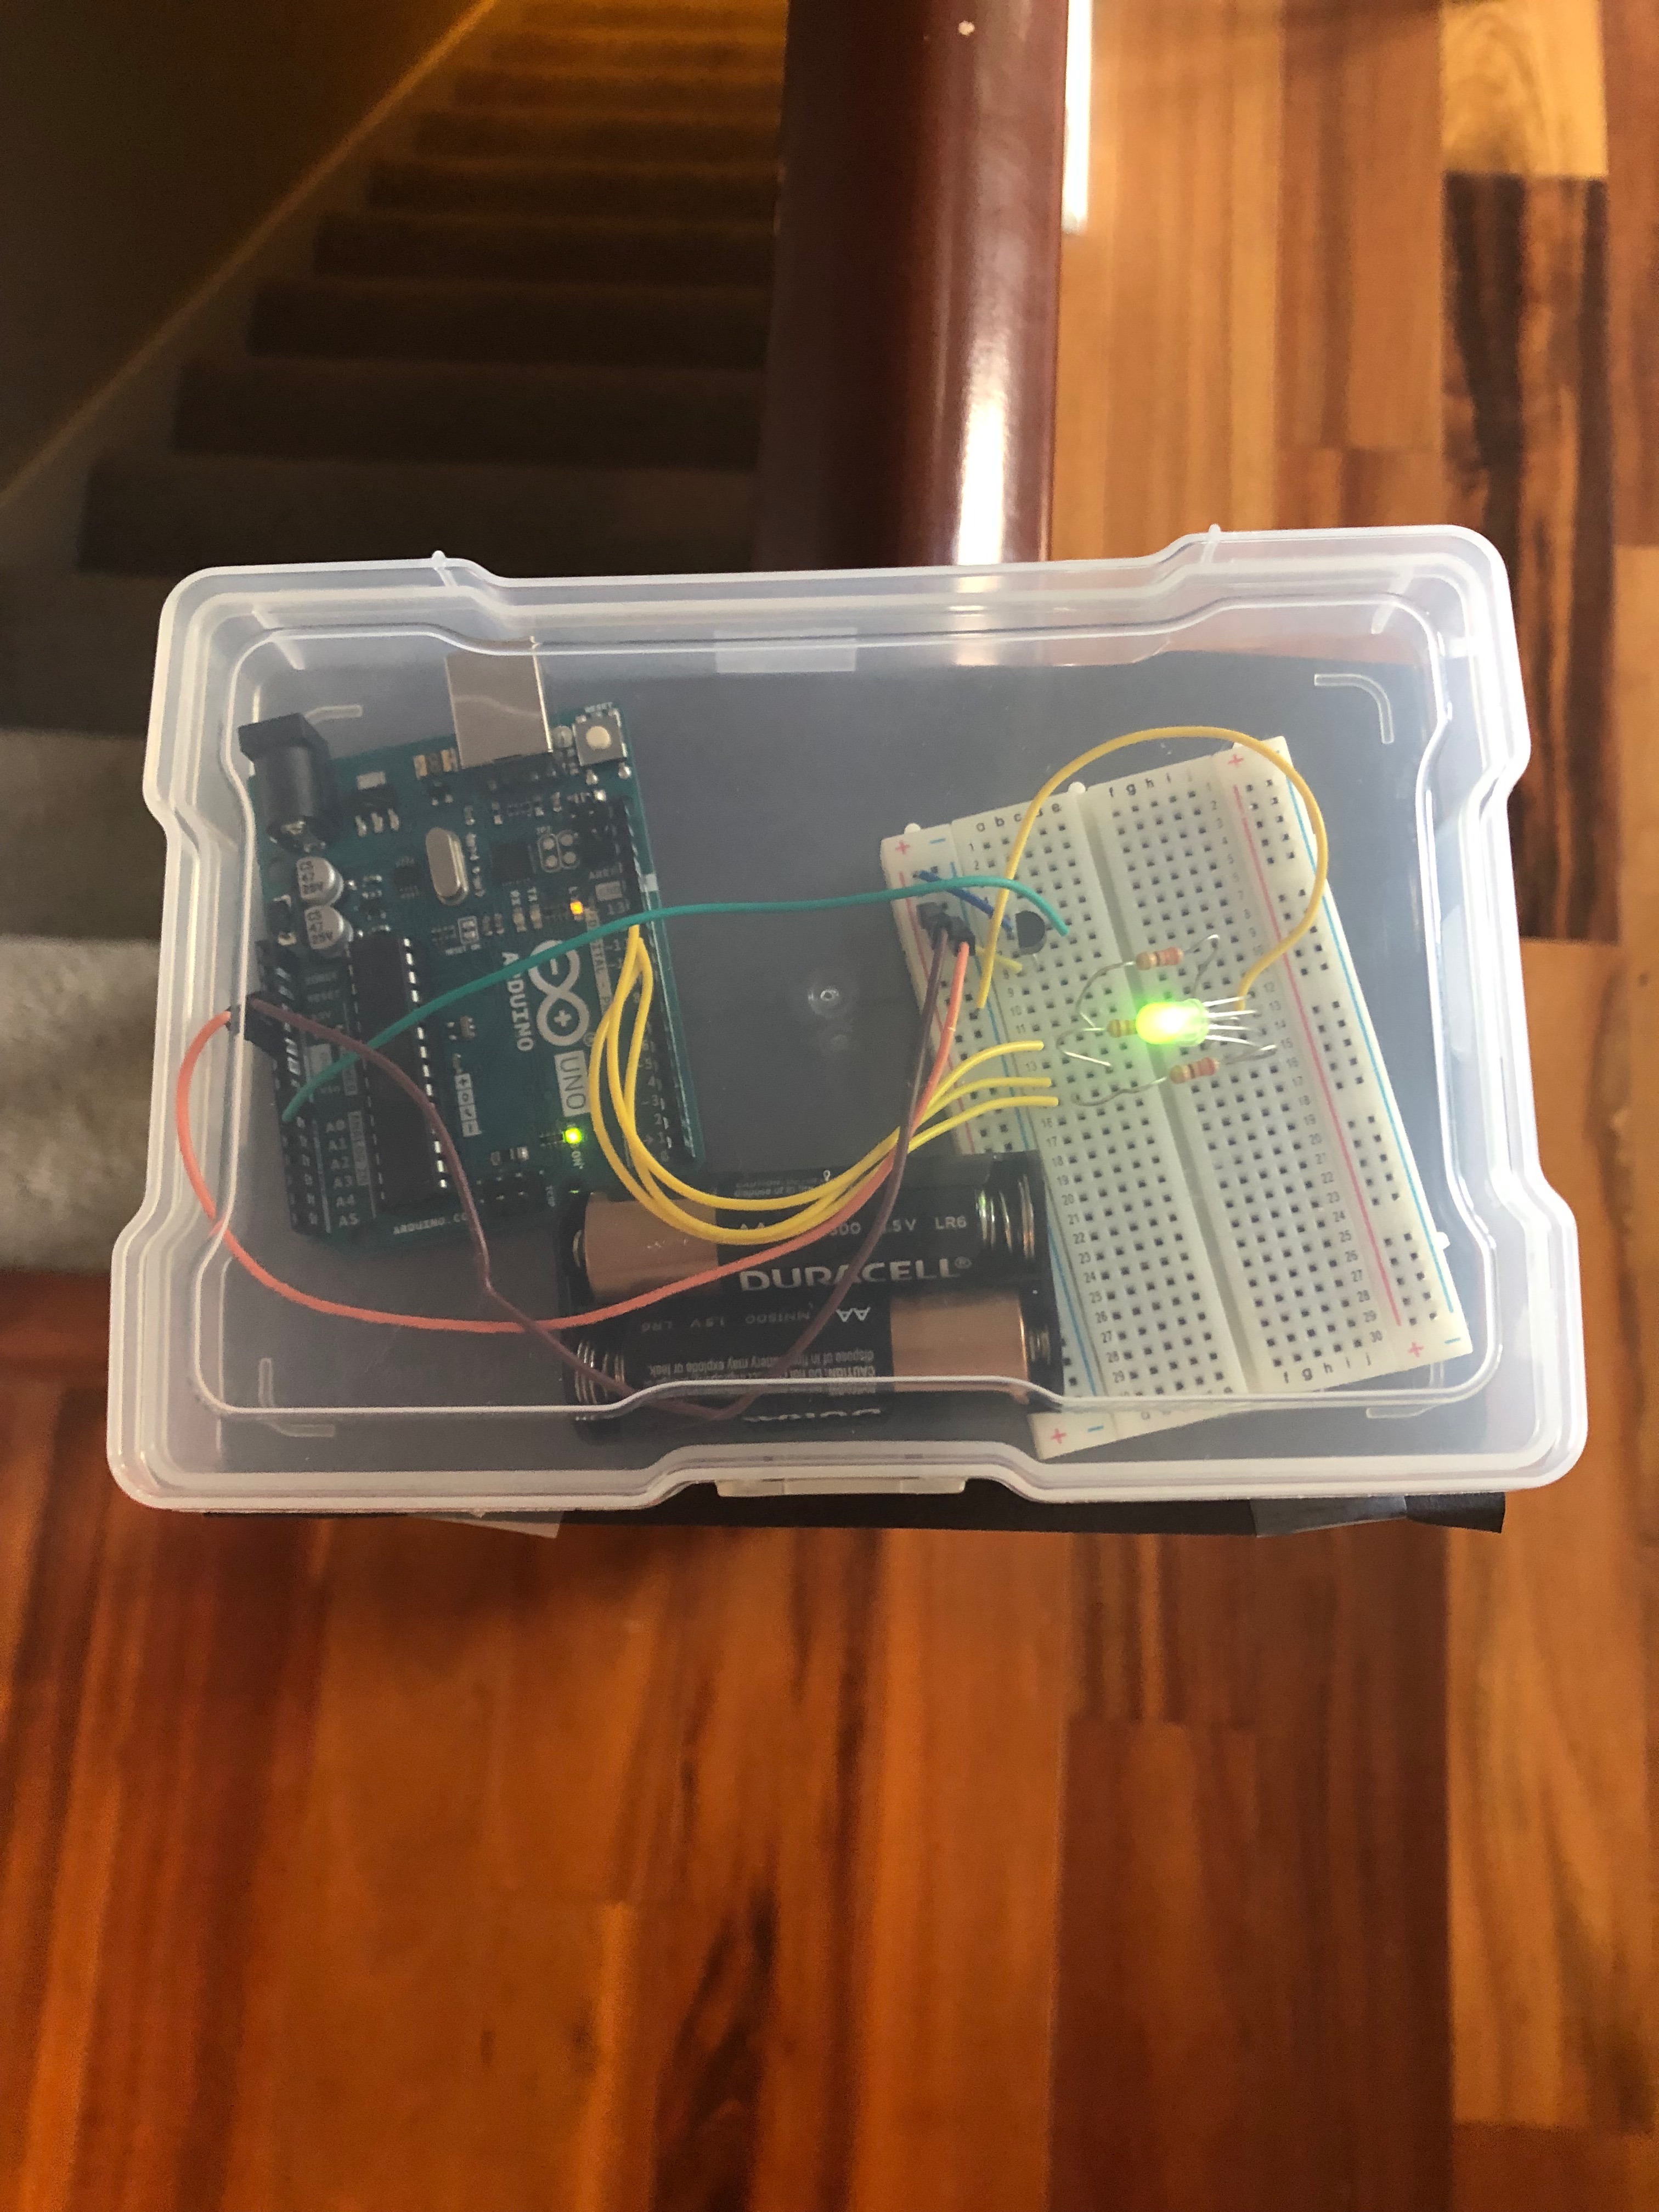
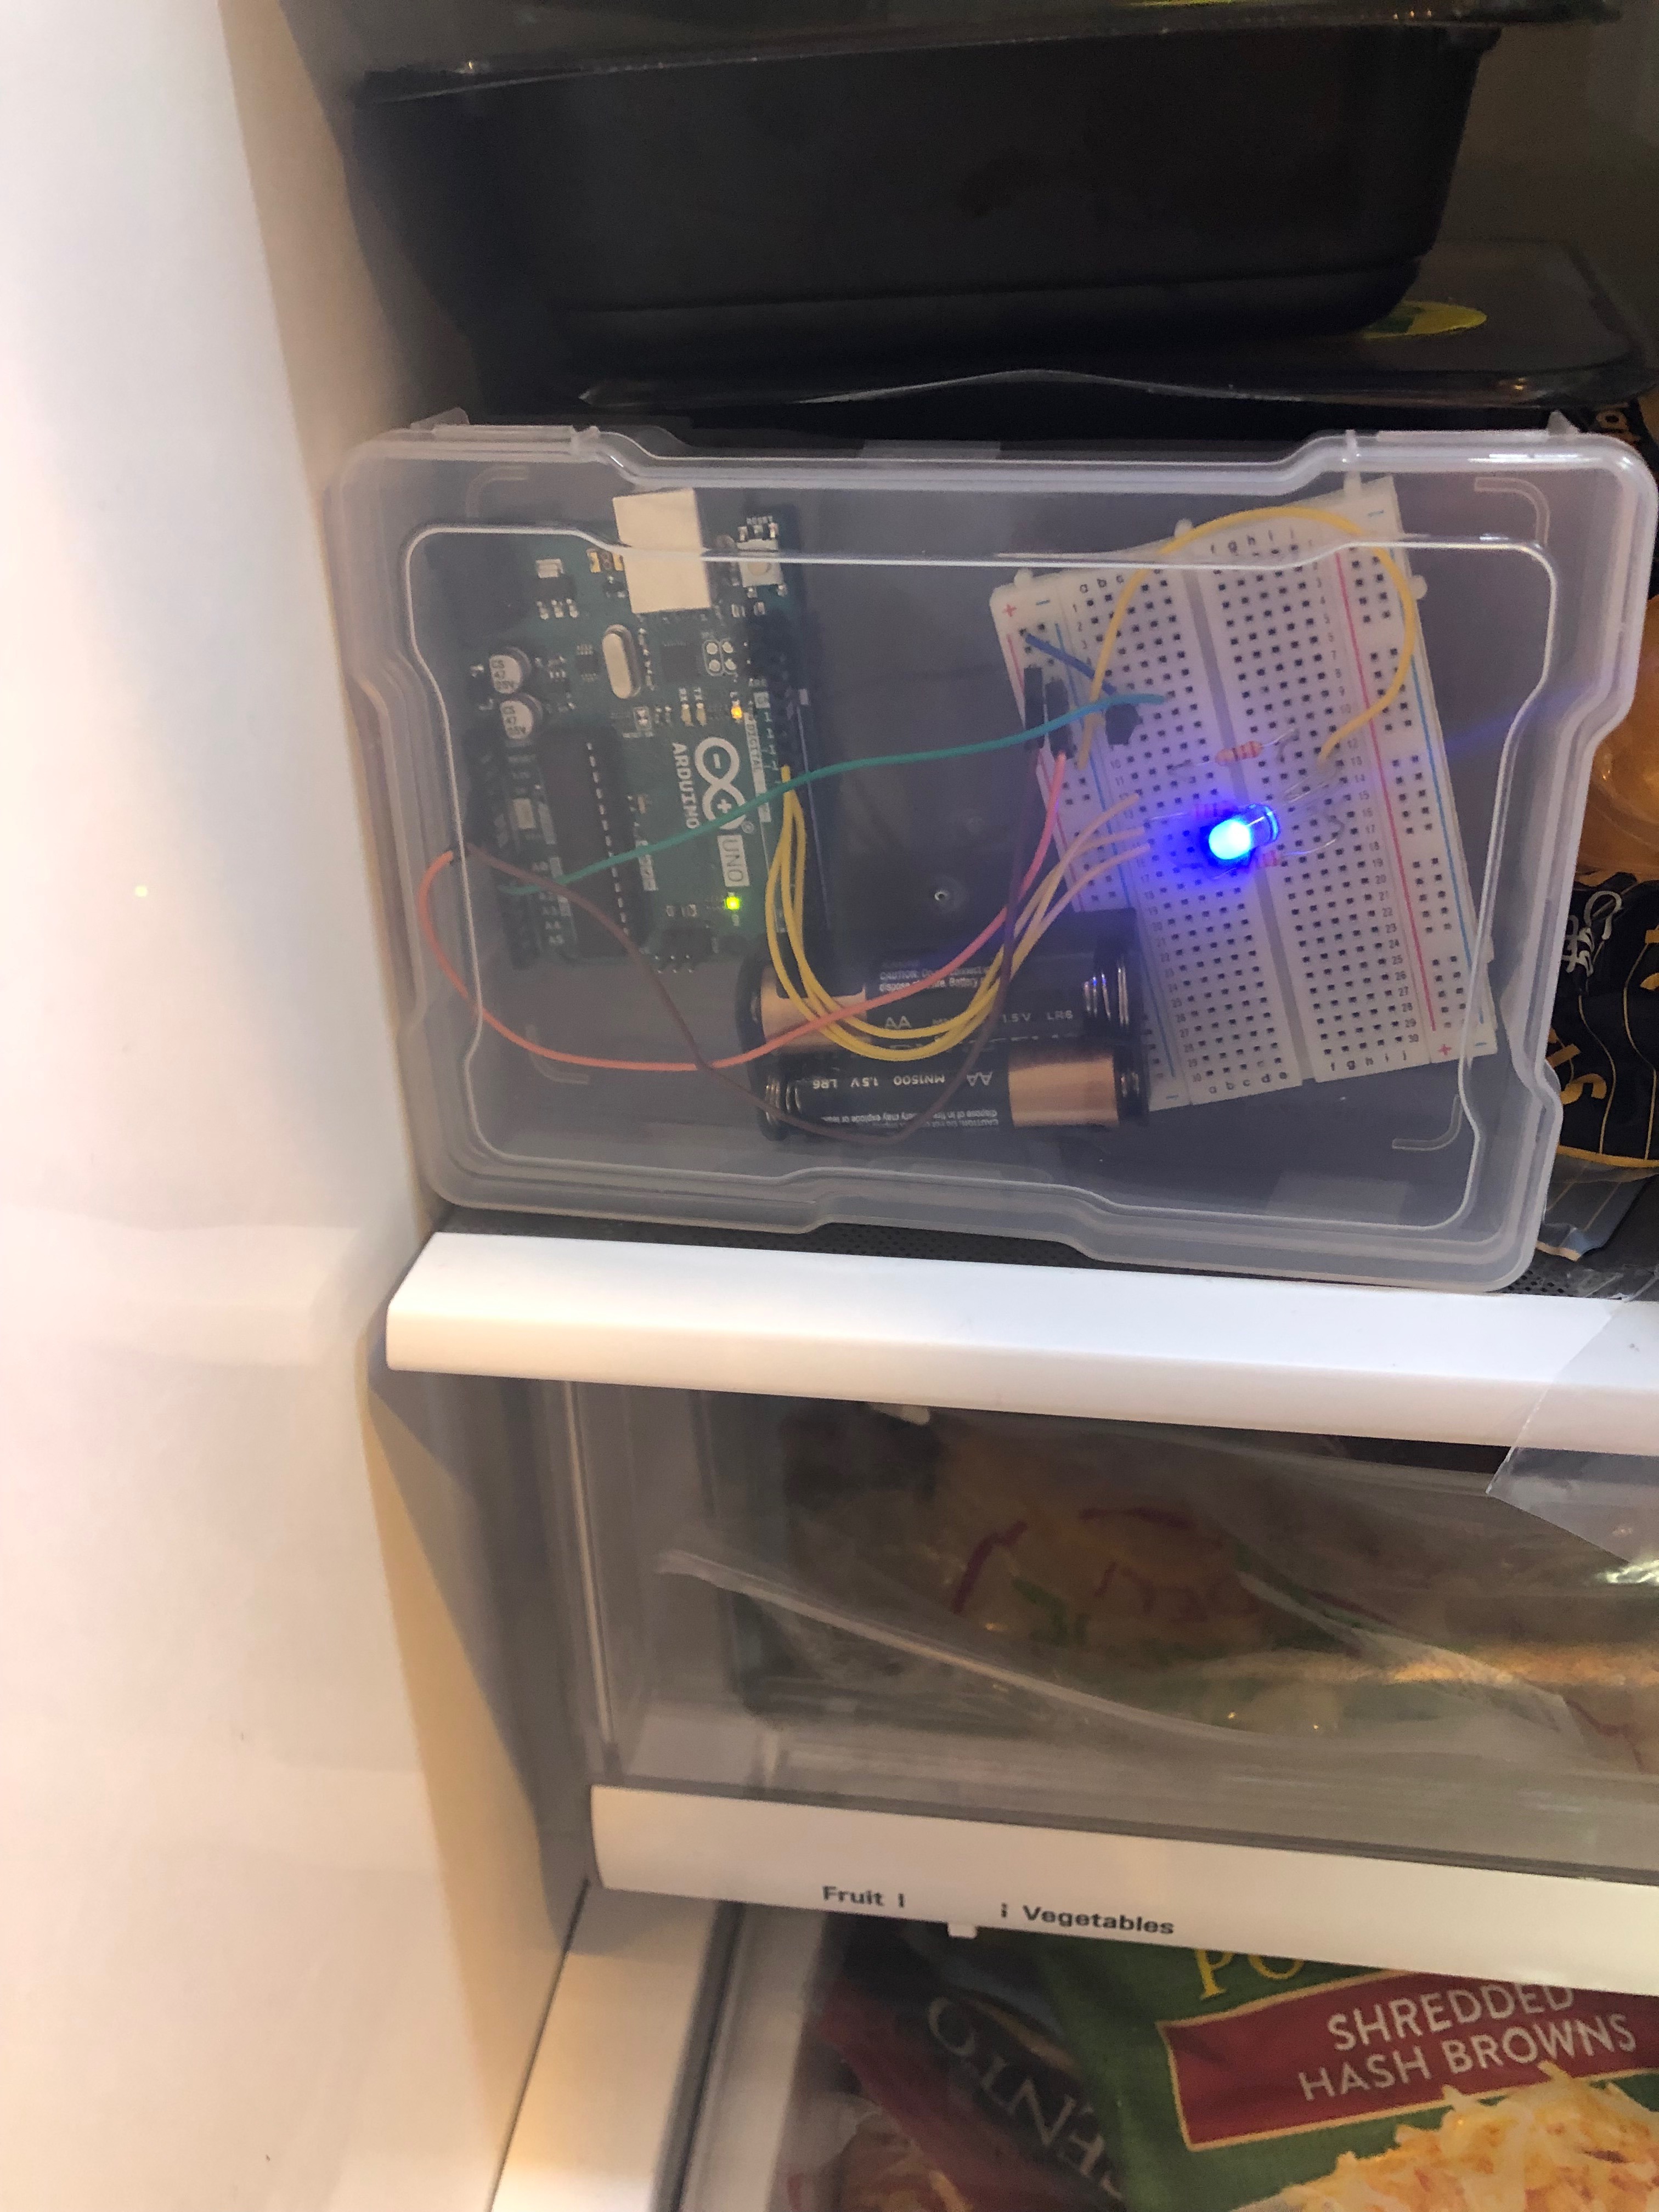
This Instructable will create a thermometer that shows the temperature by lighting up different colors. The Instructable was created in order for people to simply just look outside and see the approximate temperature. The Instructable only takes a couple of hours to complete, and very minimal materials outside of an Arduino Genuino kit. In fact, all you need is an Arduino Genuino kit, 2 AA batteries, a computer, and a clear, plastic box that is approximately 6" by 5" by 3".
Write the Code for the Temperature Sensor
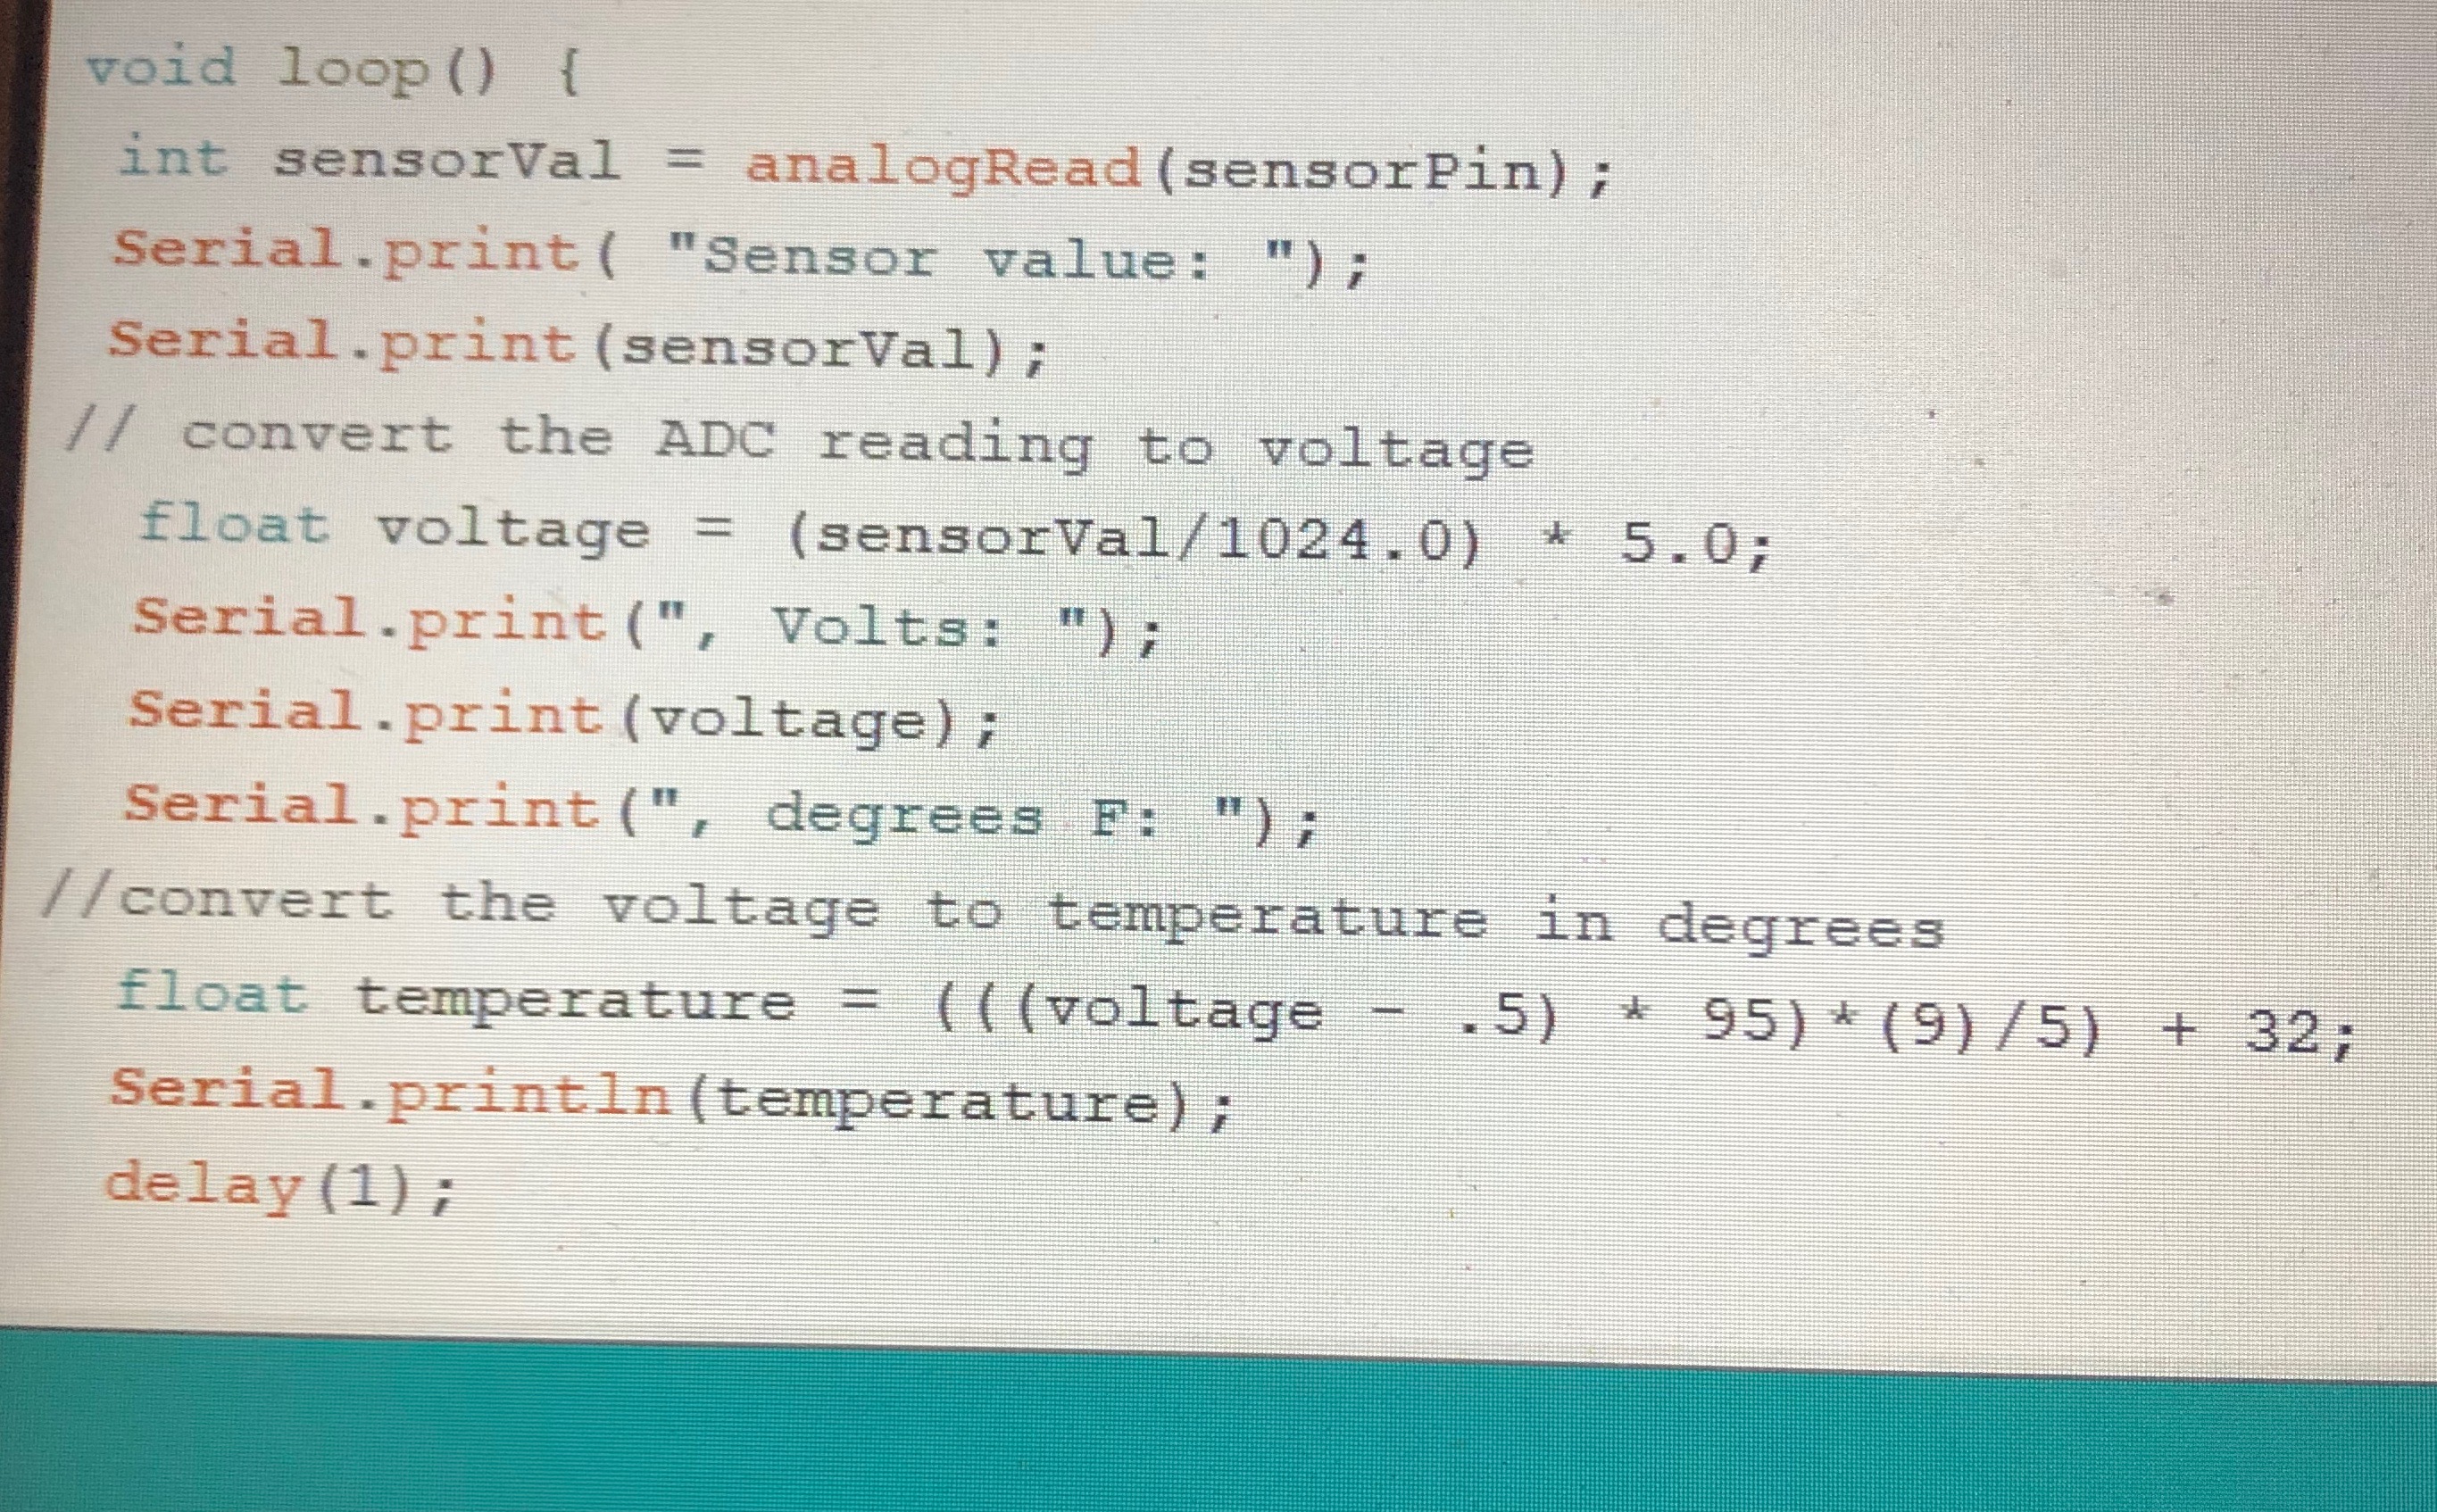
The first step is writing the code. The code should allow the computer to read the temperature sensor as degrees fahrenheit. To start, you have to create an account on the Arduino website. Once you've done so, you have to open up a new Arduino Create. From there, all you have to do is type in the code above. This should allow your computer to read the temperature sensor and complete the first part of the code.
Write the Code for the LED
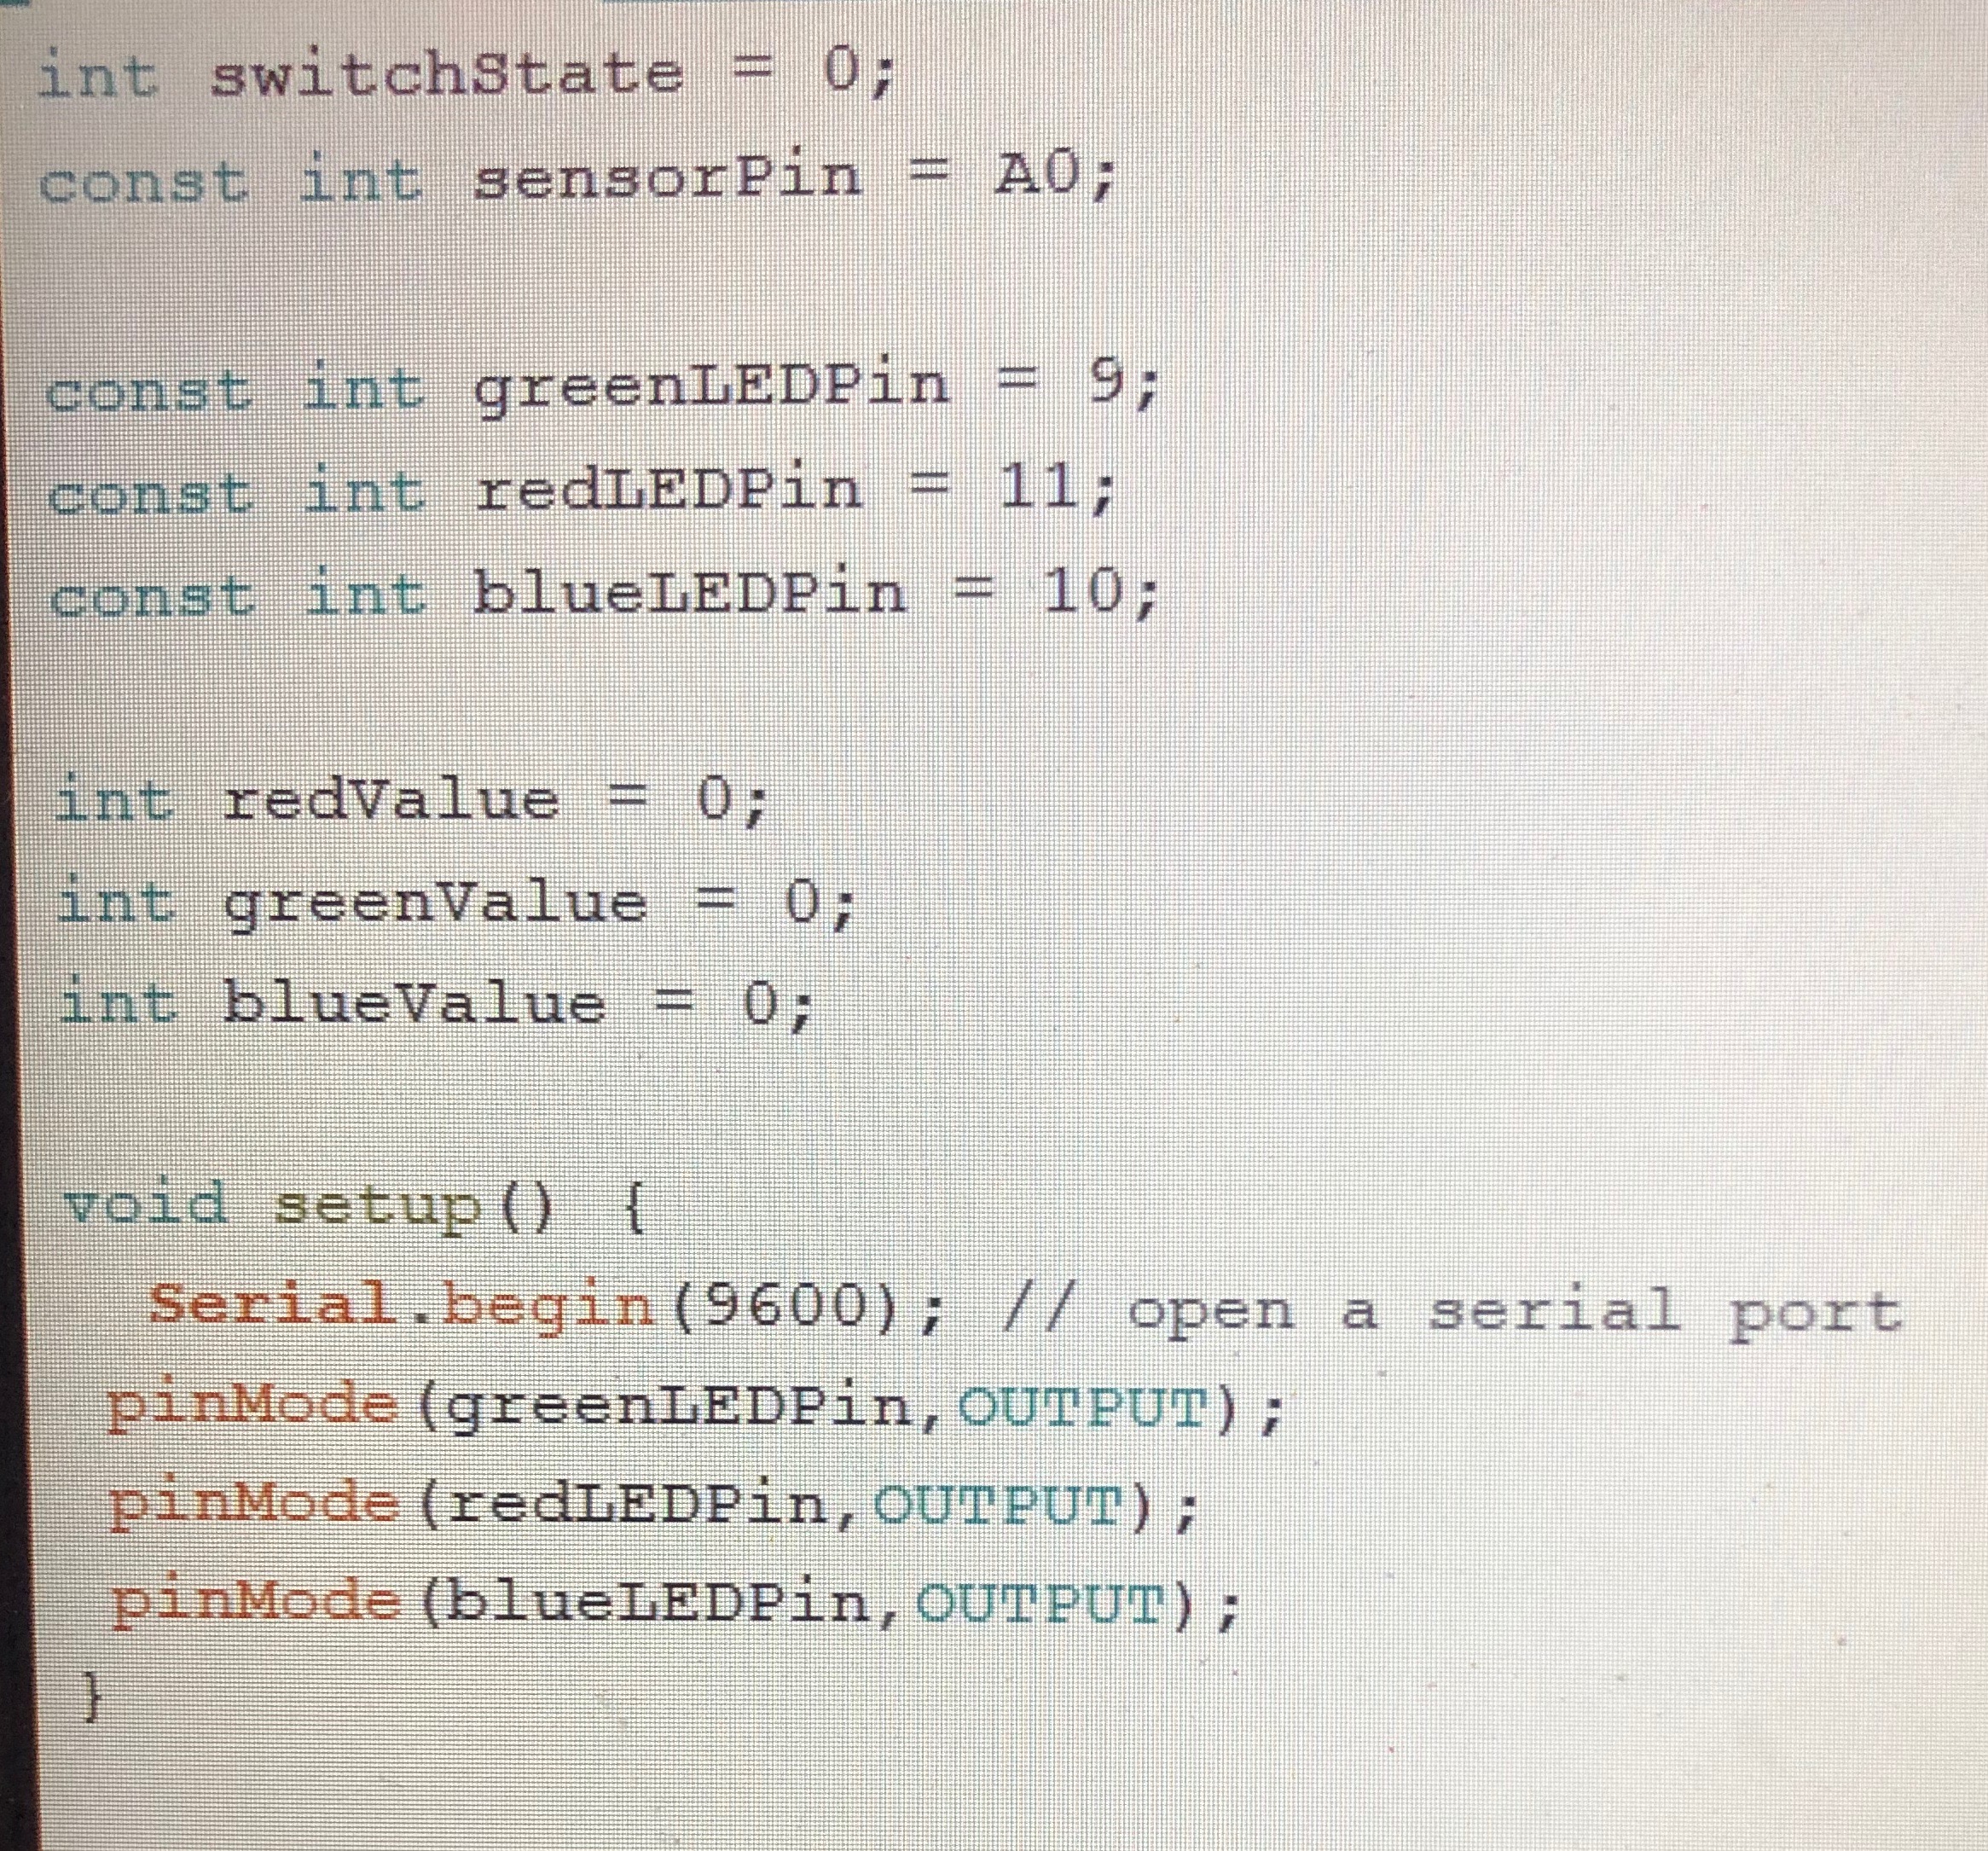
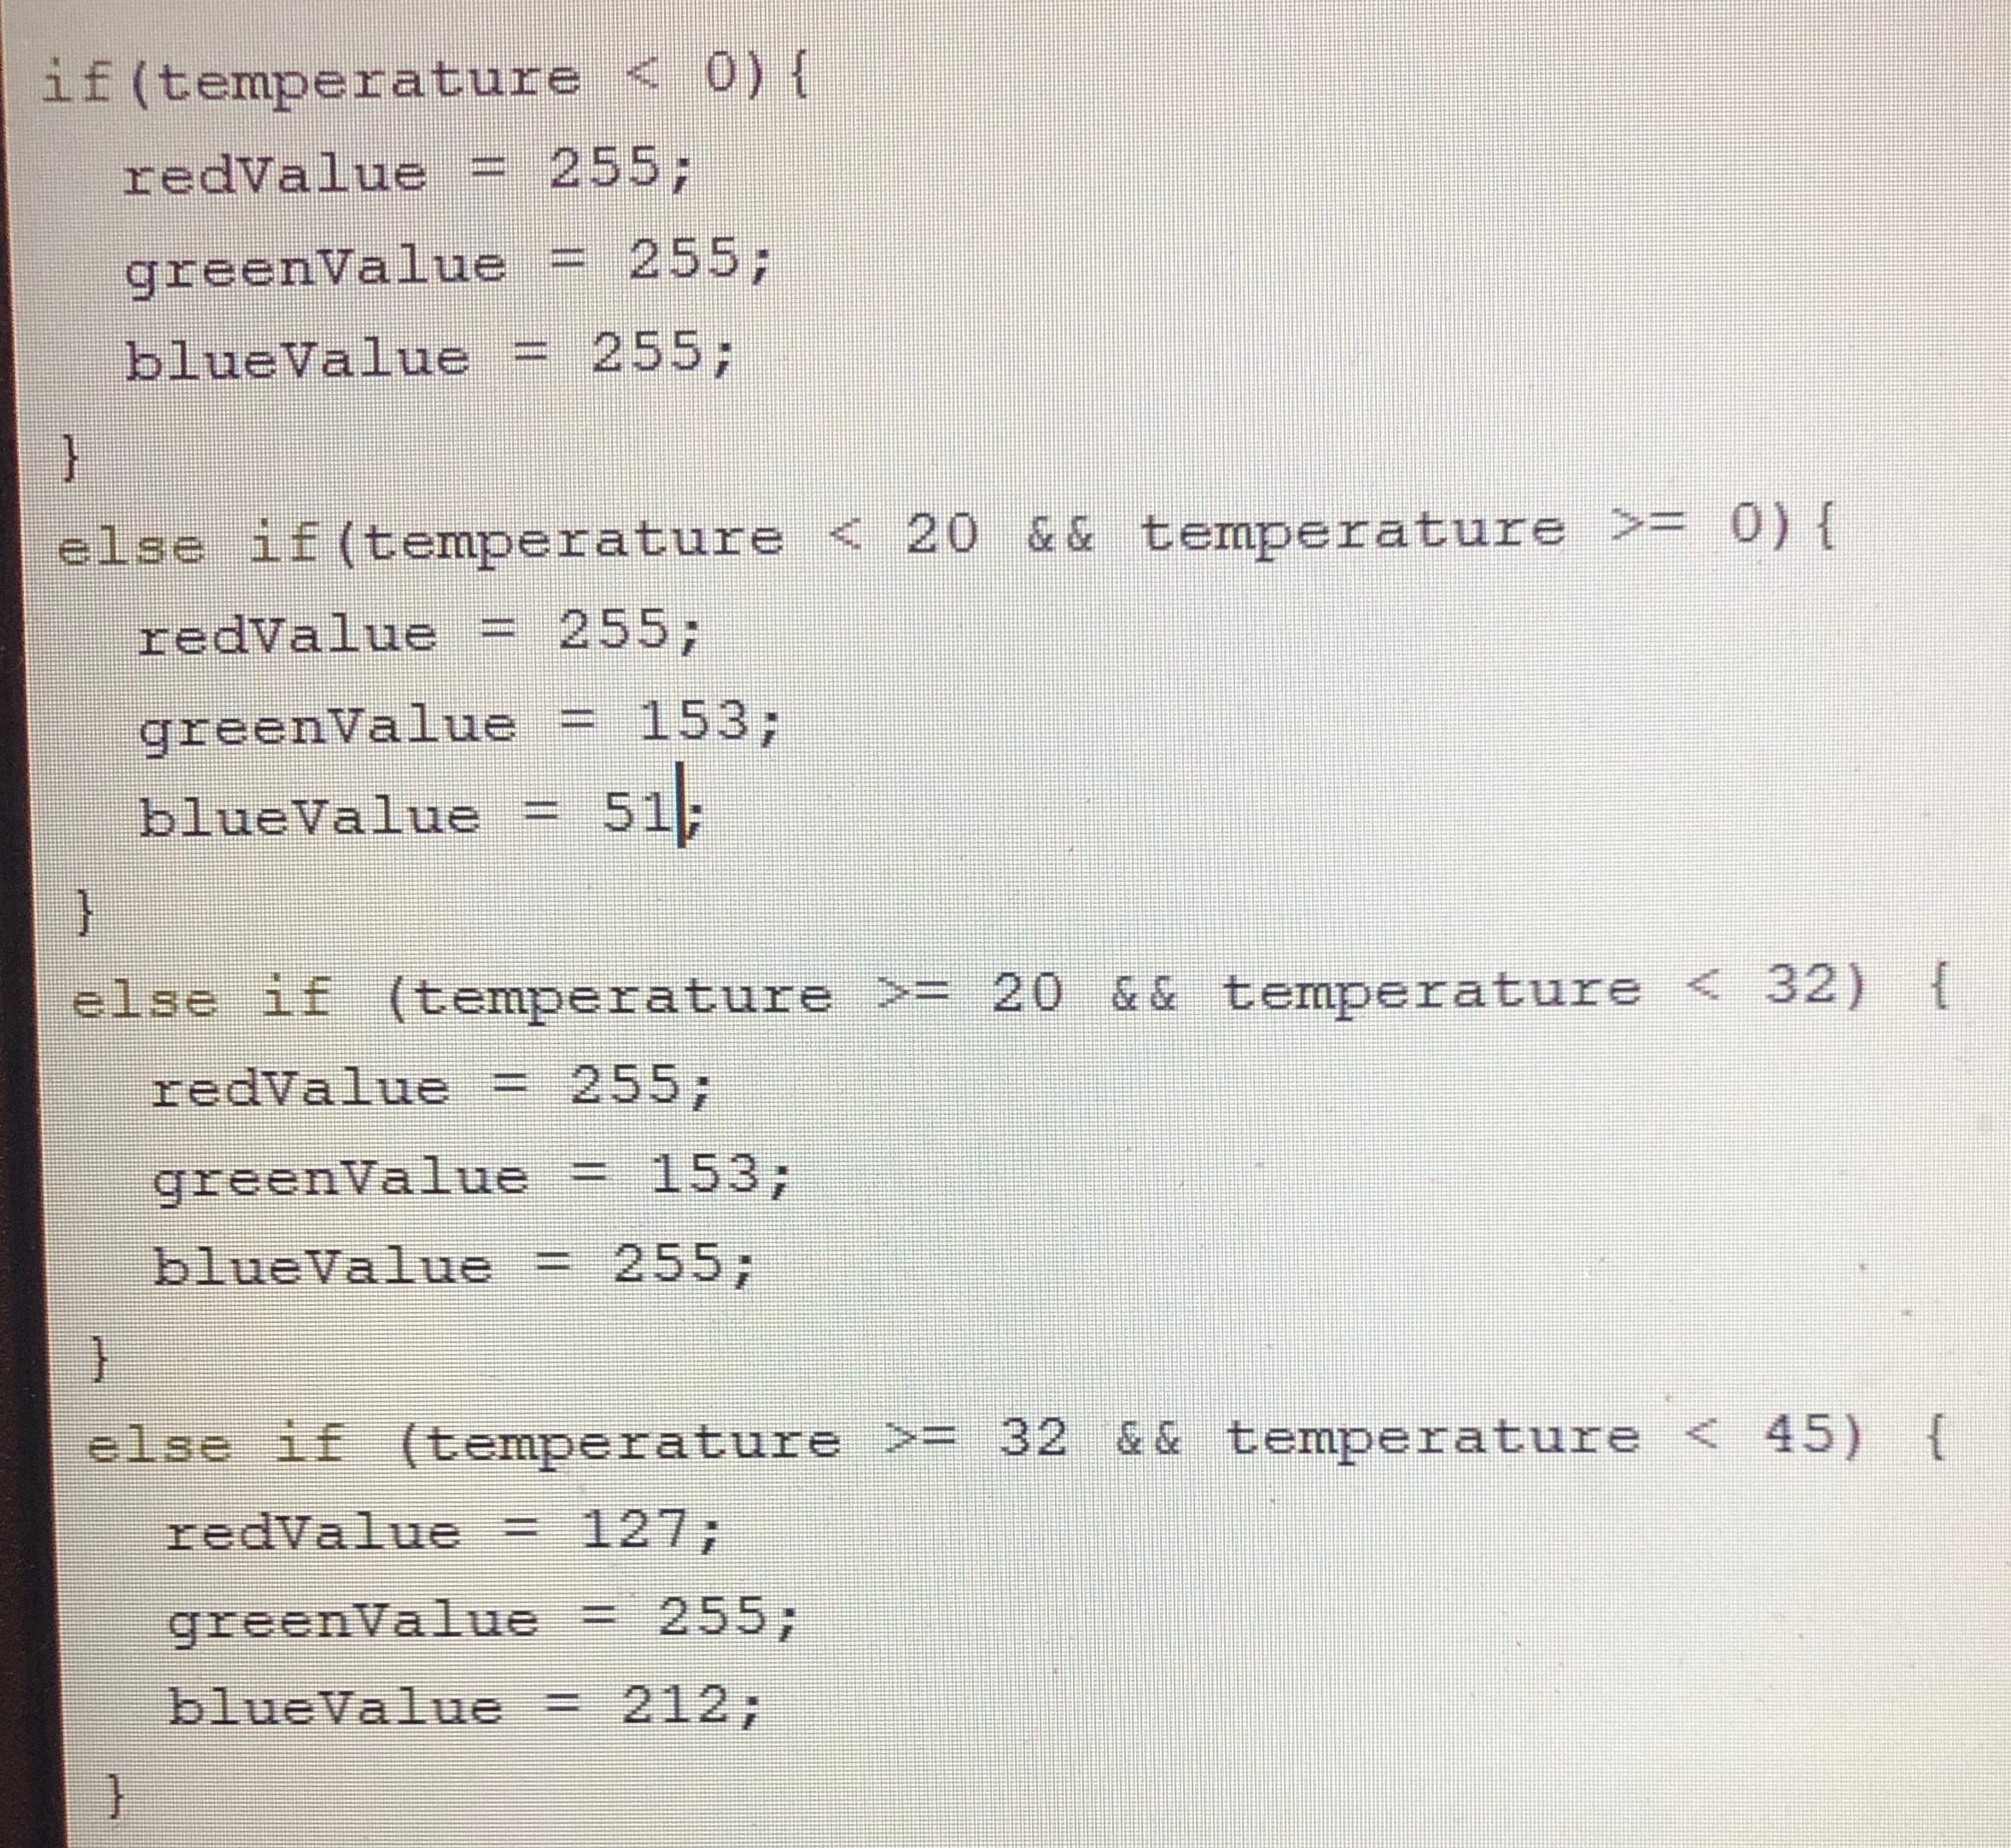
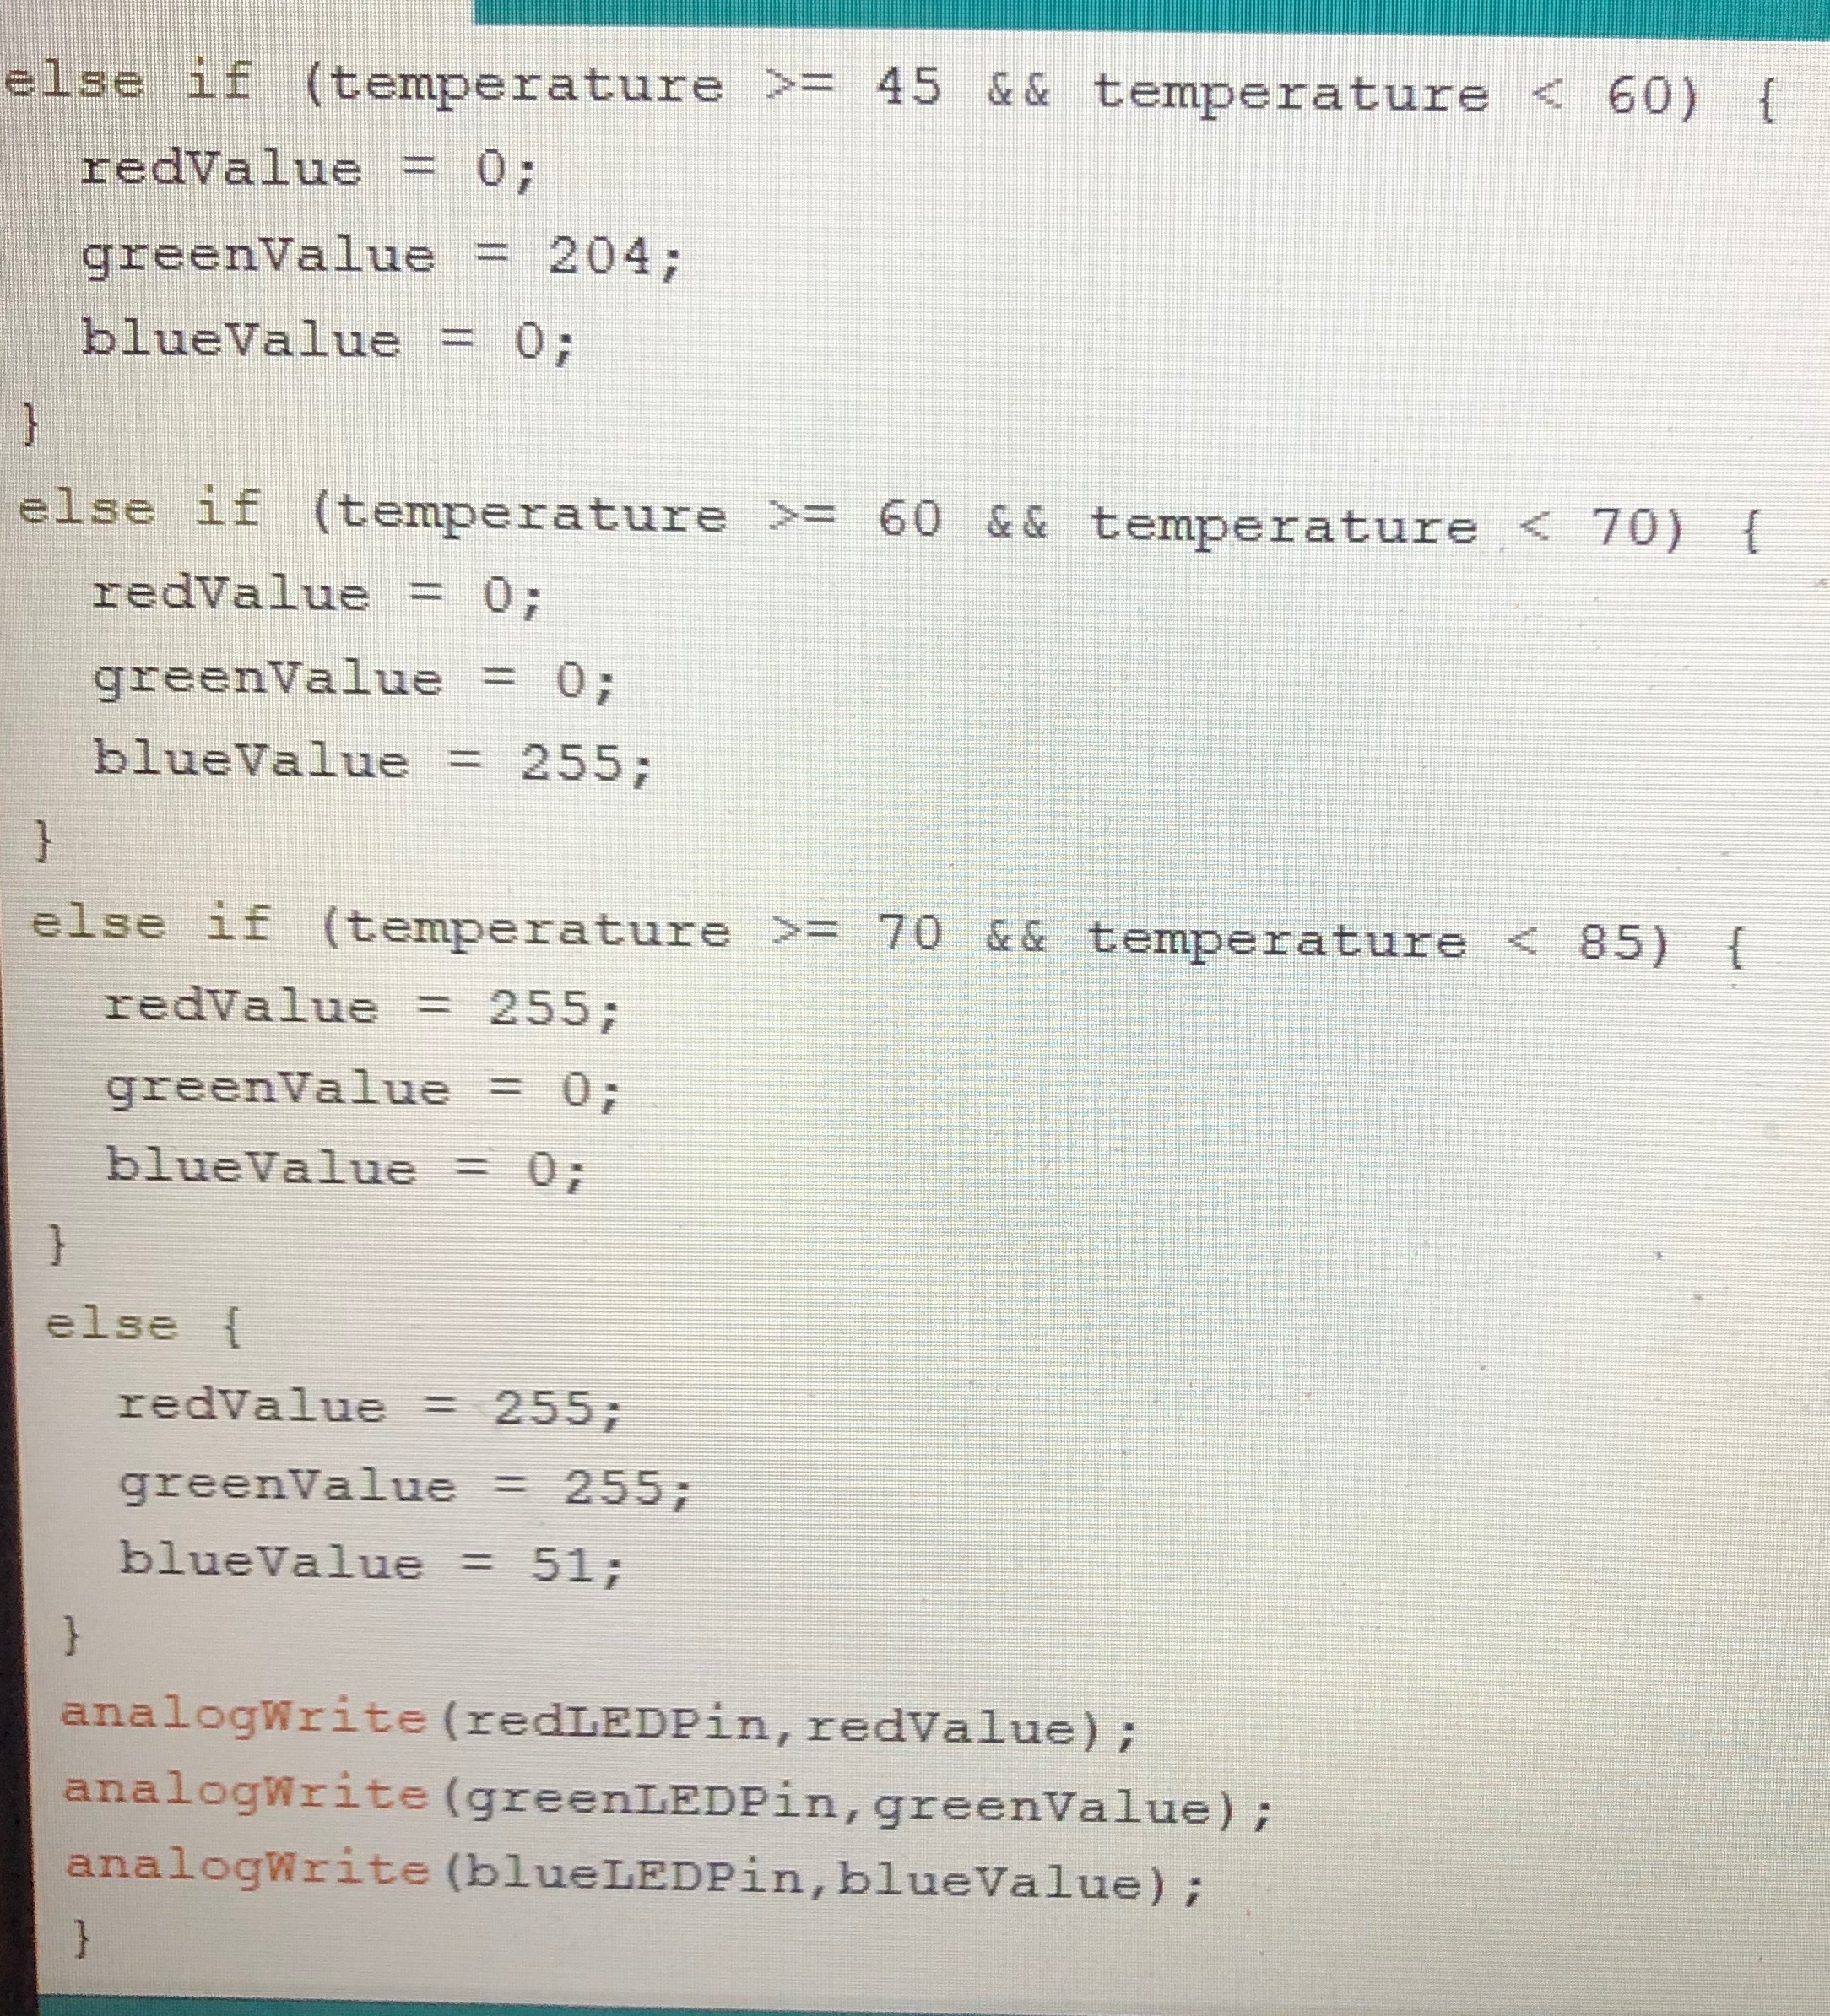
This step starts to get more complicated. In the same code as the temperature sensor, you want to add the the code from above. The first picture is establishing which inputs each color of the LED is plugged into, and the other two are establishing the range of the colors. The numbers in the range can be adjusted, based on which colors you want for specific temperature ranges. The red, green, and blue values can also be adjusted. An RGB chart can be easily found online, and the you can adjust the color as wanted
Adding the LED
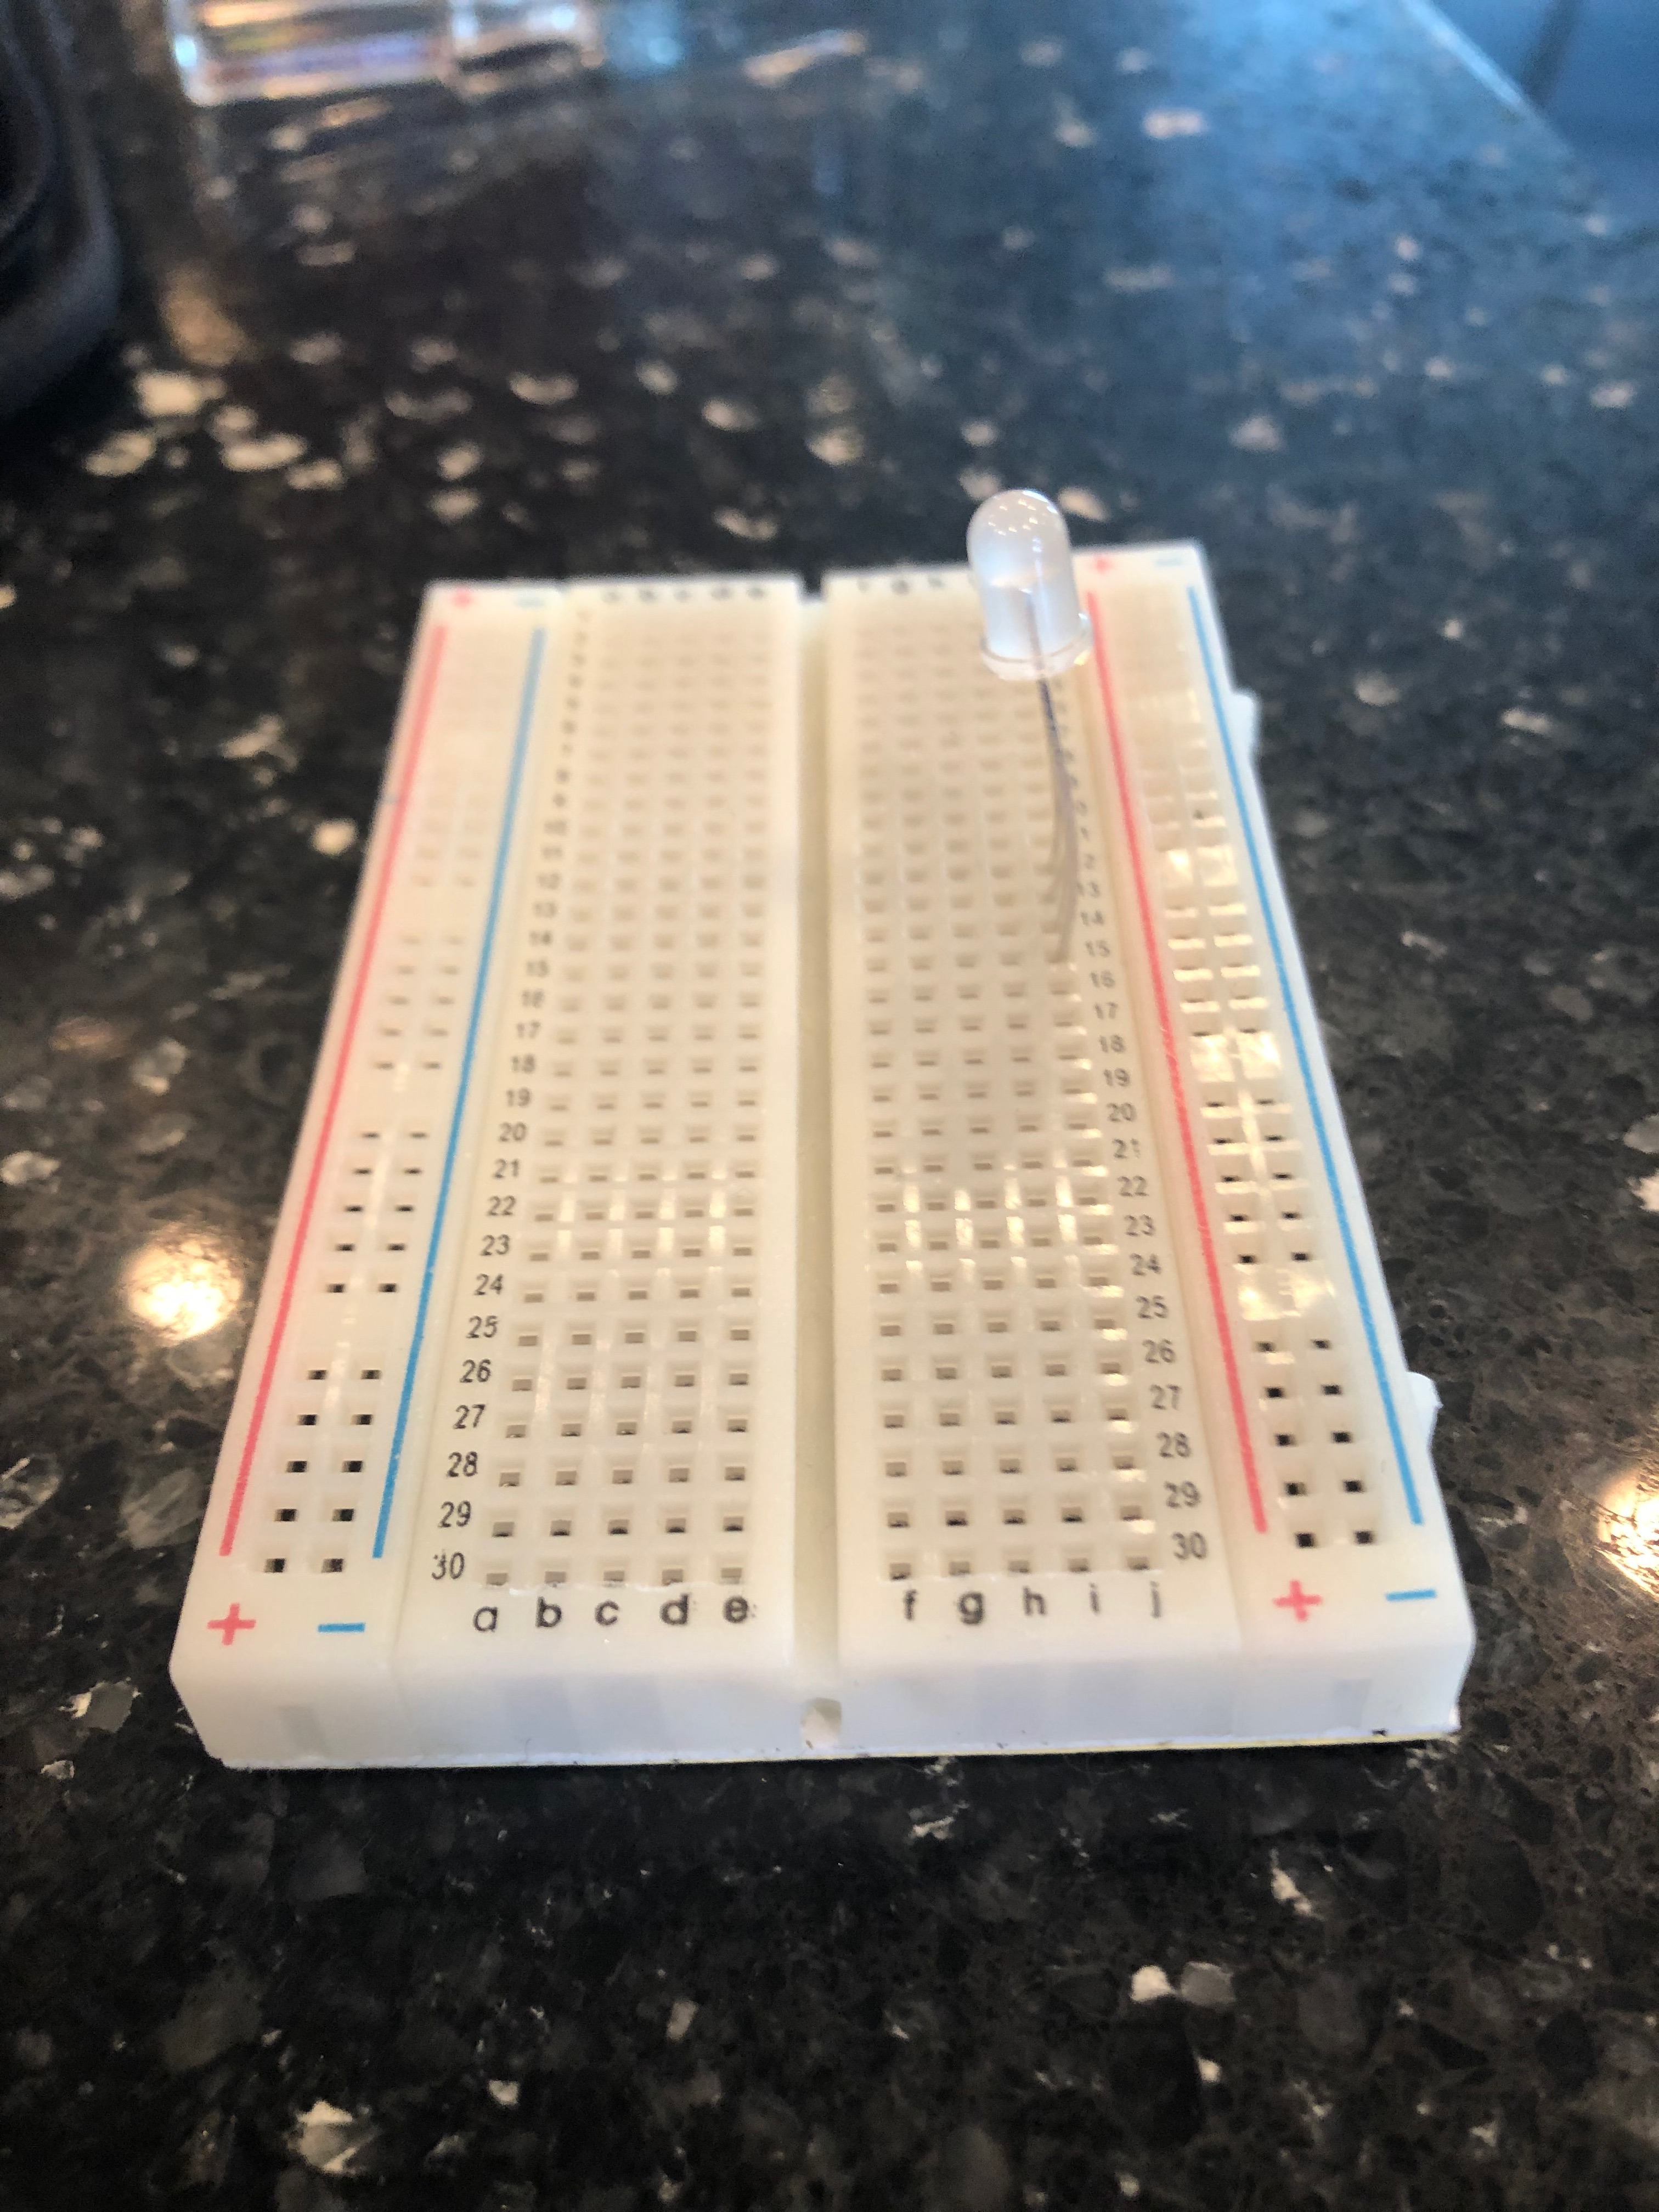
Now that the code is written, it is time to start wiring the breadboard. Before you start wiring, you have to make sure that you have an Arduino Uno kit. Otherwise, this Instructable will be much, much harder to follow. The first step to wiring is simply putting in the RGB LED. As shown in the picture, the RGB LED should be added to rows 12, 13, 14, and 15 in column J.
Adding the Resistors
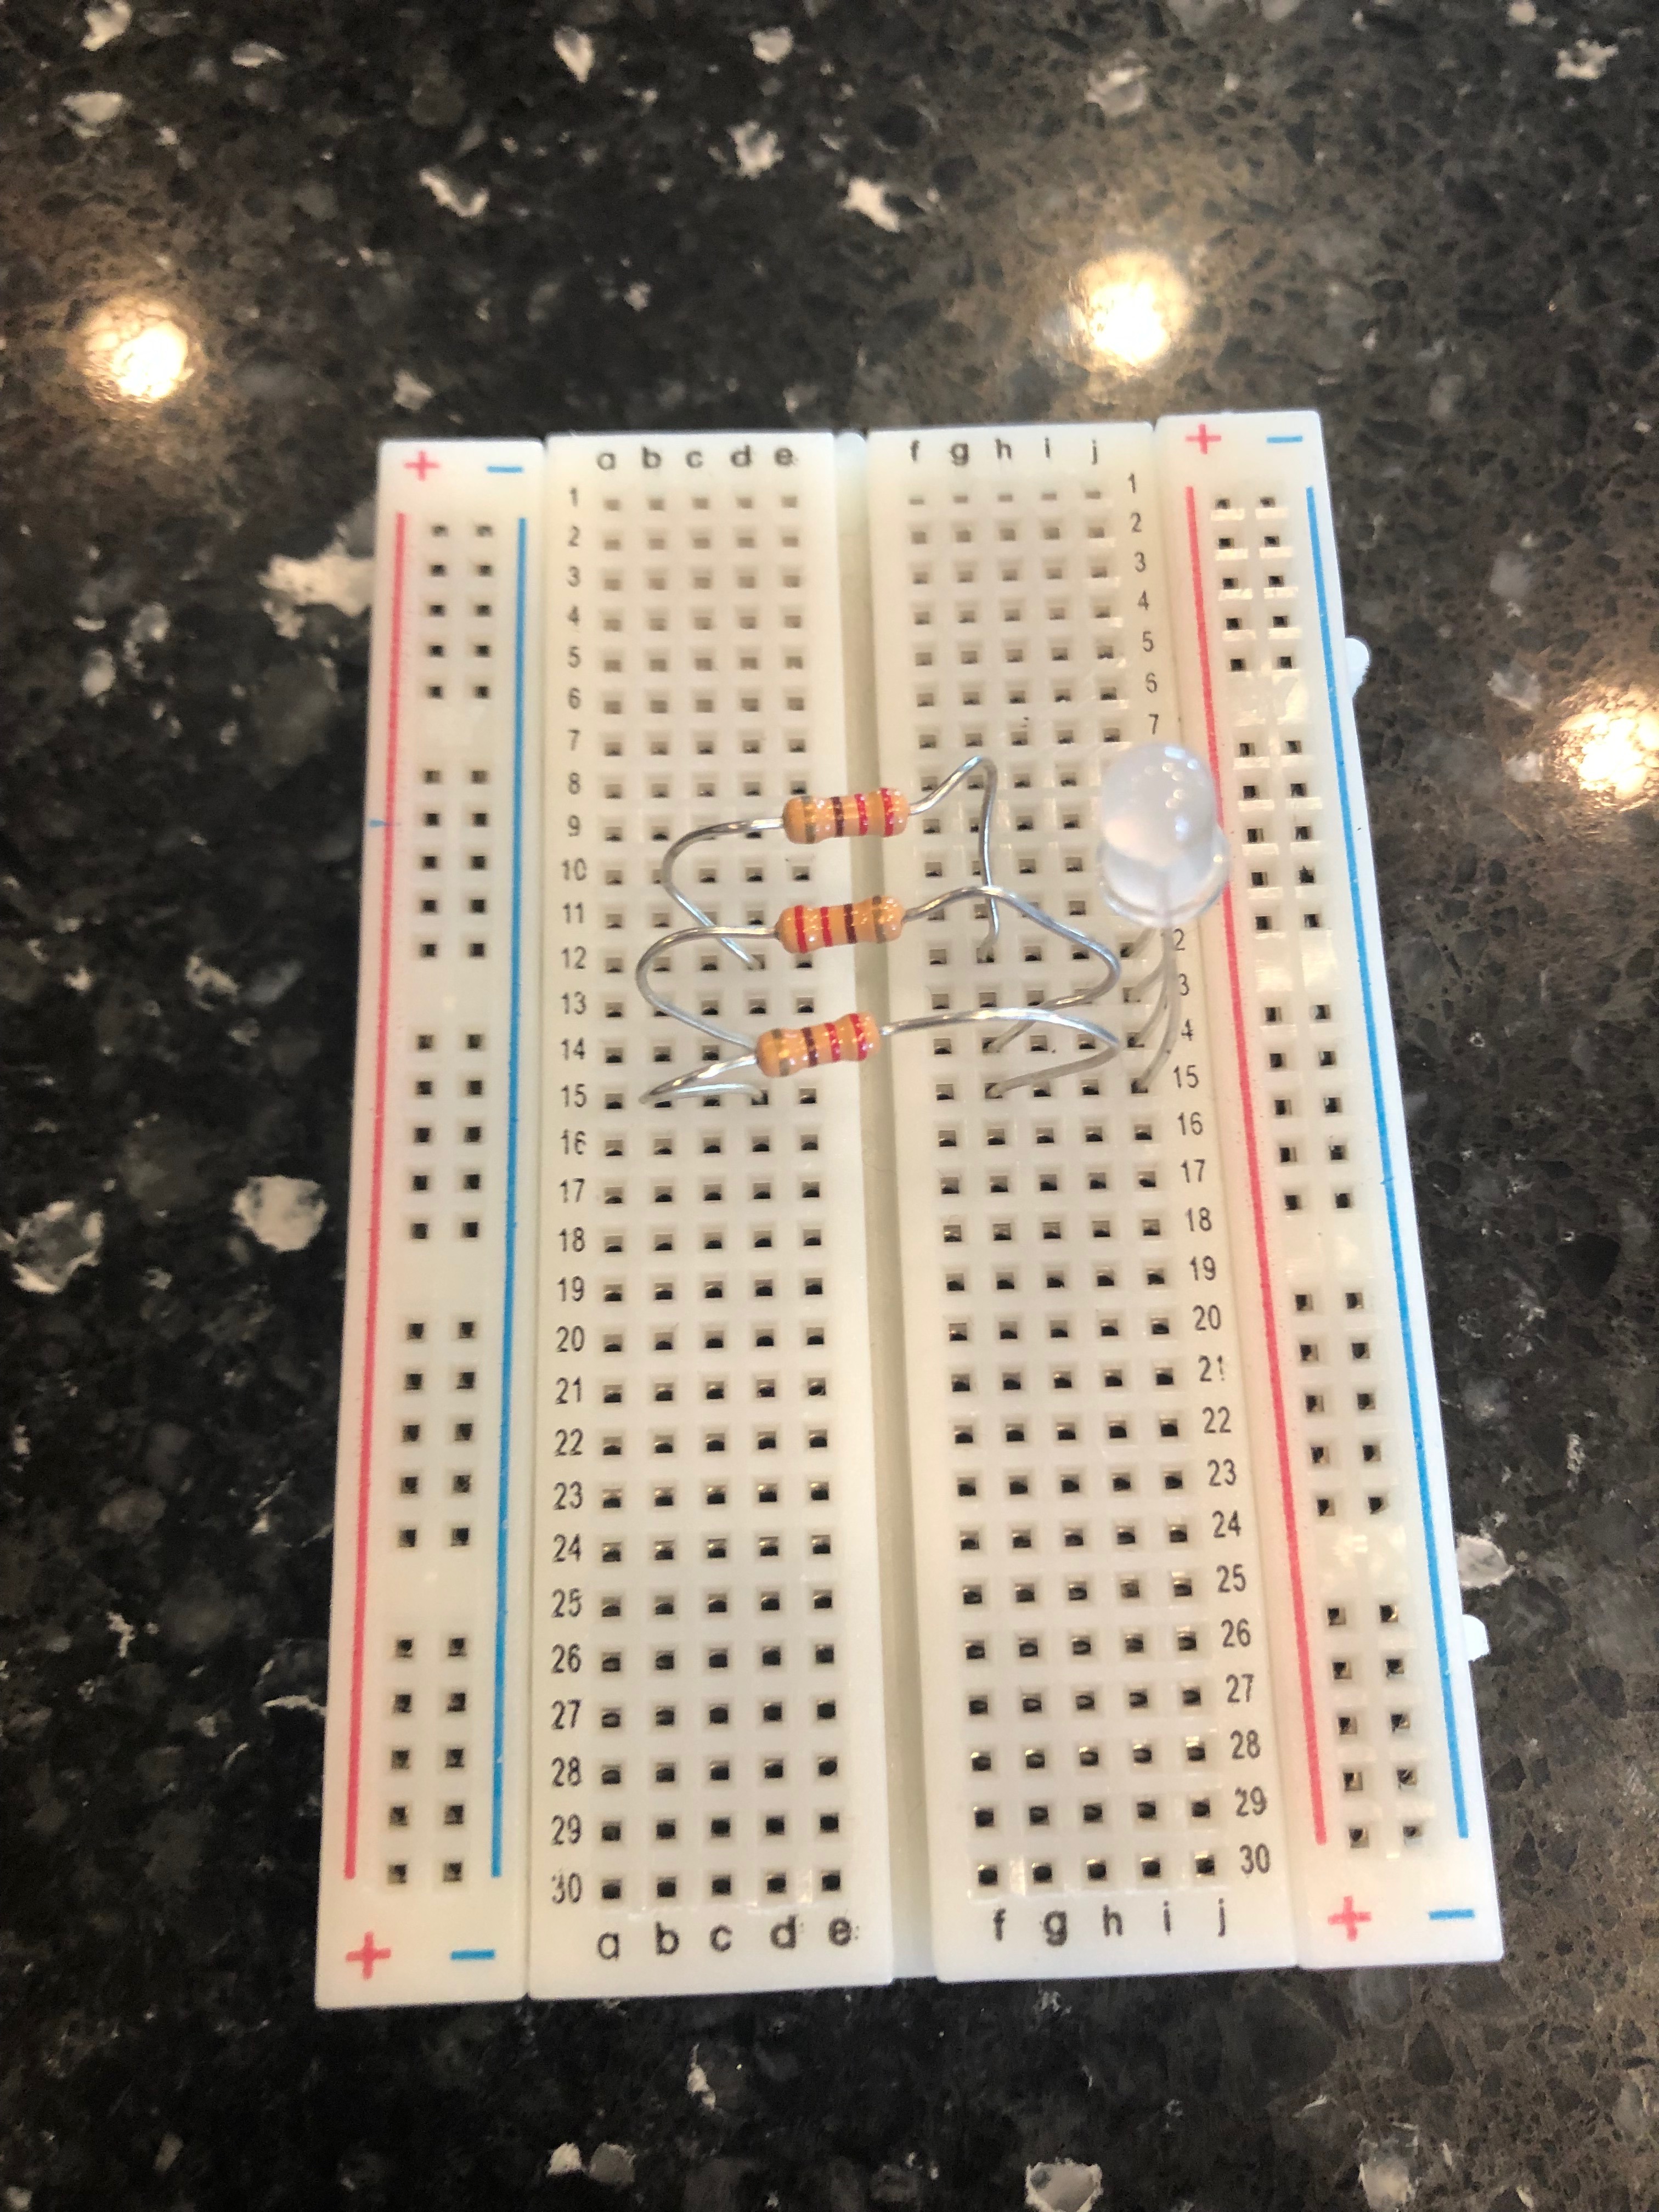
Next, you must add 3 resistors. As seen in the picture, you must add one that connects G12 to D12, one that connects G14 to D14, and one that connects G15 to D15.
Adding the Temperature Sensor
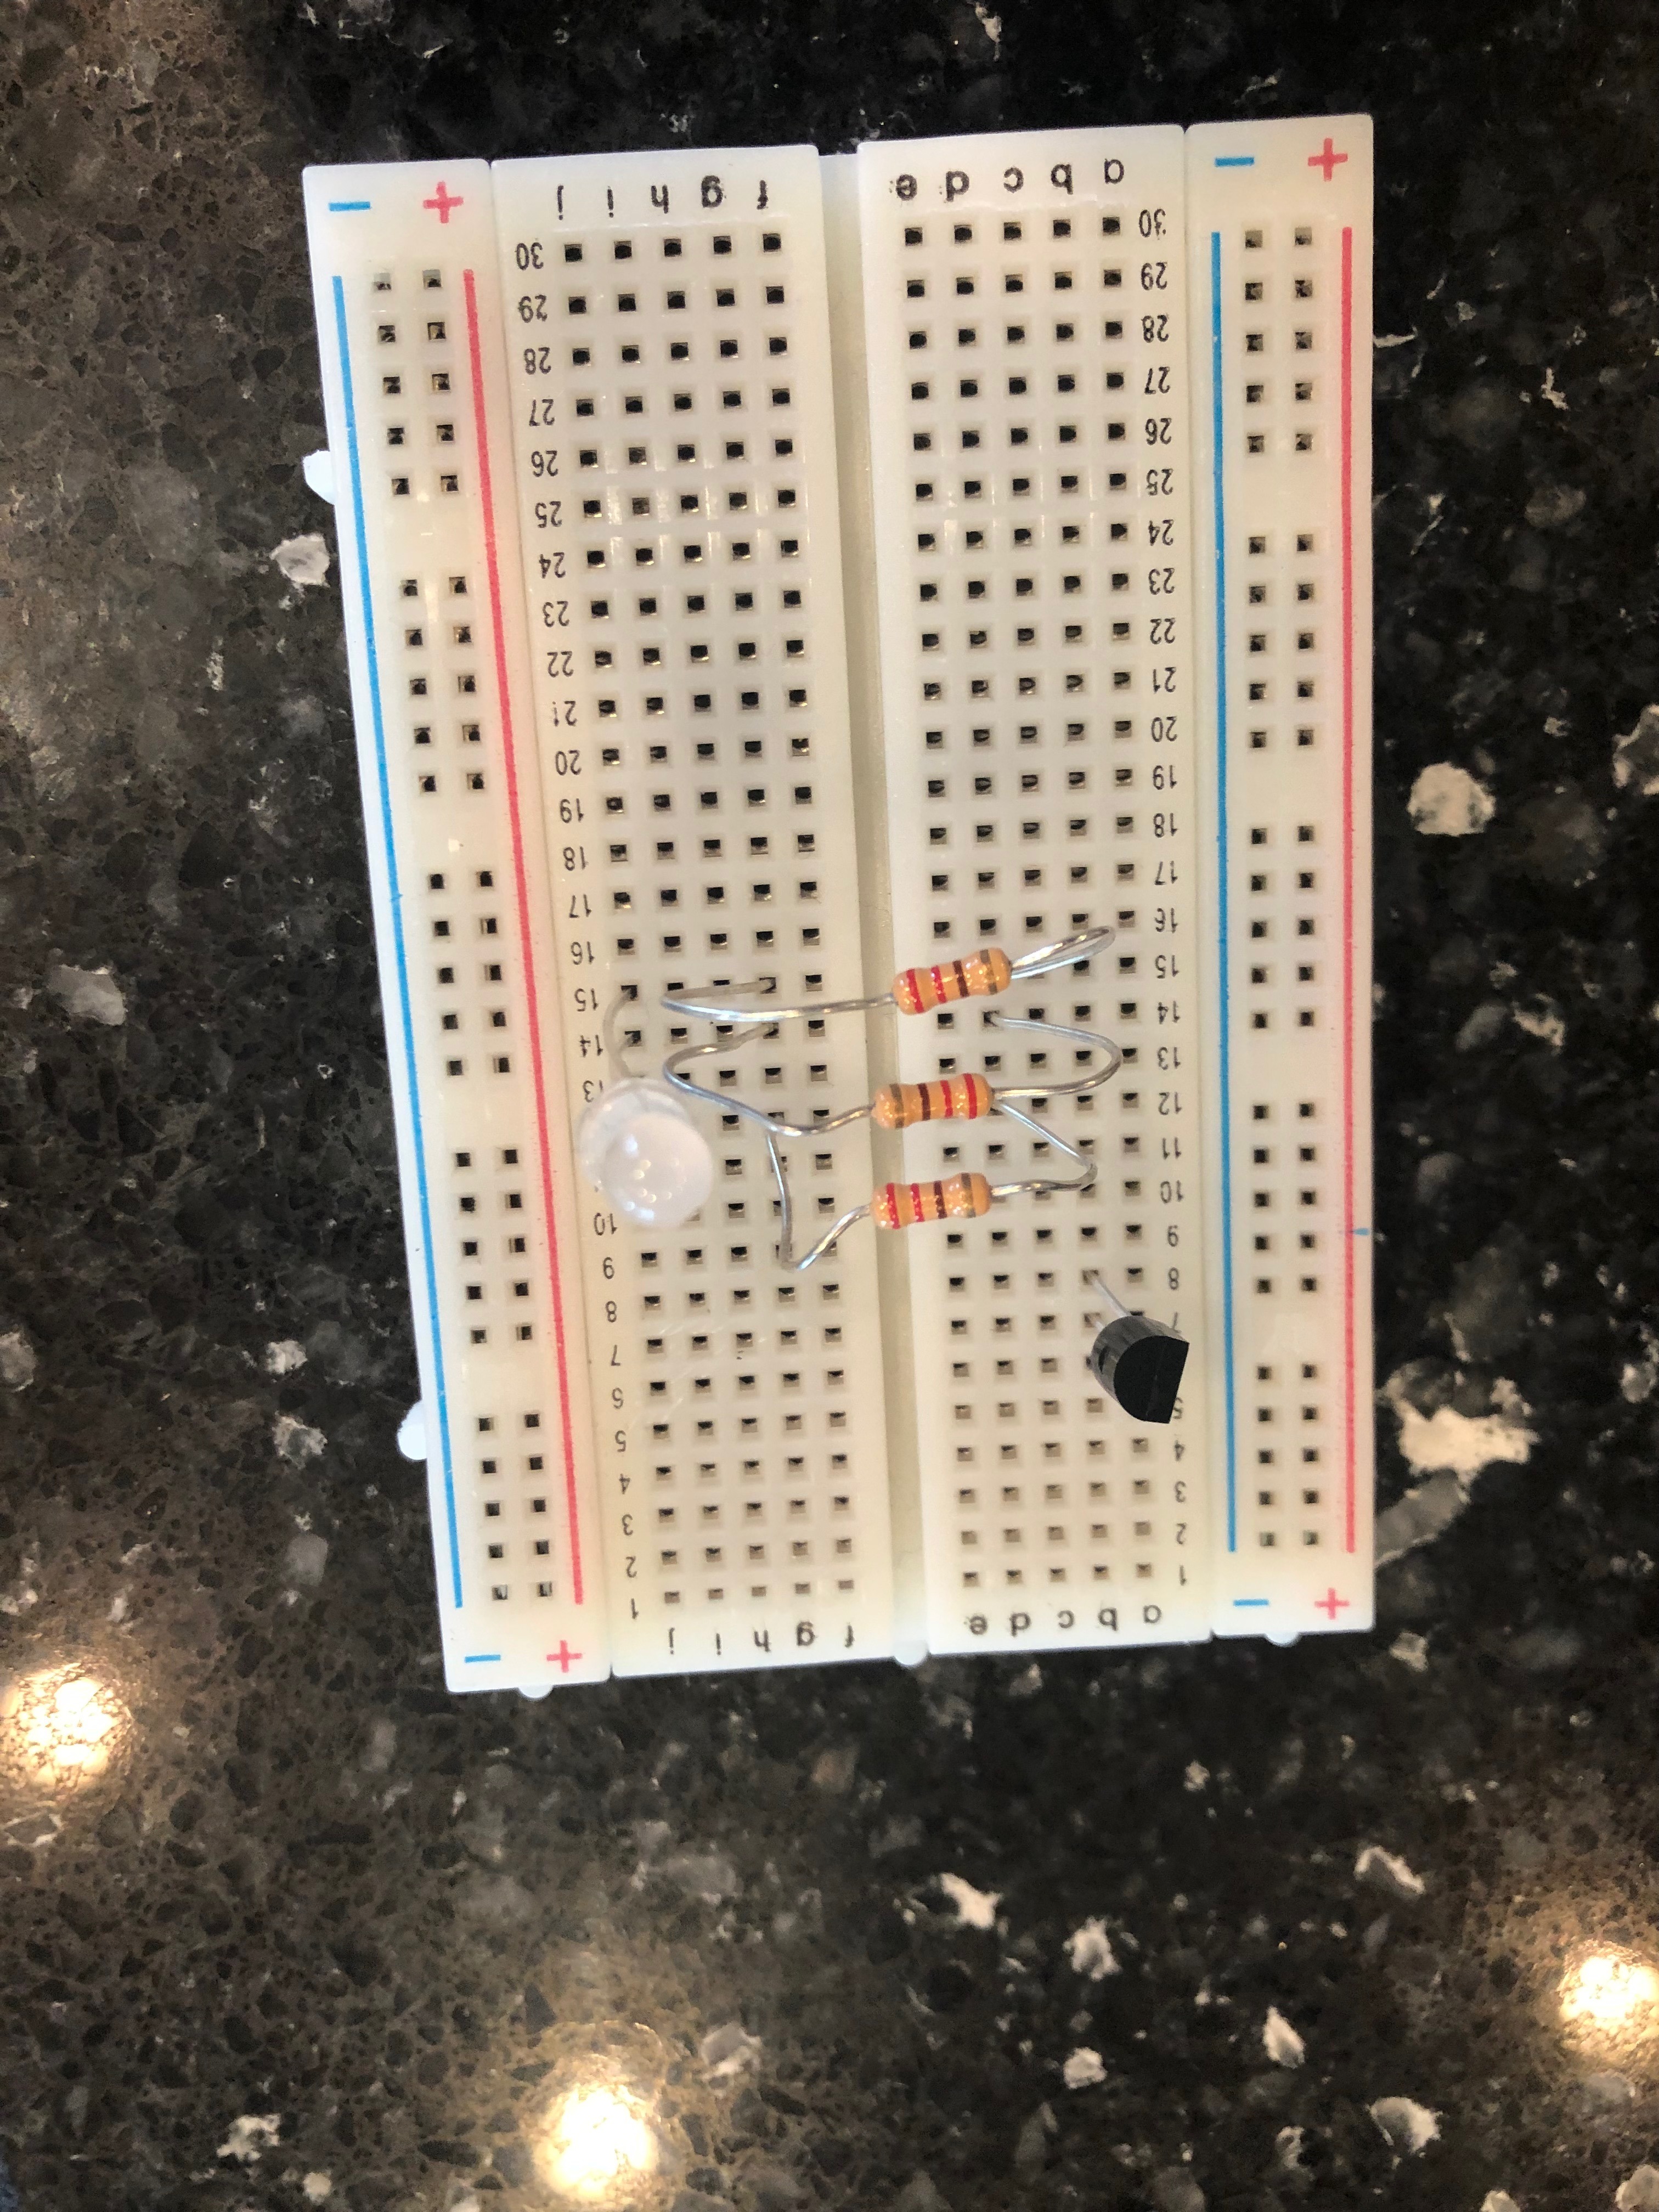
After adding the resistors, you must add the temperature sensor. Add the temperature sensor into B6, B7, and B8 with the flat side of the sensor facing the right.
Giving the Temperature Sensor Voltage
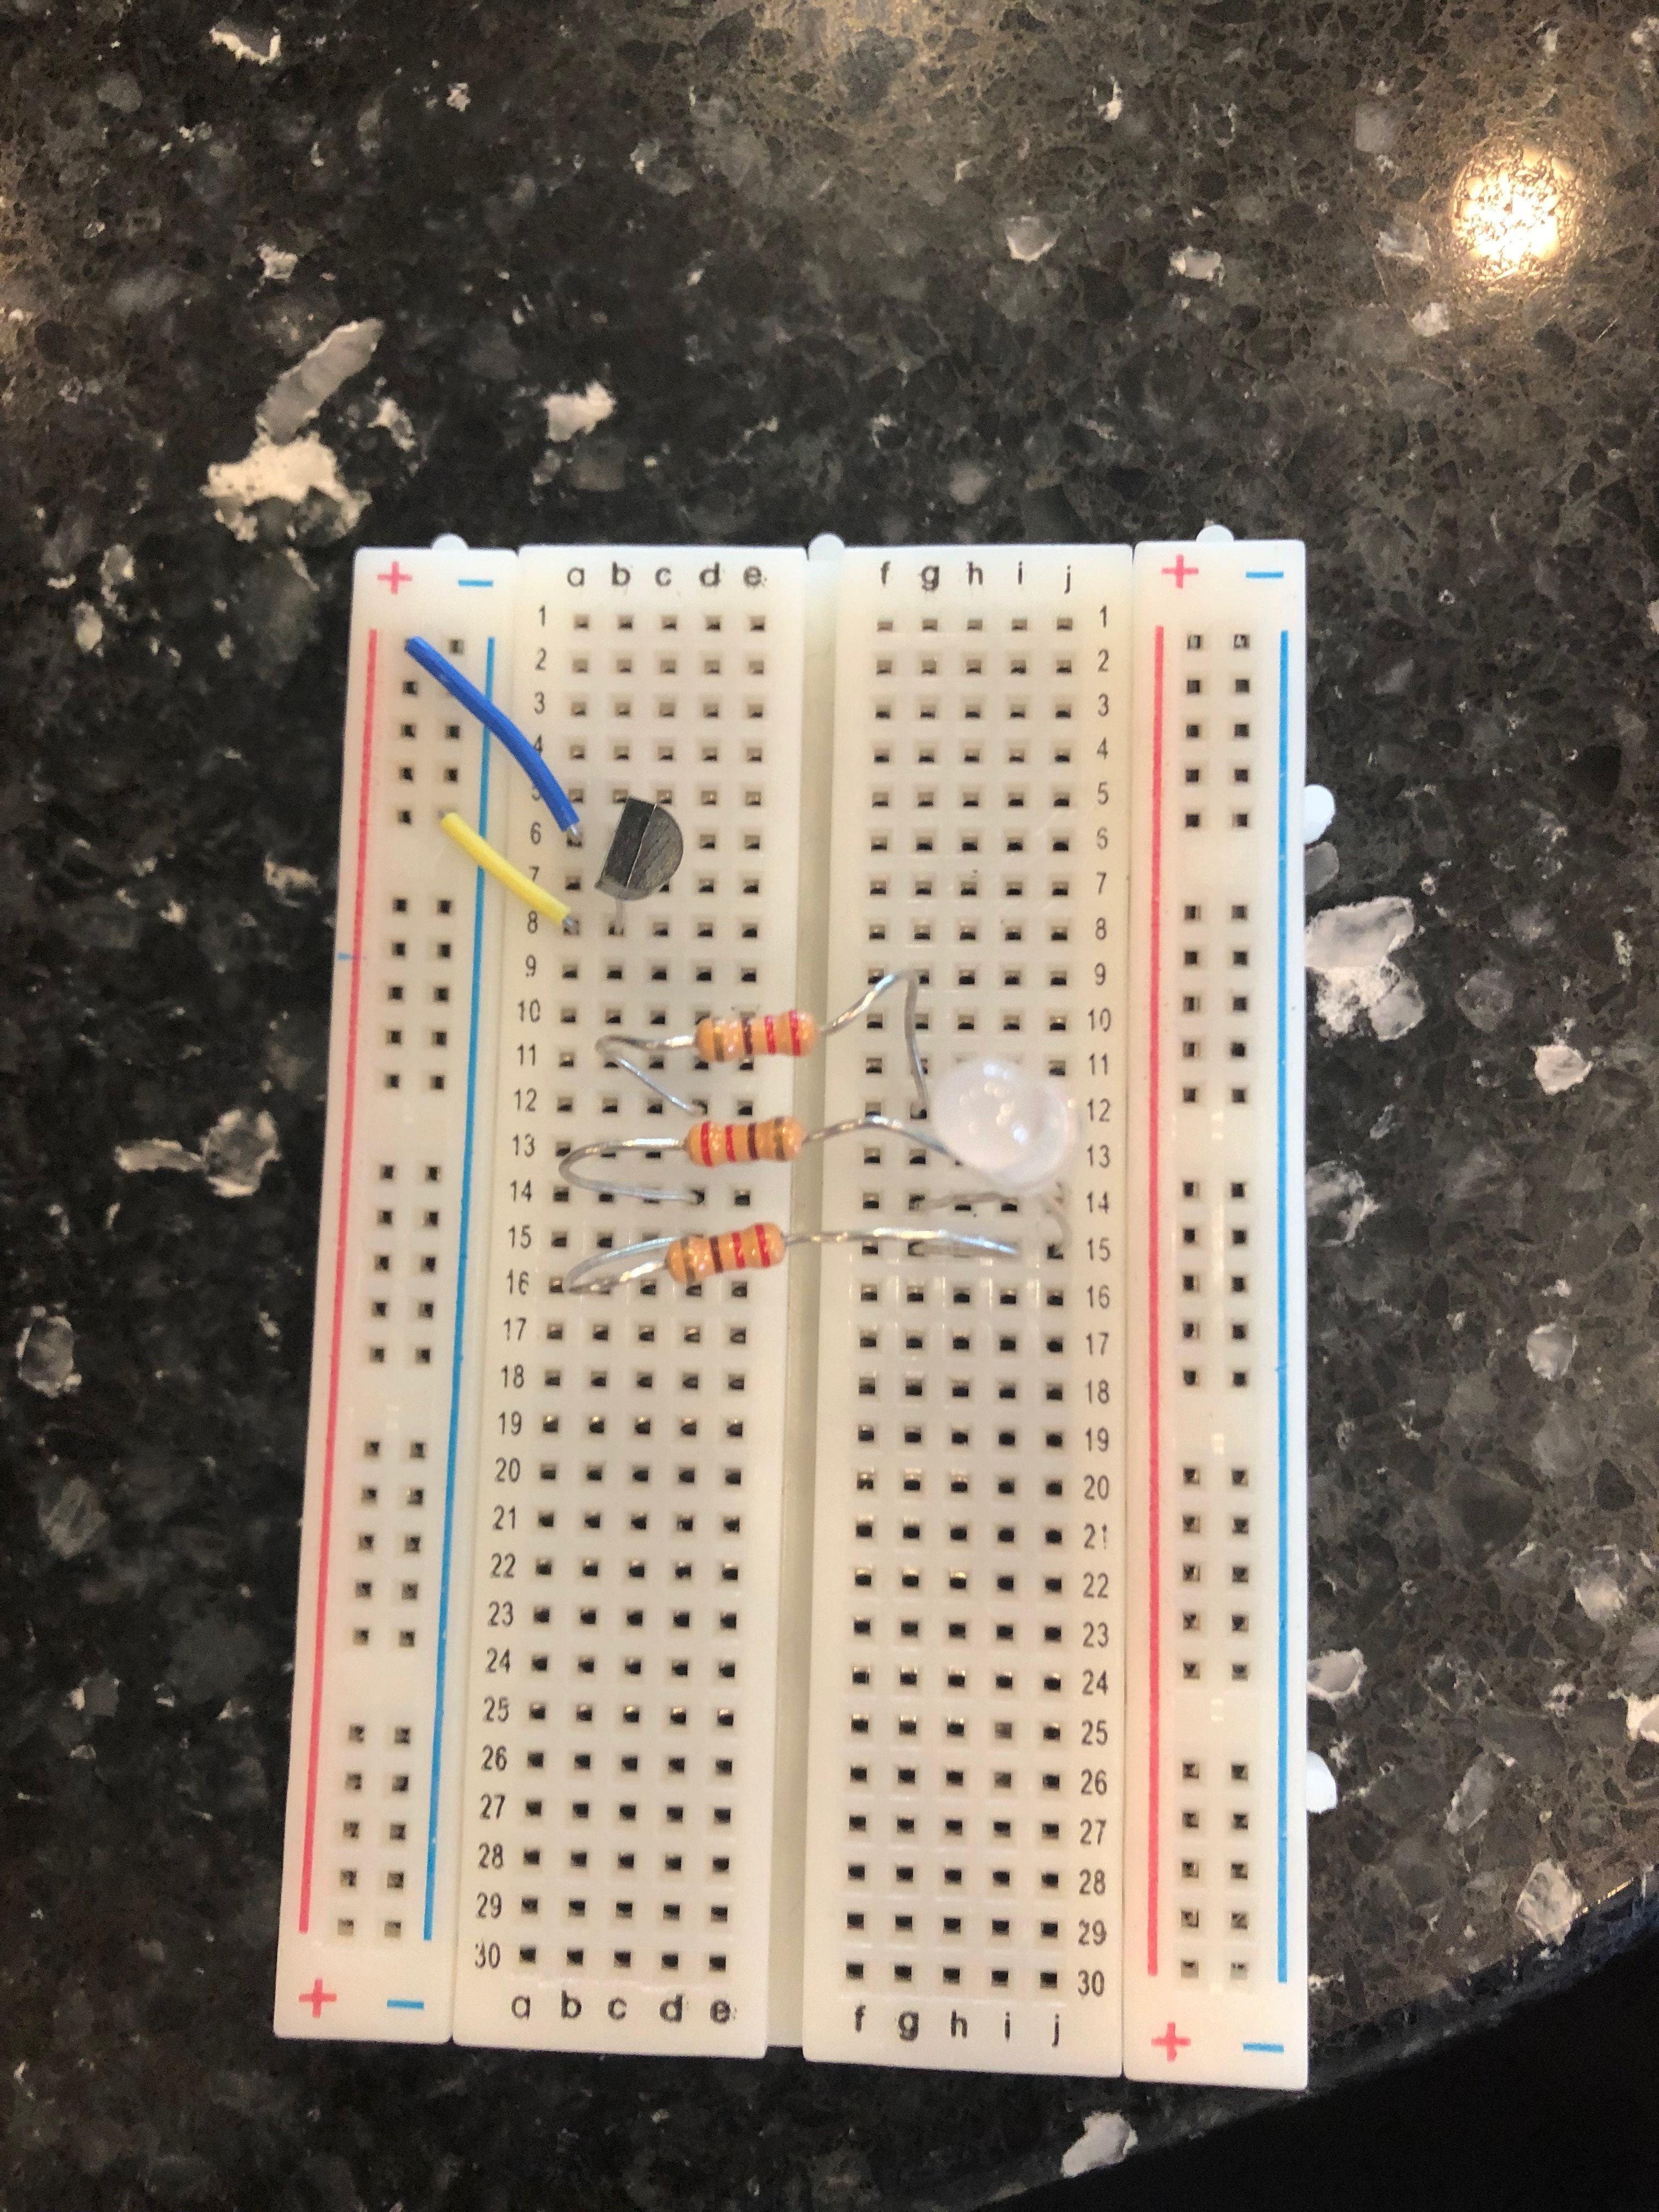
The temperature sensor can tell the temperature based off of the voltage it receives. In order to receive voltage, it must be connected to both a negative and positive charge. This where the short wires come in handy. As seen in the picture, you must connect one short wire to B8 and any negative slot, and another short wire must connect to B6 and any positive slot.
Wiring the LED to the Rev 3
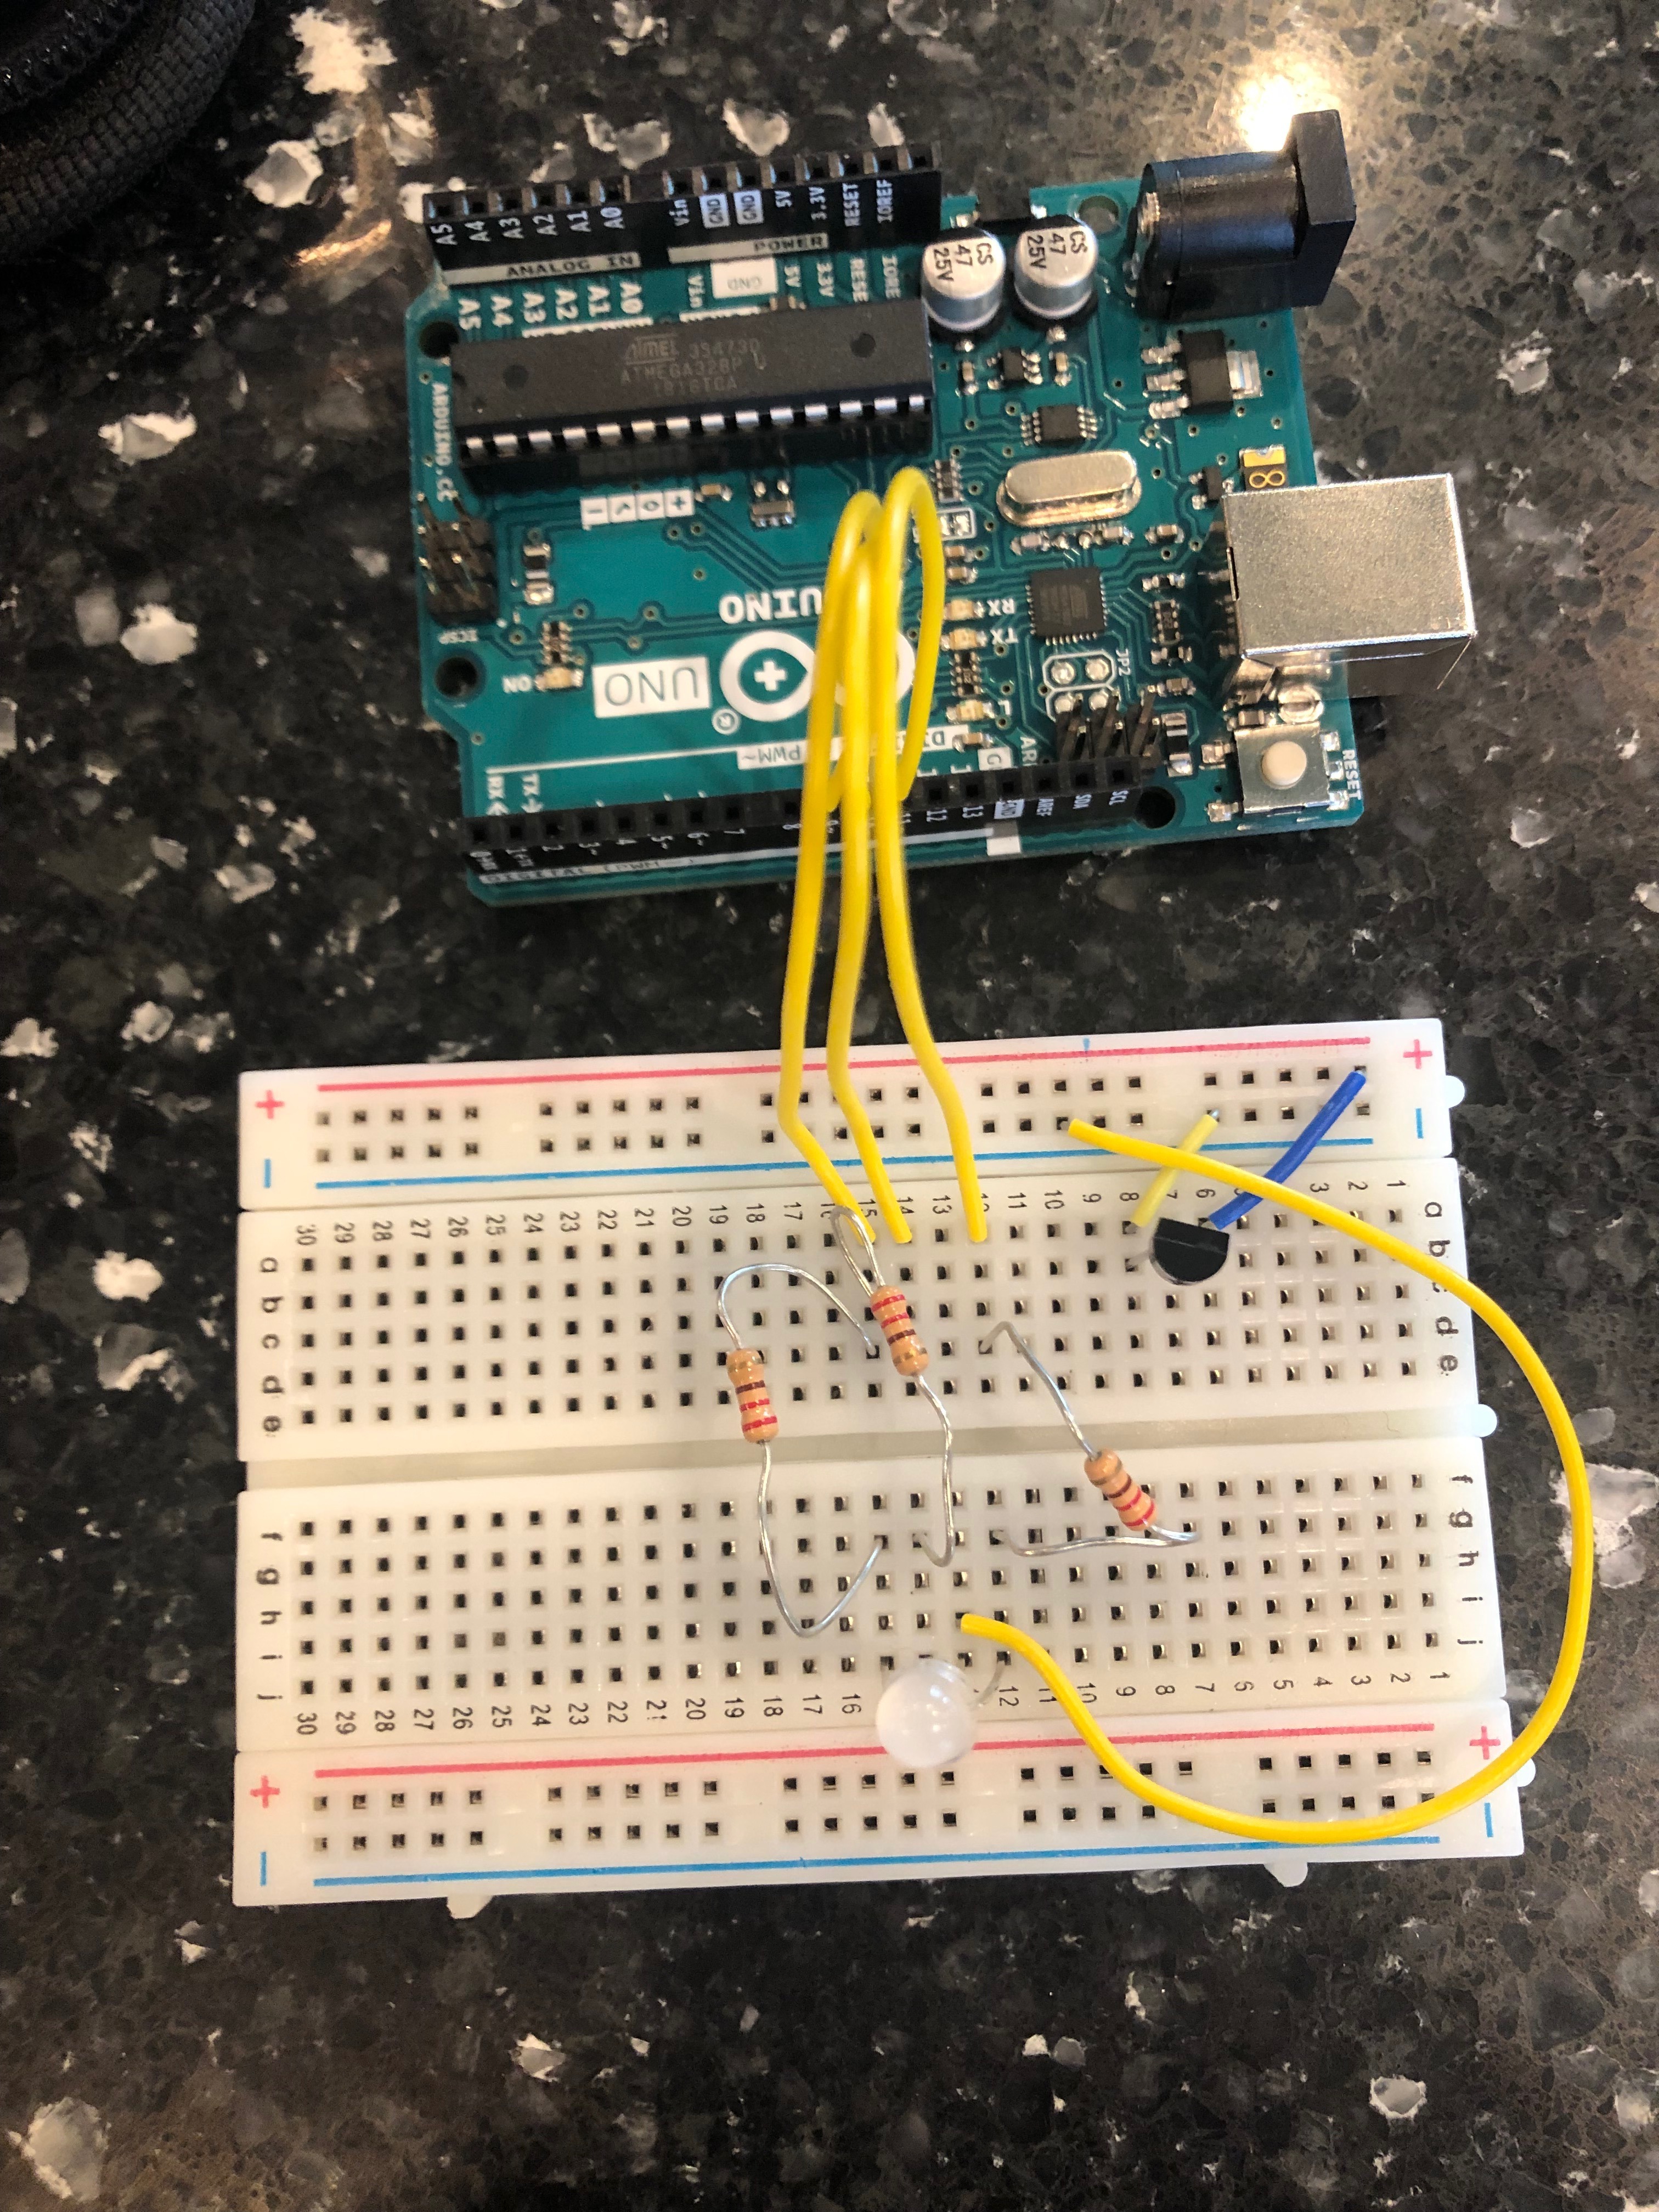
After the temperature sensor is in place, you must wire the LED to the Rev 3. You will need 4 long wires for this part. One wire will connect A12 to port 9, another will connect A14 to port 10, and one more will connect A15 to port 11. The fourth wire will ground the LED and connect H13 to any negative port.
Providing the Voltage to the Temperature Sensor
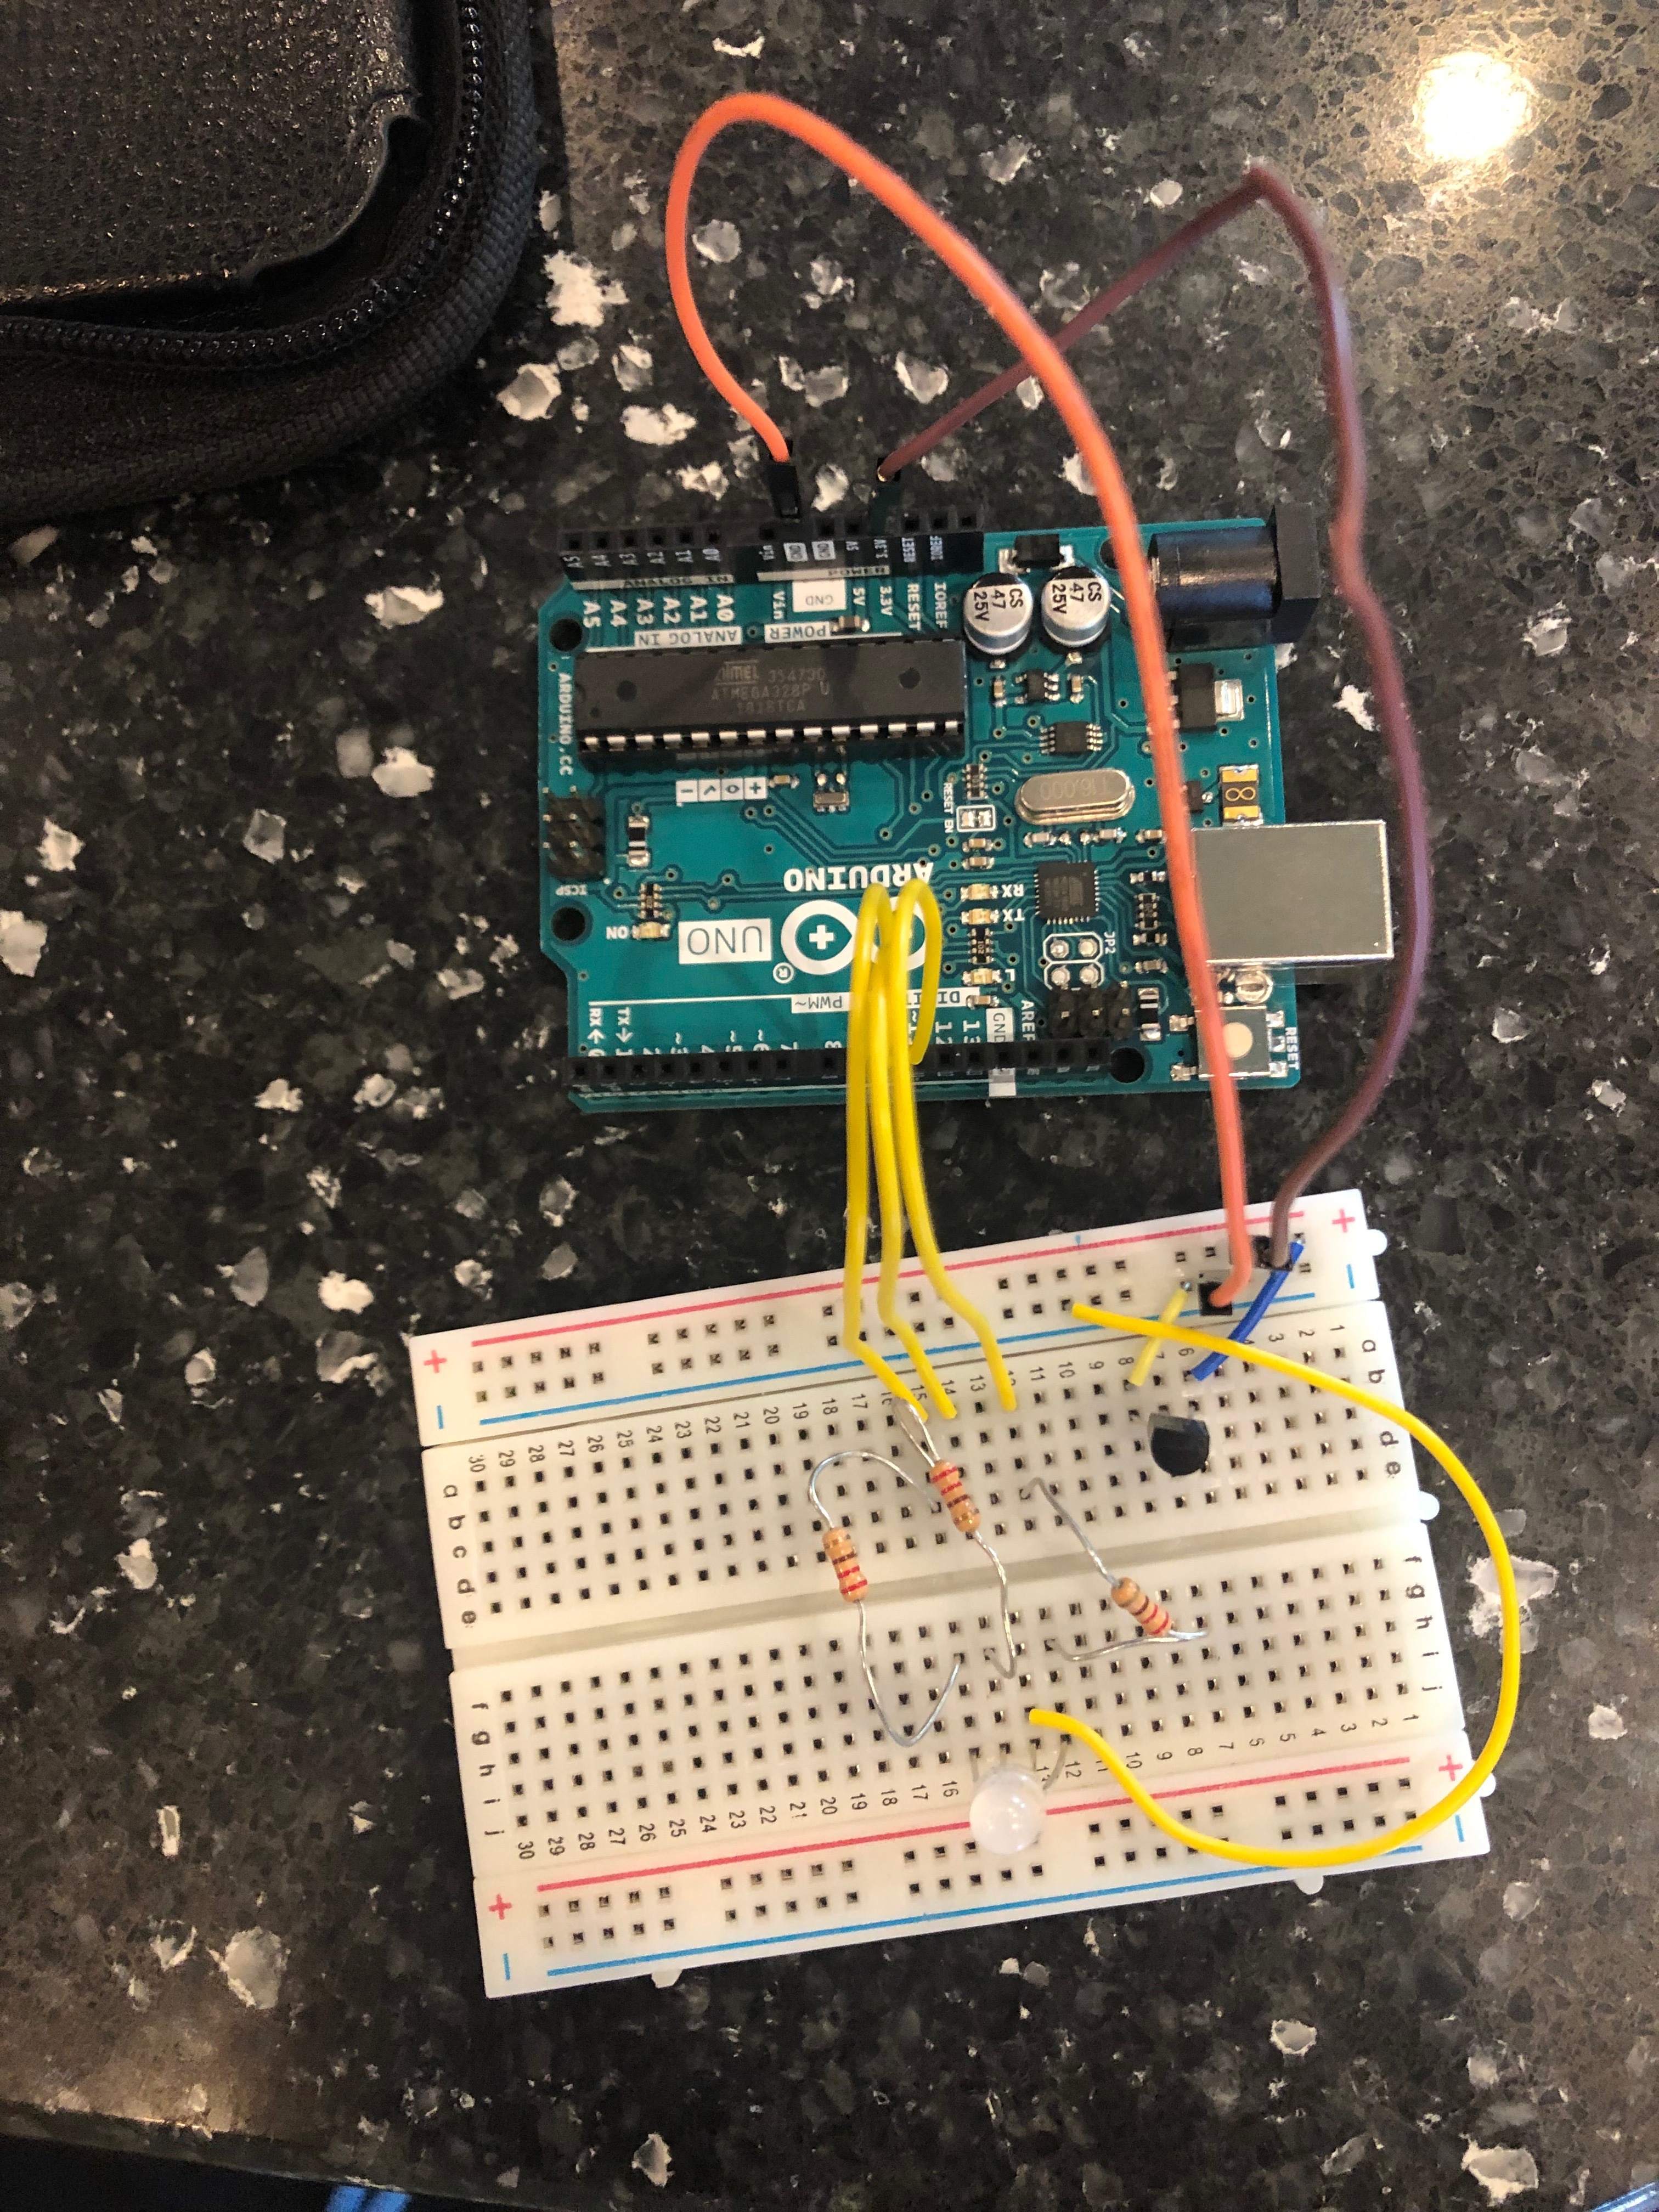
After the LED has been plugged in, you have to connect the temperature sensor to energy and also ground it. To do so, a long wire will need to be placed from any positive port to the 3.3 Volt port. The other wire will need to connect any negative port to the leftmost grounded port.
Plugging in the Temperature Sensor
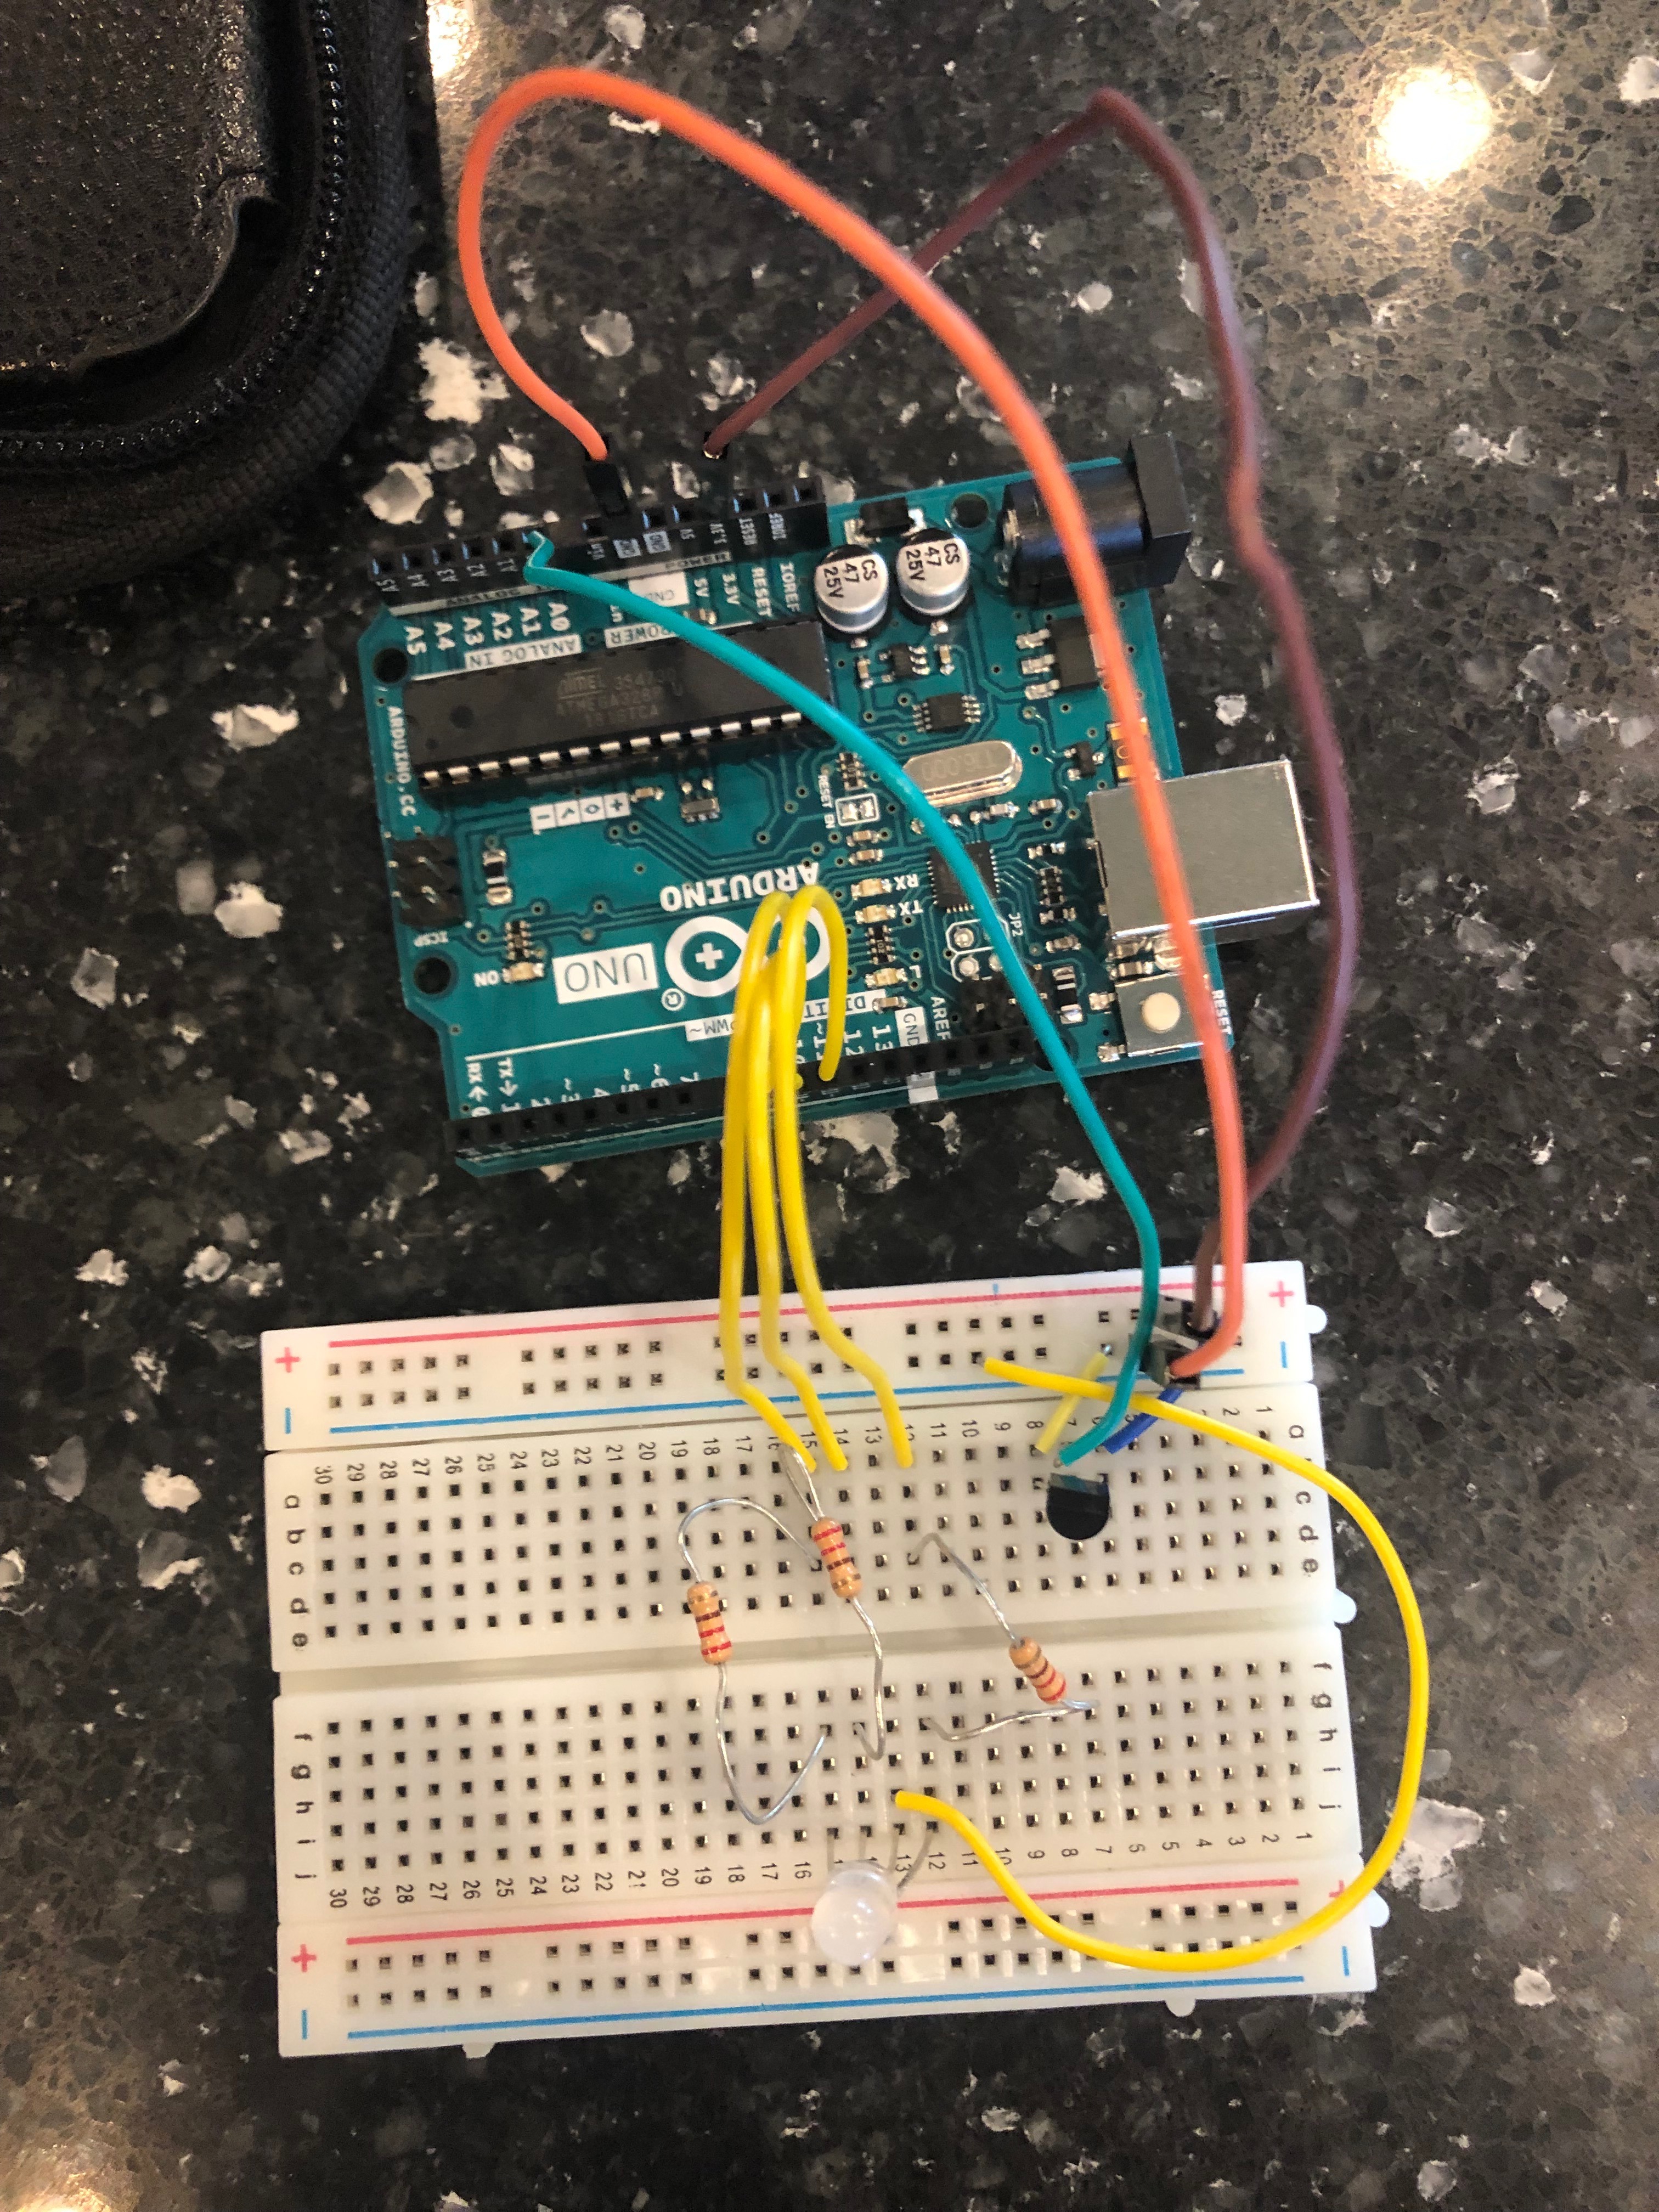
The last part of wiring the breadbasket is to connect A7 to the A0 port on the Rev 3 via a long wire. This will allow the computer to read the temperature sensor as an input.
Plug in the USB Cable
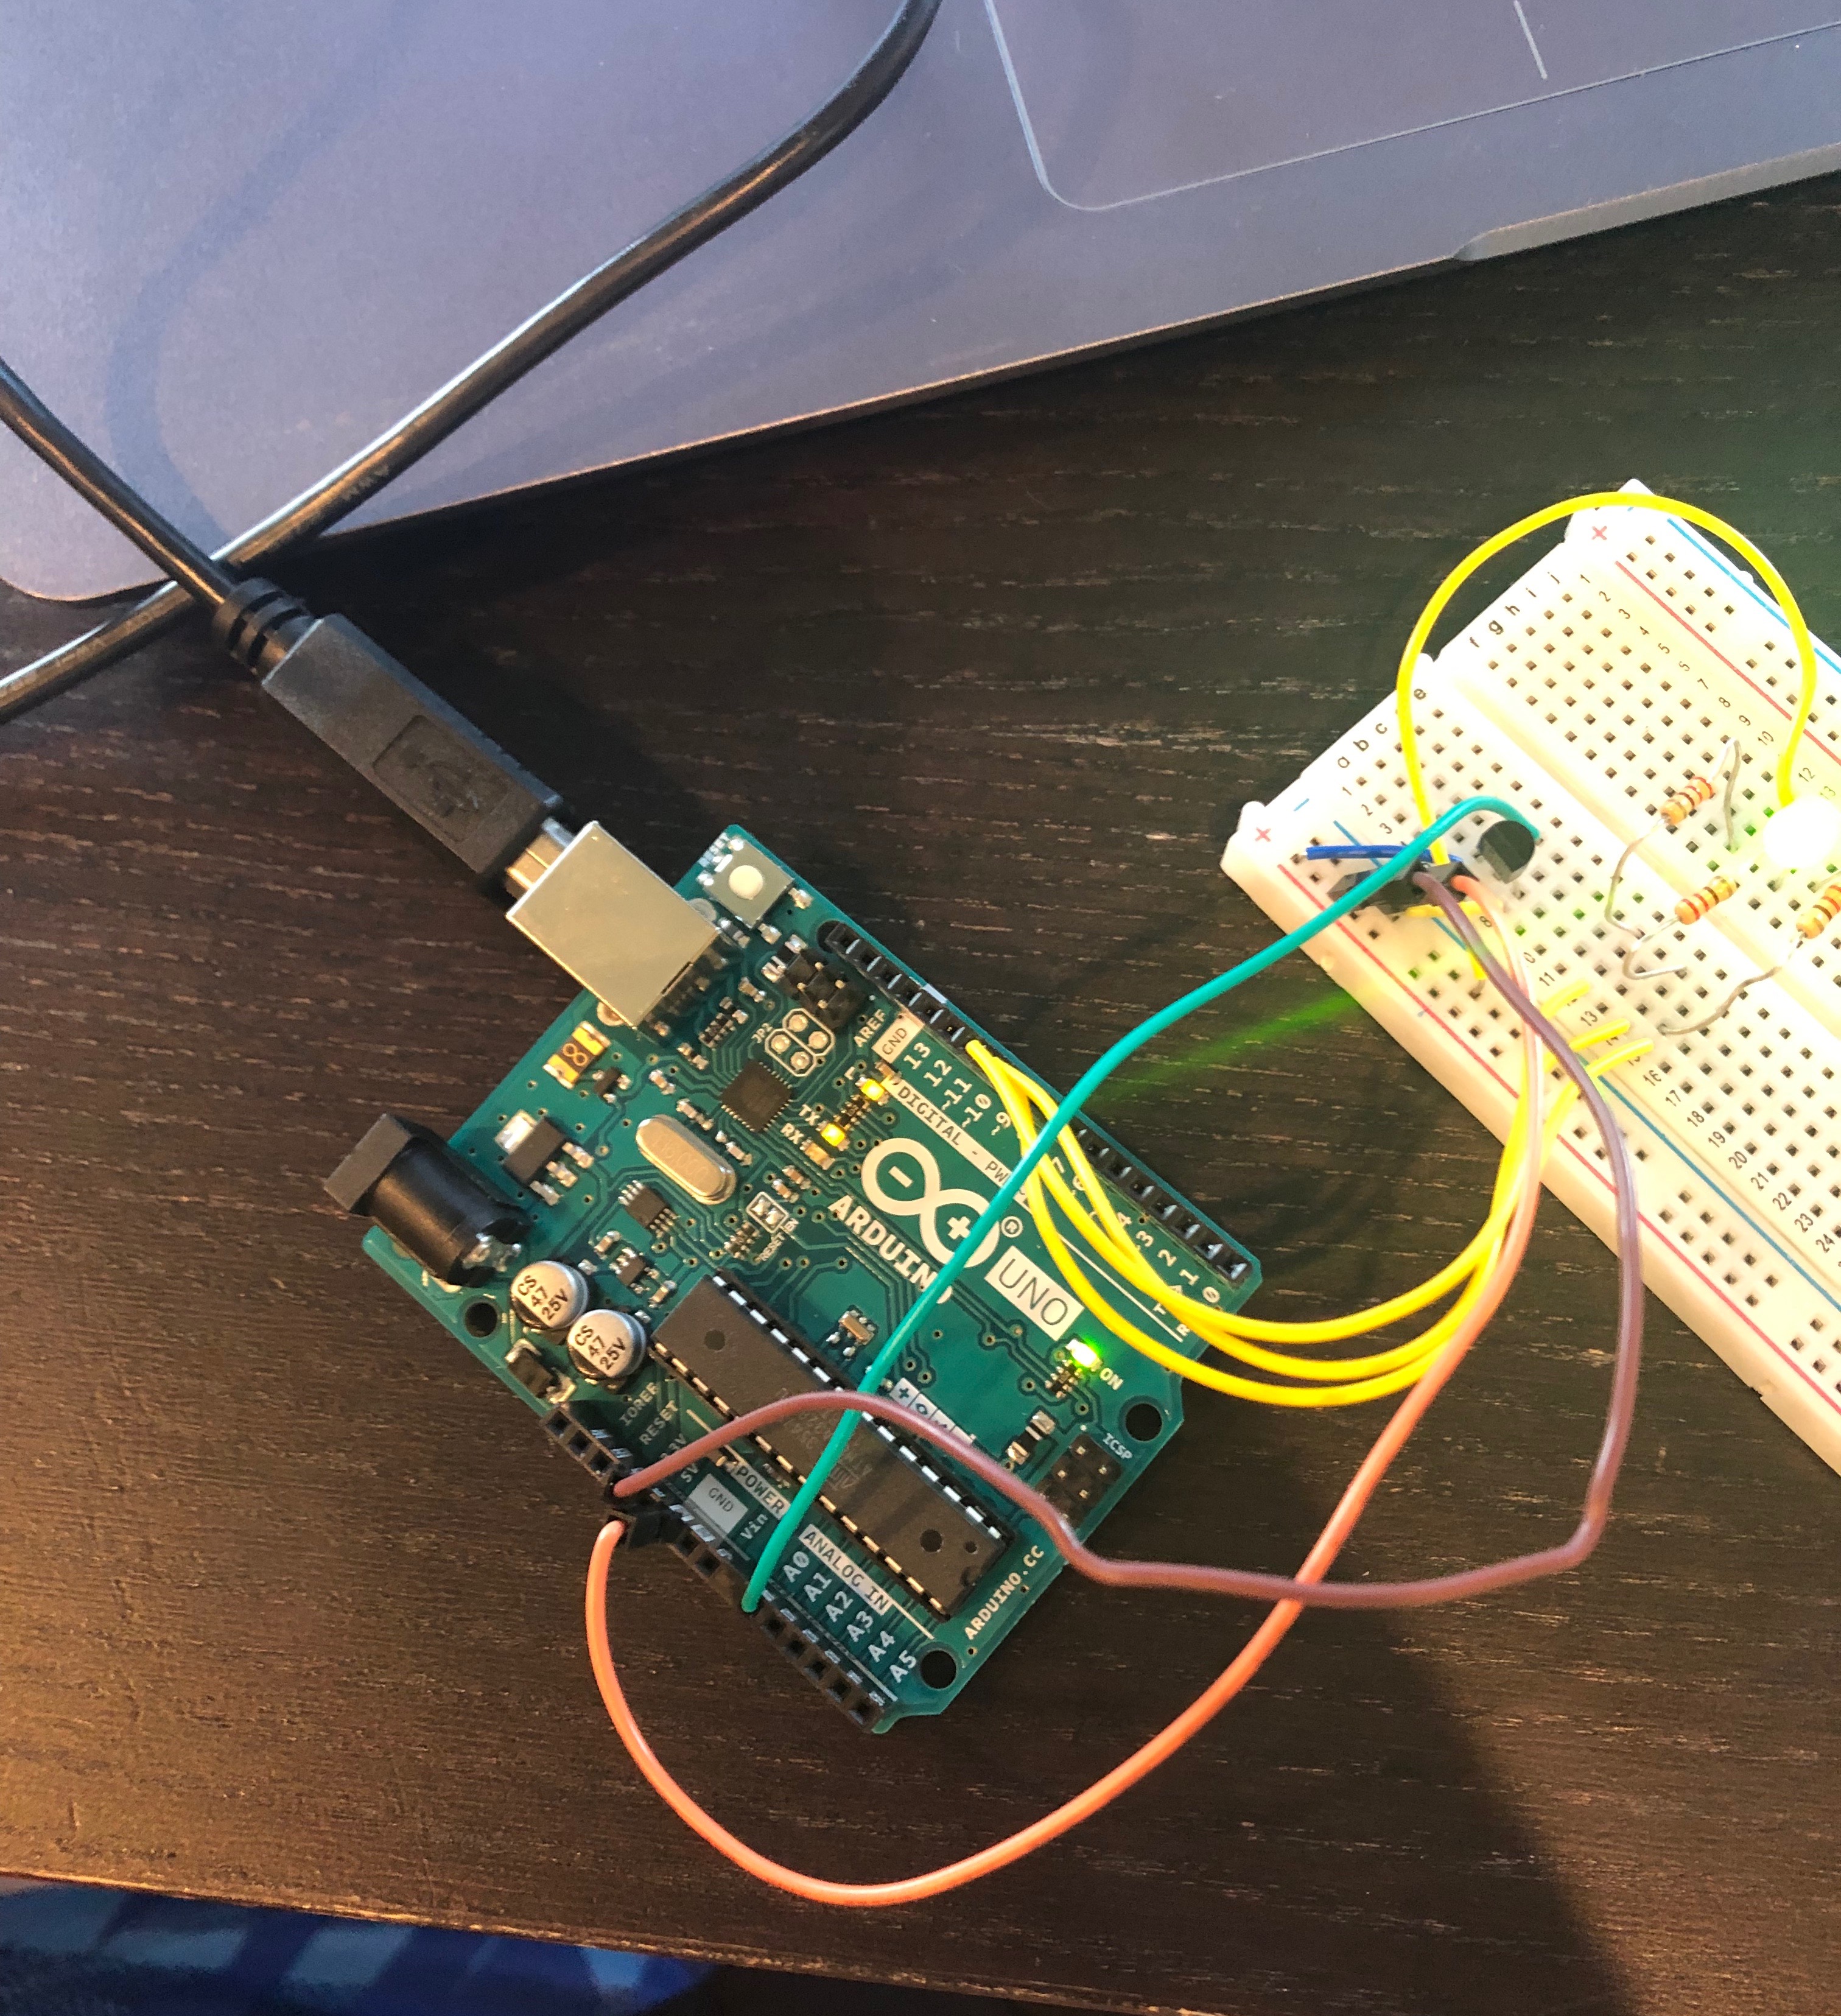
Once the wiring is done, you have to plug the USB cable into the computer and the Rev 3.
Upload the Code
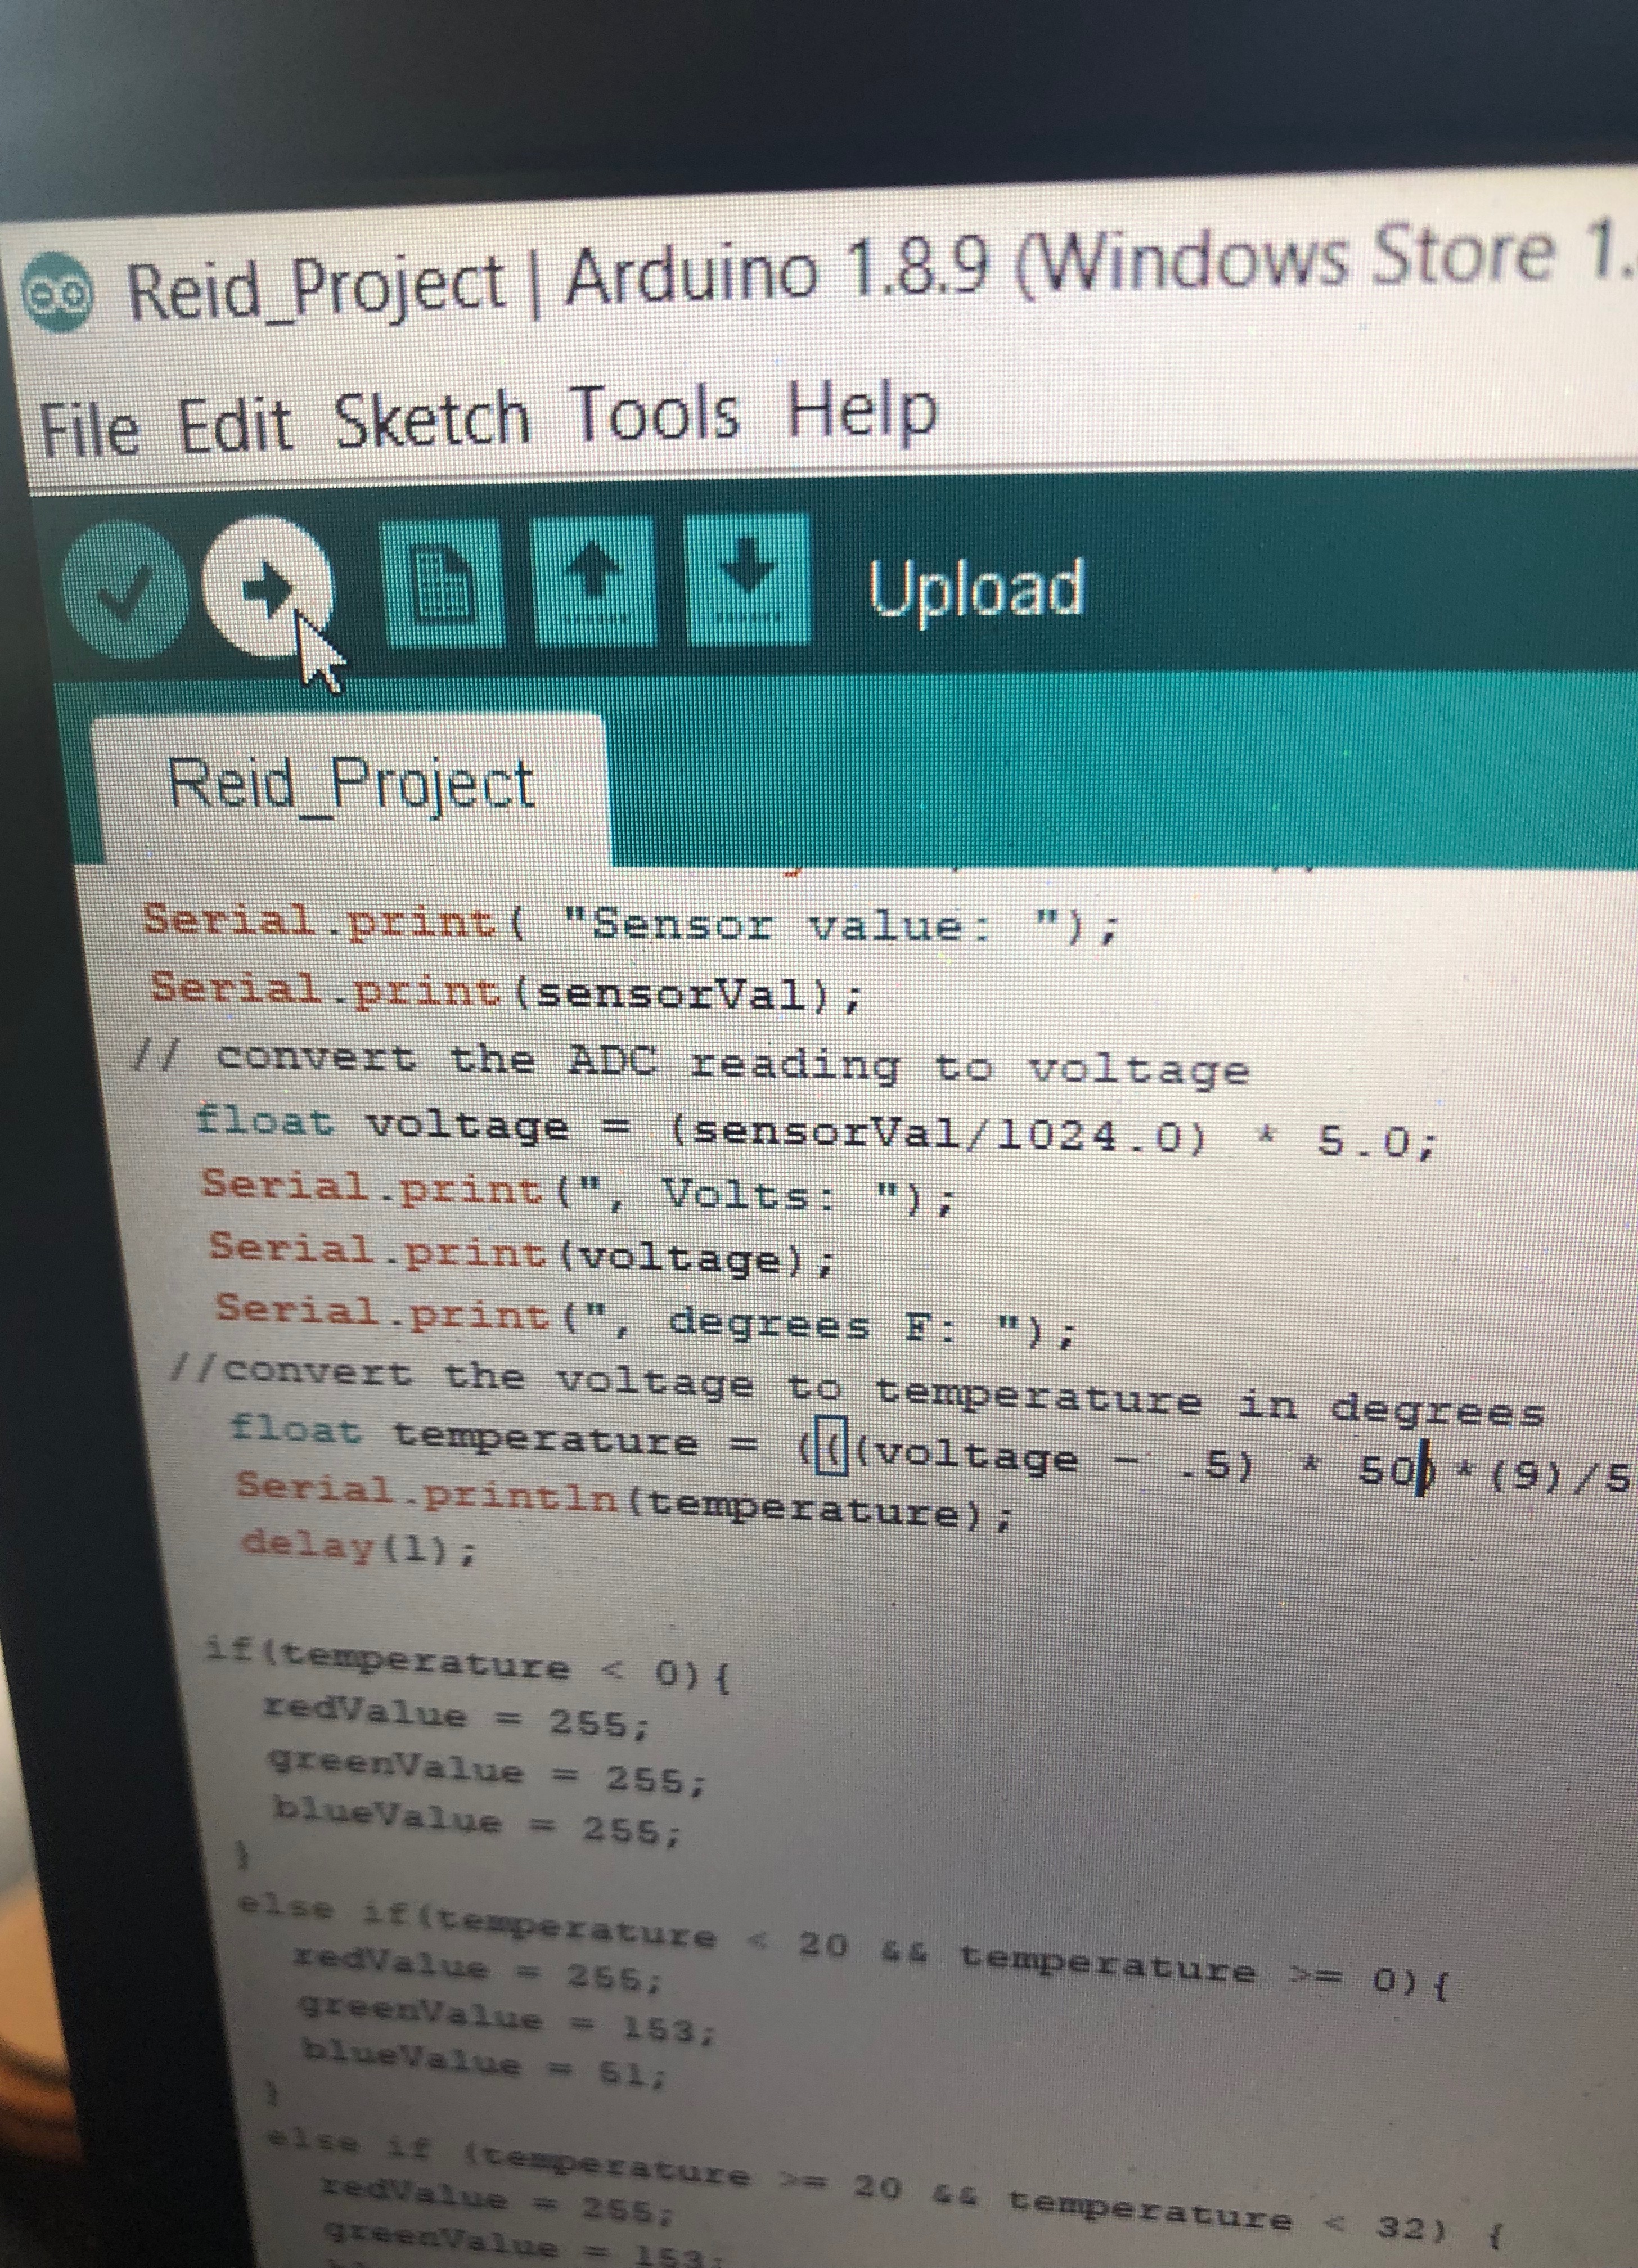
Once it is plugged in, you have to open up your code and click upload in the leftmost corner of the screen.
Add Battery Pack
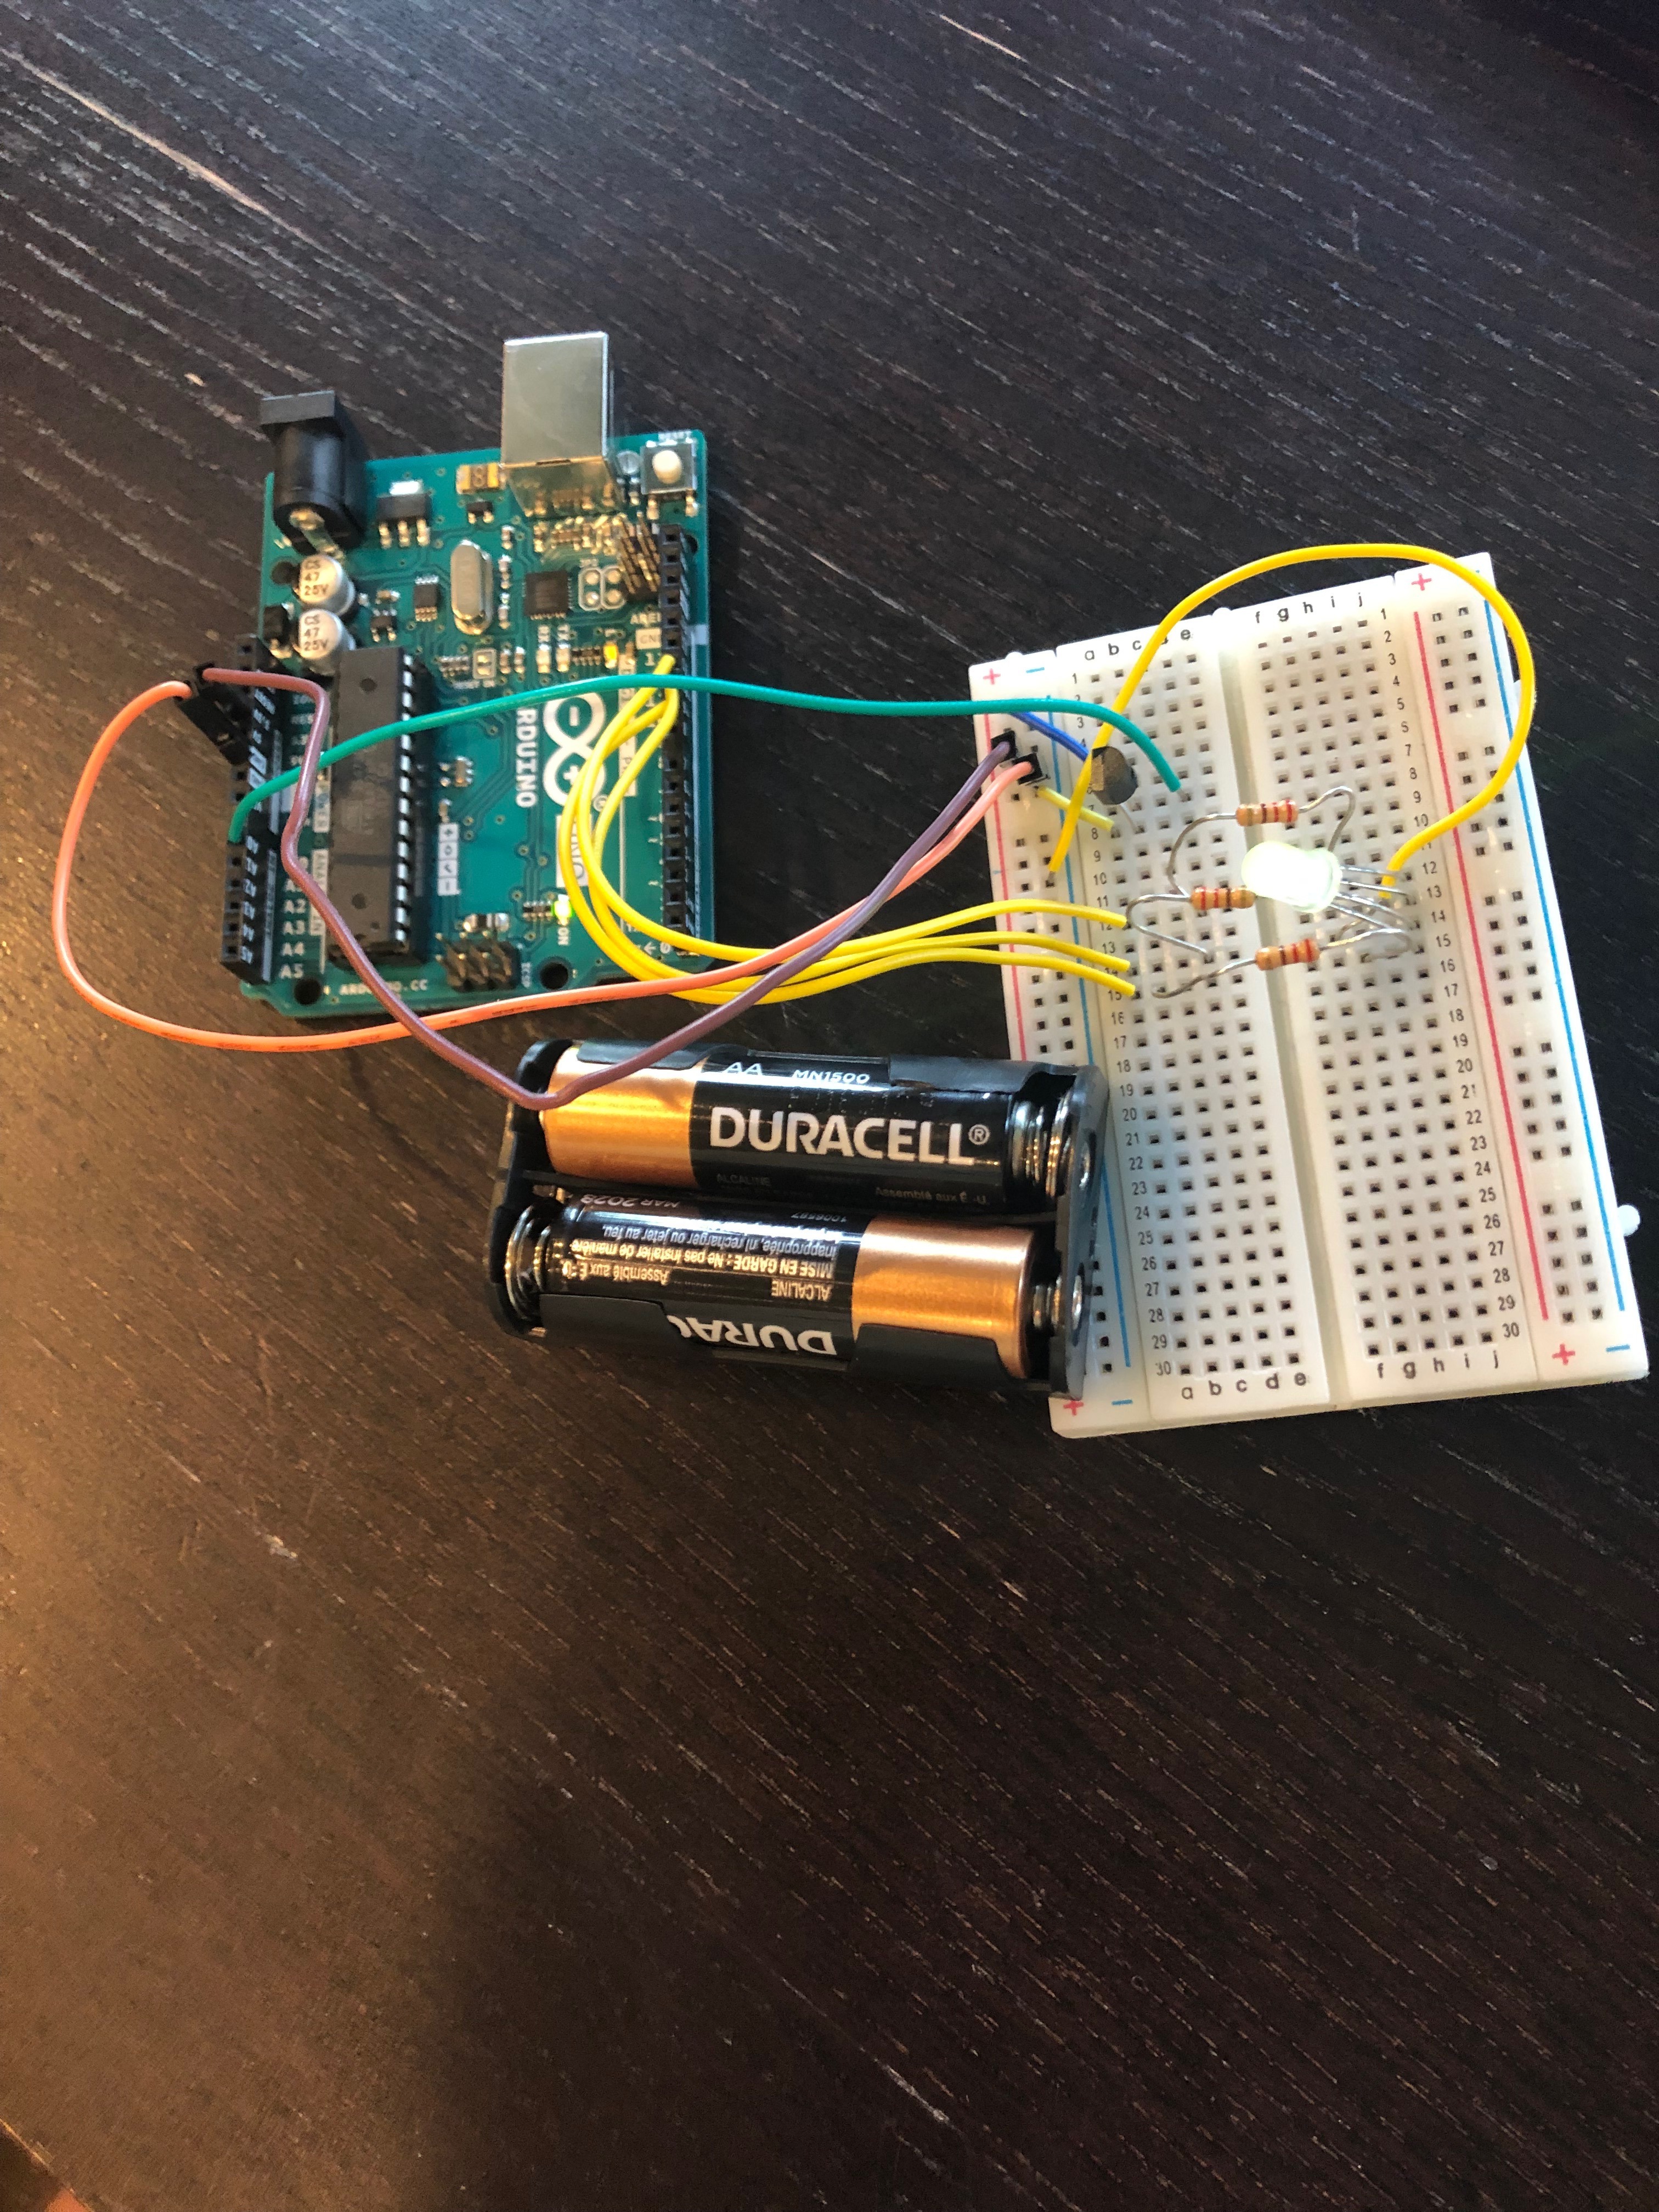
After the code has been uploaded, carefully unplug the cable and connect the battery pack to any available negative and positive slots. Make sure that the positive facing battery is connected to a positive slot and the negative facing battery is connected to a negative slot.
Put It in the Box
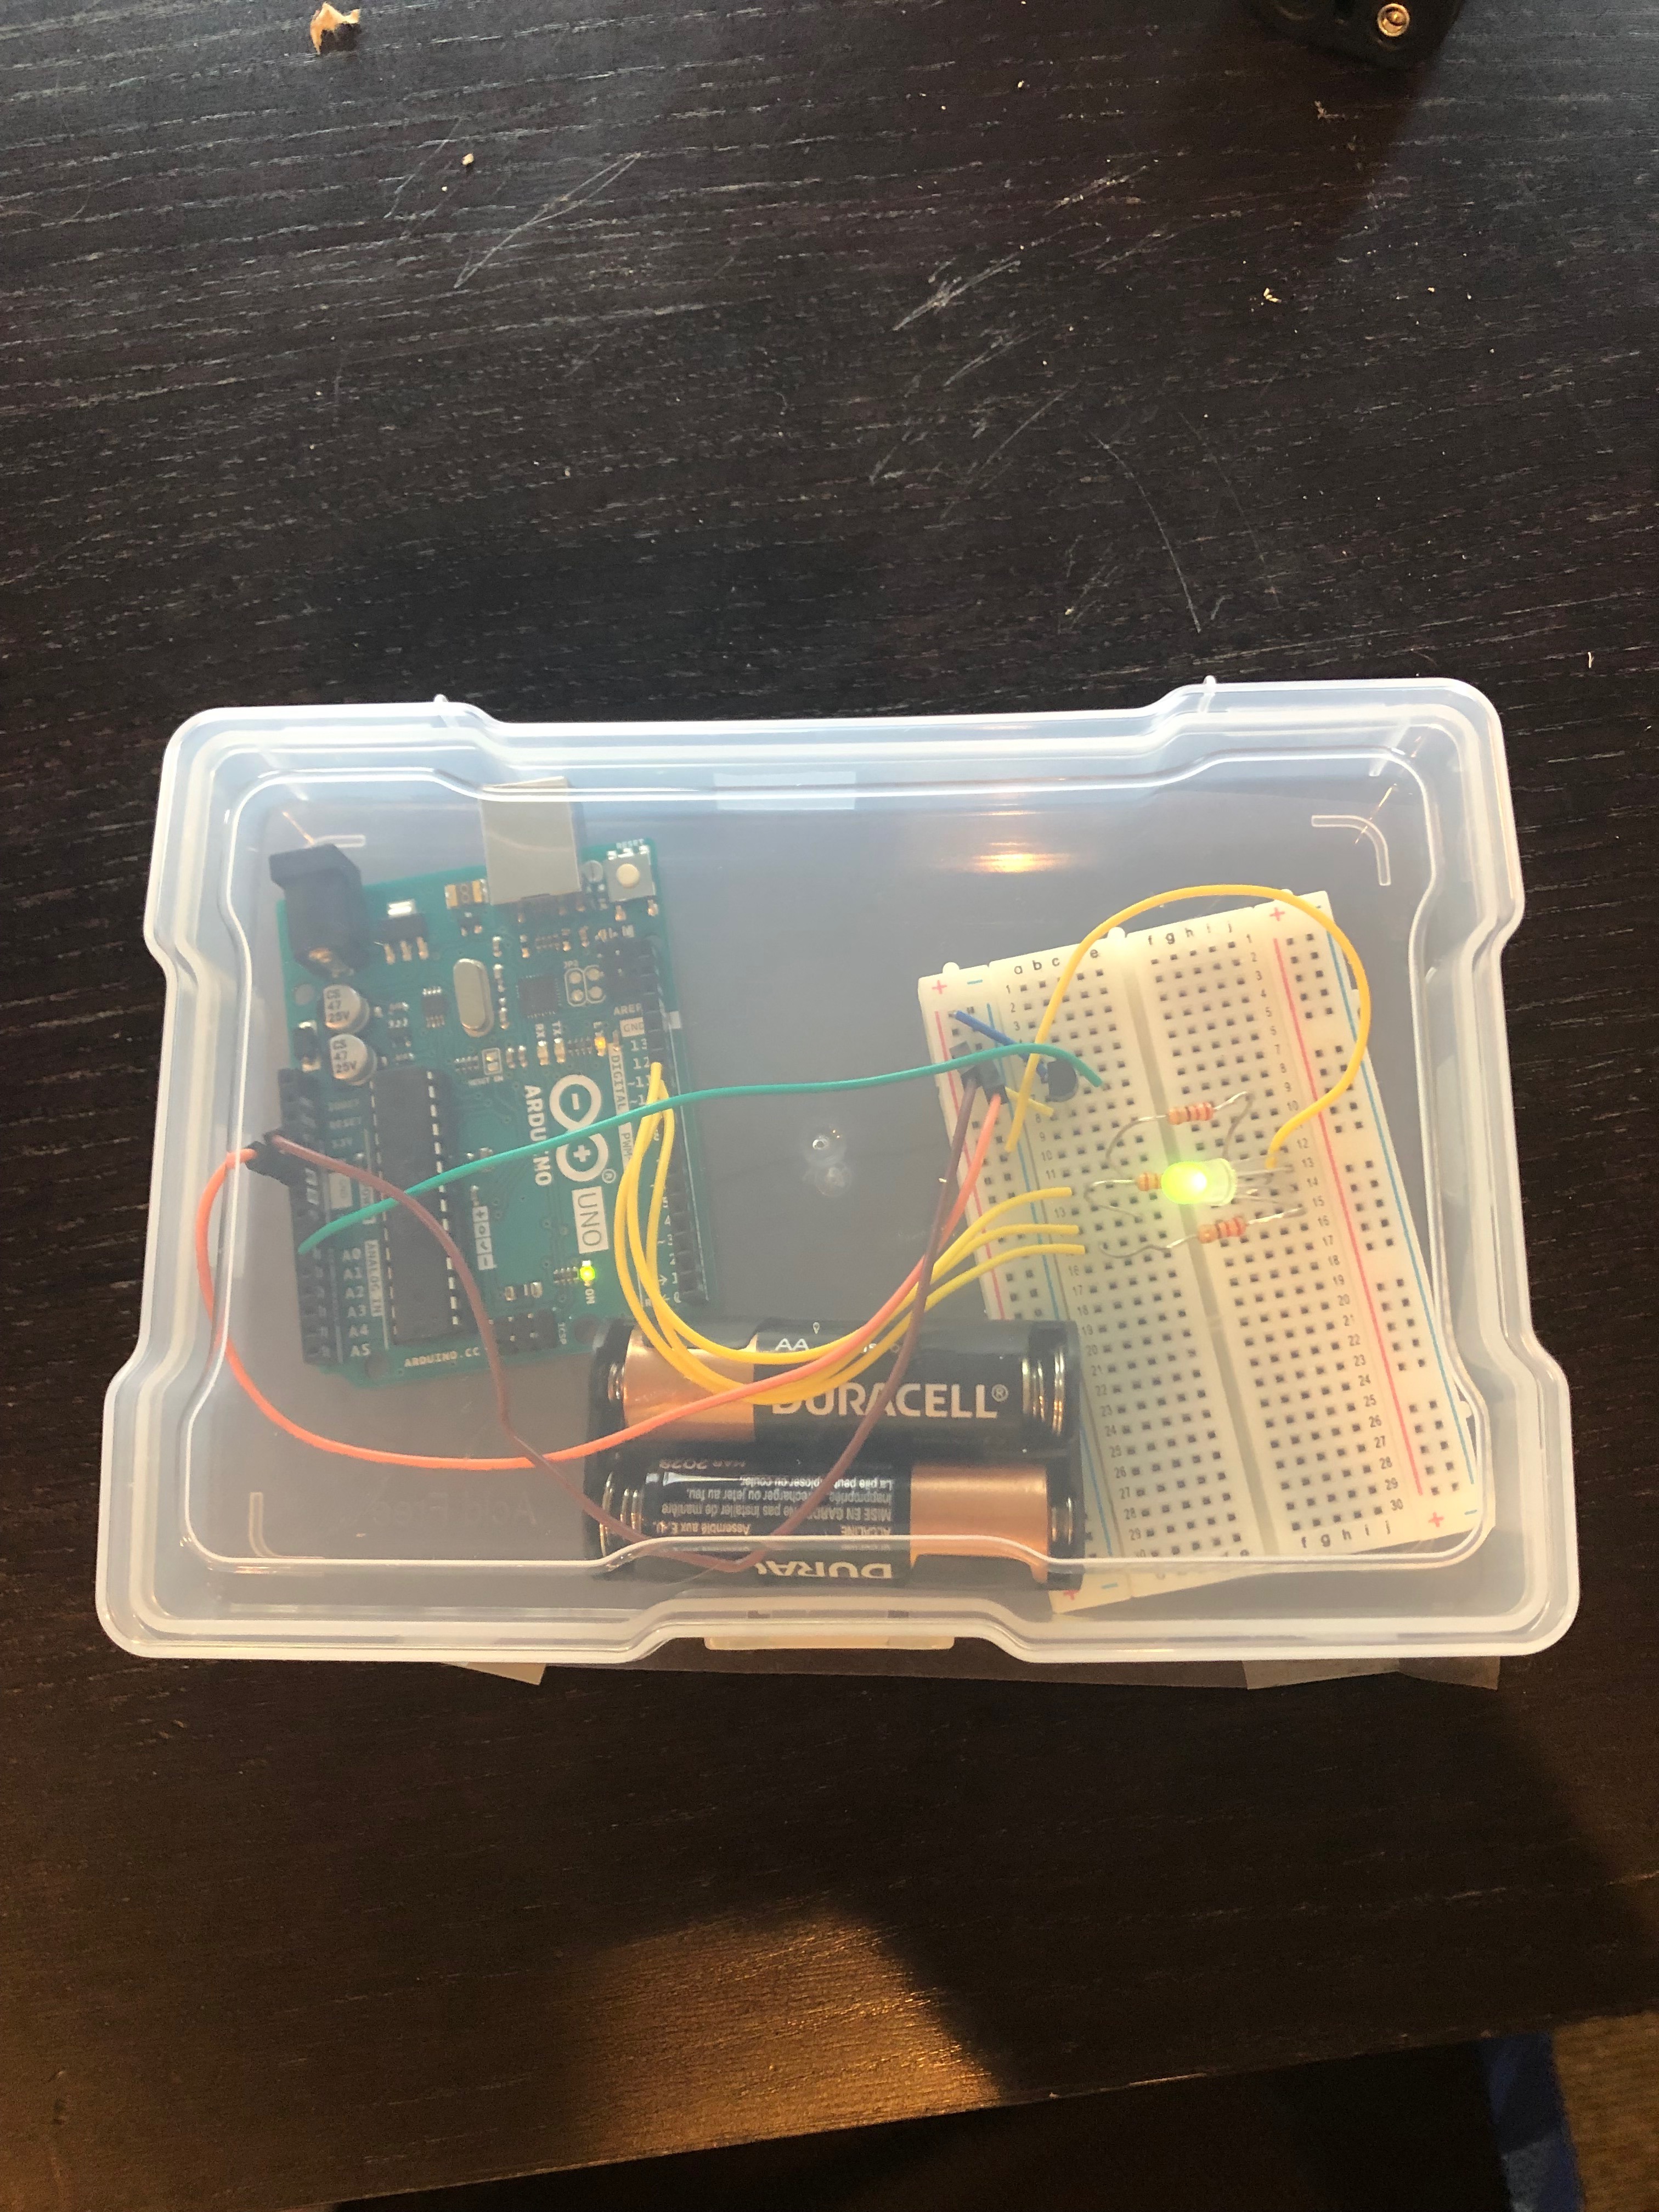
Once the battery pack is attached, open up the clear box, place the project in, and close the box.
(Optional)
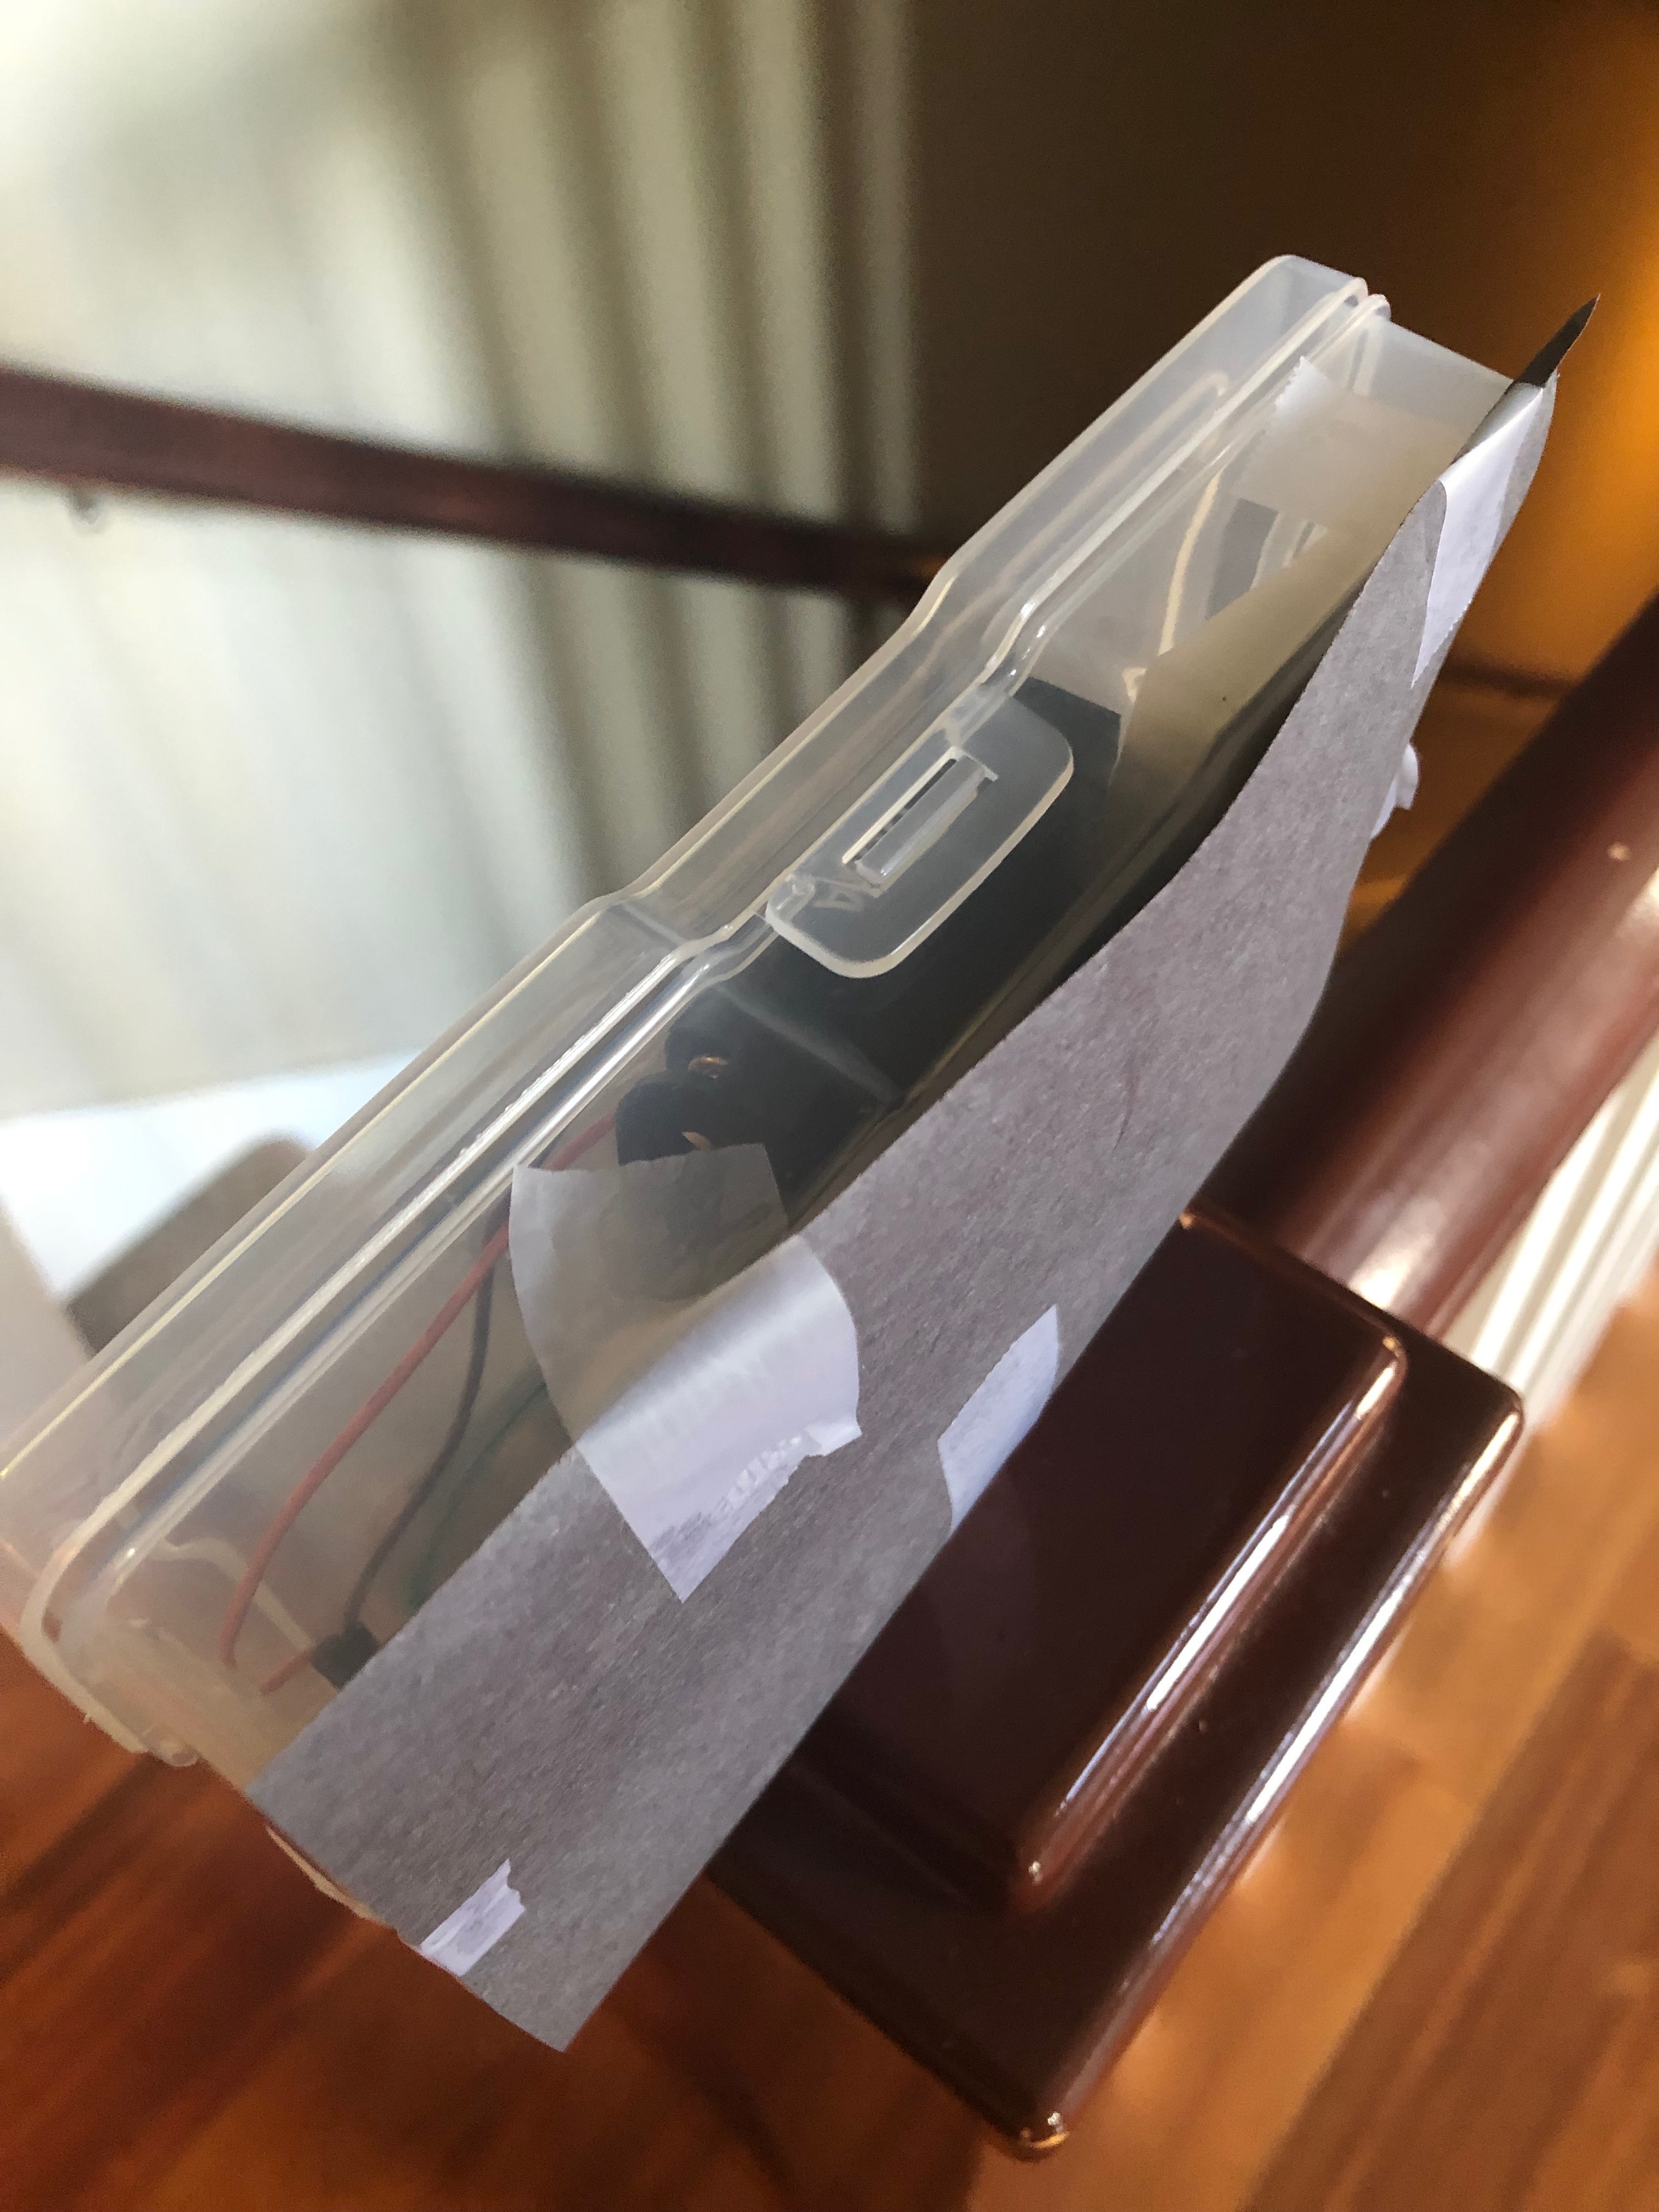
If you are having a hard time seeing the color of your box, you can add black construction paper to the back of the box. This will allow the color to contrast against a dark surface.