Visual Representation of the Snowy Day by Ezra Jack Keats With Makey Makey
by cohenros in Craft > Books & Journals
1404 Views, 5 Favorites, 0 Comments
Visual Representation of the Snowy Day by Ezra Jack Keats With Makey Makey
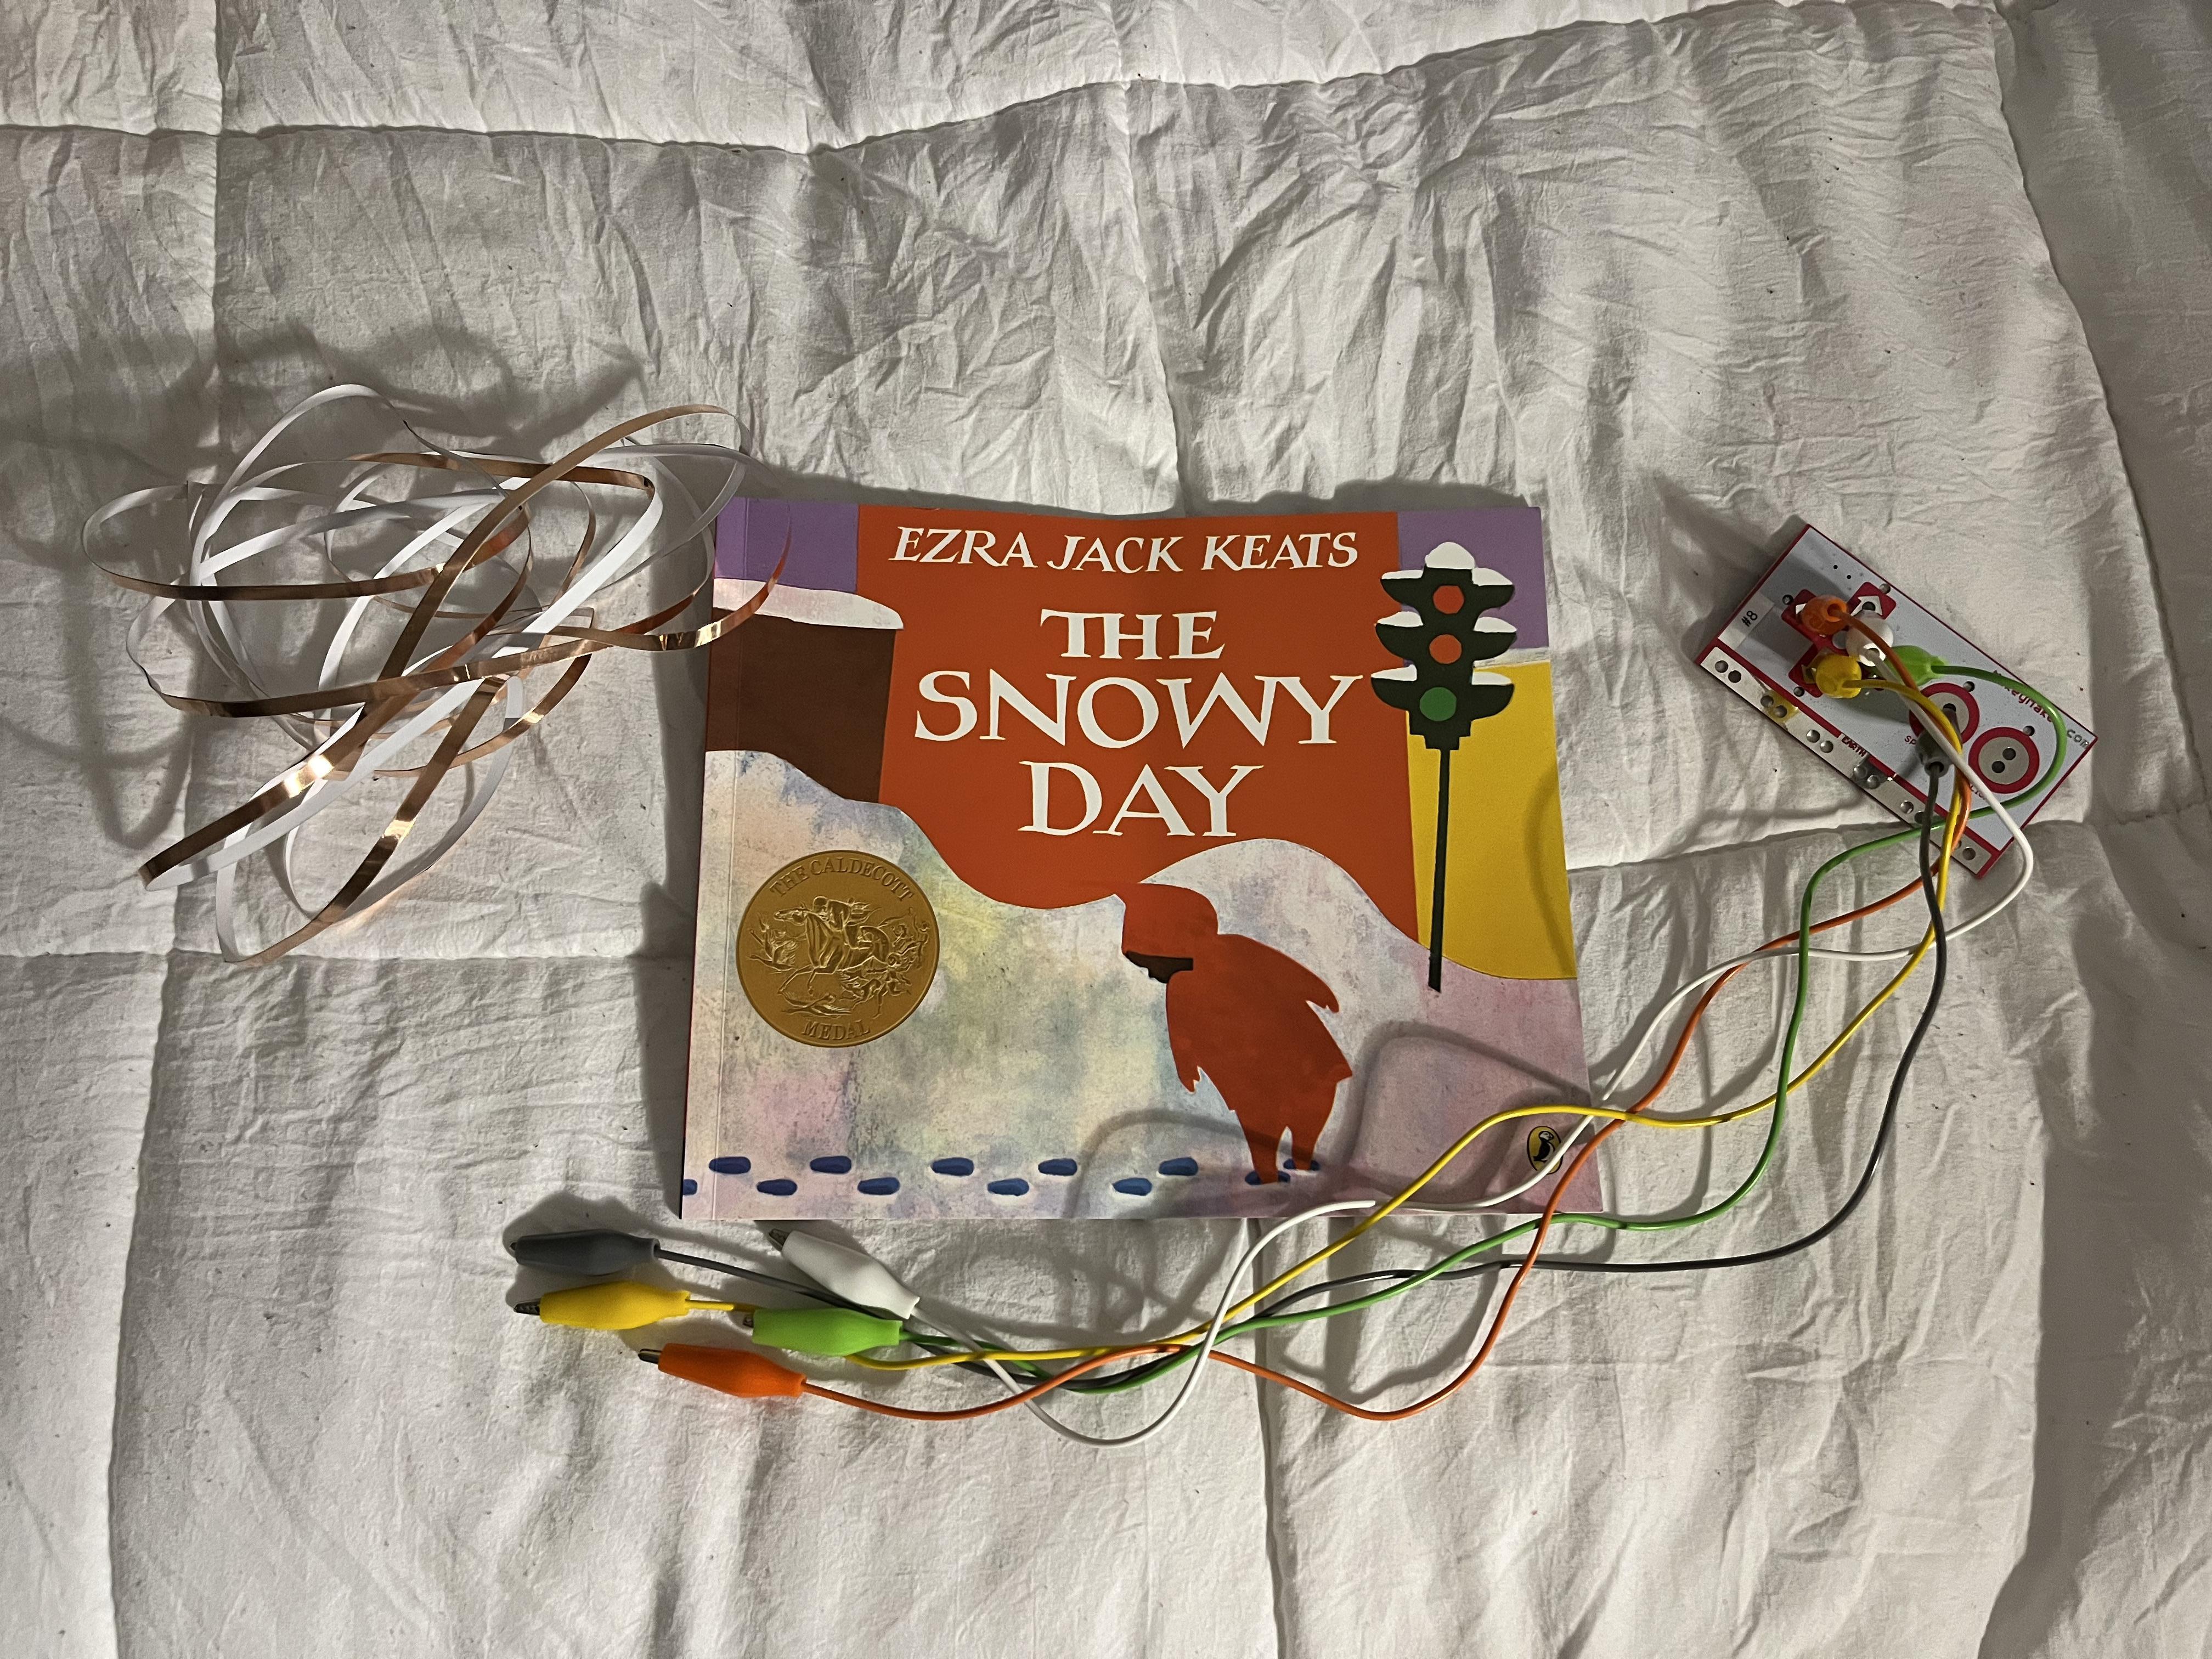
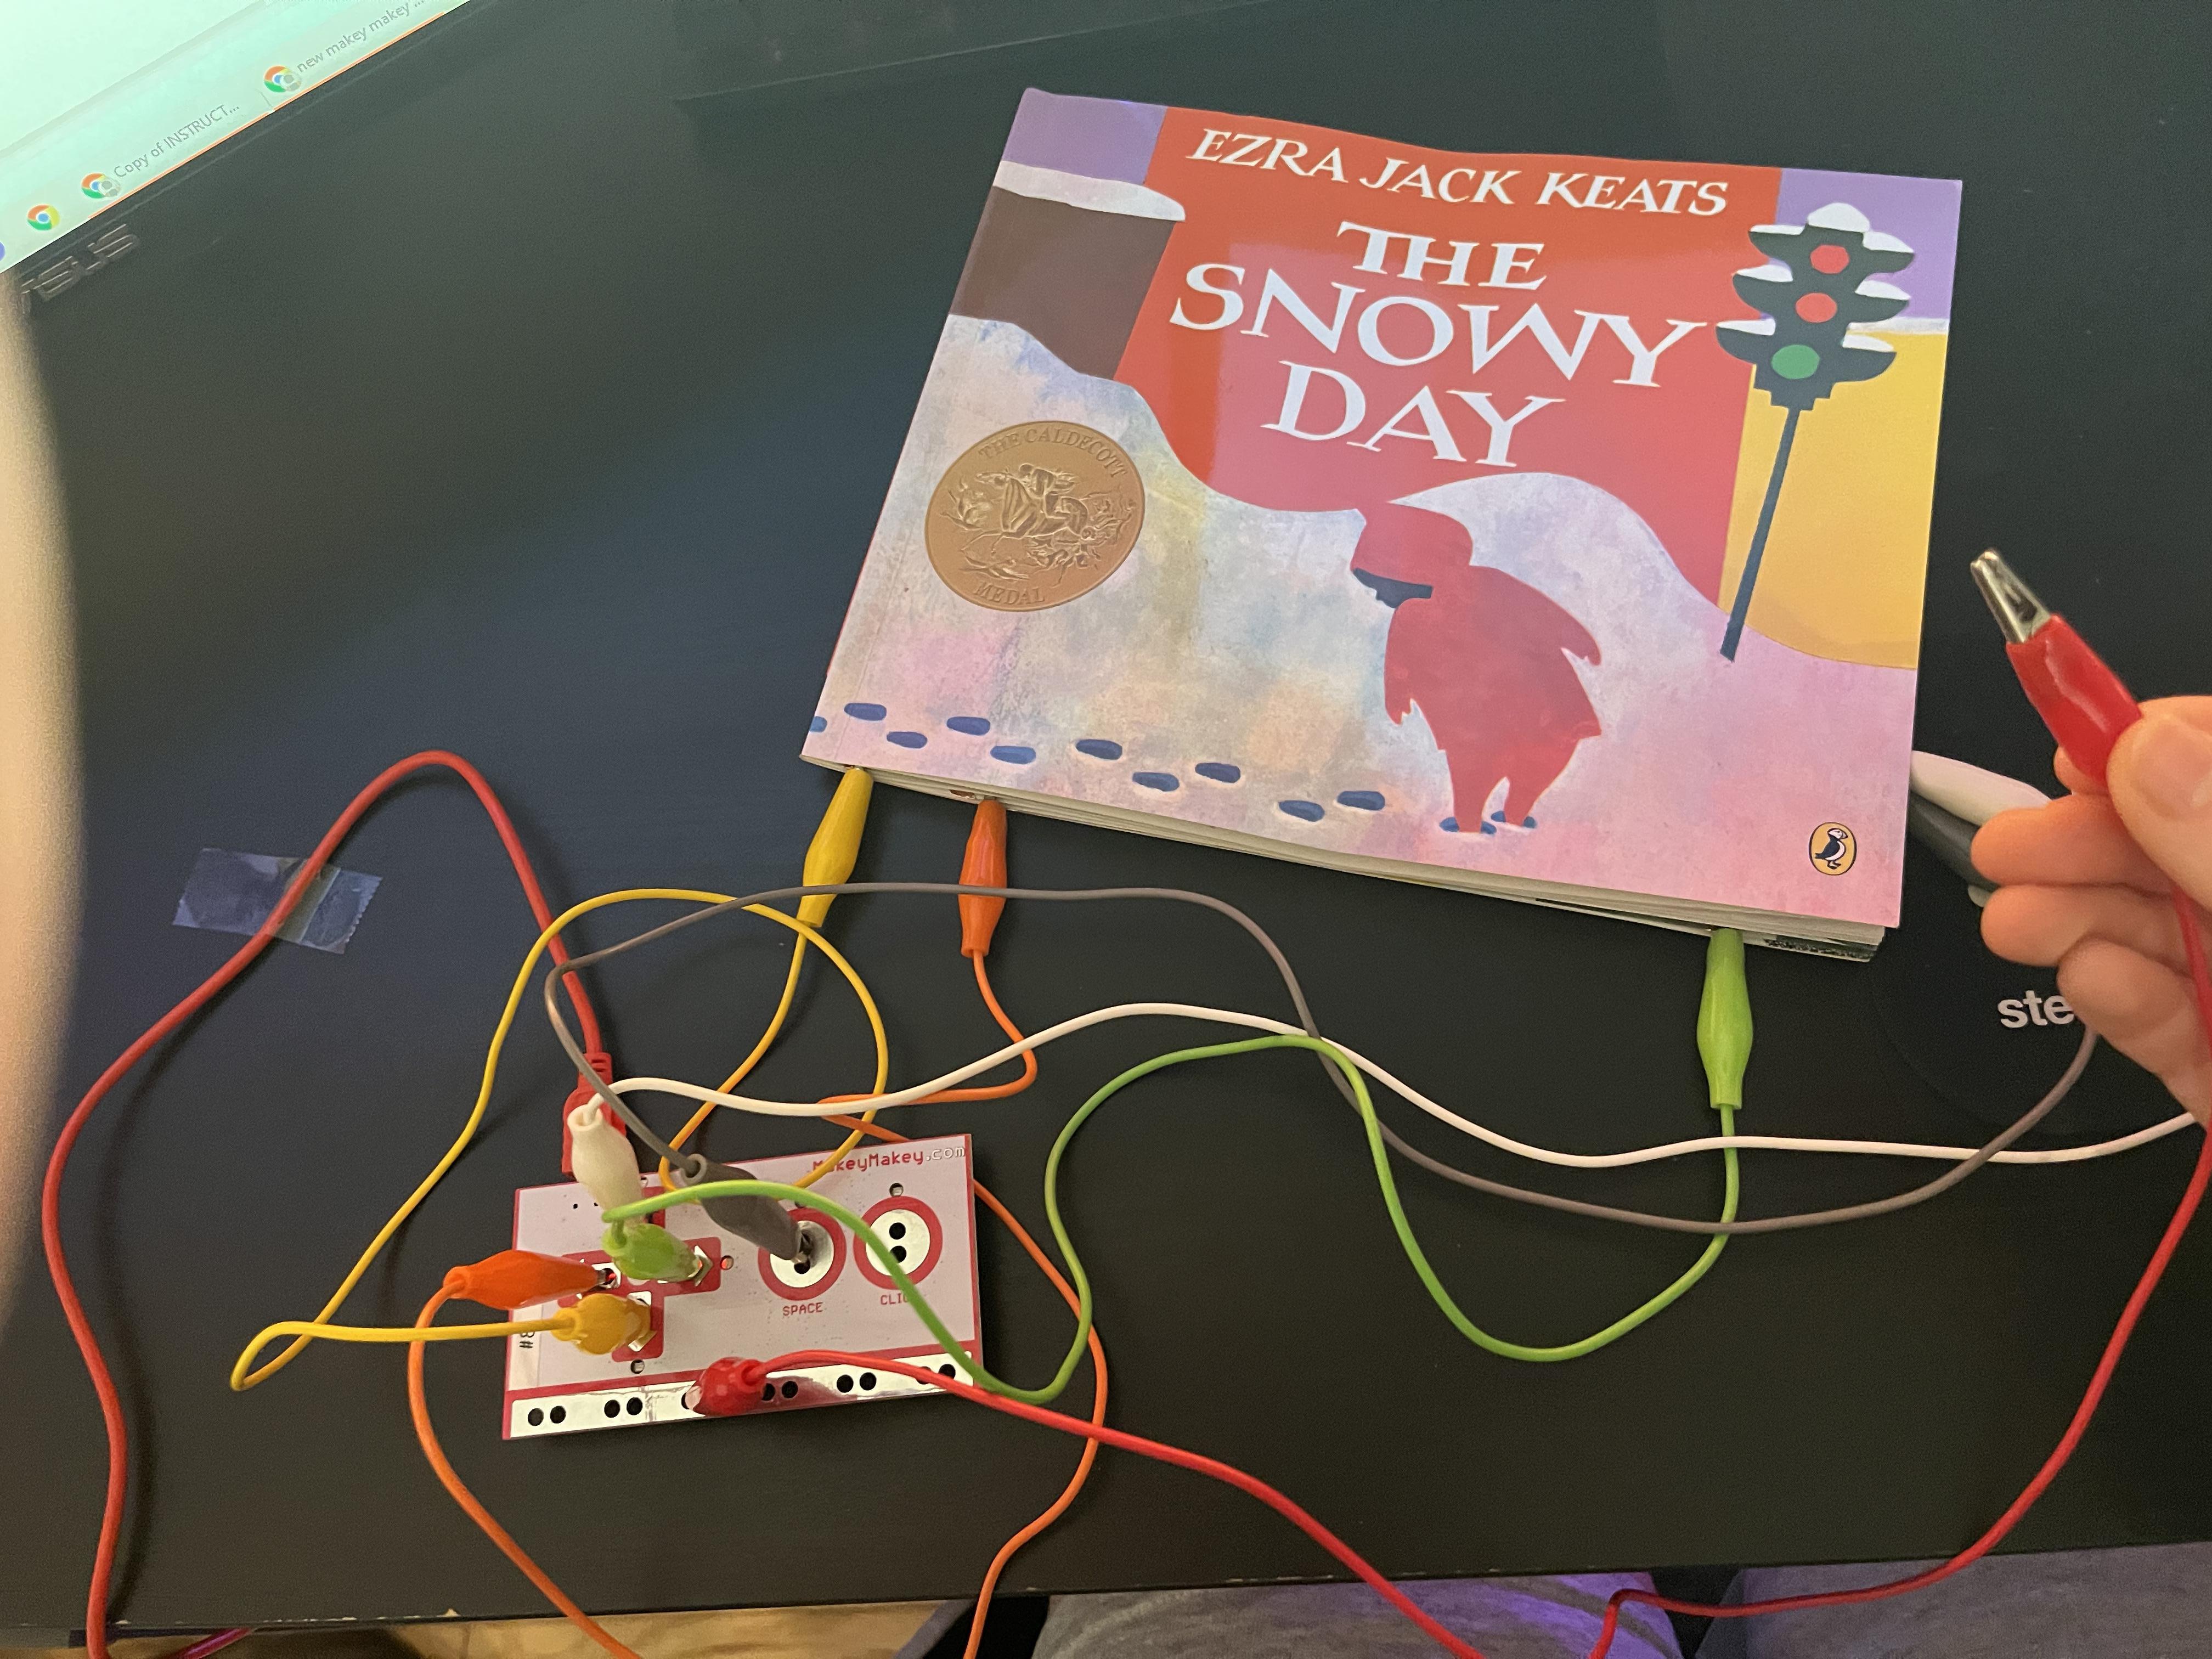
As silly as it may sound, reading takes more energy than we think. The brain exerts more than twenty percent of its energy to just read. You would think it would be a simple and relaxing activity, right? What makes reading difficult is interpreting the words and creating a story/movie in our minds as we progress throughout the novel. For example, those with autism (high on the spectrum) and/or mainly children have trouble comprehending the book they are reading because usually there aren’t any visuals or the visuals are stagnant. What if there was a book that displayed the story as you read it? This way, the person can be engaged, excited to read, and can actually understand the story. Well, that’s exactly what I did. I used the book The Snowy Day by Ezra Jack Keats and underlined certain nouns and verbs with copper tape. When you press on the copper tape while holding the ground/make a circuit, you’ll see a representation of that word or sentence on the Scratch program. I think this project along with encouraging reading can help people create ways to enhance everyday experiences for an autistic person or those who struggle with reading comprehension.
Supplies
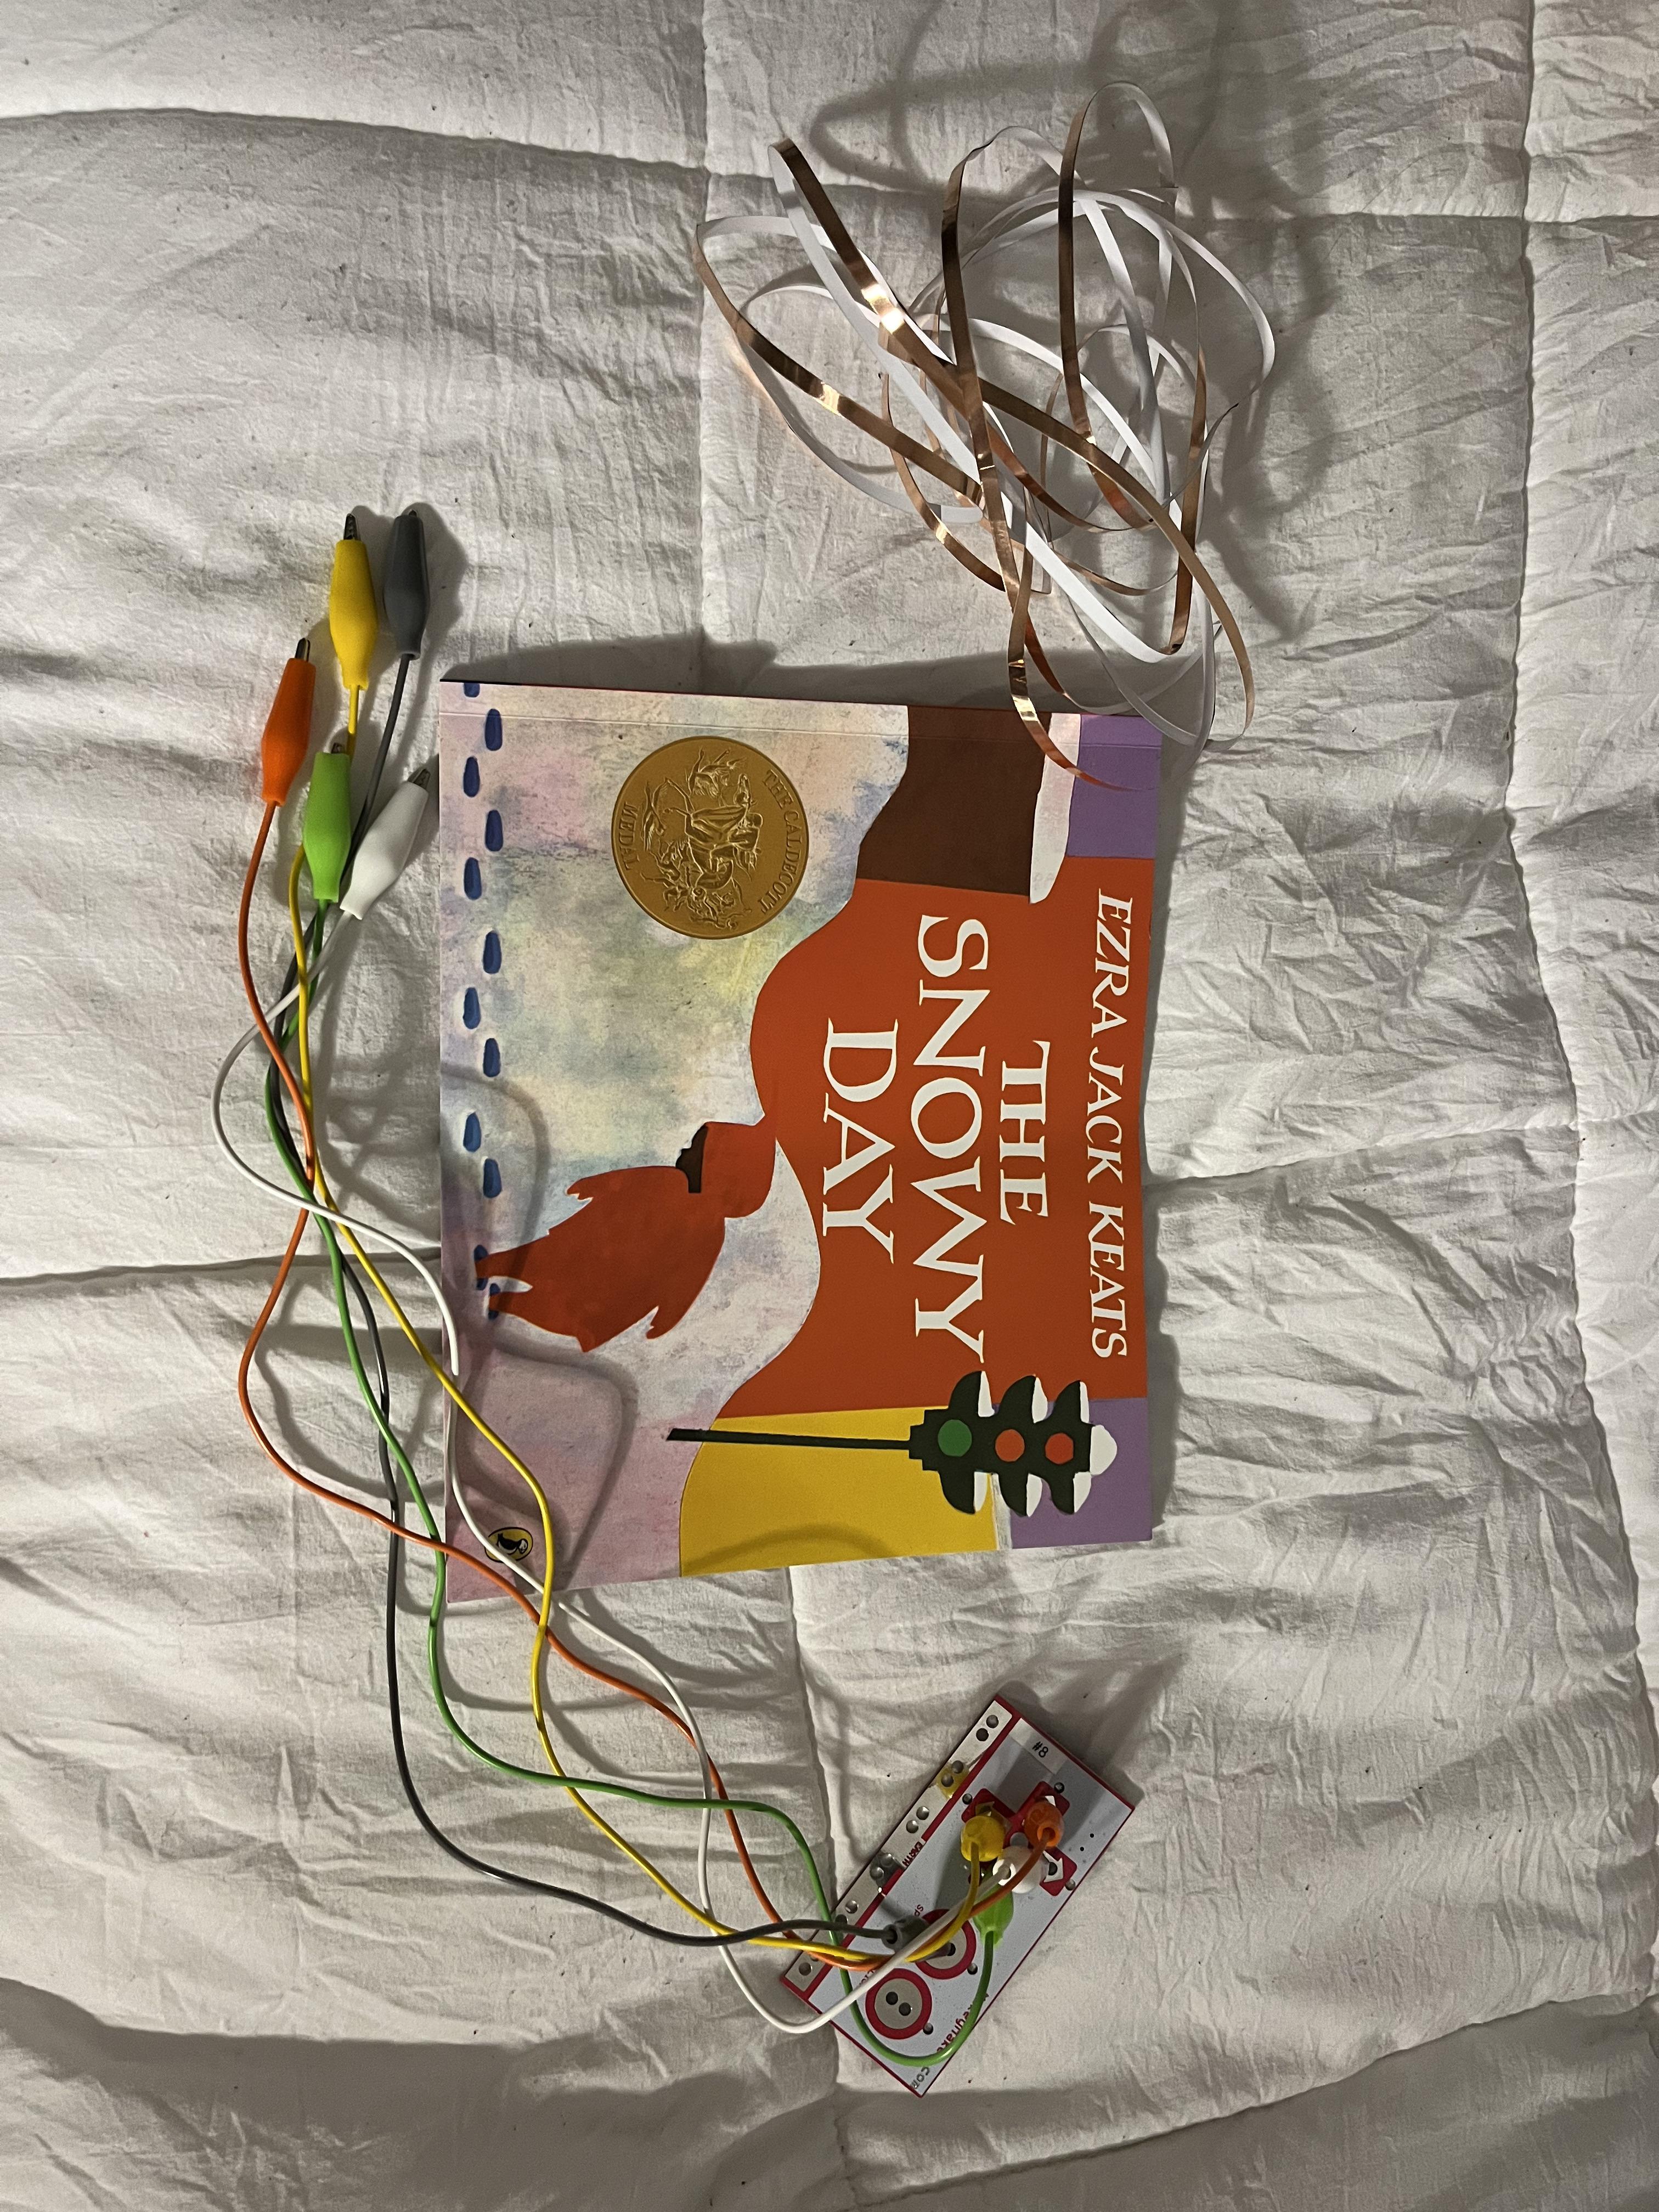
- Copper tape
- Scissors
- Makey Makey kit
- Alligator clips
- Chromebook or computer
- Scratch program
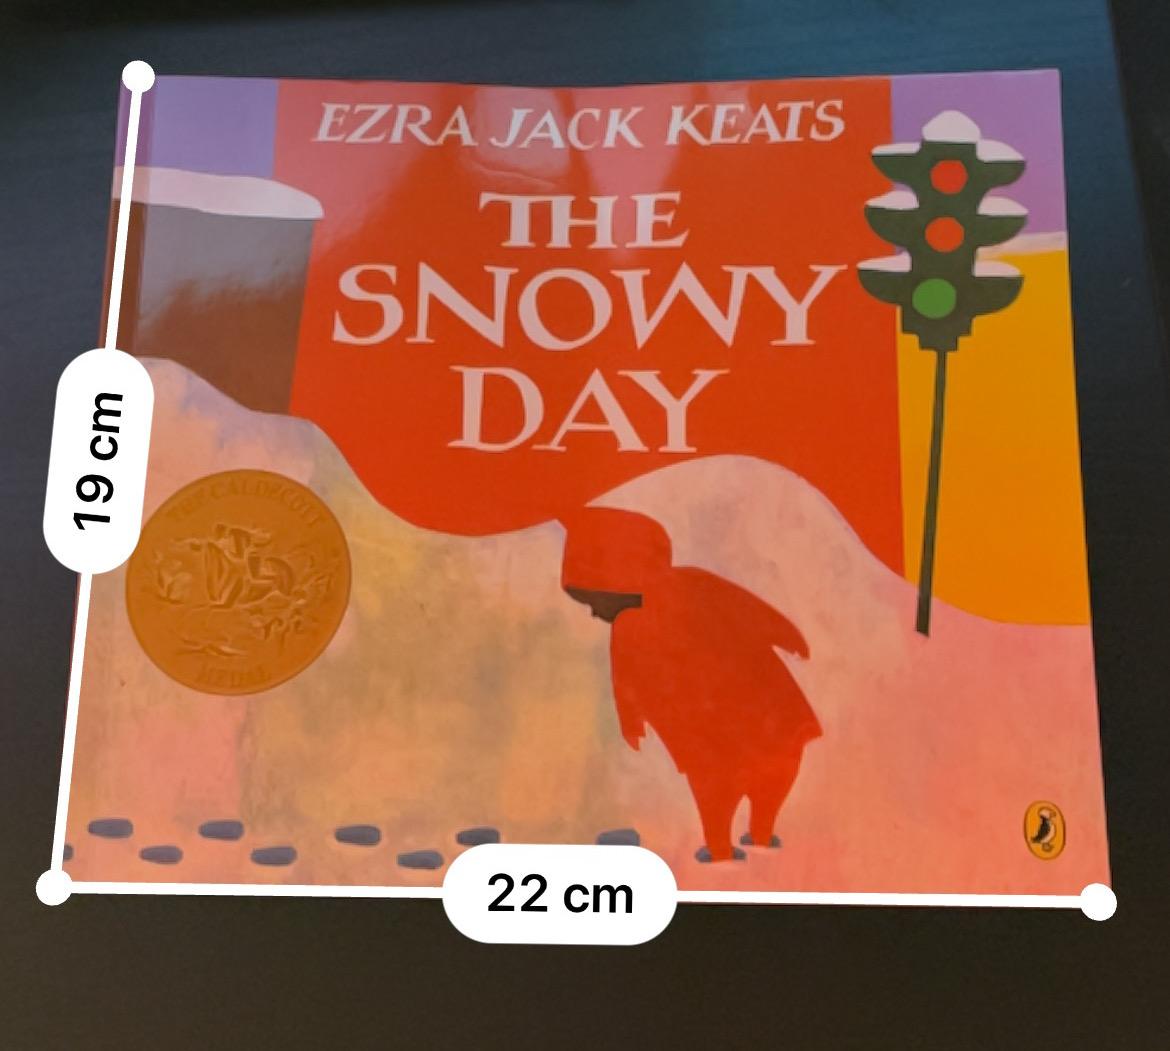
The Snowy Day book by Ezra Jack Keats (18cm x 22cm model) (https://www.amazon.com/Snowy-Day-Ezra-Jack-Keats/dp/0140501827/ref=sr_1_2?keywords=the+snowy+day&qid=1642952938&sprefix=the+snow%2Caps%2C70&sr=8-2)
Building the Project
.jpg)
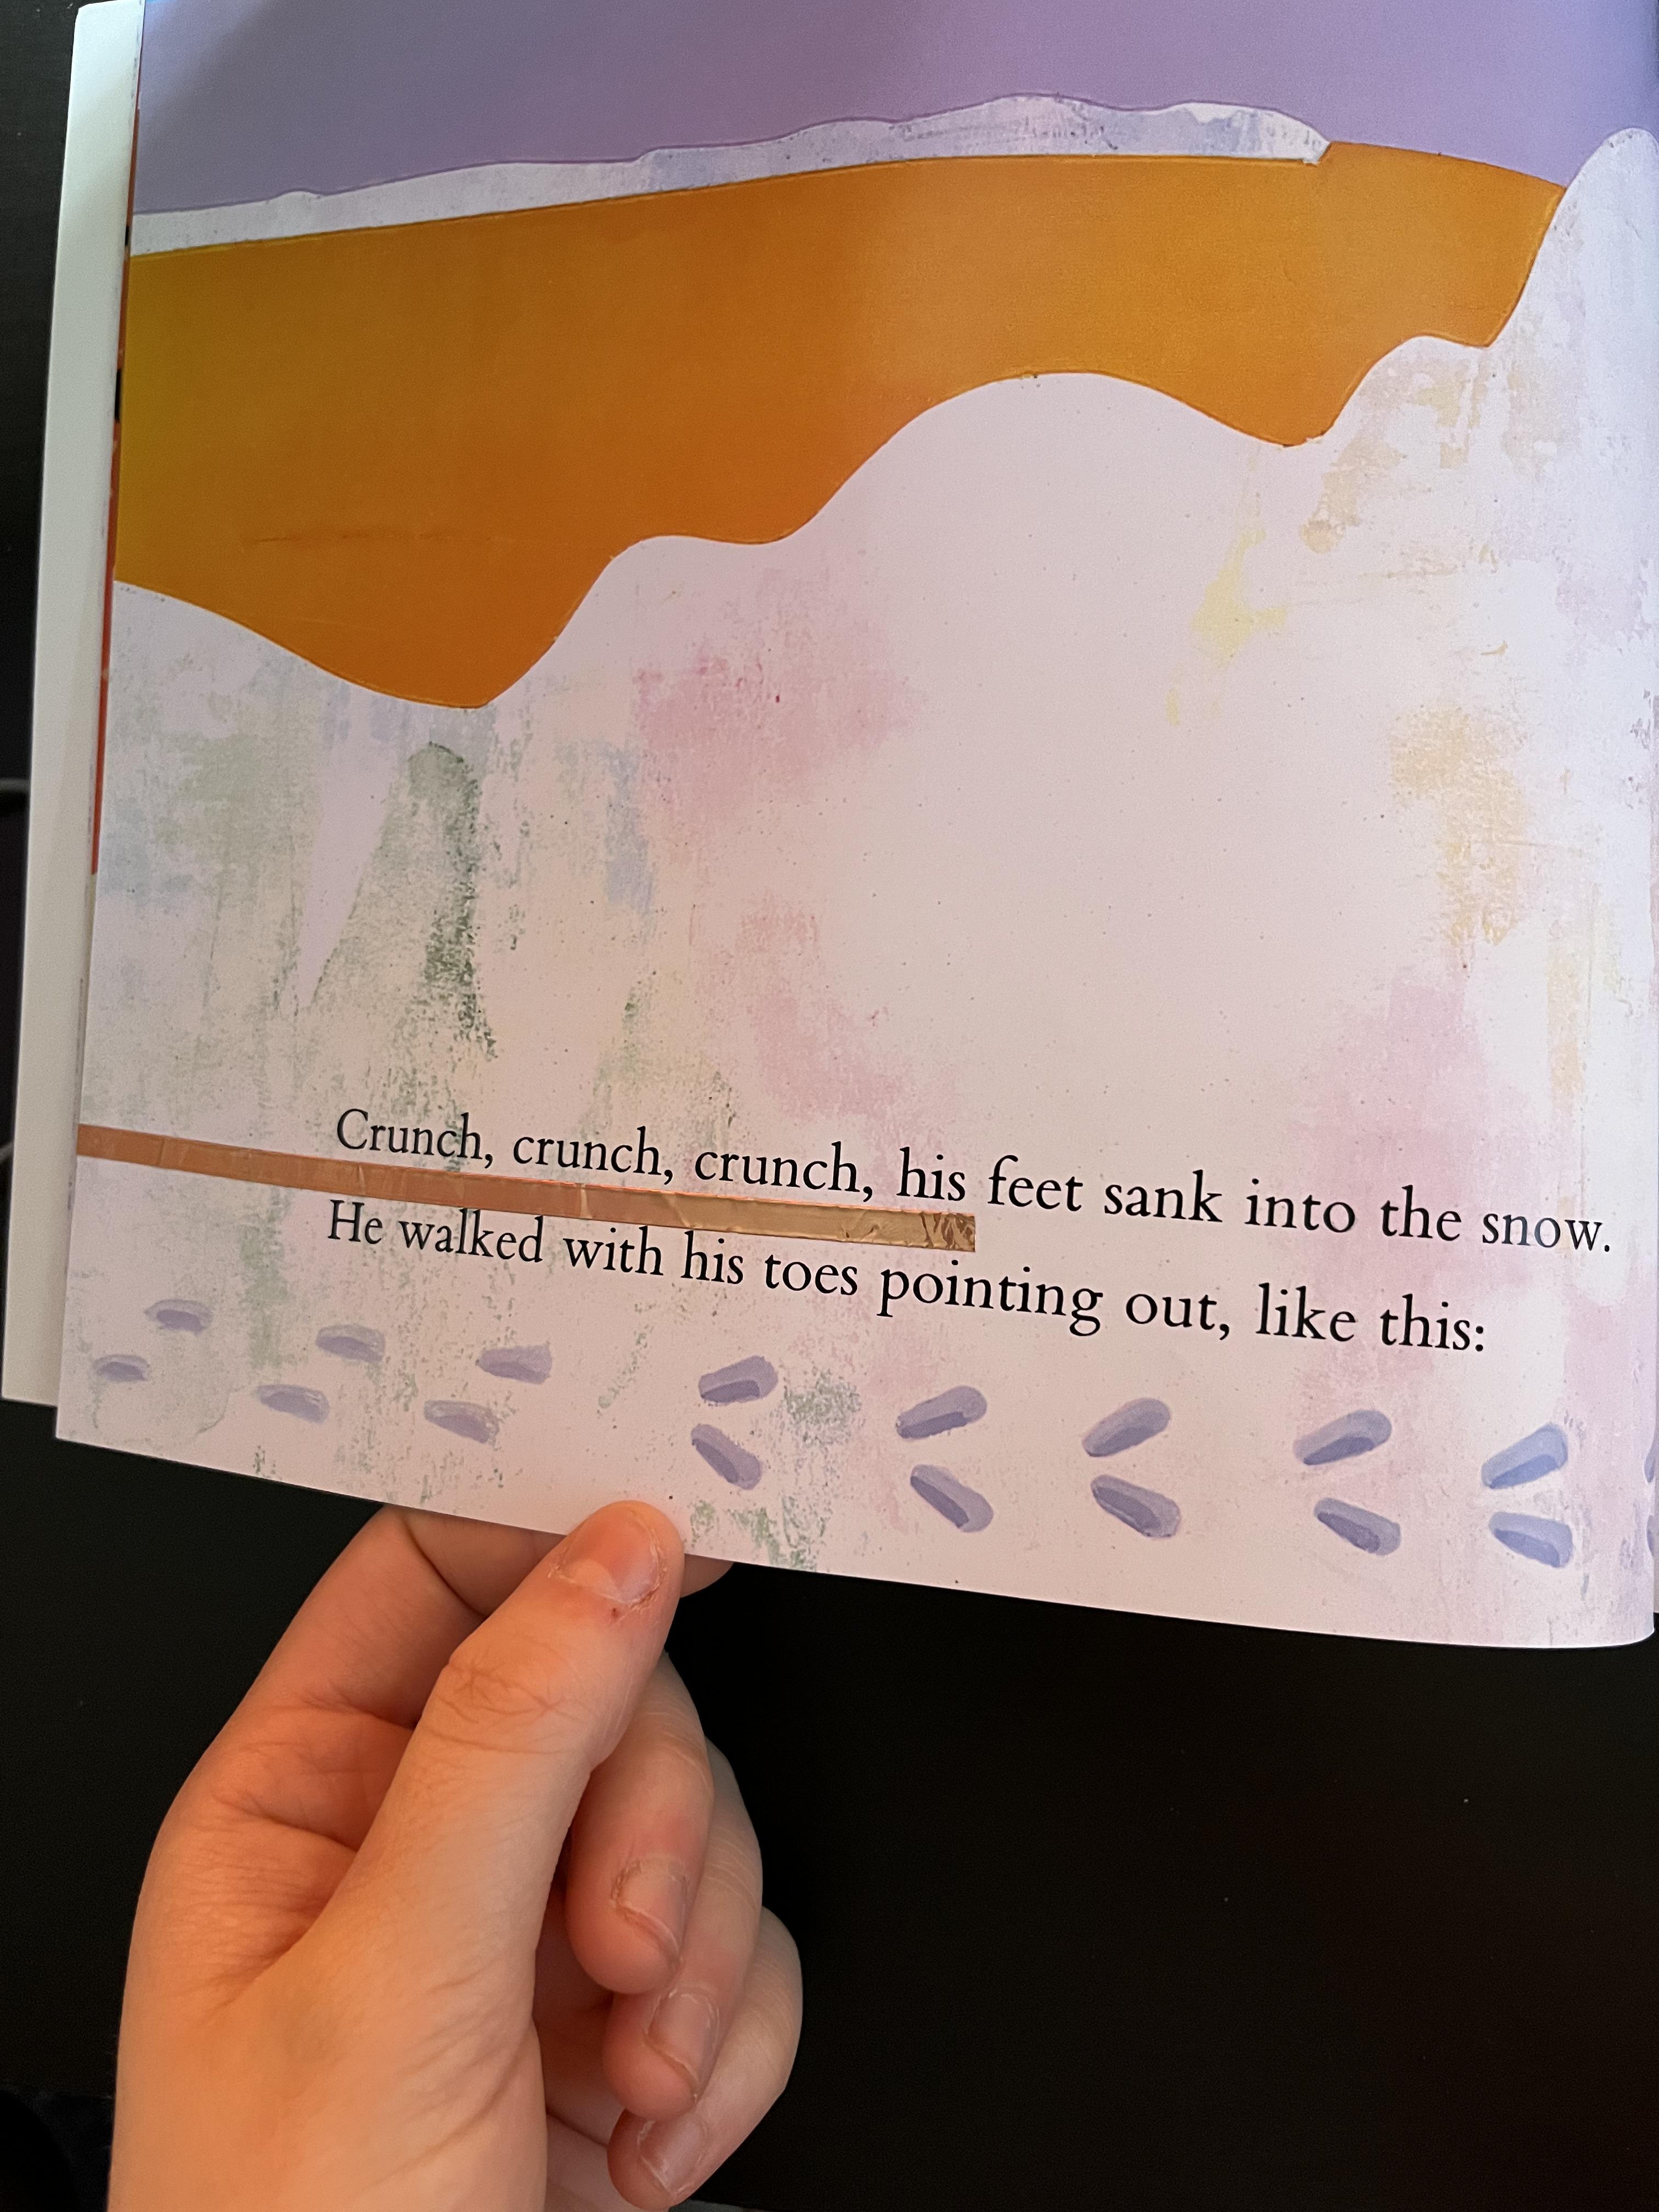
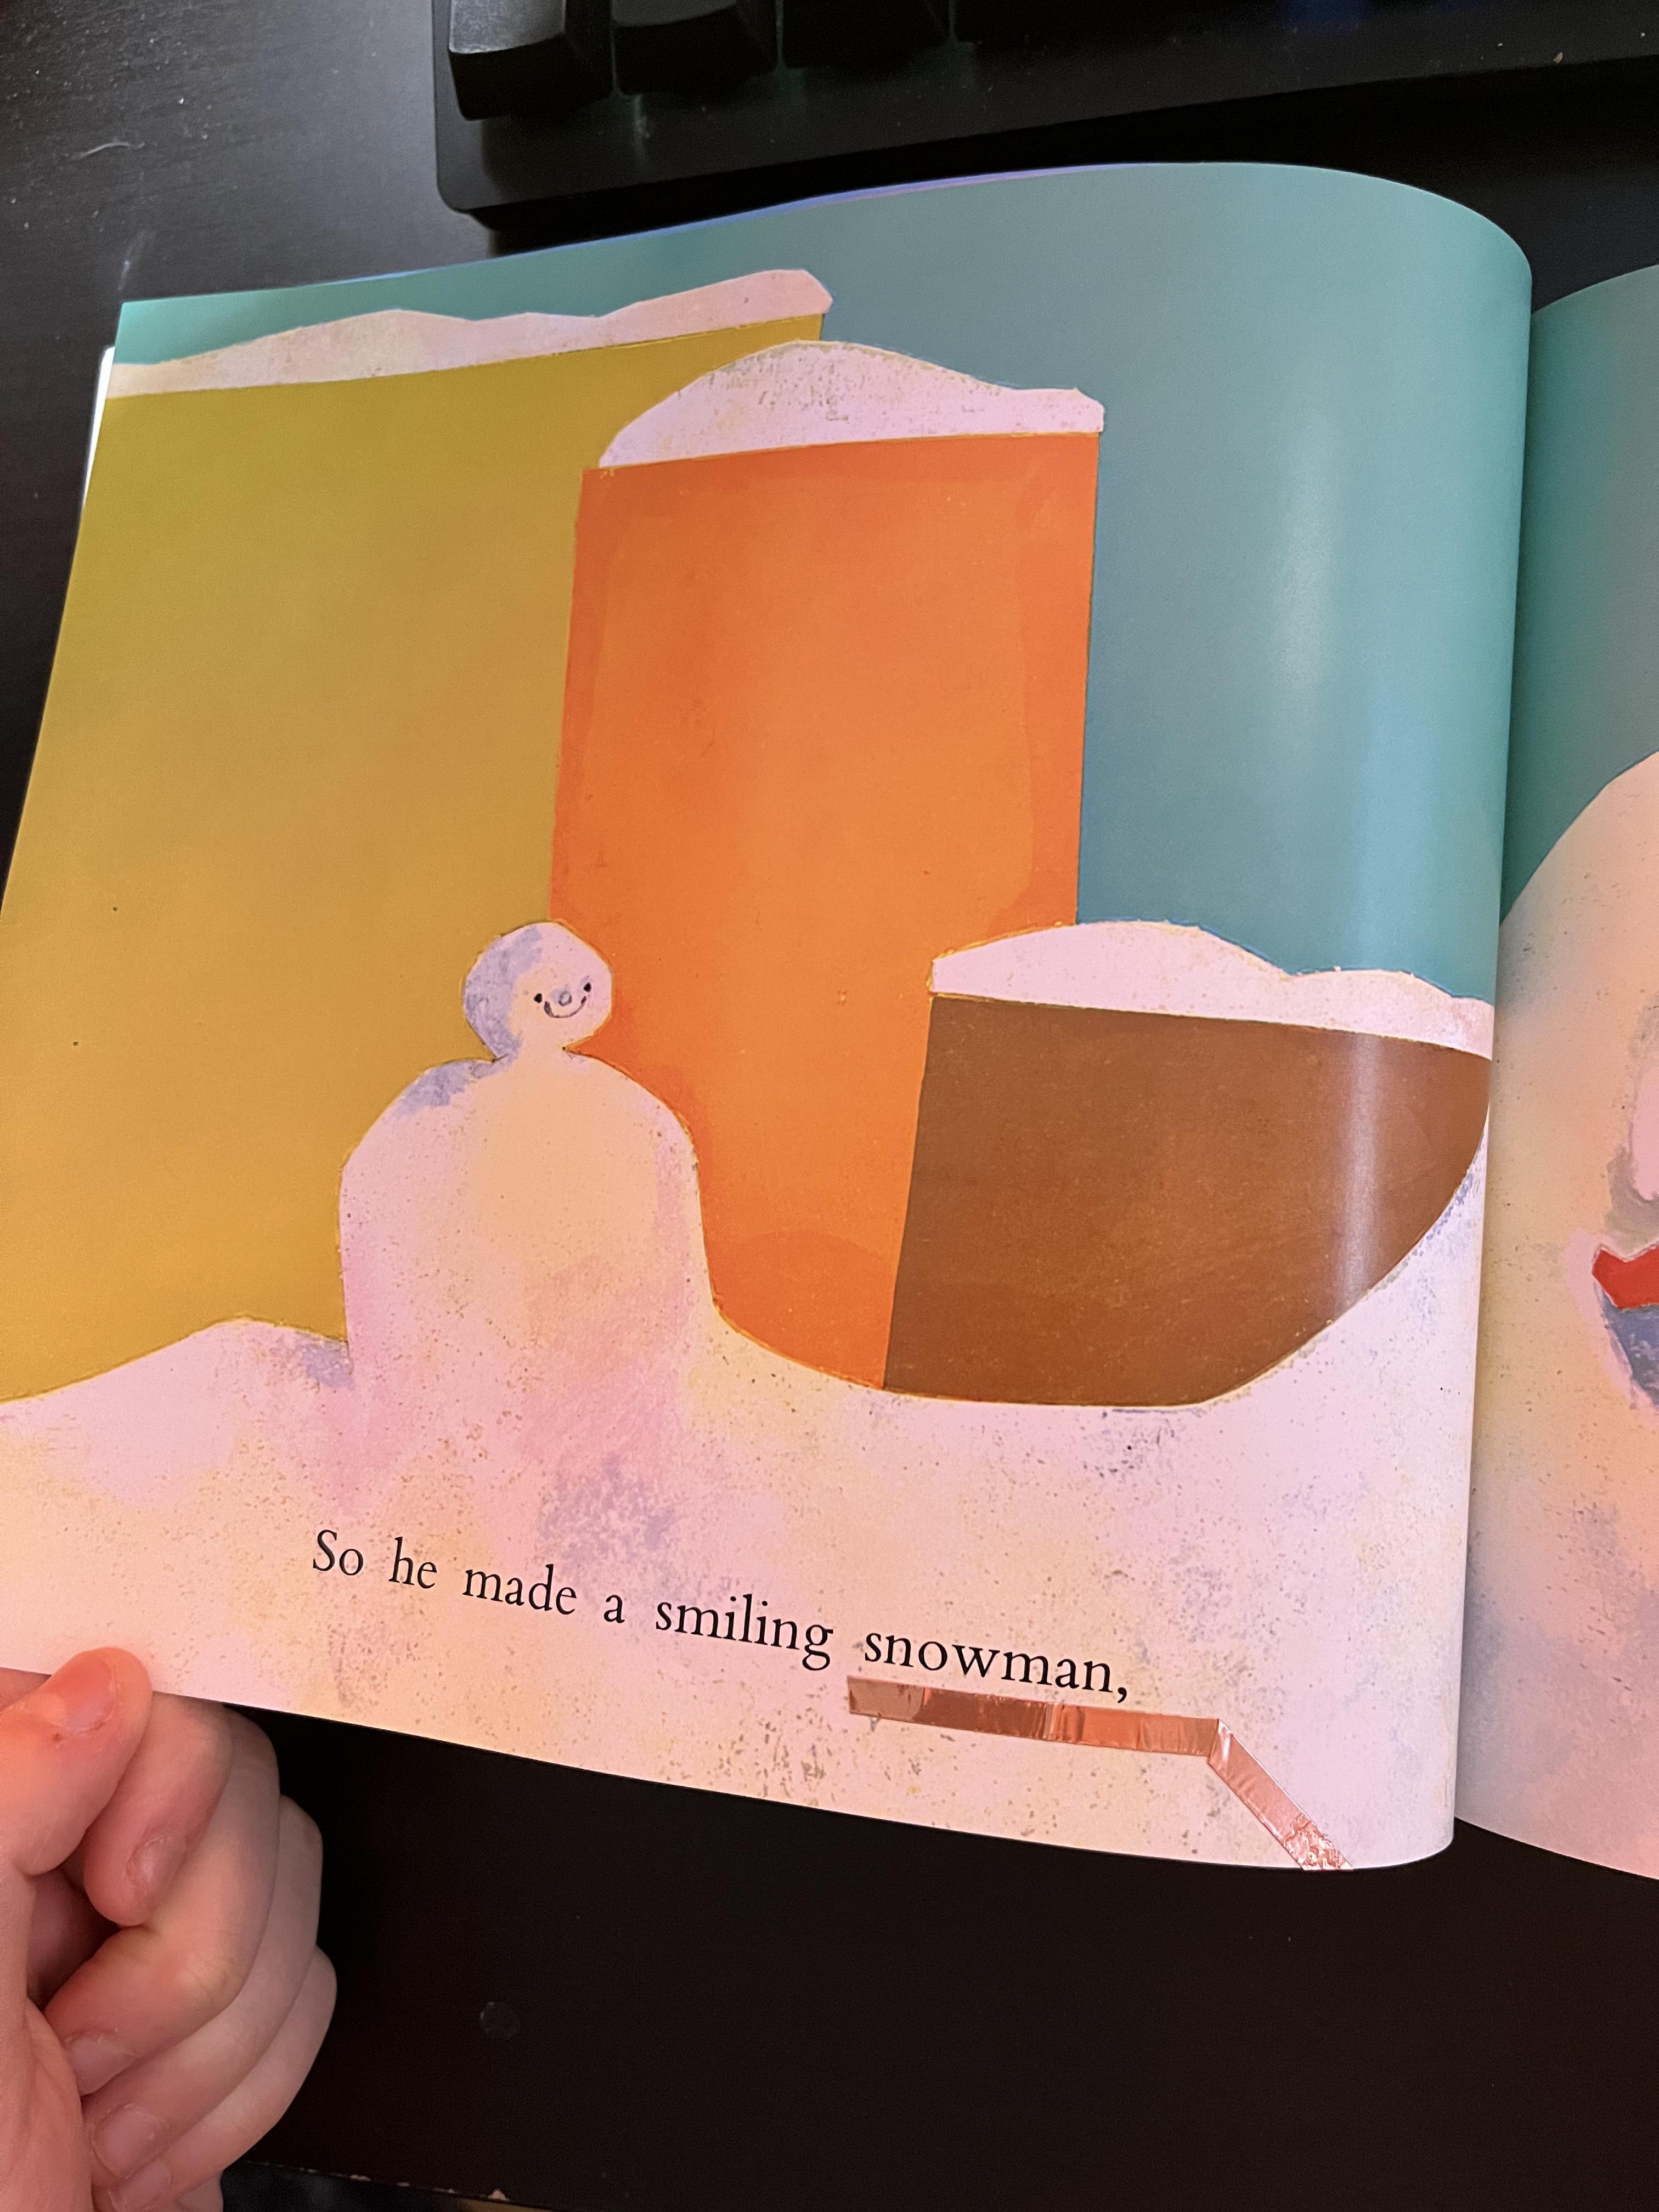
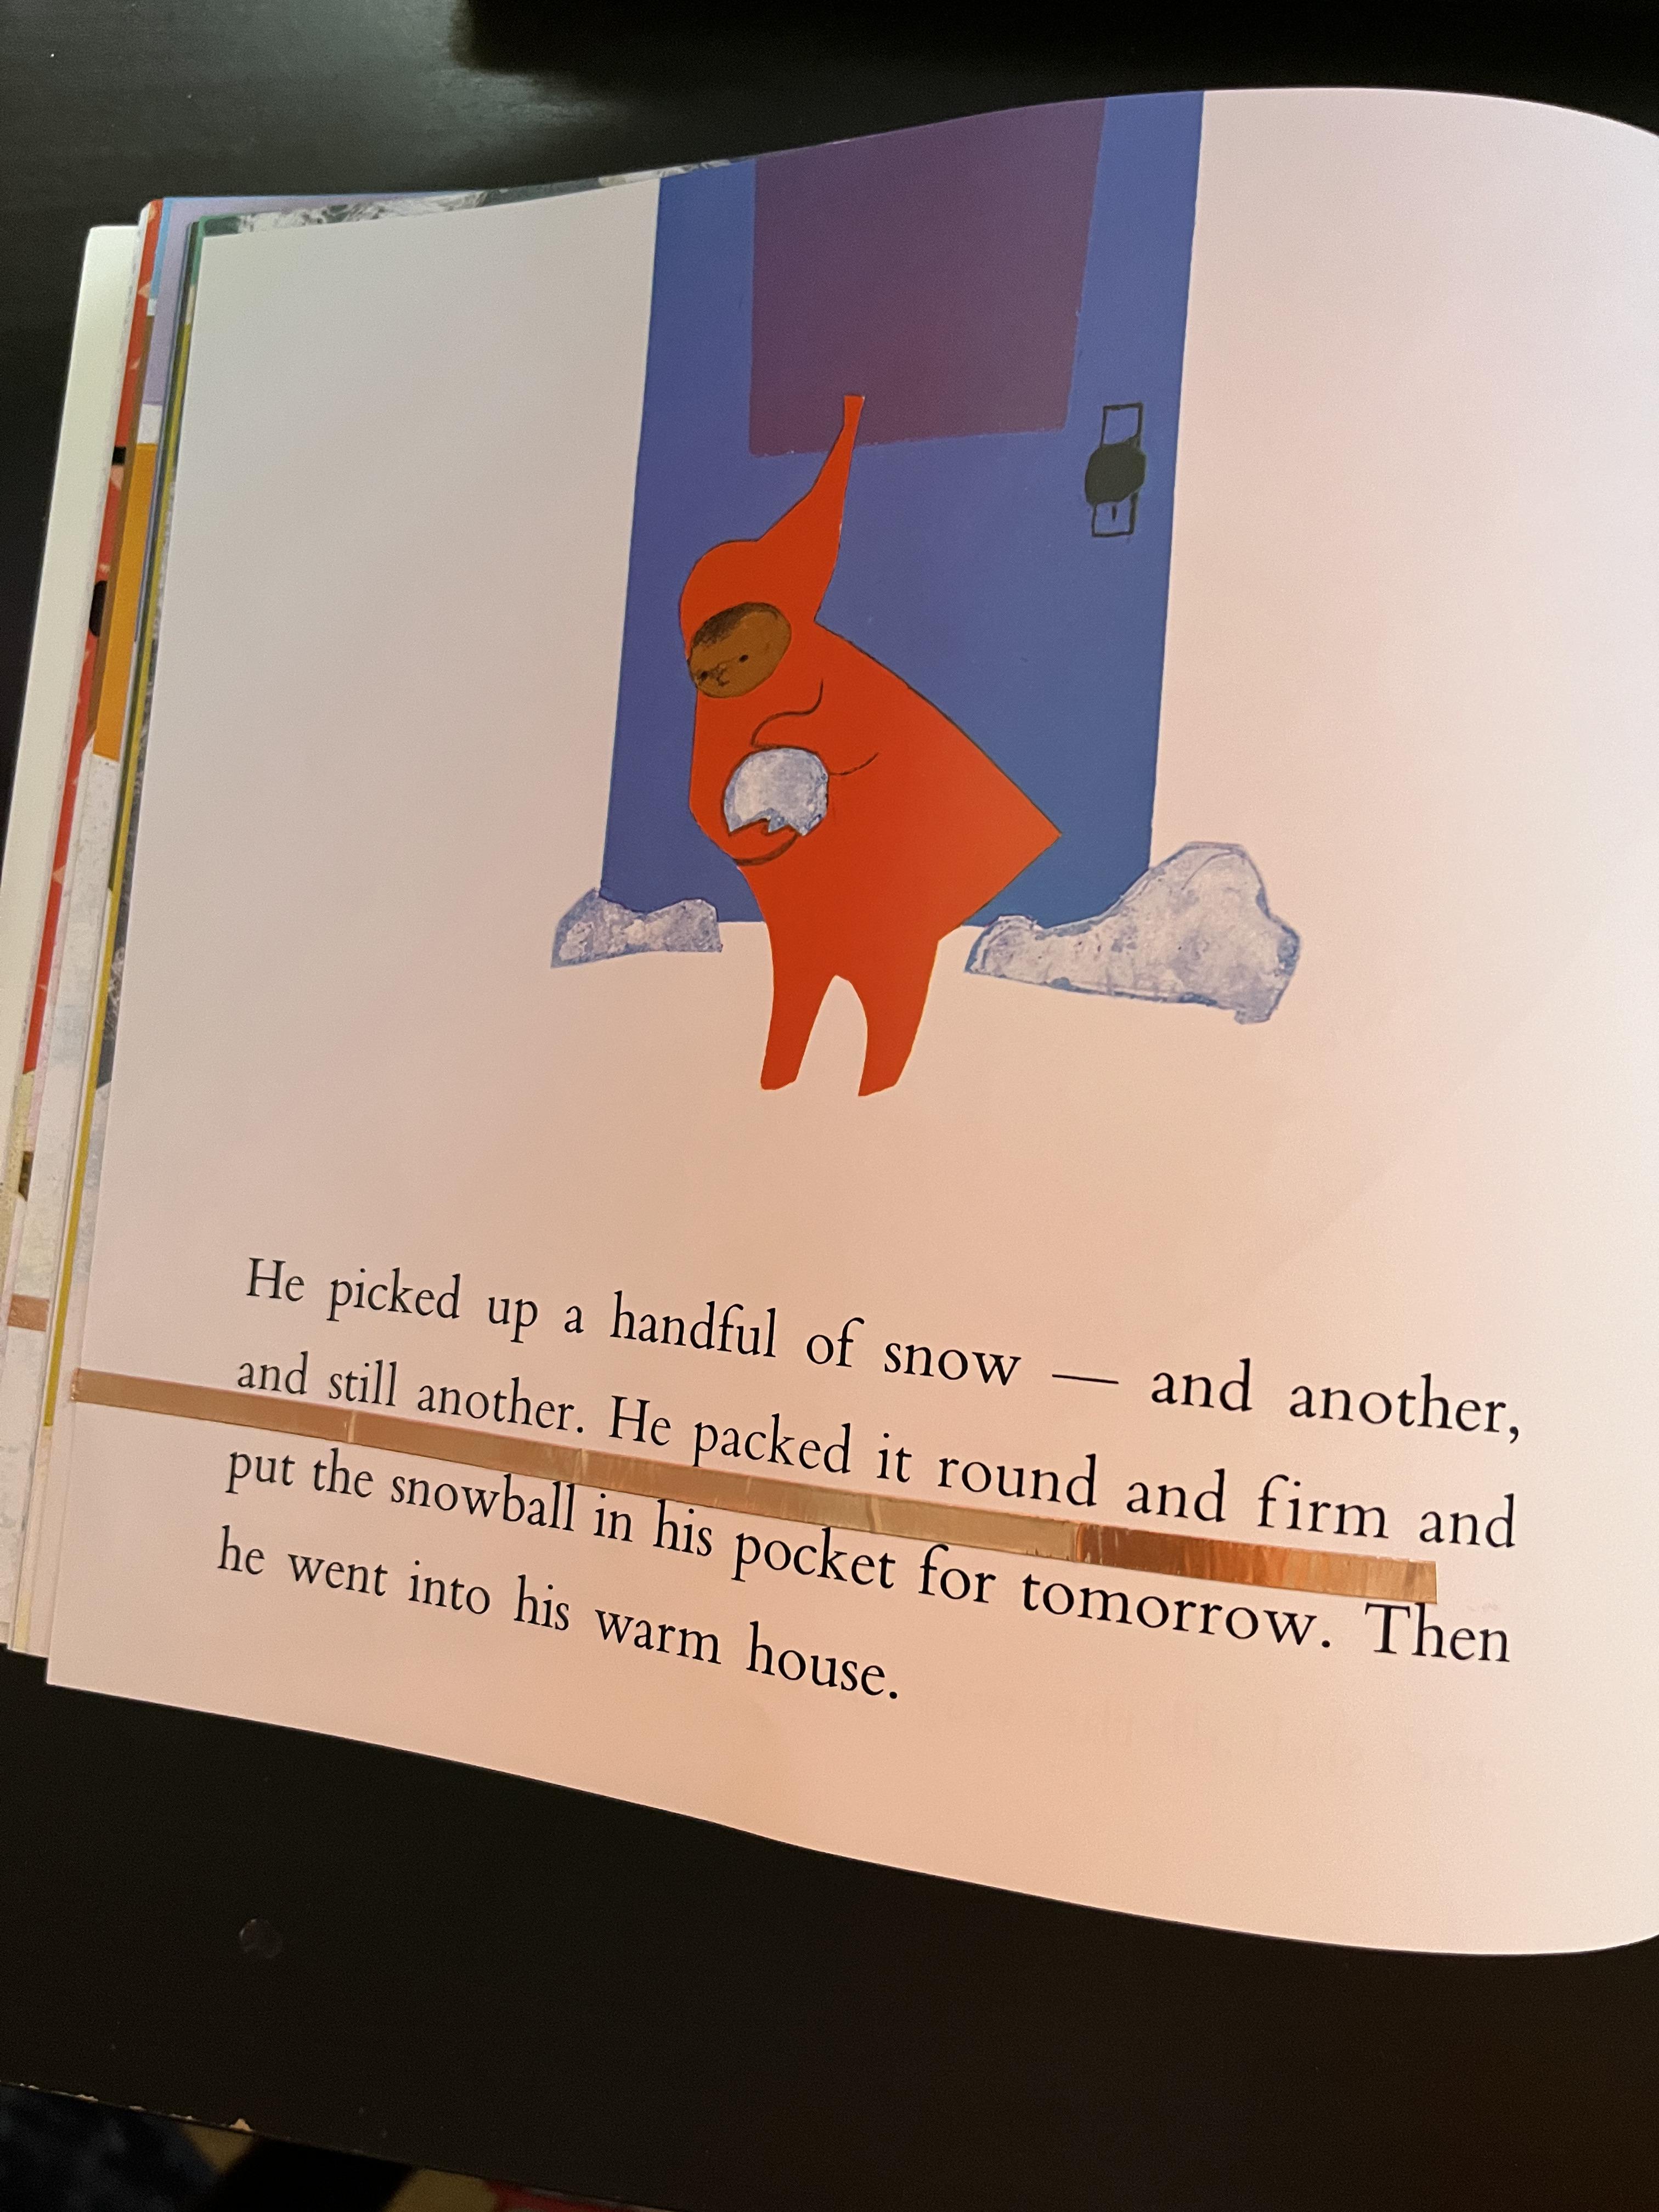
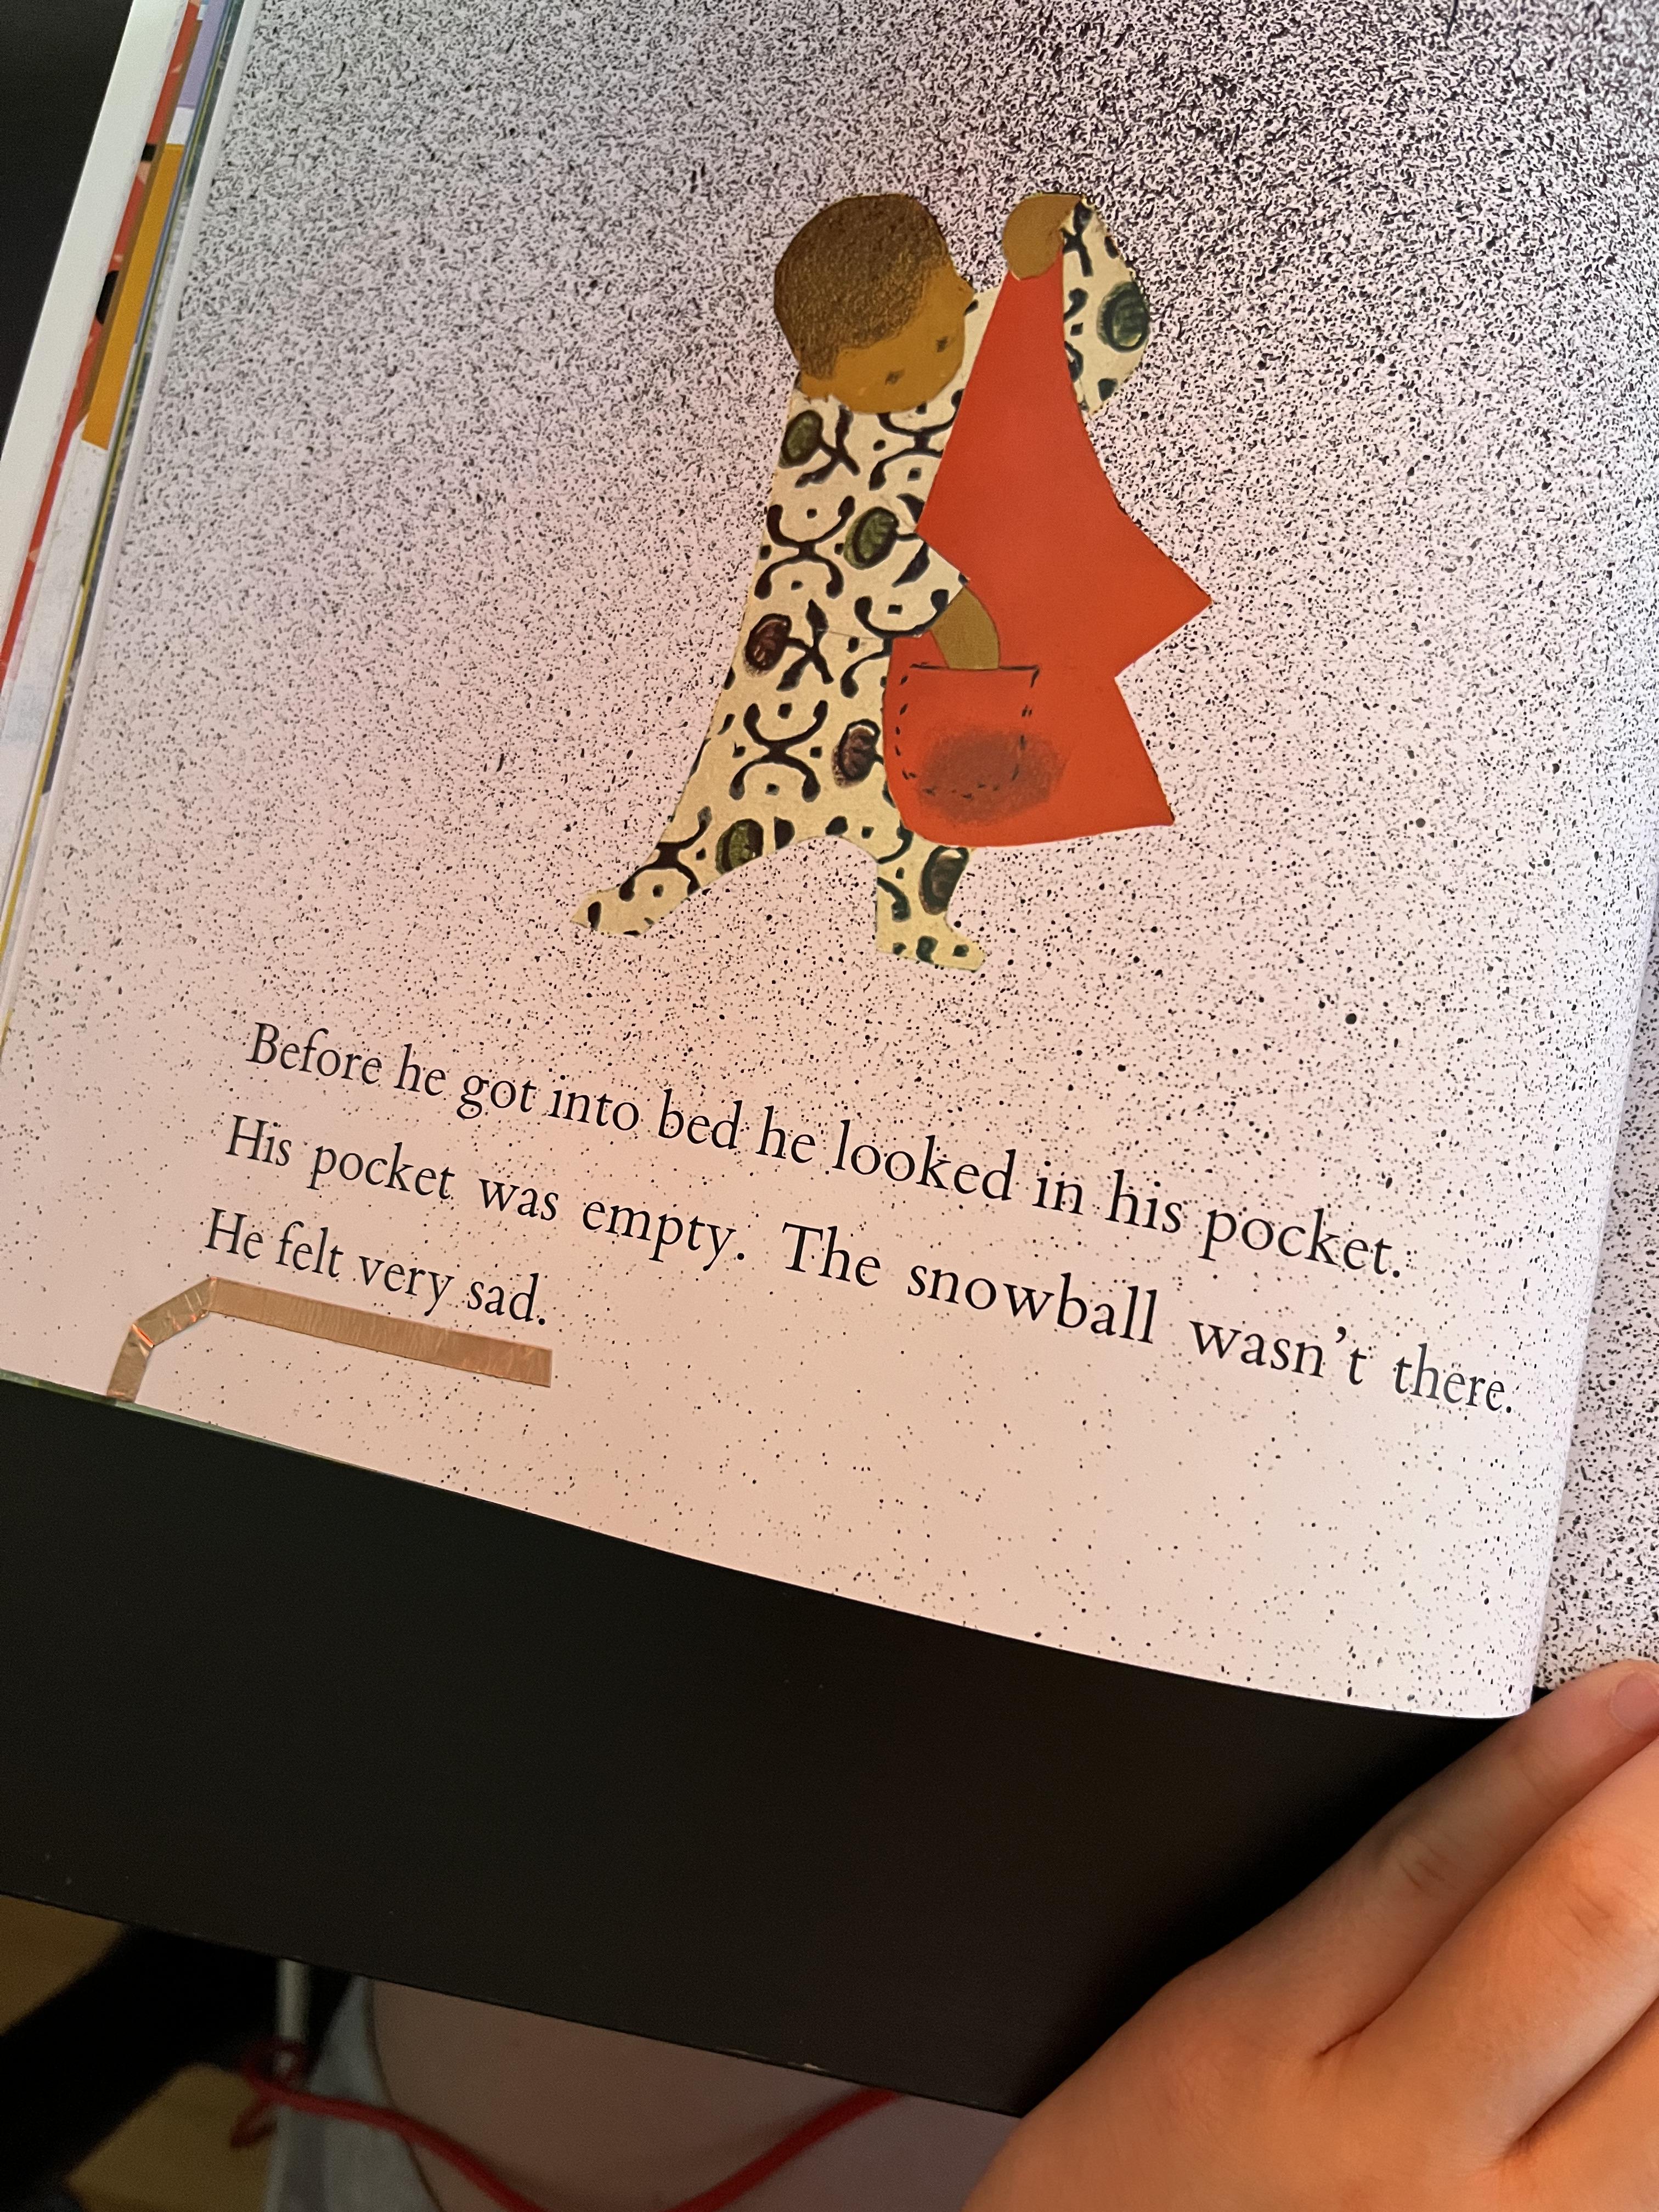
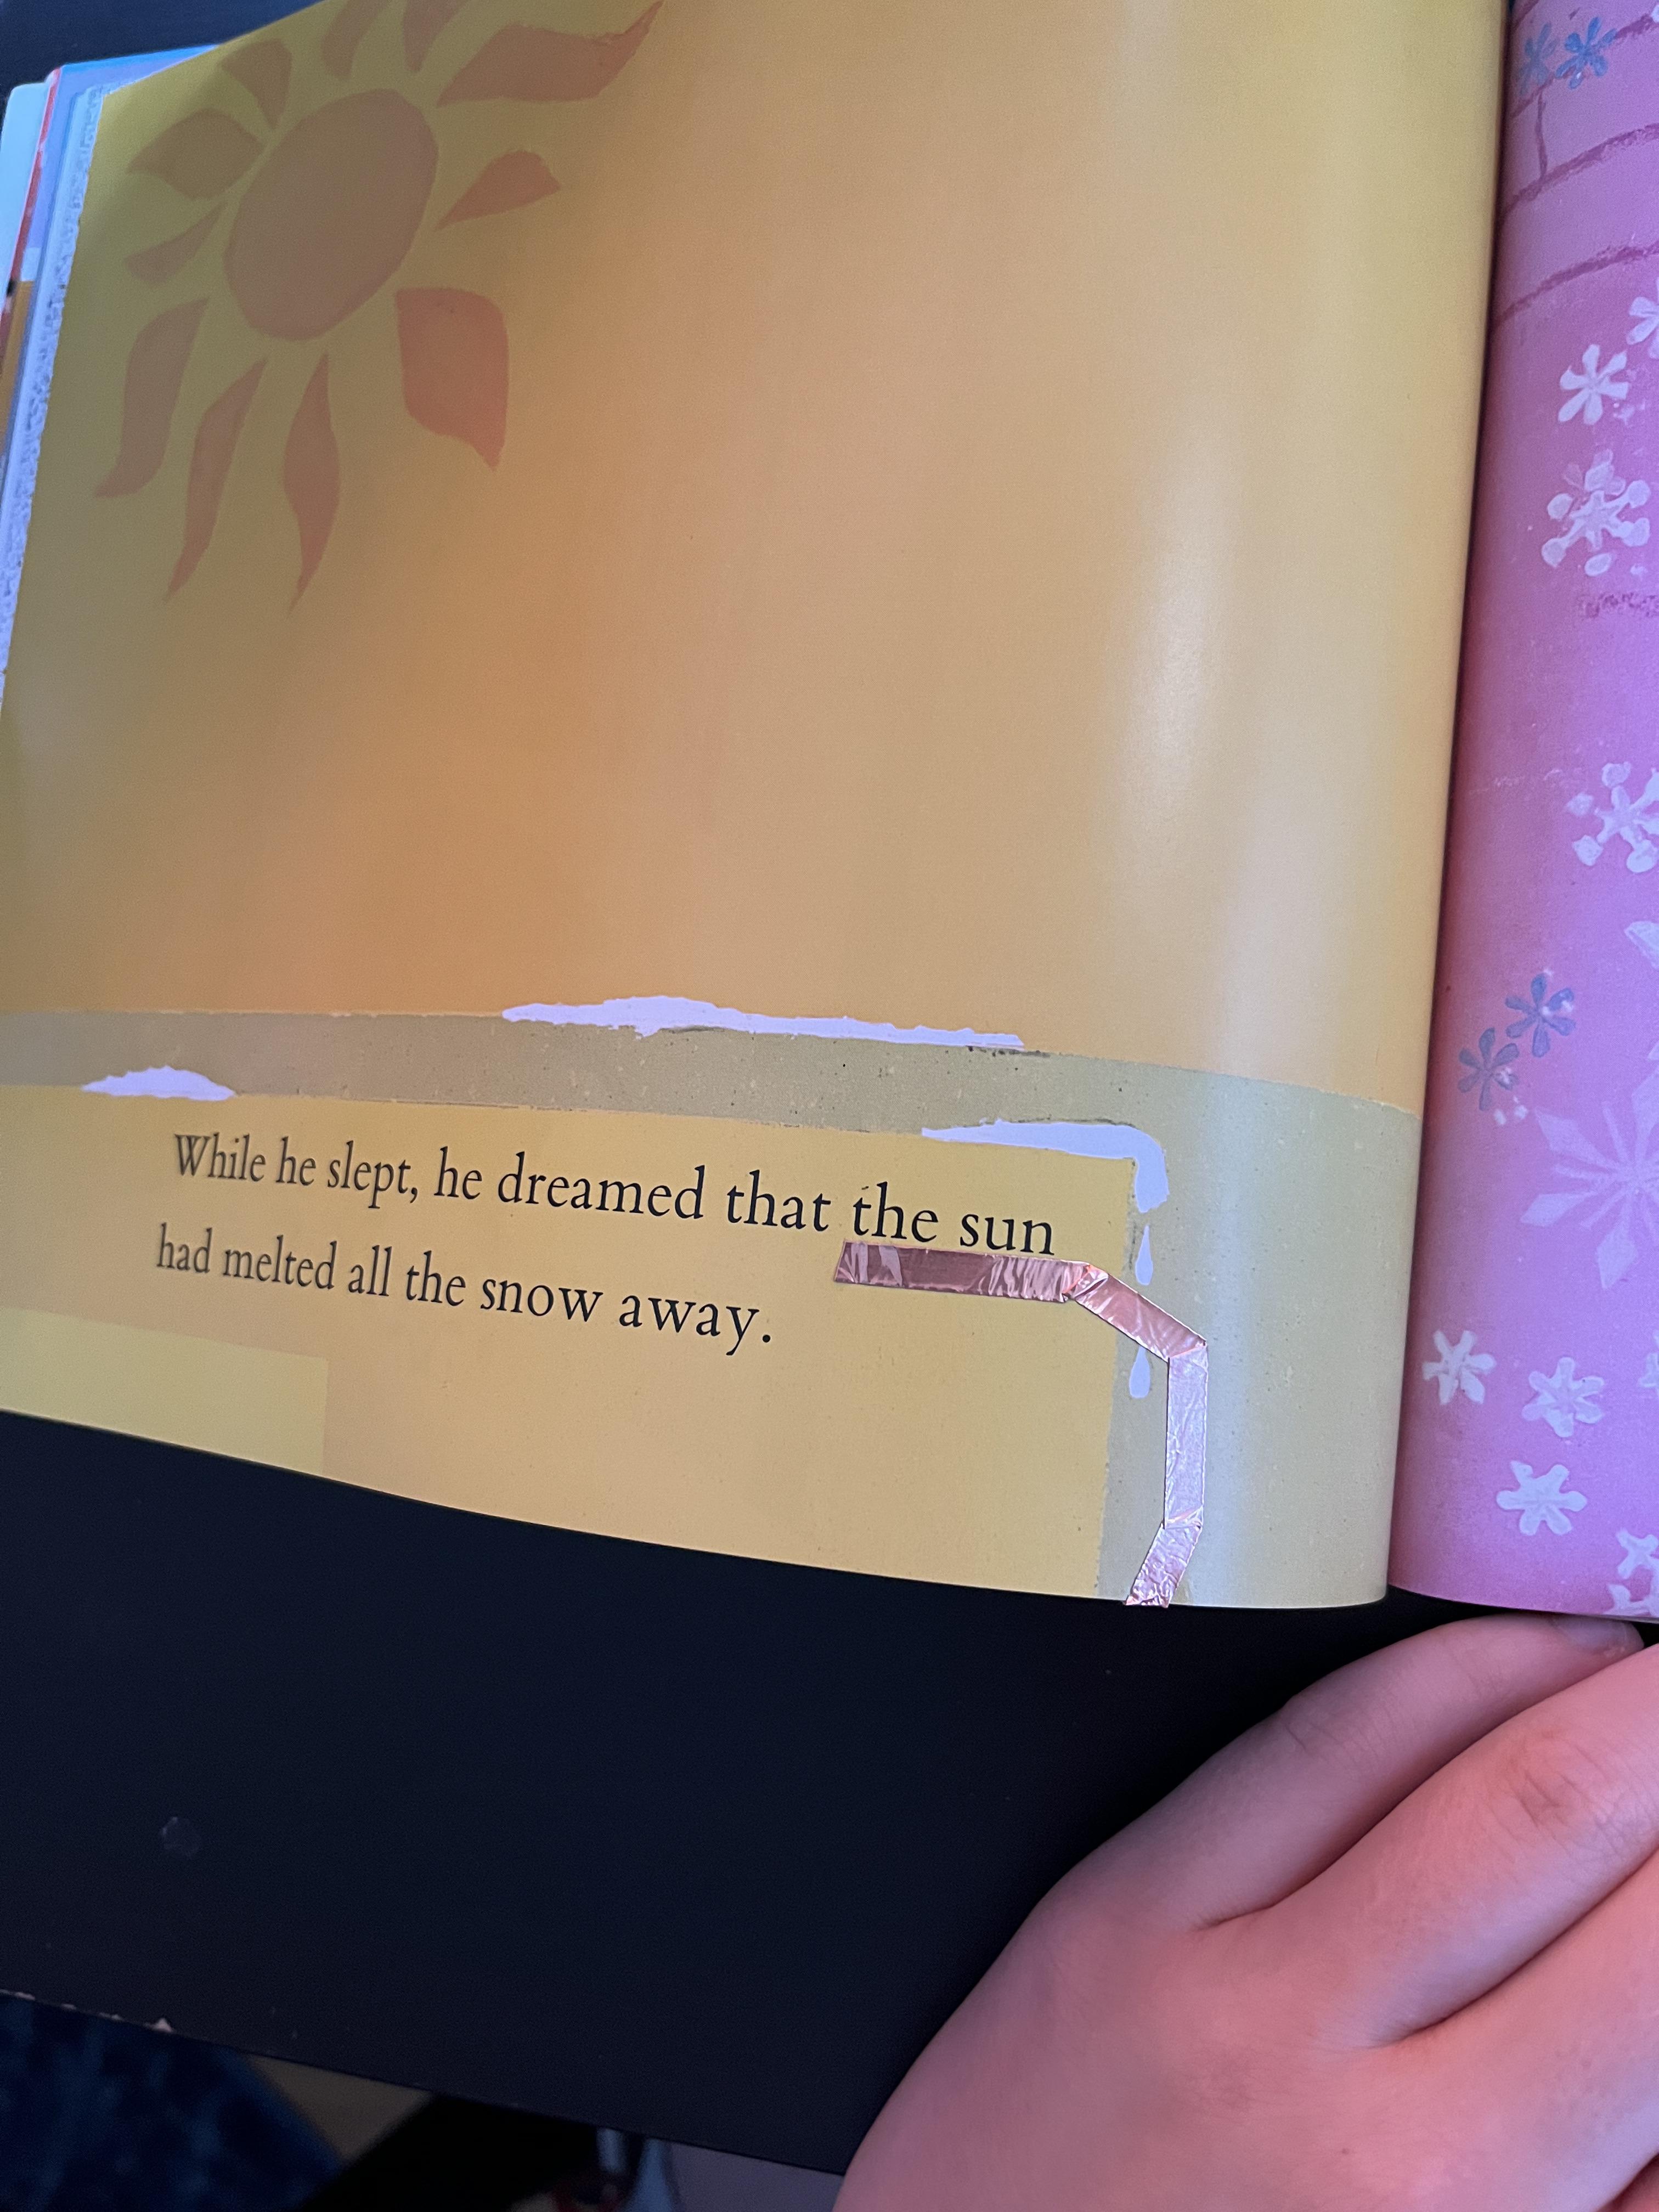
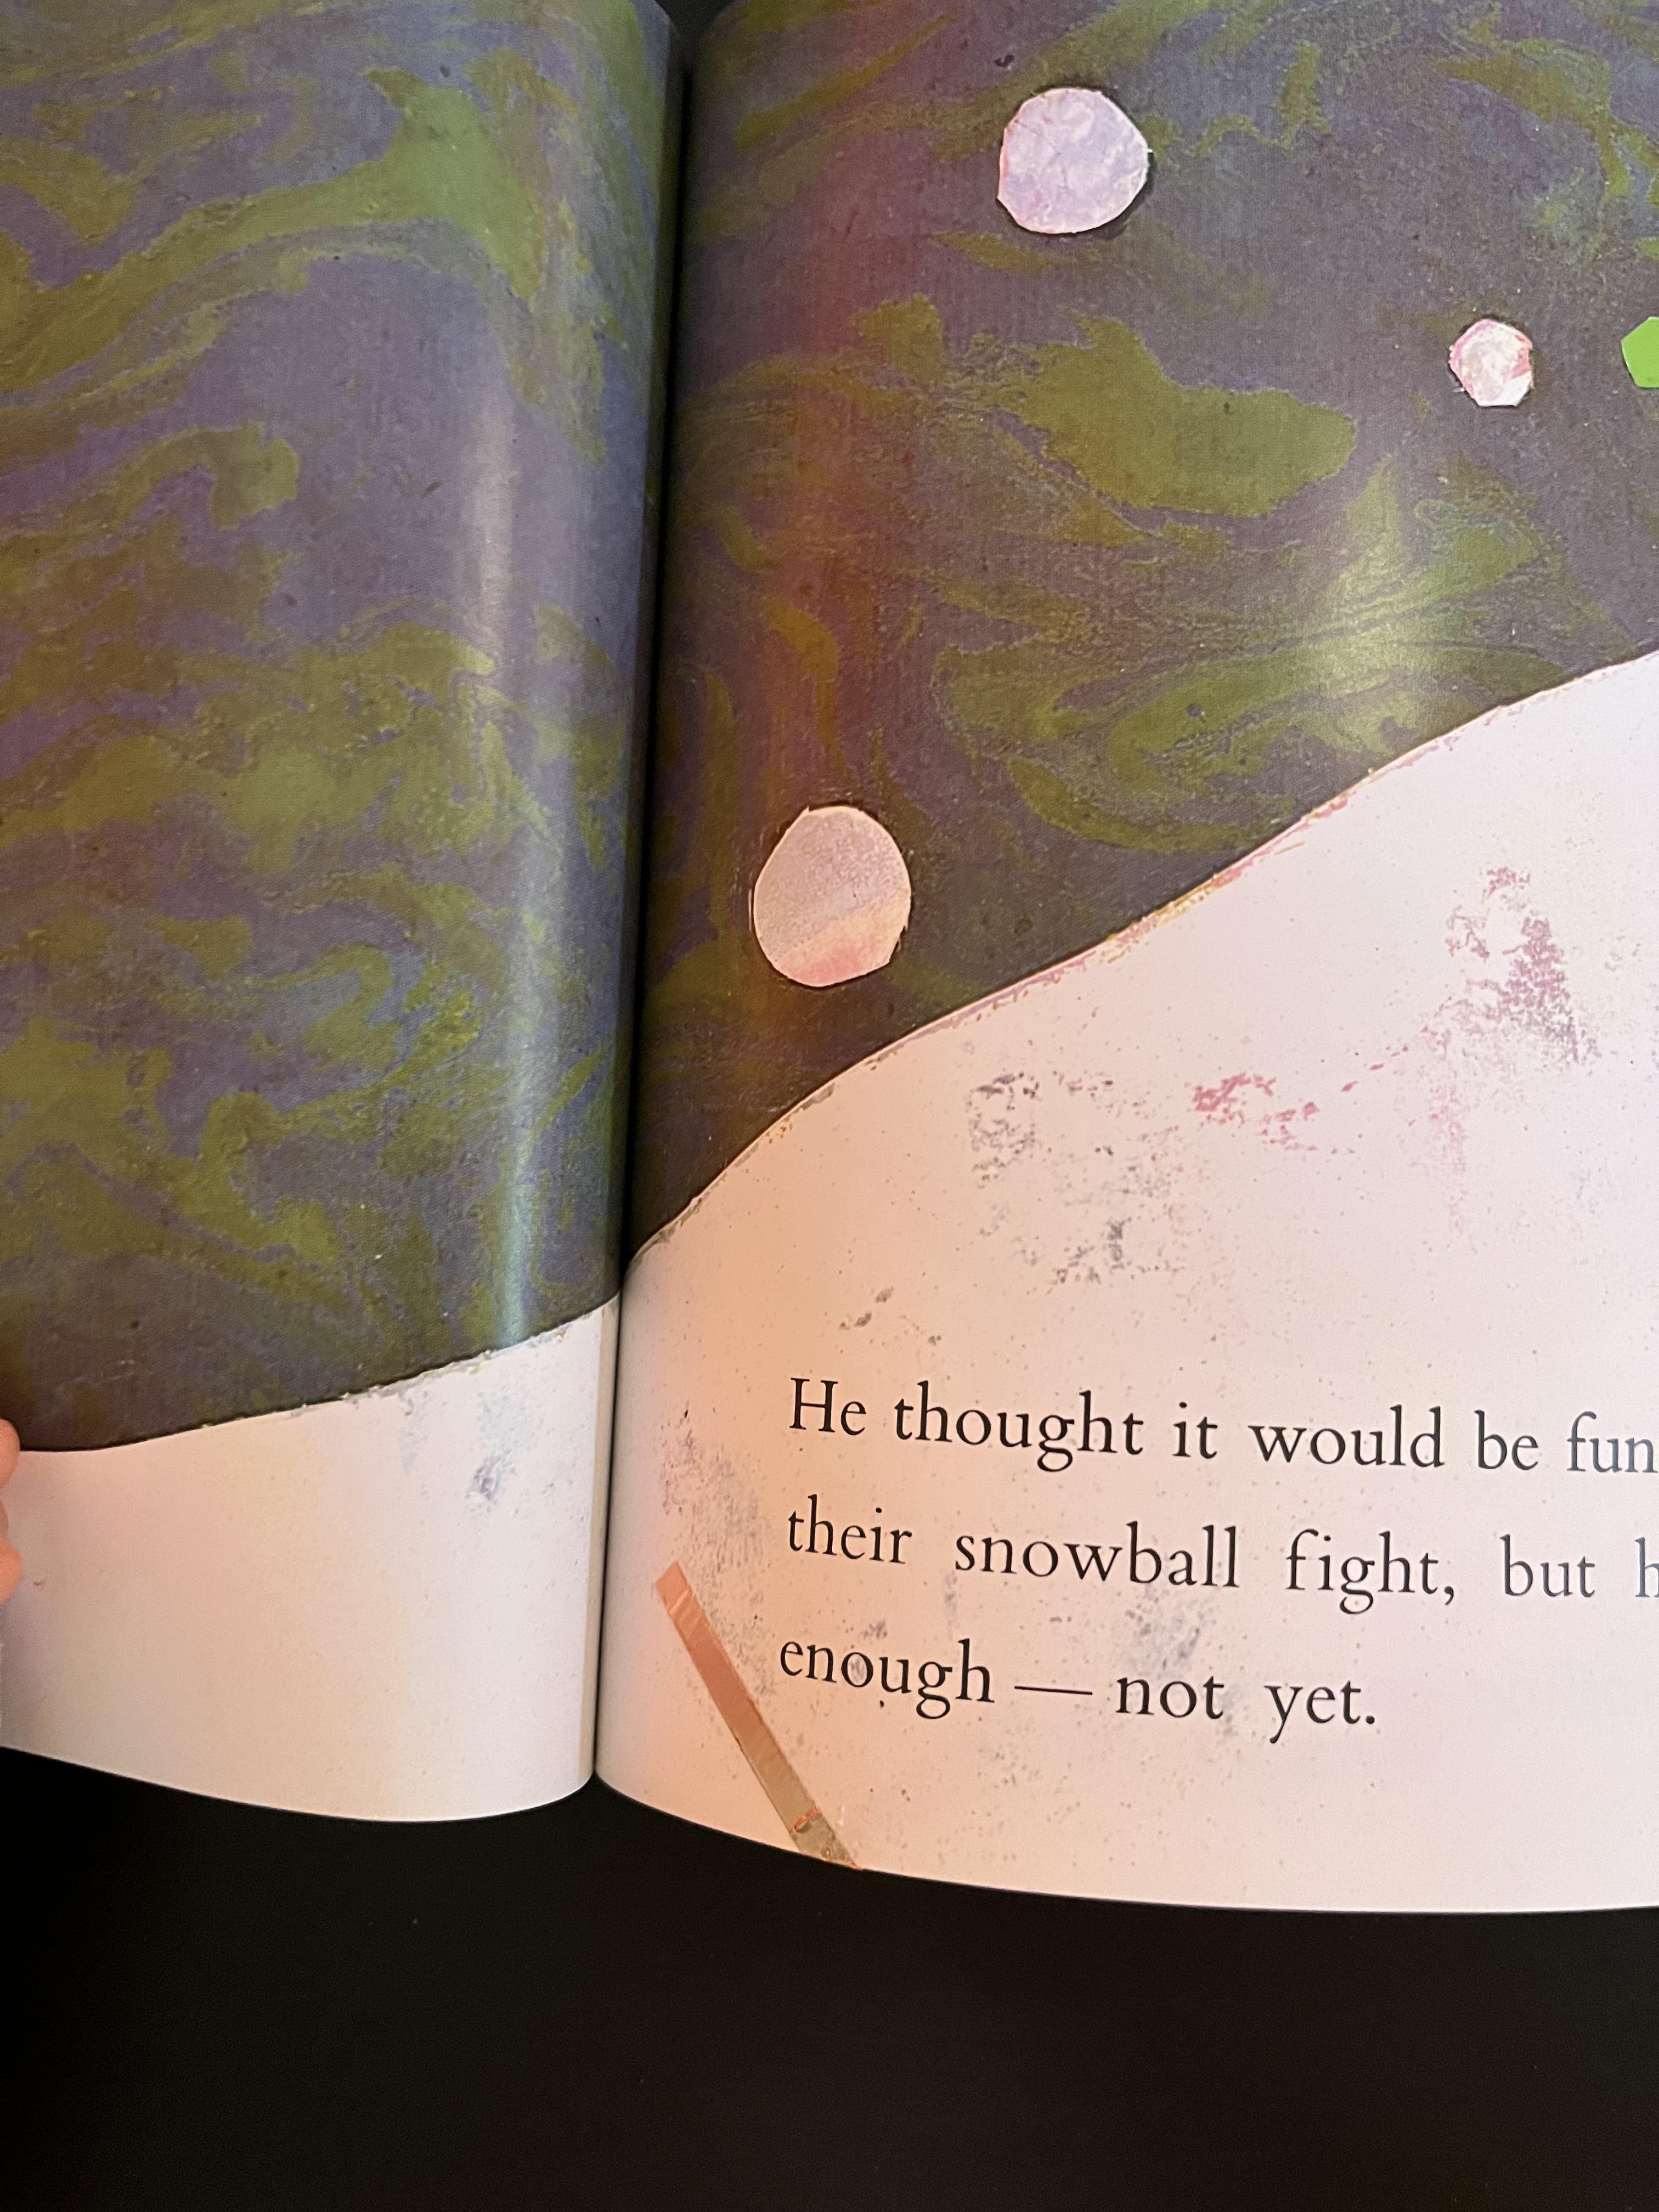
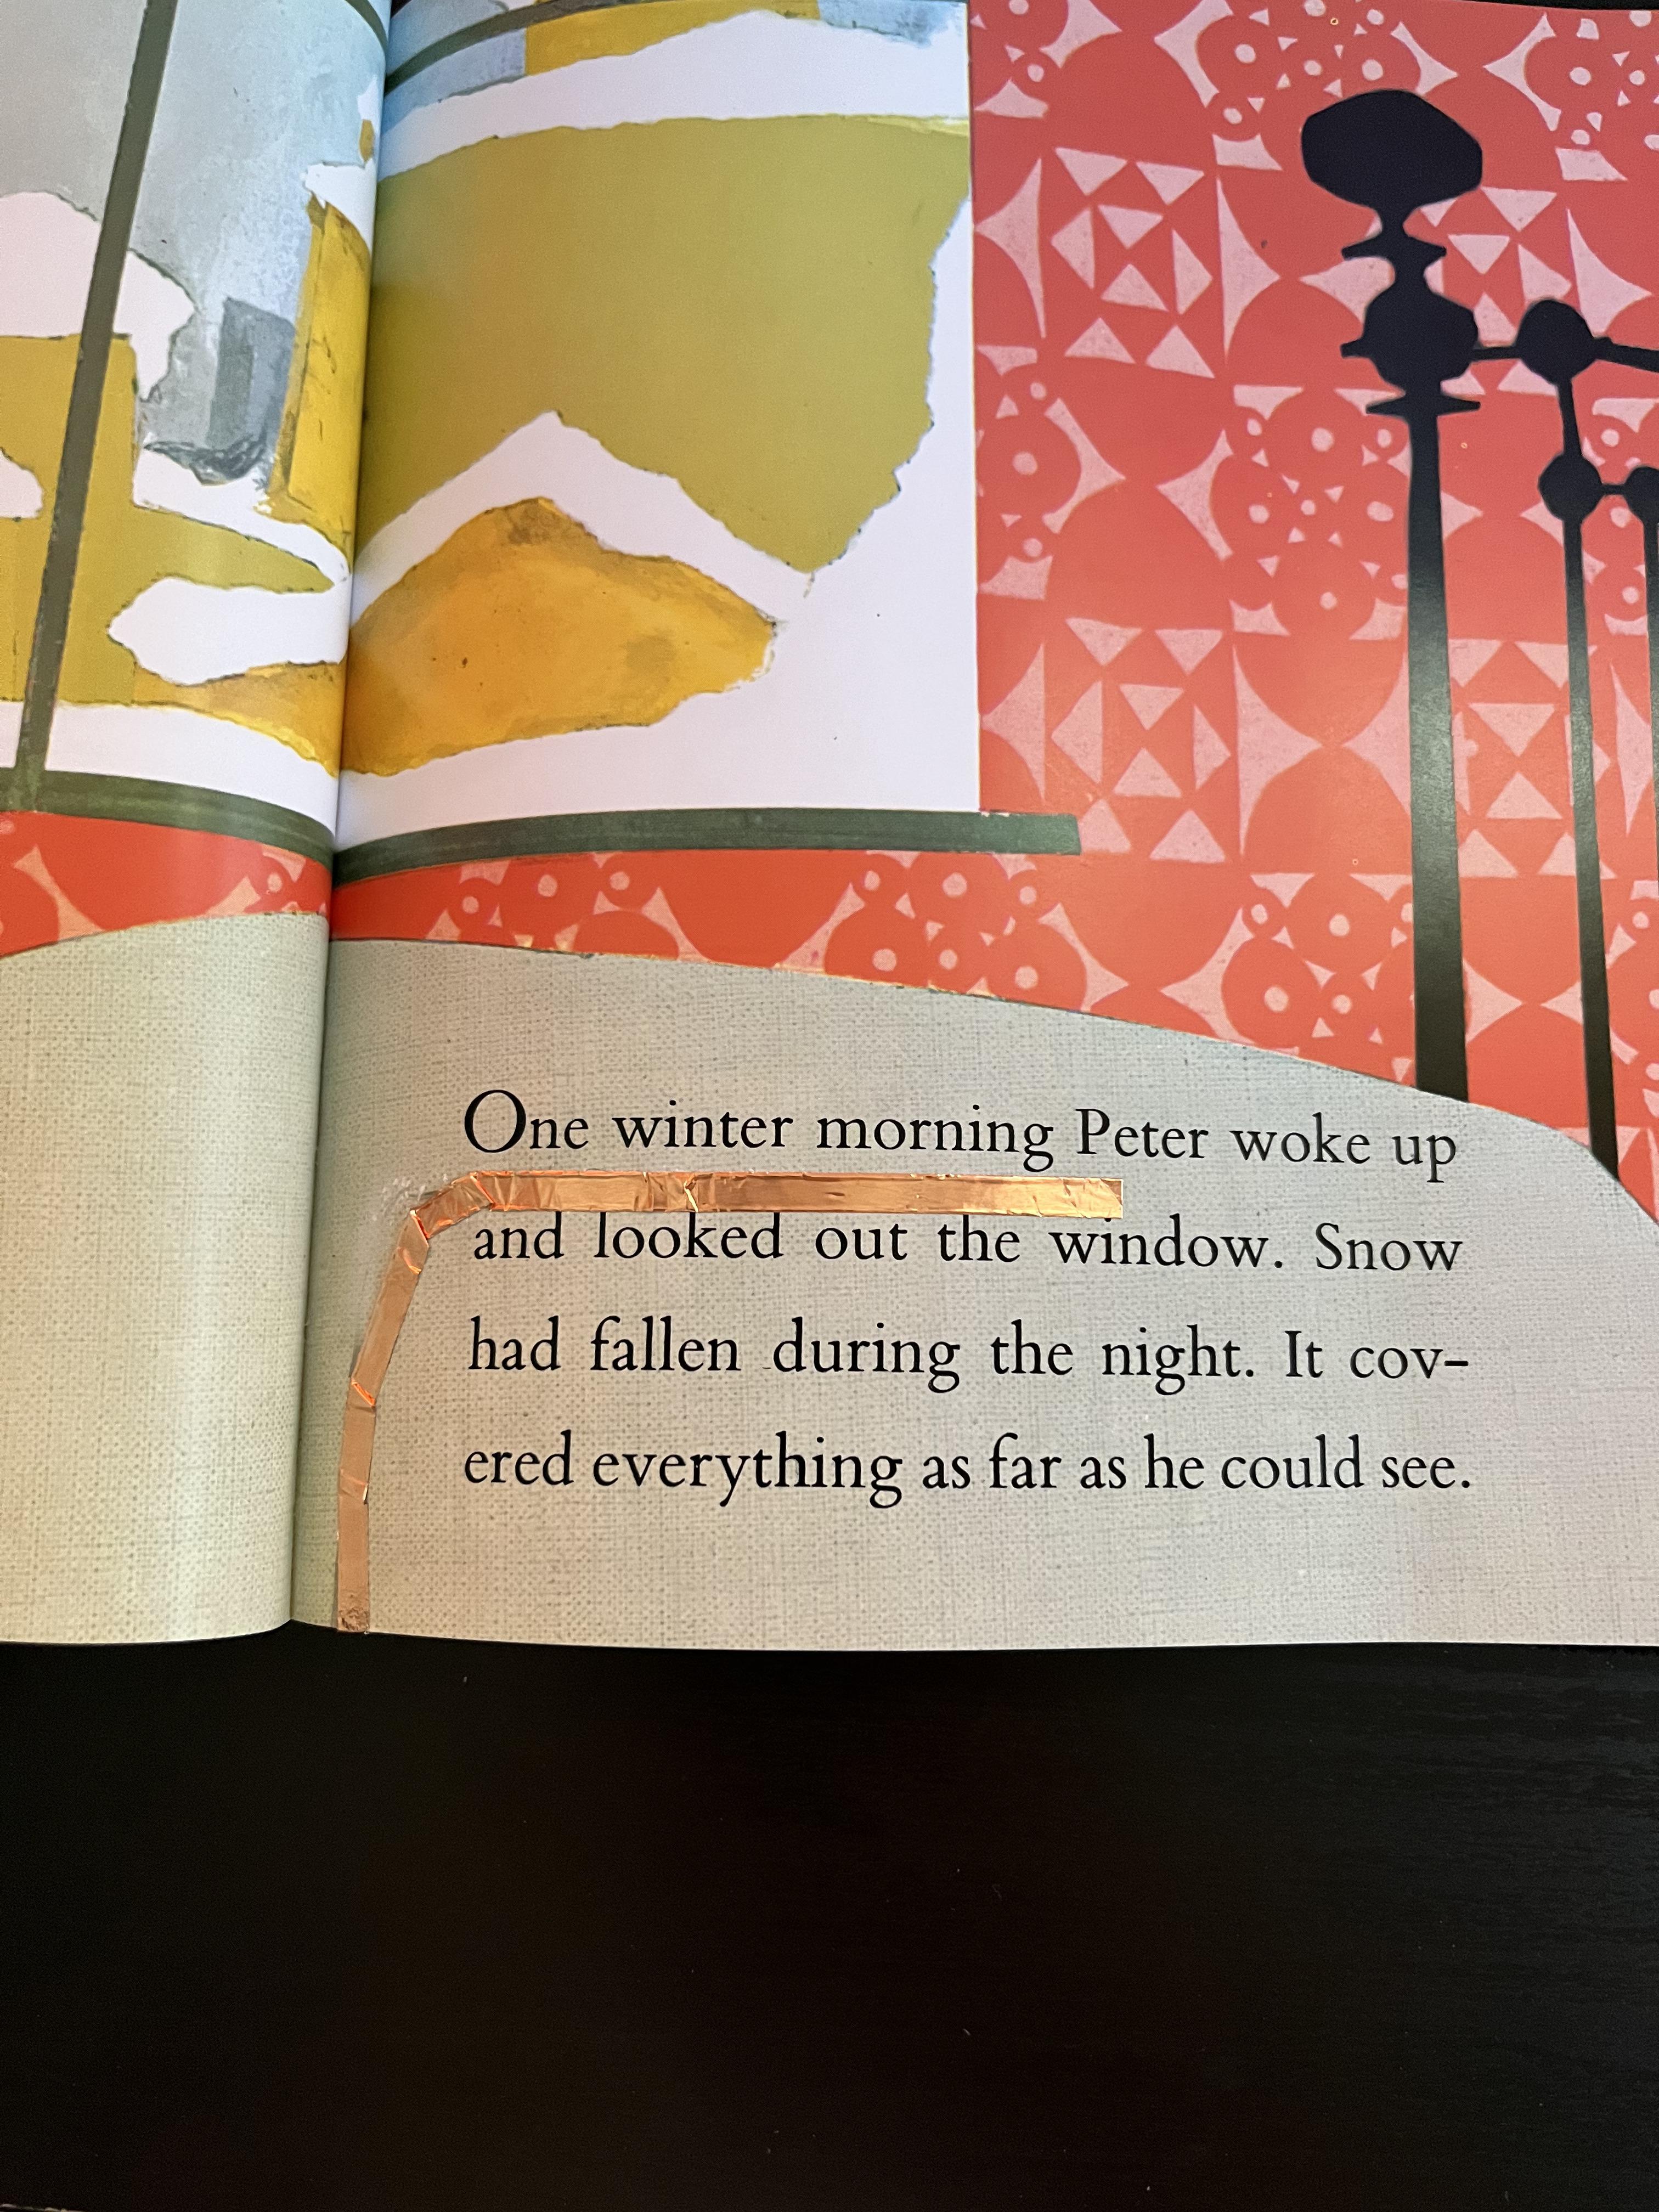
- Buy or obtain The Snowy Day book by Ezra Jack Keats.
- In the book, lightly underline the sentences or words you want to feature in the Scratch program with a pencil.
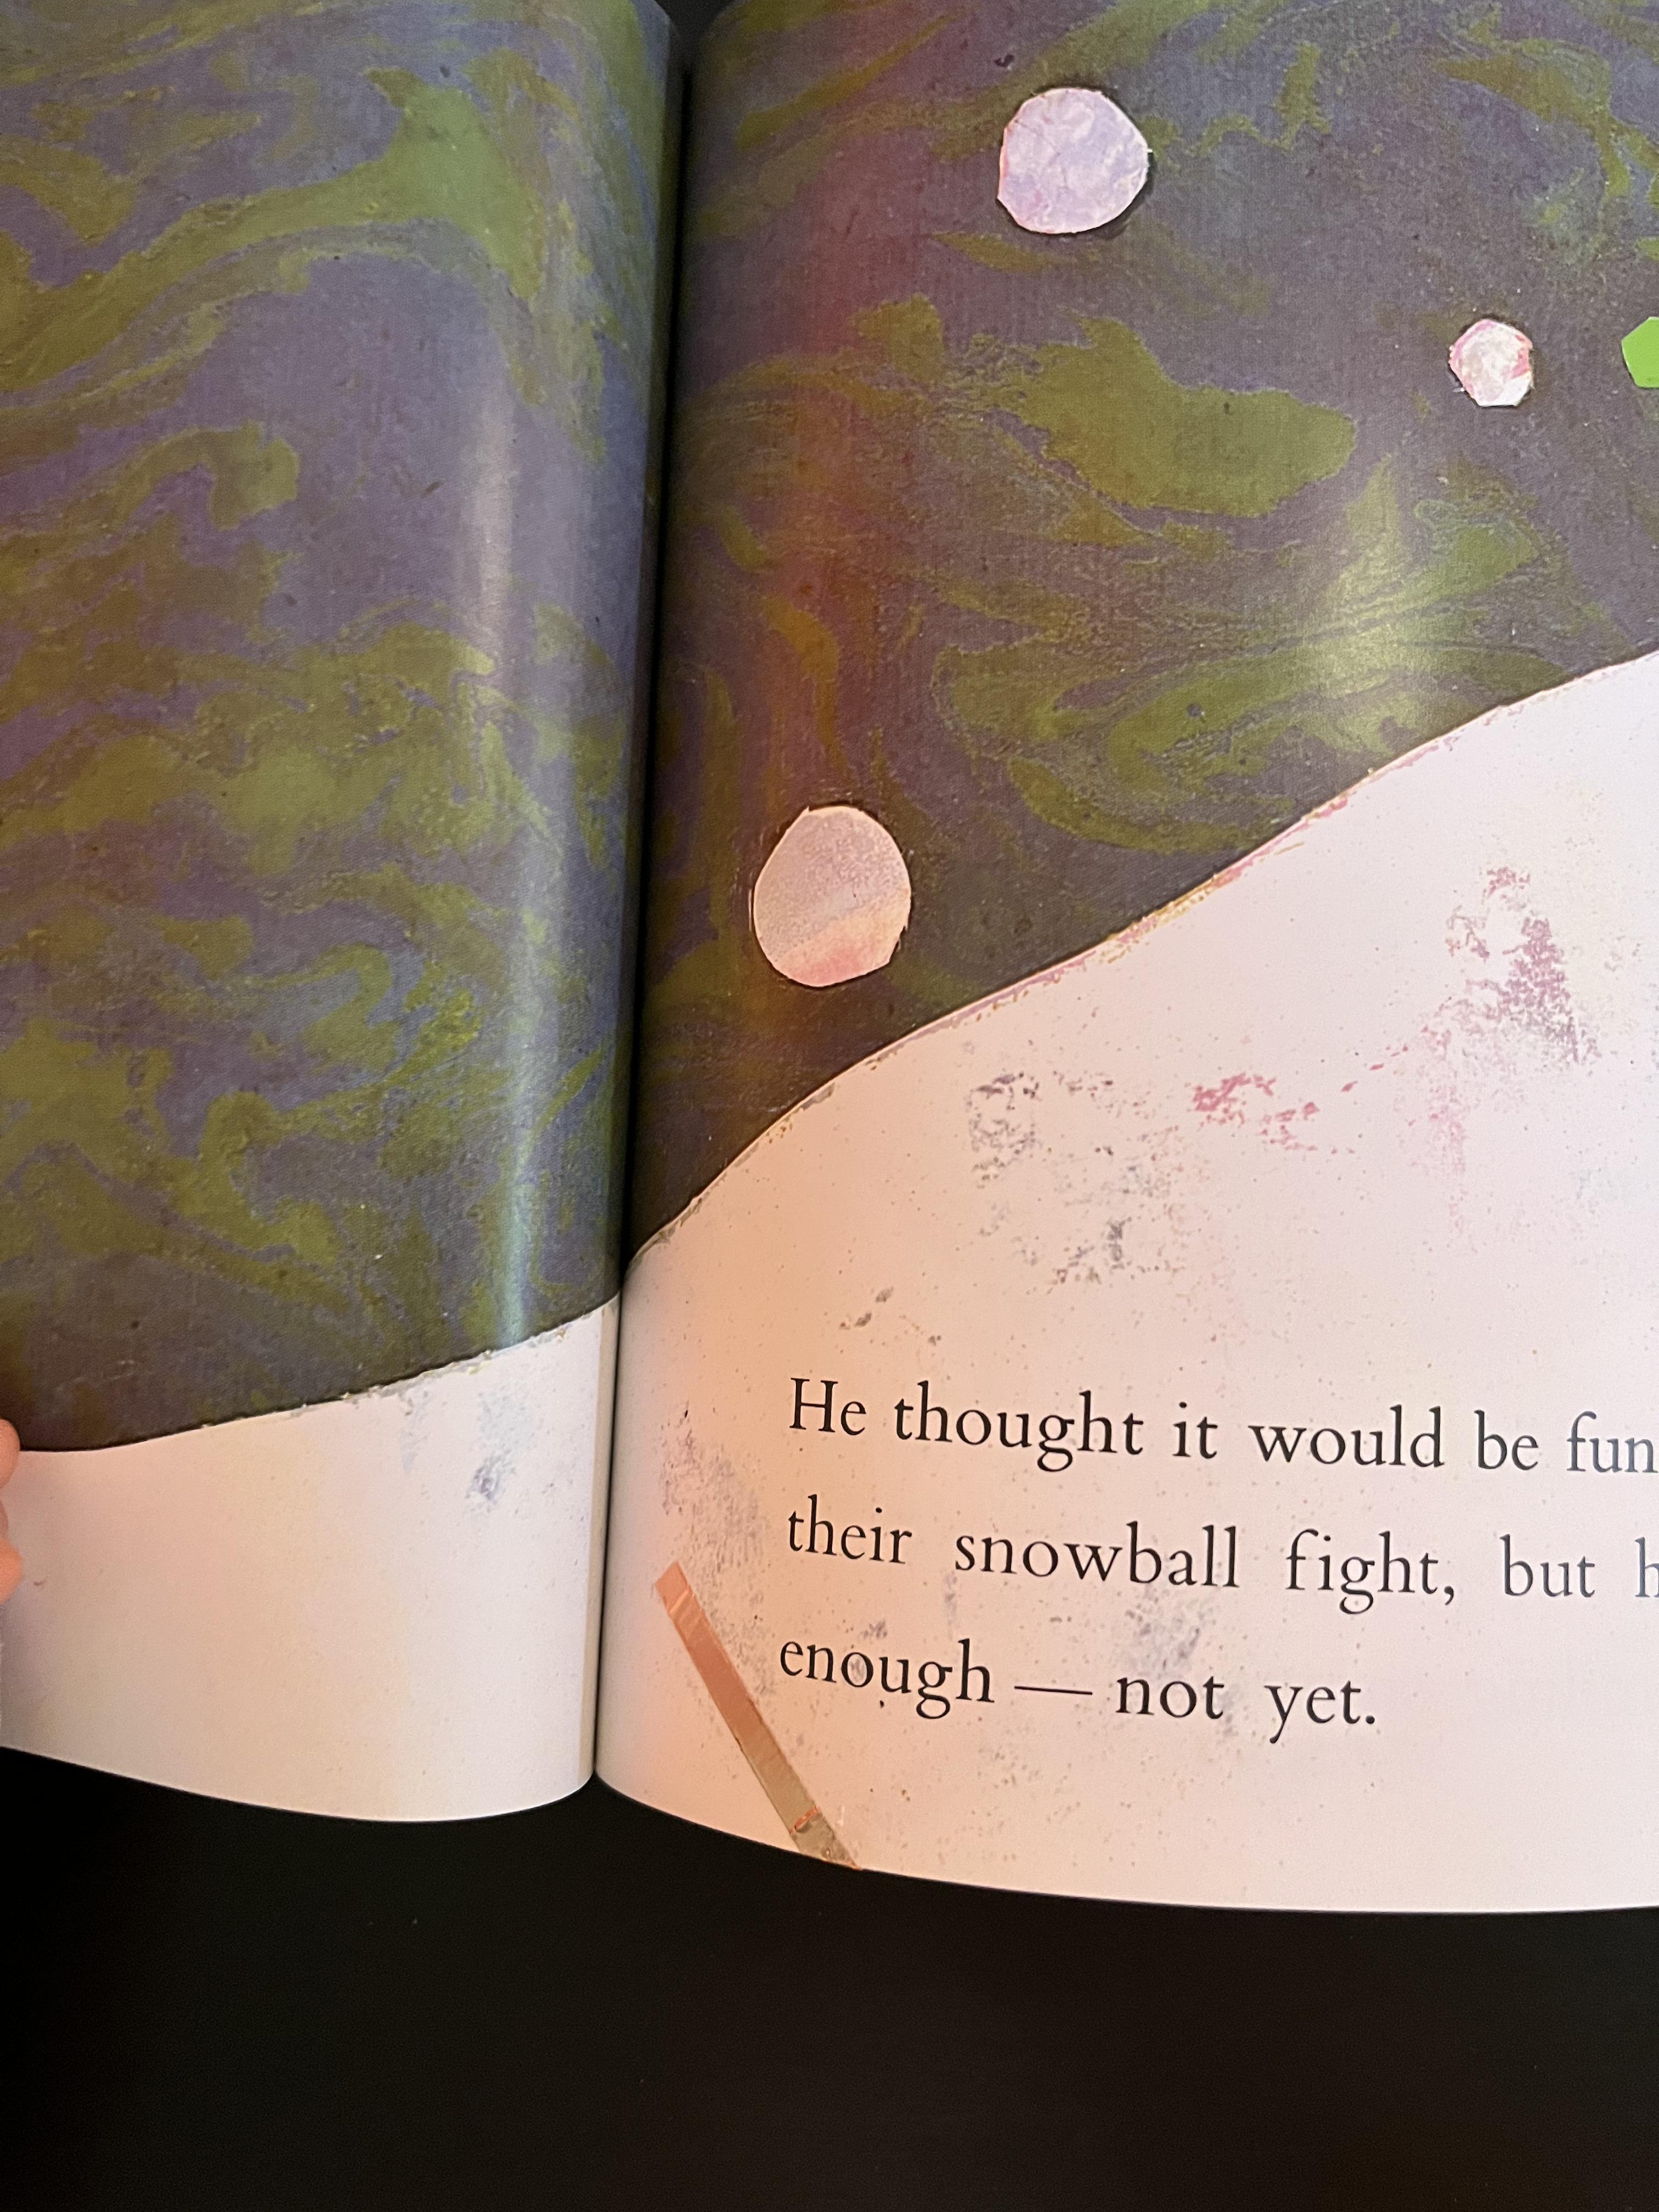
- Page 2=“One winter morning”; page 5=“Crunch, crunch, crunch”; page 15=“snowman”; page 19=“...and still another. He packed it round and firm”; page 23=“He felt very sad”; page 25=“the sun”.
- With a scissor, cut out about 4-9 inches of copper tape and stick the copper tape under the intended word or sentence. But don’t fully underline it! You should have a decent amount of excess tape left. (The amount of copper tape you cut out depends on where the intended noun/verb is. If it’s only one word you want to underline (like “the sun” on page 25), then only a little bit of tape is needed.
- Now, take the excess tape and either bend it downward or let it run straight through the page. (Bending is necessary for 4/6 of the words/sentences). Bend it about 45 degrees twice, but don’t do a full 90 degree turn because you will rip the tape. (A crease will form where you bend it- that’s okay!) (The goal is to have the rest of the tape running down the side of the paper if you bend it). For 2/6 sentences, underline the whole sentence and let it run onto the next page. A bend or turn is unnecessary.
- “One winter morning”=bend to the left; “Crunch, crunch, crunch”=let run straight to the left; “snowman”=bend to the right; “...and still another. He packed it round and firm”=let run straight to the left; “He felt very sad”=bend to the left; “the sun”=bend to the right
- Finally, take the remaining copper tape and fold it back behind the page. (There should be a little tab behind that page).
Programming Scratch
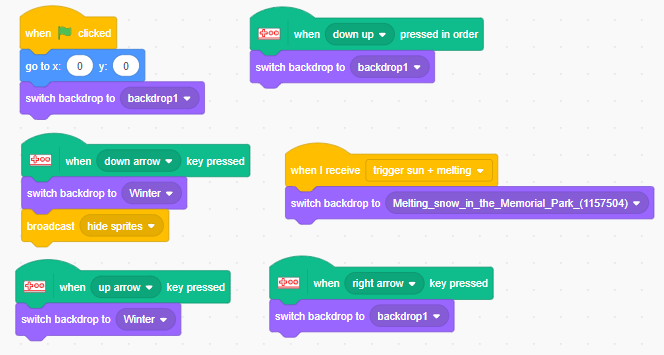

- Create a Scratch account and click “My Stuff” → “+ New Project” to start a new project.
- On the right hand side of your screen, click on “backdrops.” Then, below “Scratch” on the upper left hand side of your screen, click backdrops and add a new backdrop by clicking on the blue icon on the bottom left of your screen. Use the “winter” backdrop. Now, click on this link and the next link to download the pictures. In Scratch, upload the pictures individually as 2 separate backgrounds. Repeat the same process for this link, but upload it as a sprite by clicking on the code tab below “Scratch” and the blue icon in the bottom right hand of your screen.
- Create another background by clicking backdrops under “Scratch” on the top left. Duplicate your pre-existing winter backdrop and drag the new one to the bottom of the array.
- Title the backdrop “TheEnd”. Click on the textbox tool and place it inside the most inner box in the top left corner. Type “The End!” in a red font. Click on the bottom right corner of the textbox and enlarge it so the words are big enough to fill the innermost box.
- Go back into the code for backdrops and drag out a “when green flag clicked” block under the events tab to the center of your screen.
- Place a “go to x:__ y:__” block from the motion tab under the first block and set the coordinates to (0,0).
- In the looks tab, drag out a “switch backdrop to__” block and put it under the blue block above. Change the current option to “backdrop1”.
- Click the blue button in the bottom left hand corner; click on Makey Makey.
- Drag out a “when space key pressed” block under the Makey Makey tab to the center of your screen. Change space → down arrow and place a “switch backdrop to__” block under the green block. Change the current option to winter.
- Duplicate these blocks 2 times and set them aside.
- Below that, place a “broadcast message 1” block from the events tab. Create a new message titled “hide sprites.”
- Place a “when left up right pressed in order” block from the Makey Makey tab and put it in the center of your screen. Change the current option to down up.
- Place a “switch backdrop to__” block underneath and change the current option to backdrop 1.
- Take the 2 lines of code that were duplicated and make the following changes: for the first line of code, first block=up arrow, second block=winter; second line of code- first block=right arrow, second block=backdrop 1.
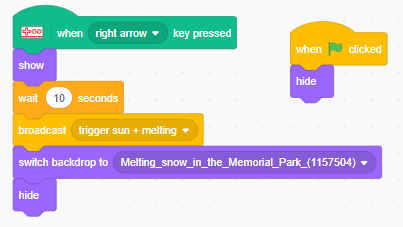
- Delete Sprite 1, or the cat. Click on the sad face sprite and drag out a “when space key pressed” block to the center of your screen. Change space → right arrow.
- In this order, place the “show” block from the looks tab underneath the first block and put the “wait 1 seconds” block from the control tab below; change the time to 10 seconds.
- Now, broadcast a new message in the block below titled “trigger sun + melting;” Change the size to 165.
- Beneath, put a “switch backdrop to__” block and “hide” block from the looks tab below respectively. Change the current option of the backdrop to “Melting_snow_in_the_Memorial_Park_”.
- Finally, place a “when green flag clicked” block in the center of your screen, followed by a “hide” block.
- Click on the sprite icon on the bottom right hand corner of the screen and insert a snowflake.
- Click on the costumes tab below where it says Scratch and click on the sprite. Then shrink the snowflake a little bit while keeping it in the center of your screen. Drag it downwards slightly.
- Place a textbox above and to the left of the snowflake.
- In the textbook, type “The Snowy Day”, then press enter, “By Ezra Jack Keats.” Change the font to curly and click on the fill button to the left of the font option. Set the color = 72, saturation = 60, brightness = 100.
- Drag the text box so that it aligns with the snowflake and is on top with some space in between. (You can enlarge the textbox and realign so it’s easier to read).
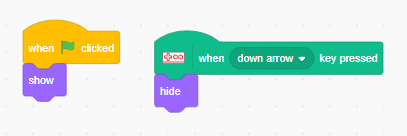
- Go back into the code tab and drag out a “when green flag clicked” to the center of your screen. Place the “show” block underneath the “when green flag clicked” block.
- Drag out a “when space key pressed” to the center of your screen. Change space → down arrow. Place a “hide” block under the green one. Place a “go to x:__ y:__” and set the coordinates to (0,0).
- Change the size to 100.
- Click on the sprite icon on the bottom right hand corner of the screen and insert Avery Walking.
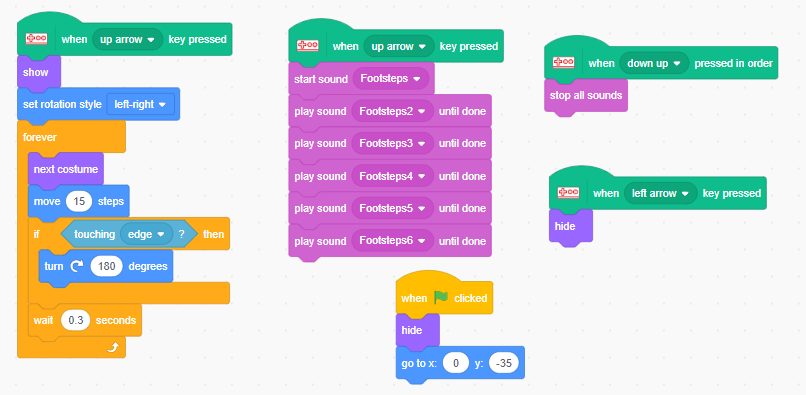
- Get a “when green flag clicked” block and place it in the center of your screen. Get a “hide” block and place it underneath the current block. Get a “go to x:__ y:__” block and place it underneath the “hide” block. Set the coordinates: x=0, y=-35. Change her size to 95.
- Grab another “when space key pressed” and drag it to the center of your screen; change space → up arrow and duplicate this block. Set the new block to the side.
- Get another “show” block and place it underneath. Now go to the motion tab and obtain the “set rotation style left-right” block. Drag it to the center of your screen.
- Below, place a “forever” loop from the control tab. Then go to the looks tab and drag a “next costume” block inside the forever loop. Go to the motion tab and get a “move 10 steps” block and place it under “next costume.” Change the 10 steps → 15 steps.
- Return back to the control tab and drag a “if __ then” block out and place it below the “move 15 steps” block. Go to the sensing tab on the left and put a “touching mouse-pointer ?” tab inside the “if ___ then” block. It should go in the gap. Then, change mouse pointer → edge.
- Under the motion tab, grab the second block with the arrow pointing to the right. Place it inside the “if then” block, but not where “touching edge” is.
- Then, go back to the control tab and obtain the “wait 1 seconds” block. Place this outside and below the “if then” block (it should be in the forever loop). Change 1 seconds → 0.3 seconds.
- Drag out a “when space key pressed” block to the center of your screen. Change space → up arrow. In the sound tab, drag out the “start sound __” block. Place it underneath the first block.
- Directly below where it says “Scratch” on the top of your screen, click on the tab that says “sounds.” Click on the megaphone icon and search “footsteps.”
- Delete the first sound on the left; duplicate the footsteps sound 5 times in order to have 6 recordings total.
- Go back into the code tab and under the “when up arrow key pressed” block put a “start sound footsteps_” from the sound tab. Click on the down arrow and click the first option.
- From the same tab, place 5 “play sound footsteps_ until done” blocks under the second block in the code of line. For each block after “footsteps”, change the number so it is increasing by one as you go down the line of code. (2nd block=footsteps 2, 3rd block=footsteps 3, etc.)
- Place a “when space key pressed” block in the center of your screen. Now, change space → left arrow. Duplicate this block, set to the side. Put a “hide” block under the first block.
- Under the sounds tab, drag the “stop all sounds” block and place it under the duplicated block.
- Insert a snowman sprite and change the size to 155.
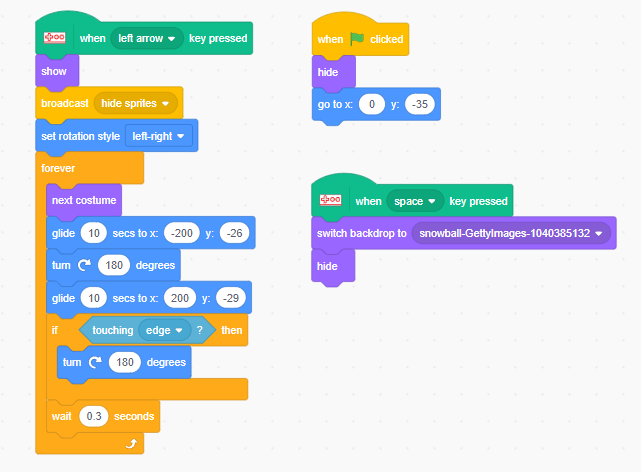
- Drag a “when green flag clicked” block out into the center of your screen and place a “hide” block below that. Put a “go to x:__ y:__” underneath the “hide” block and change the coordinates to (0,-35).
- Place a “when space key pressed” block into the center of your screen and put a “switch backdrop” block below it. Change the current option to the one that includes “gettyimages” in the name. Put a “hide” block underneath.
- Now, drag out a “when space key pressed” block into the center of your screen and change space → left arrow.
- Below, put a “show” block, “broadcast hide sprites” block, “set rotation style left-right” block, “forever” loop, and a “next costume” block in order. The last block should be inside the “forever” loop.
- Under the motions tab, obtain the “glide 1 secs to x:__ y:__” block and drag it to the center of your screen. Change the coordinates to (-200, -26) and the time to 10 seconds. Duplicate this singular block and put it off to the side momentarily.
- Put the other block under “next costume.” Return to the same tab and get the second block. Put it under the “glide” block in the forever loop; change 15 degrees → 180 degrees; duplicate it. Put it off to the side.
- Now, take the duplicated “glide 10 seconds to x: 200 y: -26” block and place it under the “turn” block above in the forever loop.
- Grab the “if then” block and put it under the last “glide” block. Put a “mouse pointer” block in the gap and change to edge, then place inside this loop and put the duplicated “turn” block inside.
- Finally, grab a “wait 1 seconds” block and place this outside and below the “if then” block. Change 1 seconds → 0.3 seconds.
- Next, insert a sun sprite.
- Grab a “when green flag clicked” block and put it in the center of your screen, followed by a “hide” block. Duplicate this block and put it to the side.
- Drag a “when backdrop switches to__” block out into the center of your screen and change it to the “Melting_snow_” option. Underneath, place a “wait 1 seconds” block and change 1 → 10 seconds.
- Now, place the duplicated “hide” hide block and “switch backdrop to__” block respectively below. Change the current backdrop option to “TheEnd”
- Under the events tab get a “when I receive__” block and drag it to the center of your screen. Duplicate this and set it to the side.
- Below, place a “switch backdrop to_” block and change the option to “Melting_snow_”.
- Now put a “show” block and “forever” loop below in order. Obtain the “glide 1 secs to x:__ y:__” block and change the time to 3 seconds and the coordinates to (-111, 113).
- Duplicate this singular block and change the coordinates of the second block to (10, 125). Place it below the first block, making both the “glide” blocks inside the “forever” loop.
- Finally, use the duplicated “when I receive__” block and click on the current option to change it to “hide sprites.” Put a “hide” block beneath.
Attaching Makey Makey to the Project
- Plug in the cable that comes with the Makey Makey to the board and a computer or laptop.
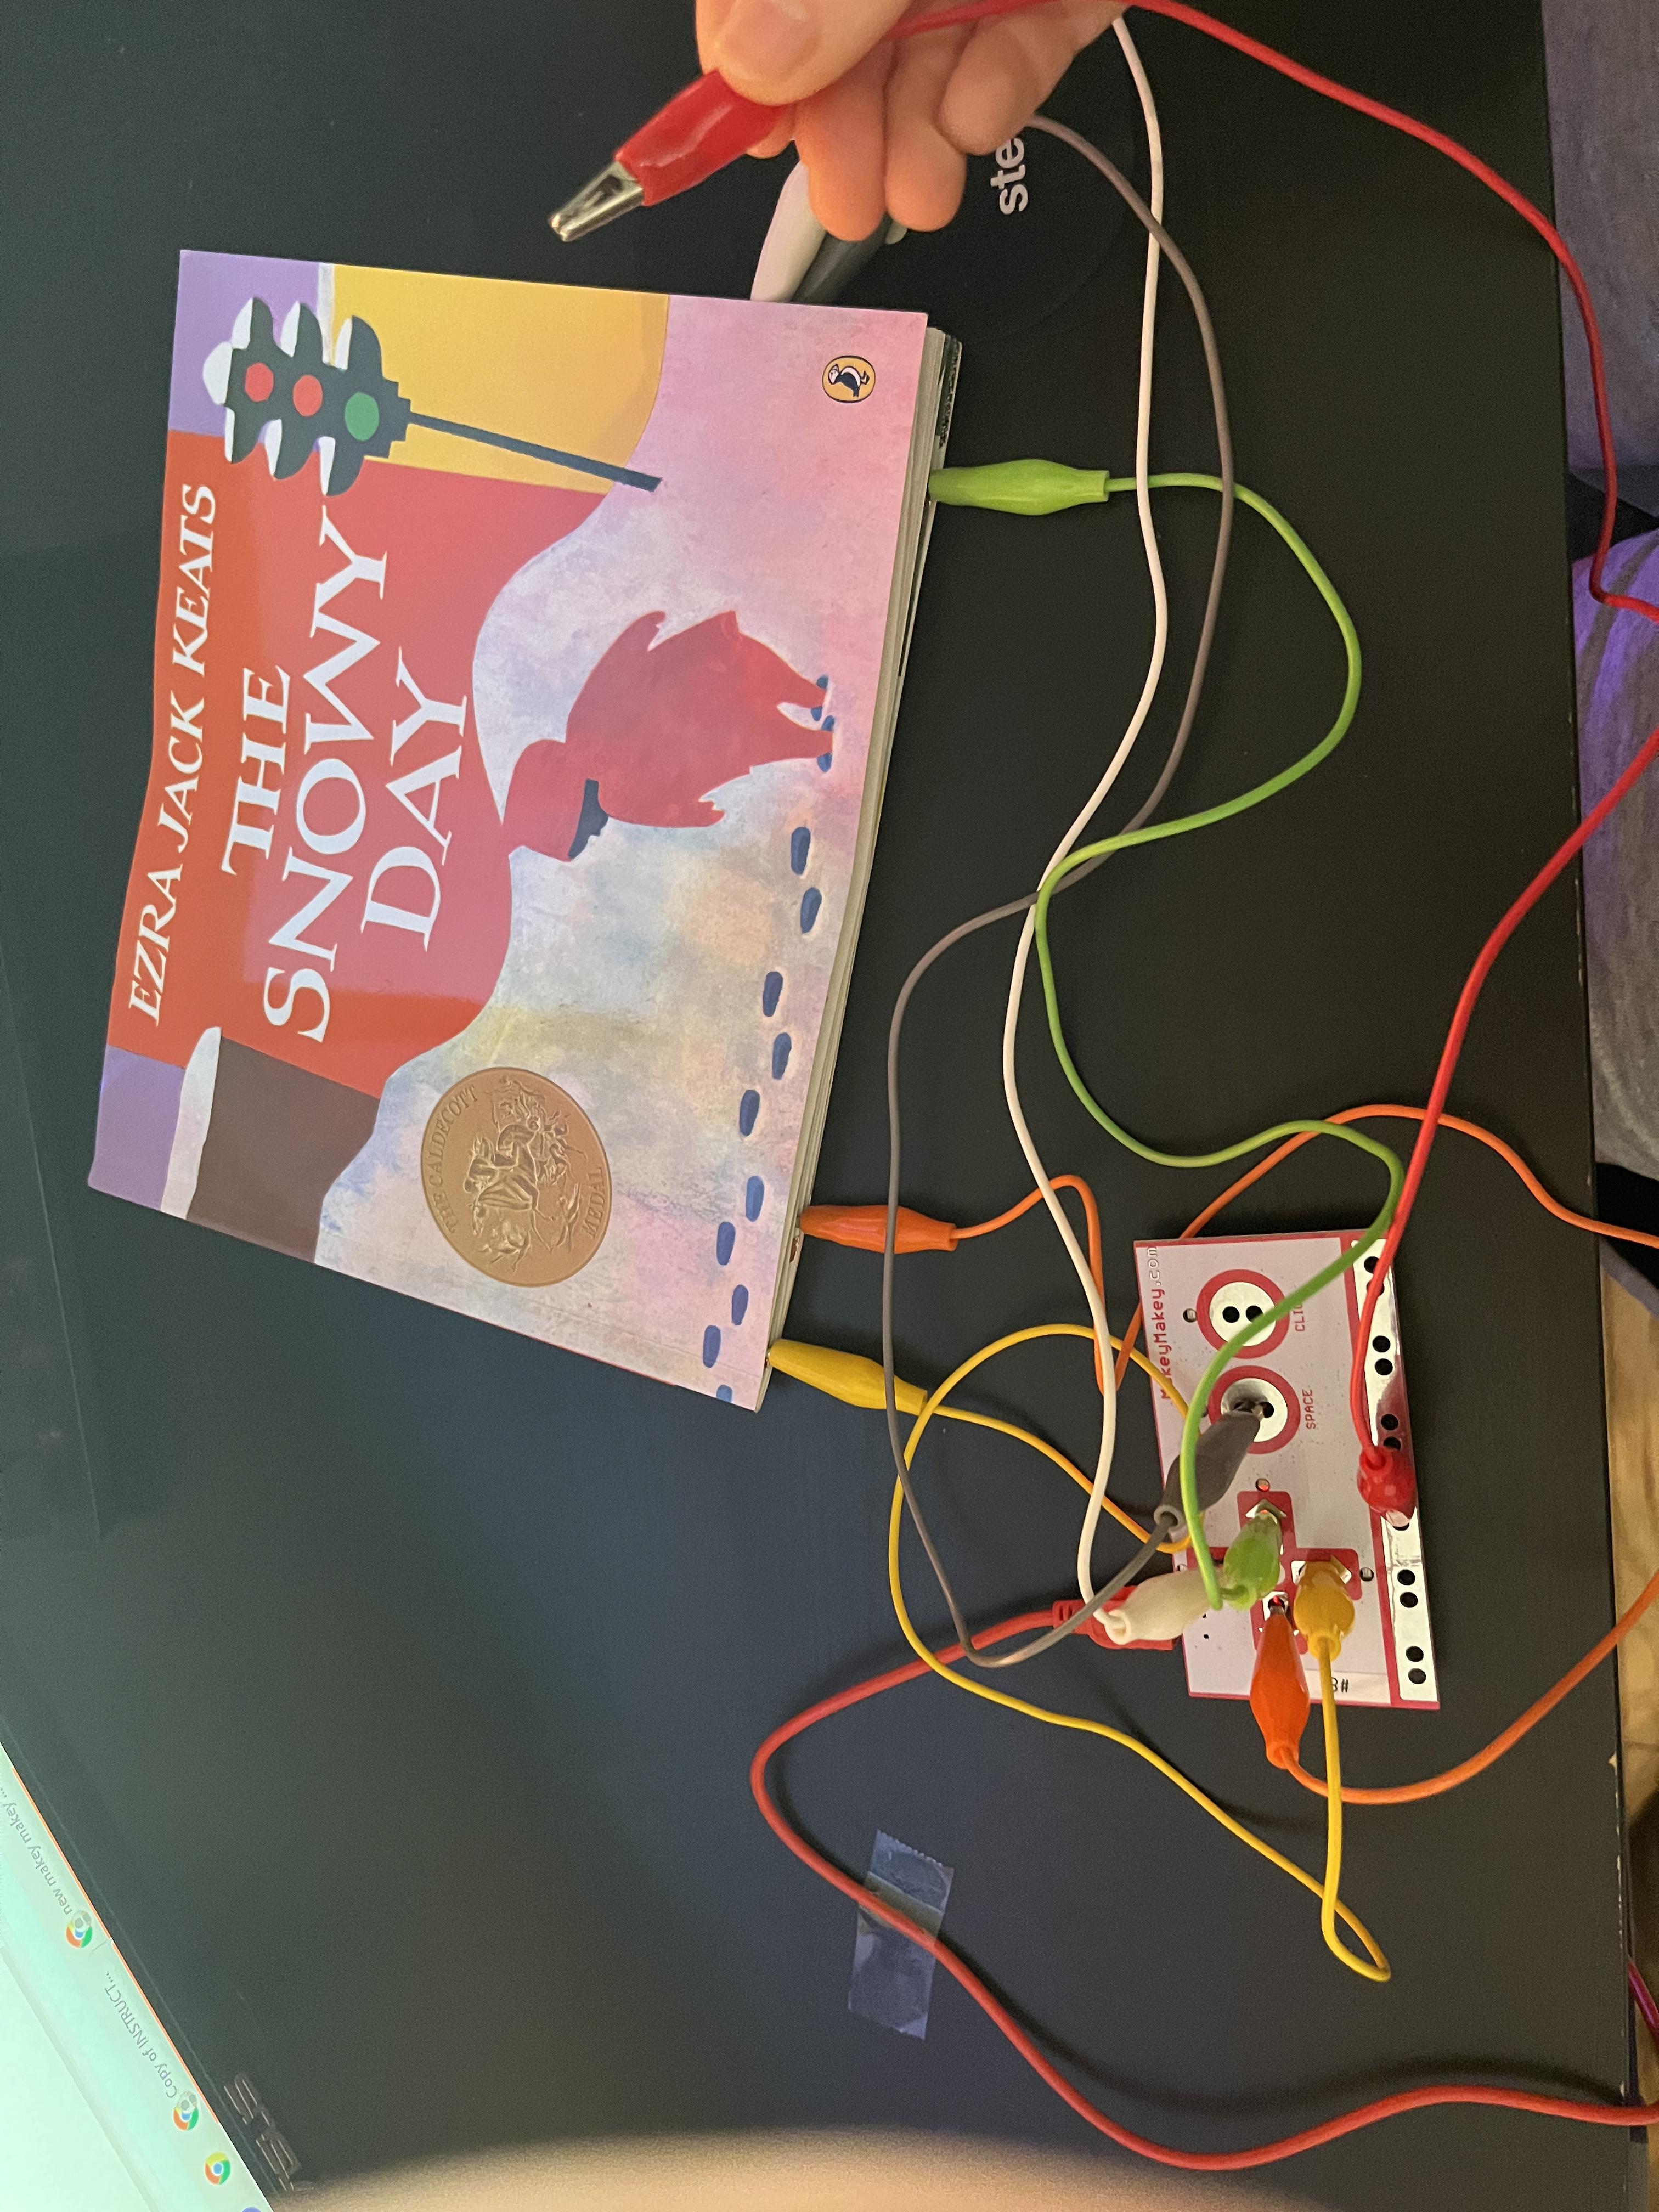
- Then, attach one end of the following colored alligator clips to the Makey Makey board. Follow this order: orange(clip)=left(Makey Makey board), white=top, green=right, yellow=bottom, gray=space.
- Now attach the other end of the alligator clips to the book by aligning and clipping the clip on top of both sides of the copper tape.
- Do in this order: 1st=yellow, 2nd=white, 3rd=orange, 4th=gray, 5th=green.
Testing and Troubleshooting
- Connect the USB head of the cable to the computer and then insert the mini USB into the Makey Makey.
- Click on this link and click “see inside” below the share button. Compare your blocks to the pictures posted above for each sprite and the backdrops.
- Attach the cables to their designated locations; make sure you can open and close the book comfortably.
- Check to see if the copper tape and alligator clips are secure.
Final Project
.jpg)
By attaching the Makey Makey (and alligator clips) to some copper tape on the book, you can create a reactive story. This model is able to function by the use of the copper tape which is conductive. In addition, it’s able to operate by the reader holding the earth/ground because people are conductive (who would have known?). When you touch the ground alligator clip and press on the copper tape simultaneously, a full circuit is created and the image/reaction appears on the Scratch program.
Two suggestions: (1) when you bend the copper tape onto the backside of the page, make sure it’s vertically straight and not placed or bent weirdly. This is because it will be hard to attach the alligator clip to one of the ends. From the back side of the page, it will look like the alligator clip isn’t attached. On the front side of the page, it will be attached, but barely. (2) In general, the alligator clips don’t clip onto the tape very well so don’t be surprised if they fall off a few times. There isn’t much you can do because the setup of having the Makey Makey and the book is supposed to be portable. Applying tape to the clips to stick onto the page can help, but it’s inconvenient to reapply and take off the tape after every single usage.
One note: the last noun, “the sun” on page 25 doesn’t have a cable attached to it. That’s intended and it's already accounted for in the Scratch program.