Vibrating Pillow

We made a vibrating pillow for deaf people to wake up in time!
Supplies
What will you need?
First for the pillow:
- 5 vibrating motors
- Arduino
- Relais
- Battery 9V
- Bluetooth connector
- a pillow
- a pillowcase
- small power wires (many)
- piece of cardboard
A device (computer) with which you make the app
And an android to connect with
App
Now that you have all the supplies we can start making a vibrating pillow!
First, we are going to make the app to connect with your phone and the Arduino.
You will open the site, https://appinventor.mit.edu. When you open the site you will see on the left top that you can 'create Apps'. Click on that button. (foto scherm eventueel voor instructies) After that, you can start a new project, click on that, you can give it a name, and start.
Video

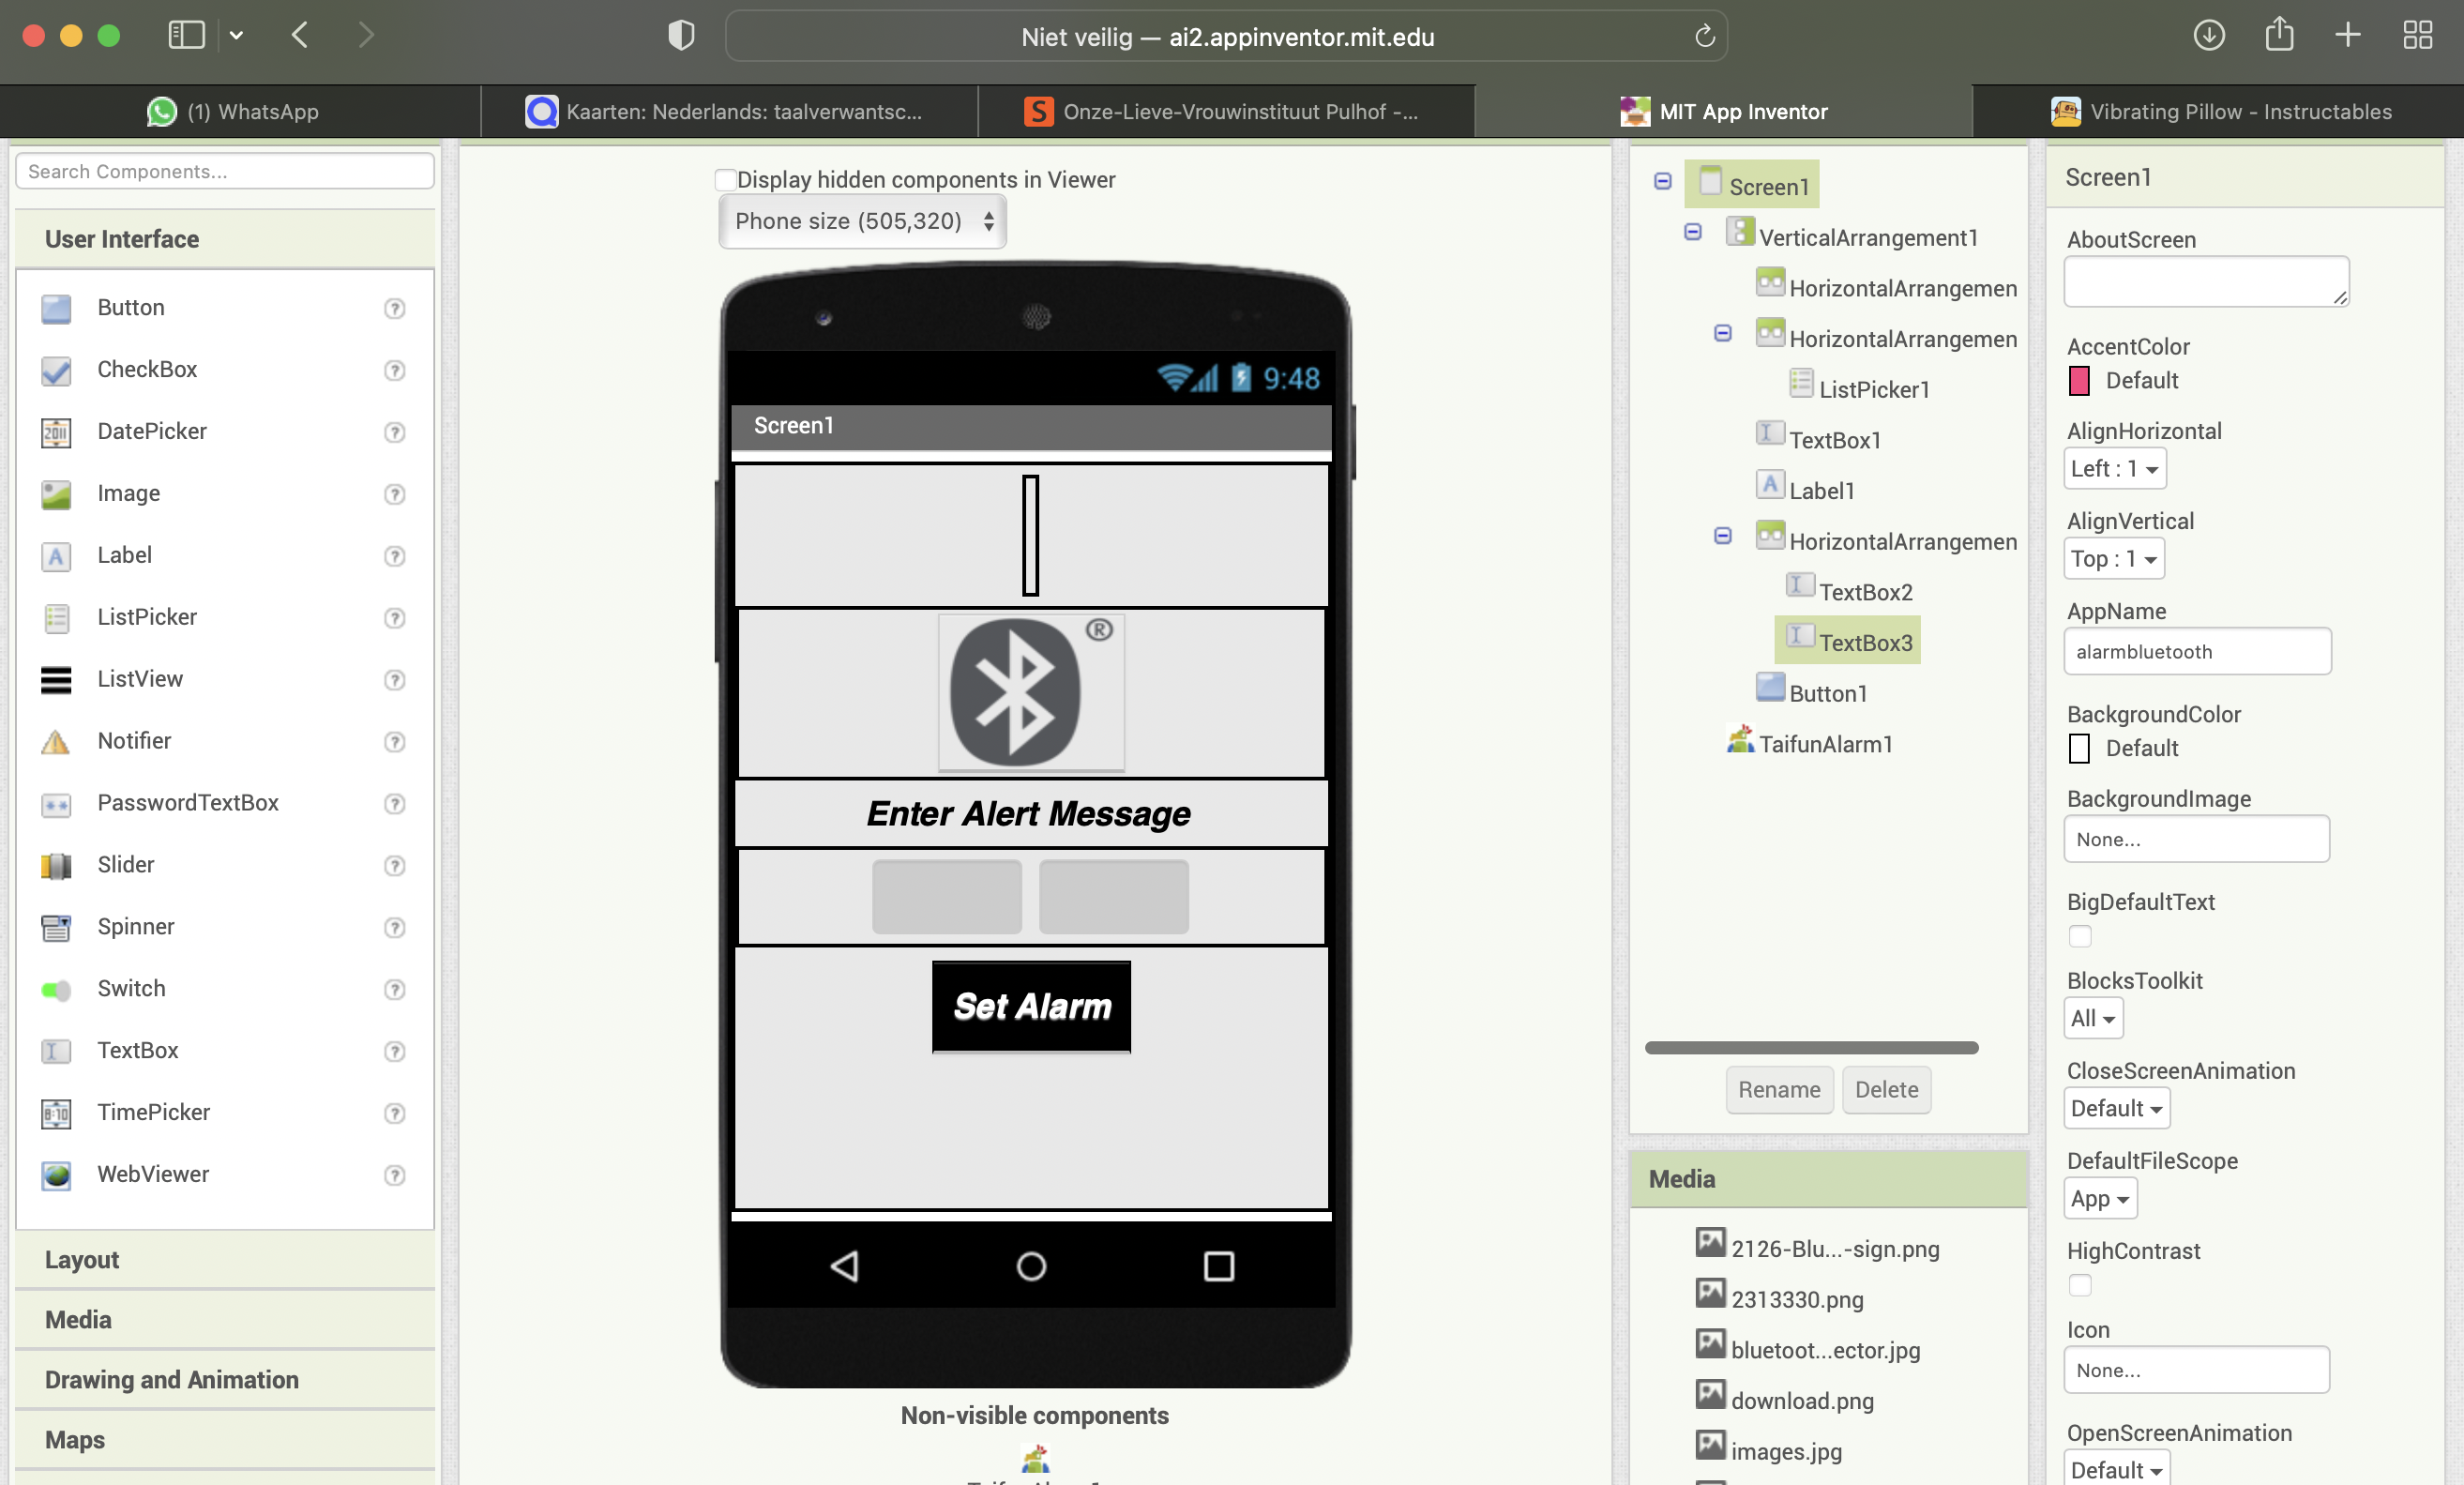
So now that you named it (and connected it with a device step3) we can start really making the app. I watched this tutorial for making the app. It really helped me watching the video, but you have to watch carefully what he's doing and explaining ! :) You are going to watch the video down below. I added my personal touch to it.
Connect
We are officially starting. You can connect your phone with the app so you can see on your phone what is exactly changing.You will have to download, the app: 'App inventor' on your android. If you downloaded the app you have two options, you can choose between taking a Qr code with your camera or just type in the code that you will see on your screen to connect your phone. And from that point you will see what you are doing on your pc appears on your android screen.
Download the Arduino IDE 2.1.0 app on your device and copy this code. I already made it for you :)
The code:
#include <SoftwareSerial.h>
SoftwareSerial mySerial(10, 11); // RX, TX
void setup() {
Serial.begin(9600);
pinMode(13,OUTPUT); digitalWrite(13,HIGH);
Serial.println("Enter AT commands:");
mySerial.begin(38400);
}
void loop()
{
pinMode(13,OUTPUT); digitalWrite(13,HIGH);
delay(2000);
digitalWrite(13,LOW);
delay(1000);
if (mySerial.available())
Serial.write(mySerial.read());
if (Serial.available())
mySerial.write(Serial.read());
}
The Real Stuff 1
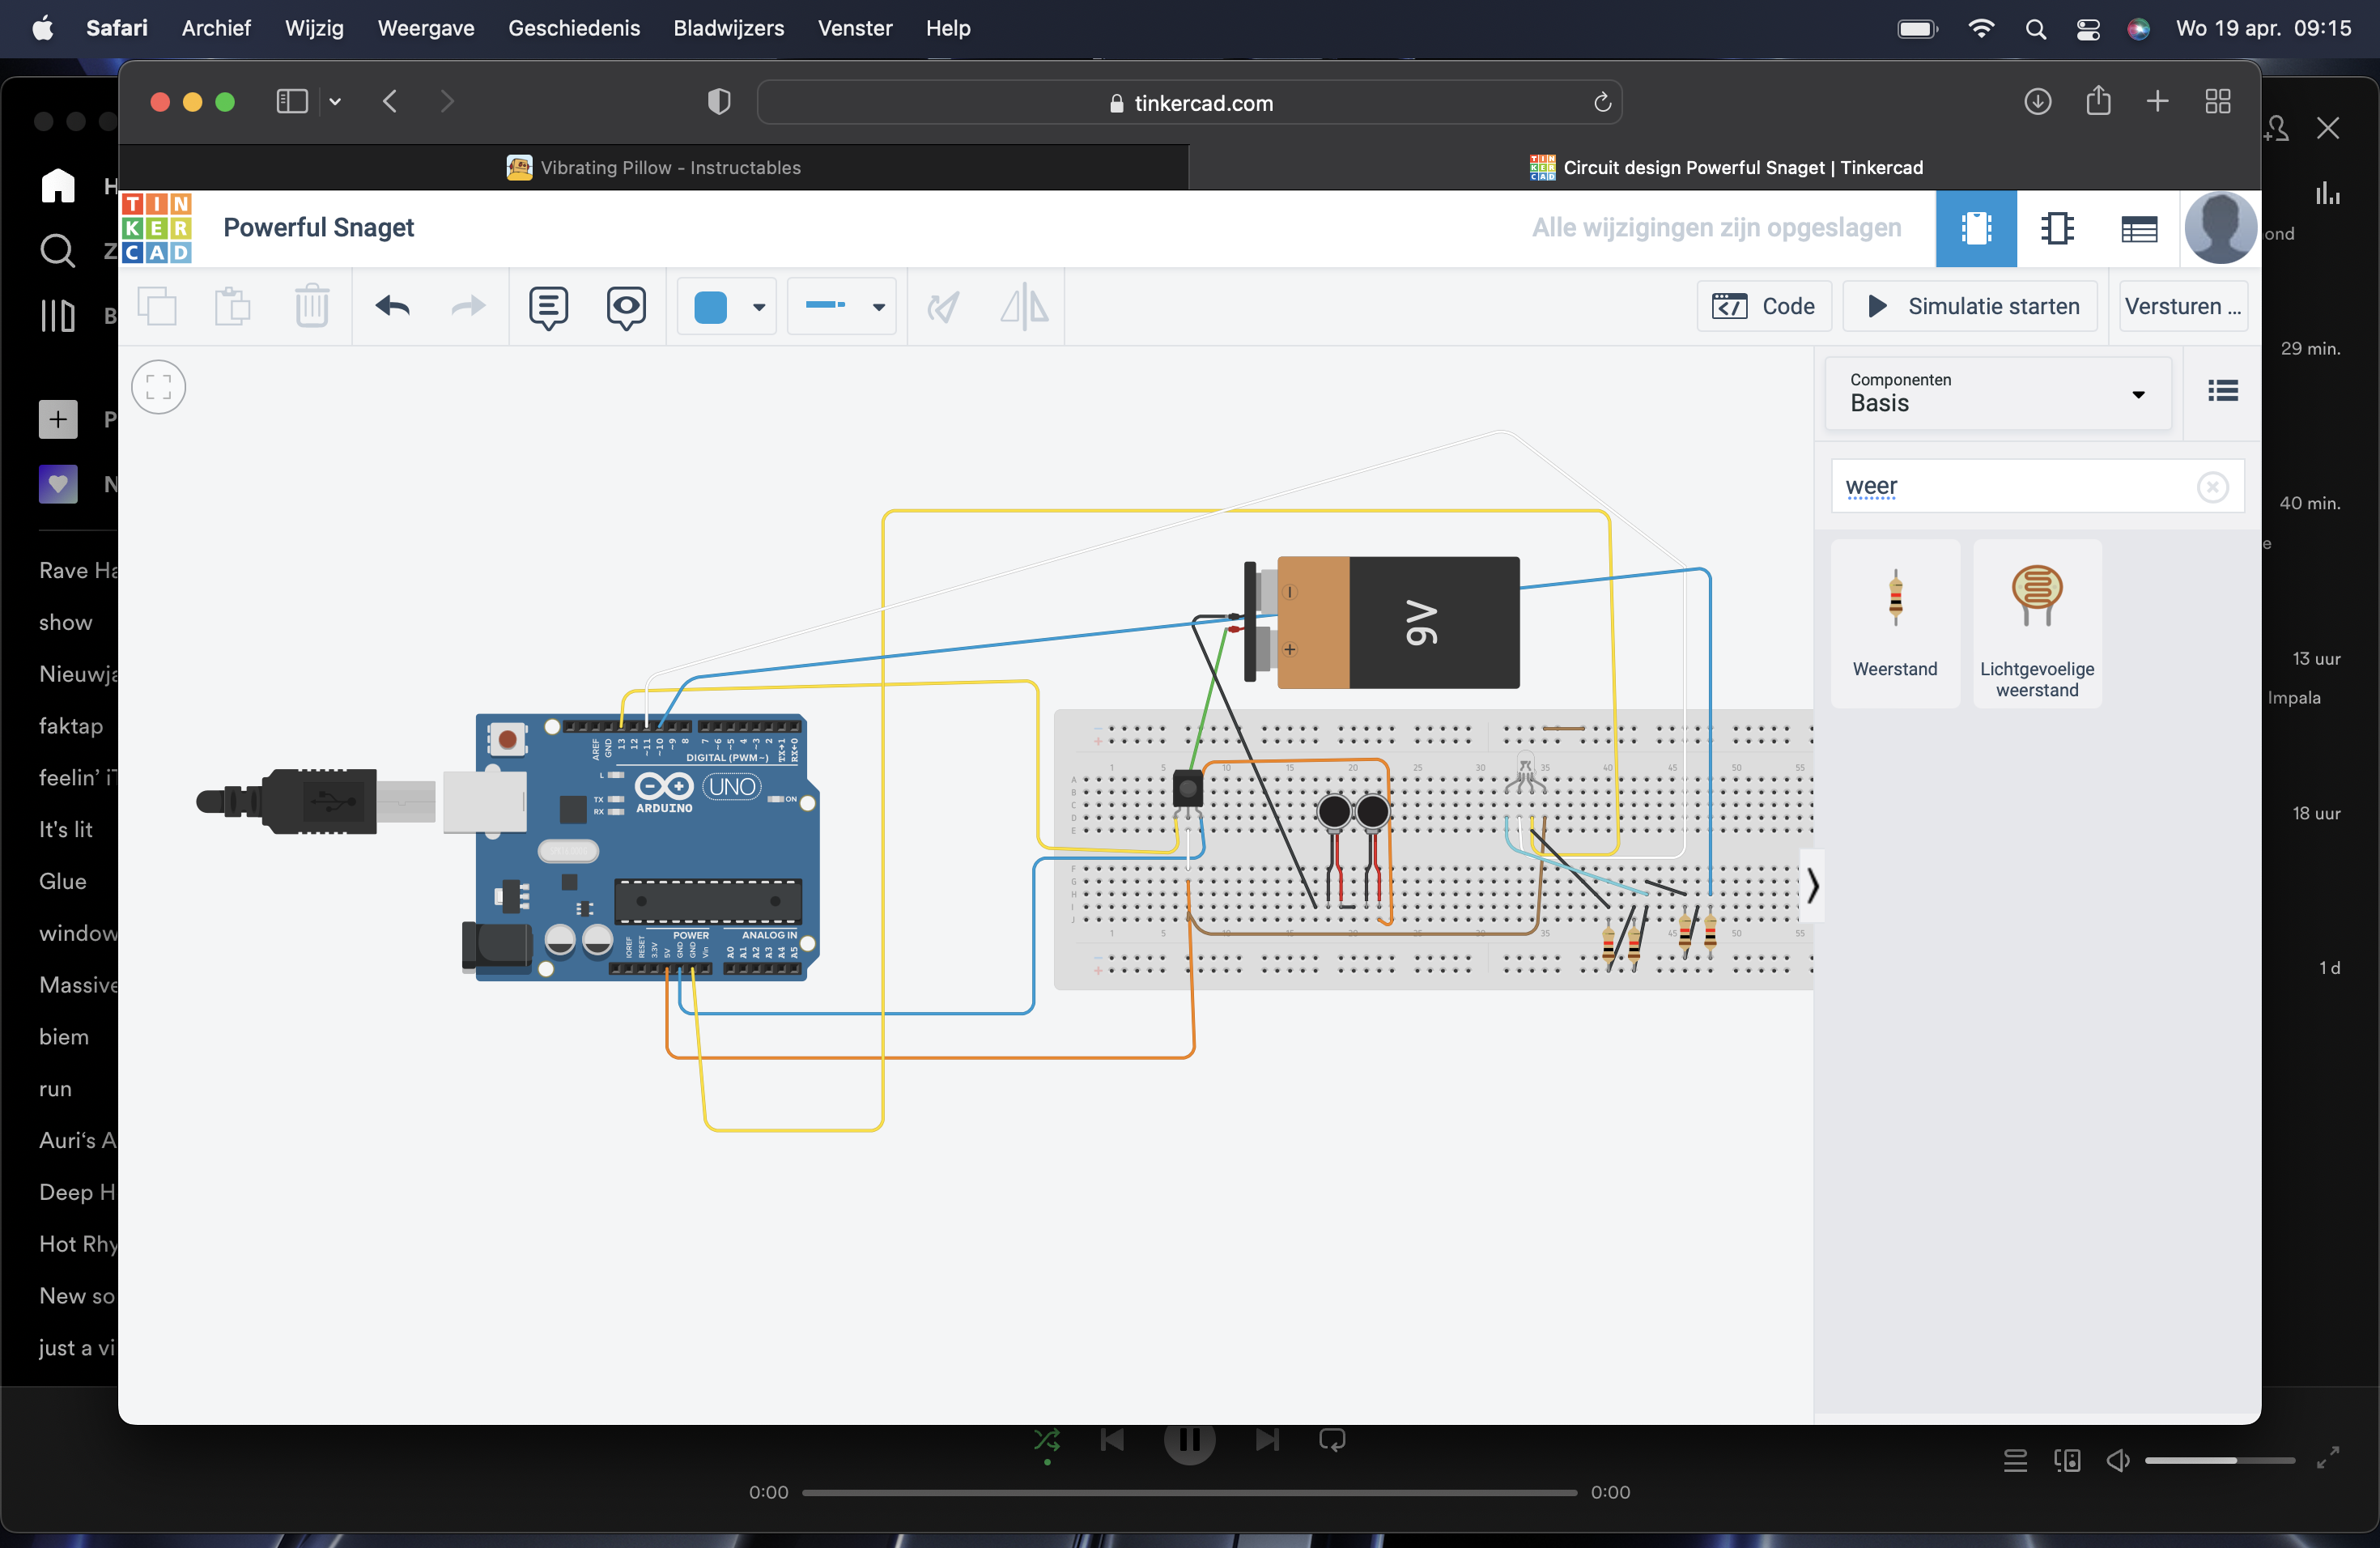

Step1 about the real stuff: arduino in tinkercad, this is an example, but it looks a little different in real life.
This is how it is supposed to look.
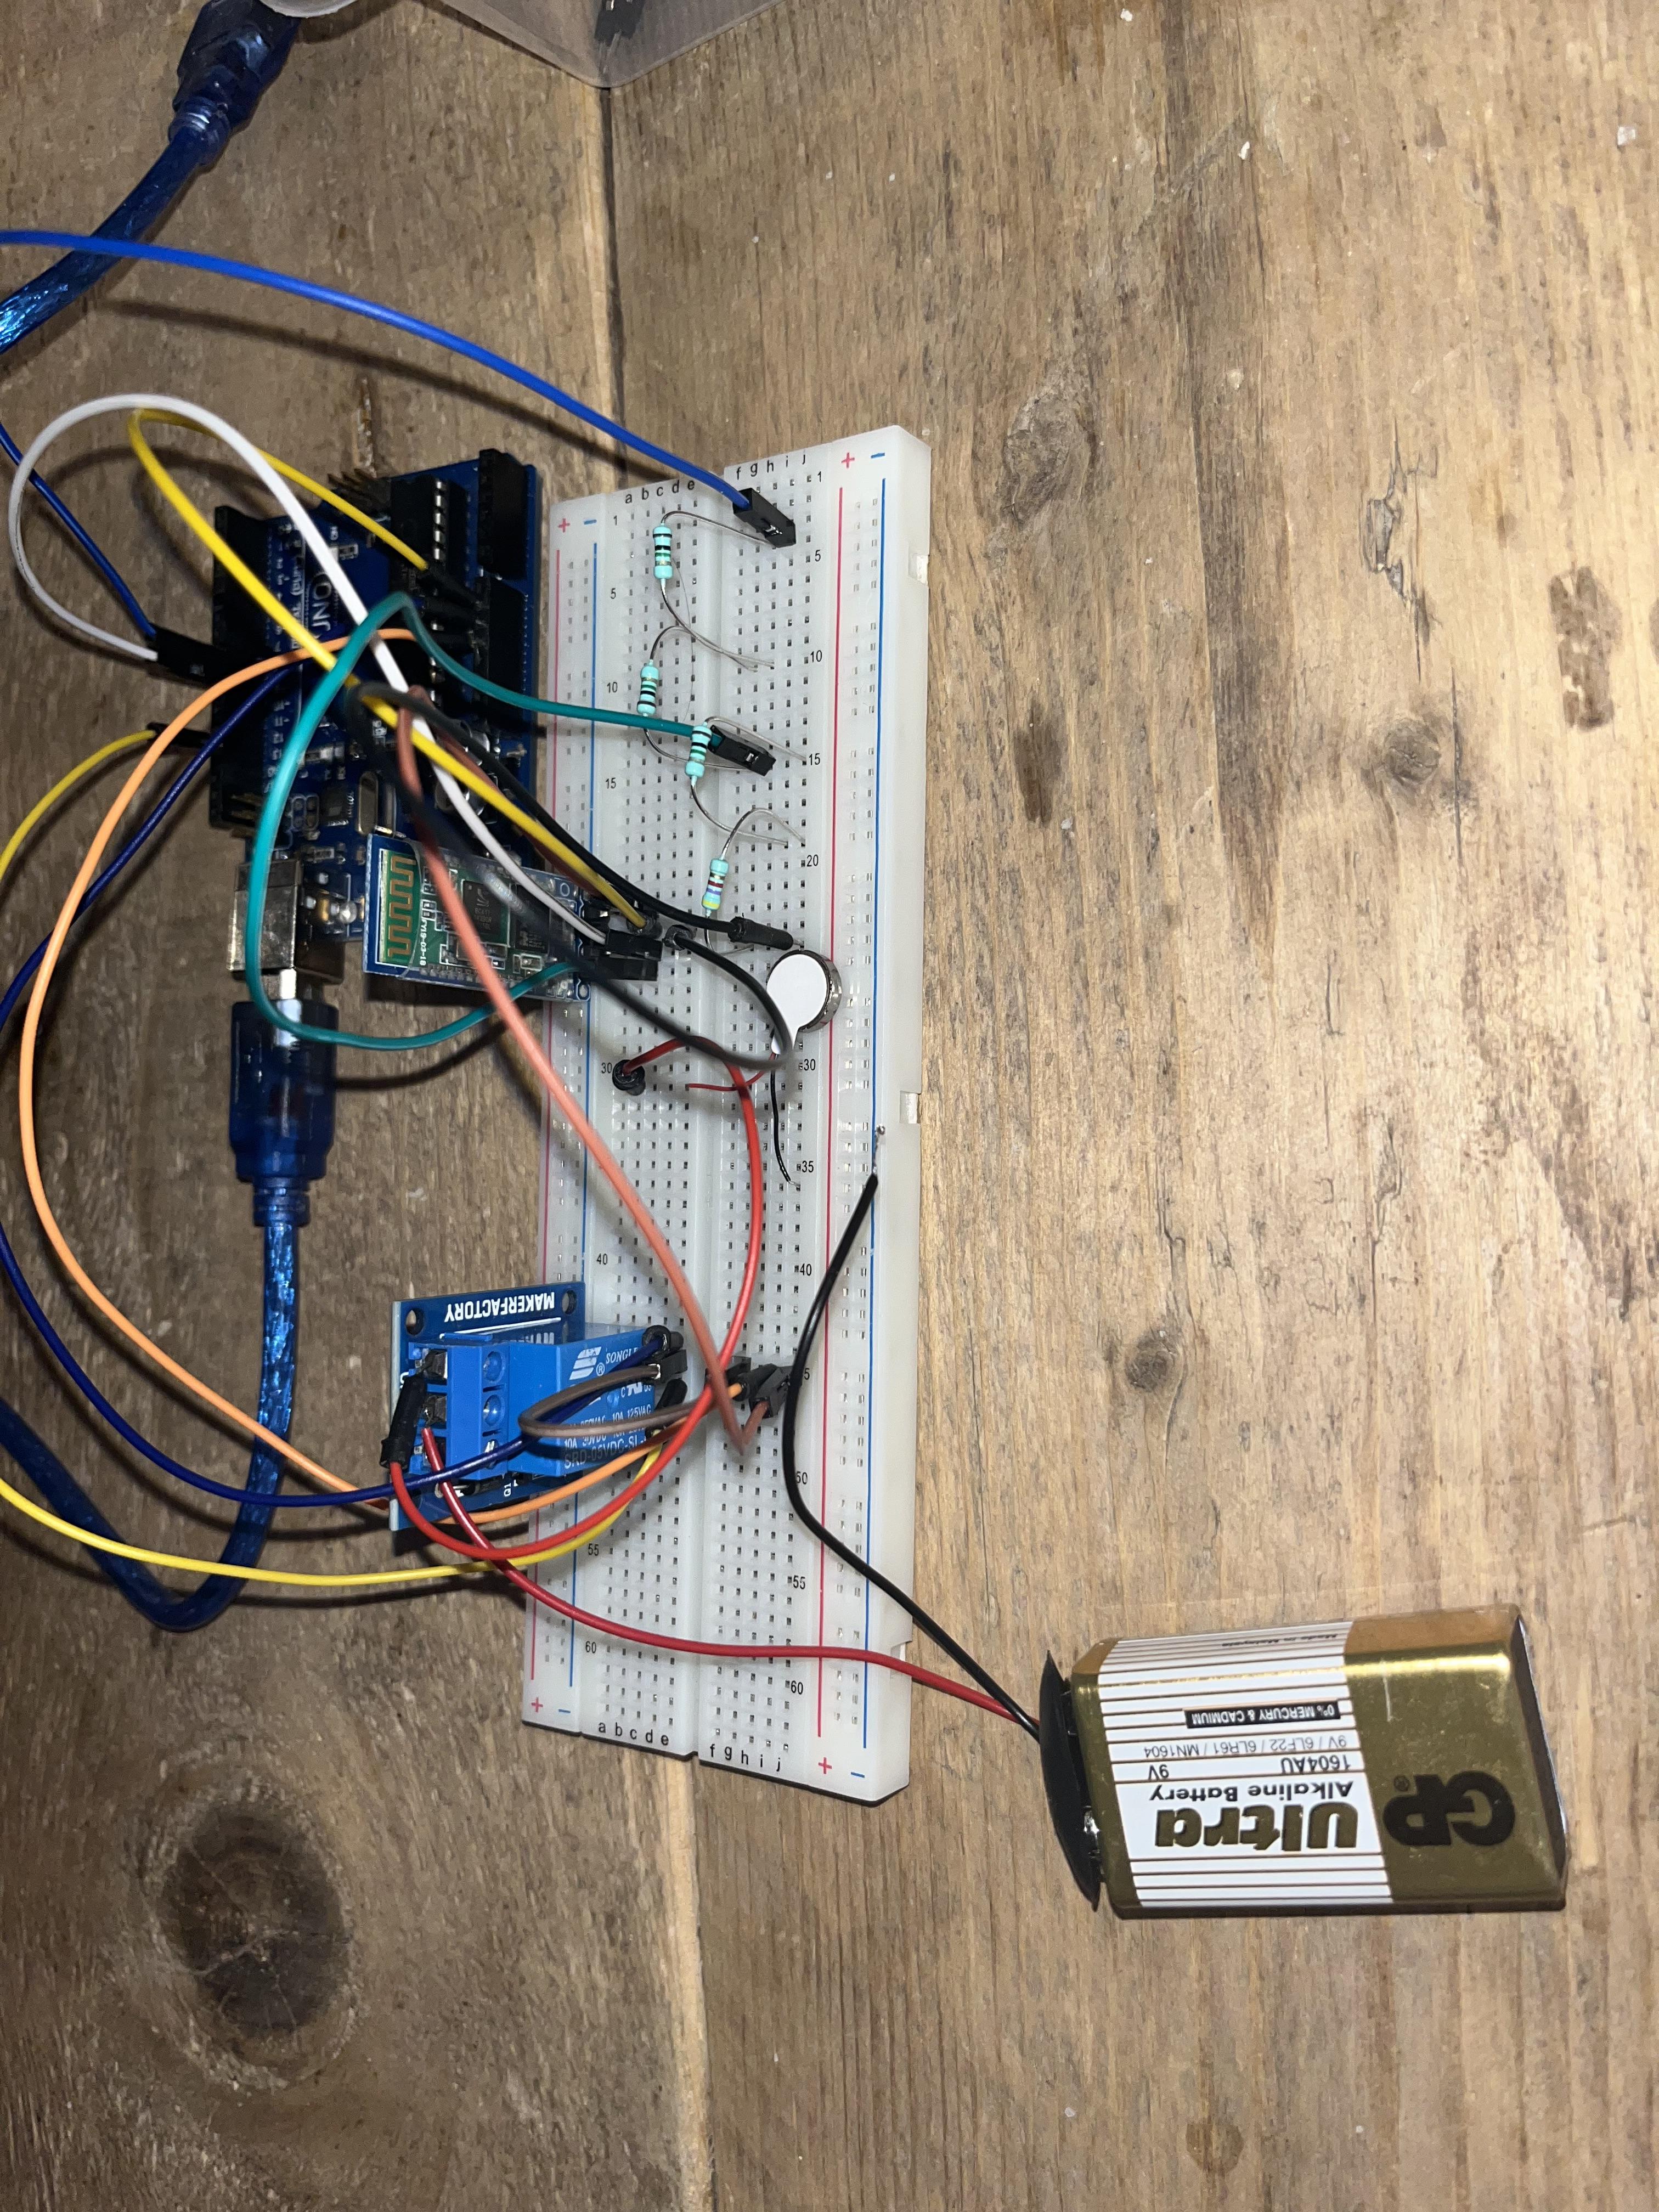
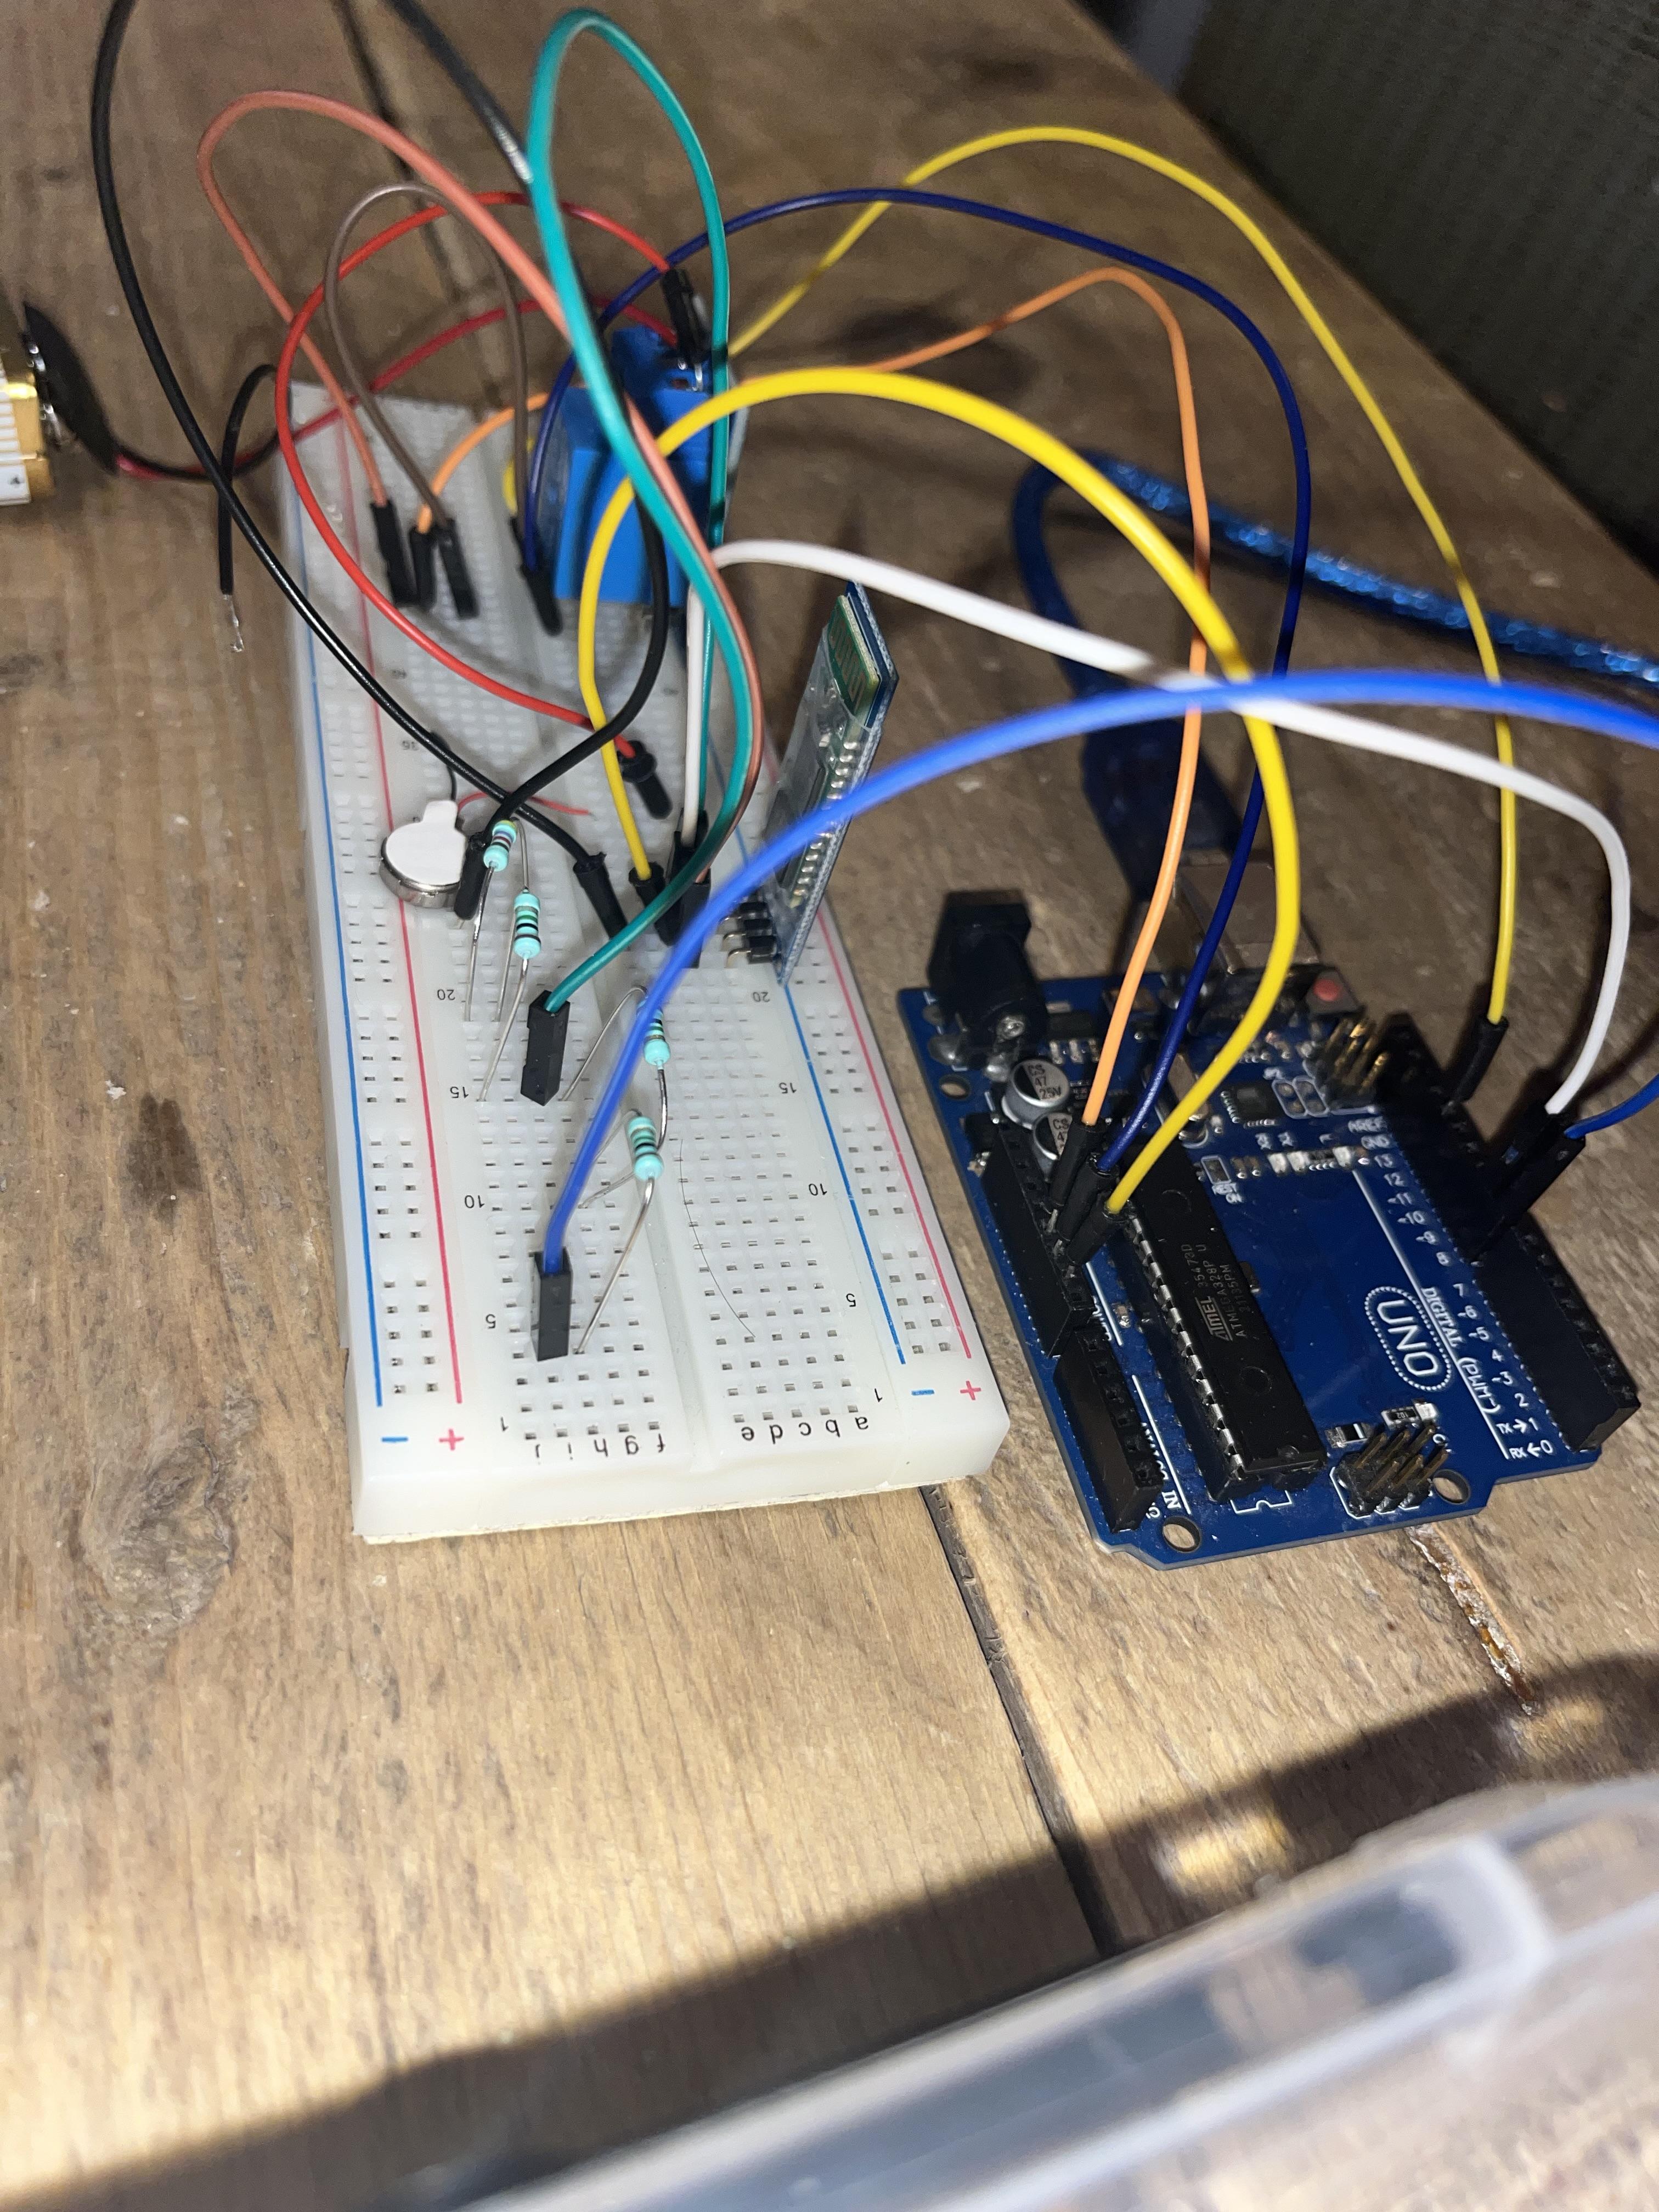
Now we're going to connect the vibrating motors to the arduino.
Now the product is ready to use!