Vectorizing Drawings for Laser Engraving and Cutting Jewelry (Free Samples Too!)
by robopanda in Craft > Jewelry
48346 Views, 102 Favorites, 0 Comments
Vectorizing Drawings for Laser Engraving and Cutting Jewelry (Free Samples Too!)
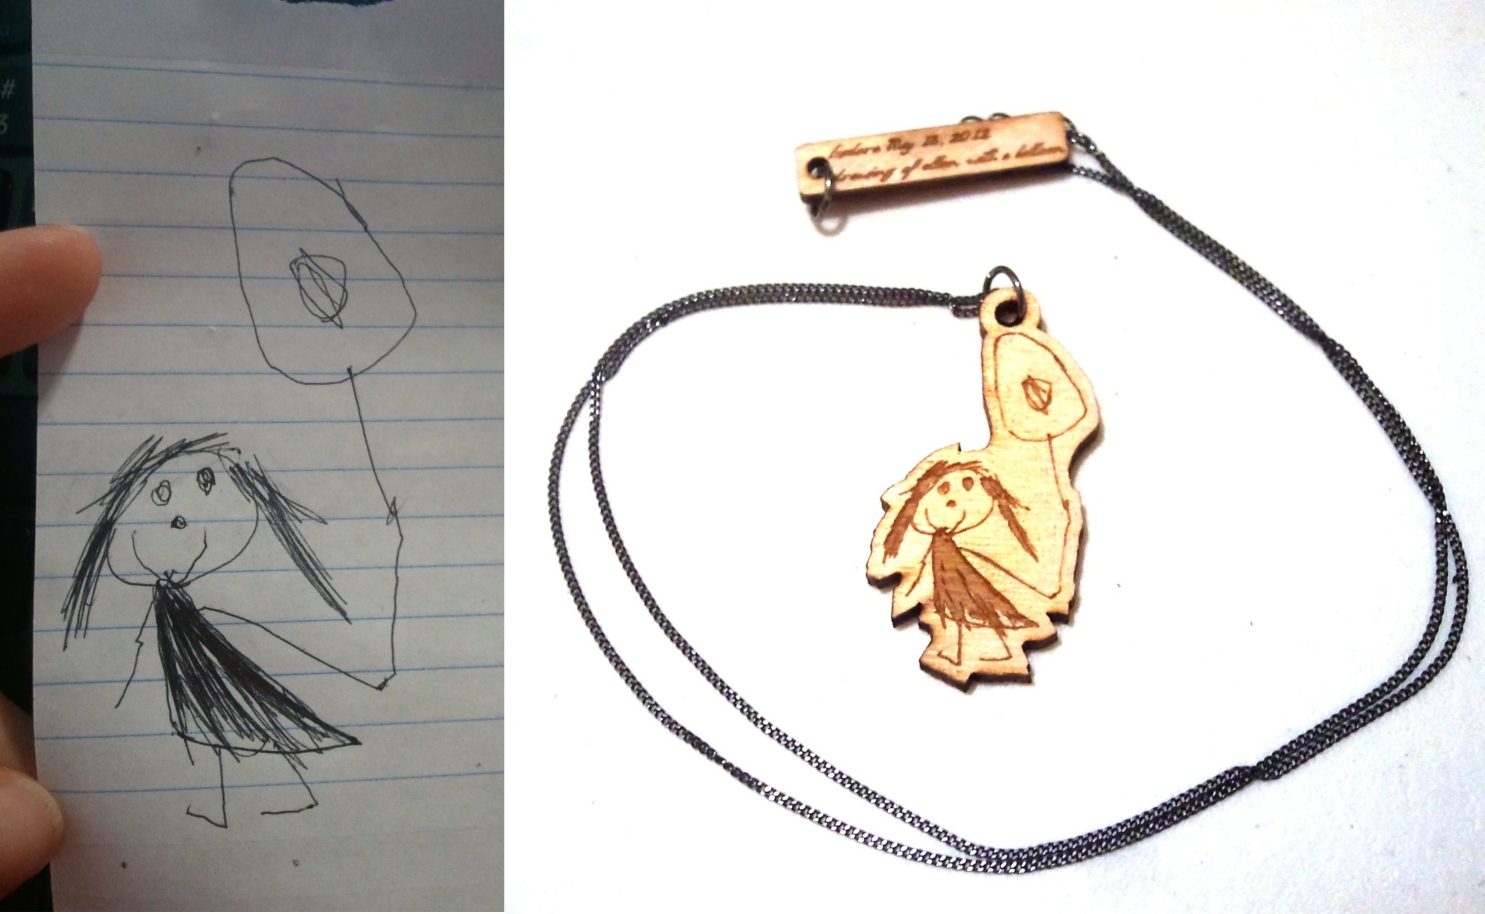
Some of the best artwork I've ever seen in my life was from the hands of a child. Unfortunately it is usually done on regular paper that won't last very long or lined notebook paper that just doesn't have that museum quality feel.
This simple instructable shows you how to take a photo of a kid's drawing (or any drawing) in black ink to convert into a vector which you can then print onto higher quality material (or in this case, laser cut for free at Outfab.com)
This drawing was specifically turned into a necklace as a present for the child's mother's birthday (best present everrrr, even the kid was blown away!)
I've designed the instructable to walk you through the most efficient manner to make the best laser etch possible. You can tweak the process to make a scalable vector of a color drawing or to vectorize your own artwork for laser cutting. Most people do not realize the importance of contouring to make something stronger, adding a loop, or using pure black & white graphics for etching (as opposed to grayscale).
I use CorelDraw but you can use similar technique with a variety of programs including Inkscape which is free at www.InkScape.org (a great starter for those unfamiliar with vector graphics)
See the Inkscape version of this instructable here.
Take a Photo & Import It to Corel Draw
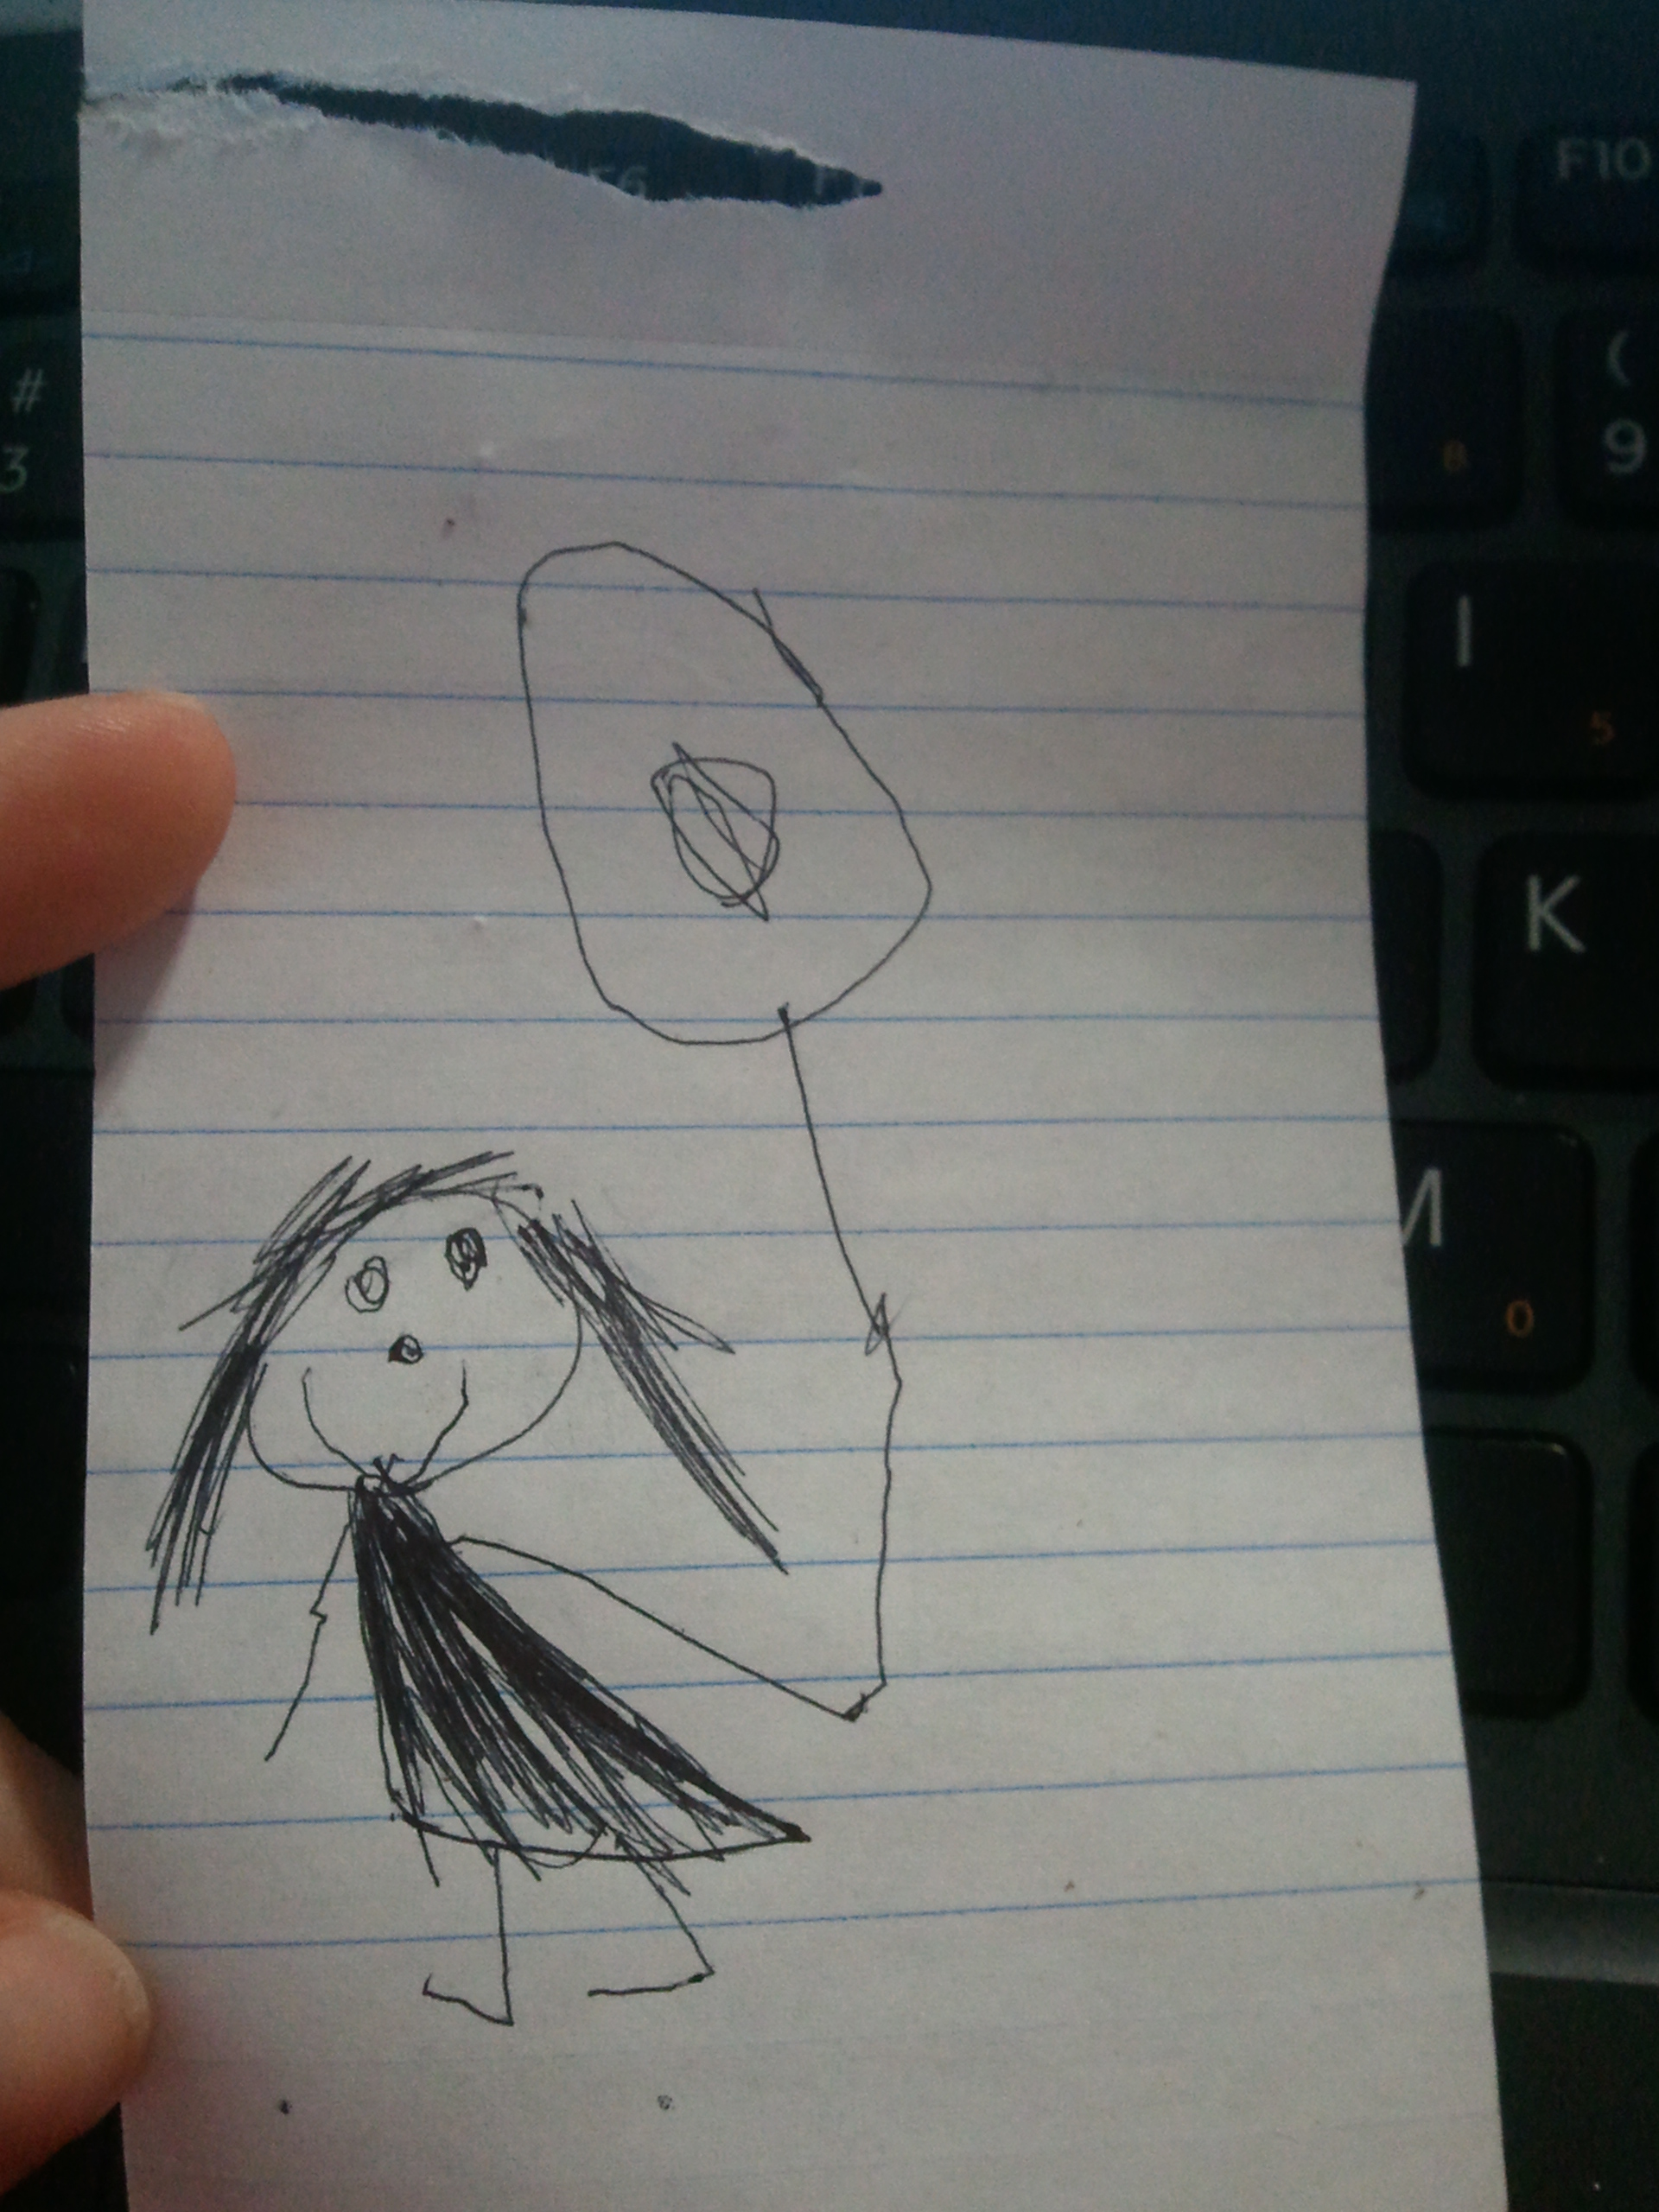
Use any old camera to take a photo of the artwork. I hate plugging the scanner in and importing scan photos when I can just email myself a photo from my phone just as well. Just make sure the contrast is pretty good. This one was taken with a cell phone camera.
You can see the paper is just cheap lined mini legal paper that will probably get lost or crumpled up!
Drag the photo right into CorelDraw.
You can see the paper is just cheap lined mini legal paper that will probably get lost or crumpled up!
Drag the photo right into CorelDraw.
Convert to Black and White 1bit
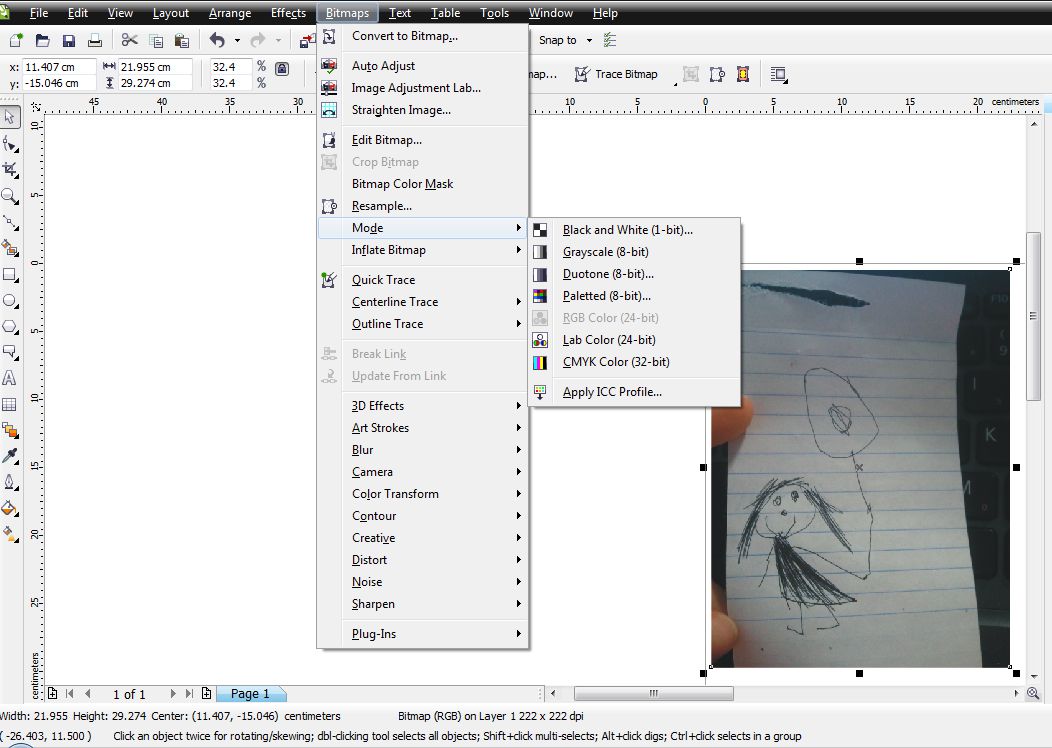
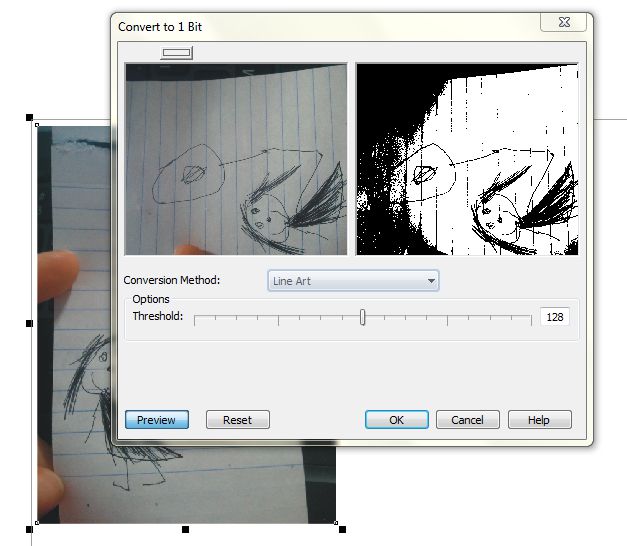
Converting the bitmap photo to black and white before auto-tracing into vector format will ensure that your etched areas are pure black, which is necessary to get a uniform laser etch.
Otherwise the program will auto-trace gradients of gray which are just a mess and won't etch correctly as the laser only reads pure RGB black.
To get a great explanation of what a vector is, see this wikipedia article.
So as you can see, simply select the imported bitmap, and through "mode" change to black and white (1-bit)
Within this menu are options for the "threshold" aka "contrast" of the black and white conversion. I find the "Line Art" conversion (as the name suggests) produces the best vector representation of line art.
You want to reduce the visibility of the page lines while preserving the drawing's detail. In some cases, you can do the same drawing twice and splice the converted B&W images together.
Next we will auto-trace the B&W bitmap and do some clean up, so it's OK if you still see some of the line.
Auto-Trace & Clean Up
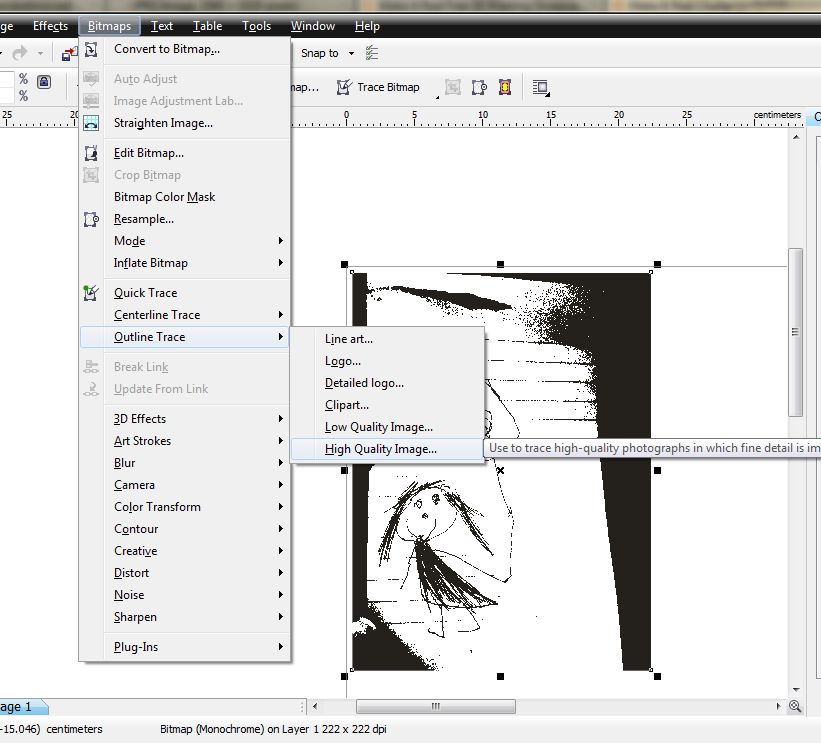
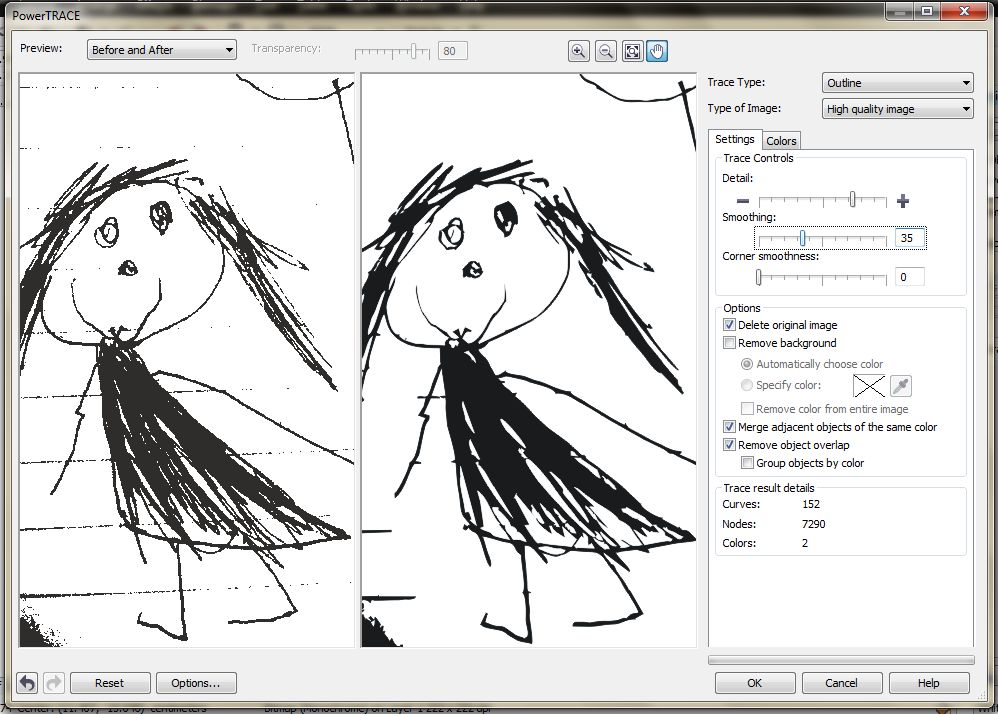
Now comes the fun part where we turn the drawing into a vector graphic we can manipulate. There are a bunch of options for tracing, but I've found it's best to do the max and reduce the complexity if needed as it's harder to go the other way.
So go to the Bitmaps menu again, then outline trace, then high quality image.
A menu will pop up that shows you a preview of the image, play with the settings until you are satisfied at the vectorized representation.
You will still be able to clean up the drawing afterwards as you'll soon see!
Right now we are still focusing on preserving the detail.
Clean Up "Nodes"
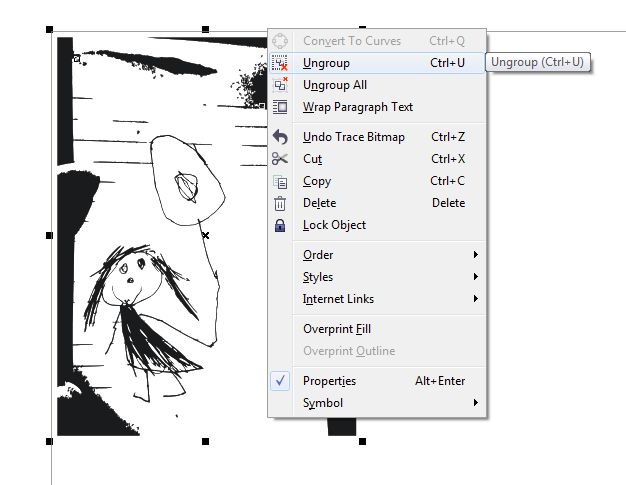
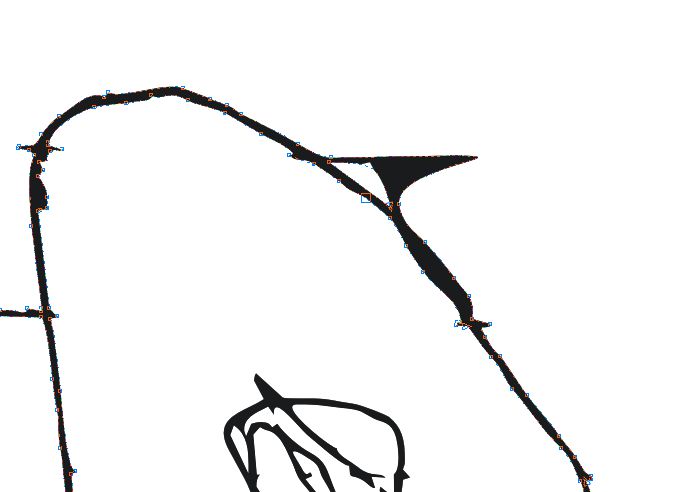
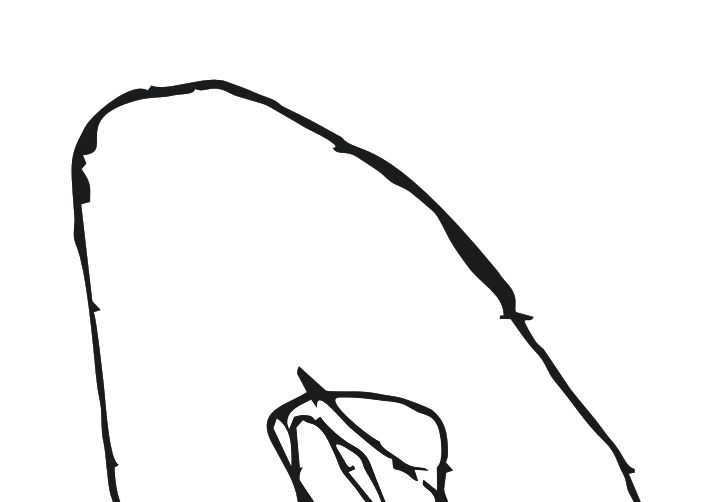
Once you have a vectorized drawing you like, you can edit the "nodes" or points on the lines that represent curves, to edit the drawing further and smooth up scratch areas like where the page lines intersected the arms.
First you must "break apart" your new vector. It is now made of black and white shapes. Once you break it apart, you can edit the points and curves on these black and white shapes.
Delete any parts that aren't relevant.
Then zoom in and very carefully, tweak the "nodes" with the black arrow to remove any parts that shouldn't be there.
Notice on the close-up how I removed the black lines that were sticking out of the balloon (remnants of the page lines)
There are other lines on the girl's arm I remove.
Now we need to create a contour around this shape so that the balloon string and legs will not be fragile.
You can simply place this on a rectangle and put a hole in the top but a contour is more impressive though a bit more work.
Add a Contour for Strength
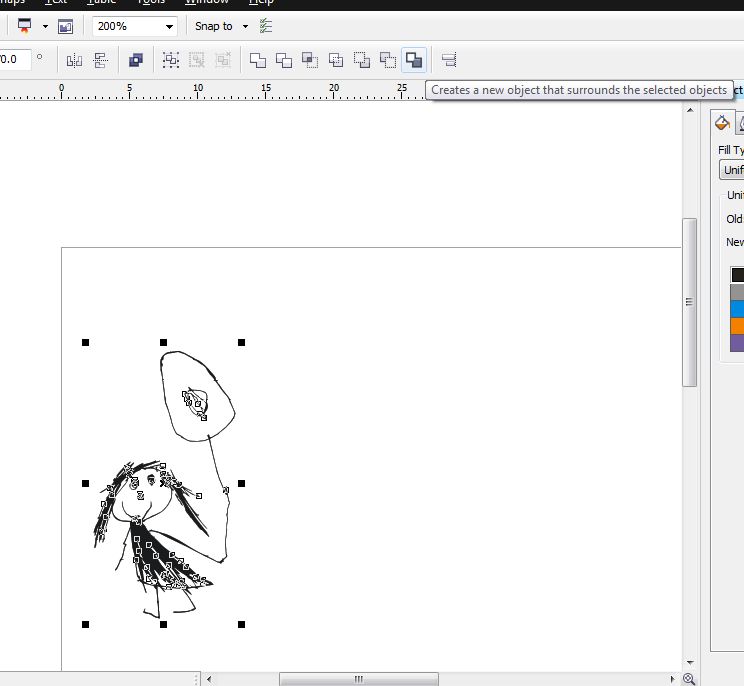
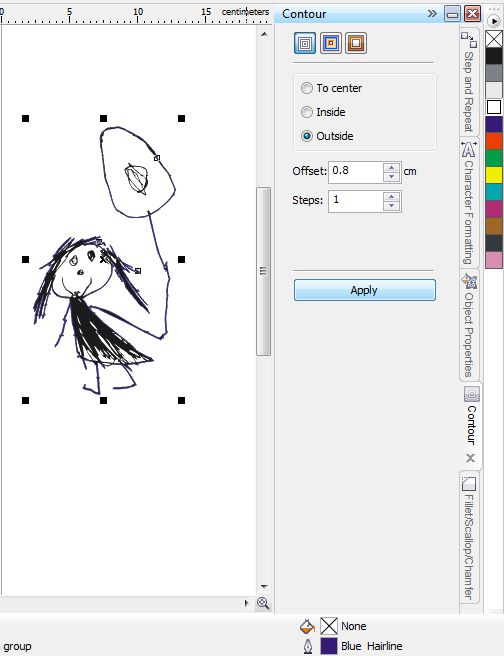
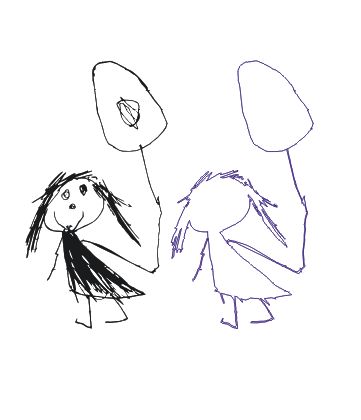
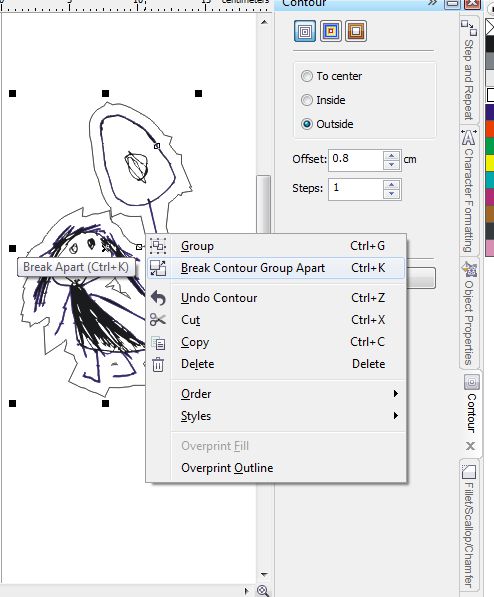
A boundary around a shape is a continuous line that surrounds another shape. Depending on the drawing, it is a good practice to create a boundary around the whole drawing. This ensures that you have a continuous line around your drawing.
Select the entirety of the drawing and click the "create boundary" icon shown on the upper part of the screen.
Now from this boundary you will create a contour. Without the boundary, your contour can get wacky though sometimes you can skip the boundary step.
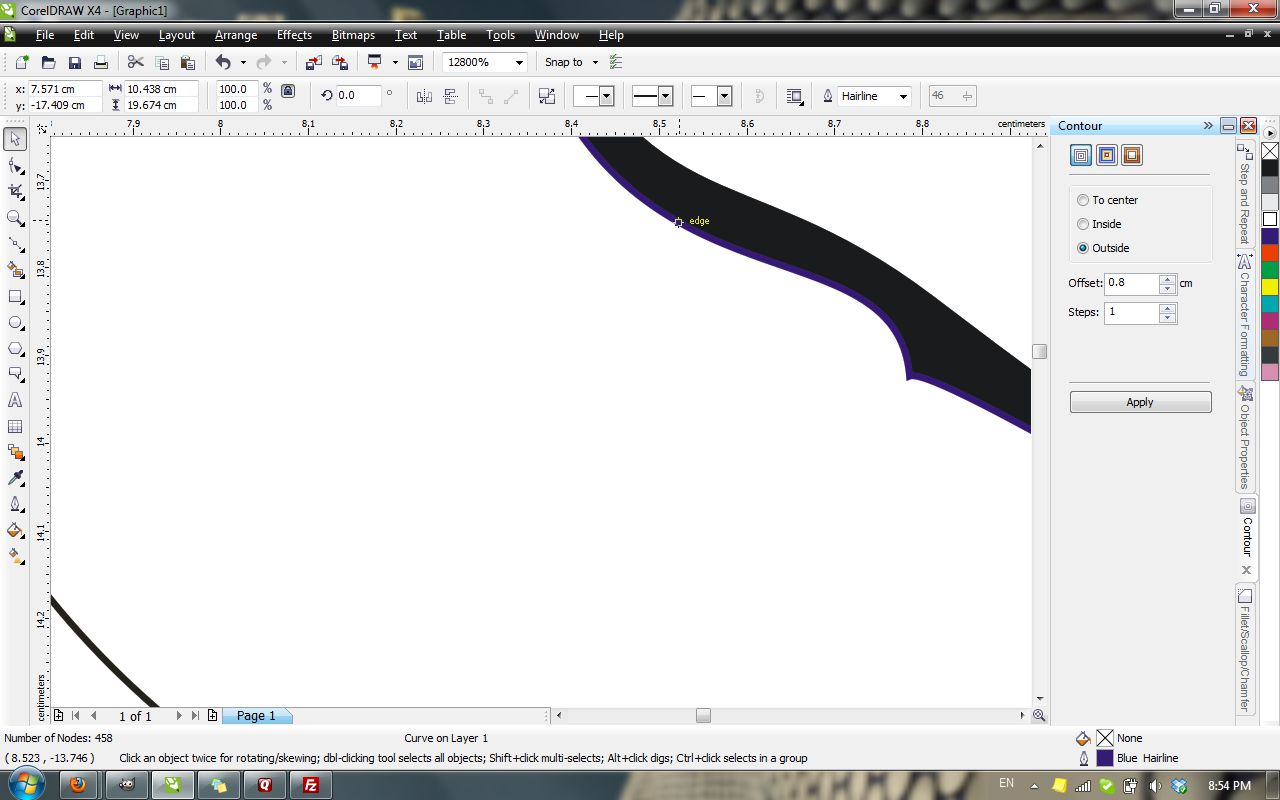
A contour around a shape is a border that is an even set distance around that shape. Contours come in handy when you have a very fragile design you want to make stronger.
In CorelDraw the contour menu is in Window>Dockers or the shortcut is CTRL+F9
You can decide on the offset based on personal preference. If you have a drawing with disconnected shapes, it is a good idea to make the contour large enough that it connects the space between the disconnected shapes. You may need to use CTRL+Z a few times to test out different contour settings.
Once you have the settings figured out, break the contour free from it's mother shape, your previously created boundary.
Delete the original boundary and you now have a perfect offset contour around your drawing. You can also tidy up this contour by using the node select tool to remove some of the pointyness or round off sharp corners.
I have my coreldraw set up to automatically set contour lines to be RGB blue hairline width. These are the settings for laser cutting.
You can see more settings here.
You can stop here and make a brooch or wall decoration, but I will now show you how to add a loop on top, resize, and finally, submit your drawing for a free laser cut sample!
Add a Loop for a Pendant
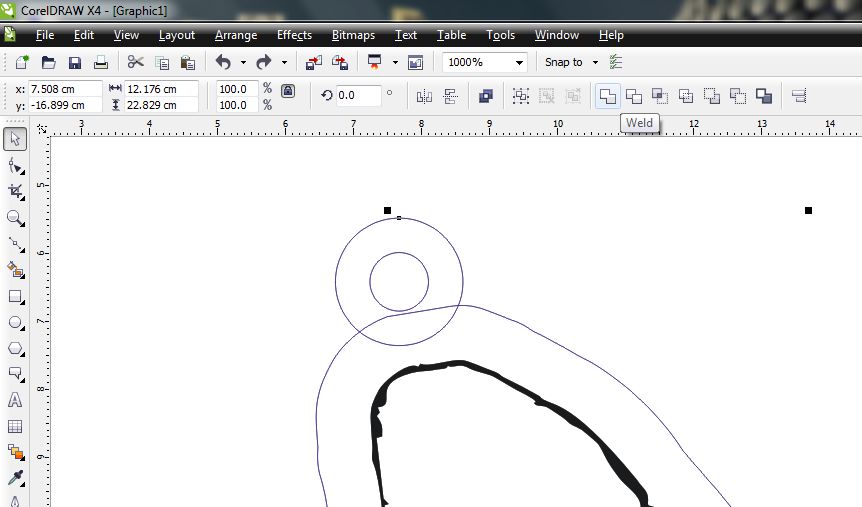
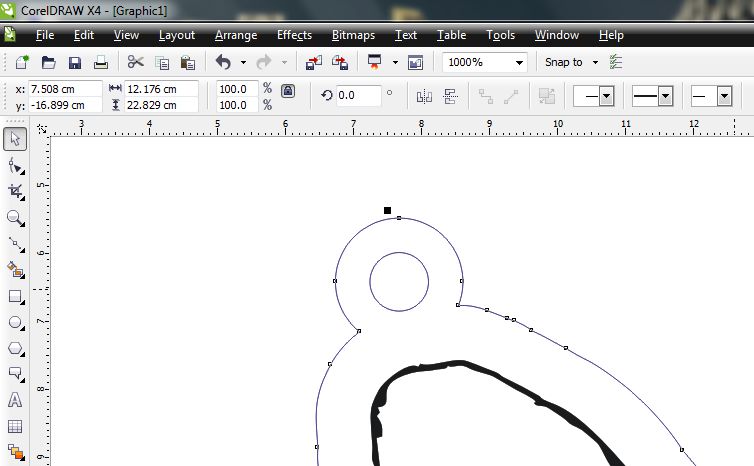
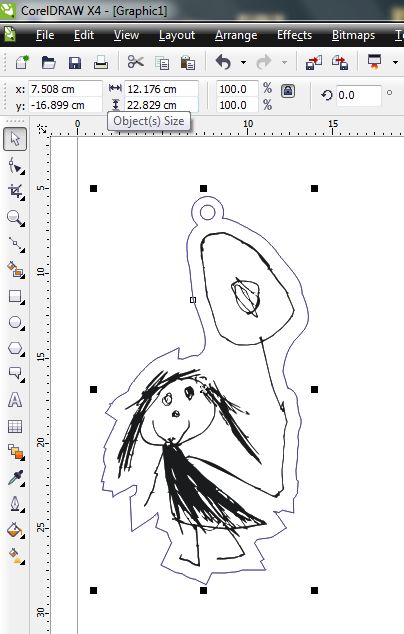
To add a loop, simple draw two concentric circles and place them near where you want the loop to be.
You can just stick a hole through the top, but a loop looks fancier.
Select the outer circle of the loop and the contour border you just made, click "weld" and watch them magically connect.
That's it!
You will want to make sure the loop is substantial enough to hold up as jewelry as well as be big enough to string chain or a jump-ring.
I suggest a 3mm hole with a 3mm wide loop as a minimum.
Resize & Add Some Extras
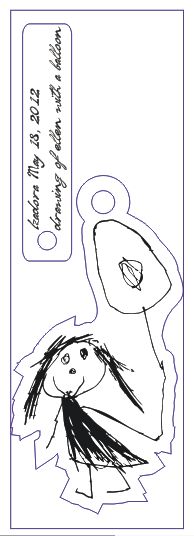
The free sample size in select materials on Outfab.com is 1"x3"
I have selected the 1/8" birch plywood though there are lots of pretty acrylics and specialty woods.
In addition to the charm, I made a quick little hangtag with some text that explains what the picture is (Drawing of Ellen holding a balloon) along with the date.
It's really free - no sign up, no visiting the shop to learn the machine, no postage, literally just upload your file and get a sample in the mail.
It's a good idea to size the pendant early on when you're working on it so you don't get surprised when you re-size it at the end only to find your loop is far too small (as I did)
I had to redo the loop after I shrunk the drawing down to 1" wide to fit the free sample size. Whoops!
After you have everything neatly packed into a 1"x3" file, upload the file at Outfab.com
You get one free sample so use it wisely, then go crazy and fill up a whole unit size with fun stuff for all your friends (only $29 for a 12"x12" of birch ply with whatever you can cram onto it.)
Attach to a Chain
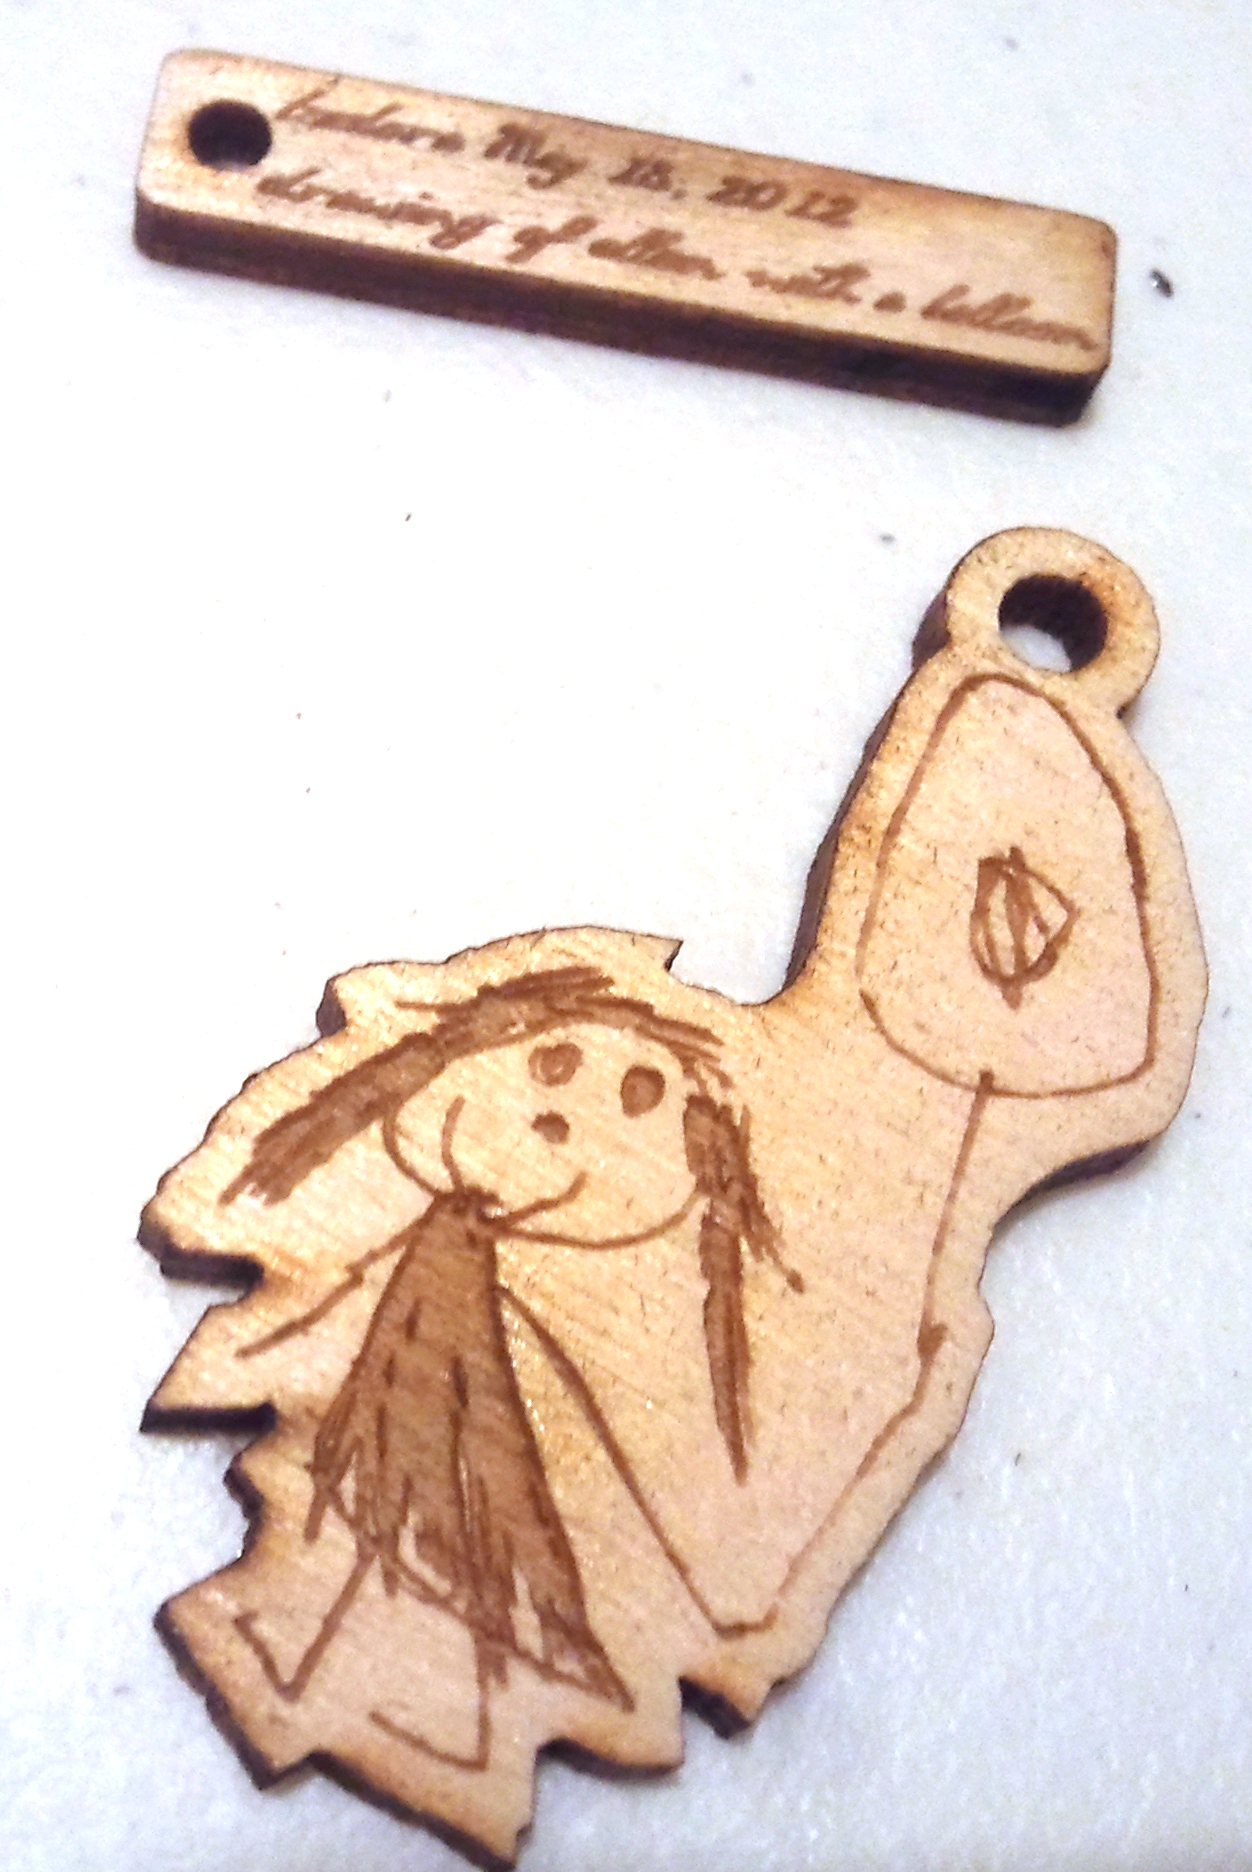
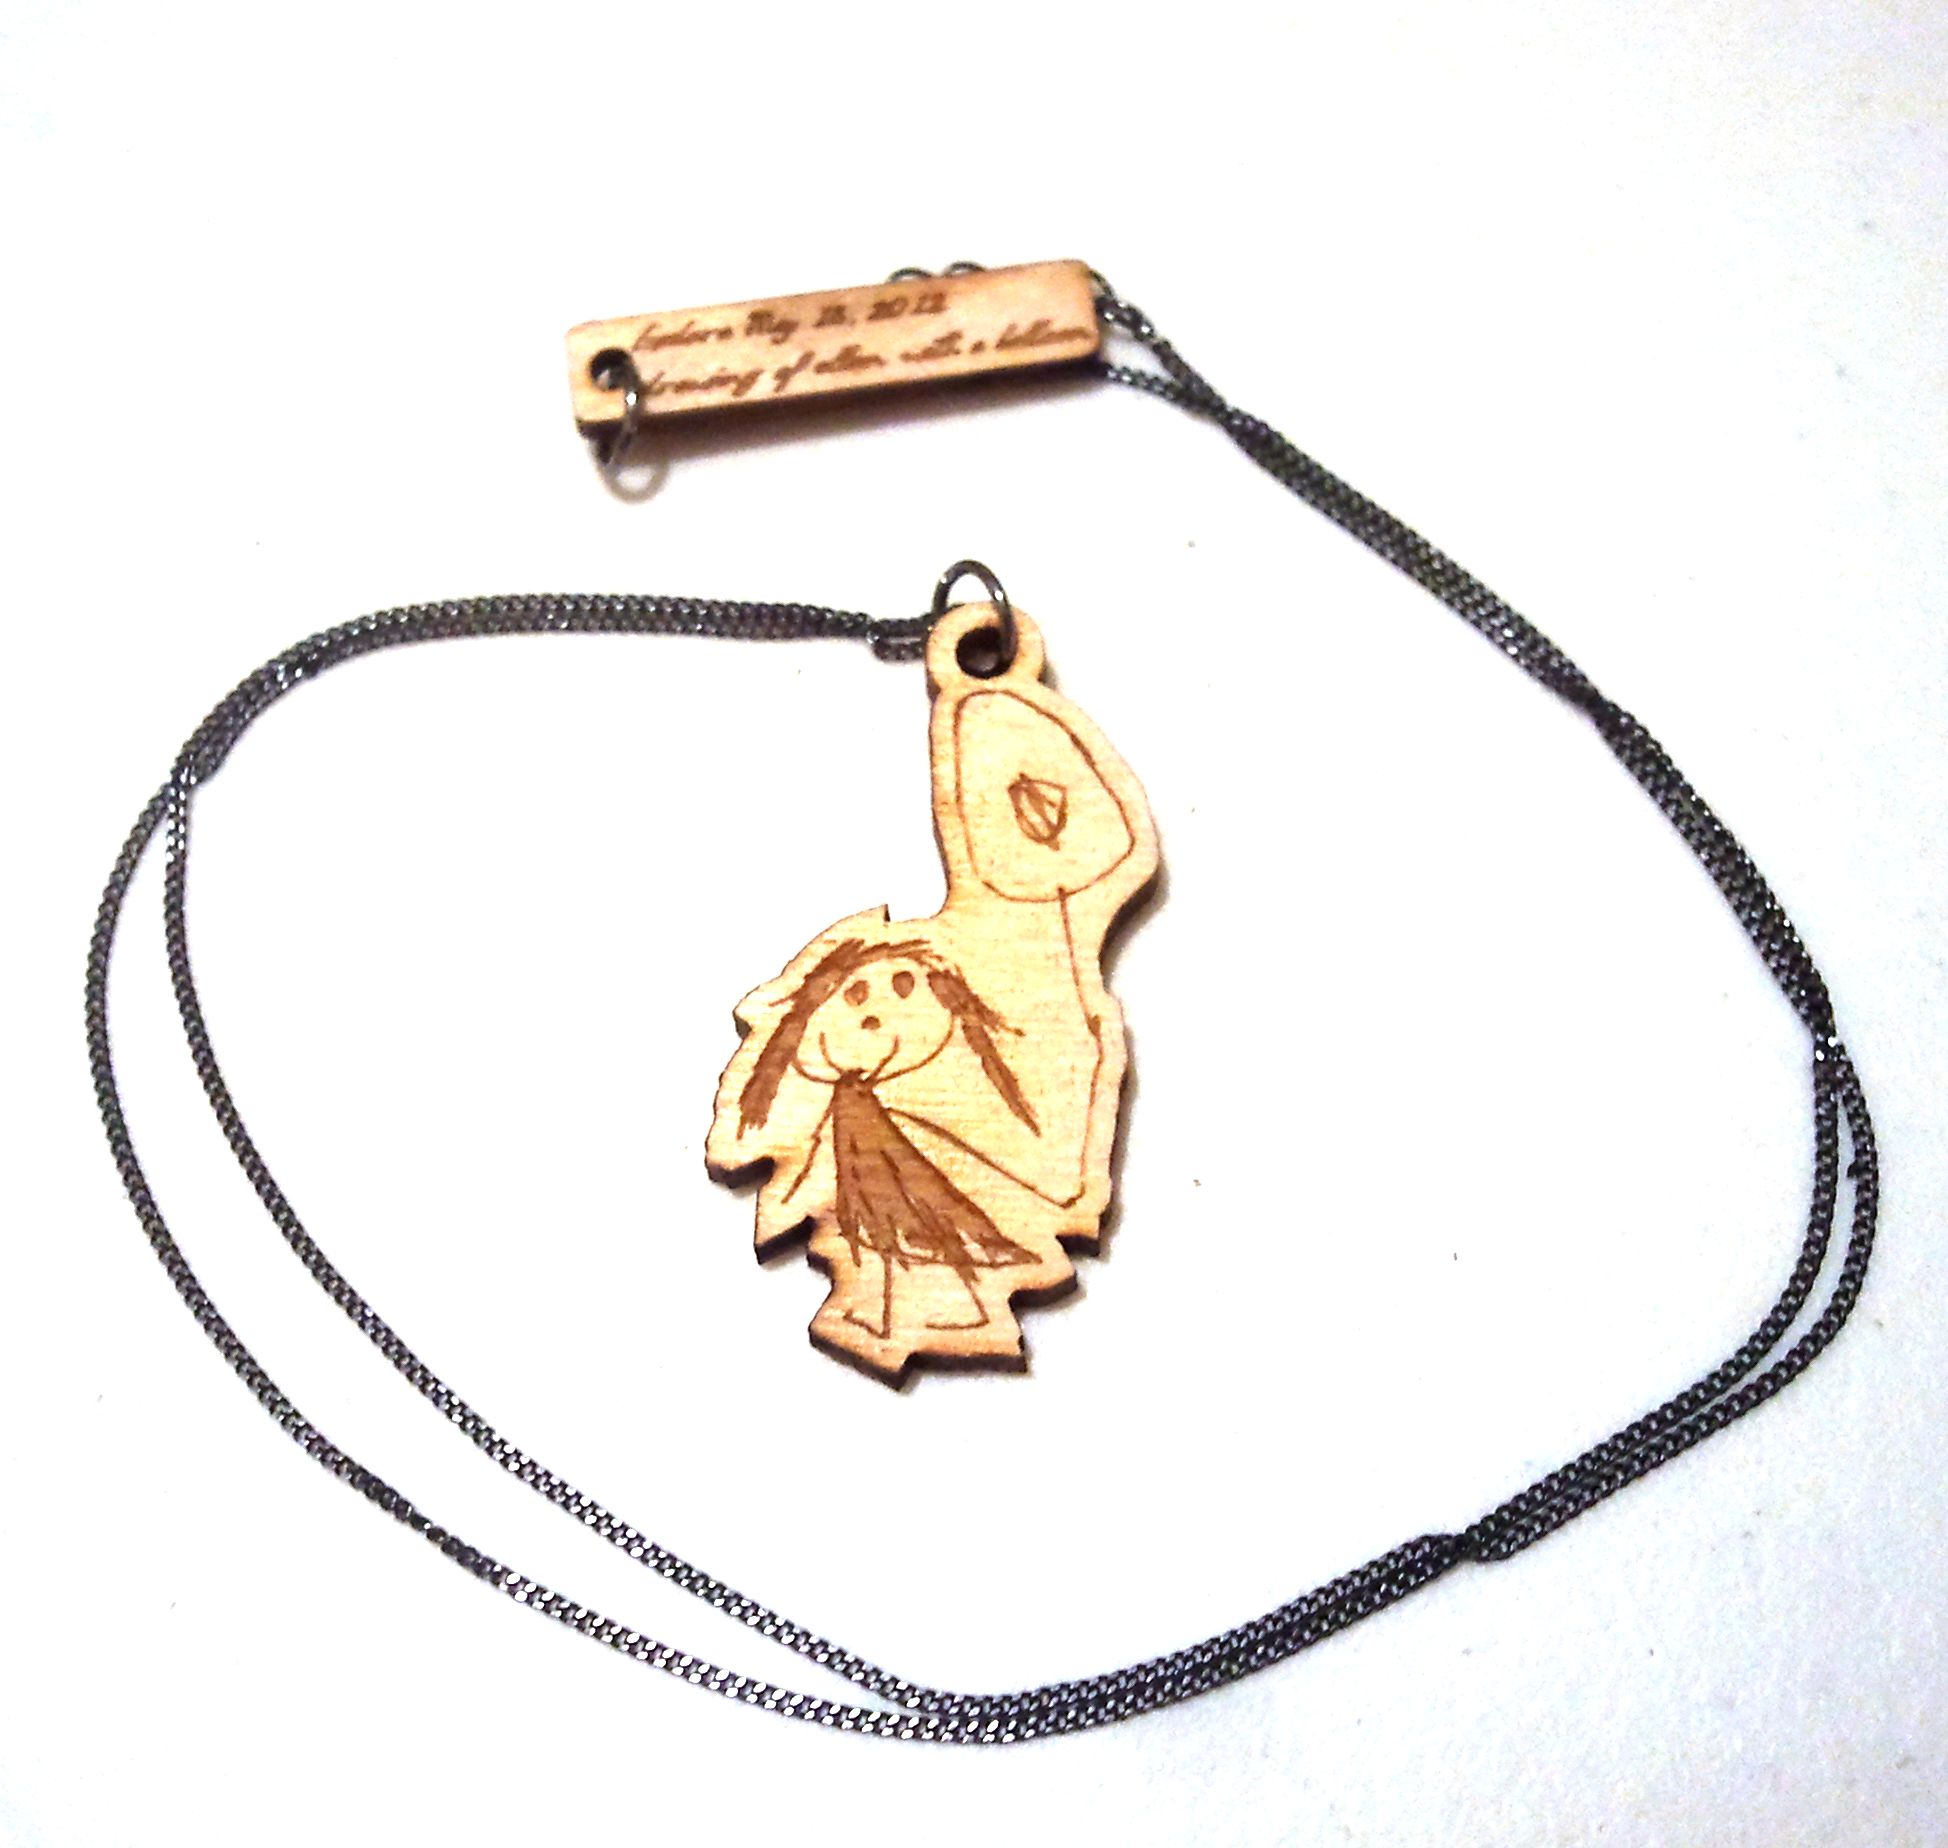
Now you will get your pieces in the mail after just a few days, then it's just a quick chain and jumpring from the nearest craft supply store and you're on your way to giving a really good gift.
I've been meaning to do things like wall mirrors, wall art in general, rings, even earrings are possible to do with the same concept of converting line art to vector graphics.
See this instructable for InkScape version (get inkscape opensource vector graphics editor at www.InkScape.org)
YAY FREE STUFF!