VHDL- VIVADO- Playing Aroud With the Block Design - Artix 7 15t Cpg236-1
by nikkischulz6 in Circuits > Electronics
993 Views, 1 Favorites, 0 Comments
VHDL- VIVADO- Playing Aroud With the Block Design - Artix 7 15t Cpg236-1
----
Overview of this tutorial:
- Simple test in Vivado to play around with the block design....
- should increment a counter and show the result on LEDs
- It does what I planned
- VHDL
- VIVADO 2021.1 ML
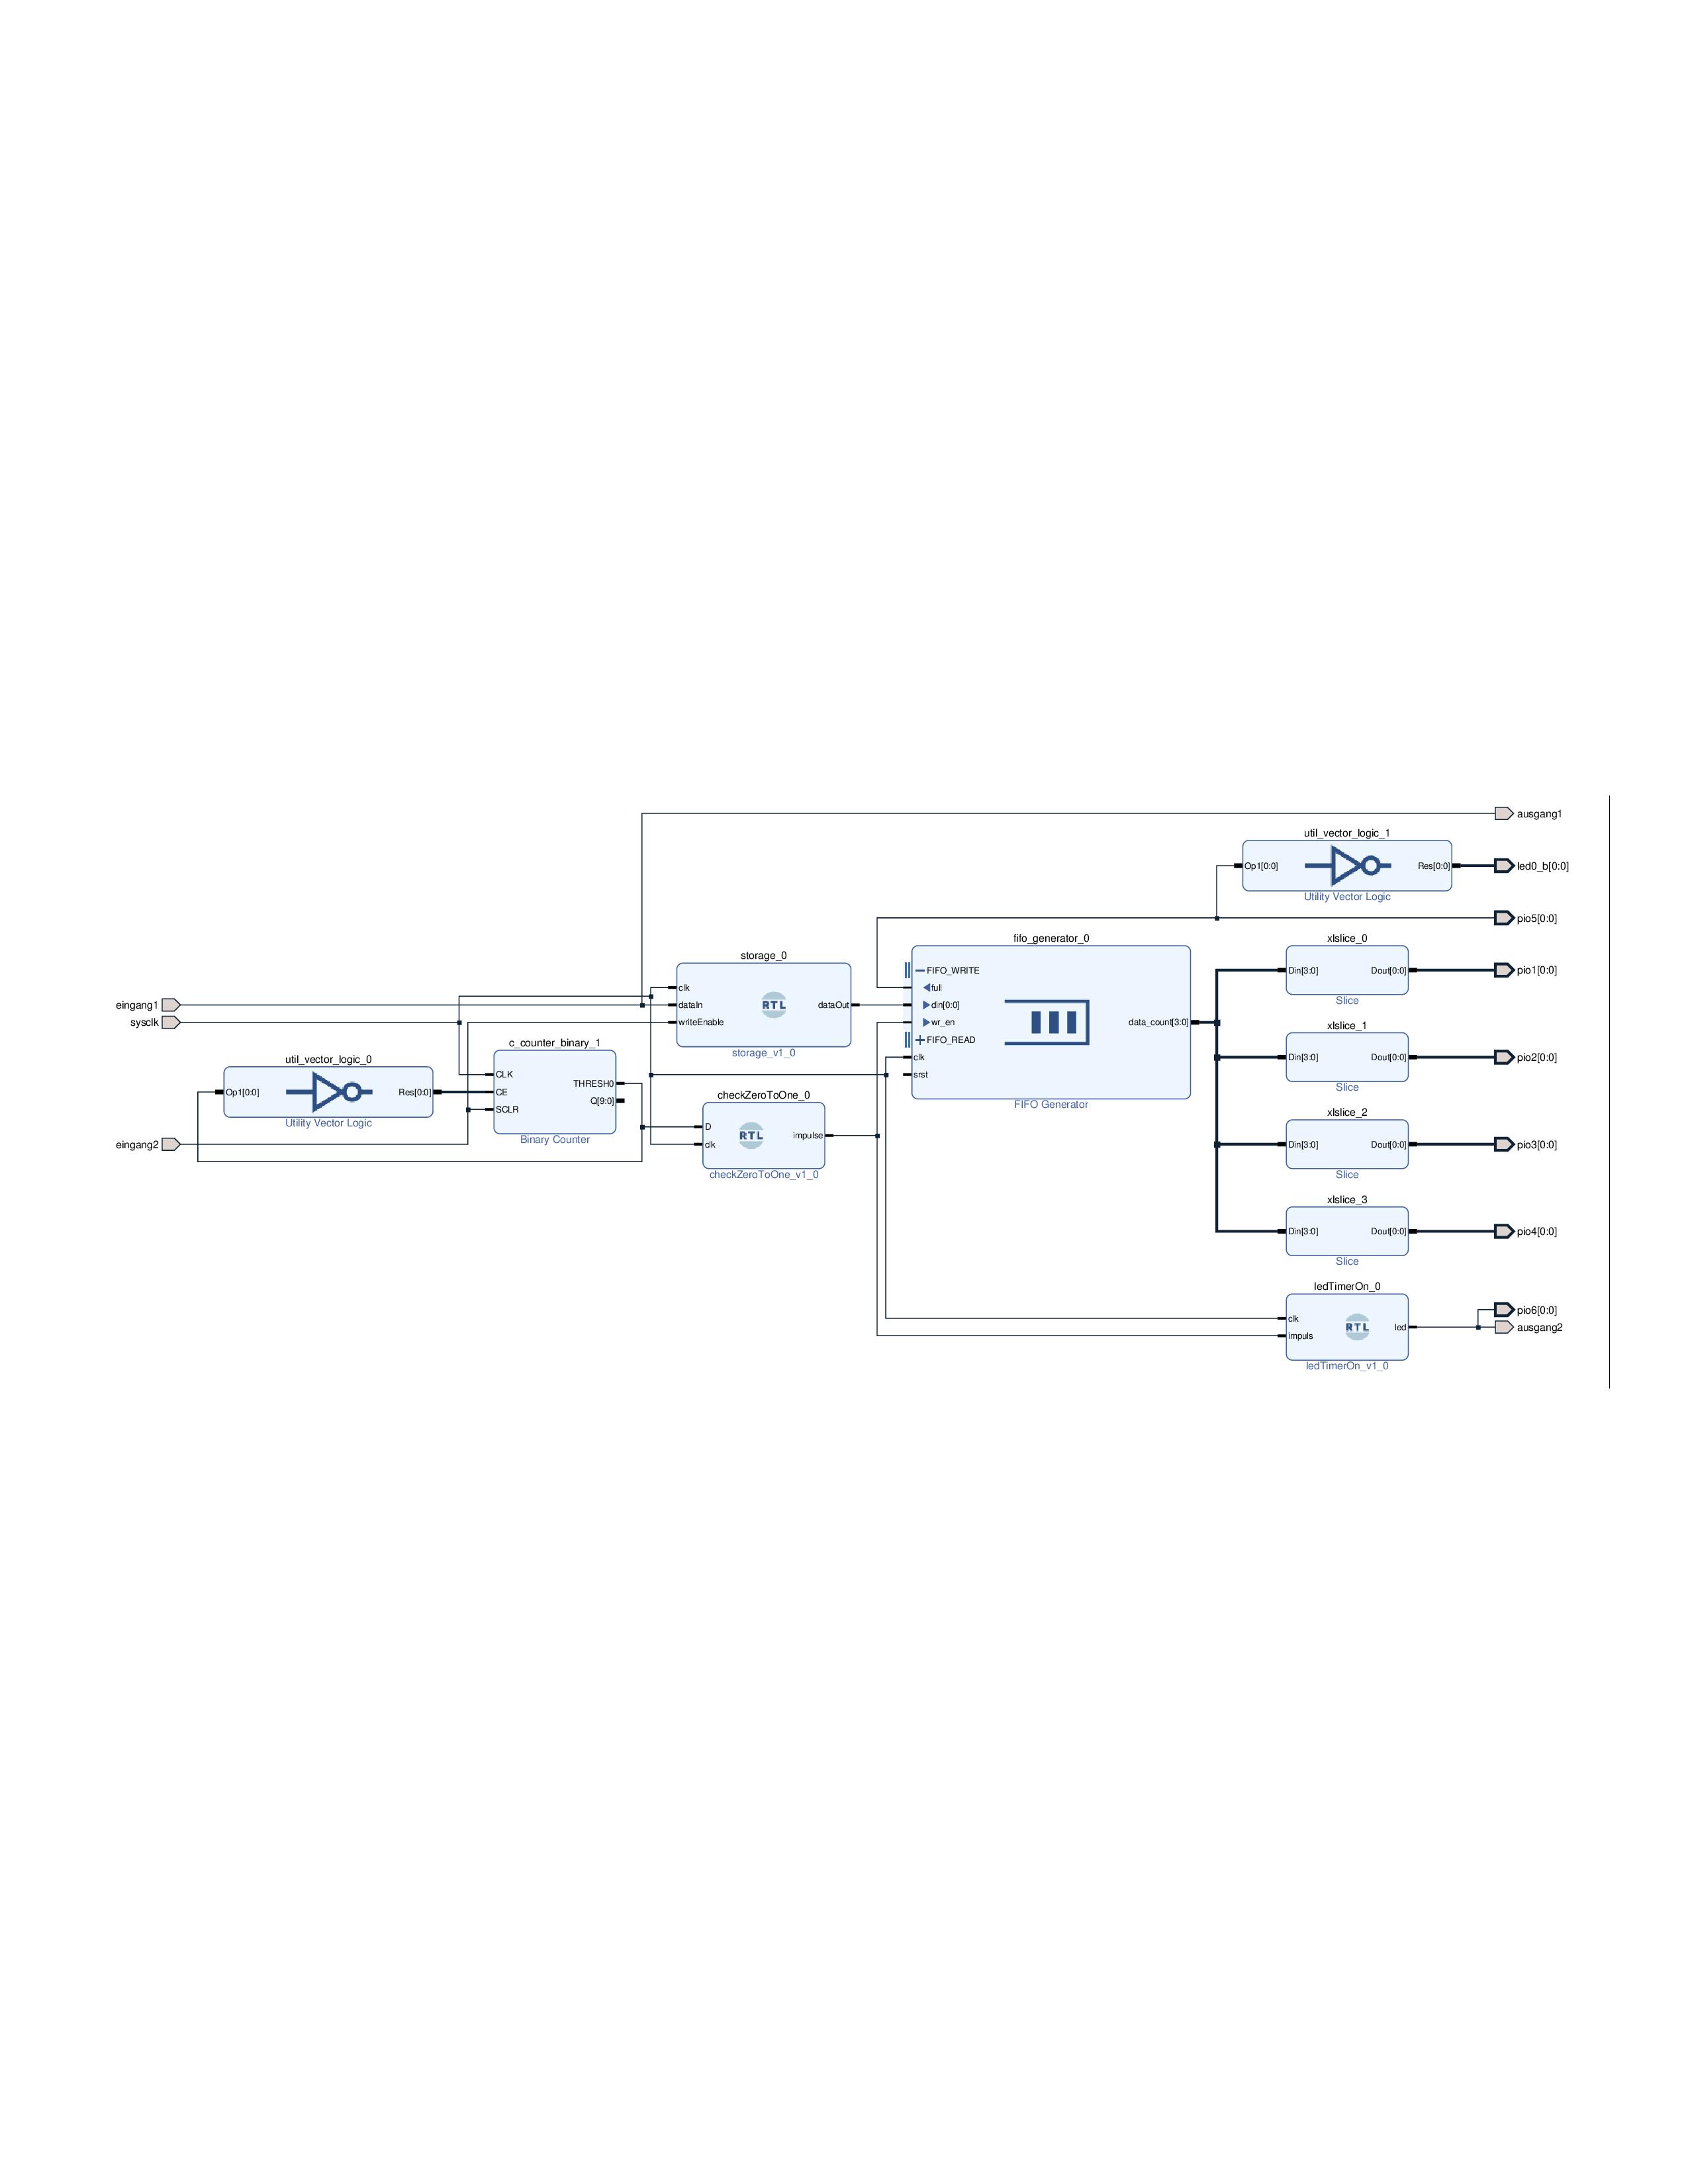
- Check .pdf with my test block design
- Check the git hub link with test block design files
----
Details
Just for playing around with the block design in VIVADO->just testing how it works
Please inform me or delete this tutorial if there are bad informations!
The video should show what happens when you press button2 ... ( button 1 is not relevant xD)
- but attention: I pressed the button really fast and also the bad quality of the video has stolen some frames so it looks stupid...
---
Thank you :D
Installing VIVADO
Here are some notes about installing Vivado in W10 or Ubuntu
Ubuntu
- after 120 times (around 10 days) it worked with Ubuntu 20.04.3 LTS and now with 2019.1
- so don't give up :)
- my main problem was, that the download always failed at the end
- i think I chose to download just the zipped version
---
- https://www.xilinx.com/support/download.html
- Xilinx Unified Installer 2021.1: Linux Self Extracting Web Installer (BIN - 301.28 MB)
- Then you also can make a desktop icon ! it is possible i did it :D
Here is just an example:
sudo chmod 777 <filename>
helped me sometimes ..
Step 1. Download the Vivado web installer here:
https://www.xilinx.com/support/downlo...
Step 2. Change the permissions on the install file with: (make sure you are in the directory where the download resides before issuing this command)
chmod +x [fileName]
Step 3. Run the installer with admin permissions with:
sudo ./[filename]
Step 4. Select the edition to install.
Step 5. Customize your installation.
Step 6. Install and wait... ... ... (this takes a while cause it downloads the actual program files)
Step 7. Add Vivado to your environment. (add this line to the end of your ".profile" or ".bashrc" in your home folder)
source /[install directory]/Vivado/[YourVersion]/settings64.sh
Step 8. Make sure this works by restarting the computer and typing "vivado" in a terminal.
you also can go into the /bin directory and type in
./vivado
If the error comes you just need to install some drivers
tools/Xilinx/Vivado/2019.1/bin$ ./vivado
application-specific initialization failed: couldn't load file "librdi_commontasks.so": libtinfo.so.5: cannot open shared object file: No such file or directory %
You can try this:
sudo apt install libtinfo-dev
Step "DESKTOP stuff".
- Its really hard to create a f. desktop icon.
- https://www.reddit.com/r/Ubuntu/comments/i92mep/ho...
- create a vivado.desktop file in /usr/share/applications/
with this
[Desktop Entry] Encoding=UTF-8 Type=Application Name=Vivado 2018.3 Comment=Vivado 2018.3 Icon=/tools/Xilinx/Vivado/2018.3/doc/images/vivado_logo.png Exec=/tools/Xilinx/Vivado/2018.3/bin/vivado
Step 11. Use this in the fields for the Icon creation: Type: Application Name: Vivado Command: vivado Comment: [YourVersionNumber]
Step 12. Change your Icon! go to your desktop folder in terminal use your favorite editor (I like nano) nano Vivado.desktop Where it says "Icon=" add the path to the Icon you want!
A few more useful commands if you run into issues: Install fix files on linux:
sudo apt-get install make
sudo apt-get install build-essential sudo apt-get install lib32stdc++6
The driver install file can be found here: /tools/Xilinx/Vivado/2018.3/data/xicom/cable_drivers/lin64/install_script/install_drivers From this directory run this command: sudo ./install_drivers
Eduardo Munoz answered another issue that was found. If you get the error: application-specific initialization failed: couldn't load file "librdi_commontasks.so": libtinfo.so.5: cannot open shared object file: No such file or directory Try:
sudo nano /etc/os-release then edit VERSION= to: VERSION="18.04.4 LTS (Bionic Beaver)"
(Or maybe your version of Ubuntu)
https://www.patreon.com/JoshuaMacFie
Windows
- It also failed a lot of times!
- When downloaded it should be easy to open the program via desktop icon
Notes
if creating/ adding design source has a bug (takes forever) check the vhdl language settings! change them! it worked for me---
Ubuntu:
if board is not found: ? - somehow it works -- maybe chmod 777 on your device: /dev/ -- something like :
sudo chmod 777 /dev/<board>
Prepare .xdc File for Controlling LEDs and Getting Button Inputs

XDC - File
Please check also: Using Constraints 78 UG903
- You need to add the board specific Cmod-A7-Master.xdc file into you Constraints folder.
- You may get it from here: https://github.com/Digilent/digilent-xdc
- Then just uncomment some lines for the led
- Your vhdl configuration has "access" to those now!
- There is also an rgb LED on-board - I use blue
additional stuff:
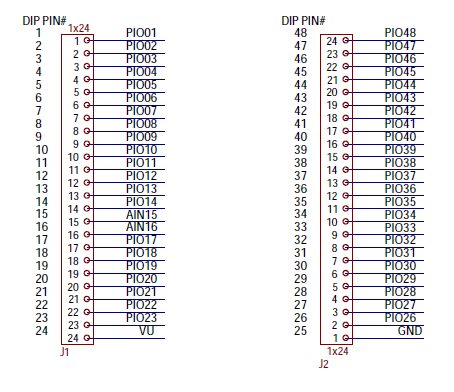
- Check the Board schematics (see picture) for the external connections (LEDs)
- (please check if LEDs are high or low active: didn't observed it well )
.XDC-FIle CODE:
attention i didn't copy it really well . But it will give you a good idea!
"#" are comments
- Clocks:
primary clocks in vivado:
"A primary clock is a board clock that enters the design through an input port or a gigabit
transceiver output pin (for example, a recovered clock)
A primary clock can be defined only by the create_clock command."
oscillator -> FPGA-PIN
- port sysclk pin is connected to L17
- tell the synth-tool that sysclk will get a 12MHz (T = 83.33 ns ) clock
12 MHz -> L17 -> sysclk
## 12 MHz Clock Signal
set_property -dict { PACKAGE_PIN L17 IOSTANDARD LVCMOS33 } [get_ports { sysclk }]; #IO_L12P_T1_MRCC_14 Sch=gclk
create_clock -add -name sys_clk_pin -period 83.33 -waveform {0 41.66} [get_ports {sysclk}];
LED stuff ( i think onboard)
## LEDs
set_property -dict { PACKAGE_PIN A17 IOSTANDARD LVCMOS33 } [get_ports { ausgang1 }];
set_property -dict { PACKAGE_PIN C16 IOSTANDARD LVCMOS33 } [get_ports { ausgang2 }];

## RGB LED
set_property -dict { PACKAGE_PIN B17 IOSTANDARD LVCMOS33 } [get_ports { led0_b }]; #IO_L14N_T2_SRCC_16 Sch=led0_b
maybe the onboard buttons A18 and B18 connected to "eingang1" and "eingang2"
## Buttons
set_property -dict { PACKAGE_PIN A18 IOSTANDARD LVCMOS33 } [get_ports { eingang1 }];
set_property -dict { PACKAGE_PIN B18 IOSTANDARD LVCMOS33 } [get_ports { eingang2 }];
Must be the external leds:
## GPIO Pins
## Pins 15 and 16 should remain commented if using them as analog inputs
 set_property -dict { PACKAGE_PIN M3 IOSTANDARD LVCMOS33 } [get_ports { led0 }]; #IO_L8N_T1_AD14N_35 Sch=pio[01]
set_property -dict { PACKAGE_PIN L3 IOSTANDARD LVCMOS33 } [get_ports { led1 }]; #IO_L8P_T1_AD14P_35 Sch=pio[02]
set_property -dict { PACKAGE_PIN A16 IOSTANDARD LVCMOS33 } [get_ports { led2 }]; #IO_L12P_T1_MRCC_16 Sch=pio[03]
 set_property -dict { PACKAGE_PIN K3 IOSTANDARD LVCMOS33 } [get_ports { led3 }]; #IO_L7N_T1_AD6N_35 Sch=pio[04]
Some Description of My Block Design
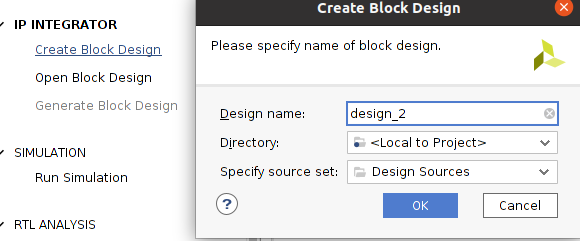
- Create a block design in VIVADO:
- click on create block desing...it will create *.bd file...
- (there you can place your stuff and connect it)
- BUT ONLY IF THE REQUIREMENTS ARE CORRECT
- I recently had a problem as I changed one .vhd file to VHDL 2008 --- I was surprised that I could add it
- other way would be creating an IP Block .. which requieres I think to start a new vivado project xD
- BUT ONLY IF THE REQUIREMENTS ARE CORRECT
----------------------
Design details:
- Its just a design to play around...
- It just fills up a fifo by pressing a button and shows you the number of stored bits in the fifo by 4 leds...
- also shows if fifo is full with 2 leds
- and shows if you pressed the "store-button" by 2 leds...
------------
a lot of leds..
...
---
please check the pdf in the attachment
Downloads
Insert IPs Into *.bd and Connect Them
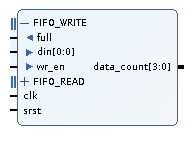
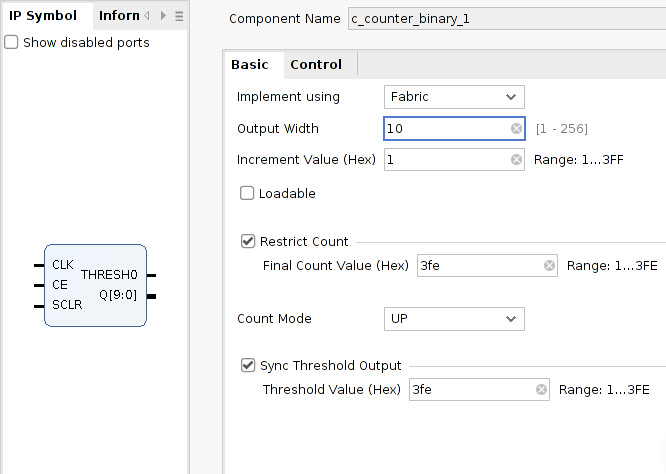
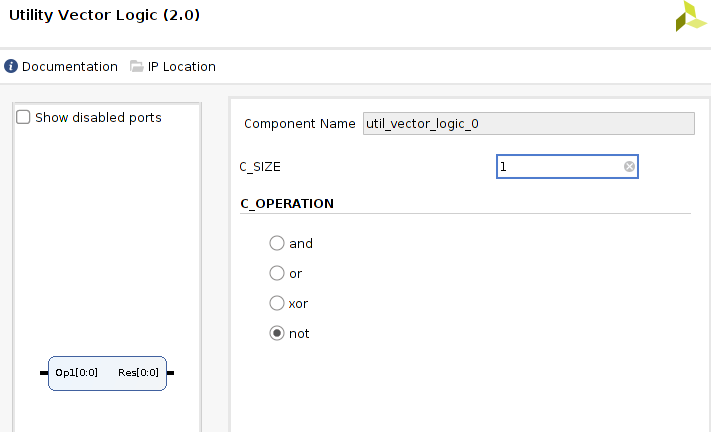
Adding pre designed IPs:
Right-click into the block desing *.bd and click add ip ( ctrl + I)
Here is what i used:
- Binary Counter ( you can calculate the time depending on the bits the counter has!)
- output width = 10
- means : it counts up to 2^10 =1024
- - here with each clk step - which is 1/12 MHz s
- so around 83 ns * 1024 = around 83000 ns = 83 us
- FIFO Generator
- generate automaticly a FIFO with status inputs and outputs
- utiltiy vector logic can create binary logic like AND, XOR
- rtl designs - drag an drop
--
Adding I/O PORTS (LED and buttons)
(It works really good without further configurations...)
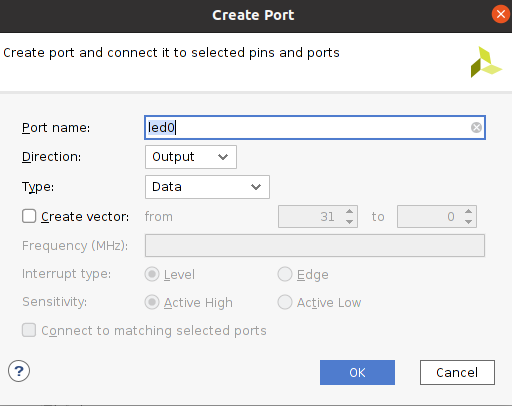
- right click and add ports via "creater port" then just add some configs it should be easy ( input / output)
- please use the same port names as in .xdc -file
- led as data, input...
- for the clk type in the name you wrote in the .xdc-file -- sysclk e.g.
--
Adding some of my own IPs...
- here are some RTLs you can drag and drop into the .bd- file!
- i think you need to add them first as Sources in the Project Manager
- https://github.com/t1nn1/tutorials/tree/master
- my used files...
- But anyway it is confusing so better do your own stuff xD
Create a HDL Wrapper

When you connected all your blocks you can create a surrounding VHDL file:
- Create HDL Wrapper by clicking right on your *.bd file!
- automatic by VIVADO
- it creates a vhdl file with all your block IPs!
- this entity can be instantiated by your testbench later!
- really good
- and maybe it is important for synthesis xD
Simulate
Simulate your block design with a testbench you create by your own:
- just instantiate your block-design-wrapper and force some inputs
- the vivado simulator looks a little bit like modelsim...
---
check the testbench:
----
entity myDesginTB is
-- Port ( ); end myDesginTB;
architecture testbenchBeh of myDesginTB is signal clock : std_ulogic; signal e1 : std_ulogic; signal e2 : std_ulogic; signal testCounter : std_ulogic;
component design_1_wrapper is port( ausgang1 : out STD_LOGIC; ausgang2 : out STD_LOGIC; eingang1 : in STD_LOGIC; eingang2 : in STD_LOGIC; sysclk : in STD_LOGIC
); end component design_1_wrapper; begin
dut: component design_1_wrapper port map(sysclk => clock, eingang1 => e1,eingang2 => e2);
clkGen : process begin clock <= '0'; wait for 83 ns; clock <= '1'; wait for 83 ns; end process; setEingang1 : process begin e2 <= '0'; wait for 150 ns; e2 <= '1'; wait for 150 ns; e2 <= '0'; wait for 200 us; --- e2 <='1'; wait for 100 ns; end process; ---- another test -
end testbenchBeh;
Synthezise and Run Implementation
- after connecting you block diagram you need to synthesize it...
- you have to start synthezise (F11)
then do the Implementation step...
Generate Bitstream and Find and Program FPGA-Target
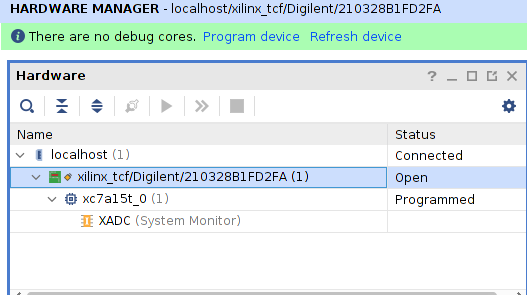
- After synthesis you need to PROGRAM AND DEBUG -> Generate Bitstream
- Just click it it should generate a file...
- should be fast
- After generating the Bitstream find your target
Get Device drivers
For linux it is lin64
https://support.xilinx.com/s/article/59128?languag...
Download the drivers.zip if auto connect doesn't work directly!
Install it!
chmod 666 /dev/
To find out your device in Ubuntu
Just copy/ paste it into your Terminal console.
It iteratese over your usb ports and shows them!
#!/bin/bash<br> for sysdevpath in $(find /sys/bus/usb/devices/usb*/ -name dev); do ( syspath="${sysdevpath%/dev}" devname="$(udevadm info -q name -p $syspath)" [[ "$devname" == "bus/"* ]] && exit eval "$(udevadm info -q property --export -p $syspath)" [[ -z "$ID_SERIAL" ]] && exit echo "/dev/$devname - $ID_SERIAL" ) donehttps://unix.stackexchange.com/questions/144029/co...
- Hardware Manager -> Auto Connect
- nice it just crashed when I clicked it :D
- Then click on "Program device" and select the little menu with the entry xc7a15t_0
- it opens a window and asks for programming the file
-
(...)/includesomeip.runs/impl_1/design_1.bit
-
Press Programm
- Now you should see some leds should go on if you press a button...
- xD
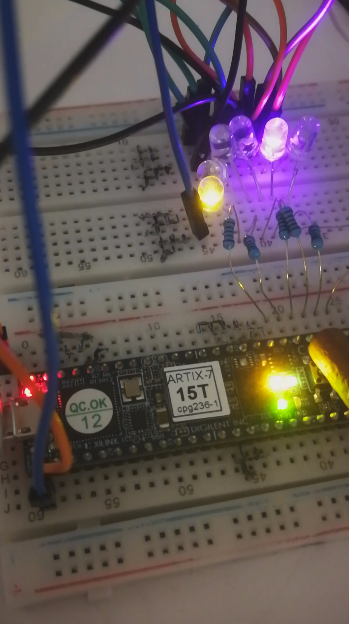
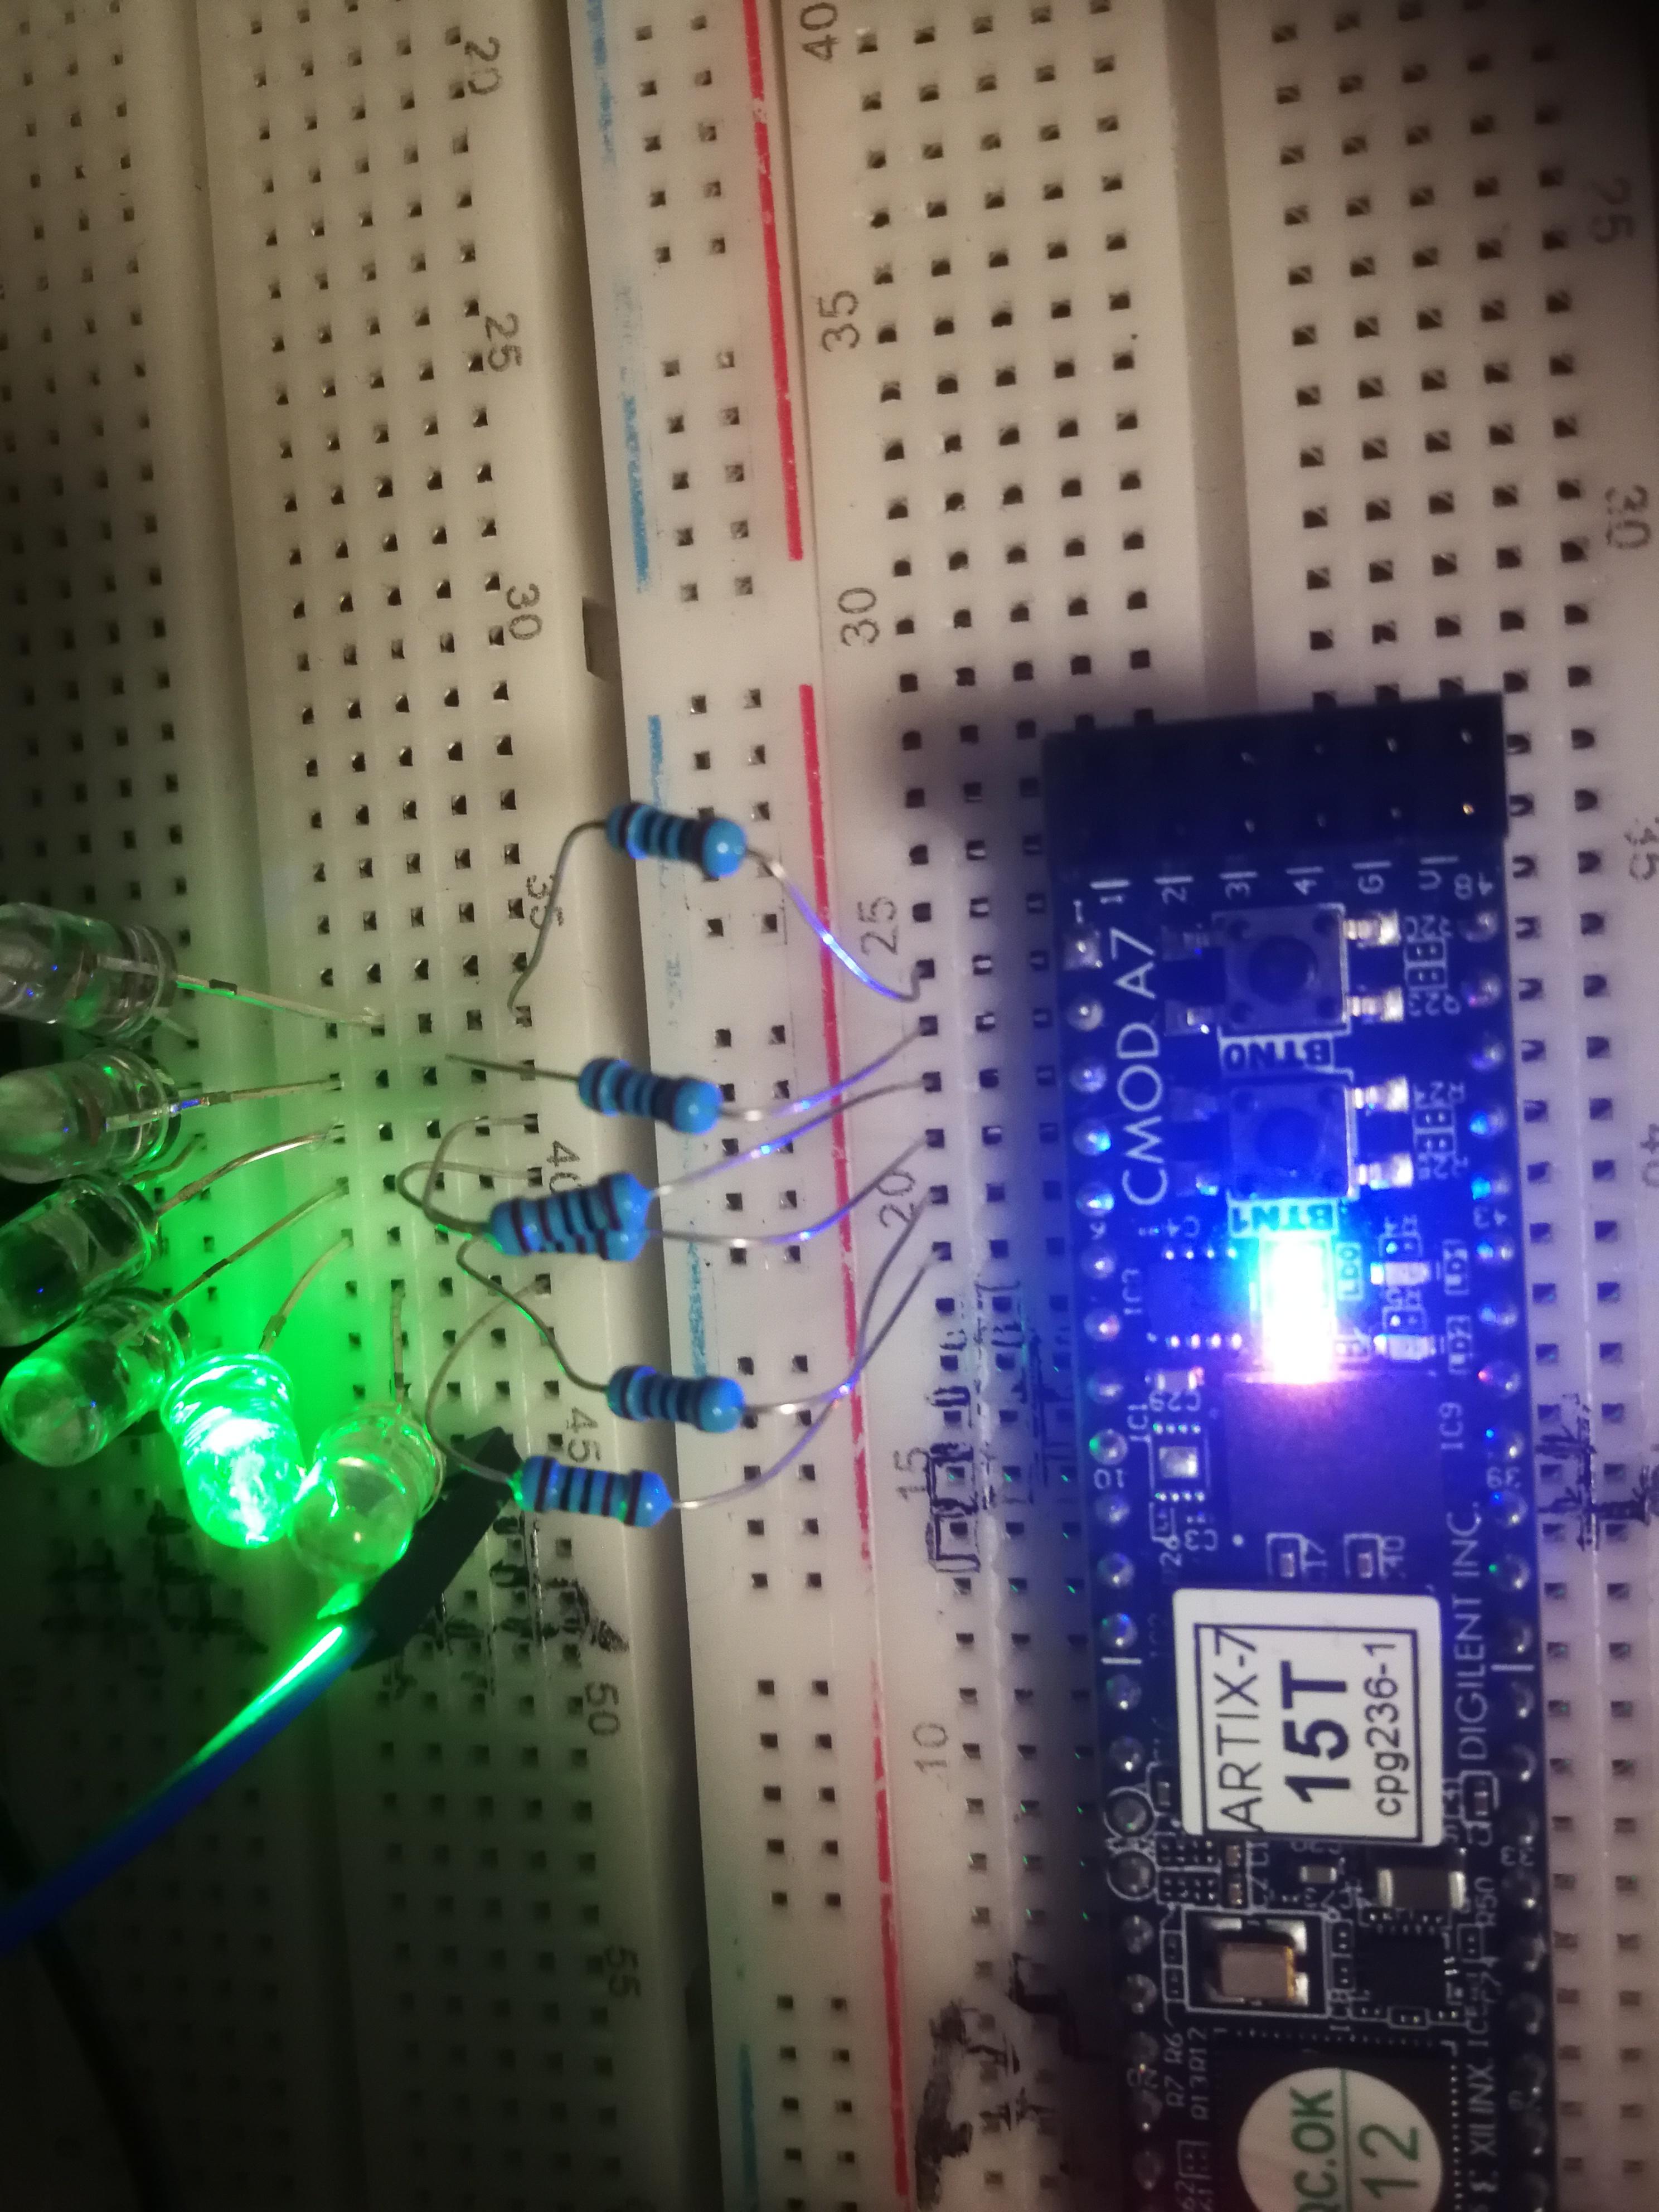
On the picture you can see that the fifo is full and the full-fifo LEDs are shining :)
---------
END of tutorial