VCarve Eagles Head 3D First Attempt
by Kevr102 in Workshop > Woodworking
5262 Views, 32 Favorites, 0 Comments
VCarve Eagles Head 3D First Attempt
In this Instructable I will show you my first attempt at 3D Carving with Vcarve Desktop.
I've just upgraded from Cut2D to VCarve Desktop and so far I've not tried the 3D option, there are quite a few onboard clipart models to select from and I'm liking the Eagles head, there are 3 options to choose from, I'm not quite sure of the correct terminology but one is like projected, there is another in a concave dish and an outline model, I'm opting for the concave model.
I have looked at a couple of Youtube videos for reference but I'm thinking it's a bit like Fusion 360 where the Software does all the hard work, so I'm thinking it should be a fairly easy project.
You do need a CNC Machine for this project and I will be wearing the necessary PPE throughout CNC operations to include Eye Protection, Ear Protection and a suitably rated Dust Mask.
Onto the the Vcarve Desktop Software:
Supplies
Piece of timber in this case its 149mm x 125mm x 20mm Pine I think?
3mm Ball Nosed Router Bit.
Medium Sandpaper.
Wood Stain.
Varnish or Boiled Linseed oil.
CNC Machine.
3mm Ball End Bit.
Vetric VCarve Desktop or Pro.
Using the VCarve Design Software
.png)
.png)
The VCarve software Format is very similar to the Cut2D software, there is definitely a lot more to it and one addition is the 3D Carving option.
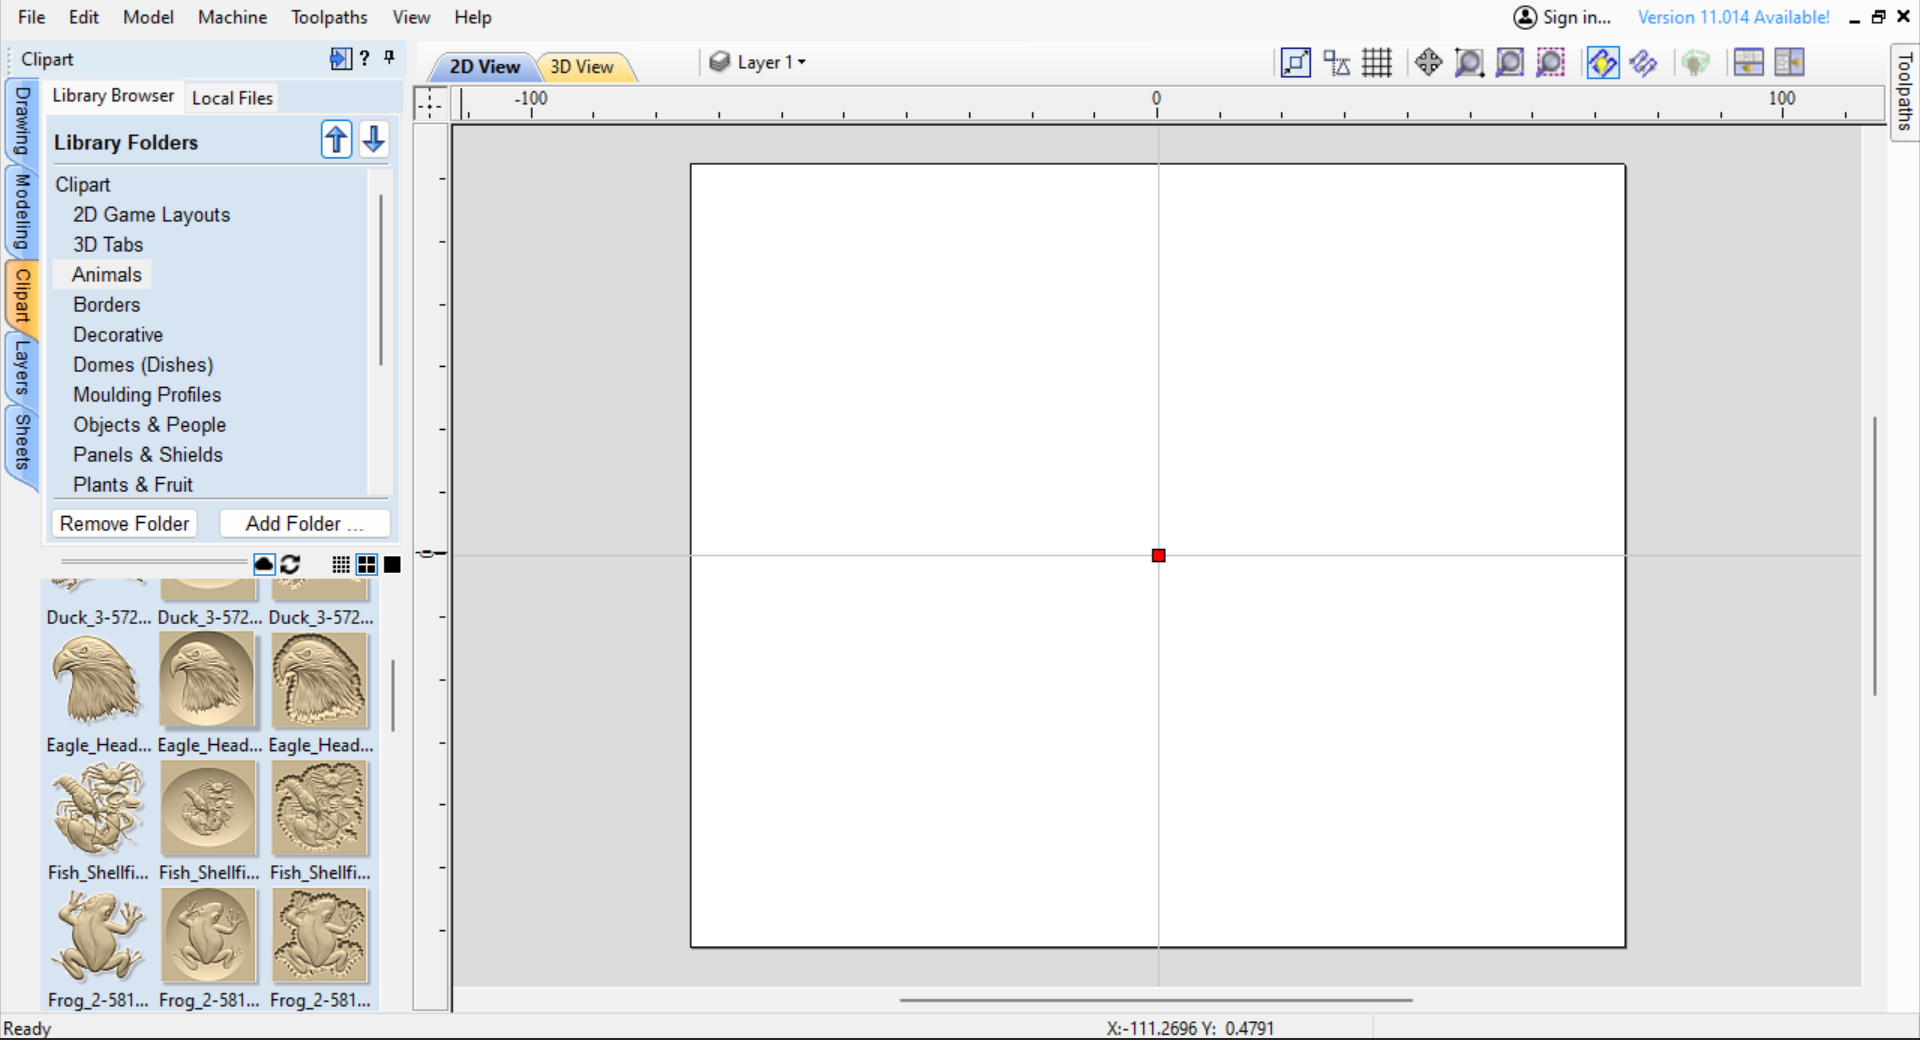
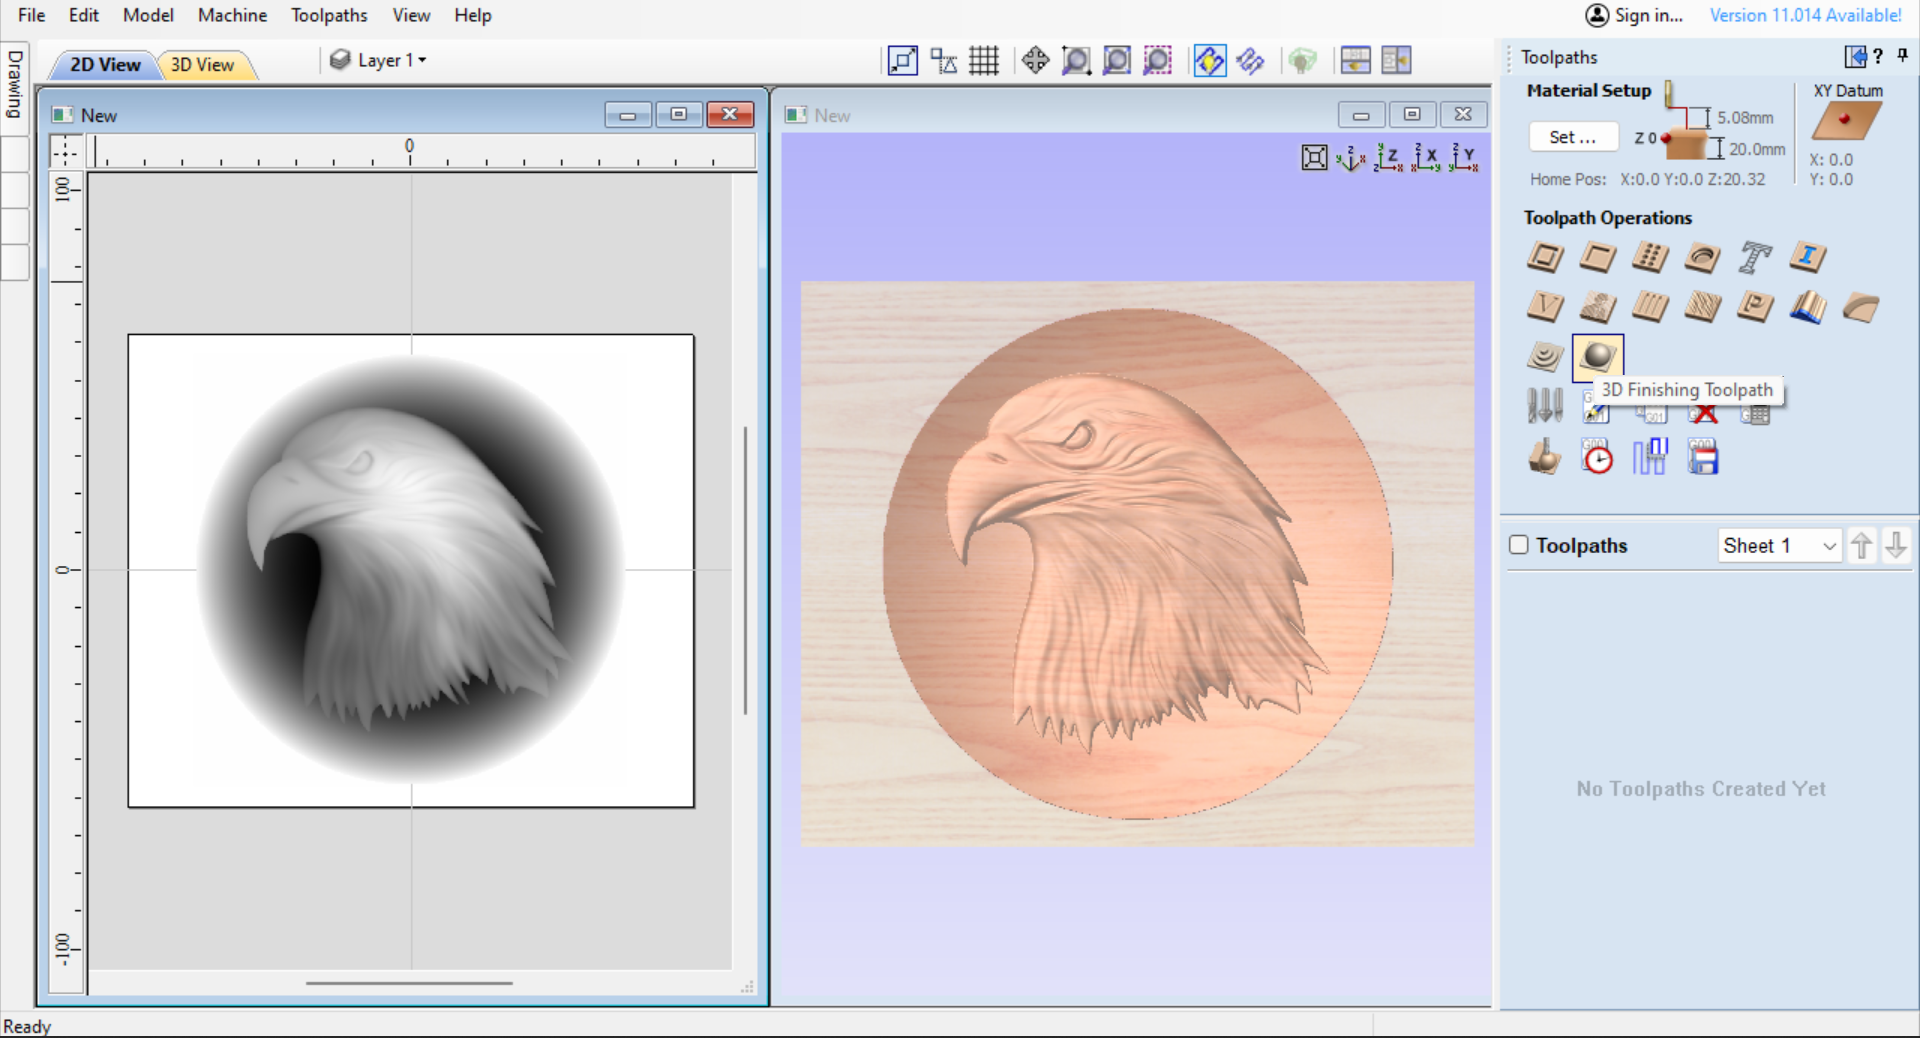
The first operation is the set up, within this section you add the Dimensions of the stock and set the Zero point which could be the centre of the piece or left bottom corner of the stock, I'm selecting the centre Zero on this occasion.
Within this section you can also select the type of material(I'm not 100% sure what wood it is, its old shelving, Pine I think?) and also the Modelling resolution, I selected High which is 3 x Slower, but there are Standard options and Very High which is 7 times slower, I believe the higher the resolution the better the definition?
Once the workpiece is set up we can now move onto importing a clipart model:
The Tabs in VCarve
.png)
.png)
.png)
.png)
.png)
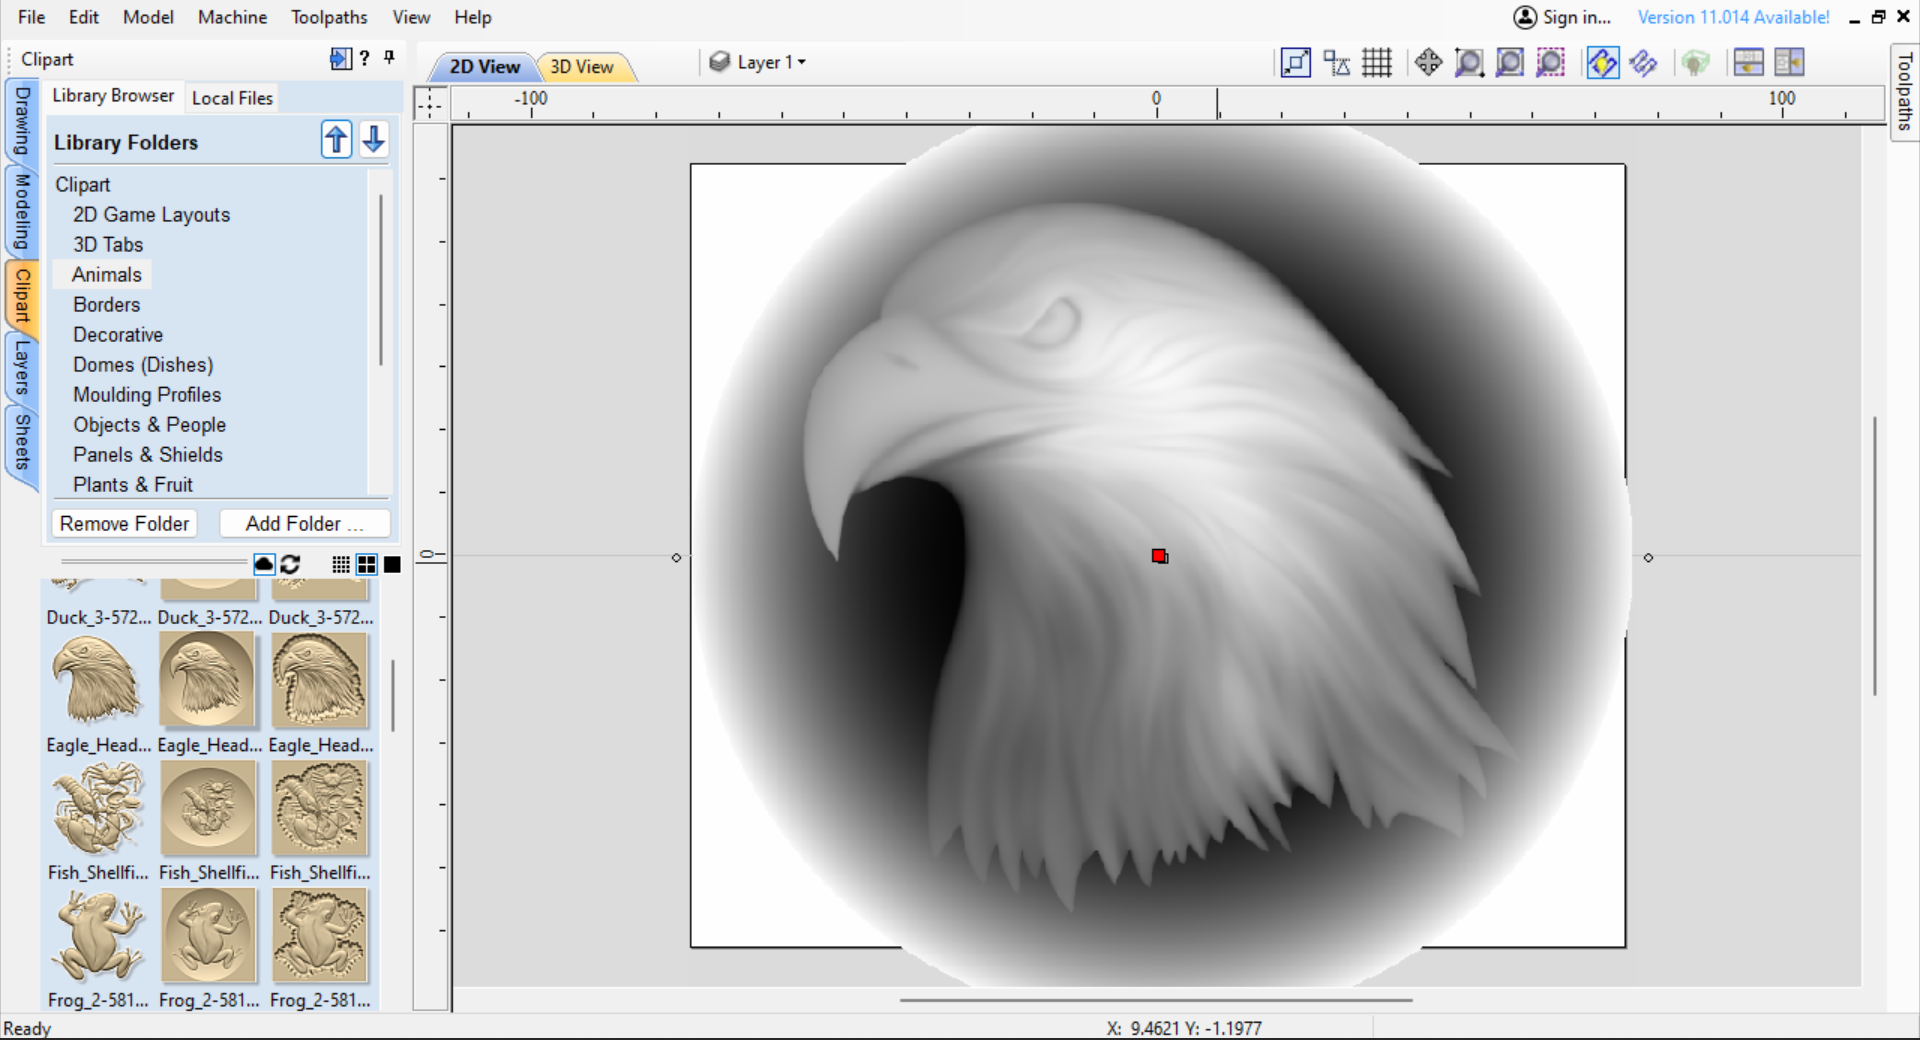
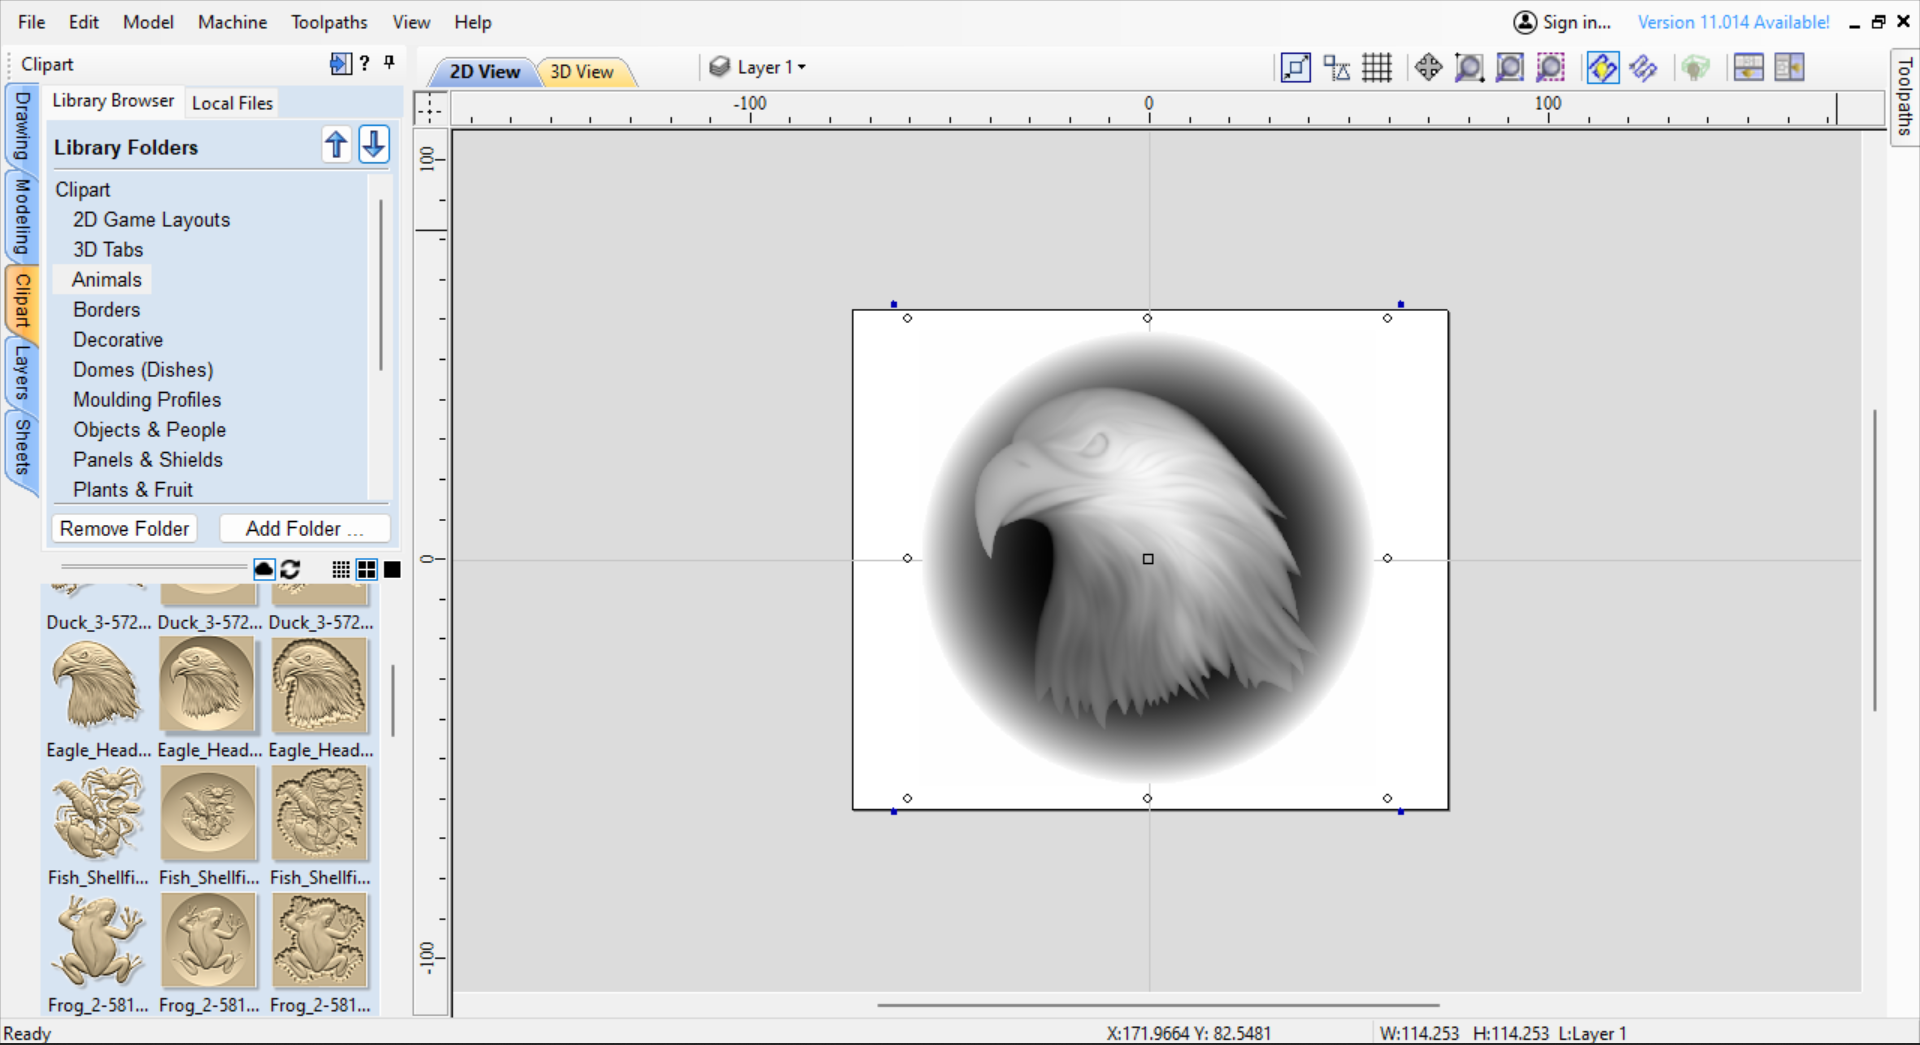
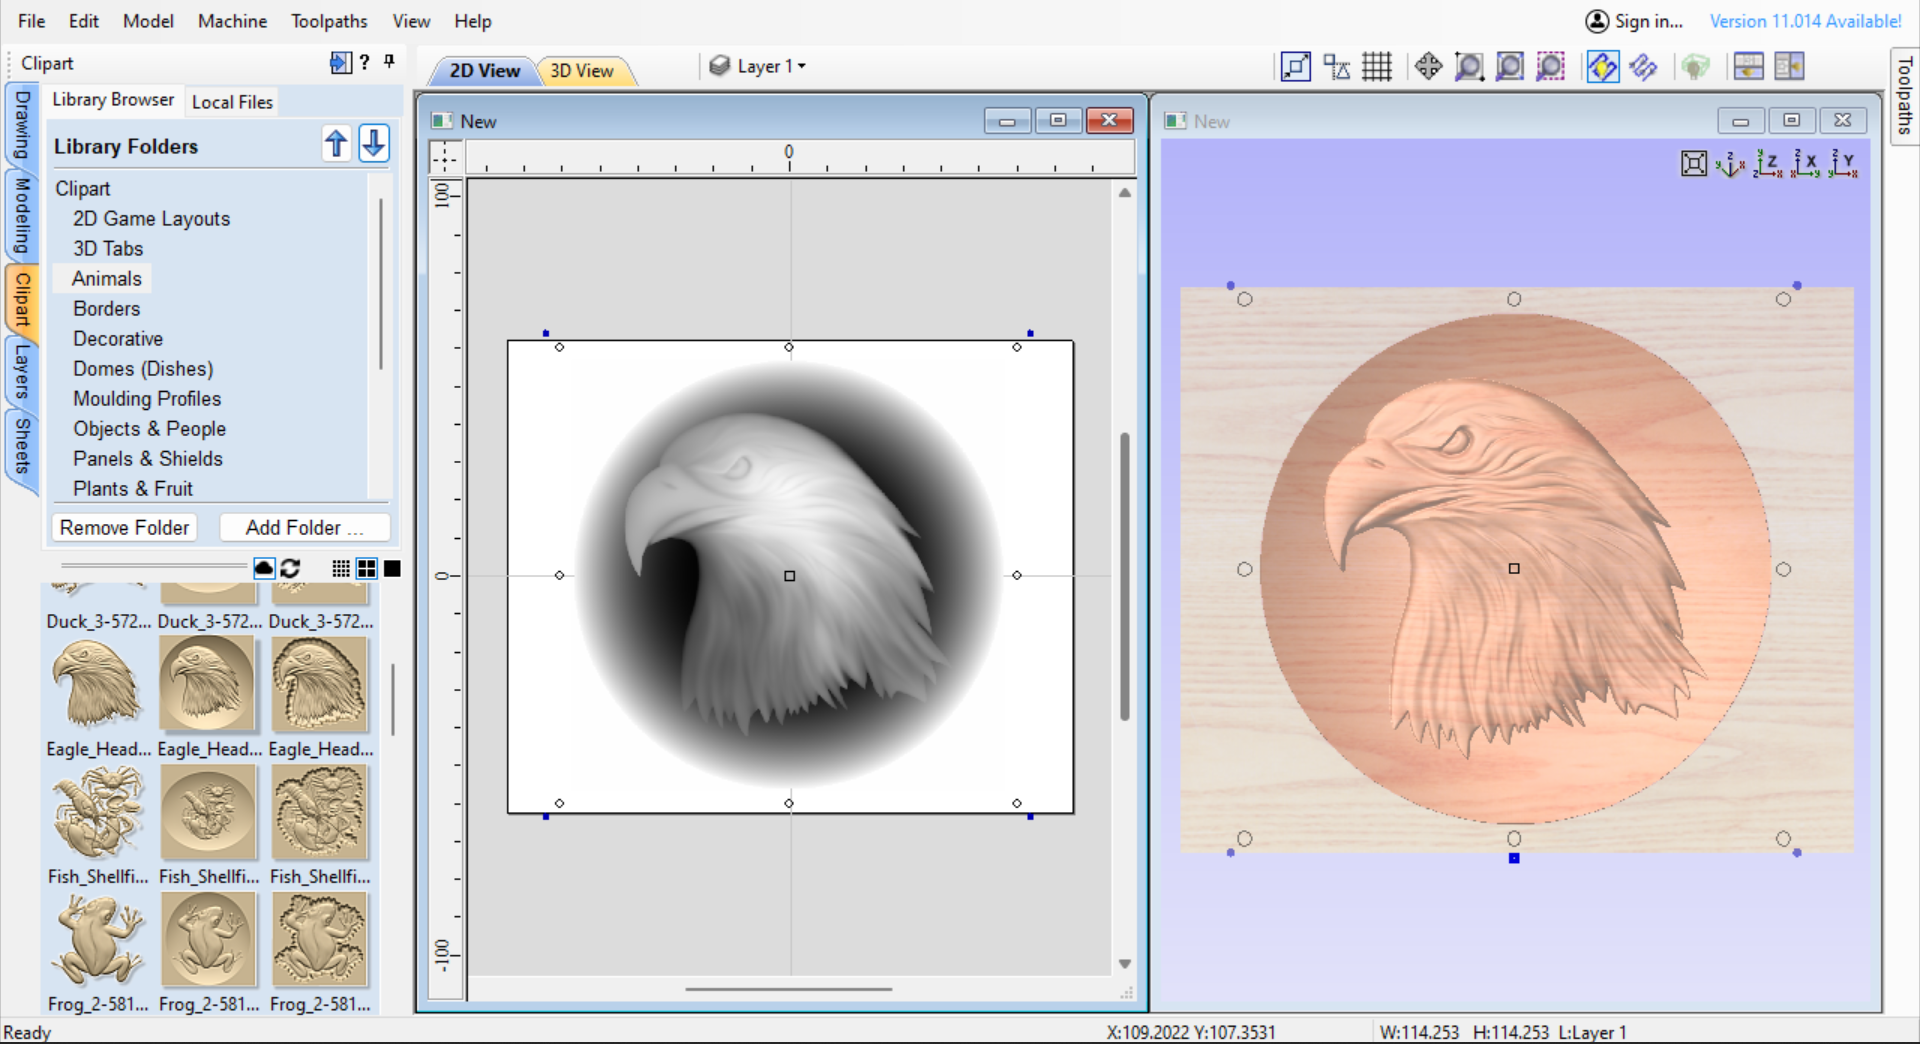
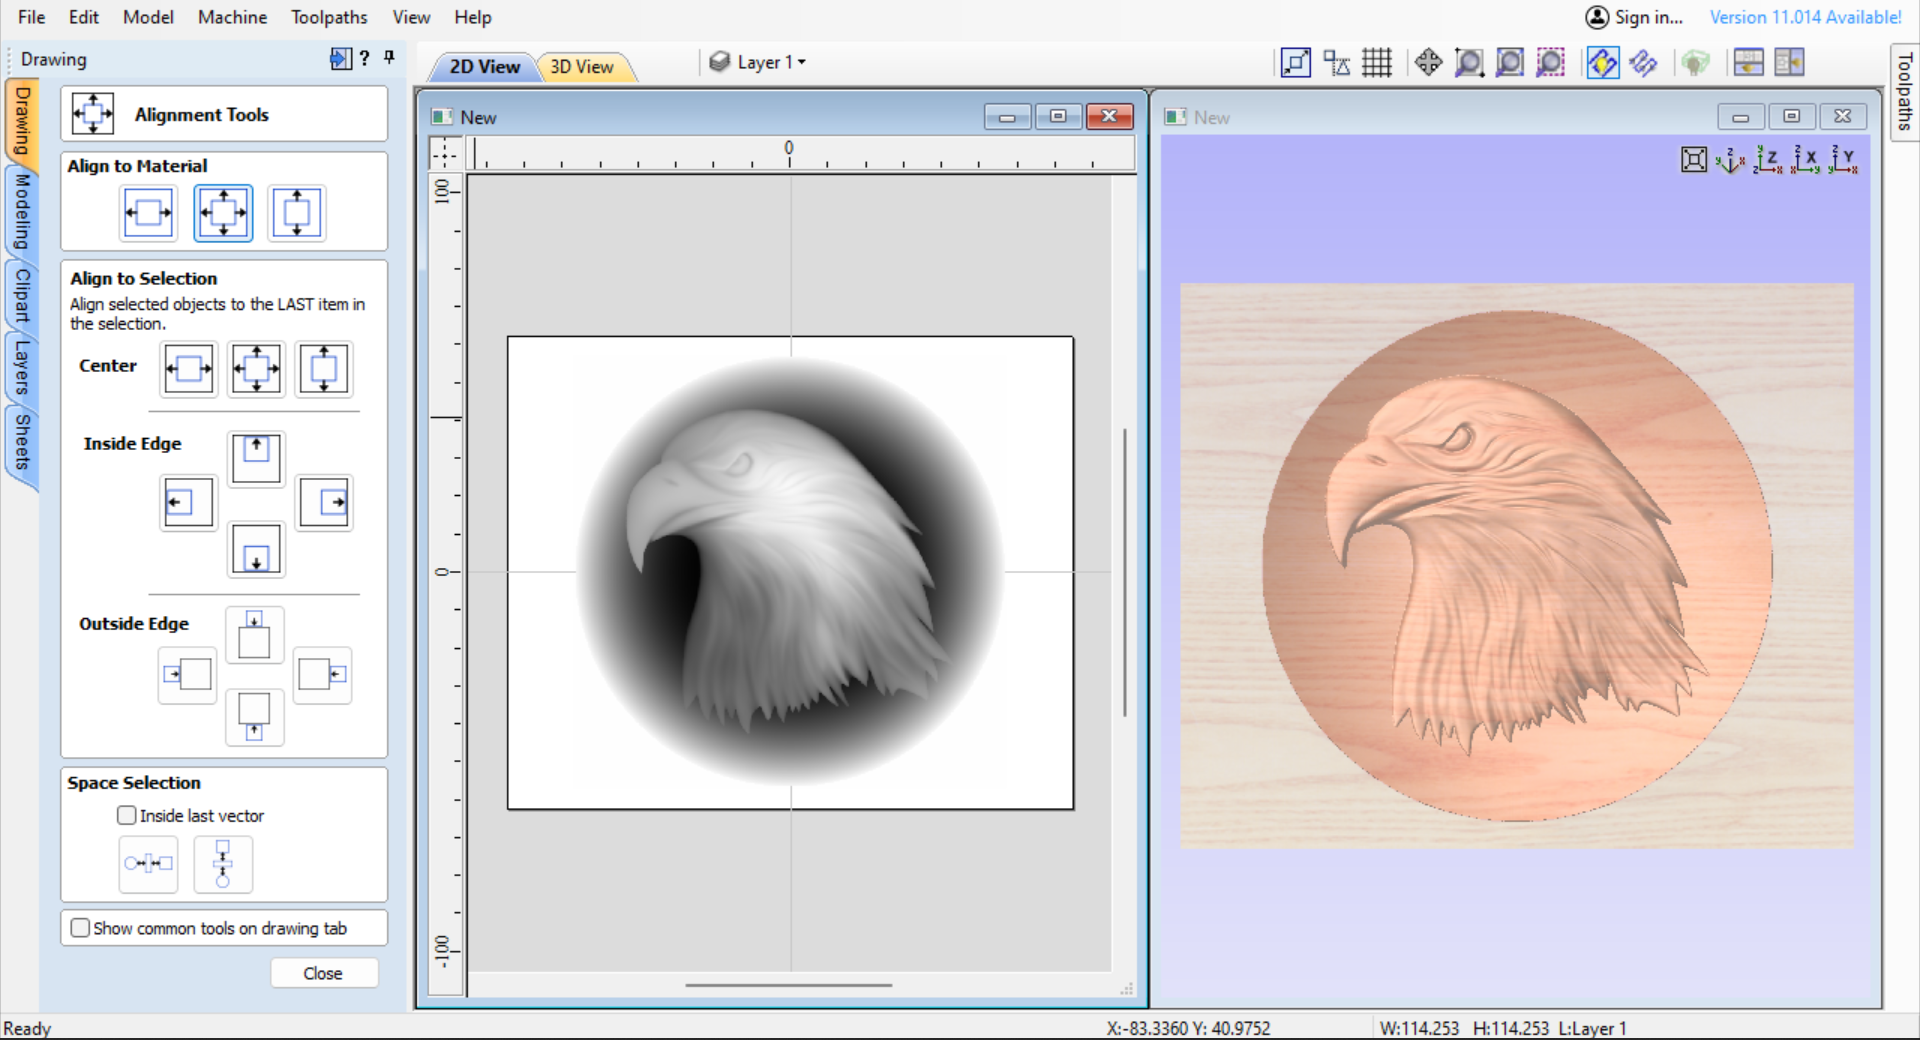
There are various tabs in VCarve Design on the left side of the page, Clipart, Modelling, Layers and Sheets, I select Clipart and scroll through the various models and select the Eagle model I want, clicking on this and dragging it across to the workpiece, from here we can adjust the size by clicking on the points while pressing the shift key and drag within the work area, then we can use the Align tool to centralise the model within the workpiece.
Looking to the top right of the layout screen there are various tabs for grids etc, there is also one for a dual screen, clicking on this lets you see the actual 3D model and how it would appear when cut, it looks good to me.
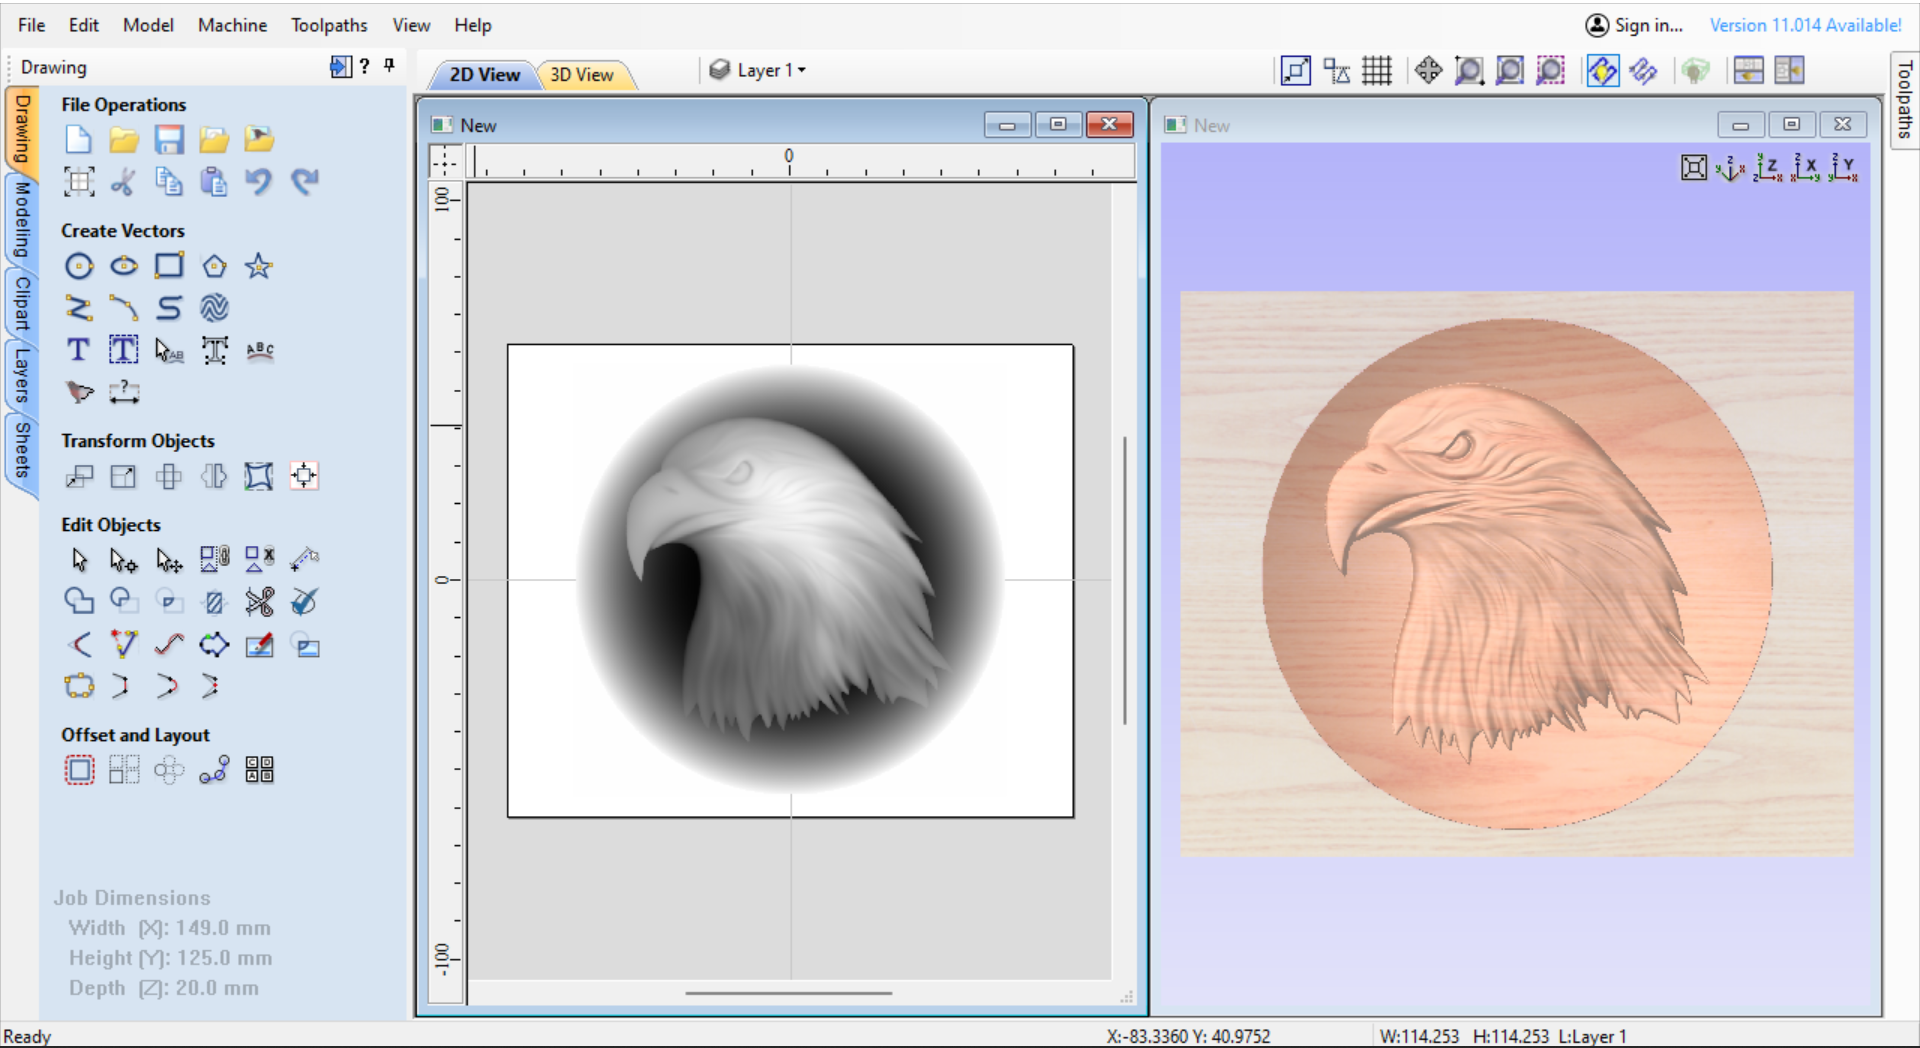
With this done we can now go to the modelling tab, to be honest I didn't adjust anything in here, but hovering over the tabs you can add 3D models or adjust the model height withing the workpiece, I didn't see any need to make any changes and I don't like to complicate things so I went from here straight to the cutting tab, its a scrap piece of wood, what's the worse that can happen.
The Cutting Process.
.png)
.png)
.png)
.png)
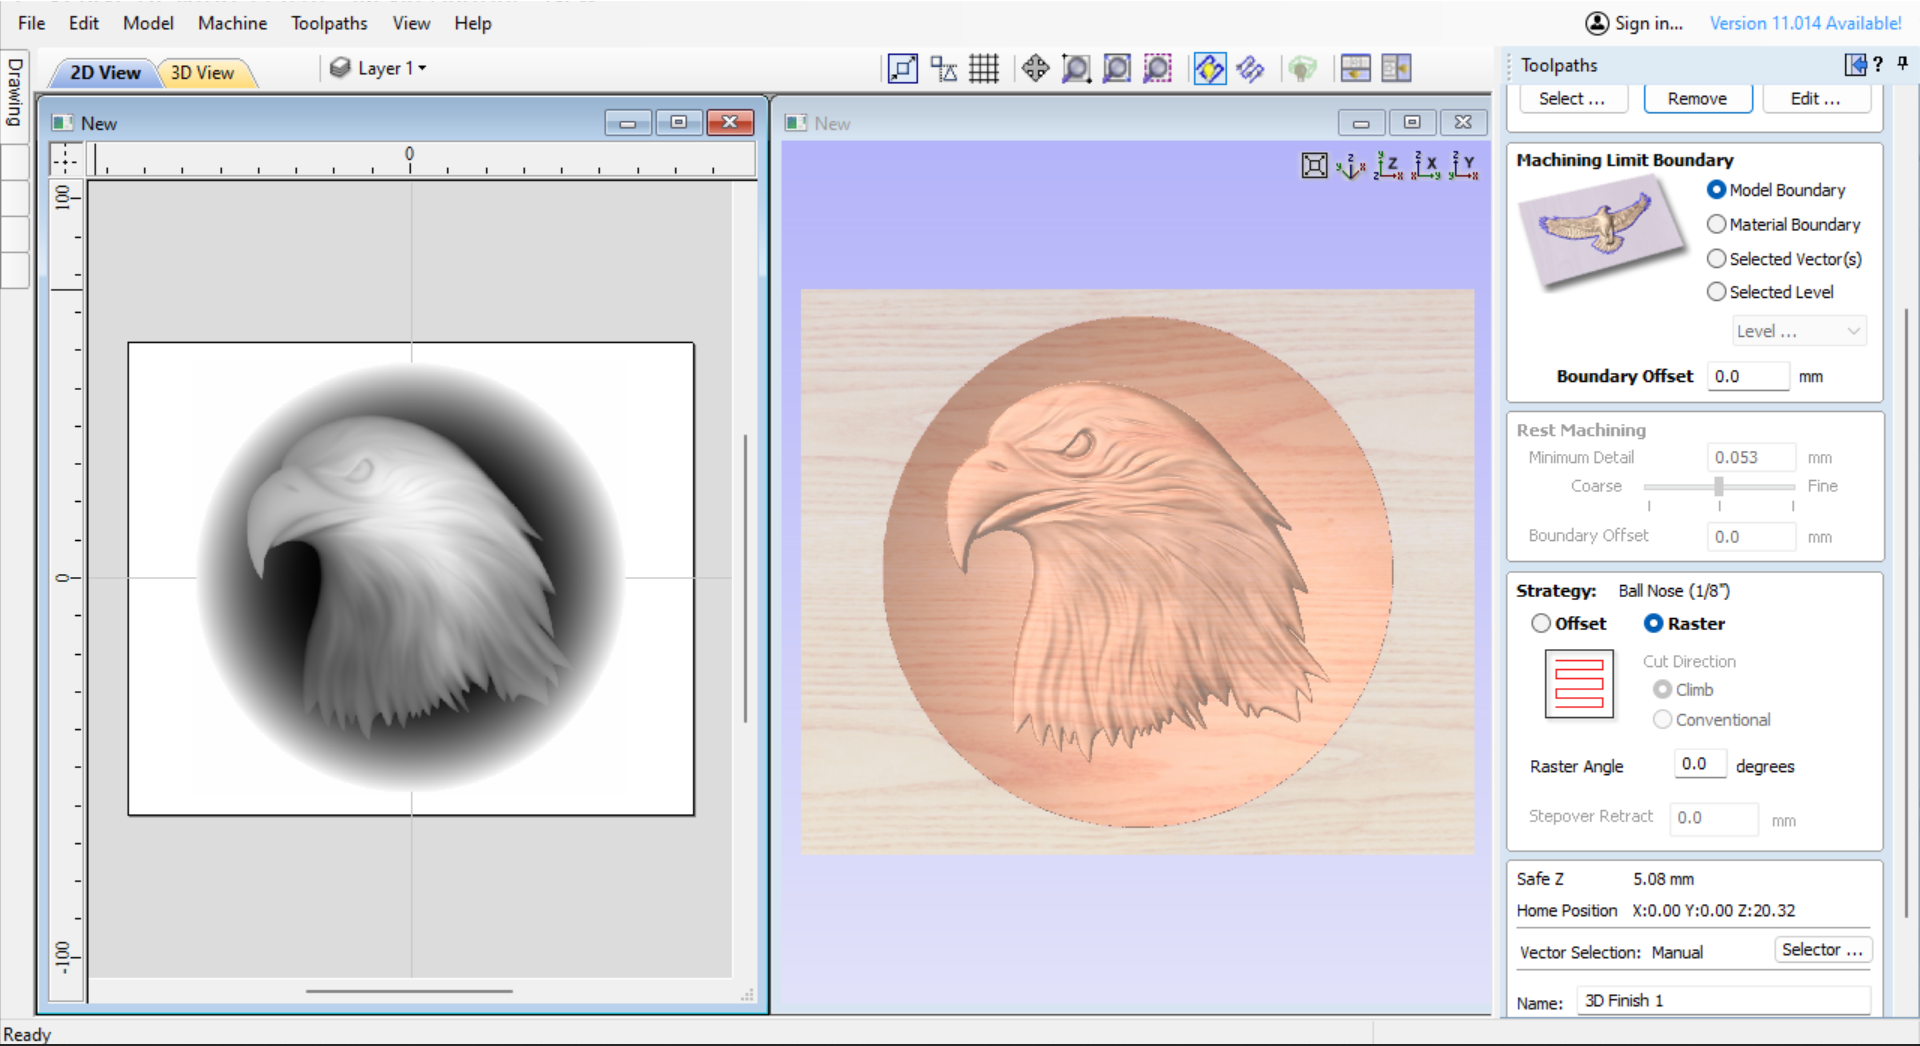
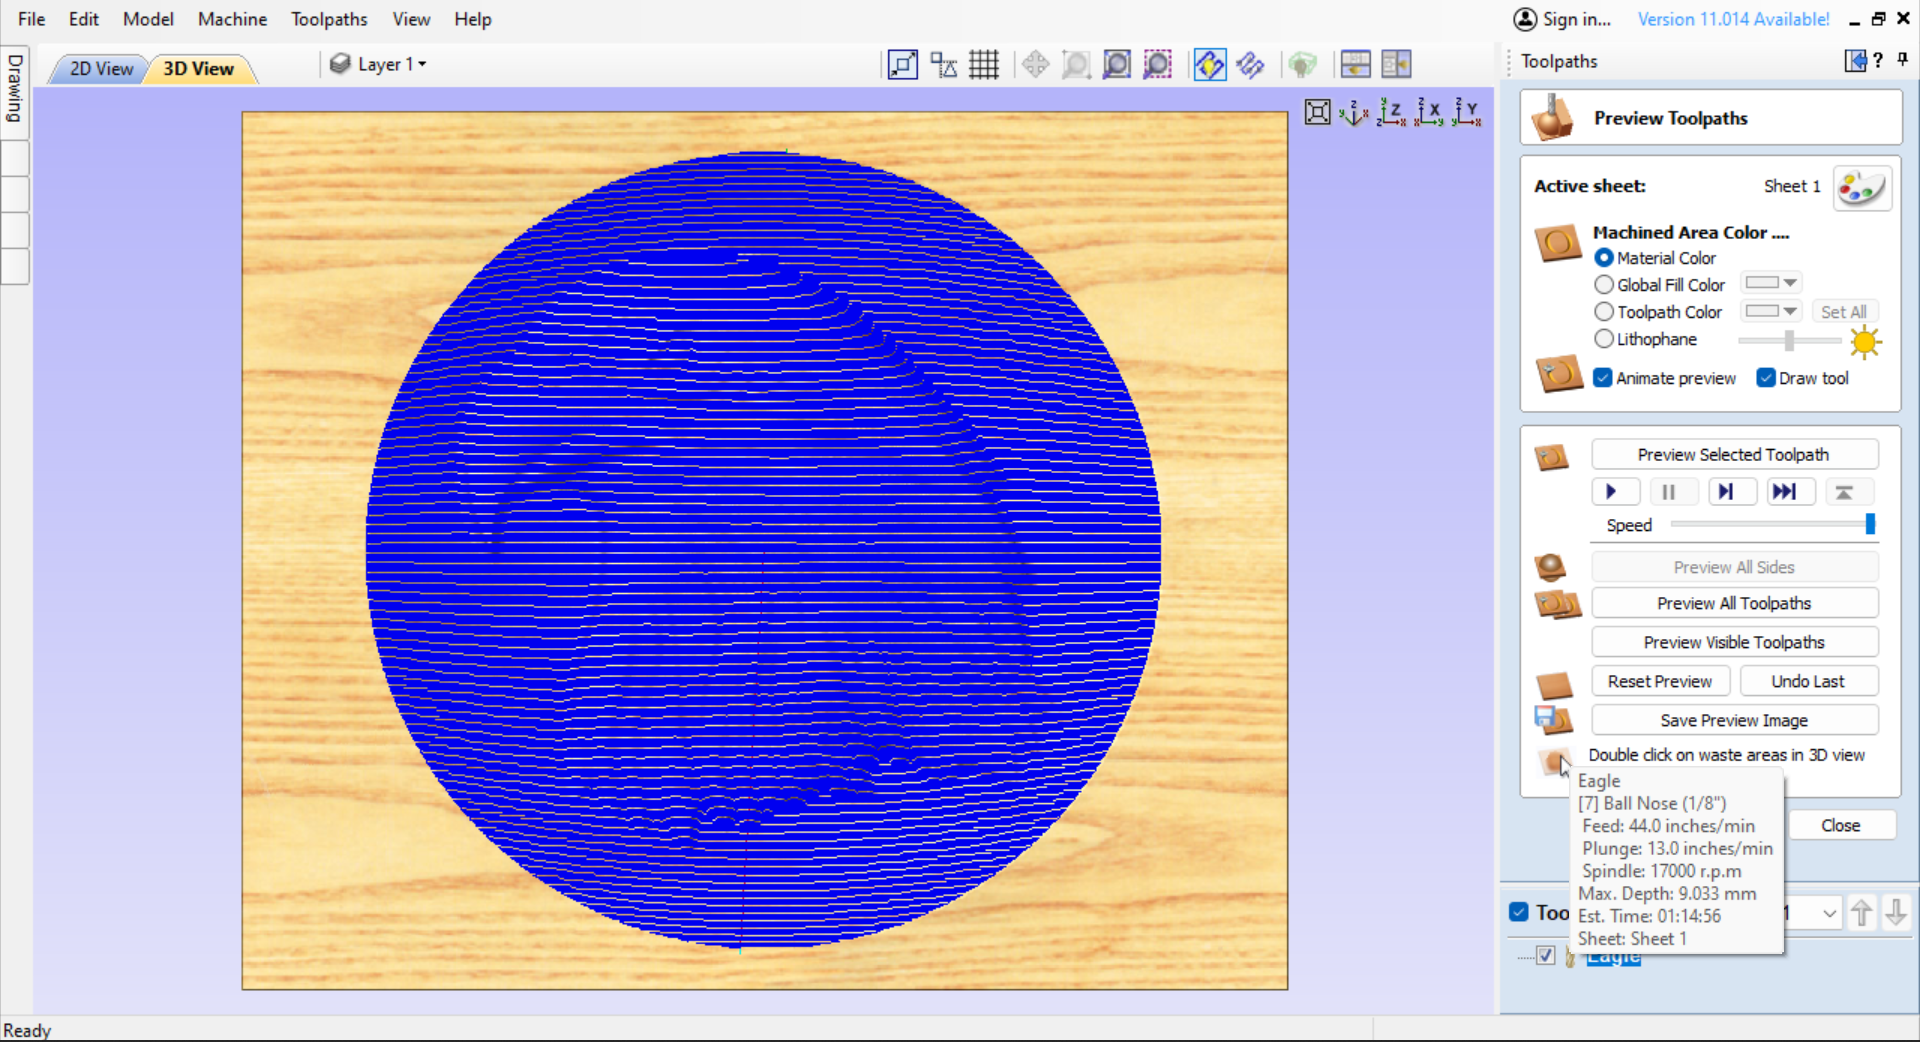
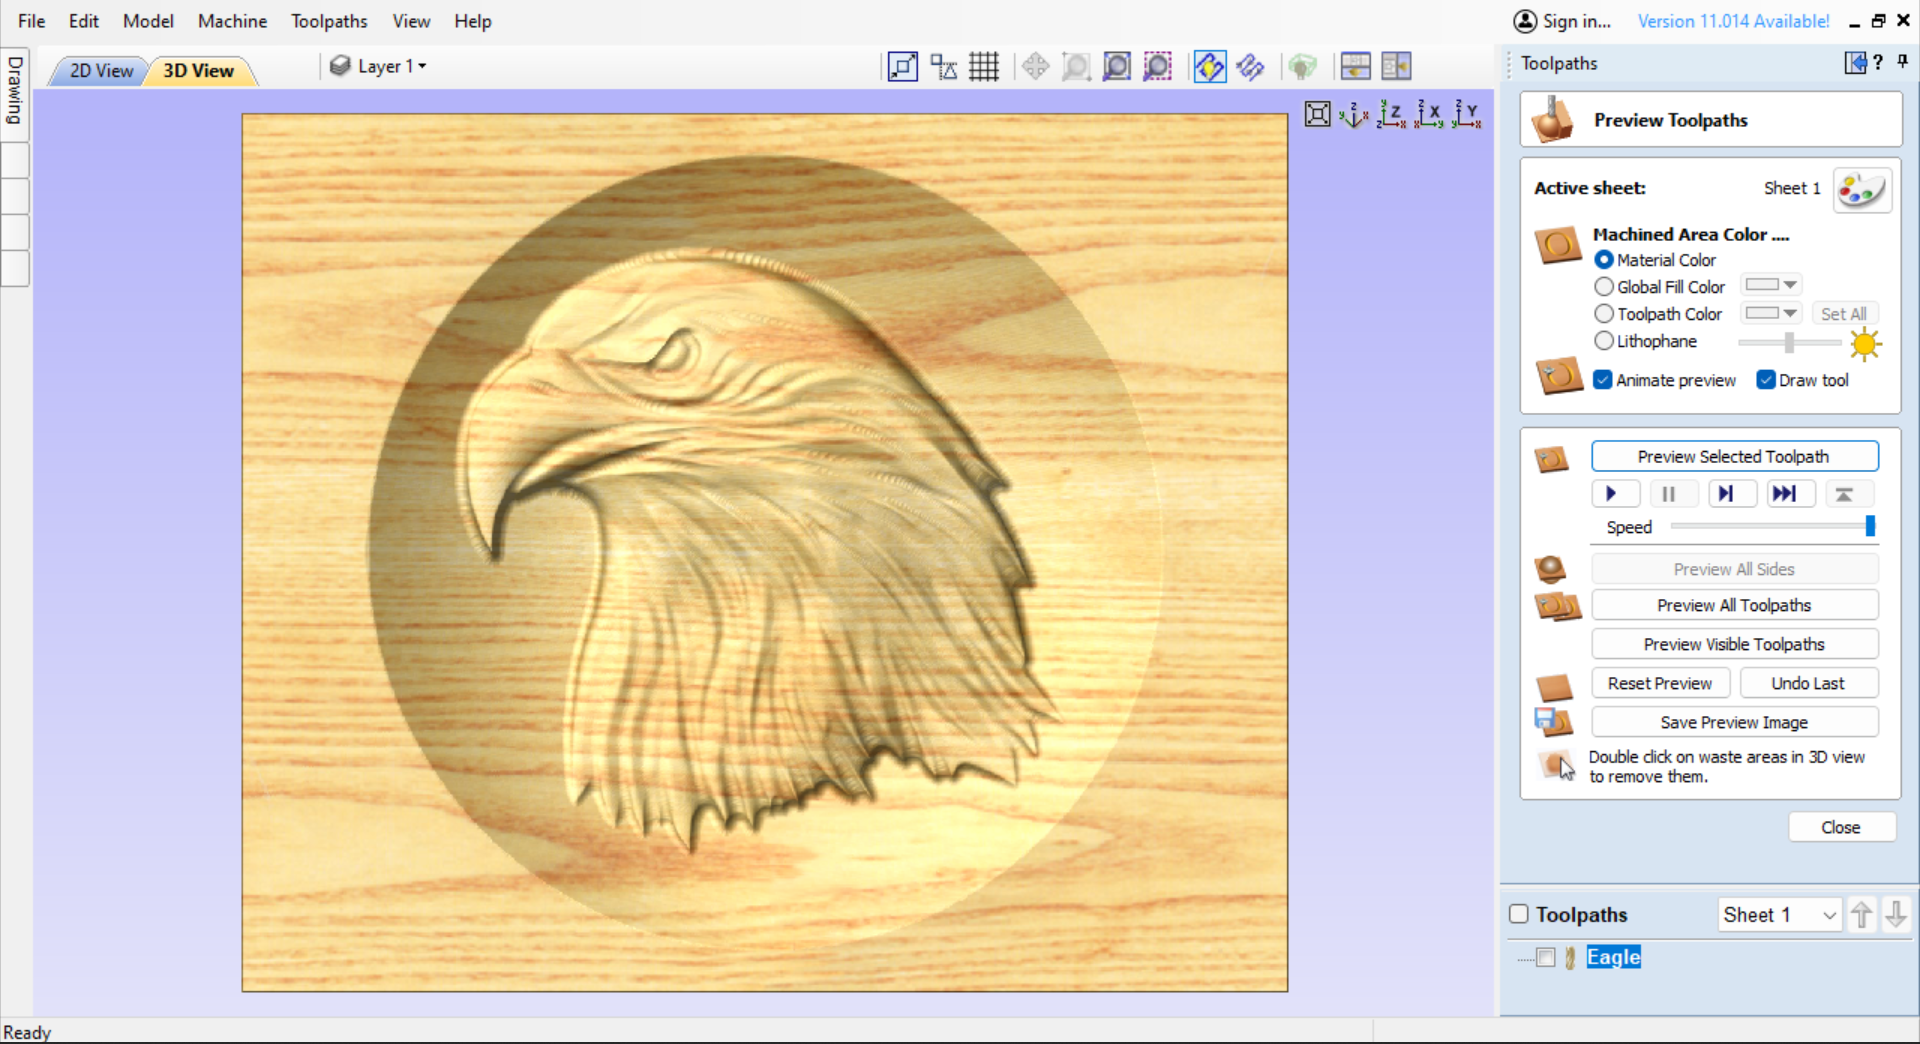
In the Toolpath environment, you can select a 3D roughing pass or a 3D finishing pass, I selected the 3D finishing pass as this is a relatively small piece and wont take long to cut.
I opted for a 3mm or 1/8" Ball Nose bit and opted for the Raster cut, this is where the cutting starts at the bottom and it works its way up the piece, first time I have used Raster, but its pretty cool watching the eagle appearing out of the wood as the bit makes its way up
With all the settings made we can preview the toolpath and everything appears to be ok, the details are all there so I rename the toolpath and Save to Desktop.
We can now send the file to the CNC Machine.
Desktop to CNC
From Desktop on my Laptop, I use a free program(With Optional Donation) Called WinSCP, My CNC is down the garden in the Garage and there is a plug in WiFi Booster in there and this allows me to keep a good WiFi signal whether I'm in the shed or the Garage.
When WinSCP is connected, you have your laptop desktop on the left hand side of the screen and the Raspberry pi screen on the right side, all you have to do is find the file and drag it across to the Raspberry Pi side.
I have a very easy set up on the CNC machine, It runs off a Raspberry Pi 3b+ with a 7 inch Touch screen a Raspberry Pi has no moving parts so its perfect for CNC operations where a lot of dust is created, this in turn sends the Files to a CNC Xpro V4 via Bluetooth and to Toggle the machine and select programs etc I use a small Bluetooth keyboard, a very simple but effective set up.
The CNC Machine is an Ox Belt driven which I have had for a good number of years, I Installed dual belts some time ago and designed and 3D printed the Tensioners, I still have the print files for the tensioners if anyone has the same CNC machine and would like to modify to dual belts, it really does work.
The operating software is just Universal G Code sender classic which works really well.
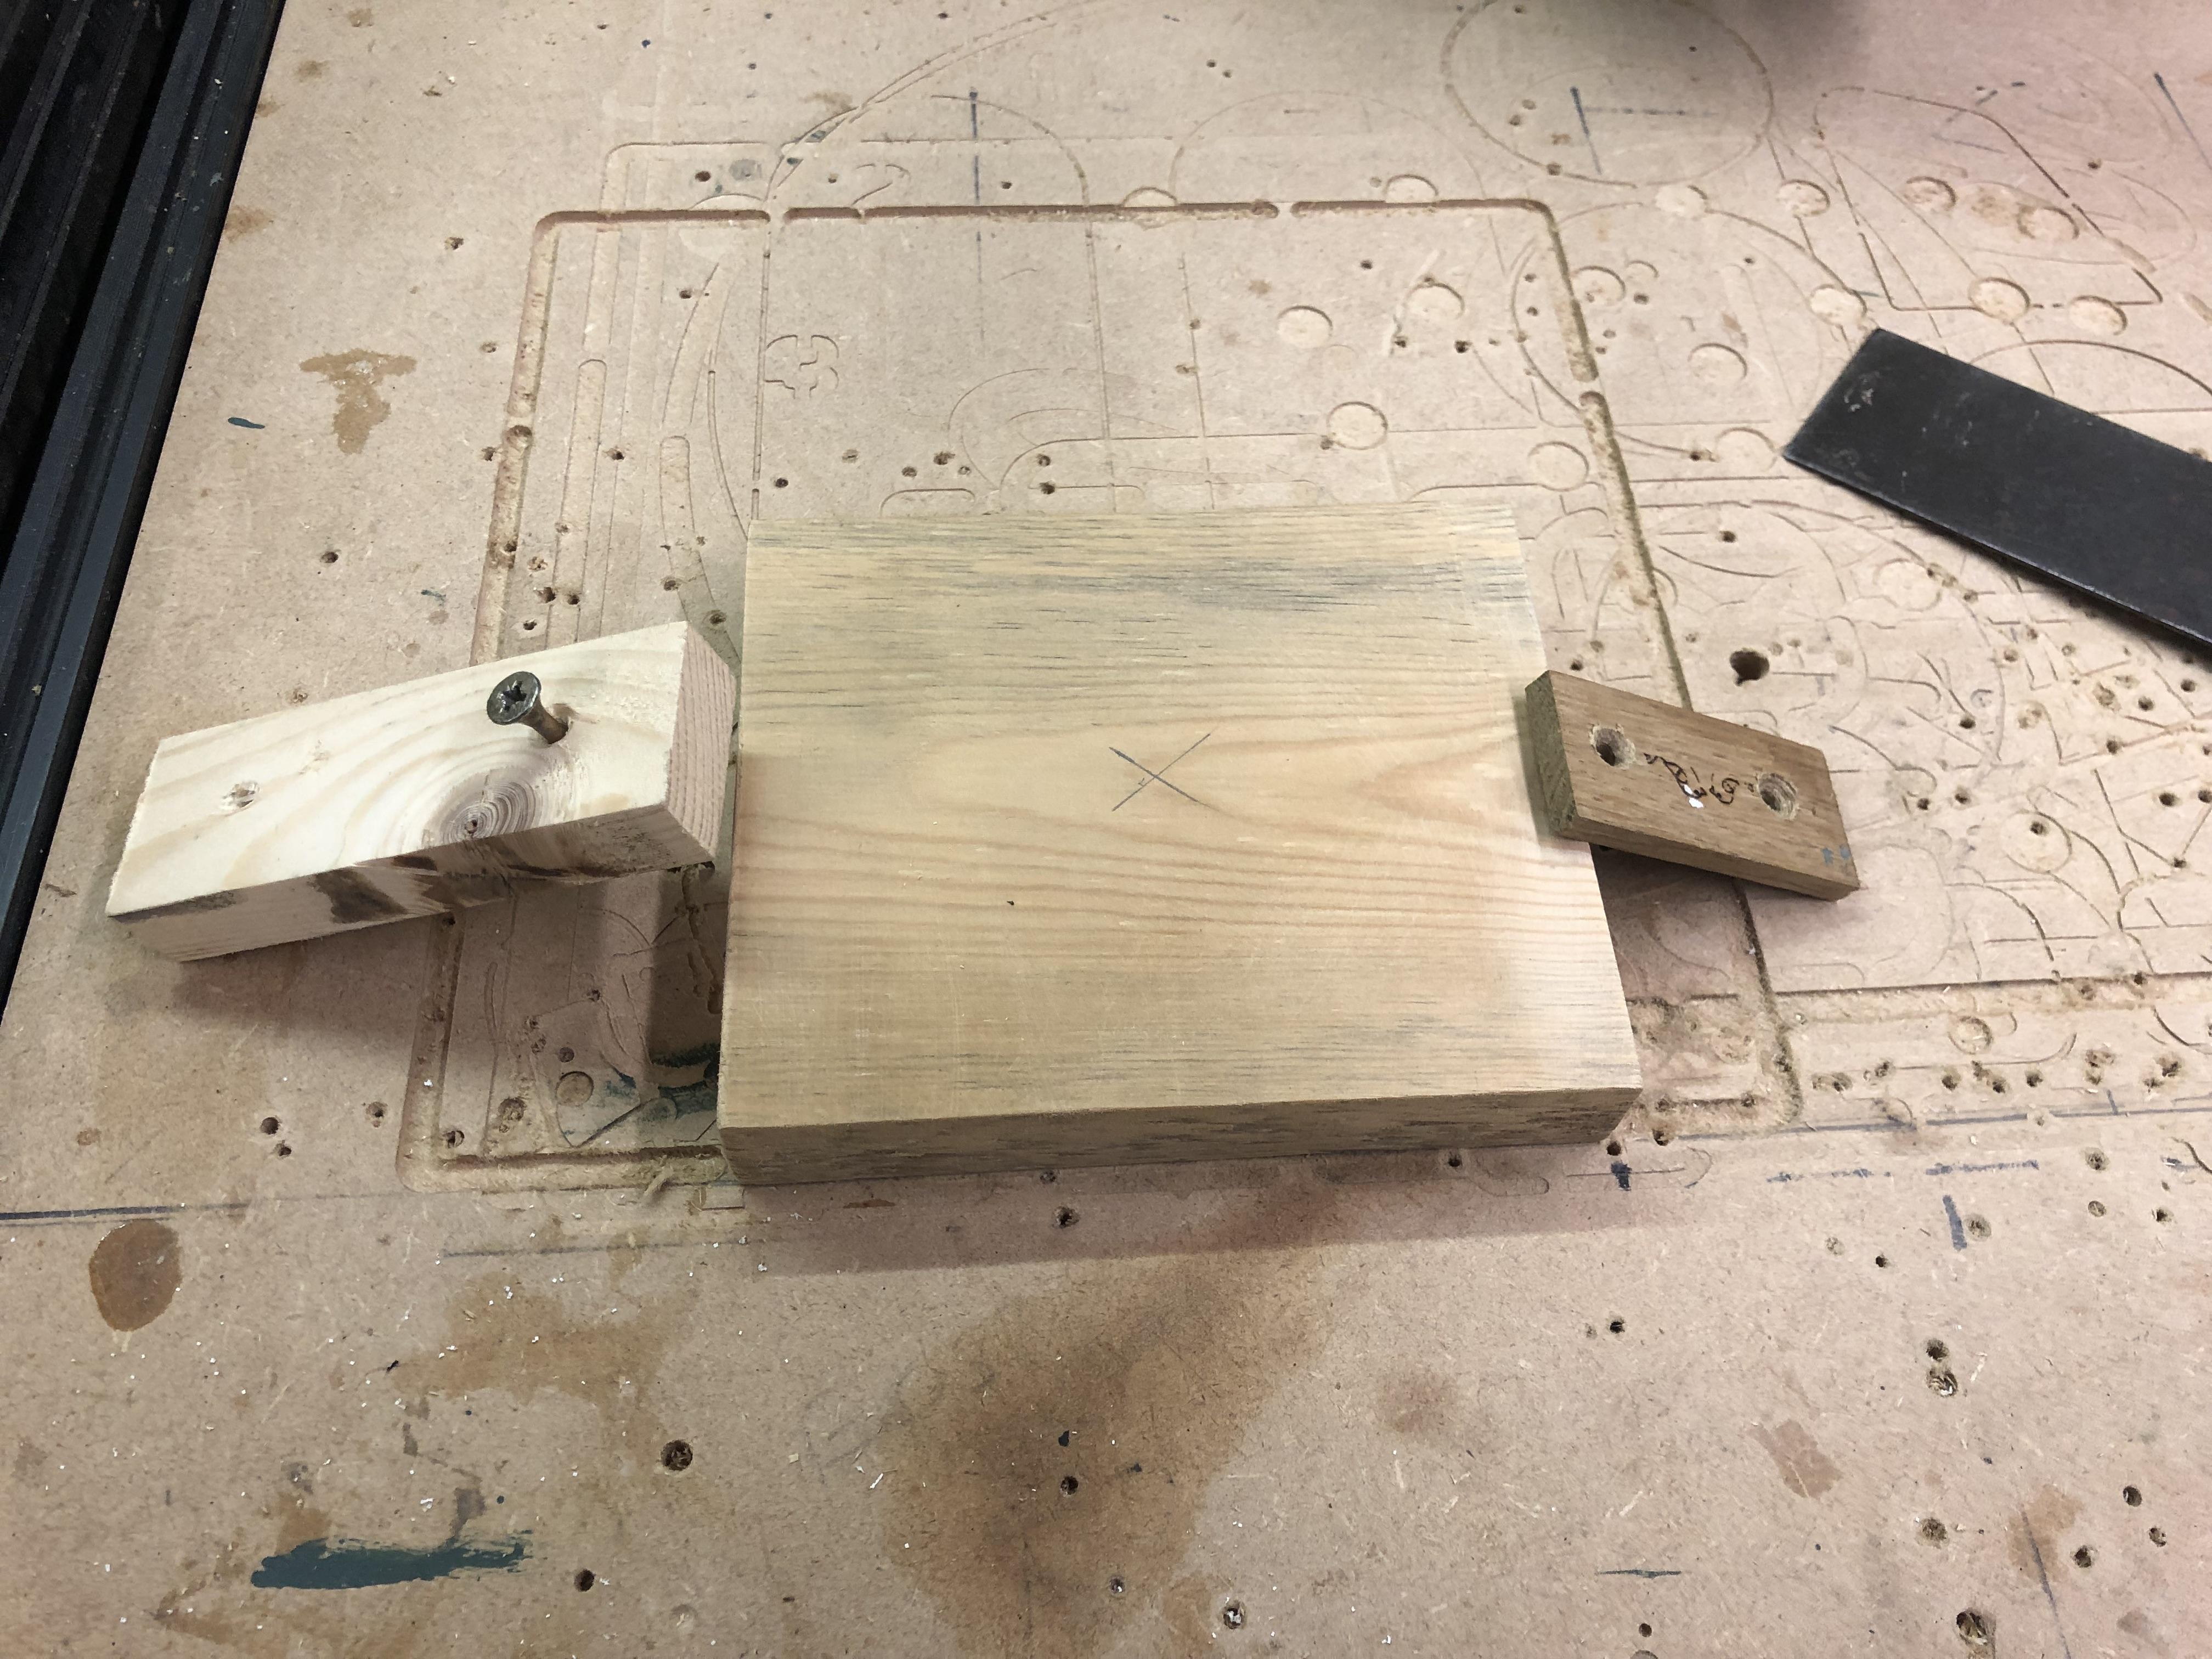
With the workpiece clamped, nothing fancy here, just 2 bits of scrap wood with a hole in and screwed to the bed I can now set the zero in the middle of the workpiece, I just use a piece of paper underneath the bit, why complicate things if it works.
I raise the bit and fit the dust shoe, turn on the router and the vacuum and off it goes.
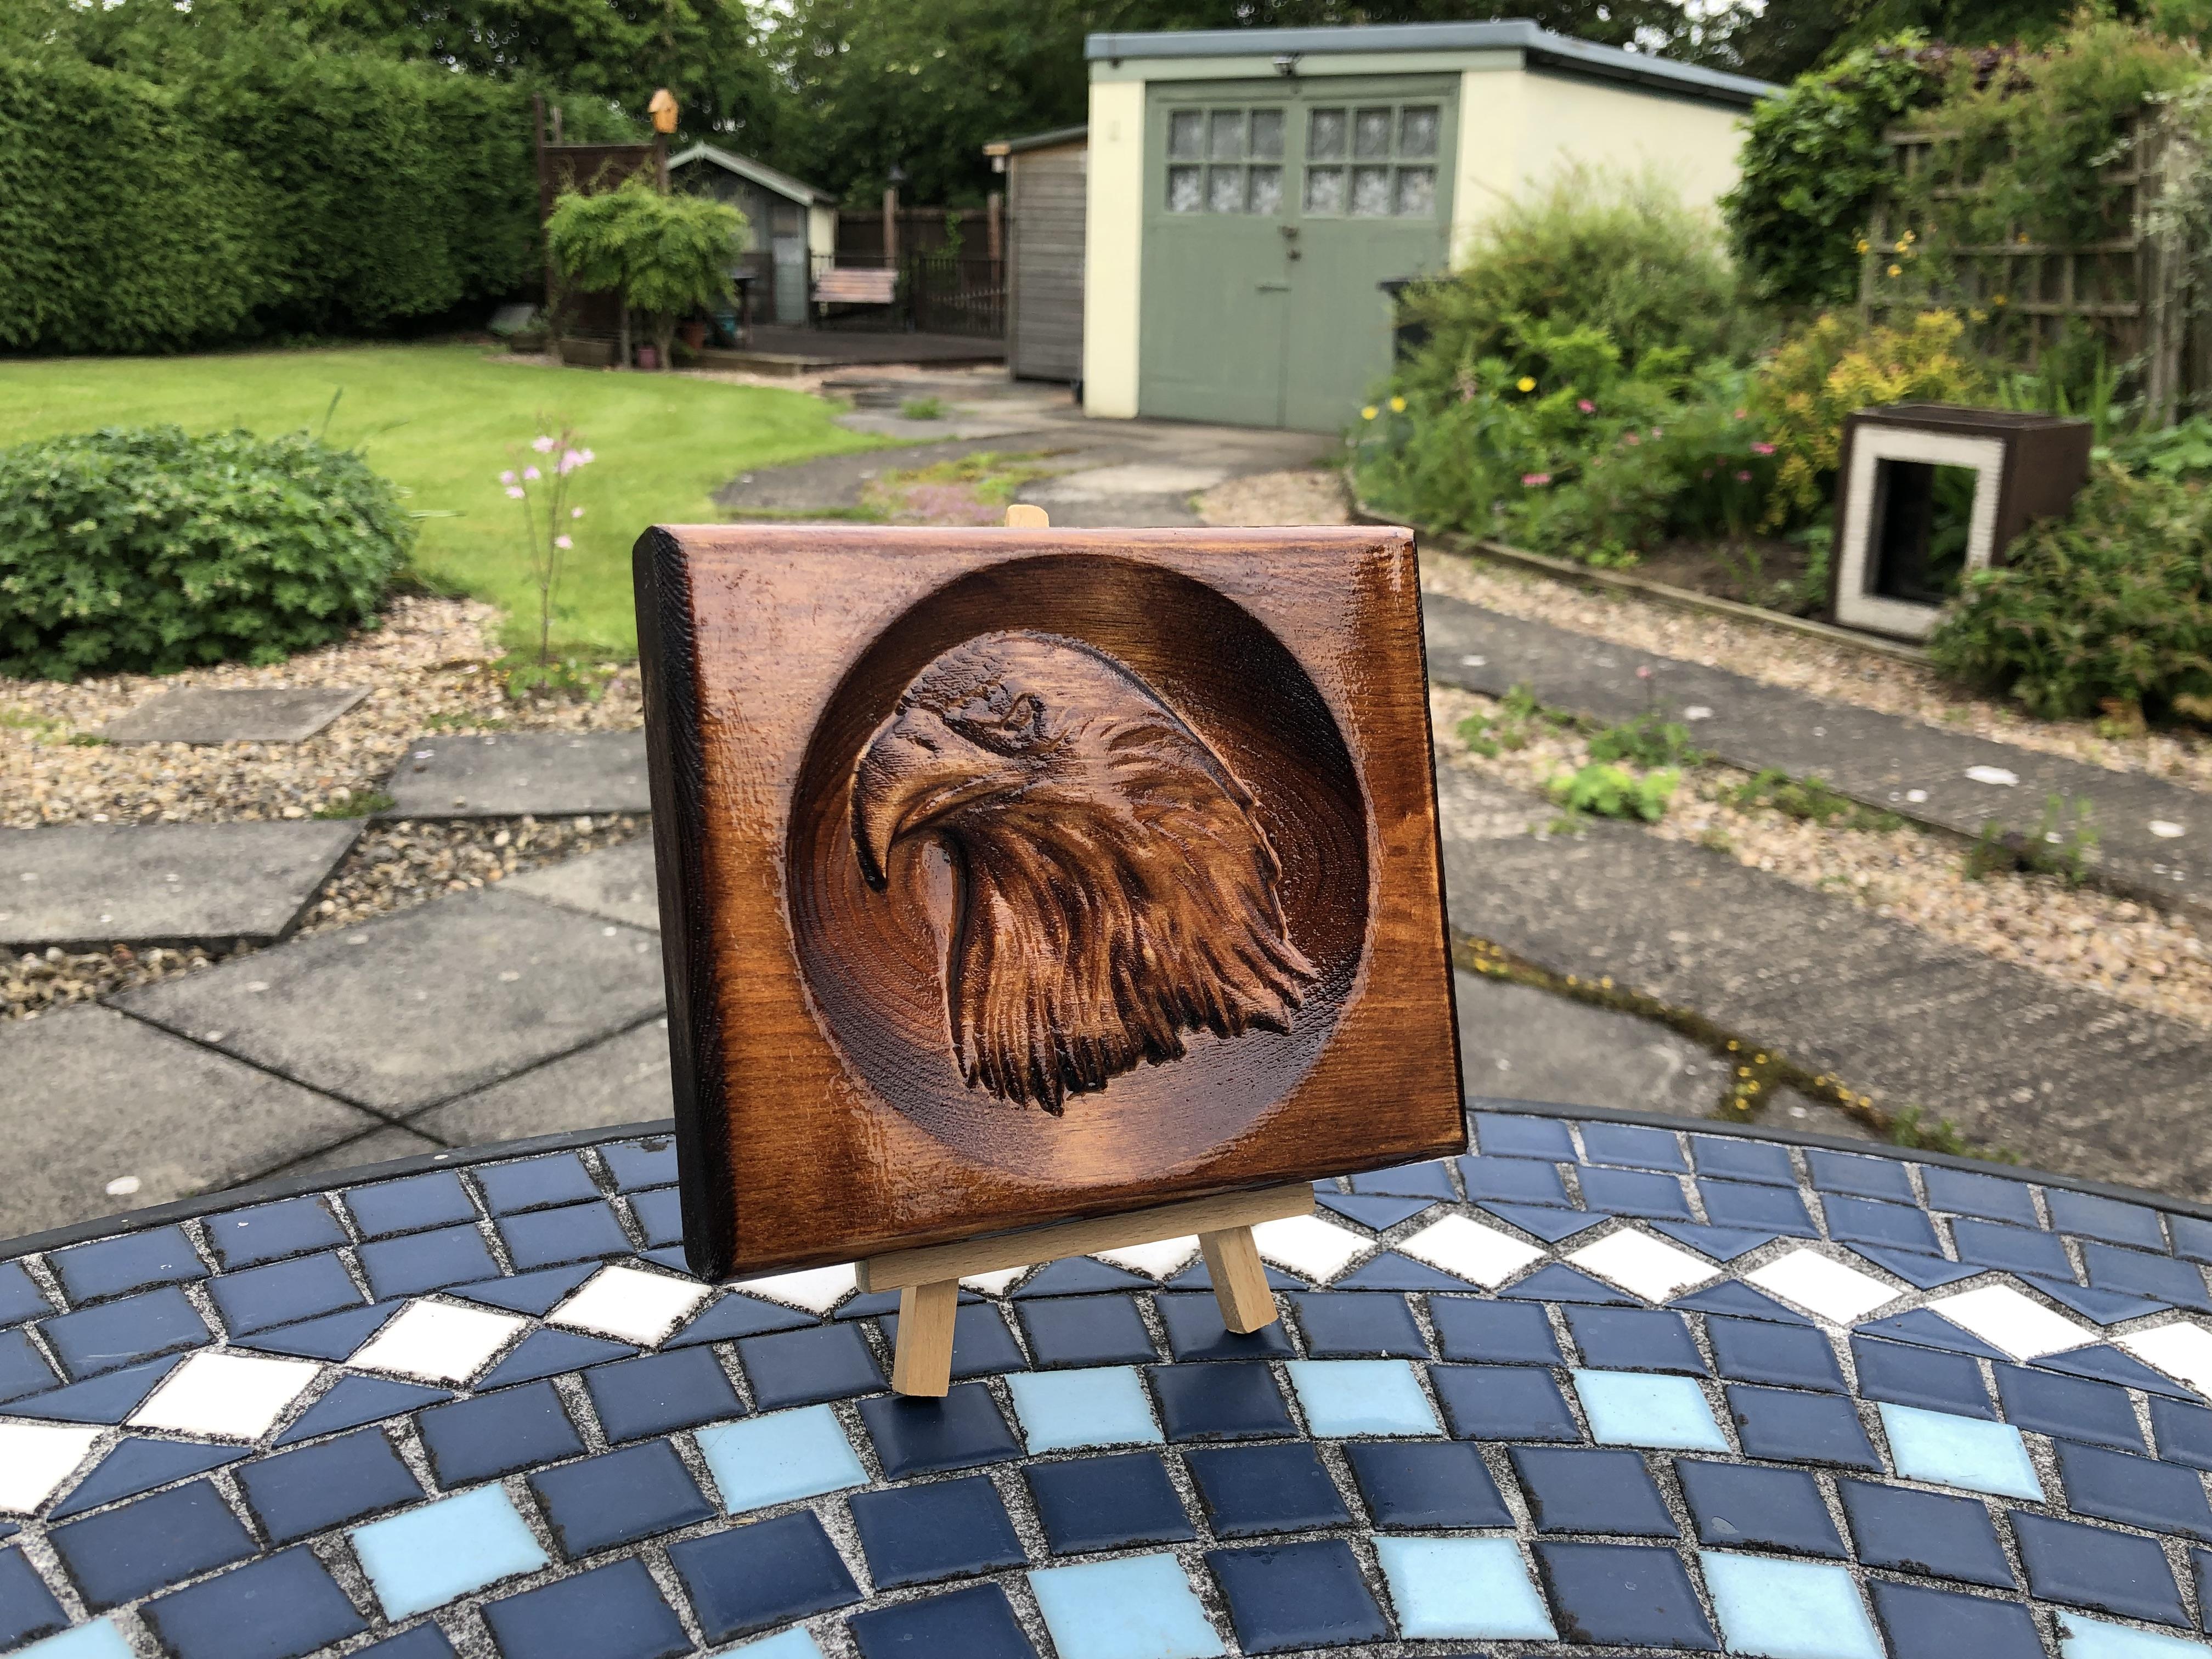
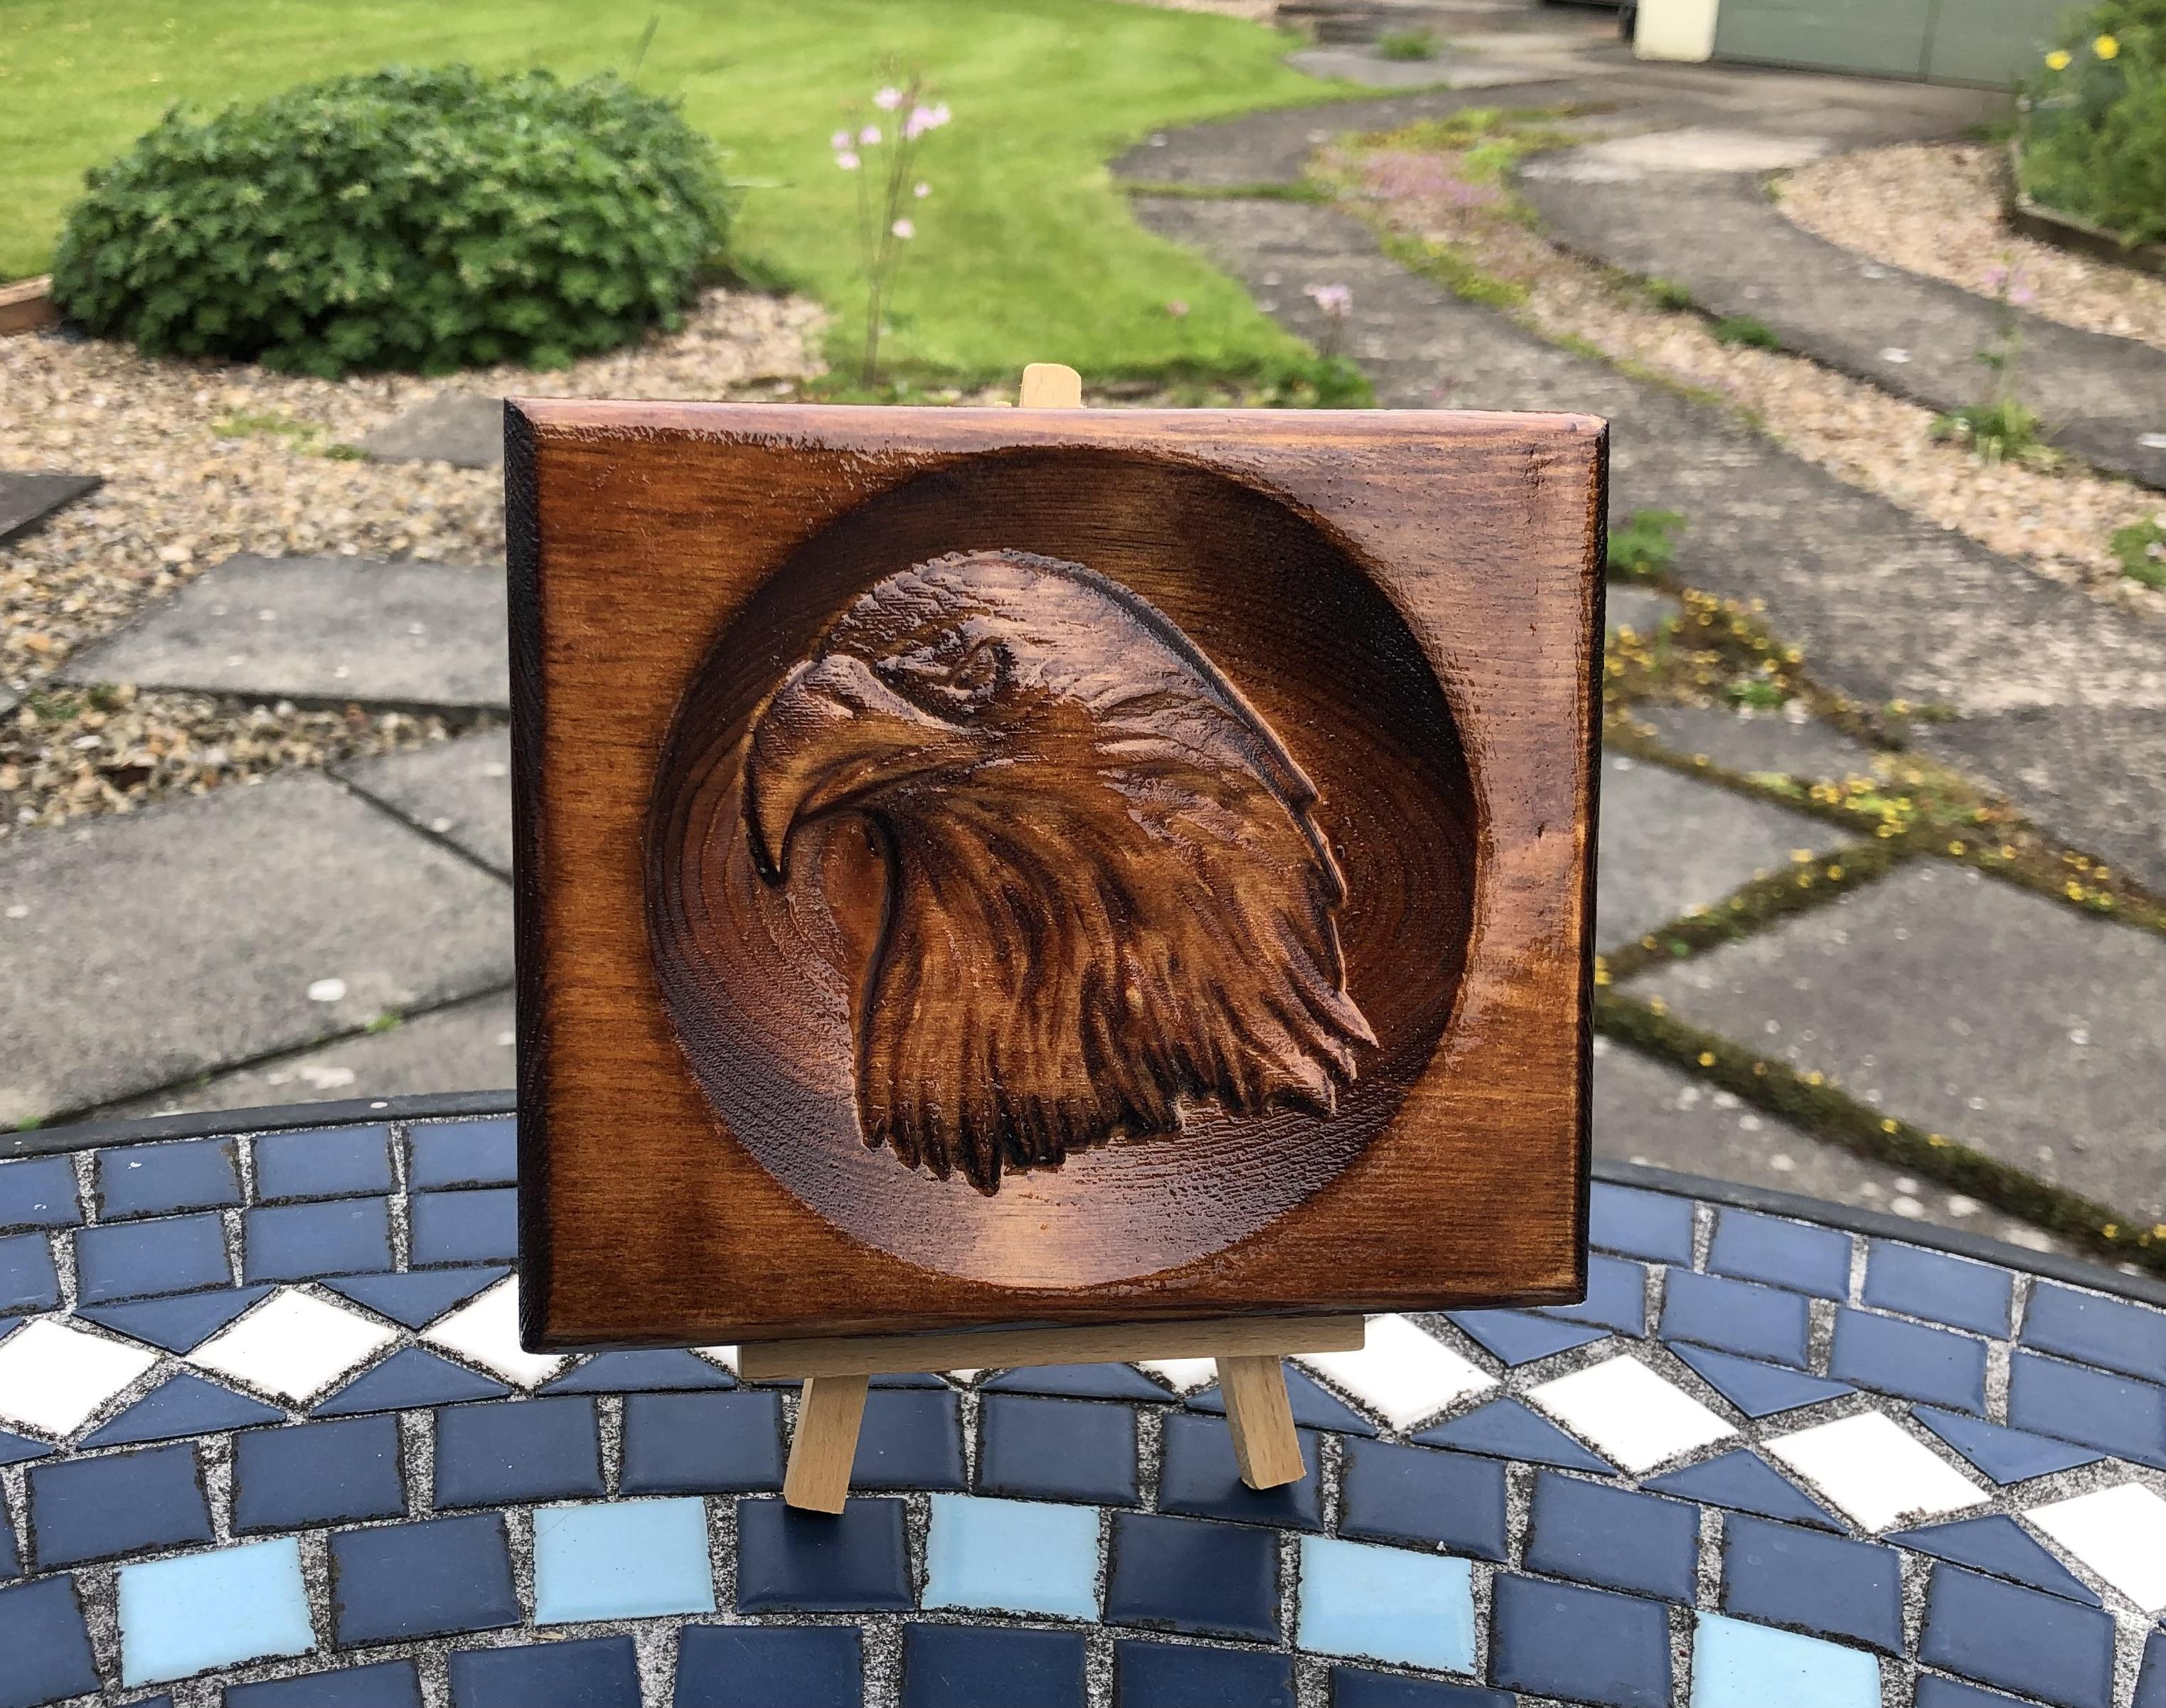
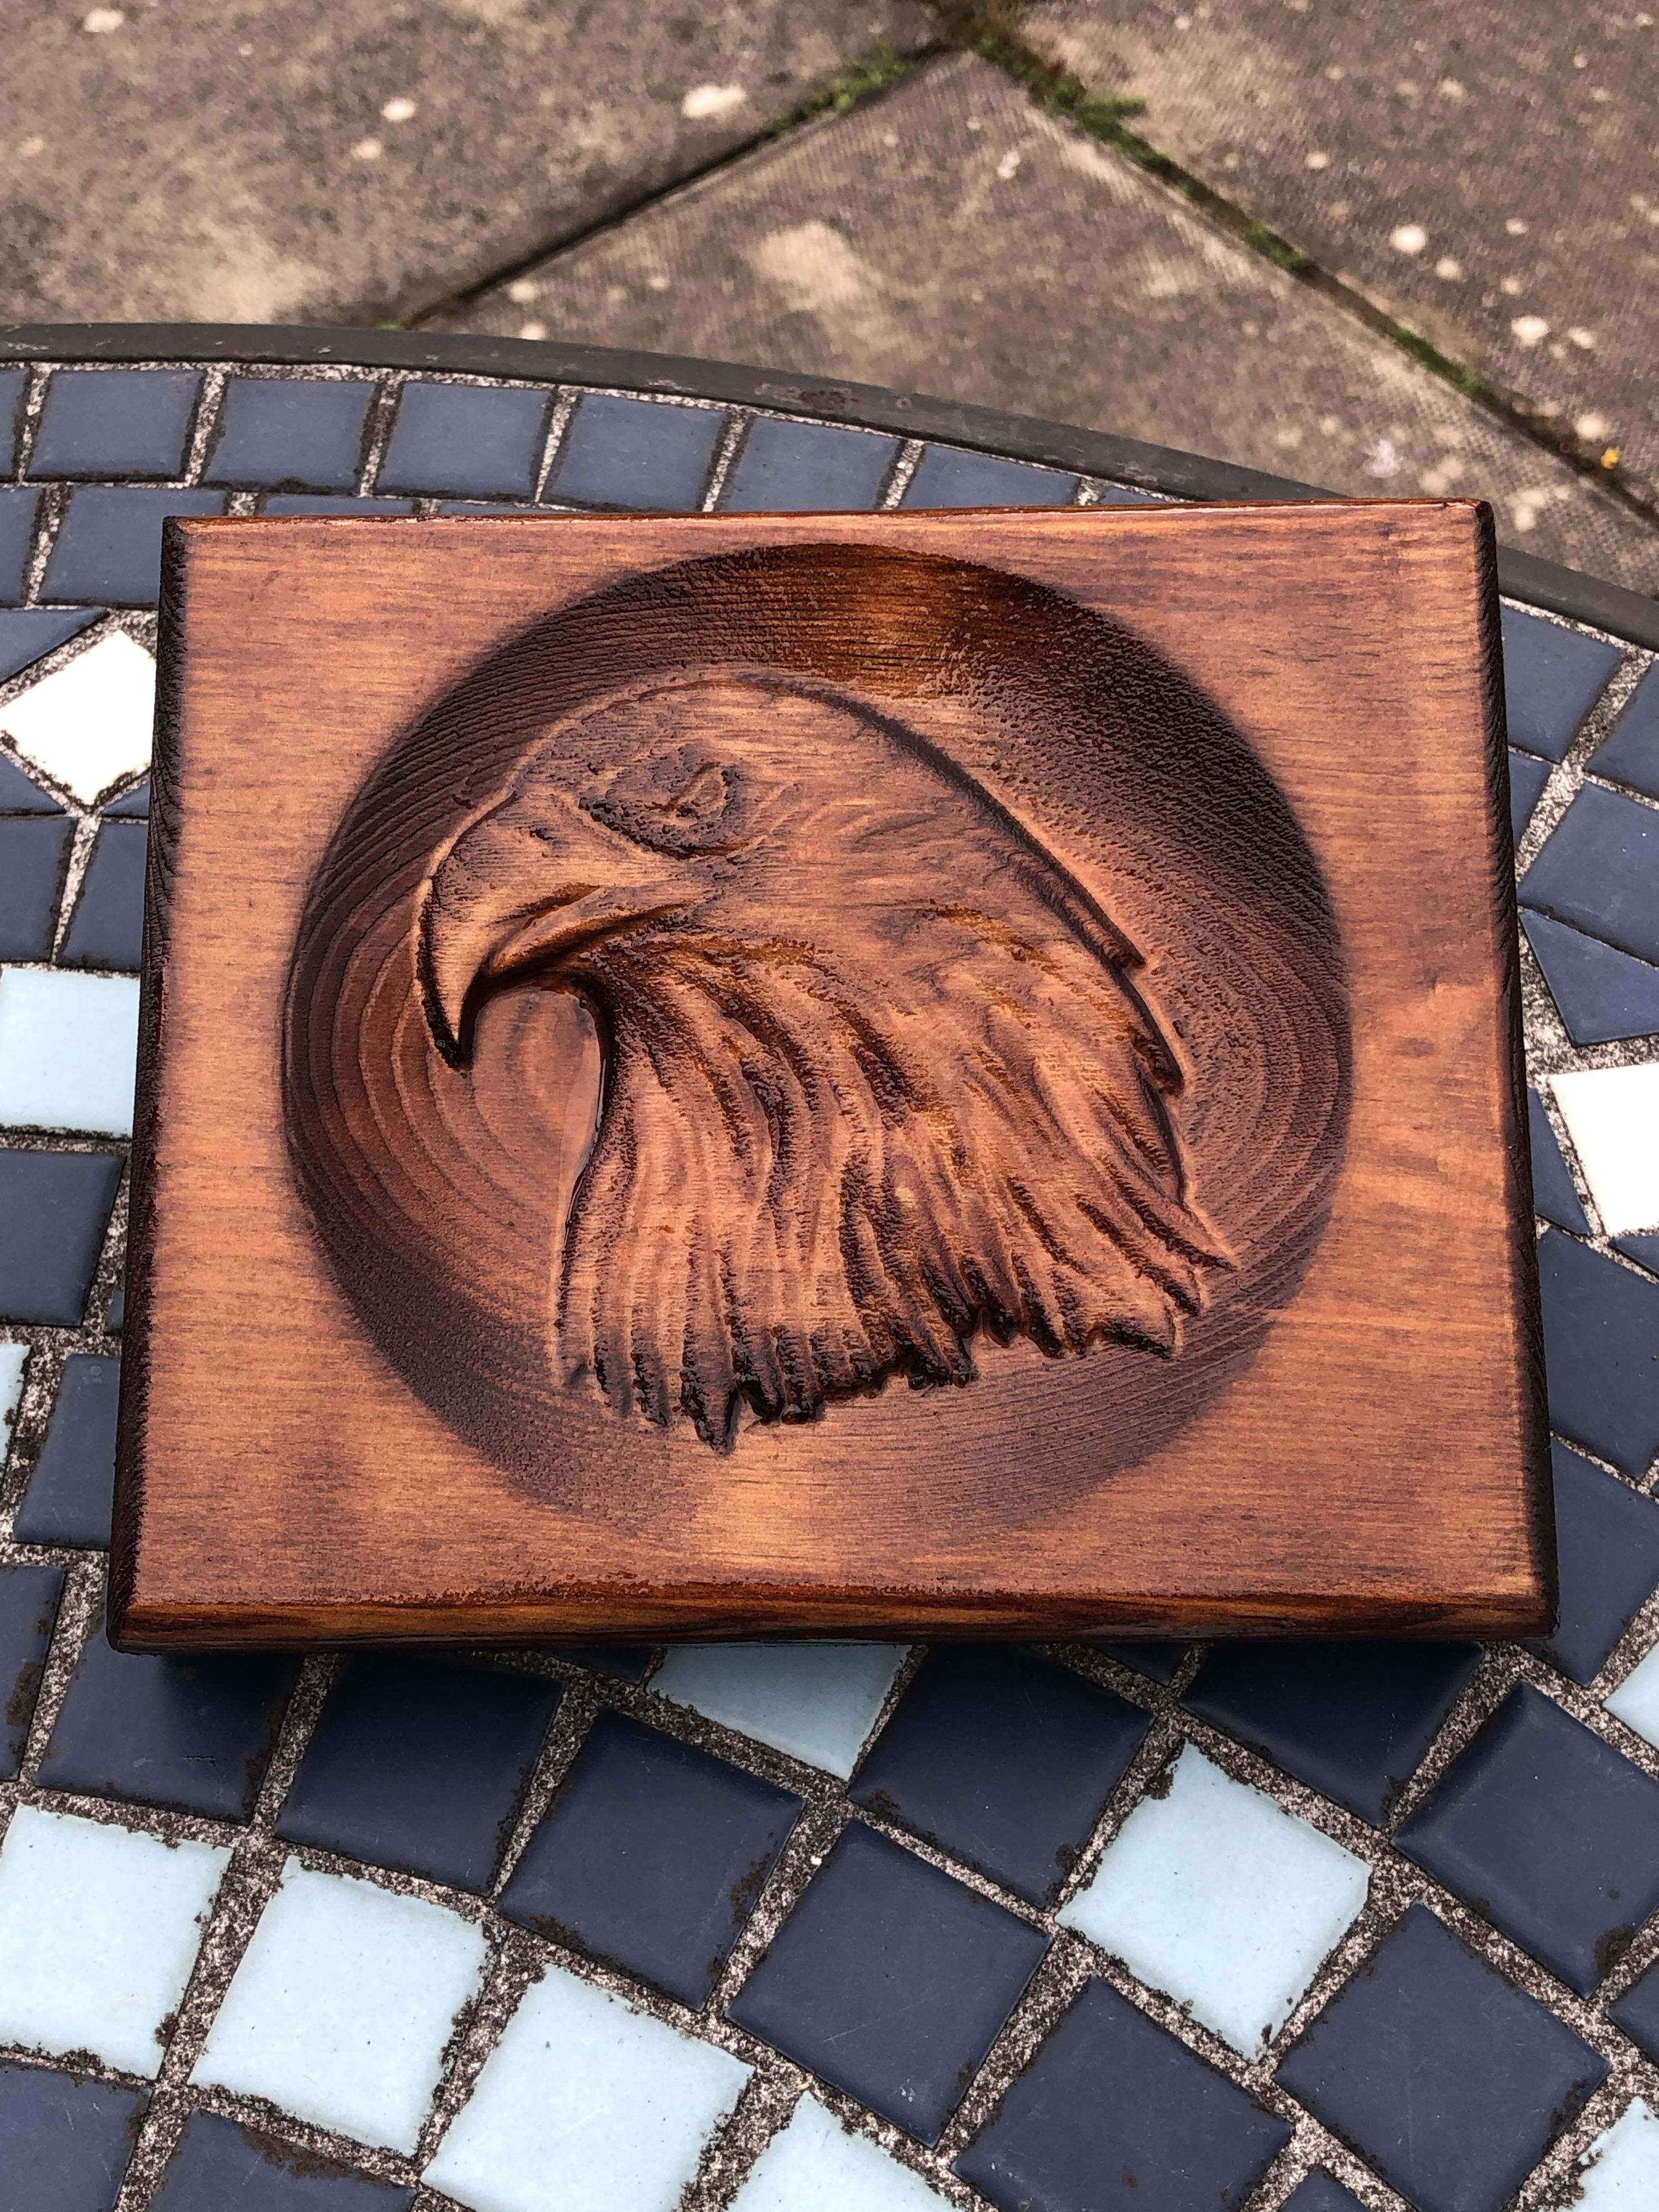
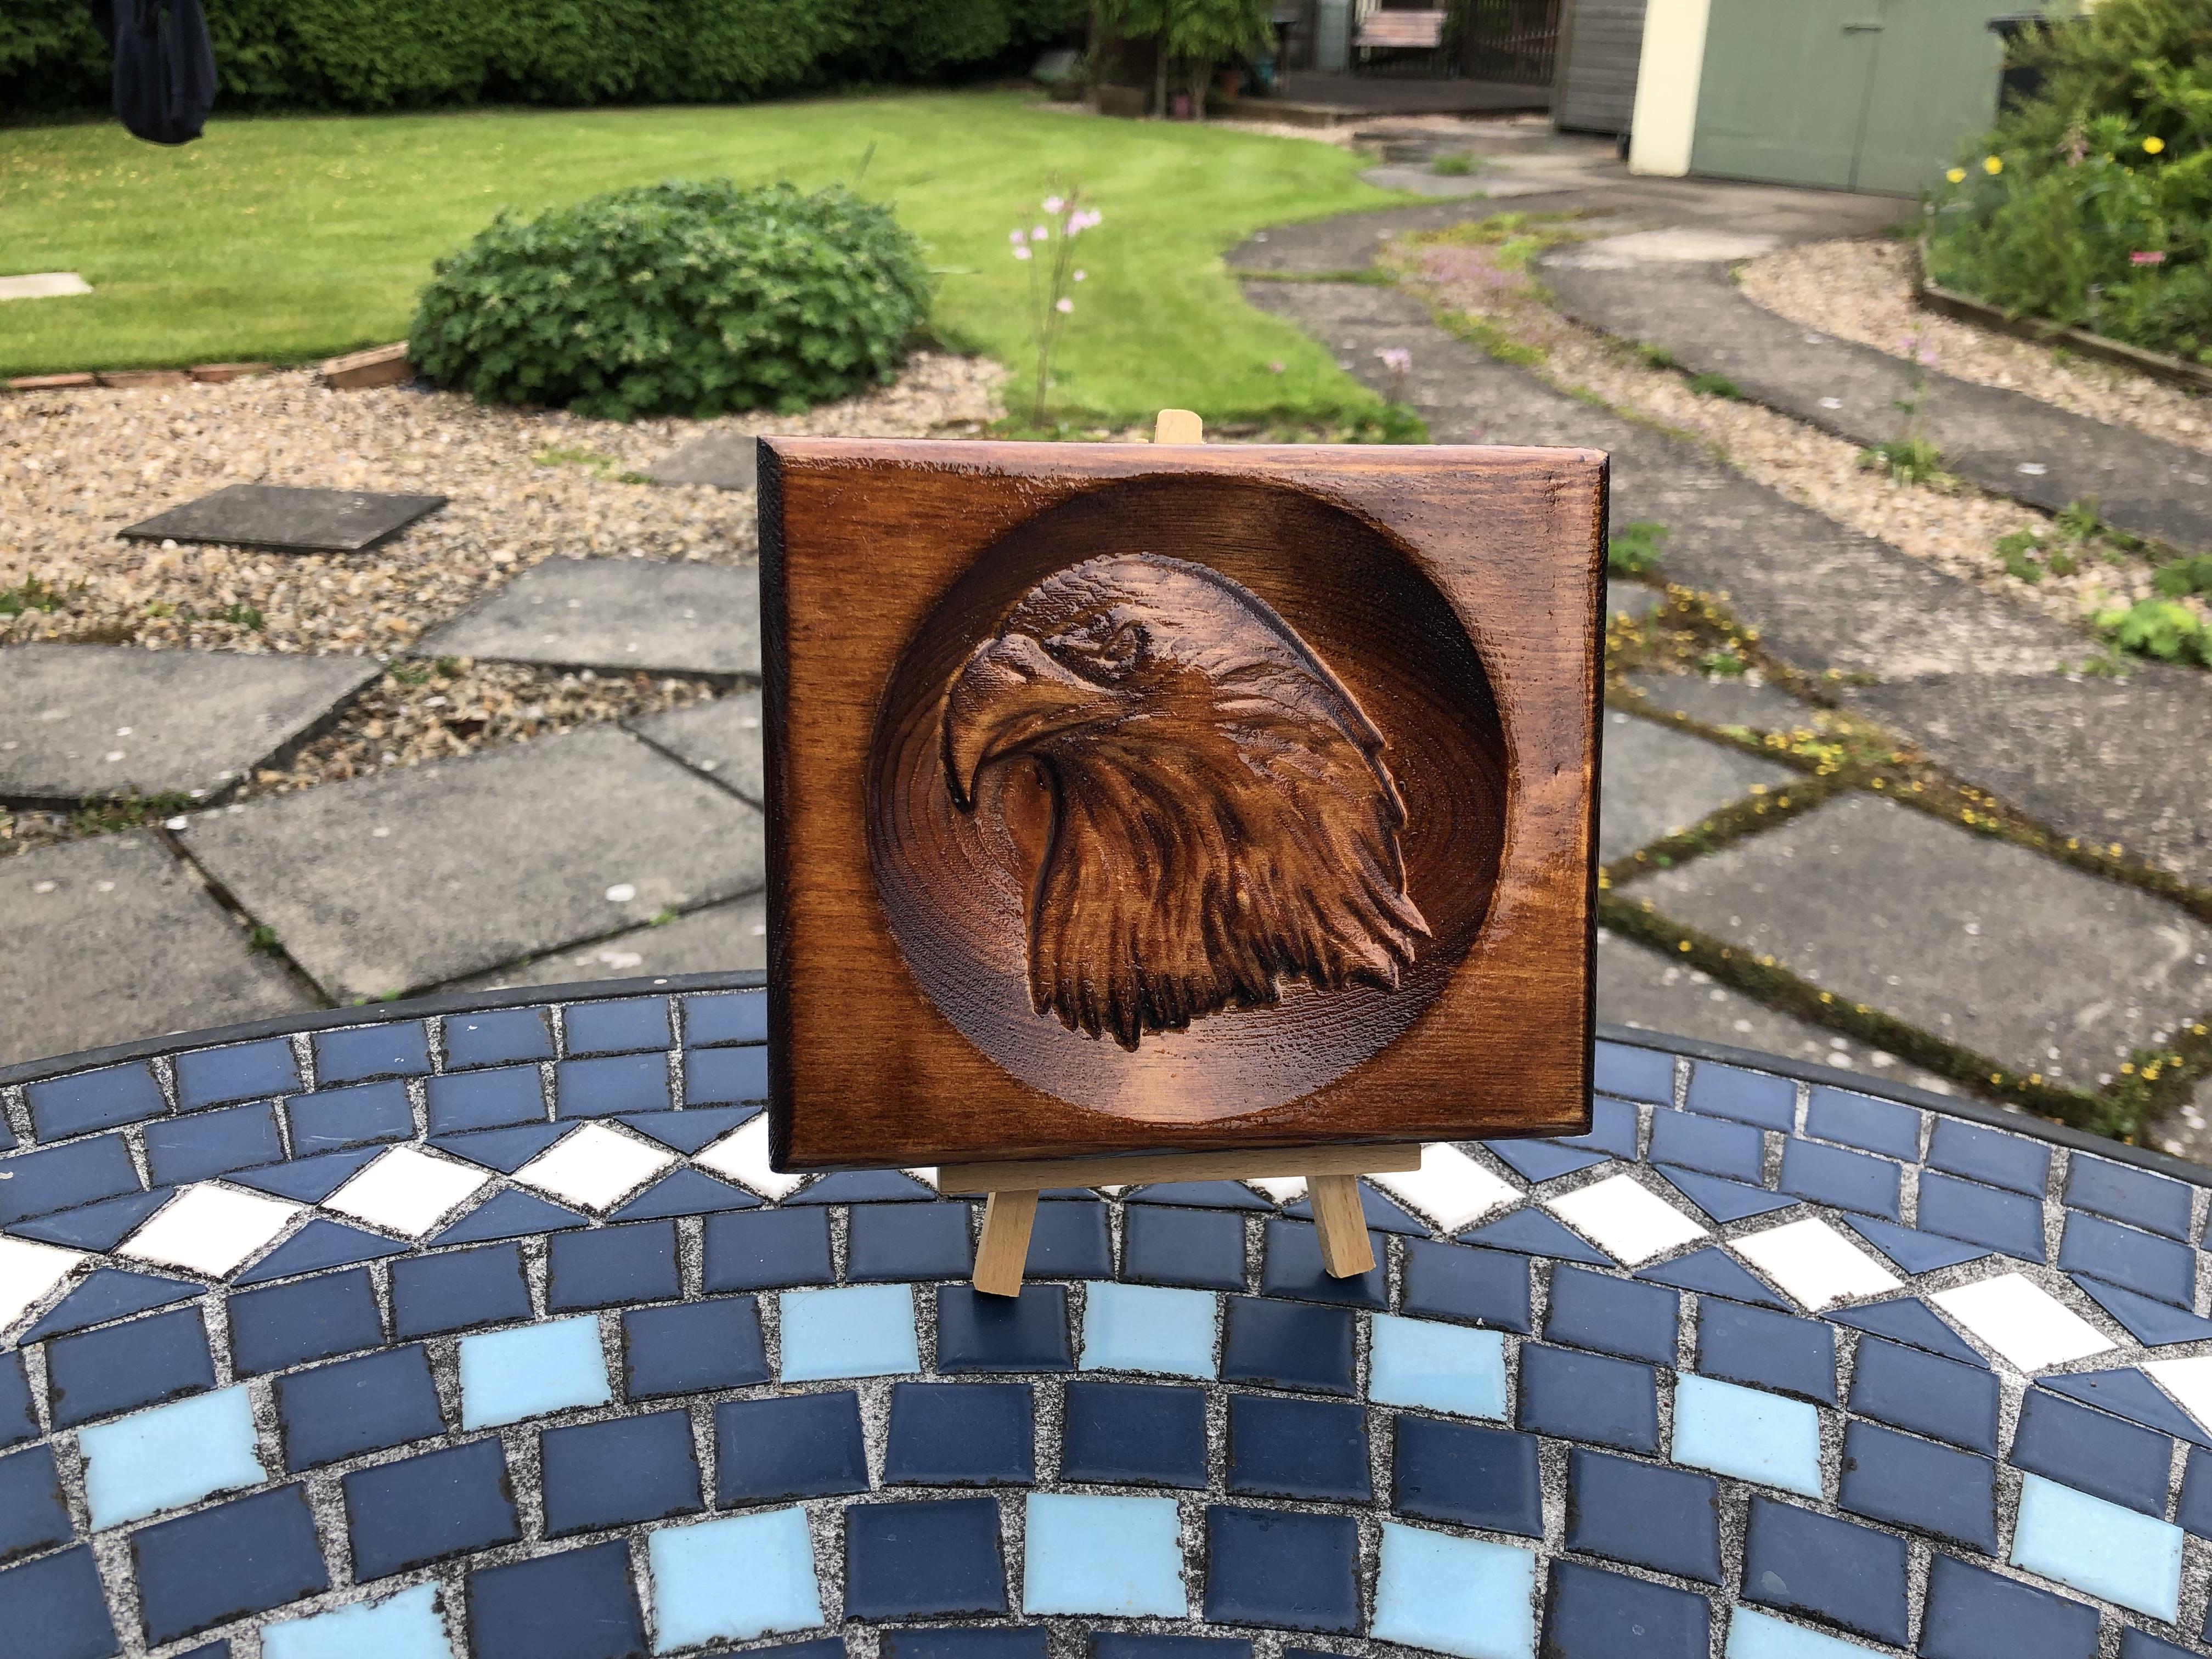
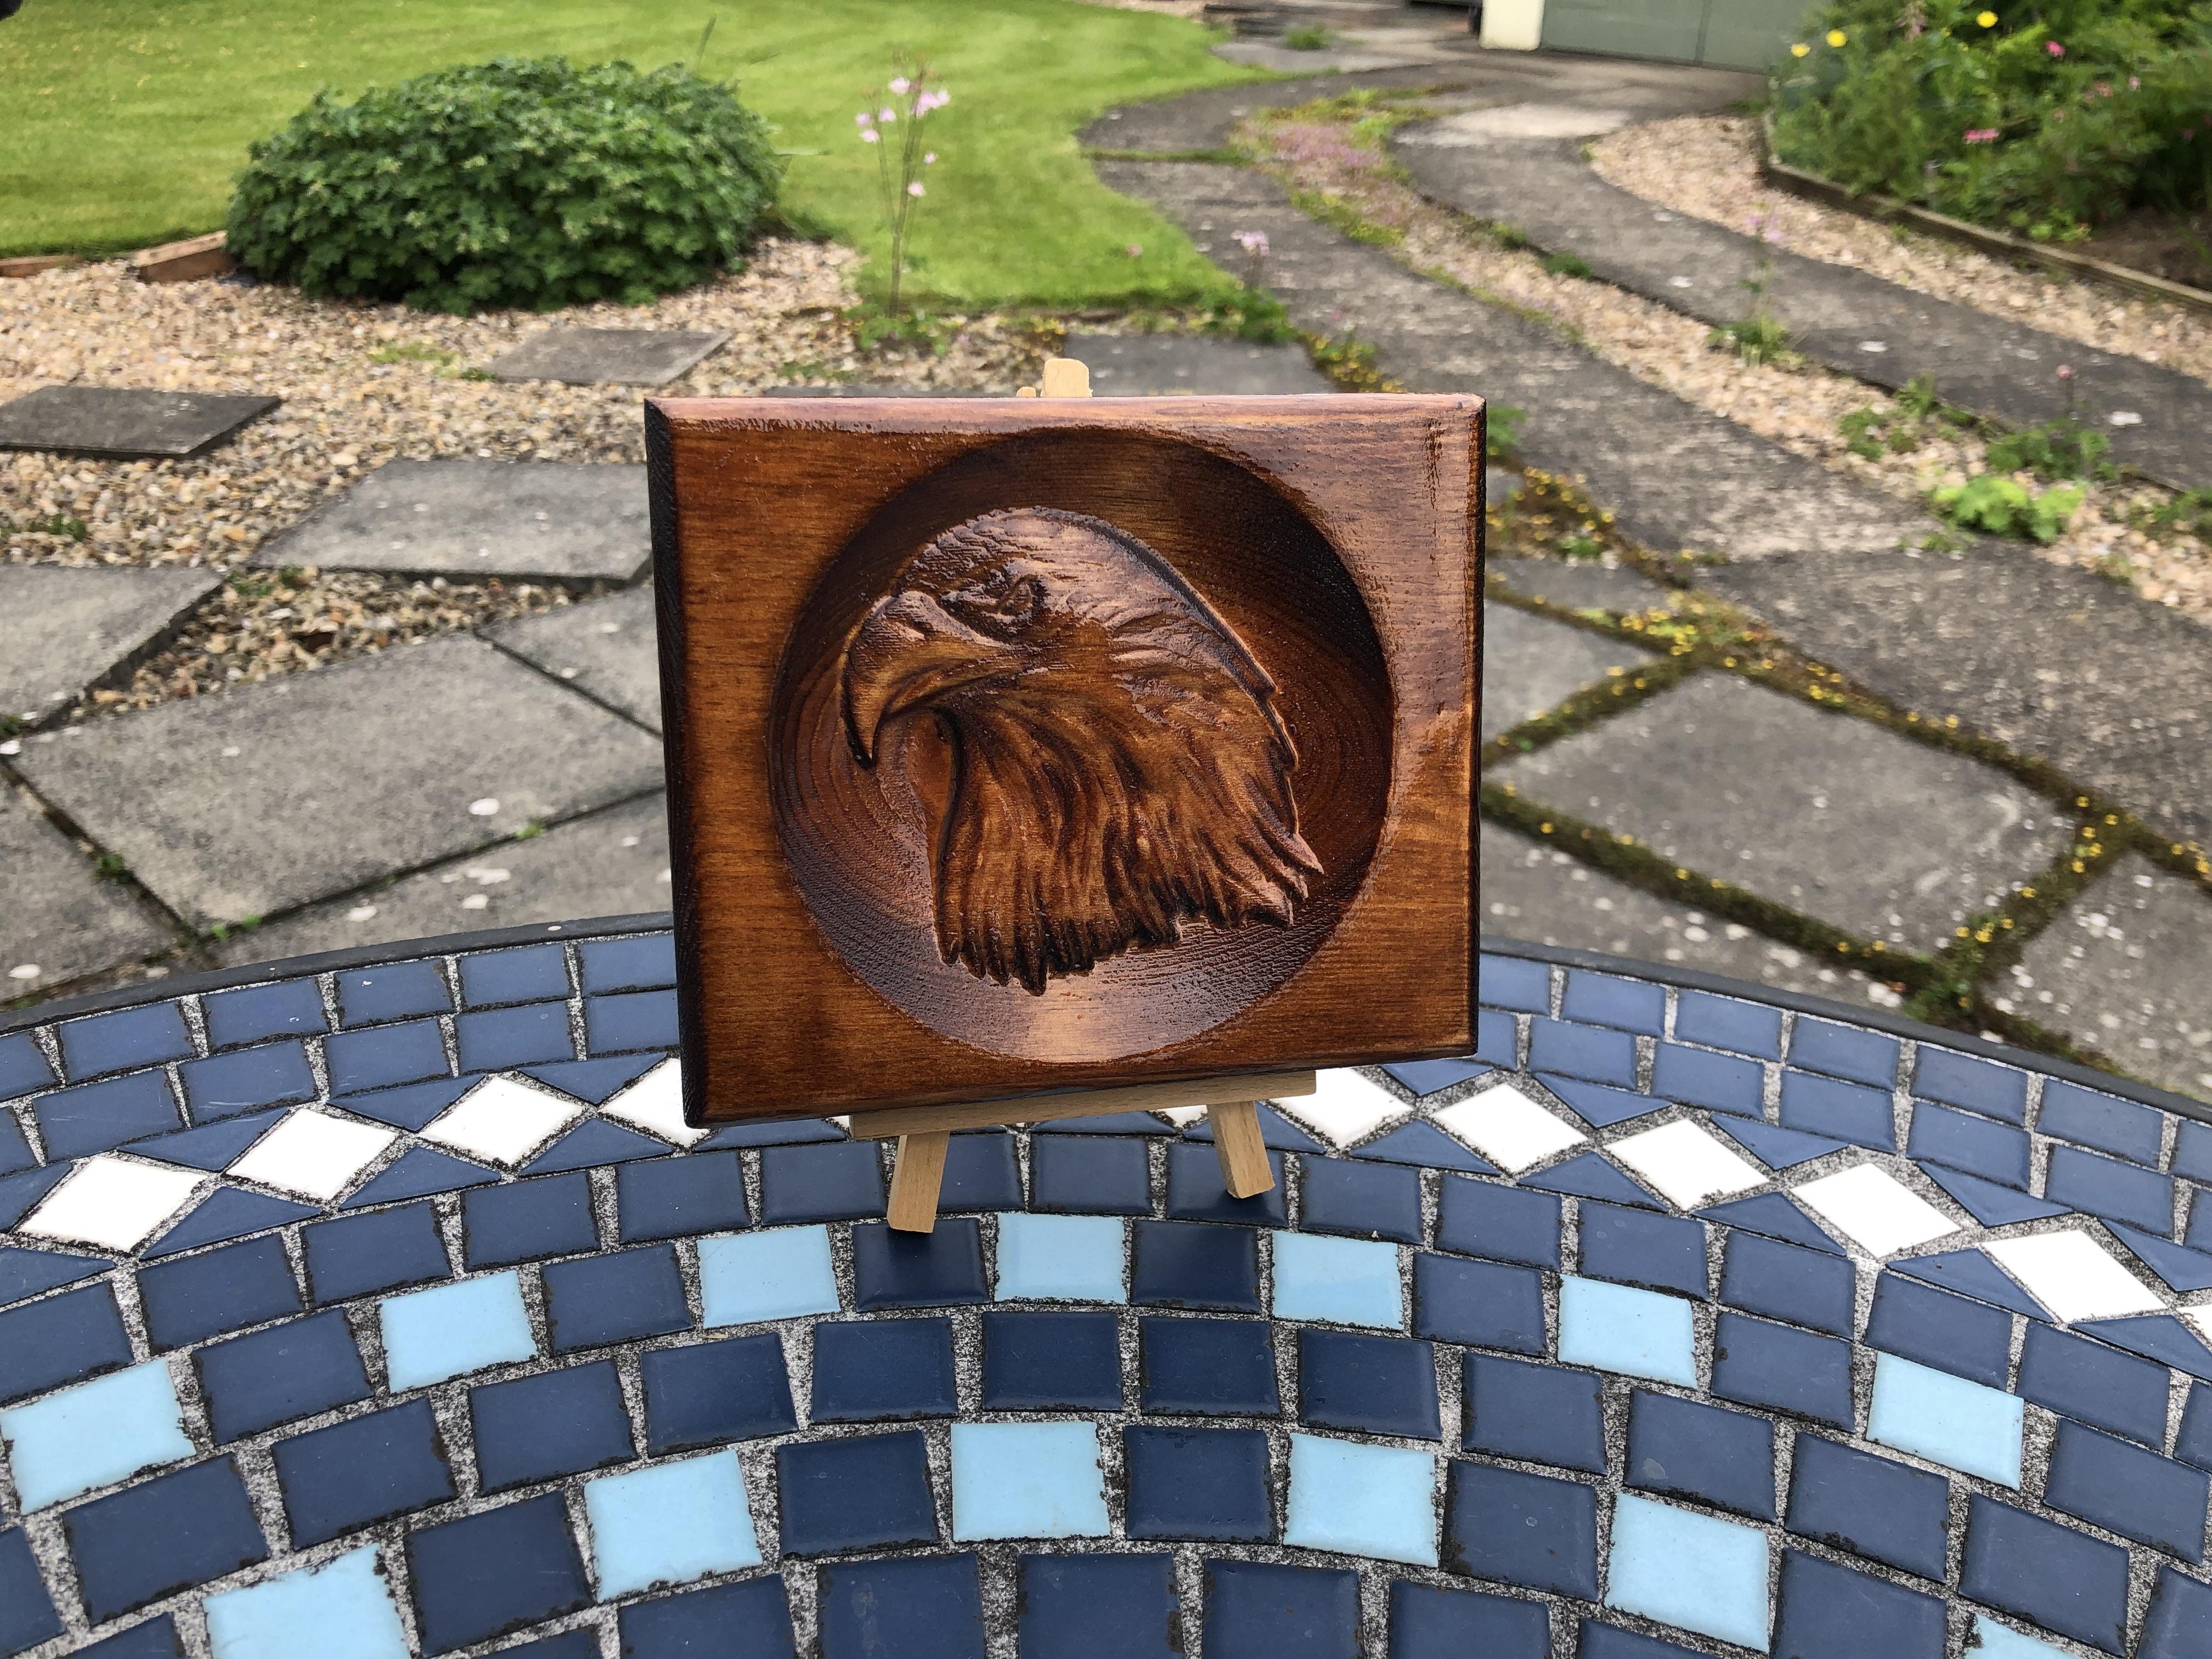
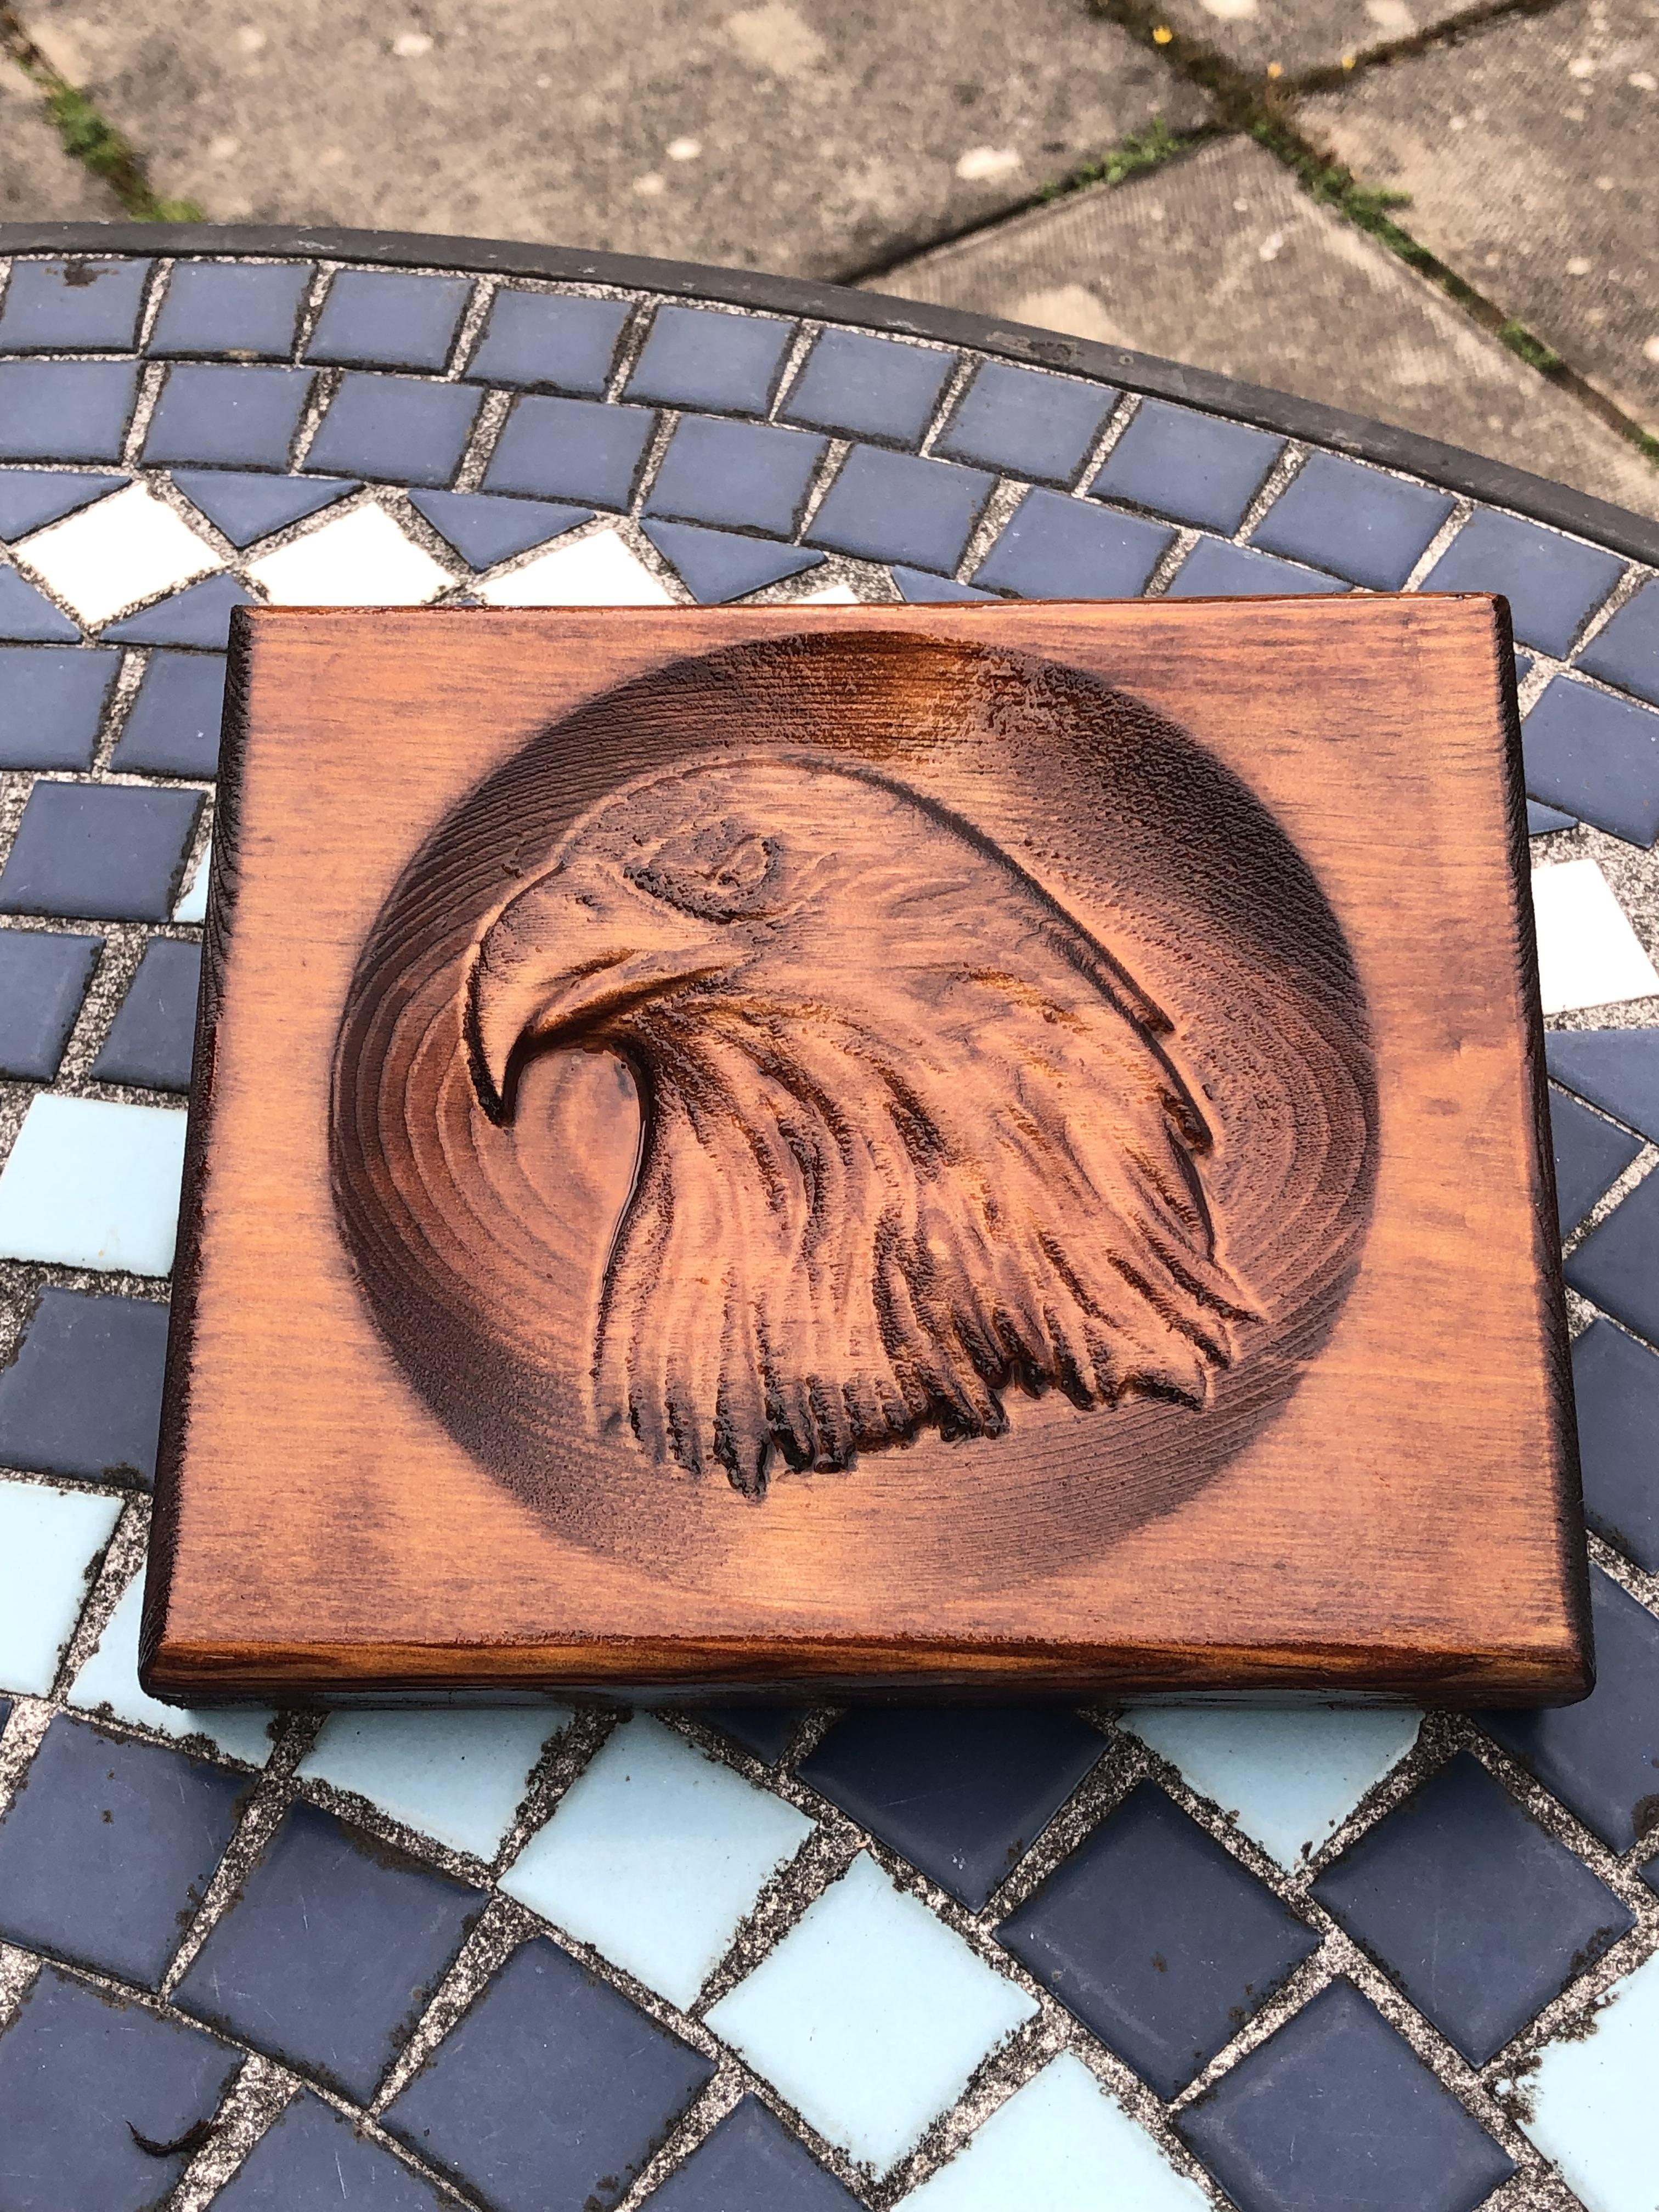
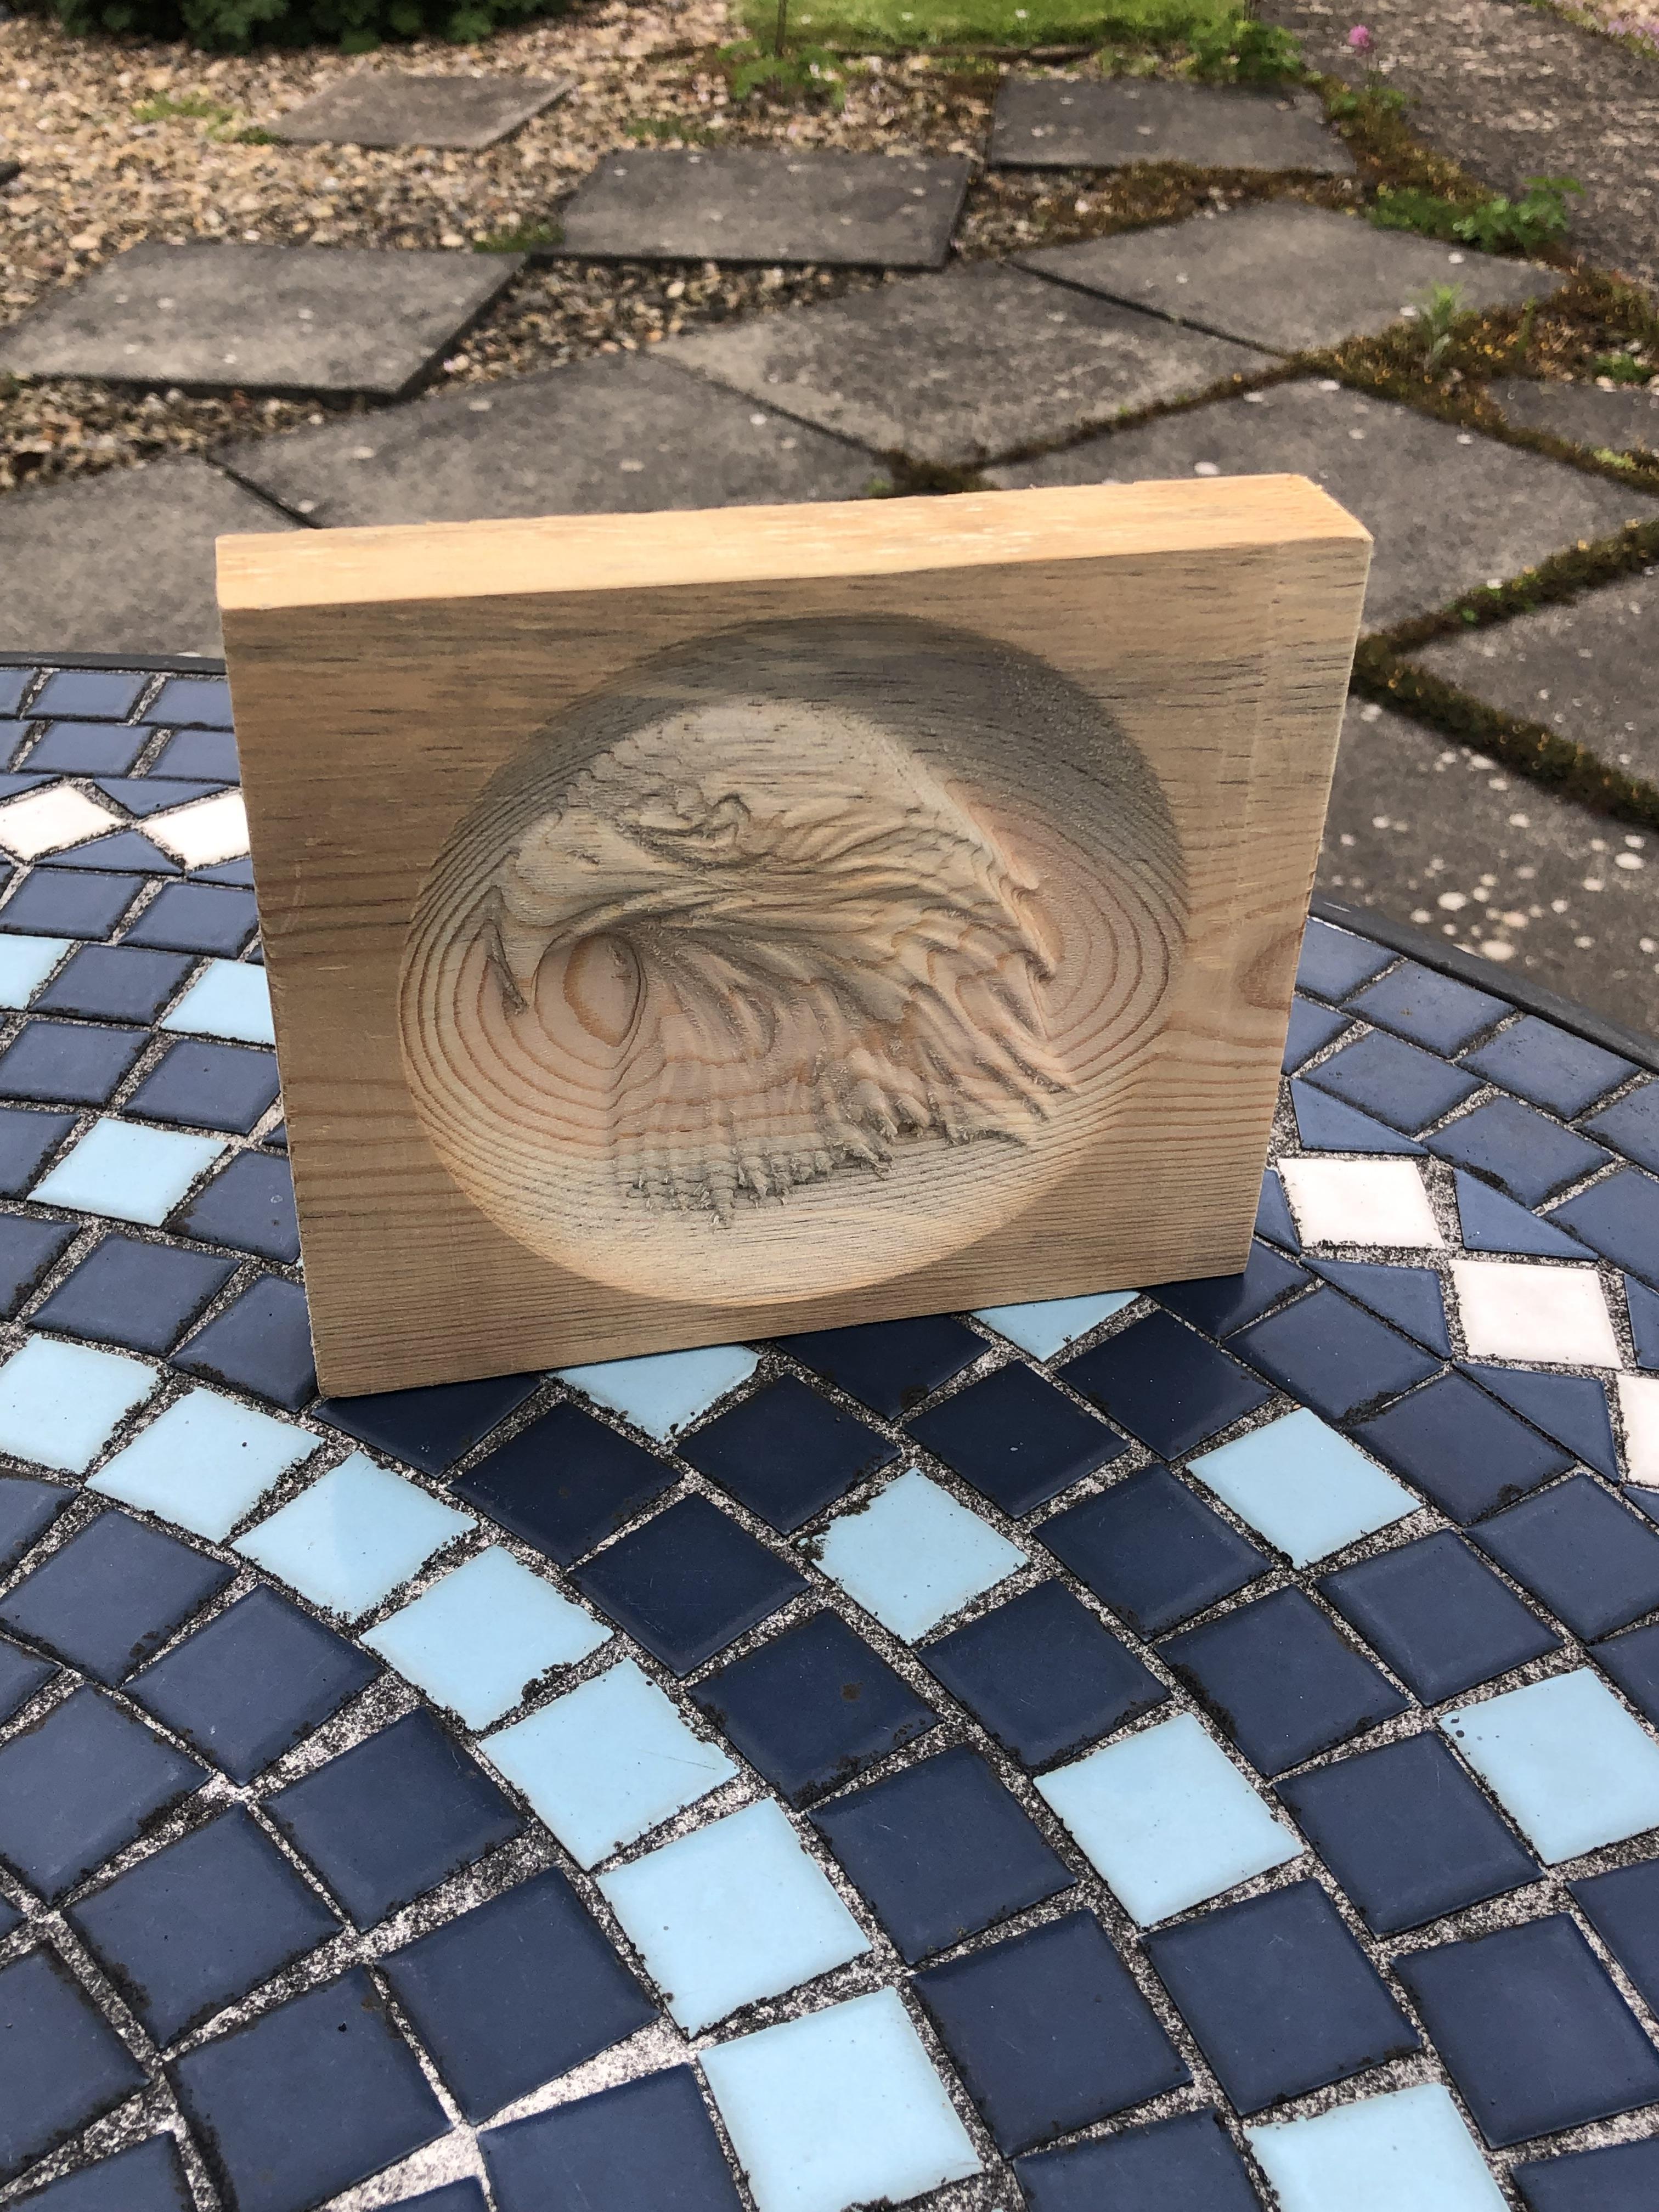
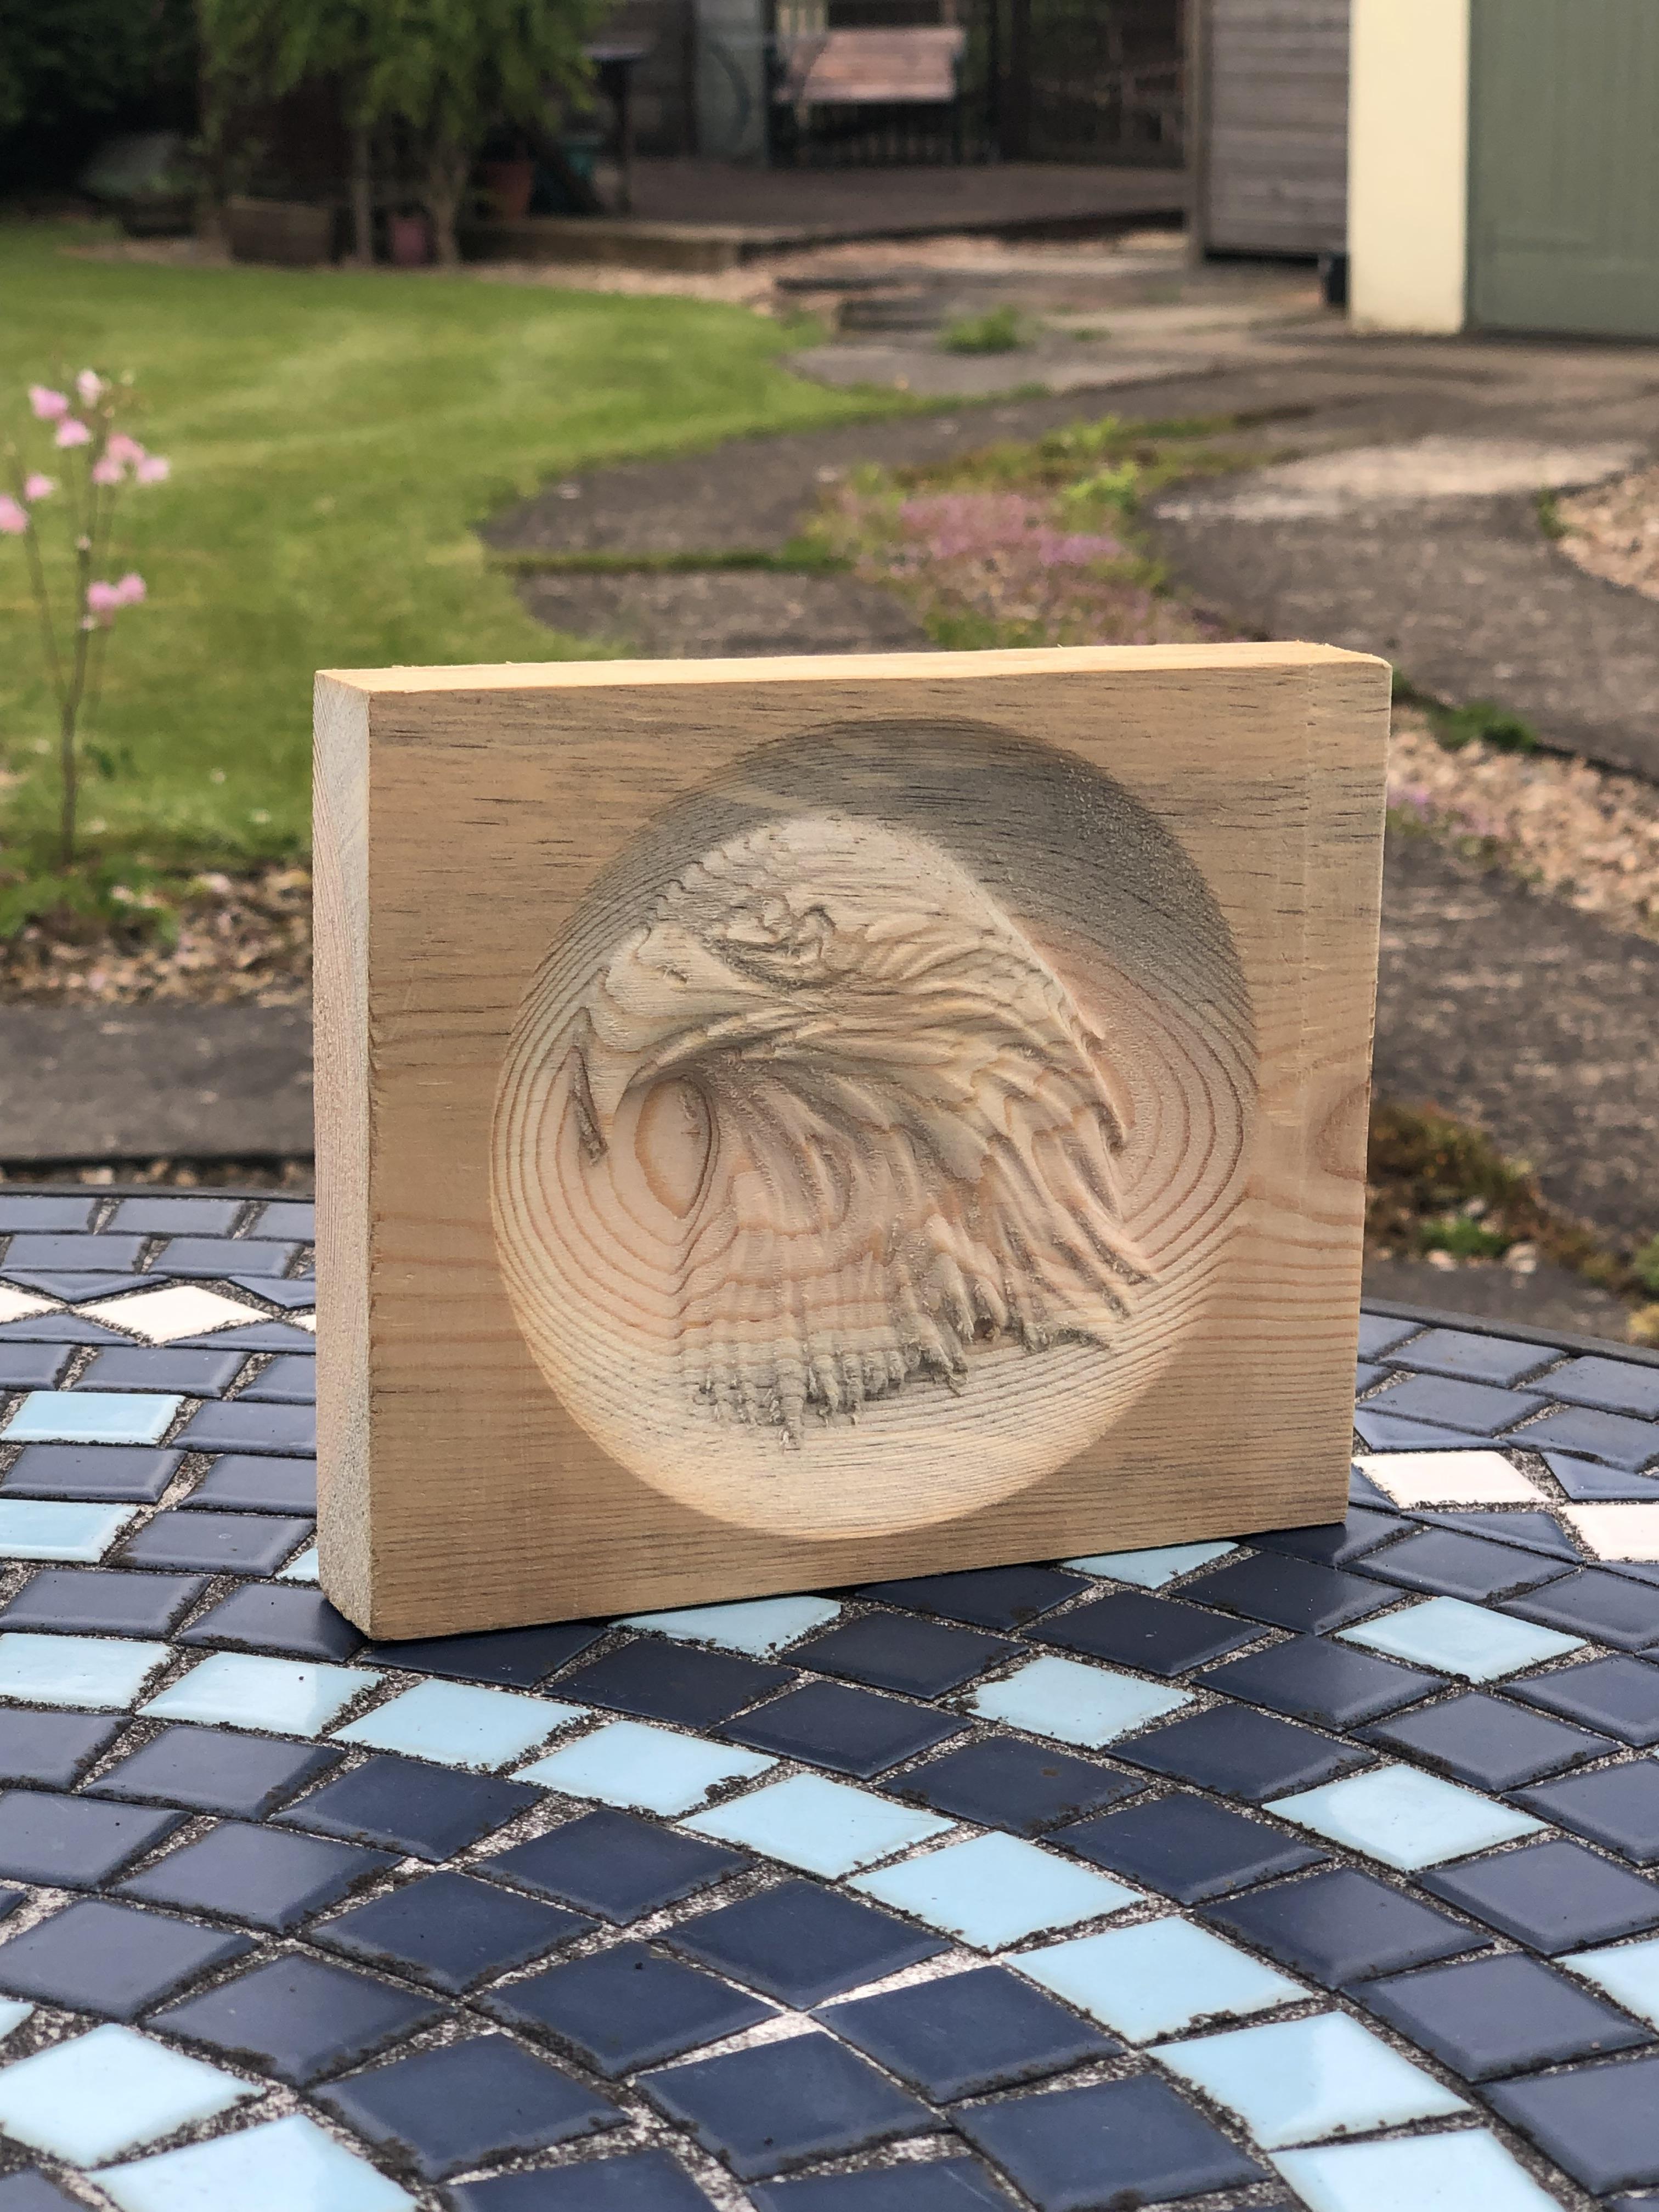
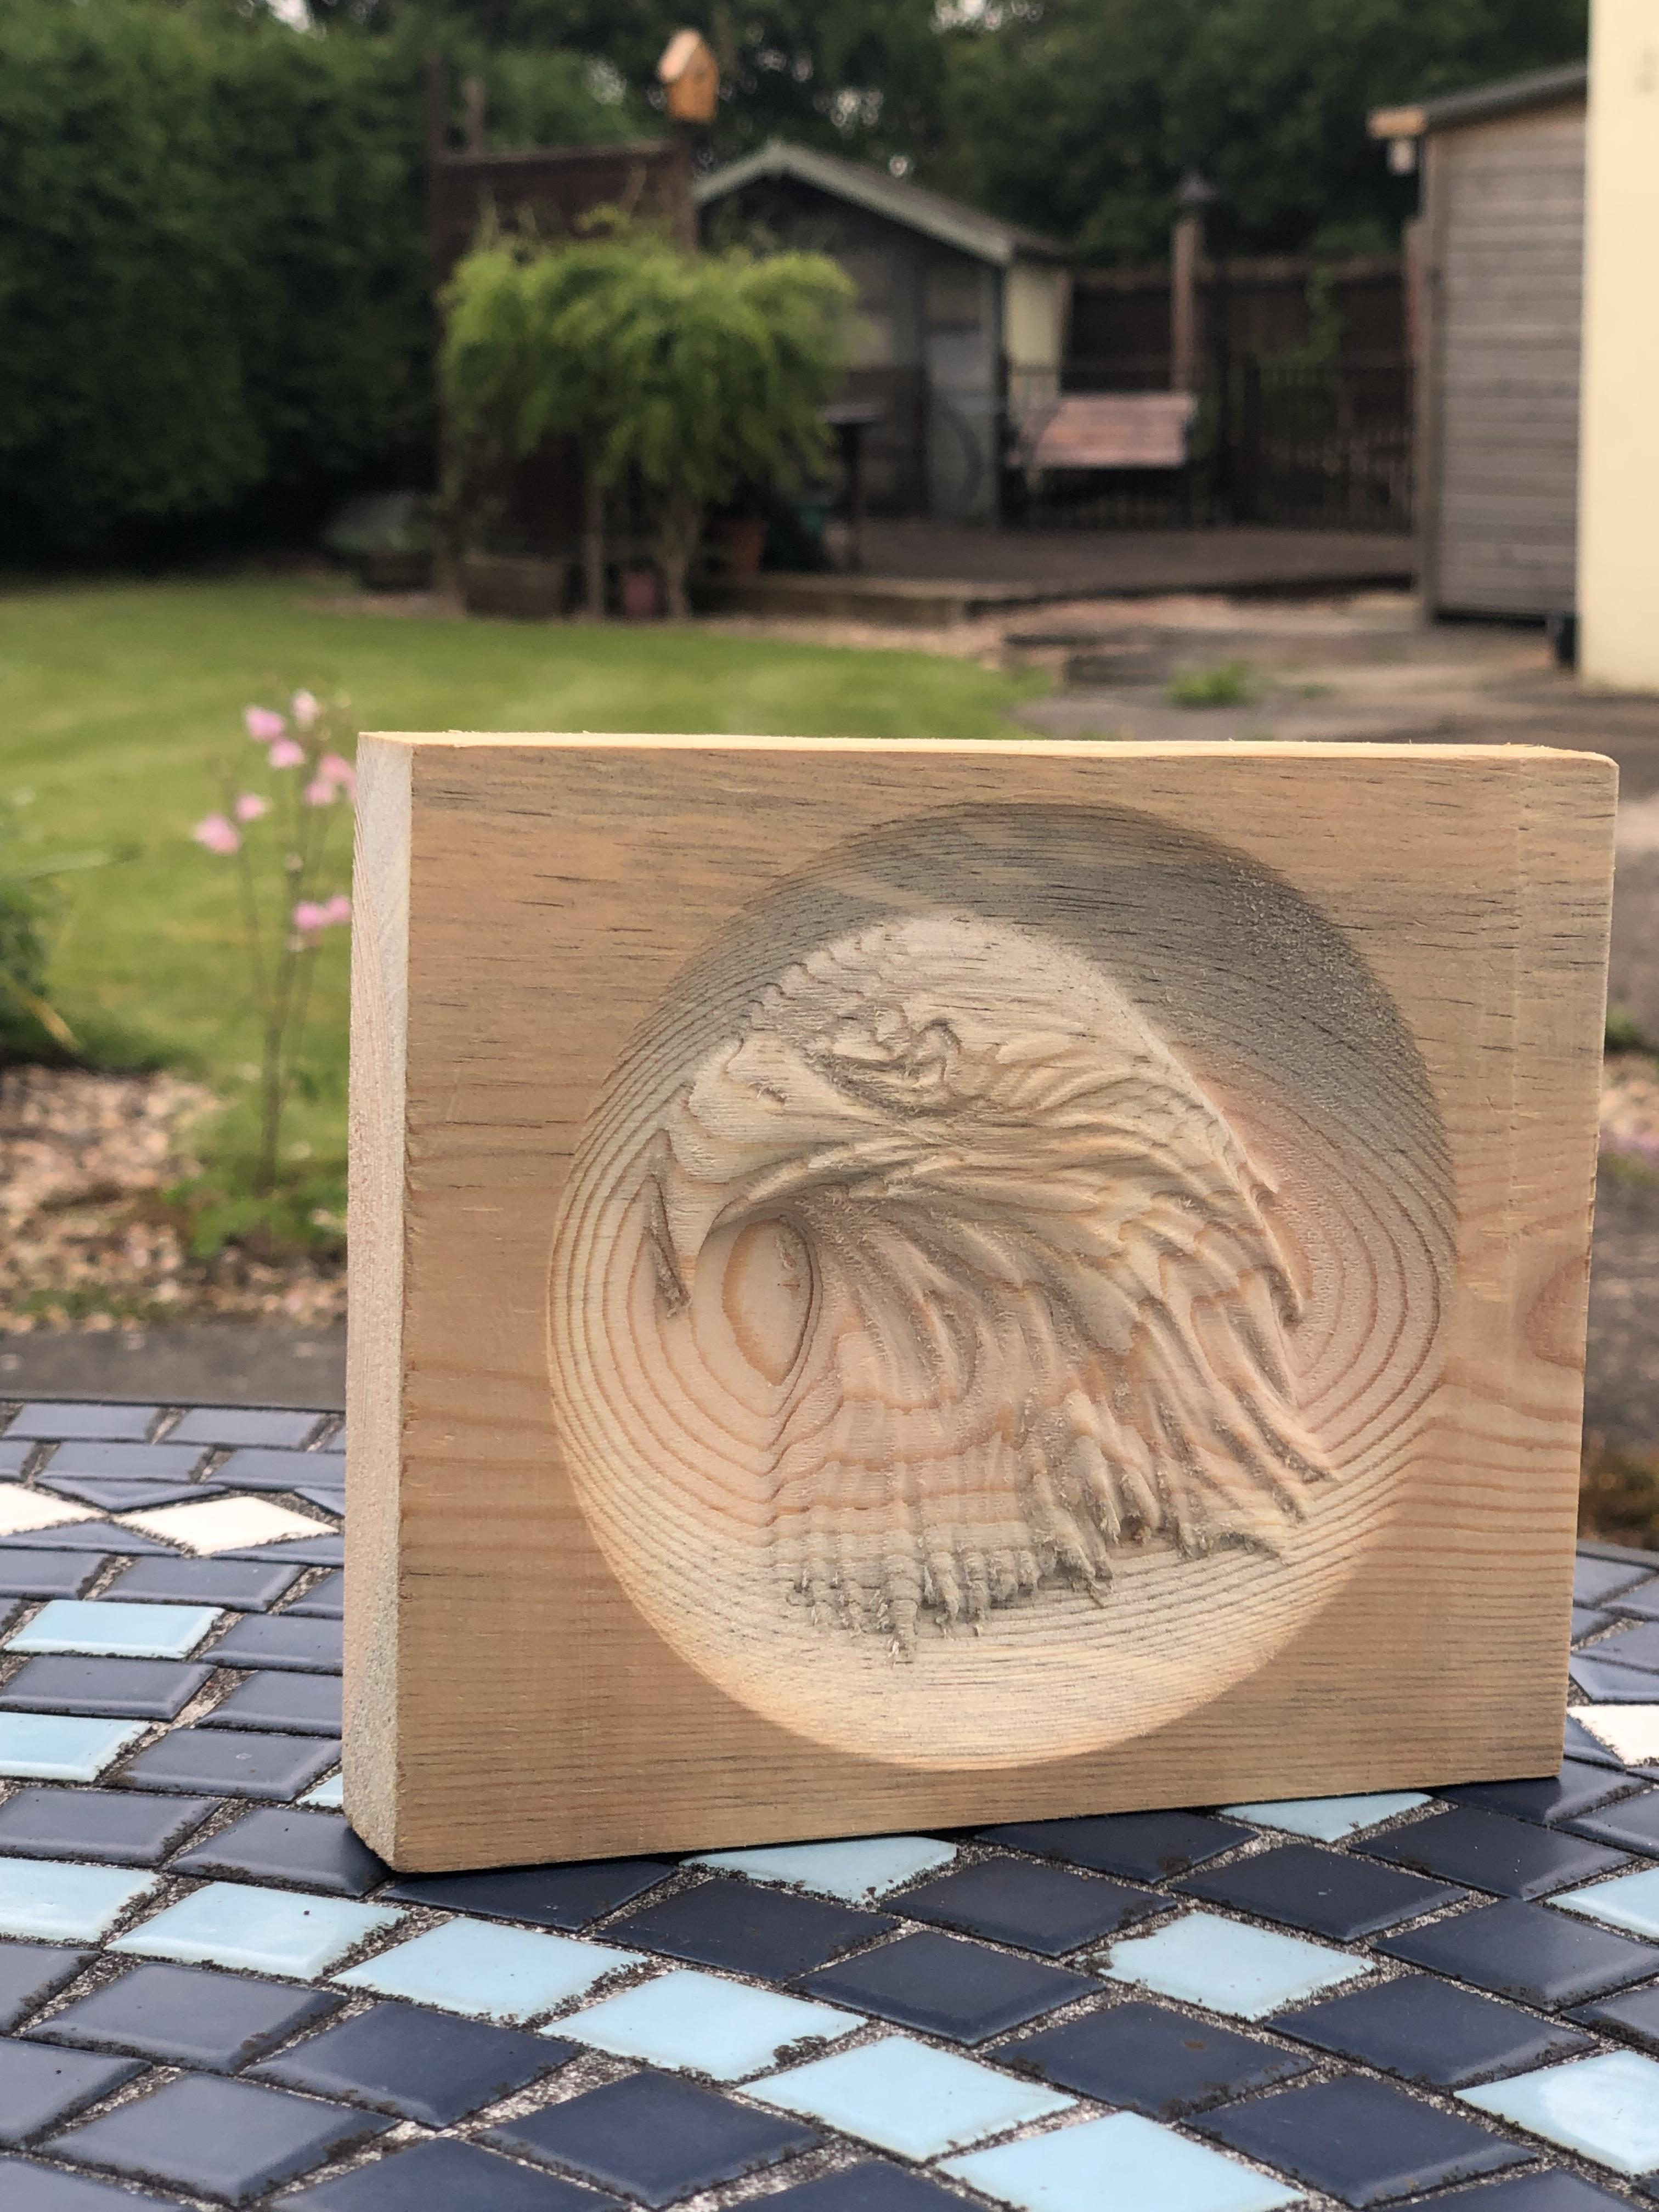
Within no time at all I'm looking at a really nicely carved eagles head from a piece of scrap pine.
Now to the finishing touches:
Finishing the Workpiece

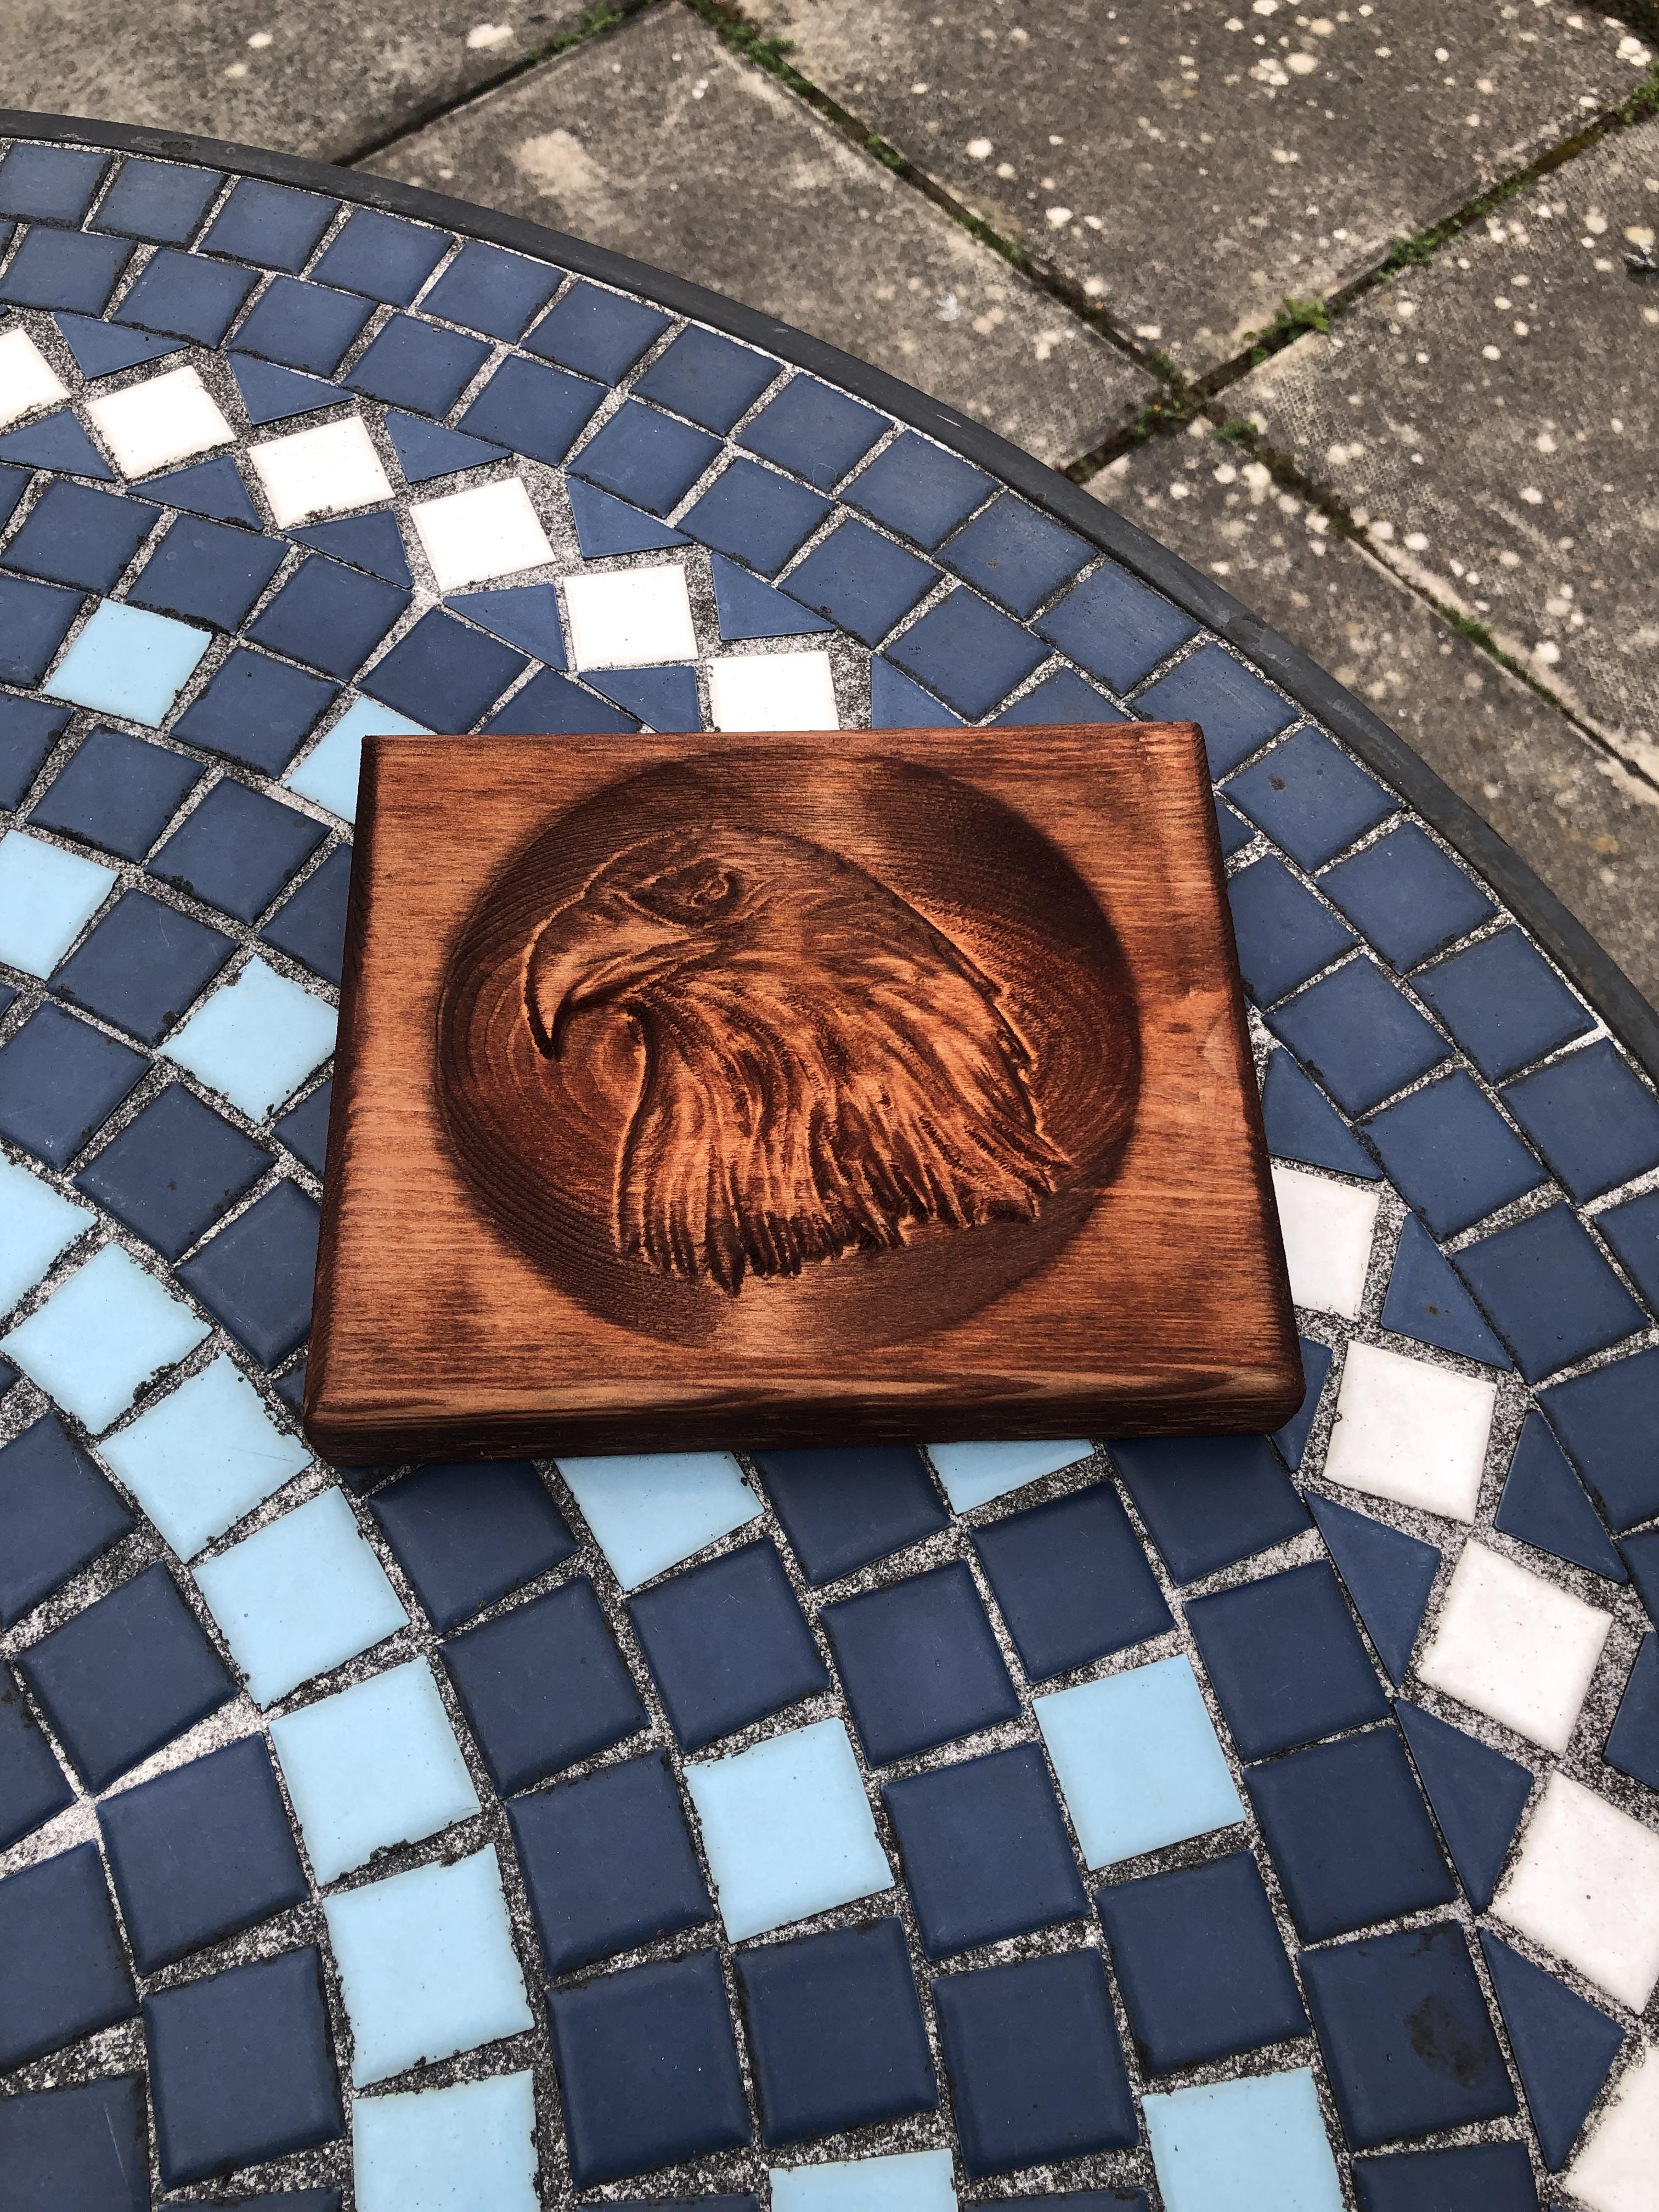
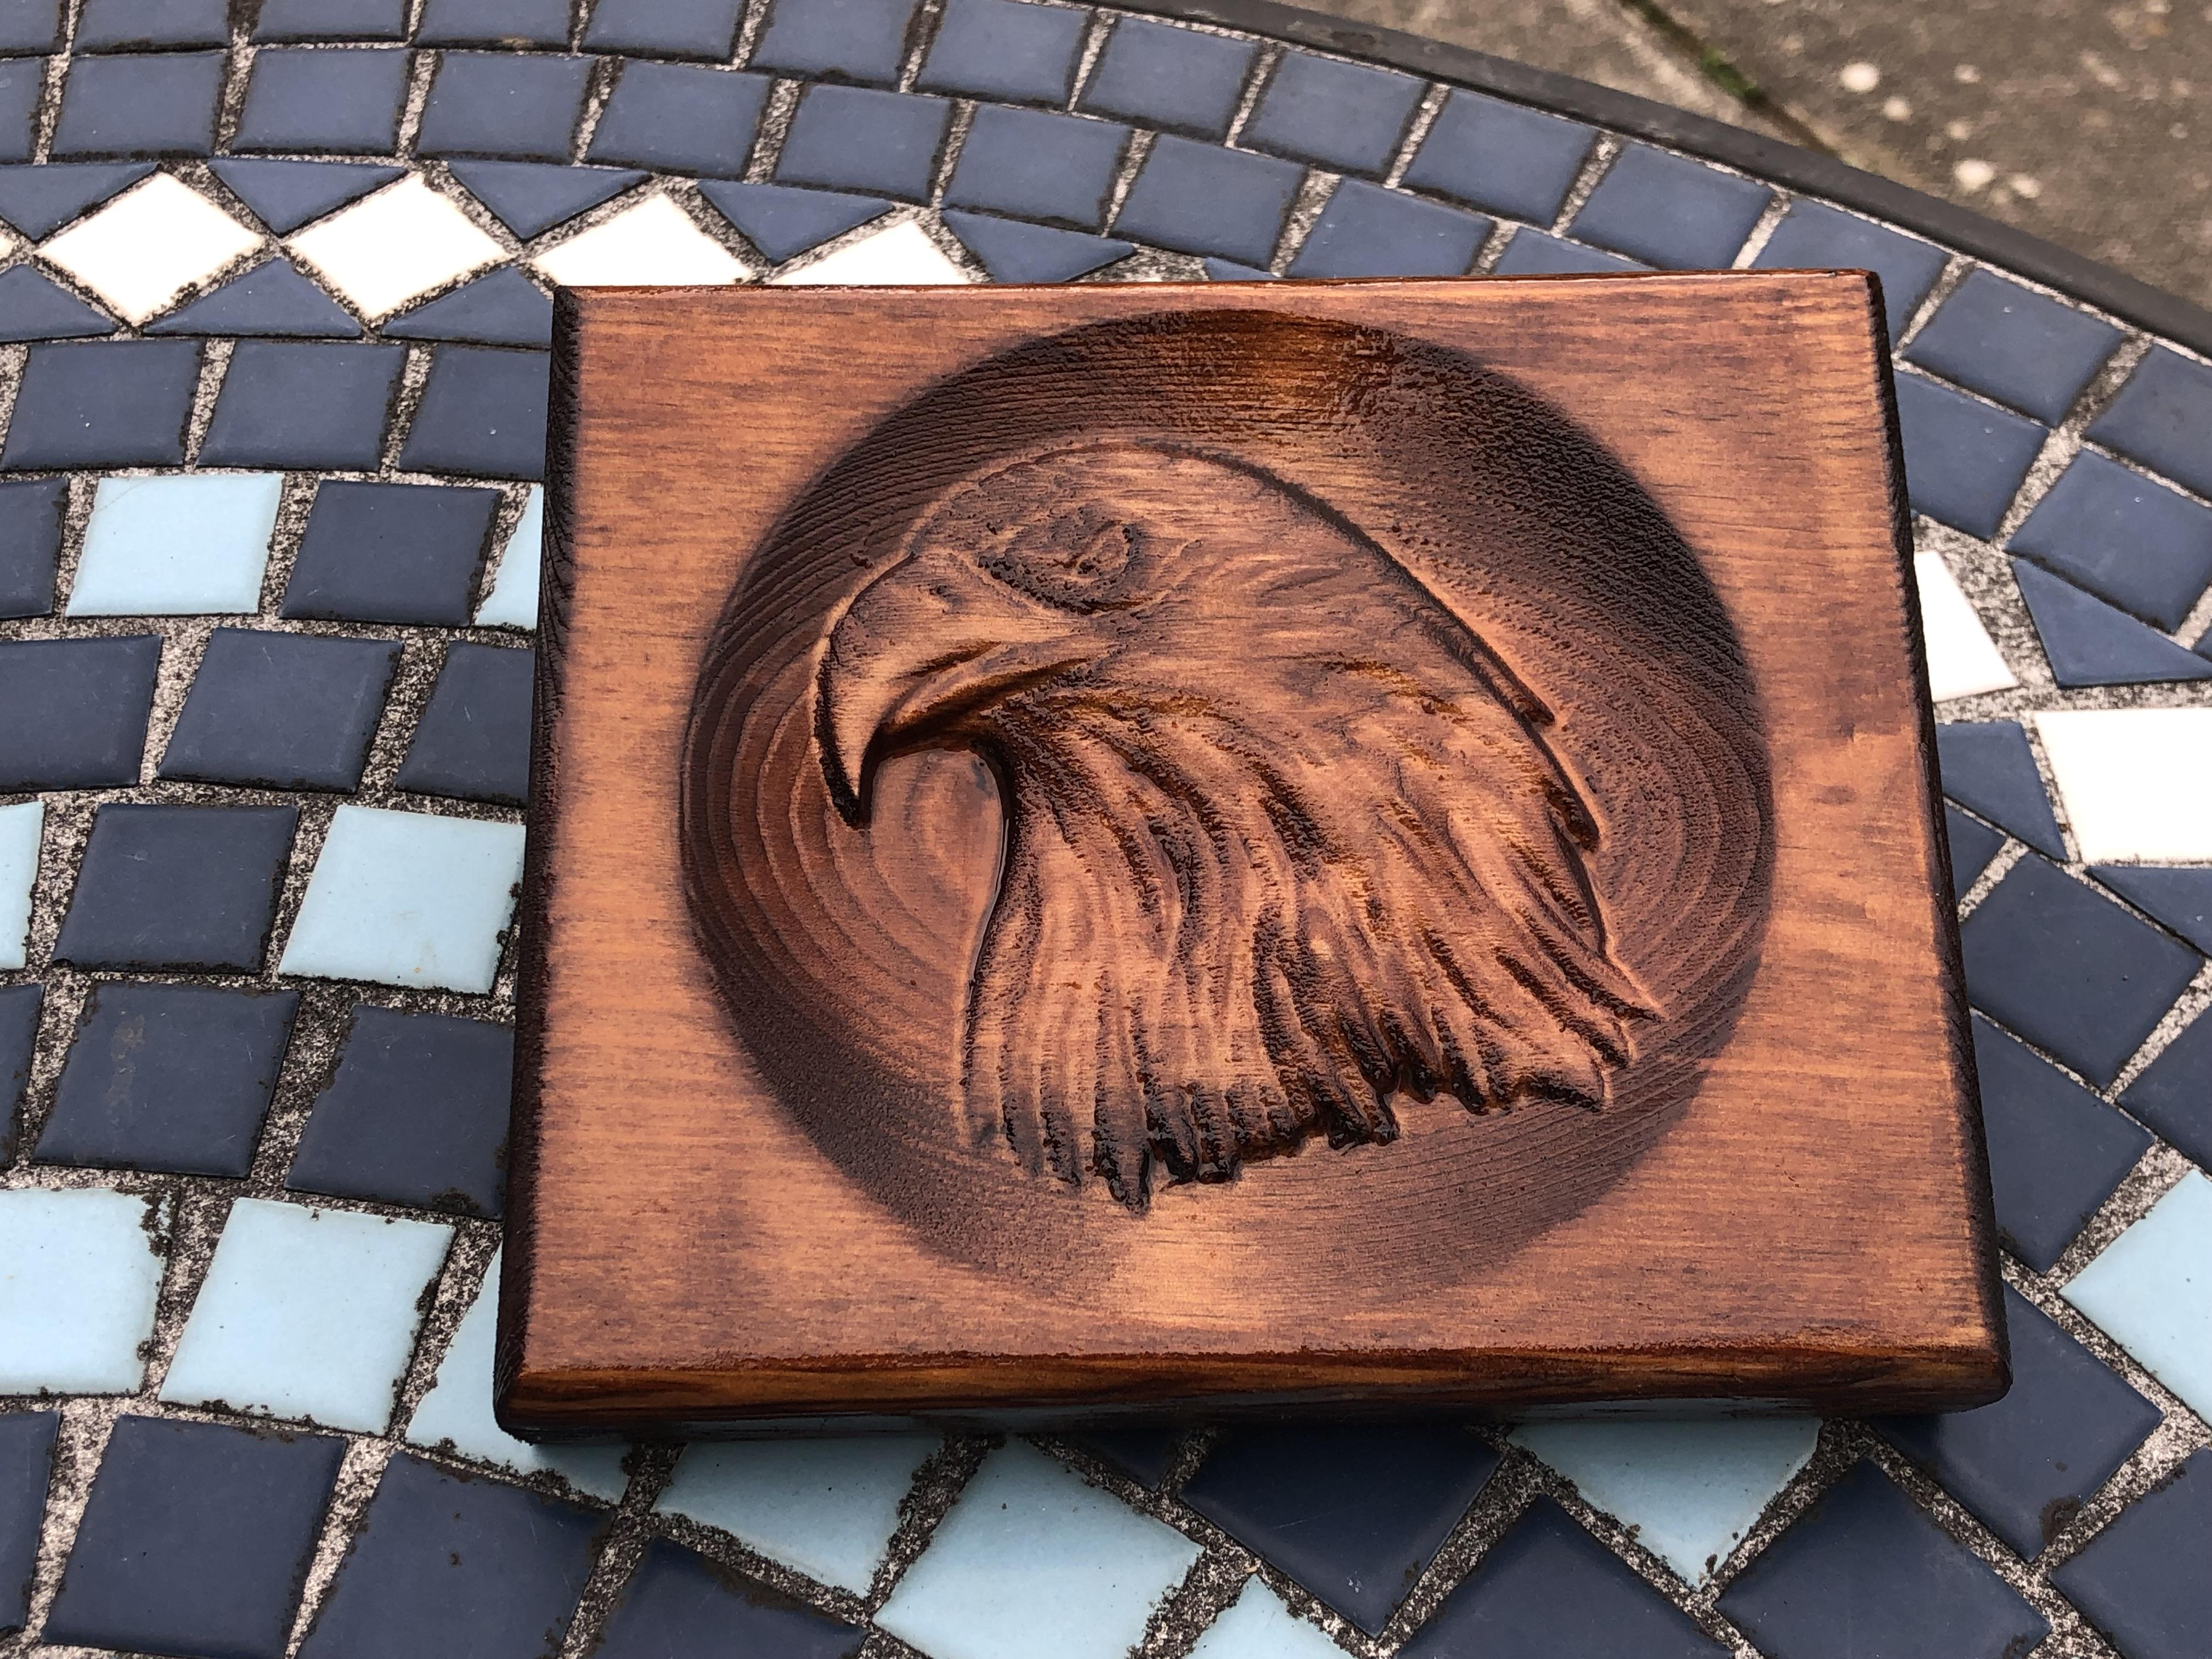
I think with this being a very light/bright looking wood, there would be more definition of the eagle head with a stain applied, all I had to hand was a red mahogany stain, so I gave it a coat of that, prior to this I had to do a little sanding but the piece popped straight away giving the Eagles head light and dark areas which made it look really good.
The final part is to give it a couple of coats of clear varnish, lightly sanding to de-nib after the first one and there you have it! A very nice ornament or trinket tray for very little effort! and you could easily add text to engrave etc to further enhance the piece, where eagles dare or something?
I hope you enjoyed this Instructable and thanks for looking.