V Carving From Photographs

This intent of this Instructable is to show how I go from a photograph to a V carving. For those of us lucky enough to have a CNC router available, it’s great to be able to take a photograph and turn it into a carving.
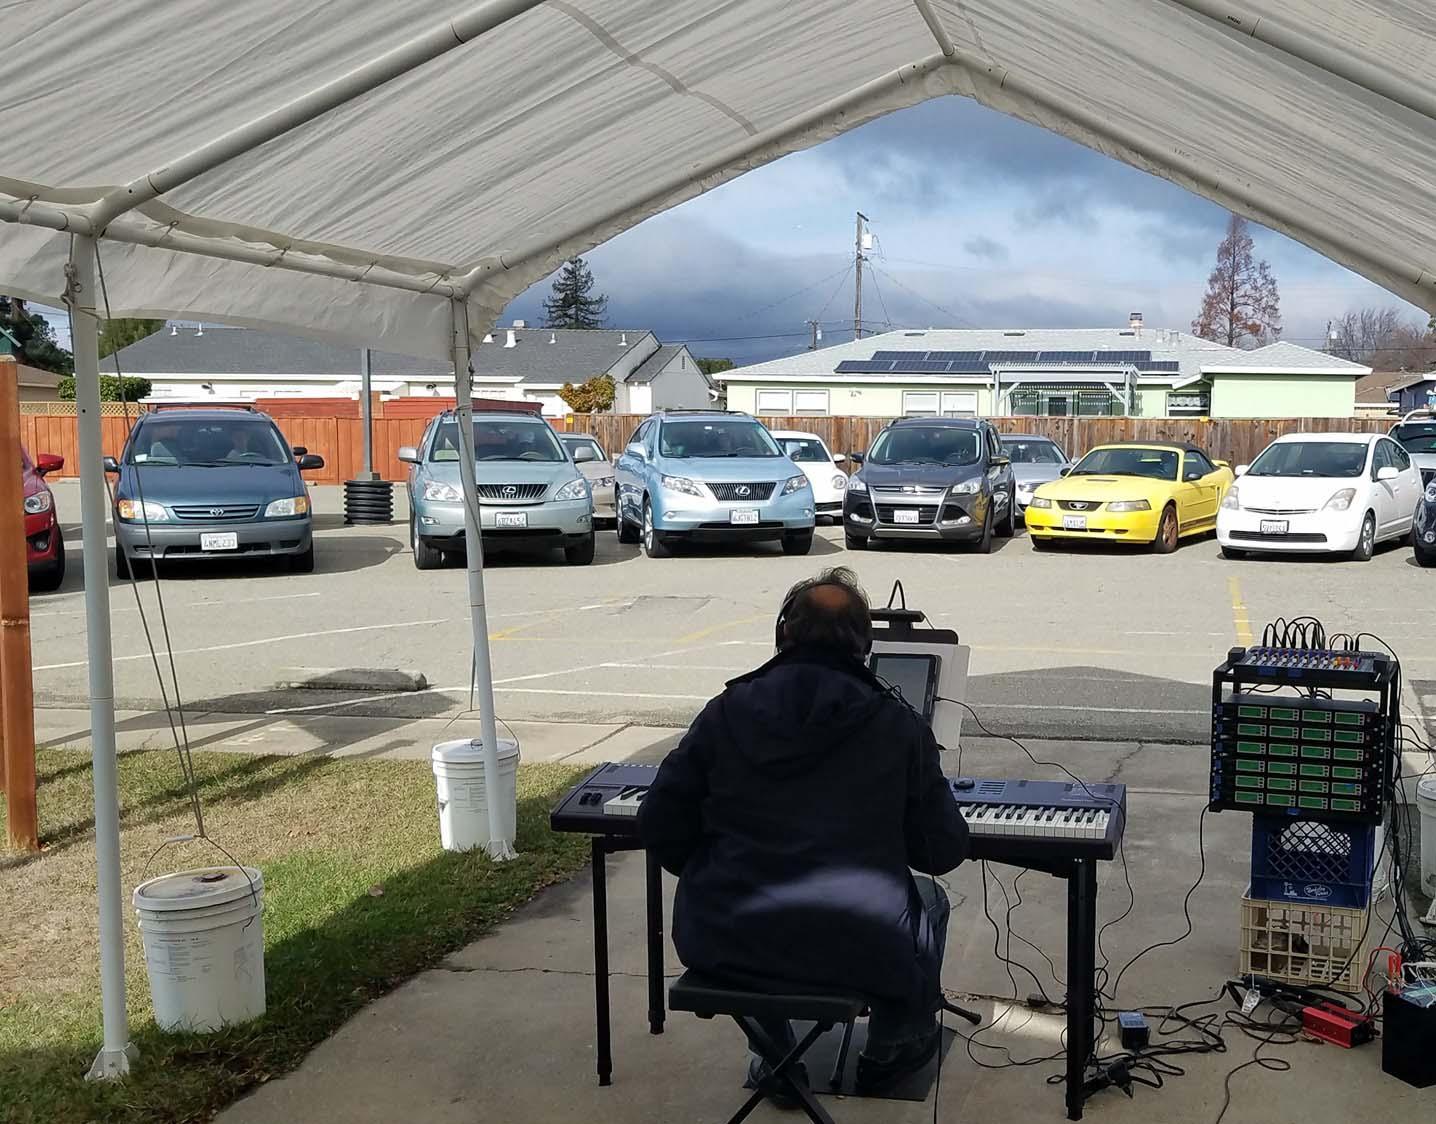
The example I’ve used here is maybe a worst case scenario. The picture has a ton of detail and it’s very far from a simple outline drawing. I used the picture to make a bunch of commemorative plaques of our Parking Lot Chorus (see Instructable https://www.instructables.com/Battery-Powered-Parking-Lot-Chorus/ ).
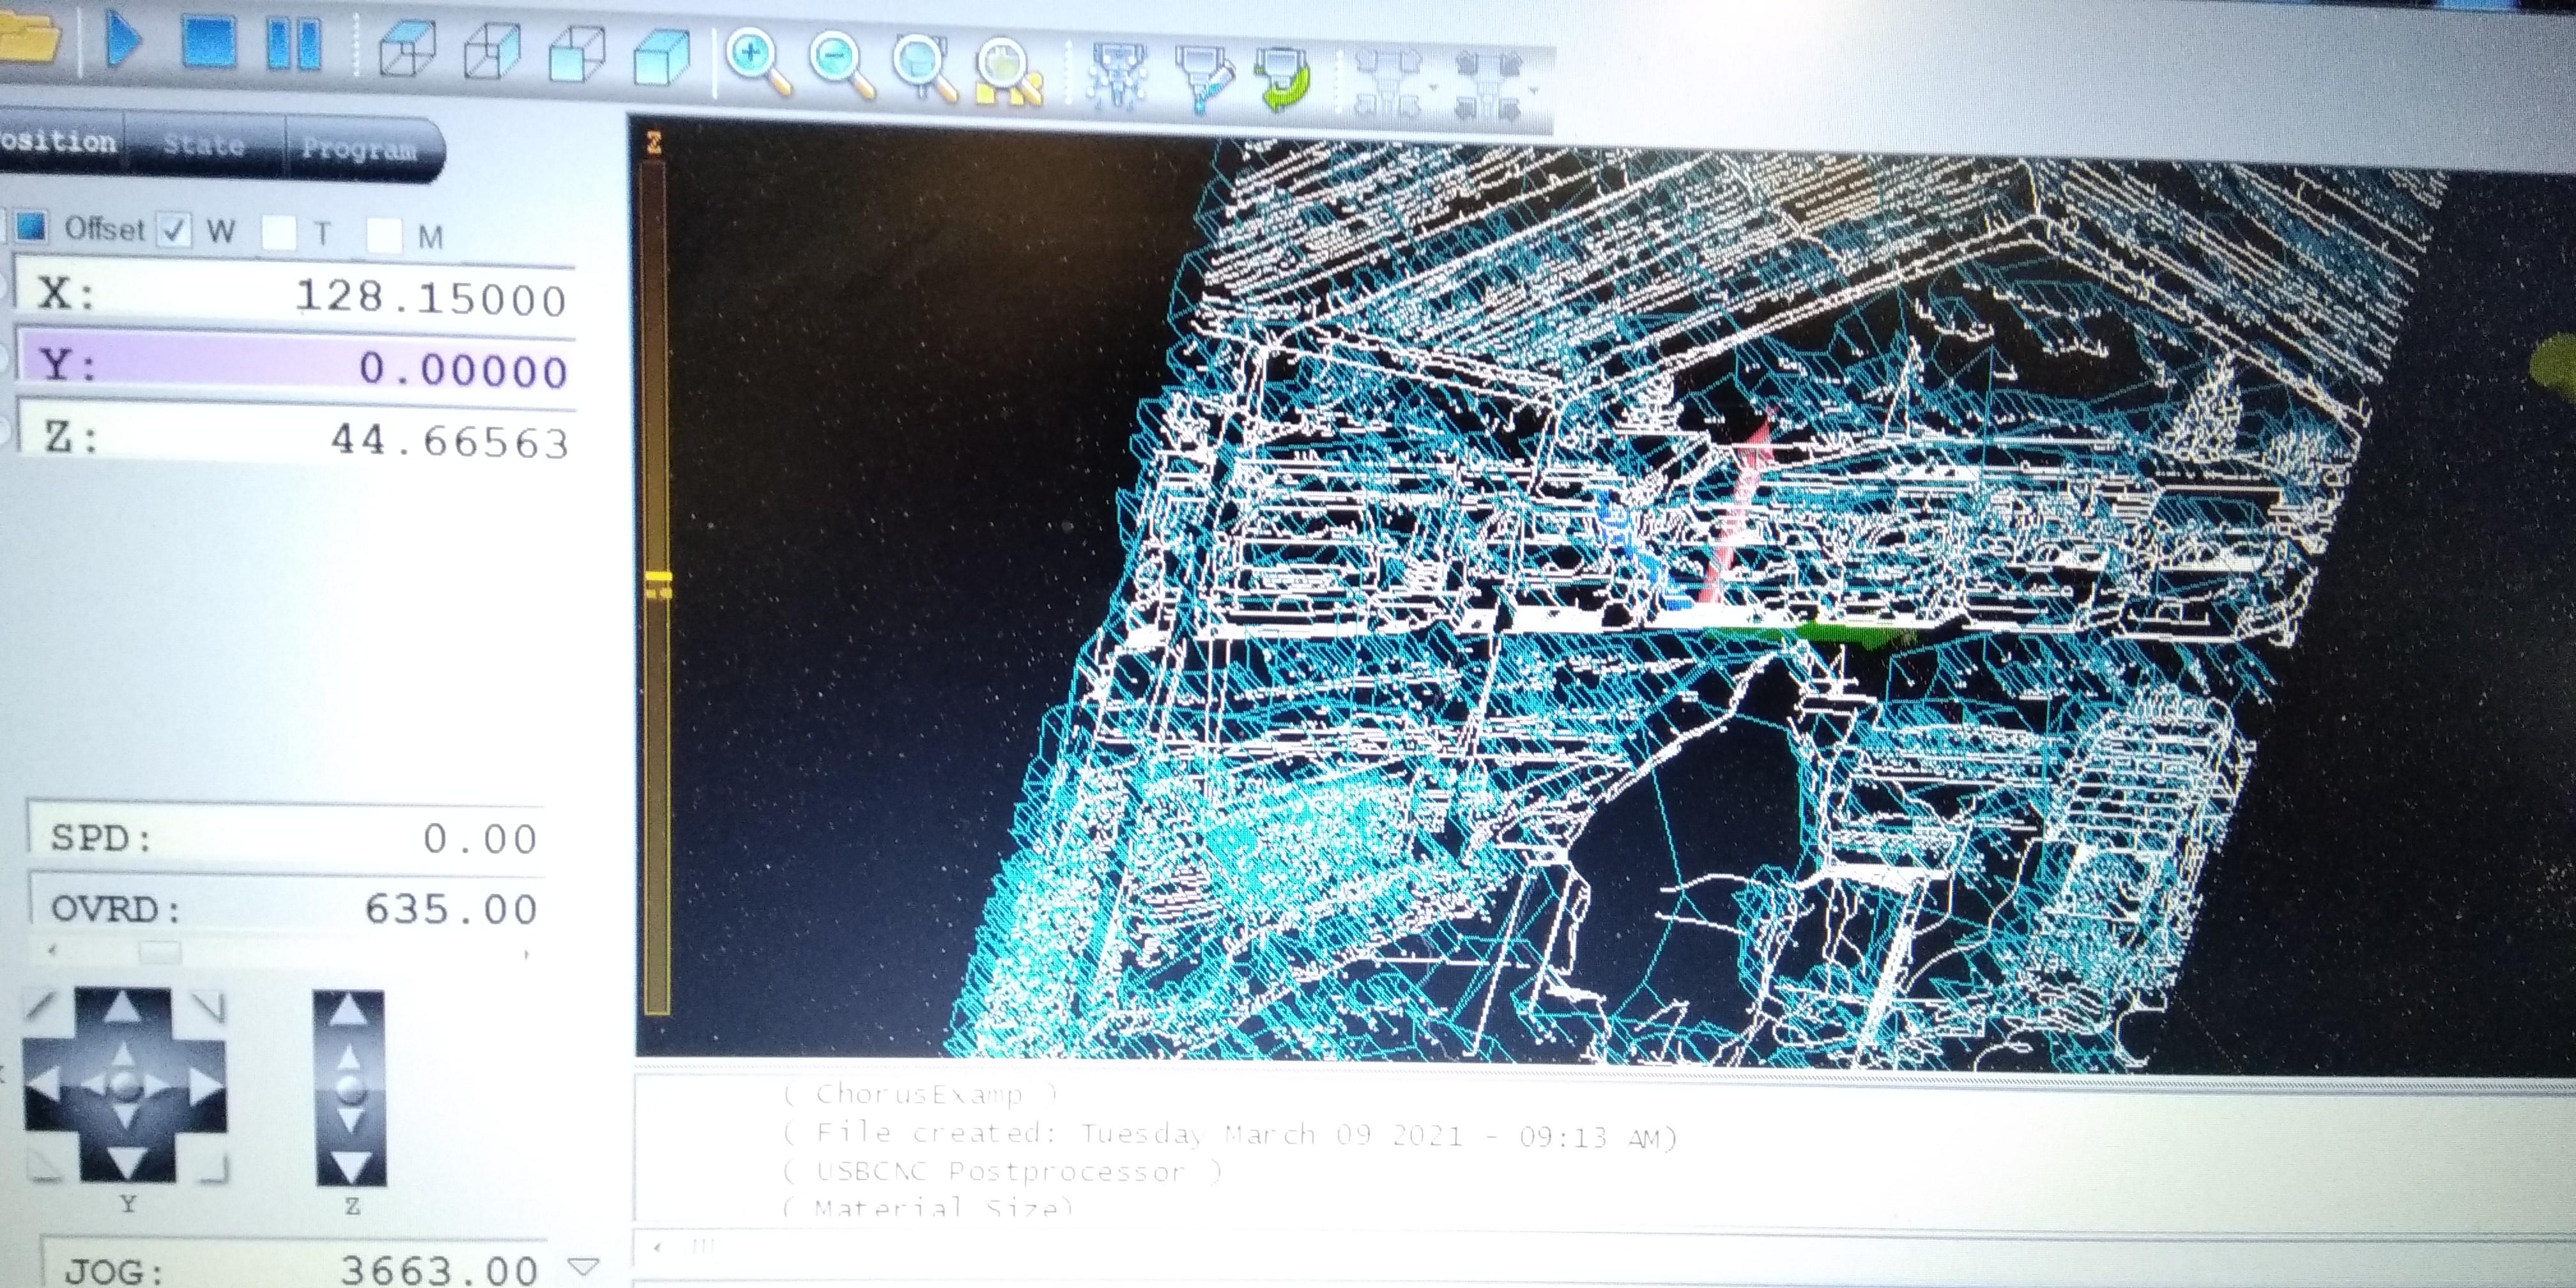
This Instructable somewhat glosses over the actions in the CAM program and completely ignores manipulating the CNC machine. Emphasis is on steps used to prepare the image before carving and on some of the V carve techniques.
Supplies
Tools required
Photoshop or other software capable of manipulating images
Vectric Aspire, or other CAM software that turn an image into G-Code
CNC router – to carve the image
Paint
Sander
Simplifying the Photograph

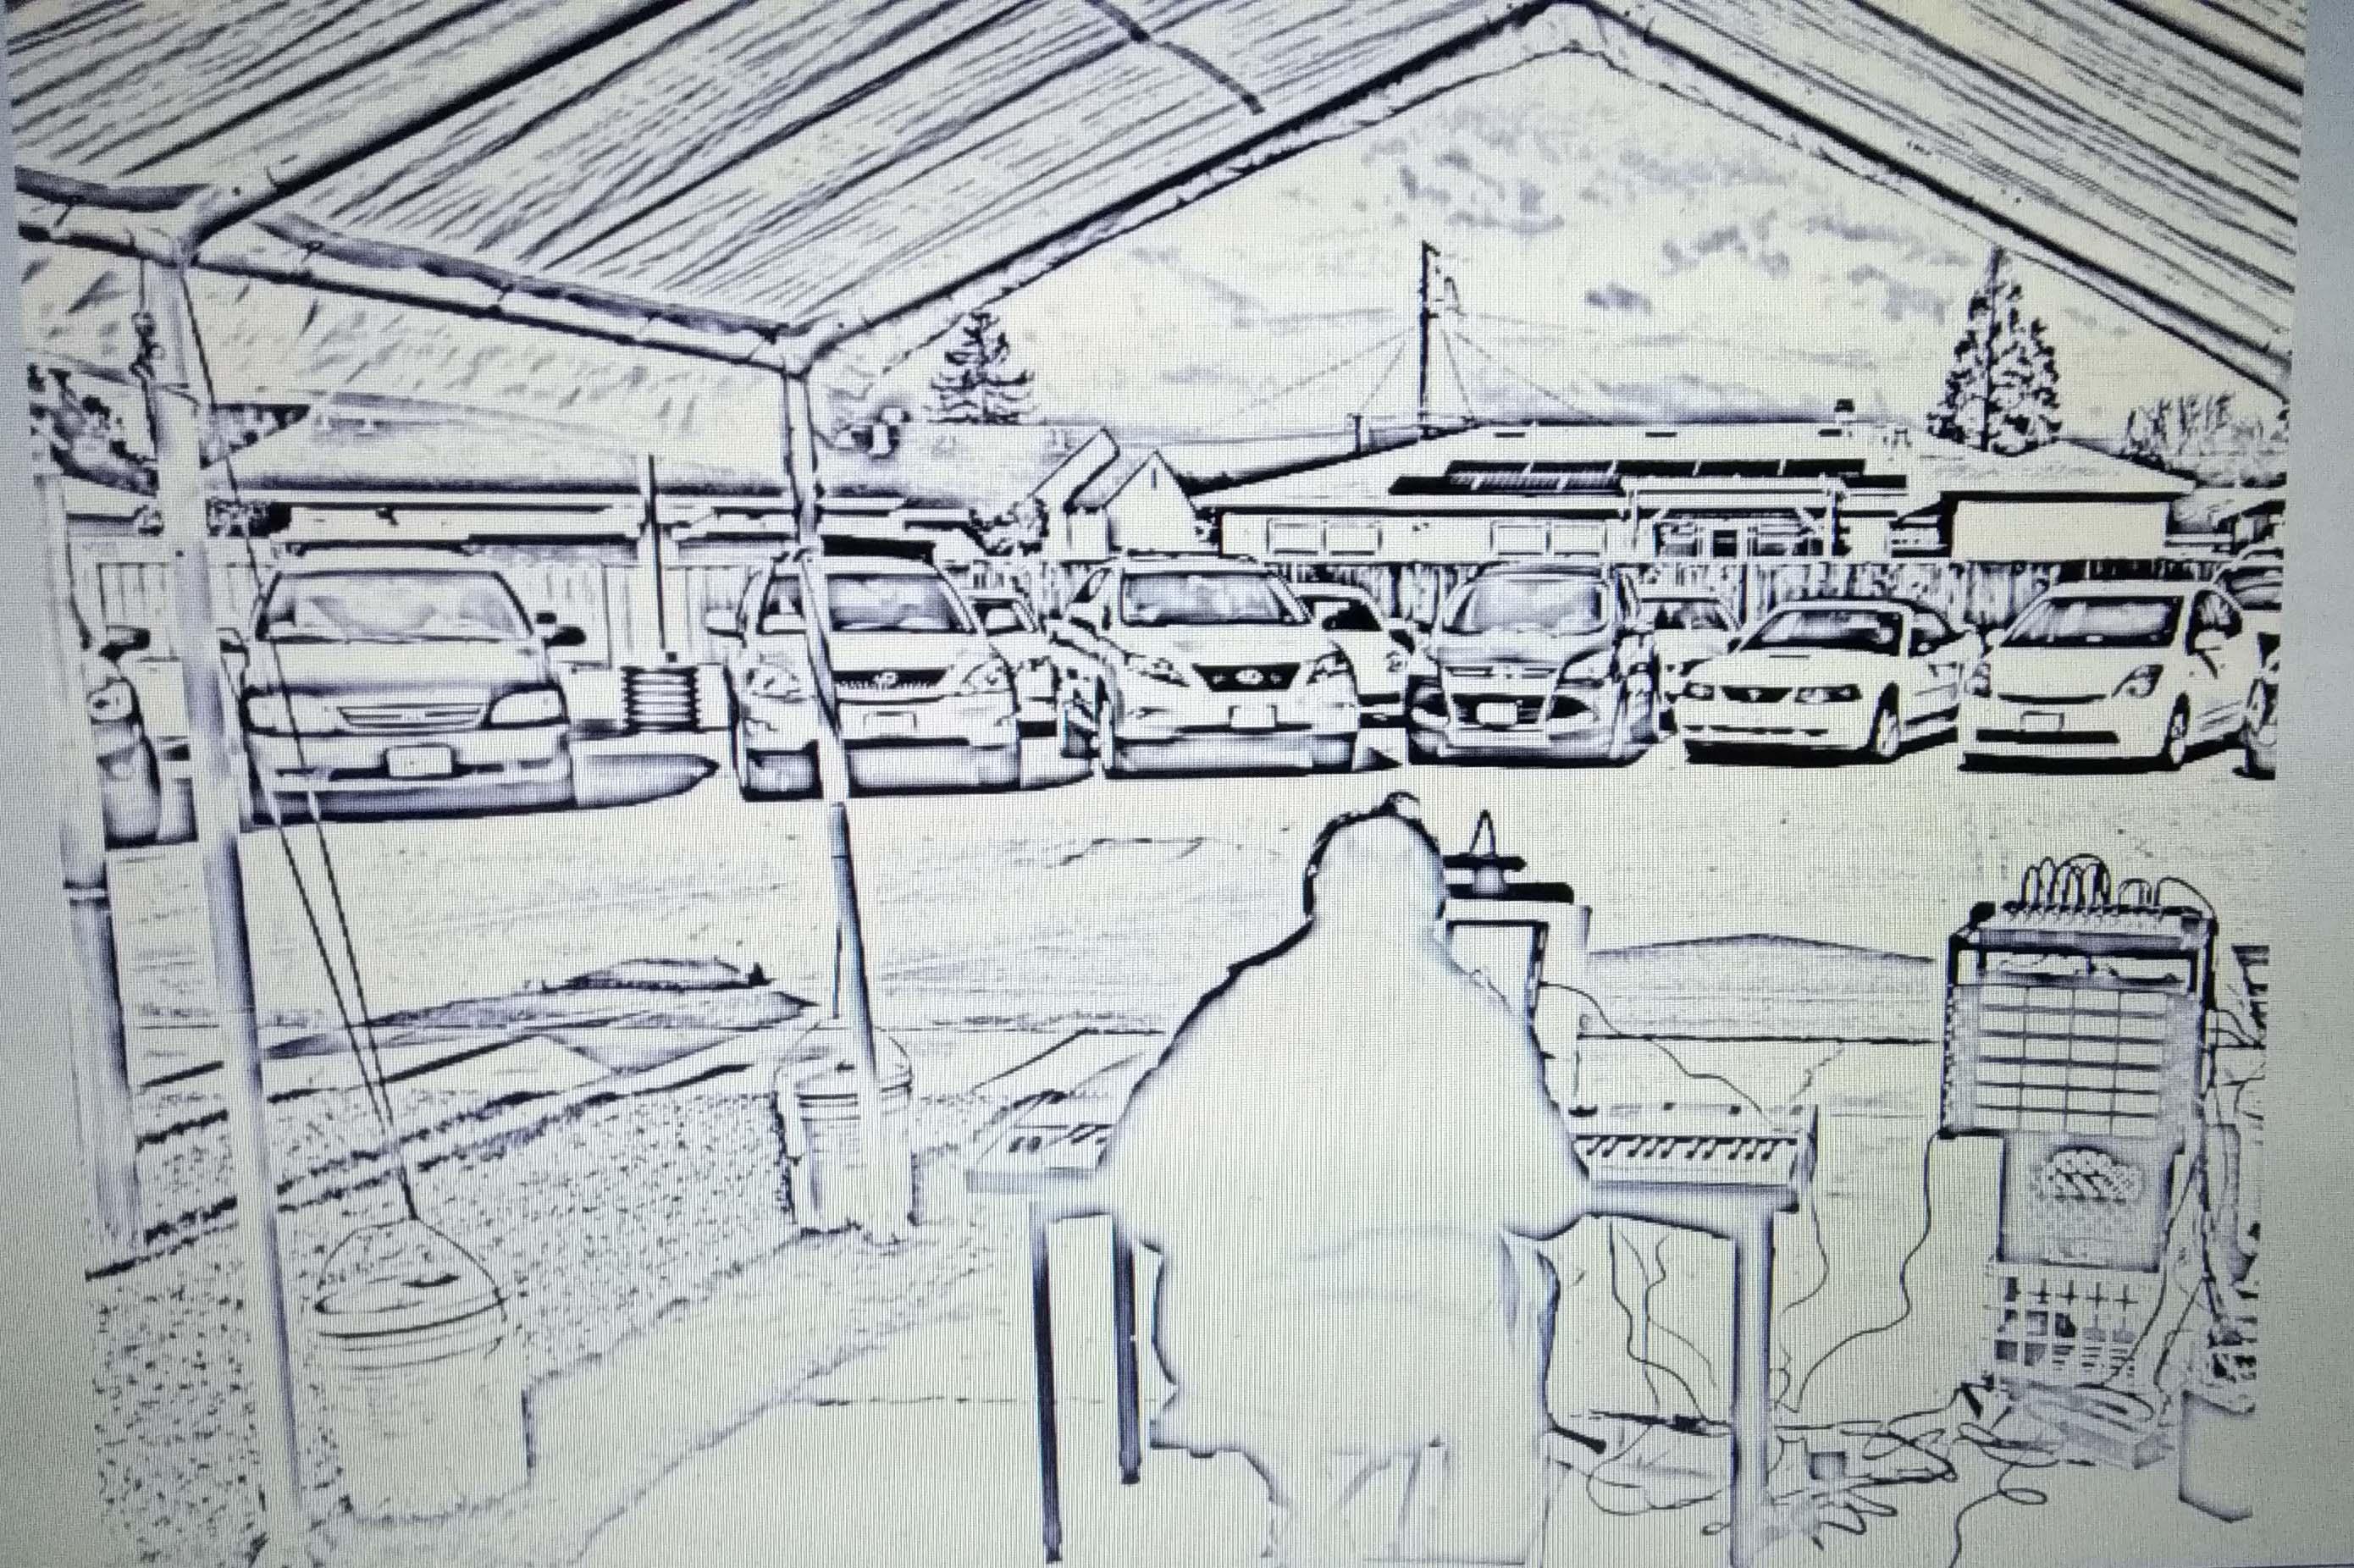
In Photoshop the first step is Image, Mode, Greyscale. This gets rid of the color, which tends to confuse the remaining steps.
The next step is Filter, Artistic, Poster Edges. This highlights the edges of things, the places where carving will occur. The image still way too complex for carving though.
The final step in Photoshop is Filter, Sketch, Photocopy. In the dialog box that appears, use the Detail and Darkness sliders until it looks good (low level of Detail will come out better).
Save the image as a JPG file with a name and place where you can find it in the next step.
Importing Into CAM
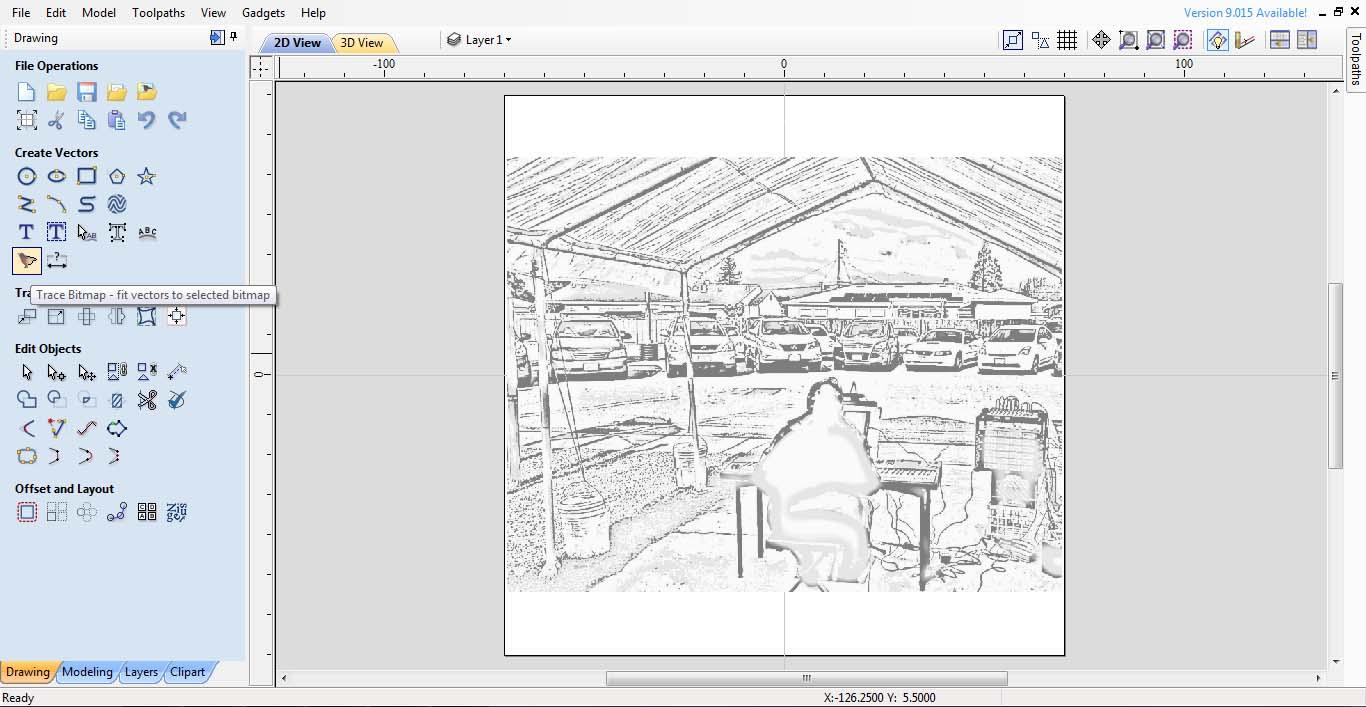
In Vectric Aspire (or similar CAM program) Create a new file. This defines the size of work area of the carving.
Then in the Modeling tab, click on the icon for Create a component from imported bitmap. I’m not going to get into much detail here but suffice it to say that you need to resize and orient the imported model to fit the work area.
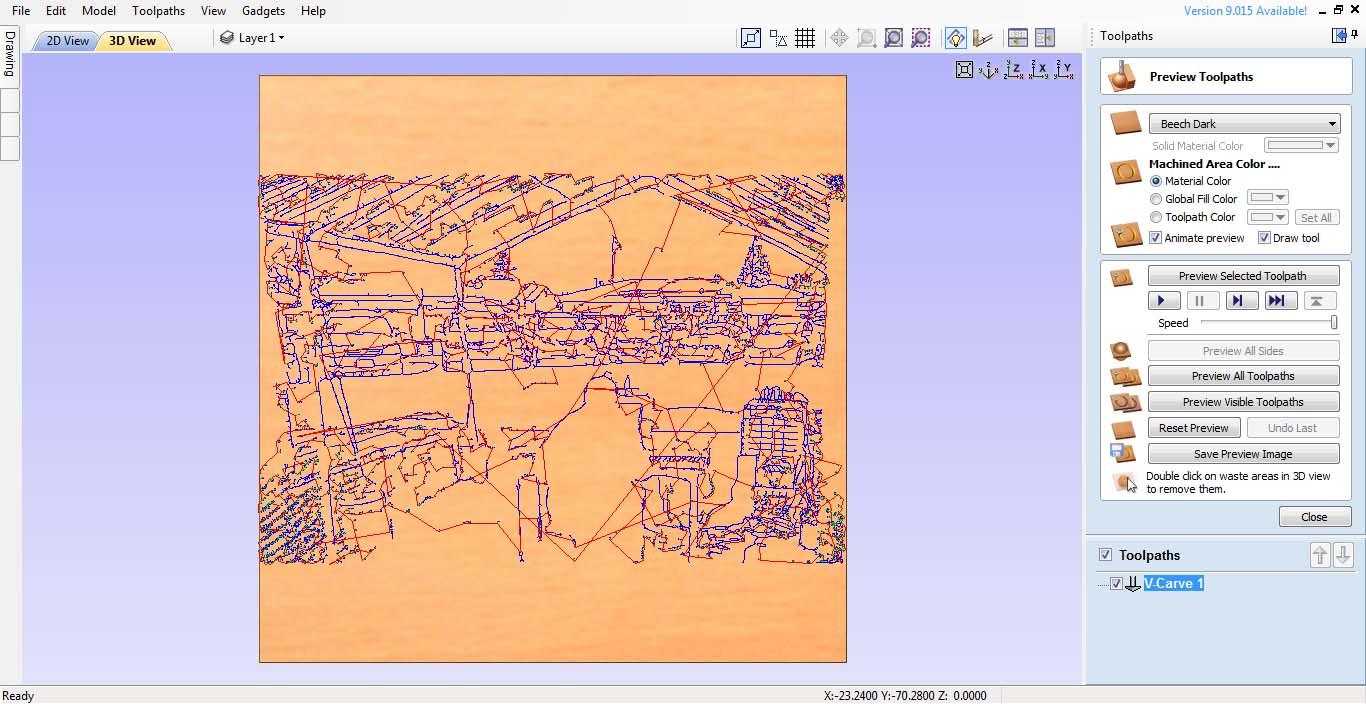
To be able to generate G-code, the CAM programs needs vectors. Vectors are all the lines in the image, and for a complicated picture there will be a ton of them. To generate vectors, go back to the Drawing tab and click of the icon for Trace Bitmap. On my old PC, this takes a long time but results in a big bunch of vectors.
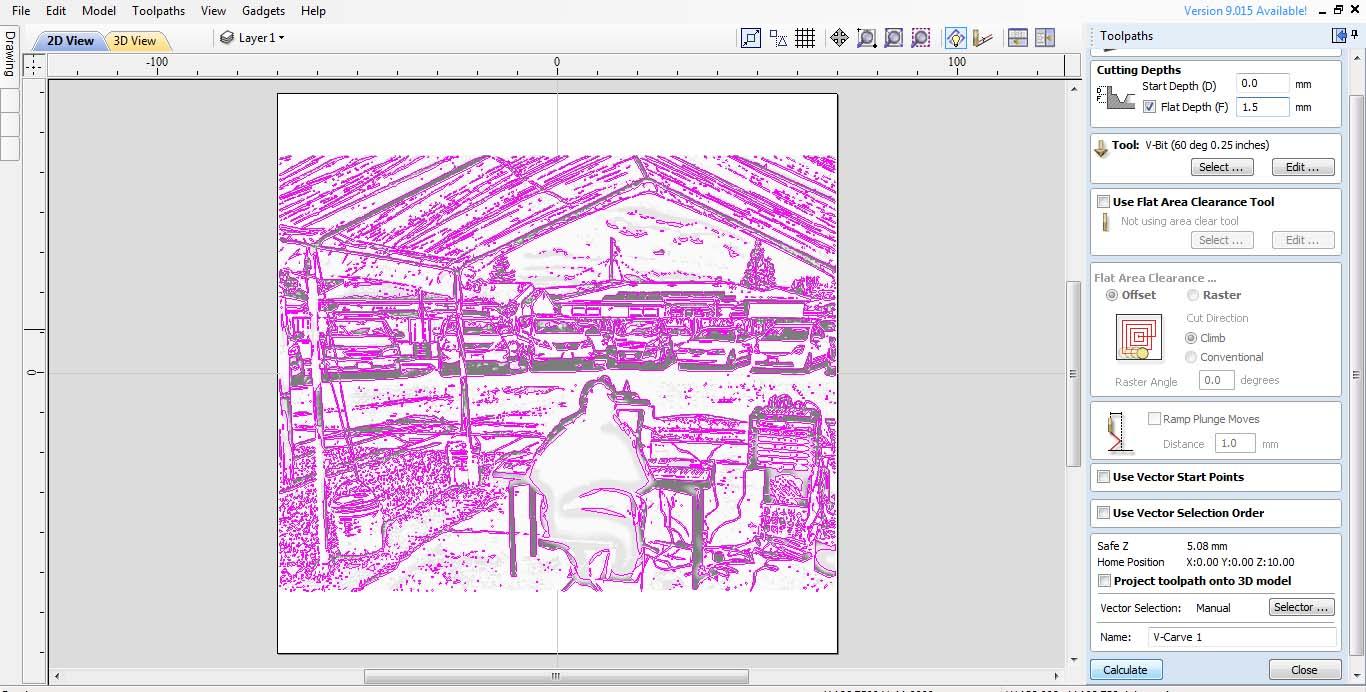
The next step is using the Toolpaths menu to select the V Carve option. I like a depth of 1.5 mm maximum. This is a good depth for the technique which follows.
Select the vectors, choose a V carve tool, and click the button to Calculate the toolpath.
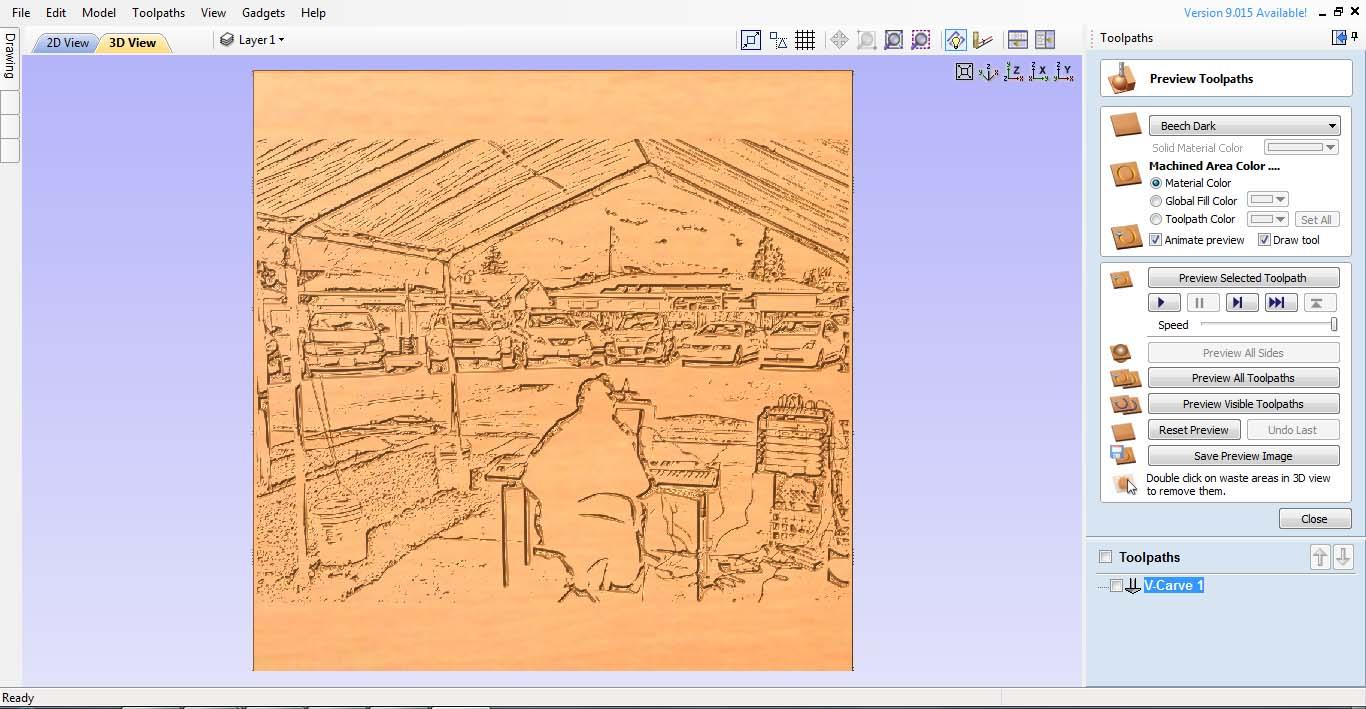
Preview the toolpath and see how it’s going to look. If you’re happy with it, Save the toolpath to a file that your CNC machine will access.
Carving the Picture
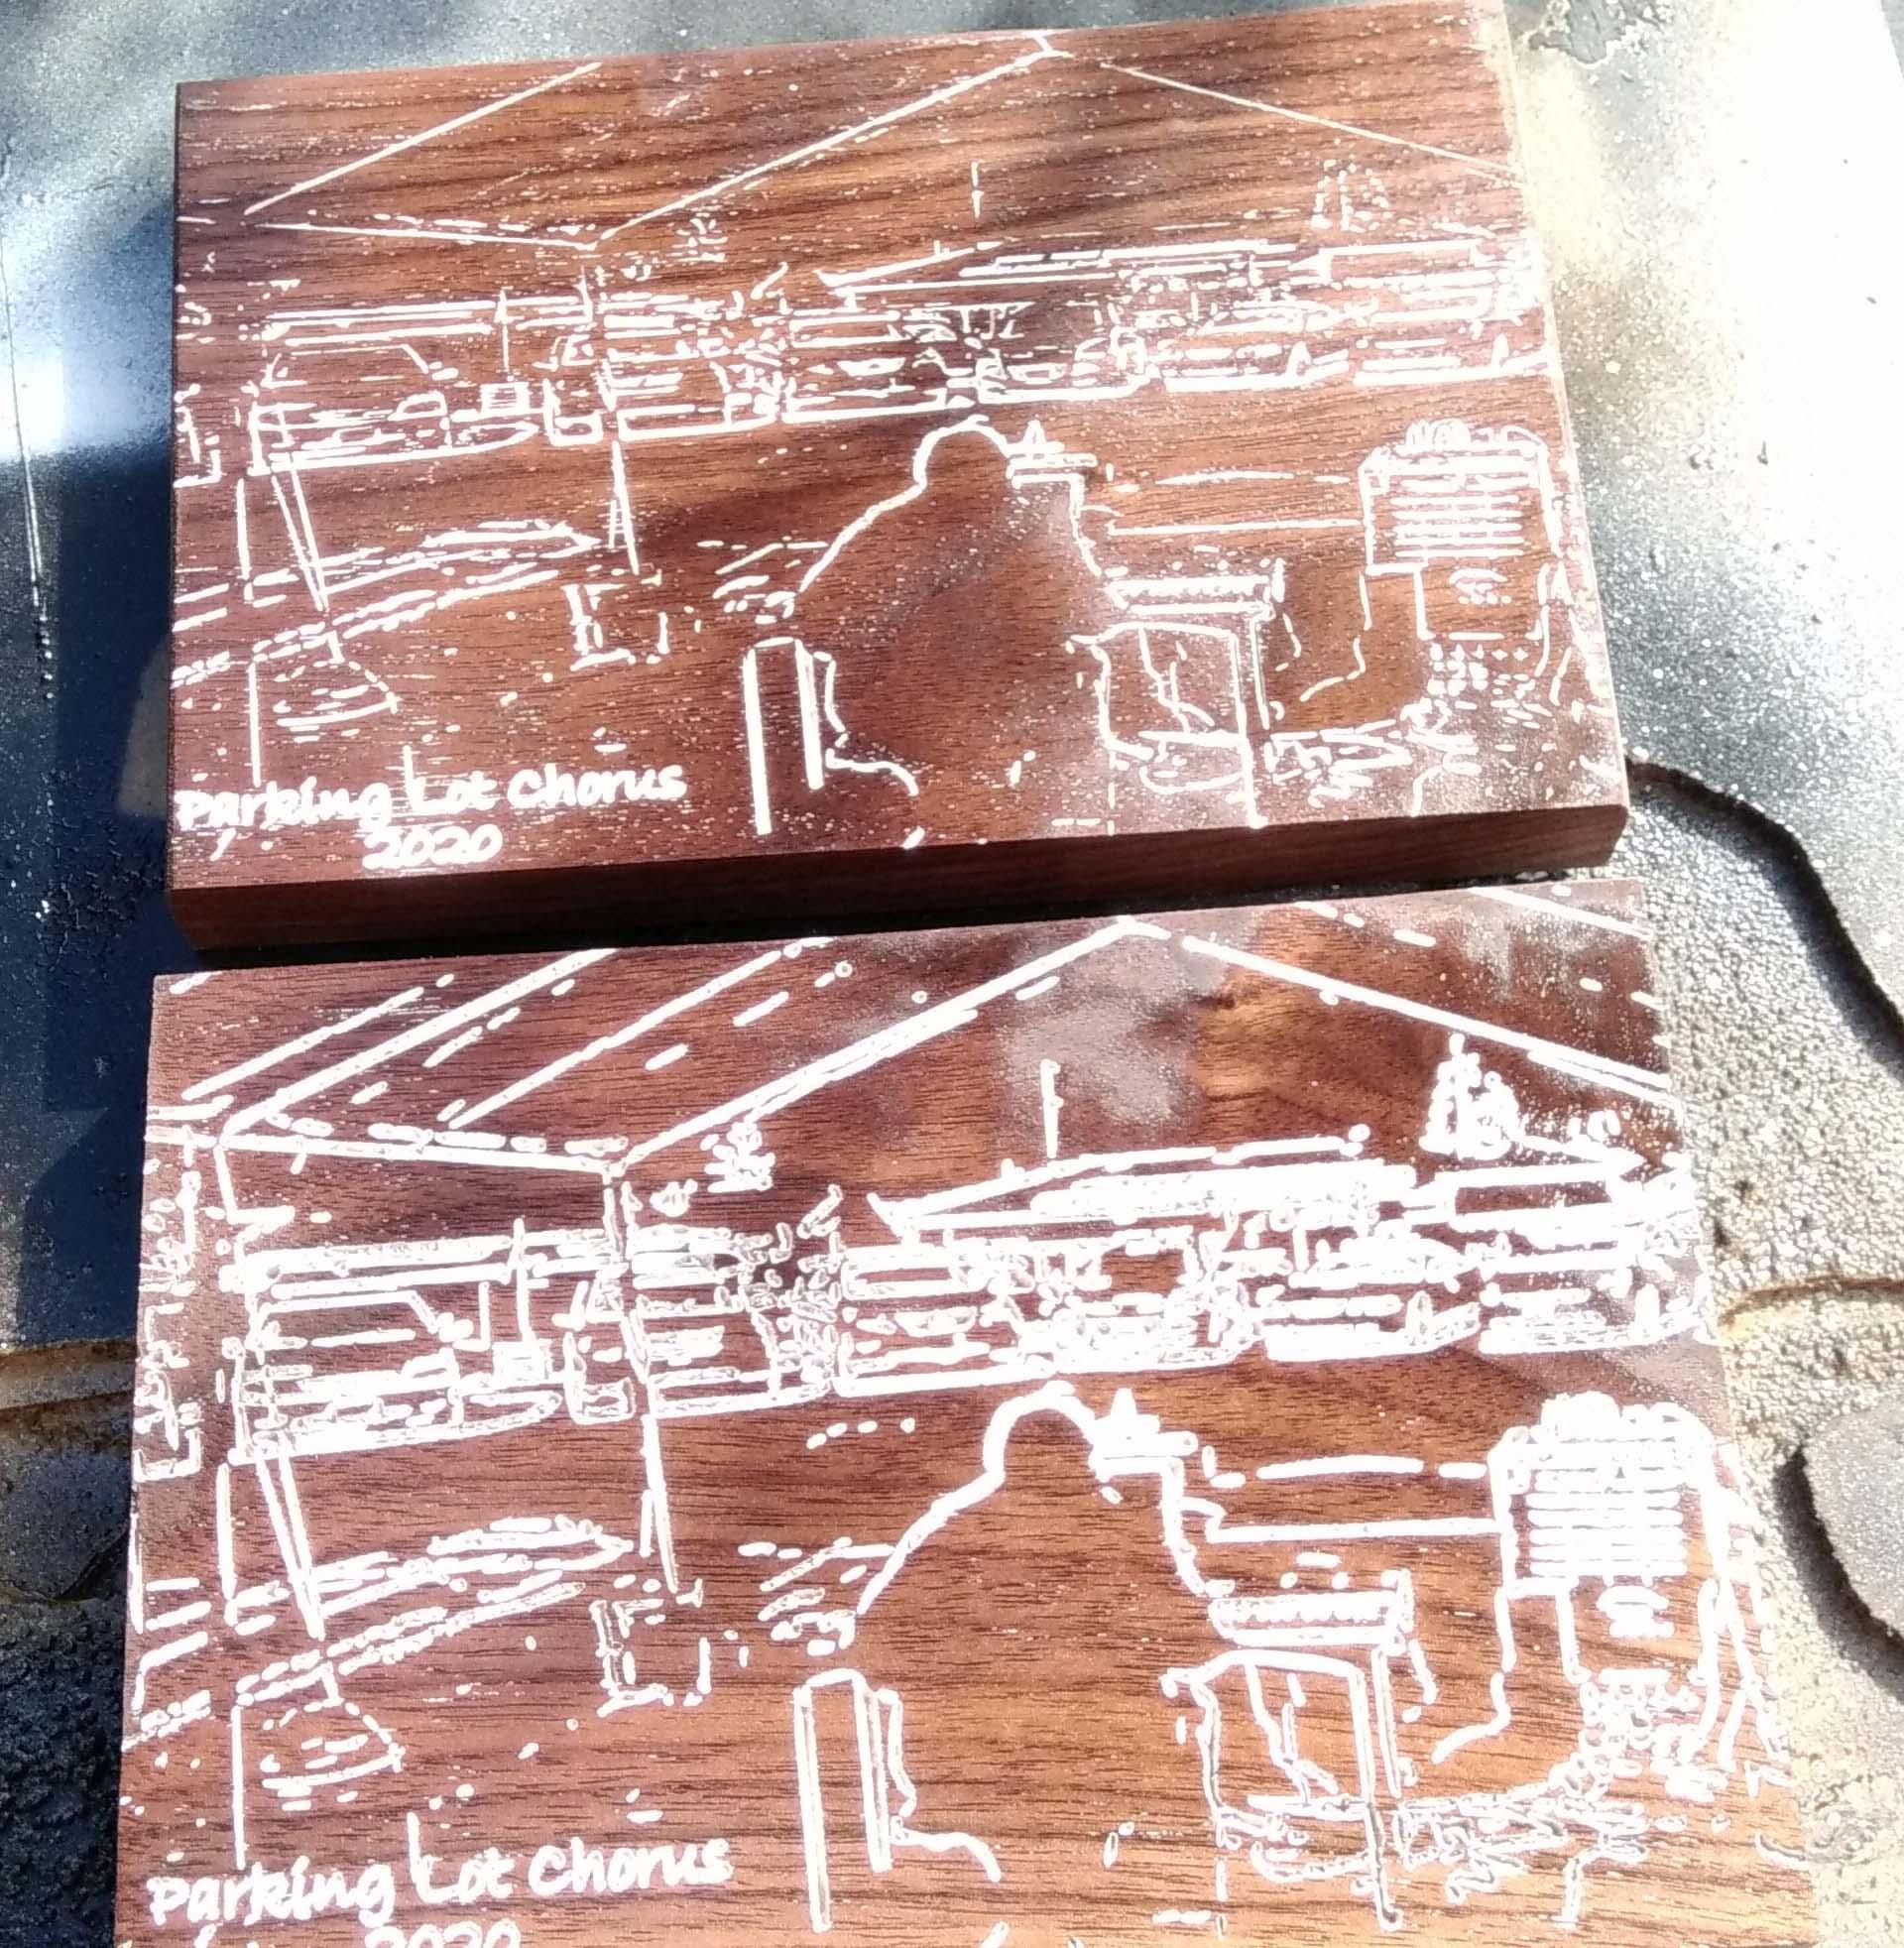
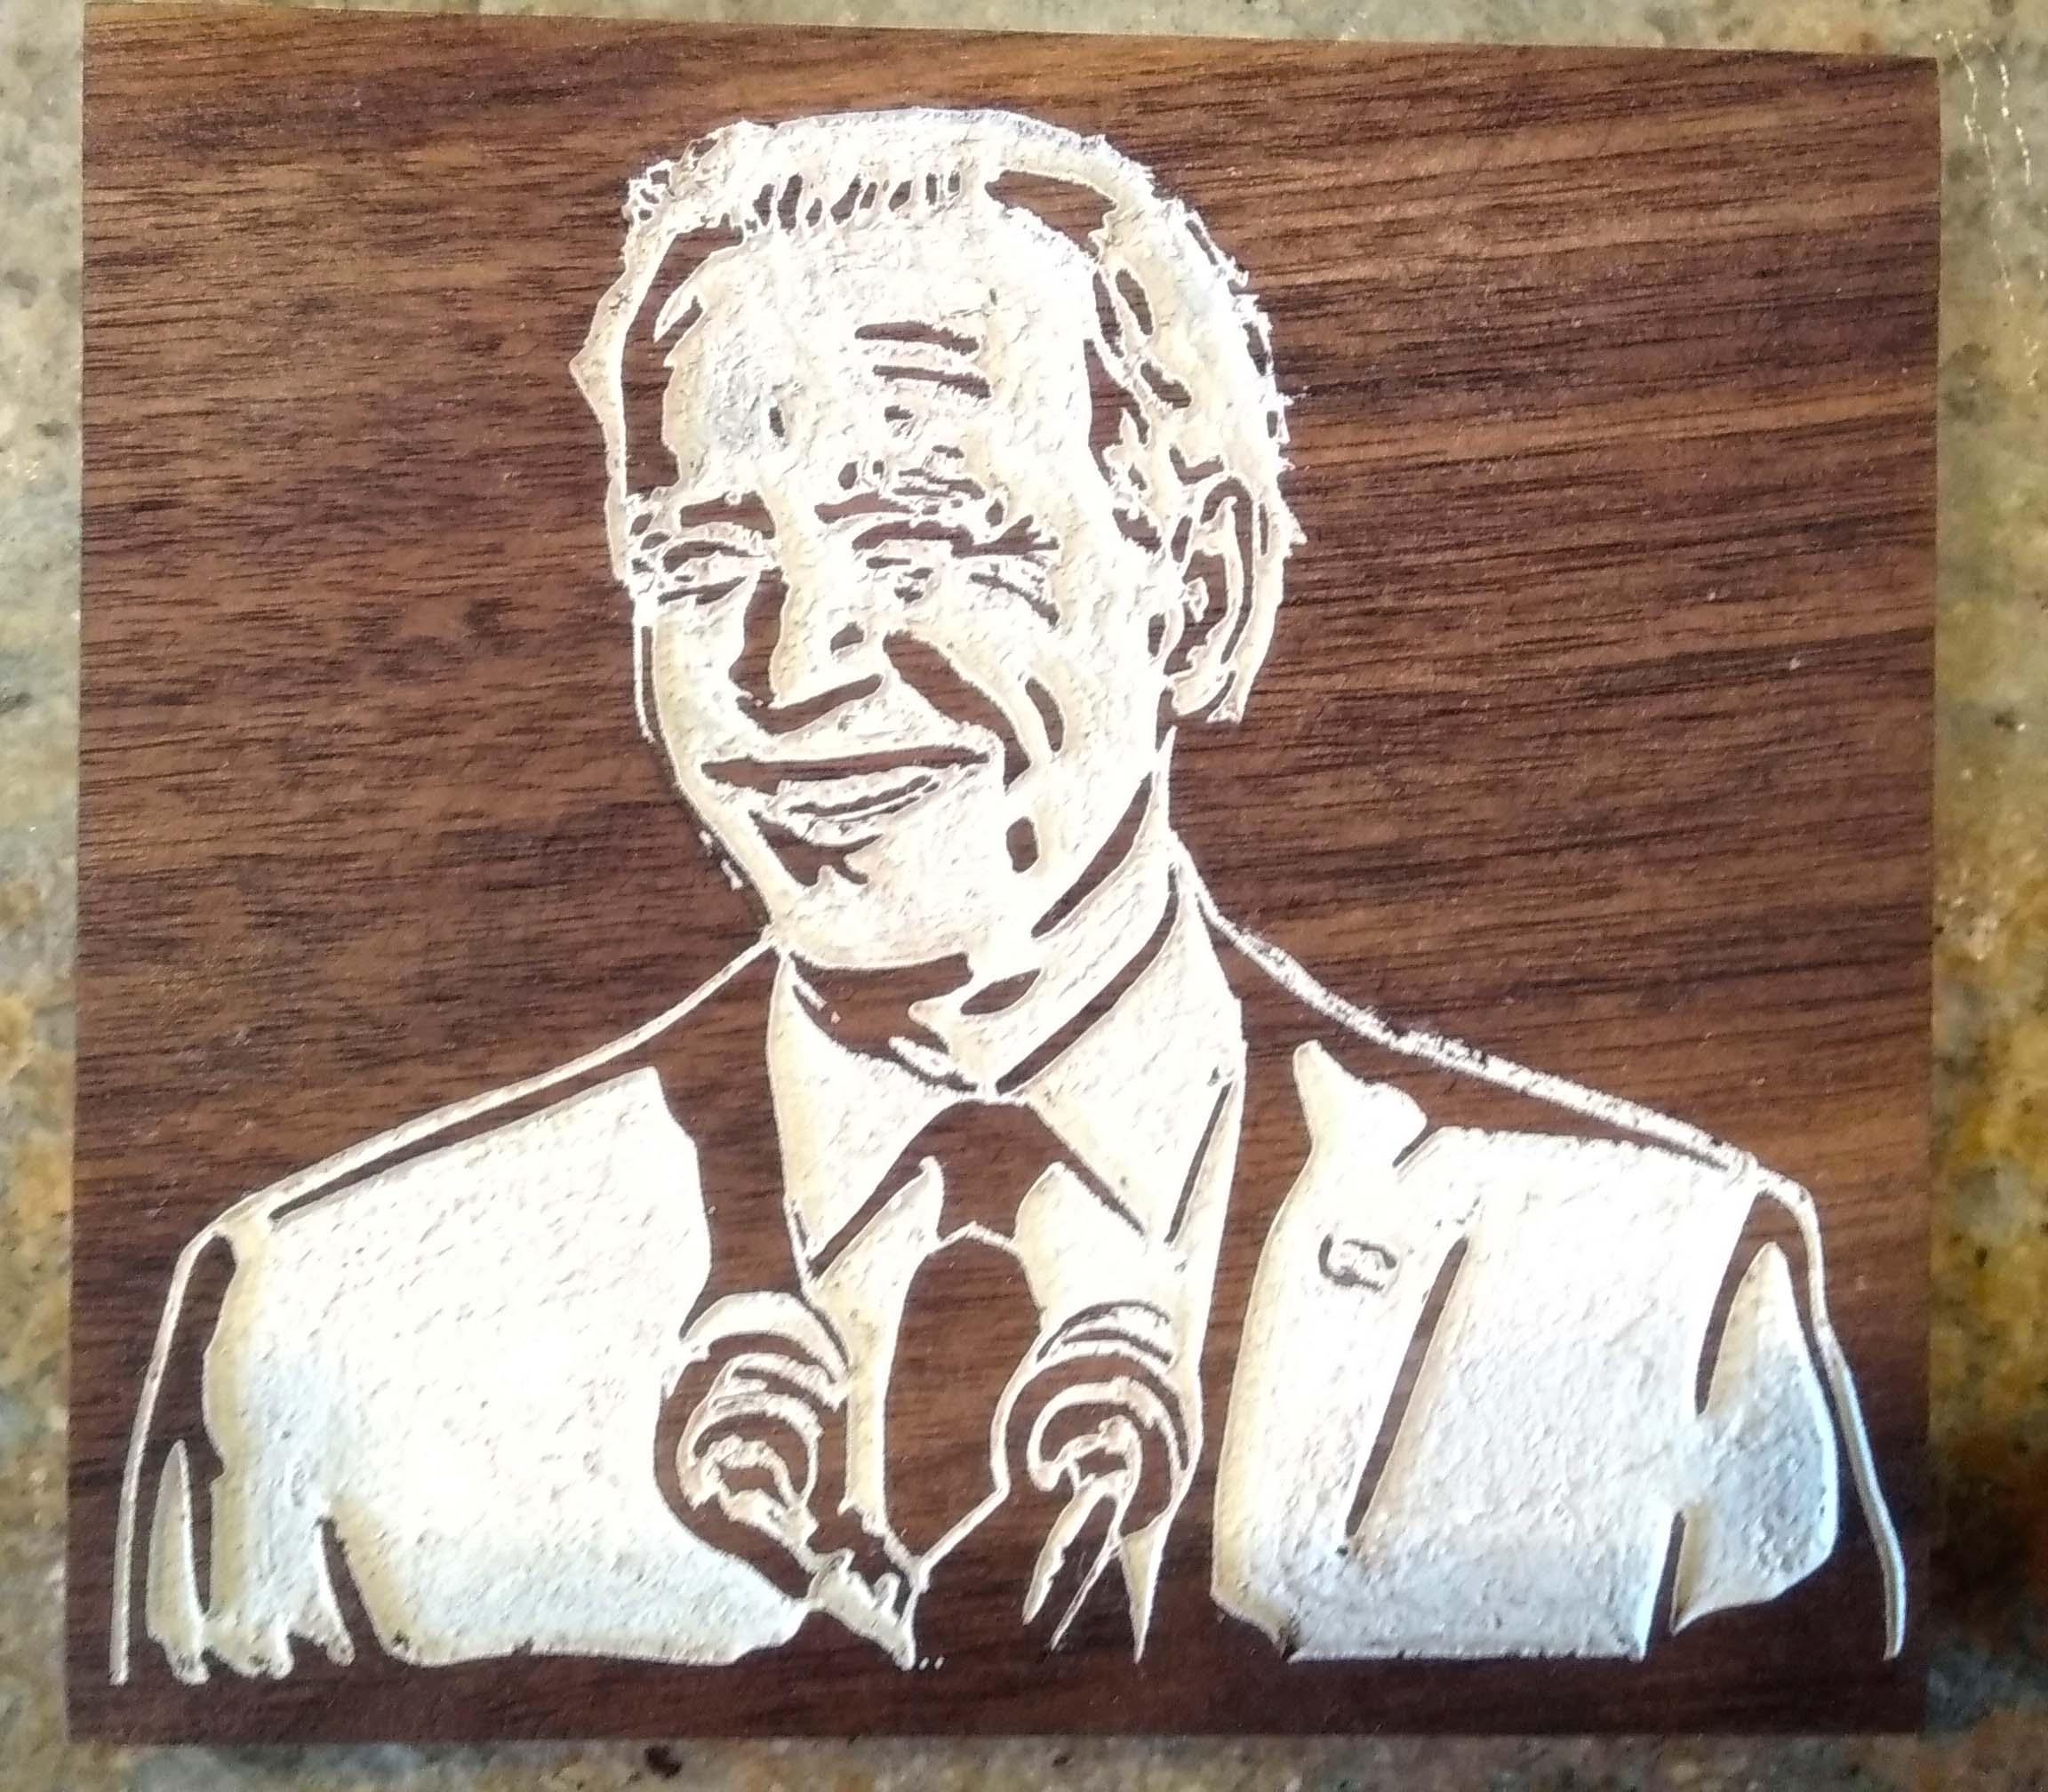
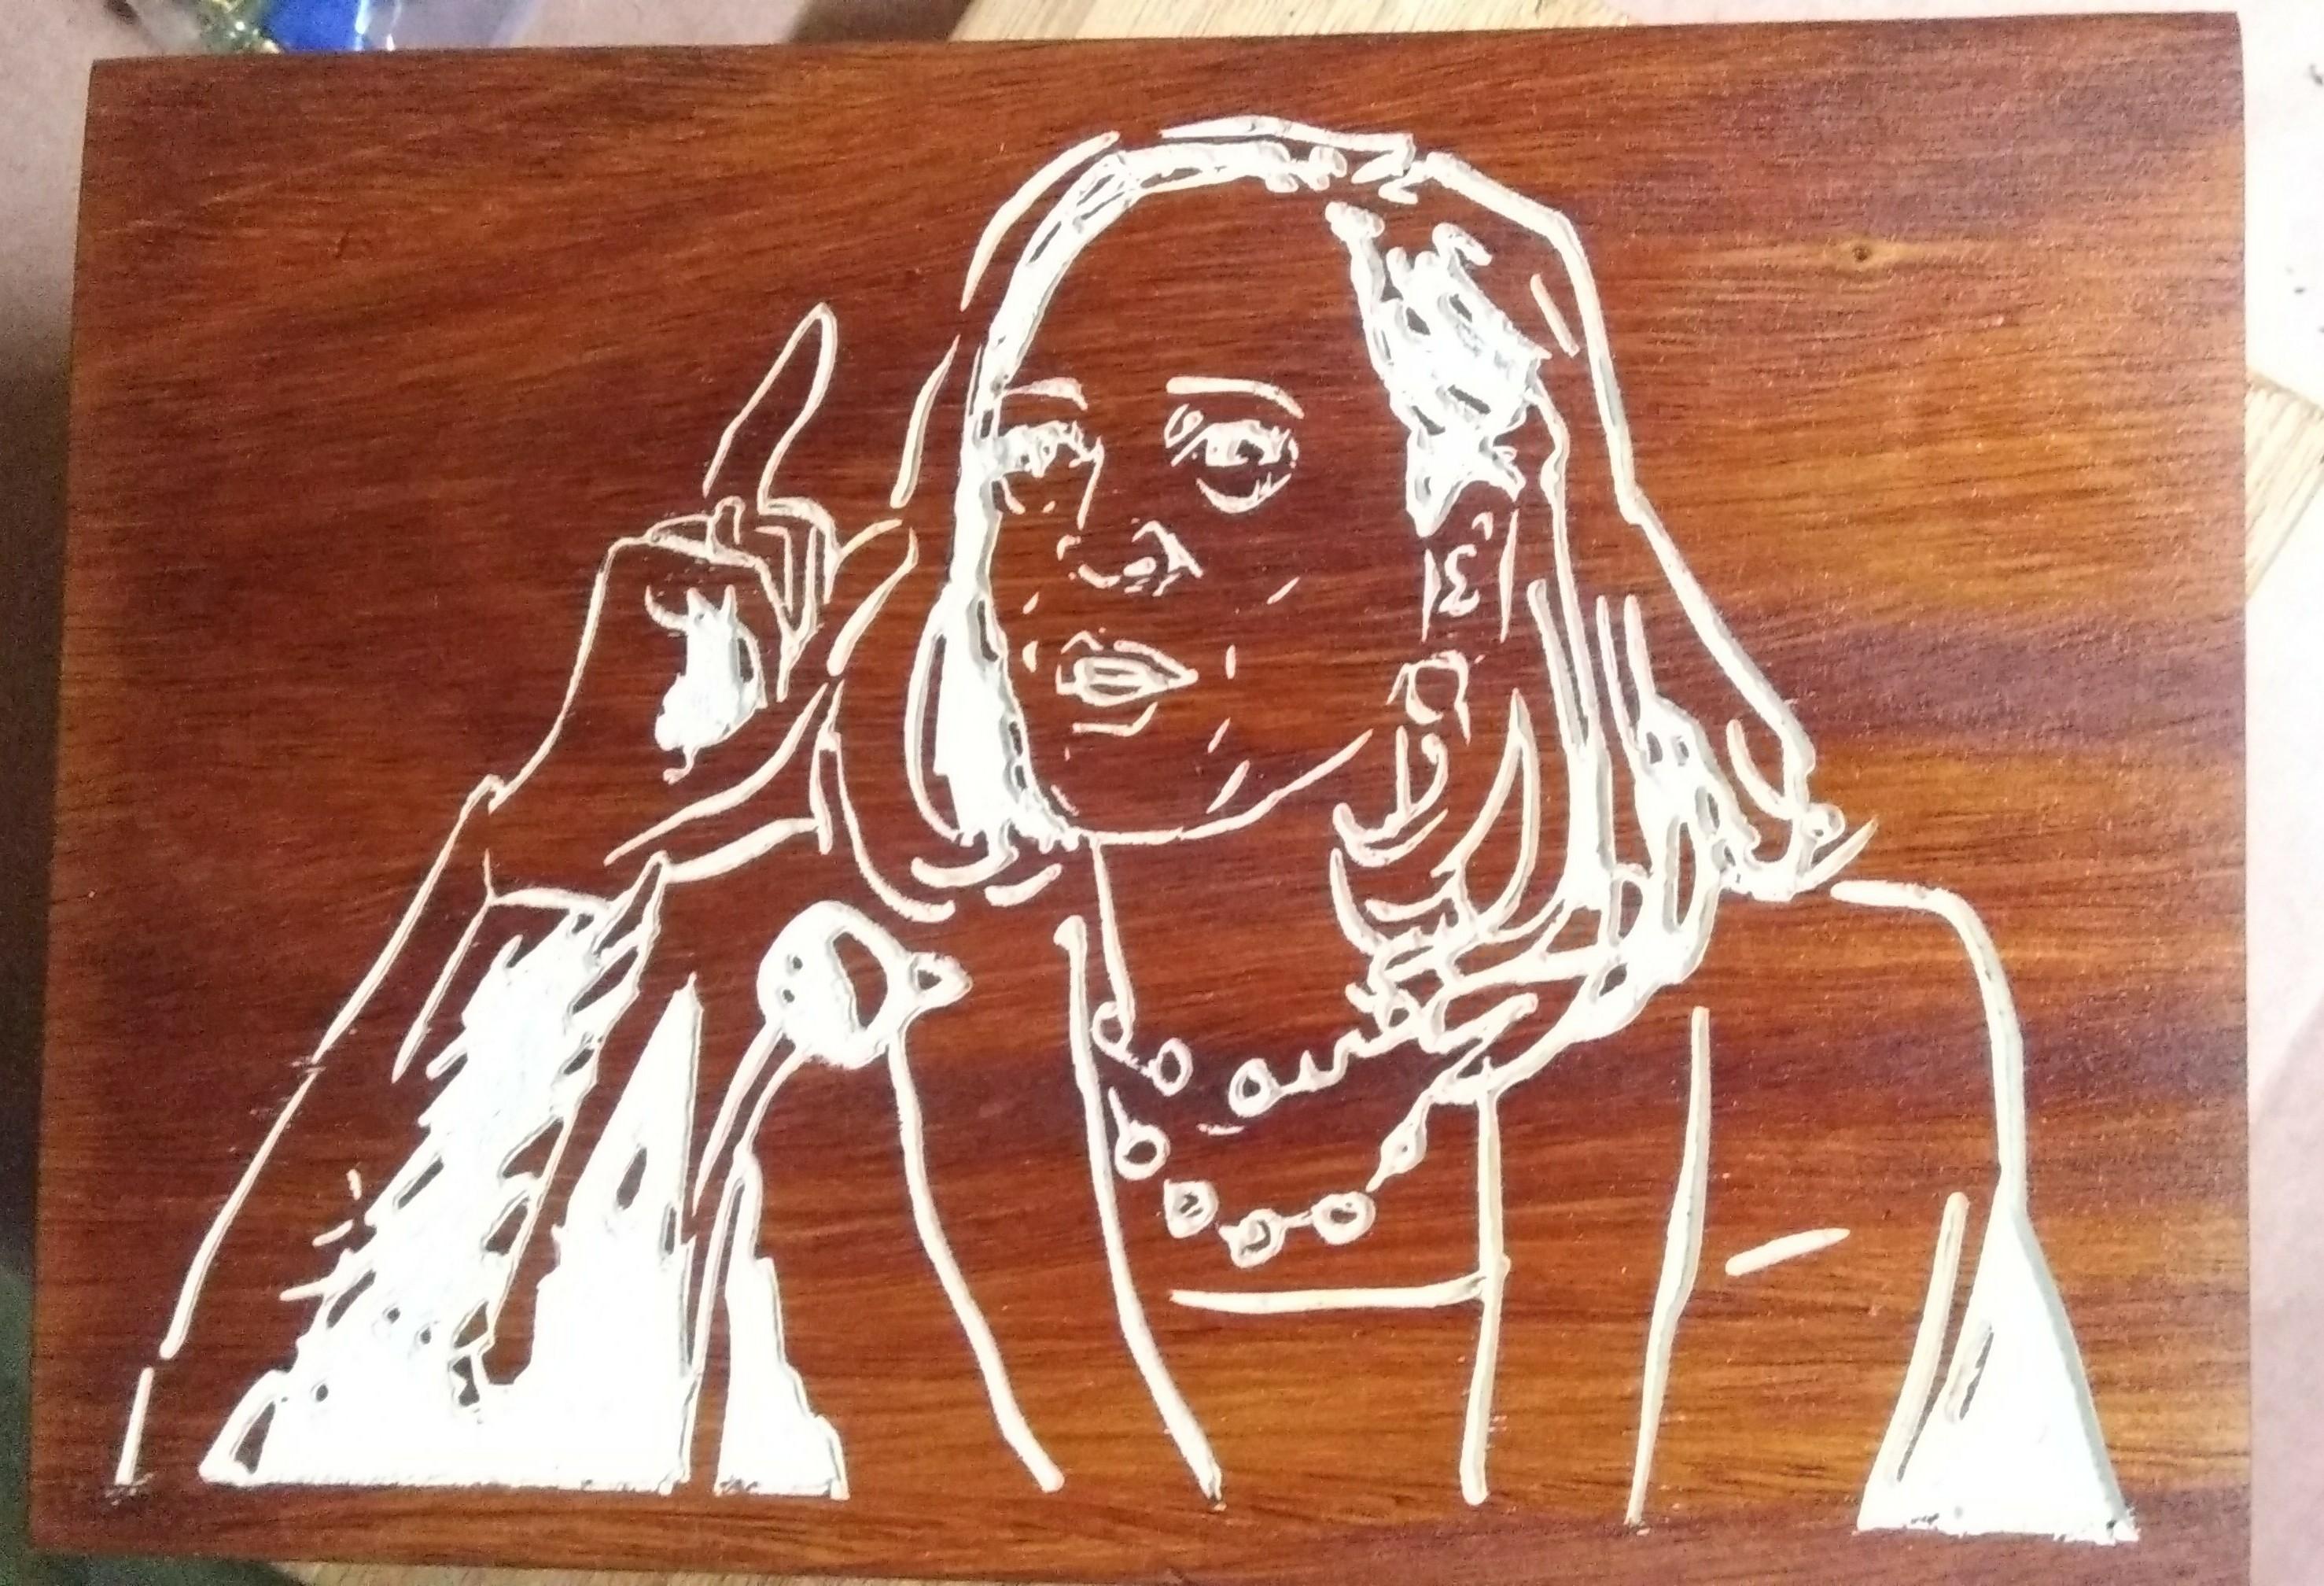
To highlight the V carved image and make it stand out against the wood, I use paint in the V-carved parts. For dark wood like walnut or mahogany I use off-white. For light wood, I use black or brown.
The technique I use is to carve, then paint the carved portion, then sand off the uncarved part to expose the wood. Before carving, paint a finish coat on the wood. This is to keep the paint from penetrating thereby making sanding easier.
I've shown in this step a couple of other examples of V-carvings from photographs.