Using Curves for Color Enhacement
by tsmilesagain in Circuits > Cameras
537 Views, 9 Favorites, 0 Comments
Using Curves for Color Enhacement
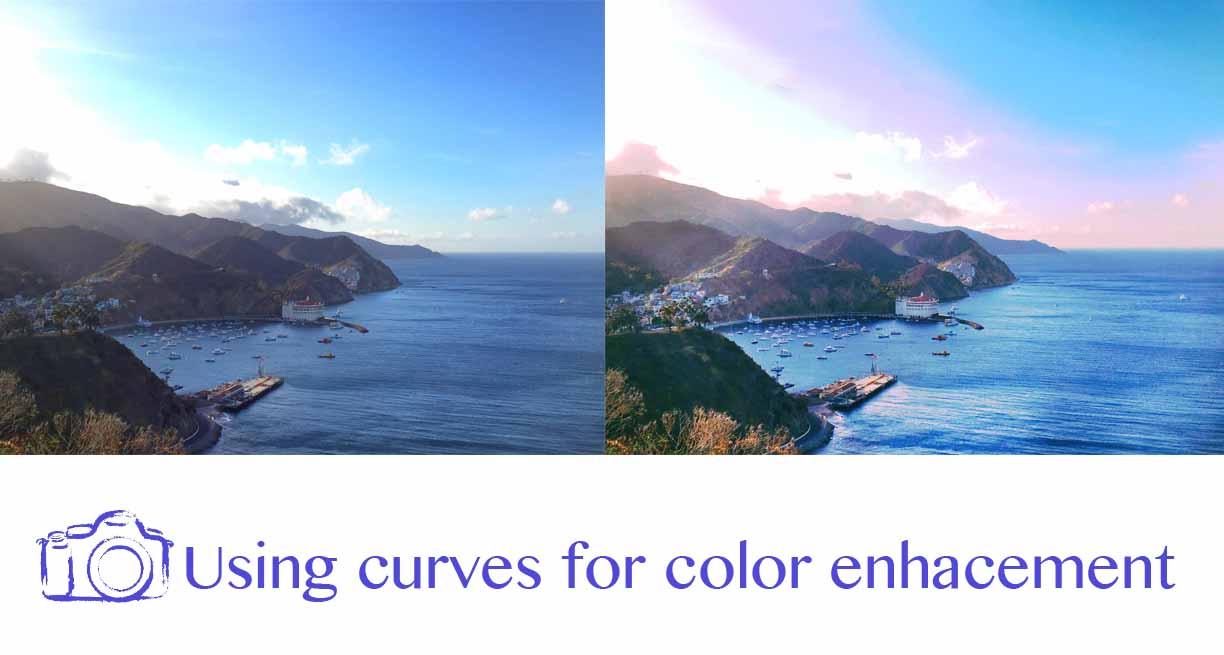
This tutorial is intended for beginners, its a simple way to enhance colors and add some drama to your photos through the use of curves in Photoshop. I have an older version of Photoshop CS5 which I am running on Mac, there are even more curve capabilities that can be achieved with newer version.
Software requirements:
Photoshop (throughout the tutorial I will be using Photoshop CS5)
Select the Picture You Will Be Editing


This picture was taking in the late afternoon with an smartphone (iPhone). I wasn't able to get the great sunset colors and was hoping to enhance to get the picture I envisioned.
1. Open your picture in Photoshop
You can do so by either dragging the picture into Photoshop or by right clicking on the photo then selecting "Open with" > Photoshop
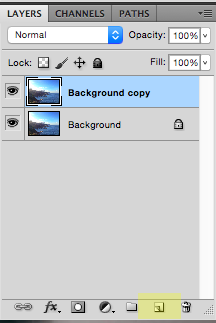
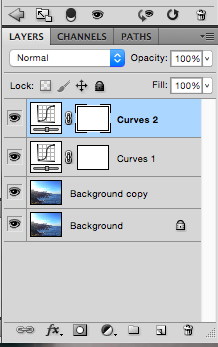
Before editing I usually like making a copy of the original layer in case I want to revert to the original. You can do so by dragging your "Background" layer to the "New layer" icon located at the bottom of the layer tab. Once copied you should see two identical layers listed on the layers tab
2. Adding some light to the sky
I wanted to add brightness to the background to avoid and over saturated end result once I changed the sky colors.
- For this I used the "Quick selection tool" which can be accessed either my pressing and holding on the "Magic Wand tool" or through the W short cut key. If you are not familiar with the Mac Photoshop short key options you review them here: https://www.nobledesktop.com/shortcuts/photoshopcs...
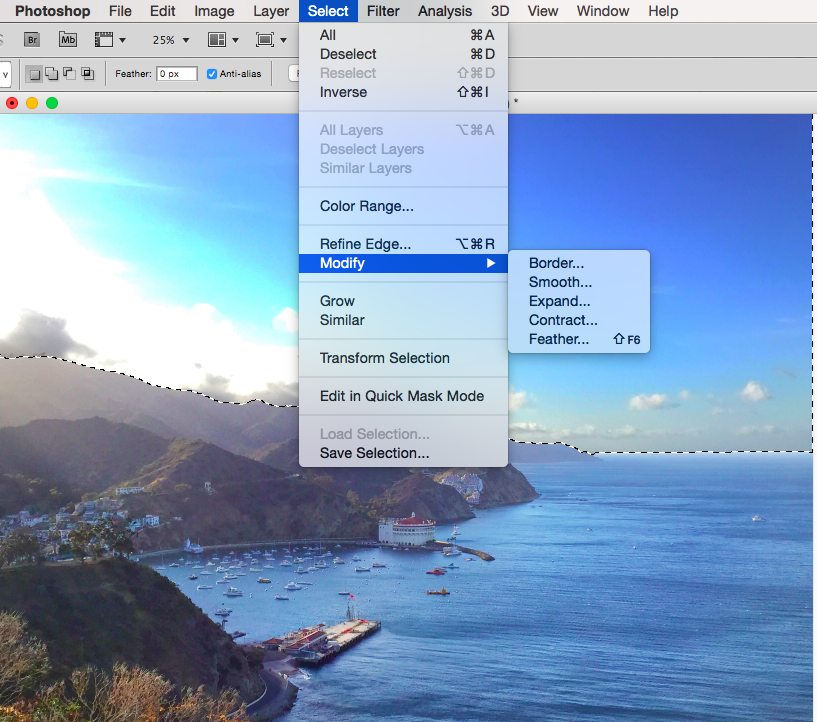
- Once you have your are selected use the "Feather" option to smooth out the selection. For this navigate to "Select" > "Modify" > "Feather"
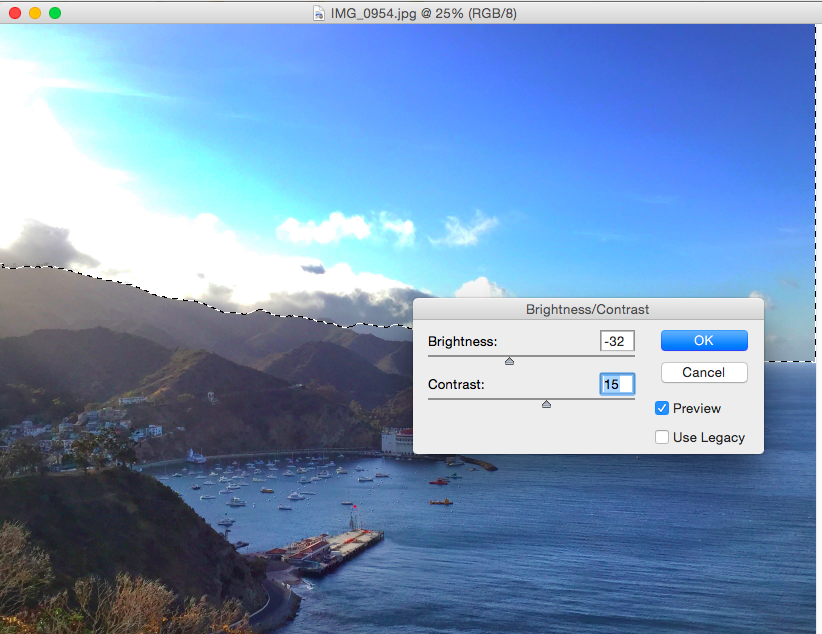
- Now lets add some brightness to your selection. Navigate to "Image" > "Adjustments" > "Brightness/Contrast"
You can move the toggle up and down the scale until you are satisfy with your change.
First Adjustment Layer: Bightness and Contrast
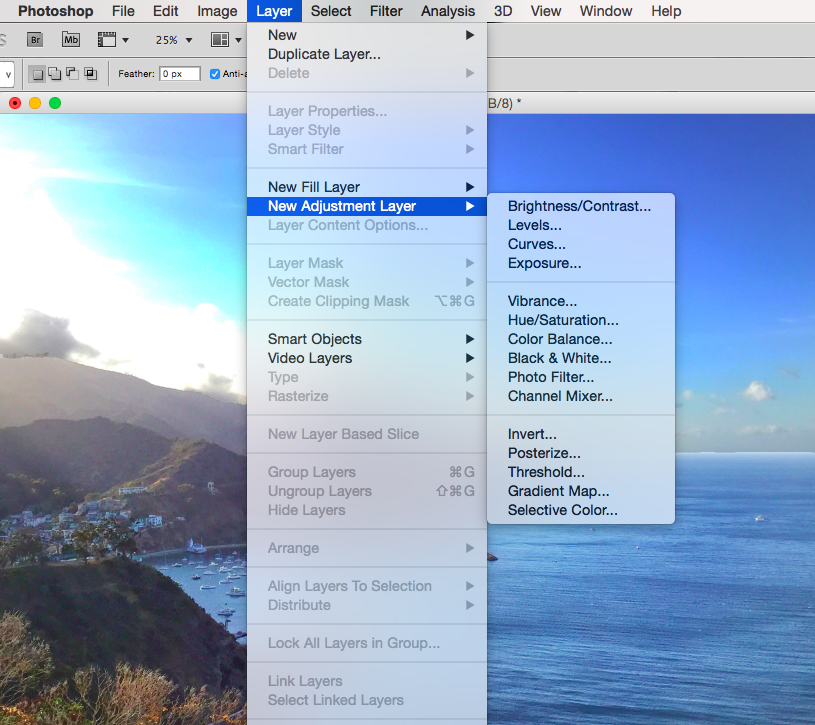

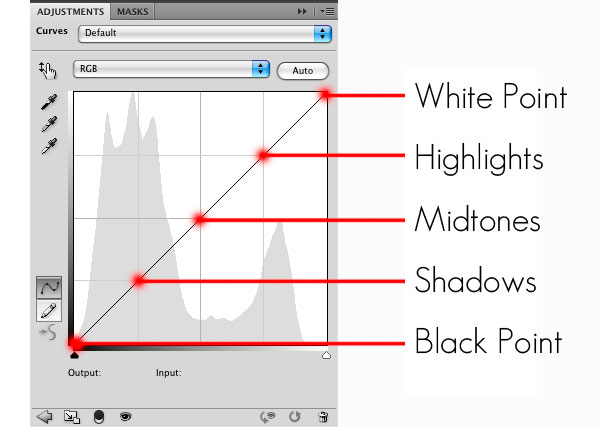
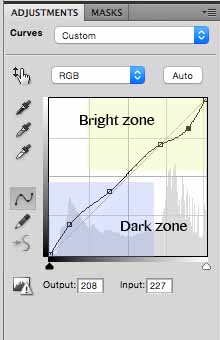
The following step assumes you do not have any part of your picture selected. Ensure to remove all selections from your layer.
To create a new curve adjustment layer navigate to "Layer" > "New adjustment layer" > "Curves..."
You should see a new curve layer listed on your layers tab. You should also see a curves graph on the "Adjustments" tab. To this graph you can add points and drag them up/down the diagonal guide line marked in gray. The key about curves is to know what each section of the graph represents. The highest point is considered the white point while the lowest point is the dark point. If you move the curve on the white point above the diagonal guide line all your highlights will be brighter, the opposite would happen if you move it below the guide. Simple: when you pull up it introduces brightness, when you pull down it introduces darkness.
In this case I am looking to add light to the darker areas, which are the mountains and the ocean. For this I added a point in the dark zone area and moved it above the guide line; I did the opposite with the bright zone. Add as many points as needed to ensure the brightness and contrast are what you are looking for.
Second Adjustment Layer: RGB
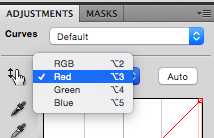


Following the same steps as before add a new curve adjustment layer by going to "Layer" > "New adjustment layer" > "Curves..."
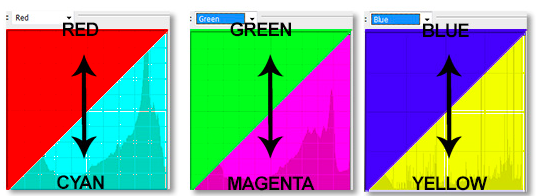
You should now see two curve layers listed on your layers tab. Make sure the second curves layer is selected to start adjusting R (red) G (green) B (blue). Each color has an opposite, for Red its opposite is Cyan, for Green its Magenta and for Blue is Yellow. In the RGB channel if you have Red selected, if you pull up it will add red and if you pull down it will add Cyan. Similarly, with green if you pull the line above the guided line it will add Green while if you pull it down it will add Magenta.
From the adjustments drop down select "Red". Start adding point to your graph. In my example I wanted to add more reds and oranges to my picture to give the illusion of a sunset. I added point in the bright area (where the skies are located) and pulled the point up to add red. In the contrary, I did not want my dark area (trees and mountains) to have a lot of red so I moved the line below the guide line.
From the adjustments drop down I then selected "Green". I wanted to add more green tones to the mountains which are in our darker zone, for this I added points along the dark zone and moved them up the guide line to introduce a soft hint of green.
End Result


Finally, I saved the project both in Photoshop format in case I wanted to make further changes and in .jpg format to be uploaded and shared.