Using an RGB LED to Detect Colours
by fjordcarver in Circuits > Sensors
268156 Views, 289 Favorites, 0 Comments
Using an RGB LED to Detect Colours
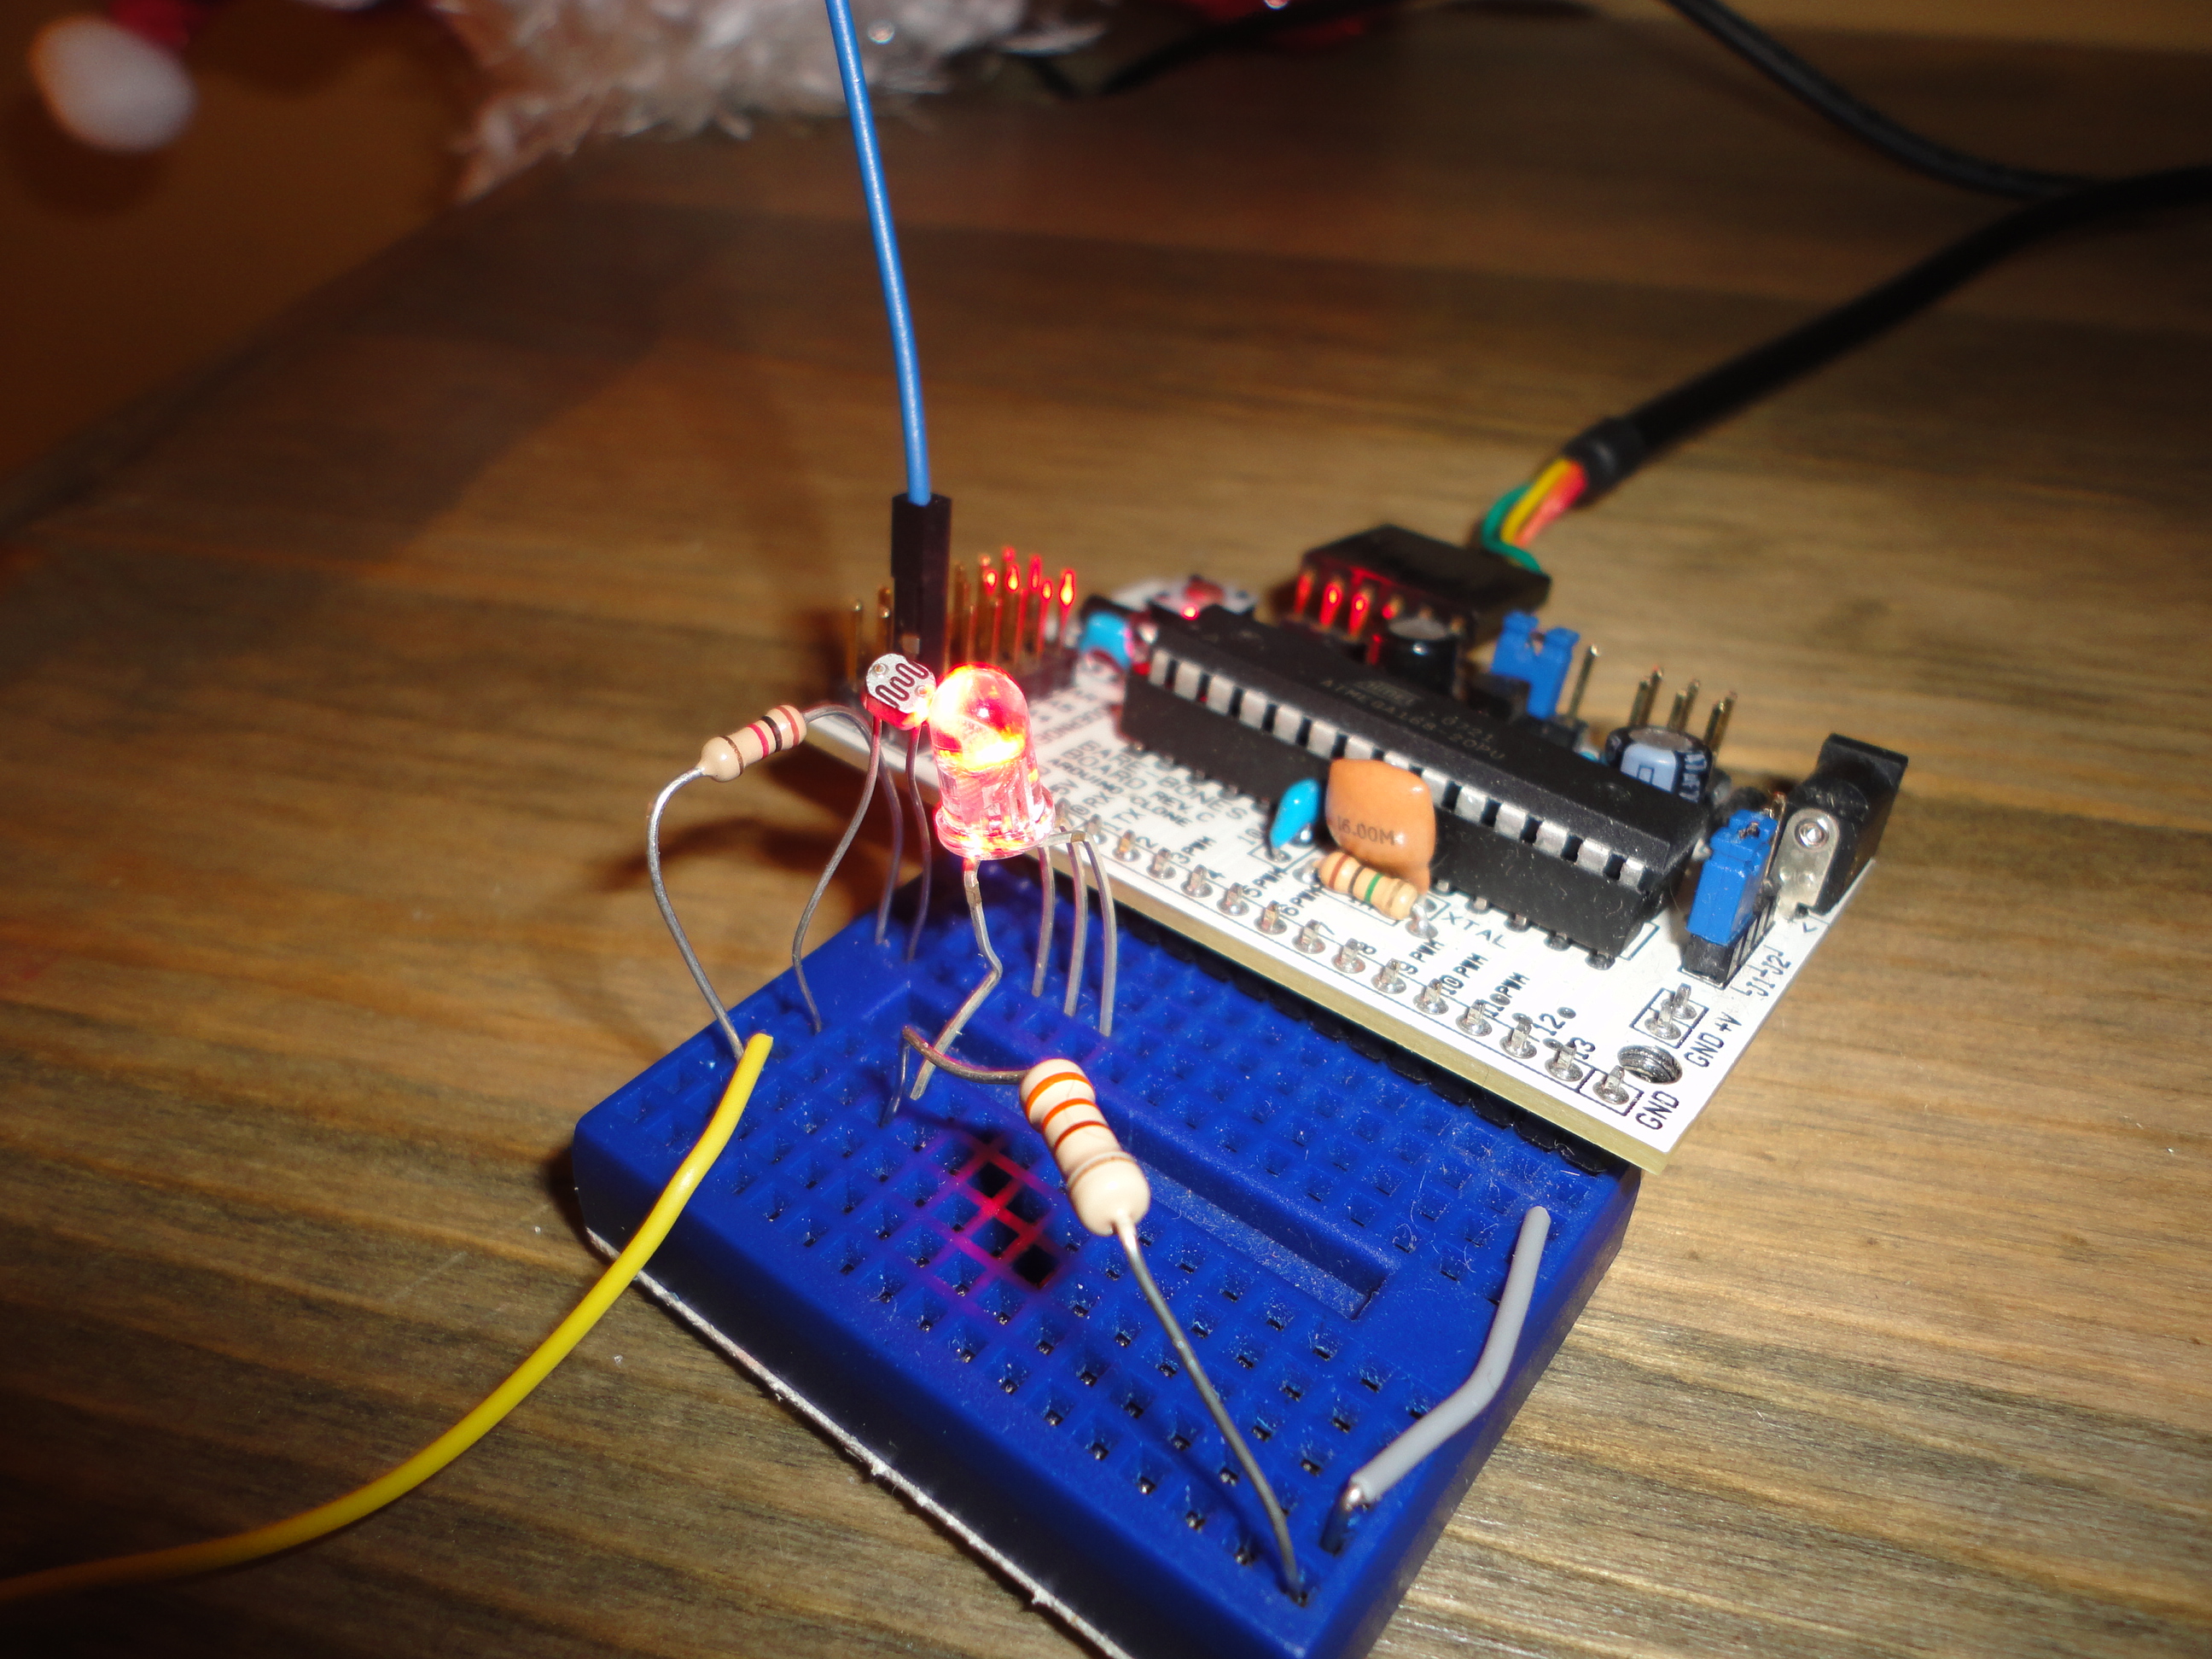
I am going to show you how you can use an RGB LED and a Cds photocell as a colour sensor for a micro-controller. I will illustrate the method to retrieve a colour using Arduino, and I will show you a how you can verify the colour being scanned with a small Processing sketch.
We will be making this colour sensor on a breadboard, but it is easily transferred onto a prototyping board, and for those who fab their own boards, this would be an awesome kit that is super cheap to throw together. I am sure it would only take about two minutes to write a gerber file for this circuit and make a nice little finished sensor.
We will be making this colour sensor on a breadboard, but it is easily transferred onto a prototyping board, and for those who fab their own boards, this would be an awesome kit that is super cheap to throw together. I am sure it would only take about two minutes to write a gerber file for this circuit and make a nice little finished sensor.
Gather Some Parts
For this sensor you will need
Tools you will need
- a breadboard (not required, but it is how I will walk you through it.)
- an RGB LED (alternatively you could use 3 LEDs)
- A 220 ohm resistor
- A CdS photocell (these can be salvaged out of all kinds of things like nightlights or garden lamps)
- An Arduino, or a clone. I am using a RBB in this example
Tools you will need
- A computer
- a cable to upload to your Arduino
A Little Theory
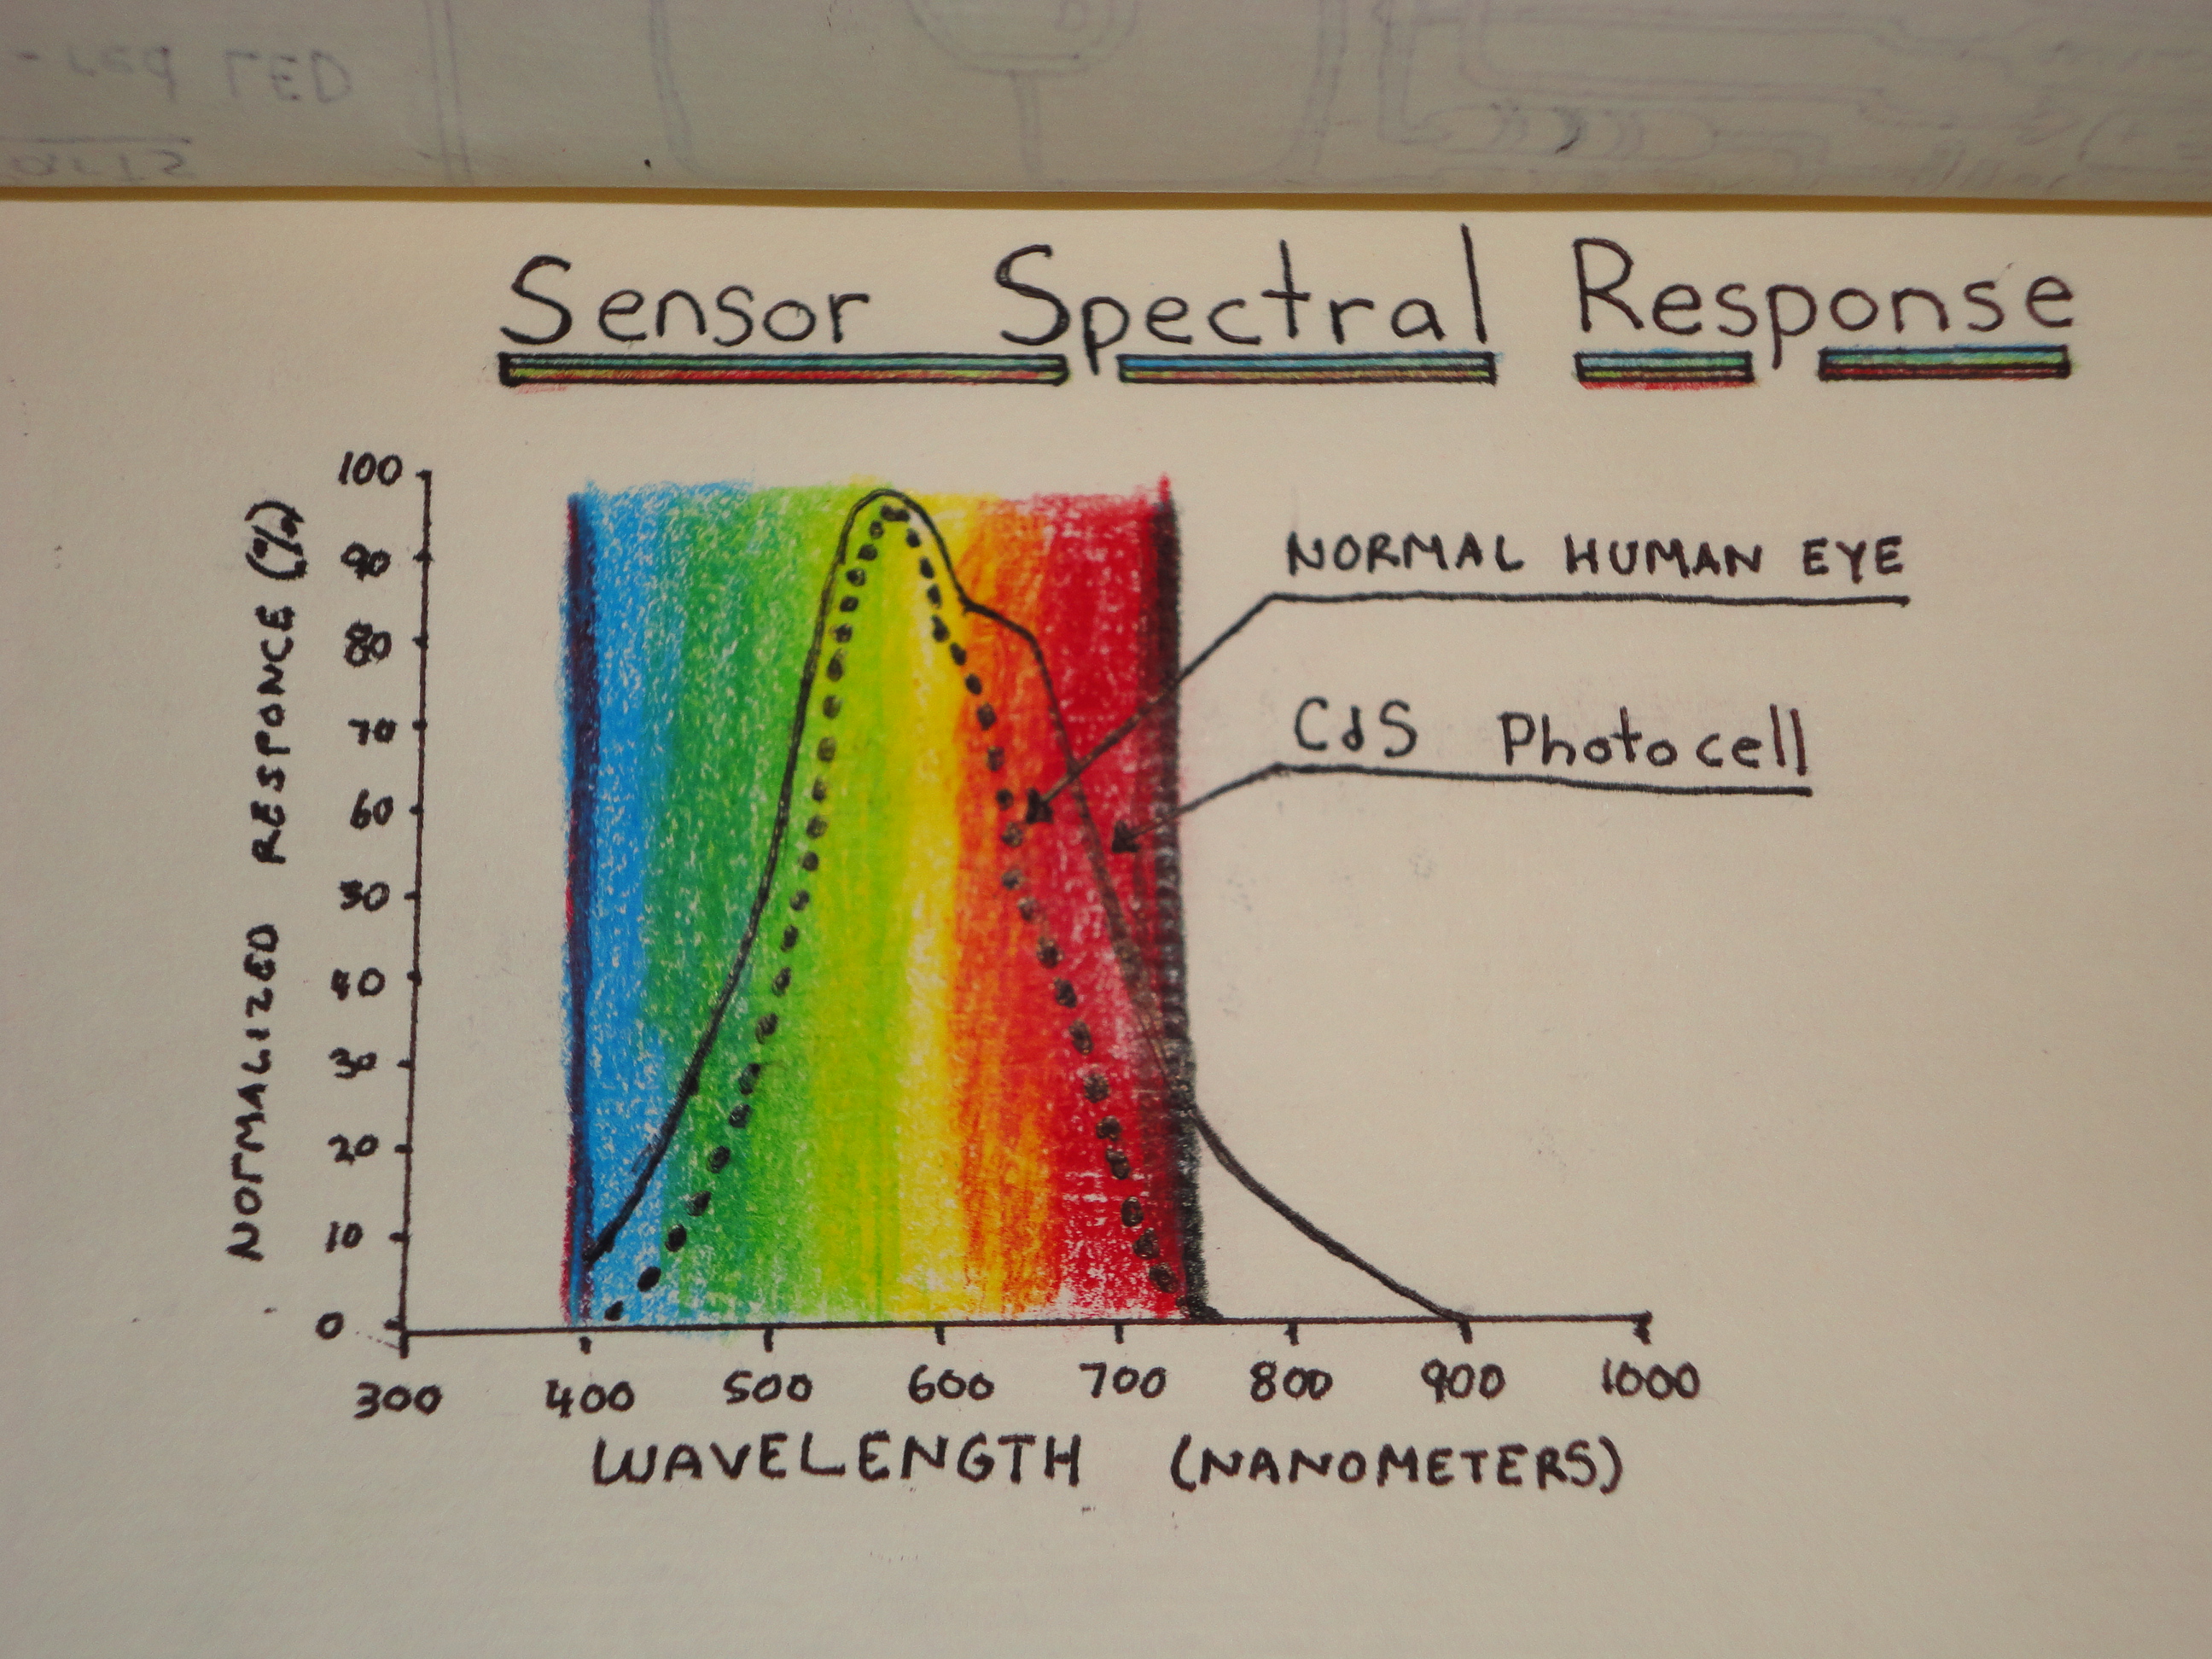
Some of you might be wondering how a CdS photocell can detect colours. Well it is surprisingly simple and provides pretty accurate results.
We see colour as a frequency of light reflected from an object. So different colours reflect different wavelengths which our eyes then interpret as colours. (Maybe brain...I am no scientist)
A common CdS photocell has a very similar response to colour as the human eye.
Because colours absorb certain wavelengths and reflect certain wavelengths, we can use different wavelengths(colours) of light and take readings(from a sensor that has nearly human responses) and thereby make a pretty good guess at what colour the sensor is being exposed to.
Build the Circuit
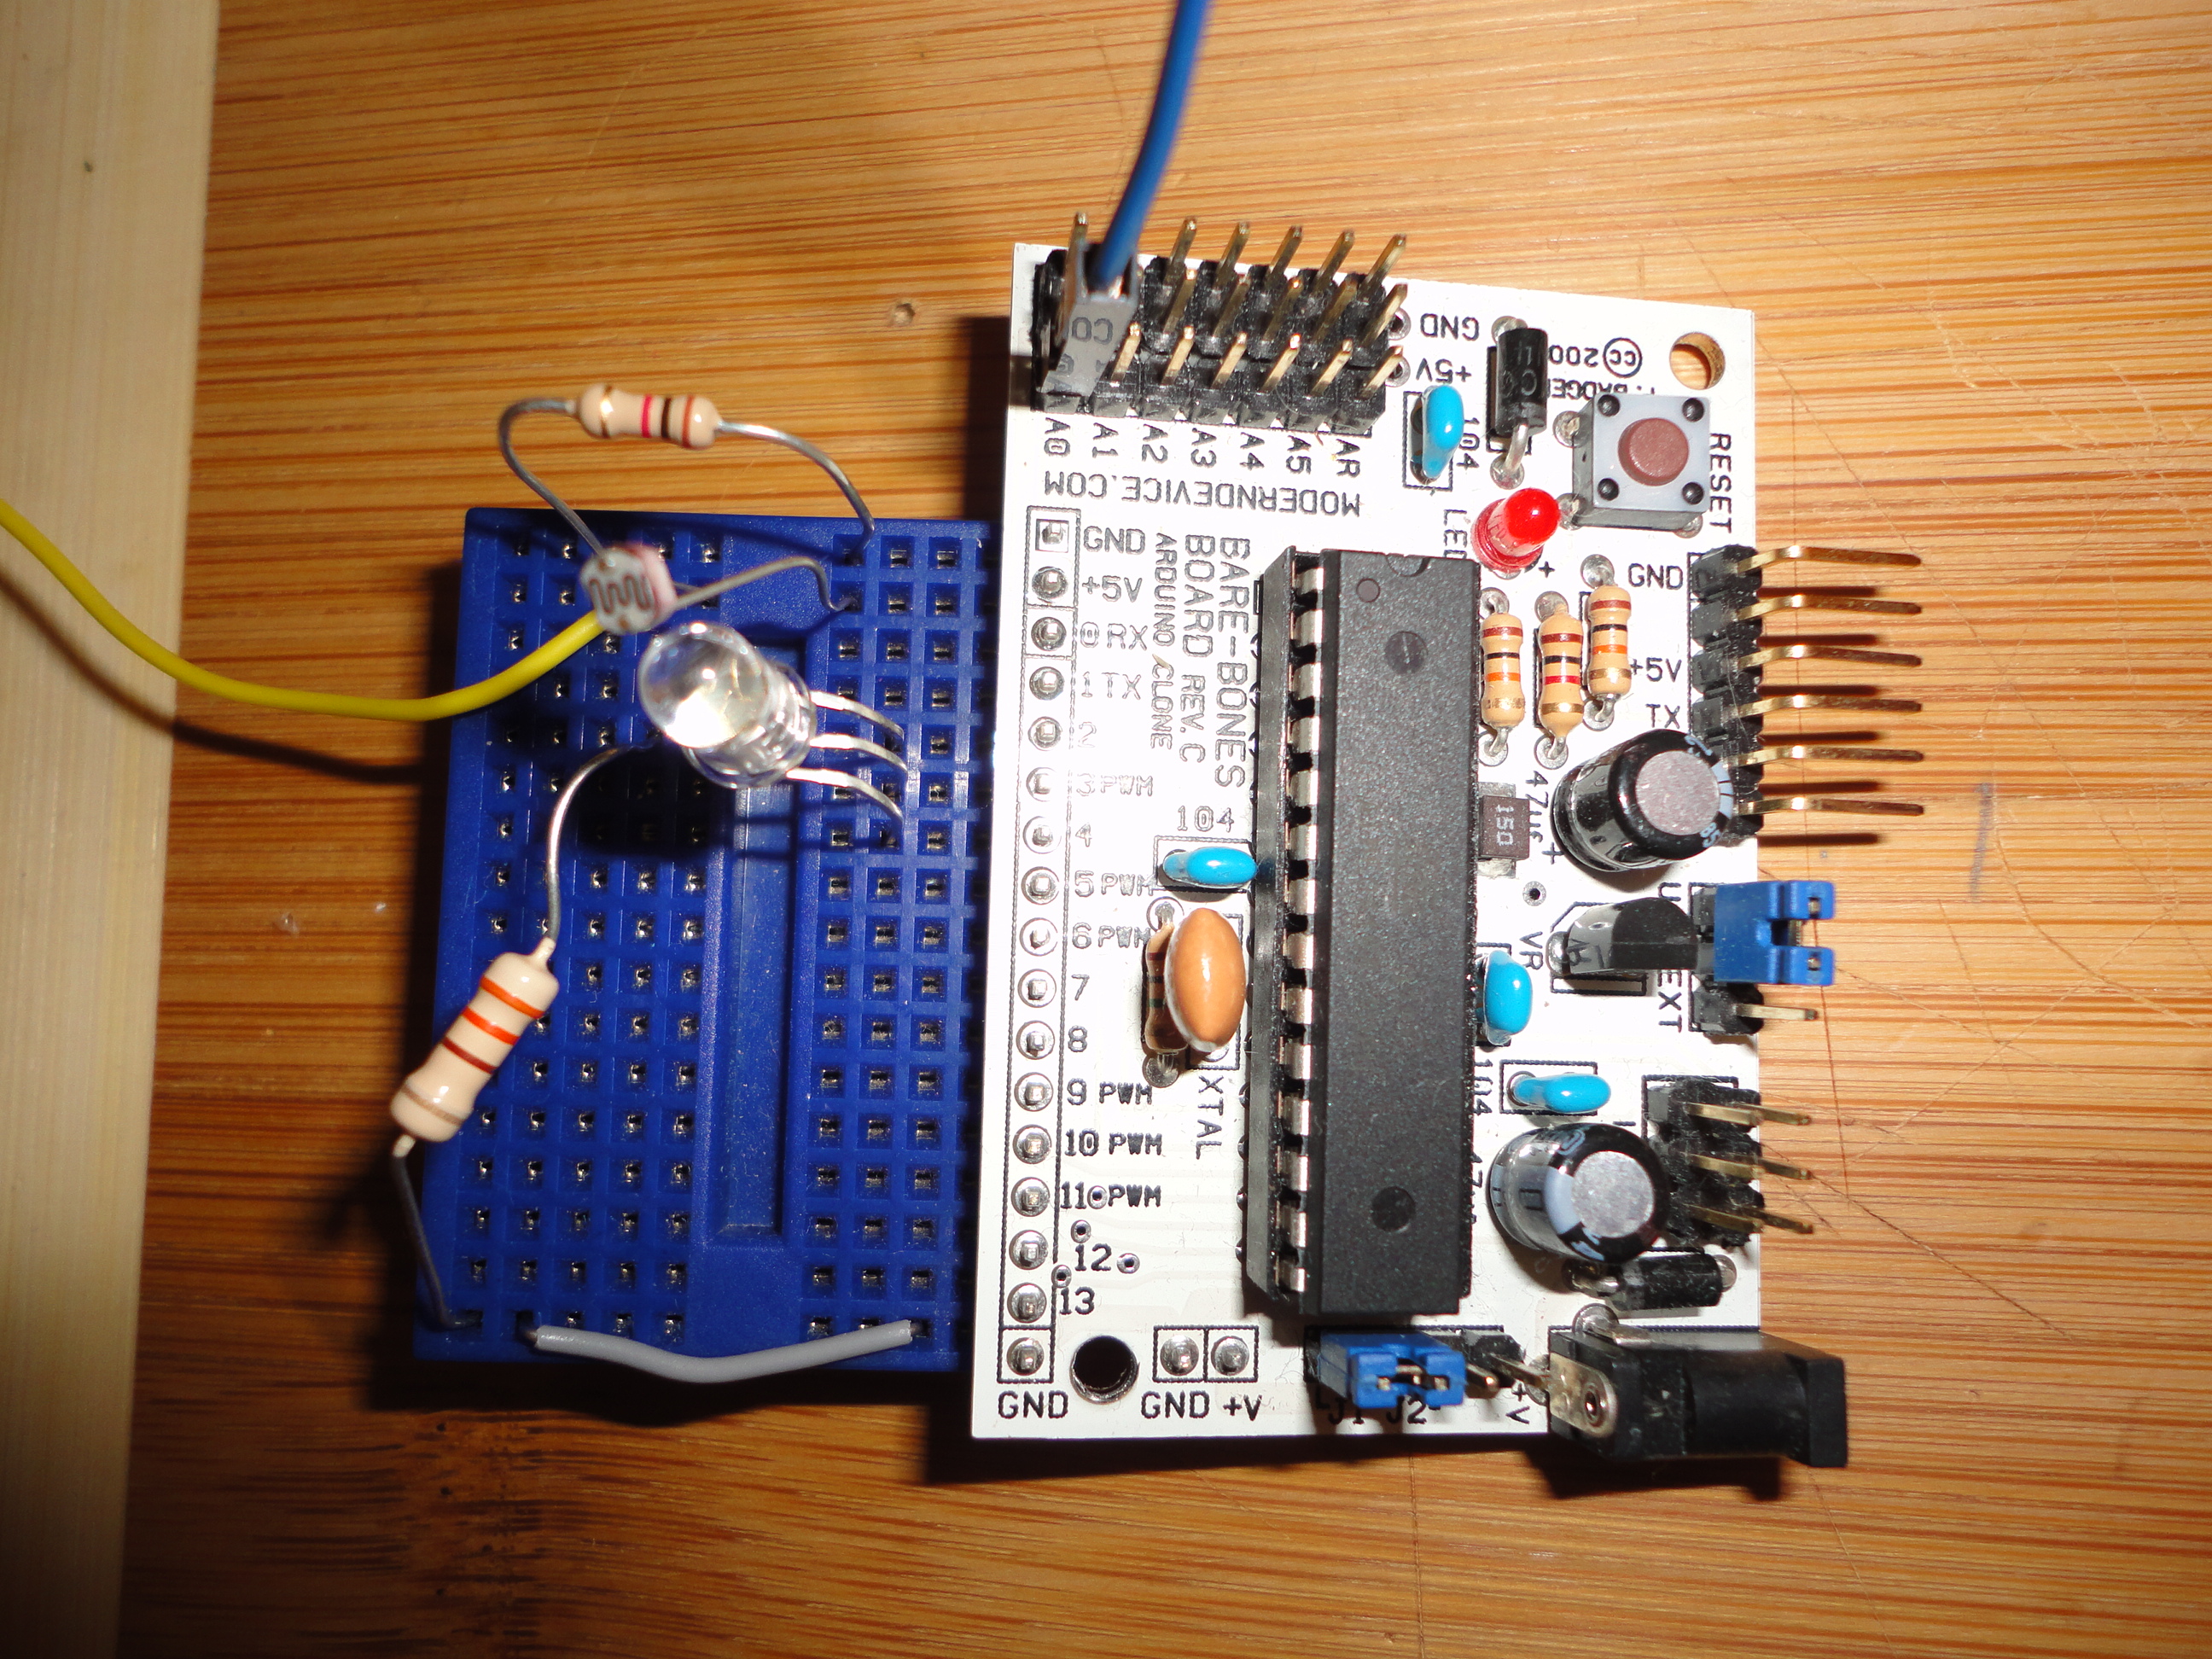
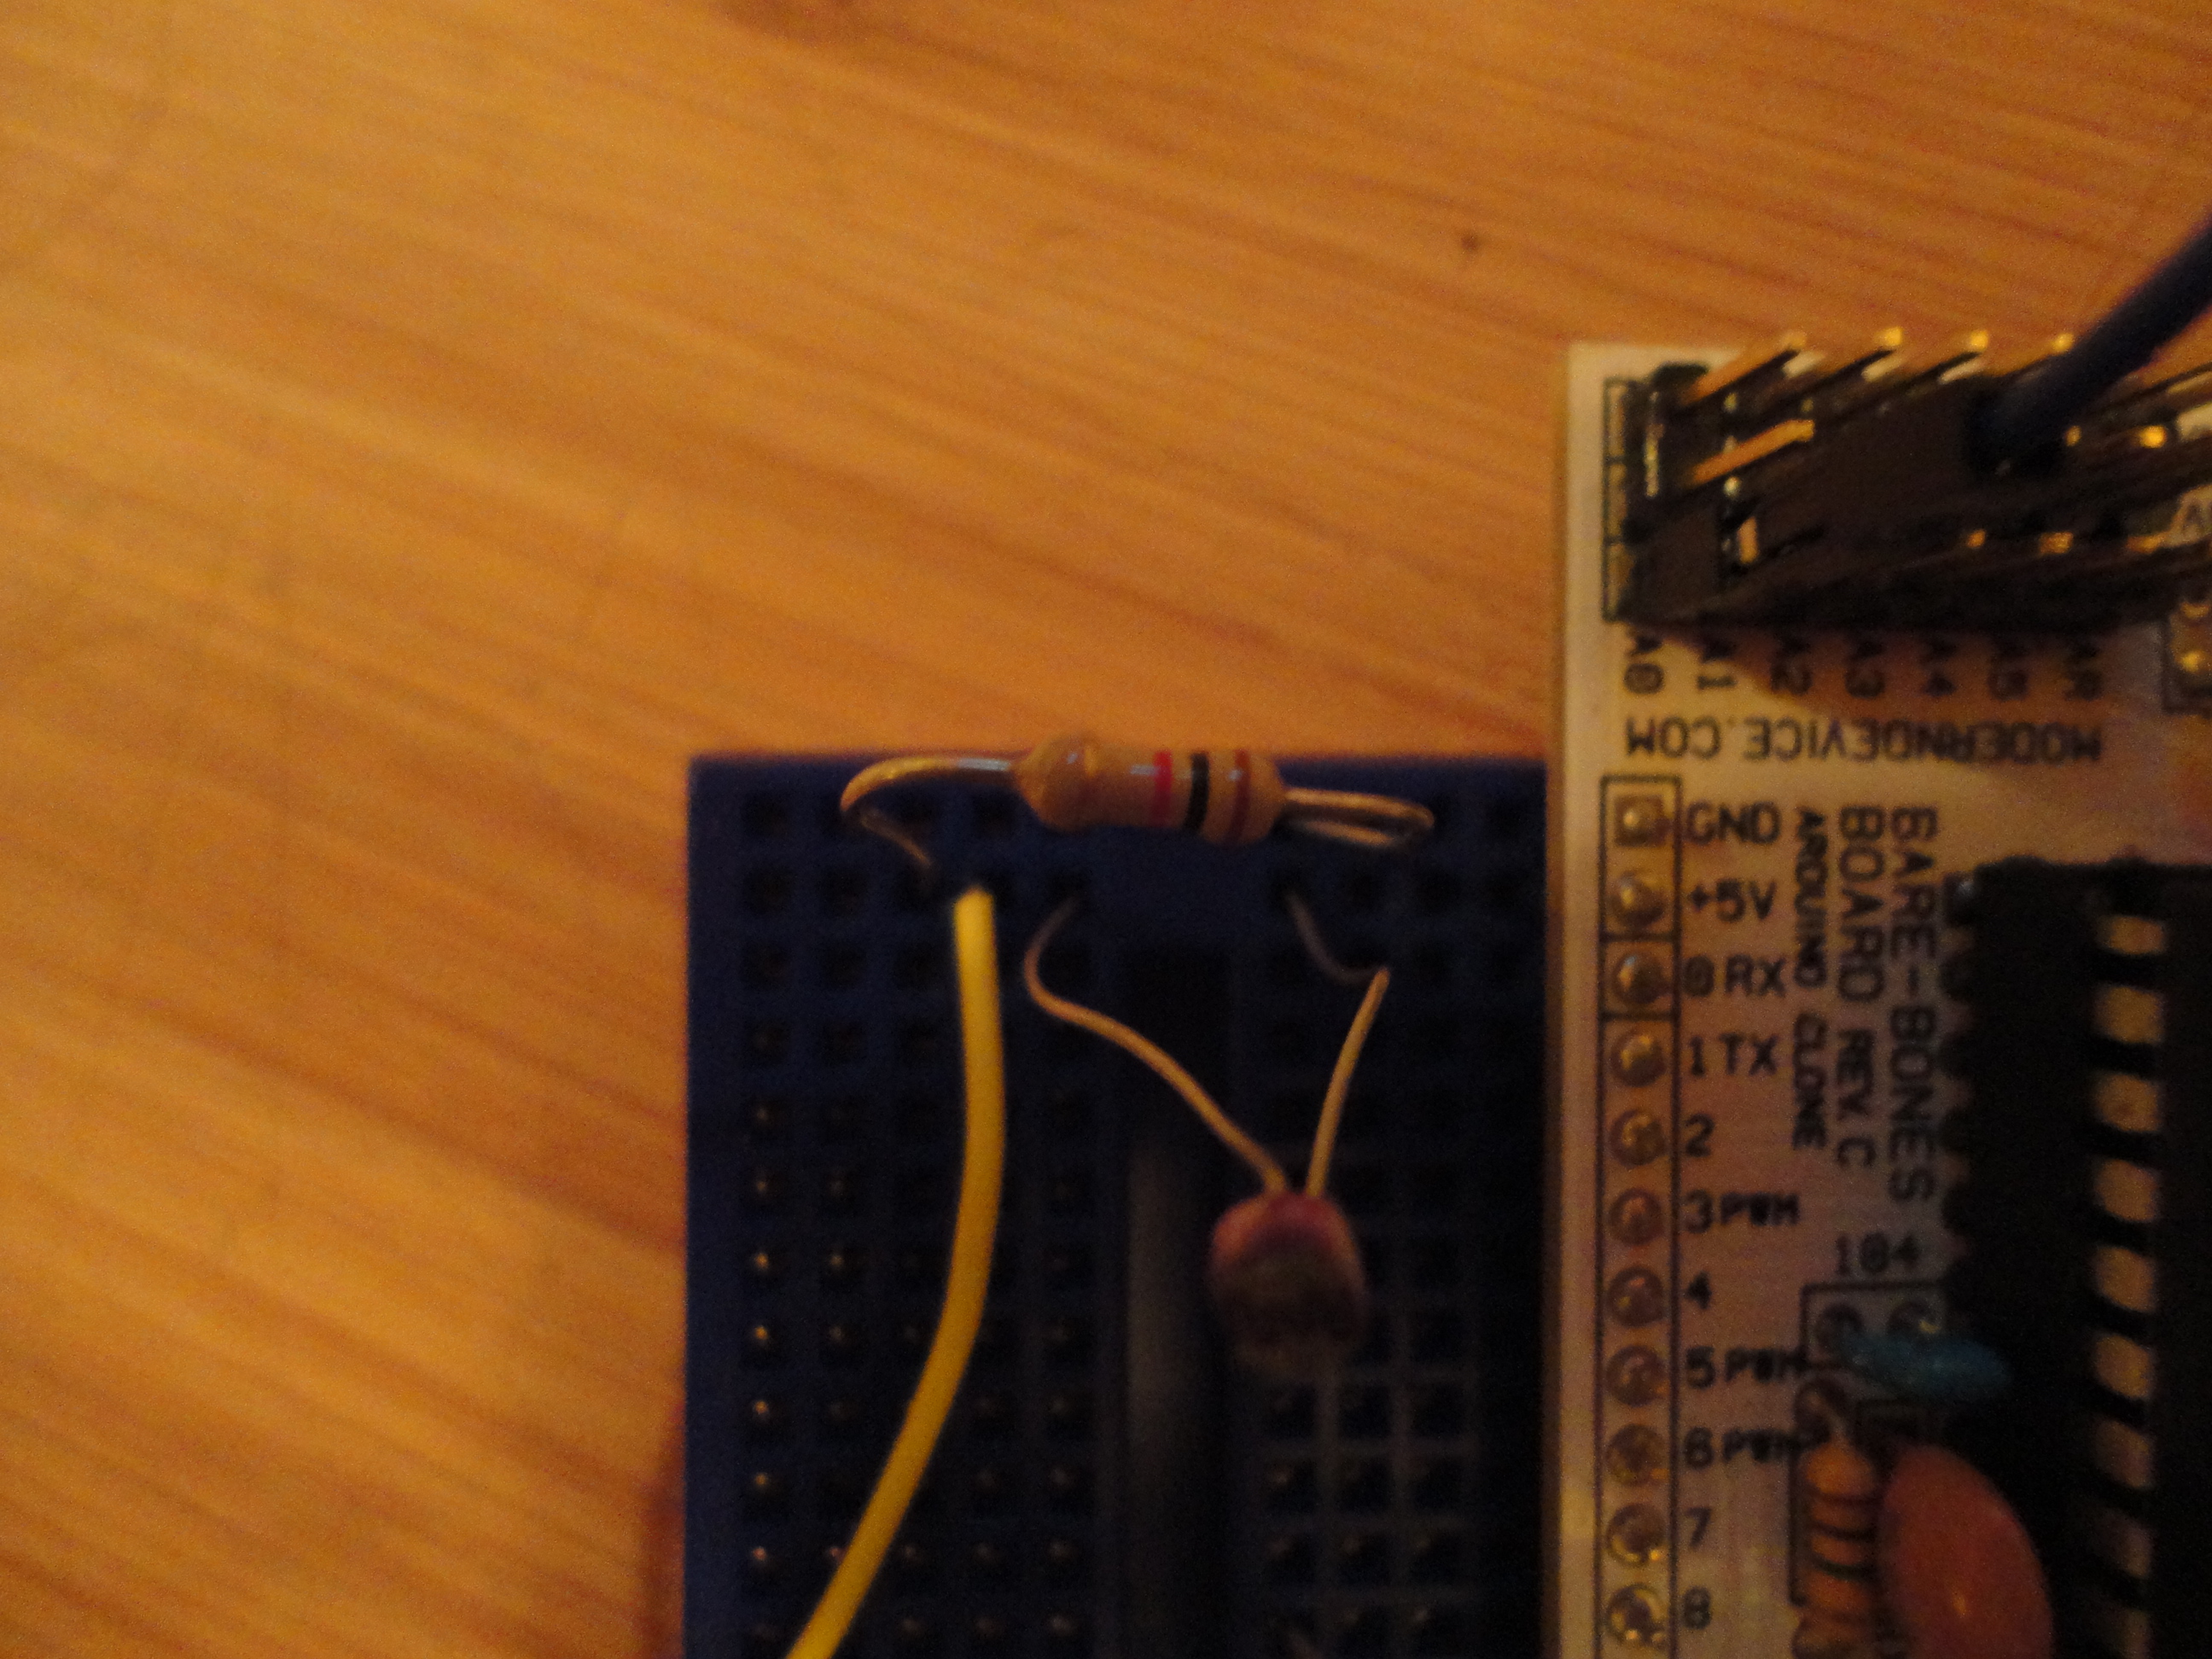
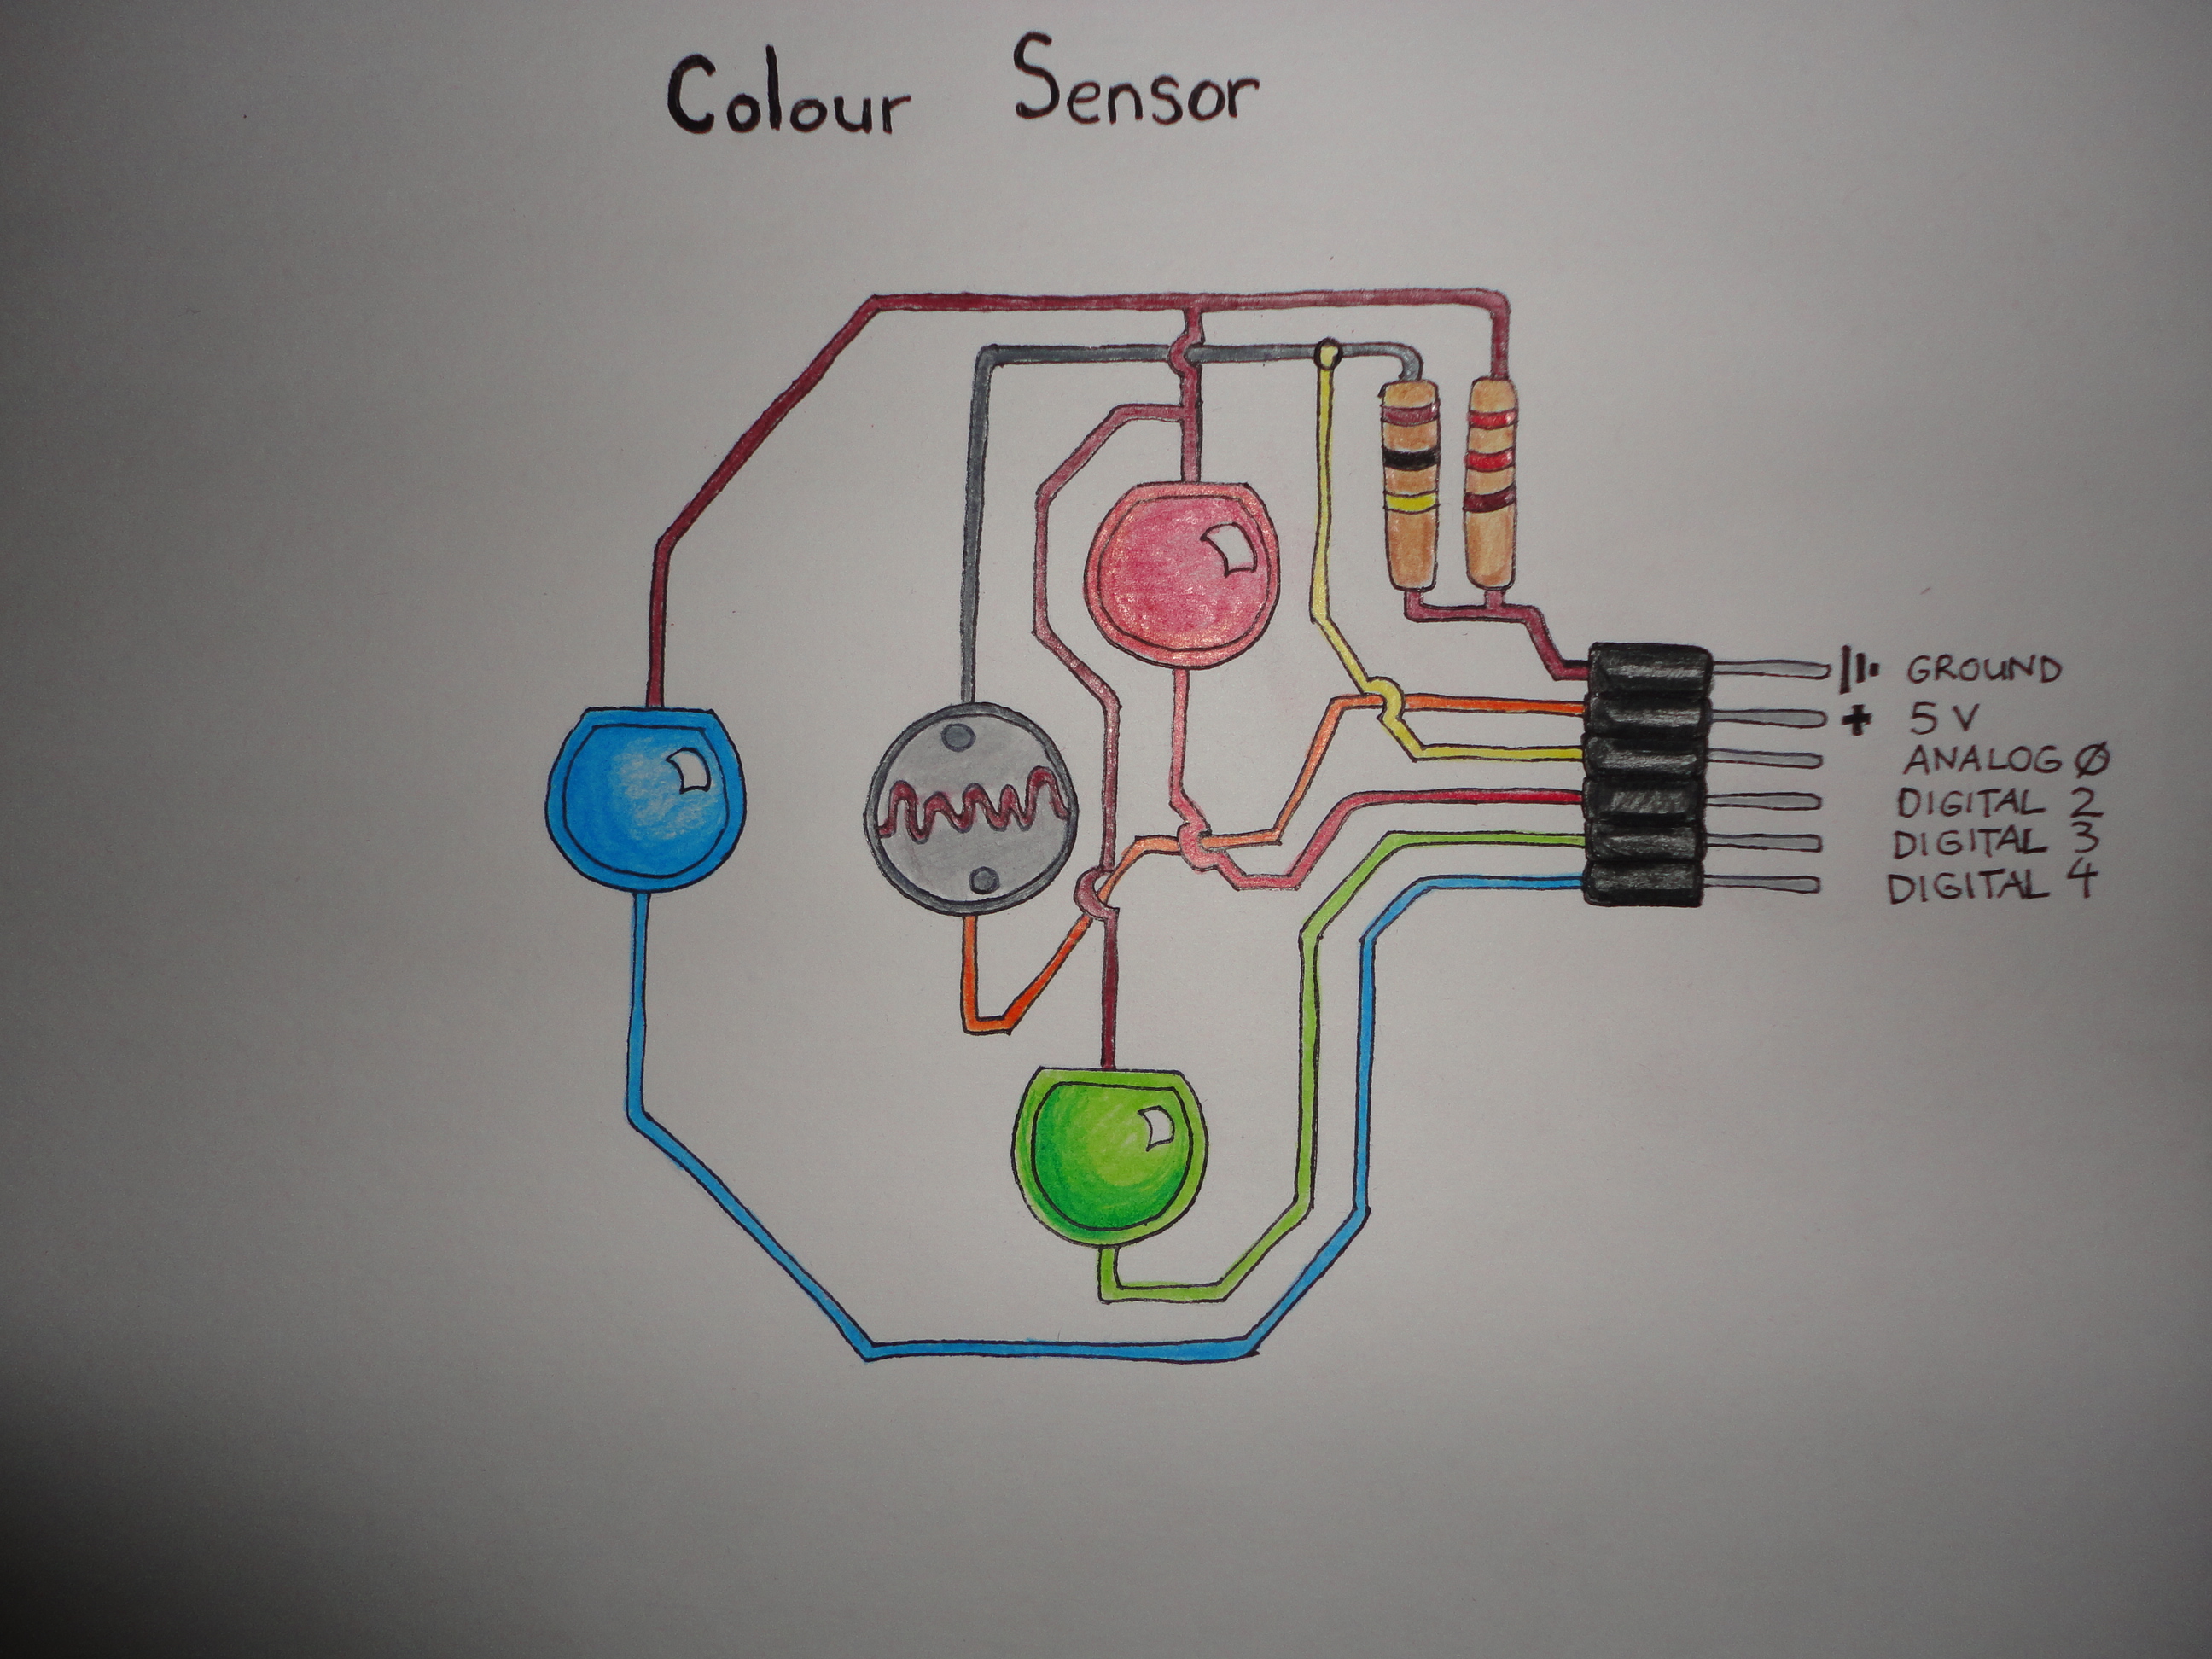
I have included both images of the breadboard arrangment, and a small diagram to show you how to wire up the sensor to the Arduino.
The circuit is really simple. First we will look at the RGB LED half of the sensor. It is simply a common cathode RGB LED connected to pins 2,3, and 4 of the Arduino with a 220 ohm resistor going out to ground. This will allow us to turn each of the LEDs within the package on and off individually when we need to.
On the other side of the circuit we have a Cds photocell being fed 5 volts from the arduino. combined with the resistor going out to ground this effectively creates a voltage divider which allows us to read a changing analog value on analog pin 0.
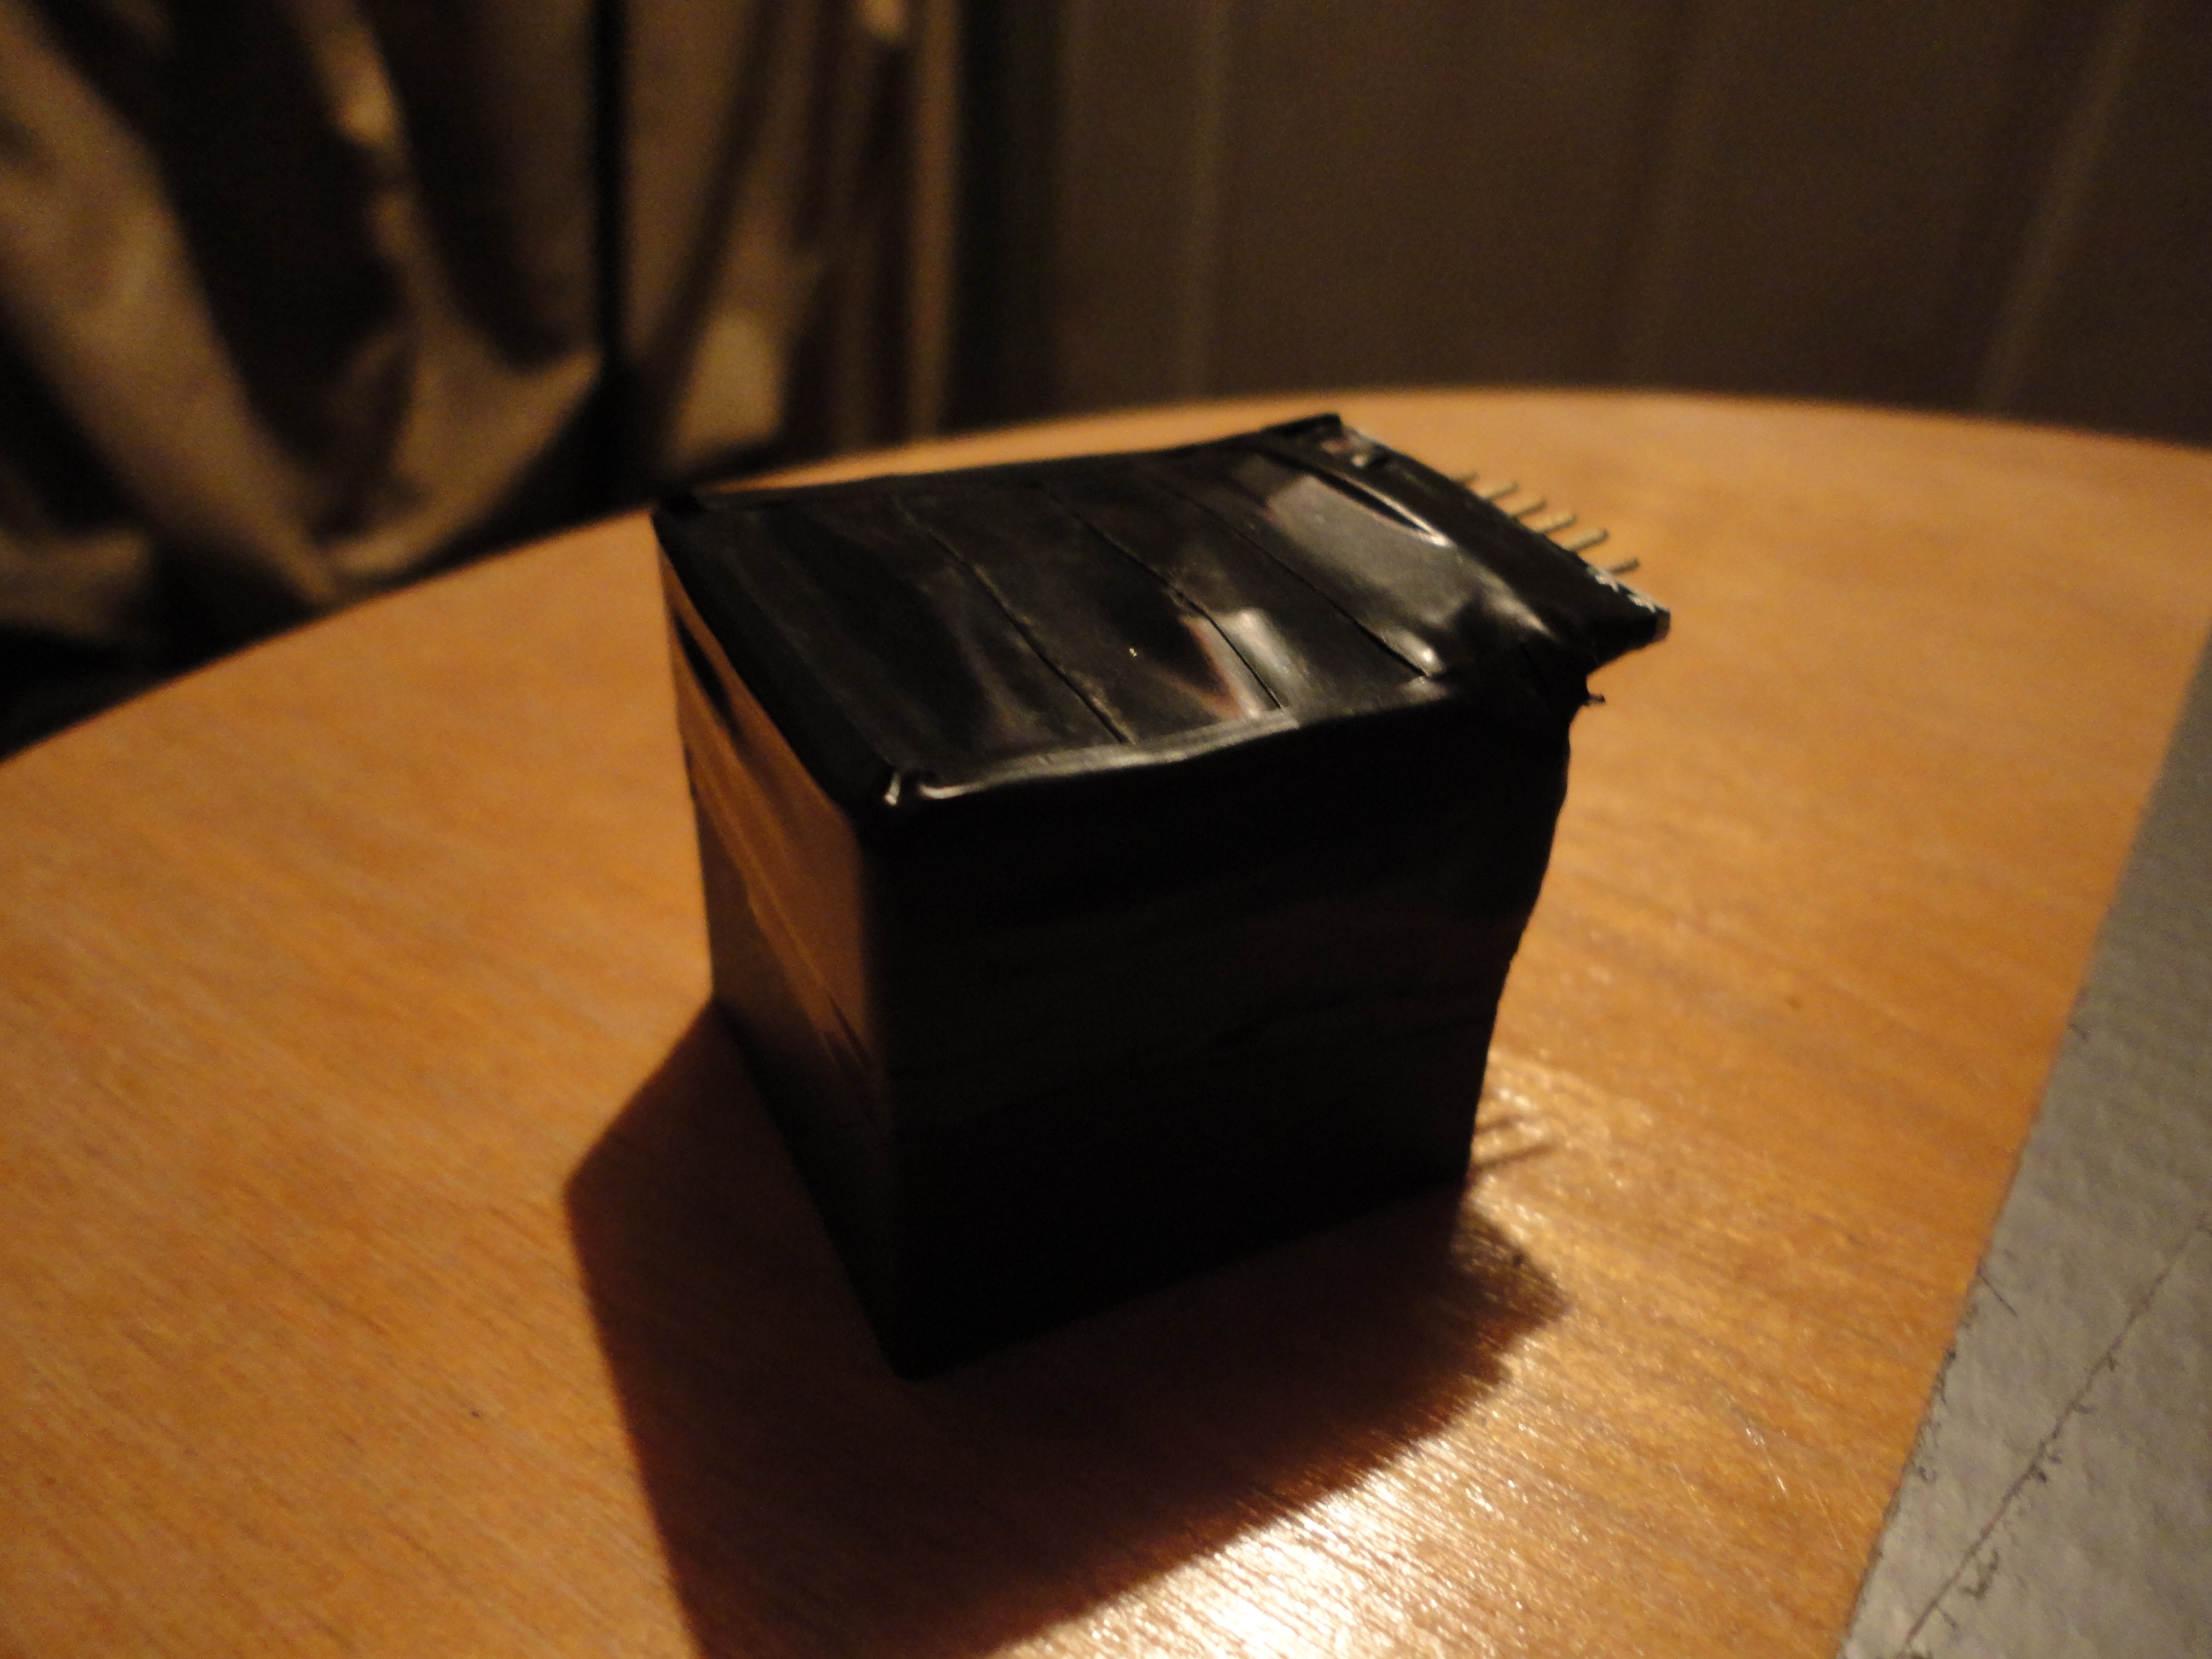
This sensor works great on a breadboard, but it works even better if you put it into a more permanent enclosure to minimilize ambient light interference. The photo of the light tight (ish) enclosure was used in another one of my projects and is included here only to illustrate what I meant. (Feel free to check it out though, here.)
Code the Arduino
Open up the Arduino environment, and create a new sketch by clicking File - New. For those that don`t want to follow along, I have included the code as a text file. Copy/Paste it into a new sketch in Arduino, and you are good to go.
Declarations
The beginning of a sketch is where we make our declarations, so type the following code into the environment window.
void loop(){
checkBalance();
checkColour();
printColour();
}
Declarations
The beginning of a sketch is where we make our declarations, so type the following code into the environment window.
// Define colour sensor LED pins
int ledArray[] = {2,3,4};
// boolean to know if the balance has been set
boolean balanceSet = false;
//place holders for colour detected
int red = 0;
int green = 0;
int blue = 0;
//floats to hold colour arrays
float colourArray[] = {0,0,0};
float whiteArray[] = {0,0,0};
float blackArray[] = {0,0,0};
//place holder for average
int avgRead;
'//' is reserved for denoted comments, therefore you do not need the text on lines that begin with '//' for the sketch to work.
The rest of it are some names that we are giving to some placeholders, and the declarations for what kind of data they will contain.
As you can see, we start by setting up an array to hold the pin numbers. These correspond to the pins that the different colour LEDs are conected to on the Arduino.
Next we declare a Boolean value to check whether or not balancing has been performed. A Boolean value is something that returns true or false.
We go on to create some place holders for the colour values, and some arrays to use for holding the scan data and balancing the detected colour.
Although we are not finished yet, go ahead and save your sketch. Give it a name that is meaningful to you, something like coloursensor.pde maybe.
Setup
The next step in creating an Arduino sketch is to write the setup function. Setup is run when the Arduino first boots up, so this is where we tell the Arduino what how we want to use the pins and setup other features that we may need such as serial communication.
Type the following below the code that you just entered.
void setup(){
//setup the outputs for the colour sensor
pinMode(2,OUTPUT);
pinMode(3,OUTPUT);
pinMode(4,OUTPUT);
//begin serial communication
Serial.begin(9600);
}
//setup the outputs for the colour sensor
pinMode(2,OUTPUT);
pinMode(3,OUTPUT);
pinMode(4,OUTPUT);
//begin serial communication
Serial.begin(9600);
}
Not much to this section. Here we are just telling the Arduino that we intend on using pins 2,3,and 4 as outputs. This is neccesary if we want to light our LEDs...and we do, if only very briefly.
The next part is to tell the Arduino that we intend to make use of the serial port, and that it should be opened and ready to communicate at the baud rate specified (in brackets).
Loop
The loop function is typically where the magic happens in an Arduino. It is the code that is run over and over again once the Arduino is booted and setup has been passed through. Put the next bit of code under your setup function.
void loop(){
checkBalance();
checkColour();
printColour();
}
Okay at first glance it looks like there really is not much there. But these are each calls to private functions. For some projects I find this type of approach works well. It makes it easier to read (I think) as each block of code is seperated with a meaningful name, and we can see what the sketch is going to do at a glance.
First it will check the balance, then it will check the colour, and then it will print the colour to the serial port so we can see the values that it read.
Let`s explore the first private function, checkBalance, and add it to our code. Type the following below your loop function.
First it will check the balance, then it will check the colour, and then it will print the colour to the serial port so we can see the values that it read.
Let`s explore the first private function, checkBalance, and add it to our code. Type the following below your loop function.
void checkBalance(){
//check if the balance has been set, if not, set it
if(balanceSet == false){
setBalance();
}
}
//check if the balance has been set, if not, set it
if(balanceSet == false){
setBalance();
}
}
As you can see, if the balanceSet value (a boolean value) is set to false, then it makes a call to a secondary function called setBalance, where we set the white and black balancing readings. This will only happen when you boot up the arduino the one time.
void setBalance(){
//set white balance
delay(5000); //delay for five seconds, this gives us time to get a white sample in front of our sensor
//scan the white sample.
//go through each light, get a reading, set the base reading for each colour red, green, and blue to the white array
for(int i = 0;i<=2;i++){
digitalWrite(ledArray[i],HIGH);
delay(100);
getReading(5); //number is the number of scans to take for average, this whole function is redundant, one reading works just as well.
whiteArray[i] = avgRead;
digitalWrite(ledArray[i],LOW);
delay(100);
}
//done scanning white, now it will pulse blue to tell you that it is time for the black (or grey) sample.
//set black balance
delay(5000); //wait for five seconds so we can position our black sample
//go ahead and scan, sets the colour values for red, green, and blue when exposed to black
for(int i = 0;i<=2;i++){
digitalWrite(ledArray[i],HIGH);
delay(100);
getReading(5);
blackArray[i] = avgRead;
//blackArray[i] = analogRead(2);
digitalWrite(ledArray[i],LOW);
delay(100);
}
//set boolean value so we know that balance is set
balanceSet = true;
delay(5000); //delay another 5 seconds to let us catch up
}
If you noticed, we made yet another call to a function getReading. We will add that right after we put in the checkColour function.
Once our balancing numbers have been set, we go on to finally read the colour. The function is basically the same as setBalance,, with the addition of the math that balances the reading. Let`s add it now.
Once our balancing numbers have been set, we go on to finally read the colour. The function is basically the same as setBalance,, with the addition of the math that balances the reading. Let`s add it now.
void checkColour(){
for(int i = 0;i<=2;i++){
digitalWrite(ledArray[i],HIGH); //turn or the LED, red, green or blue depending which iteration
delay(100); //delay to allow CdS to stabalize, they are slow
getReading(5); //take a reading however many times
colourArray[i] = avgRead; //set the current colour in the array to the average reading
float greyDiff = whiteArray[i] - blackArray[i]; //the highest possible return minus the lowest returns the area for values in between
colourArray[i] = (colourArray[i] - blackArray[i])/(greyDiff)*255; //the reading returned minus the lowest value divided by the possible range multiplied by 255 will give us a value roughly between 0-255 representing the value for the current reflectivity(for the colour it is exposed to) of what is being scanned
digitalWrite(ledArray[i],LOW); //turn off the current LED
delay(100);
}
}
We will also need to add our function getReading, otherwise our sketch won`t have real values. This function just allows us to take a few readings and average them out. This allows for a slightly smoother reading.
void getReading(int times){
int reading;
int tally=0;
//take the reading however many times was requested and add them up
for(int i = 0;i < times;i++){
reading = analogRead(0);
tally = reading + tally;
delay(10);
}
//calculate the average and set it
avgRead = (tally)/times;
}
int reading;
int tally=0;
//take the reading however many times was requested and add them up
for(int i = 0;i < times;i++){
reading = analogRead(0);
tally = reading + tally;
delay(10);
}
//calculate the average and set it
avgRead = (tally)/times;
}
Now we have a colour read into our colour holding array, all we need to do now is output it to the screen. Remember that we setup serial communication back in the setup function, all we have to do now is use the serial port to send out our data. The Arduino environment includes a serial monitor, which will allow you to see the data as it is passed from the Arduino. So let`s add the last function to the sketch.
//prints the colour in the colour array, in the next step, we will send this to processing to see how good the sensor works.
void printColour(){
Serial.print("R = ");
Serial.println(int(colourArray[0]));
Serial.print("G = ");
Serial.println(int(colourArray[1]));
Serial.print("B = ");
Serial.println(int(colourArray[2]));
//delay(2000);
}
void printColour(){
Serial.print("R = ");
Serial.println(int(colourArray[0]));
Serial.print("G = ");
Serial.println(int(colourArray[1]));
Serial.print("B = ");
Serial.println(int(colourArray[2]));
//delay(2000);
}
This will print out some data that looks something like this
R = 231
G = 71
B = 0
G = 71
B = 0
which would be the equivilent to a red-orange colour.
I have left this sketch super simple. You can dress it up as you see fit. The idea is to show how to make and use the sensor, creative implementation is up to you.
Now you can save your file again and upload it to the Arduino. Your Arduino should start running the sketch, the little lights should be flickering.
The sketch is very basic. I have offered it as a building block and to show you how to use the sensor.
Now you can save your file again and upload it to the Arduino. Your Arduino should start running the sketch, the little lights should be flickering.
The sketch is very basic. I have offered it as a building block and to show you how to use the sensor.
Downloads
Balancing the Sensor
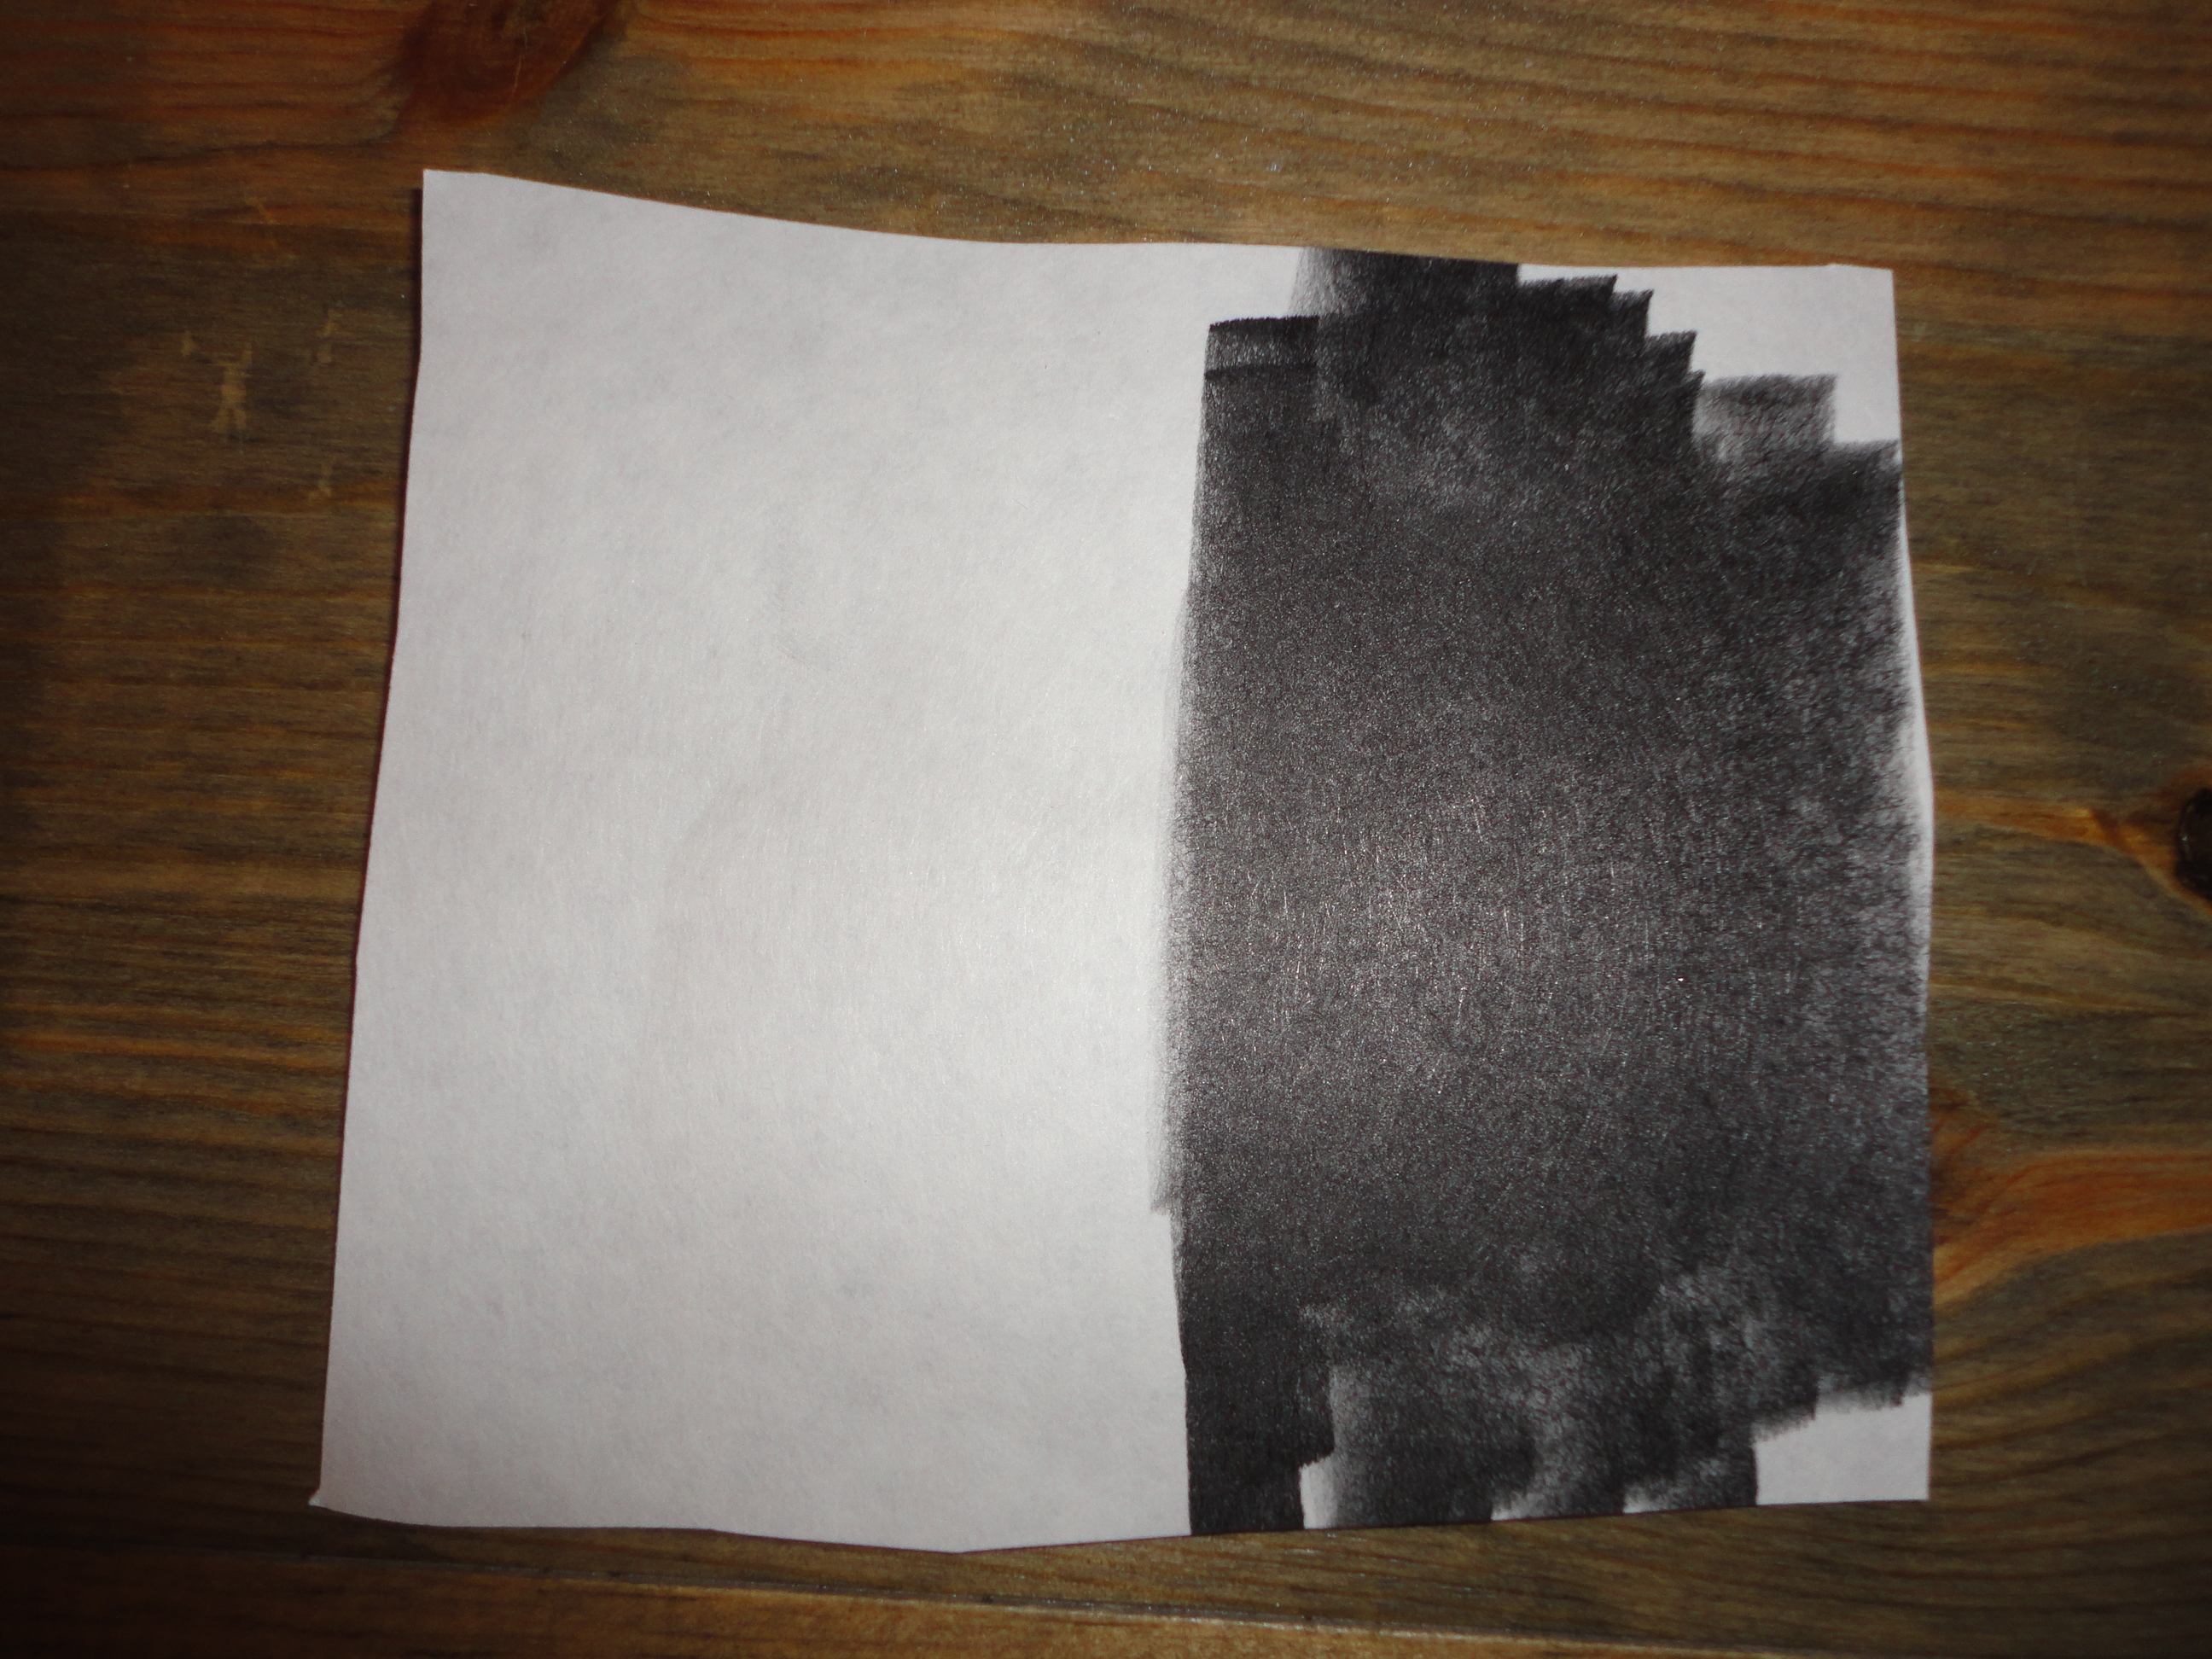
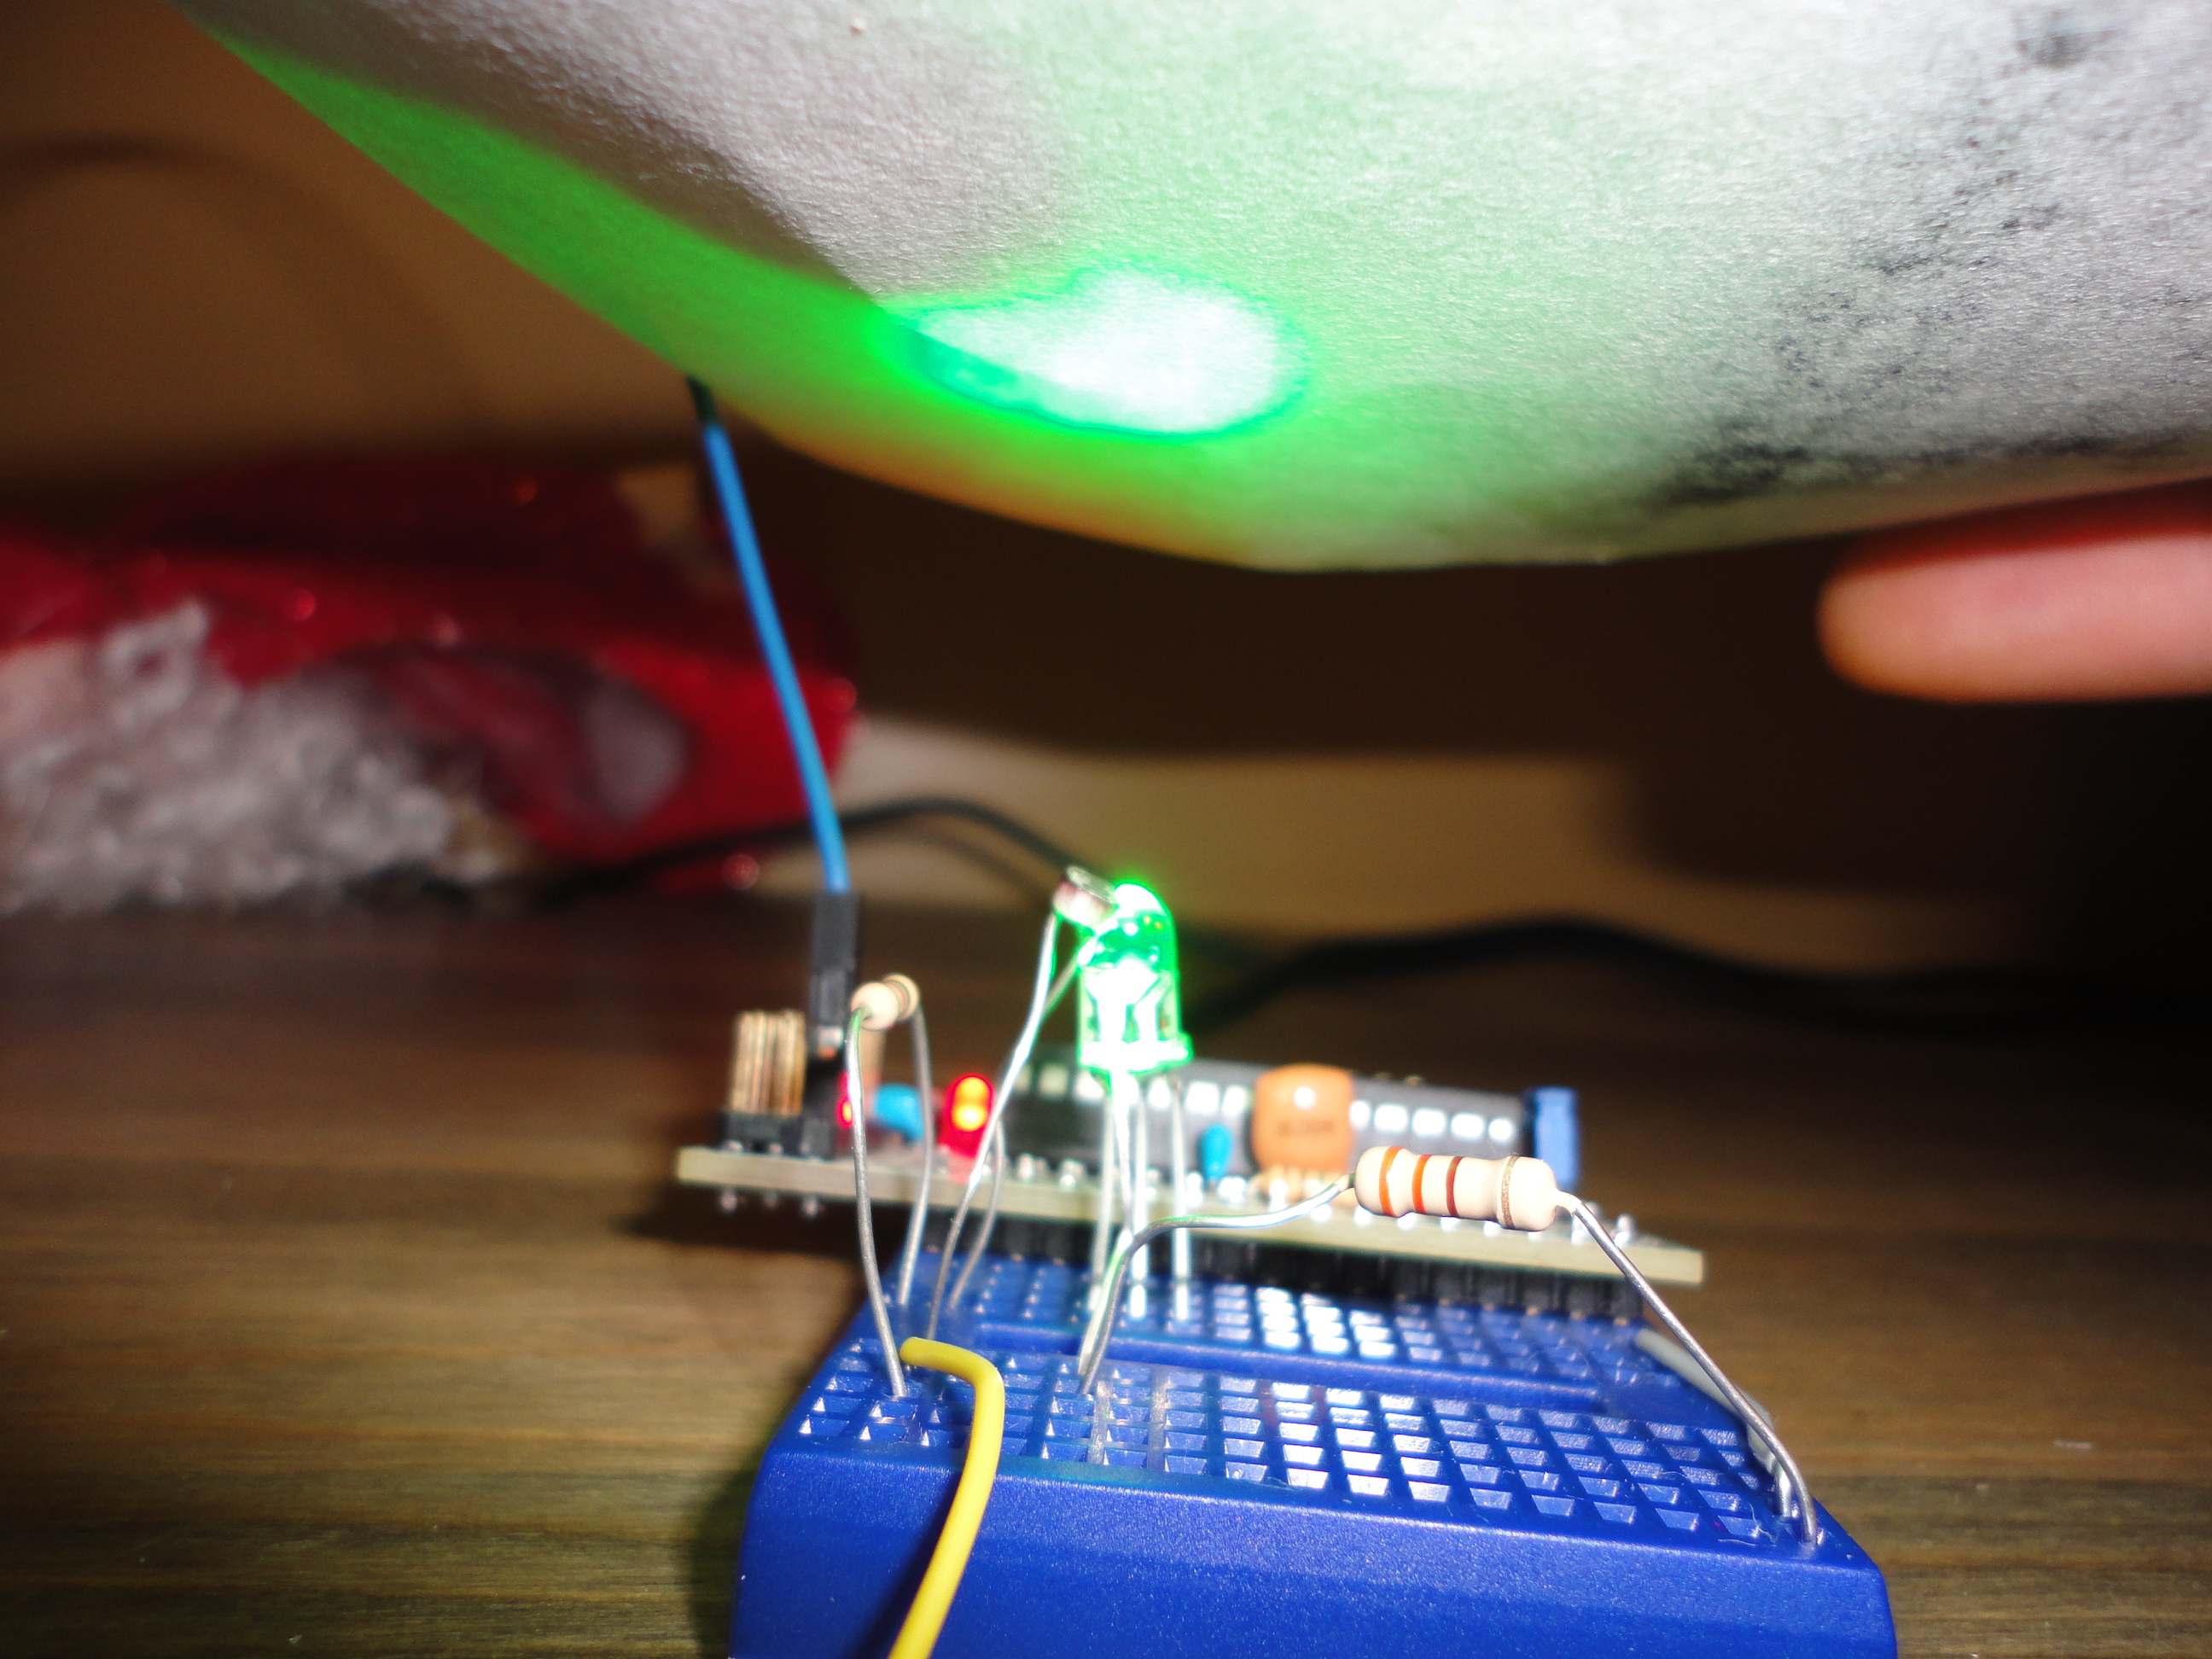
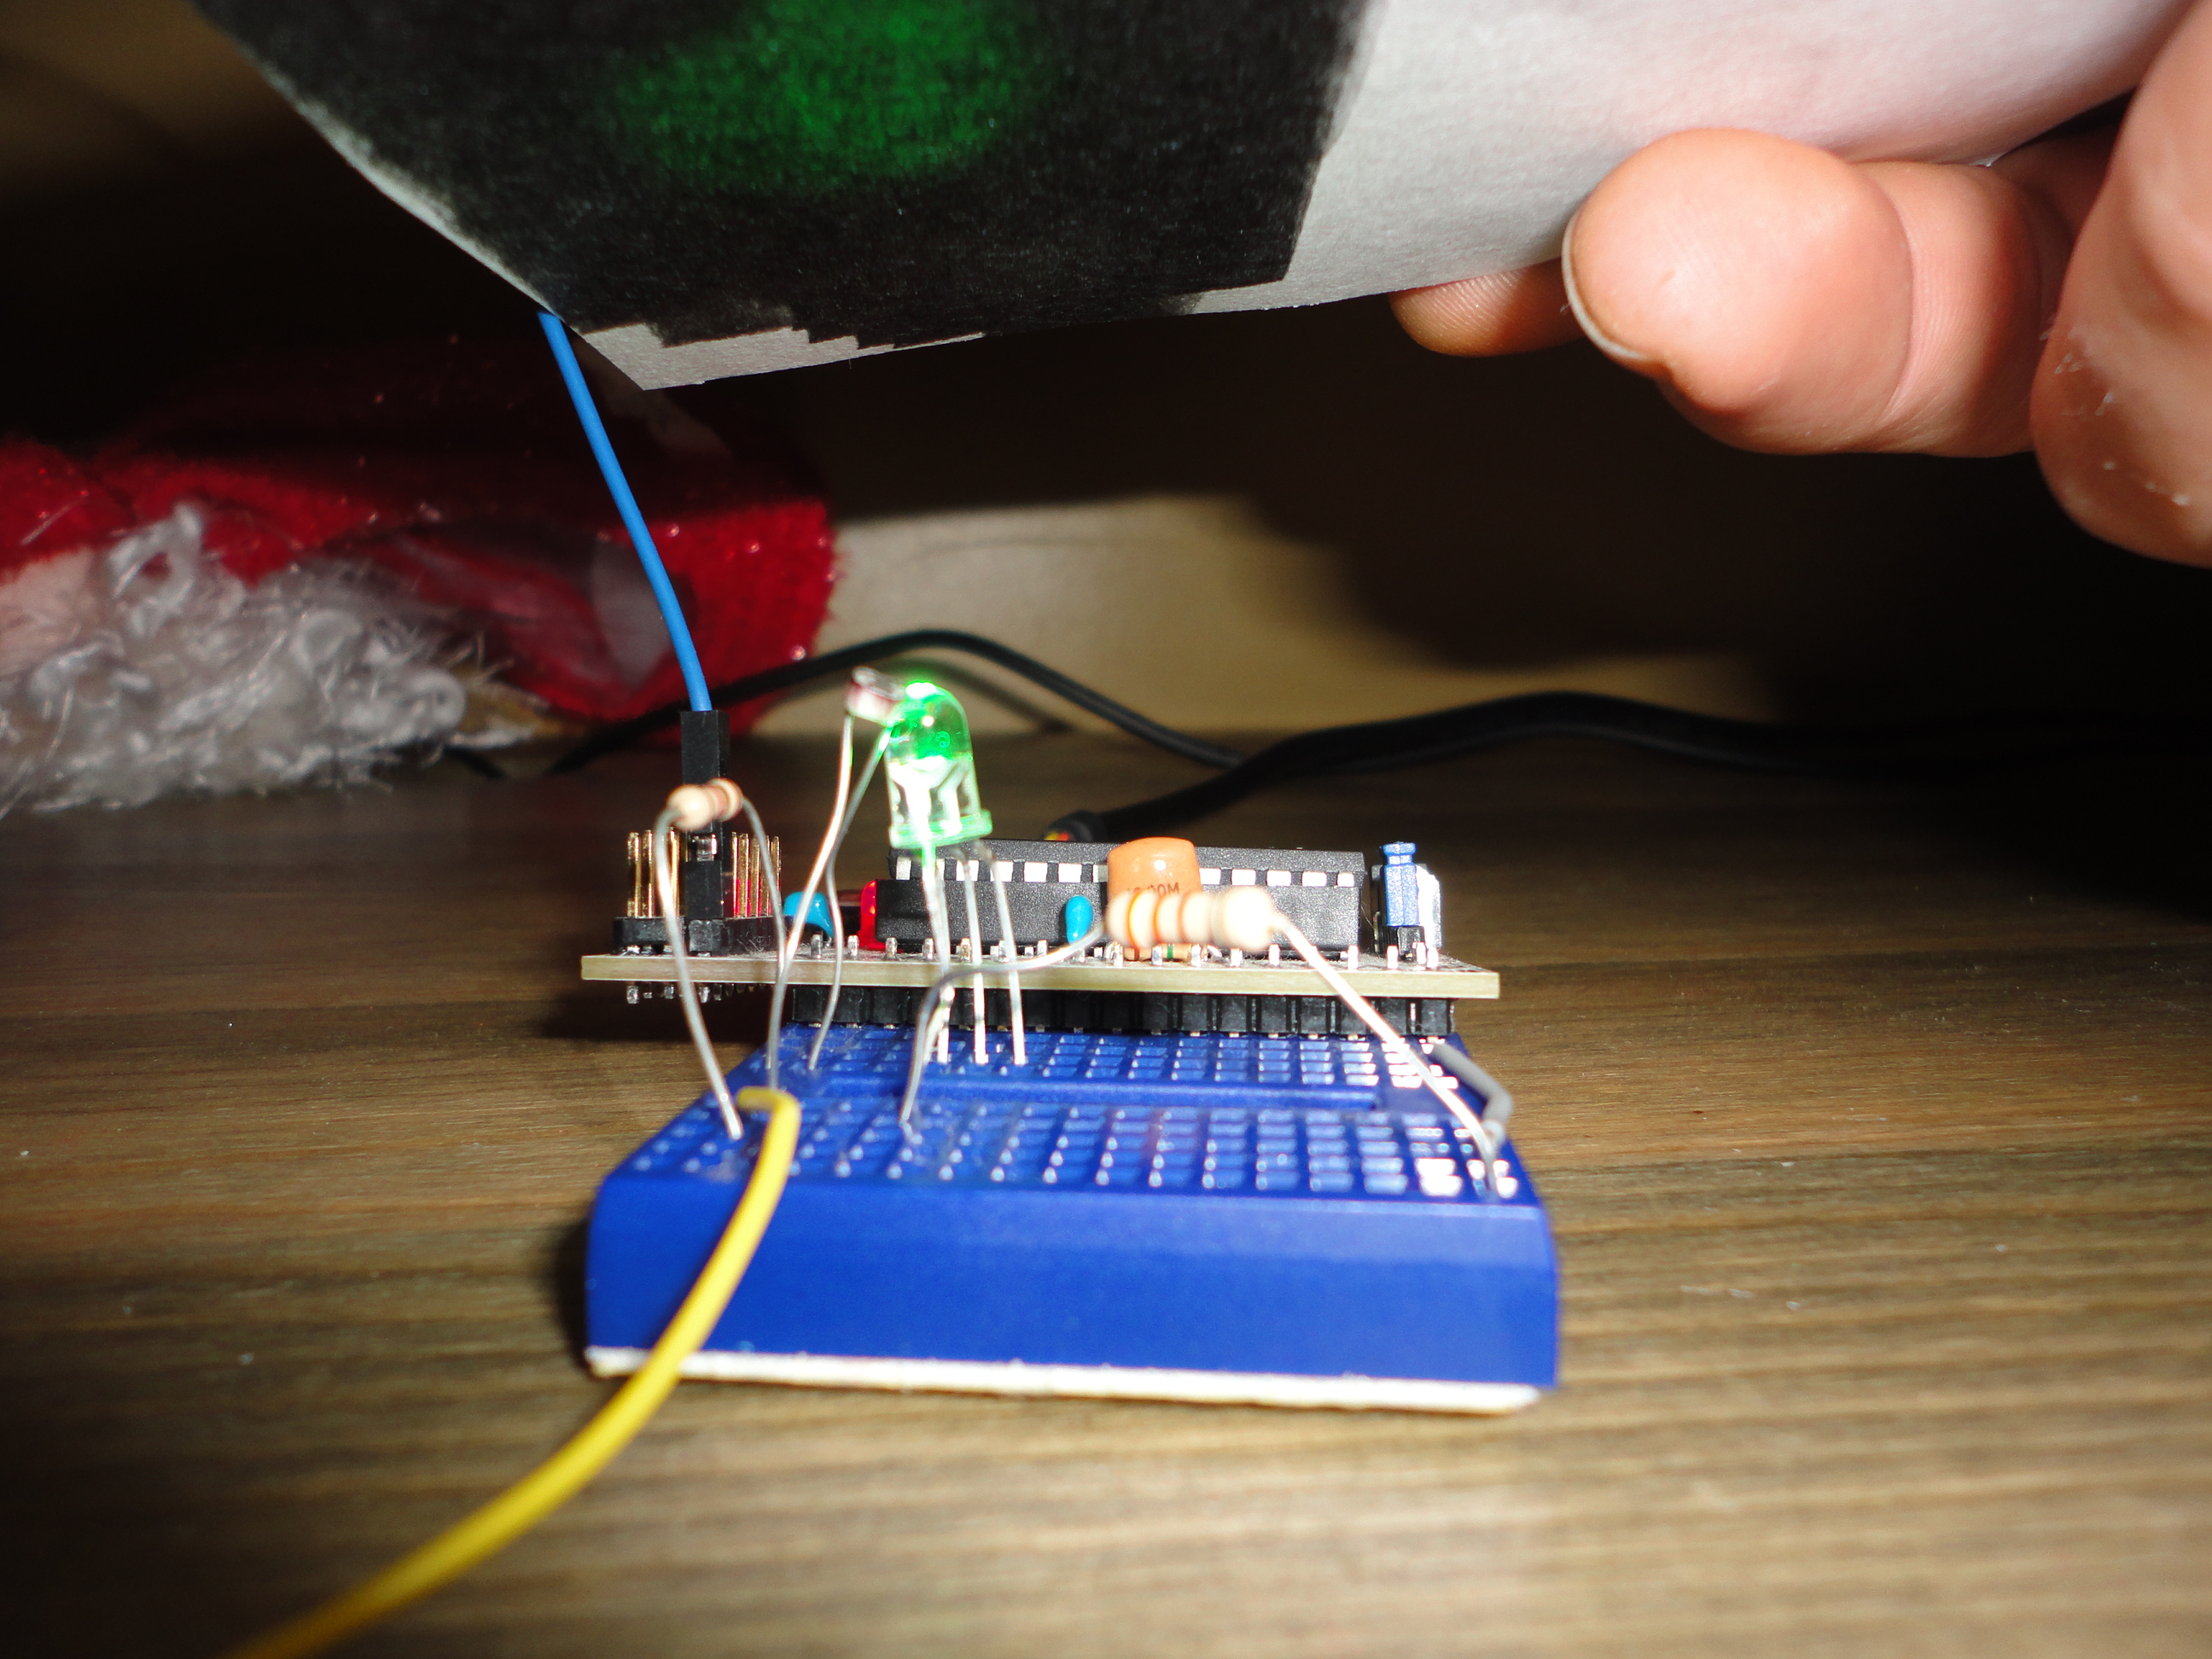
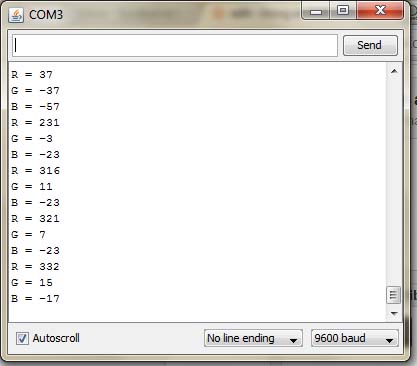
If you remember the code from earlier, the first thing that our sketch does is check to see if the balance values have been taken. When you turn on your sensor, this will be set to false and therefore the sketch will then call for the balance values to be set.
The way we do that is simple, we just show the sensor a sample of white (white card or paper) and a sample of black (black marker on a white paper or black paper). I say paper, but the sample can be anything, as long as the first sample is white and the second is black.
Take ten seconds, and prepare a quick sample card with a white side and a black side.
You will need to have the white sample in front of the sensor when you start up the Arduino (you only have 5 seconds to get it there). Once it flashes once (That is it scanning the white colour and recording the values it recieves), you will need to replace your sample with a black sample, you have five seconds to do that. It will flash again, wait another 5 seconds, and then start reporting.
Your readings will only be as good as your balancing values, so try and pay attention to taking the readings at roughly the same distance from the sensor. Alternating the height will certainly change the reflected light that falls back to the CdS photocell, but this is a fairly robust little setup and delivers very admiral results for the cost.
If you balanced it properly, you are now reading colours. Place things in front of the sensor and verify your output via the serial monitor in the Arduino environment. You should be getting back changing data in roughly the format I showed you above. If you are impatient you can start plugging these numbers into a colour selector (There are many free online, there is even one in the processing environment) and start entering your reading numbers and seeing what the selector shows.
Or you can follow along for one more step, where I will give you a little Processing sketch that will help you verify that your sensor is functioning well, and make it more fun to experiment with.
Verify Colours With Processing
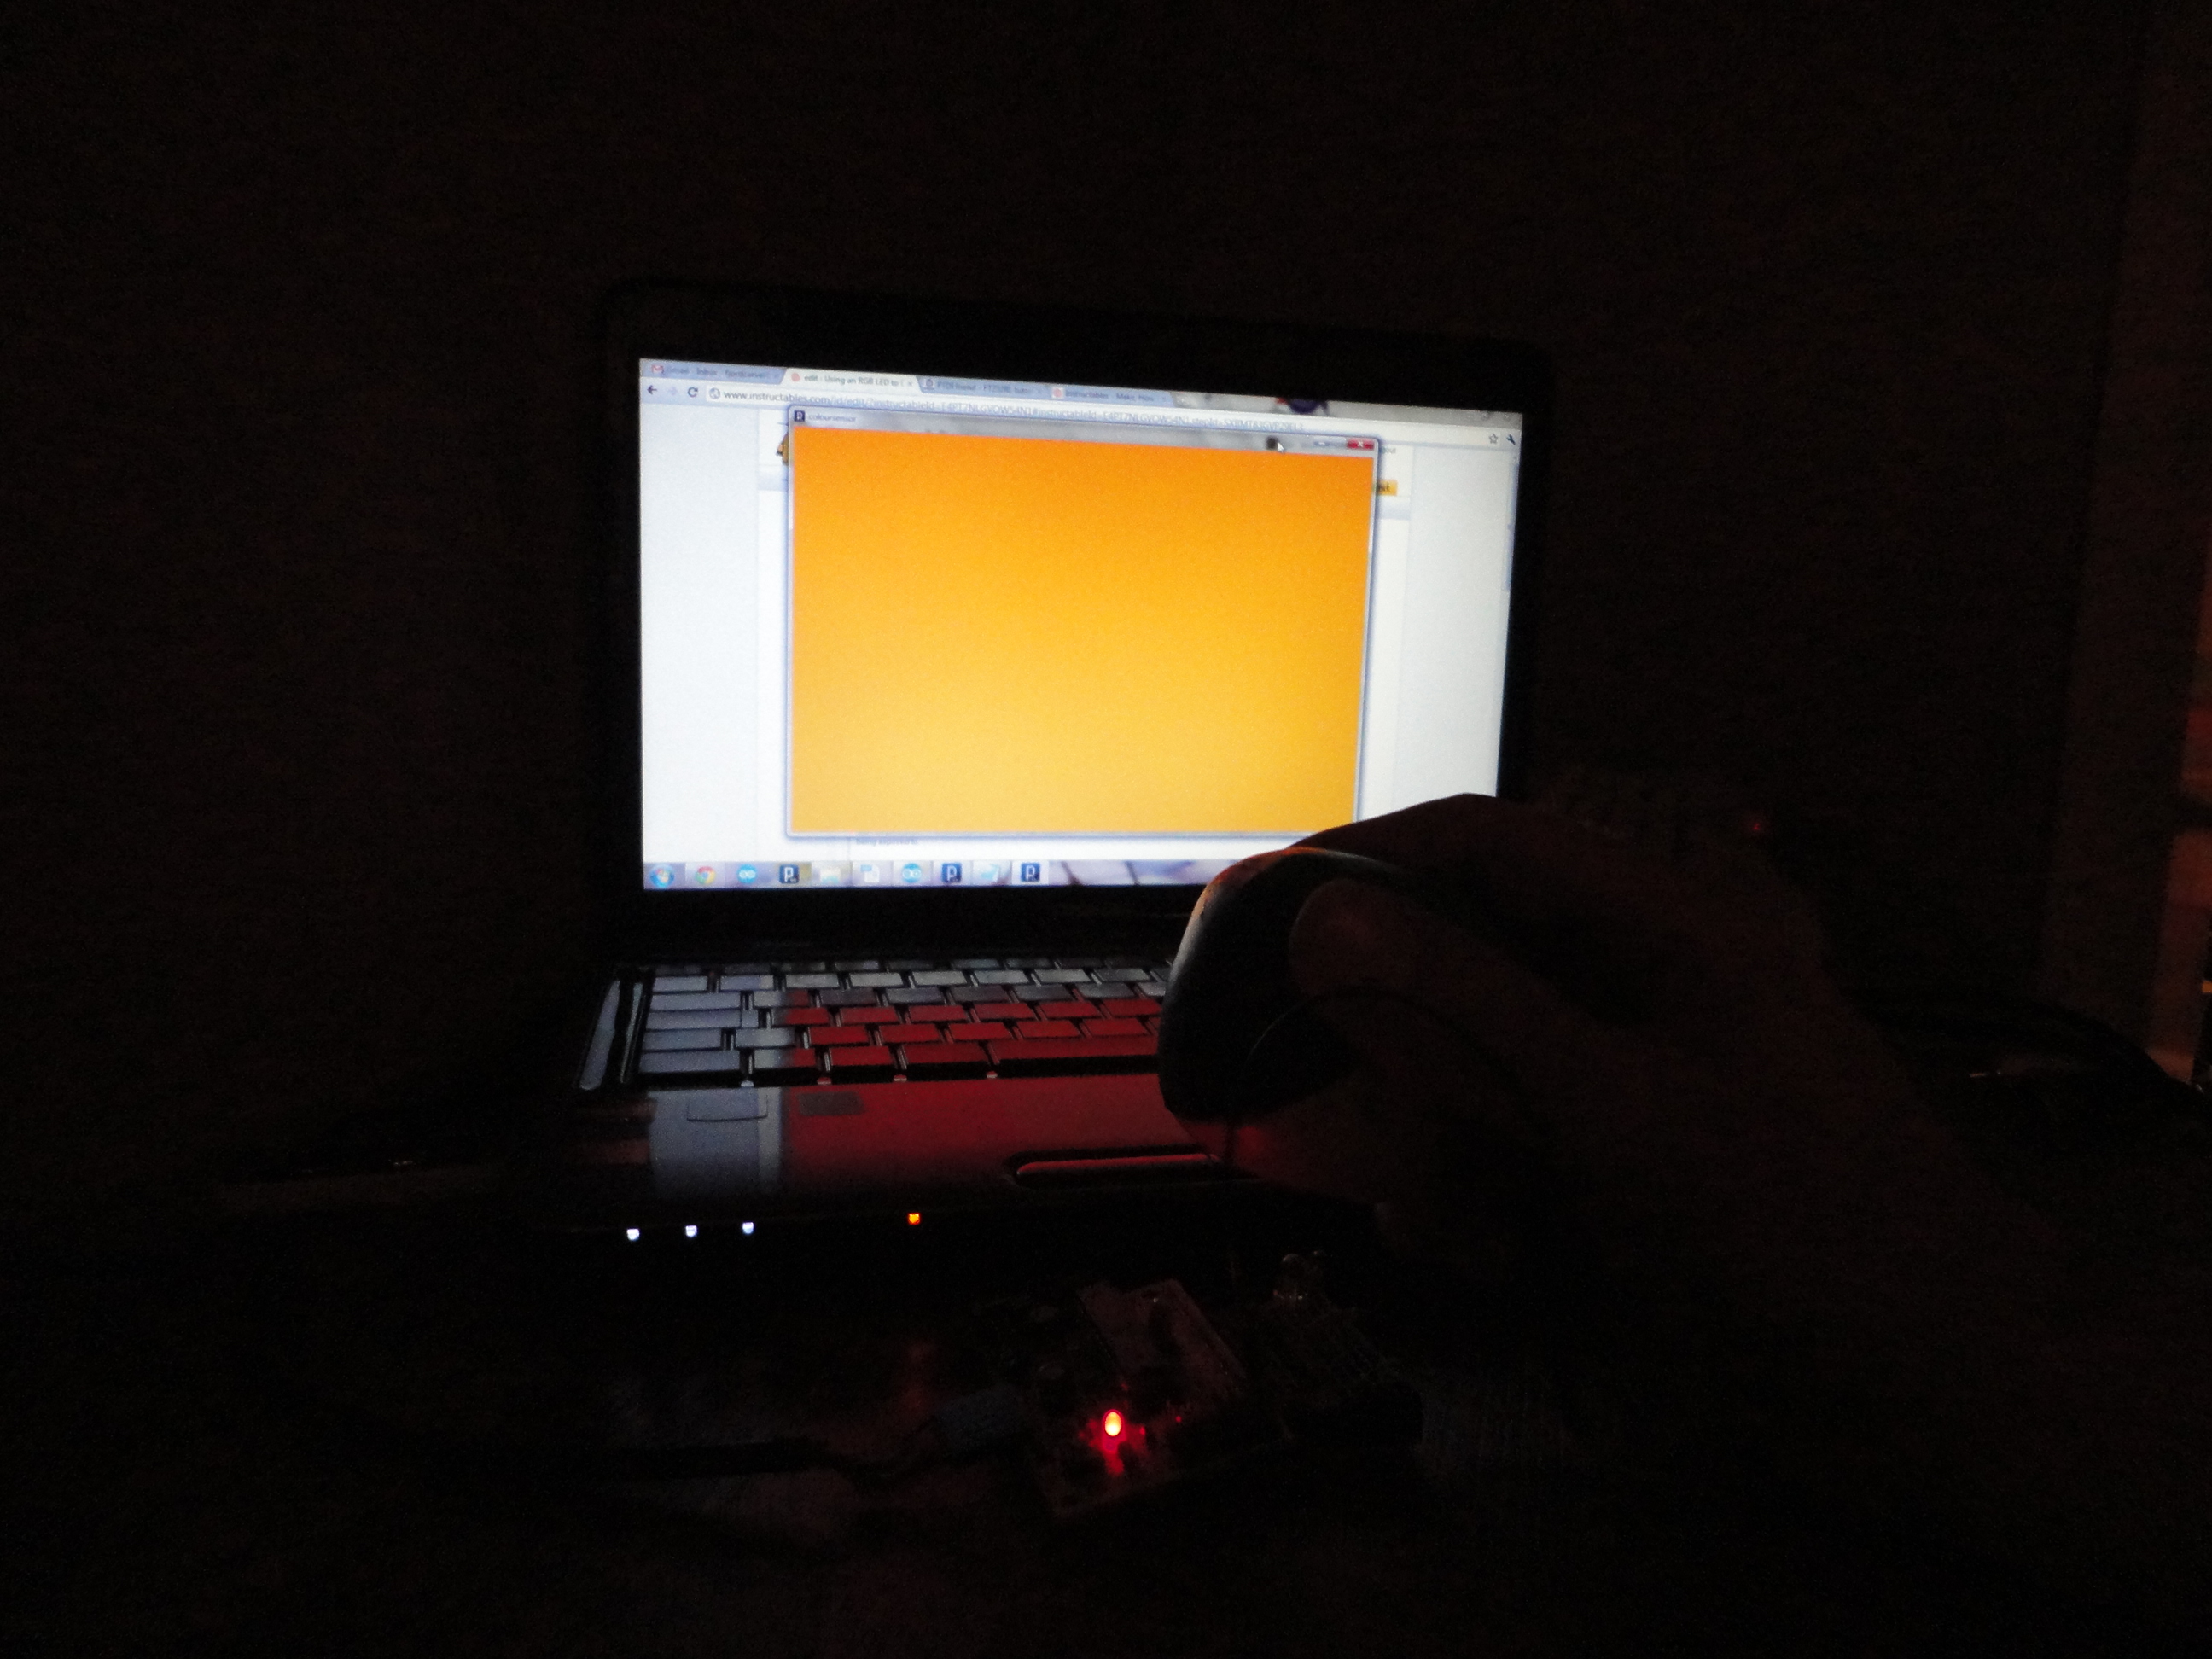
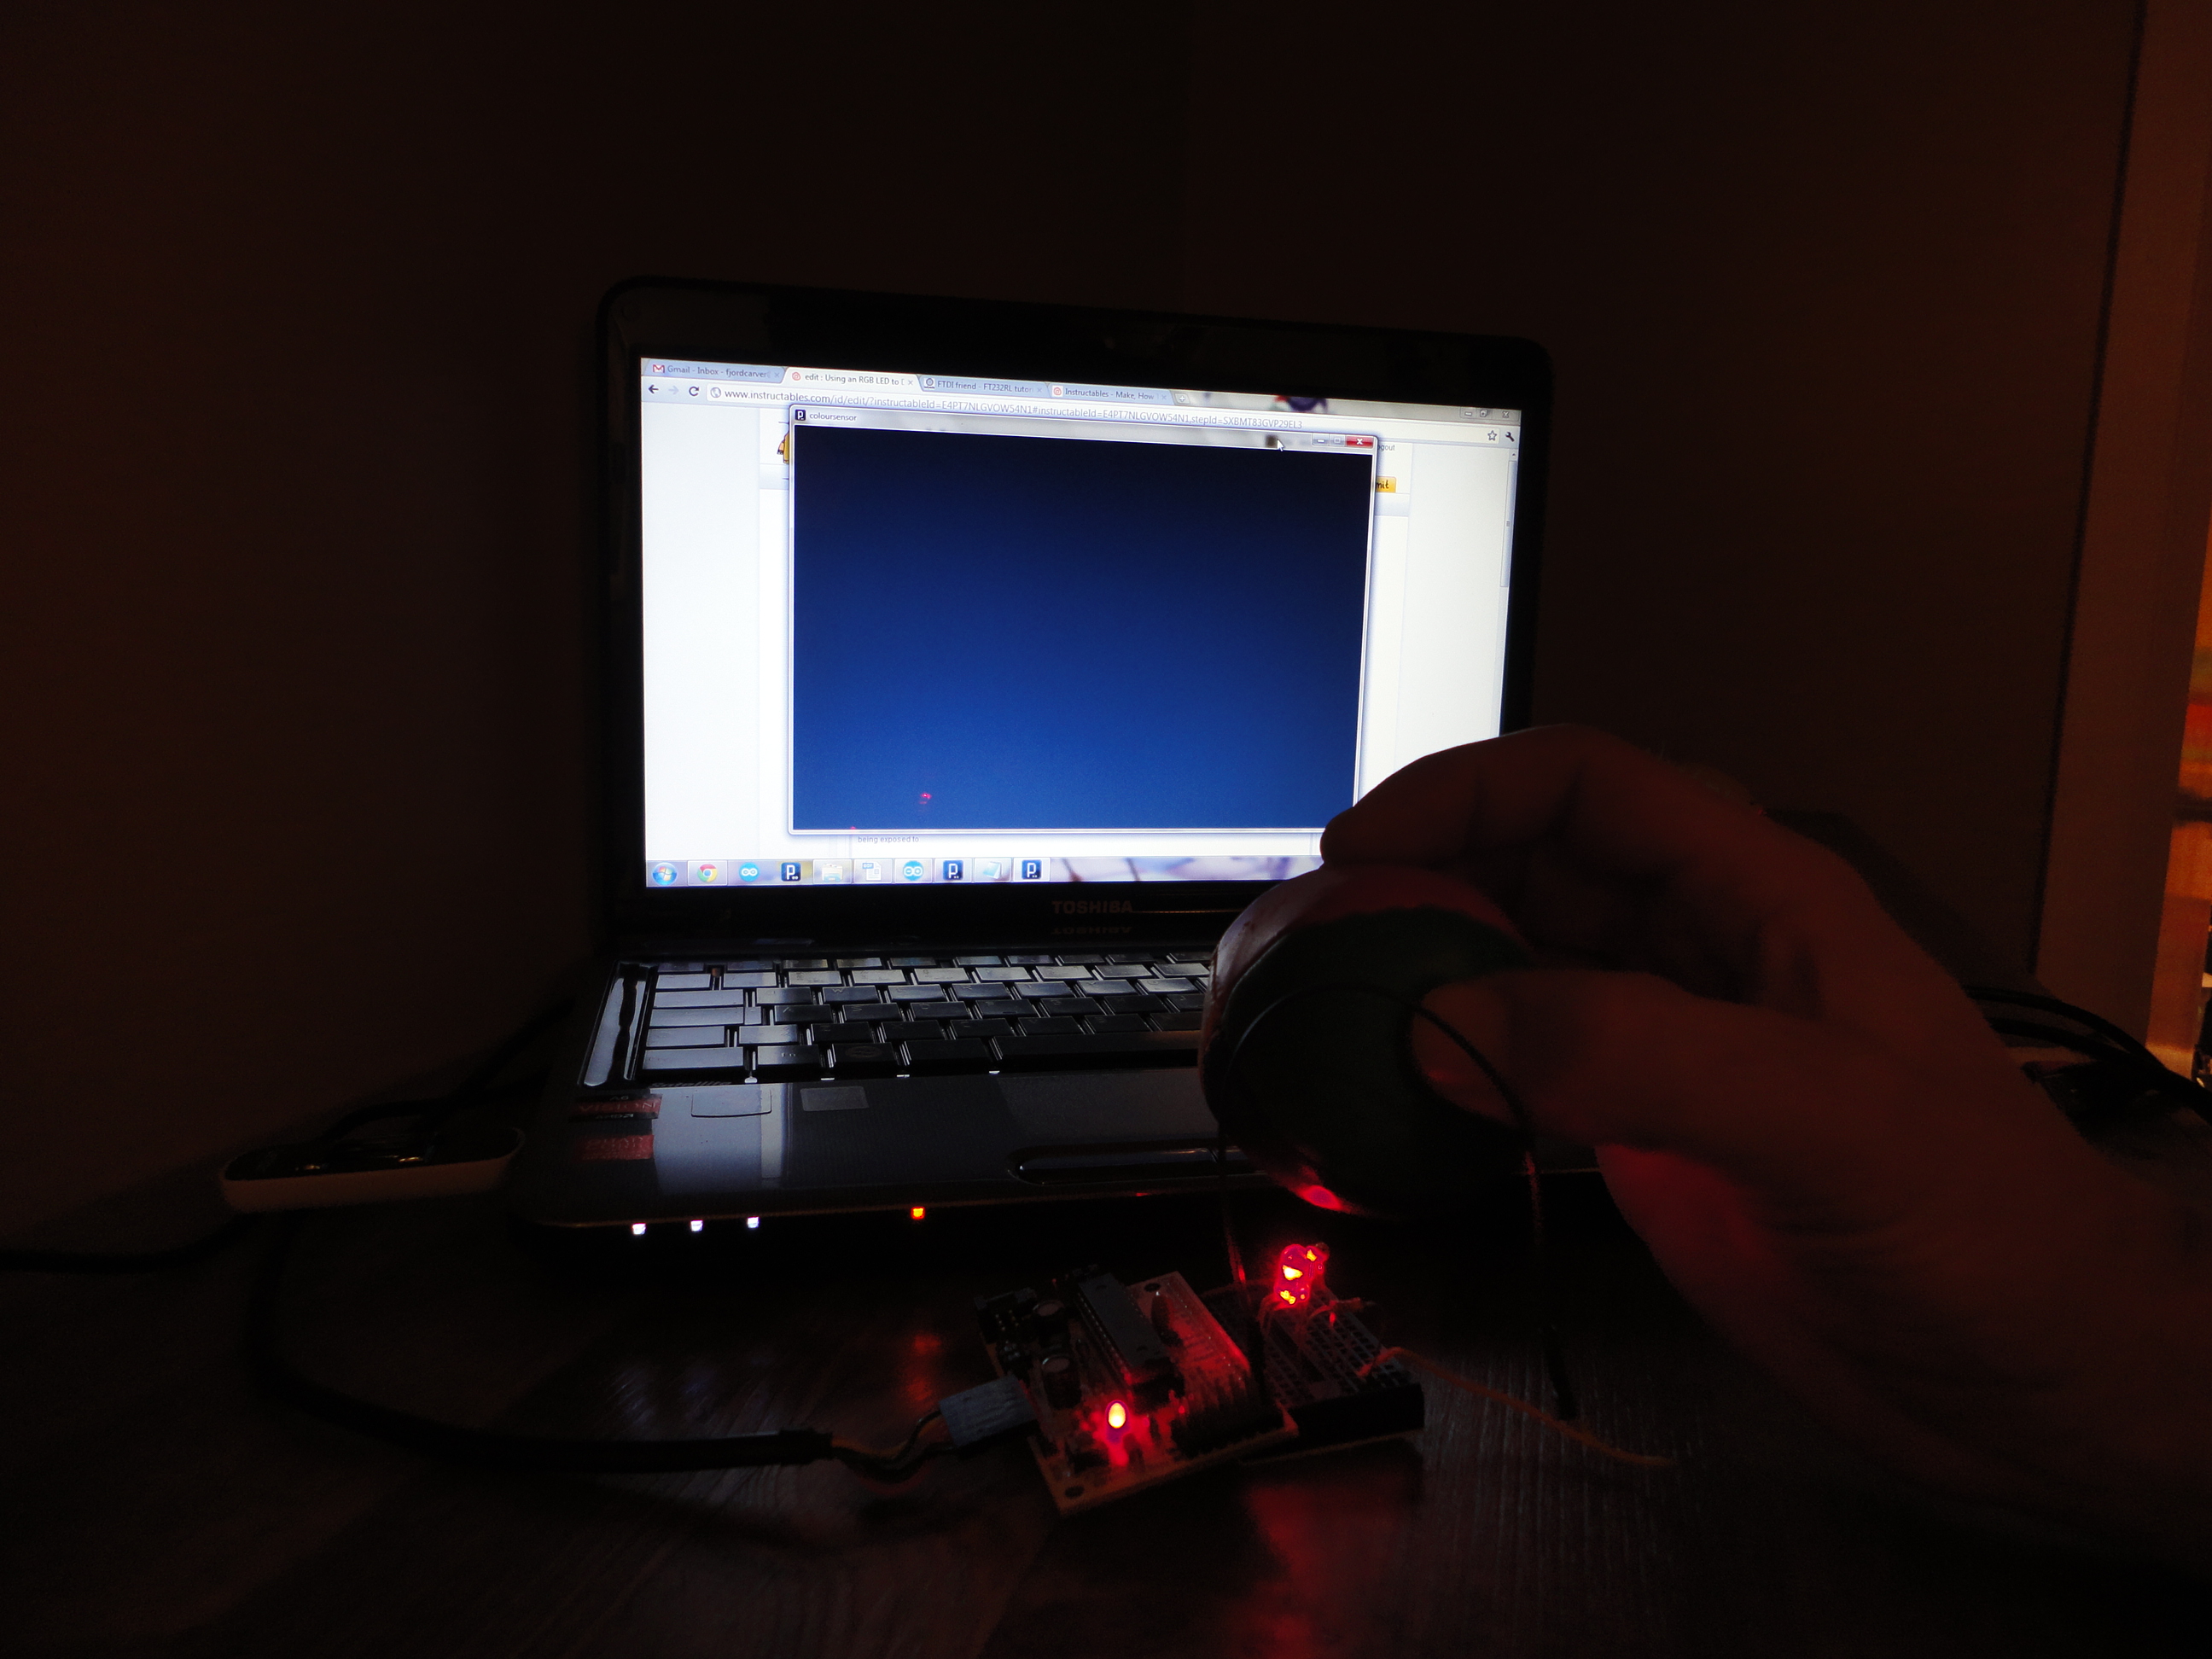
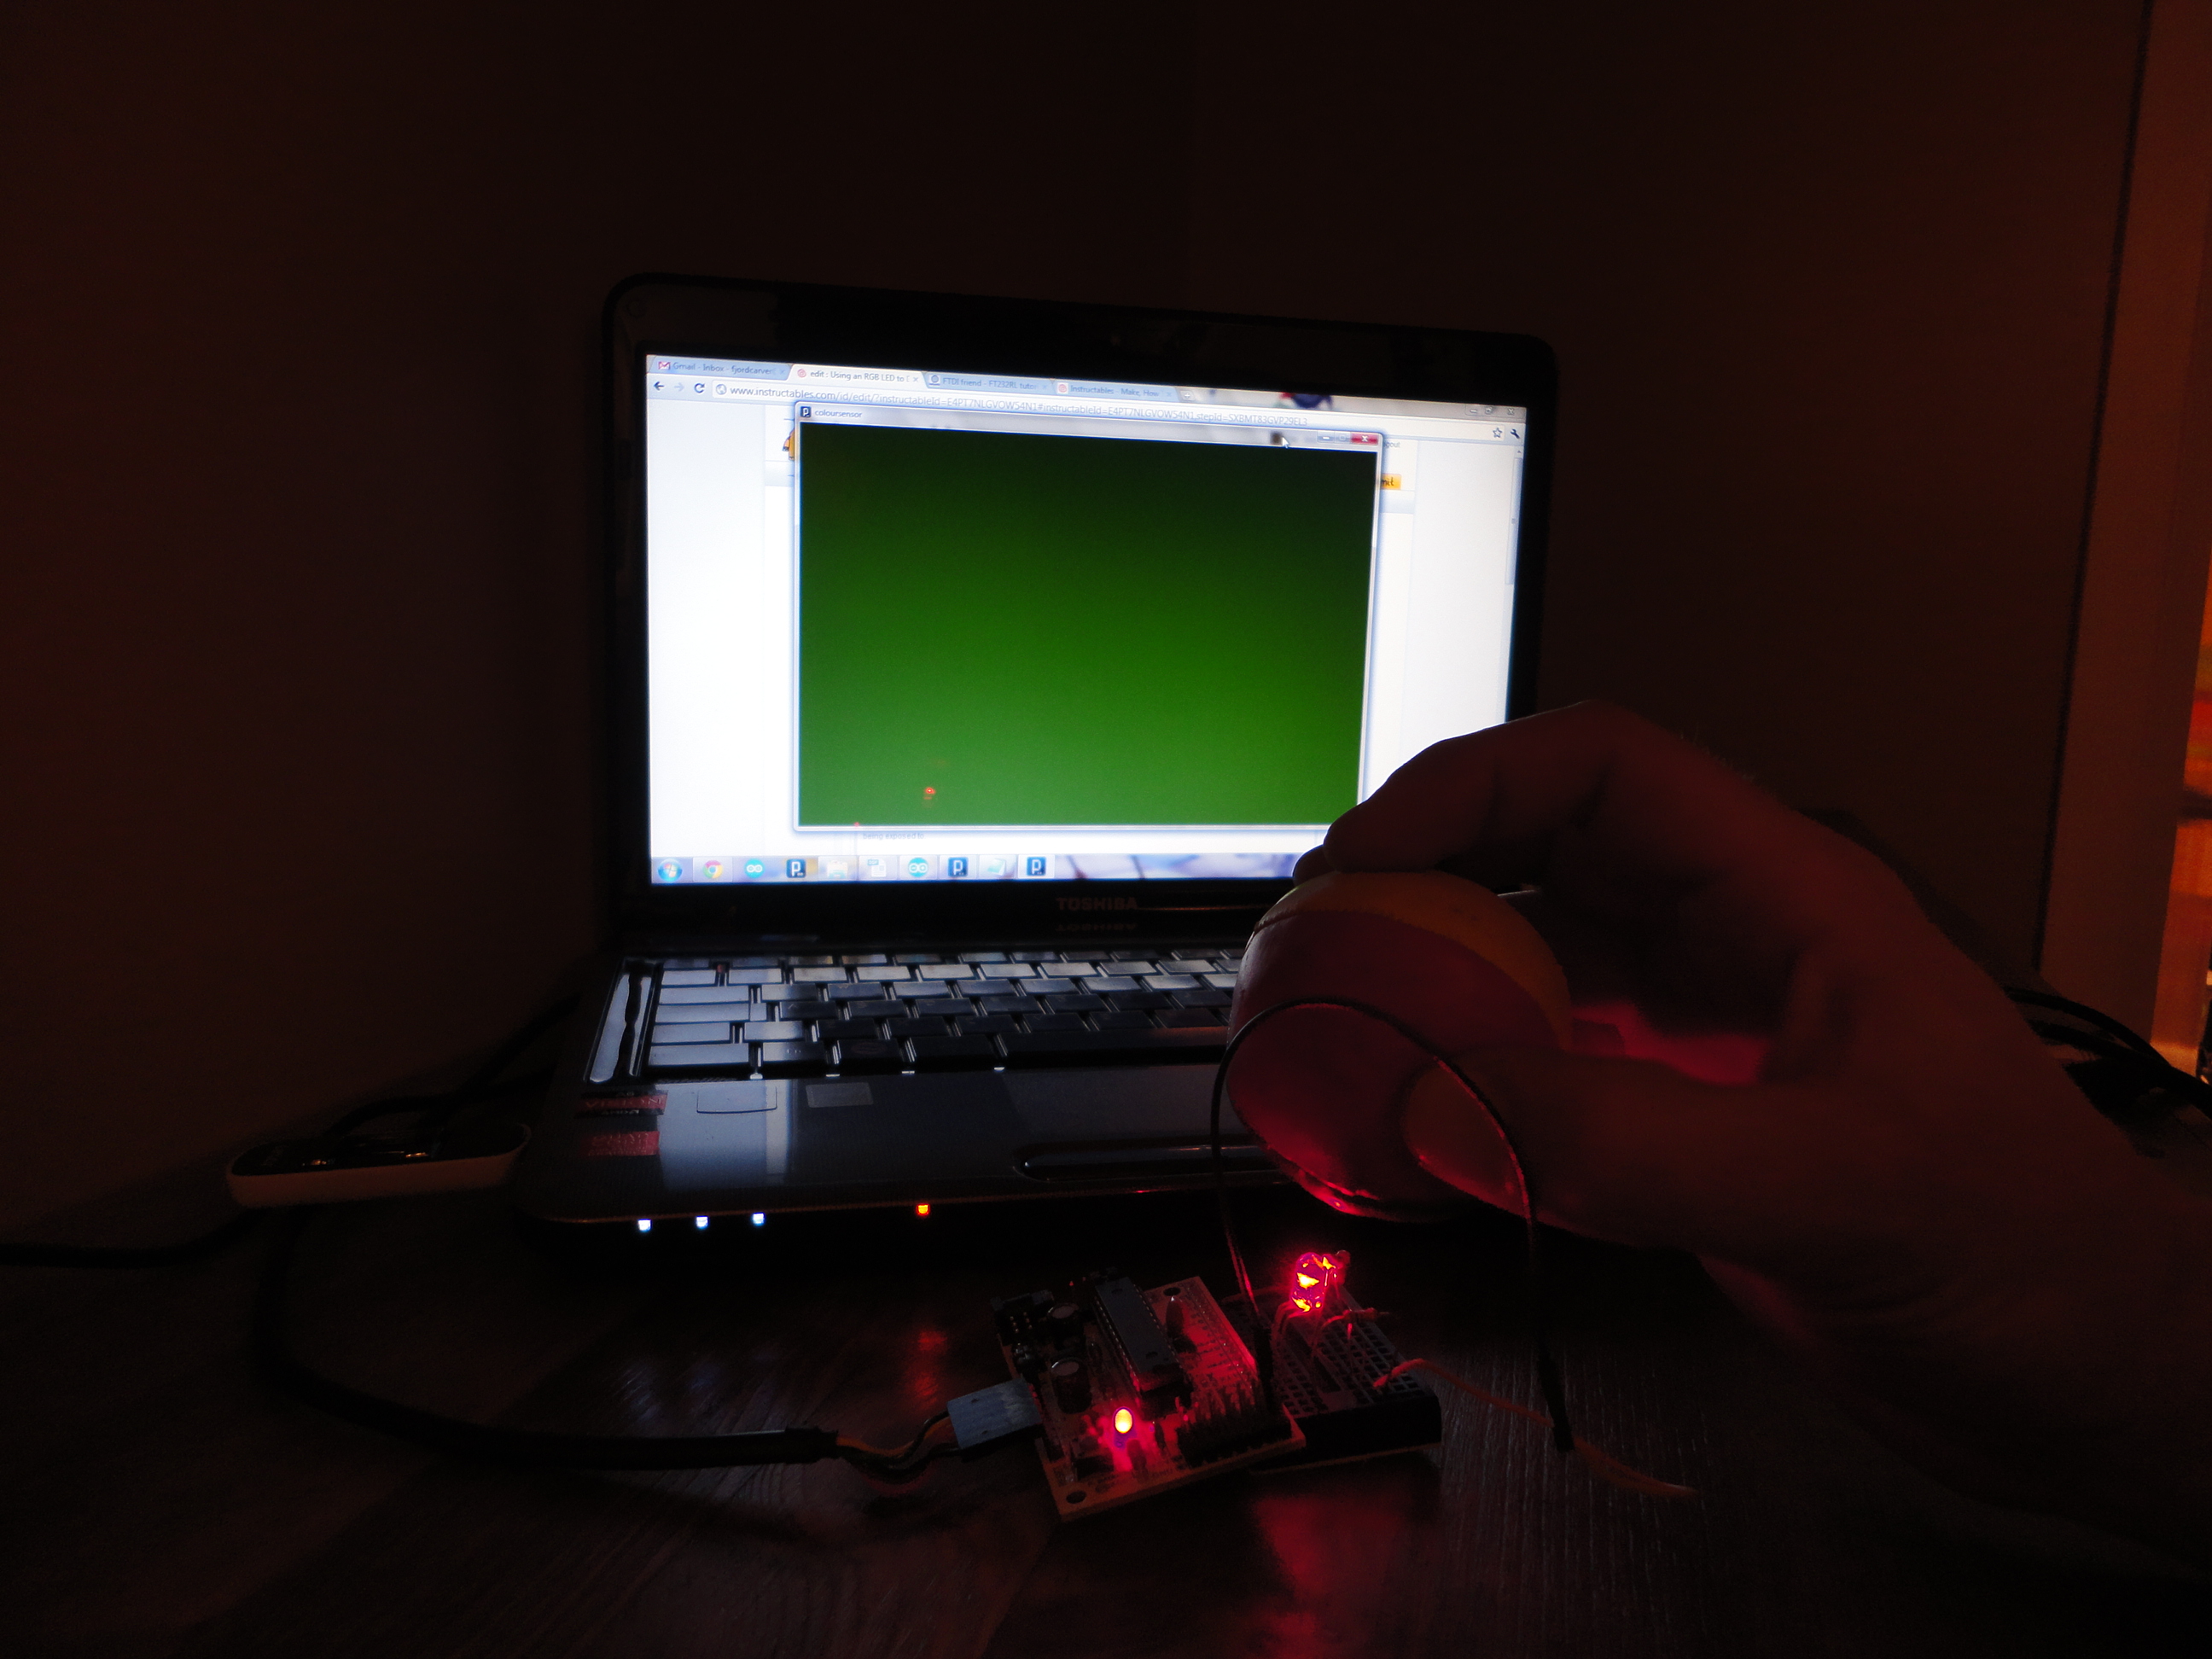
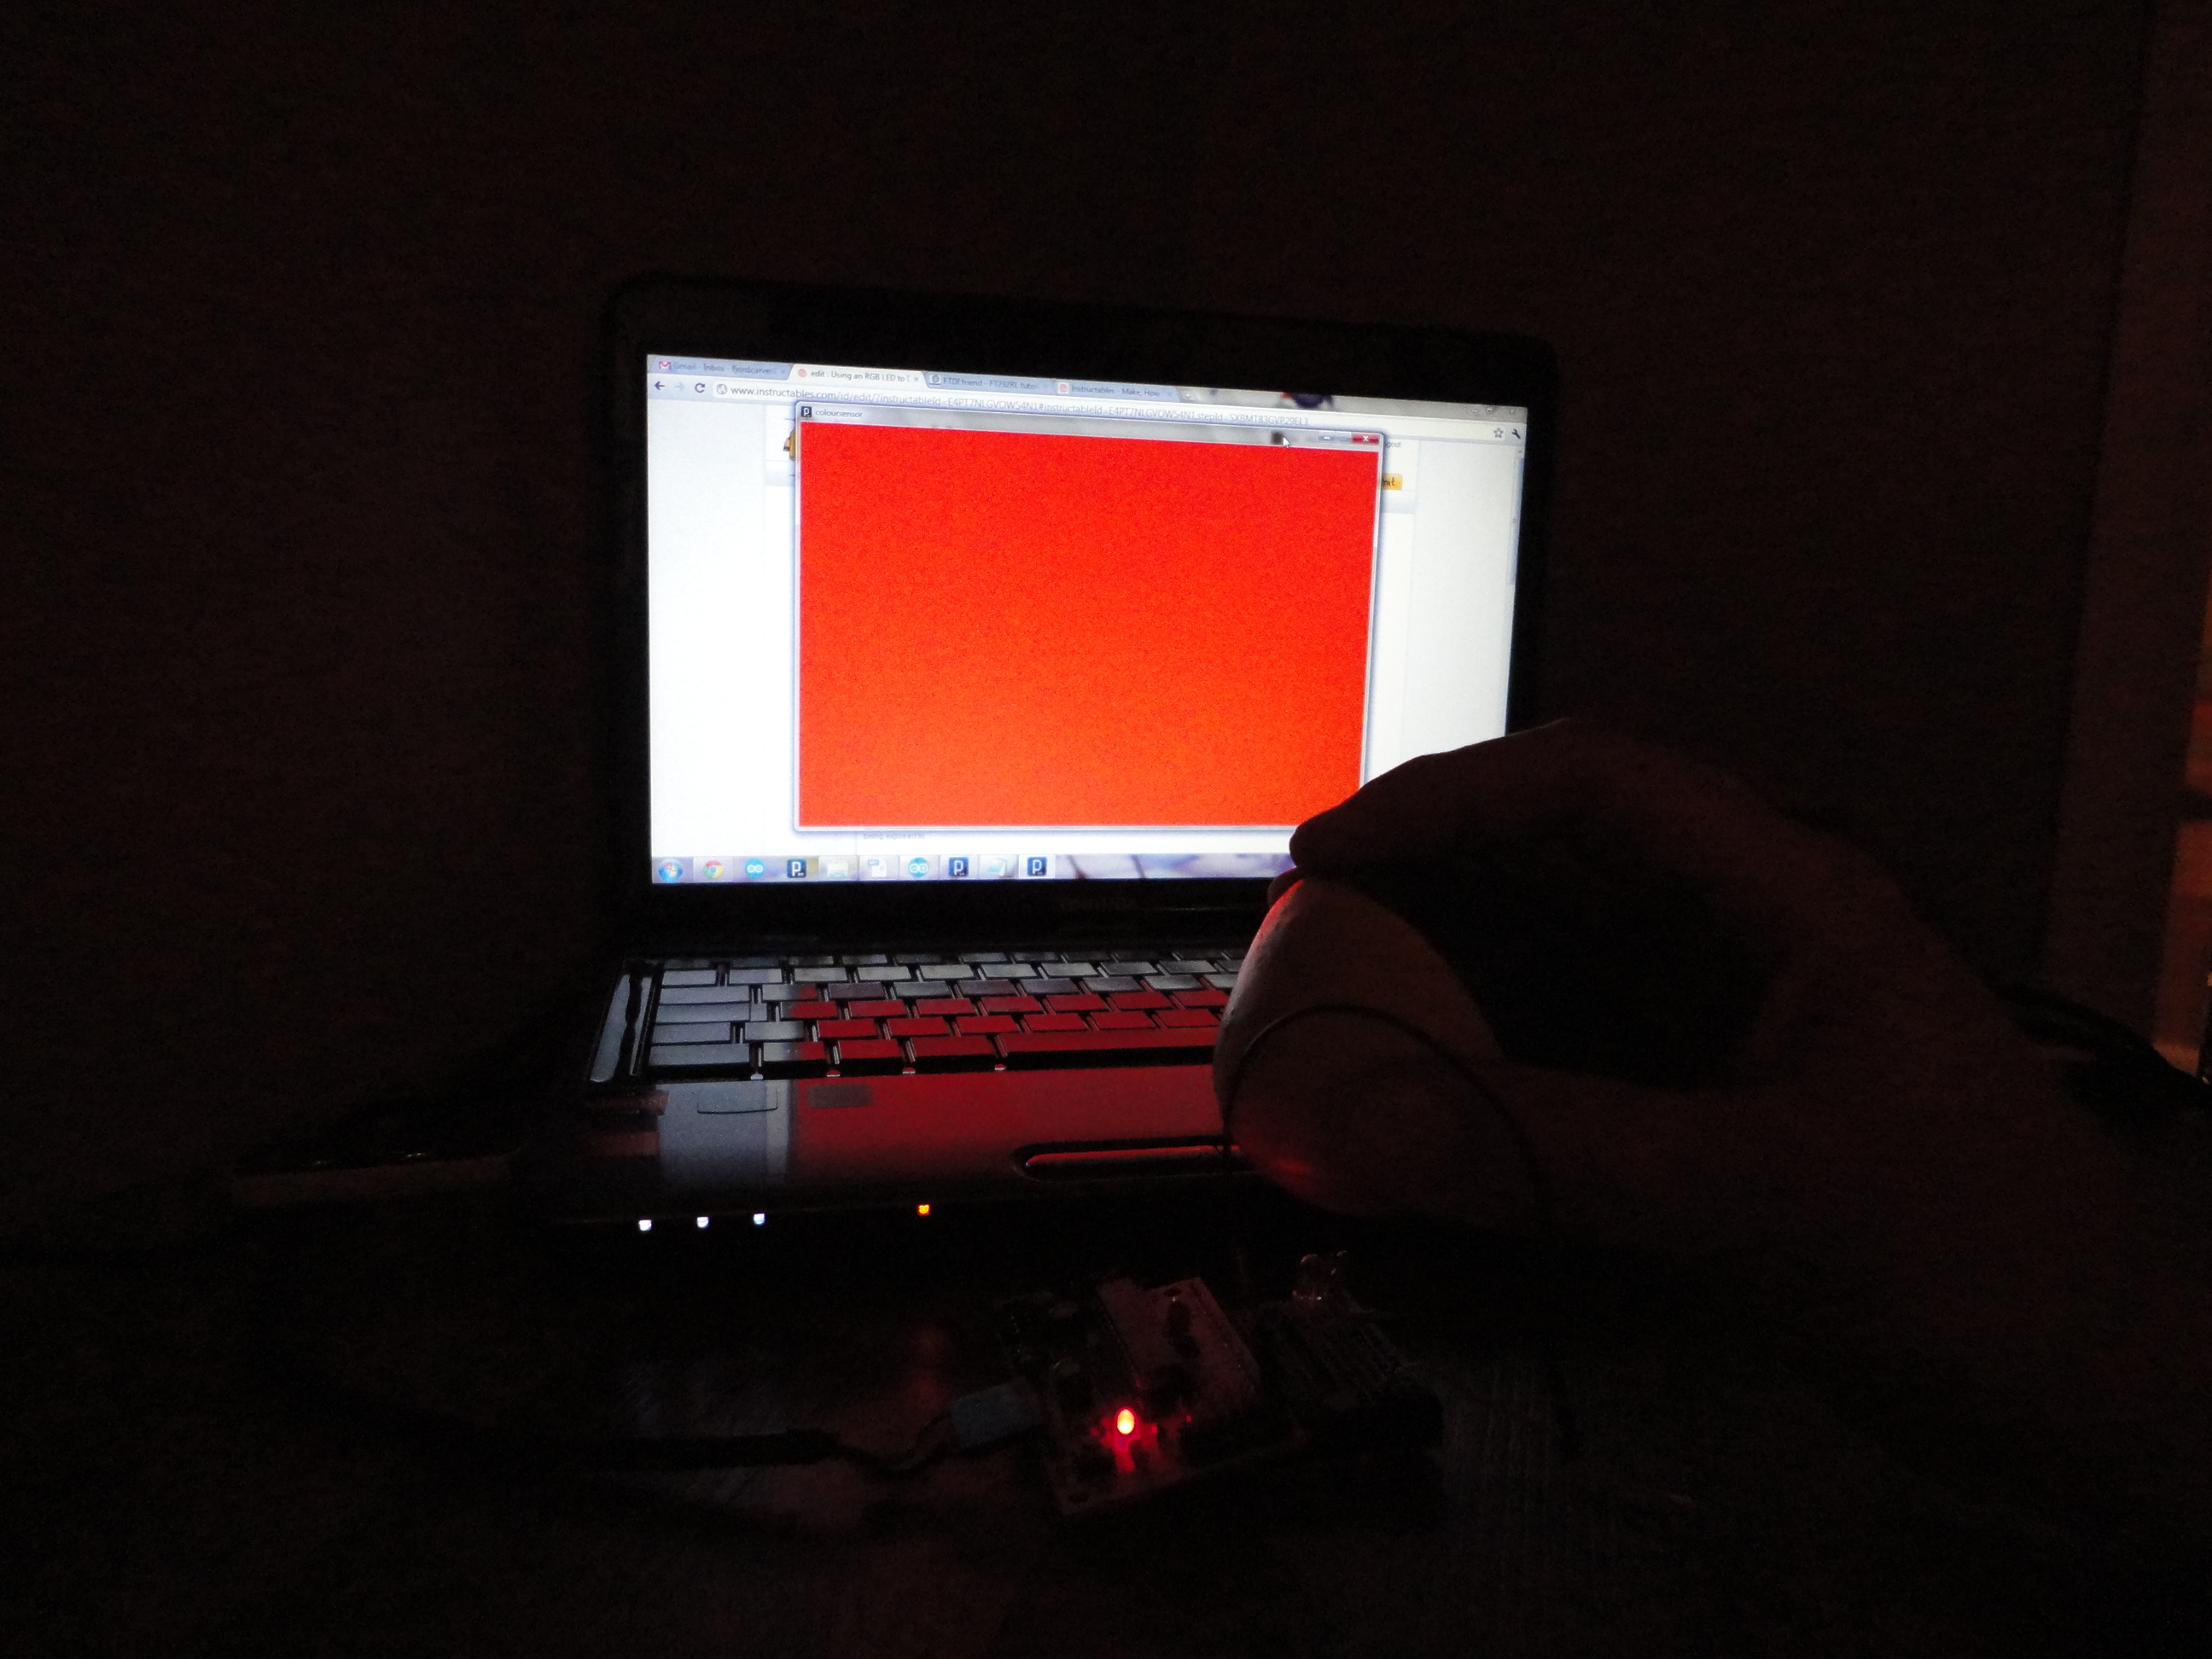
At this point you should have Red, Green and Blue values coming up on your screen via the Arduino serial monitor. Entering these values by hand in is tedious and slow.
Sure it proves the point, but we really need a better way to play with this don`t we.
Have no fear, I have included a small Processing sketch to get you started.
Copy and paste the code in the included text file into a new sketch in Processing. Save it as whatever you like, start up your Arduino, being sure that the Serial Monitor in the Arduino environment is no longer running, and enjoy the color changing light show.
The sketch doesn't do much, it just updates the background with the colour being sent out from the sensor. Make sure that you set the com Port correctly.
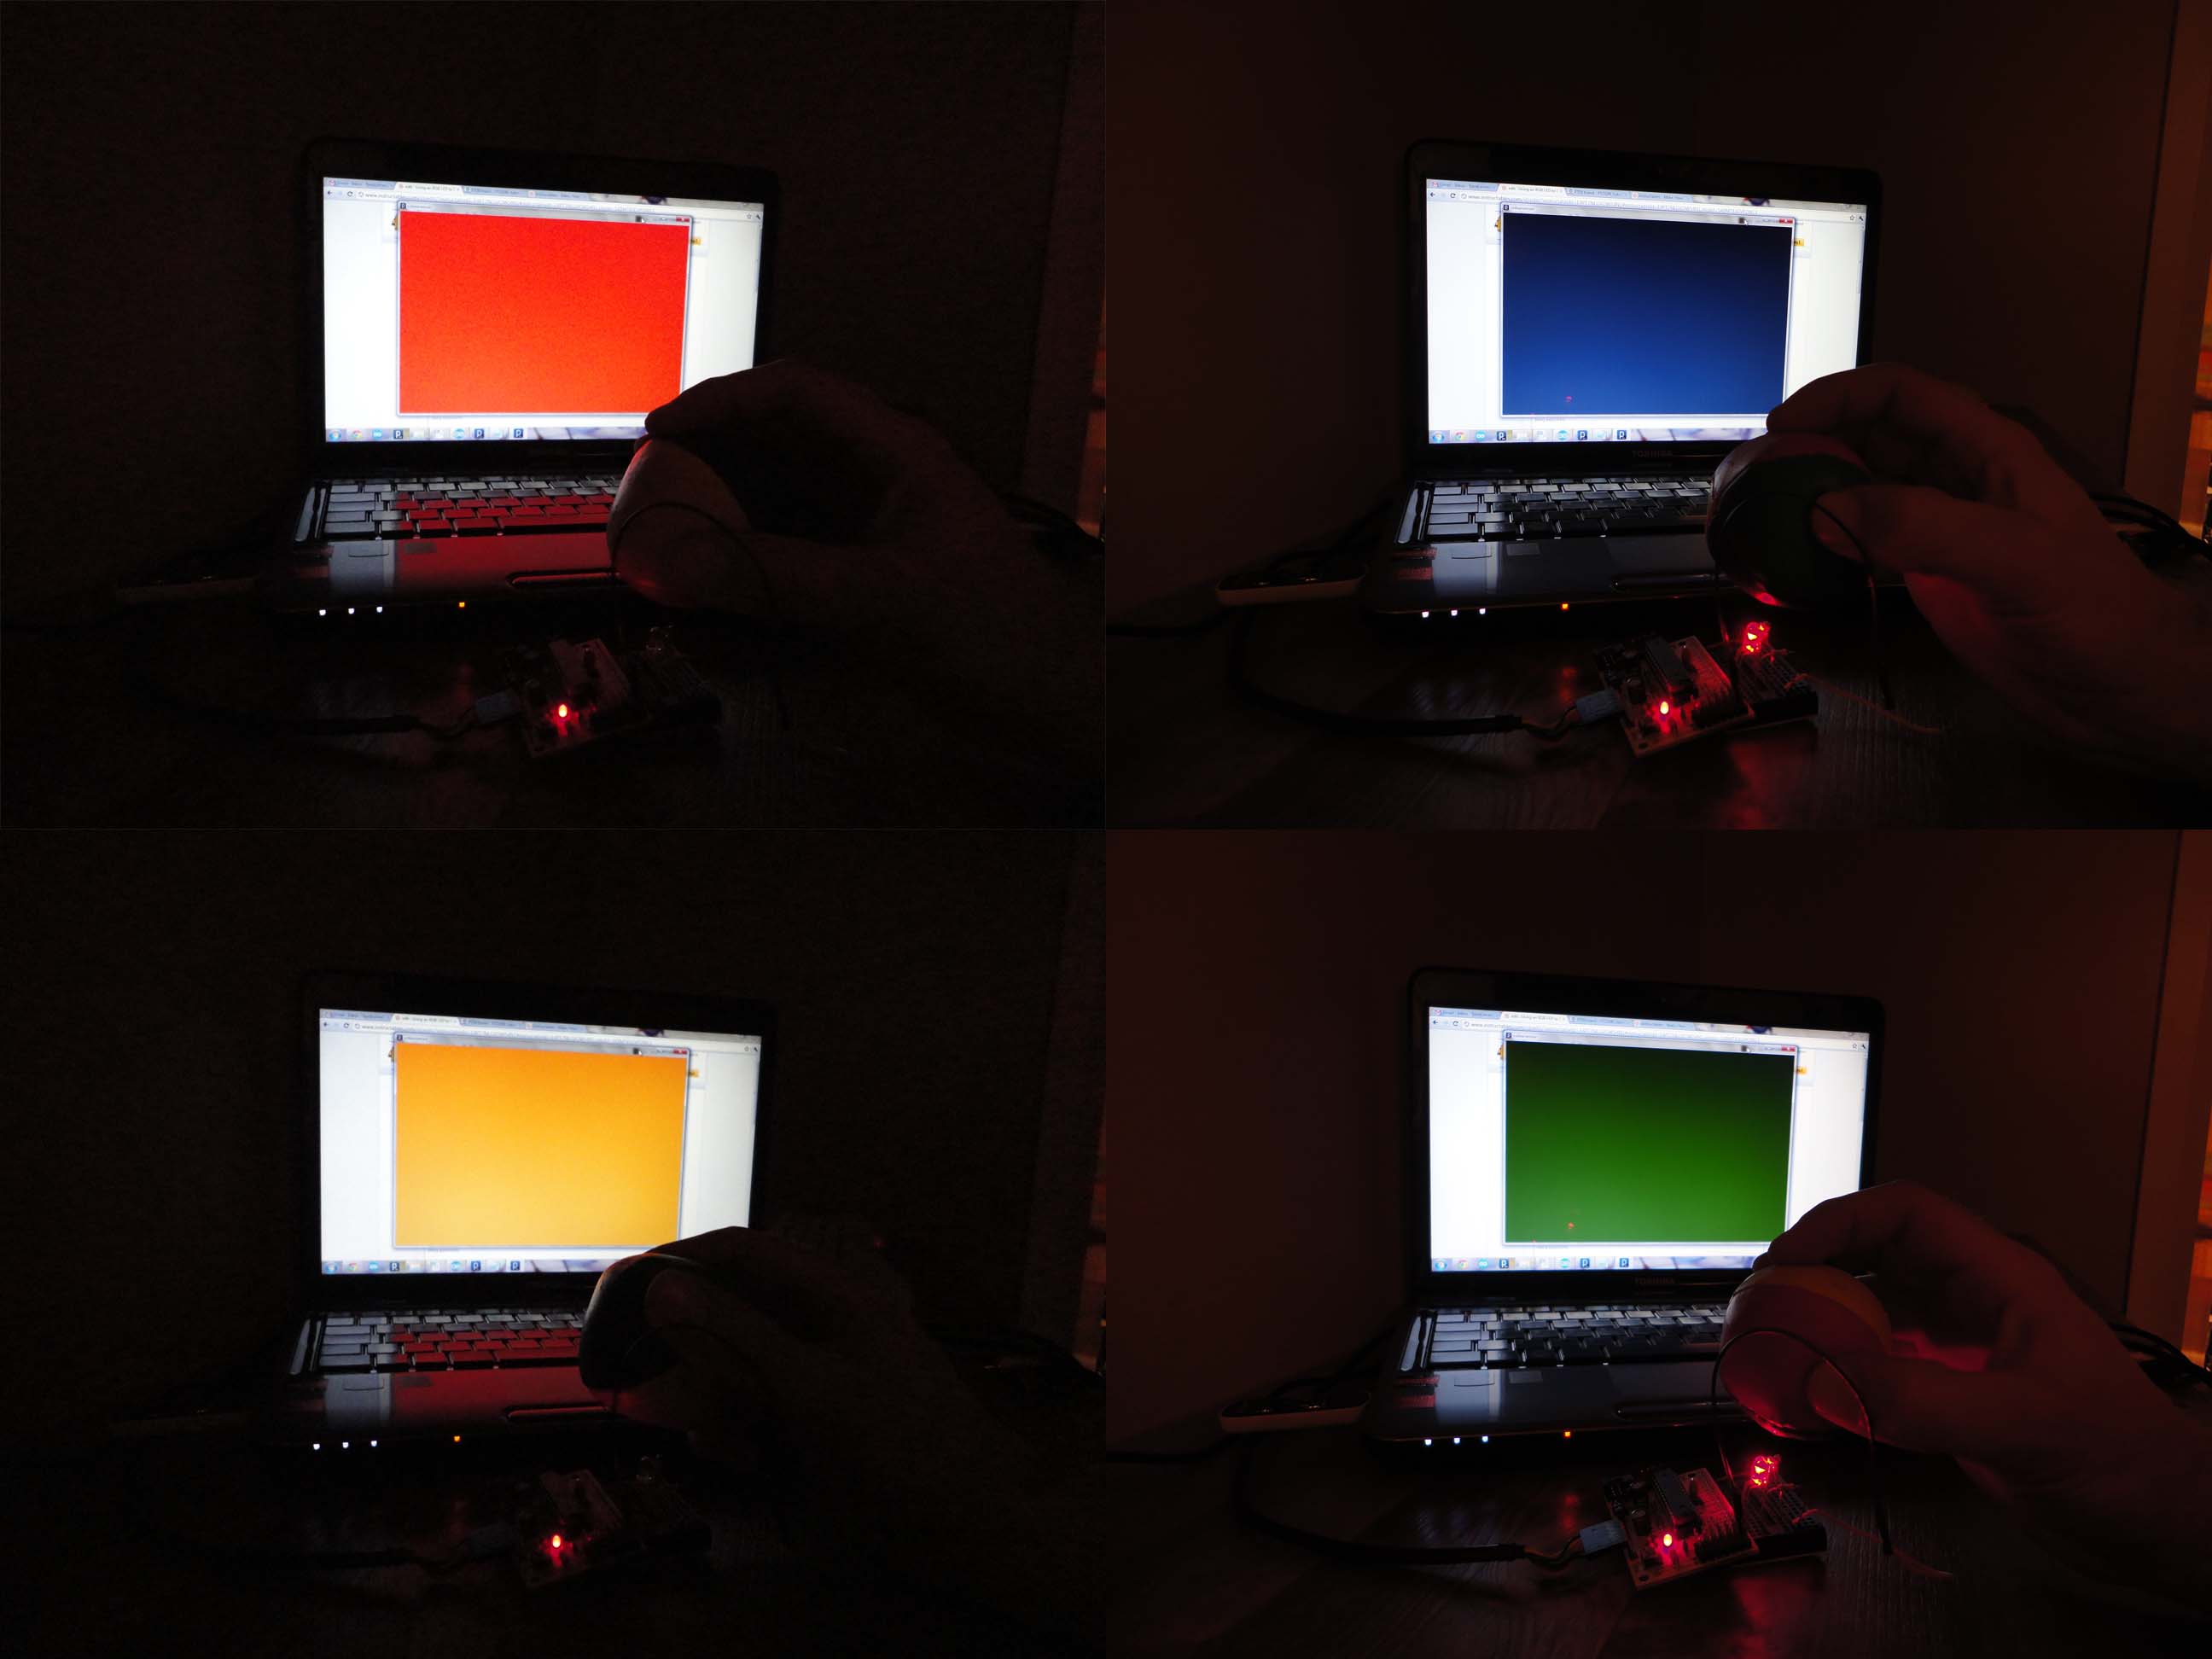
In the pictures, you can see me scanning each side of a four coloured juggling ball, and the output on the screen.
I hope that this Instructable has proved interesting to you. If you want to have a look at one of the ways I have used this type of sensor, check out my Magical Chameleon Lamp Instructable.
Support a fellow maker, vote for me often. Share and enjoy.