Using Yahoo on Thunderbird
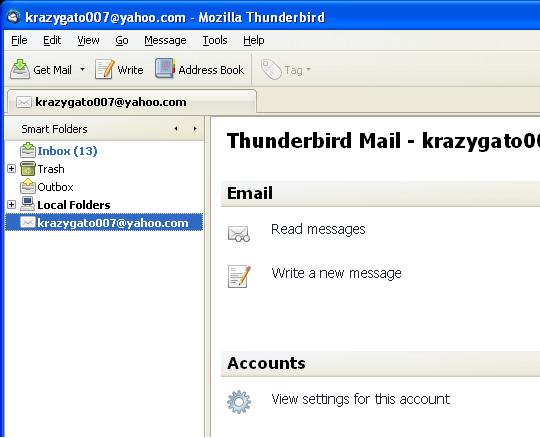
I tried many times to get Yahoo Mail to work with Thunderbird but I always failed. While trying to look for help online, I came to realize that a lot of people were also having trouble with it.
As it turns out, Thunderbird (as is without certain extensions) will not work because Yahoo's email servers are only available to third-party email clients if you pay for Yahoo's Premium Service. But with the help of the Webmail Extension you can use Yahoo Mail without paying for the service and without installing any additional software.
As it turns out, Thunderbird (as is without certain extensions) will not work because Yahoo's email servers are only available to third-party email clients if you pay for Yahoo's Premium Service. But with the help of the Webmail Extension you can use Yahoo Mail without paying for the service and without installing any additional software.
Download and Install Webmail Add-On
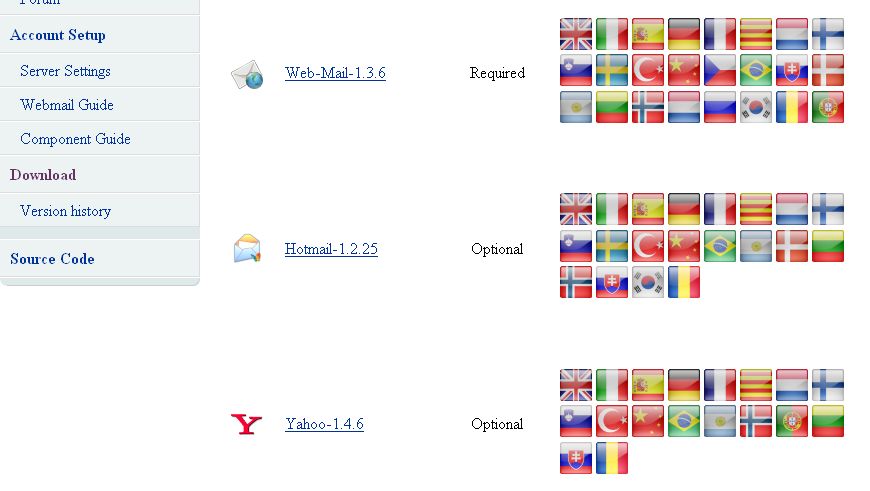
http://webmail.mozdev.org/installation.html
Download both the Webmail 1.3.6 file and also the Yahoo 1.4.6 file.
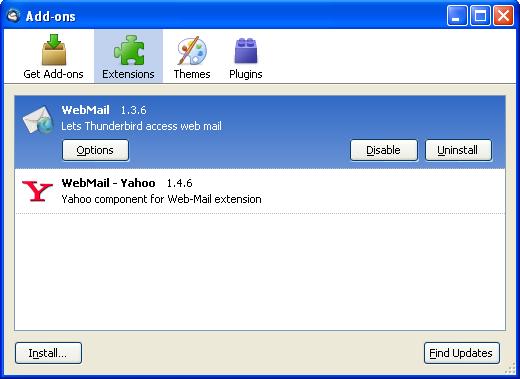
Open Thunderbird and go to Tools > Add-ons. Click the Extensions tab and click Install at the bottom of the window. Browse to your downloaded Webmail files and click Install.
Restart Thunderbird.
Download both the Webmail 1.3.6 file and also the Yahoo 1.4.6 file.
Open Thunderbird and go to Tools > Add-ons. Click the Extensions tab and click Install at the bottom of the window. Browse to your downloaded Webmail files and click Install.
Restart Thunderbird.
Webmail Servers
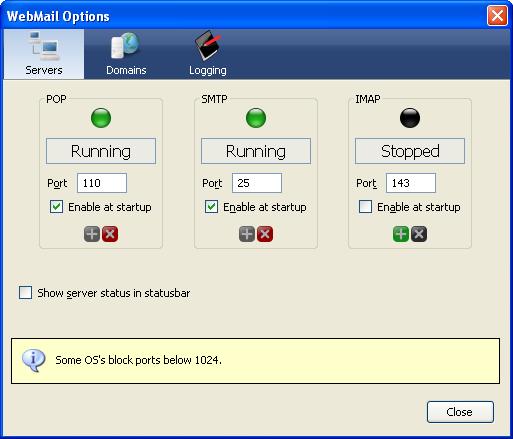
Webmail has three servers that need to be running to access your email.
Go to Tools > Add-ons and under Webmail, click Options. Under the Servers tab, make sure POP, SMTP, and IMAP are all Running. If the status is Stopped or Error, then you probably need to open the specified port in your Firewall or Router or Modem.
Once you have opened that port, click the green box under the servers settings. If it doesn't say Running, restart Thunderbird.
Add Your Email Account
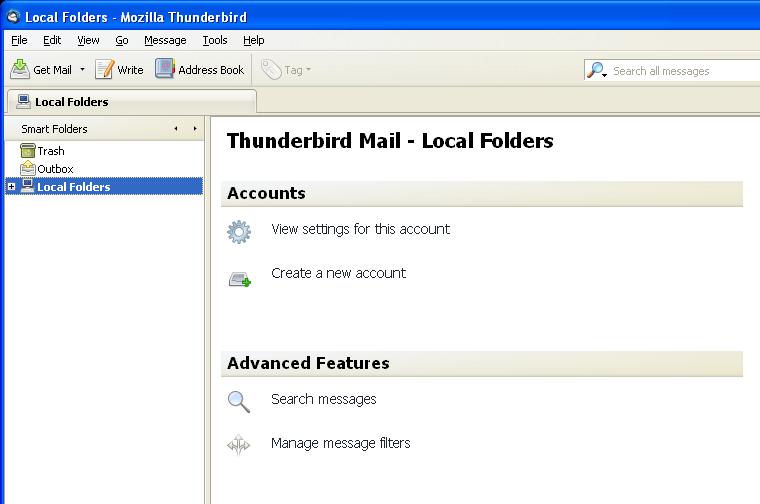
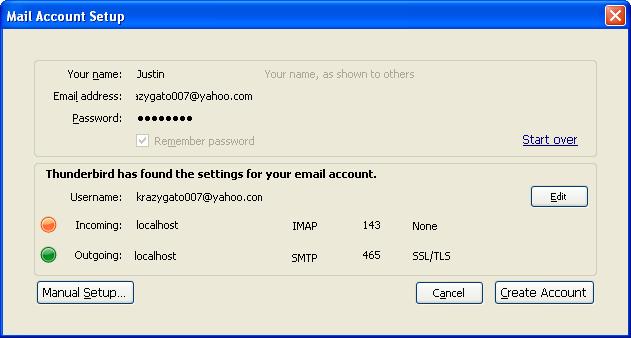
Go to File > New > Mail Account.
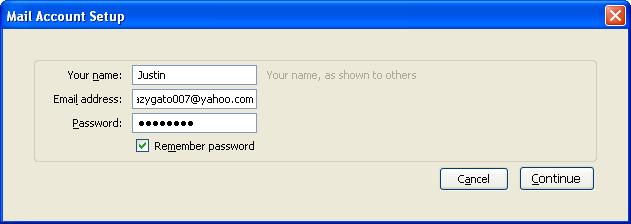
Fill in the form. Your name or nickname, then your Email Address, and Password for that email account. And click Continue.
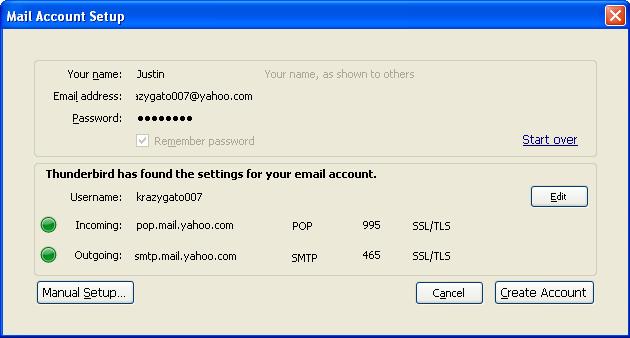
A series of mail settings appear. Unless you pay for Yahoo's Premium Service, none of these settings will work. Therefore, you have to change the settings to operate from a localhost server.
Click the Edit button on the right side of the window.
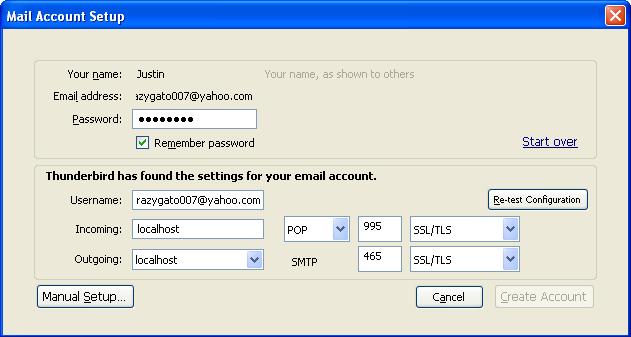
The Username has to be changed to your full email address. Change the Incoming server from pop.mail.yahoo.com to localhost. Also change the Outgoing server from smtp.mail.yahoo.com to localhost. When done, click Re-test Configuration.
Thunderbird will automatically reconfigure the other settings. When it's done, you will notice the orange dot next to the Incoming Server. When you click Create Account you will be asked if you want to continue with an unencrypted email account. If you wish to continue, click the check box next to I Understand the Risks and Continue.
I'm sure there are other Thunderbird Extensions you can install that will encrypt your email for you but I haven't tried any.
Now Thunderbird will detect your account and begin importing your email messages. If there are repeat errors like incorrect password or can't detect server, restart Thunderbird and retry.
Success

Once Thunderbird successfully detects your email account you can begin reading and sending email with that account.
By using the other Webmail extensions, you can add various other email accounts such as Hotmail or Gmail.
Be cautious when sending email though. I would recommend installing a Thunderbird Extension that will encrypt your email.
By using the other Webmail extensions, you can add various other email accounts such as Hotmail or Gmail.
Be cautious when sending email though. I would recommend installing a Thunderbird Extension that will encrypt your email.