How to Upload Program or Code Into Arduino Pro Mini by Using CH340 UART Serial Converter Cable
by mybotic in Circuits > Electronics
8907 Views, 5 Favorites, 0 Comments
How to Upload Program or Code Into Arduino Pro Mini by Using CH340 UART Serial Converter Cable
![20190108_093622[2].jpg](/proxy/?url=https://content.instructables.com/F8V/03PR/JQMOB2Z2/F8V03PRJQMOB2Z2.jpg&filename=20190108_093622[2].jpg)
The USB TTL Serial cables are a range of USB to serial converter cables which provide connectivity between USB and serial UART interfaces. A range of cables are available offering connectivity at 5 volts, 3.3 volts or user specified signal levels with various connector interfaces.
Description:
The cable is easiest way ever to connect to your microcontroller/Raspberry Pi/WiFi router serial console port. Inside the big USB plug is a USB<->Serial conversion chip and at the end of the 1 meter cable are four wire - red(power), black (ground), white (RX) into USB port, and green (TX) out of the USB port. The power pin provides the 5V @ 500mA direct from the USB port and the RX/TX pins are 3.3V level for interfacing with the most common 3.3V logic level chipsets.
Because of the separated pin plugs, this cable is ideal for powering and connecting up to the debug/login console on the Raspberry Pi or BeagleBone Black. Connect the pins as shown to power the Pi or BBB and establish the RX/TX link.
Features:
USB to UART TTL Red = V_USB
Black = Gnd
White = USB_RX
Green = USB_TX
V_USB is 5V TX and RX is 3.3V
CH340G IC Cable lenght: 1 meter
Items You Need
![20190108_105718[1].jpg](/proxy/?url=https://content.instructables.com/FOV/MOZ9/JQMOB18N/FOVMOZ9JQMOB18N.jpg&filename=20190108_105718[1].jpg)
UART cable is able to upload the code into Arduino Pro mini by using Arduino IDE Software.
To use it, we need:
- UART Serial Converter Cable
- Arduino Pro Mini 328P
Setup
![20190108_162129[1].jpg](/proxy/?url=https://content.instructables.com/FYB/SDD7/JQMOAC80/FYBSDD7JQMOAC80.jpg&filename=20190108_162129[1].jpg)
Connect the UART female header to the Pro-mini pin header as follows:
- Red --> VCC
- Black --> GND
- Green --> RXD
- White --> TXD
Upload the Code

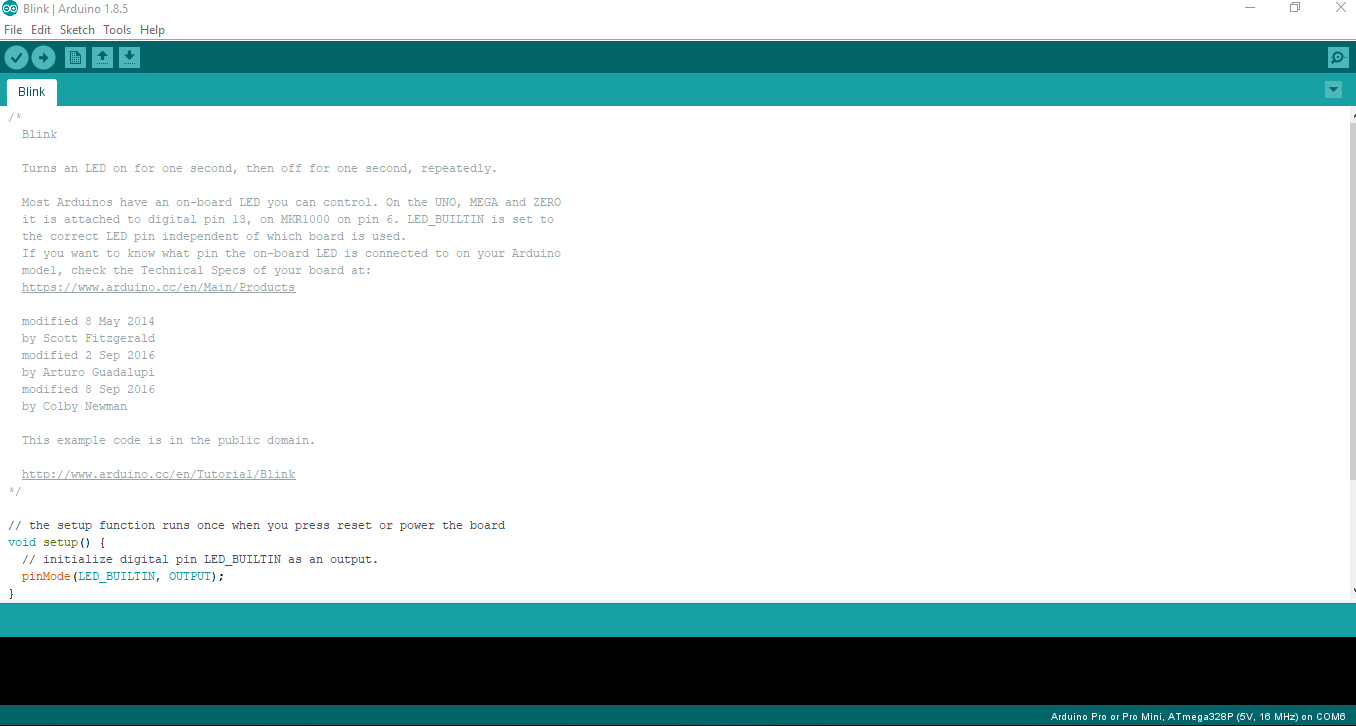
Then, plugin the USB cable to computer and open the Arduino Software.
- Click to the File\ Examples\ 01.Blinks.
- Make sure the port you use correctly by clicking at Tools\ Port.
- Set the board into Arduino Pro or Pro Mini at Tools\ Board.
- Hold the reset button on pro-mini while upload the code.
Finished
![20190108_110138[1].jpg](/proxy/?url=https://content.instructables.com/FRB/XZ3Y/JQMOB24G/FRBXZ3YJQMOB24G.jpg&filename=20190108_110138[1].jpg)
Pro-mini finally works according to the set programming.