Using SVG's Capabilities to Your Advantage in Making Art
553 Views, 3 Favorites, 0 Comments
Using SVG's Capabilities to Your Advantage in Making Art

Digital artists commonly have a fear of producing vector art with all these curves, styles, mathematical rules etc. as it feels absurds when you can't just draw with your pen. Not only that you can do anything in SVG which you can also do in some raster editor like PS, but vector graphics also have superior sides including:
(The following will be covered in detail in each step.)
- The resuting pictures are future proof, meaning they can be rendered by future generations at full resolution of their technology, and you don't need to create an enormous file for this.
- Transformations can be applied to objects (layers) without modifying them implicitly, even in the final product where one would have to rasterize rotated/scaled layers while flattening the raster image.
- Shapes are much easier to manipulate and any shape data is shared across anywhere it is used. For example you can create a transparent skin texture, draw a head shape with a tan and shade gradient and use the head shape itself to clip the texture and facial features, all with perfect antialiasing.
- You can embed raster and other vector images into your vector from external files on the net, and the final product preserves the link. This can allow you avoid copyright issues if you forget to cite the pictures, or just keep the production file size small.
- Vector (typically SVG) files can be interfaced in a web browser. You can have objects acting like hyperlinks, spanning the page width, running an animation, triggering page Javascript. For example a color picker made only using SVG and can be used by page Javascript is perfectly possible.
I myself produce some vector human drawings and upload them to deviantart.com/boraini, for proof of concept.
Supplies
A working, stable installation of Inkscape on your computer, or a similar vector editing application. Inkscape will be used as a reference for artist-targeted vector editor. As it is open-source, I consider it the most accessible vector editor. It's SVG-based workflow is also perfect for some of the tricks I will demonstrate.
I will also write some SVG XML code in later tips, so you can install a syntax-highlighting text editor if you want to dig further into these tricks.

Intuitive Shading

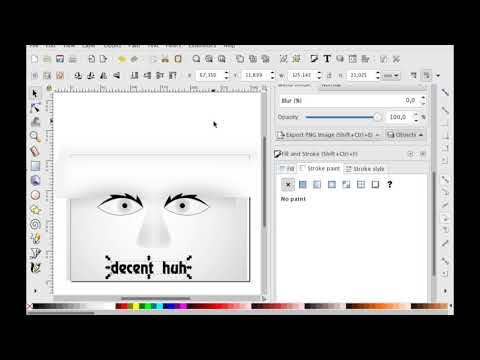
(The above pictures are GIFs. The play buttons are white and on the centers of the images.
Shading may seem like it can't be done properly only using gradients. Here are three methods which refutes this argument. All of them involve having multiple shapes that make up the shading, and clipping everything to the base shape. One of the methods uses multiple shapes filled with linear or radial gradients, then clipped. Another one uses a path which is blurred, then clipped. The last one uses the non-standardized mesh gradients, which I wonder if it will ever become a standard.
For the one with gradients:
- Create a new group
- Decide where the shading goes linear or radial. Notice alternating repetitive linear and radial gradients.
- Add shapes or paths corresponding the gradient regions you found in the previous step.
- Add corresponding gradients as the fill of these shapes. Leave one stop transparent and set the other to the shade color.
- Clip the group using the base shape. See "Clipping to Shape" to learn how to keep the clip path connected to the base shape.
For the one with blurred paths:
- Create a new group
- Determine how the dark part of the shading "flows".
- Add the "flow path". (Draw a path which passes through the dark shaded regions.)
- Set the path thickness depending on how intense the shade will be. You can adjust this later.
- Set the path stroke color to the shade color.
- Blur the path (Gaussian if you have an option). Now you can see how far the shade goes and its intensity. Readjust the path thickness and blur amount depending on the desired result. You may use more paths with different thicknesses and blur amounts.
- Clip the group using the base shape if needed. See "Clipping to Shape" to learn how to keep the clip path connected to the base shape.
For shading with mesh gradients (no demo):
Note: Mesh gradients were implemented exclusive to Inkscape SVG format, and now they talk about totally eliminating it. If you need to produce future-proof vector shading, stick with the above two methods.
- Cover the area to be shaded with some shape or path.
- Add a mesh gradient as the fill mode. Use the Mesh tool in Inkscape, for example.
- Get a good grasp of how the mesh works before digging into actual shading. I am serious.
- Disable shape rendering (hide the shape) to improve performance during the alignment of the mesh.
- Align mesh edges and control points along the edges where the surface slope varies, and on sharp or overhung edges such as the sides of human nostrils.
- Assign colors to the control points. You may find helpful creating a rectangle with a gradient fill which has all your shade values, and using the eye dropper tool to assign colors from here.
- Align the control points and edges of the mesh again, if needed.
Here are the times it took to produce the examples:
- The gradient shading example took 20 minutes to complete.
- The blurred path shading example took 15 minutes to complete.
- The mesh gradient shading example was getting out of hand by the time it takes, so I just gave up.
Uses of Uses

The SVG syntax is a very neat tool that allows developers (and artists, but likely without them knowing) to create more instances of a SVG object without creating separate data for the copied object, so without having to maintain the copy's data afterwards. While initially just being a clone of the original object with the same transformations, s can hold unique styles and transformations, and they can live in different objects than their originals, allowing me to demonstrate the following tricks.
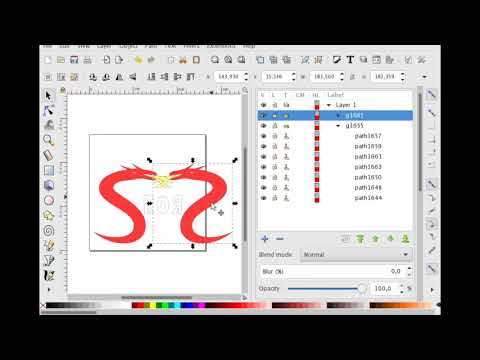
Symmetrical Editing (See Example 1, the left one.)
- Determine the symmetry axis of the thing you are going to draw. I suggest drawing the thing rotated, so the symmetry axis stays horizontal or vertical.
- Draw only one half of the object. Edit the open ends' coordinates, so they have the same x and y coordinates depending on how your symmetry axis is oriented.
- Group everything you just drew if you have multiple objects that make up the drawing.
- Select your drawing, or group of drawings, and create an of it. You have to do this by clicking Edit>Clone>Create Clone in the top-left menus.
- Flip the (clone) horizontally or vertically, again depending on your symmetry axis orientation.
- Move the (clone), aligning the open ends. You may find snapping helpful.
- Try editing the original shape. The clone should follow the changes with a slight lag.
- If you need to add a gradient or something to the resulting symmetrical shape; group the two shapes, create a separate shape with the filling you desired, and clip the fill shape using the symmetrical group. Simple.
- If you ever need to combine the symmetrical sides, convert the to a regular group/object (Edit>Clone>Unlink Clone), and join the sides like how you join any other set of objects.
Editable Clip Path (See Example 2, the middle one.)
- Create the clip path as usual, a single shape or a group of shapes, actually grouped.
- Create an (clone) of the clip path.
- Use the as the clip path. Try editing the original clip path you created. The shape of the clipping will change with a slight lag.
Both examples took only, like, a couple of minutes.
Bring Life to Your SVGs

As you define everything mathematically in SVG, you can also define movement using the system called SMIL (Synchronized Multimedia Integration Language). Well, we aren't going to integrate any multimedia, only create some animations. Any number of these animations can be used in the same XML document.
For the hovering lozenge (green diamond) example: (svgdemo_shmanimation)
- Add the object to be animated. If the element doesn't have a native y value, such as a , create an (clone) of it and animate it instead.
- Add an or node as a child of the object you are animating. Prefix with svg if everything else is also prefixed, such as in Inkscape.
- Add the following attributes to the node:
- begin = "0s" (Animation starts automatically)
- dur = "1s" (Period is 1 second)
- repeatCount = "indefinite" (Animation keeps repeating)
- attributeName = "y" (We are animating the y value)
- values = "0;-25;0" (The "keyframes." Object starts at bottom position, you may adjust -25 later)
- keyTimes = "0;0.5;1" (Ratio of keyframe times to the period)
- calcMode = "spline" (We use a custom animation interpolating function)
- keySplines = "0.37 0 0.63 1; 0.37 0 0.63 1;" (Beziér curve (0, 0) (0.37, 0) (0.63, 1) (1,1) as the timing function) (creates simple harmonic motion)
OR keySplines = "0 0 0.44 1; 0.56 0 1 1;" (creates bouncing effect)
- Save the document and open the file in a good web browser (i. e. not IE) to see the result. It will likely not work. Check you used ";", not "," , used "dur" instead of "duration", have (keyframes - 1) number of keySplines etc.
For the bootleg SCP-999 example: (svgdemo_metamorphosis)
- Create the object to be animated as a single path.
- Create a copy of the animated path and edit it, so it looks like what the animated path turns into and turns back from.
- Add an or node as a child of the object you are animating. Prefix with svg only if everything else is also prefixed, such as in Inkscape.
- Add the following attributes to the node:
- begin = "0s"
- dur = "1s"
- repeatCount = "indefinite"
- attributeName = "d"
- values = "d attribute value of animated path; d attribute value of path copy; d attribute value of animated path;" (Of course replace whatever is between ";"s with what it describes. Tedious task, I know.)
- keyTimes = "0;0.5;1"
For the wandering-around ball example: (svgdemo_motionpath)
- Create the object to be animated. Center it at the top left corner of the document.
- Draw a motion path for the object. Using the XML Editor, set its id to "motionPath" or something you can remember.
- Add an or node as a child of the object you are animating. Prefix with svg only if everything else is also prefixed, such as in Inkscape.
- Add the following attributes to the node:
- begin = "0s"
- dur = "3s"
- repeatCount = "indefinite"
- Add a or node as a child of the node. Set its xlink:href attribute to "#motionPath" or the id of your motion path prefixed with "#".
It took me 5 minutes for each of these examples, of course after getting a grasp of SMIL.