Using Opacity Masks in Adobe Illustrator
by McWhizzleteeth in Craft > Costumes & Cosplay
10760 Views, 22 Favorites, 0 Comments
Using Opacity Masks in Adobe Illustrator
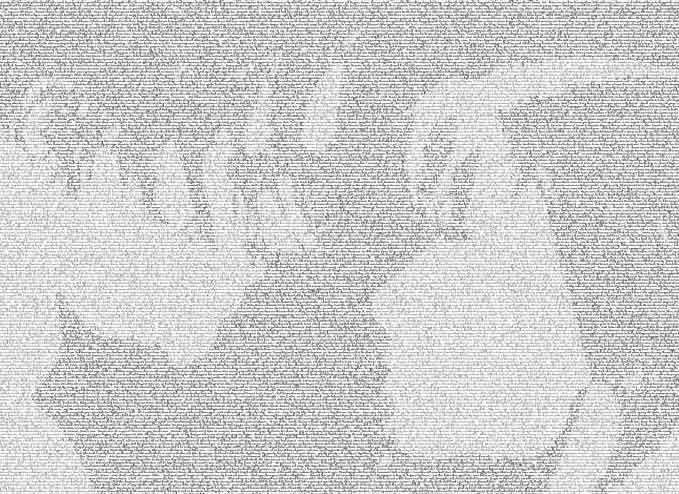
The "Origin of the Species - wall hanging" project makes a nice use of opacity masks in Illustrator, embedding an image in a field of text by changing the opacity throughout. But pulling this off can be difficult to figure out. This guide will run you through the steps to embed an image in a field of text merely by changing the opacity of the text itself. In this example, a silhoutted image is embedded in the full text of Romeo and Juliet.
Gather Your Image and Text
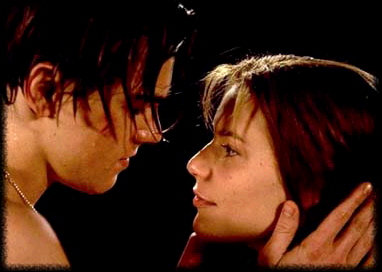
This guide will use a stripped down example because the actual sizes of text and images involved in a fullsize wall hanging will grind your system down to a crawl. You should experiment on a small scale before committing to a fullsize design.
*Obtain an image (it should be something that would look good as a silhouette)
*Obtain the text (Project Gutenberg is a great resource) and format out all the newlines and other whitespace (see the "Book Wall Hangings - Flatlands - cube" project for more info on this...)
I used the text of Romeo and Juliet with an image of Leonardo di Caprio andClaire Danes from the movie Romeo+Juliet.
*Obtain an image (it should be something that would look good as a silhouette)
*Obtain the text (Project Gutenberg is a great resource) and format out all the newlines and other whitespace (see the "Book Wall Hangings - Flatlands - cube" project for more info on this...)
I used the text of Romeo and Juliet with an image of Leonardo di Caprio and
Process Your Image
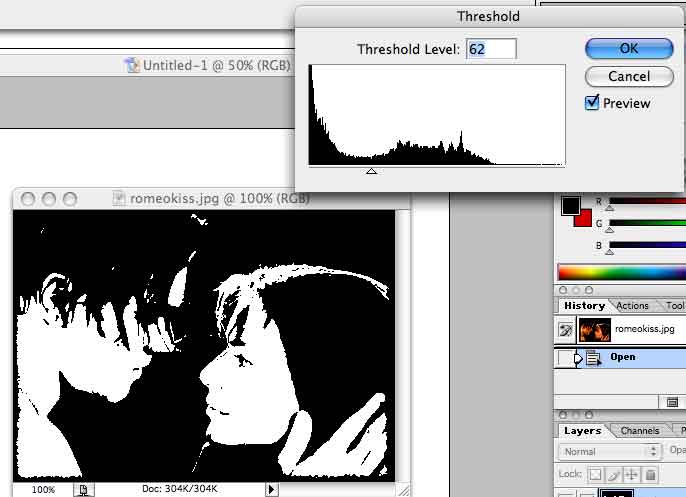
Basically you must turn the image into a silhouette. In Photoshop you can go to Image--Adjustments--Threshold and drag the slider until you achieve satisfactory results.
Vectorize Your Silhouette and Create the Mask
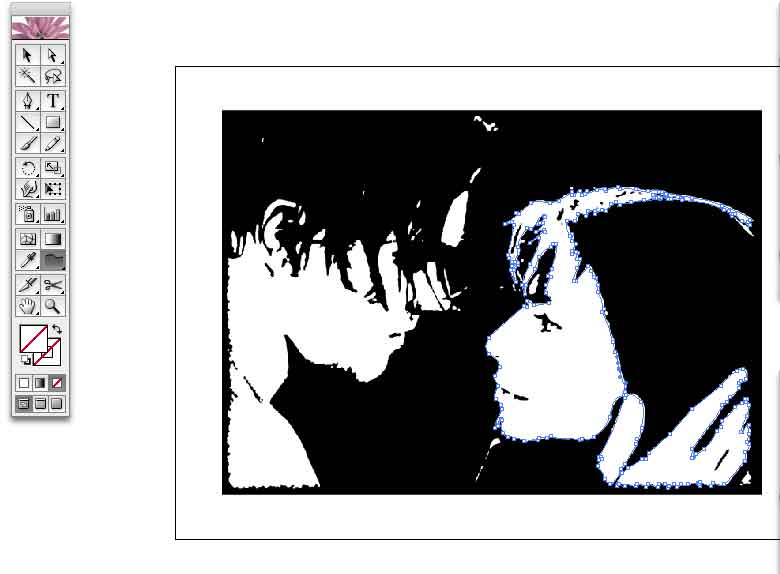

You must turn your silhouette into a vectorized graphic before you can turn it into a mask. Resize it in Photoshop, then copy and paste it into Illustrator (if it's too big to copy/paste, just save it in Photoshop and open it in Illustrator. You should be able to copy it into the right layer if you at least get it open in Illustrator first). Using the "Auto Trace Tool" in Illustrator (I'm using CS... I believe CS2 does this a bit better with a different tool), click all over the silhouette until you've vectorized all the parts you want to include in the final design. There isn't much to using the Auto Trace Tool, just lots of clicking. One note: in my example, my negative space is white, so I made sure to set the Fill Color to white in the palette before I started vectorizing. If it were black, vectorizing would turn the negative space black. When you're done, Select All and then go to Object--Group to gather all the vectorized bits into a single grouping.
This is your mask. Rename the current layer (this should be the only layer you have right now) to Mask, and then in the Layer box's drop down menu, duplicate the layer so you have a backup.
This is your mask. Rename the current layer (this should be the only layer you have right now) to Mask, and then in the Layer box's drop down menu, duplicate the layer so you have a backup.
Add Your Text Layer
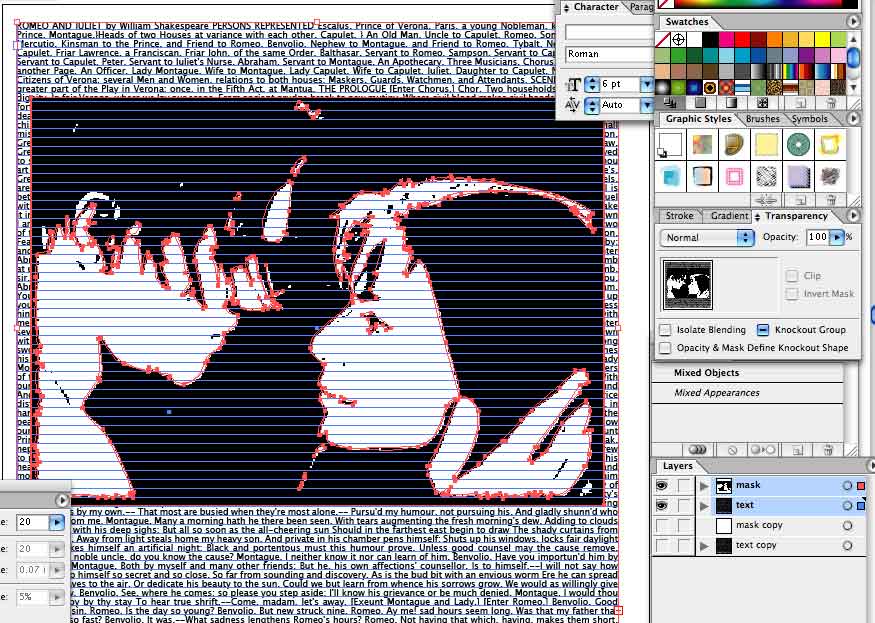
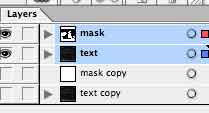
From the Layer box's drop down menu, create a new layer, and deselect all the layer views except for this new blank layer. Using the Type Tool, insert your text and adjust it for sizing. You should have your bed of text laid out just the way you want it. Now duplicate this text layer, calling the original layer Text and the duplicate Text Copy, or something appropriate. Select the layer views for the Mask and the Text layer with Mask being on top. Shift-click so both layers are highlighted as well (see the image provided in this step). Now do a Select All, and you should see both the text bed and the silhouette highlighted.
Create Opacity Mask
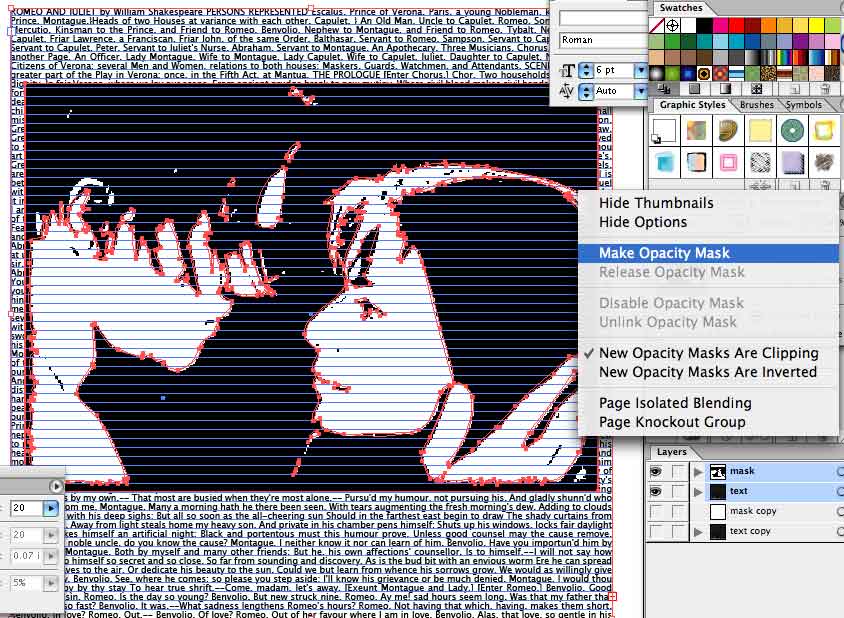
If you didn't follow the previous step exactly, you're going to have lots of trouble. It is very easy to have something extra selected or deselected and ruin the entire process... this is why you make copies of your layers when they're good, so you can just delete your errored layers and start over from a fresh point.
To create the opacity mask, find the Transparency window and select Make Opacity Mask from the drop down menu. Make sure you check "Clip" and uncheck "Invert Mask"
To create the opacity mask, find the Transparency window and select Make Opacity Mask from the drop down menu. Make sure you check "Clip" and uncheck "Invert Mask"
Alter Opacity of Masked Text to Create Light-Text Layer
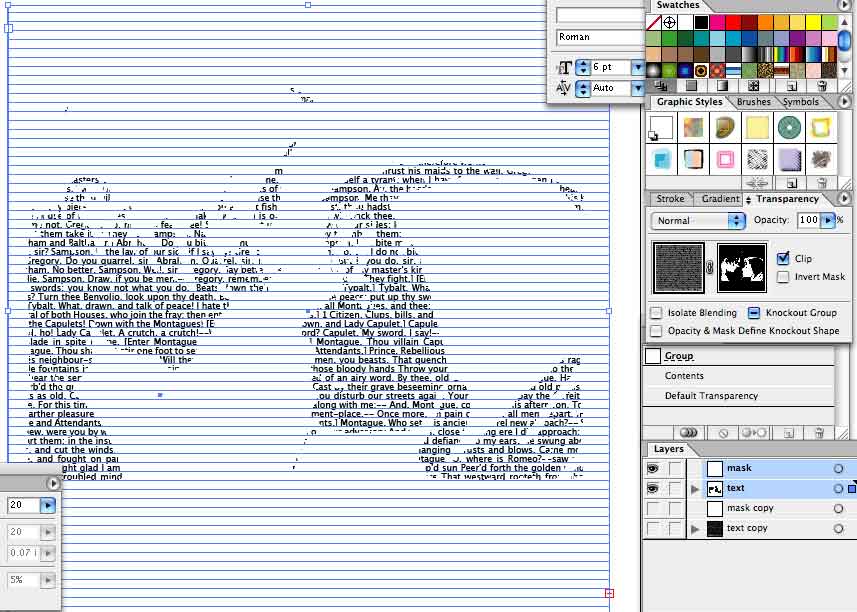
If your opacity mask went through properly, you'll have something resembling this image where the masked region is all that remains (the layers are still highlighted, that's why you see the horizontal lines in the enclosed image here). You can change the Opacity in the Transparency window to create the light text region of your final design. Now, deselect all layer views except this light text layer you've created and duplicate it for safekeeping. Drag these two layers down to the bottom of the layers box.
Create Dark Text Layer
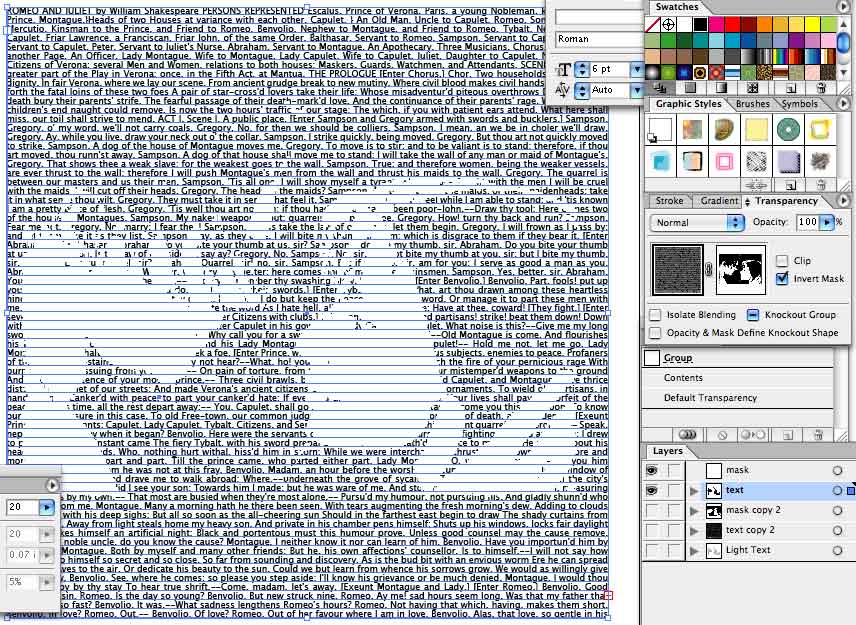
All you have to do now is create a layer with negative space where our previous light-text layer resides. Go back to your Text and Mask layers that you copied for safekeeping and duplicate 2 new working layers (one of each), and move these to the top of the layers box. Repeat the same procedure to create an opacity mask as in step 5, but this time after making the opacity mask, deselect "Clip" and make sure you check "Invert Mask". You should have the inverse of the light-text layer. Again, in the image I've provided, the horizontal lines are due to having the layers being highlighted. Deselect all layer views except your dark text layer and duplicate it for safekeeping.
Put It All Together
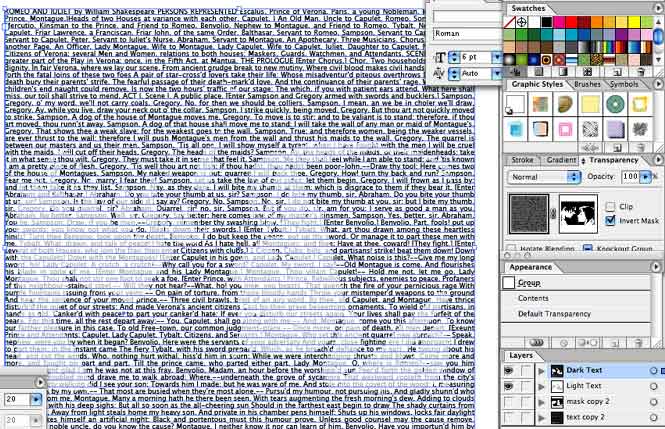
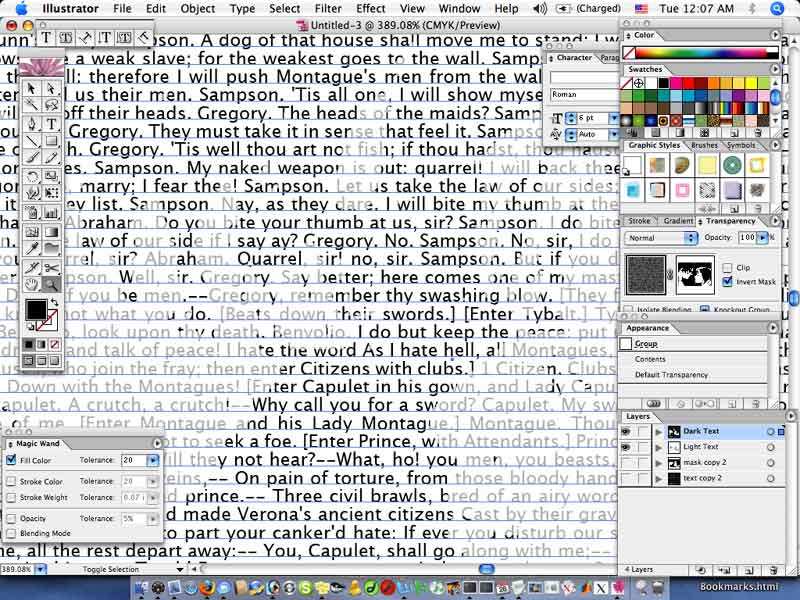

Select just the views for the Light Text and Dark Text layers. They should superimpose perfectly. Zoom in and check it out where the text transitions from dark to light. Pretty neat, eh? To clean up, shift-click both layers in the layers box and select Merge Selected from the drop down menu to create your final layer. You can delete all the rest of the layers now if you'd like, or simply deselect their views. Remember, in this example I've used much smaller scales for simplicity. In a real design this would look much, much better with the full text and full size images.