Using LCD Display With an Arduino
by ArshamGh in Circuits > Arduino
2262 Views, 3 Favorites, 0 Comments
Using LCD Display With an Arduino
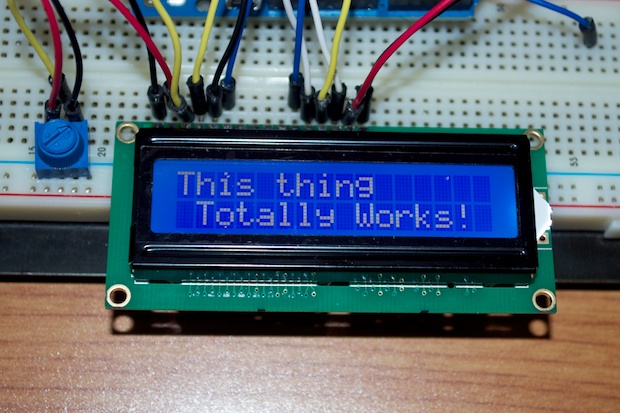
In this Instructables lesson, displaying texts and featuring them on a 16 by 2 LCD using Arduino is demonstrated. Let's get started and I hope you enjoy!
Materials
1. Arduino UNO
2. Bread Board
3. 16x2 LCD Board
4. Jumper Wires
5. 9 to 12 Vols Alkaline Battery with its Connector
6. Arduino IDE installed on MAC or Windows
7. Potentiometer
8. USB 2
Introduction to the LCD
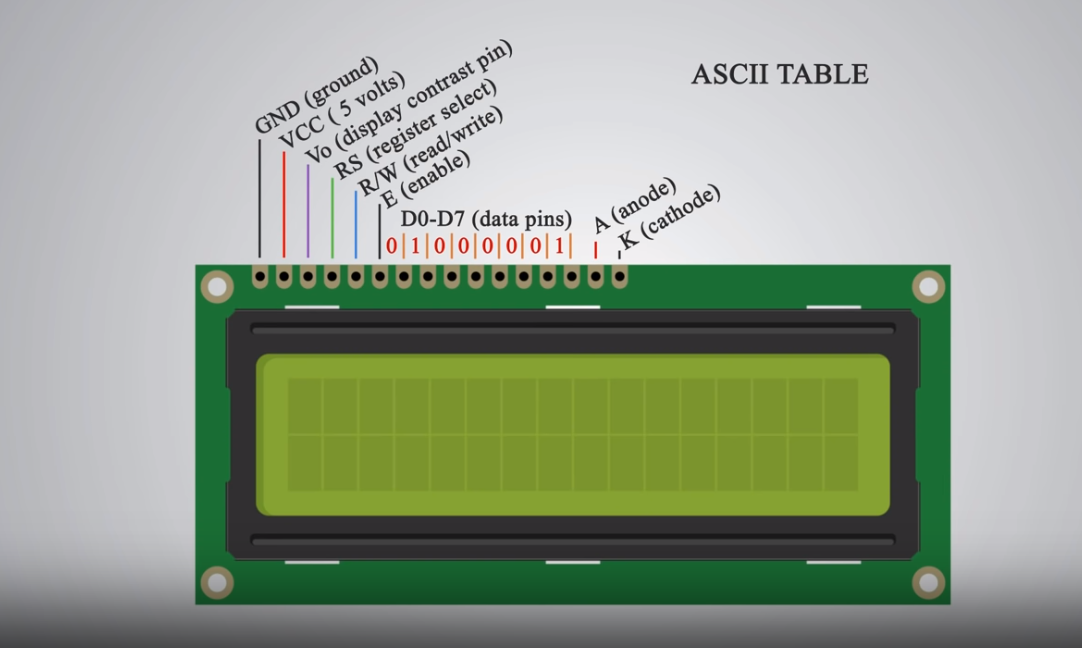
Arduino is a device that is widely used by students for various robotics projects and sensors to detect heart-rate, temperature, air pressure ... Arduino is an open-source hardware and software company, project and user community that designs and manufactures single-board micro controllers and micro controller kits for building digital devices and interactive objects that can sense and control both physically and digitally. Basically Arduino is capable to store codes inserted from Arduino IDE using C and C++ coding languages from a computer to manipulate the functions that are assigned for the device to do. LCD (Liquid Crystal Display) screen is an electronic display module and find a wide range of applications. A 16x2 LCD display is very basic module and is very commonly used in various devices and circuits. A 16x2 LCD means it can display 16 characters per line and there are 2 such lines. The LCD has 16 pins. Starting from left to right, the first pin is GND (ground). The second pin is the VCC (5 volts) pin which is connected to the Arduino board. The third pin is the Vo (display contrast) pin which can be connected to a potentiometer to adjust the display contrast. Fourth pin is the RS (register select) pin used for selecting the commands/data sent to the LCD using methods defined in the Arduino Liquid Crystal packages. Fifth one is the R/W (read/write) pin which selects the mode whether we read or write on the LCD. Sixth pin is the E (enable) pin which enables writings to the registers. The next 8 pins are data pins D0 to D7 that registers are written in using binary numbers according to the ASCII Table. The fifteenth pin is the A (anode) , and the last one is K (cathode).
The IDE
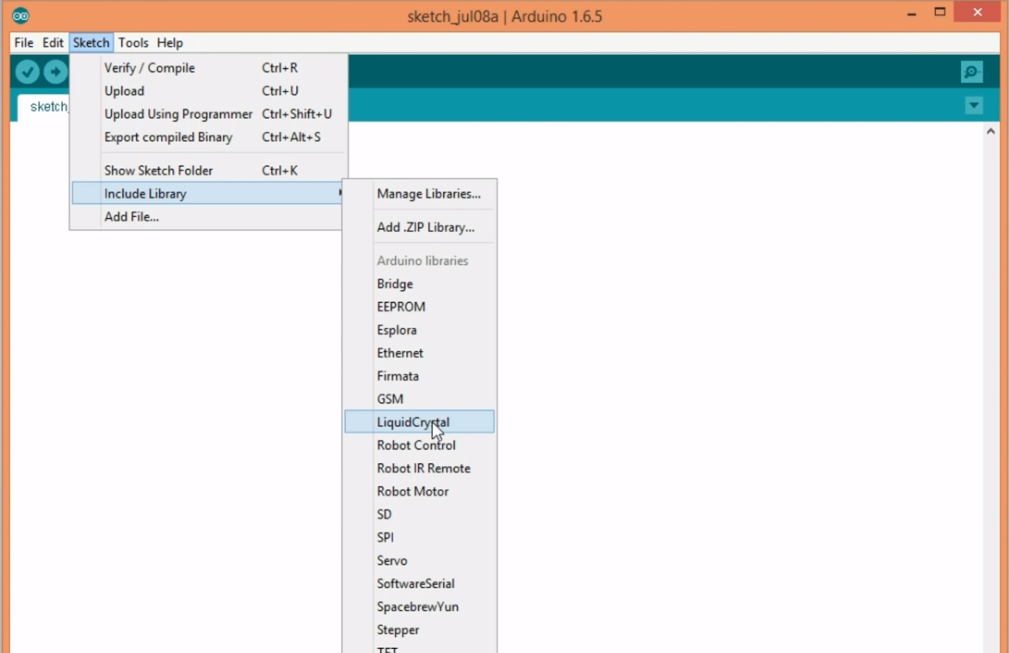
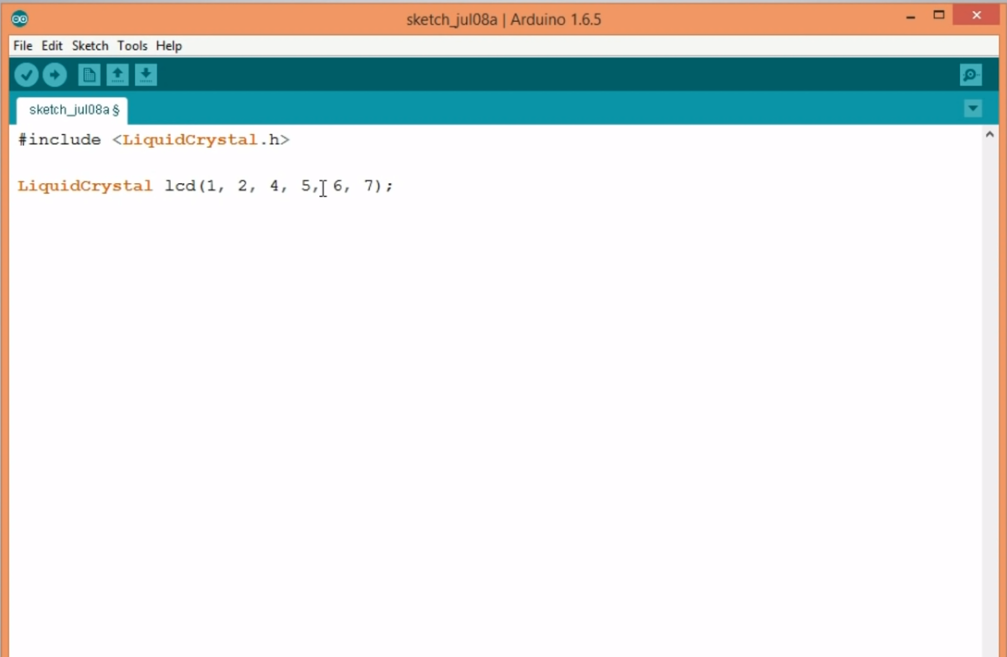
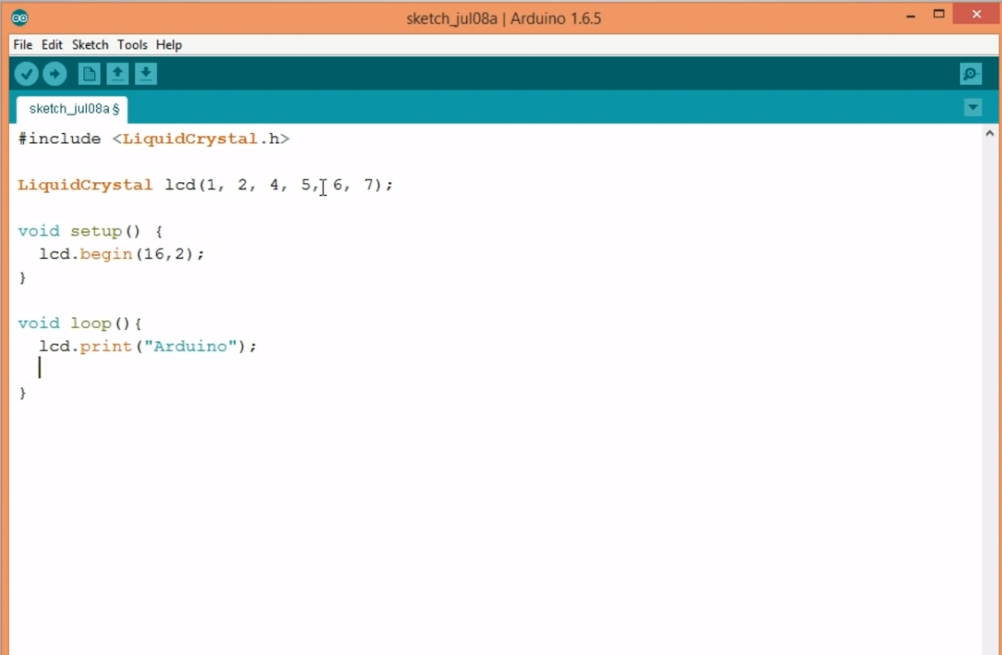
The IDE Now that we have a little undrestanding of what Arduino and the LCD are, let's jump ahead into the Arduino IDE and install that on our computer. Arduino IDE can be downloaded from Or from the windows store on windows 8. The IDE is the place where coding takes place. Here, the codes are written in C and C++. After compiling the code and troubleshooting the mistakes, the complied code is sent to the Arduino Board using the USB 2 cable. After installing the IDE we implement the Liquid Crystal package as shown below. Liquid Crystal Package implementation... Installing LiquidCrystal package opens our access to use the methods and implementations defined in the specific package regarding to the LCD on our IDE to be compiled and stored into the Arduino board. After package installation, the setup and loop are written in the IDE. Follow the above and copy the parameters to make a connection between the board and the LCD.
Copy the codes Then click on the arrow on top left corner check mark of the IDE and compile the code.
Connections
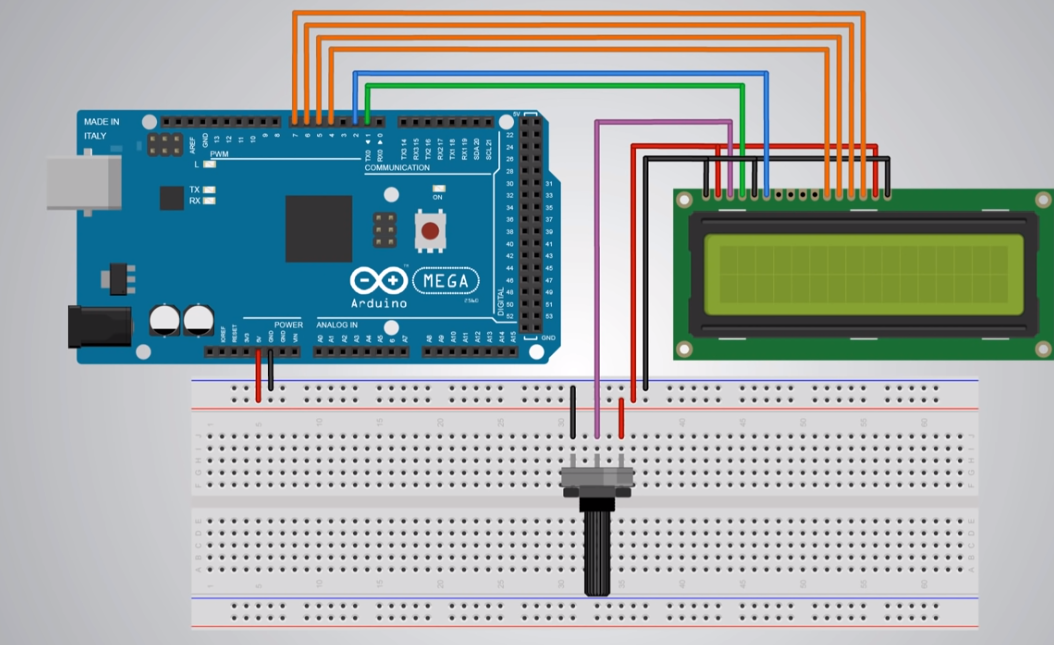
The board and LCD connections Now is the time to setup the board and the LCD and perform the required connections. Follow the Scheme provided below. Scheme img goes here... The bread board is used to prevent messiness and improve the simplicity and neatness of the code. The pins on the bread board are functional vertically, so if a 5 volt pin from the Arduino is connected to the bread board, very other vertical pins on that column are now consisting of 5 volts. The potentiometer is a device that is used for adjusting the contrast of the LCD (the brightness), without a potentiometer, the text may be to bold or bright, so it is better to use one.
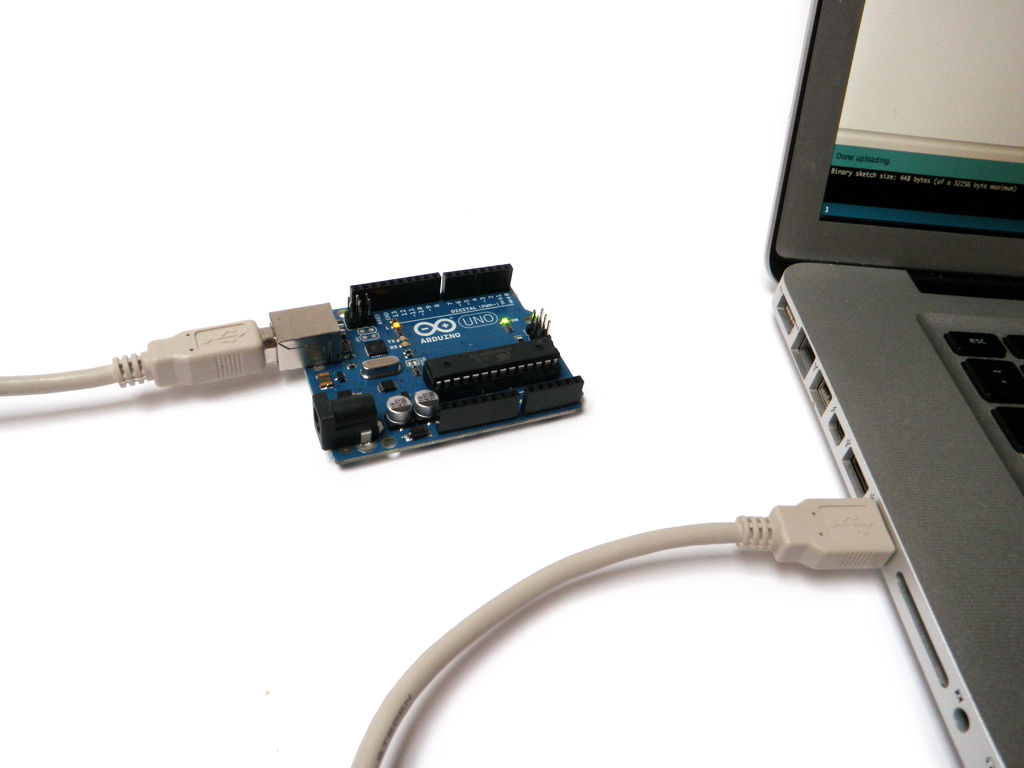
Compiling and Storing the Code into the Arduino For the last step, connect the Arduino to the computer using a USB-2 cable. compile the code and select the Arduino UNO on the IDE and store the code into the Arduino by clicking on the horizontal arrow on the top left corner of the IDE.
Extra Mile
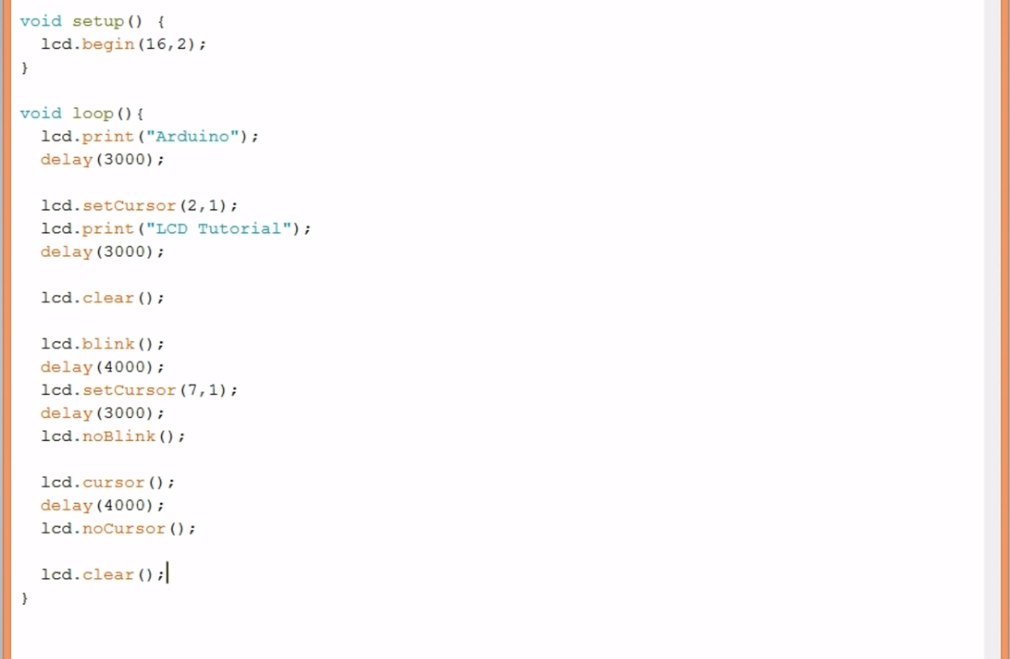
The note "Arduino" should be appearing on your LCD. Congratulations !!! You have made your first text on the LCD... Now if you want to go the extra mile, www.arduino.cc has all the methods and explanations that can be used to use on your text for further design and change, move, personalize your own text. Above are some of the example codes found in the website. Try them yourself.
I hope these information were beneficial ... Thanks.