Using CorelDraw (A Tutorial)
I use CorelDraw A LOT and I find myself explaining various things over and over in my Instructables. I don’t think I’ll stop that but it might help some people if I go over the major concepts in one place.
I’m just going to go over the 10 most needed operations in CorelDraw. If this is useful and doesn’t cover enough I’ll do another Instructable.
I am using CorelDraw Home & Student X6. TechShop has (much to my annoyance) CorelDraw X5. There are very few differences between the two but, much to my disgust, CorelDraw X5 can't read the standard save of X6. The work around is to export your coreldraw x6 files as CMX5 files.
"I made it at Techshop!" http://www.techshop.ws
Creating and Saving a New Document
When you first open CorelDraw there may be one or more dialog boxes which you probably want to just close.
To create a new document you can do file->new or ctrl-n or you can click on the icon in the extreme upper left corner of the window, just below the “file” menu.
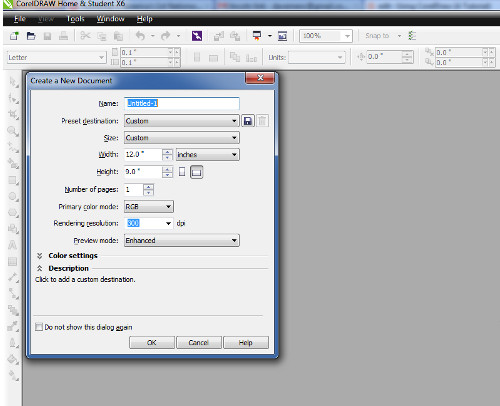
This will cause a dialog box (see image). In this dialog box you can set the name of the document and various other things but for now just say “OK”.
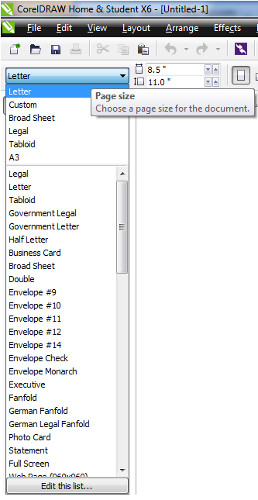
There is a rectangle on the screen with a drop shadow behind it. This is the document. At the upper left side there is a drop down that might say “letter” or “broadsheet” or “custom”. Pull it down and select “custom” (see image). Next to that pull-down there are 2 boxes with horizontal and vertical dimensions of the page. If you are using a laser etcher, you should set these to 24”x18”.
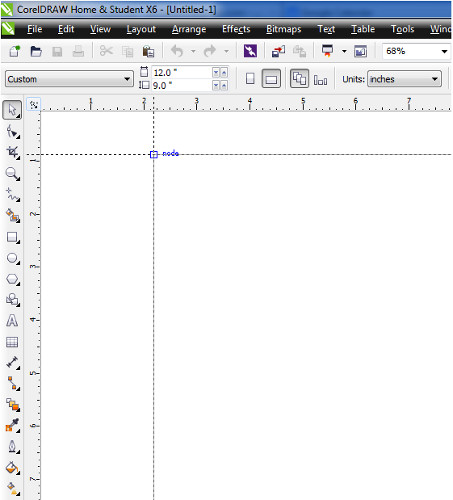
You should also “zero” your rulers by clicking on the corner where the 2 rulers meet and dragging it to the corner of the page (see image). Keep in mind that the horizontal ruler increases to the right but the vertical ruler increases in the up direction. This means that all the locations on the page have a negative Y value.
To save a document you can use file->save as. Once you’ve specified the file name you can use ctrl-S or click on the disk icon at the top of the page or use file->save.
If you want to save a different file type you would use file->save as and use the “save as type” pull down to select what type of file you want. Again, if you are using this file at techshop and you have version X6 you want to save it as a "coreldraw presentation exchange format 5.0".
Making Shapes (Box/Circle/Freehand/Polygon)
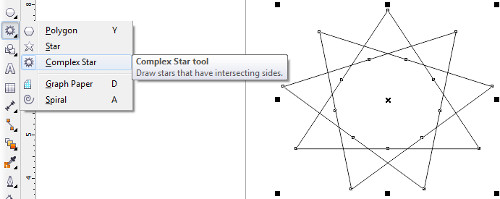
Now we need some kind of object. You can use the box tool (F6 and the 7th tool on the left hand tool bar). Or the ellipse tool (F7 and the 8th tool). Or the freehand tool (F5 and the 6th tool). Or the polygon tools (F8 and the 9th tool). The polygon tool will let you do spirals or stars.
To access the various options for each tool, click on the lower right hand corner of the tool button (where there is a little black triangle) and select the option you want.
Create an object just so you can play with it through the rest of this tutorial. It doesn’t matter WHICH object.
I created a complex star (see image).
Select an Object
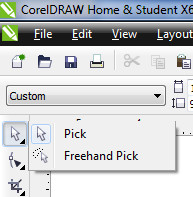
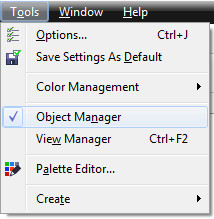
The selection tool is the very first tool in the tool bar on the left (see image). It has a rectangular picker and a freehand picker but most of the time you will simply click on an object. It helps if you click on an edge. One caveat: if there are multiple objects and some are in front of some others the program will select the object that’s in front. In those cases you can use the “Object Manager” (tool->object manager) to get the exact object you want. More on this in step 10.
When you select something, all the menus change based on what is selected; there are different options for objects and text and bitmaps and nothing selected. For example, if you select two things together the "trace" options in the bitmap menu will not be available. Keep this in mind if a menu option you want is grayed out.
When you select something, all the menus change based on what is selected; there are different options for objects and text and bitmaps and nothing selected. For example, if you select two things together the "trace" options in the bitmap menu will not be available. Keep this in mind if a menu option you want is grayed out.
Fill and Outline
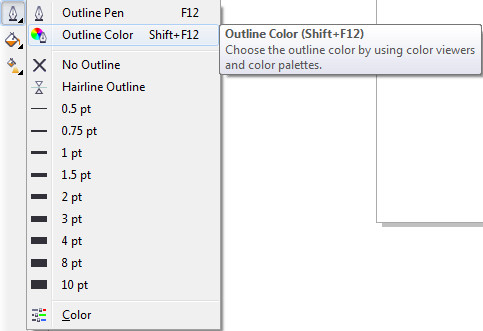
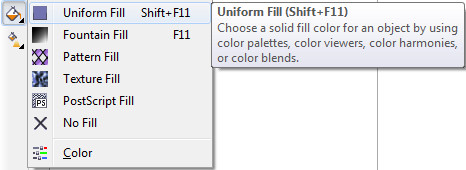
Select the object you created. You can now use the fill and outline tools (the “outline pen” is the 15th tool on the left, it looks like a pen nib; the fill tool is the 16th, it looks like a bucket) to set the fill and outline parameters(see image).
The fill tool allows you to set the fill pattern and color of your object. If you set it to “no fill” it will be transparent. If you set it to “uniform fill” it will just be one color. If you use “fountain fill” you can make a gradient of colors. You can also fill with a pattern or a texture or use “postscript fill” which allows for parametrized patterns.
The outline tool allows you to set the outline width and color or to remove the outline altogether. For laser etchers and other CNC machines “hairline” is an important setting as it means “vector cut”.
Straight Lines

Sometimes you want just a straight line to connect to shapes or even just to separate two parts of the drawing. You can use the “straight line connection tool” for this. It Is the 14th tool on the left and it looks like a line with two boxes.
It is actually a lot more than a line drawing tool but the only thing I’ll talk about here is that it can “attach” to other objects. This ensures that there are no gaps between the object and the line but it also can be frustrating if you WANT there to be gaps.
It is actually a lot more than a line drawing tool but the only thing I’ll talk about here is that it can “attach” to other objects. This ensures that there are no gaps between the object and the line but it also can be frustrating if you WANT there to be gaps.
Making Text

The text tool (11th tool on the left, looks like the letter A) allows you to write text (see image). Once you select the tool some settings appear at the top of the page which allows you to set the font and the size and various other attributes of the text.
Note that if there is no text selected then the settings apply to future text. So you either have to do the settings before you type anything or go back and select all your text and change the settings.
Text is a whole tutorial by itself but I will mention just one thing that is important and not obvious: “convert to curves”. If you take your text and convert it to curves it stops being text (which is a special kind of object) and becomes just shapes.
The most useful thing about this is that you can move your drawing to another computer that doesn’t have all the fonts installed and your drawing will still work because the text isn’t text and therefor no longer requires any particular font!
There are also various tricks you can do with a collection of curves that don’t work on text.
Bitmaps & Objects
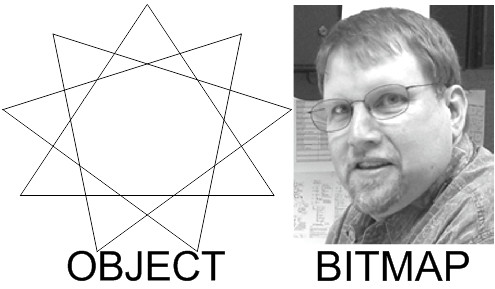
A bitmap is a collection of pixels in a rectangular shape. On your computer it may be a “jpeg” or a “tiff” or a “png” or a “gif” or any of a whole collection of other types. In CorelDraw all those are converted to a bitmap. You can apply various filters and other effects to a bitmap which you can’t do to an object. But bitmaps always look kind of funky, especially if you change their size.
An object is a collection of curves that are defined in such a way that they can scale well. Objects will generally look better even if you generated the object from a bitmap. There are a wide variety of things you can do to objects that are quite distinct from what you can do to bitmaps.
Sometimes I find it useful to change objects or bitmaps to the other kind of thing so that I can do some operation. Sometimes I even change them back again (see https://www.instructables.com/id/Make-A-Wooden-Spiral-Pendant/).
Converting Objects to Bitmaps
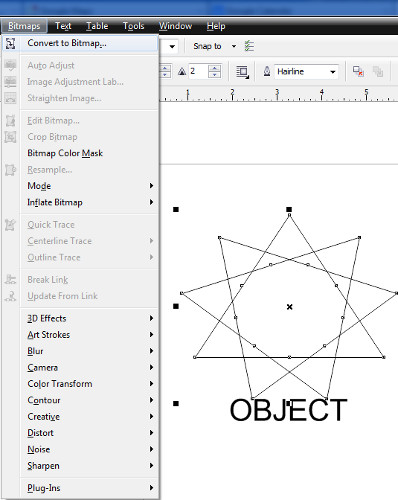
If you have an object (perhaps some text or a complex set of shapes you’ve created) you can convert it to a bit map by selecting it and then the Bitmap->Convert to bitmap menu option (see image). Be sure to have everything you want converted selected when you do that.
Converting Bitmaps to Objects
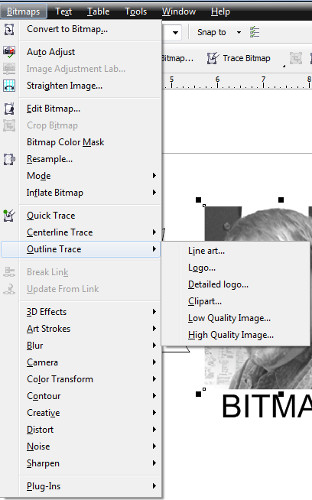
Converting bitmaps to objects is a lot more complicated but CorelDraw has a collection of tools which do a pretty good job. You access these tools by right clicking on a bitmap and selecting the tool you want to use (see image).
Quicktrace will convert a bitmap to a vector object without asking any questions. If that works then you are good to go. If not then undo and try something else.
Centerline trace tries to find the centerline of your bitmap and removes the rest. It’s good for a bitmap that is of a line drawing where you want to convert the line drawing to a vector object.
Outline trace tries to find the outline of your bitmap.
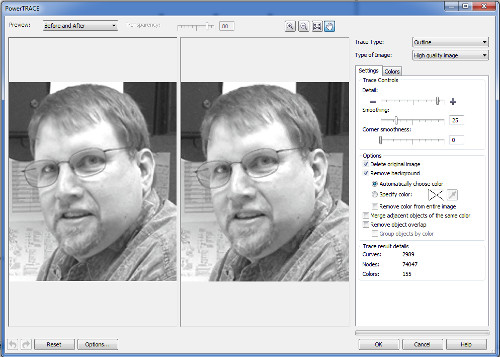
Centerline and outline give you various choices (see image). The first is what kind of art you start with. Ideally, you simply select whatever type of bitmap it is. The other two things you should play with are detail and smoothing. Usually you will want to delete the original image and remove the background but there are times when that’s not what you want.
I should mention that the kind of bitmap I have selected here is probably not going to make a good object. It's more for line art and logos.If you were to look closely at the conversion of the bitmap you would find that it has create hundreds (thousands?) of arbitrary regions which it has filled with different colors. I have yet to find anything I could do to such an object that I couldn't do with the original bitmap. Still -- pretty nifty! In this case, I only wanted to show the dialog box, not the result so it's OK.
Ordering Objects
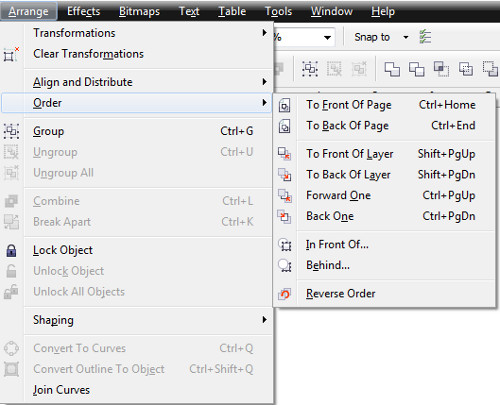
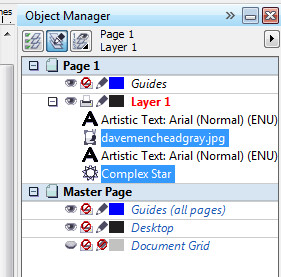
Drawings with multiple objects have the objects in a sort of a stack. You can think of this stack as the printing order. Everything prints for “Bottom” to “Top” so the top most objects will obscure the bottom most objects.
You can change this order by selecting Arrange->order and then select the change you want to make.
Or you can see how everything “stacks up” by going to tools->object manager (see image). This creates a pane on the right hand side that lists all the objects and shows their order (see image). You can change their order by dragging them around. You can also select an object by clicking on it and multiple objects by clicking on them with the shift key.
In Conclusion
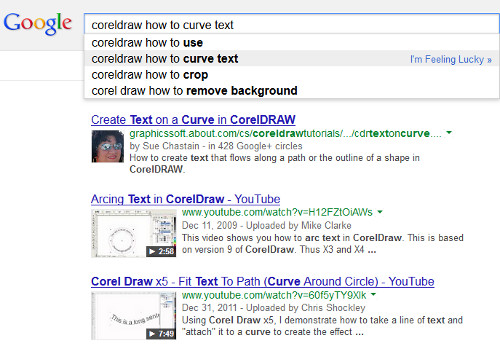
I’m sure that there is a lot of stuff I didn’t tell you that you wanted to know. I just wanted to cover a few basic concepts. You can find lots more on the web by typing “CorelDraw” and your question into google.