Using Autodesk Inventor and Autocad to Create Vector Files for Manufacturing
by EvanS78 in Workshop > Laser Cutting
8197 Views, 11 Favorites, 0 Comments
Using Autodesk Inventor and Autocad to Create Vector Files for Manufacturing
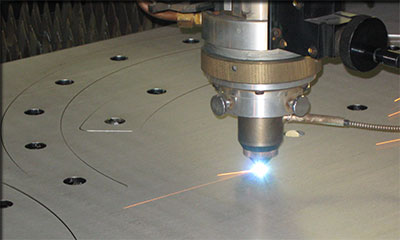
Introduction:
This instructable will show you how to take a 3D part that you have in CAD (Autodesk Inventor) and show you how to create a file that can be used on a water or laser cutter. This manual assumes that you already have experience with 3D modeling so we will not be discussing how to model parts.
Materials Needed:
- A computer with Autodesk Inventor installed (in this tutorial we will be using the 2015 versions)
- Access to a laser cutter or water cutter
- Building material for the parts I.E. Plastic/acrylic sheets, sheet metal, etc.
Open Up a Part That You Wish to Laser/water Cut.
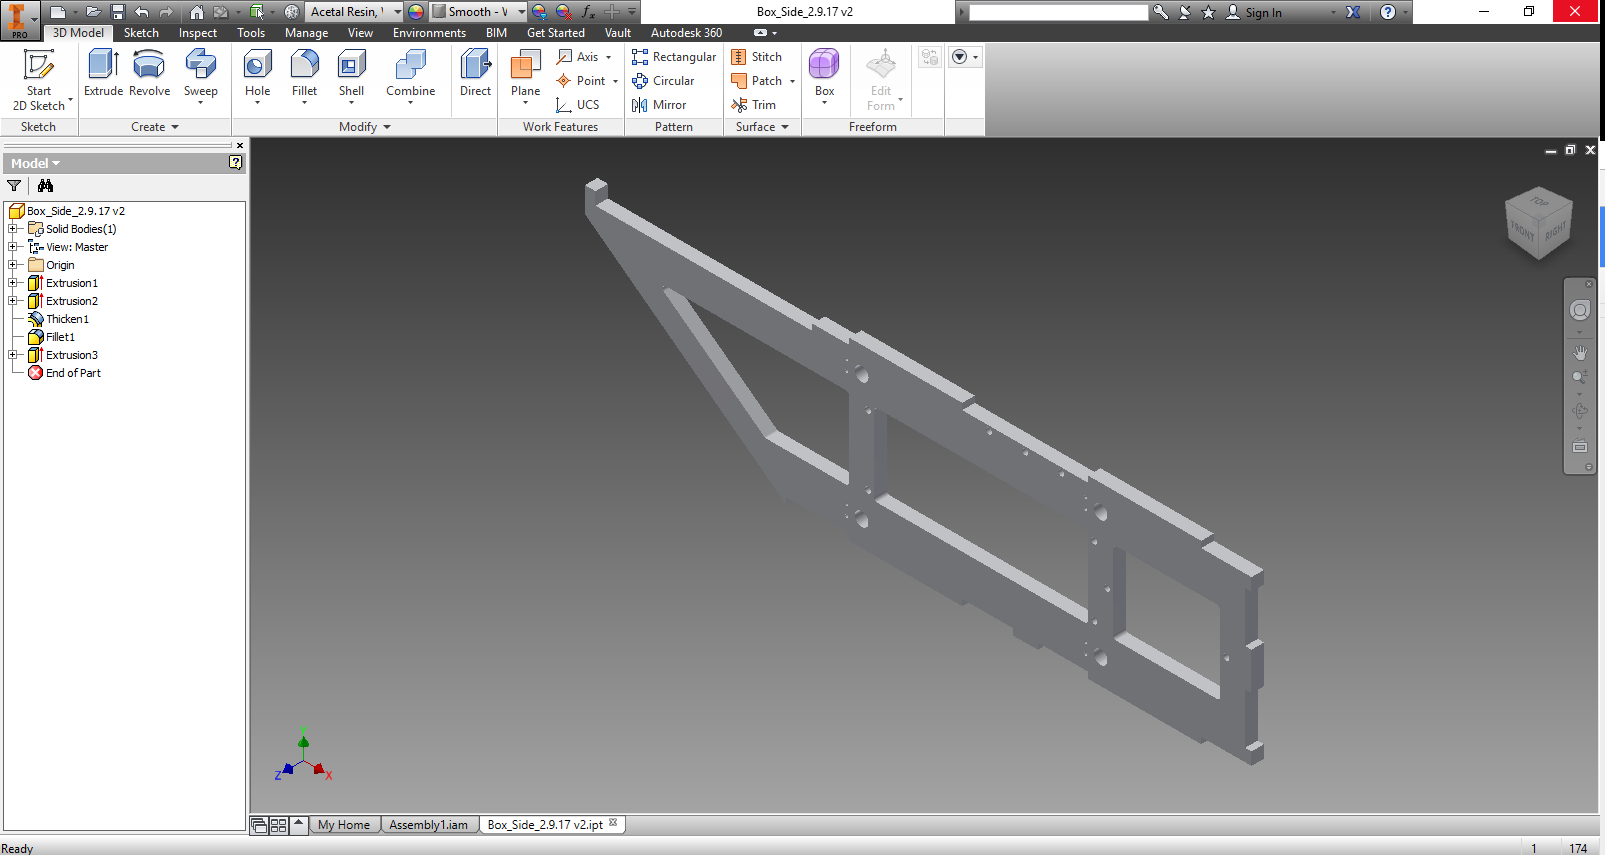
First open a part in Autodesk Inventor that you wish to laser cut. Here is a picture of the example part that we will be using in this tutorial. If you are using Autodesk Inventor, you can open .ipt, .stl, and .step files with no file conversion problems.
Create a 2D Drawing From Your 3D Part in Inventor
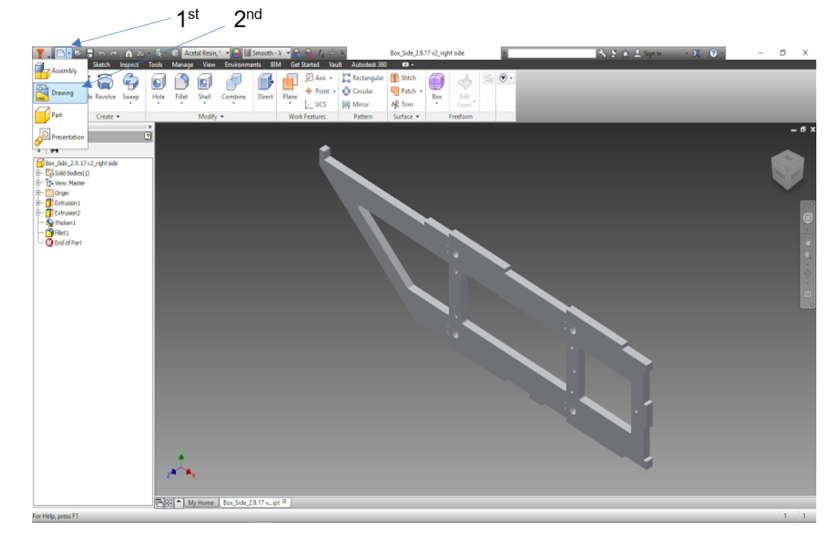
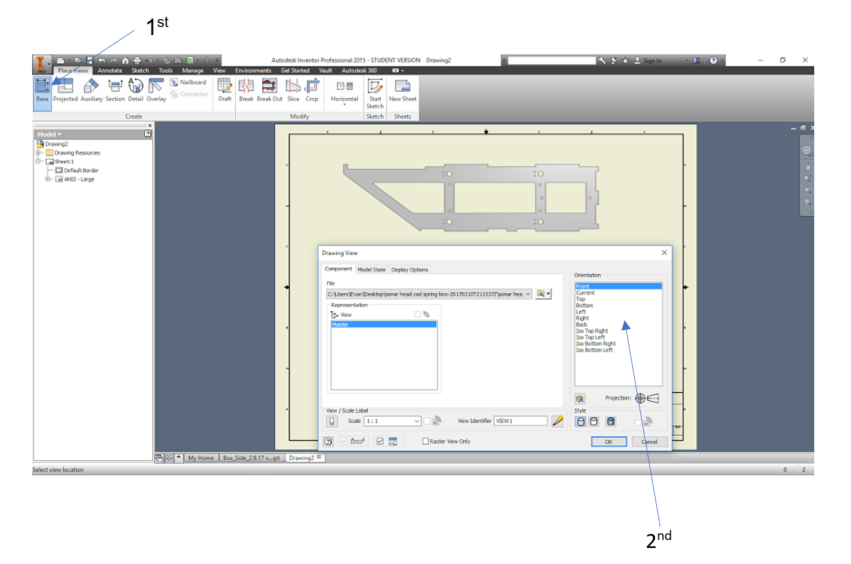
In this step you will create a 2D model directly from your 3D model in inventor. In the 1st picture you see where you will click to create a drawing.
The second picture shows you how to place the correct view of your part into the drawing. Follow the 1st and 2nd clicks labeled in the picture. For the orientation, you may have to select a different one before the correct face of the part you wish to cut out appears. For my part, the front view just so happened to be the correct face I wanted to cut out. Also in the box labeled "scale", make sure that it is a 1:1 scale so that the part is cut out at exactly the right size and dimensions. However, if you wish to change the scale to make the cut part larger/smaller, this is where you would enter in your desired scale factor.
Prepare Your Drawing for Laser Cutting
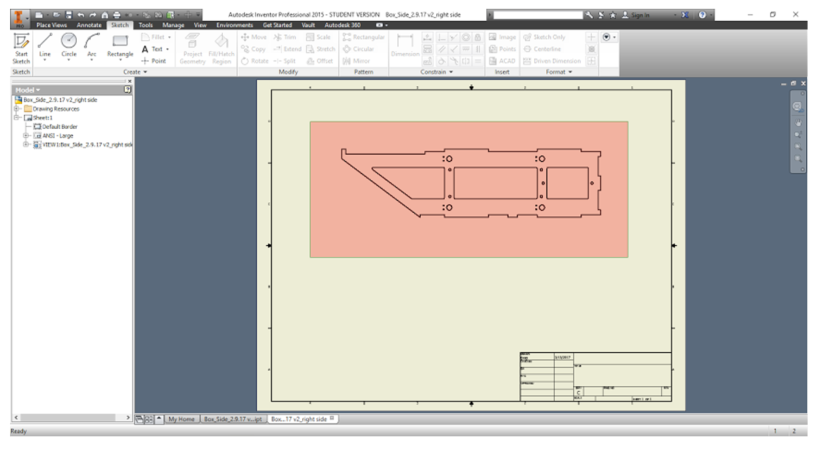
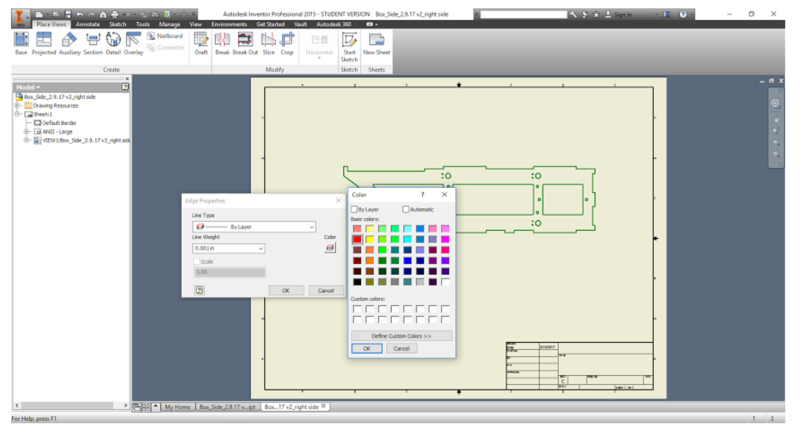
In this step you will prepare your drawing for laser cutting by changing the line weight (line thickness) and color. Most laser cutters and water cutters read red lines as cut lines. You will also change the line weight to .001in. This essentially makes a line that has no area, meaning the laser cutter will read this as a vector and cut a single straight line for all of the lines. If you use a thicker line, the cutter will go back and forth along that line to cut the thickness/area of the line. This will end up giving you a part with incorrect dimensions.
In the 1st picture we will click and drag to highlight the entire drawing. Then you will right click on one of the drawings lines and select "properties."
In the 2nd picture you see the "edge properties" dialogue box appears. In this box you will ensure that the "line weight" is set to .001 and the "color" is set to red as shown in the picture. Click "OK" in the "edge properties" dialogue box and will see that your drawing now has all red lines.
If you wish for certain features of the drawing not to be cut out such as a line or circle, right click on the line and click on "visibility" this will turn off the visibility of the line and make it disappear.
Export Your File
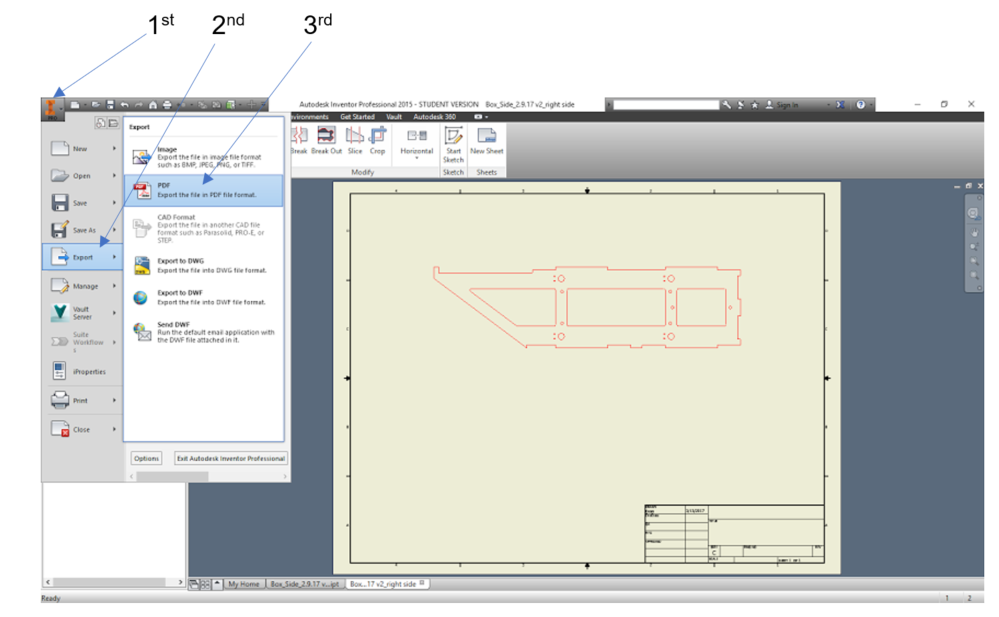
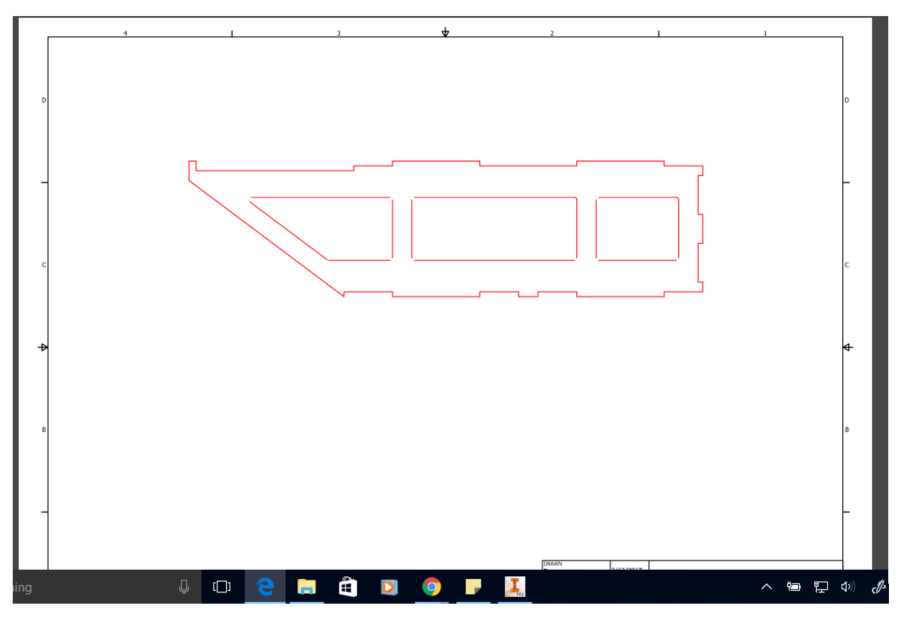
In this final step, you will export your drawing as a vector file. The most commonly used file use is .pdf. The pdf file format stores your drawing as a vector file with all of the exact dimensions of the drawing you wish to cut out on a laser or water cutter. Once you have created the pdf, you can easily upload it to any laser/water cutting program. We will not be discussing that in this manual. However you can now take this file to a machine shop and they can quickly and easily show you how to run the machine to cut out your part.
In the 1st picture, I have labeled the 3 clicks necessary in exporting the drawing as a pdf. You can now save the file to your computer.
The 2nd picture shows you the final product. Thank you for reading through my instructable, I hope you found it helpful!!