Use Your IPhone's Data Connection on Your Computer
35083 Views, 12 Favorites, 0 Comments
Use Your IPhone's Data Connection on Your Computer
NOTE: As of iOS 3 and 4, there are other ways to tether, even a legit one through AT&T (although that costs extra). This method still works, though, and always will (regardless of iOS updates) as long as you can SSH into your iPhone.
Have you ever been stuck somewhere where there is no WiFi access, or you have to pay for it, like in an airport, browsing the internet one page at a time on your iPhone's tiny screen, when you have a laptop sitting right next to you? This tutorial will show you how to access the internet on your Mac using your iPhone's data connection. You will need to know an administrator password for your computer in order to configure the system to use the connection. This should work with any version of Mac OS X, but it has not been tested on Mac OS Classic. It should also work on any version of the iPhone OS, but it does need to be Jailbroken (unless you have another way to get an SSH tunnel in); don't worry, Jailbreaking your device will only add features, it will not block your access to App Store or any other features. There are many resources online that will help you Jailbreak your iPhone if you haven't already. Please note that both the computer and the iPhone that the screenshots were taken on have been customized, so many of the buttons and other interface elements may look different from what you see on your own screens; however, they should be in the same place and function the same way.
Have you ever been stuck somewhere where there is no WiFi access, or you have to pay for it, like in an airport, browsing the internet one page at a time on your iPhone's tiny screen, when you have a laptop sitting right next to you? This tutorial will show you how to access the internet on your Mac using your iPhone's data connection. You will need to know an administrator password for your computer in order to configure the system to use the connection. This should work with any version of Mac OS X, but it has not been tested on Mac OS Classic. It should also work on any version of the iPhone OS, but it does need to be Jailbroken (unless you have another way to get an SSH tunnel in); don't worry, Jailbreaking your device will only add features, it will not block your access to App Store or any other features. There are many resources online that will help you Jailbreak your iPhone if you haven't already. Please note that both the computer and the iPhone that the screenshots were taken on have been customized, so many of the buttons and other interface elements may look different from what you see on your own screens; however, they should be in the same place and function the same way.
Jailbreak Your IPhone

If your iPhone is already Jailbroken, just skip this step.
In order to create a tunnel into your iPhone, you must be able to SSH into it; you cannot do this unless you Jailbreak your device. Jailbreaking will add extra functions to your iPhone, and will not disable any existing functionality. Many resources are available online that will help you.
In order to create a tunnel into your iPhone, you must be able to SSH into it; you cannot do this unless you Jailbreak your device. Jailbreaking will add extra functions to your iPhone, and will not disable any existing functionality. Many resources are available online that will help you.
Install OpenSSH (from Cydia)
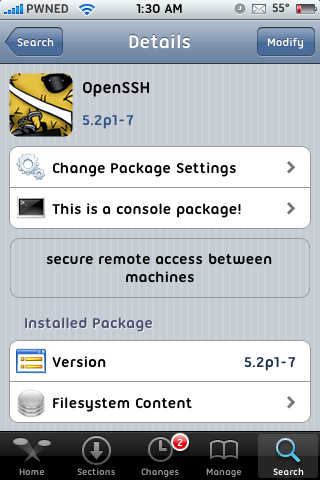
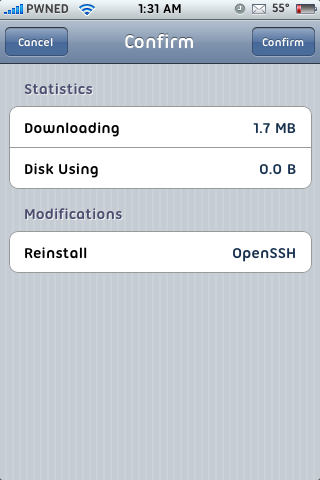
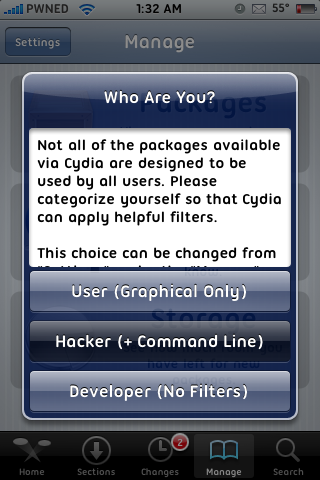
If you already have OpenSSH installed, skip this.
Launch Cydia from your SpringBoard and wait for it to load. If it is your first time opening Cydia, it will ask you to classify yourself. Choose 'Hacker'; if you choose 'User', you will not be able to install OpenSSH unless you change your settings. When it finished loading completely (the black bar at the top will disappear when it is done; it may take a while), go to the 'Search' tab and search for 'OpenSSH'. If the package appears, tap it. If it doesn't, then your type is set to User; to fix this, go to the 'Manage' tab and tap 'Settings' in the upper-left corner, select 'Hacker', and then go back and retry your search. Once the page for OpenSSH loads, tap 'Install' in the upper-right corner, and when the next page loads, tap the 'Confirm' button, which will be in exactly the same spot. (If the button in the upper-right says 'Modify' instead of 'Install', then you already have OpenSSH installed and you can skip to the next step. It says 'Modify' in the screenshot because OpenSSH is already installed on the device used for the screenshot.) A new screen will appear with text and a progress bar. Wait for it to do its thing, then tap the large button at the bottom when it becomes available. It will be labeled either 'Return to Cydia' or 'Restart SpringBoard'. You have now installed OpenSSH and can connect to your iPhone.
However, so can anyone else. You will want to change your password from the default, 'alpine'. To do this you will need to either SSH into your device or use MobileTerminal. If you want to use terminal directly on your device, download MobileTerminal from Cydia and launch it. To SSH into your iPhone, follow the next three steps to create a P2P network and join the network with your iPhone, and then SSH in to execute commands. Once in, if you are using MobileTerminal, type 'su root' and press enter to temporarily assume root privileges. (If you are using SSH, you already have root privileges.) You will be asked to enter your password; since you haven't changed it yet, it will be 'alpine'. Type it in and press enter; nothing will appear as you type, but your text is still being entered. Now that you have root permissions, type 'passwd' and press enter, and type in your current password ('alpine'), and then the new password twice (press enter after each). You have now changed the root password. You will also want to change the password for mobile, so type 'passwd mobile' and press enter. Again put in 'alpine' and then the new password twice. (It does not have to be the same as the root password, and in fact doesn't matter much at all, as long as it's not 'alpine'.) When you are finished, type 'exit' and press enter.
Create a P2P Wireless Network
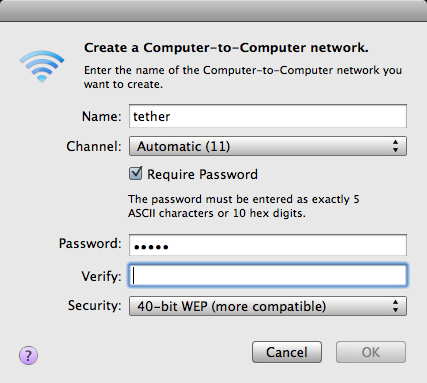
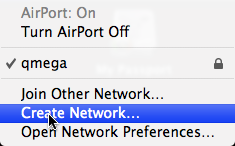
P2P means Peer-to-Peer, or Computer-to-Computer. It allows the Mac and the iPhone to communicate wirelessly. Start by clicking on the AirPort icon on your menu bar. You should see a menu like the second screenshot. Click 'Create Network...", and you will see the screen shown in the first screenshot. (If you have never done this before, 'Require Password' will probably be deselected, and the password fields will not be there.) Enter a name for the connection; it doesn't matter what you call it, and enter a password if you want to, then click OK. Congratulations, you have a network. Now you need to connect your iPhone.
Connect Your IPhone to the Network
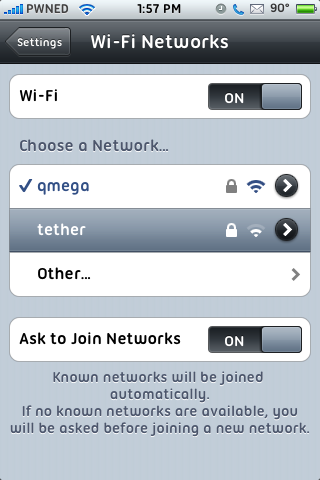
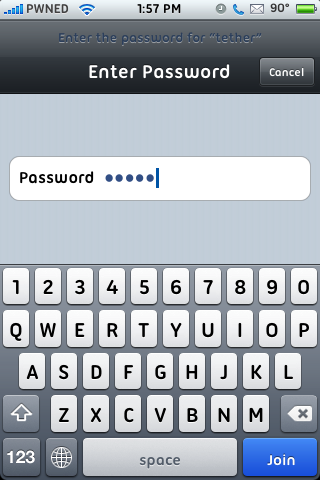
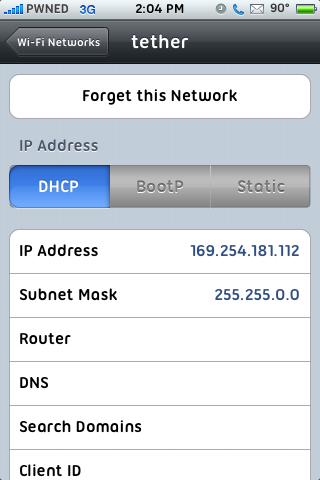
Open the Settings application from your SpringBoard, then tap 'Wi-Fi', and then the name of your new network. If you used a password, you will need to enter it. Once you are connected, you are ready to set up the tunnel. If you tap the arrow next to the name of the network, it will show you your IP address, which you will need later.
SSH Into Your IPhone
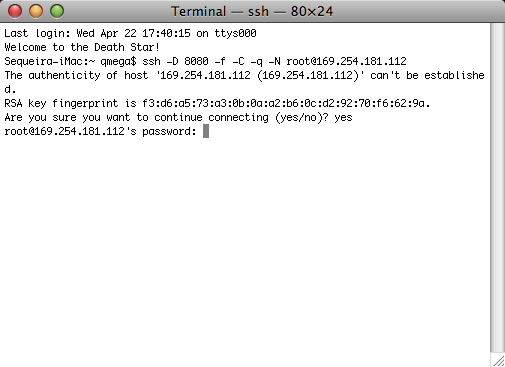
This is where you actually SSH into the device to either execute commands on it or set up a tunnel for the data connection. First, open Terminal on your Mac; it will be located in /Applications/Utilities.
You will need your iPhone's IP address for this step. In the Settings app, tap 'Wi-Fi', then tap the arrow next to the name of the network you are on. It will display your IP address; you may have to wait a few seconds.
To ssh into your phone normally and execute commands on it, such as changing the password, type (in Terminal) 'ssh root@ip', where ip is the IP address you just got, and press enter. If you want to establish a tunnel in order to access the data connection and continue the tutorial, use 'ssh -D 8080 -f -C -q -N root@ip' instead.
If this is your first time connecting using that IP Address, you will be told that the authenticity can't be verified. There is no security risk; simple type 'yes' and press enter. Enter your password when prompted and press enter. If you haven't changed it, the default is 'alpine'. If you have, it's whatever you changed it to; note that this is the password for root, not for mobile, if you made them different. Nothing will appear as you type, but the password is still being entered. If you typed in your password correctly, it will go back to the normal terminal prompt (if you didn't, it will tell you). It looks like nothing is happening, but there is now a tunnel, and you can use your device's data connection through that tunnel using a SOCKS proxy.
Set Up the SOCKS Proxy
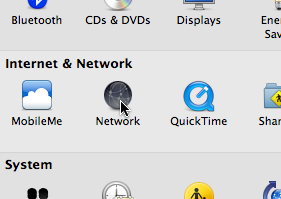
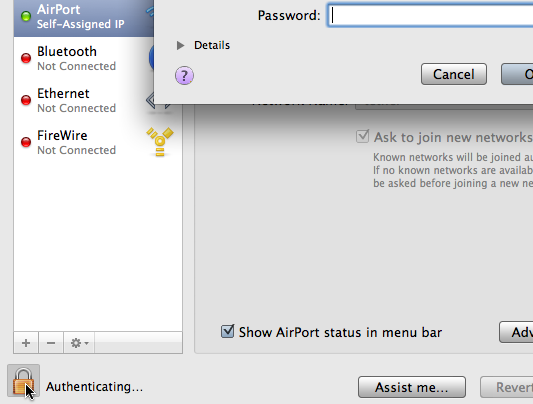
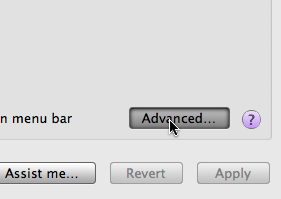
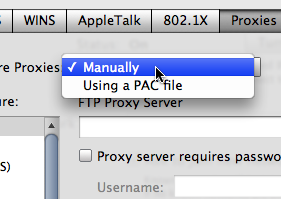
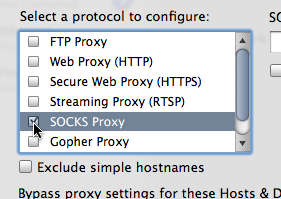

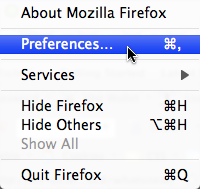
This will tell OS X to actually use the iPhone's data connection to access the internet.
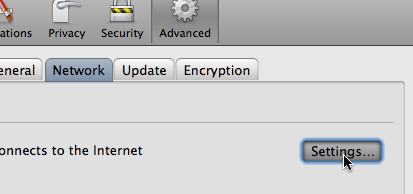
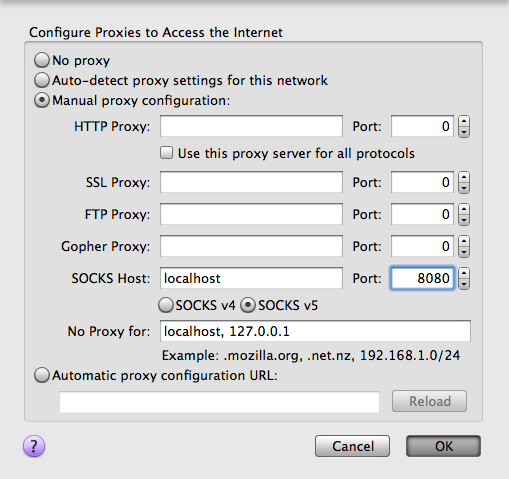
First, open System Preferences (/Applications/System Preferences.app) and open the Network panel. If the lock in the lower-left corner is closed, click on it and enter an administrator password when prompted. (The way the interface is set up is slightly different before Leopard, so you may have to look around a little if you have Tiger or earlier.) Make sure AirPort is selected on the left, then click 'Advanced...' in the lower-right corner. When the drawer comes out, select the Proxies tab, and make sure 'Configure Proxies:' is set to 'Manually'. In the box on the left side of the drawer, select the checkbox next to 'SOCKS Proxy', then enter 'localhost' and '8080' under 'SOCKS Proxy Server'. Press 'OK', and then 'Apply'. Your computer is now configured to access the internet using your iPhone's data connection! You can use Safari and most other applications; however, Firefox needs additional configuration. Open Firefox, click 'Preferences...' under the Firefox menu, then go to 'Advanced', and then 'Network', and click 'Settings...'. In the drawer that opens, select 'Manual proxy configuration:', and enter 'localhost' and '8080' in the fields for 'SOCKS Host:'. Click OK and close the preferences window, and you should be able to use Firefox as well. A few other programs, although not many, require configuration similar to that of Firefox for proxies; if the internet doesn't work on a certain application, check the preferences and change the same way as with Firefox. (The proxy preferences may not be in exactly the same place, but they should be under 'Network' or something similar, usually not difficult to find.)
When you are done, you have to put settings back to normal, or your computer won't access the internet in a normal enironment. Simply uncheck 'SOCKS Proxy' in the Settings app, click 'OK' and 'Apply', and you're good to go! If you set up Firefox (or other programs that require separate proxy configuration) as well, just select 'No Proxy' in the proxy settings drawer.